

I4.35I4.35
I4.35
I4.35I4.35
OO
WNERS MANUWNERS MANU
O
WNERS MANU
OO
WNERS MANUWNERS MANU
Xantrex
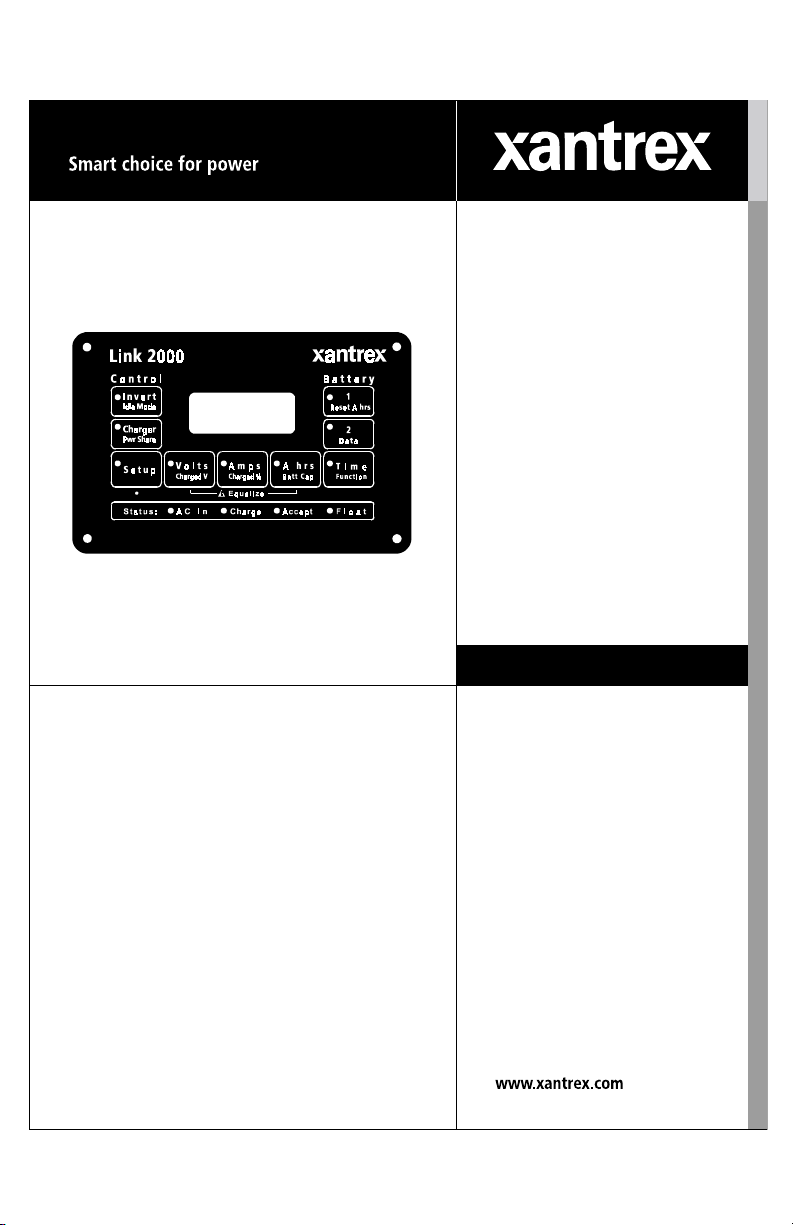
Link 2000
Inverter Controller
and Dual Battery Monitor
ALAL
AL
ALAL
Link 2000
Owner's Manual

TABLE OF CONTENTS
One Page Summary of Features Center
Introduction and Special Notes 3
Monitor Functions 4–5
Inverter and Charger Functions 5
Status Line and Starting and Stopping Equalize 6
Setup 7
Inverter Setup 8
Monitor Setup 9
Functions Setup 10–14
Data Mode 15
How to Use The Link 2000 Control Panel 16–17
Ideal Charge Curve 18
Synchronizing to a Full Battery (Resetting Amp Hours to Zero) 20
Rules for Changing the Charged Parameters 21
Selection Rules 22
Reset / Info Functions 23
High Discharge Rates and Peukert's Equation 24–25
Typical Peukert's Exponents 26–27
Error Codes and Troubleshooting 28–29
Microprocessor Reset Procedure (Resetting to Factor Defaults) 30–31
Setup and Historical Data Summary 32
Warranty 33
Required Reading Prior to Installation 36
Wire By Wire Instructions 37
Specifications 39
INSTALLERS: THIS DOCUMENT IS IMPORTANT FOR
OPERATION—PLEASE LEAVE IT WITH THE OWNER.
THIS MANUAL APPLIES TO LINK 2000 METERS WITH SERIAL NUMBERS ABOVE 8500
Notice of Copyright
Xantrex Link 2000 Inverter Controller and Dual Battery Monitor © October 2002 Xantrex
International. All rights reserved.
Disclaimer
UNLESS SPECIFICALLY AGREED TO IN WRITING, XANTREX TECHNOLOGY INC.
(“XANTREX”)
(a) MAKES NO WARRANTY AS TO THE ACCURACY, SUFFICIENCY OR SUITABILITY OF
ANY TECHNICAL OR OTHER INFORMATION PROVIDED IN ITS MANUALS OR OTHER
DOCUMENTATION.
(b) ASSUMES NO RESPONSIBILITY OR LIABILITY FOR LOSS OR DAMAGE, WHETHER
DIRECT, INDIRECT, CONSEQUENTIAL OR INCIDENTAL, WHICH MIGHT ARISE OUT OF
THE USE OF SUCH INFORMATION. THE USE OF ANY SUCH INFORMATION WILL BE
ENTIRELY AT THE USER’S RISK.
Date and Revision: October 2002, Revision 1 Part Number: 445-0198-01-01
Contact Information Web: www.xantrex.com Email: CustomerService@xantrex.com
Phone: 1 800 670 0707 (toll free in North America) 1 604 422-2777 (direct) Fax: 1 604 420-2145
2
AND LINK 2000-R METERS WITH SERIAL NUMBER ABOVE 5000

INTRODUCTION AND SPECIAL NOTES
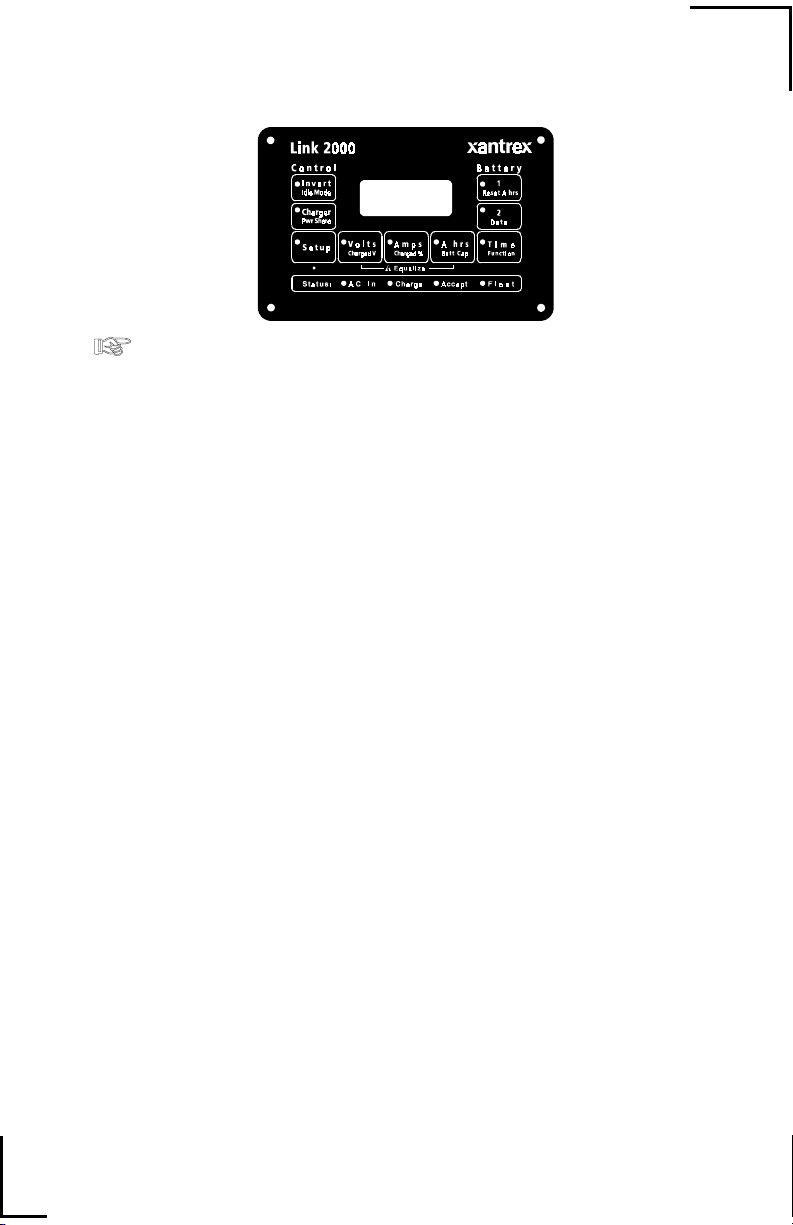
The LINK 2000 is an integrated battery monitor and inverter/charger control. It displays
the critical information necessary for 12 V or 24 VDC system battery management and
allows precise control of critical inverter and charger features. The Link 2000-R comes with
an additional manual describing the Ideal Regulator option. The LINK 2000 may be used
as a stand-alone battery monitor or with the following inverter/chargers:
FREEDOM 10, 15, 20, 25, and 30
In order to understand, use, and install the LINK 2000, PLEASE read this manual! It
is as short as possible and provides important information. For installation, operation,
or warranty questions, please call Xantrex.
The following Important Special Notes contain cautions and special considerations that
must be considered during the installation of the LINK 2000. Failure to read and follow these
special notes can lead to damage of the LINK 2000, the inverter, or other electrical equipment.
The Helping Hand is used to draw your attention to very important sections of this
manual or to indicate items that may need to be changed through the SETUP routine. Please
take the time to read these sections.
1) DO NOT DISCONNECT THE NEGATIVE BATTERY CABLE TO THE
FREEDOM WITH THE INVERTER OR CHARGER TURNED ON! WHEN
INSTALLING, CONNECT THE INVERTER CABLES
THE REMOTE CABLE INTO THE LINK 2000. UNPLUG THE REMOTE
CABLE BEFORE THE FREEDOM INVERTER IS DISCONNECTED FROM
THE BATTERY.
BEFORE PLUGGING
2) Turn the ON/OFF switch located on the inverter to the OFF position.
3) When used in a mixed voltage (12 V and 24 V) system, Battery #1 is the battery that the
LINK 2000 uses for voltage regulation. Make sure it is the battery that is used by the inverter/
charger, or with the alternator regulator option it must be the battery being charged by the
alternator. See Functions Mode F11 on page 13.
BASIC BATTERY FACTS
1) One amp-hour (Ah) is 1 amp for one hour, or 2 amps for 1/2 hour, or 4 amps for 1/4 hour, an d
so on.
2) A liquid battery is generally considered completely discharged when the battery voltage
reaches 10.5 volts for a 12 volt battery.
3) Batteries for cycling service are normally rated with a) a 20-hour discharge rate which
means, for example, a 100 Ah battery will sustain 5 amps for 20 hours, and b) a reserve
capacity stated in minutes for a 25-amp discharge rate.
4) Our Mid-Capacity Rule says that discharge below 50% shortens battery life and charging
more than 85% takes too long with an engine-driven charging system. So, 35% of the battery
capacity is all that is normally available.
3
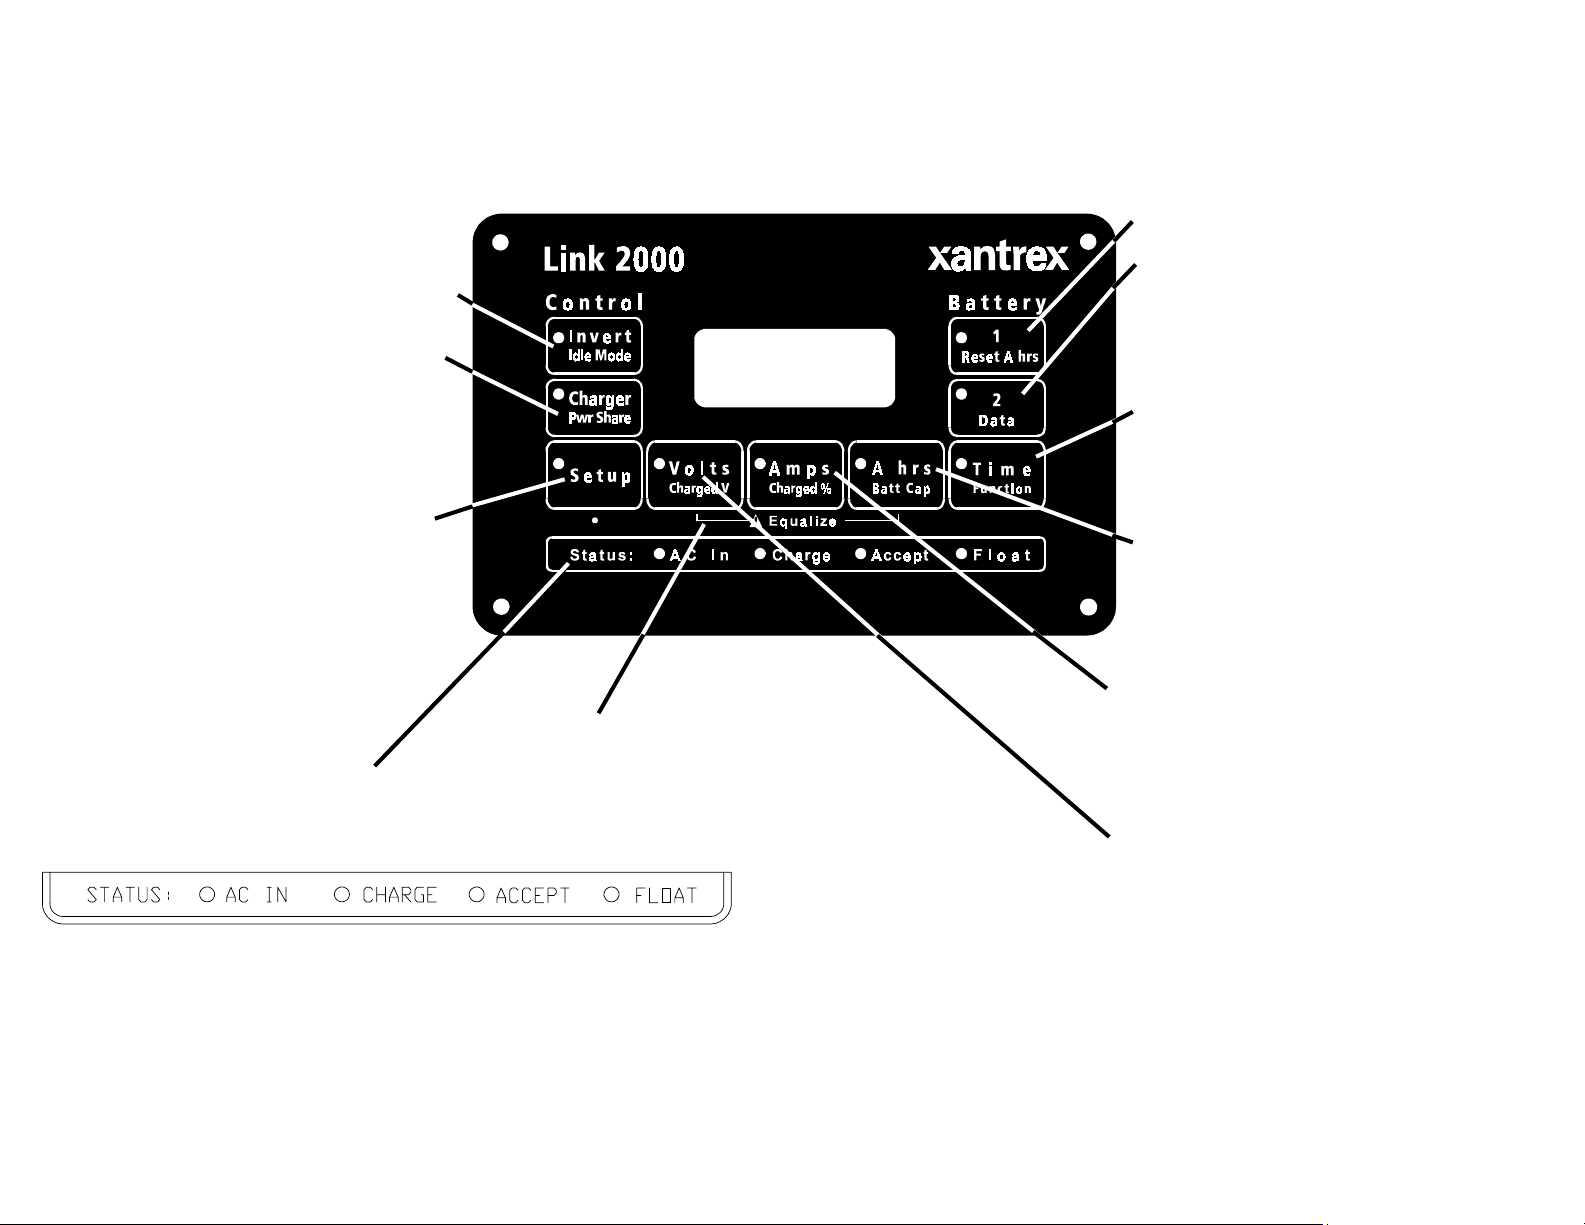
MONITOR FUNCTIONS
Please also refer to the one-page summary of features in center of this manual.
The small blue legends indicate Setup functions described later.
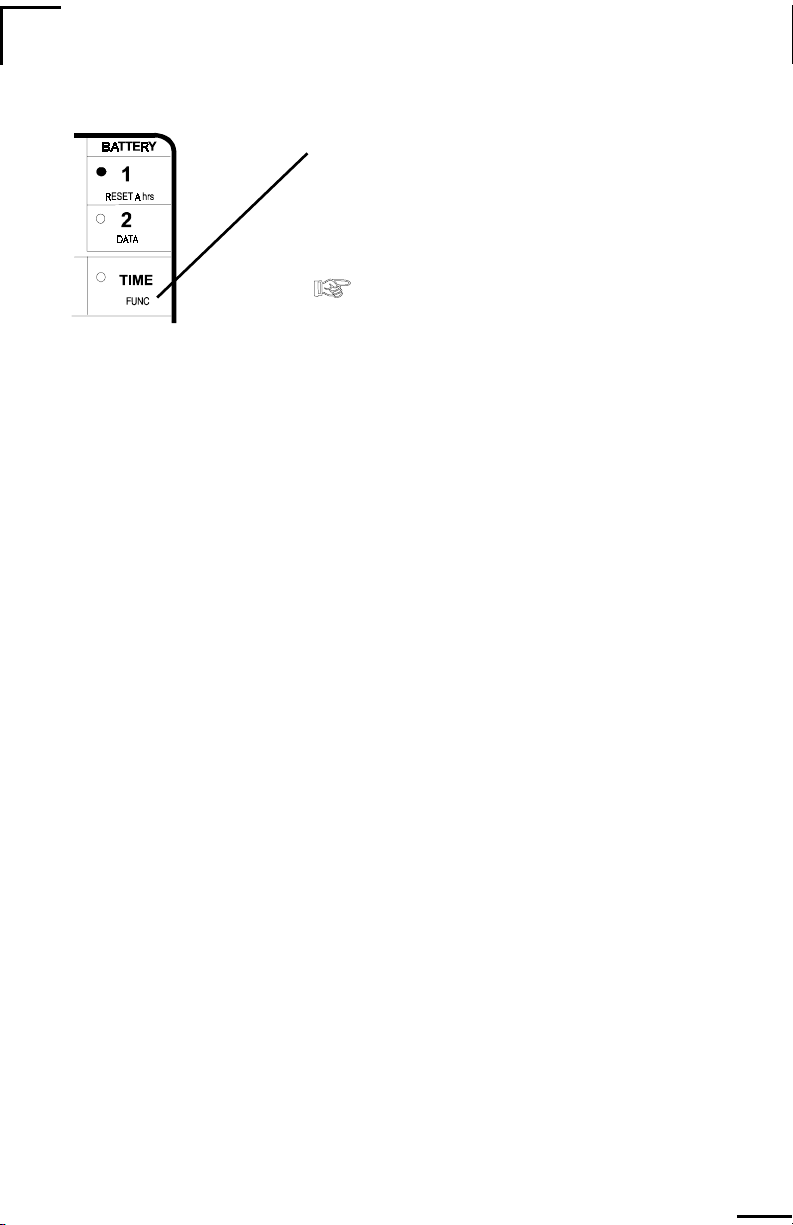
BATTERY SELECT
The battery to be monitored is
selected by pressing the #1 or
#2 switch. A Green LED indicates which battery is selected.
("Battery" may be a "bank" of
batteries.)
VOLTS
When the VOLTS switch is pressed, the voltage of the selected battery is displayed.
The measurement range is from 8.5 V to 50 V. The resolution is 0.05 volts. See page 39
for power supply specification.
AMPS
When the AMPS switch is pressed, the current flowing into or out of the selected
battery is displayed. Amps being consumed are displayed as a negative number. Charging
amps are displayed as a positive number (no sign). The resolution below 42 amps is 0.1
amps. Above 42 amps the resolution is 1 amp. The range is from -500 A to 500 A. Overrange is indicated by OL.
Ahrs
When the A hrs switch is pressed, the amp hours (Ah) consumed from the battery
is displayed as a negative number. During discharge the negative number will grow as amp
hours are consumed and the meter counts down. During charging, the number of amp hours
consumed will decrease as the meter counts back up toward zero. The range is
If the battery continues to be charged after the meter counts back up to zero,
overcharge amp hours are accumulated and displayed as a positive number. If there is an
accumulated positive number in the display when discharging begins, the meter automatically resets to zero and begins counting down. See Overcharge Amp Hours on page 16.
The meter also automatically resets to zero after a discharge/charge cycle that
satisfies the conditions for a recalculation of the Charge Efficiency Factor (CEF). In other
words, if the battery is discharged 10% and then recharged until the charged parameters
have been met, the amp hours consumed display is reset to zero.
+ 9,999Ah.
TIME
When the TIME switch is pressed, the time which the load can continue to be run
is displayed. The display is in hours with 0.1 hours resolution. The unit may be set up to
calculate the time remaining based on the instantaneous current, or a rolling average of the
last 4, 16, or 32 minutes. The time remaining function also takes into account the magnitude
of the discharge current (see pages 24–27). The maximum time remaining is 255 hours.
If you see this display, it means that the current being consumed could be supplied for
more than 255 hours. During charging, current is a positive (unsigned) number and the
4
Time remaining display reads C C C.
For the TIME function to operate correctly you must enter your BATTERY
CAPACITY through the SETUP routine (see page 9). You must also set up the correct
PEUKERT'S EXPONENT (see page 13). It is also affected by your selection of
DISCHARGE FLOOR (see page 14).
Caution: The TIME display is an estimate of how long your battery can sustain a
load. Wild variations in battery current, battery condition, erroneously declared battery
capacity, Peukert's exponent, temperature, or discharge floor, and prior charge and discharge history may affect the accuracy of this estimate. Please use this display only as a
guide. The LINK 2000 provides you with several important battery parameters. Using
all of them, including voltage, current, amp hours consumed, and time remaining, allows
you to know about the state-of-charge of your battery. Do not rely on a single value to
determine battery status or performance.
LO BAT
When 50% of the declared capacity of either Battery #1 or #2 is consumed, LO BAT
flashes in the upper left hand corner of the display. (This indicator is affected by both the
declared battery capacity and the discharge floor setting.)
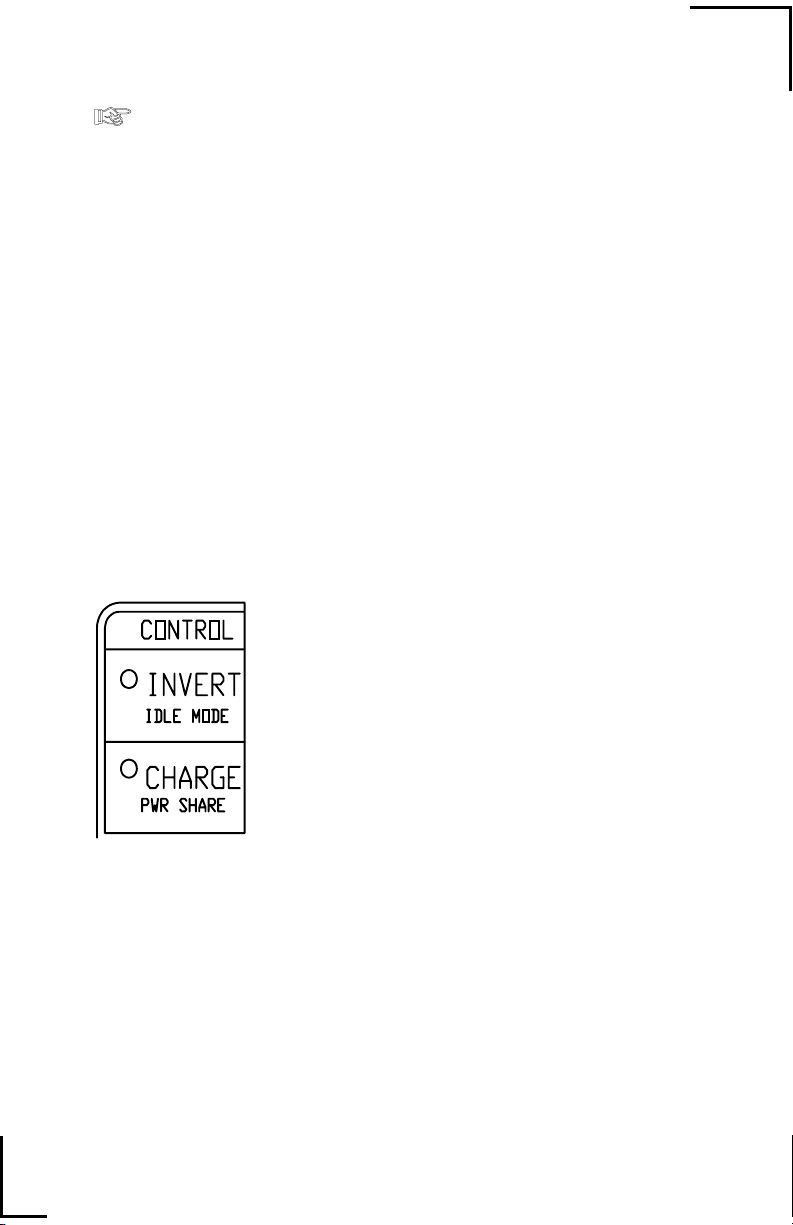
INVERTER/CHARGER FUNCTIONS
INVERT
When the INVERT switch is pressed, the inverter is
enabled and the Green LED is lit. The inverter will only provide
output if it is hooked up to the battery and there is no external
AC power available. The inverter ON indicator does not
indicate actual operation, only that the inverter is enabled. The
initial power-up condition is with the inverter turned OFF.
CHARGE
When the CHARGE switch is pressed, the charging
function of the Freedom Inverter/Charger is enabled. The
Green LED is lit when the charger is enabled. The initial powerup condition is with the charger enabled. The charger will only
provide output if it is hooked up to a battery and an external
source of AC power is present (shorepower or generator).
MARINE AND RV OPERATING TIP
When utility power is available, any loads normally supplied by the inverter are
automatically transferred to utility power through the internal transfer switch. When utility
power is not available the loads run on stored energy in the battery. If you have a load such
as an electric space heater running on a circuit that is automatically transferred, you run the
risk of deeply discharging your battery if there is a utility blackout. To avoid this, turn the
inverter function OFF when leaving the boat or RV unattended. Leaving the charger function
ON will ensure a full battery when you return.
5
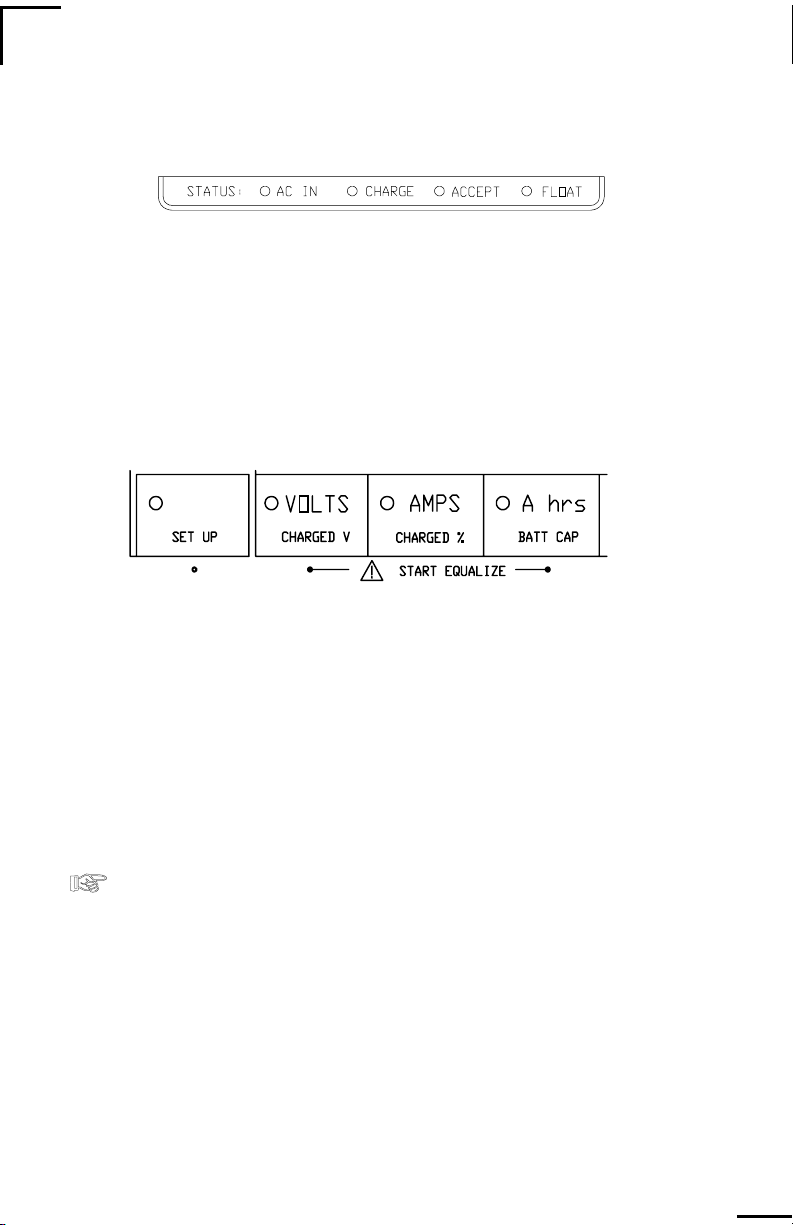
STATUS LINE
There are four LED status indicators to show the presence of AC power and the charger's
cycle state.
AC IN: Green LED on when AC is present.
CHARGE: Red LED on when charger is in Charge mode.
Flashes Red when charger is in Equalize mode.
ACCEPT: Orange LED on when charger is in Acceptance mode.
FLOAT: Green LED on when charger is in Float mode.
STARTING AND STOPPING EQUALIZE
The Equalize Cycle conditions the battery with a controlled overcharge to remove
Lead Sulfate that is not removed during normal charging. Liquid batteries should be
Equalized every 30 days when in cycling service.
CAUTION! Turn off voltage sensitive DC loads before equalizing battery!
DC Voltage from the charger may go to 17 VDC (34 V for 24 V system) during
equalizing !
Charge batteries fully before equalizing. To start the Equalize Cycle, first be sure
that the Charger is ON, then press the SETUP BUTTON for five seconds until the LED
begins to flash. Now press both the VOLTS and the A hrs BUTTONS simultaneously.
Hold them both down for five seconds, until the Red CHARGE LED begins to flash,
and the "E" in the display goes away.
To terminate the Equalize Cycle and force the charger into the Float mode, repeat
the same procedure as above. The cycle automatically terminates after eight hours, or if
AC power is interrupted.
Equalizing causes the battery to gas. You should check your battery electrolyte
before and after equalization. Do not overfill before equalization as the electrolyte may
expand enough to cause it to flow over the tops. You should be present during this type
of charging. Make sure there is adequate ventilation. Leave the filler caps on or cover the
tops with a folded paper towel.
overheat.
Gelled batteries are not normally equalized. However, if they have been severely
discharged, it may be the only way to get them to begin to accept a charge. The voltage
is limited to the Accept charging level but the cycle lasts for 8 hours. Be sure that the
battery TYPE # is set to #1 or #2 before using this cycle on gelled batteries (or #3 for
AGM type batteries).
Note: Equalizing voltages for Type #1, #2, and #3 batteries is limited to the
acceptance voltage for the respective battery type.
6
Terminate the cycle if a battery starts to overflow or
SETUP
I4.35I4.35
I4.35
I4.35I4.35
The LINK 2000 has been set up with default values chosen to work with a typical
system. Normally the only values that must be changed are:
1) Battery capacity (page 9) 3) Battery type (liquid or gel) (F02 page 11).
2) Ambient Temperature (F03 page 11) 4) Peukert's exponent (F08 page 13).
The SETUP BUTTON is used to access the functions in small blue text below each
button's primary function. It is also used for certain advanced functions described later.
To set up a value or function:
1) Select the battery to be set up by pressing Battery #1 or #2, (or Invert, or Charge, when
setting up Idle Mode or Pwr Share).
2) Hold down the SETUP BUTTON until the green LED flashes at one-second intervals.
3) Release the SETUP BUTTON and press and hold the function to be set up. The LED
of the function being set up will also begin to flash at one-second intervals. The present value
of the function will appear in the display.
4) After three seconds, with the button pressed, the display will begin scrolling. When the
desired value appears, release the button. If you continue to hold down the button, the
display will increment to the end of its range, roll over to its minimum value, and continue
to scroll. You may also "bump" a value by repeatedly pressing the button.
You may set up additional values, or functions, as long as the SETUP LED continues
to flash. When the SETUP LED stops flashing, all values that were changed during the setup
routine will be stored in nonvolatile memory.
SUMMARY OF FACTORY DEFAULT VALUES
INVERTER/CHARGER CONTROL
Standby = 4 watts (5 watts in Series 458 units)
Power Sharing = 30 amps ("OFF" for Freedom 25)
MONITORING FUNCTIONS
Charged Voltage = 13.2 volts for 12 volt systems
= 26.4 volts for 24 volt systems
Charged Current % = 2% (of battery capacity)
Battery Capacity = 200 Ah
CEF (Charge Efficiency Factor)= 87% for Liquid Acid
= 90% for other cell types
Ambient Temp. = 70 °F
Type = #0 Liquid
Peukert's Exponent= 1.25
7

INVERTER SETUP
IDLE MODE: The default value is 4 watts. This means it takes a 4-watt AC load
to turn the inverter on from its low power idle mode. Setting a value of 0 watts means the
inverter is always on. The low power idle current is about 0.25 amps. When idle mode is
set to 0 W the current consumption goes up to about 0.9 amps. Range = 0 W, 4 W, 6 W,
15 W. (0–15 watts in 5-watt steps in Series 458 units.)
SETUP EXAMPLE: To set the IDLE MODE to 0 watts, first select the INVERT
on, then press the SETUP BUTTON until the Green LED begins to flash. Now, press and
hold the IDLE MODE BUTTON. The present value will appear. The display will scroll
after three seconds. Hold the button down until 0 appears. Release the button. The new value
will remain in the display for about five seconds. When the display reverts to the normal
monitoring function the new value is stored in nonvolatile memory. To see if the new value
has been successfully stored, repeat the setup procedure but do not scroll to a new value.
PWR SHARE: The default value is 30 amps (or OFF for Freedom 25). The
power sharing feature automatically reduces the charger output, and therefore the AC
power consumption, if the load passing through the inverter's automatic transfer switch
exceeds the setup value. This load management feature helps prevent AC supply breakers
from tripping when boats or RVs are plugged into AC power and the charger, water
heater, and perhaps other loads all come on at once. In "Off Grid" applications the
auxiliary generator often has several jobs—water pumping, running the washing machine,
or heavy power tools—in addition to supplemental battery charging. With Power Sharing,
when a heavy load turns on, it reduces charger output to help supply the heavy load. The
ranges below are for units with serial numbers greater than 100,000:
Freedom 10, 15 & 20 Range = 5, 15, 20, 30 A; Freedom 25 & 30 Range = 5, 20, 30 A, OFF;
Freedom 10E & 20E Range = 2, 5, 10, 15 A; Freedom 25E Range = 2, 10, 15 A, OFF
For Freedom serial numbers below 100,000 use this table to interpret the display.
Model F10 F10 F10E F10E F20 F20 F25 F25
Serial#
Display Amps Amps Amps Amps Amps Amps Amps Amps
0 303015153030OFFOFF
1 2020101020205030
2 15 15 7.5 7.5 15 15 30 20
310552105205
Model with a serial number below 100,000, first select the CHARGE on, then press the
SETUP BUTTON until the green LED begins to flash. Now, press and hold the PWR
SHARE BUTTON. The present value will appear. The display will scroll after three
seconds. Hold the button down until 1 appears (see table above). Release the button. The
new value will remain in the display for about 5 seconds. When the display reverts to the
normal monitoring function the new value is stored in nonvolatile memory.
8
<70759 >70760 <71746 >71747 <70699 >70700 <70801 >70802
For Series 458 units, the range is 0–50 amps, settable in 5-amp steps.
ANOTHER SETUP EXAMPLE: To set PWR SHARE to 20 amps on a F10

MONITOR SETUP
Normally the only MONITOR SETUP parameter that must be changed is BATT
CAP (see bottom of this page). Please read the section on selecting charged parameters
(page 21–22)
FUNC SETUP on page 10 for other system values that may need to be changed.)
ing that changing the Charged V parameter does not change the voltage set point of the
charger in the FREEDOM Inverter/Charger. It only sets the point at which the monitor
considers the battery full. To change the charging voltage during the Acceptance and
Float cycles use Ambient Temp. Setup routine. Note also that when the FREEDOM is
the charging source, the Charged % is always 2%.
for the battery you wish to set up. The LED will light. Do this first as setup changes are
only made to the selected battery.
considers the battery full allows it to be used with any charging system or battery chemistry. The default Charged Voltage is 13.2 volts for 12-volt systems and 26.4 volts for 24volt systems. The LINK 2000 automatically selects the correct value based on the
voltage it senses. (If the Alternative Energy function F05 is ON, the default value is 13.5
volts or 27.0 volts. See FUNCTIONS SETUP, page 10, for details.)
Select the battery to be set up. Press SETUP until the LED begins to flash. Then release
the button, and press CHARGED V until the desired voltage appears and then release
the button. The new charged voltage is stored in nonvolatile memory. If the charged
voltage is inappropriate for the sensed battery voltage, Error E14 is displayed (see Error
Codes and Troubleshooting, pages 28–29). Be sure to read the section on selecting
correct charged parameters (pages 21–22) before changing the charged voltage.
before changing CHARGED V or CHARGED % default values. (See
Setting the following parameters
SELECT BATTERY #1 OR #2: To set up a battery parameter, press the button
CHARGED V: The ability to set up a Charged Voltage above which the monitor
To change CHARGED V follow the same procedure as described previously:
only affects the operation of the monitor, mean-
CHARGED %: The default value is 2%. This means that the charging current
(amps) flowing into the battery must fall below 2% of the declared battery capacity
before the meter considers the battery full. For example, using the default values of 2%
and 200 Ah means the current must fall below: 4 amps = 2% x 200 Ah.
Before changing the CHARGED % from either of these values, be absolutely
sure you understand the section on selecting charged parameters (page 21–22). Setup
and storage to nonvolatile memory is the same as for the function above.
BATT CAP: The default value is 200 Ah. The battery capacity must be set
up if it varies significantly (10–20%) from the default. The battery capacity is used in the
calculation to determine when the battery is full and in the TIME remaining function.
To change the battery capacity, press SETUP until the LED begins to flash, then
release the button. Now press BATT CAP. Scroll until the desired battery capacity is in
the display. If you are unsure of your battery capacity you may first test it as described
on page 17. The battery capacity is stored in nonvolatile memory. If you change to a
different capacity battery you must change this number. Range = 20–2000 Ah in 20 Ah
increments.
9
FUNCTIONS SETUP
FUNC: The FUNC (Function) mode is used to set up
special functions or features that are not commonly
changed. They might be thought of as internal software
switches that allow the selection of special functions,
or values that, once set, are seldom changed.
Normally the only functions that must be changed
are F02 Battery Type, F03 Ambient Battery Temperature, and F08 Peukert's Exponent. (See page 9 for how
to set battery capacity.)
The setup process for functions is slightly different because the FUNC button is
used first to scroll to the function to be set up, and then to scroll through the values for
that function. To access the FUNC mode:
1) Press and hold the SETUP button until the green LED begins to slowly flash, then
release the button.
2) Now press the (blue) FUNC button. The letters
the FUNC LED will begin flashing, indicating you are in the FUNC mode.
3) Scroll to the function to be set up by holding down the FUNC button.
4) Release the FUNC button
selected to appear in the display. This will take about three seconds.
5) Press the FUNC button now and the display will scroll through the range of values.
Stop scrolling when the value you wish appears in the display.
6) If you wish to continue to set up other functions, press the SETUP button until the
green LED by the FUNC button stops flashing. You may now choose any blue key to
continue setting up the LINK 2000. If you press the FUNC button again the process
will begin at the next function after the one you last set up. Whatever functions you have
set up will become active when the display reverts to its normal mode.
and wait for the current value of the function you have
F01 F01
F01 will appear in the display and
F01 F01
FUNCTIONS TABLE
F01 - AVERAGE PERIOD FOR TIME REMAINING CALCULATION
0 = INSTANTANEOUS (DEFAULT)
1 = 4-MINUTE AVERAGE
2 = 16-MINUTE AVERAGE
3 = 32-MINUTE AVERAGE
There are four averaging periods that the LINK 2000 can use to calculate the time
of operation remaining. You may select present consumption level (instantaneous), a
four-minute rolling average, a 16-minute, or a 32-minute rolling average. Which method is
best for you depends on your installation. Most installations will find the instantaneous
or the four-minute average appropriate.
Operating Tip: Use the longest period of time you can to ensure long term load
variations are considered. If you want instant feedback, use the instantaneous display
(no averaging) "0" display.
10
F02 - BATTERY TYPE
0 = LIQUID CELL (DEFAULT) 1 = GEL CELL (STANDARD)
2 = GEL CELL (FAST CHARGE) 3 = AGM (Absorbed Glass Mat)
This function (Default: Type 0, standard liquid cells) sets the appropriate charge
and float voltages for the FREEDOM charger (see table below) and sets an appropriate
Peukert exponent. Gel cell owners may use Type 1 or Type 2, but should consult with
the battery manufacturer prior to using the more aggressive charging regimen described
by Type 2. Type 3 sets Acceptance and Float voltages suited to AGM type batteries.
F03 -
VIEW OR SET AMBIENT BATTERY TEMPERATURE
THIS FUNCTION DEPENDS ON THE SETTING OF F14 (SEE PAGE 14
IF F14 IS
ON, F03 VIEWS THE PRESENT BATTERY TEMP. (°F)
If F14 is ON, charging voltage of the Freedom charger and the Ideal Regulator (if
using a Link 2000-R) is based on the TEMPERATURE COMPENSATION TABLE
below. The temperature is displayed until another button is pressed on the Link.
IF F14 IS OFF, F03 SETS A DECLARED BATTERY TEMP. (°F)
DEFAULT = 70 °F RANGE = 30–120 °F STEP = 10 °F
The default value for ambient temperature is 70 °F. The ambient temperature of the
battery may be set up to select the appropriate Charge and Float Voltages for the charger.
The temperature may be selected in 10 °F increments. The setup procedure is the same
as previously described.
Setting up a different value should only be done if the battery is at a temperature
significantly different from 70 °F
when they are being charged from the FREEDOM.
If the batteries are located in a hot engine room, but are not normally charged from the
FREEDOM when the engine is running, do not adjust the temperature to the engine
room level. High temperatures are destructive to batteries. If your batteries are regularly
subjected to temperatures above 100 °F you should relocate them or supply forced fresh
air ventilation.
Caution! Do not adjust to extremes unless the battery is normally at that
temperature. Destructive over- or under-charging may occur. Multiply values by
2 for 24-volt systems. Voltages are typical, charger regulation
+ 0.2 volts DC.
)
TEMPERATURE COMPENSATION TABLE
TEMP TYPE 0 TYPE 1 TYPE 2 TYPE 3
Liquid Gel 1 (Std) Gel 2 (Fast) AGM
°F °C ACCEPT FLOAT ACCEPT FLOAT ACCEPT FLOAT ACCEPT FLOAT
120 49 12.5 12.5 13.0 13.0 13.0 13.0 12.9 12.9
110 43 13.6 12.7 13.5 13.0 14.0 13.4 13.9 12.9
100 38 13.8 12.9 13.7 13.2 14.1 13.5 14.0 13.0
90 32 14.0 13.1 13.8 13.3 14.2 13.6 14.1 13.1
80 27 14.2 13.3 14.0 13.5 14.3 13.7 14.2 13.2
70 21 14.4 13.5 14.1 13.6 14.4 13.8 14.3 13.3
60 16 14.6 13.7 14.3 13.8 14.5 13.9 14.4 13.4
50 10 14.8 13.9 14.4 13.9 14.6 14.0 14.5 13.5
40 5 15.0 14.1 14.6 14.1 14.7 14.1 14.6 13.6
30 -1 15.2 14.3 14.7 14.2 14.8 14.2 14.7 13.7
11

Freedom units produced prior to serial #100,000 have temperature compensation only
for warm or cool environments. The temperature setup sets the voltages as per below:
TEMP TYPE 0 (Liquid) TYPE 1 (Gel 1)
Accept Float Equalize Accept Float Equalize
Above 80
Below 80
°F 13.9 13.3 15.8 14.1 13.8 14.1
°F 14.4 13.5 16.3 14.4 13.8 14.4
F04 - TOGGLE DISPLAY BETWEEN AHR AND KWHR
DEFAULT OFF = Ah DISPLAY MODE
ON = Ah/kWh ALTERNATING DISPLAY MODE
When this function is selected the A hrs display alternates between the normal amp-
hour mode and the kilowatt-hour counter that the LINK 2000 uses to determine if 100%
of the energy consumed from the battery has been returned. A recalculation of the CEF is
not permitted unless this counter is greater than 0.00 kWh. This counter counts down during
discharge and the kilowatt hours consumed are displayed with a negative number. During
charging it counts back up with 100% efficiency. Not allowing a recalculation of the CEF
and an Ah reset until a positive number is in the counter ensures that there will not be
a premature reset. See page 21 for conditions required for a recalculation of the CEF and
an Ah reset.
F05 - ALTERNATIVE ENERGY MODE
DEFAULT: OFF
ON = USE ALTERNATIVE ENERGY DEFAULTS
Turn this mode on if your Link 2000 is used in Alternative Energy Systems.
This function 1) reduces the time necessary to satisfy the charged parameters from five
minutes to one minute; 2) sets Batt #2 discharge floor to 100%; 3) prevents Batt #2 from
doing Ah resets; 4) changes Charged V parameter to 13.5 V (27 V). If you're using a semimechanical photovoltaic controller, we strongly suggest you also consider changing
Charged Current to 4%.
F06 - MANUALLY SET CEF (NOT RECOMMENDED)
DEFAULT OFF = AUTO RECALCULATION OF CEF
DISPLAY = A87 OR A90 (DEPENDS ON BATTERY TYPE)
RANGE = 65–99 STEP = 1
Allows manual set up of CEF (Charge Efficiency Factor). Default display A87 or
A90 (depending on battery type selected—see F02) indicates automatic CEF recalculation
feature. Returning to A87 or A90 from a user CEF restores the automatic CEF feature.
If a user-setup CEF has been selected it will appear as a U## ( U preceding a number) in
the DATA mode—see page 15. A different CEF may be set up for each battery; only the
selected battery's CEF will be changed.
F07 - SET TEMPERATURE COEFFICIENT
DEFAULT = 0.5 RANGE = 0.1–0.9 STEP = 0.1
This factor compensates for capacity change with temperature. Typical value 0.5%
Capacity/°C. This coefficient must be supplied by the battery manufacturer. The default
value is typical for lead acid liquid or gelled batteries. Normally this value is not changed.
12

F08 - SET PEUKERT'S EXPONENT
DEFAULT = 1.25 RANGE = 1.00–1.50 STEP = 0.01
Sets the exponent for Peukert’s equation. A setting of 1.00 defeats Peukert's
calculation. See pages 24–27 for a discussion of Peukert's equation and typical values for
various batteries. Properly setting Peukert's exponent ensures a more accurate display of
time remaining and percent remaining.
F09 - Ah OR RATE COMPENSATED % REMAINING MODE
DEFAULT OFF = Ah DISPLAY MODE
ON = RATE COMPENSATED PERCENT REMAINING MODE
Changes the A hrs function to % Remaining mode, which displays the selected
battery's rate compensated state-of-charge as a percentage of the declared capacity. A full
battery is displayed as P100 and a 50% charged battery is displayed as P050. When in
this mode, the battery capacity and Peukert exponent must be accurately set up.
This option is not available when F04 or F05 is ON.
F10 - ALTERNATOR CURRENT LIMIT
DEFAULT = 100 RANGE = 30–220 AMPS, OFF STEP = 10 AMPS
This function is only used with the Alternator Regulator Model (Link 2000-R). It
sets a safety current limit for the alternator. This limits the maximum amount of current
that the alternator can ever deliver which in turn reduces heat and wear on belts and bearings.
The OFF position turns alternator current limiting off.
F11 - BATTERY #2 USED FOR CONTROL
DEFAULT ON = BATTERY #2 USED FOR CONTROL
OFF = BATTERY #2 IS NOT USED FOR CONTROL
This function is used to defeat Battery #2 as a part of the charger control function
of the FREEDOM inverter (also alternator control in the Link 2000-R). This is necessary
for systems that have both 12 V and 24 V batteries. Battery #1 must be the battery that is
used by the FREEDOM. You may also wish to use this function if the main house battery
(Bank 1) is substantially larger than a separate engine battery (Bank 2) that is also monitored
by the LINK 2000. This will prevent the LINK 2000 from making a premature transition
to float based on the smaller engine battery meeting the charged parameters substantially
before the house battery.
NOTE: This function is not changed in a reset to factory default values. If you
wish to change this function you must use the setup routine to change it.
F12 - BACKLIGHTING INTENSITY CONTROL
DEFAULT = 130 RANGE = 0–240 STEP = 10
This function may be used to increase or decrease the intensity of the backlighting
for the display.
13

F13 SET DISCHARGE FLOOR
DEFAULT = 100% RANGE = 50%–100% STEP = 5%
When this option is activated, you may set a discharge floor for each battery bank.
When the discharge floor is set to 50%, the Time Remaining display reports time remaining
until the battery reaches the 50% discharged level. You may set the discharge floor from
50% to 100% in 5% increments. When the Settable Discharge Floor is 100%, time remaining
to 100% discharge is displayed. You may set a discharge floor for each battery. The settable
floor is applied to the battery selected (BAT1 or BAT2) at the time you enter this function.
You may wish to set a higher discharge floor, such as 50%, for an engine starting bank and
a deeper floor, such as 75%, for a deep-cycling house bank.
F14 - ACTIVE TEMPERATURE COMPENSATION ON, OFF
DEFAULT = OFF RANGE = OFF, ON
When this function is ON, the Link 2000/Link 2000-R uses the actual battery
temperature reported from the Freedom Inverter/Charger through the temperature probe.
If the unit Inverter/Charger does not report a valid temperature reading, the Link 2000 will
use the battery temperature declared by F03 (Default: 70 °F) to set charging voltages.
Remember: charging voltages are controlled by battery type and temperature settings.
F15 - SPECIAL FUNCTION FOR DIAGNOSTIC USE.
DEFAULT ON = INVERTER CONTROL
OFF = ASCII OUTPUT
CAUTION!! LEAVE THIS FUNCTION ON. TURNING IT OFF DISABLES
COMMUNICATION. TO BE USED FOR SERVICE DIAGNOSTIC PURPOSES
ONLY.
SUMMARY OF SOFTWARE DEFAULTS
Function Name Default Options
F01 Averaging Period 0 4, 16, 32 minutes
** F02 Battery Type Lead Acid Gel cell , AGM
** F03 View or set ambient 70 °F See text
temperature
F04 View Ah or kWh OFF (Ah) ON (kWh)
F05 Alternative Energy mode Off Solar cell (see text)
F06 Peukert's Exponent Auto See text
F07 Temp Coefficient 0.5 0.1 to 0.9
** F08 Puekert's Exponent 1.25 1.00 to 1.50 (see text)
F09 % remaining time display Off (Ah mode) On (% remaining)
F10 Alternator Current limit 100 amps 30 to 220 amps, off
F11 Battery #2 used for control On (Yes) Off
F12 Backlighting intensity 130 0 to 240
F13 Settable discharge floor 100% 50% to 100%
F14 Active Temp Compensation Off On
F15 Manufacturer Reserved On Do not change
** Item that should be confirmed or changed at installation to ensure proper operation
14

DATA MODE
DATA: The DATA mode is used to recall key
historical information about the battery (battery
banks).
To access the DATA mode:
1) Select Battery #1 or #2 to review its data.
2) Press and hold the SETUP button until the green LED begins to flash then release the
button.
3) Now press the (blue) DATA button. Each time you press the DATA button a new
piece of data is displayed. You may also hold the button down to scroll through the
following data:
CEF (Displayed as
of E99 indicates a 99% CEF. This number sets the rate at which amp hours are counted
back up during charging. This is an amp-hour CEF, not kWh efficiency. The Default setting
is 87% for Type 0 (Liquid) batteries, 90% for Types 1 & 2 (Gelled) and Type 3 AGM
batteries. NOTE: If the CEF display has a "u" in front of it, this means the CEF has been
selected by the user. See Function F06 for details. The CEF of a battery typically remains
fairly constant until end of life. A sudden drop in the CEF indicates time to equalize, a battery
failing, or a charging problem.
#CEF Recalculations (Displayed as
has been discharged more than 10% and then recharged until the Charged Parameters have
been met. May be considered as the number of charge/discharge cycles the meter has
recorded since its last RESET to factory defaults. This is useful to evaluate the cycling
performance of your battery system.
Deepest Discharge (Displayed as
recorded by the meter since its last RESET to factory defaults. Very deep discharges
indicate battery abuse.
Average Discharge (Displayed as
amp-hour value since last RESET to factory defaults. The average discharge level should
normally be no more than about 50% of declared capacity.
EXXEXX
EXX): The Charging Efficiency Factor (CEF) is displayed. A display
EXXEXX
+I999+I999
+I999): This is the number of times that the battery
+I999+I999
-i999-i999
-i999): Shows the deepest discharge in amp hours
-i999-i999
i999i999
i999): The running average of all discharges as an
i999i999
15

HOW TO USE THE LINK
CONTROL PANEL
BATTERY MANAGEMENT PHILOSOPHY:
Recharge When the Battery is 50% Discharged!
The LINK 2000 is a guide to the battery's state of charge. Our Mid-Capacity Rule
says you should begin charging when your LINK 2000 shows that 50% of battery capacity
has been consumed. In Marine and RV systems, which are trying to minimize charging time
with an engine driven alternator or generator driven charger, the battery is normally charged
only to the 85% level. This means only 35% of the battery capacity is actually available for
use. The Mid-Capacity rule is a very conservative approach to battery use. Occasionally
discharging a battery more deeply is perfectly acceptable. The Mid-Capacity rule is intended
as a design and operating guideline to provide optimal battery life and ensure the most energy
output from the battery over its life, not a law which must be obeyed without exception.
We recommend synchronizing your LINK 2000 to the 100% charged level of the
battery. You should begin recharging when 50% of your battery capacity has been
consumed.
supplied battery charger you do not have to charge until the meter reads 0 amp hours
consumed. You may cease charging when the LINK 2000 is displaying that 15% of the
battery capacity is still consumed. See the example below. When you plug back into AC
power, or when your Alternative Energy production exceeds demand, the remaining amp
hours consumed will be replaced.
of its capacity, then switch to battery #2 and use 50% of it. When both batteries are 50%
discharged it is time to charge. You should never leave either battery partially discharged
for more than a few days.
you have synchronized your LINK 2000 to 100% charged batteries. You would use battery
#1 until the LINK 2000 showed that you had used 50% (the display would show -100Ah).
You would then use battery #2 until you had used 50% of it (-100Ah). At this point charge
both batteries up to about the 85% level (-30 Ah on each). If you have other reasons to
continue running the engine or plug back into AC power you may continue charging until
the meter reads zero.
When recharging from an engine-driven alternator or generator
MANAGING A TWO-BATTERY SYSTEM
With a two-battery system we recommend using battery #1 until you consume 50%
Suppose you have two 200 Ah batteries for a total system capacity of 400 Ah and
OVERCHARGE AMP HOURS
If the battery is 100% charged, and the LINK 2000 is in sync with the batteries,
overcharge amp hours are displayed as positive. Some accumulation of overcharge amp
hours is normal and harmless with systems continuously connected to a charger. For
example: a 100 Ah battery at the Float voltage will normally have less than 0.1 A flowing
into it. This means that a maximum of 2.4 Ah of overcharge would accumulate in a 24 hour
period. If your battery system is larger there will be proportionately more current flow and
positive amp-hour accumulation.
If the charging system is a constant voltage type set at 14.2 volts, as much as one
amp of current may be flowing all the time after the battery has reached the charged
16

parameters. The battery will be gassing and you will see an accumulation of a large number
of amp hours each day. This is a clear indication that you are destroying your battery by
overcharging. Check your LINK 2000 before turning off a charging source to see that you
have not accumulated too many overcharge amp hours. When discharging begins,
overcharge amp hours are erased and the LINK 2000 resets to zero.
Systems that have a Conditioning or Equalization cycle will accumulate a few
overcharge amp hours during equalization. This is normal and ensures that the LINK 2000
stays in sync with the battery state of charge.
BATTERY CAPACITY TESTING
Your LINK 2000 can be used to conduct periodic capacity tests that tell you the
actual amount of energy your batteries can store. A capacity test should start with a battery
that has been properly charged and conditioned. The objective is to find the maximum
available capacity.
Deep-cycle battery capacity is usually based on a 20-hour discharge rate. A 100 Ah
battery will provide 5 amps for 20 hours. At discharge rates above 5 amps, the battery will
not supply 100 Ah. For example: If you are drawing 100 amps out of the battery it will last
less than one half hour. This was discovered in 1897 by a scientist named Peukert and is
discussed in detail later. You can see the effect in the following table listing approximate
capacities at different discharge rates.
CAPACITY AT VARIOUS DISCHARGE RATES
(percentage of 20-hour rate)
Hours to Discharge Capacity (percent of rating)
20 100%
10 89%
5 78%
3 66%
1 45%
To test battery capacity, turn on a load that draws approximately 5% of the declared
battery capacity. Measure the current using the Amps function of the LINK 2000. The load
should be constant, such as incandescent lighting. When the battery voltage reaches 10.5
volts, hopefully about 20 hours later, turn off the load and look at the A hrs display on your
LINK 2000. The number displayed is the capacity at the test current. If less than 20 hours
passed before the battery voltage fell to 10.5 V you can still determine the capacity with
some arithmetic. For example: assume a 12 V battery rated at 100 Ah. Apply a 5-amp load.
Suppose it only took 10 hours for the voltage to reach 10.5 volts. The LINK 2000 would
display -50 Ah. This is the 10-hour capacity. Dividing 50 by 89% (10-hour rate) from the
table above, you determine that the actual 20-hour capacity is 56 amp hours. You could
repeat the test at 5% of the tested capacity (2.8A) to verify the actual capacity.
USING YOUR FREEDOM INVERTER
TO TEST BATTERY CAPACITY
Your inverter makes testing the battery capacity easy. First fully charge (and equalize
if necessary) the battery to be tested. Use a load like incandescent lights running on the
inverter whose amperage consumption is 5% or less of the battery capacity. Let the load
run until the inverter shuts down on low voltage (about 10.2 V). Read the number of amp
hours that have been consumed from the battery. If it is not close to the expected number,
use the procedure outlined above to estimate the capacity.
Caution! Be sure to completely recharge your battery after a discharge test.
17
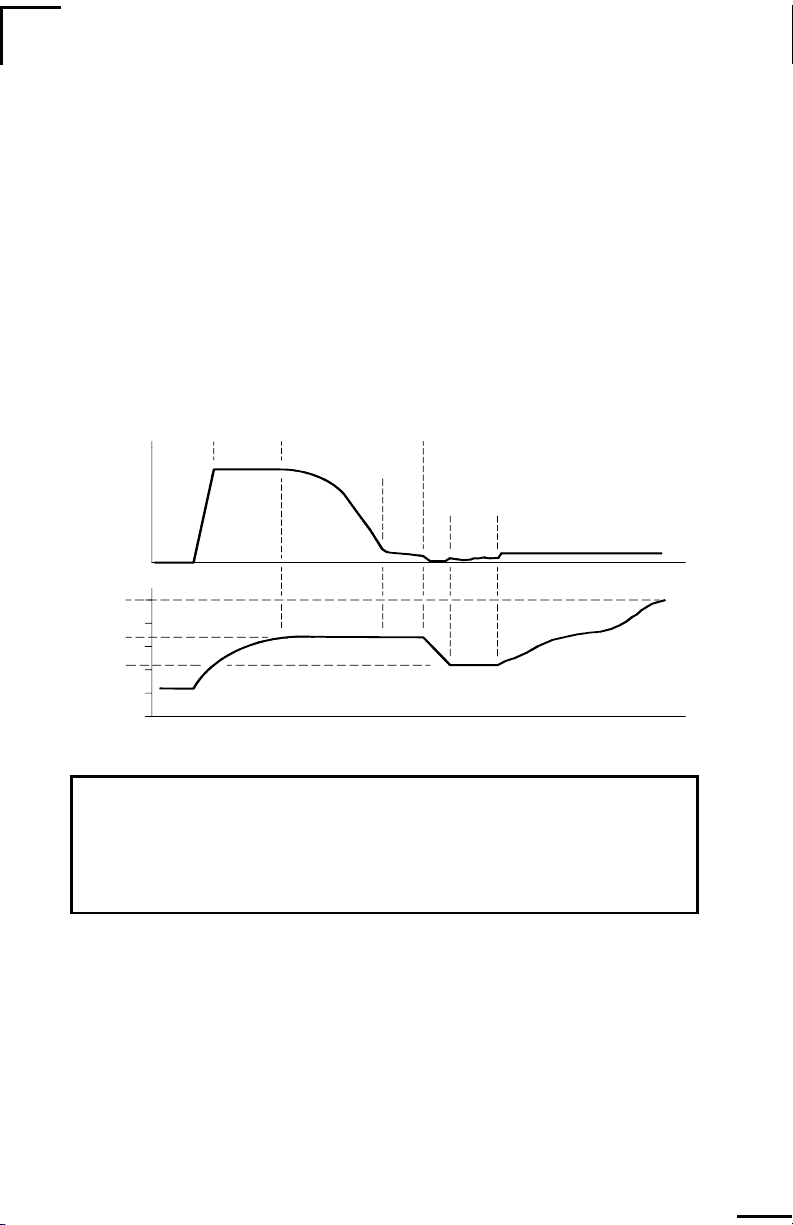
IDEAL CHARGE CURVE
The LINK 2000 transmits critical battery state of charge information to the
FREEDOM Inverter/Charger. This enables the charger to conform to our proven Ideal
Charge Curve with four basic cycles: Charge, Accept, Float, and Equalize. The
CHARGE cycle supplies full charger output current until the battery reaches the Accept
charging voltage (14.4 V typically). The ACCEPT cycle continues until the battery is
accepting only a small amount of current. The battery is now full. During the FLOAT cycle
the voltage is lowered to maintain the batteries, without water consumption, for long life.
The EQUALIZE cycle allows for periodic "equalization" of liquid electrolyte batteries for
maximum capacity and life. The batteries should be equalized about every 30 days during
deep-cycling service.
CHARGING AMPS
100%
BATTERY VOLTAGE (2X for 24 V)
EQUALIZE
ACCEPT
FLOAT
RAMP
UP
DELAY
ON
16
15
14
13
12
IDEAL CHARGE CURVE
CHARGE
ACCEPT
Time
Time
ACCEPT
HOLD
FLOAT
TRANSI-
TION
FLOAT
EQUALIZE
(8 hrs Max.)
IDEAL CHARGING STATE TABLE
CYCLE VOLTAGE BATTERY CURRENT CYCLE LIGHT
CHARGE 12.0–14.4 (Rising) Maximum Charger rating RED
ACCEPT 14.4 (Constant) Falling ORANGE
FLOAT 13.5 (Constant) Small (< 2% Capacity) GREEN
EQUALIZE 13.2–16.0 (Rising) Constant until 16 V SLOW FLASH RED
THE FACTORY DEFAULT VALUES FOR CHARGING:
Battery capacity: = 200 Ah (800 Ah if F05 is ON)
Accept Voltage: = 14.4 volts for 12-volt systems (for wet cell batteries)
= 28.8 volts for 24-volt systems (for wet cell batteries)
Charged Current: = 2% (of battery capacity)
Float Voltage: 0.9 V below the Accept Voltage for Liquid electrolyte batteries.
0.6 V below the Accept Voltage for Gel 2 electrolyte batteries.
Ambient Temp: = 70 °F (See Temperature Compensation Table)
18

HOW TO TELL WHEN A BATTERY IS
FULLY CHARGED
(CHARGED BATTERY PARAMETERS)
MULTIPLE STAGE CHARGING SYSTEMS
If you are using the charger in the FREEDOM, the battery is charged when the system
switches to the Float cycle. If another manufacturer's charging system is being used it
should be adjusted so the transition from Acceptance Charging to Float will occur when
the charging current, at the Acceptance Voltage (14.4/28.8 V typically), drops to below 2%
of the battery capacity. (See the description of the Ideal Charge Curve on the previous page.)
CONSTANT VOLTAGE CHARGING SYSTEMS
Constant voltage charging systems have restored as much charge to a battery as they
can when the voltage reaches the maximum regulation point (a typical 12 V system is set
at 13.8 V) and the charging current drops to less than 1% of the battery capacity. (It can
take more than eight hours for a battery to reach this state of charge.) If you are using an
engine-driven charging system and trying to limit engine run time, you probably will charge
only until the current drops to 5% or 10% of capacity. The LINK 2000 should be
synchronized to whichever of these charge levels is reached in normal operation.
USING SPECIFIC GRAVITY
Accurate battery current measurement is necessary to determine the charged
parameters in the two previous methods. Specific gravity of the battery can also be used
to determine the charge level of a battery. Regardless of the charging system used, a battery
is charged when the specific gravity shows no increase for three hours, when measured at
half hour intervals. Typical specific gravity @ 77 °F for a fully charged liquid electrolyte
battery is 1.265
+ 0.050.
CHARGE EFFICIENCY FACTOR (CEF)
AND HOW IT IS USED
The CEF determines the rate at which the Link 2000 counts back up during charging
to compensate for the inefficiencies of the charging process. The CEF has a factory
default value of 87%. That means the charger must return 1.15 Ah to the system for the
battery to restore 1.0 Ah.
The CEF is automatically recalculated (and averaged over the last few cycles) after
every charge cycle if the battery has been discharged more than 10% of the declared
battery capacity and the charged parameters for voltage and current (selected automatically or manually in the setup procedure) are met for five minutes (may vary by setup).
Additionally, 100% of the kWh removed must be returned during charging.
Continual CEF compensation ensures that the battery state of charge and the Link
2000 stay in sync. Monitoring the CEF over time helps assess changes in performance of
the battery or charging system.
19

SYNCHRONIZING YOUR LINK 2000
TO A CHARGED BATTERY
A charged battery has zero Ahrs removed. Synchronizing your LINK 2000 to read
zero when the battery is charged ensures that you always know the net number of amp hours
removed. The charged parameters on the previous page indicate when a charging system
has put as much energy into a battery as it normally can and the battery can be considered
charged.
Your LINK 2000 must be synchronized at this point!
TWO WAYS TO SYNCHRONIZE
There are two ways to synchronize your LINK 2000 to a battery that has met the
charged parameters:
1) Install the LINK 2000 on a charged battery and it will
2) If the LINK 2000 is installed on a partially charged battery, simply charge until
the charged parameters are met. The LINK 2000 will begin counting up and will display
charging amp hours as positive. When the battery is charged, turn off the charging source.
After discharging begins the LINK 2000
and is in sync.
If the LINK 2000 should ever get out of sync with the battery state of charge
it must be re-synchronized. The best way to do this is to be sure the battery is
discharged at least 10% of the declared battery capacity and then recharge until
the charged parameters are met. At this point the meter should
to zero.
Remember, a battery should be fully charged, and float charged if possible, when
leaving it for extended periods of time for best battery life. This will automatically ensure
that the Link 2000 stays in sync. Some things that will cause the Link 2000 to not stay in
sync are: 1) discharge cycle is less than 10% of battery capacity, 2) battery not fully charged
to 100%, 3) charged voltage set too high for the charging system, 4) charged current % of
battery capacity set too low for the charging system, 5) battery is never charged long enough
for 100% charge.
automatically resets to zero, starts counting down,
automatically be in sync.
automatically reset
MANUALLY RESETTING AMP HOURS TO ZERO
If you want to manually reset your LINK 2000 amp hours display to zero:
1) First select the battery you wish to reset.
2) Press the SETUP button for five seconds. When the LED begins flashing,
release the button.
3) Press and hold the RESET A hrs button for three seconds (until the normal
display returns) to reset the amp hours of the selected battery to zero.
20

MANUALLY SELECTING THE CHARGED
BATTERY PARAMETERS
DISCUSSION: HOW THE LINK 2000 USES THESE VALUES
The LINK 2000 allows the setup of specific charged parameters. The factory
default values have been carefully chosen to work on most systems, including constant
voltage and multiple step charging systems. The factory Charged Parameters are 13.2 volts
and 4 amps (2% of the default battery capacity of 200 Ah). This means when the battery
is above 13.2 volts and the current falls below 4 amps, for five minutes, the LINK
2000 considers the battery full.
The LINK 2000 learns the Charge Efficiency Factor (CEF) of the battery based on
the Charged Parameters. A CEF of greater than 100% is not allowed. To trigger a
recalculation of the CEF, the battery must be discharged at least 10% of declared capacity.
After this discharge, at least 100% of the energy (kWh) removed must be returned, and both
the Charged Voltage and Charged Current % parameters must be met for five minutes for
a recalculation of the CEF to occur. Amp hours consumed are automatically reset to
zero after a recalculation of the CEF. The new CEF is used during the next recharge
cycle to determine the rate that the meter counts back up toward zero.
The battery must go through several cycles for the meter to learn the CEF.
It will take several (at least six) cycles for the displayed CEF to reflect the actual CEF of
the battery.
SHOULD YOU CHANGE THE CHARGED PARAMETERS?
Please consider changing only the battery capacity unless your system falls into one
of the following categories:
1) Battery chemistry other than lead acid.
If you are using NiCad or other types of batteries you should change your Charged
Parameters to the factory specification. NiCad systems would normally use 15.5 to 15.7
as the Charged Voltage. The Charged Current % can probably stay at 2% of declared battery
capacity.
2) Charging normally ends before the current drops below 2% of battery capacity.
If the charging system is shut down before the charging current drops below 2%,
the factory Charged Current % will have to be changed. Examples might include large solar
arrays with controllers that shut off the array at a particular voltage and turn it back on at
a lower voltage, or engine-driven alternator or AC generators running large inverter/chargers
that are normally shut down before the charging current falls below 2% of capacity.
Remember, if charging is normally terminated when the current is a higher percentage
of battery capacity, the battery is probably not being thoroughly charged. If the meter
accumulates negative amp hours, it is letting you know that you must periodically remove
them by a complete charge or that you are not meeting the charged parameters.
21
Feature Summary of LINK 2000 Integrated Battery Monitoring & Inverter/Charger Control
Control Functions
Green LED indicates on.
INVERTER may be turned On or Off independently from charger.
IDLE MODE sets the load sensitivity while idling, expressed
in Watts. Range depends on Freedom inventer being used.
CHARGER feature may be turned On or Off
independently from inverter.
PWR SHARE sets the AC current limit at which the battery charge rate is reduced to avoid overloading limited
AC sources. Expressed in Amps.
Range = 5A, 15A, 20A, 30A, (Varies by Freedom model)
SET UP allows the selection of various functions
and values.
Press for 5 seconds to enter Set Up mode. The green
LED will flash at 1 second intervals. Then press the function to be set up. The present value will be displayed.
After 3 seconds, with the button pressed, the display will
begin scrolling. When the desired value appears, release
the button. If the button continues to be held down, the
display will increment to the end of its range where it will
roll over to its minimum value and contine to scroll.
Flashing green LED indicates Set Up mode. The
LED of the function being set up also flashes.
STATUS indicators show the presence
of AC power and the charge cycle state.
AC IN: Green LED on when AC is present.
CHARGE: Red LED on when charger is in Bulk Charge mode.
Flashes Red when charger is in Equalize mode.
ACCEPT: Orange LED on when charger is in Acceptance mode.
FLOAT: Green LED on when charger is in Float mode.
START EQUALIZE function of charger by pressing
SET UP button for 5 seconds followed by simultaneously pressing the VOLTS and A hrs buttons until
the "E" in the display goes out (3 sec.).
Red CHARGE LED flashes when in equalize mode.
Battery Display Select
Green LED indicates selection.
Press to select BATTERY #1.
RESET A hrs of the selected battery to zero.
Press to select BATTERY #2.
DATA Displays historical data about battery.
Monitoring Functions
Green LED indicates parameter displayed.
TIME REMAINING of operation of load with
remaining battery capacity, displayed as hours.
FUNC Allows special set ups to tailor meter to your particular
application.
AMP-HOURS consumed from selected battery
displayed as a negative number. Overcharge A hrs
displayed as positive number. BATT CAP sets battery
capacity. Default value=200Ahrs. Range 20–2000 Ahrs in
20 Ahr increments.
AMPS charging into the selected battery are displayed
as a positive number. Discharge Amps displayed as a
negative number. Range + 500 Amps with 0.1A resolution below 42A and 1A resolution above 42A.
CHARGED % sets the current that the charge rate must fall
below for the battery to be considered full. Default value=2%
of battery capacity. (Ex: 4Amps = 200 x 2%). Range 1–7% in
1% increments. .
VOLTAGE of selected battery is displayed. Range 8.5–
50 Volts with 0.05V resolution.
CHARGED V sets the Voltage the battery must be above to be
considered full. Default value = 13.2V or 26.4V Sets default
automatically for 12V or 24V systems..
Range 13–32V in 0.1V increments.

RULES FOR CHANGING THE
CHARGED BATTERY PARAMETERS
If you must change the Charged Parameters please use the following rules.
1) The Charged Voltage MUST be at least 0.1 V BELOW the charging system
voltage.
2) The Charged Current % times declared Battery Capacity MUST be
GREATER than the minimum current the charging system maintains the battery at, or
turns off at.
If the charged parameters are not correctly selected,
the LINK 2000 will never recalculate the CEF. For example:
(1) If your charging system only reaches 13.8 (27.6) volts, a Charged Voltage of 14.0 (28.0)
volts will not work—it is set too high and the Link 2000 will never know that the battery
is charged. Lower the Charged Voltage. Changing the Charged Voltage to 13.7 (27.5) volts
should work. See Monitor Setup on page 9.
(2) If the Charged Current % times the Battery Capacity is less than the current at which
the charging system switches off, the Charged Current cannot be met and the Link 2000
will never know that the battery is charged. If the charging system shuts off when the current
is 10 amps, using the factory default value of 4 amps (2% of 200 Ah) will not work.
(Changing the Charged Current % to 6% would give a Charger Current of 12 amps, which
would work fine. See Monitor Setup on page 9.)
If you have a charging system that cannot satisfy the default values, the CEF will not
be recalculated and the meter will use the default CEF of 87%. This will work fine in most
systems. You may notice an accumulation of negative amp hours. If so, set up appropriate
charged parameters or resynchronize periodically. (See Synchronizing Your Link 2000 To
a Charged Battery on page 20.)
22
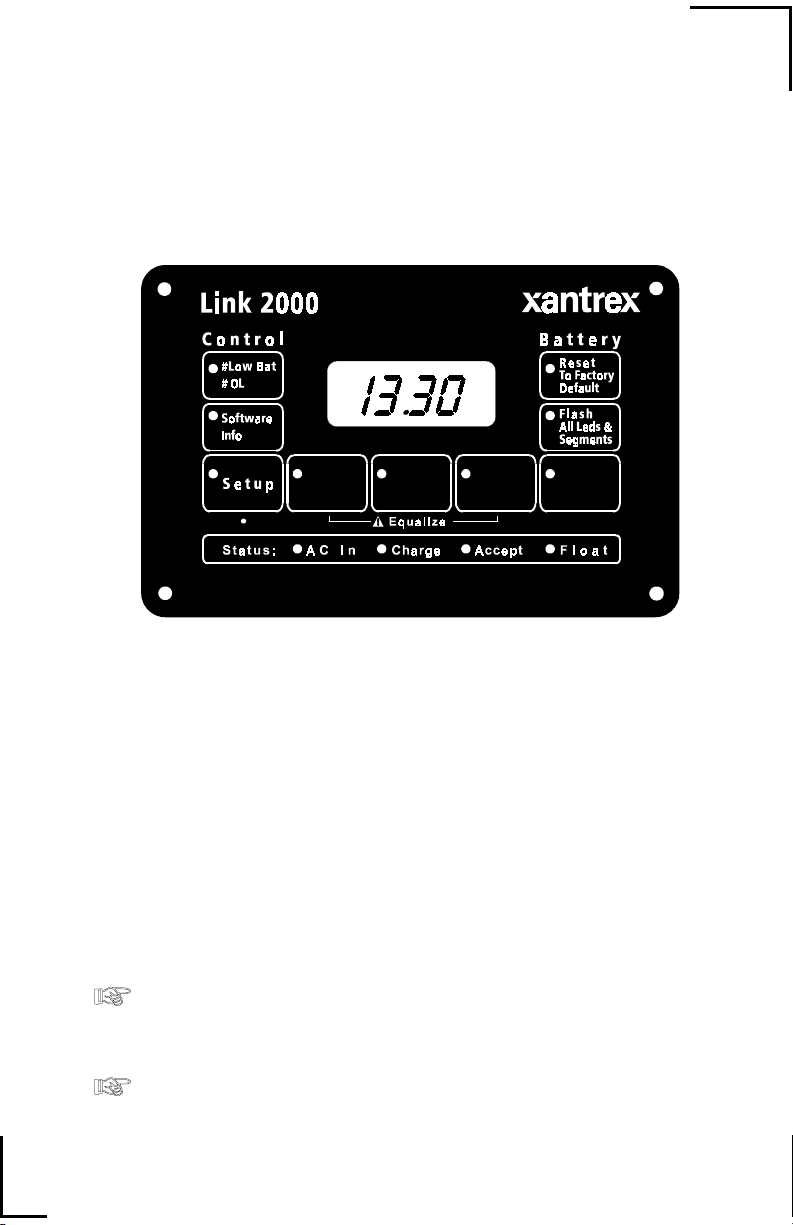
RESET / INFO FUNCTIONS
The drawing below shows the Reset/Info Functions layout. To access these, press
the SETUP BUTTON for ten seconds. The time is long to avoid unintentionally entering
this mode. When the green LED begins to
select the Advanced Function you wish
the monitoring mode five seconds after the selected function button is released.
# LOW BAT/ # OL: The number of Inverter Low Battery shutdowns (since last reset)
is displayed with a minus sign (negative number). The number of Inverter shutdowns (since
last reset) from other causes are displayed with no sign (positive number). The display
alternates at three-second intervals until the button is released.
flash quickly (about three times per second)
by consulting this drawing. The display returns to
SOFTWARE INFO: The revision number of the LINK 2000 software is displayed.
FLASH ALL LEDS & SEGMENTS: This display test continues until the button is
released.
RESET TO FACTORY DEFAULTS: When this button is held down for five seconds,
all of the values set up for the selected battery are reset to the factory values. A 0 (zero)
should appear briefly in the display (watch closely).
this would only be done if you are changing batteries.
IMPORTANT NOTE! During a RESET TO FACTORY DEFAULTS any
changes to the inverter/charger setup are also reset to the factory values IF the
INVERT or CHARGE LEDs are on.
IMPORTANT NOTE! Function F11 (Battery #2 used for control) is NOT
reset during a RESET TO FACTORY DEFAULTS.
All historical data is lost! Normally
23

HIGH DISCHARGE RATES
& PEUKERT'S EQUATION
Peukert's Equation describes the effect of different discharge rates on battery
capacity. As the discharge rate increases the available battery capacity decreases. The
tables on pages 25, 26 and 27 have typical values of "n" for common batteries. Page 25
is a look-up table, pages 26 & 27 have "n" values for common batteries, and page 27 has
the formula for calculating "n" for other batteries.
The LINK 2000 uses Peukert's equation only for calculating the Time Remaining
of operation function. The amp hours display is always the actual number of amp hours
consumed. This means that if you rapidly discharge a battery, your time remaining
number may show zero hours remaining before you see the total number of amp hours
of battery capacity consumed.
If battery Type 0 is selected, the initial Peukert exponent is set at 1.25. This
is an appropriate mid-range value for many common liquid cells. If any other battery
type is selected, the initial Peukert exponent is set at 1.11. This is an appropriate
mid-range value for many common gel and AGM cells. Please note that you may only
declare one battery type using function F02. This is because we strongly recommend
against mixing AGM, gel, and liquid electrolyte batteries in the same system. The
selected Peukert exponent is applied to both battery banks. Set the exponent to the
correct value for the bank which you use most often.
Making two discharge tests, one at a high discharge rate and one at a low rate, that
bracket your normal range of operation allows you to calculate an "n" that will describe
this varying effect. The Link 2000 uses a default value of "n" equal to 1.25 which is
typical for many batteries.
At some low-to-moderate discharge rate, typically a battery's 20-hour rate, the
logarithmic effect of Peukert's Equation is greatly reduced. The effect of discharge rates
smaller than this is nearly linear. Battery manufacturer specifications of battery capacity
in amp hours is typically given at the 20-hour rate. From this description, if a battery is
discharged at this rate for the period of time called out, you will be able to remove the
rated capacity.
The equation for Peukert's Capacity (C
C p = I n t where
By doing two discharge tests and knowing I
the two tests), and t
Peukert exponent). You will need a calculator that has a Log function to solve the equation
above. You may also use the 20-hour discharge rate and the number of reserve minutes
as the two discharges to solve Peukert's equation. See example on page 27. After you
solve for your Peukert's exponent you may enter it using Function F08.
24
& t2(time in hours for the two tests) you can calculate n (the
1
p
) is:
log
n =
t2 - log t
log I
- log I
1
& I2 (discharge current in amps of
1
1
2

TABLE OF PEUKERT'S EXPONENT FOR VARIOUS BATTERY RATINGS
25
DIRECTIONS: FIND THE 20-HOUR RATING OF YOUR BATTERY ON THE HORIZONTAL AXIS. FIND THE RESERVE
CAPACITY RATING ON THE VERTICAL AXIS. THE INTERSECTION IN THE TABLE GIVES THE "
20 Hr
rating 60 70 85 86 90 95 105 108 112 120 130 150 170 180 208 210 216 221 225
Reserve
Minutes
60 1.41
90 1.22 1.32 1.46 1.47
120 1.09 1.17 1.30 1.31 1.34 1.39 1.48 1.50
130 1.05 1.13 1.25 1.26 1.30 1.34 1.42 1.45 1.49
150 1.06 1.17 1.18 1.21 1.25 1.33 1.36 1.39 1.46
160 1.02 1.14 1.14 1.18 1.21 1.29 1.31 1.35 1.41 1.50
180 1.07 1.08 1.11 1.14 1.22 1.24 1.27 1.33 1.41
190 1.04 1.05 1.07 1.11 1.18 1.20 1.23 1.29 1.37
210 1.02 1.05 1.12 1.14 1.17 1.22 1.29 1.45
230 1.06 1.08 1.10 1.16 1.23 1.37
240 1.03 1.05 1.08 1.13 1.19 1.34 1.49
270 1.05 1.11 1.24 1.38 1.46
300 1.03 1.15 1.29 1.36
330 1.07 1.20 1.26 1.47 1.49
350 1.02 1.14 1.21 1.40 1.42 1.47
360 1.12 1.18 1.37 1.39 1.43 1.47
375 1.08 1.14 1.33 1.34 1.39 1.42 1.46
390 1.04 1.10 1.28 1.30 1.34 1.38 1.41
395 1.03 1.09 1.27 1.28 1.32 1.36 1.39
420 1.20 1.21 1.25 1.29 1.31
450 1.12 1.13 1.17 1.20 1.23
N" VALUE.

TYPICAL PEUKERT'S EXPONENTS
The following table contains values for the exponent "n" for various batteries and
manufacturers. They are calculated from the 20-hour rating and the Reserve Minutes @
25 A as supplied by the manufacturer. Page 27 shows how the calculation is performed.
You may choose a battery of similar size and construction as a guide in selecting "n" if
your battery does not appear in this table, or you may calculate "n" as shown.
Typical Values for Peukert's Exponent "n"
Prevailer & SeaGel Batteries
Model Volts Res. Min. 20-Hr. Rating "n"
8GGC 6 375 180 1.14
8GU1 12 140 43 1.20
8GU24 12 130 70 1.13
8GU27 12 167 86 1.12
8GU30H 12 188 95 1.12
84D 12 388 180 1.11
8G8D 12 500 225 1.10
Trojan Batteries
Model Volts Res. Min. 20-Hr. Rating "n"
T-105 6 447 225 1.24
T-125 6 488 235 1.19
T-145 6 530 244 1.14
J250 6 535 250 1.17
J305 6 660 305 1.21
L16 6 760 350 1.28
24TM 12 135 85 1.23
27TM 12 160 105 1.28
30XHS 12 225 130 1.24
SCS225 12 225 130 1.24
EV8D 12 450 216 1.17
26

TYPICAL PEUKERT'S EXPONENTS
Surrette and Rolls Batteries
Model Volts Res. Min. 20-Hr. Rating "n"
EHG-208 6 345 208 1.42
EIG-225 6 350 225 1.54*
EIG-262 6 395 262 1.72*
24/90 12 165 90 1.16
27/12M 12 190 112 1.23
30H/108 12 230 108 1.08
HT/4D 12 348 170 1.15
HT/8D 12 450 221 1.20
*Use Max allowed "n" of 1.50
CALCULATING PEUKERT'S EXPONENT
Example of using Reserve Minutes @ 25 amps
and the 20-hour rate to calculate "n".
First convert Reserve Minutes to hours, then find the discharge current
at the 20-hour rating. Finally use a calculator to solve the arithmetic.
Trojan T-105:
Reserve Minutes = 447 min @ 25 amps.
t
= 447 min = 447/60 = 7.45 hrs
1
I
= 25 amps
1
20-Hour rating = 225 Ah
t
= 20 hours
2
I
= 225 amp hours/20 hours = 11.25 amps
2
log t
n =
log I
- log t
2
- log I
1
log 20
log 25
- log 7.45
- log 11.25
1
=
2
=
1.301
1.398
- 0.872
= 1.24
- 1.051
27

ERROR CODES AND TROUBLESHOOTING
The following error codes are displayed when the LINK 2000 detects a problem.
The display alternates between the selected monitoring function and the Error Code. The
Error Code continues to flash until the error is corrected. (Error codes are the same for all
models.)
CODE DEFINITION
E-1 INVERTER HIGH DC/BATTERY VOLTAGE SHUTDOWN:
Battery voltage has risen above 15.5 V for 12 V models or above 31 V for 24
V models. Check all charging sources.
E-2 INVERTER LOW DC/BATTERY VOLTAGE SHUTDOWN:
Battery voltage has dropped below 10.5 V for 12 V units or below 21 V for
24 V units.
E-3 INVERTER OR CHARGER OVER TEMP SHUTDOWN:
Unit will reset automatically after it has cooled sufficiently. Be sure there is
adequate ventilation around the unit.
E-4 BATTERY OVERLOAD:
Caused by excessively discharged batteries, or a battery with a bad cell.
See section in inverter owner's manual titled "Charging over-discharged
batteries."
E-5 AC BACKFEED:
AC power from an outside source has been fed to the AC output of the inverter.
This is potentially damaging to the unit. Disconnect incoming AC
power and correct immediately. See a qualified technician if you do not
know how to check for this condition.
E-6 ELECTRONIC OVERLOAD:
Inverter overload caused by too large of a load or a short circuit on the output
of the inverter. Reset by cycling the inverter OFF and ON or connecting
incoming AC power.
E-7 TRIAC CONTROL ERROR:
The Triac is used in the battery charging circuit in the FREEDOM series
product. This error indicates that the Triac has overheated. Turn off charger
and allow to cool. Be sure there is adequate ventilation around the unit.
E-8 HIGH BATTERY VOLTAGE SHUTDOWN DURING CHARGING:
Check all charging sources (solar panels, alternators, other battery charges,
and so on) for proper voltage. Reset by cycling the charger off and on.
E-9 NOT USED:
28

E-10 LINK 2000 DEPOWERED:
Displayed on power up and when power has been interrupted or dipped below
the operating voltage of the LINK 2000.
May be caused by voltage dips during
engine starting if the meter is powered by a starting battery.
E-11 NOT USED:
E-12 BATTERY #1 VOLTAGE SENSE LEADS OPEN:
Check the fuse and connections in the sense lead (Blue wire) to battery #1.
E-13 BATTERY #2 VOLTAGE SENSE LEADS OPEN:
Check the fuse and connections in the sense lead (Violet wire) to battery #2.
E-14 INAPPROPRIATE CHARGED VOLTAGE SELECTED FOR THE
SENSED VOLTAGE:
Displayed if the Charged Voltage parameter is above 20 V and sensed voltage
is below 20 V, or if the sensed voltage is above 20 V and the Charged Voltage
parameter is below 20 V. Helps avoid an erroneous setup. See Charged V.
E-15 INCOMING AC POLARITY REVERSED:
Check incoming AC wiring for a reversed polarity (hot and neutral reversed).
See a qualified technician if you do not know how to check for this condition.
CCC INDICATES BATTERY IS BEING CHARGED.
Displayed when time remaining is selected.
Exx CHARGE EFFICIENCY IN DATA DISPLAY
LO BAT MORE THAN 50% OF DECLARED CAPACITY OF BATTERY #1
OR #2 HAS BEEN CONSUMED. SEE PAGE 5.
OL METER READING OUT OF RANGE.
Pxxx INDICATES PERCENT OF CHARGE MODE SELECTED.
Uxx DESIGNATES USER SETUP CEF. SEE F06 PAGE 12.
TO VERIFY CURRENT MEASUREMENT:
You may use a digital multimeter to verify that the current measurement is
displayed correctly. Place at least a 20- to 30-amp load on the system. Use
the multimeter to check the millivolt reading across the battery shunt. The shunt
has a 500 A 50 mV rating, which means a load of 30 amps generates 3.0 mV
across the shunt. The reading at the shunt and at the point where the wires
coming out of the meter join the shunt wiring should be the same, and when
multiplied by 10 should equal the reading in the amps display of the Link 2000.
29

MICROPROCESSOR RESET PROCEDURE
The LINK 2000 uses a microprocessor to perform all of its calculations and
functions. We have worked very hard to ensure a stable, trouble-free product. However,
like all computer products, the unit is sometimes susceptible to power supply dips or surges
that can cause erratic behavior or memory errors. If you detect a problem, please use the
following procedure to reset the microprocessor—you may also need to reset the memory
to the factory defaults as described on the next page. If you reset to factory defaults be sure
and set up appropriate values for battery capacity, battery type, ambient temperature, and
Peukert's exponent as previously described. Please read the entire instruction set before
beginning the procedure.
TO RESET FROM A LOCKUP, ERRATIC DISPLAY, OR ERRATIC BEHAVIOR
1) Disconnect from shorepower.
2) De-power the meter by removing the fuse from the red wire. If the red wire
is jumpered to the blue or violet wires, remove the fuses in the appropriate wire
to remove power to the unit. If your meter is an alternator regulator model you
can de-power the meter by removing the gray ribbon cable from the monitor
terminal board and reconnecting it.
3) Wait at least 30 seconds before reconnecting the fuse (or the ribbon cable).
When the fuse is reconnected use a continuous motion. If the meter is
intermittently powered and de-powered several times in a short period, the
microprocessor may lock up.
4) Press the INVERT and CHARGE buttons so that their LEDs are illuminated.
5) Restore shorepower. After a few seconds you should see the AC STATUS
light illuminate and the charge status lights come on indicating the CHARGE
mode. (If the battery is full the CHARGE light will only be on for a short time
before the Accept LED comes on.)
6) Check to see that your battery capacity, battery type, ambient temperature,
Peukert's exponent, charged voltage parameter, and any other values you
might have previously set up are still correct. If they are, end here; if not, change
them to the appropriate values or follow the procedure on the next page for
resetting to factory values.
30

RESETTING MEMORY TO FACTORY VALUES:
If some portions of the memory have been "corrupted" you should consider
resetting to the factory default values and then changing any specific values you need to.
This ensures a "clean slate" for your new setup.
1) Follow the procedure outlined on the previous page to first reset the
microprocessor.
2) Select Battery bank #1 on the LINK 2000 to reset to factory values for Battery
#1. To also reset Inverter and Charger functions to factory defaults, be sure
that the INVERT and CHARGE LEDs are lit.
3) Press and hold the SETUP button for approximately 10 seconds. After five
seconds the SETUP LED will begin to flash slowly—continue to hold until
the SETUP LED begins to flash quickly (about three times per second).
Release the SETUP button,
press and hold the RESET A Hrs button (blue
legend under BATTERY #1 button). After holding down the RESET A Hrs
button for about five seconds, you should see a 0 (zero) appear in the display
momentarily. If you do not see the zero, the meter did not reset and this step
must be repeated.
4) Select Battery bank #2 on the LINK 2000 to reset to factory values for
Battery #2.
5) Repeat step 3.
6) Reprogram the necessary setup values such as battery type, capacity, ambient
temperature, Peukert's exponent, inverter/charger parameters, and so on.
31

SETUP AND HISTORICAL DATA SUMMARY
The following table is a summary of the values that may be changed through setup
or by accumulating historical data. The column on the right is provided to write down your
setup values or historical data. Be sure and know these values before calling for customer
service. Multiply voltage values by two for 24-volt systems.
PARAMETER DEFAULT VALUE SETUP VALUE
B1 V
CHARGED
B2 V
CHARGED
B1 AMPS
B2 AMPS
CHARGED
CHARGED
13.2 (13.5 IF F05 IS ON) ______________
13.2 (13.5 IF F05 IS ON) ______________
2% (4% IF F05 IS ON) ______________
2% (4% IF F05 IS ON) ______________
B1 BAT CAPACITY 200 Ah (800 IF F05 IS ON) ______________
B2 BAT CAPACITY 200 Ah (800 IF F05 IS ON) ______________
AMBIENT TEMP (F03) 70 °F ______________
BATTERY TYPE (F02) #0 LIQUID LEAD ACID ______________
POWER SHARE 30 A (OFF in Freedom 25) ______________
STANDBY 4 W ______________
B1 USER CEF (F06) 87% (90% FOR GELLED) ______________
B2 USER CEF (F06) 87% (90% FOR GELLED) ______________
TIME REMAINING (F01) 0 = INSTANTANEOUS ______________
Ah OR kWh(F04) OFF = Ah ______________
ALT. ENERGY MODE (F05) OF F ______________
TEMP. COEFFICIENT (F07) 0.5 ______________
PEUKERT'S EXP. (F08) 1.25 ______________
BATT #2 FOR CNTRL (F11) ON = YES ______________
BACKLIGHTING (F12) 130 ______________
DISCHARGE FLOOR (F13) 100% ______________
TEMP. COMP. (F14) OFF ______________
HISTORICAL DATA VALUE
B1 # of CEF RECALCS ______________
B2 # OF CEF RECALCS ______________
B1 AVG DEPTH OF DISCHARGE ______________
B2 AVG DEPTH OF DISCHARGE ______________
B1 DEEPEST DISCHARGE ______________
B2 DEEPEST DISCHARGE ______________
SOFTWARE REVISION ______________
32

WARRANTY
What does this warranty cover? This Limited Warranty is provided by Xantrex Technology, Inc.
(“Xantrex”) and covers defects in workmanship and materials in your Xantrex Link 2000 Inverter Controller
and Dual Battery Monitor. This warranty lasts for a Warranty Period of 12 months from the date of purchase
at point of sale to you, the original end user customer.
This Limited Warranty is transferable to subsequent owners but only for the unexpired portion of the Warranty
Period.
What will Xantrex do? Xantrex will, at its option, repair or replace the defective product free of charge,
provided that you notify Xantrex of the product defect within the Warranty Period, and provided that Xantrex
through inspection establishes the existence of such a defect and that it is covered by this Limited Warranty.
Xantrex will, at its option, use new and/or reconditioned parts in performing warranty repair and building
replacement products. Xantrex reserves the right to use parts or products of original or improved design in the
repair or replacement. If Xantrex repairs or replaces a product, its warranty continues for the remaining
portion of the original Warranty Period or 90 days from the date of the return shipment to the customer,
whichever is greater. All replaced products and all parts removed from repaired products become the property
of Xantrex.
Xantrex covers both parts and labor necessary to repair the product, and return shipment to the customer via a
Xantrex-selected non-expedited surface freight within the contiguous United States and Canada. Alaska and
Hawaii are excluded. Contact Xantrex Customer Service for details on freight policy for return shipments
outside of the contiguous United States and Canada.
How do you get service? If your product requires troubleshooting or warranty service, contact your
merchant. If you are unable to contact your merchant, or the merchant is unable to provide service, contact
Xantrex directly at:
Phone: 1-800-670-0707 (toll free in North America) 1-604-422-2777 (direct)
Fax: 1-604-420-2145
Email: CustomerService@xantrex.com
Direct returns may be performed according to the Xantrex Return Material Authorization Policy described in your product manual. For some products, Xantrex maintains a network of regional Authorized Service Centers. Call Xantrex or check our Web site to see if your product can be repaired at one
of these facilities.
In any warranty claim, dated proof of purchase must accompany the product and the product must not
have been disassembled or modified without prior written authorization by Xantrex.
Proof of purchase may be in any one of the following forms:
• The dated purchase receipt from the original purchase of the product at point of sale to the end
user, or
• The dated dealer invoice or purchase receipt showing original equipment manufacturer (OEM)
status, or
• The dated invoice or purchase receipt showing the product exchanged under warranty
What does this warranty not cover? This Limited Warranty does not cover normal wear and tear of the
product or costs related to the removal, installation, or troubleshooting of the customer’s electrical systems.
This warranty does not apply to and Xantrex will not be responsible for any defect in or damage to:
a) the product if it has been misused, neglected, improperly installed, physically damaged or altered, either
internally or externally, or damaged from improper use or use in an unsuitable environment;
b) the product if it has been subjected to fire, water, generalized corrosion, biological infestations, or
input voltage that creates operating conditions beyond the maximum or minimum limits listed in the
Xantrex product specifications including high input voltage from generators and lightning strikes;
c) the product if repairs have been done to it other than by Xantrex or its authorized service centers
(hereafter “ASCs”);
d) the product if it is used as a component part of a product expressly warranted by another
manufacturer;
e) the product if its original identification (trade-mark, serial number) markings have been defaced,
altered, or removed.
33

Disclaimer
Product
THIS LIMITED WARRANTY IS THE SOLE AND EXCLUSIVE WARRANTY PROVIDED BY XANTREX IN CONNECTION WITH
YOUR XANTREX PRODUCT AND IS, WHERE PERMITTED BY LAW, IN LIEU OF ALL OTHER WARRANTIES, CONDITIONS,
GUARANTEES, REPRESENTATIONS, OBLIGATIONS AND LIABILITIES, EXPRESS OR IMPLIED, STATUTORY OR OTHERWISE
IN CONNECTION WITH THE PRODUCT, HOWEVER ARISING (WHETHER BY CONTRACT, TORT, NEGLIGENCE, PRINCIPLES OF
MANUFACTURER’S LIABILITY, OPERATION OF LAW, CONDUCT, STATEMENT OR OTHERWISE), INCLUDING WITHOUT
RESTRICTION ANY IMPLIED WARRANTY OR CONDITION OF QUALITY, MERCHANTABILITY OR FITNESS FOR A
PARTICULAR PURPOSE. ANY IMPLIED WARRANTY OF MERCHANTABILITY OR FITNESS FOR A PARTICULAR PURPOSE TO
THE EXTENT REQUIRED UNDER APPLICABLE LAW TO APPLY TO THE PRODUCT SHALL BE LIMITED IN DURATION TO THE
PERIOD STIPULATED UNDER THIS LIMITED WARRANTY.
IN NO EVENT WILL XANTREX BE LIABLE FOR ANY SPECIAL, DIRECT, INDIRECT, INCIDENTAL OR CONSEQUENTIAL
DAMAGES, LOSSES, COSTS OR EXPENSES HOWEVER ARISING WHETHER IN CONTRACT OR TORT INCLUDING WITHOUT
RESTRICTION ANY ECONOMIC LOSSES OF ANY KIND, ANY LOSS OR DAMAGE TO PROPERTY, ANY PERSONAL INJURY, ANY
DAMAGE OR INJURY ARISING FROM OR AS A RESULT OF MISUSE OR ABUSE, OR THE INCORRECT INSTALLATION,
INTEGRATION OR OPERATION OF THE PRODUCT.
Exclusions
If this product is a consumer product, federal law does not allow an exclusion of implied warranties.
To the extent you are entitled to implied warranties under federal law, to the extent permitted by
applicable law they are limited to the duration of this Limited Warranty. Some states and provinces do not
allow limitations or exclusions on implied warranties or on the duration of an implied warranty or on the
limitation or exclusion of incidental or consequential damages, so the above limitation(s) or exclusion(s) may
not apply to you. This Limited Warranty gives you specific legal rights. You may have other rights which may
vary from state to state or province to province.
Warning: Limitations On Use
Please refer to your product user manual for limitations on uses of the product. Specifically, please note that
the Xantrex Link 2000 is not intended for use in connection with life support systems and Xantrex makes no
warranty or representation in connection with any use of the product for such purposes.
Return Material Authorization Policy
Before returning a product directly to Xantrex you must obtain a Return Material Authorization (RMA)
number and the correct factory “Ship To” address. Products must also be shipped prepaid. Product shipments
will be refused and returned at your expense if they are unauthorized, returned without an RMA number
clearly marked on the outside of the shipping box, if they are shipped collect, or if they are shipped to the
wrong location.
When you contact Xantrex to obtain service, please have your instruction manual ready for reference and be
prepared to supply:
• The serial number of your product
• Information about the installation and use of the unit
• Information about the failure and/or reason for the return
• A copy of your dated proof of purchase
34

Return Procedure
1. Package the unit safely, preferably using the original box and packing materials. Please ensure that
your product is shipped fully insured in the original packaging or equivalent. This warranty will not
apply where the product is damaged due to improper packaging.
2. Include the following:
• The RMA number supplied by Xantrex Technology Inc clearly marked on the outside of the box.
• A return address where the unit can be shipped. Post office boxes are not acceptable.
• A contact telephone number where you can be reached during work hours
• A brief description of the problem
3. Ship the unit prepaid to the address provided by your Xantrex customer service representative.
If you are returning a product from outside of the USA or Canada
In addition to the above, you MUST include return freight funds and are fully responsible for all
documents, duties, tariffs, and deposits.
If you are returning a product to a Xantrex Authorized Service Center (ASC)
A Xantrex return material authorization (RMA) number is not required. However, you must contact the
ASC prior to returning the product or presenting the unit to verify any return procedures that may apply
to that particular facility.
35
REQUIRED READING
Before wiring the LINK 2000, install the shunt as indicated.
All wiring should be done before installing the fuses.
GENERAL NOTES
1) Wiring to the LINK 2000 should be #16 or #18 AWG. (Larger wire is acceptable, but
not necessary.) Wiring should be per NEC or applicable standards.
2) The Shunt Sense Leads should be a twisted pair. Leads up to 1,000 feet long may be
used if they are not run along with other noise-producing conductors. Offset error should
be less than 0.2 amps.
For the easiest installation you may wish to purchase our four twisted pair cable with
the same color code as the meter. This cable may be run between the meter and the batteries
to supply all needed signals. This cable is available from your dealer or from Xantrex.
Note: You may make your own twisted pair wire by chucking up two wires in an electric
drill motor and twisting them by running the drill motor until there is a twist every inch. A
wrap of tape every 16" will keep the wires together and make them easier to pull through
the raceway.
3) Caution! If your starter draws more than 500 amps see #5 below.
CAUTION!!!!
The output voltage of the shunt is very small. It is critical that all of the
connections for the shunt sense leads have the highest possible integrity. Every
effort must be made to prevent corrosion that might affect the sense leads.
4) Battery current is sensed with a shunt, which is a very precise, small resistance. It is
inserted in series (in line) in the negative wire of the circuit you wish to measure. The current
is measured by sensing the voltage drop across this resistance. The LINK 2000 uses
a 50 mV, 500-amp shunt. When 500 amps flows through the shunt, there is a 50 mV drop
across it. Thus 10 amps equals 1 mV or 1 amp equals 0.1 mV. The display is scaled to read
amps. If you wish to check this you will need a very accurate digital meter (Fluke 87 in
4 1/2 digit mode or better) if the current is below 30 amps (3.0 mV). Above 50 amps most
digital meters can be used for testing.
5) Note for Marine and RV installations: If starter current exceeds 500 amps, the starter
negative must be connected to the battery side of the battery shunt so that starter current
does not flow through it. The problem with this is that if the alternator is of the grounded
case type its current will not be flowing through the shunt. The alternator ground must be
isolated from the engine and run to the load side of the battery shunt to be able to measure
the current going into the battery from the alternator. Isolated negative output alternators
are available and we strongly recommend them. With isolated negative output alternators,
36

remember that instrumentation and other loads grounded directly to the engine block will
not be measured unless their negatives are relocated to the load side of the Battery Shunt.
Special high current shunts are also a solution and may be ordered from us. A separate
engine starting battery whose negative is connected directly to the engine also solves the
problem.
6) We have shown several wires connected to the load side of the battery shunt in the wiring
diagram. If more than a few wires must be connected here, it is best to use a 2/0 jumper
from the shunt to a good negative bus. We recommend that no more than two, or at a
maximum three, connections per large bolt be made on the negative bus side of the shunt.
The negative bus should be a solid copper or brass bar with many threaded screws under
which the negatives for all of the loads may be secured. It should be fed with a conductor
of sufficient size so that there is no appreciable voltage drop even under full load.
WIRE BY WIRE INSTALLATION
Be sure the shunt is installed before proceeding.
The BLACK WIRE (AGND) is the Analog Ground. It is the reference for all measurements. It must be connected on the BSHG (Grounded) side of the shunt. The BSHG side
of the shunt is the side opposite of the negative battery terminals. It must have a good
connection to one of the two #10 screws on the top of the battery shunt.
The RED WIRE (+12 V) is the +12 V supply. (In a 24 V system supply with +24 V.) The
wiring diagram shows two options. The preferred option is to jumper together the RED and
BLUE wires as shown. Wired this way, the meter cannot accidentally be de-powered. It
has the disadvantage of always consuming a little bit of power from the #1 Battery. The meter
consumes about 28 mA (.028 A). If left on all the time it would use about 0.7 Ah per day.
If the system is left on for long periods (long enough to significantly discharge the
battery) with no charging sources then you should consider the option shown with the
dotted line. In this case the RED wire is
common of the battery switch. (Be sure to install the 2 A fuse as near the battery switch
as possible.) Whichever battery is selected is the battery that supplies the power. If the
switch is turned off the meter is de-powered. To re-synchronize your meter you must fully
charge the battery when it is put back into service.
not jumped to the BLUE but supplied from the
The WHITE WIRE (LITE) supplies the display backlighting. It should be supplied from
a switch that controls other instrument lighting. It may be connected to +12 V along with
the RED wire if you wish the lighting to be on all the time. The backlighting consumes about
8 mA (.008 A). If left on all the time it would use less than 0.2 Ah per day.
The BLUE WIRE (B1V) supplies Battery #1 voltage for sensing. It should be supplied
directly from Battery #1. Be sure to install the 2-amp fuse shown in the drawing as near the
battery as possible.
37

The VIOLET WIRE (B2 V) supplies Battery #2 voltage for sensing. It should be supplied
directly from Battery #2. Be sure to install the 2-amp fuse shown in the drawing.
NOTE: If only one battery is to be monitored, connect the VIOLET wire to
the BLUE wire.
The GREEN WIRE (B1SHG) is connected to the SMALL SCREW ON THE GROUND
SIDE, OR LOAD SIDE, of the battery #1 shunt (B1SHG). This wire must be located
exactly as described to ensure accuracy of current measurements. The wires that run
from the battery #1 shunt sense terminals to the GREEN AND ORANGE wires should
be a twisted pair.
The ORANGE WIRE (B1SHB) is connected to the SMALL SCREW ON THE
BATTERY SIDE of the battery #1 shunt (B1SHB). This wire should be located exactly
as described to ensure accuracy in current measurements.
NOTE: If only one current input is used, connect the Green and Brown wires
together and the Orange and Yellow wires together. This hookup will display the
same current information for both the battery #1 and #2 selection.
The BROWN WIRE (B2SHG) is connected to the SMALL SCREW ON THE
GROUNDED, OR LOAD SIDE, of the battery #2 shunt (B2SHG). SEE ABOVE
CAUTIONS.
The YELLOW WIRE (B2SHB) is connected to the SMALL SCREW ON THE
BATTERY SIDE of the Battery #2 shunt (B2SHB). The YELLOW and BROWN wires
should be a twisted pair. SEE ABOVE CAUTIONS.
THE INVERTER REMOTE CABLE
The only connection between the Freedom and the Link Control Panel is a standard
remote cable. There are three jacks on the back (bottom) of the inverter. Use the one labeled
REMOTE. It is best to plug the remote cable into the LINK 2000 after it is powered up.
It is supplied with a 25' cable. You may purchase longer cords from any telephone supply
company. You should limit its length to 50 feet. Do not run the remote cable in the same
wireway as very noisy power conductors. This helps reduce noise interference problems.

SPECIFICATIONS
Power to Link 2000
Power Supply Voltage 9–40 volts DC (not for use with 32 V systems)
Power Supply Current 28 mA (typical; backlight adds 1 to 18 mA )
Measurements
Voltage Range 8.5–50 volts DC
Voltage Resolution 0.05 volts DC
Voltage Accuracy
Current Range
Current Resolution 0.1 amp DC (from 0 to
Current Accuracy
Current Shunt
Amp Hour Range
Amp Hour Accuracy
Time Remaining Range 255 hours maximum
Charger Voltage Regulation
Cut out size: 4.75" x 2.75"
Panel size: 5.75" x 3.75"
Weight: Meter 9 oz.; Shunt 20 oz.
+ 0.10 volts DC at full scale.
+ 500 amps DC
+ 42.0 amps)
1 amp DC (from
+ 0.1 amp DC at full scale low range
+ 1 amp DC at full scale high range
+ 0.25% ratio 50 mV @ 500 amps
+ 9,999 amp hours
~ Time of Measurement x Current Error
+ 0.2 volts DC
+ 42 to + 500 amps)

40
LINK 2000 USED AS A BATTERY/SOURCE MONITOR
WITH A PHOTOVOLTAIC CHARGING SYSTEM
Notes:
1) Shunt rated at 500 Amps max.
2) Link 2000 meter #18 AWG minimum.
Shunt leads are twisted pair.
3) This drawing is not to scale.
4) Color code shown for four pair cable available from Xantrex.
5) Other sources (such as wind generation) may be added
to the system by connecting their negatives to the same point
as the photovoltaic panel negative.

WITH ENGINE ALTERNATOR CHARGING SYSTEM
Notes:
1) Shunt rated at 500 Amps max.
2) Link 2000 meter #18 AWG minimum.
Shunt leads are twisted pair.
3) This drawing is not to scale.
4) Color code shown for four pair cable available from Xantrex.
5) This drawing shows typical primary wiring. Actual wiring
may vary, wire sizing by others.
41
LINK 2000 FOR TWO BATTERIES

Xantrex Technology Inc.
Toll free 1 800 670 0707
Direct 1 604 422 2777
Fax 1 604 420 2145
CustomerService@xantrex.com
www.xantrex.com
445-0198-01-01 Printed in the U.S.A.
 Loading...