

Xantrex Technology Inc.
1 800 670 0707 Tel toll free NA
1 360 925 5097 Tel direct
1 800 994 7828 Fax toll free NA
1 360 925 5143 Fax direct
customerservice@xantrex.com
www.xantrex.com
975-0111-01-01 Printed in Holland
Xantrex
Battery
Monitor
Owner’s Guide
Guía del usuario
Benutzer Handbuch
Manuel d’entretien
Guida dell’utente

Xantrex Battery Monitor
Owner’s Guide

About Xantrex
Xantrex Technology Inc. is a world-lead ing supplier of advanced pow e r
electronics and control s with products from 50 watt mobile unit s to one
MW utility-scale systems for wind, solar, batteries, fuel cells,
microturbines, and backup pow e r applications in both grid-connected
and stand-alone systems. Xantr ex pr oducts include inverters, battery
chargers, programmable power supplies , and variable speed drives that
convert, supply, control, clean, and distribute electrical power.
Trademarks
Xantrex Battery Monitor is a tra dem a r k of Xantrex International.
Xantrex is a registered trademark of Xantrex International.
Other trademarks, registered trademarks, and product names are the
property of their respective owners and are used herein for identification
purposes only.
Notice of Copyright
Xantrex Battery Monitor Owner’s Guide © Octobe r 2004 Xantrex
International. All rights reserved.
Disclaimer
UNLESS SPECIFICALLY AGREED TO IN WRITING, XANTREX TECHNOLOGY INC.
(“XANTREX”)
(a) MAKES NO WARRANTY AS TO THE ACCURACY, SUFFICIENCY OR
SUITABILITY OF ANY TECHNICAL OR OTHER INFORMATION PROVIDED IN ITS
MANUALS OR OTHER DOCUMENTATION.
(b) ASSUMES NO RESPONSIBILITY OR LIABILITY FOR LOSS OR DAMAGE,
WHETHER DIRECT, INDIRECT, CONSEQUENTIAL OR INCIDENTAL, WHICH MIGHT
ARISE OUT OF THE USE OF SUCH INFORMATION. THE USE OF ANY SUCH
INFORMATION WILL BE ENTIRELY AT THE USER’S RISK.
Date and Revision
October 2004 Revision C
Part Number
975-0111-01-01
Contact Information
Telephone: 1 800 670 0707 (toll free North Am erica)
Fax: 1 800 994 7828 (toll free North Am e ric a )
Email: customerservice@xantrex.com
Web: www.xantrex.com
1 360 925 5097 (direct)
1 360 925 5143 (direct)

English
1. Battery Monitor Basics . . . . . . . . . . . . . . . . . 1
Why should I monitor my battery? . . . . . . . . . . . . . . . . . 1
How does the Xantrex Battery Monitor work? . . . . . . . . 1
2. Setting up the Xantrex Battery Monitor. . . 2
Charge Efficiency Factor (CEF) . . . . . . . . . . . . . . . . . . 2
Charged parameters. . . . . . . . . . . . . . . . . . . . . . . . . . . . 3
Synchronizing the Xantrex Battery Monitor. . . . . . . . 3
Function overview . . . . . . . . . . . . . . . . . . . . . . . . . . . . . 4
3. General Operation . . . . . . . . . . . . . . . . . . . . 10
4. Advanced Features . . . . . . . . . . . . . . . . . . . 12
History data . . . . . . . . . . . . . . . . . . . . . . . . . . . . . . . . . . 12
Reset menu . . . . . . . . . . . . . . . . . . . . . . . . . . . . . . . . . . . 13
Battery Monitor communication software . . . . . . . . . 14
Super-lock . . . . . . . . . . . . . . . . . . . . . . . . . . . . . . . . . . . . 14
5. Troubleshooting Guidelines. . . . . . . . . . . . 15
6. Technical Data . . . . . . . . . . . . . . . . . . . . . . . 17
7. Declaration of Conformity . . . . . . . . . . . . . 19
8. Limited Warranty . . . . . . . . . . . . . . . . . . . . 19
iii

Español
1. Conceptos básicos del monitor de baterías 27
¿Por qué debería monitorizar mi batería? . . . . . . . . . . 27
¿Cómo funciona el monitor de baterías Xantrex? . . . . 27
2. Configuración del monitor de baterías
Xantrex . . . . . . . . . . . . . . . . . . . . . . . . . . . . . . . 28
Factor de eficiencia de carga (FEC) . . . . . . . . . . . . . . 28
Parámetros de carga. . . . . . . . . . . . . . . . . . . . . . . . . . . 29
Sincronización del monitor de baterías Xantrex . . . 29
Descripción general de funciones. . . . . . . . . . . . . . . . 30
3. Funcionamiento general. . . . . . . . . . . . . . . 37
4. Funciones avanzadas. . . . . . . . . . . . . . . . . . 39
Datos de historial . . . . . . . . . . . . . . . . . . . . . . . . . . . . . 39
Menú Reset (restablecer) . . . . . . . . . . . . . . . . . . . . . . 40
Enlace para PC . . . . . . . . . . . . . . . . . . . . . . . . . . . . . . . . 41
Super-lock . . . . . . . . . . . . . . . . . . . . . . . . . . . . . . . . . . . 42
5. Indicaciones para la resolución
de problemas . . . . . . . . . . . . . . . . . . . . . . . . . . 43
6. Datos técnicos . . . . . . . . . . . . . . . . . . . . . . . 45
7. Declaración de conformidad . . . . . . . . . . . 47
8. Garantía limitada. . . . . . . . . . . . . . . . . . . . . 48

Deutsch
1. Grundlagen des Akku-Monitors. . . . . . . . . 55
Warum sollte der Akku überwacht werden? . . . . . . . . . 55
Wie funktioniert der Xantrex Akku-Monitor? . . . . . . . 55
2. Einrichten des Xantrex Akku-Monitors . . 56
Ladeeffizienzfaktor (LEF) . . . . . . . . . . . . . . . . . . . . . . 56
Ladeparameter . . . . . . . . . . . . . . . . . . . . . . . . . . . . . . . 57
Synchronisieren des Xantrex Akku-Monitors. . . . . . 57
Funktionsübersicht . . . . . . . . . . . . . . . . . . . . . . . . . . . 58
3. Allgemeiner Betrieb . . . . . . . . . . . . . . . . . . 65
4. Erweiterte Funktionen . . . . . . . . . . . . . . . . 67
Verlaufsdaten . . . . . . . . . . . . . . . . . . . . . . . . . . . . . . . . 67
Menü „Zurücksetzen“ . . . . . . . . . . . . . . . . . . . . . . . . . 68
Kommunikationsschnittstellenkit . . . . . . . . . . . . . . . 69
Superlock. . . . . . . . . . . . . . . . . . . . . . . . . . . . . . . . . . . . 69
5. Richtlinien zur Fehlerbehebung . . . . . . . . 71
6. Technische Daten. . . . . . . . . . . . . . . . . . . . . 73
7. Übereinstimmungserklärung. . . . . . . . . . . 75
8. Beschränkte Gewährleistung. . . . . . . . . . . 76

Français
1. Notions fondamentales du controlleur
de batterie . . . . . . . . . . . . . . . . . . . . . . . . . . . . . 83
Pourquoi faut-il que je contrôle ma batterie ? . . . . . . . 83
Comment le controlleur de batterie Xantrex
fonctionne-t-il ? . . . . . . . . . . . . . . . . . . . . . . . . . . . . . . . . 83
2. Réglage du controlleur
de batterie Xantrex . . . . . . . . . . . . . . . . . . . . . 84
‘Charge Efficiency Factor (CEF)’ ou Facteur de rende-
ment de charge . . . . . . . . . . . . . . . . . . . . . . . . . . . . . . . 84
Paramètres de charge. . . . . . . . . . . . . . . . . . . . . . . . . . 85
Synchronisation du controlleur de batterie Xantrex 85
Présentation générale des fonctions . . . . . . . . . . . . . 86
3. Fonctionnement standard . . . . . . . . . . . . . 93
4. Fonctionnalités avancées . . . . . . . . . . . . . . 96
Données historiques . . . . . . . . . . . . . . . . . . . . . . . . . . 96
Menu Reset (Réinitialiser) . . . . . . . . . . . . . . . . . . . . . 97
Communiquer avec un ordinateur personnel . . . . . . 97
Verrouillage Super-Lock . . . . . . . . . . . . . . . . . . . . . . . 98
5. Consignes de dépannage. . . . . . . . . . . . . . . 99
6. Données techniques . . . . . . . . . . . . . . . . . 101
7. Déclaration de conformité . . . . . . . . . . . . 103
8. Garantie limitée. . . . . . . . . . . . . . . . . . . . . 103

Italiano
1. Informazioni di base sul monitoraggio delle
batterie . . . . . . . . . . . . . . . . . . . . . . . . . . . . . . . 111
Importanza del monitoraggio delle batterie . . . . . . . . 111
Funzionamento del sistema di monitoraggio batterie
Xantrex . . . . . . . . . . . . . . . . . . . . . . . . . . . . . . . . . . . . . . 111
2. Impostazione del sistema di monitoraggio
batterie Xantrex . . . . . . . . . . . . . . . . . . . . . . . 112
Fattore di efficienza di carica (CEF, Charge Efficiency
Factor) . . . . . . . . . . . . . . . . . . . . . . . . . . . . . . . . . . . . . . 113
Parametri di carica. . . . . . . . . . . . . . . . . . . . . . . . . . . . 113
Sincronizzazione del sistema di monitoraggio batterie
Xantrex . . . . . . . . . . . . . . . . . . . . . . . . . . . . . . . . . . . . . 114
Panoramica delle funzioni. . . . . . . . . . . . . . . . . . . . . . 114
3. Funzionamento generale . . . . . . . . . . . . . 122
4. Funzioni avanzate . . . . . . . . . . . . . . . . . . . 125
Dati cronologici . . . . . . . . . . . . . . . . . . . . . . . . . . . . . 125
Menu Reset (Reimposta). . . . . . . . . . . . . . . . . . . . . . 126
Collegamento a un PC . . . . . . . . . . . . . . . . . . . . . . . . 126
Super-lock. . . . . . . . . . . . . . . . . . . . . . . . . . . . . . . . . . . 127
5. Istruzioni per la risoluzione
dei problemi . . . . . . . . . . . . . . . . . . . . . . . . . . 128
6. Dati tecnici . . . . . . . . . . . . . . . . . . . . . . . . . 130
7. Dichiarazione di conformità . . . . . . . . . . 132
8. Garanzia limitata. . . . . . . . . . . . . . . . . . . . 132


1 Battery Monitor Basics
Why should I monitor my battery?
Batteries are used in a wide variety of applications; mostly to store
energy for later use. But how do you know how much energy is
stored in your battery? No one can tell you that by just looking at it.
Some basic battery knowledge and good monitoring is essential if
you want to maximize the lifetime of your expensive batteries. The
lifetime of batteries is dependent on many factors. Battery lifetime is
reduced by under-charging, over-charging, too deep discharging, too
fast discharging and too high ambient temperature. An advanced
battery monitor like the Xantrex Battery Monitor can give you
important feedback about the performance of your batteries and
help you extend their lifetime.
How does the Xantrex Battery Monitor work?
The capacity of a battery is rated in amp hours (Ah). For example, a
battery that can deliver a current of 5 amps for a period of 20 hours
is rated at 100 Ah (5 × 20 = 100). The Xantrex Battery Monitor
continuously measures the current flow in or out of the battery so it
can calculate the amount of energy removed from or added to the
battery. But since battery age, discharge current, and temperature all
influence the battery’s capacity, you cannot rely on an amp-hours
reading. When the same 100 A h battery is discharged completely in
two hours, it will give you only 56 Ah. As you can see, the battery’s
capacity is almost halved. When the temperature of the battery is
also low, its capacity is decreased even more. This is why simple
amp-hour counters or voltmeters cannot give you an accurate stateof-charge indication.
The Xantrex Battery Monitor can display both a mp hours removed
(not compensated) and actual state-of-charge. Reading state-ofcharge is the best way to read your battery. This parameter is given
as a percentage, where 100.0% represents a fully charged battery
and 0.0% a completely flat battery. You can comp are this to a fuel
gauge in a car.
The Xantrex Battery Monitor also estimates how long the battery can
support the present load (time-to-go readout). This is actually the
time left until the battery needs to be charged ag ai n. If the battery
load is fluctuating heavily it is best not to rely on this reading too
1

much since it is a momentary readout and must be used as a guide
only. We always encourage the use of the state-of-charge readout for
accurate battery monitoring.
Besides the main function of the Xantrex Battery Monitor—
displaying the actual battery status—this monitor offers other
features. The readout of actual battery voltage, current and
temperature (with optional temperature sensor), the ability to store
history data, the PC computerlink and the Super-lock function are
just a few features of the Xantrex Battery Monitor. These features are
more specifically explained in the corresponding sections of this
manual.
2 Setting up the Xantrex Battery Monitor
Before proceeding with this chapter, please make sure
your Xantrex Battery Monitor is completely installed
according to the enclosed installation guide.
When your Xantrex Battery Monitor is installed it is time to adjust
the battery monitor to your battery system. But before discussing the
functions in the setup menu, four important items are expla ined in
the next sections. These four item s will help you become more
familiar with battery monitoring. The actual setup menu functions
are explained in “Function overview” on page 4.
Charge Efficiency Factor (CEF)
Not all energy transferred into the battery during battery charging is
also available during discharging of the battery. The charge
efficiency of a brand new battery is approximately 90%, meaning
that 10 Ah must be transferred to the battery to get 9 Ah actually
stored in the battery. This efficiency figure is called Charge
Efficiency Factor (CEF) and will decrease with battery age.
The Xantrex Battery Monitor automatically calculates the CEF of the
battery as the battery is discharged. The level at which the CEF is
recalculated is variable and is linked to the discharge floor set in
F05. The CEF algorithm starts operating when 10% of the difference
between 100% and the discharge floor is discharged from a fully
charged battery.
2

For example, assume the discharge floor is set to 50%. Then the CEF
algorithm starts operating when 100% - 50% / 10 = 5% is discharged
from a fully charged battery. When the discharge floor is set to 0%,
this level is 100% - 0% / 10 = 10%.
Charged param e ters
Based on increasing charge voltage and decreasing charge current, a
decision can be made whether the battery is fully charged. When the
battery voltage is above a certain level during a predefined time
while the charge current is below a certai n level during the same
time, the battery can be considered as fu lly charged. These voltage
and current levels as well as the predefined time are called charged
parameters. In general for a 12 V lead acid battery, the voltage
charged parameter is 1 3.2 V and the current charged parameter is
2.0% of the total battery capacity (for example, 4 A with a 200 Ah
battery). A charged parameter time of 4 minutes is sufficient for
most battery systems. Please note that these parameters are very
important for correct operation of your Xantrex Battery Monitor,
and must be set appropriately in the corresponding Functions.
Synchronizing the Xantrex Battery Monitor
For a reliable readout of the state of charge of the battery, the battery
monitor has to be synchronized regularly with battery and charger.
This is accomplished by fully charging the battery. When the charger
is operating in the “float” stage, the charger considers the battery
full. At this moment the Xantrex Batte ry Monitor must consider the
battery as full too, so that the amp-hour counting can be reset to zero
and the state of charge reading set to 100.0%. B y precisely adjusting
the charged parameters in the Xantrex Battery Monitor, the battery
monitor can automatically synchronize with the charger when the
“float” stage is reached. The range of the charged parameters is wide
enough to adjust the Xantrex Battery Monitor to most battery
charging methods.
When the Xantrex Battery Monitor cannot be adjusted to the
charging algorithm of the installed charger, the user can always
synchronize the battery monitor manually when the battery is fully
charged. This is realized by pressing both < and > selection keys
simultaneously for three seconds. By manually synchronizing the
battery monitor, the CEF will not be calcula t ed automatically.
When the supply voltage of the Xantrex Battery Monitor
has been interrupted, the battery monitor must always be
synchronized in order to operate correctly.
3

Please note that regularly (at least once per month) fully charging
your battery not only keeps it synchronized with the Xantrex Battery
Monitor, but also prevents substantial capacity loss of your battery,
limiting its lifetime.
Function overview
The Xantrex Battery Monitor factory settings are suitable for an
average 12 V lead acid battery system of 200 Ah. So in mo st cases
when monitoring a 12 V system, the only Function which may need
to be changed is the battery capacity (F01). When using other types
of batteries, please ensure that you know all the relevant
specifications to properly set up the Xantrex Battery Monitor
Functions.
You can fully adjust your Xantrex Battery Monitor with the help of
20 different settings, or “Functions.” Before setting up the Xantrex
Battery Monitor, you must activate the setup mode first. The setup
mode can be activated by pressing the SETUP key for three seconds.
The display will blink to indicate that the setup mode is a ctive. The
desired Function can be selected by repeatedly pressing the SETUP
key. The selected Function is represented as Fxx where xx indicates
the Function number. The < and > keys can be used to alter the value
of the selected Function. The next Function can be selected by
pressing the SETUP key again. To save the changed settings to the
Xantrex Battery Monitor memory, press the SETUP key for three
seconds until the display stops flashing and the battery monitor
jumps back to normal operating mode again. If the Xantrex Battery
Monitor operates in the setup mode and not a single key is pressed
for 90 seconds, the monitor will jump back to normal operating
mode automatically, without saving the altered settings.
The table below gives an overview of all Xantrex Battery Monitor
Functions, including a short description. For most battery systems,
adjusting the values of Functions F01, F02, F03, F07 and F08 should
be sufficient. It is recommended no t to change the Functions F04,
F05, F06, F09, F10, F11, F12, F13, F14, F15, F16, F17, F18 and F20
when in doubt.
F01 Battery capacity in amp hours (Ah). This must be the
capacity at a 20h discharge rate and 20 °C (68 °F).
Default Range Step size
200 Ah 20 – 2000 Ah 1 Ah
4

F02 Voltage charged parameter. The battery voltage must be
above this voltage level to consider the ba ttery as fully
charged. Make sure the voltage charged parameter is
always slightly below the voltage at which the charger
finishes charging the battery (usually 0.1 V or 0.2 V below
the “float” stage voltage of the charger).
Default Range Step size
13.2 V 8.0 – 33.0 V 0.1 V
F03 Current charged parameter. When the charge current
value is below this percentage of the battery capacity (see
F01), the battery can be considered as fully charged.
Make sure the current charged parameter is always
greater than the minimum current at which the charger
maintains the battery, or stops charging.
Default Range Step size
2.0% 0.5 – 10.0% 0.5%
F04 Charged parameter time. This is the time the charged
parameters (as described in F02 and F03) must be met in
order to consider the battery as fully charge d.
Default Range Step size
4 minutes 1 – 4 minutes 1 minute
F05 Low-battery alarm ON (discharge floor). When the state-
of-charge percentage has fallen below this value, the
alarm relay will be activated and the CHARGE BATTERY
indication will flash on the display to indicate the battery
must be charged. The time-to-go calculation and the
state-of-charge bar graph are also linked to this value. It
is recommended to keep this va lue at or around 50.0%.
Default Range Step size
50.0% 0.0 – 99.0% 1.0%
5

F06 Low-battery alarm OFF. When the state-of-charge
percentage has ri se n ab ov e t his v al ue an d th e al arm r e l ay
is activated, the alarm relay will be deact ivated again.
When FULL is selected the alarm relay is deactivated
when the charged parameters are met.
Default Range Step size
80.0% 0.0 – 100.0% /
F07 Under-voltage alarm. When the battery voltage falls
below this value, after 10 seconds the message Lo will
appear on the display and the alarm relay will be
activated.
FULL
1.0%
Default Range Step size
10.5 V OFF / 8.0 – 33.0 V 0.1 V
F08 Over-vol tage al arm. When the batte ry vol tage r ises abov e
this value, after 5 seconds the message Hi shall appear on
the display and the alarm relay will be activated.
Default Range Step size
16.0 V OFF / 10.0 – 35.0 V 0.1 V
F09 Charge efficiency factor (CEF). It is recommended to
keep this value at AU (automatic calculation). The value
A90 resets the automatic calculation to 90%. A manual
setting is represented by Uxx where xx is the charge
efficiency. (See page 2 for more info about CEF.)
Default Range Step size
AU U50 – U99 / AU /
F10 Peukert exponent (discharge efficiency). When unknown
it is recommended to keep this value at 1.25. A value of
1.00 disables the Peukert compensation. Call Customer
Service or your battery manufacturer before changing
this setting.
A90
1%
Default Range Step size
1.25 1.00 – 1.50 0.01
6

F11 Battery temperature. In this Function the average battery
temperature can be adjusted. The value AU enables the
automatic temperature measurement provided that an
external temperature sensor is connected to the Xantrex
Battery Monitor. Also the temperature readout in normal
mode is enabled. When AU is selected and the connection
with the temperature sensor is lost, four dashes (- - - -)
are displayed and the internal temperature compensation
calculations are made using the default 20 °C value. This
Function can only be set in °C. Use the following
formulas to convert °C to °F : T(
and T(
) = (T(°F) – 32) / 1.8.
°C
) = (T(°C) x 1.8) + 32
°F
Default Range Step size
20 °C 0 – 50 / AU 1 °C
F12 Temperature coefficient. This is the percentage the
battery capacity changes with temperature. The unit of
this value is “%cap/°C” or percent capacity per degree
Celsius. The default setting is 0.5 %cap/°C, which is
typical for most batteries. The setting OFF disables
temperature compensation.
Default Range Step size
0.5 %cap/ °COFF / 0.05 – 0.95
F13 T ime-to-go averaging period. Specifies the time window
in minutes the moving averaging filter works with.
Selecting the right time depends on your installation. A
value of 0 disables the filter and gives you instantaneous
(real-time) readout; however, the displayed value s may
fluctuate heavily. Selecting the highest time (12 minutes)
ensures that long term load fluctuations are included in
the time-to-go calculations.
%cap/ °C
0.05 %cap/ °C
Default Range
3 minutes 0 / 3 / 6 / 9 / 12 minutes
7

F14 Current threshold. When the measured current falls
below this value it will be considered as zero am ps. With
this function it is possible to cancel out very small
currents which can negatively affect long-term state-ofcharge readout in noisy environments. For example if an
actual long-term current is +0.05 A and due to injected
noise or small offsets the battery monitor measures
–0.05 A, in the long term the Xantrex Battery Monitor
can wrongly indicate that the battery needs rech arging.
In this case set Function 14 to 0.1. The Xantrex Battery
Monitor calculates with 0.0 A so that no wrong
assumptions can be made. A setting of 0.0 disables this
Function.
Default Range Step size
0.0 A 0.0 – 2.0 A 0.1 A
F15 Temperature unit selection. This Function enables
selection between degrees Celsius (°C) and degrees
Fahrenheit (°F) temperature readout.
Default Range
°C °C, °F
F16 Voltage prescaler. This Function is only important when
an optional prescaler is installed on the batter y voltage
sense input of the Xantrex Battery Monitor. The voltage
charged parameter, under-voltage and over-voltage
alarm settings are linked with this Function. Don’t
change this value when you are not using a prescaler!
Default Range
1-1 1-1 / 1-5 / 1-10
8

F17 Display (backlight) mode. Duration of backlight
activation in seconds after pressing a key on the Xantrex
Battery Monitor. The backlight can also be set to be
always ON or always OFF. In the setting AU the backlight
will be activated automatically when the charge/
discharge current exceeds 1 A or when a key is pressed.
Default Range Step size
30 seconds OFF / 10 – 60 / ON
F18 Alarm relay contact polarity. This Function enables
selection between a normally open (NO) or normally
closed (NC) contact. Please note that the NC setting will
slightly increase the Xantrex Battery Monitor’s supply
current in normal operating mode.
/ AU
10 seconds
Default Range
NO NO, NC
F19 Firmware version. Displays th e firmware version of the
Xantrex Battery Monitor. No alterations can be made.
Default
x.xx
F20 Setup lock. When this Function is ON, all functions
(except this one) are locked and cannot be altered.
Default
OFF
When all the necessary changes are made and checked in the setup
mode, you can jump back to the normal operating mode by pressing
the SETUP key for three seconds. Your Xantrex Ba ttery Monitor is
now ready for use.
Range
OFF / ON
9
3 General Operation
In normal operating mode the Xantrex Battery Monitor can display
the six most important parameters of your DC system. To select the
desired parameter, use the < and > selection keys.
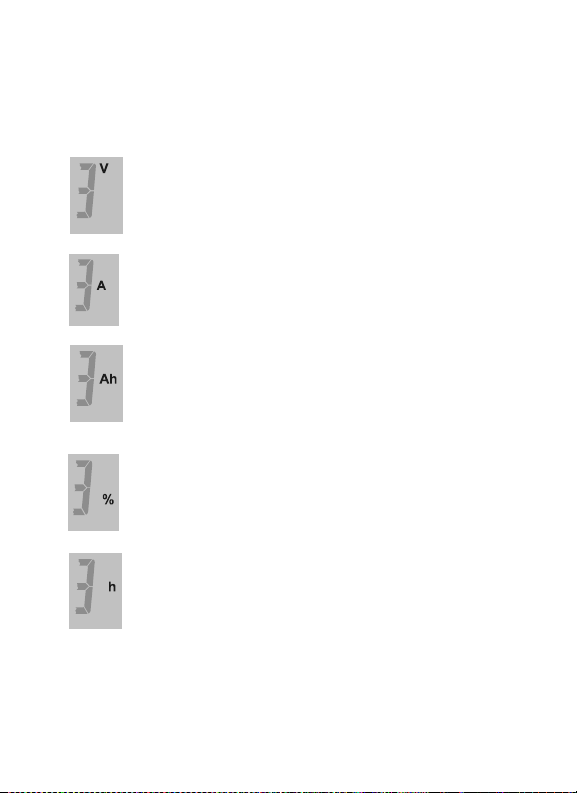
Battery voltage (V). This readout is useful to
roughly estimate the battery’s state-ofcharge. A 12 V battery is considered empty
when it cannot maintain a voltage of 10.5 V
under load conditions.
Current (A) represents the actual current flowing in or
out of the battery. A discharge current is indicated as a
negative value (current flowing out of the battery). If,
for example, a DC to AC inverter draws 5 amps from
the battery, it will be displayed as –5.0 A.
Consumed amp hours (Ah) displays the amount of
amp hours consumed from the battery. A fully
charged battery sets this readout to 0.0 Ah
(synchronized system). When a current of 12 amps is
drawn from the battery for three hours, this readout
shows –36.0 Ah.
State-of-charge (%). This is the best way to monitor
the actual state of the battery. This readout represents
the current amount of energy left in the battery. A
fully charged battery sets this readout to 100.0% while
a fully discharged battery is represented as 0.0%.
Time-to-go (h:m) is an estimation of how long the
battery can support the present load before it needs
recharging. This time will be represented in hours
(above 100h) or in hh.mm format (under 100h). A
time-to-go of 15 hours and 45 minutes will be
represented as 15:45 h:m and a time-to-go of 120
hours will be represented as 120 h. When the battery
is being charged the display will show ----h, which
means that no time-to-go can be calculated.
10
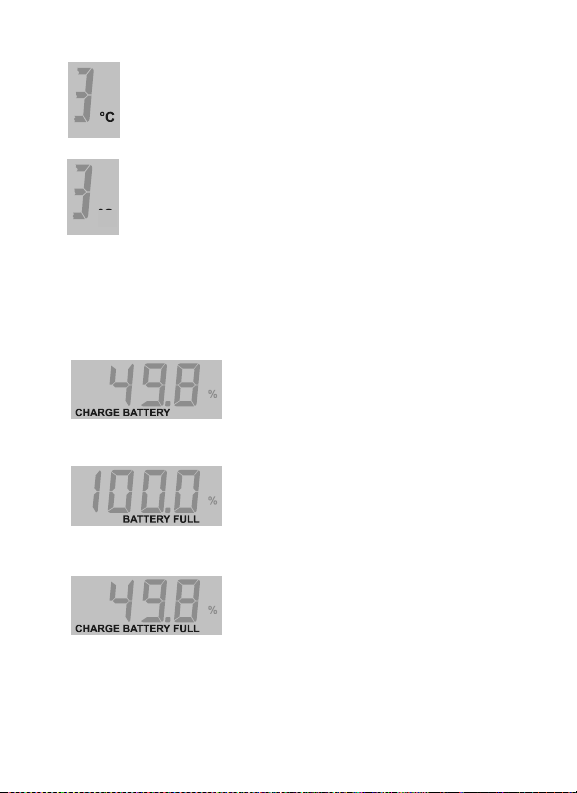
Temperature (°C or °F) displays the present battery
temperature. This readout is automatically activated
when Function F11 is set to AU and the optional
temperature sensor is connected to the Xantrex
Battery Monitor. When connection with the
temperature sensor is lost, the display will show four
dashes (- - - -). The temperature unit can be selected
in Function F15.
°F
The Xantrex Battery Monitor also indicates when the battery needs
to be recharged or when the battery is fully charged. These
indications are made using the CHARGE BATTERY FULL indicators
at the bottom of the display or the five-segment bar graph at the top
of the display. In the table below the four possible combinations of
these indicators are explained.
CHARGE BATTERY (flashing). The
state-of-charge of the battery has
dropped below the adjusted “discharge
floor” (see Function F05). The battery
needs to be recharged as soon as
possible.
BATTERY FULL (flashing). The
battery is fully charged and the battery
charger possibly operates in the “float”
stage. The charger may be turned off.
The monitor is synchronized with the
battery!
CHARGE BATTERY FULL (flashing).
Charge the battery completely full!
This is displayed when the Xantrex
Battery Monitor needs to be
synchronized with the battery (for
example after a number of charge/
discharge cycles, after a reset or after
power-up).
11
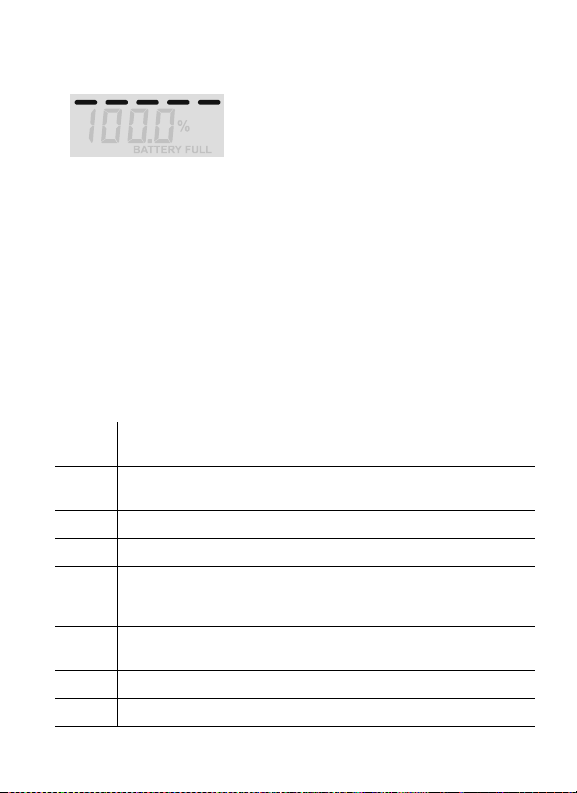
STATE OF CHARGE BAR GRAPH.
This bar represents the state of charge
in five steps until the “discharge floor”
(see Function F05) is reached. Five bar
segments represent a fully charged
battery. When the battery is
discharged, the bar disappears and the
message “CHARGE BATTERY” will
appear.
4 Advanced Features
Besides the general functionality as described in the previous
chapter, the Xantrex Battery Monitor offers some a dditional
advanced features. These features are reviewed in the next three
sections.
History data
The Xantrex Battery Monitor is able to store “special” events as
history data in its memory. The following events are stored as history
data:
H01 The automatically calculated charge efficiency factor
H02 The average discharge in Ah. This value will be
H03 The deepest discharge in Ah.
H04 Number of charge/discharge cycles.
H05 The number of “synchronizations.” This is the number
H06 The number of full discharges (reaching a state-of-
H07 The number of under-voltage alarms.
H08 The number of over-voltage alarms.
(CEF).
recalculated after each synchronization.
of times the battery is fully charged meeting the charged
parameters condition.
charge of 0.0%).
12

H09 The average discharge in %. This value will be
H10 The deepest discharge in %.
The information stated above can be recalled in the “history
readout.” This readout can be activated by pressing the SETUP key
for five seconds. After this five seconds, a flashing “H01” appears on
the display. You can display the value of H01 with the < and >
selection keys. By pressing the SETUP (next) key, the next history
event, in this case “H02,” can be selected. To jump back to normal
operating mode, the SETUP key must be pressed for three seconds.
recalculated after each synchronization.
Reset menu
The Reset menu allows you to reset individual Xantrex Battery
Monitor Functions and the History Data to their factory defaults.
Resetting the History Data is recommended to be used only when
replacing your batteries. If you replace your batteries with the exact
same brand and type, it is only necessary to reset the History Data
and leave the Functions unchanged.
To activate the Reset menu, press the SETUP key for eight seconds.
After eight seconds a flashing “rSt.F” (“Reset Functions”) appears on
the display. To change the value to “On” or “OFF,” press the < and >
keys.
By pressing the SETUP (next) key, “rSt.H” (“Reset History”) can be
selected. Again, to change the value to “On” or “OFF,” press the
<and > keys.
To apply the actual reset of whichever item is set to “On,” press the
SETUP key for three seconds until the display stops flashing and the
battery monitor jumps back to normal operation mode again.
When the monitor is secured by the Super-lock, the Functions and
History Data cannot be reset and “S.Loc” will appear on the display
after pressing the < or the > key.
If the Xantrex Battery Monitor operates in the Reset menu and no
keys are pressed for 90 seconds, the monitor will jump back to
normal operating mode automatically, without resetting the
Functions and/or History Data.
13

Battery Monitor communication software
The Xantrex Battery Monitor is able to communicate with a personal
computer. However, the optional external communications inte rfac e
kit is required for this feature. This communicatio ns interface only
needs to be connected when actually communicating with the
Xantrex Battery Monitor, which will avoid unnecessary power
consumption. With the dedicated Xantrex Battery Monitor Windows
95/98/Me/2000/XP
display all parameters. You can also program the Xantrex Battery
Monitor from this link, and save the complete Function setup to
disk. Furthermore, you can also read history data, test the Xantrex
Battery Monitor, and activate or deactivate the Super-lock.
®
software, the user can simultaneously
Super-lock
With the Super-lock feature, the setup menu of the Xantrex Battery
Monitor can be completely locked and secured by a password. In
Super-lock mode the history data cannot be erased. The normal
operating mode is not affected by the Super-lock and the Functions
in the setup menu can be reviewed, but not altered. Only a user/
installer with the password can unlock the Xantrex B attery Monitor
using the communication software.
The Super-lock must not be confused with the setup lock (Function
F20). The big difference between the two is that anybody can disable
the setup lock, even without communication between the Xantrex
Battery Monitor and the PC. The setup lock is used to avoid
accidental altering of the Function values. The Super-lock can only
be activated or deactivated through the communication software
using a unique password. The Super-lock feature is primarily meant
for warranty purposes.
14

5 Troubleshooting Guidelines
PROBLEM REMEDY OR SUGGESTION
The monitor doesn’t
operate (no display)
Current readout gives
wrong polarity (positive
current instead of
negative when
discharging)
The monitor resets all the
time
No changes can be made
in the setup mode
readouts in norm al
Not al l
mode can be selected
• Check monitor and battery side
connections.
• Make sure the inline fuses are
installed and not blown.
• Check battery voltage. Battery
might be flat. Vbatt must be
8VDC.
• Try to restart the monitor by
removing then replacing the
fuses.
Current sense leads from the shunt
are reversed. Check the installation
guide.
Check the wiring for corrosion and/
or loose contacts.
Battery might be flat or defective.
Check if the setup-lock is OFF
(Function F20)
Your Xantrex Battery Mo nitor
might be locked by the Super-lock.
Ask the installer for the password to
unlock the monitor using the
communication software.
Installer has cancelled some
parameter readouts using the
administrator software with the
communication software.
15

CHARGE BATTERY or
CHARGE BATTERY
FULL flashes
State-of-charge and/or
time-to-go readout are
not accurate
Display returns “- - - -” in
temperatur e readout
Battery voltage readout is
highly inaccurate
If none of the above remedies help to solve your problem, contact
your local dealer for further help.
• Charge battery full (equalize/
synchronize your battery with
the monitor)
• Check the charged parameters
in Functions F02, F03 and F04
for possible incorrect settings.
• Check if all current is flowing
through the shunt (the negative
terminal of the battery may only
contain the wire going to the
battery side of the shunt!).
• Current sense leads from the
shunt are reversed.
• Check battery capacity in
Function F01
• Check CEF in Function F09
•Check Peukert Exponent in
Function F10
• Check Battery temperature in
Function F11
• Check Temperature coefficient
in Function F12
Connection with temperature
sensor is lost. Check for failed
connections and/or cable damage.
Check prescaler setting in Function
F16
16

6 Technical Data
Xantrex Battery Monitor TECHNICAL DATA
Supply voltage range 9 .. 35 VDC
Supply current @Vin=24 VDC
without BL
@Vin=12 VDC without BL 8 mA
Input voltage range 0 .. 35 VDC
Input current range -500 .. +500 A
Battery capacity range 20 .. 2000 Ah
Operating temperature range 0 .. 50 °C
Readout resolution
voltage (0 .. 35 V) ± 0.01 V
current (0 .. 200 A) ± 0.1 A
current (200 .. 500 A) ± 1 A
amp hours (0 .. 200 Ah) ± 0.1 Ah
amp hours (200 .. 2000 Ah) ± 1 Ah
state-of-charge (0 .. 100%) ± 0.1%
time-to-go (0 .. 100 hrs) ± 1 minute
time-to-go (100 .. 240 hrs) ± 1 hr
temperature (0 .. 50 ×C) ± 1 °C
Voltage measurement
accuracy
Current measurement
accuracy
6 mA
± 0.3%
± 0.4%
17

Dimensions
front panel 65 × 65 mm
body diameter ø 52 mm
total depth 72 mm
Equipped with : - Potential free alarm contac t
Accessories/future options : Xantrex Battery Monitor
Note: these specifications are subject to change without notice.
- 500 A/50 mV current shunt
Connection kit:
• part # 854-2020-01
(length 10 m)
• part # 854-2021-01
(length 15 m)
Xantrex Battery Monitor
temperature sensor
• part # 854-2022-01
(length 10 m)
• part # 854-2023-01
(length 20 m)
Xantrex Battery Monitor
communications interface kit:
•part # 854-2019-01 (with
interface box, serial cable
and software)
Xantrex voltage prescaler:
•part # 854-2018-01
USB Interface Kit
18
7 Declaration of Conformity
Manufacturer: TBS Electronics
Address: De Factorij 46
Declares that the following products:
Product Type: Battery Monitor
Model: Xantrex Battery Monitor
Conforms to the requirements of the following Directive of the
European Union: EMC Directive 89/336/EEC
The above product is in conformity with the following
harmonized standards :
EN50081-1 : 1994 EMC - Generic Emissions Standard
EN50082-1 : 1997 EMC - Generic Immunity Standard
1689 AL Zwaag, The Netherlands
19

8 Limited Warranty
Warranty
What does this warranty cover? This Limited Warranty is provided by Xantrex
Technology , Inc. ("Xantrex") and covers defects in workmanship and materials in your
Xantrex Battery Monitor. This warranty period lasts for 1 year from the date of
purchase at the point of sale to you, the original end user customer. You require proof
of purchase to make warranty claims.
What will Xantrex do? Xantrex will, at its option, repair or replace the defective
product free of charge, provided that you notify Xantrex of the product defect within
the Warranty Period, and provided that Xantrex through inspection establishes the
existence of such a defect and that it is covered by this Limited Warranty.
Xantrex will, at its option, use new and/or reconditioned parts in performing warranty
repair and building replacement products. Xantrex reserves the right to use parts or
products of original or improved design in the repair or replacement. If Xantrex repairs
or replaces a product, its warranty continues for the remaining portion of the original
Warranty Period or 90 days from the date of the return shipment to the customer,
whichever is greater. All replaced products and all parts removed from repaired
products become the property of Xantrex.
Xantrex covers both parts and labor necessary to repair the product, and return
shipment to the customer via a Xantrex-selected non-expedited surface freight within
the contiguous United States and Canada. Alaska and Hawaii are excluded. Contact
Xantrex Customer Service for details on freight policy for return shipments outside of
the contiguous United States and Canada.
How do you get service? If your product requires troubleshooting or warranty
service, contact your merchant. If you are unable to contact your merchant, or the
merchant is unable to provide service, contact Xantrex directly at:
Telephone: 1 800 670 0707 (toll free North America)
Fax: 1 800 994 7828 (toll free North America)
Email: customerservice@xantrex.com
Direct returns may be performed according to the Xantrex Return Material
Authorization Policy described in your product manual. For some products, Xantrex
maintains a network of regional Authorized Service Centers. Call Xantrex or check
our website to see if your product can be repaired at one of these facilities.
What proof of purchase is required? In any warranty claim, dated proof of
purchase must accompany the product and the product must not have been
disassembled or modified without prior written author izat ion by Xantre x.
1 360 925 5097 (direct)
1 360 925 5143 (direct)
20

Proof of purchase may be in any one of the following forms:
• The dated purchase receipt from the original purchase of the product at point of
sale to the end user, or
• The dated dealer invoice or purchase receipt showing original equipment
manufacturer (OEM ) sta tus, or
• The dated invoice or purchase receipt showing the product exchanged under
warranty
What does this warranty not cover? This Limited Warranty does not cover normal
wear and tear of the product or costs related to the removal, installation, or
troubleshooting of the customer's electrical systems. This warranty does not apply to
and Xantrex will not be responsible for any defect in or damage to:
a) the product if it has been misused, neglected, improperly installed, physically
damaged or altered, either internally or externally, or damaged from improper
use or use in an unsuitable environment;
b) the product if it has been subjected to fire, water, generalized corrosion, biolog-
ical infestations, or input voltage that creates operating conditions beyond the
maximum or minimum limits listed in the Xantrex product sp ec ific ations
including high input voltage from generators and lightning strikes;
c) the product if repairs have been done to it other than by Xantrex or its autho-
rized service centers (hereafter "ASCs");
d) the product if it is used as a component part of a product expressly warranted by
another manufacturer;
e) the product if its original identification (trade-mark, serial number) markings
have been defaced, altered, or removed.
Disclaimer
Product
THIS LIMITED WARRANTY IS THE SOLE AND EXCLUSIVE WARRANTY
PROVIDED BY XANTREX IN CONNECTION WITH YOUR XANTREX
PRODUCT AND IS, WHERE PERMITTED BY LAW, IN LIEU OF ALL OTHER
WARRANTIES, CONDITIONS, GUARANTEES, REPRESENTATIONS,
OBLIGATIONS AND LIABILITIES, EXPRESS OR IMPLIED, STA T UT ORY OR
OTHERWISE IN CONNECTION WITH THE PRODUCT, HOWEVER ARISING
(WHETHER BY CONTRACT, TORT, NEGLIGENCE, PRINCIPLES OF
MANUFACTURER'S LIABILITY, OPERAT ION OF LAW, CONDUCT,
STATEMENT OR OTHERWISE), INCLUDING WITHOUT RESTRICTION ANY
IMPLIED WARRANTY OR CONDITION OF QUALITY, MERCHANTABILITY
OR FITNESS FOR A PARTICULAR PURPOSE. ANY IMPLIED WARRANTY OF
MERCHANTABILITY OR FITNESS FOR A PARTICULAR PURPOSE TO THE
EXTENT REQUIRED UNDER APPLICABLE LAW TO APPLY TO THE
PRODUCT SHALL BE LIMITED IN DURA TION T O THE PERIOD STIPULATED
UNDER THIS LIMITED WARRANTY.
21

IN NO EVENT WILL XANTREX BE LIABLE FOR ANY SPECIAL, DIRECT,
INDIRECT, INCIDENTAL OR CONSEQUENTIAL DAMAGES, LOSSES, COSTS
OR EXPENSES HOWEVER ARISING WHETHER IN CONTRACT OR TORT
INCLUDING WITHOUT RESTRICTION ANY ECONOMIC LOSSES OF ANY
KIND, ANY LOSS OR DAMAGE TO PROPERTY, ANY PERSONAL INJURY,
ANY DAMAGE OR INJURY ARISING FROM OR AS A RESULT OF MISUSE OR
ABUSE, OR THE INCORRECT INSTALLATION, INTEGRATION OR
OPERATION OF THE PRODUCT.
Exclusions
If this product is a consumer product, federal law does not allow an exclusion of
implied warranties. To the extent you are entitled to implied warranties under federal
law, to the extent permitted by applicable law they are limited to the duration of this
Limited Warranty. Some states and provinces do not allow limit at ions or exclu sion s
on implied warranties or on the duration of an implied warranty or on the limitation or
exclusion of incidental or consequential damages, so the above limitation(s) or
exclusion(s) may not apply to you. This Limited Warranty gives you specific legal
rights. You may have other rights which may vary from state to state or province to
province.
Warning: Limitations On Use
Please refer to your product manual for limitations on uses of the product.
SPECIFICALLY, PLEASE NOTE THAT THE
M
ONITOR SHOULD NOT BE USED IN CONNECTION WITH LIFE SUPPORT
SYSTEMS OR OTHER MEDICAL EQUIPMENT OR DEVICES. WITHOUT
LIMITING THE GENERALITY OF THE FOREGOING, XANTREX MAKES NO
REPRESENTATIONS OR WARRANTIES REGARDING THE USE OF THE
XANTREX
SUPPORT SYSTEMS OR OTHER MEDICAL EQUIPMENT OR DEVICES.
XANTREX BATTERY MONITOR IN CONNECTION WITH LIFE
Return Material Authorization Policy
Before returning a product directly to Xantrex you must obtain a Return Material
Authorization (RMA) number and the correct factory "Ship To" address. Products
must also be shipped prepaid. Product shipments will be refused and returned at your
expense if they are unauthorized, returned without an RMA number clearly marked on
the outside of the shipping box, if they are shipped collect, or if they are shipped to the
wrong location.
XANTREX BATTERY
22

When you contact Xantrex to obtain service, please have your instruction manual
ready for reference and be prepared to supply:
• The serial number of your product
• Information about the installation and use of the unit
• Information about the failure and/or reason for the return
• A copy of your dated proof of purchase
Return Procedure
1. Package the unit safely, preferably using the original box and packing materials.
Please ensure that your product is shipped fully insured in the original
packaging or equivalent. This warranty will not apply where the product is
damaged due to improper packaging.
2. Include the following:
• The RMA number supplied by Xantrex Technology, Inc. clearly marked
on the outside of the box.
• A return address where the unit can be shipped. Post office boxes are not
acceptable.
• A contact telephone number where you can be reached during work hours.
• A brief description of the problem.
3. Ship the unit prepaid to the address provided by your Xantrex customer service
representative.
If you are returning a product from outside of the USA or Canada In addition to
the above, you MUST include return freight funds and are fully responsible for all
documents, duties, tariffs, and deposits.
If you are returning a product to a Xantrex Authorized Service Center (ASC) A
Xantrex return material authorization (RM A) number is not required. However, you
must contact the ASC prior to returning the product or presenting the unit to verify any
return procedures that may apply to that particular facility.
Out of Warranty Service
If the warranty period for your Xantrex Battery Monitor has expired, if the unit was
damaged by misuse or incorrect installation, if other conditions of the warranty have
not been met, or if no dated proof of purchase is available, your product may be
serviced or replaced for a flat fee.
To return your Xantrex Battery Monitor for out of warranty service, contact Xantrex
Customer Service fo r a Re turn M a te ria l A uth orization (RMA) number and follow the
other steps outlined in “Return Procedure” on page 23.
Payment options such as credit card or money order will be explained by the Customer
Service Representative. In cases where the minimum flat fee does not apply, as with
incomplete units or units with excessive damage, an additional fee will be charged. If
applicable, you will be contacted by Customer Service once your unit has been
received.
23

24

Monitor de baterías
Xantrex
Guía del usuario

Información sobre Xantrex
Xantrex Technology Inc. es un proveedor líder en el mercado mundial de sistemas de
control y electrónica de potencia avanzada, con productos que van desde unidades
transportables de 50 vatios hasta grupos generadores de 1 MW para aplicaciones de
carga eólicas, solares, con baterías, con células energéticas, con microturbinas y con
energía de respaldo, tanto para sistemas conectados a la red como para sistemas
autónomos. Entre los productos de Xantrex se incluyen inversores, cargadores de
batería, suministros de energía programables e impulsores de velocidad variable que
convierten, suministran, controlan, limpian y distribuyen energía eléctrica.
Marcas comerciales
Monitor de baterías Xantrex es una marca comercial de Xantrex International.
Xantrex es una marca comercial registrada de Xantrex International.
Otras marcas comerciales, marcas comerciales registradas y nombres de
productos son propiedad de sus respectivos titulares y sólo se utilizan en el
presente documento con fines identificativos.
Nota sobre la propiedad intelectual
Guía del usuario del monitor de baterías Xantrex © Octubre de 2004 Xantrex
International. Todos los derechos reservados.
Descargo de responsabilidad
A MENOS QUE SE ACUERDE ALGO DI STINTO POR ESCRITO, XANTREX TECHNOLOGY INC.
(EN ADELANTE, “XANTREX”)
(a) NO OFRECE NINGUNA GARANTÍA REFERENTE A LA PRECISIÓN, SUFICIENCIA O
ADECUACIÓN DE NINGÚN TIPO DE INFORMACIÓN, TÉCNICA O DE OTRO TIPO, CONTENIDA EN
SUS MANUALES O EN CUALQUIER OTRA DOCUMENTACIÓN.
(b) NO SE HACE RESPONSABLE DE NINGUNA PÉRDIDA, DAÑO, COSTE O GASTO, YA SEA
ESPECIAL, DIRECTO, INDIRECTO, DERIVADO O ACCIDENTAL, QUE SE PUEDA DE RIVAR DEL
USO DE DICHA INFORMACIÓN. EL USUARIO ASUME TODOS LOS RIESGOS DERIVADOS DEL
USO DE DICHA INFORMACIÓN.
Fecha y revi sión
Octubre de 2004 Revisión C
Número de referencia
975-0111-01-01
Información de contacto
Teléfono: 1 800 670 0707 (gratuito en Améric a del Norte)
Fax: 1 800 994 7828 (gratuito en Am é ric a del Norte)
Correo electrónico: customerservice@xantrex.com
Sitio Web: www.xantrex.com
1 360 925 5097 (directo)
1 360 925 5143 (directo)

1 Conceptos básicos del monitor de baterías
¿Por qué debería monitorizar mi batería?
Las baterías se utilizan en aplicaciones muy diversas; en la mayor ía
de los casos, se utilizan para almacenar energía para utilizarla
posteriormente. Pero, ¿cómo saber cuánta energía hay almacenada
en la batería? Nadie puede saberlo con sólo mirarla. Si desea
maximizar la vida de las b aterías, que son caras, es esencial tener
unos conocimientos básicos sobre el las y realiz ar una monitoriz ación
correcta. La vida de las baterías depende de muchos factores. La vida
de las baterías se reduce si no se cargan lo suficiente, si se
sobrecargan, si se descargan demasiado o demasiado rápido y si la
temperatura ambiente es demasiado elevada. Un monitor de
baterías avanzado como el monitor de baterías Xantrex puede
proporcionarle información importante sobre el rend imiento de las
baterías y ayudarle a prolongar su vida útil.
¿Cómo funcio n a el monitor de baterías Xantrex?
La capacidad de una batería se mide en amperios/hora (Ah). Por
ejemplo, una batería que puede proporcionar una corriente de 5
amperios durante un período de 20 hor as se clasifica como de 100
Ah (5 × 20 = 100). El monitor de baterías Xantrex mide
continuamente el flujo de corriente que entra o sale de la batería, de
manera que puede calcular la cantidad de energía obtenida de la
batería o añadida a la misma. Pero como la antigüedad de la batería,
la corriente de descarga y la batería influyen en la capacidad de la
batería, no es fiable basarse en una lectura de amperios/hora. Si la
misma batería de 100 Ah se descarga por completo en dos horas, le
proporcionará sólo 56 Ah. Como puede observar, la capacidad de la
batería se reduce casi a la mitad. Si la temperatura de la batería es
baja, su capacidad disminuye aún más. Ésta es la razón por la que los
contadores de amperios/hora o los voltímetros no pueden indicarle
con precisión el estado de carga.
El monitor de baterías Xantrex puede mostrar tanto los amperios/
hora consumidos (sin compensar) como el estado de carga actual. La
lectura de l e stad o de ca rga e s l a me jor m ane ra de re aliz ar un a le ctu ra
de la batería. Este parámetro se indica como porcentaje, donde
27

100,0% representa una batería completamente cargada y 0,0% una
completamente descargada. Puede comparar estas cifras con el
indicador de combustible de un coche.
El monitor de baterías Xantrex también calcula el tiempo que la
batería puede soportar la carga actual (la lectura de tiempo
restante). Éste es en realidad el tiempo restante hasta que haya que
volver a cargar la batería. Si la carga de la batería tiene grandes
fluctuaciones, es mejor no confiar demasiado en esta lectura, ya que
es una lectura momentánea y se debe utilizar sólo como guía.
Nosotros siempre recomendamos utilizar las lecturas de estado de
carga para monitor izar la batería con precisión.
Además de la función principal del monitor de baterías Xantrex
(mostrar el estado real de las baterías), este monitor dispone de otras
funciones. L a lectura del voltaje, la corriente y la temperatura (con el
sensor de temperatura opcional) reales de la batería, la posibilidad de
almacenar datos de historial, el enlace a ordenadores PC y la función
Super-lock son algunas de ellas. Estas funciones se explican con más
detalle en las secciones correspondientes de este manual.
2 Configuración del monitor de baterías Xantrex
Antes de continuar con este capítulo, asegúrese de que el
monitor de baterías Xantrex es té comple tamente i nstala do
según la guía de instalación adjunta.
Cuando esté instalado, deberá ajustar el monitor de baterías a su
sistema de baterías. Pero antes de comentar las funciones de menú
de configuración, se explican cuatro funciones importantes en las
secciones siguientes. Estos cuatro elementos le ayudarán a
familiarizarse con la monitorización de baterías. La funciones reales
del menú de configuración se describen en “Descripción de
funciones” en la página 30.
Factor de eficiencia de carga (FEC)
No toda la energía transferida a la batería duran t e la carga está
también disponible durante la descarga. La eficiencia de carga de
una batería n u e va e s apr oximadamente del 90%, l o qu e si g nifica que
se deben transferir a l a bat erí a 10 Ah p ar a que se al m ace ne n 9 Ah en
la misma. Esta cifra de eficiencia se denomina Factor de Eficiencia
de Carga (FEC) y disminuirá con la edad de la batería. El monitor de
baterías Xantrex puede calcular automáticamente el FEC de la
batería.
28

El monitor de baterías Xantrex calcula automáticamente el Factor de
Eficiencia de carga de la batería a medida que se descarga. El nivel
en el que se vuelve a calcular en FEC es variable y está vinculado al
límite de descarga establecido en F05. El algoritmo del FEC
comienza a operar cuando se descarga el 10% de la diferencia en tre
el 100% y el límite de descarga en una batería completamente
cargada.
Por ejemplo, supongamos que el límite de descarga se ha establecido
en el 50%. El algoritmo del FEC comienza a funcionar cuando
100% - 50% / 10 = 5% se descarga de una batería completamente
cargada. Si el límite de descarga se establece en el 0%, este nivel es
100% - 0% / 10 = 10%.
Parámetros de carga
En función del voltaje de carga en aumento y de la corriente de carga
en disminución, se puede tomar una decisión sobre si la batería está
completamente cargada. Si el voltaje de la batería se encuentra por
encima de determinado nivel durante un tiempo predefinido
mientras la corriente de carga se encuentra por debajo de un
determinado nivel en el mismo período de tiempo, se puede
considerar que la batería está completamente cargada. Estos niveles
de voltaje y corri e nt e, as í c omo e l tiempo predefinido, se denominan
parámetros de carga. En general, para una batería de ácido de plomo
de 12 V, el parámetro de carga de voltaje es de 13,2 V y el parámetro
de carga de corriente es un 2,0% del total de la capacidad total de la
batería (por ejemplo, 4 A con una batería de 200 Ah). Un tiempo de
parámetro de carga de 4 minutos es suficiente para la mayoría de los
sistemas de baterías. Tenga en cuenta que estos parámetros son muy
importantes para un correcto funcionamiento de su monitor de
baterías Xantrex, y se debe establecer correctamente en las
funciones correspondientes .
Sincronización del monitor de baterías Xantrex
Para una lectura fiable del estado de carga de la batería, el monitor
de baterías se debe sincronizar regularmente con la batería y el
cargador. Para ello se debe cargar por completo la batería. Cuando el
cargador esté funcionando en la fase de “flotación”, el cargador
considera que la batería está llena . En este momento, el monitor de
baterías Xantrex debe considerar también que la batería está llena,
de manera que el recuento de amperios/hora se pueda restablecer en
cero y la lectura del estado de carga establecido en 100.0%. Al ajustar
con precisión los parámetros de carga en el monitor de baterías
29

Xantrex, el monitor de baterías se puede sincronizar
automáticamente con el cargador cuando se alcance el estado de
“flotación”. El rango de pará metros de carga es lo suficientemente
amplio como para ajustar el monitor de baterías Xantrex a la
mayoría de los métodos de carga de baterías.
Si el monitor de baterías Xantrex no se puede ajustar para el
algoritmo de carga del cargador instalado, el usuario siempre puede
sincronizar manualmente el monitor de baterías cuando la batería
esté completamente cargada. Para ello se deben pulsar
simultáneamente las dos teclas de selección < y > durante tres
segundos. Al sincronizar manualmente el monitor de baterías, el
FEC no se calculará automáticamente. Si se ha interrumpido el
voltaje de alimentación del monitor de baterías Xantrex, se
debe volver a sincronizar siempre el monitor de baterías
para que funcione correctamente.
Tenga en cuenta que al cargar regularmente por completo la batería
(al menos una vez al mes) no sólo se mantiene sincronizada con el
monitor de baterías Xantrex, sino que también se evita que se
produzca una pérdida sustancial de la capacidad de la batería,
limitando su vida útil.
Descripción general de funciones
Los ajustes de fábrica del monitor de baterías Xantrex son los
adecuados para un sistema de baterías de ácido de plomo de 12 V y
200 Ah. Por eso, en la mayoría de los casos, al monitorizar un sistema
de 12 V la única función que se puede cambiar es la capacidad de la
batería (F01). Si utiliza otro tipo de baterías, asegúrese de que cono c e
todas las especi ficaciones relevantes para configurar correctamente
las funciones del monitor de baterías Xantrex.
Puede ajustar por completo el monitor de baterías Xantrex con la
ayuda de 20 ajustes o “Funciones” diferentes. Antes de configurar el
monitor de baterías Xantrex, debe activar primero el modo de
configuración. Para activar el modo de configuración se debe pulsar
la tecla SETUP durante tres segundos. La pantalla parpadeará para
indicar que el modo de configuración está activo. Para seleccionar la
función deseada se debe pulsar repetidamente la tecla SETUP. La
función seleccionada se representa mediante Fxx, siendo xx el
número de función. Las teclas < y > se pueden utilizar para
modificar el valor de la función seleccionada. Para seleccionar la
función siguiente se debe volver a pulsar la tecla SETUP. Para
guardar la configuración modificada en la memoria del monitor de
30

baterías Xantrex, pulse la tecla SETUP durante tres segundos hasta
que la pantalla deje de parpadear y el monitor de baterías vuelva al
modo de funcionamiento normal. Si el monitor de baterías funciona
en modo de configuración y no se pulsa ninguna tecla durante 90
segundos, el monitor volverá al modo de funciona miento normal
automáticamente, sin guardar los ajustes modificados.
En la tabla siguiente se describen de forma general todas las
funciones del monitor de baterías Xantrex, incluyendo una
descripción breve. En la mayoría de los sistemas de baterías, debería
ser suficiente con ajustar los valores de las funciones F01, F02, F03,
F07 y F08. Se recomienda no cambiar las funciones F04, F05, F06,
F09, F10, F11, F12, F13, F14, F15, F16, F17, F18 y F20 si se tiene
alguna duda.
F01 Capacidad de la batería en amperios/hora (Ah). Debe ser
la capacidad de descarga a una veloci dad de 20 h y a
20 °C (68 °F).
Predeterminado Rango Tamaño del paso
200 Ah 20 – 2000 Ah 1 Ah
F02 Parámetro de voltaje de carga. Para que se considere que
la batería está completamente cargada, el voltaje de la
batería debe ser superior a este nivel de voltaje.
Asegúrese de que el parámetro de voltaje de carga esté
siempre ligeramente por debajo del voltaje al que el
cargador finaliza de cargar la batería (normalmente 0,1 V
ó 0,2 V por debajo de la fase de “flotación” del cargador).
Predeterminado Rango Tamaño del paso
13,2 V 8,0 – 33,0 V 0,1 V
F03 Parámetro de corriente de carga. Cuando el valor de
corriente de carga se encuentre por debajo de este
porcentaje de la capacidad de la bater ía (ver F01), la
batería se considera completamente cargada. Asegúrese
de que el parámetro de corriente de carga sea siempre
superior a la corriente mínima a la que el cargador
mantiene la batería o d etiene la carga.
Predeterminado Rango Tamaño del paso
2,0% 0,5 – 10,0% 0,5%
31

F04 Tiempo de parámetro de carga. Es el tiempo en el que se
deben cumplir los parámetros de carga (con se describe
en F02 y F03) para considerar que la batería está
completamente cargada.
Predeterminado Rango Tamaño del paso
4 minutos 1 – 4 minutos 1 minuto
F05 Alarma de batería baja activada (ON ) (límite de
descarga). Cuando el porcentaje de estado de carga
por debajo de este valor, se activ ará el relé de alarma y la
indicación CHARGE BATTERY (cargar batería)
parpadeará en la pantalla para indicar que se debe cargar
la batería. El gráfico de barra del estado de carga y el
cálculo del tiempo restante también están vinculados a
este valor. Se recomienda mantener este valor en torno al
50,0%.
caiga
Predeterminado Rango Tamaño del paso
50,0% 0,0 – 99,0% 1,0%
F06 Alarma de batería baja desactivada (OFF). Cuando el
porcentaje del estado de carga
de alarma esté activado, se volverá a desactivar. Si se
selecciona FULL (completo), el relé de alarma se
desactivará cuando se alcancen los parámetros de carga.
supere este valor y el relé
Predeterminado Rango Tamaño del paso
80,0% 0,0 – 100,0% /
F07 Alarma de bajo voltaje. Cuando el voltaje de la batería se
encuentre por debajo de este valor, tr as 10 segundos
aparecerá el mensaje Lo en la pantalla y se activará el relé
de alarma.
FULL (llena)
1,0%
Predeterminado Rango Tamaño del paso
10,5 V OFF
(desactivado)
/ 8,0 – 33,0 V
0,1 V
32

F08 Alarma de sobretensión. Cuando el voltaje de la batería se
encuentre por encima de este valor, tras 5 segundos
aparecerá el mensaje Hi en la pantalla y se activará el relé
de alarma.
Predeterminado Rango Tamaño del paso
16,0 V OFF
F09 Factor de eficiencia de c arga (FEC). Se recomienda
mantener este valor en AU (cálculo automático). El valor
A90 restablece el cálculo automático en 90%. Un valor
manual se representa mediante Uxx siendo xx la
eficiencia de carga. (Si desea obtener más información
sobre el FEC, consulte la página 28.)
(desactivado) /
10,0 -35,0 V
0,1 V
Predeterminado Rango Tamaño del paso
AU U50 – U99 /
F10 Exponente de Peukert (efici encia de descarga). Si se
desconoce, se recomienda mantener este valor en 1,25.
Un valor de 1,00 desactiva la compensación de Peukert.
Antes de cambiar este valor, consulte al servicio de
atención al cliente o al fabricante de la batería.
AU / A90
1%
Predeterminado Rango Tamaño del paso
1,25 1,00 – 1,50 0,01
33

F11 Temperatura de la batería. Esta función permite ajustar
la temperatura media de la batería. El valor AU activa la
medición automática de temperatura, siempre que haya
un sensor de temperatura externo conectado al monitor
de baterías Xantrex.. También está activada la lectura de
temperatura en modo normal. Si AU está seleccionado y
se pierde la conexión con el sensor de temperatura,
aparecerán cuatro guiones (- - - -) y los cálculos de
compensación de la temperatura interna se realizarán
utilizando el valor predeterminado de 20 °C. Esta función
sólo se puede ajustar en °C. Para convertir °C a °F utilice
las siguientes fórmulas: T(
) = (T(°F) – 32) / 1,8.
y T(
°C
) = (T(°C) x 1,8) + 32
°F
Predeterminado Rango Tamaño del paso
20 °C 0 – 50 / AU 1 °C
F12 Coeficiente de temperatura. Éste es el porcentaje de
cambio de la capacidad de la batería en función de la
temperatura. La unidad de este valor es “%cap/°C” o
capacidad porcentual por grado centígrado. El valor
predeterminado es 0,5 %cap/°C, que es el habitual para
la mayoría de las baterías. El va lor OFF desactiva la
compensación de temperatura.
Predeterminado Rango Tamaño del paso
0,5 %cap/ °C OFF / 0,05 –
F13 Período medio del tiempo restante. Especifica el lapso de
tiempo en minutos con el que opera el f iltro de media
móvil. La selección del tiempo correcto d epende de la
instalación. Un valor de 0 desactiva el filtro y
proporciona una lectura instantánea (en tiempo real); no
obstante, los valores mostrados pueden fluctuar
significativamente. Si se selecciona el tiempo mayor (12
minutos) se asegura que las fluctuaciones a largo plazo se
incluyan en los cálculos de tiem po restante.
0,95 %cap/ °C
0,05 %cap/ °C
Predeterminado Rango
3 minutos 0 / 3 / 6 / 9 / 12 minutos
34

F14 Umbral de corriente. Cuando la corriente medida se
encuentre por debajo de este valor se considerará como
cero amperios. Con esta función es posible cancelar
corrientes muy pequeñas que pueden afectar
negativamente a las lecturas de estado de carga a largo
plazo en entornos con interferencias. Por ejemplo, si una
corriente a largo plazo real es +0,05 A y, debido a
interferencias introducidas o pequeñas desviaciones, el
monitor de baterías marca –0,05 A, a largo plazo el
monitor de baterías Xantrex puede indicar de manera
incorrecta que es necesario recargar la batería. En este
caso la función 14 se debe establecer en 0,1. El monitor de
baterías Xantrex realiza el cálculo con 0,0 A, por lo que
no se pueden realiza r suposiciones incorrectas. Un valor
de 0,0 desactiva esta función.
Predeterminado Rango Tamaño del paso
0,0 A 0,0 – 2,0 A 0,1 A
F15 Selección de la unidad de temperatura. Esta función
permite seleccionar entre la lectura en grados centígrados
(°C) y Fahrenheit (°F).
Predeterminado Rango
°C °C, °F
F16 Divisor de frecuencia de voltaje. Esta función sólo es
importante si se ha instalado un divisor de frecuencia
opcional en el sensor de entr ada de voltaje de la batería
del monitor de baterías Xantrex. Los valores de alarma
del parámetro de voltaje de carga, bajo voltaje y
sobretensión están vinculados a esta función. No cambie
este valor si no utiliza ningún divisor de frecuencia.
Predeterminado Rango
1-1 1-1 / 1-5 / 1-10
35

F17 Modo de pantalla (iluminación posterior). Duración de la
iluminación posterior en segundos tras pulsar una tecla
del monitor de baterías Xantrex. La iluminación
posterior también se puede establecer en siempre
activada (ON) o siempre desactivada (OFF). En el valor
AU la iluminación posterior se activará automáticamente
cuando la corriente de carga/descarga ex ceda 1 A o
cuando se pulse una tecla.
Predeterminado Rango Tamaño del paso
30 segundos OFF / 10 – 60
F18 Polaridad de contacto del relé de alarma. Esta función
permite seleccionar entre contacto n ormalmente abierto
(NO) o normalmente cerrado (NC). Tenga en cuenta que
el valor de NC aumentará ligeramente la corriente de
alimentación del monitor de baterías Xantrex en modo de
funcionamiento normal.
/ ON / AU
10 segundos
Predeterminado Rango
NO NO, NC
F19 Versión del firmware. Muestra la versión del firmware del
monitor de baterías Xantrex. No se puede realizar
ninguna modificación.
Predeterminado
x.xx
F20 Bloqueo de la configuración. Si esta función está activada
(ON), todas las funciones (excepto ésta) se bloquearán y
no se podrán modificar.
Predeterminado Rango
OFF OFF / ON
Cuando se hayan realizado y comprobado todos los cambios del
modo de configuración, pulse la tecla SETUP durante tres segundos
para volver al modo de funcionamiento normal. El monitor de
baterías Xantrex estará listo para su uso.
36

3 Funcionamiento general
En el modo de funcionamiento normal, el monitor de baterías
Xantrex puede mostrar los seis pa rámetros más importantes del
sistema de CC. Para seleccionar el parámetro que desee, utilice las
teclas de selección < y >.
Voltaje de la batería (V). Esta lectura es útil para
calcular de forma aproximada el estado de carga de la
batería. Se considera que una batería de 12 V está
vacía cuando no puede mantener un voltaje de 10,5 V
en condiciones de carga.
La corriente (A) representa la corriente actual que se
transfiere hacia o desde la batería. Una corriente de
descarga se indica mediante un valor negativo
(corriente que se transfiere desde la batería). Si, por
ejemplo, un inversor de CC a CA c onsume 5 amperios
de la batería, se mostrará como –5,0 A.
Los amperios/hora consumidos (Ah) muestran la
cantidad de amperios/hora consumidos de la batería.
La lectura en una batería completamente cargada es
0,0 Ah (sistema sincronizado). Si se con sume una
corriente de 12 amperios de la batería durante tres
horas, esta lectura mostrará –36,0 Ah.
Estado de carga (%). Ésta es la mejor forma de
monitorizar el estado real de la b atería. Esta lectura
representa la cantidad de energía actual que queda en
la batería. En una batería completamente cargada esta
lectura es 100,0%, mientras que en una
completamente descargada es 0,0%.
37

El tiempo restante (h:m) es una estimación del tiempo
que la batería puede aguantar la carga actual antes de
que se necesite recargarla. Este tiempo se representa
en horas (por encima de 100 h) o en formato hh.mm
(por debajo de 100 h). Un tiempo restante de 15 horas
y 45 minutos se representará como 15:45 h:m y un
tiempo restante de 120 horas se representará com o
120 h. Cuando la batería se esté cargando la pantalla
mostrará ----h, lo que s ignifica que no se puede
calcular el tiempo restante.
Temperatura (°C o °F) muestra la temperatura actual
de la batería. La lectura se activa automática mente
cuando la función F11 se establece en AU y el sensor
de temperatura opcional está conectado al monitor de
baterías Xantrex. Si se pierde la conexión con el
sensor de temperatura, la pantalla mostrará cuatro
guiones (- - - -). La unidad de temperatura se puede
seleccionar en la función F 15.
°F
El monitor de baterías Xantrex también indica si es necesario
recargar la batería o si está completamente cargada. Estas
indicaciones se realizan mediante los indicadores CHARGE
BATTERY FULL (carga completa de la batería) de la parte inferior
de la pantalla o el gráfico de barra de cinco segmentos de la parte
superior de la misma. En la tabla siguiente se explican las cuatro
combinaciones posibles de estos indicadores.
CHARGE BATTERY (intermitente) . El
estado de carga de la batería se
encuentra por debajo del “límite de
descarga” ajustado (ver función F05).
Es necesario volver a cargar la batería
lo antes posible.
38

BATTERY FULL (interm itente). La
batería está completamente cargada y
probablemente el cargador de baterías
este funcionando en modo de
“flotación”. Se puede apagar el
cargador. El monitor está sincronizado
con la batería.
CHARGE BATTERY FULL
(intermitente). La batería está
completamente cargada. Esto aparece
cuando se necesita sincr o ni za r el
monitor de baterías Xantrex con la
batería (por ejemplo, tras un
determinado número de ciclos de
carga/descarga, tras una
reinicialización o tras el encendido).
GRÁFICO DE BARRA DE ESTADO DE
CARGA. Esta barra representa el
estado de carga en cinco pasos hasta
alcanzar el “límite de descarga” (ver
función F05). Si la barra tiene cinco
segmentos, indica que la batería está
completamente cargada. Cuando la
batería esté descargada, la barra
desaparece y aparece el mensaje
“CHARGE BATTERY” (cargar batería).
4 Funciones avanzadas
Además de las funciones generales descritas en el capítulo anterior,
el monitor de baterías Xantrex ofrece algunas funciones avanzadas
adicionales. Estas funciones se revisan en las tres secciones
siguientes.
Datos de historial
El monitor de baterías Xantr ex puede almacenar eventos
“especiales” como datos de historial en su memoria. Los eventos
siguientes se almacenan como datos de historial:
39

H01 El factor de eficiencia de carga (FEC) calculado
H02 La descarga media en Ah. Este valor se volverá a
H03 La descarga mayor en Ah.
H04 El número de ciclos de carga/descarga.
H05 El número de “sin cron iz aci ones ”. Es el númer o d e vec es
H06 El número de descargas completas (en las que se
H07 El número de alarmas de bajo voltaje.
H08 El número de alarmas de sobretensión.
H09 La descarga media en %. Este valor se volverá a calcular
H10 La descarga mayor en %.
La información indicad a anteriormente se puede recuperar en las
“lecturas de historial”. Para activar esta lectura se debe pulsar la
tecla SETUP durante cinco segundos. Transcurridos estos cinco
segundos, “H01” aparecerá de forma intermitente en la pantalla.
Para mostrar el valor de H01 utilice las teclas de selección < y >. Para
seleccionar el siguiente evento del historial, en este caso “H02”,
pulse la tecla SETUP (siguiente). Para volver al modo de
funcionamiento normal, se debe pulsar la tecla SETU P duran te tres
segundos.
automáticamente.
calcular tras cada sincronización.
que la batería se carga por completo según la condición
de los parámetros de carga.
alcanza un estado de carga de 0,0%).
tras cada sincronización.
Menú Reset (restablecer)
El menú Reset (restablecer) le permite restablecer funciones
individuales del monitor de baterías Xantrex y los datos de historial
a los valores predeterminados de fábrica. Sólo se recomiend a
restablecer los datos del his torial al su stituir las ba terías. Si sustituye
40

sus baterías por otras de exactamente la misma marca y tipo, sólo
será necesario restablecer los datos de historial y no mo dificar las
funciones.
Para activar el menú Reset (restablecer), pulse la tecla SETUP
(configurar) durante ocho segundos. Después de ocho segundos,
aparecerá en la pantalla la indicación “rSt.F” (“Reset Functions”,
restablecer funciones). Para cambiar el valor a “On” (activar) u
“OFF” (desactivar), pulse las teclas < y >.
Al pulsar la tecla SETUP (siguiente), se podrá seleccionar “rSt.H”
(“Reset History”, restablecer historial). De nuevo, para cambiar el
valor a “On” (activar) u “OFF” (desactivar), pulse las teclas < y >.
Par aplicar el restablecimiento real de cualquier elemento que esté
activado (“On”), pulse la tecla SETUP durante tres segundos hasta
que la pantalla deje de parpadear y el monitor de baterías vuelva al
modo de funcionamiento normal.
Si el monitor está asegurado media nte la función Super-lock
(superbloqueo), las funciones y los datos del historial no se podrán
restablecer y “S.Loc” (superbloqueo) aparecerá en la pantalla tras
pulsar las teclas < o >.
Si el monitor de baterías Xantrex está en el menú Reset (restablecer)
y no se pulsa ninguna tecla durante 90 segundos, el monitor volverá
automática men te a l mod o de funcio na mien to n ormal si n re stabl ec er
los datos del historial ni las funciones.
Enlace para PC
El monitor de baterías Xantrex se puede comunicar con un
ordenador personal. Para utilizar esta función se requiere el kit de
interfaz de comunicaciones externas opcional. Sólo es necesario
conectar esta interfaz de comunicaciones externas al establecer la
comunicación con el mo nitor de baterías Xantrex, para evitar un
consumo innecesario de corriente. Con el software dedicado al
monitor de baterías Xantrex para Windows 95/98/Me/2000/XP
el usuario puede mostrar simultáneamente todos los parámetros.
También se puede programar el monitor de baterías Xantrex desde
este enlace, y guardar en el disco la con figuración de todas las
funciones. Además, también se pueden consultar los datos de
historial, comprobar el monitor de baterías Xantrex y activar o
desactivar el Super-lock.
®
,
41

Super-lock
La función Super-lock permite bloquear completamente mediante
contraseña el menú de configuración del monitor de baterías
Xantrex. En el modo Super-lock no se pueden borrar los datos de
historial. El funcionamiento no rmal no se ve afectado por el Superlock, y se pueden revisar, aunque no modificar, las funciones del
menú de configuración. Sólo un usuario/inst alador que conozca la
contraseña puede desbloquear el monitor de baterías Xantrex
mediante el enlace para PC.
El Super-lock no se debe confundir con el bloqueo de configuración
(función F20). La principal diferencia entre los dos es que cualquier
persona puede desactivar el bloqueo de configuración, incluso
aunque no haya comunicación entre el monitor de baterías Xantrex y
el PC. El bloqueo de configuración se utiliza para evitar modificar
accidentalmente los valores de las funciones. El Super-lock sólo se
puede activar o desactivar mediante el enlace para PC y con una
contraseña única. La función Super-lock está destinada
principalmente a finalidades de garantía.
42

5 Indicaciones para la resolución de problemas
PROBLEMA REMEDIO O SUGERE NCIA
El monitor no
funciona (no
muestra nada en
la pantalla)
La lectura de
corriente muestra
la polaridad
incorrecta
(corriente positiva
en lugar de
negativa al
descargar)
El monitor se
reinicia
continuamente
No se puede
realizar ningún
cambio en el
modo de
configuración
No se pueden
seleccionar todas
las lecturas en
modo normal
• Comprue be el m on it or y la s co ne xion e s d el
lado de la batería.
• Asegúrese de que los fusibles en línea
estén instalados y no es tén fundidos.
• Compruebe el voltaje de la batería. La
batería puede estar vacía. El voltaje de la
batería debe ser 8 VCC.
• Pruebe a reiniciar el monitor; para ello,
retire y vuelva a colocar lo s fusibles.
Los electrodos del sensor de corriente del
shunt están invertidos. Consulte la guía de
instalación.
Compruebe que los contactos de los c ables
no estén corroídos ni flojos.
La batería puede estar vacía o defectuosa.
Compruebe si el bloqueo de configuración
está desactivado (OFF) (función F20)
Su monitor de baterías Xantrex puede estar
bloqueado por el Super-lock. Pida al
instalador la contraseña para desbloquear el
monitor mediante el enlace para PC.
El instalador ha cancelado las lecturas d e
algunos parámetros median te el software de
administrador con el enlace para PC.
43

CHARGE
BATTERY (cargar
batería) o
CHARGE
BATTERY FULL
(cargar batería
completamente)
parpadea
Las lecturas de
estado de carga y/
o tiempo restante
no son precisas
La pantalla
muestra “- - - -” en
la lectura de
temperatura
La lectura del
voltaje de la
batería es muy
inexacta
Si ninguno de los remedios anteriores soluciona su problema, pida
ayuda a su distribuidor local.
• Cargue por completo la batería
(ecualice/sincronice su batería con el
monitor)
• Compruebe si los parámetros de carga de
las funciones F02, F03 y F04 son
correctos.
• Compruebe si toda la corriente pasa a
través del shunt (el terminal negativo de
la batería sólo puede contener el cable
que va al lado de la batería del shunt).
• Los electrodos del sensor de corriente
del shunt están invertidos.
• Compruebe la capacid ad de la batería en
la función F01
• Compruebe el FEC en la función F09
• Compruebe el exponente Peukert en la
función F10
• Compruebe la temperatura de la batería
en la función F11
• Compruebe el coeficiente de
temperatura en la función F 12
Se ha perdido la conexión con el sensor de
temperatura. Compruebe que las conexiones
sean correctas y que el cable no esté dañado.
Compruebe el valor del divisor de frecuencia
en la función F16
44

6 Datos técnicos
Monitor de baterías Xantrex DATOS TÉCNICOS
Rango de voltaje de
alimentación
Corriente de
alimentación
@Vin=24 VCC sin BL
@Vin=12 VCC sin BL 8 mA
Rango de voltaje de
entrada
Rango de corriente de
entrada
Rango de capacidad
de la batería
Rango de temperatura
de funcionamiento
Resolución de lecturas
voltaje (0 .. 35 V) ± 0,01 V
corriente (0 .. 200 A) ± 0,1 A
corriente (200 .. 500 A)
amperios/hora (0 ..
200 Ah)
amperios/hora (200 ..
2000 Ah)
estado de carga (0 ..
100%)
tiempo restante (0 ..
100 horas)
tiempo restante (100 ..
240 horas)
temperatura (0..50 ×C)
9 .. 35 VCC
6 mA
0 .. 35 VCC
-500 .. +500 A
20 .. 2000 Ah
0 .. 50 °C
± 1 A
± 0,1 Ah
± 1 Ah
± 0,1%
± 1 minuto
± 1 hora
± 1°C
45

Precisíon de la medi cí on
de voltaje
Precisíon de la medi cí on
de corriente
Dimensiones
panel frontal 65 × 65 mm
diámetro del chasis ø 52 mm
profundidad total 72 mm
Equipado con: - Contacto de alarma de potencial libre
Accesorios/opciones
futuras:
Nota: estas especificaciones pueden cambiar sin previo aviso.
± 0,3%
± 0,4%
- shunt de corriente de 500 A/50 mV
Kit de conexión del monitor de
baterías Xantrex:
• número de referencia 854-2020-01
(longitud 10 m)
• número de referencia 854-2021-01
(longitud 15 m)
Sensor de temperatura del monitor de
baterías Xantrex
• número de referencia 854-2022-01
(longitud 10 m)
• número de referencia 854-2023-01
(longitud
Kit de interfaz de comunicaciones del
monitor de baterías Xantrex:
• número de referencia 854-2019-01
(con caja de interfaz, cable serie y
software)
Divisor de frecuencia de voltaje de
Xantrex:
• número de referencia 854-2018-01
Kit de interfaz USB
20
m)
46

7 Declaración de conformidad
Fabricante: TBS Electronics
Dirección: De Factorij 46
Declara que los productos siguie ntes:
Tipo de producto: Monitor de baterías
Modelo: Monitor de baterías Xantrex
Cumple los requisitos de la directiva siguiente de la Unión
Europea: Directiva EMC 89/336/EEC
El producto indicado anteriormente cumple los sigui entes
estándares armonizados:
EN50081-1 : 1994 EMC - Estándar de emisiones genéricas
EN50082-1 : 1997 EMC - Estándar de inmunidad genérica
1689 AL Zwaag, The Netherlands
47

8 Garantía limitada
Garantía
¿Qué cubre esta garantía? Xantrex Technology, Inc. ("Xantrex") proporciona esta
garantía limitada, que cubre los defectos de fabricación y materiales de su Monitor de
baterías Xantrex. La presente garantía tiene validez durante 1 año a partir de la fecha
de compra en el punto de venta en que usted, el usuario final, adquirió el producto.
Para utilizar la garantía deberá disponer de una prueba de compra.
¿Cómo actuará Xantrex? Xantrex reparará o sustituirá, según su propio criterio, el
producto defectuoso de forma gratuita, siempre y cuando el defecto del producto se
haya notificado a Xantrex dentro del Período de garantía y que Xantrex, tras una
inspección, constate la existencia de dicho defecto y que está cubierto por la presente
Garantía limitada.
Además, Xantrex puede decidir, según su criterio, utilizar piezas nuevas y/o
reconstruidas para realizar las reparaciones cubiertas por la garantía y fabricar
productos de reposición. Xantrex se reserva el derecho de utilizar piezas o productos
de diseño original o mejorado en la reparación o sustitución del producto. En caso de
que Xantrex repare o sustituya un producto, la presente garant ía cont inua rá vige nte
durante el período restante del Período de garantía original o durante un período de 90
días a partir de la fecha de devolución al cliente, el de mayor duración de los dos.
Xantrex se quedará con la propiedad de todos los productos sustituidos y las piezas
retiradas de los productos reparados.
Xantrex se hará cargo de las piezas y la mano de obra necesarias para la reparación del
producto, así como de la devolución del producto al cliente, que se realizará mediante
un transporte por tierra no urgente seleccionado por Xantrex dentro de las zonas
contiguas de Estados Unidos y Canadá. No se incluyen ni Alaska ni las islas Hawái.
Si desea obtener información detallada sobre la polític a de tra nsp orte para la
devolución de productos fuera de las fronteras de Estados Unidos y Canadá, póngase
en contacto con el servicio de atención al cliente de Xantrex.
¿Qué debe hacer para recibir asistenc ia? Si el producto requiere servicio de
asistencia en garantía o resolución de problemas, póngase en contacto con su
vendedor. Si no consigue ponerse en contacto con el vendedor o si éste no puede
proporcionarle asistencia, póngase en contacto con Xantrex en las direcciones y
teléfonos siguientes:
Teléfono: 1 800 670 0707 (gratuito en América del Norte)
Fax: 1 800 994 7828 (gratuito en América del Norte)
Correo electrónico: customerservice@xantrex.com
1 360 925 5097 (directo)
1 360 925 5143 (directo)
48

Las devoluciones directas se realizarán según la política de autorización para la
devolución de materiales (RMA) de Xantrex descrita en el manual del producto. Para
determinados productos, Xantrex dispone de un red de centros regionales de asistencia
autorizados. Póngase en contacto con Xantrex o visite nuestro sitio Web para
comprobar si su producto se puede reparar en alguna de estas instalaciones.
¿Cuál es la prueba de compra que se necesita? Para cualquier reclamación en
garantía es necesario proporcionar una prueba de compra fechada y el producto no
debe haber sido desmontado ni modificado sin previa autorización por escrito de
Xantrex.
Constituyen prueba de compra los siguientes documentos:
• El recibo de compra fechado correspondiente a la compra original del producto
por parte del usuario final en el punto de venta.
• El recibo de compra o la factura del distribuidor con fecha que muestre el estado
de equipo original del fabricante (OEM), o bien
• el recibo de compra o la factura con fecha que indiquen el producto
intercambiado dentro de la garantía.
¿Qué limitaciones tiene la garantía? La pre s en te G ara ntía limitada no cubre el
desgaste normal del producto ni los costes relacionados con la retirada, instalación o
resolución de problemas de los sistemas eléctricos del clie nte. Esta garantía no tendrá
aplicación, y Xantrex no se hará responsable de ningún daño o defecto del producto,
en los siguientes casos:
a) Cuando el producto no se haya utilizado debidamente, se haya descuidado, no
se haya instalado correctamente, se haya dañado o modificado, ya sea por
dentro o por fuera, o los daños que haya sufrido sean derivados del uso
incorrecto o la utilización en un entorno inadecuado.
b) Cuando el producto haya entrado en contacto con fuego, agua, corrosión
generalizada o plagas biológicas, o se haya sometido a un voltaje que haga que
las condiciones de funcionamiento sobrepasen los límites inferiores o superiores
indicados en las especificaciones del producto de Xantrex, incluido el voltaje
procedente de generadores y rayos.
c) Cuando las tareas de reparación del producto no se hayan realizado en Xantrex
o en uno de sus centros de asistencia autori zado s (en adelante, "ASC").
d) Cuando el producto se haya utilizado como componente de un producto
garantizado expresamente por otro fabricante.
e) Cuando las marcas de identificación originales (marca comercial, número de
serie) del producto se hayan desfigurado, alterado o eliminado.
Descargo de responsabi lidad
Producto
LA PRESENTE GARANTÍA LIMITADA CONSTITUYE LA ÚNICA Y
EXCLUSIVA GARANTÍA PROPORCIONADA POR XANTREX PARA SU
PRODUCTO XANTREX Y PREV ALEC E, EN LA MEDIDA PERMITIDA POR LA
LEY, SOBRE CUALQUIER OTRA GARANTÍA, CONDICIÓN, AFIRMACIÓN,
49

OBLIGACIÓN O RESPONSABILIDAD, Y A SEA IMPLÍCITA O EXPRESA,
ESTATUTARIA O DE CUALQUIER OTRO TIPO, RELACIONADA CON EL
PRODUCTO O QUE PUDIESE SURGIR (YA SEA POR CONTRATO, AGRAVIO,
NEGLIGENCIA, PRINCIPIOS DE RESPONSABILIDAD DEL FABRICANTE,
APLICACIÓN DE LA LEY, COMPORTAMIENTO, DECLARACIÓN O
CUALQUIER OTRO MODO), INCLUIDAS SIN RESTRICCIÓN TODAS LAS
GARANTÍAS IMPLÍCITAS O CONDICIONES DE CALIDAD,
COMERCIALIZACIÓN O ADECUACIÓN A UN FIN CONCRETO. LA
DURACIÓN DE TODAS LAS GARANTÍAS IMPLÍCITAS DE
COMERCIALIZACIÓN O ADECUACIÓN A FIN CONCRETO QUE EN LA
MEDIDA REQUERIDA POR LA LEY SE APLIQUEN AL PRODUCTO ESTARÁ
LIMITADA AL PERÍODO ESTIPULADO EN LA PRESENTE GARANTÍA
LIMITADA.
XANTREX NO SE HARÁ RESPONSABLE EN NINGÚN CASO DE LOS DAÑOS
ESPECIALES, DIRECTOS, INDIRECTOS, ACCI DENTALES NI DERIVADOS, NI
TAMPOCO DE LAS PÉRDIDAS, GASTOS O COSTES QUE SE PUDIESEN
DERIVAR, YA SEA POR CONTRATO O AGRAVIO, INCLUIDAS SIN
RESTRICCIÓN LAS PÉRDIDAS ECONÓMICAS DE CUALQUIER TIPO, LAS
PÉRDIDAS O DAÑOS DE LA PROPIEDAD, LESIONES PERSONALES, DAÑOS
O LESIONES DERIVADAS DE O PRODUCIDAS COMO RESUL TADO DE UN
MAL USO, ABUSO O DE UNA INSTALACIÓN, INTEGRACIÓN O
FUNCIONAMIENTO INCORRECTOS DEL PRODUCTO.
Exclusiones
Si este producto es un producto de consumo, las leyes federales no permiten la
exclusión de garantías implícitas. En la medida en que tenga derecho a garantías
implícitas según las leyes federales y en la medida permitida por la legislación
aplicable, estas garantías están limitadas a la duración de esta Garantía limitada.
Algunos estados y provincias no permiten limitaciones o exclusiones a las garantí a s
implícitas o a la duración de una garantía implícita o a la limitación o exclusión de
dalos derivados o incidentales, por lo que es posible que las limitaciones o exclusiones
anteriores no sean de aplicación. Esta Garantía limitada le concede unos derech os
legales específicos. Es posible que tenga otros derechos que pueden variar de un
estado a otro o de una provincia a otra.
Advertencia: Limitaciones de uso
Para obtener información sobre las limitaciones de uso del producto, consulte el
manual del producto.
ESPECÍFICAMENTE, TENGA EN CUENTA QUE EL
BATERÍAS XANTREX NO SE DEBE UTILIZAR CON SISTEMAS DE
ASISTENCIA VITAL NI CON NINGÚN OTRO SISTEMA O DISPOSITIVO
MÉDICO. SIN LIMITAR LA GENERALIDAD DE LO ANTERIOR, XANTREX
50
MONITOR DE

NO REALIZA NINGUNA AFIRMACIÓN NI OFRECE NINGUNA GARANTÍA
EN RELACIÓN AL USO DEL XANTREX
ANTREX CON SISTEMAS DE ASISTENCIA VITAL U OTROS SISTEMAS O
X
DISPOSITIVOS MÉDICOS.
MONITOR DE BATERÍAS
Política de autorización para la devolución de materiales
Antes de devolver un producto a Xantrex, deberá obtener el número de autorización
para la devolución de materiales (RMA) y la dirección correcta a la que debe realizar
el envío. Además, los productos deben enviarse a portes pagados. En caso de que los
envíos de devoluciones de productos no hayan sido autorizados, no indiquen
claramente el número de autorización para la devolución de materiales en la parte
exterior del embalaje o se hayan enviado a portes debidos o a una dirección
equivocada, el producto le será devuelto y usted co rrerá con los gastos de devolución.
Cuando se ponga en contacto con Xantrex para solicitar asistencia, deberá disponer del
manual de instrucciones para su consulta y proporcionar la siguiente información:
• El número de serie del producto.
• Información sobre la instalación y uso de la unidad.
• Información sobre el defecto y/o la razón por la que se realiza la devolución.
• Una copia de la prueba de compra fechada.
Procedimiento de devolución
1. Embale la unidad de forma segura, preferiblemente en el embalaje o rigin al .
Asegúrese de que el producto se envía completamente protegido por el embalaje
original o uno equivalente. La presente garantía no se aplicará si el producto
resulta dañado a causa de un embalaje incorrecto.
2. Incluya la siguiente información:
• Indique claramente en la parte exterior del paquete el número de
autorización para la devolución de materiales que le haya proporcionado
Xantrex Technology, Inc.
• La dirección a la que se debe enviar la unidad cuando se haya reparado. No
se podrá utilizar un apartado de correos.
• Un número de teléfono de contacto en el que se le pueda localizar durante
las horas de trabajo.
• Una breve descripción del problema.
3. Envíe la unidad a portes pagados a la dirección que le haya indicado su
representante del servicio de atención al cliente de Xantrex.
Si devuelve un producto desde fuera de Estados Unidos o Canadá Además de la
información indicada anteriormente, deberá incluir el coste de transporte
correspondiente a la devolución y se hará cargo de cualquier documentación,
impuesto, arancel y depósito.
51

Si devuelve un producto a un centr o de asistencia autor i z ado (ASC) de Xantrex
No será necesario que Xantrex le proporcione el número de autorización para la
devolución de materiales (RMA). Sin embargo, antes de devolver la unidad deberá
ponerse en contacto con el centro de asistencia para comprobar los procedimientos de
devolución específicos del mismo.
Asistencia fuera del período de garantía
Si el período de garantía de su Monitor de baterías Xantrex ha finalizado, si el
producto ha sufrido daños por un uso indebido o una instalación incorrecta del mismo,
si no se cumplen las condiciones de la garantía o no se dispone de una prueba de
compra con fecha, se cobrará una tarifa fija por la reparac ión o sustitución del
producto.
Para enviar el Monitor de baterías Xantrex al servicio de asistencia fuera del período
de garantía, póngase en contacto con el servicio de atención al cliente de Xantrex para
obtener el número de autorización para la devolución de materiales (RMA) y siga las
indicaciones descritas en “Procedimiento de devolución” en la página 51.
El representante del servicio de atención al cliente le explicará las distintas opciones
de pago, como tarjeta de crédito o giro postal. En los casos en los que no se aplica la
tarifa mínima, como en el caso de las unidades incompletas o aquélla s que se
encuentren excesivamente dañadas, se cargará un importe adicional. Si corresponde, el
servicio de atención al cliente se pondrá en contacto con usted cuando se haya recibido
la unidad.
52

Xantrex Akku-Monitor
Benutzer Handbuch

Info zu Xantrex
Xantrex Technology Inc. ist ein weltweit führender Hersteller hochentwickelter
Leistungselektronik und -steuerungssyste me mit eine r Pr oduktreihe, die von 50Watt-Mobilgeräten bis hin zu 1-MW-Systemen der Energieversorgungsklasse
reicht, die für an Versor gungsnetze angeschlossene oder unabhängige Wi nd-, Solar, Batterie-, Brennstoffelement-, Mikroturbinen- und Notstromanwendungssysteme
verwendet werden. Zu den Produkten von Xantrex gehören Inverter,
Akkuladegeräte, programmierbare Energieversorgungsgeräte und Regelantriebe für
die Umwandlung, Versorgung, Regelung, Bereinigung und Verteilung elektrischer
Leistung.
Marken
Xantrex Akku-Monitor (Xantrex Akku-Monitor) ist eine Marke von Xantrex
International. Xantrex ist eine eingetragene Marke von Xantrex International.
Andere Marken, eingetragene Marken und Produktbezeichnungen sind das
Eigentum der jeweiligen Besitzer und werden lediglich zur eindeutige n
Identifikation verwendet.
Copyright
Xantrex Akku-Monitor-Benutzerhandbuch © Oktober 2004 Xantrex International.
Alle Rechte vorbehalten.
Haftungsausschluss
Wenn nicht ausdrücklich schriftlich festgelegt, trifft FÜR Xantrex Technology Inc.
(im Folgenden kurz „Xantrex“ genannt) folgendes zu:
(a) Xantrex gibt keine Garantie hinsichtlich der Genauigkeit, Zulänglichkeit oder Eignung
der in den Handbüchern oder anderen Unterlagen enthaltenen technischen oder SONSTIGEN
Informationen.
(b) XANTREX ÜBERNI MMT KEINE VERANTWORTUNG ODER HAFTUNG FÜR
VERLUSTE ODER SCHÄDEN, WEDER DIREKTE, INDIREKTE, KONKLUDENTE ODER
VERSEHENTLICHE, ZU DENEN ES AUFGRUND DER VERWENDUNG DIESER
INFORMATIONEN KOMMEN KÖNNTE. DIE VERWENDUNG DIESER
INFORMATIONEN UNTERLIEGT GÄNZLICH DEM RISIKO DES ANWENDERS.
Datum und Neubearbeitung
Oktober 2004 Überarbeitung C
Artikelnummer
975-0111-01-01
Kontaktinformationen
Telefon: 1 800 670 0707 (g ebührenfrei in Nordame rika)
Fax: 1.800.994 0707 (gebührenfrei in Nordamerika)
E-Mail: customerservice@xantrex.com
WWW: www.xantrex.com
1 360 925 5097 (Durchwah l)
1 360 925 5143 (Durchwah l)

1 Grundlagen des Akku-Monitors
Warum sollte der Akku überwacht werden?
Akkus werden in einer Vielzahl von Geräten verwendet. Sie dienen in
der Regel zur Sp eicheru ng von Energie zu r späte ren Verw endung . Wie
lässt sich jedoch feststellen, wie viel Energie im Akku gespeichert ist?
Der Zustand des Akkus lässt sich nicht ohne weiteres z. B. an seinem
Äußeren erkenn en . U m d ie L ebe ns d aue r I h rer kos tsp ie li gen Akkus zu
erhöhen, sind ein wenig Grundlagenwissen über Akkus und eine gute
Überwachung notwendig. Die Lebensdauer von Akkus hängt von
vielen Faktoren ab. Sie wird durch zu kurze oder zu lange Ladezeiten,
zu umfangreiche oder zu schn elle Entladungen und eine zu hohe
Umgebungstemperatur reduziert. Ein moderner Akku-Monitor, wie
der Xantrex Akku-Monitor, gibt Ihnen wichtige Rückmeldungen über
die Leistung Ihrer Akkus, wodurch die Lebensdauer der Akkus
verlängert werden kann.
Wie funktioniert der Xantrex Akku-Monitor?
Die Kapazität eines Akkus wird in Amperestunden (Ah) gemessen.
Beispielsweise hat ein Akku, der über einen Zeitraum von
20 Stunden einen Strom von 5 Ampere liefert, eine Kapazität von
100 Ah (5 × 20 = 100). Der Xantrex Akku-Monitor misst fortlaufend
den Stromfluss von und zu dem A kku, so dass die Menge der
verbrauchten oder eingespeisten Energie berechnet werden kann.
Da die Kapazität eines Akkus von seinem Alter, dem
Entladungsstrom und der Temperatur beeinflusst wird, können Sie
sich auf die Amperestunden-Anzeige nicht verlassen. Wi rd derselbe
100-Ah-Akku in zwei Stunden vollständig entladen, liefert er nur
56 Ah. Wie Sie sehen, wird die Kapazität des Akkus dadurch fast
halbiert. Wenn die Temperatur des Akkus zudem niedrig ist, wird
die Kapazität zusätzlich verringert. Deshalb liefern Ihnen einfache
Zähler auf Grundlage von Amperestunden oder Voltmeter nicht die
exakten Statusangaben.
Der Xantrex Akku-Monitor kann Ihnen die verbrauchten (nicht
kompensierten) Amperestunden und den tatsächlichen Ladezustand
anzeigen. Lesen Sie Ihren Akku am Besten über den Ladezustand ab.
Dieser Parameter wird in Prozen t dargestellt, wobei für einen
55

vollständig aufgeladenen Akku 100,0 % und für einen leeren 0,0 %
angezeigt werden. Sie können dies mit der Treibstoffanzeige eines
Autos vergleich en.
Außerdem schätzt der Xantrex Akku-Monitor, wie lang der Akku bei
der derzeitigen Last betrieben werden kann (Restzeitanzeige). Dies
ist die verbleibende mögliche Betriebsdauer, bis der Akku erneut
aufgeladen werden muss. Bei stark schwankender Last sollten Sie
sich nicht auf diese Angabe verlassen und sie nur als Hinweis
verstehen, da es sich um einen momentanen Wert handelt. Zur
exakten Überwachung des Akkus empfiehlt es sich, die
Ladezustands-Anzeige zu verwenden.
Neben dieser Hauptfunktion – der Anzeige des tatsächlichen AkkuStatus – bietet der Xantrex Akku-Monitor weitere Funktionen. Die
Anzeige der tatsächlichen Werte für Spannung, Strom und
Temperatur (mit dem optionalen Temperatursensor) des Akkus sowie
die Möglichkeit zum Speichern von Verlaufsdaten und der PCComputerlink bzw. die Superlock-Funktion sind nur einige weitere
Funktionen des Xantrex Akku-Monitors. Diese Funktionen werden
ausführlich in den entsprechenden Abschnitten dieses Handbuchs
erklärt.
2 Einrichten des Xantrex Akku-Monitors
Stellen Sie entsprechend der beiliegenden
Installationsanleitung sicher, dass der Xantrex AkkuMonitor vollständig installiert i st, bevor Sie mit den
Anweisungen dieses Kapitels fortfahren.
Wenn der Xantrex Akku-Monitor installiert ist, muss der AkkuMonitor an Ihr Akkusystem angepasst werden. Bevor jedoch auf die
Funktionen im Einrichtun gsmenü eingegangen wird, werden i n den
nächsten Abschnitten vier wichtige Punkte erläutert. Diese vier
Punkte bieten weiterführende Informationen zur Überwachung von
Akkus. Die tatsächlichen Funktionen des Einrichtungsmenüs
werden unter „Funktionsübersicht“ auf Seite 58 beschrieben.
Ladeeffizienzfaktor (LEF)
Die beim Laden in den Akku übertragene Energie steht beim
Entladen des Akkus nicht vollständig zur Verfügung. Die
Ladeeffizienz eines fabrikneuen Akkus beträgt ungefähr 90 %, d. h.,
dass 10 Ah in den Akku übertragen werden müssen, damit 9 Ah auch
56

tatsächlich im Akku gespeichert werden. Diese Abbildung der
Effizienz wird Ladeeffizienzfaktor (LEF) genannt. Sie nimmt mit
zunehmendem Alter des Akkus ab. Der Xantrex Akku-Monitor kann
den LEF eines Akkus automatisch berechnen.
Durch den Xantrex Akku-Monitor wird automatis ch der
Ladeeffizienzfaktor des Akkus beim Entladen berechnet. Der St and,
auf dem der LEF neu berechnet wird, ist variabel und abhängig von
der in F05 festgelegten Mindestladung. Der LEF-Algorithmus setzt
ein, wenn ein vollständig aufgeladener Akku um 10 % der Differenz
zwischen 100 % und der Mindestladung entladen wird.
Ist die Mindestladung beispielweise auf 50% festgelegt, setzt der
LEF-Algorithmus ein, wenn 100 % - 50 % / 10 = 5 % von einem
vollständig aufgeladenem Akku entladen werden. Wird die
Mindestladung bei 0 % festgelegt, liegt dieser Stand bei
100 % - 0 % / 10 = 10 %.
Ladeparameter
Auf Grundlage der ansteigenden Ladespannung und des
abnehmenden Ladestroms kann entschieden werden, ob der Akku
vollständig geladen ist. We nn die Akkuspannung für einen
festgelegten Zeitraum über einer best immten Stufe liegt, während
der Ladestrom für denselben Zeitraum unter einer bestimmten Stufe
liegt, kann der Akku als vollständig geladen betrachtet werden. Diese
Spannungs- und Stromstufen werden in Verbindung mit dem
festgelegten Zeitraum als Ladeparameter bezeichnet. Im
Allgemeinen liegt für einen 12-V-Bleisäureakku der SpannungsLadeparameter bei 13,2 V und der Strom-Ladeparameter bei 2,0 %
der Gesamt-Akkukapazität (z. B. 4 A bei einem 200-Ah-Akku). Für
den Zeit-Ladeparameter sind bei den meisten Akkusystemen
4 Minuten ausreichend. Beachten Sie, dass diese P arameter für den
fehlerfreien Betrieb des Xantrex Akku-Monitors sehr wichtig sind
und in den entsprechenden Fun ktionen ordnungsgemäß gesetzt
werden müssen.
Synchronisieren des Xantrex Akku-Monitors
Um den Ladezustand des Akkus zuverlässig lesen zu können, muss
der Akku-Monitor regelmäßig mit dem Akku und dem Ladegerät
synchronisiert werden. Dies wird durch das vollständige Laden des
Akkus erreicht. Das Ladegerät erkennt den Akku als voll, wenn es in
der Float-Stufe arbeitet. In diesem Moment muss der Xantrex AkkuMonitor den Akku ebenfalls als voll era chten, so dass der Zähler der
57

Amperestunden auf Null und die Ladezustandsanzeige auf 100,0 %
gesetzt werden können. Durch genaues Einstellen der
Ladeparameter im Xantrex Akku-Monitor kann der Akku-Monitor
automatisch mit dem Ladegerät synchronisiert werden, wenn die
Float-Stufe erreicht wird. Der Bereich der Ladeparameter ist groß
genug, um den Xantrex Akku-Monitor an die meisten AkkuLadegeräte anzupassen.
Wenn der Xantrex Akku-Monitor nicht an den Ladealgorithmus des
installierten Ladegeräts angepasst werden kann, hat der Benutzer
die Möglichkeit, den Akku-Monitor bei vollständig geladenem Akku
manuell zu synchronisieren. Dies geschieht durch gleichzeitiges
Drücken der <- und >-Auswahltasten für drei Sekunden. Bei der
manuellen Synchronisation des Akku-Monitors wird der LEF nicht
automatisch berechnet. Wenn die Versorgungsspannung des
Xantrex Akku-Monitors unterbrochen wurde, muss der
Akku-Monitor für den ordnungsgemäßen Betrieb wieder
synchronisiert werden.
Beachten Sie, dass regelmäßiges vollständiges Laden (mindestens
ein Mal pro Monat) Ihren Akku nicht nur mit dem Xantrex AkkuMonitor synchronisiert hält, sondern ihn auch vor erheblichem
Kapazitätsverlust und der Verkürzung seiner Lebensdauer schützt.
Funktionsübersicht
Die werkseitigen Voreinstellungen des Xantrex Akku-Monitors sind
für ein handelsübliches 12-V-Bleisäureakkusystem mit 200 Ah
geeignet. Somit muss in den meisten Fällen zum Überwachen eines
12-V-Systems nur die Funktion der Akkukapazität (F01) angepasst
werden. Stellen Sie bei der Verwendung anderer Akkutypen sicher,
dass Ihnen alle relevanten Angaben vorliegen, um die Funktionen
des Xantrex Akku-Monitors korrekt einzurichten.
Sie können den Xantrex Akku-Monitor mithilfe von 20 verschiedenen
Einstellungen o der „F unktio nen“ vo llstän dig anp assen . Aktivi eren Sie
vor dem Einrichten des Xantrex Ak ku-Monitors den
Einrichtungsmodus. Der Einrichtungsmodus wird aktiviert, indem
Sie für drei Sekunden die Taste SETUP drücken. Die Anzeige blinkt,
wenn der Einrichtungsmodus aktiviert ist. Durch wiederholtes
Drücken der Taste SETUP gelangen Sie zu den verschiedenen
Funktionen. Die ausgewählte Funktion wird durch die Zeichenfolge
Fxx dargestell t, wobei xx für die Nummer der Funkt ion steh t. Übe r die
Tasten < und > können Sie den Wert der ausgewählten Funktion
ändern. Zur nächsten Funktion gelangen Sie, indem Sie die Taste
58

SETUP erneut drücken. Um die geänderten Einstellungen im Speicher
des Xantrex Akku-Monitors zu sichern, drücken Sie erneut für drei
Sekunden die Taste SETUP bis die Anzeige nicht mehr blinkt und der
Akku-Monitor in den normalen Betriebsmodus wechselt. Wenn sich
der Xantrex Akku-Monitor im Einrichtungsmodus befindet und für
90 Sekunden keine Taste gedrückt wird, wird automatisch in den
normalen Betriebsmodus gewechselt, ohne dass die geänderten
Einstellungen gespeichert werden.
Die folgende Tabelle zeigt eine Übers icht über die gesamten
Funktionen des Xantrex Akku-Monitors, jeweils mit einer kurzen
Beschreibung. Bei den mei sten Akkusystemen sollte es genügen, die
Werte der Funktionen F01, F02, F03, F07 und F08 anzupassen. Es
wird empfohlen, im Zweifelsfall die Funktionen F0 4, F05, F06, F09,
F10, F11, F12, F13, F14, F15, F16, F17, F18 und F20 nicht zu
verändern.
F01 Kapazität des Akkus in Amperestunden (Ah). Dieser
Wert stellt die Kapazität bei einer Entladungszeit von
20 Stunden bei 20 °C dar.
Voreinstellung Bereich Schrittweite
200 Ah 20 – 2000 Ah 1 Ah
F02 Spannungsladeparameter. Die Akkuspannung muss
über diesem Wert liegen, damit der Akku als vollständig
geladen erkannt wird. Stellen Sie sicher, dass der
Spannungsladeparameter immer knapp unter der
Spannung liegt, bei der das Ladegerät das Laden des
Akkus beendet (normalerweise 0,1 V oder 0,2 V unter
der Float-Spannung des Ladegeräts).
Voreinstellung Bereich Schrittweite
13,2 V 8,0 – 33,0 V 0,1 V
F03 Stromladeparameter. Wenn der Wert des Ladestroms
unter diesem Prozentsatz der Akkukapazi tät li egt (siehe
F01), wird der Akku als vollständig geladen betrachtet.
Stellen Sie sicher, dass der Stromladeparameter immer
größer ist als der Minimalstrom, bei dem das Ladegerät
den Akku wartet oder das Lade n beendet.
Voreinstellung Bereich Schrittweite
2,0 % 0,5 – 10,0 % 0,5 %
59

F04 Zeitraum-Ladeparameter. Das ist der Zeitraum, für den
die Ladeparameter (wie unter F02 und F03 beschrieben)
zutreffen müssen, damit der Akku als vollständig
geladen erkannt wird.
Voreinstellung Bereich Schrittweite
4 min 1 – 4 min 1 min
F05 Warnung bei geringer Akkuladung ON (Mindestladung).
Um darauf hinzuweisen, dass der Akku aufgeladen
werden muss, wird das Alarmrelais aktiviert und in der
Anzeige der Hinweis CHARGE BATTERYblinkend
angezeigt, wenn der Prozentsatz des Ladezustands
diesen Wert fällt. Auf diesem Wert basieren auch die
Berechnung des Restzeitwerts und die Balkenanzeige des
Ladezustands. Es wird empfohlen, diesen Wert bei circa
50,0 % zu belassen.
unter
Voreinstellung Bereich Schrittweite
50,0 % 0,0 – 99,0 % 1,0 %
F06 Warnung bei geringer Akkuladung OFF. W e nn der
Prozentsatz des Ladezustands
wird das aktivierte Alarmrelais wieder deaktiviert. Bei
der Einstellung FULL wird das Alarmrelais nur
deaktiviert, wenn die Ladeparameter zutreffen.
über diesen Wert steigt,
Voreinstellung Bereich Schrittweite
80,0 % 0,0 – 100,0 % /
FULL
F07 U nterspannungsalarm. Fällt die Akkuspannung unter
diesen Wert, wird nach 10 Sekunden das Alarmrelais
aktiviert, und im Display wird der Hinweis Lo angezeigt.
1,0 %
Voreinstellung Bereich Schrittweite
10,5 V OFF / 8,0 –
33,0 V
F08 Überspannungsalarm. Steigt die Akkuspannung über
diesen Wert, wird nach 5 Sekunden das Alarmrelais
aktiviert, und im Display wird der Hinweis Hi angezeigt.
0,1 V
60

Voreinstellung Bereich Schrittweite
16,0 V OFF / 10,0 –
F09 Ladeeffizienzfaktor (LEF). Es wird empfohlen, diesen
Wert in der Einstellung AU (automatische Berechnung)
zu belassen. Mit dem Wert A90 wird die automatische
Berechnung auf 90 % gesetzt. Eine ma nu e l l e E in st e l l u ng
wird durch Uxx dargestellt, wobei xx für die eingestellte
Ladeeffizienz steht. (Weitere Informationen über LEF
finden Sie auf Seite 56.)
35,0 V
0,1 V
Voreinstellung Bereich Schrittweite
AU U50 – U99 / AU /
F10 Peukert-Exponent (Entladungseffizienz). Wenn dieser
Wert nicht bekannt ist, empfiehlt es sich, ihn in der
Einstellung 1,25 zu belassen. Ein Wert von 1,00
deaktiviert die Peukert-Kompensation. Wenden Sie sich
an den Kundendienst oder den Hersteller des Akkus,
bevor Sie diesen Wert ändern.
A90
1%
Voreinstellung Bereich Schrittweite
1,25 1,00 – 1,50 0,01
F11 Akku-Temperatur. Über diese Funktion können Sie die
durchschnittliche Akku-Temperatur einstellen. Der Wert
AU aktiviert die automatische Temperaturmessung.
Dafür muss an den Xantrex Akku-Monitor ein externer
Temperaturfühler angeschlossen sein. Außerdem wird
für den normalen Modus die Temperaturanzeige
aktiviert. Wenn Sie die Einstellun g AU auswählen und
die Verbindung zum Temperaturfühler abbricht, werden
vier Striche (- - - -) angezeigt, und die interne
Berechnung der Kühlung wird mit der Voreinstellung
von 20 °C durchgef üh rt. Sie könn en hi er nur We rte in °C
angeben. Verwenden Sie nötigenfalls folgende Formeln,
um zwischen °C und °F umzurechnen: T(
1,8) + 32
und T(
) = (T(°F) – 32) / 1,8.
°C
) = (T(°C) x
°F
61

Voreinstellung Bereich Schrittweite
20 °C 0 – 50 / AU 1 °C
F12 Temperaturkoeffizient. Dieser Wert gibt den Prozentsatz
an, um den die Kapazität des Akkus mit der Temperatur
schwankt. Die Einheit dieses Wertes ist „%Kapazität/
°C“, also Kapazität in Prozent pro Grad Celsius. Die
Voreinstellung ist 0,5 %Kap azität/°C, dieser Wert sollte
bei den meisten Akkus zutreffen. Die Einstellung OFF
deaktiviert die Kühlung.
Voreinstellung Bereich Schrittweite
0,5 %Kapazität
/ °C
F13 Zeitraum zur Berechnung der Restzeit. Mit dieser
Einstellung legen Sie den Ze itraum in Minuten fest, auf
dessen Grundlage der Filter zur Berechnung der
Durchschnittswerte arbeitet. Der richtige Wert für diese
Einstellung hängt von Ihrer Installation ab. Der Wert 0
deaktiviert den Filter und aktualisiert die Anzeige
unmittelbar (in Echtzeit); dies kan n jedoch dazu führen,
dass stark schwankende Werte angezeigt werden. Indem
Sie den größten Wert (12 M inuten) auswählen, stellen
Sie sicher, dass Langzeit-Ladeschwankungen mit in die
Berechnung der Restzeit einbezogen werden.
OFF / 0,05 –
0,95 %Kapazität/
°C
0,05 %Kapazität
/ °C
Voreinstellung Bereich
3 min 0 / 3 / 6 / 9 / 12 min
62

F14 Stromschwellenwert. Fällt der gemessene Strom unter
diesen Wert, wird er als null Ampere betrachtet. Mithilfe
dieser Funktion ist es möglich, sehr kleine Ströme
auszuschließen, die in lauten Umgebungen
Langzeitberechnungen des Ladezustands negativ
beeinflussen können. Wenn beispielsweise der
tatsächliche Langzeitstrom +0,05 A beträgt und der
Akku-Monitor aufgrund von empfangenen Störsignalen
oder kleinen Abweichungen –0,05 A misst, kann der
Xantrex Akku-Monitor fälschlicherweise anzeigen, dass
der Akku aufgeladen werden muss. Setzen Sie in diesem
Fall Funktion 14 auf 0,1. Dadurch rechnet der Xantrex
Akku-Monitor mit 0,0 A, so dass nicht von falschen
Annahmen ausgegangen werden kann. Eine Einstellung
von 0,0 deaktiviert diese Funktion.
Voreinstellung Bereich Schrittweite
0,0 A 0,0 – 2,0 A 0,1 A
F15 Auswahl der Temperatureinheit. Mithilfe dieser
Funktion können Sie zwischen einer Temperaturanzeige
in Grad Celsius (°C) und in Grad Fahrenheit (°F) wählen.
Voreinstellung Bereich
°C °C, °F
F16 Spannungs-Prescaler. Diese Funktion ist nur wichtig,
wenn ein optionaler Prescaler für den Messeingang der
Akkuspannung des Xantrex Akku-Monitors installiert
ist. Der Spannungsladeparameter und die Einstellungen
der Unterspannungs- und Überspannungsalarme
basieren auf dieser Funktion. Ändern Sie diesen Wert
nicht, wenn Sie keinen Prescaler verwenden!
Voreinstellung Bereich
1-1 1-1 / 1-5 / 1-10
63

F17 Anzeigemodus (Hintergrundbeleuchtung). Dauer der
Hintergrundbeleuchtung in Sekunden, nachdem eine
Taste des Xantrex Akku-Monitors gedrückt wurde. Die
Hintergrundbeleuchtung kann über die Einstellungen
ON immer ein- bzw. OFF immer ausgeschaltet werden.
Durch die Einstellung AU wird die
Hintergrundbeleuchtung automatisch ak tiviert, wenn
der Entlade-/Ladestrom 1 A überschreitet oder eine
Taste gedrückt wird.
Voreinstellung Bereich Schrittweite
30 s OFF / 10 – 60 /
F18 Polarität des Alarmrelaiskontakts. Durch diese Funktion
legen Sie fest, ob der Kontakt normalerweise offen (NO)
oder geschlossen (NC) ist. Beachten Sie, dass die
Einstellung NC den Versorgungsstrom des Xantrex
Akku-Monitors im normalen Betriebsmodus leicht
ansteigen lässt.
ON / AU
10 s
Voreinstellung Bereich
NO NO, NC
F19 Version der Firmware. Zeigt die Version der Firmware
des Xantrex Akku-Monitors an. Dieser Wert kann nicht
geändert werden.
Voreinstellung
x.xx
F20 Sperren des Einrichtungsmodus. Wenn diese Funktion
auf ON gesetzt ist, sind alle Funktionen (außer dieser)
gesperrt und können nicht geändert werden.
Voreinstellung Bereich
OFF OFF / ON
Wenn alle notwendigen Änderungen im Einrichtungsmodus
durchgeführt und überprüft wurden, können Sie in den normalen
Betriebsmodus zurückkehren, indem Sie die Taste SETUP für drei
Sekunden drücken. Ihr Xantrex Akku-Monitor ist dann
betriebsbereit.
64

3 Allgemeiner Betrieb
Im normalen Betriebs modus kann der Xantrex Akku-Monitor die
sechs wichtigsten Parameter Ihres Gleichstrom-Systems anzeigen.
Verwenden Sie die Auswahltasten < und >, um den gewünschten
Parameter auszuwählen.
Akkuspannung (V). Diese Funktion kann verwendet
werden, um den Ladezustand des Akkus grob zu
schätzen. Ein 12-V-Akku wird als leer betrachtet,
wenn er unter Last keine Spannung von 10,5 V
aufrechterhalten kann.
Unter Strom (A) wird der tatsächliche Strom
dargestellt, der in den Akku hinein- oder aus dem
Akku herausfließt. Ein Entladungsstrom (aus dem
Akku fließender Strom) wi rd durch einen negativen
Wert angezeigt. Wenn beispielsweise ein DC-zu-ACInverter 5Ampere aus dem Akku entni mmt, wird die s
als –5,0A angezeigt.
Mit der Funktion zur Anzeige der verbrau chte n
Amperestunden (Ah) wird die Menge der aus dem
Akku entnommenen Amperestunden angezeigt. Für
einen vollständig aufgeladenen Akku wird dieser Wert
0,0 Ah
auf
drei Stunden lang ein Strom von 12 Ampere aus dem
Akku abfließt, zeigt diese Anzeige den Wert –
an.
Ladezustand (%). Hiermit können Sie den
tatsächlichen Zustand des Akkus am besten
überwachen. Diese Anzeige stellt die aktuelle Menge
der im Akku vorhandenen Energie dar. Für einen
vollständig aufgeladenen Akku werden hier
angezeigt, für einen vollständig entladenen Akku
0,0 %
gesetzt (synchronisiertes System). Wenn
.
36,0 Ah
100,0 %
65

Unter Restzeit (h:m) wird eine Schätzung angezeigt,
wie lange der Akku unter der aktuellen Last betrieben
werden kann, bevor er wieder aufgeladen werden
muss. Diese Zeit wird in Stunden (bei über
100 Stunden) oder im F ormat hh.mm (bei unter
100 Stunden) angezeigt. Eine Restzeit von 15 Stunden
und 45 Minuten wird demnach als 15:45 h:m und eine
Restzeit von 120 Stunden als 120 h dargestellt. Beim
Laden des Akkus wird ----h angezeigt, da
währenddessen keine Restzeit berechnet werden
kann.
Unter Temperatur (°C oder °F) wird die aktuelle
Temperatur des Akkus angezeigt. Diese Anzeige wird
automatisch aktiviert, wenn die Funktion F11 auf AU
gesetzt und der optionale Temperaturfühler mit dem
Xantrex Akku-Monitor verbunden wurde. Besteht
keine Verbindung zum Temp eraturfühler, werden in
der Anzeige vier Striche (- - - -) angezeigt. Die
Temperatureinheit kann über die Funktion F15
eingestellt werden.
°F
Außerdem zeigt der Xantrex Akku-Monitor an, wenn der Akku
aufgeladen werden muss oder vollständig geladen ist. Diese
Hinweise werden über die Anzeigen CHARGE BATTERY FULL am
unteren Ende des Displays und mit den fünf Segmenten der
Balkenanzeige am oberen Ende dargestellt. In der folgenden Tabelle
werden die vier möglichen Kombinationen dieser Anzeigen erklärt.
CHARGE BATTERY (blinkend). Der
Ladezustand des Akku ist unter den
eingestellten Wert „Mindestladung“
gefallen (siehe Funktion F05). Der Akku
muss so schnell wie möglich aufg eladen
werden.
66

BATTERY FULL (blinkend). Der Akku
ist vollständig geladen, und das
Ladegerät arbeitet möglicherweise auf
der Float-Stufe. Das Ladegerät kann
ausgeschaltet werden. Der Monitor ist
mit dem Akku synchronisiert.
CHARGE BATTERY FULL (blinkend).
Laden Sie den Akku vollständig auf. Dies
wird angezeigt, wenn der Xantrex AkkuMonitor mit dem Akku synchronisiert
werden muss (z. B. nach einer gewissen
Anzahl von Lade-/Entladezyklen, nach
dem Zurücksetzen oder nach dem
Einschalten).
STATE OF CHARGE BAR GRAPH.
Diese Balkenanzeige stellt den
Ladezustand in fünf Stufen dar, bis die
„Mindestladung“ (siehe Funktion F05)
erreicht ist. Werden fünf
Balkensegmente angezeigt, bedeutet
dies, dass der Akku vollständig
aufgeladen ist. Wenn der Akku entladen
ist, wird statt der Balkenanzeige die
Meldung „CHARGE BATTERY“
angezeigt.
4 Erweiterte Funktionen
Neben den im vorangegangenen Kapitel beschriebenen allgemeinen
Funktion, verfügt der Xantrex Akku-Monitor über einige zusätzliche
erweiterte Funktionen. Diese Funktionen werden in den folgenden
Kapiteln beschrieben.
Verlaufsdaten
Im Xantrex Akku-Monitor können „besondere“ Ereignisse als
Verlaufsdaten gespeichert werden. Folgende Ereignisse werden als
Verlaufsdaten gespeichert:
H01 Der automatisch berechnete Ladeeffizienzfaktor (LEF).
67

H02 Die durchschnittliche Entladung in Amperestunden.
H03 Die höchste Entladung in Amperestunden.
H04 Anzahl der Lade/Entladungszyklen.
H05 Anzah l der „Synchronisierungen“. Dies bezeichnet, wie
H06 Anzahl vollständiger Entladungen (Erreichen eines
H07 Anzahl von Unterspannungsalarmen.
H08 Anzahl der Überspannungsalarme.
H09 Die durchschnittliche Entladung in %. Dieser Wert wird
H10 Die tiefste Entladung in %.
Diese hier beschriebenen Informationen können in der
„Verlaufsanzeige“ abgelesen werden. Halten Sie die Taste SETUP für
fünf Sekunden gedrückt, um diese Anzeige zu aktivieren. Nach fünf
Sekunden wird ein blinkendes „H01“ angezeigt. Sie können den
Wert von H01 durch Drücken der < und > Auswahltasten anzeigen.
Das nächste Verlaufsereignis (in diesem Fall „H02“) wird durch
Drücken der Taste SETUP (weiter) ausgewählt. Halten Sie die Taste
SETUP für drei Sekunden gedrückt, um in den normalen
Betriebsmodus zurückzukehren.
Menü „Zurücksetzen
Mithilfe des Menüs „Zurücksetzen“ können Sie einzelne Funktionen
des Xantrex Akku-Monitors sowie die Verlaufdaten auf die
Werkseinstellungen zurücksetzen. Das Zurücksetzen der
Verlaufsdaten wird nur beim Auswechseln der Akkus empfohlen.
Wenn die neuen Akkus exakt die gleiche Marke und den gleichen
Typ aufweisen wie die bisherigen, müssen nur die Verlaufsdaten
ersetzt werden. Die Funktionen können unverändert beibehalten
werden.
Dieser Wert wird nach jeder Synchronisierung neu
berechnet.
oft der Akku unter Erfüllung der Bedingungen der
Ladeparameter vollständig geladen wurde.
Ladezustands von 0,0 %).
nach jeder Synchronisierung neu berechnet.
“
68

Zum Aktivieren des Menüs „Zurücksetzen“ halten Sie die Taste
SETUP acht Sekunden lang gedrückt. Nach acht Sekunden wird der
blinkende Eintrag „rSt.F“ („Reset Functions“ - „Funktionen
Zurücksetzen“) angezei gt. Zur Auswahl von „Ein“ od er „Aus“
drücken Sie die Tasten < und >.
Durch Drücken der Taste SETUP (weiter), kann „rSt.H“ („Reset
History“ - „Verlauf zurücksetzen“ ) ausgewählt werden. Zur Auswahl
von „Ein“ oder „Aus“ drücken Sie erneut die Tasten < und >.
Um die geänderten Einstellungen für alle Elemente zu übernehmen,
die jetzt auf „Ein“ gesetzt sind, drücken Sie drei Sekunden lang die
Taste SETUP, bis die Anzeige nicht mehr blinkt und der AkkuMonitor wieder in den normalen Betriebsmodus wechselt.
Wenn der Monitor durch Superlock gesichert ist, können die
Funktionen und die Verlaufsdaten nicht zurückgesetzt werden. Nach
Drücken der Tasten < oder > wird entsprechend „S.Loc“ angezeigt.
Wenn beim Xantrex Akku-Monitor im Modus „Zurücksetzen“ 90
Sekunden lang keine Tasten gedrückt werden, wechselt dieser
automatisch in den normalen Betriebsmodus zurück, ohne die
Funktionen und/oder die Verla ufsdaten zurückzusetzen.
Kommunikationsschnittstellenkit
Der Xantrex Akku-Monitor kann auch an einen Computer
angeschlossen werden. Hierfür wird jedoch das optionale externe
Kommunikationsschnittstellenkit benötigt. Schließen Sie diese
Kommunikationsschnittstelle nur an den Computer an, wenn Sie
diese Verbindung tatsächlic h benötigen, um unnötigen
Stromverbrauch zu vermeiden. Mit der Windows 95/98/Me/2000/
®
-Software für den Xantrex Akku-Monitor kann der Benutzer
XP
alle Paramet er gleichzeitig anzeigen. Da rü ber h in au s k ö nne n Si e mit
dieser Verbindung den Xantrex Akku-Monitor programmieren und
die vollständige Funktionseinrichtung auf einem Datenträger
speichern. Außerdem können Sie Verlaufsdaten anzeigen, den
Xantrex Akku-Monitor testen und Superlock aktivieren bzw.
deaktivieren.
Superlock
Mit der Superlock-Funktion kann das Einrichtungsmenü des
Xantrex Akku-Monitors vollständig ges perrt und durch ein
Kennwort geschützt werden. Im Superlock-Modus können die
Verlaufsdaten nicht gelöscht werden. Der normale Betriebsmodus
ist von der Superlock-Funktion nicht betroffen, und d ie Funktionen
69

im Einrichtungsmenü können angezeigt jedoc h nicht geändert
werden. Nur Benutzer, die über das Kennwort verfügen, können den
mit dem Kommunikationsschnittstellenkit verbundenen Xantrex
Akku-Monitor entsperren.
Superlock sollte nicht mit der Einrichtungssperre (Funktion F20)
verwechselt werden. Der Unterschied besteht darin, dass die
Einrichtungssperre jederzeit auch ohne Verbindung zwischen dem
Xantrex Akku-Monitor und dem Computer entsperrt werden kann.
Die Einrichtungssperre dient dazu, unbeabsichtigte Änderungen der
Funktionswerte zu verhindern. Superlock kann nur durch
Kommunikationsschnittstelle und unter Verwendung eines
eindeutigen Kennworts aktiviert bzw. deaktiviert werden. Sie
Superlock-Funktion dient im Wesentlichen zu
Gewährleistungszwecken.
70

5 Richtlinien zur Fehlerbehebung
PROBLEM BEHEBUNG ODER GEGENMASSNAHME
Der Monitor
funktioniert nicht
(keine Anzeige).
Stromanzeige gibt
die falsche
Polarität an
(positiv statt
negativ bei
Entladung)
Der Monitor wird
wiederholt
zurückgesetzt.
Im
Einrichtungsmod
us können keine
Änderungen
vorgenommen
werden.
• Überprüfen Sie die seitlichen Anschlüsse
von Monitor und Akku.
• Stellen Sie sicher, dass die InlineSicherungen installiert und
funktionstüchtig sind.
• Überprüfen Sie die Akkuspannung.
Möglicherweise ist der Akku leer. Vbatt
muss bei 8 V Gleichstrom liegen.
• Versuchen Sie, den Monitor neu zu
starten, indem Sie die Sicherungen
entfernen und erneut einsetzen.
Die Stromsensorleitungen des Shunts sind
vertauscht. Lesen Sie in der
Installationsanleitung nach.
Untersuchen Sie die Verkabelung auf
Korrosion und/oder lose Verbindungen.
Der Akku ist möglicherweise leer oder
defekt.
Überprüfen Sie, ob die Einrichtungssperre
auf OFF geschaltet ist (Funktion F20).
Möglicherweise ist Ihr Xantrex AkkuMonitor durch die Su perlock-Funktion
gesperrt. Wenden Sie sich an den Benutzer,
der die Software installiert hat, um von
diesem das Kennwort zu erhalten und den
Monitor über Kommunikationsschni ttstelle
zu entsperren.
71

Es können nicht
alle
Anzeigen im
normalen Modus
ausgewählt
werden.
Die Anzeigen
CHARGE
BATTERY oder
CHARGE
BATTERY FULL
blinken.
Die
Ladezustandsund/oder
Restzeitanzeige
sind nicht exakt.
Die
Temperaturanzei
ge zeigt „- - - -“ an.
Die
Akkuspannungsa
nzeige ist sehr
ungenau.
Sollte Ihnen keine der hier genannten Gegenmaßnahm en bei der
Lösung Ihres Problems geholfen haben, wenden Sie sich an Ihren
Händler.
Ein Benutzer hat unter Verwendung der
Administrator-Software einige
Parameteranzeigen mit
Kommunikationsschnittstelle gelöscht.
• Laden Si e den Akku vollständig auf
(Akku mit dem Monitor
synchronisieren/ausgleichen).
• Überprüfen Sie die Ladeparameter in
den Funktionen F02, F03 und F04 auf
mögliche fehlerhafte Einstellungen.
• Überprüfen Sie, ob der gesamte Strom
durch den Shunt fließt (möglicherweise
verfügt der negative Pol des Akk us nur
über ein Kabel, das zur Akkuseite des
Shunts führt).
• Die Stromsensorleitungen des Shunts
sind vertauscht.
• Überprüfen Sie die Akkukapazität in
Funktion F01.
• Überprüfen Sie LEF in Funktion F09.
• Überprüfen Sie in Funktion F10 den
Peukert-Exponenten.
• Überprüfen Sie in Funktion F11 die
Akkutemperatur.
• Überprüfen Sie in Funktion F12 den
Temperaturkoeffizienten.
Die Verbindung zum Tem peraturfühler ist
unterbrochen. Überprüfen Sie, ob
fehlerhafte Verbindungen und/oder
Beschädigungen eines Kabels vorliegen.
Überprüfen Sie in Funktion F16 die
Einstellungen des Prescalers.
72

6 Technische Daten
Xantrex Akku-Monitor TECHNISCHE DATEN
Versorgungsspannungsbereich 9 .. 35 V Gleichstrom
Versorgungsstrom @Vin=24 V
Gleichstrom ohne BL
@Vin=12 V Gleichstrom ohne BL8mA
Eingangsspannungsbereich 0 .. 35 V Gleichstrom
Eingangsstrombereich -500 .. +500 A
Akkukapazitätsbereich 20 .. 2000Ah
Betriebstemperatur 0 .. 50 °C
Anzeigeauflösung
Spannung (0 .. 35 V) ±0,01 V
Stromstärke (0 .. 200 A) ± 0,1 A
Stromstärke (200 .. 500 A) ± 1 A
Amperestunden (0 .. 200 Ah) ± 0,1 Ah
Amperestunden (200 ..
2000 Ah)
Ladezustand (0 .. 100%) ± 0,1 %
Restzeit (0 .. 100 Std) ± 1 min
Restzeit (100 .. 240 Std) ± 1 Std.
Temperatur (0 .. 50 °C) ± 1 °C
Genauigkeit der
Spannungsmessung
6mA
± 1 Ah
± 0,3 %
73

Genauigkeit der
Stromstärkenmessung
Abmessungen
Vorderseite 65 × 65 mm
Chassis du r c h messer ø 52 mm
Gesamttiefe 72 mm
Ausstattung: - Potenzialfreier Alarmkontakt
Zubehör/zukünftige Optionen: Xantrex Akku-Monitor-
Hinweis: Diese technischen Daten können ohne vorherige
Ankündigung geändert werden.
± 0,4 %
-500 A/50 mV-Strom-Shunt
Verbindungskit:
• Artikelnr. # 854- 2020-01
(Länge 10 m)
• Artikelnr. # 854- 2021-01
(Länge 15 m)
Xantrex Akku-MonitorTemperaturfühler
• Artikelnr. # 854 -2022-01
(Länge 10 m)
• Artikelnr. # 854- 2023-01
(Länge 20 m)
Xantrex Akku-MonitorKommunikationsschnittstellen
kit
• Artikelnr. # 854-2019-01
(mit Schnittstellenbox,
seriellem Kabel und
Software)
Xantrex-Spannungs-Prescaler:
•Artikelnr. # 854-2018-01
USB-Schnittstellenkit
74

7 Übereinstimmungserklärung
Hersteller: TBS Electronics
Adresse: De Factorij 46
erklärt, dass folgende Produkte:
Produkttyp: Akku-Monitor
Modell: Xantrex Akku-Monitor
mit den Anforderungen der folgenden EU-Richtlinie
übereinstimmt: EMV-Richtlinie 89/336/EEC
Das oben genannte Produkt entspricht der folgenden
harmonisierten Norm:
EN50081-1: 1994 EMV - Generic Emissions Standard
EN50081-1: 1997 EMV - Generic Immunity Standard
1689 AL Zwaag, The Netherlands
75

8 Beschränkte Gewährleistung
Gewährleistung
Gewährleistungsumfang Diese beschränkte Gewährleistung wird von Xantrex
Technology, Inc. („Xantrex“) für Herstellungs- und Materialfehler des Xantrex AkkuMonitor gewährt. Diese Gewährleistung erstreckt sich über einen Zeitraum von 1 Jahr,
gerechnet ab Erwerb durch den Endkunden. Um Gewährleistungsansprüche geltend
machen zu können, benötigen Sie einen Kaufnachweis.
Gewährleistung durch Xantrex Xantrex wird, nach eigenem Ermessen, das defekte
Produkt kostenlos reparieren oder ersetzen, vorausgesetzt, dass Sie Xantrex vom
Produktdefekt innerhalb des Gewährleistungszeitraums informieren und Xantrex nach
Prüfung einen derartigen Defekt zur Kenntnis nimmt. Dieser Defekt muss durch die
vorliegende Gewährleistung abgedeckt werden.
Xantrex wird, nach eigenem Ermessen, entweder neue oder überholte Teile für die
gewährleistete Reparatur und die Erstellung von Ersatzprodukten verwenden. Xantrex
behält sich das Recht vor, originale oder verbesserte Teile oder Produkte für die
Reparatur oder ein Ersatzprodukt zu verwenden. Wenn Xantrex ein Produkt repariert
oder ersetzt, besteht für dieses die noch verbleibende Gewährleistungsdauer des
Originalprodukts oder - wenn diese kürzer als 90 Tage ist - eine Gewährleistungsdauer
von 90 Tagen, gerechnet ab Versand des reparierten Produkts an den Kunden. Alle
ersetzten Produkte und alle Teile, die von reparierten Produkten entfernt wurden,
gehen in das Eigentum von Xantrex über.
Xantrex übernimmt bei der Reparatur des Produkts sowohl die Ko sten für die Teile
und Arbeitszeit als auch die Versandkosten an den Kunden mittels eines von Xantrex
ausgewählten Zustelldienstes innerhalb der USA und Kanadas. Alaska und Hawaii
sind davon ausgeschlossen. We nden Sie sich für weitere Informationen zu den
Versandbedingungen an den Xantrex-Kundendienst.
Wie erreichen Sie unseren Kundendienst? Sollten Sie technische Probleme haben
oder die Gewährleistungsansprüche geltend machen, wenden Sie sich an Ihren
Händler. Wenn Sie Ihren Händler nicht erreichen können oder der Händler Ihnen nicht
weiterhelfen kann, wenden Sie sich direkt an Xantrex:
Telefon: 1 800 670 0707 (gebührenfreie Telefonnummer in Nordamerika)
Fax: 1 800 994 7828 (gebührenfrei in Nordamerika)
E-Mail: customerservice@xantrex.com
Direkte Rücksendungen werden entsprechend den Richtlinien für die
Materialrücksendung von Xantrex durchgeführt, die im Handbuch erläutert sind. Für
einige Produkte verfügt Xantrex über ein Netzwerk von regionalen autorisierten
1 360 925 5097 (direkte Durchwahlnummer)
1 360 925 5143 (direkte Durchwahlnummer)
76

Kundendienstzentren. Wenden Sie sich per Telefon an Xantrex, oder besuchen Sie die
Website, um zu überprüfen, ob Ihr Produkt in einem dieser Zentren repariert werden
kann.
Welche Art von Kaufnachweis wird benötigt? Dem Gewährleistungsanspruch
muss ein datierter Kaufbeleg beiliegen, und das Produkt darf nicht auseinandergebaut
oder ohne vorherige Einwilligung von Xantrex verändert worden sein.
Der Kaufbeleg kann in einer der folgenden Formen vorliegen:
• Kaufbeleg mit Datum vom Originalverkauf des Produkts beim Einzelhandel an
den Endkunden, oder
• datierte Rechnung des Händlers oder ein Kaufbeleg, der den Status des
Originalgeräteherstellers (OEM) anzeigt, oder
• die datierte Rechnung oder die Kaufbelege, die beweisen, dass das Produkt
während des Garantiezeitraums den Besitzer gewechselt hat.
Was ist von der Gewährleistung ausgeschlossen? Diese beschränkte Garantie
bezieht sich nicht auf den normalen Verschleiß des Produkts oder auf Kosten, die
durch Entfernung, Installation oder Fehlerbehebung am elektrischen System des
Kunden entstanden sind. Diese Gewährleistung gilt nicht für folgende Defekte oder
Schäden am Produkt bzw. für Schäden, die unter folgenden Umständen entstanden
sind:
a) wenn das Produkt innen oder außen unsachgemäß verwendet oder installiert,
vernachlässigt, beschädigt oder verändert wurde oder durch falsche
Verwendung bzw. Verwendung in ungeeigneter Umgebung beschädigt wurde;
b) wenn das Produkt Feuer, Wasser, allgemeiner Korrosion, biologischem Befall
oder einer Eingangsspannung ausgesetzt wird, die zu Betriebsbedingungen
führt, die das Maximum bzw. Minimum der Xantrex-Produktspezifikationen
überschreiten, einschließlich zu hoher, durch Generatoren und Blitzschläge
hervorgerufener Eingangsspannung;
c) wenn das Produkt von anderen Stellen als von Xantrex oder einem anerkannten
Kundendienstzentrum (im folgenden "ASCs") repariert wurde;
d) wenn das Produkt als Teil eines anderen Produkts verwendet wurde, das
ausdrücklich der Gewährleistung eines anderen Herstellers unterliegt;
e) wenn die originalen Kennzeichen (Markenzeichen, Seriennummer) unleserlich
gemacht, verändert oder entfernt wurden.
Haftungsausschluss
Produkt
DIESE BESCHRÄNKTE GARANTIE IST DIE EINZIGE UND
AUSSCHLIESSLICHE GARANTIE, DIE XANTREX IN VERBINDUNG MIT
IHREM XANTREX-PRODUKT LIEFERT UND BESTEHT, WO IMMER DAS
GESETZ ES GESTATTET, AN STELLE VON ALLEN ANDEREN GARANTIEN,
BEDINGUNGEN, ERKLÄRUNGEN, VERPFLICHTUNGEN UND HAFTUNGEN,
AUSDRÜCKLICH ODER IMPLIZIT, SCHRIFTLICH ODER ANDERNFALLS IN
77

VERBINDUNG MIT DEM PRODUKT, WORAUF SIE AUCH IMMER BAS IEREN
(ENTWEDER AUF VERTRAG, UNERLAUBTER HANDLUNG,
VERNACHLÄSSIGUNG, PRINZIPIEN DER HAFTUNG DES HERSTELLERS,
RECHTSTÄTIGKEIT, VERHALTEN, ERKLÄRUNG ODER ANDERES),
EINSCHLIESSLICH ABER NICHT BESCHRÄNKT AUF JEGLICHE IMPLIZITE
GARANTIE ODER QUALITÄT, MARKTFÄHIGKEIT ODER EIGNUNG FÜR
EINEN BESTIMMTEN ZWECK. JEGLICHE IMPLIZITE GEWÄHRLEISTUNG
DER MARKTFÄHIGKEIT ODER EIGNUNG FÜR EINEN BESTIMMTEN
ZWECK, IN DEM AUSMASSE WIE ES DAS ANWENDBARE RECHT
ERFORDERT, IST AUF DIE UNTER DIESER BESCHRÄNKTEN GARANTIE
FESTGELEGTE ZEITDAUER BESCHRÄNKT.
XANTREX IST IN KEINEM FALL HAFTBAR FÜR BESONDERE, DIREKTE,
INDIREKTE, VERSEHENTLICHE ODER KONKLUDENTE SCHÄDEN,
VERLUSTE, KOSTEN ODER AUSGABEN, WIE AUCH IMMER DIESE
AUFTRETEN, WEDER INNERHALB EINES VERTRAGES ODER
UNERLAUBTER HANDLUNG EINSCHLIESSLICH ABER NICHT
BESCHRÄNKT AUF WIRTSCHAFTLICHE VERLUSTE JEGLICHER ART,
JEGLICHEN VERLUST ODER SCHADEN AN EIGENTUM, JEGLICHEN
PERSONENSCHADEN, JEGLICHEN SCHADEN ODER VERLETZUNG DURCH
ODER ALS ERGEBNIS VON FALSCHER VERWENDUNG ODER
MISSBRAUCH, ODER FALSCHER INSTALLATION, INTEGRATION ODER
BEDIENUNG DES PRODUKTES.
Ausschlüsse
Wenn es sich bei diesem Produkt um ein Endverbraucher-Produkt handelt, ist
aufgrund von Bundesgesetzen der Ausschluss von impliziten Garantien nicht zulässig.
Soweit Ihnen implizite Garantien nach Bundesgesetz zustehen und diese durch
anwendbare Gesetze geltend gemacht werden können, sind diese dennoch durch die
Dauer dieser beschränkten Gewährleistungen begrenzt. In einigen Bundesstaaten und
Regionen sind Einschränkungen oder Ausschlüsse von impli ziten Garantien oder
Begrenzungen der Dauer für implizite Garantien oder Beschränkungen oder
Ausschlüsse von zufälligen oder Folgeschäden nicht zulässig. In diesem Fall gelten
die oben genannten Einschränkungen oder Ausschlüsse für Sie nicht. Diese
beschränkte Garantie gewährt Ihnen bestimmte Rechte. Je nach Bu nde sstaa t oder
Region können Sie über zusätzliche Rechte verfügen.
Warnung: Verwendungsein schränkungen
In Ihrem Produkthandbuch finden Sie Informationen zu
Verwendungseinschränkungen des Produkts.
BEACHTEN SIE INSBESONDERE, DASS DAS
NICHT MIT LEBENSERHALTENDEN SYSTEMEN ODER ANDEREN
MEDIZINISCHEN GERÄTEN VERWENDET WERDEN DARF. OHNE DEN
78
XANTREX AKKU-MONITOR

ALLGEMEINEN ANSPRUCH DES OBEN GENANNTEN EINZUSCHRÄNKEN,
GIBT XANTREX KEINE ERKLÄRUNGEN ODER GARANTIEN FÜR DEN
EINSATZ VON XANTREX
ZUSAMMENHANG MIT LEBENSERHALTENDEN SYSTEMEN ODER
ANDEREN MEDIZINISCHEN GERÄTEN.
XANTREX AKKU-MONITOR IM
Richtlinien für die Produktrücksendung
Bevor Sie ein Produkt direkt an Xantrex zurücksenden können, müssen Sie eine
Materialrücksendungsnummer (RMA-Nummer) und die korrekte Adresse erhalten, an
die Sie das Produkt senden. Das Versandporto muss im Voraus bezahlt werden. Die
Annahme von Produktsendungen wird verweigert, oder die Sendung wird auf zu Ihren
Lasten an Sie zurückgesandt, wenn sie nicht autorisiert oder nicht mit einer deutlich
auf der Außenseite der Versandverpackung sichtbaren RMA-Nummer versehen sind
bzw. wenn sie unfrei oder an die falsche Adresse versandt werden.
Wenn Sie sich an den Xantrex Kundendienst wenden, halten Sie Ihr
Benutzerhandbuch bereit, um folgende Informationen anzugeben:
• Seriennummer des Produkts
• Informationen zur Installation und Verwendung des Geräts
• Informationen zum Problem bzw. zum Grund für die Rücksendung
• Kopie des datierten Kaufbelegs
Rückgabeverfahren
1. Verpacken Sie das Gerät sicher, vorzugsweise in der Originalverpackung.
Vergewissern Sie sich, dass das Produkt vollständig versichert und in der
Originalverpackung oder einer entsprechenden Verpackung versandt wird.
Diese Garantie bezieht sich nicht auf Schäden, die durch unsachgemäße
Verpackung entstanden sind.
2. Legen Sie Folgendes bei:
• die RMA-Nummer, die Sie von Xantrex Technology Inc. erhalten haben,
und die sich deutlich sichtbar auf der Außenseite der Verpackung befinden
muss
• eine Absenderadresse, an die das Gerät zurückgesandt werden kann.
Postfachadressen sind nicht zulässig.
• eine Kontakttelefonnummer, unter der Sie tagsüber erreichbar sind
• eine kurze Beschreibung des Problems
3. Senden Sie das Gerät mit bezahltem Porto an die Adresse, die Ihnen von Ihrem
Xantrex Kundendienstvertreter mitgeteilt wurde.
Wenn Sie ein Produkt von außerhalb der USA oder Kanada zu r ücks e nde n:
Zusätzlich zu oben genannten Bedingungen MÜSSEN Sie den Betrag für das
Rücksendungsporto beilegen, und Sie sind für alle Frachtdokumente, Abgaben, Zölle
und Kautionen verantwortlich.
79

Wenn Sie ein Produkt an ein Xantrex Kundendienstzentrum (ASC)
zurücksenden: Hier benötigen Sie keine Xantrex RMA-Nummer. Sie müssen sich
jedoch vor der Rücksendung an ein ASC wenden oder das Gerät vorzeigen, um sich
über das im jeweiligen Kundendienstzentrum geltende Rückgabeverfahren zu
informieren.
Kundendienstleistungen nach Ablauf der
Gewährleistungsfrist
Wenn die Gewährleistungsfrist für Ihr Xantrex Akku-Monitor abgelaufen ist, das
Gerät durch unsachgemäßen Gebrauch oder eine falsche Installation beschädigt
wurde, andere Gewährleistungsbedingungen nicht erfüllt wurden oder kein datierter
Kaufbeleg verfügbar ist, kann das Produkt gegen einen Pauschalbetrag repariert oder
ersetzt werden.
Für eine Rücksendung des Xantrex Akku-Monitor zu Reparaturzwecken bei
abgelaufener Gewährleistungsfrist wenden Sie sich an den Xantrex Kundendienst, um
eine RMA-Nummer anzufordern, und folgen Sie den unter “Rückgabeverfahren“ auf
Seite 79 beschriebenen Schritten.
Der Kundendienstvertreter erklärt Ihnen gern die Zahlungsoptionen, wie
beispielsweise Kreditkarte oder Zahlungsanweisung. In Fällen, in denen der
Mindestpauschalbetrag nicht zutrifft, z. B. bei unvollständigen Einheiten oder stark
beschädigten Geräten, wird ein zusätzlicher Betrag erhoben. In diesem Fall tritt der
Kundendienst mit Ihnen in Verbindung, sobald das Gerät eingetroffen ist.
80

Controlleur de batterie
Xantrex
Manuel d’entretien

À propos de Xantrex
Xantrex Technology Inc. est un fournisseur leader sur le marché mondial des
appareils et contrôleurs d'alimentation électrique avec une gamme de
produits allant d'unités mobiles de 50 watts aux systèmes professionnels de 1
mégawatt pour l'énergie éolienne ou solaire, les batteries, les dispositifs de
pile à combustible, les microturb ine s et les appl ic at io ns d'alimentation de
secours pour les réseaux coordonnés mais aussi les systèmes autonomes. Les
produits Xantrex compren nent les onduleurs, les chargeurs de batterie, les
dispositifs programmables d'alimen ta tion e n courant électrique ainsi que les
entraînements à vitesse varia bl e qui convertissent, alimentent, contrôlent,
nettoient et distribue nt le courant électriq ue.
Marques de commerce
Controlleur de batterie Xantrex est une marque commerciale de Xantrex
International. Xantrex est une m arque déposée de Xantrex Interna t ional.
Les autres marques commerciales, marques déposées et noms de produit sont
la propriété de leurs propriétaires respectifs et sont utilisés ici dans le seul but
d'être iden tifiés.
Avis de droit d'auteur
Manuel d’entretien du controlleur de batterie Xa nt rex © Octobre 2004
Xantrex International. Tous droits réservés.
Décharge de responsabilité
SAUF ACCORD ÉCRIT EXPLICITE, XANTREX TECHNOLOGY INC. (« XANTREX »)
(a) NE GARANTIT PAS QUE LES INFORMATIONS TECHNIQUES OU AUTRES FOURNIES
DANS SES MANUELS OU AUTRES DOCUMENTATIONS, SOIENT EXACTES, SUFFISANTES
OU APPROPRIÉES.
(b) NE SERA RESPONSABLE D’AUCUNE PERTE OU DOMMAGE DIRECTS, INDIRECTS,
CONSÉCUTIFS OU ACCIDENTELS, QUI POURRAIENT DÉCOULER DE L’UTILISATION DE
CES INFORMATIONS. L ’UTILISATION DE TOUTE INFORMATION SE FAIT AUX RISQUES ET
PÉRILS DE L’UTILISA T EUR.
Date et révision
Octobre 2004 Révision C
Numéro de référence
975-0111-01-01
Comment nous contacter
Téléphone : 1 800 670 0707 (num é ro vert aux États-Unis)
Télécopie : 1 800 994 7828 (numé ro ve rt a ux É ta ts-Unis)
Courriel : customerservice@xantrex.com
Web : www.xantrex.com
1 360 925 5097 (direct)
1 360 925 5143 (direct)

1 Notions fondamentales du controlleur de
batterie
Pourquoi faut-il que je contrôle ma batterie ?
Les batteries ont leur utilité dans un grand nombre d’applications,
leur but principal étant de stocker de l’énergie pour un usage
ultérieur. Ma is comm en t sav oir la qua ntité d’én ergie stoc kée d ans une
batterie ? Nul ne peut dire d’un simple coup d’œil. Quelques
rudiments et une bonne surveillance sont essentiels pour maximiser la
durée de vie de vos batteries somme toute onéreuses. La durée de vie
des batteries est fonction de plusieurs facteurs. Elle s’amenuise suite à
des sous-tensions, des surintensités, une décharge complète, une
décharge trop rapide et dans des conditions de température ambiante
trop élevée. Un controlleur de batterie aussi sophistiqué que le modèle
Xantrex peut donner un certain nombre d’informations importantes
en retour sur les performances de vos batteries et vous aider à
prolonger leur durée de vie.
Comment le controlleur de batterie Xantrex
fonctionne-t-il ?
La capacité d’une batterie se définit en ampères-heures (symb. Ah).
Par exemple, une batterie capable de fournir du courant à 5 ampères
pendant une périod e de 20 heures est cl ass ée à 100 Ah (5 × 20 = 100).
Le controlleur de batterie Xantrex mesure en continu l’intensité de
courant qui entre ou sort de la batterie, puis calcule la quantité
d’énergie ajoutée ou supprimée de la batterie, respectivement.
Compte tenu de l’influence de l’âge de la batterie, du courant de
décharge et de la te mpér ature s ur la capa cité de la batt erie, il n’est pas
indiqué de se fier au simple relevé d’un compteur d’ampères-heures.
Quand la même bat te ri e de 100 Ah se déc h arg e en ti èr ement en
l’espace de deux heures, le relevé révèle 56 Ah uniquement. L’on
constate que la capacité de la batterie a quasiment diminué de moitié.
Dans des conditions où la température est également basse, la
capacité de la batterie est réduite encore davantage. C’est pourquoi le
simple relevé d’un compteur d’ampères-heures ou d’un voltmètre ne
suffit pas pour donner une indication exacte et précise de l’état de
charge.
Le controlleur de batterie Xantrex peut afficher à la fois les ampèresheures débités (non compensés) et l’état de charge réelle. Une simple
lecture de l’état de charge est le meilleur moyen pour savoir où en est
83

votre batterie. Comparable à la jauge de carburant d’une voiture, ce
paramètre apparaît sous forme d’un pourcentage, 100 %
correspondant à une batterie complètement chargée et 0 % à une
batterie entièrement vide.
Par ailleurs, le controlleur de batterie Xantrex estime combien de
temps la batterie est capable de supporter la charge présente, à
savoir le temps restant avant qu’il soit nécessaire de recharger la
batterie. En cas de fluctuation importante de la charge assumée par
la batterie, il est préférable de ne pas trop se fier au relevé du
compteur vu son caractère temporaire et de s’en servir comme guide
uniquement. Nous préconisons toujours la lecture de l’affichage de
l’état de charge pour une surveillance exacte et précise de la batterie.
Outre la fonction principale (affichage de l’état réel de la batterie), le
controlleur Xantrex offre un grand nombre d’autres caractéristiques,
notamment l’affichage de la tension, du courant et de la température
(avec capteur de température en option) réels de la batterie, la
possibilité d’emmagasiner des données historiques, le lien
informatique PC et le verrouillage ‘Super-Lock’. Ces fonctionnalités
sont plus amplement expliquées dans les rubriques correspondantes
du présent manuel.
2 Réglage du controlleur de batterie Xantrex
Avant de procéder avec ce chapitre, assurez-vous que le
controlleur de batterie Xantrex est parfaitement installé,
conformément au guide d’installation ci-i nclus.
À l’issue de l’installation, il est bon de régler le controlleur Xantrex sur
votre système de batterie. Avant d’étudier les fonctions du menu de
configuration, il convient toutefois d’examiner quatre éléments
importants (expliqués dans les rubriques suivantes) qui vont
permettre de mieux vous familiariser avec le controlleur de batterie.
Les fonctions réelles du menu de configuration figurent à la rubrique
‘Présentation générale des fonctions’ en page 86.
‘Charge Efficiency Factor (CEF)’ ou Facteur de
rendement de charge
La quantité d’énergie transférée dans la b atterie durant la recharge
n’est pas en totalité disponible lors de la déc ha rge de la batterie. Le
rendement de charge d’une batterie neuve est d’environ 90 %, c’està-dire qu’il faut transférer 10 Ah pour qu’il y ait 9 Ah véritablement
84

stockés dans la batterie. Ce chiffre, appelé ‘Charge Efficiency Factor
(CEF)’ ou Facteur de rendem ent de charge, diminue avec le temps .
Le controlleur Xantrex peut procéder au calcul automatique du CEF
de la batterie.
Le moniteur de batterie Xantrex procède au calcul automatique du
CEF de la batterie alors que celle-ci se décharge. Le niveau auquel le
CEF est calculé est variable et lié au niveau de décharge défini dans
la fonction F05. L’algorithme CEF commence à fonc tionner lorsque
10% de la différence entre 100% et le niveau de décharge sont
déchargés depuis une batterie chargée à fond.
Par exemple, prenons pour hypothèse un niveau de décharge défini
sur 50%. Ainsi, l’algorithme CEF commence à fonctionner lorsque
100% - 50% / 10 = 5% sont déchargés depuis une batterie chargée à
fond. Lorsque le niveau de décharge est défini sur 0%, ce niveau est
100% - 0% / 10 = 10%.
Paramètres de charge
Selon que la tension de charge augmente et que le courant de charge
diminue, on peut décider si la batterie est complètement chargée. Si
la tension est supérieure à un niveau donné durant un temps
prédéfini e t qu e le co urant de char ge e st i nfé rieu r à un ce rta in n ive au
pour la même durée, la batterie peut être considérée comme
complètement chargée. Ces niveaux de tension et de courant, ainsi
que le temps prédéfini, sont appelés Paramètres de charge. En règle
générale, une batterie au plomb 12 V s’acquitte d’un paramètre de
charge Tension de 13.2 V et d’un paramètre de charge Courant de 2
% de la capacité totale (par exemple, 4 A avec u ne batterie de 200
Ah). La plupart des systèmes de ba tterie se contentent d’un
paramètre de charge Temps de 4 minutes. À noter que ces
paramètres sont essentiels au bon fonctionneme nt de votre
controlleur de batterie Xantrex et qu’il faut les régler de manière
adéquate au niveau des fonctions correspondantes.
Synchronisation du controlleur de batterie Xantrex
Pour garantir un affichage de l’état de charge des plus fiables, il
importe de synchroniser de façon régulière le controlleur avec la
batterie et le chargeur. Pour ce faire, il faut charger complètement la
batterie. Quand il fonctionne en phase ‘Entretien’, le chargeur
considère que la batterie est complètement chargée. À ce même
instant, le contro ll eu r Xantrex doit lui aussi considér er que la batterie
est entièrement chargée pour que le compteur d’ampères-heures
puisse être remis à zéro et que le relevé de l’état de charge affiche
85

100 %. Le réglage préc is de s pa ramètres de charge du controlleur de
batterie Xantrex permet une synchronisation automatique avec le
chargeur dès que la phase ‘Entretien’ est atteinte. La plage des
paramètres de ch arge est suffisamment vaste pour que le controlleu r
de batterie Xantrex s’adapte à la majeure partie des méthodes de
charge.
S’il n’est pas possible d’ajuster le controlleur Xantrex à l’algorithme
de charge du chargeur installé, vous pouvez toujours le synchroniser
manuellement une fois la batterie complètement chargée. Pour ce
faire, appuyez longuement (3 secondes) sur les touches de sélection
< et > en même temps . Une sy nchron isation manue lle du co ntroll eur
de batterie empêche le calcul automatique du CEF. En cas
d’interruption de la tension d’alimentation, il importe de
toujours synchroniser le controlleur de batterie Xantrex
pour garantir son bon fonctionnement.
À noter qu’une recharge complète régulière (a u moins une fois par
mois) de la batterie non seulement maintient la synchronisation avec
le controlleur Xantrex, mais empêche aussi une perte substantielle
de la capacité de la batterie, à l’origine d’une durée de vie limitée.
Présentation générale des fonctions
Les réglages en usine du controlleur de batterie Xantrex conviennent
à un système de batterie au plomb 12 V standard de 200 Ah. Dans la
plupart des cas de contrôle d’un système 12 V, seule la capacité de la
batterie (F01) nécessite par conséquent une éventuelle modification.
Si vous utilisez d’autres types de batteries, veillez à bien connaître
toutes les spécifications appropriées pour pouvoir configurer les
fonctions du controlleur de batterie Xantrex comme il se doit.
Vous pouvez régler votre controlleur de batterie Xantrex sur la base
de 20 paramètres (autrement appelés ‘Fonctions’) différents. Avant
de régler le controlleur de batterie Xantrex, il vous faut d’abord
activer le mode de configuration. Pour ce faire, il suffit d’appuyer
longuement (3 secondes) sur la touche SETUP. L’écran se met à
clignoter pour indiquer que le mode de configuration est actif. Pour
sélectionner la fonction de votre choix, appuyez plusieurs fois sur la
touche SETUP. La fonction sélectionnée apparaît sous la forme ‘Fxx’,
sachant que xx correspond au numéro de la fonction. Les touches <
et > servent à modifier la valeur de la fonction sélectionnée. Pour
sélectionner une autre fonction, appuyez de nouveau sur la touche
SETUP. Pour enregistrer les r églages modifiés dans la mémoire du
controlleur de batterie Xantrex, appuyez longuement (3 secondes)
86

sur la touche SETUP jusqu’à ce que l’écran cesse de clignoter et que
le controlleur de batterie se remette en mode de fonctionnement
normal. Si aucune touche n’est actionnée pendant 90 secondes en
mode de configuration, le controlleur de batterie Xantrex retourne
automatiquement en mode de fonctionnement normal sans que les
réglages effectués ne soient sauvegardés.
Le tableau ci-dessous offre un aperçu de l’ense mble des f oncti ons du
controlleur de batterie Xantrex, chacune accompagnée d’une
description succincte. Pour la m ajeure partie des systèmes de
batterie, il suffit de régler les valeurs des fonctions F01, F02, F03,
F07 et F08. En cas de dou te, il est recommandé de ne pas toucher
aux fonctions F04, F05, F06, F09, F10, F11, F12, F13, F14, F15, F16,
F17, F18 et F20.
F01 Capacité de la batterie en ampères-heures (Ah). Il doit
s’agir de la capacité selon un régim e de décharge de 20
heures à 20 °C (68 °F).
Valeur par
défaut Plage Taille graduelle
200 Ah 20 – 2000 Ah 1 Ah
F02 Paramètre de charge Tension. La batterie doit avoir une
tension supérieure à ce niveau pour être considérée
comme complètement chargée. Assurez-vous que le
paramètre de charge Tension est tou jours légèrement audessous du niveau auquel le chargeur finit de charger la
batterie (d’ordinaire 0,1 V ou 0,2 V au-dessous de la
tension en phase ‘Entretien’ du chargeur).
Valeur par
défaut Plage Taille graduelle
13,2 V 8,0 – 33,0 V 0,1 V
F03 Paramètre de charge Courant. Quand la valeur du
courant de charge est in férieure à ce pourcentage de la
capacité de la batterie (cf. la fonction F01), la batterie
peut être considérée comme complètement chargée.
Assurez-vous que le paramètre de charge Courant est
toujours supérieur au niveau minimum auquel le
chargeur maintient la batterie ou cesse de charger.
87

Valeur par
défaut Plage Taille graduelle
2,0 % 0,5 – 10,0 % 0,5 %
F04 Paramètre de charge Temps. Il s’agit de la durée à
laquelle les paramètres de charge (selon la description
des fonctions F02 et F03) doivent se conformer pour que
la batterie soit considérée comme complètement chargée.
Valeur par
défaut Plage Taille graduelle
4 minutes 1 – 4 minutes 1 minute
F05 Alarme de batterie faible ACTIVÉE (ON) – niveau de
décharge. Lorsque le pourcentage d’état de charge
en dessous de cette valeur, le relais de l’alarme est activé
et CHARGE BATTERY se met à clignoter sur l’écran,
indiquant qu’il faut charger la batterie. Le calcul du
temps restant et le diagramme à barres de l’état de charge
sont également liés à cette valeur. Il est recommandé de
maintenir cette valeur à ou aux environs de 50 %.
tombe
Valeur par
défaut Plage Taille graduelle
50,0 % 0,0 – 99,0 % 1,0 %
F06 Alarme de batterie faible DÉSACTIVÉE (OFF). Lorsque
le pourcentage d’état de charge
relais de l’alarme est activé, puis de nouveau désactivé. Si
FULL est sélectionné, le relais de l’alarme est désactivé
au moment où les paramètres de charge concordent.
dépasse cette valeur, le
Valeur par
défaut Plage Taille graduelle
80,0 % 0 – 100 % /
CHARGE
COMPLÈTE
1,0 %
88

F07 Alarme de sous-tension. Quand la tension de la batterie
tombe en dessous de cette valeur, le message Lo apparaît
sur l’écran au bout de 10 secondes et le relais de l’alarme
est activé.
Valeur par
défaut Plage Taille graduelle
10,5 V OFF / 8,0 -33,0 V 0,1 V
F08 Alarme de surtension. Quand la tension de la batterie
dépasse cette valeur, le message Hi apparaît sur l’écran
au bout de 5 secondes et le relais de l’alarme est activé.
Valeur par
défaut Plage Taille graduelle
16,0 V OFF / 10,0 -35,0 V 0,1 V
F09 ‘Charge Efficiency Factor (CEF)’ ou Facteur de
rendement de charge. Il est recommandé de maintenir
cette valeur sur AU (calcul automatique). La valeur A90
réinitialise le calcul automatique à 90 %. Un réglage
manuel est représenté par Uxx, sachant que xx
correspond au rendement de la charge. (Cf. page 84 pour
plus de détails sur le CEF.)
Valeur par
défaut Plage Taille graduelle
AU U50 – U99 / AU /
F10 Exposant Peukert (rendement de décharge). Quand elle
n’est pas connue, il est recommandé de maintenir cette
valeur à 1,25. Une valeur de 1,00 désactive la
compensation Peukert. Appelez le service Relations
clientèle ou le fabricant de votre batterie avant de
modifier ce réglage.
A90
1 %
Valeur par
défaut Plage Taille graduelle
1,25 1,00 – 1,50 0,01
89

F11 Température de la batterie. La température moyenne de
la batterie est ajustable au niveau de cette fonction. La
valeur AU permet une mesure automatique de la
température sous réserve qu’un capteur de température
externe ait été connecté au controlleur de batterie
Xantrex. L’affichage de la température en mode normal
est également possible. Si AU est sélectionné et que la
connexion au capteur de température est perdue, quatre
tirets (- - - -) apparaissent et de s calcu ls de compen sation
thermique interne sont effectués sur la base de la valeur
par défaut, soit 20 °C. Cette fonction ne peut se régler
qu'en °C. Utilisez les formules suivantes pour convertir
des °C en °F: T(
) = (T(°F) – 32) / 1,8.
et T(
°C
) = (T(°C) x 1,8) + 32
°F
Valeur par
défaut Plage Taille graduelle
20 °C 0 – 50 / AU 1 °C
F12 Coefficient de température. Il s’agit du pourcentage de
modification de la capacité de la b atterie par rapport à la
température. L’unité de cette valeur se définit en ‘%cap/
°C’ ou pourcentage de la ca pacité par degré Celsius. Le
réglage par défaut est 0,5 %cap/°C, soit la valeur type
pour la majeure partie des batteries. Le réglage OFF
désactive la compensation thermique.
Valeur par
défaut Plage Taille graduelle
0,5 %cap/ °C OFF / 0,05 – 0,95
F13 Temps restant moyen. Spécifie la durée (en minutes) de
fonctionnement du filtre de moyenne mobile. Le temps
adéquat à sélectionner dépend de votre installation. La
valeur 0 désactive le filtre, donnant un affichage
instantané (en temps réel) ; une importante fluctuation
des valeurs qui apparaissent est néanmoins possibl e. Une
sélection de la durée la plus longue (12 minutes) garantit
la prise en compte de fluctuations de charge à long terme
dans les calculs du temps restant.
%cap/ °C
0,05 %cap/ °C
90

Valeur par
défaut Plage
3 minutes 0 / 3 / 6 / 9 / 12 minutes
F14 Seuil du courant. Lorsque le courant mesuré tombe en
dessous de cette valeur, son intensité est évaluée à zéro
ampère. Cette fonction permet d’éliminer des courants de
très faible intensité pouvant avoir des conséquences
négatives sur l’affichage de l’état de charge à long terme
dans les environnements très perturbés. Par exemple, si
le courant réel à long terme est évalué à +0,05 A et qu’en
raison de perturbations ou de petits décalages survenus,
l’écran affiche –0,05 A, le controlleur de batterie Xantrex
peut indiquer à tort qu’il faut recharger la batterie
pendant longtemps. Dans ce c as, réglez la fonction 14 à
0,1. Le controlleur de batterie Xantrex effectue le calcul
sur la base de 0,0 A pour éviter les fausses suppositions.
La valeur 0,0 désactive la fonction.
Valeur par
défaut Plage Taille graduelle
0,0 A 0,0 – 2,0 A 0,1 A
F15 Sélection de l’unité de température. Cette fonction
permet de choisir entre des degré s Celsius (°C) et des
degrés Fahrenheit (°F) pour la lecture de la température.
Valeur par
défaut Plage
°C °C, °F
F16 Générateur d’échelles de tension. Cette fonction n’a
d’importance que si un générateur d’échelles en option
est installé à l’entrée de lecture de la tension de la batterie
sur le controlleur Xantrex. Le paramètre de charge
Tension et les réglages d’alarme en cas de sous-tension et
de surtension sont liés à cette fonction. Veillez à ne pas
modifier cette valeur si vous ne disposez pas d’un
générateur d’échelles !
91
 Loading...