WIKA CPH6000 Specifications

Calibration technology
ProcessCalibrator
Model CPH6000
WIKA data sheet CT 15.01
Applications
■■ Calibration service companies/service industry ■■ Maintenance facilities
■■ Measurement and control laboratories ■■ Quality assurance
Special features
■■ Digital indicator with easily interchangeable reference pressure sensors (sensor can also be attached externally)
■■ Measuring ranges from 0 ... 250 mbar to 0 ... 8,000 bar
■■ Accuracy:0.025 % (incl.calibration certificate)
■■ Calibration and pressure-switch test functions
■■ Software and complete service cases (incl. pumps) available
Description
Handling
For a solution that always matches the application, there are many pressure sensors to choose from, with accuracies of up to 0.025 % and measuring ranges up to 8,000 bar, which can be interchanged quickly and without tools. In addition to being fixed to the instrument, the reference pressure sensor can, optionally, be used externally via an approx. 1.2 m long connecting cable. If the reference pressure sensor on the instrument is changed, then the digital indicator will recognise the new measuring range and so this saves the operator from having to configure it via the menu.
Functionality
In the setup menu there are 3 operating modes to choose from:
MEASURING, CALIBRATION and PRESSURE SWITCHTEST. In the CALIBRATION and PRESSURE SWITCHTEST modes, a menu assistant supports the user during each operation and records, for example, the calibration data from several calibrations or automatically calculates the switch hysteresis. To power the test item and to read its measurement signals, there are electrical inputs and outputs which are protected from adverse conditions in the field by captive protection caps.
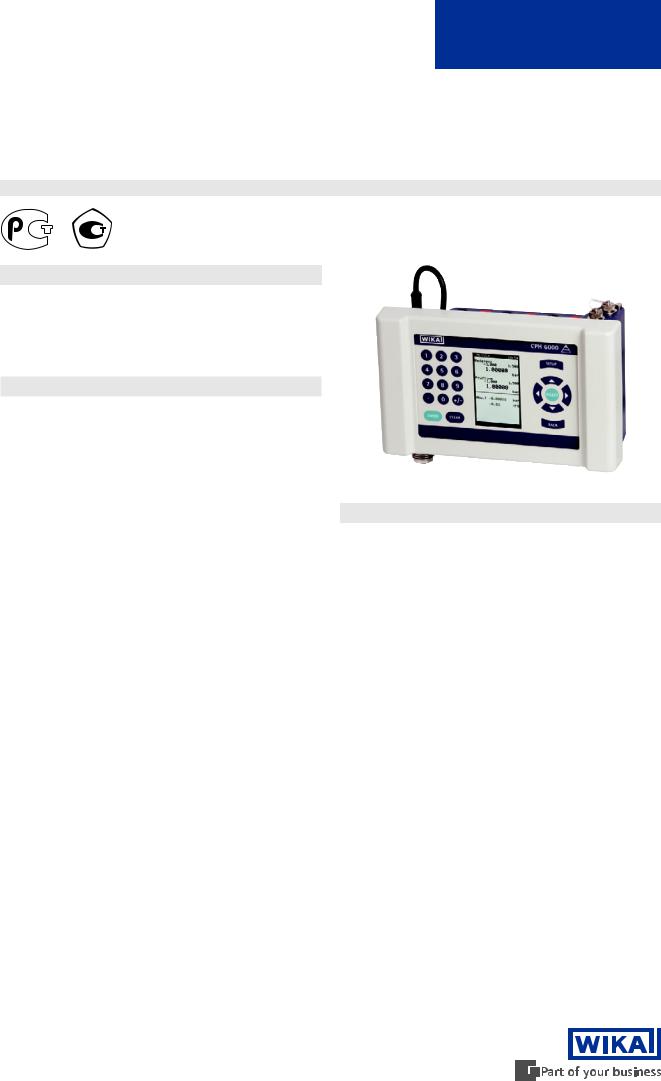
ProcessCalibrator model CPH6000
Software
For the evaluation and documentation of the calibration data stored in the CPH6000, WIKA-CAL calibration software
is available. Using this software, the data is automatically transferred into a printable calibration certificate. Furthermore,WIKA-CAL also offers, over and above
PC-supported calibration, the management of the calibration and instrument data in an SQL database. For data transfer, an RS-232 and a USB interface are available.
Complete test and service cases
For maintenance and service applications, various service case systems are available. These include service cases with or without pressure generation, charger, test-cable set, adapter, etc.
Certified accuracy
For each reference pressure sensor, the accuracy is certified by a factory calibration certificate which accompanies the instrument. On request, we are also pleased to provide a
DKD/DAkkS calibration certificate for the instrument from our own DKD/DAkkS laboratory.
|
|
WIKA data sheet CT 15.01 ∙ 03/2014 |
Page 1 of 10 |
Data sheets showing similar products and accessories:
Test pumps, hydraulic; model CPP series; see data sheet CT 91.05
Test pump, pneumatic; model CPP30; see data sheet CT 91.06
Calibration software; WIKA-CAL; see data sheet CT 95.10

Specifications
ProcessCalibrator model CPH6000
Sensor technology |
1 reference pressure sensor (interchangeable without tools) 1); optional: external operation via 1.2 m cable |
|
||||||||||
Measuring range |
bar |
0 ... 0.25 |
0 ... 0.4 |
0 ... 0.6 |
0 |
... 1 |
0 ... 1.6 |
0 ... 2.5 |
0 ... 4 |
0 ... 6 |
0 ... 10 |
0 ... 16 |
Overpressure limit |
bar |
1.6 |
2 |
4 |
5 |
|
10 |
10 |
14 |
35 |
35 |
80 |
Burst pressure |
bar |
2.4 |
2.4 |
4.8 |
6 |
|
12 |
12 |
20.5 |
40 |
42 |
96 |
Accuracy of the measuring chain |
0.025 % FS 2) |
|
|
|
|
|
|
|
|
|
|
|
Measuring range |
bar |
0 ... 25 |
0 ... 40 |
0 ... 60 |
0 |
... 100 |
0 ... 160 |
0 ... 250 |
0 ... 400 |
0 ... 600 |
0 ... 1,000 |
|
Overpressure limit |
bar |
80 |
80 |
120 |
200 |
320 |
500 |
800 |
1,200 |
1,500 |
|
|
Burst pressure |
bar |
96 |
96 |
550 |
800 |
1,000 |
1,200 |
1,700 |
2,400 |
3,000 |
|
|
Accuracy of the measuring chain |
0.025 % FS 2) |
|
|
|
|
|
|
|
|
|
|
|
Measuring range |
bar |
0 ... 1,600 |
0 ... 2,500 |
0 ... 4,000 |
0 |
... 5,000 |
0 ... 6,000 |
0 ... 7,000 |
0 ... 8,000 |
|
|
|
Overpressure limit |
bar |
2,300 |
3,500 |
5,000 |
6,000 |
7,000 |
8,000 |
10,000 |
|
|
|
|
Burst pressure |
bar |
4,000 |
6,000 |
8,000 |
10,000 |
11,000 |
11,000 |
12,000 |
|
|
|
|
Accuracy of the measuring chain |
0.1 % FS 2) |
|
|
|
|
|
0.15 % FS 2) |
|
|
|
||
Types of pressure |
Relative pressure, {absolute pressure measuring ranges from 0 ... |
25 bar abs. and vacuum measuring ranges from |
||||||||||
|
-1 ... +39 bar} |
|
|
|
|
|
|
|
|
|
|
|
Sensor compatibility |
Compatible with model CPT6000 reference pressure sensors |
|
|
|
|
|
||||||
{} |
Items in curved brackets are optional extras for an additional price. |
1) |
Up to 10 reference pressure sensors can be supported on each instrument (up to 10 calibration data sets). |
2) |
Calibrated at 23 °C and in vertical mounting position, pressure connection facing downwards. |
Digital indicator model CPH6000
Display |
|
Display |
Large TFT colour screen for the display of reference and test signals and additional information |
Display resolution |
up to 6 digits; adjustable |
Pressure units |
mbar, bar, psi, Pa, hPa, kPa, MPa, mmHg, cmHg, inHg, mmH2O, cmH2O, mH2O, inH2O, kg/cm² and |
|
a customer-specific unit (freely selectable dependant on measuring range) |
Functions |
|
Operating mode |
MEASURING, CALIBRATION and SWITCH-TEST |
Measuring rate |
2 values/s |
Functions |
MEASURING, CALIBRATION and SWITCH-TEST |
|
Min/Max memory,Tare, Min/Max alarm (audible/visual), filter (running average), zero-point adjust- |
|
ment, PowerSave function |
Menu languages |
English, German, Spanish, French, Italian, Russian (settable) |
CALIBRATE function |
|
Memory capacity |
up to 16 test items |
Test points/test item |
up to 32 comparison points |
SWITCH-TEST function |
|
Switch points |
Determination of the switch point and automatic calculation of the hysteresis |
Measuring input, voltage 3) |
|
Measuring range |
DC 0 … 1 V; DC 0 ... 2 V; DC 0 ... 5 V; DC 0 ... 10 V |
Resolution |
up to 6 digits; adjustable |
Accuracy |
0.5 mV |
Measuring input, current 3) |
|
Measuring range |
0 ... 20 mA; 4 ... 20 mA |
Resolution |
up to 6 digits; adjustable |
Accuracy |
1.6 µA |
Output |
|
Voltage supply |
DC 24 V [load: max. 50 mA; min 20 mA] (can be activated via menu) |
Power supply |
|
Supply |
Internal Lithium-Ion rechargeable battery (charging time: < 6 h) |
Battery life |
approx. 20 hours of operation |
3)Factory calibration certificate (optional:DKD/DAkkS calibration certificate).
Page 2 of 10 |
WIKA data sheet CT 15.01 ∙ 03/2014 |

Digital indicator model CPH6000
Permissible ambient conditions |
|
Operating temperature |
0 ... 50 °C |
Storage temperature |
-20 ... +70 °C |
Relative humidity |
0 ... 85 % r. h. (non-condensing) |
Communication |
|
Interface |
RS-232 and USB |
Case |
|
Material |
impact-resistant ABS plastic, membrane keypad, transparent screen |
Ingress protection |
IP 54 (with protection caps closed) |
Dimensions |
see technical drawing |
Weight |
approx. 850 g |
Reference pressure sensor model CPT6000
Pressure connection |
≤ 1,000 bar:G ½ B;{various connection adapters on request} |
|
> 1,000 bar: M16 x 1.5 female, with sealing cone |
Material |
Stainless steel (with measuring ranges > 25 bar ...≤ 1,000 bar Elgiloy® in addition) |
Wetted parts |
|
Internal transmission fluid |
Synthetic oil (only for measuring ranges up to 25 bar) {Halocarbon oil for oxygen variants} 4) |
Sensor specifications |
|
Accuracy per year |
≤ 0.025 % FS (only with CPH6000) |
Compensated range |
0 ... 50 °C |
Permissible ambient conditions |
|
Medium temperature 1) |
-20 ... +80 °C 4) |
Operating temperature |
-20 ... +80 °C |
Storage temperature |
-40 ... +85 °C 4) |
Relative humidity |
0 ... 95 % r. h. (non-condensing) |
Case |
|
Material |
Stainless steel |
Connection to the CPH6000 |
Option: external operation via 1.2 m connection cable (plug-and-play) |
Ingress protection |
IP 65 (with cable connected) |
Dimensions |
see technical drawing |
Weight |
approx. 230 g |
{} |
Items in curved brackets are optional extras for an additional price. |
4) |
For oxygen versions, the medium temperature must not exceed 60 °C. |
CE conformity, approvals, certificates
CE conformity, CPH6000 |
|
EMC directive |
2004/108/EC, EN 61326 emission (group 1, class B) and interference immunity (portable measuring |
CE conformity CPT6000 |
equipment) |
|
|
Pressure equipment directive |
97/23/EC; module A |
EMC directive |
2004/108/EC, EN 61326 emission (group 1, class B) and interference immunity (industrial application) |
Approvals |
|
GOST-R |
Import certificate, Russia |
GOST |
Metrology/measurement technology, Russia |
Certificates |
|
Calibration |
Standard:3.1 calibration certificate per DIN EN 10204 |
|
Option:DKD/DAkkS calibration certificate |
Approvals and certificates, see website
WIKA data sheet CT 15.01 ∙ 03/2014 |
Page 3 of 10 |
 Loading...