

Page 1
Page 2
PN 4000/6000
For your safety
Before you start to install and use this navigation system, please familiarise yourself with its
various components and functions. Furthermore, please read through the safety instructions
carefully to avoid causing injury to yourself and/or other road users.
Do not subject the navigation system to high temperatures or extreme exposure to
sunlight. Temperatures over 50 °C can severely damage the navigation system, especially the lithium ion battery. The lithium ion battery can only be charged within a
temperature range of 0-45 °C. Please note the safety instructions when operating the
battery!
The device is not splashproof and must therefore not be exposed to moisture, as this
may result in damage.
GPS (Global Positioning System) is a satellite-based system that supports geographical
and time-related information all around the world. The system is operated and controlled by the United States of America. The USA is also responsible for the availability
and accuracy of this system. All changes to the GPS availability and accuracy, as well as
other factors from the surrounding environment can influence the operation of the
navigation system. The supplier of this system does not accept any liability whatsoever
for the availability and accuracy of GPS data.
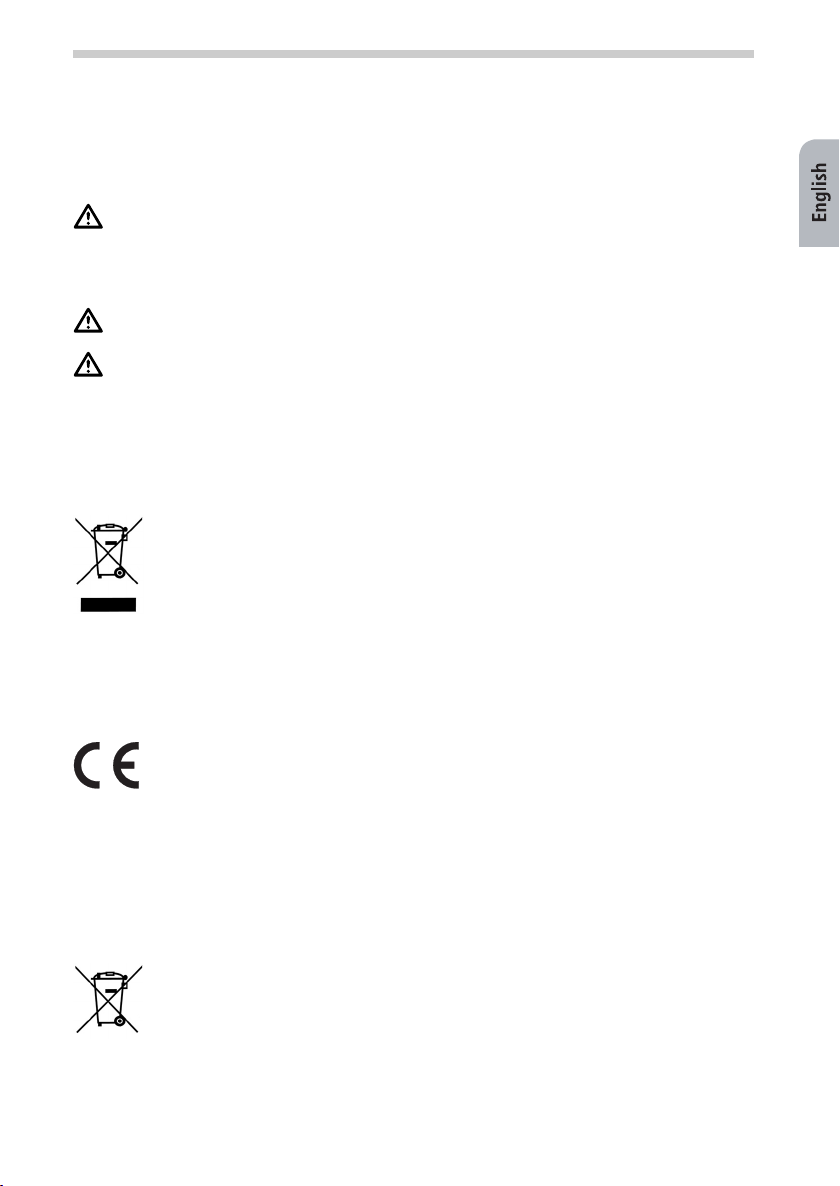
WEEE compliance
All electrical and electronic equipment must be disposed of separately from general household waste using the sites designated by local authorities. If a product
displays this symbol of a crossed-out rubbish bin, the product is subject to European Directive 2002/96/EC. The appropriate disposal and separate collection of
used equipment serve to prevent potential harm to the environment and to
health. They are a requirement for the re-use and recycling of used electrical and
electronic equipment. For further information on disposing of your used equipment, please contact your local authority, your refuse collection service or the
dealer you purchased the product from.
9
CE quality mark
This product satisfies the requirements for the CE quality mark for use in a home,
office or commercial environment.
R&TTE directive
We, Siemens VDO Trading GmbH, declare that this device complies with the essential
requirements and other pertinent regulations laid down in Directive 1999/5/EC.
The declaration of conformity can be requested from the following address:
Siemens VDO Trading GmbH, Kruppstraße 105, 60388 Frankfurt am Main, Germany.
Batteries/rechargeable batteries
In many countries it is forbidden to dispose of flat batteries and rechargeable
batteries with normal household waste. Please find out the regulations that apply in your area regarding the disposal of used batteries/rechargeable batteries.
Please also dispose of damaged batteries or batteries that are past their expiry
date in a safe and suitable way.
Page 3
10
PN 4000/6000
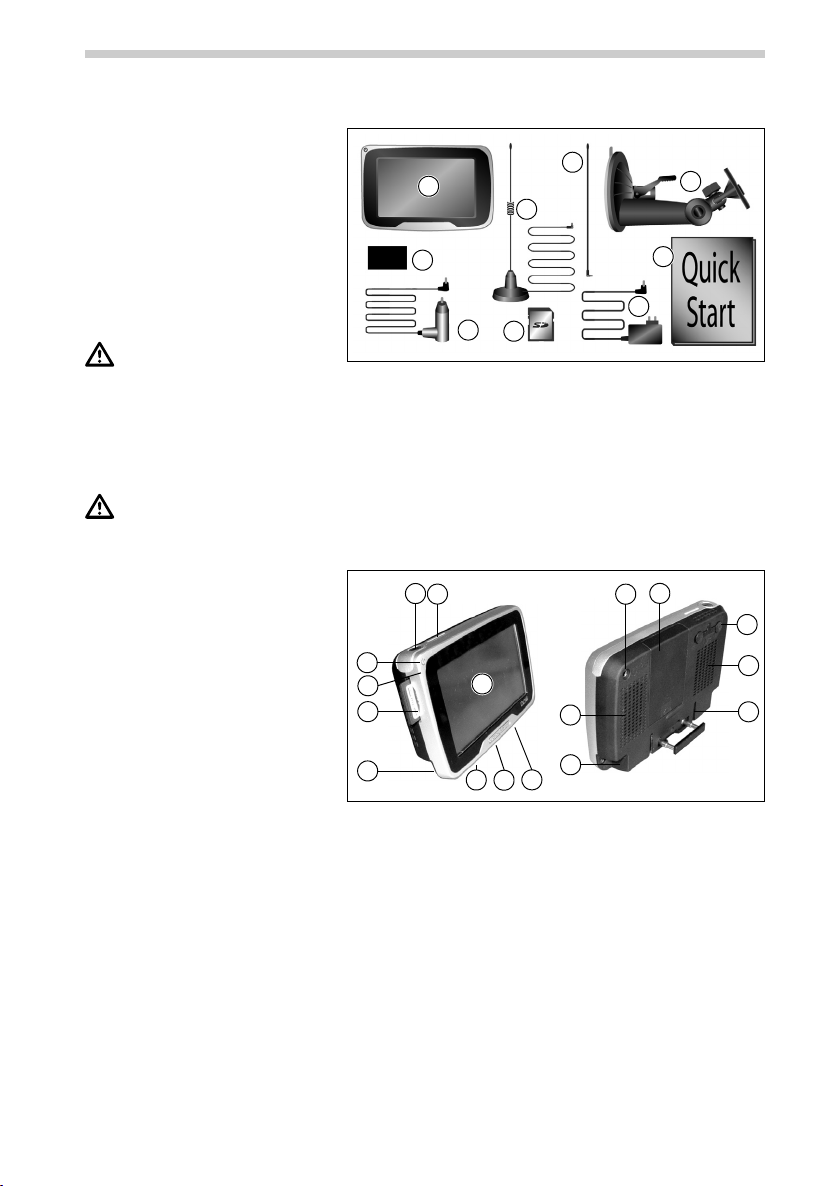
What's included?
1 Navigation system
2 Lithium ion battery
3 Cradle with suction cup to
attach the device to the
windscreen
1
9
3
8
4 12 V DC cable to power the
navigation system from
2
6
within the vehicle (adapter
for cigarette lighter)
5 100/240 V AC adapter
You must not use any
4
7
5
cables other than the AC
adapter and DC cable provided to power the device and to charge the battery!
6 Quick Start Guide
7 SD card with map data
8 DVB-T antenna (with cable)
9 DVB-T antenna (without cable)
Headphones/volume adjustment: high volumes can damage or reduce your hearing.
Overview of device
1 Power button
1
2 Light sensor
2
3 Display/touchscreen
4 Status LED
5 Infrared sensor
useful in conjunction with
RCS 5100 steering wheel
remote control (accessory)
4
5
11
3
9
6 Compartment for lithium ion
battery (cover)
7 Connection for external GPS
12
16
15
13
14
antenna
8 Connections for DVB-T antennae
9 Loudspeaker
10 Grooves for cradle fixation
11 Slot for SD card*
12 Headphone socket
13 Connection for 100 V/240 V adapter or 12 V cigarette lighter cable
14 Serial connection – for active cradle (optional)
15 USB port for connection to your PC
16 Reset button
*"Secure Digital Card" and the "Secure Digital Logo" are legal trademarks of the SD Card
Association.
6
7
8
9
10
Page 4

PN 4000/6000
Getting started
Before you can switch on the navigation system
for the first time, you must insert the battery.
This is done by performing the following steps:
• Open the battery compartment.
• Push the battery into the battery compartment with the connection contacts facing
downwards. You can now close the battery
compartment.
• Connect the navigation system to the 12 V
power supply in your vehicle. The battery
will now start to charge. It takes approx.
8 hours to fully charge the battery.
The battery life without an external power
source for the PN 4000 is approx. 5 hours for
navigation and approx. 2 hours for DVB-T
use (PN 6000: approx. 6 hours for navigation
and approx. 4 hours for DVB-T). In addition,
the battery life depends on the display
brightness you have set.
• Insert the supplied SD card containing the maps into the SD card slot.
The battery must only be charged whilst someone is monitoring it. Do not open the
battery with force as this may release corrosive acids. Damaged batteries or batteries
that are past their expiry date should no longer be used and should be disposed of in
a safe and suitable way.
11
Installation
• Before attaching the cradle to the front windscreen, you should clean the area on the
windscreen to remove grease and dust.
• Differences between daytime and nighttime temperatures and/or humidity and moisture can break the vacuum seal under the suction cup of the cradle. You should therefore
attach the navigation system so that it will not be damaged if it falls off the windscreen.
As a precautionary measure, you should detach the navigation system at night.
• Please do not use any cleaning agents or detergents to clean the screen and case of the
device. The best method is to use a soft, damp cloth.
The device must not be attached in a way that obscures the view. Nor should the
device be attached within the area in which the airbags open or within reach of the
head or knees in the event of a collision.
Secure the device so that it will not slide around in the event of emergency braking or
a collision.
Page 5

12
To install the device in the vehicle, proceed as follows:
• Find a suitable place in the vehicle for attaching
the cradle. The screen should be clearly visible from
the driver's seat but the device should not obscure
the driver's view.
• Press the suction cup against the glass (with a clear
view of the sky) and move the pressure lever towards the glass until it locks in place.
• Attach the navigation system to the cradle.
Detaching: To detach the device, move the
pressure lever to the opposite direction and
carefully pull the transparent rubber end of the
suction cup to remove it from the windscreen.
For safety reasons you should install the device and enter the required information in
the system before you start your journey or when your vehicle is stationary.
The use of the navigation system does not under any circumstances release the driver
from their personal responsibility. The applicable road traffic regulations and current
traffic conditions always have priority. The information provided by the device is for
orientation purposes only and is not binding.
Always check the information provided by the device (speed, remaining travelling
time, distance, recommended route).
Only look at the screen when it is safe to do so. If you need to look at the screen for a
longer period of time, stop the vehicle at an appropriate and safe place.
The touchscreen must not be operated with sharp or rough-edged objects as these can
damage it.
If you leave the vehicle for long periods you should take the navigation system with
you to avoid theft.
PN 4000/6000
GPS reception
When you switch on the device for the first time, it can take several minutes for the GPS
reception to reach a sufficient level and to determine your current position.
Always hold the navigation system vertically.
If you are using the navigation system in an inner-city area, it may take longer to
refresh the map details.
Page 6

PN 4000/6000
Navigation
• After switching on the navigation system, the legal disclaimer screen appears.
• Tap OK after reading the screen.
• As soon as the system is ready, the Main menu will appear on the screen.
Main menu
Tap on
Settings > Regional.
• Language: select your preferred language for
the menu and map display.
• Voice: select the preferred voice for the navigational information.
• Units: switch between km and miles.
• House number position: in the first or last place.
• Time format: switch between 12h/24h time format.
• Time zone: select your current time zone.
Tap the Back button in the top left corner of the screen to exit from a sub-menu without saving changes. You return to the previous menu. If you tap OK the selections you
have made are confirmed and you return to the previous menu.
Enter destination
First select your destination. Tap the Destination button in the Main menu. This
menu gives you several options.
You can enter an Address or select an address from your Address book, from the
list of your previous destinations (History) or a special destination (POI, e.g.
restaurant, petrol station or car dealer).
Tap the Address button.
13
• Tap the country entry. Scroll up and down the
list to select the desired country.
• Tap the city entry and type the name of the city
you wish to travel to.
• Tap the street entry and type the name of the
desired street.
• Finally, choose the house number and tap OK.
Page 7

14
List button: After you have typed a
few letters you can tap the List button.
A list of matching results is displayed.
The number of entries that exist under
this button is displayed in small digits.
Switch between alphabetical, numerical
and accented characters/special characters by using the keyboard toggle.
By using the "backspace" button, you
can delete incorrect entries (either
whole words or individual letters).
PN 4000/6000
Map display
When you have set your destination the route will
automatically be calculated and displayed on the
map. You can now start driving and the navigation
system will guide you to your specified destination.
By tapping the Map display button in
the Main menu you directly enter the
map display.
Fast access to important system settings.
Stop Guidance
By tapping the Stop Guidance button the current guidance will be stopped.
Multimedia/DVB-T
You can use your PN 4000/6000 to receive television programmes via DVB-T (Digital Video
Broadcasting Terrestrial).
There might not be as many channels available as there are on your home set, and the
DVB-T standard is not available in all countries. The reception quality also depends on
a number of factors, e.g.:
• The number of transmitters, their distance and their power
• The speed and direction in which your vehicle is moving.
Other factors that might impair reception quality include:
• Multipath reception when operated as the vehicle is moving, e.g. through builtup areas
• Weak signal when overshadowed by other vehicles, travelling through underpasses, etc.
Page 8

PN 4000/6000
For DVB-T reception, connect both the DVB-T antennae included in the scope of delivery to the PN 4000/6000. Open the rubber cover on the top right of the back and plug
in the antenna cables. The two antennae must be positioned at least 50 cm apart to
enable reception.
DVB-T picture reception switches off at speeds greater than 7 km/h unless the VDO
Dayton back seat cradle is used. DVB-T sound reception and navigational information
continue to be available.
To switch on the television, tap the DVBT button in the Multimedia menu.
The television screen will be displayed
with the buttons for operating the television receiver.
Scanning for and selecting a channel
Call up the scanning and channel selection functions by
tapping the Channels bar at the top of the screen.
15
Tap the Channels bar to open the relevant submenu.
Tap the Scanning Channels button to
start scanning.
Once the search has ended the list of channels
found will be displayed. Tap the required channel
to view the current programme.
Exit the sub-menu by tapping the Back
button and return to the previous
menu.
You can now scroll between the programmes using
the up/down arrow buttons on both sides of the
Channels bar.
Page 9

16
PN 4000/6000
System settings
After tapping the Settings button you can make various system settings.
Channel and programme selection (EPG – Electronic Program Guide)
Call up the channel and programme selection function by tapping the EPG
button. This displays an overview of channels and current programmes.
Teletext
When a channel is active you can also view the teletext pages for that channel by
tapping the Teletext button. If you want to go straight to a particular teletext
page, tap the screen to call up the numbers keypad. Enter the required page
number on the screen to bring up the page.
Exit DVB-T mode
Exit DVB-T mode by tapping the Back button to return to navigation mode.
Please note:
Further information about the functions offered by the PN 4000/6000 may be found in the
detailed operating instructions available for downloading at www.vdodayton.com.
Legal notice
© 2007 Siemens VDO Trading GmbH
Siemens VDO Trading GmbH, Kruppstraße 105, 60388 Frankfurt am Main, Germany
All rights reserved. These operating instructions are protected by copyright. Subject to tech-
nical and visual changes as well as printing errors.
The information contained in this document is subject to change at any time without prior
notification. Siemens VDO Trading GmbH reserves the right to modify or improve its products and modify the contents without obligation to inform any particular persons or organ-
isations. The device specifications and the contents of the package may deviate from what
is stated in this document.
Service
For current information on VDO Dayton Multimedia Systems, service addresses and software
updates please visit our website:
www.vdodayton.com
or contact a VDO Dayton dealer.
 Loading...