

Page 1

QUICK LOGIC MIXER FOR DM-24
OVERVIEW
This solution is recommended for those times when only VOLUME, PAN and
Program change parameters are needed. The advantage of using this mixer in
place of the template is that the tracks will be part of LOGIC’S MIXER and
therefore will be available on the same screen. If more in depth control is
needed then the DM-24 TEMPLATE would be a better choice.
What this solution will do:
1) SEND/RECEIVE Volume (CC#7)
2) SEND/RECEIVE Pan (CC#10)
3) SEND/RECEIVE SySex (as recorded into Logic Tracks)
4) SEND/RECEIVE DM-24 Track Automation (recorded real-time into Logic
tracks)
What it will NOT do:
1) Send Custom CC#s (other than those RECORDED into Logic’s tracks).
2) Send SySex (other than SySex recorded/dumped into Logic Tracks).
The main difference between this and the DM-24 template is that the template
allows the programming of Custom CC# & SySex commands to faithfully
represent the DM-24 surface. Using a MULTI will allow only the above listed
controls but, will be part of Logic’s MIXER and therefore easier to access and
control for those times when quick adjustments of basic controller are needed
(i.e. Volume, Pan, Prg. Chg). It will not send MUTE info since it uses Logic’s
internal code to mute its own tracks, without sending an equivalent MIDI
controller number. However, it will record MUTE commands FROM the DM24 and play them back as recorded making it possible to do automated
mutes.
Page 2
CREATING A DM-24 MULTI
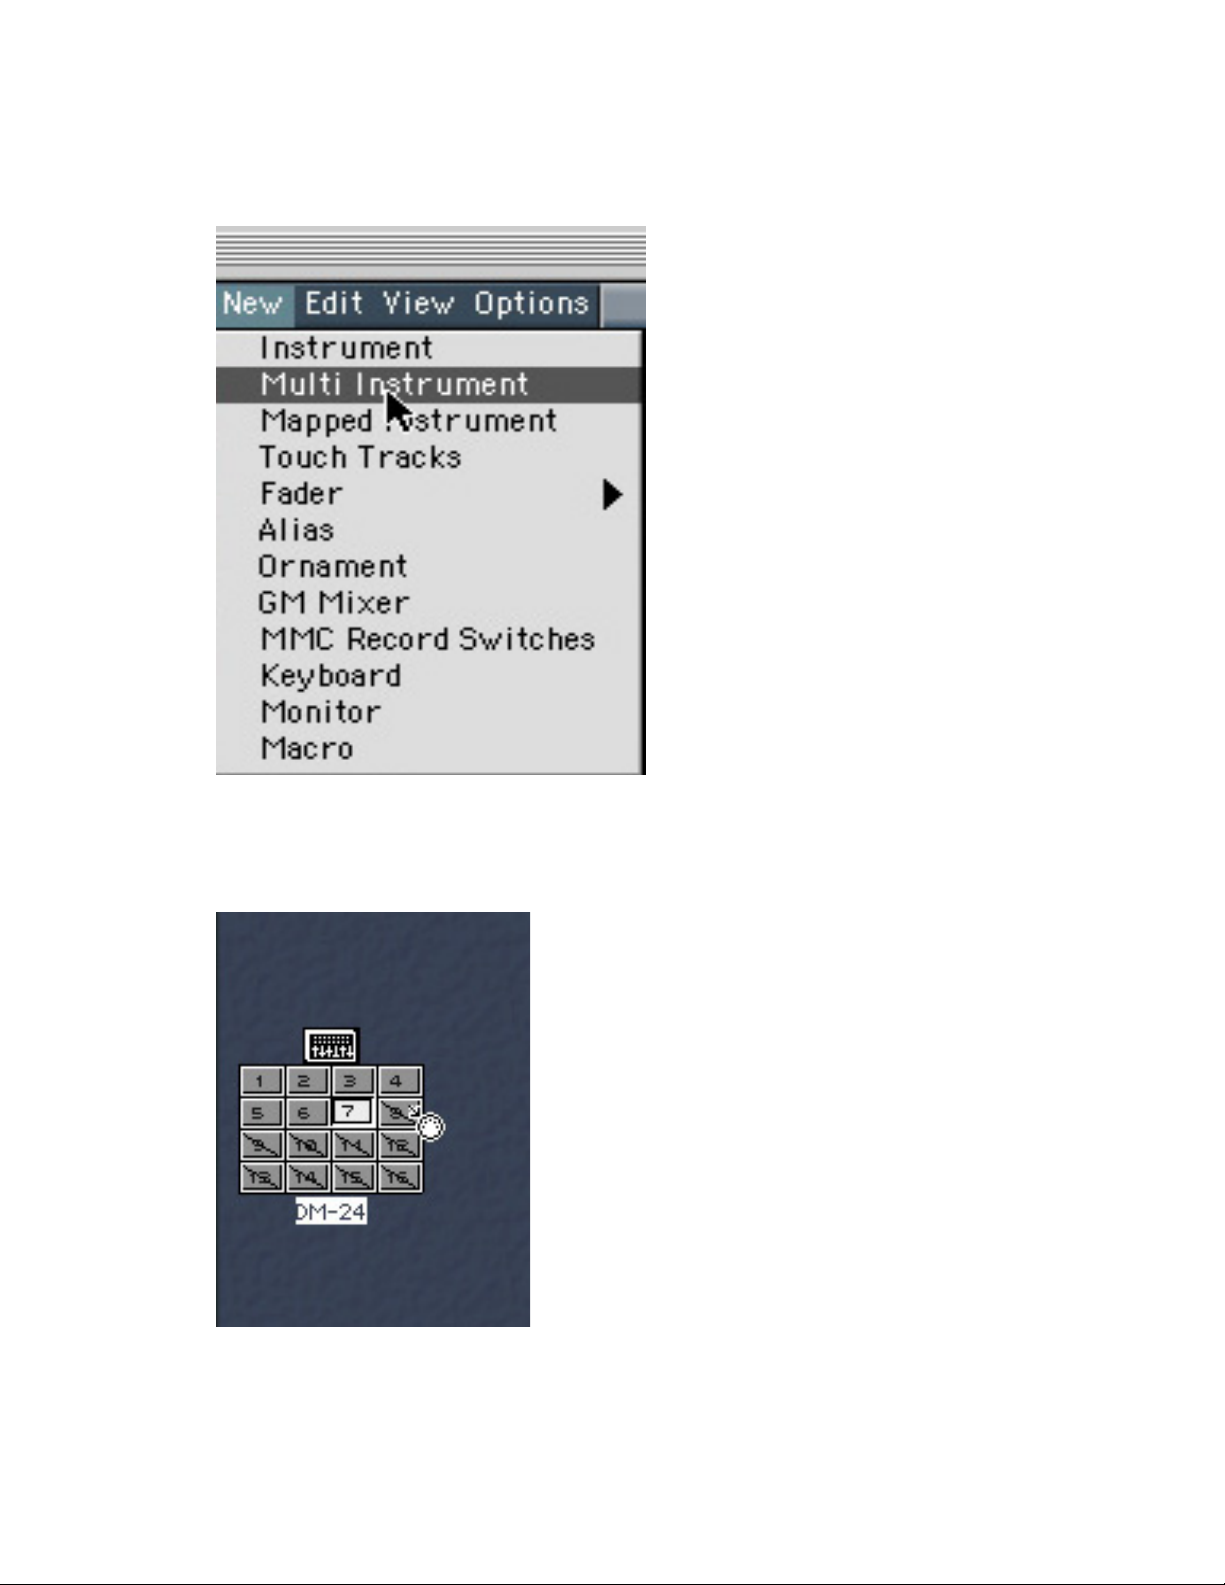
Open Logic’s ENVIRONMENT and choose NEW>MULTI.
You will see that the channels within the newly created MULTI are crossed.
Click on each one to activate them so that they will be visible (and selectable)
from the Arrange window.
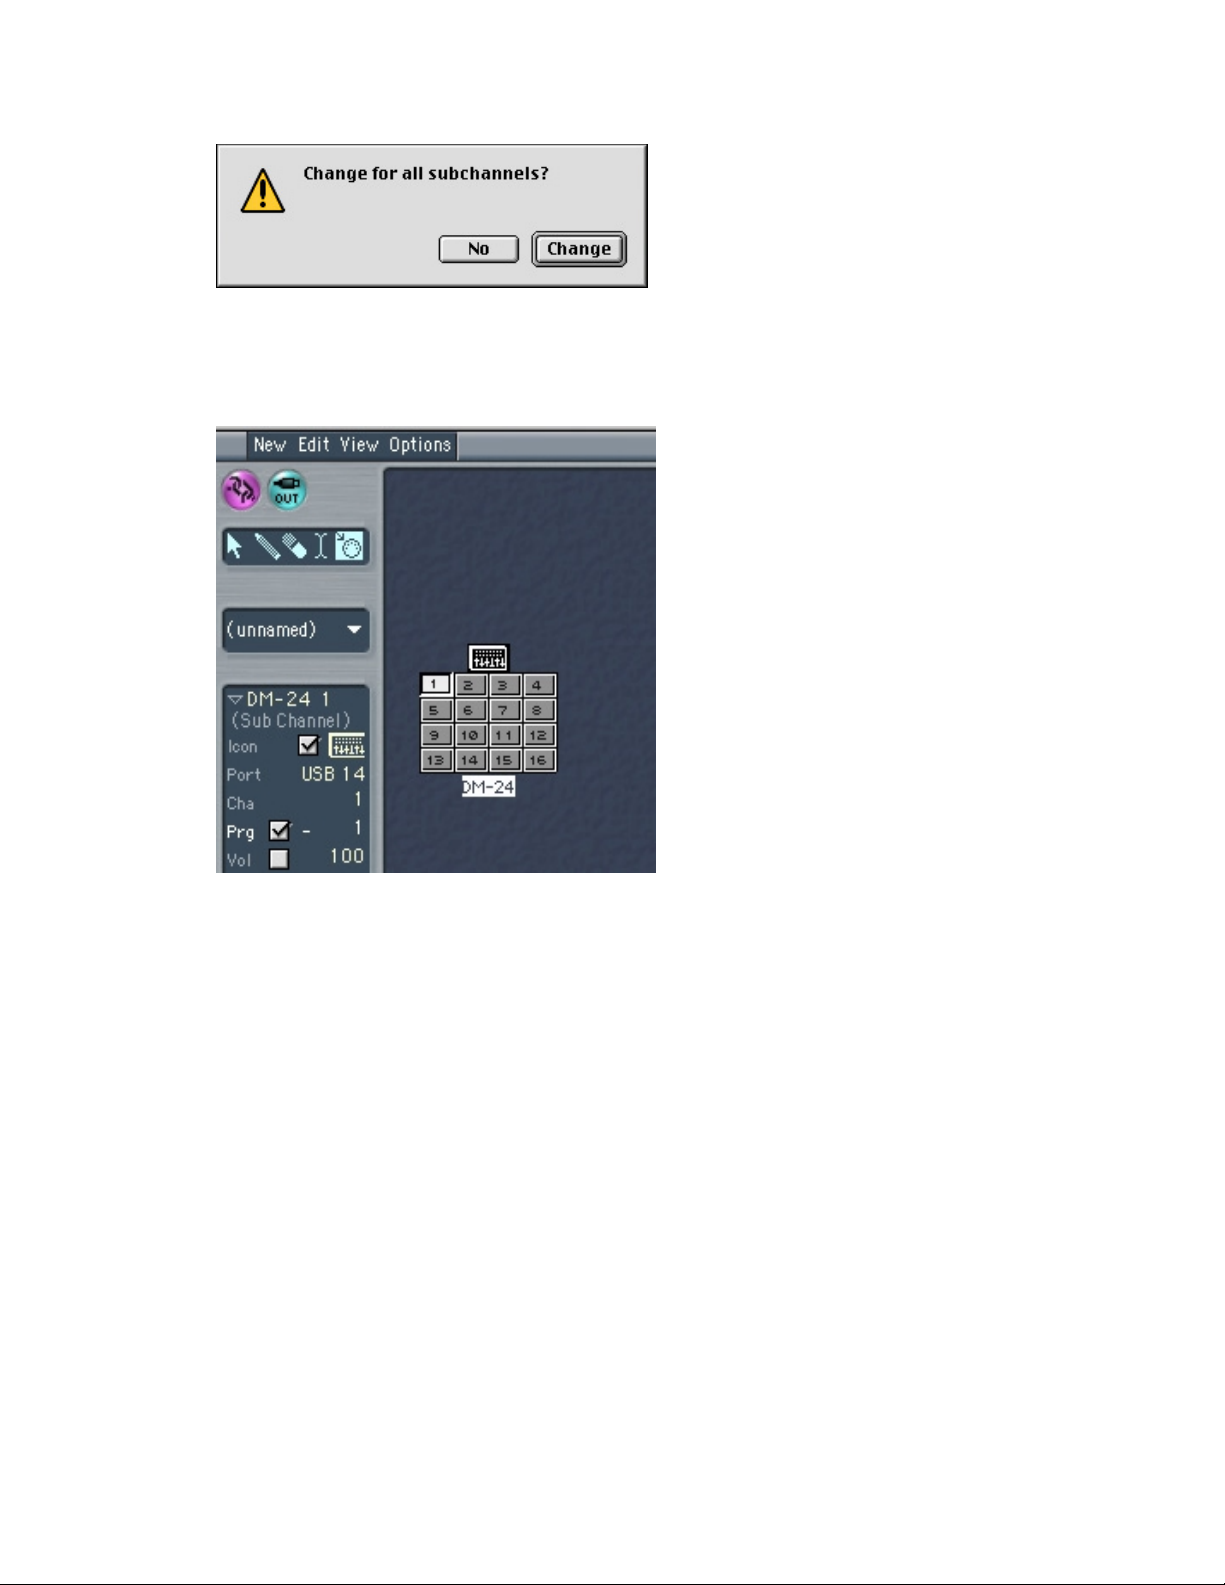
Now, click on the MULTI and choose the MIXER icon and click YES when
prompted to change for all sub-channels.
Page 3
Click on channel 1 and activate BANK/PROGRAM change. Do the same for
channel two. This will allow you to select SNAPSHOTS and EFX patches
from Logic.
Now, click on the name and name it…DM-24 - That’s it! Easy!
USING MMC
ON THE DM-24: Go to the DM-24 MIDI/MMC page and select an OPEN
LOOP. Move the cursor to the PLAY button in the window and press ENTER.
Do the same for RECORD. Use the ROTARY DIAL to select which tracks
you would like to us to ARM Logic’s track. You have a few choices, select the
one you prefer (1-8, 1-16, 1-24, etc…).
IN LOGIC: Go to the OPTIONS>MIDI page and select LISTEN TO MMC.
Chose ID=ALL
Page 4

That’s it. Now the DM-24 will control the following:
PLAY/STOP/FWD/RWD/RECORD/Track arm.
RECORDING DM-24 AUTOMATION INTO LOGIC
In the ARRANGE window in Logic, select a TRACK/OBJECT and assign the
DM-24 MULTI to that track/object. Make sure you assign the MAIN MULTI
(CH=ALL) not the individual channels and select it.
On the DM-24: go to the MIDI/MMC page and make sure the CC & SySex are
checked (PASS) as well as other data you want to record. You are now
ready to record DM-24 automation into Logic.
Press RECORD in Logic and make some fader/pan/mute moves. You should
see the data being recorded into the track. When you are finished press
STOP. As you see, you now have ONE track containing the automation data
for ALL the DM-24 channels.
Page 5

(Recorded Automation DATA for all 16 ch. on one track)
If you rewind and press PLAY the DM-24 faders should move as you
recorded them. Since now all the automation is stored/recorded into one
track if you wish to edit tracks individually you can use the various
SPLIT/DEMIX features in LOGIC. If you de-mix by MIDI channels you will get
16 separate tracks. If however, you need to control both layers you should
chose de-mix by CC number. This will assign each controller number to a
separate track within the arrange window. Chose the solution that best suits
your needs.
(Recorded Automation DE-MIXED by MIDI channel)
Once you have de-mixed the tracks you can fine tune the automation (if
needed) by using the HYPER EDITOR in Logic. This will allow you to modify
Page 6

the fader values as desired with a simple, easy to see and intuitive graphical
interface, as illustrated below.
DRAWING AUTOMATION
An alternative (and very effective) way to EDIT or CREATE Automation is by
using the Hyperdraw feature of Logic. Simply click on VIEW TRACK
AUTOMATION and use the mouse to either edit recorded fader moves or
create new ones. This will allow for very precise fader moves, using the gird
to place automation in perfect sync with the music and or the sound file. For
example, using Hyperdraw could allow you to look at a the wave of a
recorded track and precisely contour the automation envelope to accordingly.
(Hand-drawn Volume envelope)
It is hoped that this short tutorial was helpful in getting you on your way to
fully enjoying the benefit the DM-24 brings to your mixing environment when
used with Logic as the DAW of choice. The two have the power to become a
perfectly integrated recording/mixing system that retains the “hands on” feel
of traditional mixing desks while taking advantage of the latest in software and
hardware technology.
Page 7

 Loading...