

Page 1
VISION II DPB : QUICK-START GUIDE
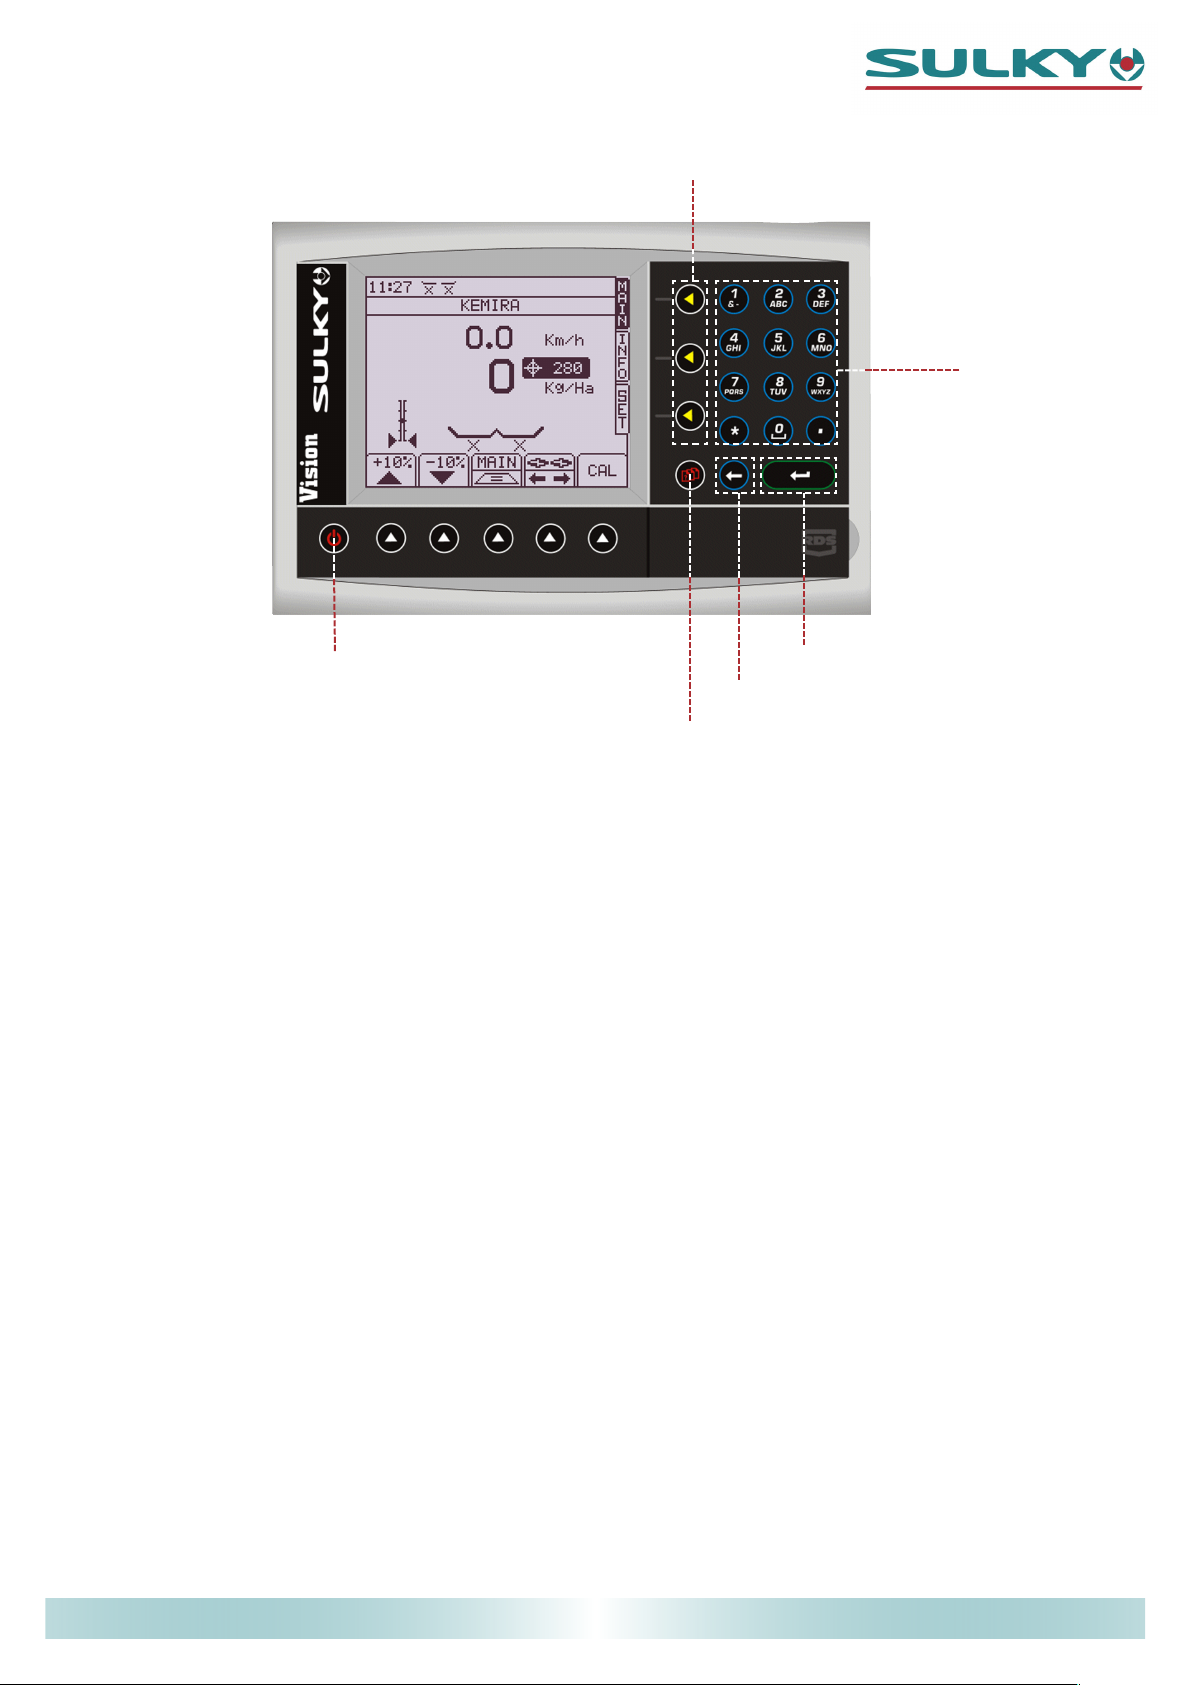
GENERAL PRESENTATION
Menu selection
Numeric keypad
Power On/Off
Data confirmation
Backspace
Factory parameters
and diagnostic
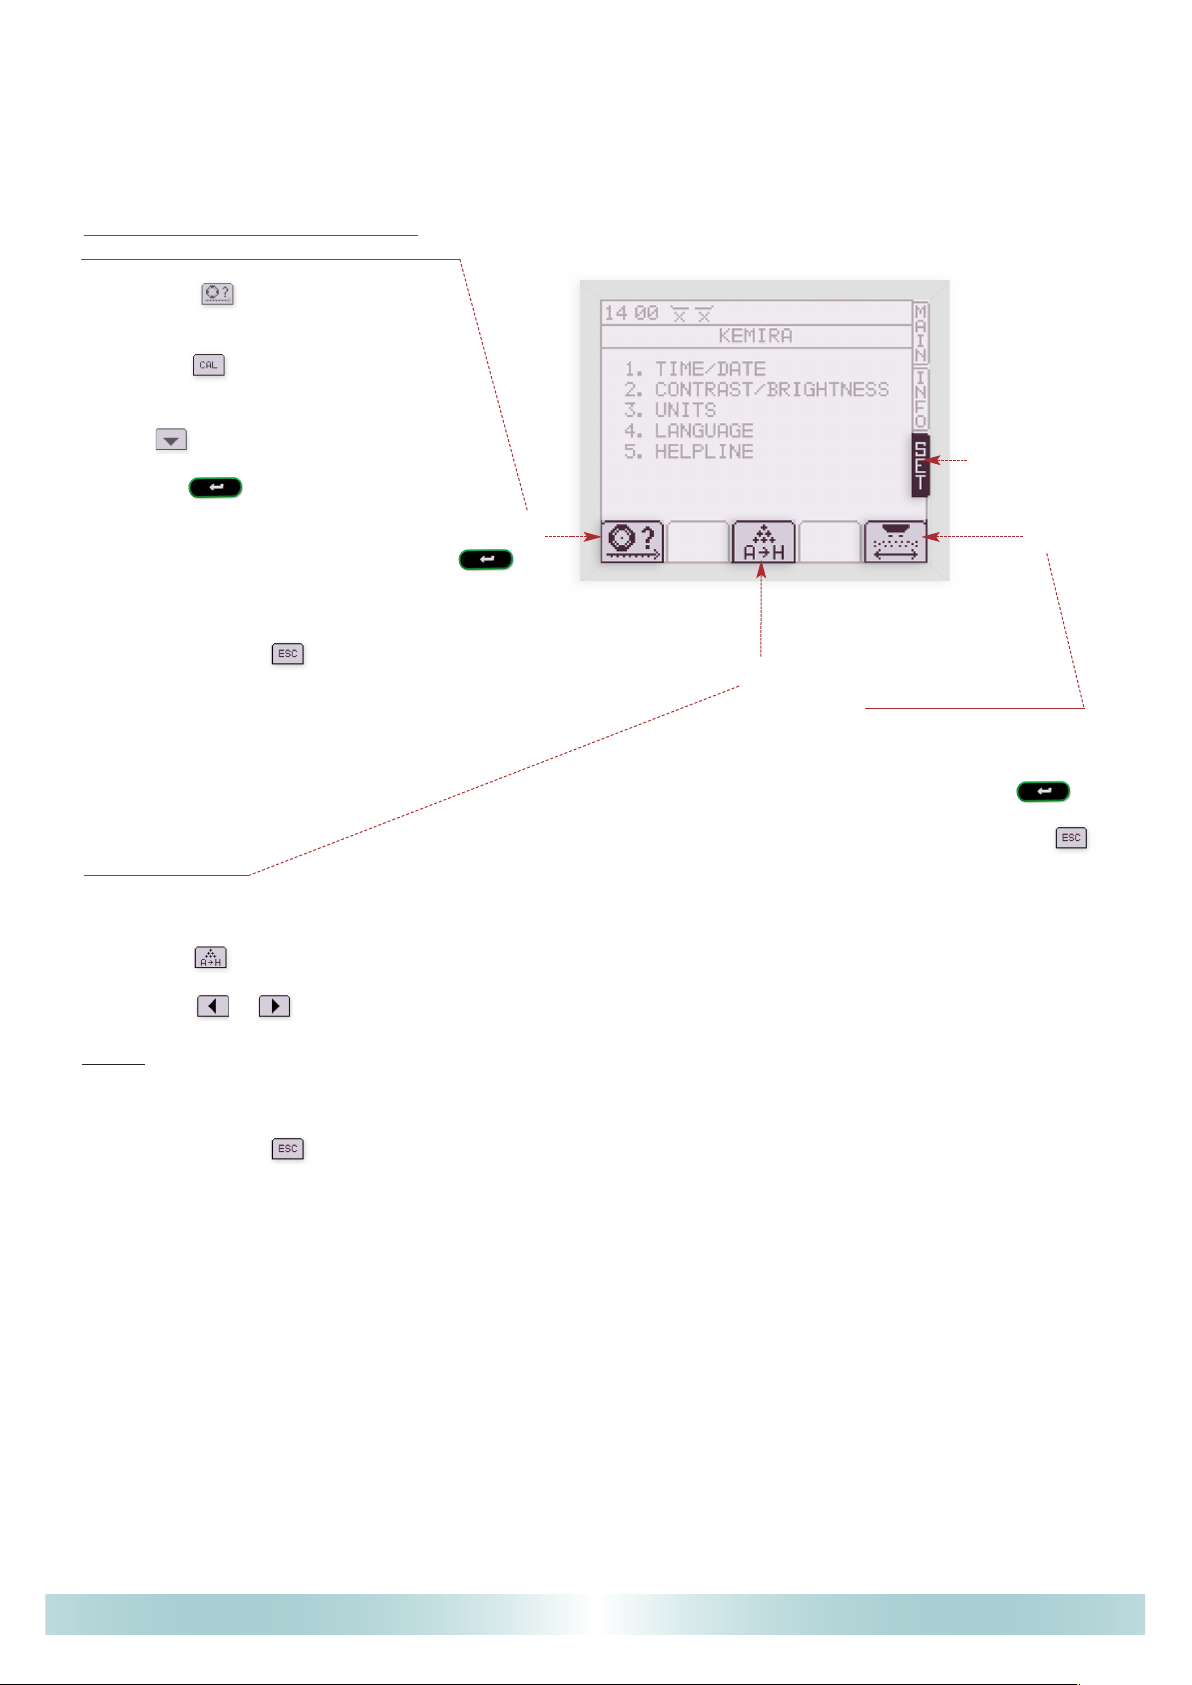
Á There is a choice of 3 menus : Spreading menu (MAIN)
Information menu (
Setting menu (
INFO)
SET)
Á Fit a speed sensor ideally on the front transmission shaft (a semi-circular magnet) or on the
wheels : front wheel
rear wheel
If the tractor has a radar or speed sensor, it is possible to connect directly using a special
plug to the tractor's original socket.
4 magnets
Á
8 magnets
Á
Á When setting up the DPB, follow these steps in order :
•
1
• Calibrate the forward speed.
1
•
2
• Set the working width.
2
•
3
• Choose a product (A, B, C…).
3
•
4
• Do a rate calibration test (T factor).
4
•
5
• Set the quantity / ha.
5
Réf: 400 355 - 00 - GB / DIS
1
03/2008
Page 2
VISION II DPB : QUICK-START GUIDE
•
1
• CALIBRATING THE FORWARD SPEED
1
ON A DISTANCE OF
- Press on .
(choose tractor n°1)
- Press on .
- Move the cursor to "calibrate over 100 m"
with .
- Press on .
(confirm data)
- Once in front of the first mark, press .
- Then follow the on-screen instructions.
100 m
1
1
Setting menu
2
2
- At the end, press to exit.
3
3
•
3
• FERTILI SER TYP E
3
Enables selection of a fertiliser stored in memory :
- Press on then,
- Press on or to select a letter for a fertiliser.
NOTE :
the T-factor is assigned to the selected fertiliser, it is updated everytime you do a
calibration test (in the spreading menu).
- At the end, press to exit.
•
2
• SETTING THE
2
WORKING WIDTH
- Use the numeric keypad,
confirm with .
- At the end, press to
exit.
Réf: 400 355 - 00 - GB / DIS
2
03/2008
Page 3

VISION II DPB : QUICK-START GUIDE
Shows if the hydraulic shutters are
open or closed
Shows the type of fertiliser
Shows the position of
the electric actuators
Use these keys to modulate the
rate/ha. The 100% key
brings you back to the initial rate.
Use this to control the TR IBORD 3D.
Yield borders
Environment borders
•
5
• SETTING THE QUANTITY PER HA
5
Spreading menu
5
5
4
4
Use to select the right, left or both
discs for modulation
- Use the numeric keypad,
confirm with .
(you are now ready to begin spreading)
•
4
• CARRYING OUT A RATE CALIBRATION TEST
4
With the hydraulic shutters closed)
- Press on , l, the cursor is on CAL TEST.
- Confirm by pressing , the electric actuators move to mark 35,
then follow the on-screen instructions.
- Open the shutter.
- Let the fertiliser flow for about 15 to 20 seconds.
- Weigh the sample collected in the bucket.
- Using the numeric keypad, enter the weight and confirm with .
The T-factor has now been updated.
.
Réf: 400 355 - 00 - GB / DIS
3
03/2008
Page 4
VISION II DPB : QUICK-START GUIDE
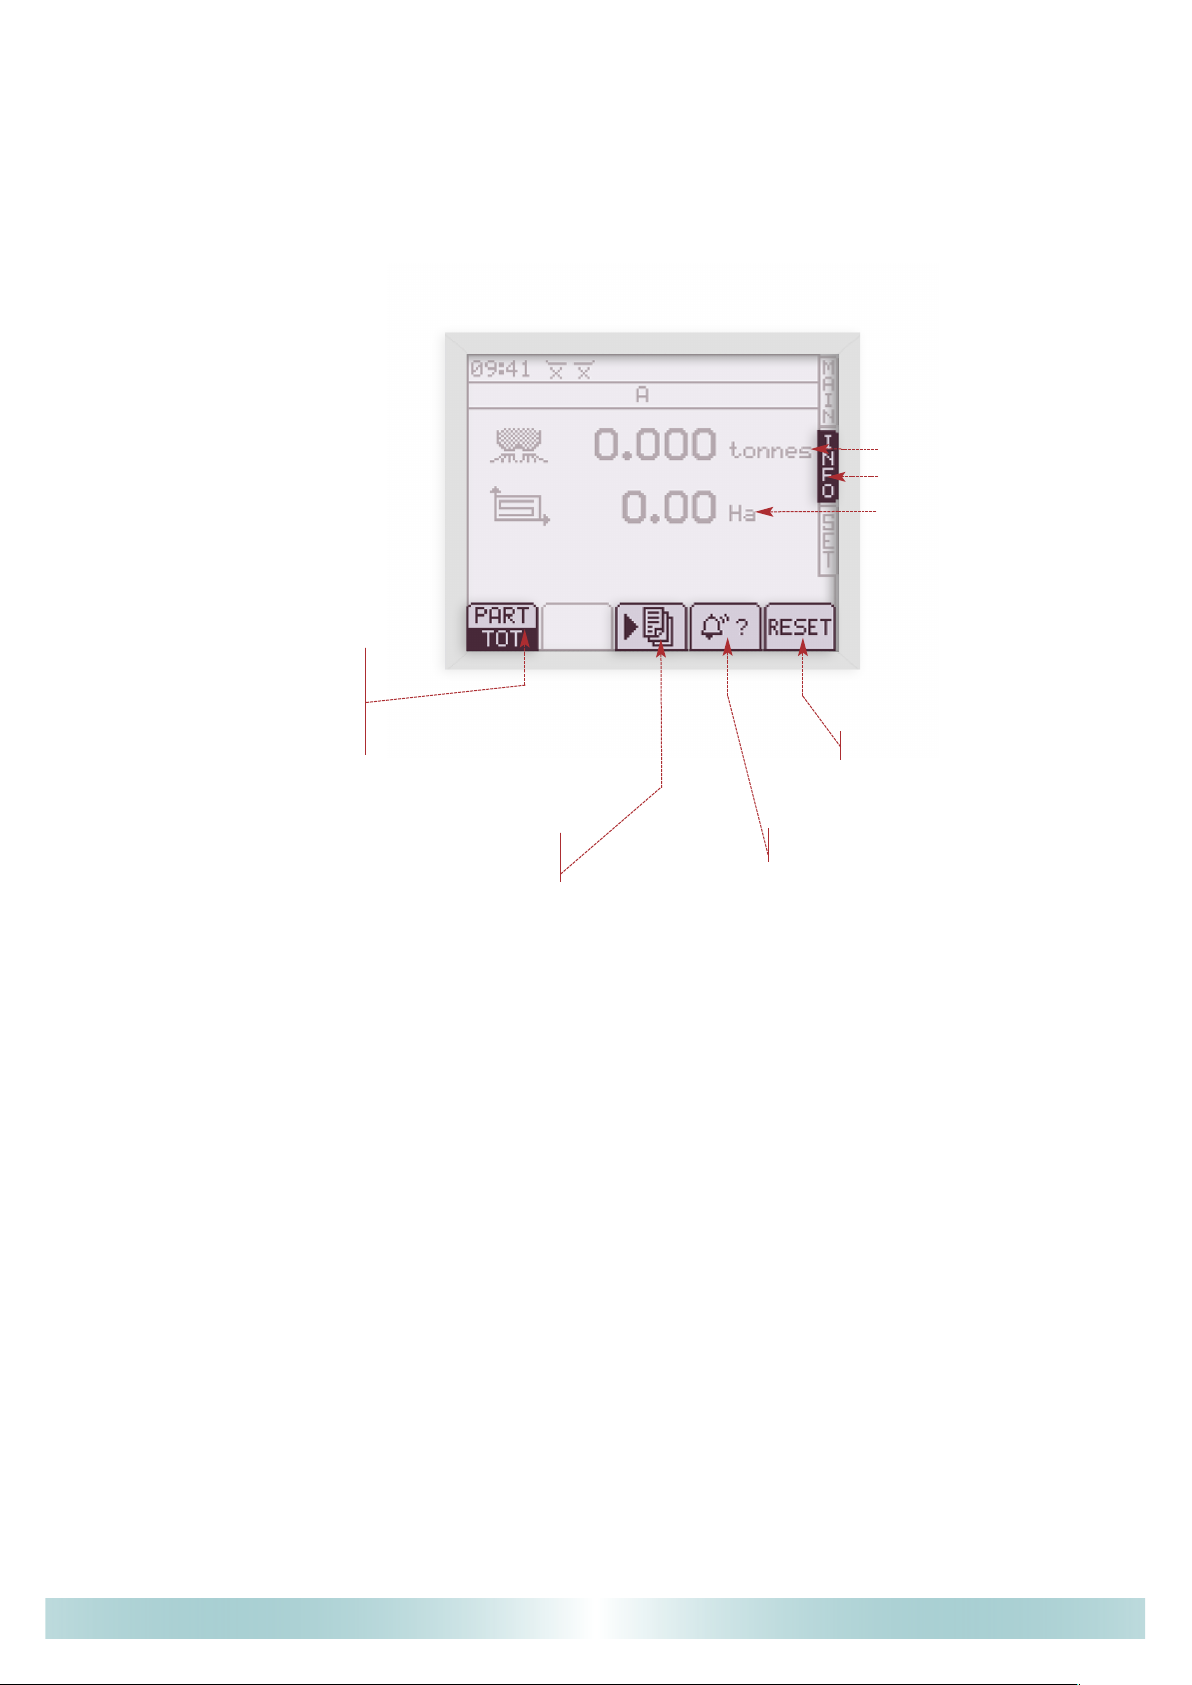
Tons spread
Information menu
Area covered
Choice of either
PARTIAL or TOTAL counter for :
. tons spread
. area covered
Use this to download information
onto a computer, GPS or printer.
Use to reset counters
Shows current alamrs
Réf: 400 355 - 00 - GB / DIS
4
03/2008
 Loading...