

Page 1
Operation Manual
Page 2

Cristina Bachmann, Heiko Bischoff, Lillie Harris, Christina Kaboth, Insa Mingers, Matthias Obrecht, Sabine Pfeifer,
Benjamin Schütte, Marita Sladek
This PDF provides improved access for vision-impaired users. Please note that due to the complexity and number
of images in this document, it is not possible to include text descriptions of images.
The information in this document is subject to change without notice and does not represent a commitment on
the part of Steinberg Media Technologies GmbH. The software described by this document is subject to a License
Agreement and may not be copied to other media except as specically allowed in the License Agreement. No
part of this publication may be copied, reproduced, or otherwise transmitted or recorded, for any purpose,
without prior written permission by Steinberg Media Technologies GmbH. Registered licensees of the product
described herein may print one copy of this document for their personal use.
All product and company names are ™ or ® trademarks of their respective owners. For more information, please
visit www.steinberg.net/trademarks.
© Steinberg Media Technologies GmbH, 2019.
All rights reserved.
Dorico_2.2.0_en-US_2019-01-29
Page 3

Table of Contents
8 Introduction
8 Platform-Independent Documentation
8 Usage of musical terms
9 Conventions
11 How you can reach us
12 First steps
12 Getting around
19 Starting a new project
22 Writing music
28 Dorico Elements concepts
28 Design philosophy
29 Key musical concepts
32 User interface
32 Hub
36 Windows
49 Setting up your workspace
55 Preferences dialog
62 Setup mode
62 Project window in Setup mode
70 Project Info dialog
71 Layout Options dialog
73 Players
81 Ensembles
82 Instruments
96 Player groups
98 Flows
101 Layouts
106 Videos
112 Write mode
112 Project window in Write mode
119 Introduction to inputting and editing
129 Notation Options dialog
131 Note input
163 Notations input
253 Arranging tools
259 Splitting ows
261 Layout and formatting
261 Engrave mode
261 Frames
262 Master pages
262 Page layouts
271 Music Fonts dialog
272 Editing text
278 Note spacing
281 Staff spacing
282 Play mode
282 Project window in Play mode
287 Playback Options dialog
288 Event display
296 Tracks
313 Playhead
314 Playing back music
319 Swing playback
324 Mixer
326 Transport window
328 Endpoints
332 Expression maps
340 Percussion maps
347 Played vs. notated note durations
350 Print mode
350 Project window in Print mode
354 Printing layouts
356 Exporting layouts as graphic les
359 Printers
359 Page arrangements for printing/exporting
362 Duplex printing
363 Handling page sizes and paper sizes
364 Graphics le formats
365 Annotations
366 Notation reference
367 Introduction
368 Accidentals
368 Changing accidentals
368 Deleting accidentals
369 Showing accidentals in parentheses
370 Altered unisons
371 Microtonal accidentals
371 Accidental duration rules
374 Articulations
375 Copying articulations
375 Changing articulations
375 Deleting articulations
376 Positions of articulations
378 Articulations in playback
379 Bars
379 Deleting bars
381 Changes to the length of bars
381 Splits in bars
382 Combining bars
384 Barlines
385 Deleting barlines
385 Moving barlines rhythmically
386 Barlines across staff groups
388 Bar numbers
388 Appearance of bar numbers
391 Bar numbers in parts
3
Page 4

Table of Contents
392 Hiding/Showing bar number ranges on multi-
bar rests
393 Positions of bar numbers
396 Bar number changes
398 Subordinate bar numbers
399 Bar numbers and repeats
400 Beaming
400 Beaming notes together manually
401 Changing the direction of partial beams
401 Beam groups
403 Beam placement relative to the staff
404 Beam slants
405 Centered beams
406 Creating cross-staff beams
409 Beam corners
409 Secondary beams
410 Tuplets within beams
411 Stemlets
411 Fanned beams
413 Note and rest grouping
413 Conventions for beam grouping according to
meter
414 Creating custom beat groupings for meters
415 Brackets and braces
416 Brackets according to ensemble type
416 Secondary brackets
417 Chord symbols
417 Chord components
417 Changing existing chord symbols
418 Transposing chord symbols
418 Hiding/Showing chord symbols
419 Hiding/Showing the root and quality of chord
symbols
419 Positions of chord symbols
421 Changing the enharmonic spelling of chord
symbols
422 Chord symbols imported from MusicXML
423 Clefs
424 General placement conventions for clefs
424 Moving clefs rhythmically
425 Deleting clefs
425 Changing the position of clefs relative to grace
notes
426 Transposing clefs
427 Octave lines
428 Lengthening/Shortening octave lines
429 Moving octave lines rhythmically
429 Changing the alignment of octave line
numerals relative to notes
430 Changing the position of octave line numerals
relative to accidentals
430 Changing the placement of octave lines
relative to the staff
430 Deleting octave lines
432 Cues
433 Dynamics
433 Types of dynamics
434 General placement conventions for dynamics
435 Showing dynamics in parentheses
435 Moving dynamics rhythmically
436 Copying dynamics
437 Deleting dynamics
438 Voice-specic dynamics
438 Niente hairpins
439 Expressive text
441 Gradual dynamics
445 Placement of dynamics
445 Groups of dynamics
447 Dynamics linked across multiple staves
449 VST Expression Maps for volume types
450 Fingering
450 General placement conventions for ngering
450 Changing ngerings to substitution ngerings
451 Changing existing ngerings
452 Changing the placement of ngerings relative
to the staff
452 Hiding/Showing ngering
453 Deleting ngerings
453 Cautionary ngerings
454 Fingerings for valved brass instruments
454 Hiding/Showing ngering shifts for string
instruments
455 Fingerings imported from MusicXML les
456 Front matter
456 Project information used in default master
pages
458 Grace notes
459 General placement conventions for grace
notes
460 Grace note size
460 Grace note slashes
461 Grace note stems
461 Grace note beams
462 Holds and pauses
462 Types of holds and pauses
464 General placement conventions for holds and
pauses
465 Changing the appearance/duration of existing
holds and pauses
467 Moving holds and pauses rhythmically
467 Positioning fermatas on barlines
468 Changing the number of fermatas per staff
469 Key signatures
469 General placement conventions for key
signatures
470 Types of key signatures
471 Tonality systems
472 Moving key signatures rhythmically
473 Deleting key signatures
474 Multiple simultaneous key signatures
474 Transposing key signatures alongside
selections
475 Enharmonic equivalent key signatures
476 Cautionary key signatures
477 Lyrics
477 General placement conventions for lyrics
478 Filters for lyrics
479 Types of lyrics
480 Types of syllables in lyrics
481 Changing the text of existing lyrics
482 Showing lyrics in italics
4
Page 5

Table of Contents
483 Positions of lyrics
486 Lyric hyphens and lyric extender lines
488 Deleting lyric lines
489 Lyric line numbers
492 Verse numbers
493 East Asian elision slurs
494 Project-wide engraving options for lyrics
495 Notes
495 Project-wide engraving options for notes
497 Notehead sets
510 Changing the size of notes
511 Moving notes rhythmically
512 Changing the width of ledger lines
512 Changing the consolidation of rhythm dots
513 Specifying on which string individual notes are
played
514 Deleting notes
515 Ornaments
515 General placement conventions for ornaments
516 Project-wide engraving options for ornaments
516 Changing the intervals of ornaments
518 Changing the speed of trills
518 Lengthening/Shortening trills rhythmically
519 Hiding/Showing trill extension lines
520 Positions of ornaments
523 Arpeggio signs
524 General placement conventions for arpeggio
signs
524 Changing the type of arpeggio signs
525 Changing the end appearance of arpeggio
signs
525 Length of arpeggio signs
527 Positions of arpeggio signs
529 Project-wide engraving options for arpeggio
signs
529 Arpeggios in playback
532 Glissando lines
532 General placement conventions for glissando
lines
533 Glissando lines across empty bars
533 Changing the style of glissando lines
534 Changing glissando line text
535 Moving glissando lines graphically
536 Changing the default angles of glissando lines
project-wide
537 Project-wide engraving options for glissando
lines
538 Jazz articulations
539 Jazz ornaments
540 Positions of jazz articulations
540 Changing the type/length of existing jazz
articulations
541 Changing the line style of smooth jazz
articulations
542 Deleting jazz articulations
543 Page numbers
543 Changing the page number numeral style
545 Hiding/Showing page numbers
547 Pedal lines
548 General placement conventions for pedal lines
548 Sustain pedal retakes and pedal level changes
555 Positions of pedal lines
558 Lengthening/Shortening pedal lines
559 Project-wide engraving options for pedal lines
559 Pedal line start signs, hooks, and continuation
lines
564 Pedal line start, continuation, and restorative
text
566 Pedal lines in playback
566 Pedal lines imported from MusicXML les
567 Playing techniques
567 General placement conventions for playing
techniques
568 Project-wide engraving options for playing
techniques
568 Positions of playing techniques
570 Adding text to playing techniques
571 Erasing the background of text playing
techniques
572 Hiding/Showing playing techniques
573 Custom playing techniques
581 Playing techniques in playback
582 Rehearsal marks
582 General placement conventions for rehearsal
marks
583 Positions of rehearsal marks
585 Deleting rehearsal marks
585 Changing the order of rehearsal marks
586 Changing the rehearsal mark sequence type
587 Adding prexes/suxes to rehearsal marks
587 Project-wide engraving options for rehearsal
marks
591 Markers
591 Project-wide engraving options for markers
592 Changing the vertical position of markers
593 Changing the text shown in markers
593 Changing the marker/timecode font styles
594 Moving markers rhythmically
594 Changing the timecodes of markers
595 Dening markers as important
595 Hiding/Showing markers
596 Deleting markers
597 Timecodes
598 Changing the initial timecode value
598 Showing timecodes on a separate staff
599 Hiding/Showing timecodes in markers
600 Changing the timecode frequency
601 Repeat endings
601 Changing the total number of playthroughs in
repeat endings
602 Project-wide engraving options for repeat
endings
603 Lengthening/Shortening segments in repeat
endings
604 Positions of repeat endings
606 Deleting repeat endings
606 Changing the text shown in repeat endings
607 Changing the appearance of individual nal
repeat ending segments
608 Lengthening/Shortening repeat ending hooks
608 Repeat endings in MusicXML les
5
Page 6

Table of Contents
609 Bar repeats
610 Project-wide engraving options for bar repeats
610 Changing the length of the repeated phrase in
bar repeat regions
611 Moving bar repeat regions
611 Lengthening/Shortening bar repeat regions
612 Hiding/Showing bar repeat region highlights
612 Bar repeat counts
616 Bar repeat grouping
619 Rhythm slashes
619 Slash regions
620 Project-wide engraving options for rhythm
slashes
621 Slashes in multiple-voice contexts
623 Splitting slash regions
624 Moving slash regions
624 Lengthening/Shortening slash regions
625 Hiding/Showing stems in slash regions
625 Slash region counts
630 Rests
630 General placement conventions for rests
631 Implicit vs. explicit rests
633 Per-ow notation options for rests
633 Project-wide engraving options for rests
634 Showing rest colors
635 Deleting rests
636 Hiding/Showing bar rests in empty bars
636 Hiding/Showing multi-bar rests
637 Moving rests vertically
639 Slurs
640 General placement conventions for slurs
643 Project-wide engraving options for slurs
644 Cross-staff and cross-voice slurs
645 Nested slurs
646 Moving slurs rhythmically
647 Lengthening/Shortening slurs
648 Linked slurs across multiple staves
649 Slur segments
651 Slurs in Engrave mode
655 Short slurs that cover large pitch ranges
656 Slur height
657 Slur shoulder offset
659 Slur curvature direction
660 Slur styles
662 Slur collision avoidance
664 Slurs over system and frame breaks
664 Slurs in playback
665 Staff labels
666 Instrument names in staff labels
667 Project-wide engraving options for staff labels
669 Changing the length of staff labels project-
wide
671 Changing the length of staff labels at specic
positions
672 Instrument transpositions in staff labels
674 Staff labels for percussion kits
676 Staves
676 Project-wide layout options for staves
678 Staff size
682 Changing the thickness of staff lines
682 Deleting staves
683 Extra staves
684 Ossia staves
684 System objects
686 System indents
687 Divisi
688 Stems
688 Stem direction
693 Project-wide engraving options for stems
693 Stem length
694 Hiding stems
695 Split stems for altered unisons
696 Tempo marks
697 Types of tempo marks
697 General placement conventions for tempo
marks
698 Text in tempo marks
699 Positions of tempo marks
702 Lengthening/Shortening gradual tempo
changes
702 Hiding/Showing tempo marks
703 Deleting tempo marks
703 Project-wide engraving options for tempo
marks
704 Tempo mark components
705 Metronome marks
708 Gradual tempo changes
711 Ties
711 General placement conventions for ties
713 Tie chains
713 Ties vs. slurs
714 Non-standard ties
717 Deleting ties
717 Splitting tie chains
718 Project-wide engraving options for ties
718 Changing the position/shape of ties
719 Tie shoulder offset
721 Tie height
722 Tie styles
725 Tie curvature direction
727 Time signatures
728 General conventions for time signatures
728 Project-wide engraving options for time
signatures
729 Project-wide spacing gaps for time signatures
729 Types of time signatures
732 Large time signatures
734 Time signature styles
737 Positions of time signatures
741 Hiding/Showing time signatures
742 Deleting time signatures
742 Time signature font styles
744 Tremolos
745 Tremolos in tie chains
746 General placement conventions for tremolos
747 Changing the speed of tremolos
747 Deleting tremolos
748 Rhythmic positions of notes with tremolos
748 Moving tremolo strokes
749 Project-wide engraving options for tremolos
750 Tremolos in playback
6
Page 7

Table of Contents
752 Tuplets
752 General placement conventions for tuplets
753 Nested tuplets
754 Notations on tuplet notes
754 Turning existing notes into tuplets
755 Turning tuplets into normal notes
755 Moving tuplets rhythmically
756 Deleting tuplets
757 Tuplet beams
757 Tuplet brackets
761 Tuplet numbers/ratios
763 Project-wide engraving options for tuplets
764 Unpitched percussion
764 Percussion kits vs. individual percussion
instruments
765 Percussion kits
766 Project-wide engraving options for unpitched
percussion
767 Per-ow notation options for unpitched
percussion
767 Changing the playing techniques of notes on
percussion kit staves
768 Showing notes in percussion instruments as
ghost notes
768 Moving notes to different instruments in
percussion kits
769 Notations on notes in percussion kits
770 Percussion kit presentation types
772 Playing techniques for unpitched percussion
instruments
776 Percussion legends
779 Voices in percussion kits
781 Unpitched percussion in Play mode
783 Universal Indian Drum Notation
784 Voices
784 Note positions in multiple-voice contexts
785 Per-ow notation options for voices
786 Showing voice colors
786 Deleting unused voices
787 Swapping the order of voices
788 Notes crossed to staves with existing notes in
other voices
789 Rhythm dot consolidation
789 Slash voices
792 Glossary
802 Index
7
Page 8

Introduction
Thank you very much for purchasing Dorico Elements.
We are delighted that you have chosen Steinberg's scoring application and hope that you will
enjoy using it for years to come.
Dorico Elements is a next-generation application for producing beautiful sheet music, whether
you are a composer, arranger, music engraver, publisher, instrumentalist, teacher, or student.
Whether you want to print your music or share it in a digital format, Dorico Elements is the most
sophisticated program available.
Like all of Steinberg's products, Dorico Elements has been designed from the ground up by a
team of musicians who understand your needs and who are dedicated to producing a tool that is
both easy to learn and use, but also capable of results of the highest quality. Dorico Elements
also integrates with your existing workow and can import and export les in a variety of
formats.
Dorico Elements thinks about music the same way a human musician does and has a deeper
understanding of the elements of music and musical performance than other scoring
applications. Its unique design allows an unprecedented degree of exibility, in music input and
editing, in score layout, in rhythmic freedom, and many other areas besides.
Most sincerely yours,
Your Steinberg Dorico Elements Team
Platform-Independent Documentation
The documentation applies to the operating systems Windows and macOS.
Features and settings that are specic to one of these platforms are clearly indicated. In all other
cases, the descriptions and procedures in the documentation are valid for Windows and macOS.
Some points to consider:
● The screenshots are taken from Windows.
● Some functions that are available on the File menu on Windows can be found in the
program name menu on macOS.
Usage of musical terms
This documentation uses American terminology for musical items throughout the
documentation.
The following table lists all the notes and notations that have different names in American and
British English:
8
Page 9
Introduction
Conventions
American Name British Name
Double whole note Breve
Whole note Semibreve
Half note Minim
Quarter note Crotchet
Eighth note Quaver
Sixteenth note Semiquaver
Thirty-second note Demisemiquaver
Sixty-fourth note Hemidemisemiquaver
Hundred twenty-eighth note Semihemidemisemiquaver
Two hundred fty-sixth note Demisemihemidemisemiquaver
Staff Stave
Bar/Measure
NOTE
This documentation only uses “bar”.
Conventions
In our documentation, we use typographical and markup elements to structure information.
Typographical Elements
The following typographical elements mark the following purposes.
Prerequisite
Requires you to complete an action or to fulll a condition before starting a
procedure.
Procedure
Lists the steps that you must take to achieve a specic result.
Bar
Important
Informs you about issues that might affect the system, the connected hardware, or
that might bring a risk of data loss.
Note
Informs you about issues that you should consider.
Example
Provides you with an example.
9
Page 10
Introduction
Conventions
Markup
Result
Shows the result of the procedure.
After Completing This Task
Informs you about actions or tasks that you can perform after completing the
procedure.
Related Links
Lists related topics that you can nd in this documentation.
Elements of the user interface are highlighted throughout the documentation.
Names of menus, options, functions, dialogs, windows, and so on, are highlighted in bold.
EXAMPLE
To open the Project Info dialog, choose File > Project Info.
If bold text is separated by a greater-than symbol, this indicates a sequence of different menus
to open.
EXAMPLE
Choose Setup > Layout Options.
File names and folder paths are shown in a different font.
EXAMPLE
example_file.txt
Key Commands
Many of the default key commands, also known as keyboard shortcuts, use modier keys, some
of which are different depending on the operating system.
Many of the default key commands use modier keys, some of which are different depending on
the operating system. When key commands with modier keys are described in this manual, they
are indicated with the Windows modier key rst, followed by the macOS modier key and the
key.
EXAMPLE
Ctrl/Cmd-Z means: press Ctrl on Windows or Cmd on macOS, then press Z.
Key commands in Dorico Elements
The default key commands in Dorico Elements depend on your keyboard layout.
If you move the mouse over a tool or a function, the information in brackets shows the key
command that is used to activate or deactivate a tool or a function.
You can also do one of the following:
● Choose Help > Key Commands to open the Dorico Key Commands window, which
provides an overview of all available key commands.
● Search for key commands of specic functions or menu items in the Preferences dialog. In
this dialog, you can also assign new key commands or change default key commands.
10
Page 11

Introduction
How you can reach us
RELATED LINKS
Interactive Dorico Elements key commands map on page 57
Searching for the key commands of functions on page 58
Preferences dialog on page 55
Key Commands page in the Preferences dialog on page 56
Assigning key commands on page 59
How you can reach us
On the Help menu you nd items linking to additional information.
The menu contains links to various Steinberg web pages. Selecting one of these menu items
automatically launches your web browser and opens the page. On these pages, you can nd
support and compatibility information, answers to frequently asked questions, information
about updates and other Steinberg products, and so on.
This requires that you have a web browser installed on your computer and a working Internet
connection.
11
Page 12
First steps
This chapter helps you to get started with Dorico Elements.
When you start Dorico Elements for the rst time, we recommend that you open one of the
templates rst to have a look at the user interface and the functions that Dorico Elements
provides before you start your own projects. You are welcome to skip this part and explore the
program for yourself.
The following sections inform you about the following topics:
● Overview of the most important workspaces
● Setting up a new project
● Writing your music and adding notation items to your score
● Laying out and formatting pages
● Playing back what you created
● Printing and exporting
Getting around
The following sections give you an overview of the user interface and introduce you to how
Dorico Elements is structured.
Opening a template
Before you start your own project, we recommend that you familiarize yourself with the user
interface of Dorico Elements. To prepare for this, open one of the templates that are provided
with the program.
PREREQUISITE
You have started Dorico Elements. The Hub is open.
PROCEDURE
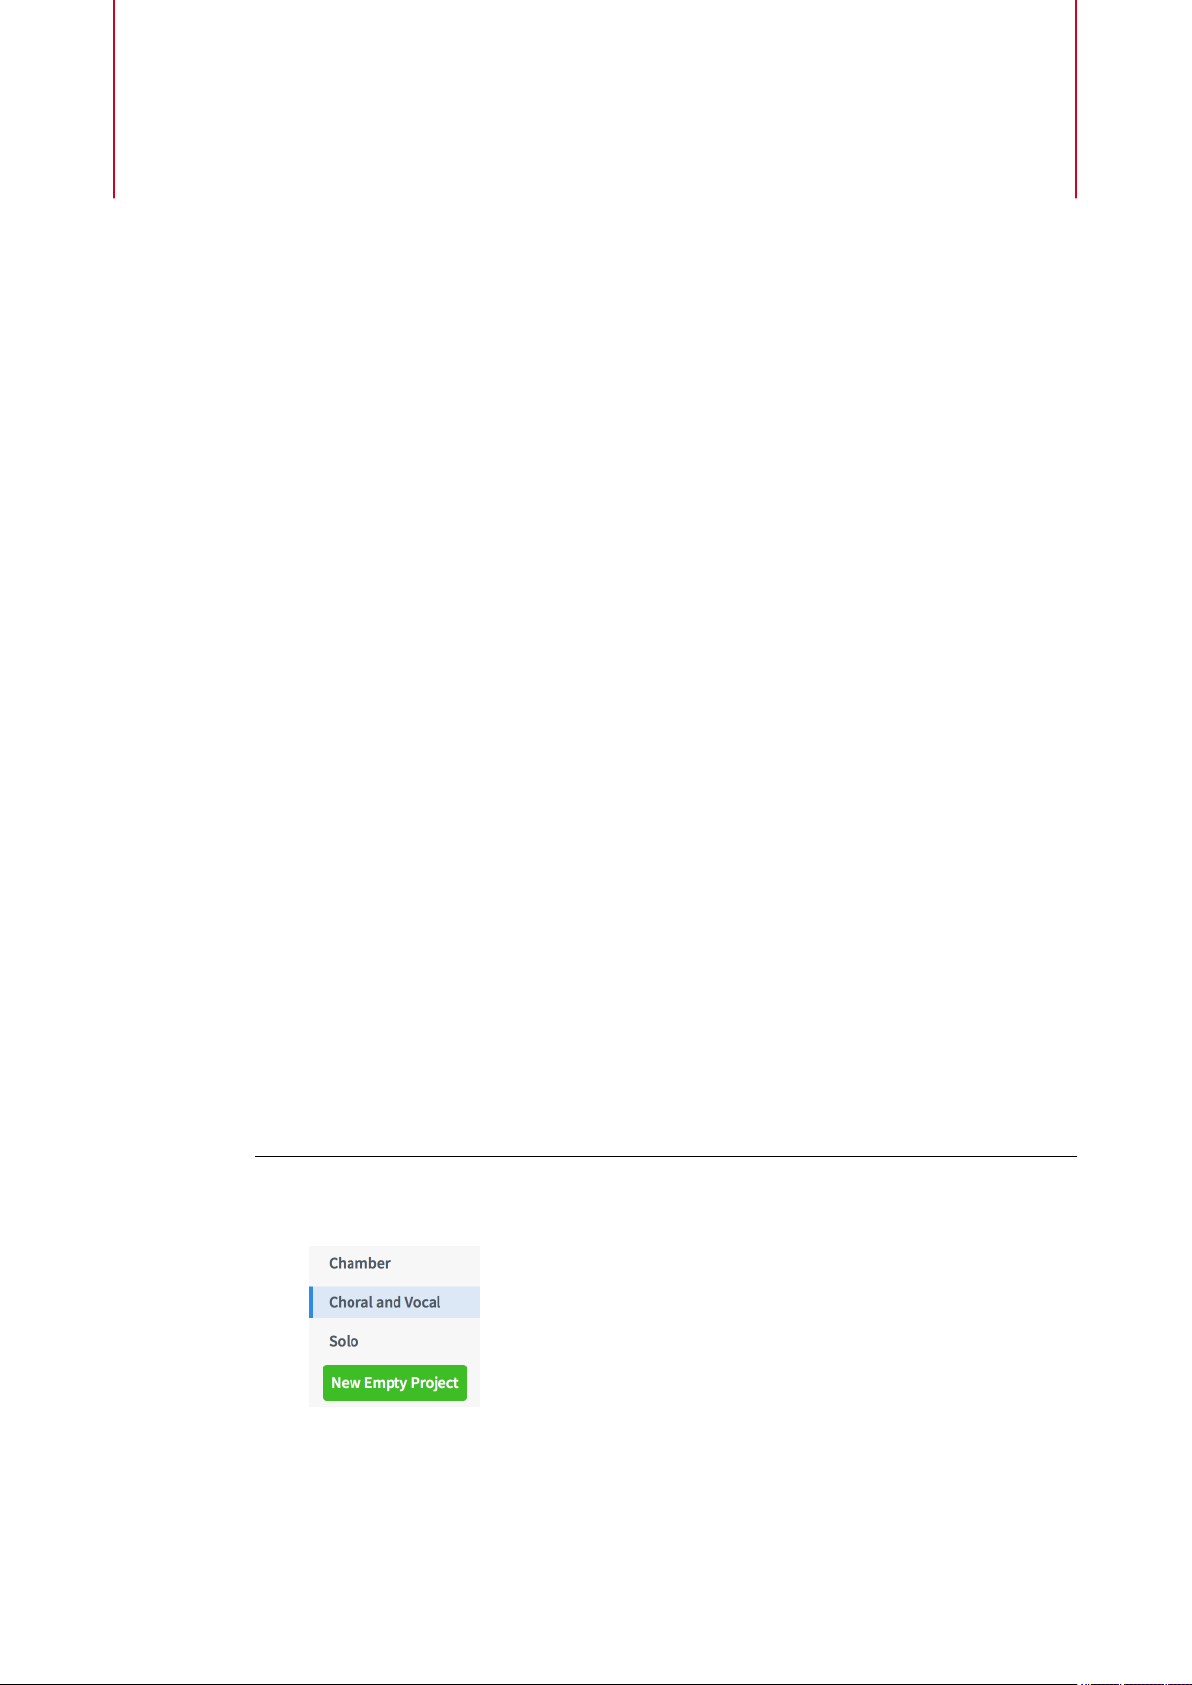
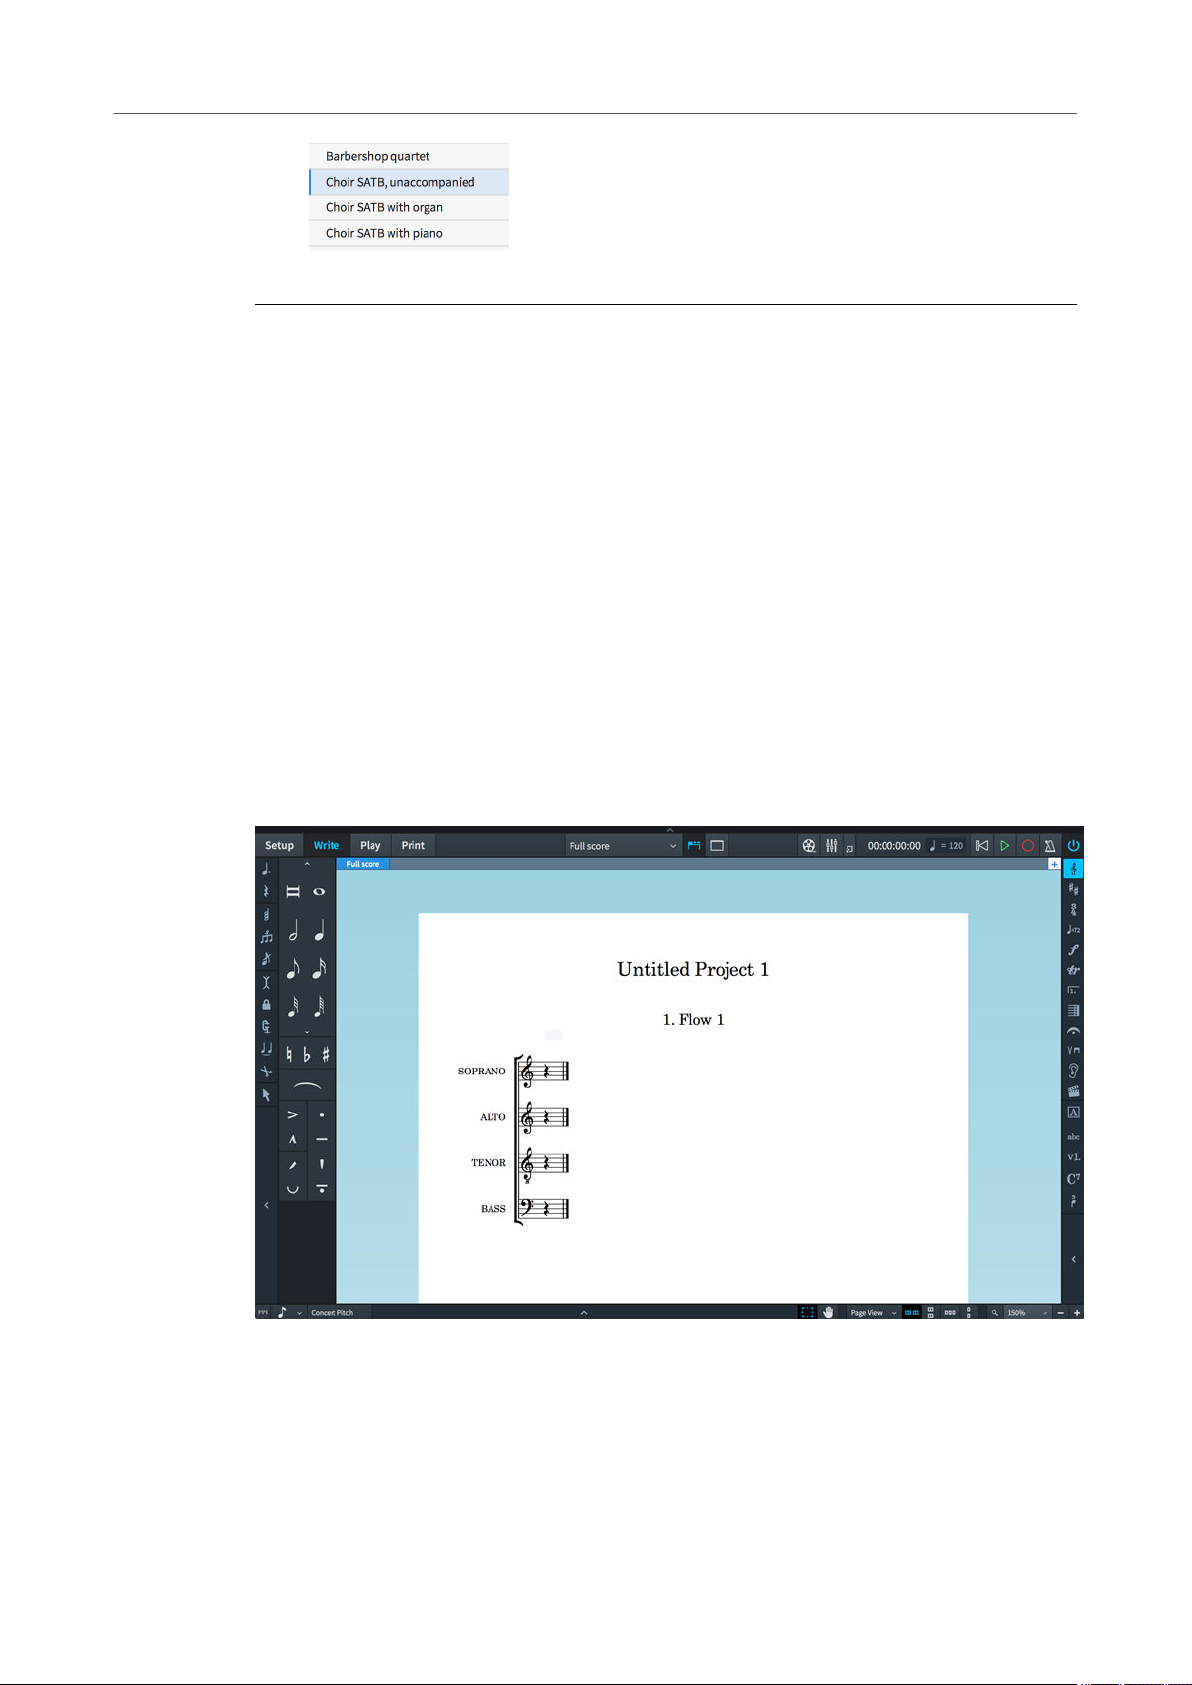
1. In the Hub, select one of the listed template groups. For example, select the Choral and
Vocal templates.
2. Select one of the listed templates.
12
Page 13
First steps
Getting around
3. Click New from Template.
RESULT
The template opens.
AFTER COMPLETING THIS TASK
Proceed to the following sections that provide a quick overview of the user interface and that
introduce you to the main functions of the program.
RELATED LINKS
Hub on page 32
Quick tour of the user interface
The user interface of Dorico Elements consists of different modes that represent different phases
in the workow of preparing a score.
The user interface has a structure that is the same in each of the application’s modes. There is
always a large area for editing your music in the center of the project window. In every mode,
there are collapsible panels on the left, right, and bottom of the project window, depending on
which mode you are using. The contents of these panels change according to the selected mode.
When you open the template, the rst view shows the project window in Write mode:
The project window when you open a template
The project window contains the following areas:
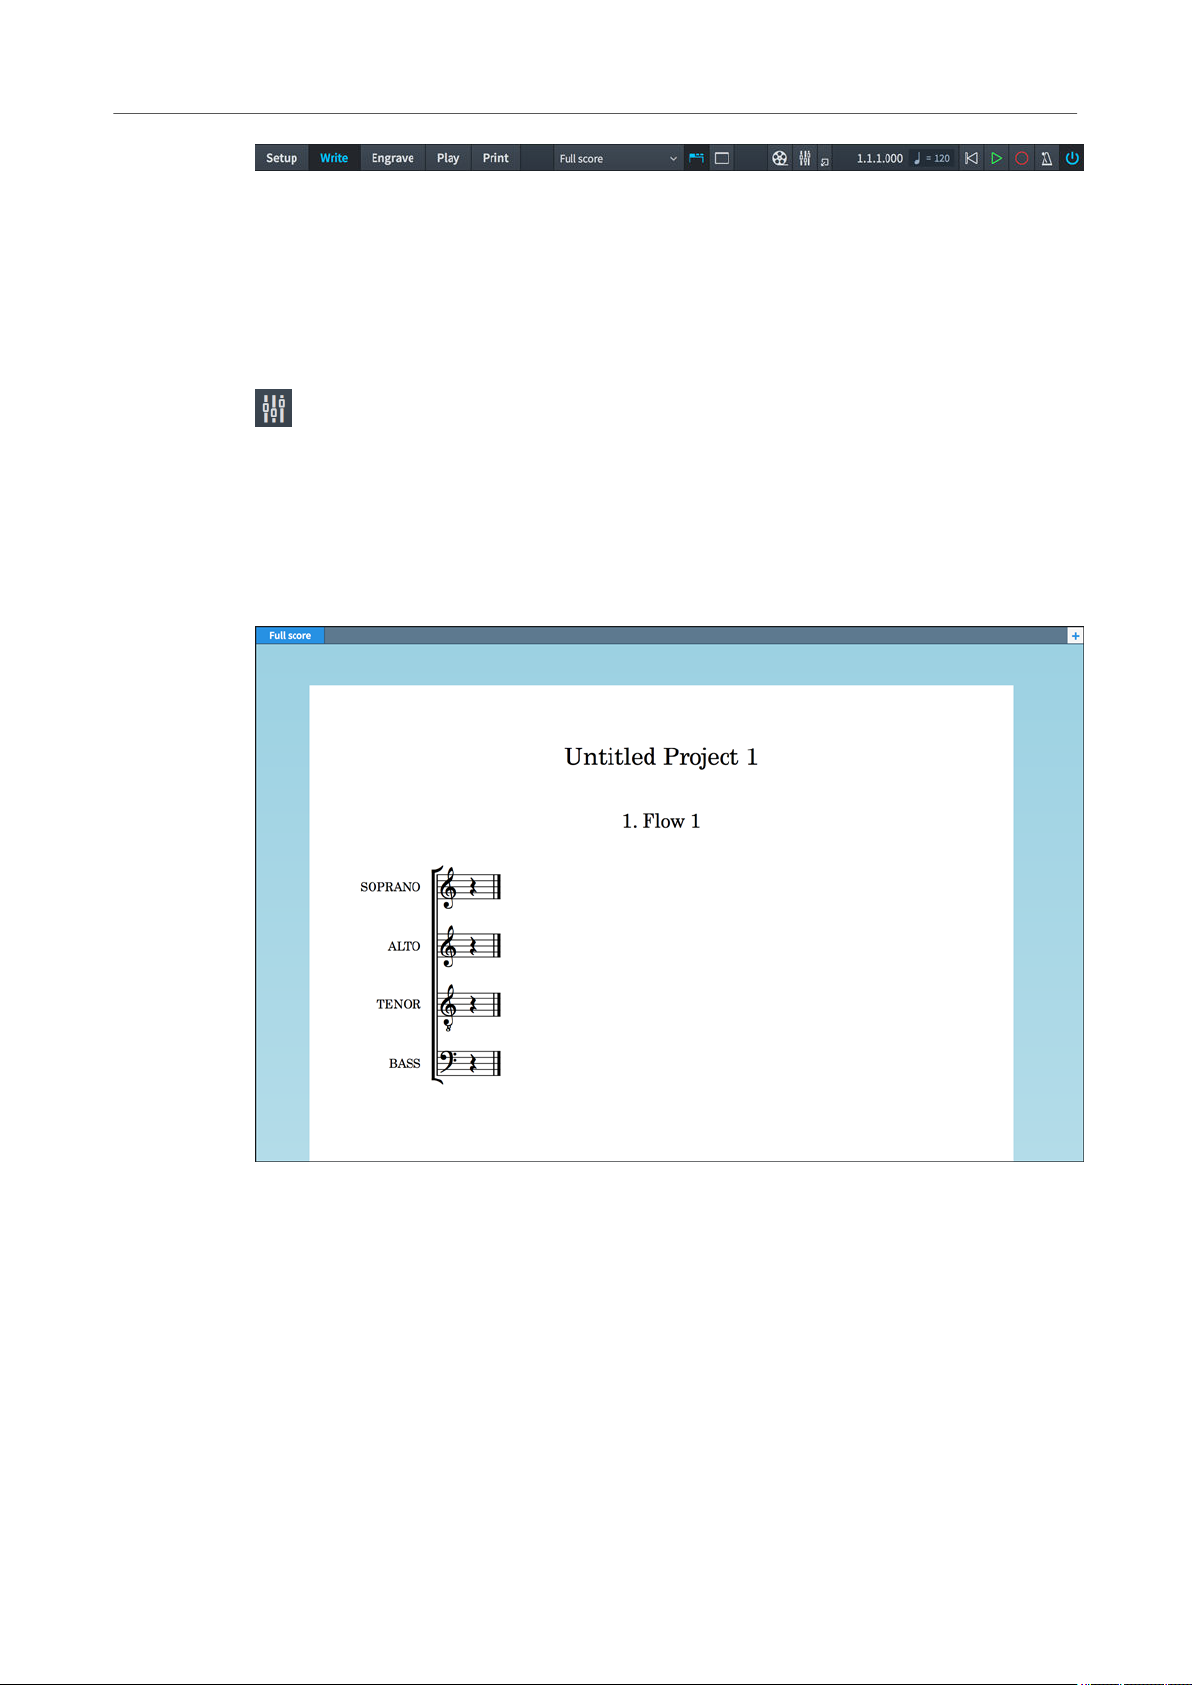
Toolbar
The toolbar is located at the top of the project window.
13
Page 14
First steps
Getting around
Toolbar
On the left side of the toolbar, the modes are displayed. By activating a mode, you change the
workspace and the available panels. The active mode is highlighted in a different color. In the
middle of the toolbar, layout options allow you to switch between the different layouts in your
project and to show/hide panels and tabs.
On the right side of the toolbar, you can open a Mixer and use basic transport controls that,
among other functions, allow you to play back and record your music.
Show Mixer button
Music area
The music area is the main part of the project window in Setup and Write modes where you set
up, input, edit and format your music. In Play mode, this area is called event display, in which
every note is displayed as an event. In Print mode, this area is called print preview area, which
shows a preview of what is going to be printed or exported as a graphic.
The music area in Write mode after starting a new project from a choral template
The music area displays the scores or the instrumental parts that you create. Above the music
area you can activate several layouts in tabs and switch between them. Layouts in Dorico
Elements allow you to show different presentations of your music. If you have a full score with
different instrumental parts, such as a violin part and a bassoon part, you can switch between
that full score layout and the layouts of each part. To save space on the screen or to focus on a
specic layout, you can hide the tabs.
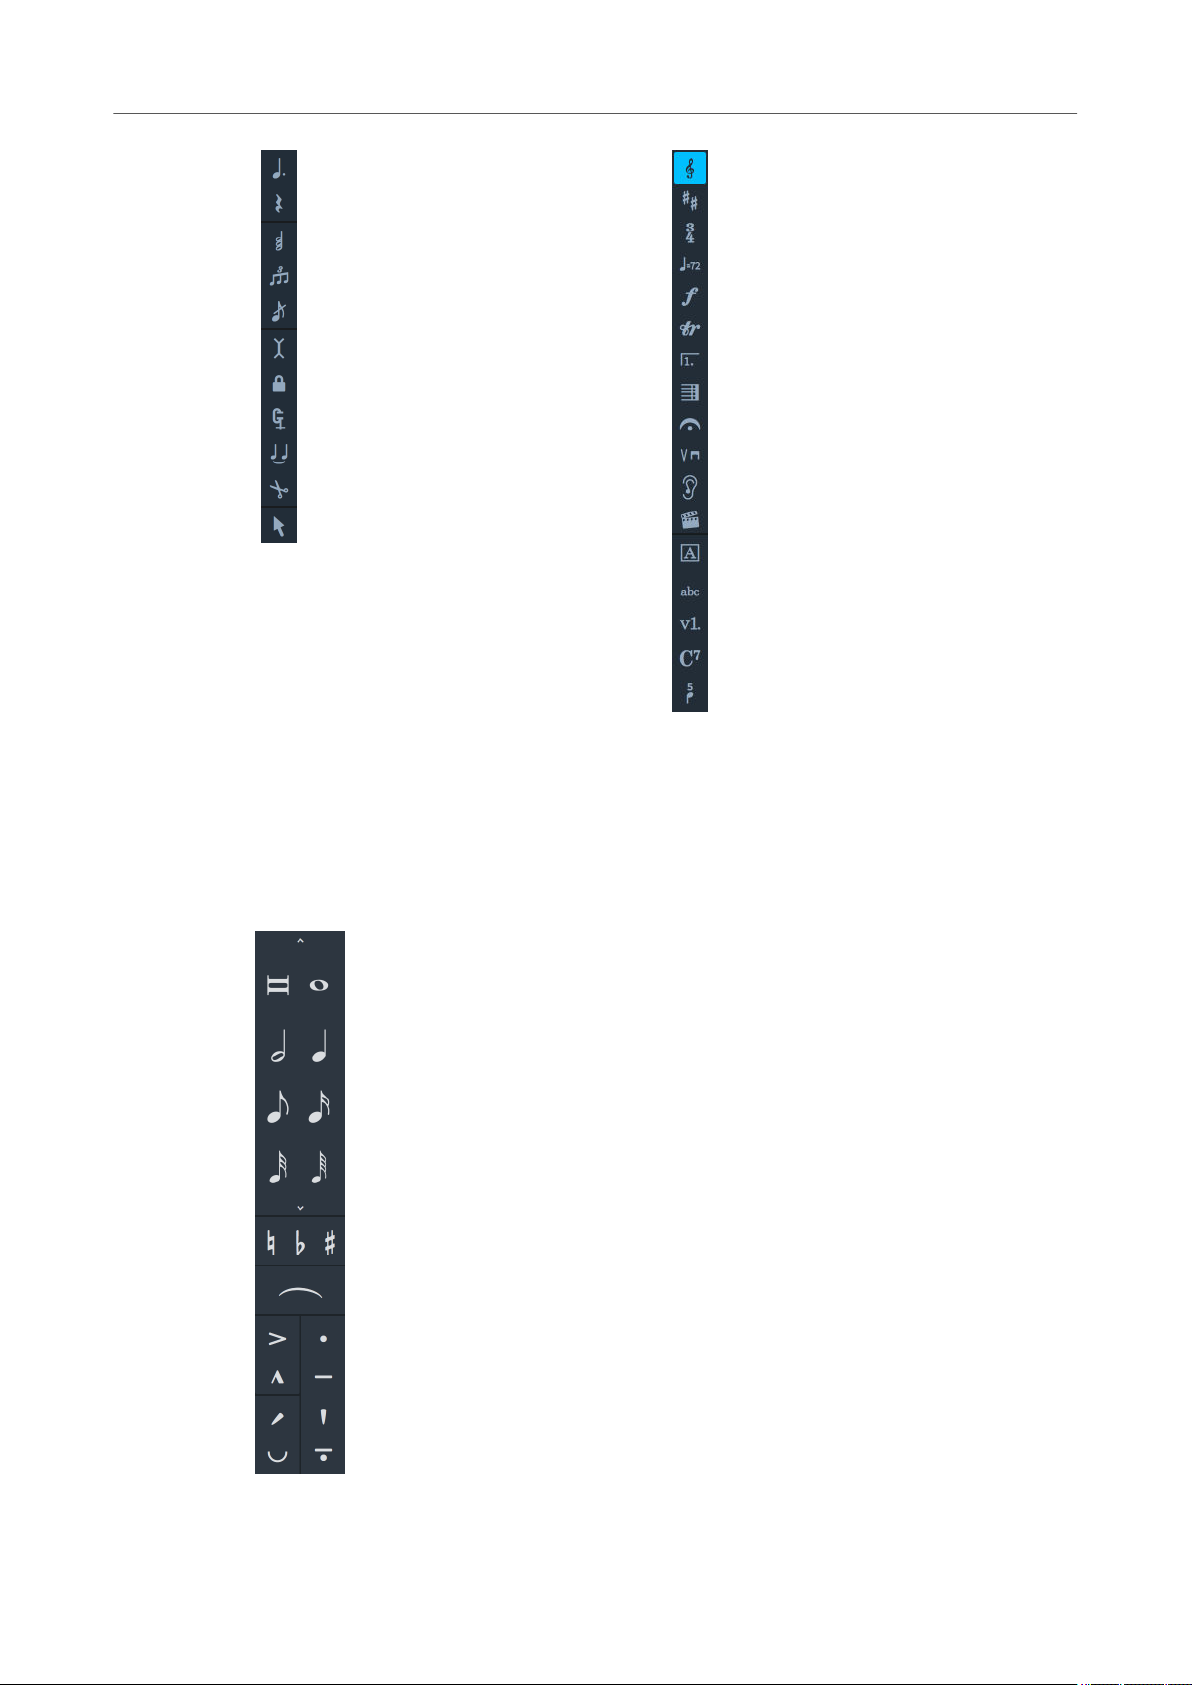
Toolboxes
Toolboxes are the columns on the left and right edges of the project window. They contain
different tools and options according to the current mode, but in general their purpose is to
provide tools that allow you to input and modify notes and notation items. The Notations toolbox
also determines which options are shown in the Notations panel.
14
Page 15
First steps
Getting around
Notes toolbox in Write mode
Notations toolbox in Write mode
Panels
Dorico Elements provides panels with various functions in all modes. When you open the
template, there is a panel on the left of the music area. This is the Notes panel in Write mode. It
contains all the durations, accidentals, slurs, and articulations that are most commonly used
when inputting notes.
Notes panel in Write mode
15
Page 16
First steps
Getting around
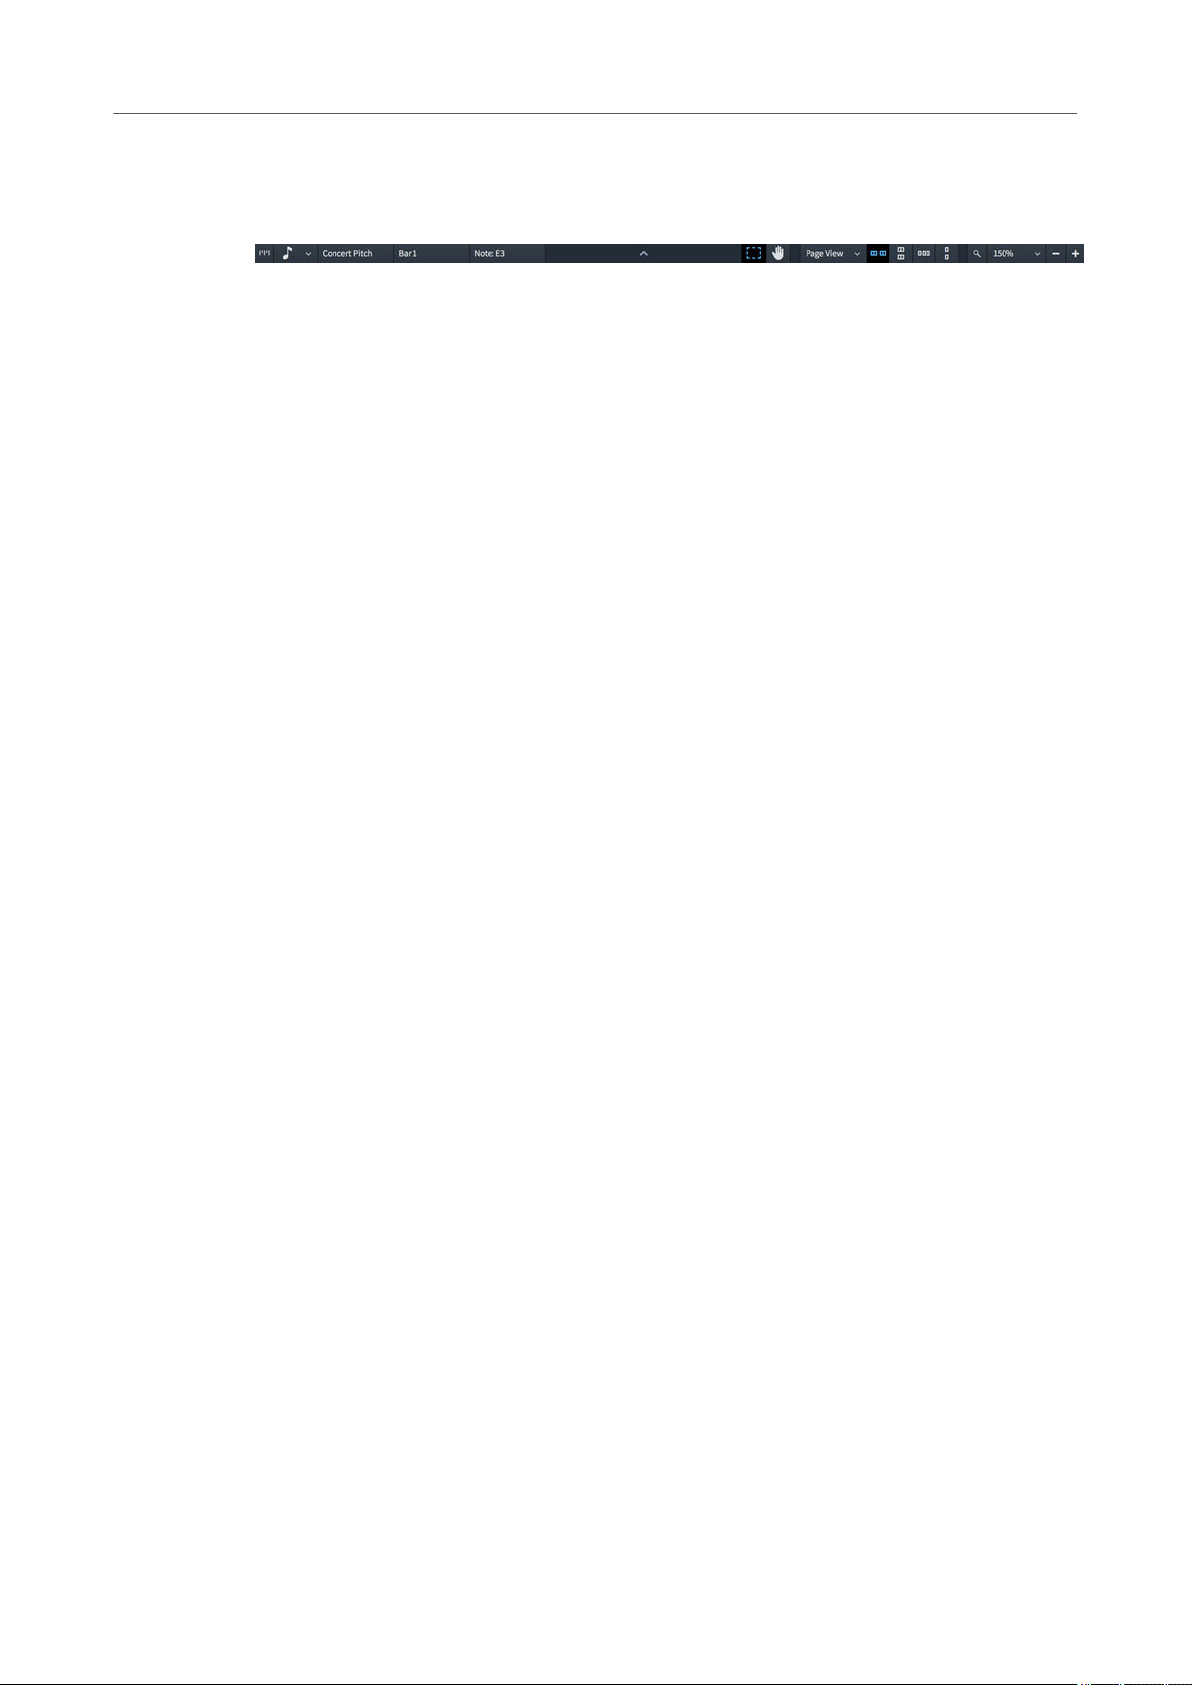
Status Bar
At the bottom of the project window, a status bar allows you to select different views and page
arrangements for the music area. It contains different options in different modes.
Status bar
RELATED LINKS
Functions of the modes on page 16
User interface on page 32
Mixer on page 324
Transport window on page 326
Functions of the modes
Modes represent different phases in the workow of preparing a score.
By switching to another mode, you change the workspace and the available panels.
Setup Mode
In Setup mode, you can create players and groups of players, and assign instruments to them.
You can dene different layouts for your project that you can print or export independently. For
example, you can print or export a layout for the full score and separate layouts for each
instrumental part.
You can switch to Setup mode in any of the following ways:
● Press Ctrl/Cmd-1.
● Click Setup in the toolbar.
● Choose Window > Setup.
Write Mode
In Write mode, you can input your music. The available toolboxes and panels allow you to input
all the notes and notation items that are most commonly used.
You can switch to Write mode in any of the following ways:
● Press Ctrl/Cmd-2.
● Click Write in the toolbar.
● Choose Window > Write.
Play Mode
In Play mode, you can assign virtual instruments and effects for playback to instruments and
playing techniques. You can make adjustments to how individual notes are played back in order
to produce a more realistic performance.
You can switch to Play mode in any of the following ways:
● Press Ctrl/Cmd-4.
● Click Play in the toolbar.
● Choose Window > Play.
Print Mode
In Print mode, you can print your layouts or export them as graphic les.
You can switch to Print mode in any of the following ways:
16
Page 17
First steps
Getting around
● Press Ctrl/Cmd-5.
● Click Print in the toolbar.
● Choose Window > Print.
RELATED LINKS
Setup mode on page 62
Write mode on page 112
Engrave mode on page 261
Print mode on page 350
Play mode on page 282
Hiding/Showing panels
You can hide/show individual or multiple panels. This is useful if you want to see more of the
music area, for example.
PROCEDURE
● Hide individual panels or all panels in the following ways:
●
To hide/show the left panel:
Press Ctrl/Cmd-7.
Click the disclosure arrow on the left edge of the main window.
Choose Window > Show Left Panel.
● To hide/show the right panel:
Press Ctrl/Cmd-9.
Click the disclosure arrow on the right edge of the main window.
Choose Window > Show Right Panel.
● To hide/show the bottom panel:
Press Ctrl/Cmd-8.
Click the disclosure arrow at the bottom of the main window.
Choose Window > Show Bottom Panel.
● To hide/show all panels:
Press Ctrl/Cmd-0.
Click Hide/Restore Panels.
Choose Window > Hide/Restore Panels.
RESULT
The corresponding panels are hidden/shown. Panels are hidden when no tick is shown beside
the corresponding panel in the menu, and shown when a tick is shown in the menu.
If you hide all active panels, the Hide/Restore Panels button in the toolbar changes its look and
indicates which panels were active but are now hidden.
EXAMPLE
Appearance when panels are shown
17
Appearance when all panels were previously shown
but are now all hidden
Page 18
First steps
Getting around
Working with tabs and windows
Dorico Elements enables you to set up your workspace according to your working style.
Dorico Elements allows you to open multiple tabs to display multiple layouts in the same project
within the same window. You can also open the same project in several windows.
RELATED LINKS
Setting up your workspace on page 49
Opening a new tab
You can open a new tab to display a different view or layout within the same project window.
Each tab can contain a separate layout or a different view of a layout already open in another tab
or window. Whenever you open a new tab, you are prompted to select a layout that you want to
display in the tab.
You can nd tabs in the tab bar, located at the top of the music area, below the toolbar. If you do
not see any tabs, click Show Tabs in the toolbar.
PROCEDURE
● To open a new tab, do one of the following:
● Press Ctrl/Cmd-T.
● At the right end of the tab bar, click New Tab.
● Choose Window > New Tab.
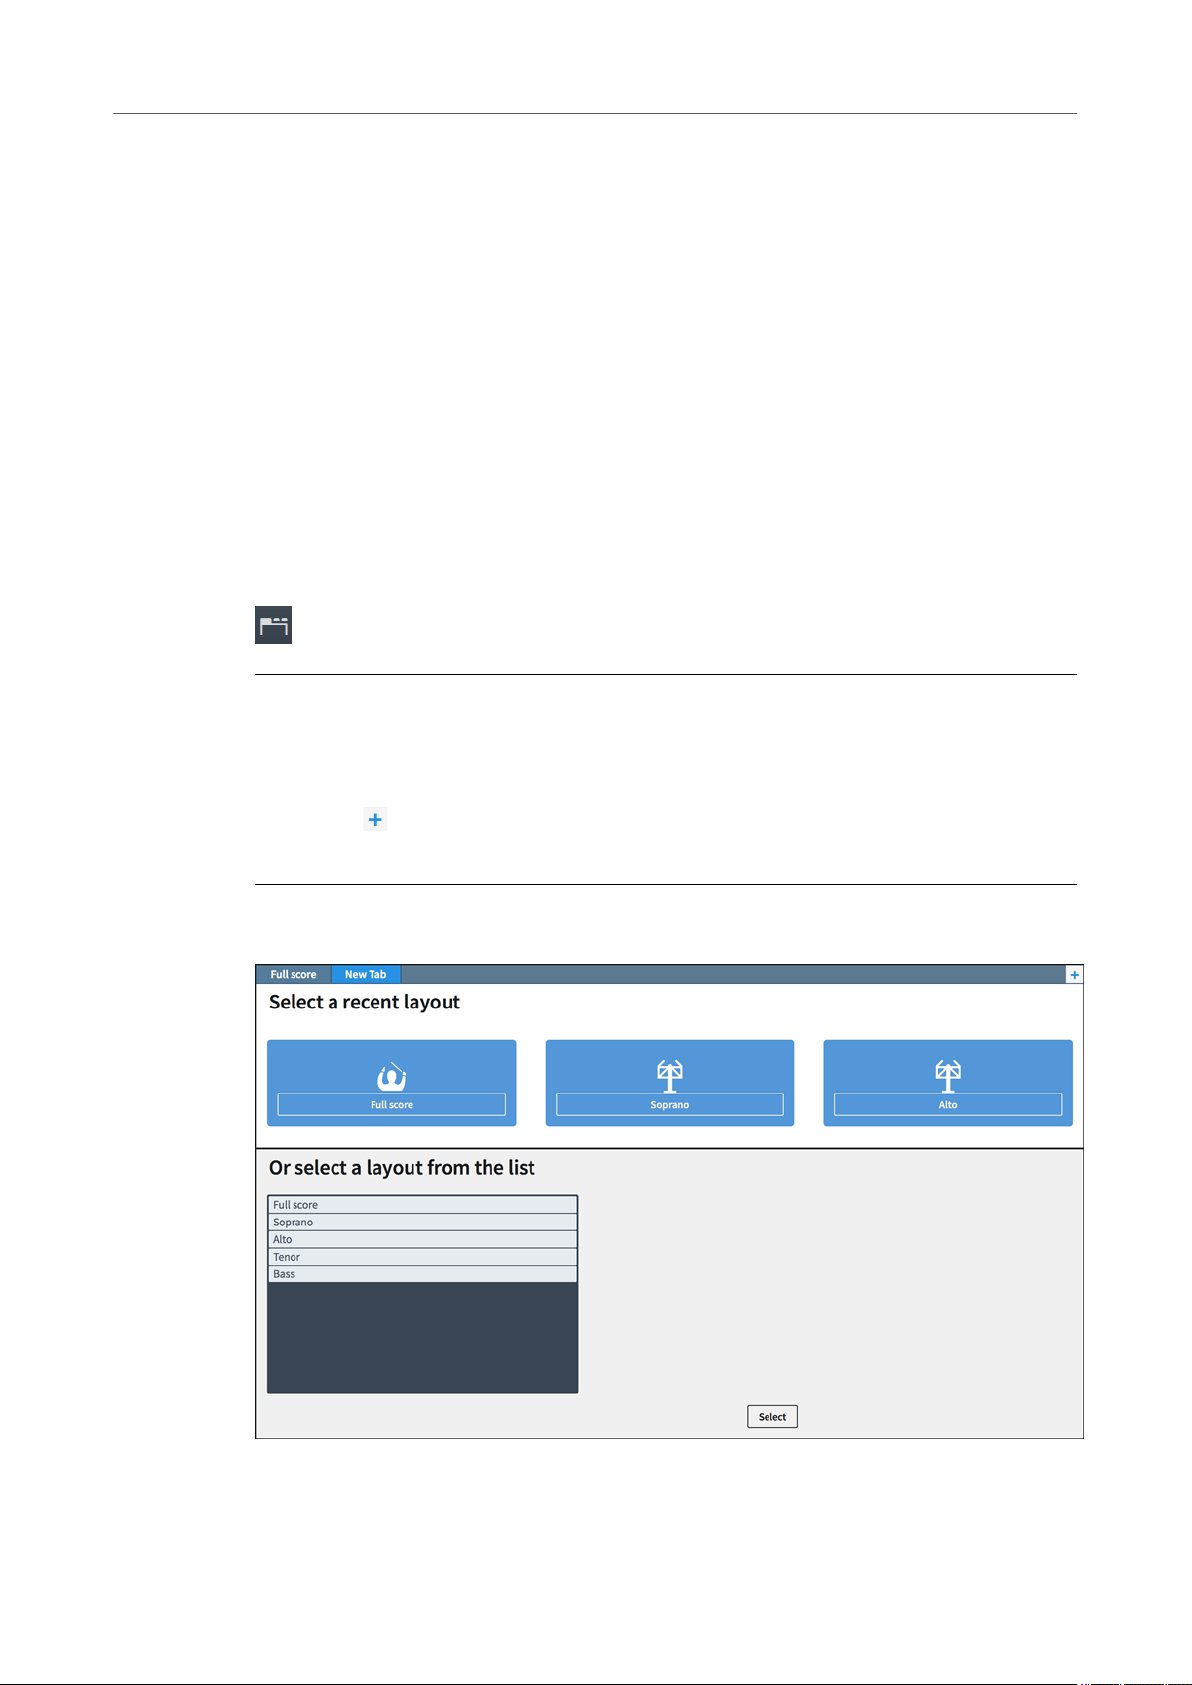
RESULT
A new tab opens that shows several icons at the top and a list of layouts at the bottom.
Options available in the music area when you open a new tab
18
Page 19
First steps
Starting a new project
AFTER COMPLETING THIS TASK
You can click one of the icons or select a layout from the list at the bottom. Alternatively, you can
click Select Layout in the toolbar and choose one of the layouts from the menu. The layout that
you choose opens in the active tab.
RELATED LINKS
Tab bar on page 40
Opening a new window
You can open another window for the same project.
This can be useful if you want to see and work on multiple layouts at the same time. You can also
open multiple project windows to show different modes of the same project.
PROCEDURE
● Open a new project window in any of the following ways:
●
Press Ctrl/Cmd-Shift-T.
●
Choose Window > New Window.
RESULT
A duplicate of the window opens. It contains the same tabs and the same view options as the
original window.
RELATED LINKS
Opening multiple project windows on page 53
Starting a new project
After getting a rst impression of the Dorico Elements user interface you can get started with
inputting your own music. In this section, you learn how to set up a new project.
PREREQUISITE
NOTE
All inputs that are made and the images that are used to accompany the steps in this chapter are
intended merely to be helpful examples. Therefore, there is no need to make the exact same
entries in order to get the depicted results.
Close the template without saving. The Hub reopens.
PROCEDURE
● Start a new project in any of the following ways:
Press Ctrl/Cmd-N.
●
Click New Empty Project.
●
RESULT
A new project window opens.
19
Page 20
First steps
Starting a new project
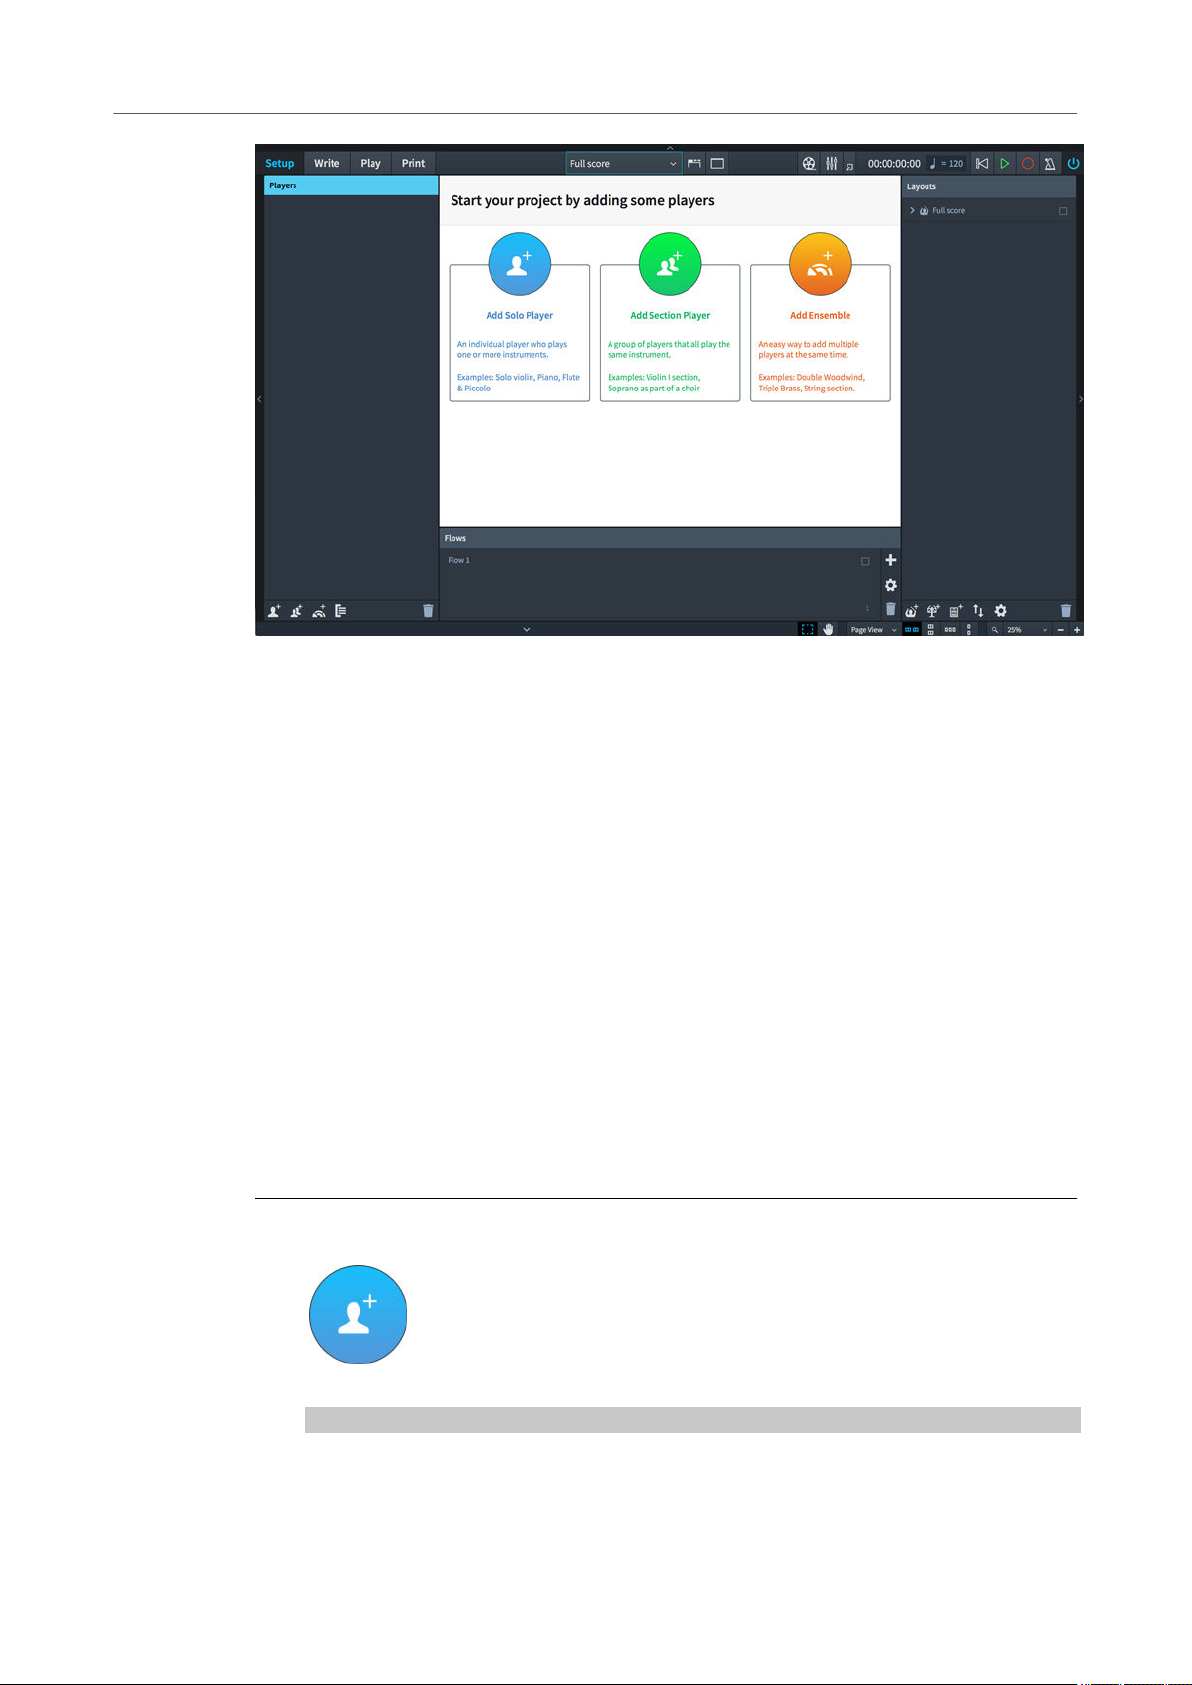
Whenever you start a new project without selecting a specic project template, Setup mode is
activated. This allows you to specify players and assign instruments right from the start. The area
in the middle, the project start area, which becomes the music area once you have added a
player, allows you to start your project with different types of players. On the right, the Layouts
panel shows a Full score entry. This entry is available in every new project. At the bottom of the
window is the Flows panel where you can specify separate spans of music for your project.
AFTER COMPLETING THIS TASK
Start your project by adding an individual player or by adding a section player and assign an
instrument. You are free to assign any kind of instrument. In this chapter, only one piano player
is added as an example.
RELATED LINKS
Windows on page 36
Flows in Dorico Elements on page 30
Adding a solo player
In this section, you learn how to add a player and assign an instrument.
PREREQUISITE
You have started a new project. You are in Setup mode.
PROCEDURE
1. Click Add Solo Player.
The instrument picker opens.
TIP
You can also open the instrument picker at any time by clicking the plus symbol to the
right of the added empty-handed player.
20
Page 21
First steps
Starting a new project
2. Select a piano in the instrument picker in any of the following ways:
Alternatively, you can right-click the player and choose Add Instrument to Player from
the context menu.
● Enter piano into the search box.
● Start entering the instrument name you want, then select it from the ltered list.
● Click an instrument family and then an instrument.
●
Press Up Arrow/Down Arrow to select an instrument family, then press Tab to
switch to the instrument column. Press Up Arrow/Down Arrow to select an
instrument.
TIP
●
An enclosure line shows which instrument family or instrument is selected
when using the keyboard to navigate.
●
Press Shift-Tab to switch back to the previous column in the instrument
picker.
3. Click Add.
RESULT
You have added your rst player. In the music area, the required piano staves including their
respective clefs are displayed.
AFTER COMPLETING THIS TASK
Save your project.
NOTE
You can save your project at any time.
Optionally, you can now edit the project title or add more players.
The following sections help you to create ows and layouts. If you want to start composing, you
can skip those sections.
RELATED LINKS
Writing music on page 22
Adding solo/section players on page 74
Creating a ow
Flows are separate spans of music within your project, for example, movements or songs. In this
section, you learn how to create a ow.
PREREQUISITE
You have added at least one player. You are in Setup mode.
PROCEDURE
● In Setup mode, click Add Flow in the Flows panel at the bottom of the window.
21
Page 22
First steps
Writing music
RESULT
A new ow is added to your project each time you click Add Flow. All existing players are
assigned to new ows, and new ows are automatically added to all existing full score and part
layouts.
AFTER COMPLETING THIS TASK
Rename the ow if required.
Optionally, deactivate the checkboxes of the players that you want to exclude from the ow in
the Players panel.
Optionally, deactivate the checkboxes of the layouts from which you want to exclude the ow in
the Layouts panel.
RELATED LINKS
Flows on page 98
Renaming ows in Setup mode on page 100
Adding ows on page 99
Creating a layout on page 22
Creating a layout
Layouts dene how music for one or more players in one or more ows is presented, including
page size, margins, staff size, and so on. In this section, you learn how to create a new layout.
PREREQUISITE
You have added at least one player and one ow. You are in Setup mode.
Several layouts are often used in ensembles with multiple players, where each player may
require a layout of the individual instrumental part. Dorico Elements automatically creates a full
score layout that contains all players and all ows as well as individual part layouts that each
contain one player and all ows. If you require a different combination of players and ows, for
example, a part containing the music for two players, you can create your own layouts, as
follows:
PROCEDURE
● In the Layouts panel, click Add Instrumental Part Layout.
RESULT
An empty part is created on the Layouts panel.
AFTER COMPLETING THIS TASK
Double-click the empty part to give it a name. Optionally, select the ows that you want to assign
to the layout in the Flows panel. Activate the checkboxes of the players that you want to assign
to the layout in the Players panel.
RELATED LINKS
Creating layouts on page 102
Writing music
Once you have set up your project, you can start writing music.
In Write mode, you can input notes and insert other notations into your score.
22
Page 23
First steps
Writing music
TIP
Throughout Dorico Elements, most tasks can be accomplished using only your computer's
keyboard. You do not need to use the mouse or touchpad. Learning key commands allows you to
use Dorico Elements most eciently. The fastest way to input music is using a MIDI keyboard. If
you do not have a MIDI keyboard, you can use your computer's keyboard. Of course, you can still
use the mouse or touchpad if you want.
In the following sections, you learn how to input notes and notation items.
Inputting your rst notes
In this section, you learn how to input notes. You can start inputting notes without having to rst
add a time signature or key signature.
PREREQUISITE
● You have set up your MIDI keyboard.
NOTE
If you have not set up a MIDI keyboard yet, you can start inputting notes with the
computer keyboard.
● You have added a piano player in Setup mode.
● You are in Write mode.
PROCEDURE
1. Select the rest that was automatically inserted next to the clef when you added a solo
player.
2. Start note input in any of the following ways:
● Select the staff where you want to input notes and press Shift-N or Return.
● Select the staff where you want to input notes and choose Write > Note Input.
● Double-click the staff where you want to input notes.
The caret is displayed.
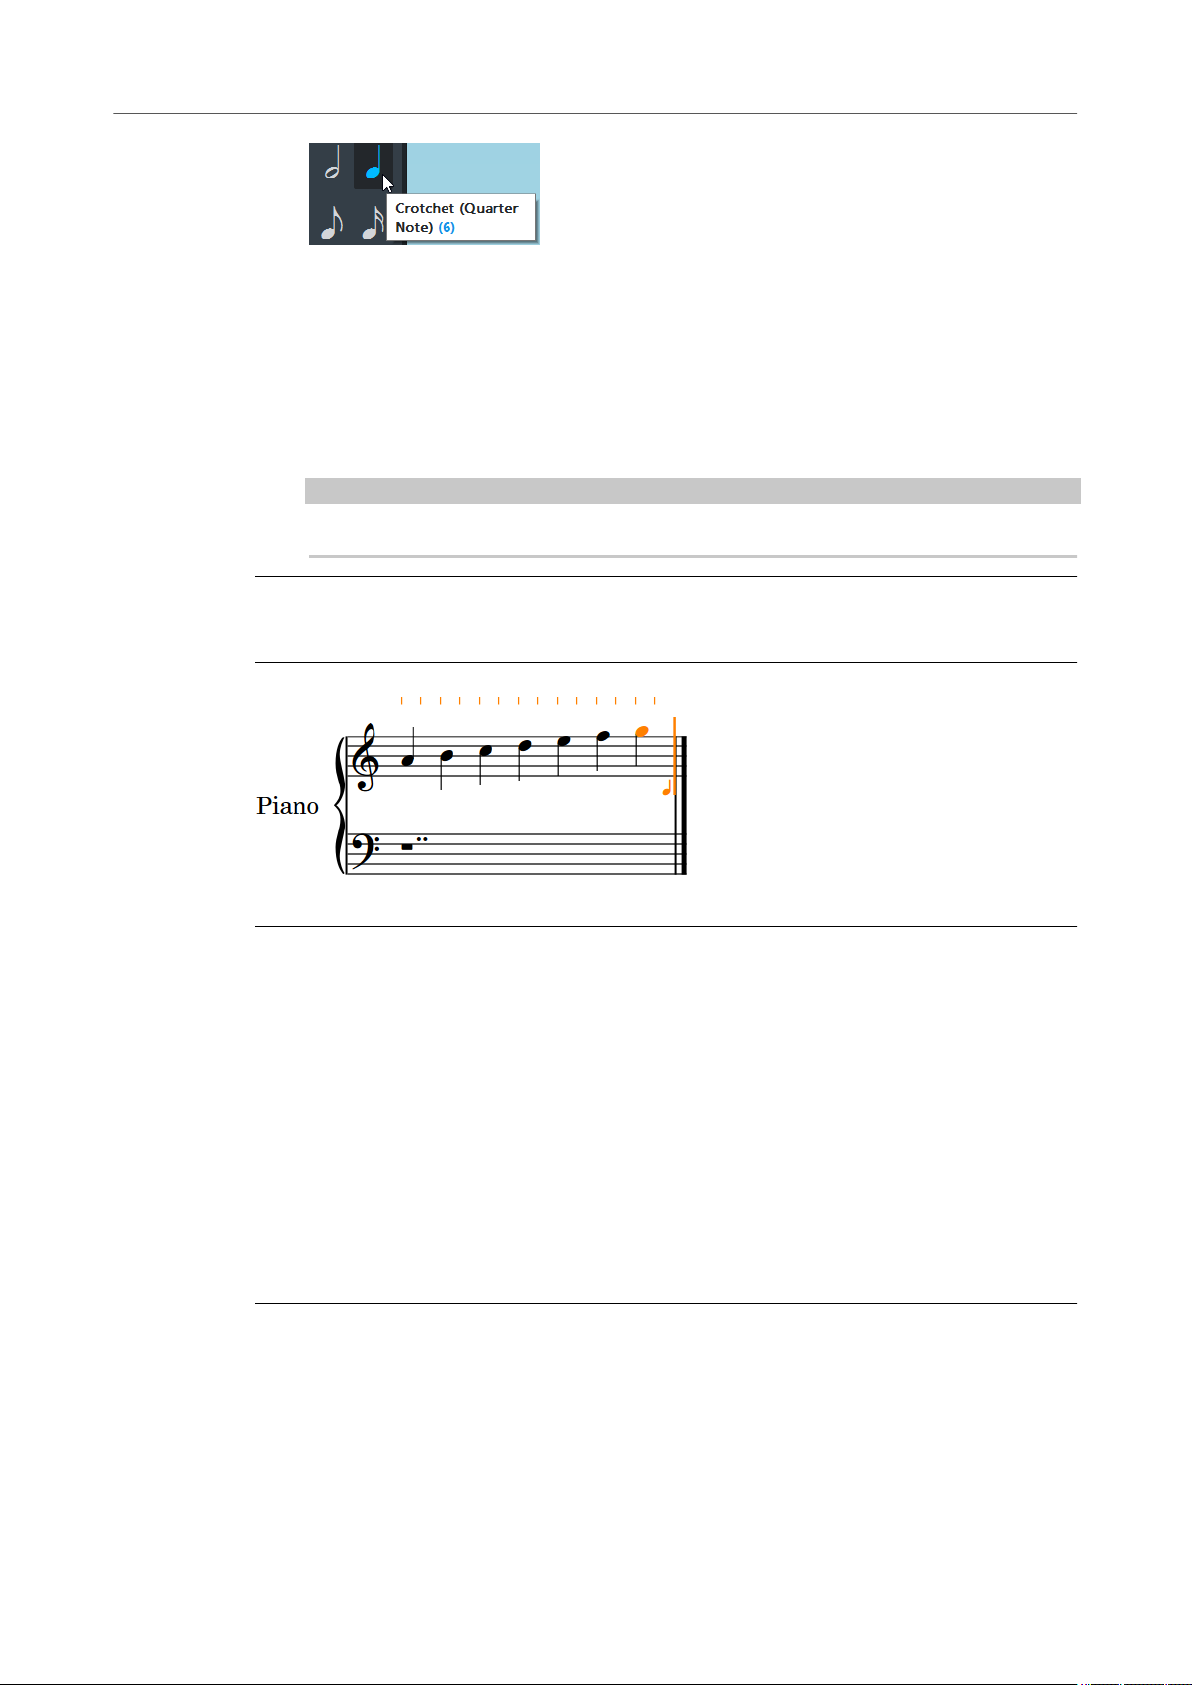
3. In the Notes panel, click a duration.
NOTE
By default, Dorico Elements selects a quarter note (crotchet) for you.
23
Page 24
First steps
Writing music
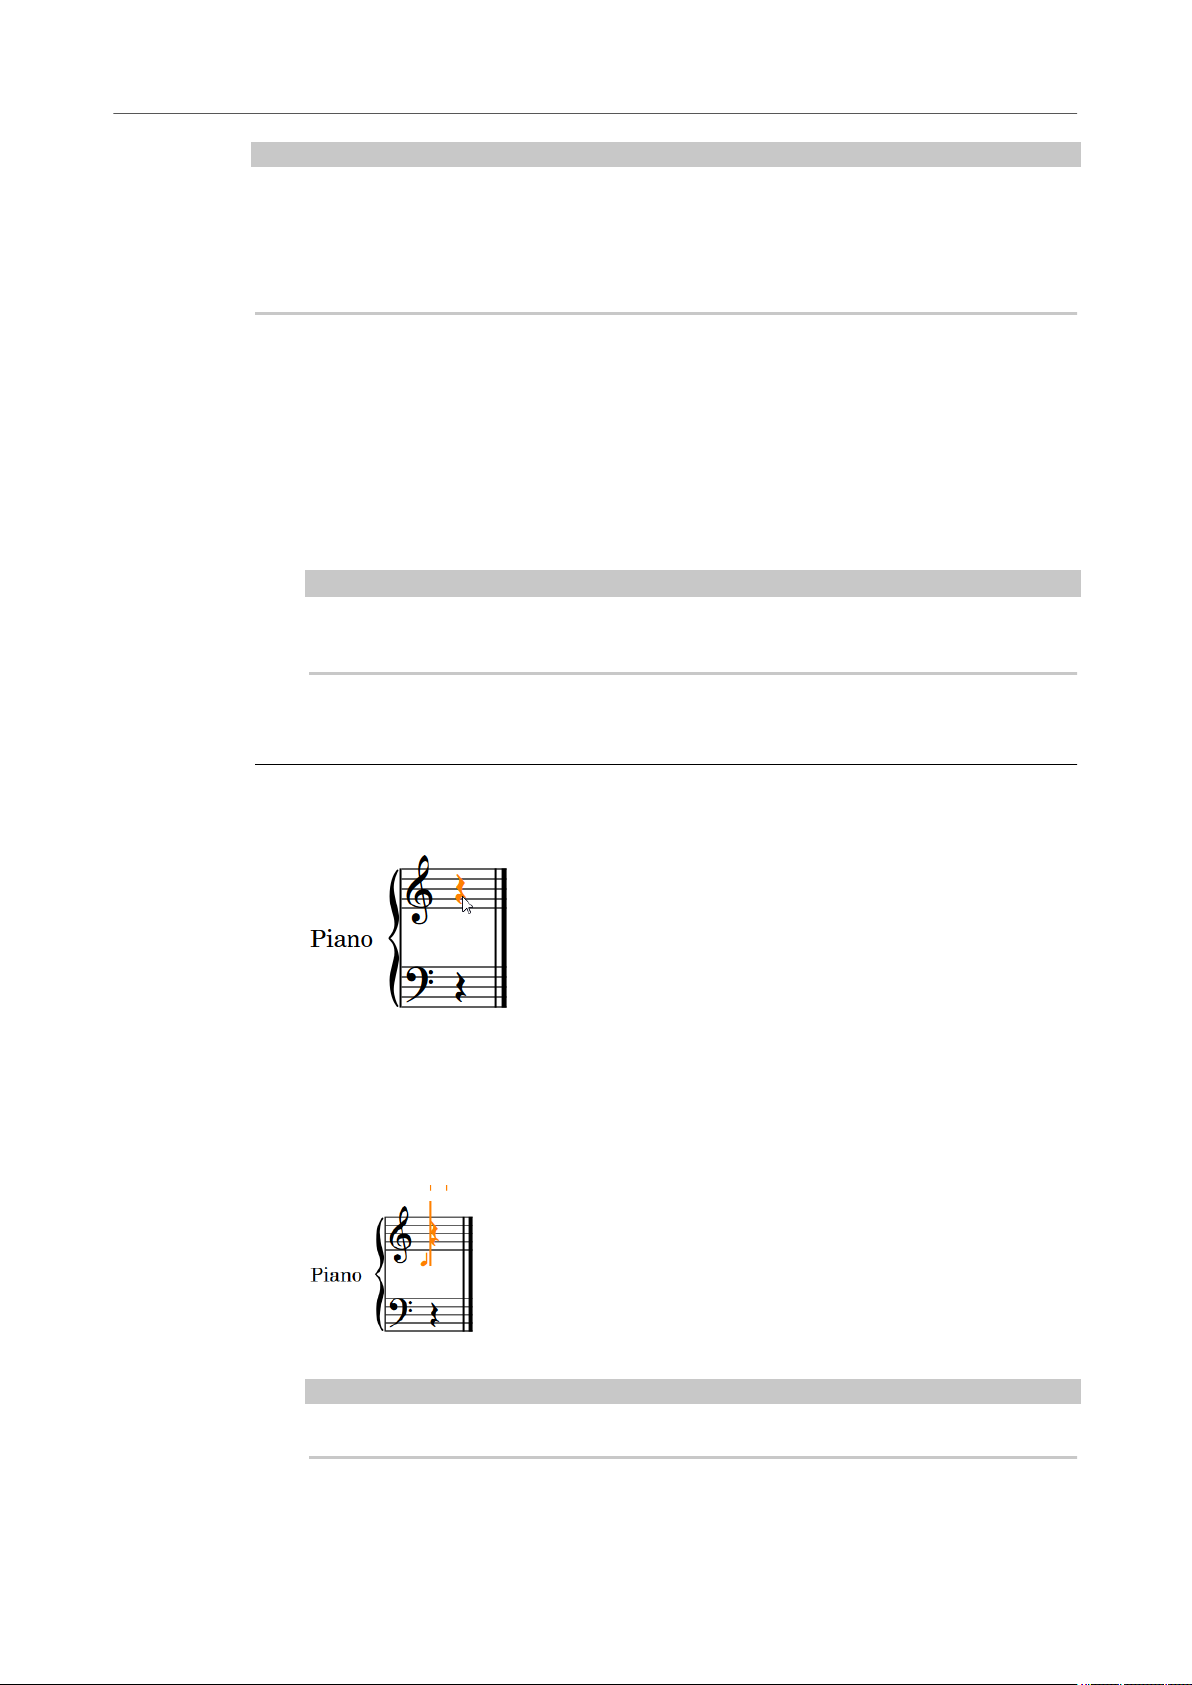
4. Start playing notes on the MIDI keyboard, or press A, B, C, D, E, F, G on the computer
keyboard to input the corresponding pitches.
If you want higher or lower pitch for the note that Dorico Elements inputs for you, you can
force a different register.
● To input a note above the previously input note, press Shift-Alt as well as the letter
for the note.
●
To input a note below the previously input note, press Ctrl (macOS) or Ctrl-Alt
(Windows) as well as the letter for the note.
NOTE
You must press Ctrl on Mac, not Cmd.
RESULT
The pitches you enter or play in are input as notes.
EXAMPLE
Input notes with the caret still active after the nal note
RELATED LINKS
Write mode on page 112
Register selection during step input on page 136
Key commands in Dorico Elements on page 10
Adding a time signature on page 24
Adding a time signature
In this section, you learn how to add a time signature at the beginning of the staff. You can add a
time signature before or after inputting a melody.
PREREQUISITE
Press Esc to deactivate the caret.
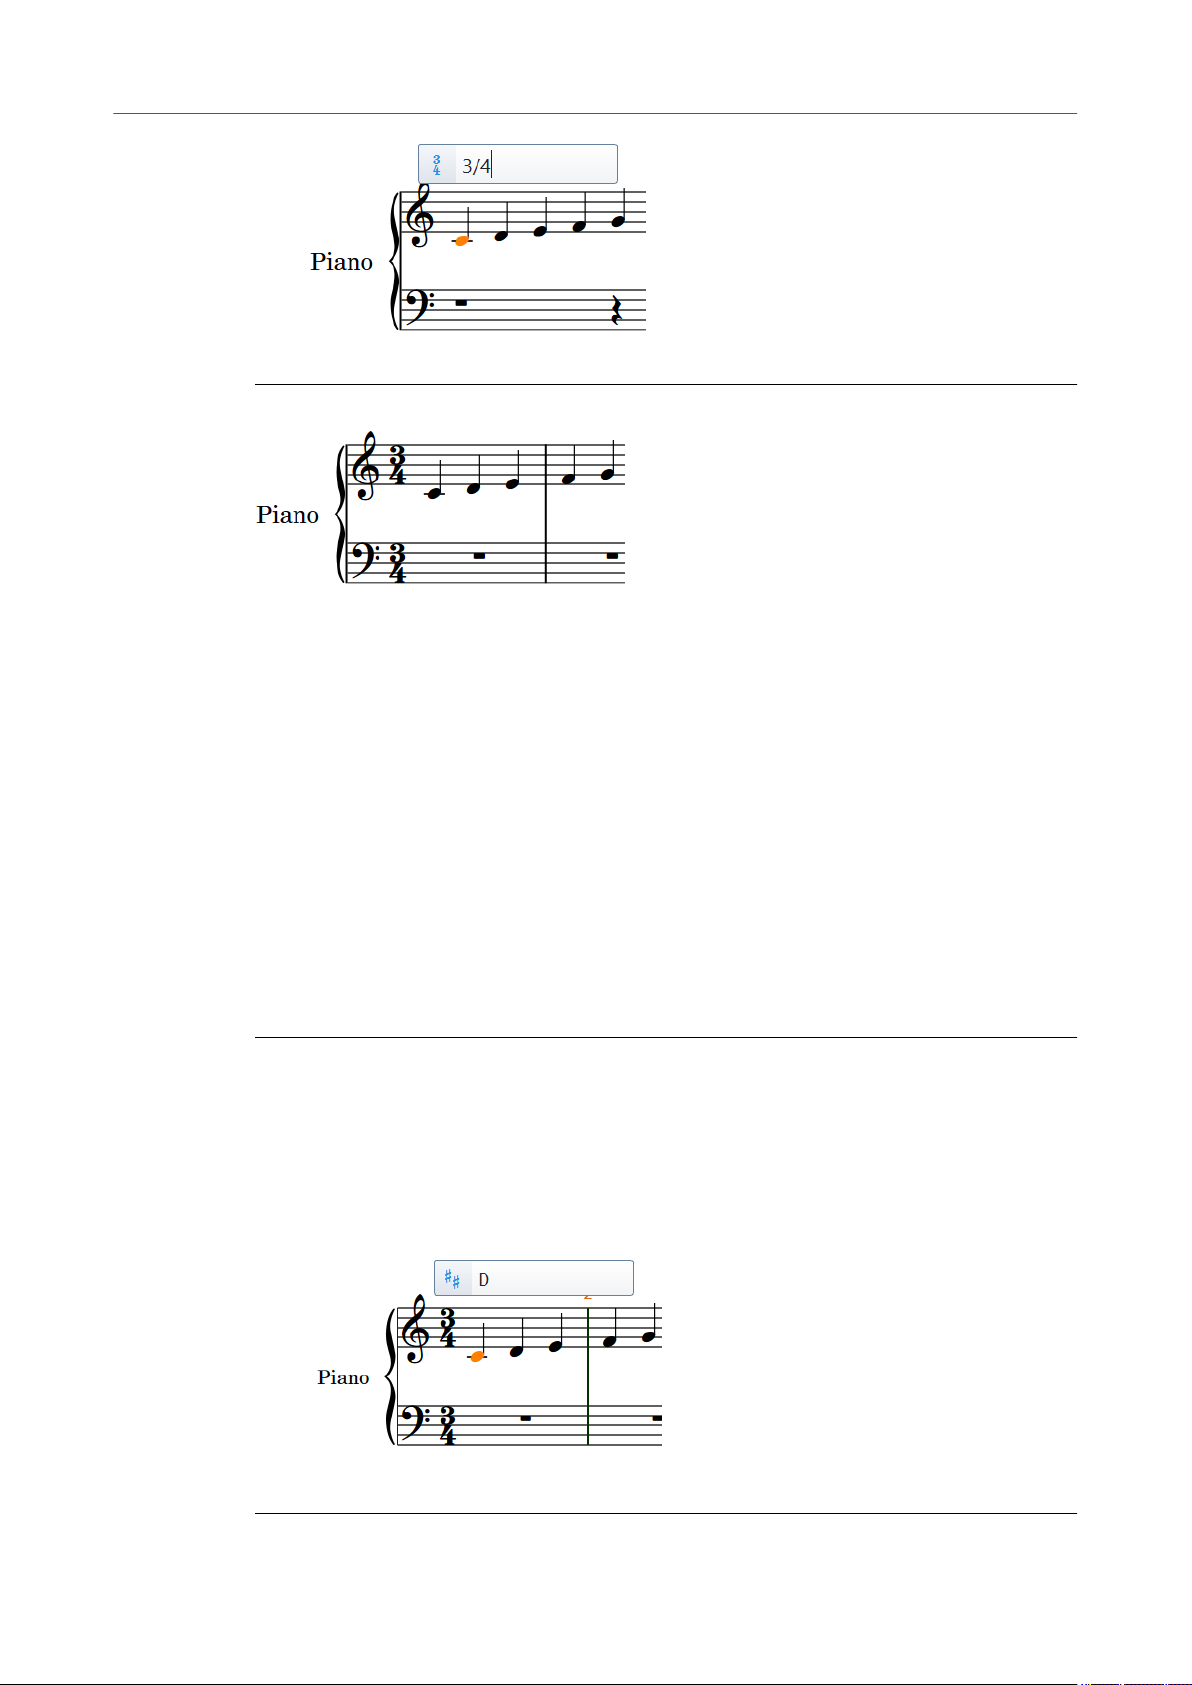
PROCEDURE
1. Select the rst note on the staff.
2. Press Shift-M.
The time signatures popover opens above the staff.
3. Enter a typical time signature into the popover, such as 3/4.
24
Page 25
First steps
Writing music
4. Press Return to close the popover.
RESULT
The time signature is automatically input to the left of the note, and the required bar lines are
automatically inserted at the correct positions. If you want to insert a key signature, proceed to
the next section.
RELATED LINKS
Adding a key signature on page 25
Adding a key signature
In this section, you learn how to add a key signature. You can add a key signature at any
rhythmic position on the staff.
When you start a new project from scratch, by default, there is no key signature shown.
Depending on the kind of music you are writing, the key signature might be taken to mean C
major or an open key with no specic tonal center.
You can change the key anywhere on the staff. To add a different key signature at the beginning
of the staff, for example, D major, proceed as follows:
PROCEDURE
1. Select the rst note on the staff.
2. Press Shift-K.
This opens the key signatures popover on top of the staff.
3. Enter a key signature into the popover. If you want to enter D major, enter an uppercase
D.
For D minor, enter a lowercase d.
4. Press Return.
25
Page 26
First steps
Writing music
RESULT
The key signature is inserted between the clef and the time signature. Dorico Elements
automatically adds accidentals where necessary.
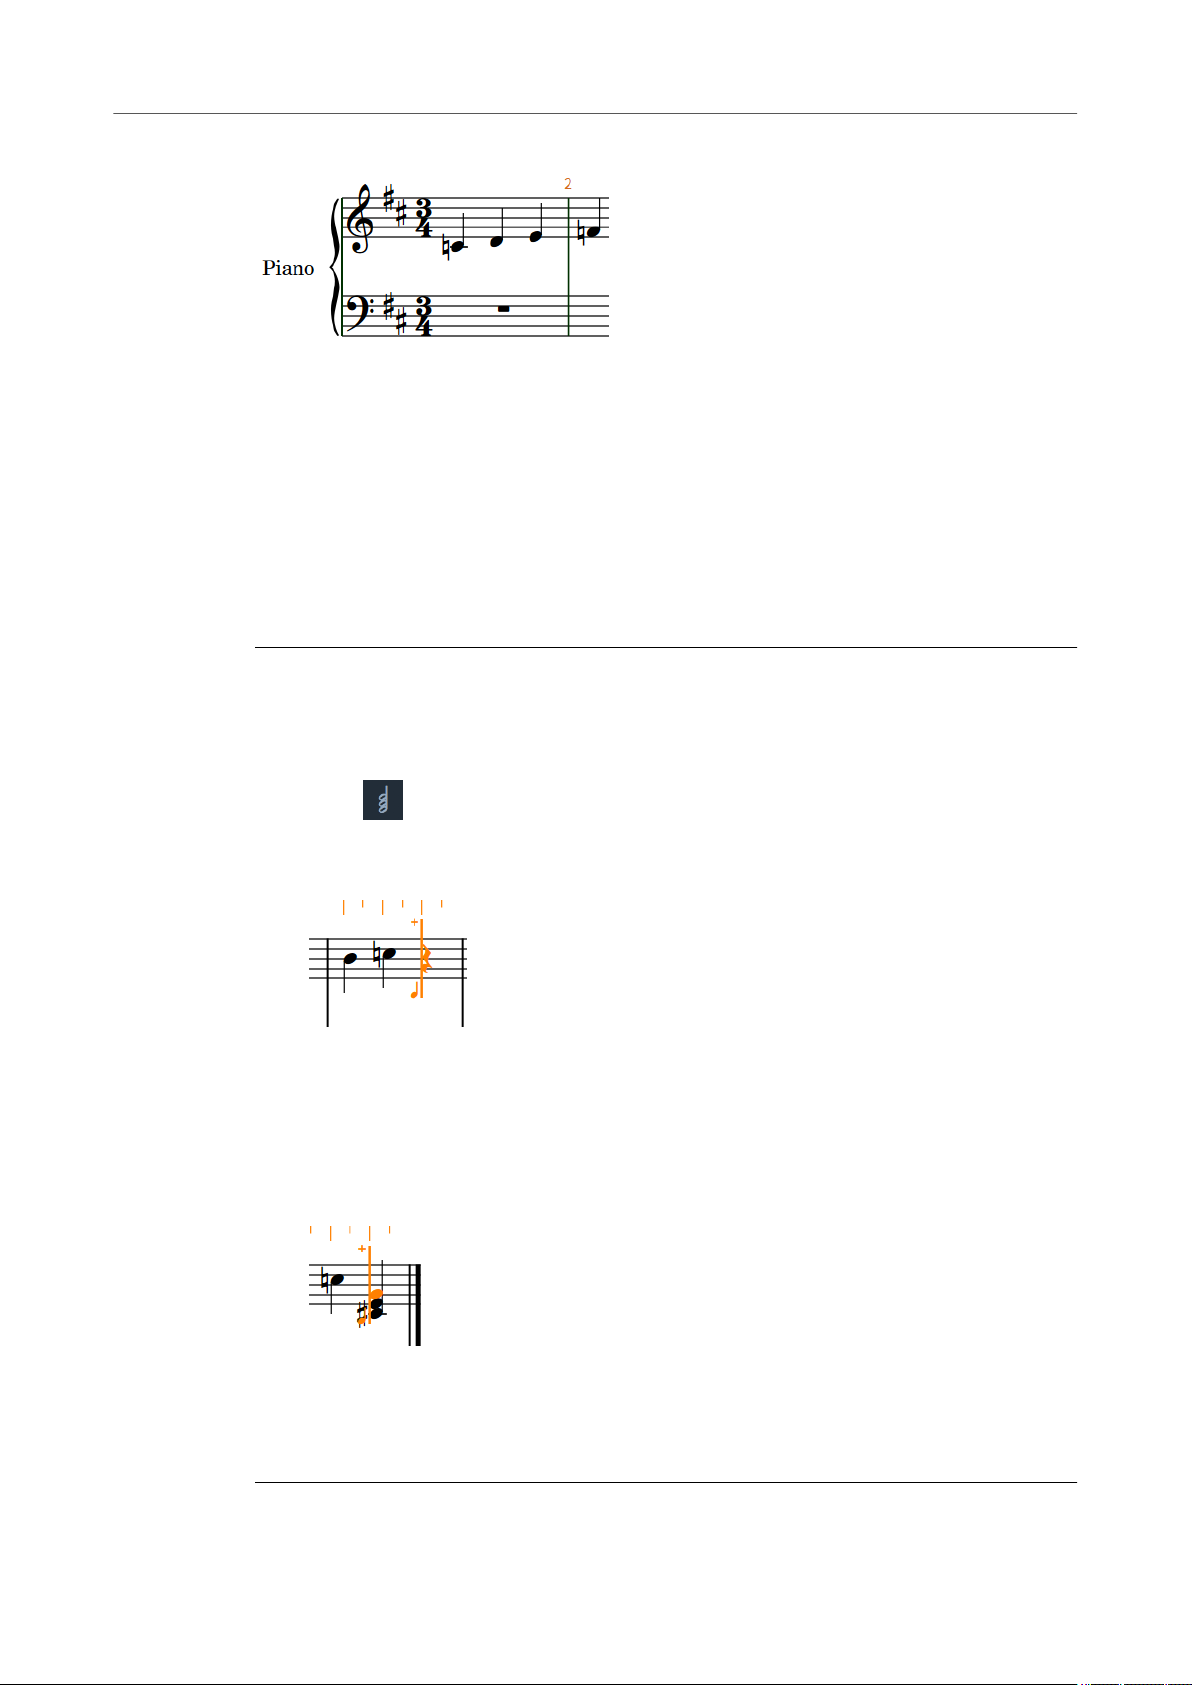
Inputting your rst chord
In this section, you learn how to input a chord with the computer keyboard, using chord mode. If
you want to use a MIDI keyboard instead, you can input the chord with your keyboard, and you
do not need to use chord mode. Dorico Elements automatically inputs the correct notes.
PREREQUISITE
Select the last note or rest on the staff, and press Return. This shows the caret.
PROCEDURE
1. Activate Chords in any of the following ways:
● Press Q.
● In the Notes toolbox, click Chords.
The caret shows a plus sign at the top.
2. Optional: In the Notes panel, select a duration.
3. Input the notes that you want in your chord by pressing keys from A to G, one after the
other. For example, for a C major chord, press C, E, and G.
By default, Dorico Elements adds each new note above the previous note. You can select
the register of notes manually.
The example shows a possible result.
4. Press Space to advance the caret to the next note position and continue with the next
chord.
Dorico Elements expects further chord input until you deactivate it.
5. Optional: To deactivate chord input, press Q or deactivate Chords.
26
Page 27

First steps
Writing music
RELATED LINKS
Key commands in Dorico Elements on page 10
Register selection during step input on page 136
27
Page 28

Dorico Elements concepts
The following sections give you an overview of the design philosophy as well as concepts on
which Dorico Elements is based.
We recommend that you familiarize yourself with these concepts as these are often returned to
throughout the documentation.
Design philosophy
If you are experienced with other scoring applications and are interested in learning more about
deep design considerations for scoring programs, you may nd the following discussion
illuminating, but everybody can safely skip it.
Dorico Elements has a forward-thinking design that is led by musical concepts rather than
computational convenience, and this provides many benets.
Higher-level concepts
In most graphically-orientated scoring applications, the highest-level concept is the staff or the
instrument denition that creates a staff or staves. When setting up your full score, you start by
adding the correct number of staves, and you are immediately forced into making decisions
about the layout. This means that you must know in advance whether two utes share a staff or
have their own individual staves, or whether there should be two trumpets or three. Many of
these decisions have signicant effects throughout the process of inputting, editing, and
producing individual instrumental parts.
Typically, every system of a score must contain the same number of staves, even if some are
hidden on particular systems. This requires the user to manage common conventions for
themselves, such as multiple players of the same instrument sharing staves. This can be timeconsuming and is naturally error-prone.
Dorico Elements is designed to conform more closely to how music is performed in the real
world and to make the score a exible expression of the practical choices that go into a musical
performance, rather than to make the musical performance subservient to the way the score was
initially prepared.
To that end, the highest-level concept of Dorico Elements is the group of human musicians that
performs a score. A score can be written for one or more groups, for example, a double choir or
an orchestra plus off-stage chamber ensemble, and so on. Each group includes one or more
players which correspond to the humans who play one or more instruments. Players may either
be individuals who can play more than one instrument, for example, an oboist doubling cor
anglais, or groups in which everyone plays only one instrument, for example, eight desks of
violinists.
The actual music that is played by the group in your score belongs to one or more ows. A ow is
any span of music that stands alone, for example, a whole song, a movement of a sonata or
symphony, a number in a musical show, or even a short scale or exercise. Players might or might
not have any music to play in a given ow. For example, all the brass players might be omitted
from the slow movement of a classical symphony, or certain players might have nothing to do in
28
Page 29

Dorico Elements concepts
Key musical concepts
some cues in a movie score. This is no problem as you can combine players in ows in any
combination.
Dorico Elements provides several benets. Chief among them is its ability to produce different
score layouts that share the same musical content. For example, in the same project you can
create a full score with each player's music on separate staves, a custom score layout containing
just the piano and vocal staves, and an instrumental part for each player that only contains the
music belonging to them.
One crucial difference between Dorico Elements and other scoring applications is that the
musical content exists independently of the score layout in which it is viewed.
Key musical concepts
In order to work eciently with Dorico Elements, it is important to understand the conceptual
model of the program.
The model is closely based on the practical considerations of how music is written and performed
by real humans.
RELATED LINKS
Projects in Dorico Elements on page 29
Modes in Dorico Elements on page 29
Instruments in Dorico Elements on page 30
Players in Dorico Elements on page 30
Groups in Dorico Elements on page 30
Flows in Dorico Elements on page 30
Layouts in Dorico Elements on page 31
Projects in Dorico Elements
A project is an individual document that you create within Dorico Elements. It can contain
multiple separate pieces of music, from very short to very long, written for any combination of
instruments and using different layouts.
Modes in Dorico Elements
Modes represent different phases in the workow of preparing a score.
Dorico Elements contains the following modes:
Setup
In this mode, you can set up the players and instruments that are played in the
project. You can create and manage ows and set up layouts.
Write
In this mode, you can write your music. You can insert notes and rests, key
signatures, time signatures, and idiomatic notations.
Play
In this mode, you can set up your project for playback. You can assign VST
instruments, adjust the mix, and change the sounding duration of notes in playback
without affecting their notated duration.
Print
In this mode, you can dene different print jobs, such as printing full conductors
scores, study scores, individual parts, and so on. For every print job, you can specify
options for page size and duplex printing. You can also manage other output, such
as exports to various le types, such as PNG.
29
Page 30
Dorico Elements concepts
Key musical concepts
Instruments in Dorico Elements
In Dorico Elements, an instrument is an individual musical instrument, such as a piano, a ute, or
a violin.
Dorico Elements has a database of information about properties of each instrument. These
include the playable range, common and uncommon playing techniques, notational conventions,
transposition properties, tunings, clef, number of staves, type of staff, and so on.
RELATED LINKS
Instruments on page 82
Players in Dorico Elements
In Dorico Elements, a player can represent an individual musician or several musicians.
●
Solo players are individual musicians who can play one or more instruments, for example,
a clarinettist who doubles on alto saxophone or a percussionist who plays bass drum,
clash cymbals, and triangle.
●
Section players represent multiple musicians who all play the same instrument, for
example, a violin section player can represent eight desks of musicians, or a soprano
section player can represent the whole soprano section in a mixed voice choir.
NOTE
Section players cannot double instruments, but they can play divisi. This means that they can be
divided into smaller units, which is commonly required for strings.
Groups in Dorico Elements
A group represents a collection of musicians that are considered together, such as a choir,
orchestra, or a chamber ensemble.
In a typical project, there might be only one group that contains all of the dened players, but
you can dene as many groups as required to allow easy separation of forces in larger-scale
works. It might also be necessary to assign players to these groups for the purposes of, among
other things, properly bracketing and labelling their staves in the conductor's score.
EXAMPLE
A work for double choir and organ can dene the two choirs as separate groups. This allows each
choir to have its own label in addition to the labels for each sectional player (soprano, alto, tenor,
bass) within the choir.
In a complex work, such as Elliott Carter's “A Symphony of Three Orchestras”, each of the
orchestras can be dened as a separate group.
Flows in Dorico Elements
Flows are separate spans of music that are completely independent in musical content, for
example, a song, a movement in a sonata or symphony, a number in a stage musical, or a short
scale or sight-reading exercise of only a few bars in length. A single project can contain one or
more ows.
Each ow can contain music for any combination of players. For example, brass players are often
tacet in the second movements of Classical-period symphonies, so you can simply remove brass
players from the ow for the second movement. In a set of cues for a movie, for example,
specic players might not be required in some cues, so the corresponding ows can contain only
those players who have anything to play.
30
Page 31

Dorico Elements concepts
Key musical concepts
The correct assignment of players to ows allows Dorico Elements, for example, to generate
tacet sheets automatically for individual instrumental parts.
Layouts in Dorico Elements
Layouts dene how music for one or more players in one or more ows is presented, including
page size, margins, staff size, and so on.
Layouts combine musical content, as represented by ows, with rules for page layout and music
engraving. As well as part layouts for individual players, you can have layouts for multiple players
drawn from multiple different ows. You can use the layouts to produce paginated music
notation that can be printed or exported in various formats.
A typical project for an ensemble of multiple players contains several layouts. For example, a
work for string quartet in three movements contains four solo players – two violins, one viola,
and one cello – and three ows, one for each movement. Such a project might require ve
layouts:
●
Four layouts each containing the music from all three ows for one of the solo players,
that is, the individual instrumental parts
●
One layout containing the music from all three ows and all four players, that is, the full
score
Each layout provides independent control over practically every aspect of the visual appearance
of the music, including independent staff size, note spacing, and system formatting.
Each layout can have independent page layout properties, such as page size, margins, running
headers, and footers. These can be dened as master pages and then be applied freely to left- or
right-hand pages or to specic pages in a layout, for example, the rst or last page.
Flow frames dene where music appears on each page. One or more ows are assigned to each
ow frame, in a manner analogous to how ows of text are assigned to text frames in desktop
publishing applications. Dorico Elements also provides for text frames, which allow the
presentation of blocks of text, such as prefatory material, critical commentary, and block lyrics.
NOTE
The page layout features of Dorico Elements allow you to have multiple ow frames and text
frames on the same page. This enables you to combine music from multiple ows on the same
page.
31
Page 32

User interface
The user interface of Dorico Elements is designed to be as unobtrusive as possible while keeping
all of the important tools at your ngertips.
You can explore the interface without doing any damage to your project. You can always undo
any inadvertent edits or close your project without saving it.
Hub
When you start Dorico Elements, the Hub opens. The Hub keeps you up-to-date with the latest
information and assists you with organizing your projects. It consists of the News section and
the Projects section.
The Hub contains the following:
1 Recent Projects
Allows you quick access to the projects that you worked on last. Selecting Recent Projects
shows them in the list. You can scroll through the list using either a mouse/trackpad or
using the Up Arrow/Down Arrow keys.
2 Project template categories
Allows you quick access to a suitable project template in the available categories. Selecting
a category shows the possible templates in that category in the list.
3 New Empty Project
Starts a new project with no players or ows.
4 List
32
Page 33

User interface
Hub
Displays options according to your selection on the left of the dialog.
5 Open Other
Allows you to search for and open any other project le in your le system.
6 New from Template (project template selected)
Creates a new project using the selected project template. Only available if you have
selected a project template.
Open Selected Project (recent project selected)
Opens the recent project le that you selected in the list. Alternatively, you can double-click
the le name or select the le and press Return.
7 User Forum
Links you to the user forum on the Steinberg website.
8 Downloads
Links you to the download page on the Steinberg website, where you can nd relevant
update installers and a link to the documentation.
9 News
Displays recent Steinberg news. Double-clicking a news item, or selecting it and clicking
Read More, opens it in a web browser.
10 Video Tutorials
Displays recent Dorico Elements tutorials. Double-clicking a video tutorial, or selecting it
and clicking Read More, opens it in a web browser.
11 More
Links you directly to the Dorico YouTube channel.
RELATED LINKS
Starting new projects on page 33
Starting new projects from project templates on page 33
Brackets according to project template categories on page 34
Starting new projects
Dorico Elements provides several ways to start new projects.
PROCEDURE
● Start a new project in any of the following ways:
● Press Ctrl/Cmd-N at any time.
● Choose File > New at any time.
● In the Hub, click New Empty Project.
RESULT
A new project window opens.
Starting new projects from project templates
Dorico Elements provides multiple project templates that you can use to start a new project, for
example, multiple types of orchestras and vocal ensembles.
PROCEDURE
1. In the Hub, select one of the following project template categories:
Orchestral
●
33
Page 34

User interface
Hub
● Band
● Jazz
● Chamber
● Choral and Vocal
● Solo
2. Select a project template from the available templates in the category.
3. Click New from Template.
RESULT
The project template opens in a new project window.
TIP
You can also start a new project from a template at any time by choosing File > New from
Template > [Template category] > [Project template].
AFTER COMPLETING THIS TASK
You can add additional players/instruments and delete players/instruments that were included in
the template to customize your project.
RELATED LINKS
Brackets according to project template categories on page 34
Adding solo/section players on page 74
Deleting players on page 80
Adding instruments to players on page 83
Deleting instruments on page 87
Brackets according to project template categories
Staves are bracketed differently depending on the category of project template you use to start a
new project, even if you later add or remove players from the project. For example, all staves are
bracketed together when you start a project using one of the chamber templates.
The following categories of templates are available in Dorico Elements, which bracket staves
automatically in different ways.
NOTE
● Grand staff instruments, such as piano, are always excluded from brackets and split
brackets if they are placed within a bracketed group.
● There must be at least two adjacent instruments for a bracket to be shown.
Orchestral
Large ensembles containing most Western instruments, including strings,
woodwinds, brass, and percussion.
In orchestral templates, staves are bracketed according to their instrument family.
For example, adjacent string instruments are bracketed together separately from
adjacent woodwind instruments.
Band
Large ensembles containing primarily wind instruments, including woodwind and
brass instruments, and optionally percussion and other instruments, such as strings
and guitars.
Different band templates bracket instruments differently, for example, the concert
band template brackets woodwind and brass instruments separately, whereas the
34
Page 35

User interface
Hub
brass band template brackets brass instruments according to their instrument type,
except for horns and trumpets, which are bracketed together; any other instruments
in the score are bracketed according to their instrument family, and percussion and
timpani are bracketed separately.
Jazz
Popular ensembles commonly used to perform jazz.
In jazz templates, no staves are bracketed together. Grand staff instruments are still
shown with braces.
Chamber
Typically small ensembles containing only a few players.
In chamber templates, all staves in the project are bracketed together with a single
bracket, regardless of their instrument family.
Choral and Vocal
Ensembles containing voices, including popular choir arrangements.
In choral and vocal templates, staves are bracketed according to their instrument
family. For example, adjacent vocal staves are bracketed together separately from
woodwind instruments.
Solo
Ensembles containing only a single player/instrument.
In solo templates, no staves are bracketed together. Grand staff instruments are still
shown with braces.
RELATED LINKS
Starting new projects from project templates on page 33
Adding solo/section players on page 74
Adding instruments to players on page 83
Adding ensembles on page 81
Deleting players on page 80
Deleting instruments on page 87
Selecting recent projects
You can open a project on which you recently worked.
PROCEDURE
● In the Hub, select a recent project in any the following ways:
● In the Recent Projects list, select a le name and press Up Arrow/Down Arrow to
scroll through the list of le names. To open a le, press Return.
In the Recent Projects list, double-click a project le name.
●
In the Recent Projects list, select a project le name and click Open Selected
●
Project.
Choose File > Open Recent > [Project le name] at any time.
●
35
Page 36

User interface
Windows
Opening other les
You can open other Dorico Elements projects that are not listed in the Recent Projects list, or
you can import MusicXML or MIDI les.
PROCEDURE
1. Open the File Explorer/macOS Finder in any of the following ways:
● In the Hub, click Open Other.
● Choose File > Open at any time.
2. In the File Explorer/macOS Finder, locate and select the le you want to open.
TIP
You can select multiple les to open them at the same time.
3. Click Open.
RESULT
The selected le is opened.
If you imported a MusicXML or a MIDI le, Dorico Elements creates a new project le from the
MusicXML or MIDI content, which you can save as a default Dorico Elements project.
Windows
Dorico Elements provides a project window and oating windows.
Project Window
You can open multiple project windows for the same or for different projects. The project window
consists of several areas.
Project window
36
Page 37

User interface
Windows
1 Toolbar
Allows you to access the modes, the workspace options, the Mixer, and the main transport
options.
2 Tab bar
Shows the tabs that are open in Setup and Write modes. If you split the music area and
open several tabs, tab groups are shown.
3 Project start area/Music area/Event display/Print preview area
When you set up a new empty project, this area in Setup and Write modes shows the
project start area that allows you to add your rst players. Once you have added a player
or an ensemble, this area becomes the music area that shows the score or parts of the
score that you set up, write, edit, and format. In Play mode, this area contains an event
display that shows the effects of manipulating the playback of your score. In Print mode,
the print preview area shows a preview of how your project is going to be printed onto
paper or exported into a graphic le format.
4 Panel
Provides notes and notations that you need to create and edit your music. Different panels
contain different items and functions, according to the mode.
5 Toolbox
Provides access to items and tools that you can use to input and edit your music. Different
toolboxes contain different items and tools, according to the mode.
6 Status bar
Allows you to choose a different view and page arrangement of the music area. It also
contains zoom options and a summary of your current selection in the music area.
Toolbar
Floating Windows
Dorico Elements allows you to open oating windows, such as the Mixer and the Transport
windows. These can be hidden and shown independently of the mode that is selected in the main
window. The following options open oating windows:
Show Mixer
Opens the Mixer window.
Show Transport Bar
Opens the Transport window.
RELATED LINKS
Opening multiple project windows on page 53
The toolbar allows you to access the modes and workspace options as well as the Mixer and
main transport options.
The toolbar is always available independent of the mode or tool that you are using. If you must
hide the toolbar for a specic reason, click the disclosure arrow on top of the toolbar.
The toolbar consists of the following items:
37
Page 38

User interface
Windows
1 Modes
Selectable workspaces in the project window that represent different phases in the
workow of preparing a score.
2 Workspace options
Provide options that allow you to select different layouts to open in the music area and to
change the working environment.
3 Show Video
Hides/Shows the video window.
4 Show Mixer
Hides/Shows the Mixer window.
5 Mini transport
Allow to you quick access to the main transport functions, including Play, Record, and
Click.
6 Activate Project
Shows which project is activated for playback when you have multiple projects open.
RELATED LINKS
Workspace options on page 38
Mini transport on page 38
Workspace options
The workspace options in the middle of the toolbar provide options that allow you to select
different layouts and to change the working environment.
Select Layout
Allows you to switch back and forth between layouts.
Show Tabs
Appearance when the tab bar is hidden Appearance when the tab bar is shown
Shows/Hides the tab bar above the music area.
Hide/Restore Panels
Appearance when panels are shown
Shows/Hides all open panels.
Appearance when all panels were previously
shown but are now all hidden
Mini transport
The mini transport on the right of the toolbar provide quick access to the main transport
functions of Dorico Elements.
Show Transport Bar
38
Page 39

User interface
Windows
Opens the Transport window.
Time display
Time display showing bars
and beats
Time display showing elapsed
time
Time display showing the
timecode
Shows the position of the playhead in one of the following formats:
● Bars, beats, and ticks
● Elapsed time in the following order of units: hours, minutes, seconds,
milliseconds
● Timecode in the following order of units: hours, minutes, seconds, frames
You can change the content shown in the Time display by clicking it.
Tempo
How Tempo appears when xed tempo mode
is active
How Tempo appears when follow tempo is
active
Displays the tempo used for both playback and recording. Its appearance changes
according to its current mode.
You can change the tempo mode by clicking the Tempo beat unit.
Rewind to Beginning of Flow
Moves the playhead back to the beginning of the ow.
Play
Play outside of playback Play during playback
Starts/Stops playback from the previous playhead position.
Record
Starts/Stops MIDI recording.
Click
Plays/Mutes the metronome click during playback and recording.
Activate Project
Shows which project is activated for playback when you have multiple projects open.
39
Page 40

User interface
Windows
Tab bar
TIP
The Transport window contains additional transport functions.
RELATED LINKS
Transport window on page 326
Playing back music on page 314
Moving the playhead on page 314
Changing the tempo mode on page 318
The tab bar in Dorico Elements allows you to display different layouts within the same project
window. It is located between the toolbar and the music area.
TIP
If you cannot see the tab bar, click Show Tabs in the toolbar. If Show Tabs is activated, the tab
bar is always displayed, even if only a single tab is open.
The tab bar contains the following:
1 Tabs
Each tab currently open is displayed, with their position from left to right reecting the
order in which you opened them. Each tab is labeled with the name of the selected layout.
The tab currently in view in the music area is highlighted.
When you hover over an individual tab, an x appears that allows you to close the tab.
2 New Tab
Allows you to open a new tab. Tabs may contain a different layout, or an additional view of
a layout that is already open in another tab or window.
RELATED LINKS
Toolbar on page 37
Music area on page 42
40
Page 41
User interface
Windows
Project start area
The project start area is displayed in the middle of the project window in Setup and Write modes
when you set up a new empty project. It remains in the music area until you have added at least
one player.
Project start area
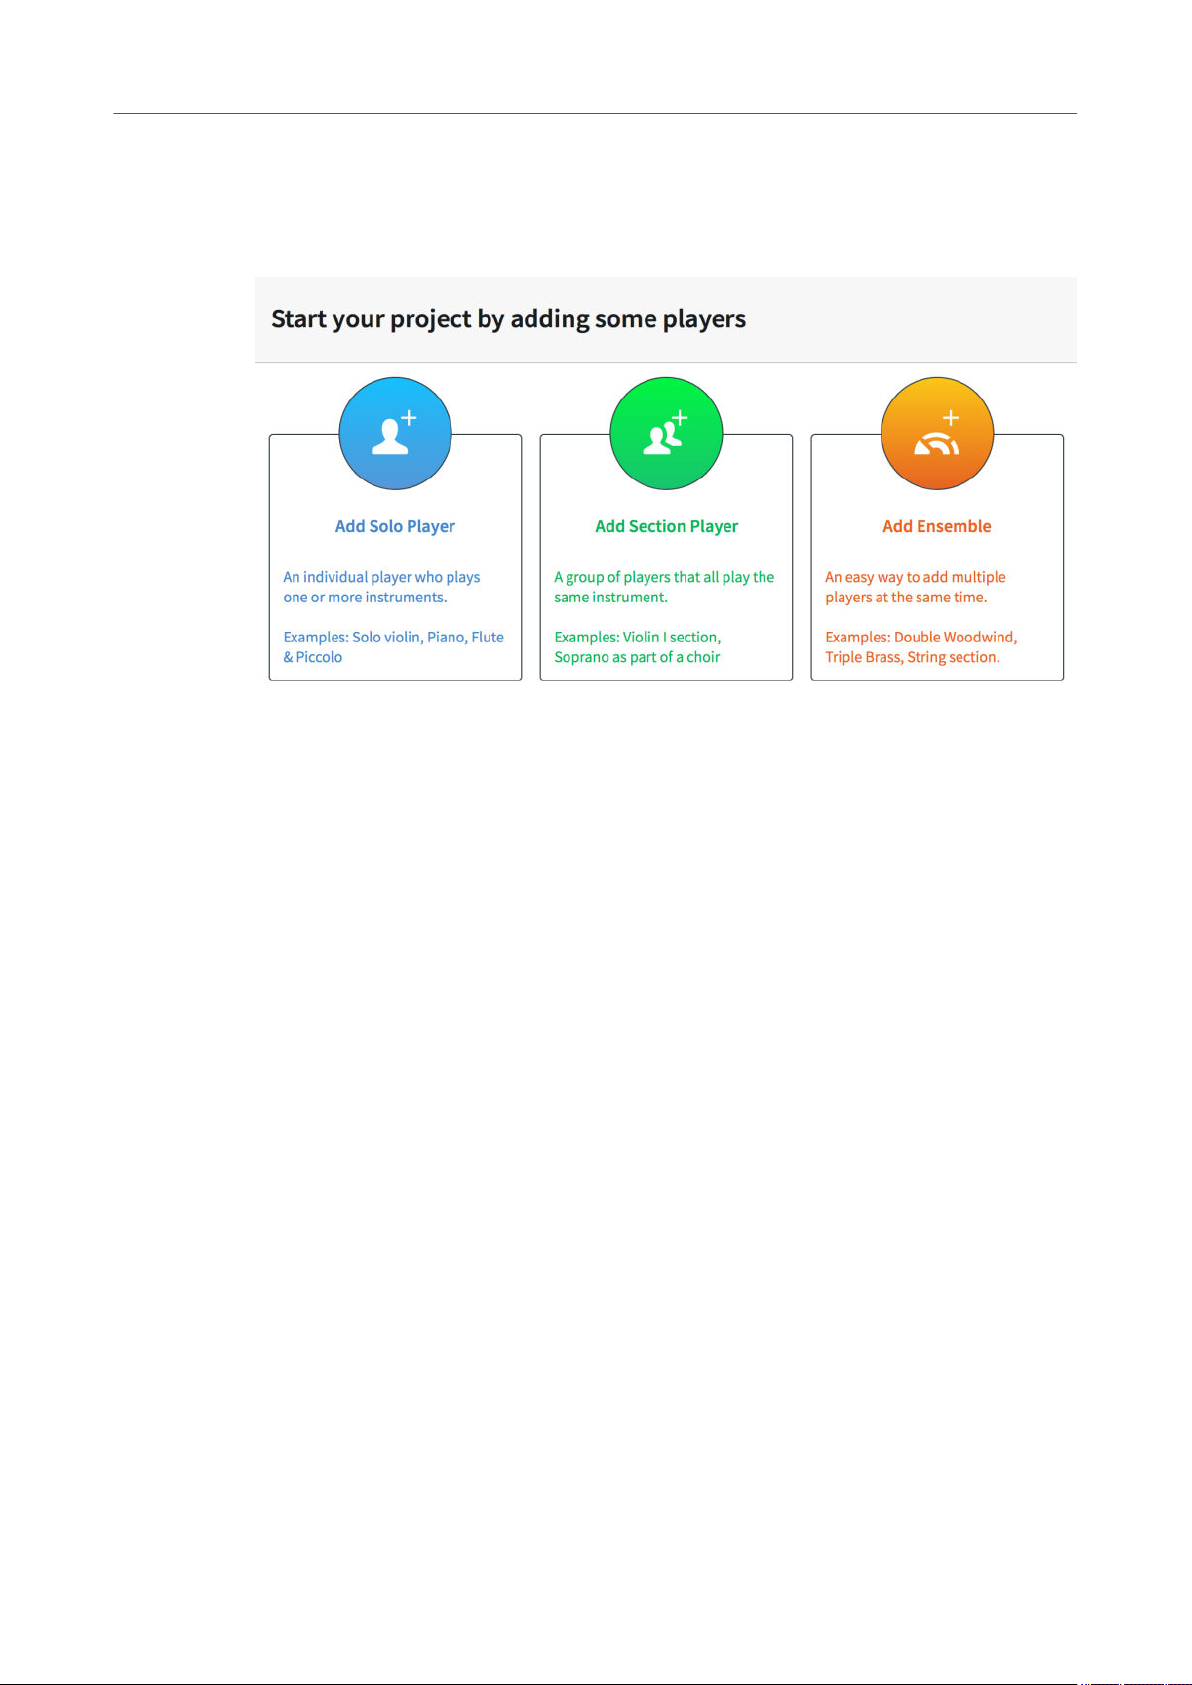
The project start area shows cards that allow you to add your rst players. To add players, click
one of the cards:
Add Solo Player
Adds an individual player to whom you can assign one or more instruments.
Add Section Player
Adds a player that represents multiple players who all play the same instrument.
Add Ensemble
Adds multiple players who play different instruments. The ensembles that you can
add represent standard combinations of musicians.
41
Page 42

User interface
Windows
Music area
In Setup and Write modes, the music area shows the editable score.
Music area showing a sample of a score
The music area can be displayed in several views. The music area tab bar allows you to open
several layouts from your project and switch between them. The scroll bars to the right and to
the bottom of the music area allow you to scroll within the layout.
When panels are open on the right, left, and at the bottom of the window, the music area can be
reduced. You can hide/show panels when necessary.
RELATED LINKS
Hiding/Showing panels on page 17
42
Page 43

User interface
Windows
Print preview area
The print preview area in Print mode shows a preview of what is going to be printed or exported
as a graphic.
Print preview area displaying a score set to print 2-up
In the print preview area, you can scroll through the pages that are shown, but you cannot edit
your layouts. If you want to make changes, you must switch to Setup or Write mode.
If you select multiple layouts to be printed as part of the same print job, the print preview area
only displays the rst layout. If you want to show the expected page arrangement for each layout
in the print preview, you must check each layout individually before you start printing.
RELATED LINKS
Project window in Print mode on page 350
43
Page 44

User interface
Windows
Panels
The panels in the project window provide the notes, notations, and functions that you need to set
up, write, edit, and format your music.
Notes panel (left), Notations panel (right), and Properties panel (bottom) in Write mode.
The panels have different names and functions in each mode in Dorico Elements.
Modes and their panels
Mode Left Panel Right Panel Bottom Panel
Setup Players Layouts Flows
Write Notes Notations Properties
Play n/a VST and MIDI
Print Layouts Print Options n/a
Some panels are displayed by default. You can hide/show each panel individually or all of them at
the same time. For a full description of each panel, refer to the documentation of the project
window in each mode.
RELATED LINKS
Modes in Dorico Elements on page 29
Hiding/Showing panels on page 17
Project window in Setup mode on page 62
Project window in Write mode on page 112
Project window in Play mode on page 282
Project window in Print mode on page 350
n/a
Instruments
44
Page 45

User interface
Windows
Disclosure arrows
Disclosure arrows indicate that objects and menus can be expanded/contracted, either vertically
or horizontally.
In Dorico Elements, disclosure arrows are commonly used to hide/show panels, sections, and
advanced options, and to expand/contract cards, such as player cards in the Players panel in
Setup mode.
Disclosure arrow for the bottom
panel
RELATED LINKS
Panels on page 44
Hiding/Showing panels on page 17
Players on page 73
Players panel on page 64
Instruments on page 82
Disclosure arrows for both the
player card and the instrument
within it
Disclosure arrows for sections in
the Tempo panel
Toolboxes
Status bar
Toolboxes are available in Write mode and Play mode. They contain different tools and options
according to the current mode, but in general their purpose is to provide tools that allow you to
input and modify notes and notation items. The Notations toolbox also determines which
options are shown in the Notations panel.
The following toolboxes are available in the different modes:
Write mode
● Notes toolbox on the left of the window
● Notations toolbox on the right of the window
Engrave mode
● Engrave toolbox on the left of the window
Play mode
● Play toolbox on the left of the window
RELATED LINKS
Notes toolbox on page 113
Notations toolbox on page 117
Play toolbox on page 283
The status bar at the bottom of the project window allows you to choose a different view and
page arrangement in the music area.
NOTE
Not all options in the status bar are available in all modes.
45
Page 46
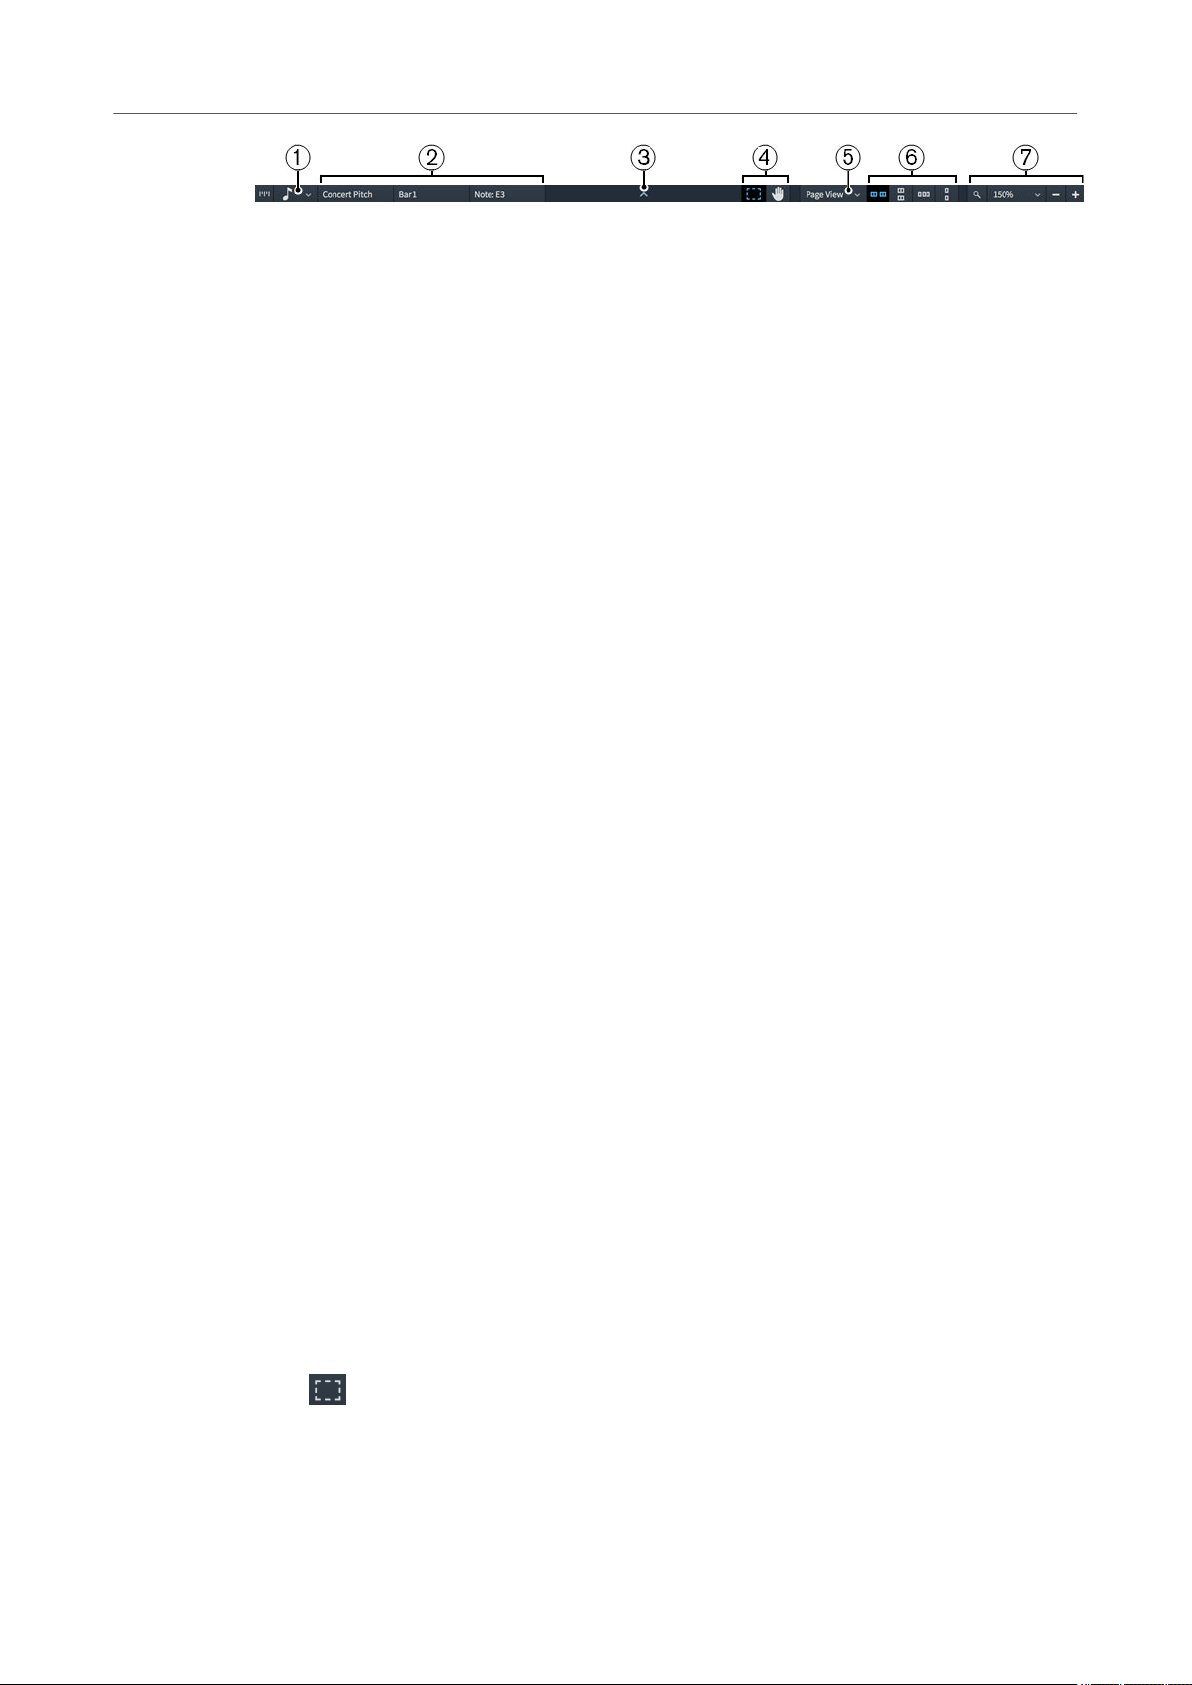
User interface
Windows
Status bar in Write mode
1 Rhythmic Grid selector
Allows you to change the rhythmic grid value, which affects certain aspects of inputting
and editing, such as the amount by which items move.
2 Status bar summary
Displays information about the current layout and selection, divided in up to three
sections.
● 1. Transposition of the current layout
● 2. The bar/range of bars of the current selection.
● 3. Summary of the selection, for example, the pitch of a single selected note or the
implied chord of multiple selected notes.
3 Disclosure arrow
Allows you to show/hide the bottom panel in Setup and Write modes.
4 Selection tools
Allow you to switch between using the Marquee Tool and the Hand Tool in Write mode.
5 View type selector
Allows you to select one of the provided view types for the music area in Setup and Write
mode.
6 Page arrangement options
Allow you to choose between different horizontal and vertical arrangements of either
individual pages or pairs of pages, which are called spreads.
7 Zoom options
Allow you to change the zoom factor of the music area and its musical contents. There are
preset zoom levels but you can also use a custom zoom level.
RELATED LINKS
Rhythmic grid on page 120
View types on page 47
Selection tools on page 46
Page arrangements for page view on page 48
Zoom options on page 49
Selection tools
Dorico Elements allows you to choose selection tools from the status bar that you can use to
select or move items within the music area.
Pressing Shift in combination with the chosen selection tool allows you to instantly use the other
tool.
You can use the following tools:
Marquee Tool
Hand Tool
Allows you to click and drag a rectangle to select multiple notes and notations.
Allows you to click and move the view within the music area.
46
Page 47

User interface
Windows
RELATED LINKS
Status bar on page 45
Making marquee selections on page 47
Moving the view on page 47
Making marquee selections
You can use a marquee selection to select multiple notes and notations at the same time within a
specic area.
PREREQUISITE
PROCEDURE
1. In the status bar, click Marquee Tool.
2. In the music area, click and drag across the area where you want to select everything,
A gray rectangle is shown to indicate which notes and notations will be selected. We
recommend that you click in one corner of the area you want to select and drag diagonally
across to the other corner.
RESULT
All notes and notations in the area indicated by the gray rectangle are selected.
NOTE
Only items completely within the area are selected. However, if any part of a note/tie chain is
within the area, the whole note/tie chain is selected.
RELATED LINKS
Status bar on page 45
Moving the view
You can move the view within the music area in Write mode.
PROCEDURE
1. In the status bar, click Hand Tool.
2. Click and drag in any empty space in the music area.
RELATED LINKS
Status bar on page 45
The mouse pointer changes into a hand symbol during the move.
View types
Dorico Elements provides different ways to view your layouts.
Dorico Elements saves your chosen view type for each layout, so you only need to set it once. You
can change the default view types for new projects in the preferences.
47
Page 48

User interface
Windows
The following view types are available:
Galley View
Lays out your music on a single continuous system. It also shows all of the
instruments that are included in the active layout and ow.
This view type is most useful during the process of inputting the music as it allows
you to focus on the musical content of your project.
NOTE
Note spacing in galley view is unjustied, which means that it is neither expanded
nor contracted to t the width of a page or a music frame. However, changes made
to note spacing in galley view also apply to page view.
Page View
Displays your layout paginated exactly as it appears when you print or export it.
This view type is useful if you want to view spreads or single pages. Spreads allow
you to work out page turns, because the performer only needs to turn the page at
the end of the right-hand page of a pair. Viewing single pages can be helpful if you
want to print the layout as a series of single pages. This might be necessary if you
are using, for example, a fan-fold or concertina approach, in which case the
distinction between left- and right-hand pages is insignicant.
RELATED LINKS
Preferences dialog on page 55
Page arrangements for page view on page 48
Changing the view type in the music area on page 54
Page arrangements for page view
You can change the way pages are arranged for display in the music area.
Spreads Horizontally
Displays pages in pairs as two-page spreads, with each pair laid out from left to right
in a row.
Spreads Vertically
Displays pages in pairs as two-page spreads, with each pair laid out from top to
bottom in a column.
Single Pages Horizontally
Displays individual pages laid out from left to right.
Single Pages Vertically
Displays individual pages laid out from top to bottom.
RELATED LINKS
Changing the view type in the music area on page 54
48
Page 49
User interface
Setting up your workspace
Zoom options
You can change the size of notes and notations in the music area.
Zoom Out
Decreases the size of notes and notations in the music area.
Custom Zoom
Allows you to set a custom zoom percentage.
Set Zoom
Allows you to select one of the available zoom scaling factors. You can set a
permanent zoom factor in Preferences.
Zoom In
Increases the size of notes and notations in the music area.
RELATED LINKS
Preferences dialog on page 55
Setting up your workspace
Dorico Elements enables you to set up your workspace according to your working style.
Dorico Elements allows you to open multiple tabs to display multiple layouts in the same project
within the same window. You can also open the same project in several windows.
RELATED LINKS
Hiding/Showing panels on page 17
Switching between layouts
If you have created several layouts in your project, you can switch between which is displayed in
the music area in every mode. In Setup and Write modes,, this changes the layout displayed in
the current tab only.
NOTE
You can only switch between layouts to which players are assigned.
PROCEDURE
● Switch to another layout in any of the following ways:
Press Shift-Alt-] to switch to the next layout.
●
Press Shift-Alt-[ to switch to the previous layout.
●
Select an item on a staff or in the piano roll of the player whose layout you want to
●
open and press W.
NOTE
Implicit rests are not items.
Select an item on a staff or in the piano roll of the player whose layout you want to
●
open and choose Window > Counterpart Layout.
Select a layout from the menu in the middle of the toolbar.
●
49
Page 50

User interface
Setting up your workspace
RESULT
The selected layout is opened in the music area. It replaces the layout previously open in the tab.
RELATED LINKS
Tab bar on page 40
Opening new tabs on page 50
Opening new tabs
You can open multiple tabs in the same project window, which you can use to display multiple
layouts or different views of the same layout. For example, you can show your full score layout in
page view in one tab and in galley view in another tab.
Each tab can contain a separate layout or a different view of a layout already open in another tab
or window. Whenever you open a new tab, you are prompted to select a layout that you want to
display in the tab.
You can nd tabs in the tab bar, located at the top of the music area, below the toolbar. If you do
not see any tabs, click Show Tabs in the toolbar.
PROCEDURE
1. Open a new tab in any of the following ways:
● Press Ctrl/Cmd-T.
● At the right end of the tab bar, click New Tab.
● Choose Window > New Tab.
A new tab opens that shows several icons at the top and a list of layouts at the bottom.
50
Page 51

User interface
Setting up your workspace
2. Select a layout to open in the new tab in any of the following ways:
● Click one of the icons.
● Select a layout from the list at the bottom.
● In the toolbar, click Select Layout and choose one of the layouts from the pop-up
menu.
RESULT
The layout that you choose opens in the active tab.
TIP
You can also switch between different layouts within the same tab.
RELATED LINKS
Switching between layouts on page 49
Toolbar on page 37
Showing multiple tabs in the same project window
You can split your project window to display two tabs at the same time. The split can be either
vertical or horizontal, allowing you to display different layouts either side by side or above one
another.
Splitting your project window divides your currently open tabs into two groups. You can move
tabs between the groups at any time, for example, to compare different layouts together or to
compare two views of the same layout.
PROCEDURE
1. Select the tab of the layout that you want to move to a new tab group.
2. Split the view in one of the following ways:
To show layouts side by side, choose Window > Vertical Split.
●
To show layouts above one another, choose Window > Horizontal Split.
●
51
Page 52

User interface
Setting up your workspace
RESULT
The project window is split to show two tabs at the same time. The selected tab is moved to the
new tab group.
RELATED LINKS
Moving tabs to another tab group on page 53
Closing tabs
You can close individual tabs of layouts that you no longer need, and you can close multiple tabs
at the same time.
PROCEDURE
● Close tabs in any of the following ways:
●
●
●
●
Select the tab you want to close and press Ctrl/Cmd-W.
Hover over the tab you want to close and click x.
Right-click the single tab you want to close and choose Close Tab from the context
menu.
Right-click the tab you do not want to close and choose Close Other Tabs from the
context menu.
NOTE
You cannot close the last tab in a window. If only one tab is open and you no longer want
to see the tabs, deactivate Show Tabs in the main toolbar. The tab is no longer displayed,
but the corresponding layout is still shown.
RESULT
If you selected a single tab and closed it, the selected tab and its corresponding layout are
closed.
If you selected a single tab and close other tabs, all open tabs except for the selected tab are
closed.
Switching between tabs
You can switch between different open tabs to show different layouts in the music area.
PROCEDURE
● Switch tabs in any of the following ways:
Press Ctrl/Cmd-Tab to cycle through all open tabs in turn.
●
Press Ctrl/Cmd-Shift-Tab to cycle through all open tabs in reverse order.
●
Click the tab to which you want to switch.
●
Choose Window > Next Tab/Previous Tab.
●
Changing the order of tabs
You can move tabs to a different position on the tab bar.
PROCEDURE
1. Click and drag a tab to the new position.
The other tabs move to show where the dragged tab will be positioned.
52
Page 53

User interface
Setting up your workspace
2. Release the mouse button.
Moving tabs to another tab group
You can move tabs to other tab groups.
NOTE
You can only move tabs to other tab groups if you have opened at least two tabs.
PROCEDURE
1. Click and drag the tab to a blank space next to the target tab group.
2. Release the mouse button.
Moving tabs to other windows
You can move tabs to another open window of the same project to show the corresponding
layouts in a new window.
NOTE
● The layouts must belong to the same project. If you attempt to move a tab to a window of
a different project, a new window is created for the project to which the layout belongs.
● You can only move tabs to other windows if you have opened at least two tabs.
PROCEDURE
● Do one of the following:
● To create a new window of the same project with the tab inserted, click and drag a
tab horizontally to the right/left, away from the tab bar and release it.
● To insert the tab into the tab bar of another window of the same project, click and
drag a tab onto the tab bar.
● Select and right-click a tab and choose Move Tab to New Window from the context
menu.
● Select a tab and click Window > Move Tab to New Window.
Opening multiple project windows
You can open multiple project windows for the same project.
This can be useful if you want to see and work on multiple layouts at the same time. You can also
open multiple project windows to show different modes of the same project.
Each window in a project is completely independent, so you can, for example, have one window
in Write mode and another in Play mode. During playback, all windows that belong to the same
project show the playhead and move the view to follow the music during playback.
PROCEDURE
● Open a new project window in any of the following ways:
Press Ctrl/Cmd-Shift-T.
●
Choose Window > New Window.
●
53
Page 54

User interface
Setting up your workspace
RESULT
A duplicate of the window opens. It contains the same tabs and the same view options as the
original window.
RELATED LINKS
Playhead on page 313
Changing to full screen mode
You can maximize the amount of screen estate available for your music by making any project
window cover the whole screen.
You can also hide the desktop elements provided by your operating system, for example, the
task bar in Windows or the system menu bar and Dock in macOS.
Within Dorico Elements you can also hide/show the panels on the right, left, and at the bottom of
the window.
PROCEDURE
● Choose View > Full Screen.
AFTER COMPLETING THIS TASK
To return to the default view, choose View > Full Screen again.
RELATED LINKS
Hiding/Showing panels on page 17
Changing the view type in the music area
You can switch between several view types in the music area, including page view and galley
view.
PROCEDURE
1. In the status bar, click the view selector.
2. Choose one of the view types from the list.
● Galley View
Page View
●
3. Optional: If you selected Page View, choose one of the following page arrangement
options:
Spreads Horizontally
●
Spreads Vertically
●
Single Pages Horizontally
●
Single Pages Vertically
●
54
Page 55

User interface
Preferences dialog
RELATED LINKS
View types on page 47
Page arrangements for page view on page 48
Preferences dialog
In the Preferences dialog, you can make permanent settings for your workspace and dene key
commands.
You can open Preferences in any of the following ways:
● Press Ctrl/Cmd-, (comma).
● Choose Dorico > Preferences (macOS).
● Choose Edit > Preferences (Windows).
Preferences
The Preferences dialog contains the following:
1 Page list
Contains the categories of options that you can view and change in the dialog, divided into
pages. When you click a page in this list, any applicable section titles appear below the
page in the page list.
2 Section titles
Shows the titles of any sections on the selected page. You can click these section titles to
navigate directly to that section of the page.
3 Section
Pages are divided into sections, which can contain multiple options. Sections that contain
many options are divided into subsections. For options that have multiple possible
settings, the current setting is highlighted. Click other settings to choose them instead.
55
Page 56

User interface
Preferences dialog
NOTE
The arrangement of options on the Key Commands page is signicantly different to other
pages in the Preferences dialog. These are described separately in further detail.
RELATED LINKS
Key Commands page in the Preferences dialog on page 56
View types on page 47
Zoom options on page 49
Selection tools on page 46
Layout Options dialog on page 71
Key Commands on page 10
Key Commands page in the Preferences dialog
The Key Commands page in the Preferences dialog allows you to view all the items and
functions that can be assigned key commands, change existing key commands, and assign new
key commands to items and functions that have no key command assigned by default.
Most of the main menus in Dorico Elements have key commands for certain menu items. In
addition, there are other Dorico Elements functions that can be assigned key commands. This
can be helpful for items or actions that you nd yourself performing regularly.
● You can nd the Key Commands page by opening the Preferences dialog and clicking
Key Commands in the page list.
Key Commands page in Preferences
The Key Commands page comprises the following:
1 Search eld
Allows you to search for menu items and functions to view, change, or add key commands.
Because there are multiple levels of disclosure arrows before you reach many menu items
and functions, this is often the quickest way to nd what you are looking for.
2 Menu items and functions
56
Page 57

User interface
Preferences dialog
3 Key Commands section
4 MIDI Learn section
Displays the menu items and functions that can be assigned key commands. The list can
be ltered using the Search eld. Disclosure arrows beside options indicate that further
options are available when the option is expanded.
Allows you to see any existing key commands set for the selected menu item or function
and to set new ones. If you enter a key command that has already been assigned to
another menu item or function, a warning tells you that you cannot use that key
command.
You can assign multiple key commands to the same menu item or function, and the
Keyboard language menu allows you to assign different key commands for each of the
available languages.
● Add Key Command
Adds the key command you pressed to the selected menu item or function.
● Remove Key Command
Removes the currently selected key command from the selected menu item or
function.
● Print Summary
Directs you to an oine page in a web browser that displays your key commands on
an interactive keyboard.
● Reset Key Commands
Resets all of your key commands to their defaults.
Allows you to assign MIDI controllers, notes, and combinations of notes to control menu
items and functions.
● MIDI Learn
Prepares Dorico Elements to receive the MIDI input data that you want to save as a
command.
● Add MIDI Command
Adds the MIDI controllers or notes you changed or pressed to the selected menu
item or function.
● Remove MIDI Command
Removes the MIDI command from the selected menu item or function.
RELATED LINKS
Preferences dialog on page 55
Interactive Dorico Elements key commands map on page 57
Assigning key commands on page 59
Assigning MIDI commands on page 60
Interactive Dorico Elements key commands map
The interactive Dorico Key Commands map shows a virtual computer keyboard, with keys that
have been assigned key commands highlighted in different colors according to the modier keys
they contain. All key commands for the selected keyboard language layout are listed below,
divided into global and mode-specic groups.
You can open the Dorico Key Commands map in any of the following ways:
● Choose Help > Key Commands.
57
Page 58

User interface
Preferences dialog
● Choose Edit > Preferences, and click Print Summary in the Key Commands section of the
Preferences dialog.
The interactive key commands map as it appears when US English is selected
The Dorico Key Commands map opens in a web browser. It allows you to do any of the
following:
● To see the available key commands, select a context. The context of a key command is the
mode in which it can be used. Key commands that have a global context work in all modes.
● To highlight the keys that you can press in combination with the modier key to form a key
command, press a modier key on your computer keyboard, such as Shift, or click a
modier key on the virtual keyboard. You can also press more than one modier key. The
virtual computer keyboard shows the highlighted keys and displays on each key to which
functions it is assigned.
● To search for a specic key command, enter one or multiple words in the search input
eld.
● To get an overview of all available key commands, browse the key commands that are
listed below the virtual keyboard. The key commands are listed according to the context in
which they can be used.
RELATED LINKS
Preferences dialog on page 55
Key Commands page in the Preferences dialog on page 56
Changing the keyboard layout on page 60
Searching for the key commands of functions
You can search for key commands that are assigned to functions or menu items in Dorico
Elements.
TIP
You can also search for functions in the interactive key commands map.
58
Page 59

User interface
Preferences dialog
PROCEDURE
1. Open Preferences in any of the following ways:
2. Click Key Commands in the page list.
3. Enter the name of a function in the Search eld.
4. Expand an entry and select the function for which you want to see the key command.
RESULT
If the function has a key command, it is shown in the Assigned key commands display.
RELATED LINKS
Interactive Dorico Elements key commands map on page 57
Preferences dialog on page 55
● Press Ctrl/Cmd-, (comma).
● Choose Edit > Preferences (Windows).
● Choose Dorico > Preferences (macOS).
The entries that are listed below are ltered according to the words that you enter.
Assigning key commands
You can assign key commands to many menu items and functions, for example, if you use a
menu item frequently and want to be able to access it quickly but it does not have a key
command assigned by default. You can also change existing key commands.
PROCEDURE
1. Open Preferences in any of the following ways:
● Press Ctrl/Cmd-, (comma).
● Choose Edit > Preferences (Windows).
● Choose Dorico > Preferences (macOS).
2. Click Key Commands in the page list.
3. Search for the name of a function and select it.
4. Optional: Press Remove Key Command if the function already has an assigned key
command.
NOTE
If you assign a new key command without removing an existing one, you can use either
key command.
5. Click the New key command input eld.
6. Press the key command that you want to assign on your computer keyboard.
7. Click Add Key Command.
The key command is shown in the Assigned key commands display.
8. Click Apply, then Close.
RESULT
You can immediately use the assigned key command.
RELATED LINKS
Searching for the key commands of functions on page 58
Resetting key commands on page 61
59
Page 60
User interface
Preferences dialog
Preferences dialog on page 55
Key Commands page in the Preferences dialog on page 56
Assigning MIDI commands
You can assign specic keys or buttons on your MIDI keyboard to perform functions and access
menu items. For example, if you want to navigate using MIDI keys during chord symbol input.
PROCEDURE
1. Open Preferences in any of the following ways:
●
Press Ctrl/Cmd-, (comma).
●
Choose Edit > Preferences (Windows).
●
Choose Dorico > Preferences (macOS).
2. Click Key Commands in the page list.
3. Select the menu item or function to which you want to assign MIDI commands.
4. Click MIDI Learn.
5. Press the key or button on your MIDI keyboard that you want to assign to the selected
parameter.
6. Click Add MIDI Command.
7. Click Apply, then Close.
RELATED LINKS
Preferences dialog on page 55
Key Commands page in the Preferences dialog on page 56
Changing the keyboard layout
You can change the keyboard layout in Dorico Elements. This allows you to use the predened
key commands for that language.
PROCEDURE
1. Open Preferences in any of the following ways:
● Press Ctrl/Cmd-, (comma).
● Choose Edit > Preferences (Windows).
● Choose Dorico > Preferences (macOS).
2. Click Key Commands in the page list.
3. Select a different keyboard layout from the Keyboard language menu.
4. Click Apply, then Close.
RESULT
You can immediately use the available key commands for your language.
RELATED LINKS
Preferences dialog on page 55
60
Page 61

User interface
Preferences dialog
Removing key commands
You can remove individual key commands from a function.
PROCEDURE
1. Open Preferences in any of the following ways:
● Press Ctrl/Cmd-, (comma).
● Choose Edit > Preferences (Windows).
● Choose Dorico > Preferences (macOS).
2. Click Key Commands in the page list.
3. Search for the name of a function and select it.
4. Click Remove Key Command.
5. Click Apply, then Close.
RESULT
The key command is removed from the selected function.
RELATED LINKS
Searching for the key commands of functions on page 58
Resetting key commands on page 61
Preferences dialog on page 55
Resetting key commands
You can reset all the key commands in your project to their defaults.
PROCEDURE
1. Open Preferences in any of the following ways:
● Press Ctrl/Cmd-, (comma).
● Choose Edit > Preferences (Windows).
● Choose Dorico > Preferences (macOS).
2. Click Key Commands in the page list.
3. Click Reset Key Commands.
4. Click Apply, then Close.
RESULT
All custom key commands are deleted and the default key commands are reinstated.
RELATED LINKS
Preferences dialog on page 55
61
Page 62

Setup mode
In Setup mode, you can determine the players and instruments for your project. You can also
create and manage ows, set up layouts, and add videos.
Project window in Setup mode
The project window in Setup mode contains the default toolbar, the music area, and the status
bar. It provides panels with all the tools and functions that allow you to add players and
instruments as well as to create layouts and ows for your project.
You can switch to Setup mode in any of the following ways:
● Press Ctrl/Cmd-1.
● Click Setup in the toolbar.
● Choose Window > Setup.
Panels in Setup mode
The following panels are available:
1 Players
Lists the players, instruments, and groups in your project. By default, players are assigned
to all ows and to both the full score layout and their own part layout.
62
Page 63

Setup mode
Project window in Setup mode
2 Layouts
Lists the layouts in your project. A single full score layout and a part layout for each player
are created automatically, but you can create and delete layouts as required. By default,
layouts contain all ows and full score layouts contain all players.
3 Flows
Shows the ows in your project, ordered left to right. By default, ows contain all players
and are assigned to all layouts.
The three panels work together to allow you to control how and where the players, layouts, and
ows in your project are used. When you select an item in one of the panels, that panel and the
selected item are highlighted in a different color and checkboxes appear in cards in the other
panels. You can activate/deactivate these checkboxes independently to change how material is
distributed across players, layouts, and ows.
RELATED LINKS
Players, layouts, and ows on page 63
Changing the players assigned to ows on page 99
Changing the players assigned to layouts on page 102
Changing the ows assigned to layouts on page 103
Players, layouts, and ows
In Dorico Elements, players, layouts, and ows are all connected to each other, meaning that you
can control where music appears in a exible way.
● Players can be assigned to any combination of layouts and ows. For example, you can
assign a single player to both the full score layout and their own part layout, and remove
them from ows in which they do not play. By default, players are assigned to all ows and
to both the full score layout and their own part layout.
● Layouts can contain any combination of players and ows. For example, you can assign all
the singers to a single part layout, then remove the ows from the layout in which they do
not sing. By default, layouts contain all ows and full score layouts contain all players.
● Flows can contain any combination of players and be assigned to/removed from layouts.
By default, ows contain all players and are assigned to all layouts.
NOTE
● If you remove a player from a ow, any notes you have already input for that player in that
ow are deleted.
● Removing a ow from a layout automatically removes that layout from the ow, and vice
versa. The same is true for players and layouts, and players and ows.
You can control how and where the players, layouts, and ows in your project are used by using
the panels in Setup mode.
RELATED LINKS
Project window in Setup mode on page 62
Flows on page 98
Players on page 73
Layouts on page 101
Changing the ows assigned to layouts on page 103
Changing the players assigned to layouts on page 102
Changing the players assigned to ows on page 99
63
Page 64

Setup mode
Project window in Setup mode
Players panel
The Players panel lists the players, instruments, and groups in your project. It is located on the
left of the window in Setup mode.
You can hide/show the Players panel in Setup mode in any of the following ways:
● Press Ctrl/Cmd-7.
● Click the disclosure arrow on the left edge of the main window.
● Choose Window > Show Left Panel.
Players panel in Setup mode
The Players panel lists all the groups, players, and ensembles in your project, with each player
shown as a card. Each player card shows the following:
1 Disclosure arrow
Expands/Collapses the player card.
2 Player type
Shows the type of player from the following options:
● Solo player
64
Page 65

Setup mode
Project window in Setup mode
● Section player
3 Player name
Shows the name of the player. Dorico Elements automatically adds the names of the
assigned instruments to the player name. If required, you can rename the player.
4 Add instruments icon
Opens the instrument picker from which you can select an instrument for the player.
5 Instrument labels
Each instrument assigned to a player has its own instrument label. If you hover the mouse
pointer over an instrument label, an arrow appears that allows you to open a menu with
further options that allow you to, for example, change the instrument names or move the
instrument to another player.
The action bar at the bottom of the panel contains the following options:
Add Solo Player
Adds an individual player to your project. Dorico Elements also automatically adds a
part layout for the player to the Layouts panel.
Add Section Player
Adds a player to your project that represents multiple players who all play the same
instrument. Dorico Elements also automatically adds a part layout for the player to
the Layouts panel.
Add Ensemble
Adds multiple players to your project that represent standard combinations of
musical instruments. Dorico Elements also automatically adds part layouts for each
player in the ensemble to the Layouts panel.
Add Group
Adds a group to your project to which you can assign all types of players.
Delete Player
Deletes selected players or groups from the Players panel.
The order in which the players are listed in the panel is the default order in which they appear in
layouts. You can change the player order for each layout individually in the Players section of the
Players page in Setup > Layout Options.
RELATED LINKS
Players on page 73
Layouts panel (Setup mode) on page 67
Layout Options dialog on page 71
65
Page 66

Setup mode
Project window in Setup mode
Instrument picker
The instrument picker allows you nd the correct instrument or ensemble you want to add to
your project. It contains multiple versions of some instruments that have specic formatting
requirements, such as French Horn, which has a version whose part layouts are always in treble
clef.
● You can open the instrument picker in Setup mode by clicking the plus symbol in solo
player cards in the Players panel. It also opens automatically when you add a new player
or ensemble.
Instrument picker
The instrument picker contains the following sections and options:
1 Search eld
Allows you to enter the instrument you are searching for directly. You can enter only part
of the instrument name, such as cello for Violoncello.
2 Instrument family column
Contains instrument families to help you focus your instrument search.
TIP
As well as clicking them, you can select other items in the same column by pressing
Up Arrow/Down Arrow.
You can cycle forwards through the columns by pressing Tab, and backwards by pressing
Shift-Tab.
3 Instrument column
Contains the instruments available in the selected instrument family.
4 Transposition/Part specication column
Contains options for multiple possible transpositions or different behavior in part layouts
for the selected instrument. This column is not populated for instruments that do not have
further options.
66
Page 67

Setup mode
Project window in Setup mode
5 Create Empty Kit
Adds an empty percussion kit to the player.
6 Import Kit
Imports an existing percussion kit previously exported as a library le.
7 Add/Add Ensemble to Score
Adds the selected instrument/ensemble to the project. Adding an ensemble adds multiple
players at once.
RELATED LINKS
Players panel on page 64
Adding solo/section players on page 74
Adding ensembles on page 81
Adding empty percussion kits to players on page 84
Importing percussion kits on page 766
Layouts panel (Setup mode)
In Setup mode, the Layouts panel lists all the full score and instrumental part layouts. It is
located on the right of the window.
You can hide/show the Layouts panel in Setup mode in any of the following ways:
● Press Ctrl/Cmd-9.
● Click the disclosure arrow on the right edge of the main window.
● Choose Window > Show Right Panel.
Layouts panel in Setup mode
67
Page 68

Setup mode
Project window in Setup mode
The Layouts panel lists the default full score layout and all the layouts that you have created for
your project, displayed as cards. Each layout card shows the following:
1 Disclosure arrow
Expands/Collapses the layout card.
2 Layout type
Shows the type of layout from the following options:
● Full score layout
● Instrumental part layout
● Custom score layout
3 Layout name
Shows the name of the layout. Dorico Elements automatically adds default names
depending on the name of the instrument that is assigned to a player and on the type of
layout that is added. For example, if you assign a ute to a player, the instrumental part
layout automatically gets the same name. If you add an empty instrumental part layout,
the layout name shows Empty part and an incremental number if you add multiple empty
part layouts.
4 Page size and orientation
Shows the size and orientation of the layout, as set on the Page Setup page in Setup >
Layout Options.
5 Space size
Shows the space size between two staff lines in points, as set on the Page Setup page in
Layout Options. This indicates the size of staves in the layout.
6 Layout number
Allows you to set a unique number for the layout that can be used as part of its le name
when exported as a graphic. This can be useful to ensure exported part layout les are
organized in their orchestral order, as this is usually different to their alphabetical order.
The action bar at the bottom of the panel contains the following options:
Add Full Score Layout
Adds a full score layout to your project. By default, every player and ow is
automatically included in the layout.
Add Instrumental Part Layout
68
Page 69

Setup mode
Project window in Setup mode
Adds an empty instrumental part layout to your project. You can then add one or
multiple players to the layout. By default, a part layout contains all ows that are
created in your project.
Add Custom Score Layout
Adds a custom score layout that initially without players or ows.
Sort Layouts
Sorts all layouts in the Layouts panel according to their type in the following order:
full score layouts, instrumental part layouts, custom score layouts.
Layout Options
Opens the Layout Options dialog for one or multiple selected layouts.
Delete Layout
RELATED LINKS
Layouts on page 101
Layout Options dialog on page 71
Flows panel
The Flows panel shows all the ows that are created for your project. It is located at the bottom
of the window in Setup mode.
You can hide/show the Flows panel in Setup mode in any of the following ways:
● Press Ctrl/Cmd-8.
● Click the disclosure arrow at the bottom of the main window.
● Choose Window > Show Bottom Panel.
Deletes selected layouts from the Layouts panel.
Flows panel in Setup mode
The Flows panel shows the default ow and all the ows that you created for your project as
cards. Each ow card shows the following:
69
Page 70

Setup mode
Project Info dialog
1 Flow name
2 Film reel icon
3 Flow timecode
4 Flow number
Shows the name of the ow. If you create multiple ows without renaming them, each
ow name shows a number that increments with each new ow that you create. The
number also indicates the position of the ow in a layout.
Indicates the ow has an attached video.
Shows the start timecode for the ow.
Shows the number of the ow. The number increments with each new ow that you
create. The number also indicates the position of the ow in a layout.
To the right of the Flows panel, the following options are available:
Add Flow
Adds a new ow to your project. By default, every new ow is automatically included
in all layouts, and every player is added to the new ow.
Notation Options
Opens the Notation Options dialog that provides multiple options that allow you to
make changes that affect the way music is notated for each ow.
Delete Flow
Deletes one or multiple selected ows.
RELATED LINKS
Flows on page 98
Notation Options dialog on page 129
Videos on page 106
Project Info dialog
For every project and every ow that you create in Dorico Elements, you can specify project
information in the Project Info dialog.
● You can open the Project Info dialog by choosing File > Project Info.
In the Project Info dialog, you can enter information for the whole project and for each ow. For
example, each ow in your project might have a different composer and lyricist.
70
Page 71

Setup mode
Layout Options dialog
You can use tokens in text frames to refer to the information you enter into the different elds on
the different pages in the Project Info dialog.
RELATED LINKS
Text tokens on page 273
Layout Options dialog
The Layout Options dialog provides multiple options that allow you to make changes that affect
the way the notation is laid out on pages of each layout.
You can change the physical properties of the layout, such as page size, staff size, or margins,
and the notation, such as note spacing or staff labels.
TIP
You can save all options that you set in Layout Options as default values for new projects by
selecting a layout type from the Layout type menu and clicking Save as Default.
You can open Layout Options in any of the following ways:
● Press Ctrl/Cmd-Shift-L in any mode.
● Choose Setup > Layout Options in Setup mode.
● Click Layout Options at the bottom of the Layouts panel in Setup mode.
● Right-click an instrumental part or a full score in the Layouts panel and choose Layout
Options from the context menu.
Layout Options
The Layout Options dialog contains the following:
1 Page list
71
Page 72

Setup mode
Layout Options dialog
2 Section titles
3 Section
4 Layouts list
5 Selection options
Contains the categories of options that you can view and change in the dialog, divided into
pages. When you click a page in this list, any applicable section titles appear below the
page in the page list.
Shows the titles of any sections on the selected page. You can click these section titles to
navigate directly to that section of the page.
Pages are divided into sections, which can contain multiple options. Sections that contain
many options are divided into subsections. For options that have multiple possible
settings, the current setting is highlighted. Click other settings to choose them instead.
Lists all the layouts in your project. You can select one, multiple, or all layouts. You can
select multiple layouts in any of the following ways:
● Click one of the selection options.
● Ctrl/Cmd-click to select multiple layouts.
● Shift-click to select multiple adjacent layouts.
Allow you to select layouts in the Layouts list according to their type.
● Select All selects all layouts in the Layouts list, regardless of their type.
● Select All Full Score Layouts selects all full score layouts in the Layouts list only.
● Select All Part Layouts selects all part layouts in the Layouts list only.
● Select All Custom Score Layouts selects all custom score layouts in the Layouts list
only.
6 Layout type
Allows you to select the layout type for which you want to save your settings as the default.
For example, you can save new default settings for part layouts without affecting the
default settings for full score layouts.
7 Save as Default
Saves all options that you have set in the dialog as the default for the selected layout type
in new projects.
8 Reset to Factory
Resets all the options in the dialog back to the default factory settings for the selected
layout type.
RELATED LINKS
Notation Options dialog on page 129
Playback Options dialog on page 287
Staves on page 676
Making layout-specic changes in Layout Options on page 72
Making layout-specic changes in Layout Options
You can make project-wide changes for each layout independently in Layout Options.
PROCEDURE
1. Open Layout Options in any of the following ways:
Press Ctrl/Cmd-Shift-L in any mode.
●
Choose Setup > Layout Options in Setup mode.
●
Click Layout Options at the bottom of the Layouts panel in Setup mode.
●
72
Page 73

Setup mode
Players
● In Setup mode, right-click an instrumental part or a full score in the Layouts panel
and choose Layout Options from the context menu.
2. In the Layouts list, select the layouts in which you want to change options in one of the
following ways:
● Click Select All.
● Click Select All Full Score Layouts.
● Click Select All Part Layouts.
● Click Select All Custom Score Layouts.
●
Ctrl/Cmd-click individual layouts.
●
Shift-click adjacent layouts.
By default, the layout currently open in the music area is selected when you open the
dialog.
3. Click a page in the page list.
4. Look through the available options, and change the options you want.
5. Click Apply, then Close.
Players
NOTE
If you make changes and close the dialog without clicking Apply, you are prompted to
save or discard your changes.
RESULT
The changes are applied immediately to the selected layouts.
Before you start writing music, you must specify the players that are playing one or multiple
instruments.
A player can be a solo player, which represents a single person who can play one or more
instruments. For example, a clarinettist may double alto saxophone or bass clarinet.
A player can also be a sectional player, which represents multiple people, each of whom plays the
same instrument. For example, a violin section or the soprano section of a choir.
Dorico Elements uses this knowledge about players and their instruments to assist you in
producing a practical score eciently, for example, by making it very easy to handle instrument
doubling and divisi.
When you add a player in Dorico Elements, the following happens automatically:
An instrumental part layout is created.
●
The player is added to any full score layouts that already exist. If no full score layouts
●
exists, a new full score layout is created.
The player is included in all existing ows.
●
RELATED LINKS
Players, layouts, and ows on page 63
Flows on page 98
Layouts on page 101
Changing the players assigned to layouts on page 102
73
Page 74

Setup mode
Players
Changing the players assigned to ows on page 99
Adding solo/section players
You can add both solo and section players to your project. Solo players can hold multiple
instruments, whereas section players can divide.
PREREQUISITE
The Players panel is open.
PROCEDURE
1. In the Players panel, add an empty-handed player in any of the following ways:
●
If you have started a new project, click Add Solo Player in the project start area.
●
If you have started a new project, click Add Section Player in the project start area.
● At the bottom of the Players panel, click Add Solo Player.
● At the bottom of the Players panel, click Add Section Player.
The instrument picker opens.
TIP
You can also open the instrument picker at any time by clicking the plus symbol in solo
player cards.
Alternatively, you can right-click a player and choose Add Instrument to Player.
2. Select an instrument in the instrument picker in any of the following ways:
● Start entering the instrument name you want, then select it from the ltered list.
Click an instrument family and then an instrument.
●
Press Up Arrow/Down Arrow to select an instrument family, then press Tab to
●
switch to the instrument column. Press Up Arrow/Down Arrow to select an
instrument.
TIP
An enclosure line shows which instrument family or instrument is selected
●
when using the keyboard to navigate.
Press Shift-Tab to switch back to the previous column in the instrument
●
picker.
3. Add the selected instrument in any of the following ways:
74
Page 75

Setup mode
Players
● Press Return.
● Click Add.
RESULT
The solo/section player is automatically named after the selected instrument.
TIP
If you want to add multiple instruments to your project at the same time, you can add ensembles
or use a project template.
AFTER COMPLETING THIS TASK
If you added a solo player and you want them to hold multiple instruments, add other
instruments to the solo player.
RELATED LINKS
Instrument picker on page 66
Player, layout, and instrument names on page 75
Changing player names on page 78
Project start area on page 41
Adding instruments to players on page 83
Adding ensembles on page 81
Starting new projects from project templates on page 33
Duplicating players
You can duplicate players. This adds another player of the same type.
PROCEDURE
● In the Players panel, right-click the player you want to duplicate and choose Duplicate
Player from the context menu.
RESULT
A new player is added, with the same instruments as the original player. The original and new
players are automatically numbered to ensure their names are unique.
RELATED LINKS
Player, layout, and instrument names on page 75
Changing player names on page 78
Instrument numbering on page 82
Player, layout, and instrument names
In Dorico Elements, you can use three different names to refer to the same player in different
contexts. This allows you to show relevant information in different places in the score.
The three different names that relate to players and instruments are:
Player name
●
Layout name
●
Instrument name
●
You can change all of these names for individual players independently of other instruments of
the same type. Each name is used in different places. Player and layout names are shown using
text tokens.
75
Page 76

Setup mode
Players
Player name
Given to players in the Players panel. It is not used in the score, instead you can use
the player name as part of your own workow, independently of what instruments
and players are called in staff labels and layout names.
Player names are automatically generated when you add instruments.
Layout name
The name for each layout in the Layouts panel. They are used at the top of individual
part layouts.
Layout names are automatically generated when you add instruments, and are
linked to the player name until you change the layout name.
Instrument names
Used in staff labels. This means that the instrument label on each staff is relevant to
the instrument currently being played by that player, rather than listing all
instruments that player is playing in the ow.
For example, if a clarinettist is doubling bass clarinet, the staff label where the player
plays clarinet automatically shows Clarinet, and the staff label automatically shows
Bass Clarinet where the player plays bass clarinet.
All instruments in Dorico Elements come with a set of instrument names that you can
change.
You can change the instrument names for individual instruments independently,
even if other players in the project are playing the same instrument.
You can save your changes to instrument names as default, so your names are used
whenever you add that instrument again in the project.
NOTE
Changing the default instruments names does not change the instrument names of
existing instruments of that type in your project.
RELATED LINKS
Instrument numbering on page 82
Edit Instrument Names dialog on page 76
Text tokens on page 273
Staff labels on page 665
Layouts on page 101
Changing player names on page 78
Changing layout names on page 79
Changing instrument names on page 80
Edit Instrument Names dialog
The Edit Instrument Names dialog allows you to change the content and formatting of
instrument names, which are used in staff labels. You can edit both singular/plural full
instrument names and singular/plural short instrument names for each instrument.
● You can open the Edit Instrument Names dialog in Setup mode by clicking the arrow in
an instrument label in the Players panel and choosing Edit Names.
76
Page 77

Setup mode
Players
Edit Instrument Names dialog
The Edit Instrument Names dialog contains the following options and sections:
1 Editing instrument
Displays the permanent underlying name of the instrument. You cannot change this
name.
2 Editing
Allows you to switch between editing the Singular names and Plural names of the
selected instrument.
Singular names is used when staff labels are shown by default, Plural names is used
when the staff contains multiple players.
3 Full name section
Contains options that allow you to edit the appearance of the full instrument name.
4 Full name text editor options
Allows you to customize the font, size, and formatting of the long staff label of the selected
instrument.
5 Full name text editing area
Shows the current long name for the selected instrument, as it appears in Full staff labels.
You can select any part of the instrument name and edit it independently of other parts,
for example, if you want to add additional information on a new line and in italics.
Staff labels are right-aligned by default, so appear at the right edge of the text editing
area.
6 Short name section
77
Page 78

Setup mode
Players
Contains options that allow you to edit the appearance of the short instrument name.
7 Short name text editor options
Allows you to customize the font, size, and formatting of the short staff label of the
selected instrument.
8 Short name text editing area
Shows the current short staff label for the selected instrument, as it appears in
Abbreviated staff labels. You can select any part of the instrument name and edit it
independently of other parts, for example, if you want to add additional information on a
new line and in italics.
Staff labels are right-aligned by default, so appear at the right edge of the text editing
area.
9 Show transposition
Allows you to choose when the transposition is shown in the instrument name for the
selected instrument. It is common to see the transposition included in the name of
transposing instruments, such as Clarinet in B♭.
You can choose when the transposition is shown from the following options:
● Always: instrument transpositions are shown even if you have chosen to hide them
on the Staves and Systems page in Setup > Layout Options.
● Follow Layout Options: instrument transpositions can be hidden and shown,
depending on your per-layout settings in Layout Options.
● Never: instrument transpositions are never shown, even if you have chosen to show
them in Layout Options.
10 Save as default for instrument
Activating the checkbox saves your changes in the dialog as the default for any new
instruments of that type that you add to the project.
11 Reset to Default
Removes all your changes to staff labels for the selected instrument type and reverts them
to the default settings.
RELATED LINKS
Changing instrument names on page 80
Project-wide layout options for staves on page 676
Staff labels on page 665
Changing the length of staff labels project-wide on page 669
Changing player names
You can change the player names of players, and reset renamed players to their default name.
NOTE
Player names are not used for staff labels in the score or for naming layouts, instead they are for
your own reference in Setup mode.
Staff labels use the name set for each instrument in the Edit Instrument Names dialog.
PROCEDURE
1. In the Players panel, select the card of the player whose player name you want to change.
2. Open the player name text eld in any of the following ways:
Double-click anywhere in the player card.
●
Right-click in the player card and choose Rename from the context menu.
●
78
Page 79

Setup mode
Players
3. Enter a new name, or click Reset to Default to revert the name to the default name.
4. Save your changes in any of the following ways:
● Press Return.
● Click outside of the text eld.
RESULT
The player name of the selected player is changed.
NOTE
This does not change the staff label that appears in the score. You can change the name used for
staff labels in the Edit Instrument Names dialog, and change the layout name for the names at
the top of parts.
RELATED LINKS
Edit Instrument Names dialog on page 76
Changing layout names
Layout names are used to identify individual layouts, for example, as the name at the top of
parts. You can change the layout names of players, and reset renamed players to their default
name.
NOTE
Layout names are not used for staff labels. Staff labels use the name set for each instrument in
the Edit Instrument Names dialog.
PROCEDURE
1. In the Layouts panel, select the name of the player whose layout name you want to
change.
2. Open the layout name text eld in any of the following ways:
● Double-click anywhere in the layout card.
● Right-click in the layout card and choose Rename from the context menu.
3. Enter a new name, or click Reset to Default to revert the name to the player name.
4. Save your changes in any of the following ways:
Press Return.
●
Click outside of the layout name eld.
●
RESULT
The layout name of the selected player is changed, or reverted to the default name.
NOTE
This does not change the staff label that appears in the score. You can change the name used for
staff labels in the Edit Instrument Names dialog, and change the layout name for the names at
the top of parts.
79
Page 80

Setup mode
Players
RELATED LINKS
Edit Instrument Names dialog on page 76
Changing instrument names
Instrument names are used in staff labels. You can change the different instrument names used
for each instrument.
NOTE
Changing instrument names does not change the name shown at the top of part layouts. If you
want to change the name used at the top of part layouts, change the layout name.
PROCEDURE
1. In the Players panel, click the disclosure arrow in the player card containing the
instrument whose names you want to change.
This expands the card to show the instruments held by the player.
2. Click the arrow that appears in the instrument label when you hover over it and choose
Edit Names.
The Edit Instrument Names dialog opens.
3. Enter new names in any of the name elds.
4. Click OK to save your changes and close the dialog.
RESULT
The instrument names for the selected instrument are changed.
If you did not save your changes as default, only the names of the selected instrument are
changed. Any instruments of the same type added later use the original default names.
If you saved your changes as default, any instruments of the same type added later use your new
instrument names. The instrument names of any other instruments of the same type already in
your score are not changed.
RELATED LINKS
Edit Instrument Names dialog on page 76
Changing layout names on page 79
Changing the orchestral order of players
You can change the order in which players appear in the score in the Players panel.
PROCEDURE
1. In the Players panel, select the player card of the player whose position in the score you
want to change.
2. Click and drag the player card upwards/downwards in the panel.
An insertion line indicates where the player will be positioned.
Deleting players
You can delete players from your project.
PROCEDURE
1. In the Players panel, select the players that you want to delete.
80
Page 81

Setup mode
Ensembles
2. Delete the players in any of the following ways:
● Press Backspace or Delete.
● Click Delete Player.
● Right-click a single player and choose Delete Player from the context menu.
NOTE
You can only delete a single player at a time when using the context menu.
3. Choose one of the following options in the warning message that opens:
●
Delete Player Only
Deletes the player and the music that you created for the instruments belonging to
that player.
●
Delete Player and Part Layouts
Deletes the player, the music, and all part layouts to which the player is assigned.
NOTE
The part layout cannot be deleted if it contains more than the deleted player.
Ensembles
If you add an ensemble in Dorico Elements, multiple players are added to your project at the
same time.
Dorico Elements provides a set of predened ensembles that you can use. Adding an ensemble is
one of the ways to achieve building up an instrumentation quickly. The predened ensembles
that you can create with Dorico Elements follow standard patterns, such as double woodwind
which refers to two utes, two oboes, two clarinets, and two bassoons.
Adding ensembles
You can add multiple players at once by adding ensembles, such as a complete string section or
four-part choir.
PREREQUISITE
The Players panel is open.
PROCEDURE
1. Do one of the following:
●
If you have started a new project, click Add Ensemble in the project start area.
Click Add Ensemble at the bottom of the Players panel.
●
2. In the instrument picker, select an ensemble in any of the following ways:
81
Page 82

Setup mode
Instruments
● In the search eld, enter the rst letters of the ensemble, then select it from the
ltered list, and click Add Ensemble to Score.
● Scroll through the list, select an ensemble, and click Add Ensemble to Score.
● Use Tab/Shift-Tab and the arrow keys on your computer keyboard to scroll through
the list. To select an ensemble, press Return.
RESULT
The ensemble players are added to the Players panel, either as solo or as section players.
TIP
You can also add multiple instruments to your project at the same time by using a project
template.
RELATED LINKS
Instrument picker on page 66
Changing player names on page 78
Project start area on page 41
Starting new projects from project templates on page 33
Instruments
You can assign instruments to solo and section players as well as to ensembles.
In Dorico Elements, you can assign multiple instruments to solo players, as solo players often
play multiple instruments, such as an oboist doubling the cor anglais.
Before you can assign instruments, you must add players or ensembles, which may in turn also
be assigned to groups if needed. If you add ensembles, it is by default not necessary to add any
instruments, since these are already included when you select the type of ensemble. However,
you can add further instruments to ensembles.
Instruments in Dorico Elements do not have limited ranges; it is possible to notate any pitch in
any register on every instrument. However, in the piano roll editor in Play mode, only pitches
that fall in the MIDI note range 0-127 can be represented. Similarly, if you input a pitch beyond
the range of samples in the assigned VST instrument, the pitch does not sound in playback.
You can always change the initial specication and add or delete instruments.
RELATED LINKS
Piano roll editor on page 290
VST and MIDI Instruments panel on page 284
Instrument numbering
When there are multiple instruments of the same type in the same score, they are each
automatically given a number for easy and clear identication.
For example, if there is only one ute in a score, it is called Flute, but if there are three utes, they
are called Flute 1, Flute 2, and Flute 3.
Dorico Elements automatically numbers instruments when there are multiple instruments of the
same type in your project.
82
Page 83

Setup mode
Instruments
One violin with no number Adding a second violin automatically generates
Instrument numbers are automatically generated for players if the following criteria are met:
●
Players are the same type, either solo or section.
●
Players have at least one instrument in common.
●
Players are in the same group.
●
Instrument names are the same.
For example, if you have two utes in your project, but one ute is a section player and the other
ute is a solo player, they are not numbered automatically. Similarly, if the two utes are in
different player groups, they are not numbered automatically.
RELATED LINKS
Player, layout, and instrument names on page 75
Changing instrument names on page 80
Player groups on page 96
Transposing instruments
While most instruments produce notes at concert pitch, transposing instruments produce a note
that is different to the one that is written. For example, two common orchestral transposing
instruments are clarinet in B♭ and horn in F.
numbers for both violins
When a clarinet in B♭ plays a C, the sound produced is a B♭, one tone below. When a horn in F
plays a C, the sound produced is an F, a fth below. Other instruments that conventionally
produce a pitch different to the one notated include the piccolo (sounding an octave above
written), double bass (sounding an octave below written), and glockenspiel (sounding two
octaves above written).
Dorico Elements stores all note information in concert pitch and automatically transposes notes
as appropriate for the transposition of the instrument. This means notes are automatically
changed in transposing layouts compared to non-transposing layouts. You can also change
instruments at any time, and the music is adjusted automatically to ensure the correct pitches
are shown.
RELATED LINKS
Concert vs. transposed pitch on page 105
Changing whether layouts are transposing/non-transposing on page 104
Adding instruments to players
You can add instruments to both solo and section players. You can add multiple instruments to
solo players, but only a single instrument to section players.
PREREQUISITE
You have added a solo or section player.
83
Page 84

Setup mode
Instruments
PROCEDURE
1. In the Players panel, open the instrument picker in any of the following ways:
● Select the solo or section player and press Shift-I.
● Click the plus symbol to the right of the added empty-handed player.
● Right-click the player and choose Add Instrument to Player from the context
menu.
2. Select an instrument in the instrument picker in any of the following ways:
● Start entering the instrument name you want, then select it from the ltered list.
●
Click an instrument family and then an instrument.
●
Press Up Arrow/Down Arrow to select an instrument family, then press Tab to
switch to the instrument column. Press Up Arrow/Down Arrow to select an
instrument.
TIP
●
An enclosure line shows which instrument family or instrument is selected
when using the keyboard to navigate.
●
Press Shift-Tab to switch back to the previous column in the instrument
picker.
3. Add the selected instrument in any of the following ways:
● Press Return.
● Click Add.
4. Optional: Repeat steps 1 to 3 to add multiple instruments to a single solo player.
NOTE
You can only add a single instrument to each section player.
RESULT
The selected instrument is added to the player. If you selected multiple players, the instrument is
only added to the rst player in the Players panel.
TIP
If you want to add multiple instruments to your project at the same time, you can add ensembles
or use a project template.
RELATED LINKS
Instrument picker on page 66
Adding ensembles on page 81
Starting new projects from project templates on page 33
Adding empty percussion kits to players
You can add empty percussion kits to players, to which you can then add unpitched percussion
instruments.
PROCEDURE
1. In the Players panel, open the Edit Percussion Kit dialog in any of the following ways:
84
Page 85

Setup mode
Instruments
● Select a solo or section player, press Shift-I, and click Create Empty Kit in the
instrument picker.
● Click the plus symbol to the right of the added empty-handed player and click
Create Empty Kit in the instrument picker.
● Right-click a player and choose Create Empty Kit from the context menu.
2. Add the percussion instruments you want to the kit in the Edit Percussion Kit dialog.
RELATED LINKS
Edit Percussion Kit dialog on page 87
Instrument picker on page 66
Combining individual percussion instruments into kits
If a player is holding one or more individual percussion instruments, you can combine them into
a percussion kit.
PROCEDURE
1. Right-click the card of the player whose percussion instruments you want to combine into
a kit and choose Combine Instruments into Kit from the context menu.
2. Edit the kit in the Edit Percussion Kit dialog that opens.
For example, you can change the order in which the instruments appear in a grid or on a
ve-line staff.
RESULT
A new kit is created containing all the instruments held by the player.
NOTE
If the player was already holding one or more kit instruments, all individual instruments and any
other kits are combined into the rst kit.
Changing instruments
You can change the instruments held by players without affecting any music already entered
onto their staves. You can change pitched instruments and individual unpitched percussion
instruments, but you cannot change percussion kits into other instruments.
NOTE
Only unpitched percussion instruments are shown in the instrument picker when you choose
Change Instrument for an unpitched percussion instrument.
PROCEDURE
1. In the Players panel, expand the card of the player whose instrument you want to change.
The card lists the instruments of the player.
2. Hover over the label of the instrument you want to change, click the arrow that appears,
and choose Change Instrument.
85
Page 86

Setup mode
Instruments
The instrument picker opens.
3. Select an instrument in the instrument picker in any of the following ways:
● Start entering the instrument name you want, then select it from the ltered list.
● Click an instrument family and then an instrument.
● Press Up Arrow/Down Arrow to select an instrument family, then press Tab to
switch to the instrument column. Press Up Arrow/Down Arrow to select an
instrument.
TIP
●
An enclosure line shows which instrument family or instrument is selected
when using the keyboard to navigate.
●
Press Shift-Tab to switch back to the previous column in the instrument
picker.
4. Change to the selected instrument in any of the following ways:
●
Press Return.
●
Click Add.
RESULT
The selected instrument is changed, without affecting any music on its staff.
NOTE
Where appropriate, new clefs are input. This means that notes can appear differently so that they
are notated correctly according to the new clef.
Moving instruments between players
You can move individual instruments between players without affecting any music already input
for those instruments.
PROCEDURE
● In the Players panel, move instruments to other players in any of the following ways:
● Click and drag instruments individually and release them over the player card to
which you want to move them.
● Click the arrow that appears in the instrument label when you hover over it and
choose Move Instrument to Player > [Player].
NOTE
You can only move instruments to players already added to your project.
RELATED LINKS
Adding solo/section players on page 74
86
Page 87

Setup mode
Instruments
Deleting instruments
You can delete instruments from players.
IMPORTANT
If you delete an instrument from a player, any music that you have created for this instrument is
also deleted.
PROCEDURE
1. In the Players panel, click the disclosure arrow in the player card of the player holding the
instrument you want to delete.
The player card opens.
2. Click the arrow that appears in the instrument label when you hover over it and choose
Delete Instrument.
3. Click OK.
RESULT
The instrument is deleted from the player.
Edit Percussion Kit dialog
The Edit Percussion Kit dialog allows you to make changes to percussion kits, including which
instruments are included in them and how instruments are arranged in the different available kit
presentations.
● The dialog opens automatically when you create empty kits or combine existing
instruments into a kit.
● You can also open the Edit Percussion Kit dialog manually for existing percussion kit
instruments by expanding the player card of the player holding the percussion kit in the
Players panel in Setup mode. Then click the arrow in its label and choose Edit Percussion
Kit.
NOTE
Percussion kit instrument labels are green in the Players panel in Setup mode.
87
Page 88

Setup mode
Instruments
Edit Percussion Kit dialog
1 Name
Allows you to enter the full name for the percussion kit. This is used in Full staff labels for
percussion kits that use the ve-line staff presentation type.
2 Short name
Allows you to enter the abbreviated name for the percussion kit. This is used in
Abbreviated staff labels for percussion kits that use the ve-line staff presentation type.
3 Drum set
Allows you to dene the percussion kit as a drum set by activating the checkbox.
Percussion kits that are dened as drum sets follow your settings for drum sets on the
Percussion page in Notation Options, including for voicing and default stem directions.
4 Presentation types
Allows you to select a percussion kit presentation type in order to edit how the selected
percussion kit appears in that presentation type.
● 5-line Staff
Kit instruments are shown on a ve-line staff. You can determine which instruments
are shown on each line and in each space of the staff. A single staff label containing
the name of the kit is shown.
● Grid
Kit instruments are shown on a grid, with each instrument on its own line. You can
customize how large the gaps between each line are. Staff labels are shown for each
instrument in a smaller font than normal staff labels.
● Single-line Instruments
88
Page 89

Setup mode
Instruments
Kit instruments are shown as individual instruments with their own lines. Normalsized staff labels are shown for each instrument.
5 Editor
Displays the current arrangement of instruments in the selected percussion kit
presentation type. You can change the order of instruments, and the layout of lines and
spaces in the grid presentation type, by using the controls.
6 Controls
Allows you to change the order and stem direction of instruments in the selected
percussion kit presentation type. It also allows you to add slash voices to the kit.
You can access dialogs to change the noteheads used for each instrument in the kit by
clicking Edit Noteheads, and how combinations of noteheads and articulations and
tremolos affect playback by clicking Edit Percussion Playing Techniques.
You can also change the names of individual instruments within percussion kits. Click Edit
Names to open the Edit Instrument Names dialog.
NOTE
This changes the appearance of percussion instrument names in all presentations.
Staff labels use different information, depending on the kit presentations.
7 Action bar
The action bar at the bottom of the dialog provides other operations that apply to all
presentation types.
● Add New Instrument
Opens the instrument picker, allowing you to choose a new unpitched percussion
instrument to be added to the kit.
● Add Existing Instrument From Player
Shows a menu listing the other players in your project that are holding individual
percussion instruments not in kits. You can select a percussion instrument from
another player to move to this kit, bringing its music with it.
● Remove Instrument From Kit
Removes the selected instrument from the kit, so it appears as an individual
instrument. You can move individual instruments to other players or into other kit
instruments.
● Change Instrument
Opens the instrument picker, allowing you to choose a new unpitched instrument to
replace the selected instrument, while retaining its music.
● Delete Instrument
Deletes the instrument from the kit, including its music.
8 Export Kit
Allows you to export the percussion kit as a library les so you can use it in other projects.
89
Page 90

Setup mode
Instruments
RELATED LINKS
Percussion kits on page 765
Staff labels for percussion kits on page 674
Percussion kit presentation types on page 770
Percussion Instrument Playing Techniques dialog on page 772
Playing techniques for unpitched percussion instruments on page 772
Dening percussion kits as drum sets on page 91
Dening how combinations of articulations and single-note tremolos sound in playback on page
346
Specifying the stem direction/voice of instruments in percussion kits on page 781
Exporting percussion kits on page 765
Adding instruments to percussion kits
You can add new instruments to percussion kits within the Edit Percussion Kit dialog.
PROCEDURE
1. In the Players panel, expand the card of the player holding the kit to which you want to
add instruments.
2. Click the arrow that appears in the kit instrument label when you hover over it and choose
Edit Percussion Kit.
The Edit Percussion Kit dialog opens.
3. Click Add New Instrument.
4. Select a percussion instrument in the instrument picker in any of the following ways:
● Start entering the instrument name you want, then select it from the ltered list.
● Click an instrument family and then an instrument.
● Press Up Arrow/Down Arrow to select an instrument family, then press Tab to
switch to the instrument column. Press Up Arrow/Down Arrow to select an
instrument.
TIP
● An enclosure line shows which instrument family or instrument is selected
when using the keyboard to navigate.
● Press Shift-Tab to switch back to the previous column in the instrument
picker.
5. Add the selected instrument in any of the following ways:
● Press Return.
Click Add.
●
6. Click Close.
RESULT
The selected instrument is added to the percussion kit.
RELATED LINKS
Edit Percussion Kit dialog on page 87
90
Page 91

Setup mode
Instruments
Changing instruments in percussion kits
You can change existing instruments in percussion kits while retaining any existing music for that
instrument.
PROCEDURE
1. In the Players panel, expand the card of the player holding the kit in which you want to
change instruments.
2. Click the arrow that appears in the kit instrument label when you hover over it and choose
Edit Percussion Kit.
The Edit Percussion Kit dialog opens.
3. Click the instrument you want to change.
4. Click Change Instrument in the action bar.
5. Select a percussion instrument in the instrument picker in any of the following ways:
●
Start entering the instrument name you want, then select it from the ltered list.
●
Click an instrument family and then an instrument.
●
Press Up Arrow/Down Arrow to select an instrument family, then press Tab to
switch to the instrument column. Press Up Arrow/Down Arrow to select an
instrument.
TIP
● An enclosure line shows which instrument family or instrument is selected
when using the keyboard to navigate.
● Press Shift-Tab to switch back to the previous column in the instrument
picker.
6. Change to the selected instrument in any of the following ways:
● Press Return.
● Click Change.
7. Click Close.
RESULT
The instrument is changed to the one selected in the instrument picker. Any music input for the
previous instrument is retained.
NOTE
Playing techniques expressed using playing technique-specic noteheads are not retained.
RELATED LINKS
Edit Percussion Kit dialog on page 87
Dening percussion kits as drum sets
You can dene individual percussion kits as drum sets. Drum sets follow your project-wide
setting for voicing in drum sets with ve-line staff presentations.
PROCEDURE
1. In the Players panel, expand the card of the player holding the kit you want to dene as a
drum set.
91
Page 92
Setup mode
Instruments
2. Click the arrow that appears in the kit instrument label when you hover over it and choose
Edit Percussion Kit.
The Edit Percussion Kit dialog opens.
3. Activate Drum set in the top right of the dialog.
4. Click Apply, then Close.
RESULT
The selected percussion kit is dened as a drum set. The arrangement of voices for instruments
in the kit when using the ve-line staff presentation type follows your project-wide setting on the
Percussion page in Write > Notation Options.
NOTE
If you no longer want a percussion kit to be dened as a drum set, you can deactivate Drum set
in the Edit Percussion Kit dialog for that kit.
RELATED LINKS
Notation Options dialog on page 129
Edit Percussion Kit dialog on page 87
Percussion Instrument Playing Techniques dialog on page 772
Creating groups of instruments within grid presentation percussion kits
You can create groups of instruments within percussion kits that use the grid presentation type
in order to have a better overview of the instruments in the kit.
In grid presentation percussion kits, the name of each individual instrument is shown in the staff
label. You can simplify the staff label of grid presentation percussion kits by creating groups, for
example, to show Wood Blocks instead of Wood Block (High), Wood Block (Medium), and Wood
Block (Low).
PROCEDURE
1. In the Players panel, expand the card of the player holding the kit in which you want to
create groups in the grid presentation.
2. Click the arrow that appears in the kit instrument label when you hover over it and choose
Edit Percussion Kit.
The Edit Percussion Kit dialog opens.
3. Click Grid at the top of the dialog.
4. Click the rst instrument you want to include in the group.
5. Shift-click the last instrument you want to include in the group.
NOTE
You can only include adjacent instruments in groups.
6. Click Add.
RESULT
A group is created containing the selected instruments. The group is given a default name that
you can change.
92
Page 93

Setup mode
Instruments
RELATED LINKS
Edit Percussion Kit dialog on page 87
Renaming groups in grid presentation percussion kits on page 93
Renaming groups in grid presentation percussion kits
Group names are shown as instrument labels. You can change the names of groups in
percussion kits using grid presentation.
PROCEDURE
1. In the Players panel, expand the card of the player holding the kit in which you want to
change the names of groups in the grid presentation.
2. Click the arrow that appears in the kit instrument label when you hover over it and choose
Edit Percussion Kit.
The Edit Percussion Kit dialog opens.
3. Click Grid at the top of the dialog.
4. Open the Edit Percussion Grid Group Names dialog in any of the following ways:
●
Double-click the group.
●
Click the group, then click Edit.
Groups are shown as colored blocks in the column to the left of the list of percussion kit
instruments.
5. Enter the names you want to give the group in the corresponding elds in the Edit
Percussion Grid Group Names dialog:
● Full Name
● Short Name
6. Click OK to save your changes and close the dialog.
RESULT
The name of the group is changed. This also changes the staff label for the group.
NOTE
Staff labels for groups in grid presentation percussion kits use a different paragraph style to the
staff labels for non-grouped instruments in grid presentation percussion kits.
EXAMPLE
Ungrouped grid presentation percussion kit
RELATED LINKS
Edit Percussion Kit dialog on page 87
Grid presentation percussion kit with wood blocks
grouped
93
Page 94

Setup mode
Instruments
Staff labels for percussion kits on page 674
Deleting groups within grid presentation percussion kits
You can delete groups in percussion kits using grid presentation, without deleting the
instruments within the group.
PROCEDURE
1. In the Players panel, expand the card of the player holding the kit from whose grid
presentation you want to delete groups.
2. Click the arrow that appears in the kit instrument label when you hover over it and choose
Edit Percussion Kit.
The Edit Percussion Kit dialog opens.
3. Click Grid at the top of the dialog.
4. Click the group you want to delete.
Groups are shown as colored blocks in the column to the left of the list of percussion kit
instruments.
5. Click Delete.
RESULT
The group is deleted. The individual staff labels for each instrument in the group are restored.
RELATED LINKS
Edit Percussion Kit dialog on page 87
Changing the positions of instruments within percussion kits
You can change the positions of instruments within percussion kits of all presentation types to
change the order in which the instruments appear in the score and parts. In ve-line staff
presentation types, you can also change the staff position of slash voices.
PROCEDURE
1. In the Players panel, expand the card of the player holding the kit in which you want to
change the positions of instruments.
2. Click the arrow that appears in the kit instrument label when you hover over it and choose
Edit Percussion Kit.
The Edit Percussion Kit dialog opens.
3. Click the kit presentation type in which you want to change the order of instruments.
For example, click Grid to change the order of instruments when the kit uses the grid
presentation type.
4. Click a percussion instrument or slash voice whose position you want to change.
5. Change the position of the selected instrument in any of the following ways:
Click Move up arrow to move it upwards.
●
Click Move down arrow to move it downwards.
●
Click and drag the instrument upwards/downwards (ve-line staff presentation
●
only).
6. Optional: Repeat these steps for other instruments in the percussion kit, and for other kit
presentation types for the same percussion kit.
7. Click Apply, then Close.
94
Page 95

Setup mode
Instruments
RESULT
The position of the selected instrument or slash voice within the kit is changed. Multiple
instruments can share the same staff position, but we recommend that they use different
noteheads so that the player can tell them apart.
RELATED LINKS
Edit Percussion Kit dialog on page 87
Moving notes to different instruments in percussion kits on page 768
Changing the size of gaps between lines in percussion grids
You can change the size of gaps between lines in percussion kits using the grid presentation
type.
PROCEDURE
1. In the Players panel, expand the card of the player in whose percussion kit you want to
change the size of gaps in the grid presentation.
2. Click the arrow that appears in the kit instrument label when you hover over it and choose
Edit Percussion Kit.
The Edit Percussion Kit dialog opens.
3. Click Grid at the top of the dialog.
4. Click the instrument below which you want to change the gap size.
5. Change the value in the Gap eld in any of the following ways:
● Enter a value into the value eld and press Return.
● Click the arrows beside the value eld.
6. Click Apply, then Close.
RESULT
The size of the gap below the selected instrument is changed.
RELATED LINKS
Edit Percussion Kit dialog on page 87
Removing individual instruments from percussion kits
You can remove individual instruments from percussion kits, for example, if you want to move an
instrument from one percussion kit to another player.
PROCEDURE
1. In the Players panel, expand the card of the player holding the kit from which you want to
delete instruments.
2. Click the arrow that appears in the kit instrument label when you hover over it and choose
Edit Percussion Kit.
The Edit Percussion Kit dialog opens.
3. Click the instrument you want to remove from the kit.
4. Click Remove Instrument From Kit in the action bar.
5. Click Close.
95
Page 96

Setup mode
Player groups
RESULT
The selected instrument appears as an individual instrument belonging to the same player but
separate from the percussion kit.
You can then move the instrument to other players if required.
RELATED LINKS
Edit Percussion Kit dialog on page 87
Moving instruments between players on page 86
Player groups
Grouping players together means they are positioned together in the score, numbered
independently, and are bracketed together according to the project template.
For example, if your project is for double choir (SATB/SATB), all voices are joined by a single
bracket by default because they are in the same family. However, if you add each choir to its own
group, they are bracketed separately. This is useful for to bracket players properly in works
containing multiple groups, such as in Britten's “War Requiem”, which has three distinct groups,
or in Walton's “Belshazzar's Feast” which requires two separate off-stage brass groups.
Similarly, you can create a group for an off-stage group of players in a large-scale work.
If the instruments were not already next to each other according to orchestral order, adding a
player group changes the order of players in the score project-wide.
RELATED LINKS
Brackets according to project template categories on page 34
Adding groups of players
You can organize players into groups, for example, if you want to bracket them together.
PREREQUISITE
The Players panel is open.
PROCEDURE
1. Optional: In the Players panel, select the players that you want to include in the group.
2. At the bottom of the Players panel, click Add Group.
RESULT
If you selected one or more players, they are added to the group. If no player was selected, an
empty group is added to the Players panel.
RELATED LINKS
Adding players to groups on page 97
Brackets and braces on page 415
96
Page 97

Setup mode
Player groups
Renaming player groups
You can change the name of player groups after you have added them.
PROCEDURE
1. In the Players panel, double-click the name of the group.
2. Enter the new name.
3. Press Return.
Deleting player groups
You can delete groups of players.
NOTE
If you delete a group, you can keep the players that you added to the group.
PROCEDURE
1. In the Players panel, select the group that you want to delete.
2. Delete the group in any of the following ways:
● Click Delete.
● Press Delete.
3. Choose one of the following options in the warning message that opens:
● Keep Players
Deletes the group but keeps the players.
● Delete Players
Deletes the group and the players it contains.
Adding players to groups
You can add existing or new players to player groups.
PREREQUISITE
You have added at least one player, one ensemble, or one group.
PROCEDURE
● In the Players panel, do one of the following:
Select one or more players and click Add Group.
●
Select a group, and click Add Solo Player, Add Section Player, or Add Ensemble.
●
RESULT
If you clicked Add Group, a new group is added for the selected players. If you clicked Add Solo
Player, Add Section Player or Add Ensemble, a new player or ensemble is added to the selected
group.
RELATED LINKS
Adding groups of players on page 96
97
Page 98

Setup mode
Flows
Adding solo/section players on page 74
Moving players between groups
You can move players from one group to another.
PROCEDURE
1. In the Players panel, select the players that you want to move to another group.
2. Click and drag the selected players to the position you want in the other group.
An insertion line indicates where the players will be positioned.
RESULT
The players are moved to the other group.
Removing players from groups
You can remove players from groups.
PROCEDURE
● In the Players panel, remove players from groups in any of the following ways:
● Click and drag multiple selected players out of the group and release the mouse
button.
● Right-click a single player and choose Remove Player from Group from the context
menu.
Flows
NOTE
You can only remove a single player from a group at a time when using the context
menu.
RESULT
The players are removed from their groups but remain in the project as individual players.
Flows are separate spans of music within your project, for example, movements or songs.
Every project contains at least one ow, and by default, every layout includes the music from
every ow in your project. If you create a new ow in Dorico Elements, the following happens:
All music that you write for the new ow is automatically included in the existing full score
●
and instrumental part layouts. You can exclude any ow from any layout by deactivating
the respective ow card.
All players are added to the new ow. You can exclude players from the ow by
●
deactivating the respective player card.
IMPORTANT
If you exclude a player from a ow, any notes that you have already input for that player in
that ow are deleted.
You can change certain options in each ow independently in the Notation Options dialog.
98
Page 99

Setup mode
Flows
RELATED LINKS
Flows in Dorico Elements on page 30
Flows panel on page 69
Changing options in Notation Options on page 131
Players on page 73
Layouts on page 101
Changing the players assigned to ows on page 99
Changing the ows assigned to layouts on page 103
Adding ows
If you need more than one ow in your project, you can add new ows.
PROCEDURE
1. In the Flows panel, click Add Flow.
2. Optional: Repeat for as many ows as you require.
RESULT
A new ow is added to your project each time you click Add Flow. All existing players are
assigned to new ows, and new ows are automatically added to all existing full score and part
layouts.
Changing the players assigned to ows
By default, all players in your project are added to all ows. You can assign players to and remove
players from ows manually, for example, if the soloists in a choral work do not sing for an entire
ow.
NOTE
If you remove a player from a ow, any notes you have already input for that player in that ow
are deleted.
PROCEDURE
1. In the Flows panel, select the ow whose assigned players you want to change.
2. In the Players panel, change the players assigned to the ow in the following ways:
● Activate the checkbox in the player card of each player you want to assign to the
ow.
Deactivate the checkbox in the player card of each player you want to remove from
●
the ow.
TIP
You can Shift-click to activate/deactivate the checkboxes in multiple player cards at once.
3. Optional: Repeat steps 1 and 2 for other ows whose assigned players you want to
change.
RESULT
Players are assigned to the selected ow when the checkbox in their player card is activated, and
removed from the ow when the checkbox is deactivated.
99
Page 100

Setup mode
Flows
RELATED LINKS
Flows on page 98
Players on page 73
Layouts on page 101
Changing the ows assigned to layouts on page 103
Changing the players assigned to layouts on page 102
Flow names and ow titles
Whenever you add a ow to a project, the default name of a ow is Flow plus an incremental
number. You can rename ows in the Project Info dialog and in the Flows panel in Setup mode.
When you enter names for ows in the Flows panel in Setup mode, those names are
automatically added in the Title eld for the appropriate ow in the Project Info dialog. If you
change the name in the Flows panel again later, the ow title is updated in the Project Info
dialog.
Titles shown in scores and parts in the music area are linked to the Title eld for each ow in the
Project Info dialog.
This link is maintained until you change the names of ows in the Project Info dialog. Once you
change ow titles in the Project Info dialog, changing ow names in the Flows panel no longer
updates the Title eld for that ow in the Project Info dialog.
This allows you to organize ows in Setup mode with different names to their ocial title.
RELATED LINKS
Project Info dialog on page 70
Text tokens on page 273
Renaming ows in Setup mode
You can change the names of ows in Setup mode. This automatically updates the title of the
corresponding ow until you change the title in the Project Info dialog.
PROCEDURE
1. In the Flows panel, open the ow name text eld in any of the following ways:
● Double-click the name of the ow.
● Right-click the name of the ow and choose Rename from the context menu.
2. Enter a new name for the ow or edit the existing name.
3. Press Return.
RESULT
The name of the ow is changed. If you have not entered a different title for the ow in the
Project Info dialog, the title shown in the music area is updated to match the new ow name.
Changing ow titles in the Project Info dialog
You can change ow titles in the Project Info dialog. Once you have done so, ow titles are no
longer changed if you change their name in the Flows panel in Setup mode.
PROCEDURE
1. Choose File > Project Info.
The Project Info dialog opens.
100
 Loading...