

Page 1

Operation Manual
Page 2

Daniel Spreadbury
Cristina Bachmann, Heiko Bischoff, Christina Kaboth, Insa Mingers, Matthias Obrecht, Sabine Pfeifer,
Benjamin Schütte, Marita Sladek
This PDF provides improved access for vision-impaired users. Please note that due to the complexity and
number of images in this document, it is not possible to include text descriptions of images.
The information in this document is subject to change without notice and does not represent a commitment
on the part of Steinberg Media Technologies GmbH. The software described by this document is subject to
a License Agreement and may not be copied to other media except as specifically allowed in the License
Agreement. No part of this publication may be copied, reproduced, or otherwise transmitted or recorded, for
any purpose, without prior written permission by Steinberg Media Technologies GmbH. Registered licensees
of the product described herein may print one copy of this document for their personal use.
All product and company names are ™ or ® trademarks of their respective owners. For more information,
please visit www.steinberg.net/trademarks.
©
Steinberg Media Technologies GmbH, 2017.
All rights reserved.
Page 3

Table of Contents
4 Introduction
4 Platform-Independent Documentation
4 Usage of Musical Terms
5 Conventions
9 How You Can Reach Us
11 First Steps
11 Getting Around
18 Starting a New Project
21 Writing Music
26 Dorico Concepts
26 Design Philosophy
27 Key Musical Concepts
31 User Interface
31 Hub
34 Windows
44 Setting up Your Workspace
53 Setup Mode
53 Project Window in Setup Mode
58 Players
63 Ensembles
63 Instruments
65 Groups
67 Flows
69 Layouts
74 Write Mode
74 Project Window in Write Mode
79 Note Input
112 Engrave Mode
112 Project Window in Engrave Mode
117 Master Pages
126 Frames
143 Properties in Engrave Mode
154 Print Mode
154 Project Window in Print Mode
157 Printing Your Layouts
160 Exporting Your Layouts as Graphic Files
162 Printing/Exporting Multiple Layouts
162 Layout Page Arrangements for Printing/
Exporting
164 Handling Page Sizes and Paper Sizes
165 Annotations
167 Notation Reference
167 Spaces
167 Stems
169 Accidentals
175 Articulations
180 Time Signatures
181 Ties
185 Lyrics
187 Index
3
Page 4
Introduction
Thank you very much for purchasing Dorico.
We are delighted that you have chosen Steinberg's new scoring application and hope that you
will enjoy using it for years to come.
Dorico is a next-generation application for producing beautiful sheet music, whether you
are a composer, arranger, music engraver, publisher, instrumentalist, teacher, or student.
Whether you want to print your music or share it in a digital format, Dorico is the most
sophisticated program available.
Like all of Steinberg's products, Dorico has been designed from the ground up by a team
of musicians who understand your needs and who are dedicated to producing a tool that
is both easy to learn and use, but also capable of results of the highest quality. Dorico also
integrates with your existing workflow and can import and export files in a variety of formats.
Dorico thinks about music the same way a human musician does and has a deeper
understanding of the elements of music and musical performance than other scoring
applications. Its unique design allows an unprecedented degree of flexibility, in music input
and editing, in score layout, in rhythmic freedom, and many other areas besides.
Most sincerely yours,
Your Steinberg Dorico Team
Platform-Independent Documentation
The documentation applies to the operating systems Windows and macOS.
Features and settings that are specific to one of these platforms are clearly indicated. In all
other cases, the descriptions and procedures in the documentation are valid for Windows
and macOS.
Some points to consider:
•
The screenshots are taken from Windows.
•
Some functions that are available on the File menu on Windows can be found in the
program name menu on macOS.
Usage of Musical Terms
This documentation uses American terminology for musical items throughout the
documentation.
The following table lists all the notes and notations that have different names in American
and British English:
4
Page 5

Introduction
Conventions
American Name British Name
Double whole note Breve
Whole note Semibreve
Half note Minim
Quarter note Crotchet
Eighth note Quaver
Sixteenth note Semiquaver
Thirty-second note Demisemiquaver
Sixty-fourth note Hemidemisemiquaver
Hundred twenty-eighth note Semihemidemisemiquaver
Two hundred fifty-sixth note Demisemihemidemisemiquaver
Staff Stave
Bar/Measure
NOTE
This documentation only uses “bar”.
Conventions
In our documentation, we use typographical and markup elements to structure information.
Typographical Elements
The following typographical elements mark the following purposes.
PREREQUISITE
Bar
Requires you to complete an action or to fulfill a condition before starting a
procedure.
PROCEDURE
Lists the steps that you must take to achieve a specific result.
IMPORTANT
Informs you about issues that might affect the system, the connected hardware,
or that might bring a risk of data loss.
5
Page 6
Introduction
Conventions
Markup
NOTE
Informs you about issues that you should consider.
EXAMPLE
Provides you with an example.
RESULT
Shows the result of the procedure.
AFTER COMPLETING THIS TASK
Informs you about actions or tasks that you can undertake after completing the
procedure.
RELATED LINKS
Lists related topics that you can find in this documentation.
Elements of the user interface are highlighted throughout the documentation.
Names of menus, options, functions, dialogs, windows, etc. are highlighted in bold.
EXAMPLE
To open notation options in Write mode, select Write> Notation Options.
If bold text is separated by a greater-than symbol, this indicates a sequence of different
menus to open.
EXAMPLE
Select Engrave> Engraving Options.
File names and folder paths are highlighted in Courier typeface.
Key Commands
Many of the default key commands, also known as keyboard shortcuts, use modifier keys,
some of which are different depending on the operating system.
For example, the default key command for Undo is Ctrl-Z on Windows and Cmd-Z on macOS.
When key commands with modifier keys are described in this manual, they are shown with
the Windows modifier key first, in the following way:
•
Windows modifier key/macOS modifier key-key
EXAMPLE
Ctrl/Cmd-Z means: press Ctrl on Windows or Cmd on macOS, then press Z.
6
Page 7

Introduction
Conventions
Key Commands in Dorico
The default key commands in Dorico depend on your keyboard layout.
If you move the mouse over a tool or a function, the information in brackets shows the key
command that is used to activate or deactivate a tool or a function.
You can also do one of the following:
• Open the Dorico Key Commands window that provides an overview of all available key
commands.
• Search for key commands of specific functions or menu items in the Preferences
dialog. In this dialog, you can also assign new key commands or change default key
commands.
RELATED LINKS
Dorico Key Commands Window on page 7
Searching for Key Commands of Functions on page 8
Dorico Key Commands Window
The Dorico Key Commands window shows a virtual computer keyboard. Depending on the
selected keyboard layout that you have selected in the Preferences dialog, it highlights the
keys that have been assigned key commands. Below the virtual computer keyboard, all key
commands are listed.
To access the Dorico Key Commands window, do one of the following:
• Select Help> Key Commands.
• Select Edit> Preferences, and in the Preferences dialog, in the Key Commands
section, click Print Summary.
The Dorico Key Commands window opens in a web browser. You have the following options:
• To see the available key commands, select a context. The context of a key command is
the mode in which it can be used. Key commands that have a global context work in all
modes.
• To highlight the keys that you can press in combination with the modifier key to form
a key command, press a modifier key on your computer keyboard, such as Shift. You
can also press more than one modifier key. The virtual computer keyboard shows the
highlighted keys and displays on each key to which functions it is assigned.
NOTE
You can also use the mouse to select a modifier key on the virtual computer keyboard.
• To search for a specific key command, enter one or multiple words in the search input
field.
• To get an overview of all available key commands, browse the key commands that
are listed below the virtual keyboard. The key commands are listed according to the
context in which they can be used.
7
Page 8
Introduction
Conventions
Searching for Key Commands of Functions
You can search for key commands that are assigned to functions or menu items in Dorico.
NOTE
You can also search for functions in the Dorico Key Commands window.
PROCEDURE
1. Select Edit> Preferences.
2. In the Key Commands section, in the Search field, enter the name of a function.
The entries that are listed below are filtered according to the words that you enter.
3. Expand an entry and select the function for which you want to see the key command.
RESULT
If the function has a key command, it is shown in the Assigned key commands display.
RELATED LINKS
Dorico Key Commands Window on page 7
Changing the Keyboard Layout
You can change the keyboard layout in Dorico. This allows you to use the pre-defined key
commands for your language.
PROCEDURE
1. Select Edit> Preferences.
2. In the Key Commands section, from the Keyboard language pop-up menu, select a
different keyboard layout.
3. Click Apply.
RESULT
You can immediately use the available key commands for your language.
Assigning Key Commands
You can assign key commands to Dorico functions that have no key commands assigned. You
can also change existing key commands.
PROCEDURE
1. Select Edit> Preferences.
2. In the Key Commands section, search for the name of a function and select it.
3. Optional: Press Remove Key Command if the function is already assigned a key
command.
NOTE
If you assign a new key command without removing an existing one, you will be able to
use either key command.
4. Click in the New key command input field.
8
Page 9

Introduction
How You Can Reach Us
5. On your computer keyboard, press the key command that you want to assign.
6. Click Add Key Command.
The key command is shown in the Assigned key commands display.
7. Click Apply.
RESULT
You can immediately use the assigned key command.
RELATED LINKS
Searching for Key Commands of Functions on page 8
Resetting Key Commands on page 9
Removing Key Commands
You can remove assigned key commands from a function.
PROCEDURE
1. Select Edit> Preferences.
2. In the Key Commands section, search for the name of a function and select it.
3. Click Remove Key Command.
4. Click Apply.
RESULT
The key command is removed from the selected function.
RELATED LINKS
Searching for Key Commands of Functions on page 8
Resetting Key Commands on page 9
Resetting Key Commands
You can reset all key commands to their defaults.
PROCEDURE
1. Select Edit> Preferences.
2. In the Key Commands section, click Reset Key Commands.
3. Click OK.
RESULT
All custom key commands are deleted and the default key commands are reinstated.
How You Can Reach Us
On the Help menu you find items linking to additional information.
The menu contains links to various Steinberg web pages. Selecting one of these menu items
automatically launches your web browser and opens the page. On these pages, you can find
support and compatibility information, answers to frequently asked questions, information
9
Page 10

Introduction
How You Can Reach Us
about updates and other Steinberg products, etc. This requires that you have a web browser
installed on your computer and a working Internet connection.
10
Page 11
First Steps
This chapter helps you to get started with Dorico.
When you start Dorico for the first time, we recommend that you open one of the templates
first to have a look at the user interface and the functions that Dorico provides before you
start your own projects. You are welcome to skip this part and explore the program for
yourself.
The following sections inform you about the following topics:
• Overview of the most important workspaces
• Setting up a new project
• Writing your music and adding notation items to your score
• Laying out and formatting pages
• Playing back what you created
• Printing and exporting
Getting Around
The following sections give you an overview of the user interface and introduce you to how
Dorico is structured.
Opening a Template
Before you start your own project, we recommend that you familiarize yourself with the user
interface of Dorico. To prepare for this, open one of the templates that are provided with the
program.
PREREQUISITE
You have started Dorico. The Hub is open.
PROCEDURE
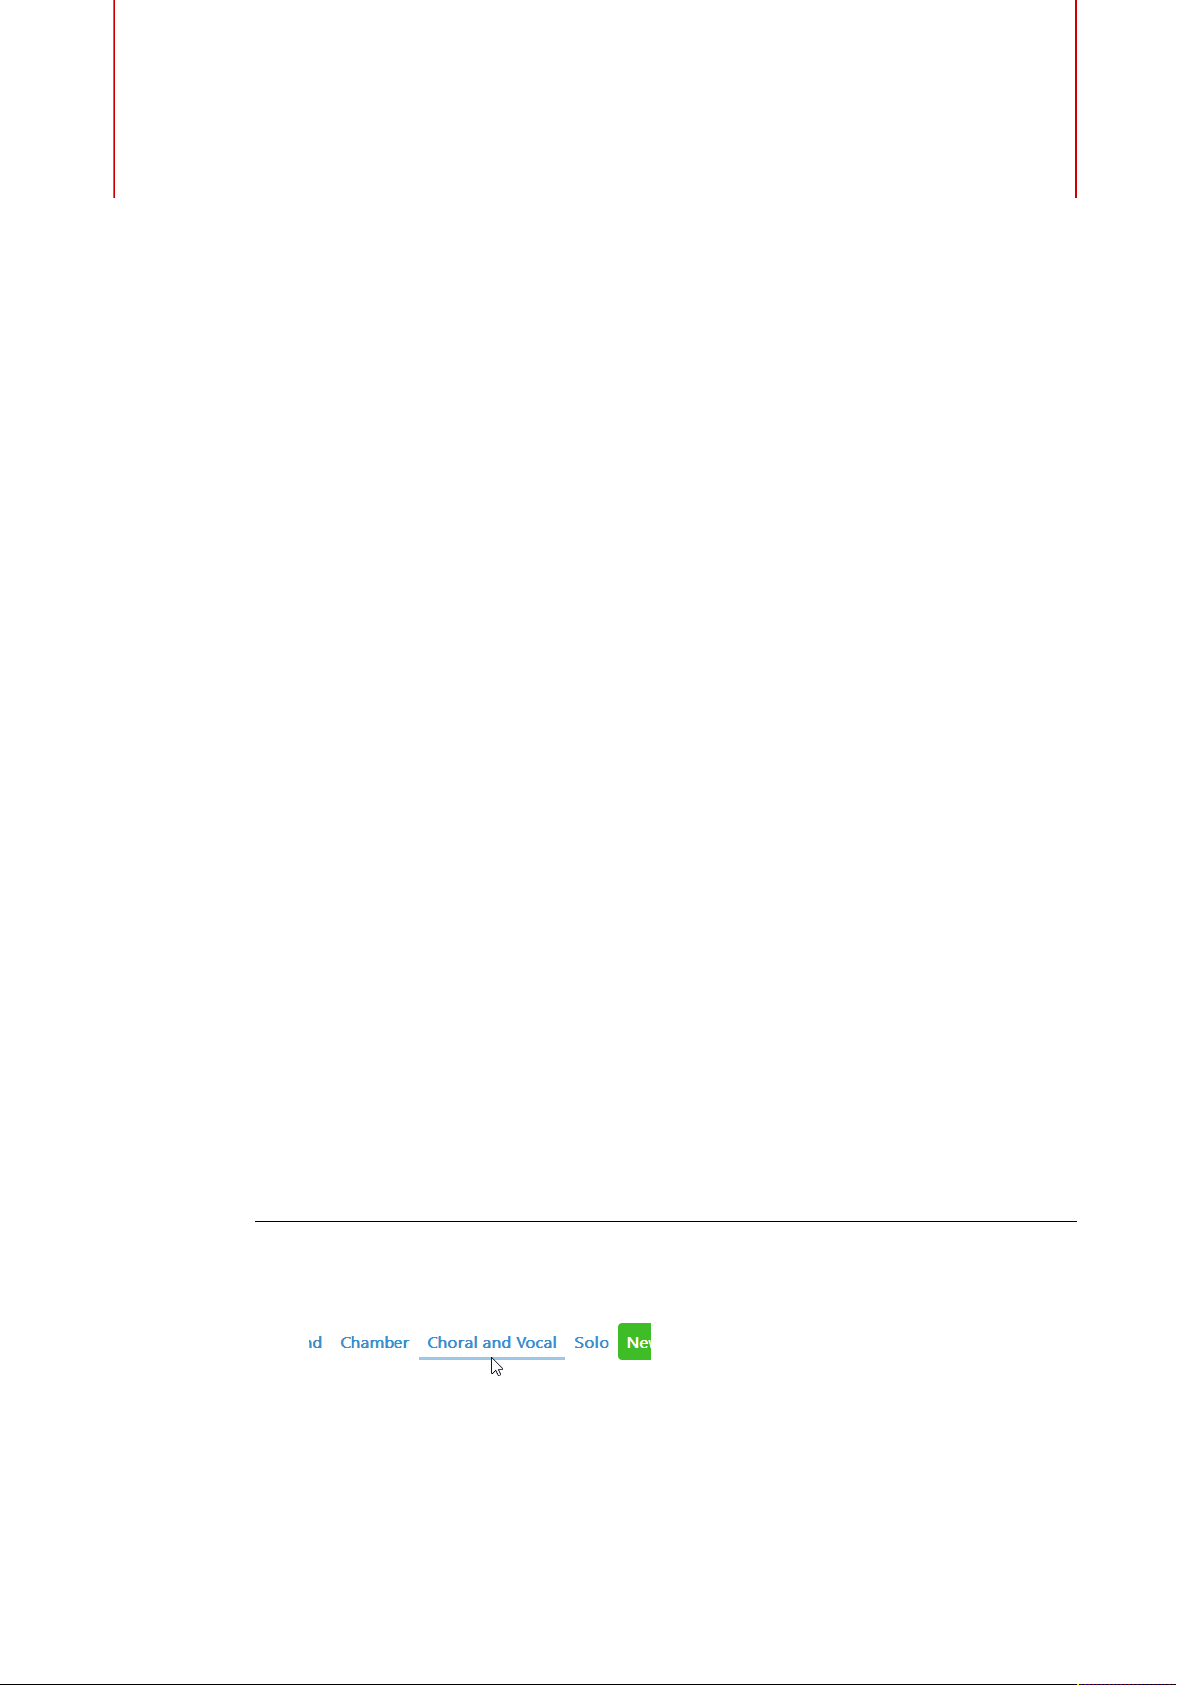
1. In the Hub, select one of the listed template groups, for example the Choral and Vocal
templates.
2. Select one of the listed templates.
11
Page 12

First Steps
Getting Around
3. Click New from Template.
RESULT
The template opens.
AFTER COMPLETING THIS TASK
Proceed to the following sections that provide a quick overview of the user interface and that
introduce you to the main functions of the program.
RELATED LINKS
Hub on page 31
Quick Tour of the User Interface
The user interface of Dorico consists of different modes that represent different phases in
the workflow of preparing a score.
The user interface has a structure that is the same in each of the application’s modes. There
is always a large area for editing your music in the center of the project window. In every
mode, there are collapsible panels on the left, right, and bottom of the project window,
depending on which mode you are using. The contents of these panels change according to
the selected mode.
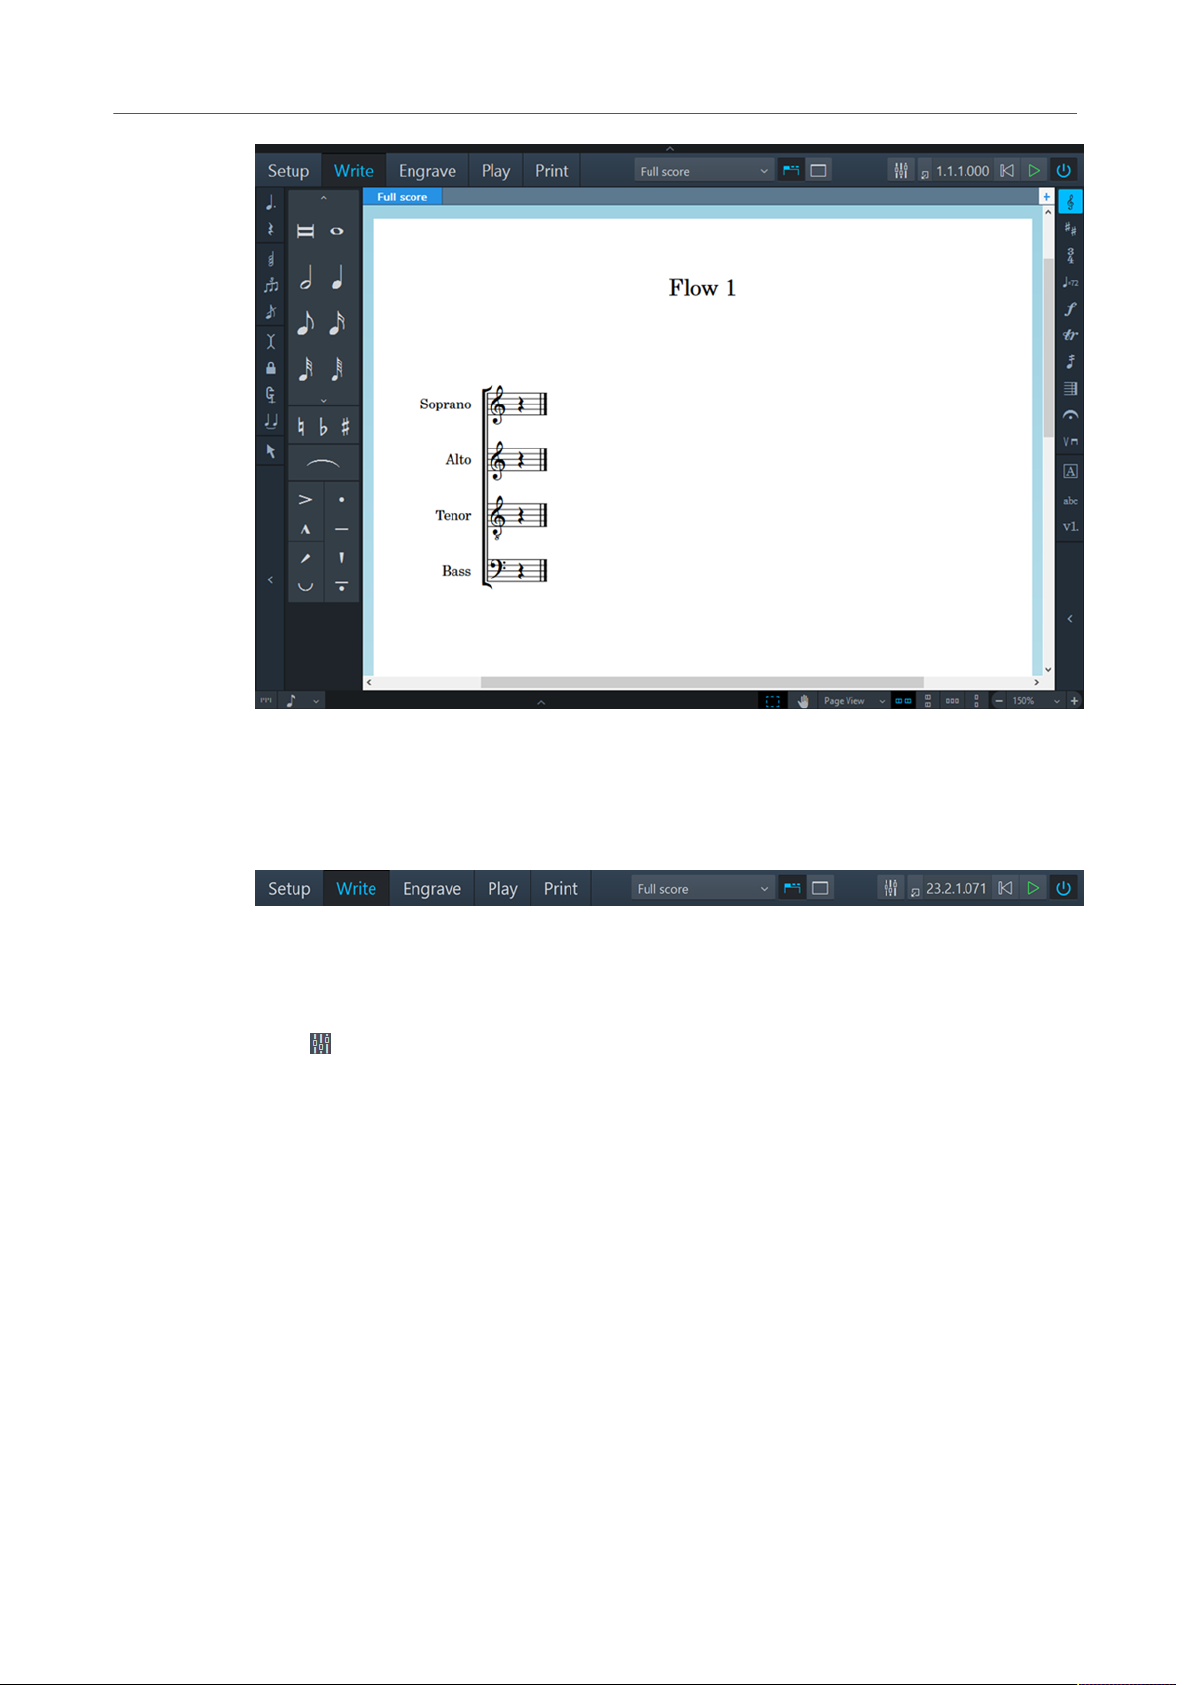
When you open the template, the first view shows the project window in Write mode:
12
Page 13
First Steps
Getting Around
The project window contains the following areas:
Toolbar
The toolbar is located at the top of the project window.
On the left side of the toolbar, the modes are displayed. By activating a mode, you change the
workspace and the available panels. The active mode is highlighted in a different color. In the
middle of the toolbar, layout options allow you to switch between the different layouts in your
project and to show/hide panels and tabs. On the right side of the toolbar, you can open a
Mixer and activate basic transport controls that, among other functions, allow you to play
back and record your music.
Music Area
The music area is the main part of the project window in Setup, Write, and Engrave mode
where you set up, input, edit and format your music. In Play mode, this area is called event
display, in which every note is displayed as an event. In Print mode, this area is called print
preview area, which shows a preview of what is going to be printed or exported as a graphic.
13
Page 14
First Steps
Getting Around
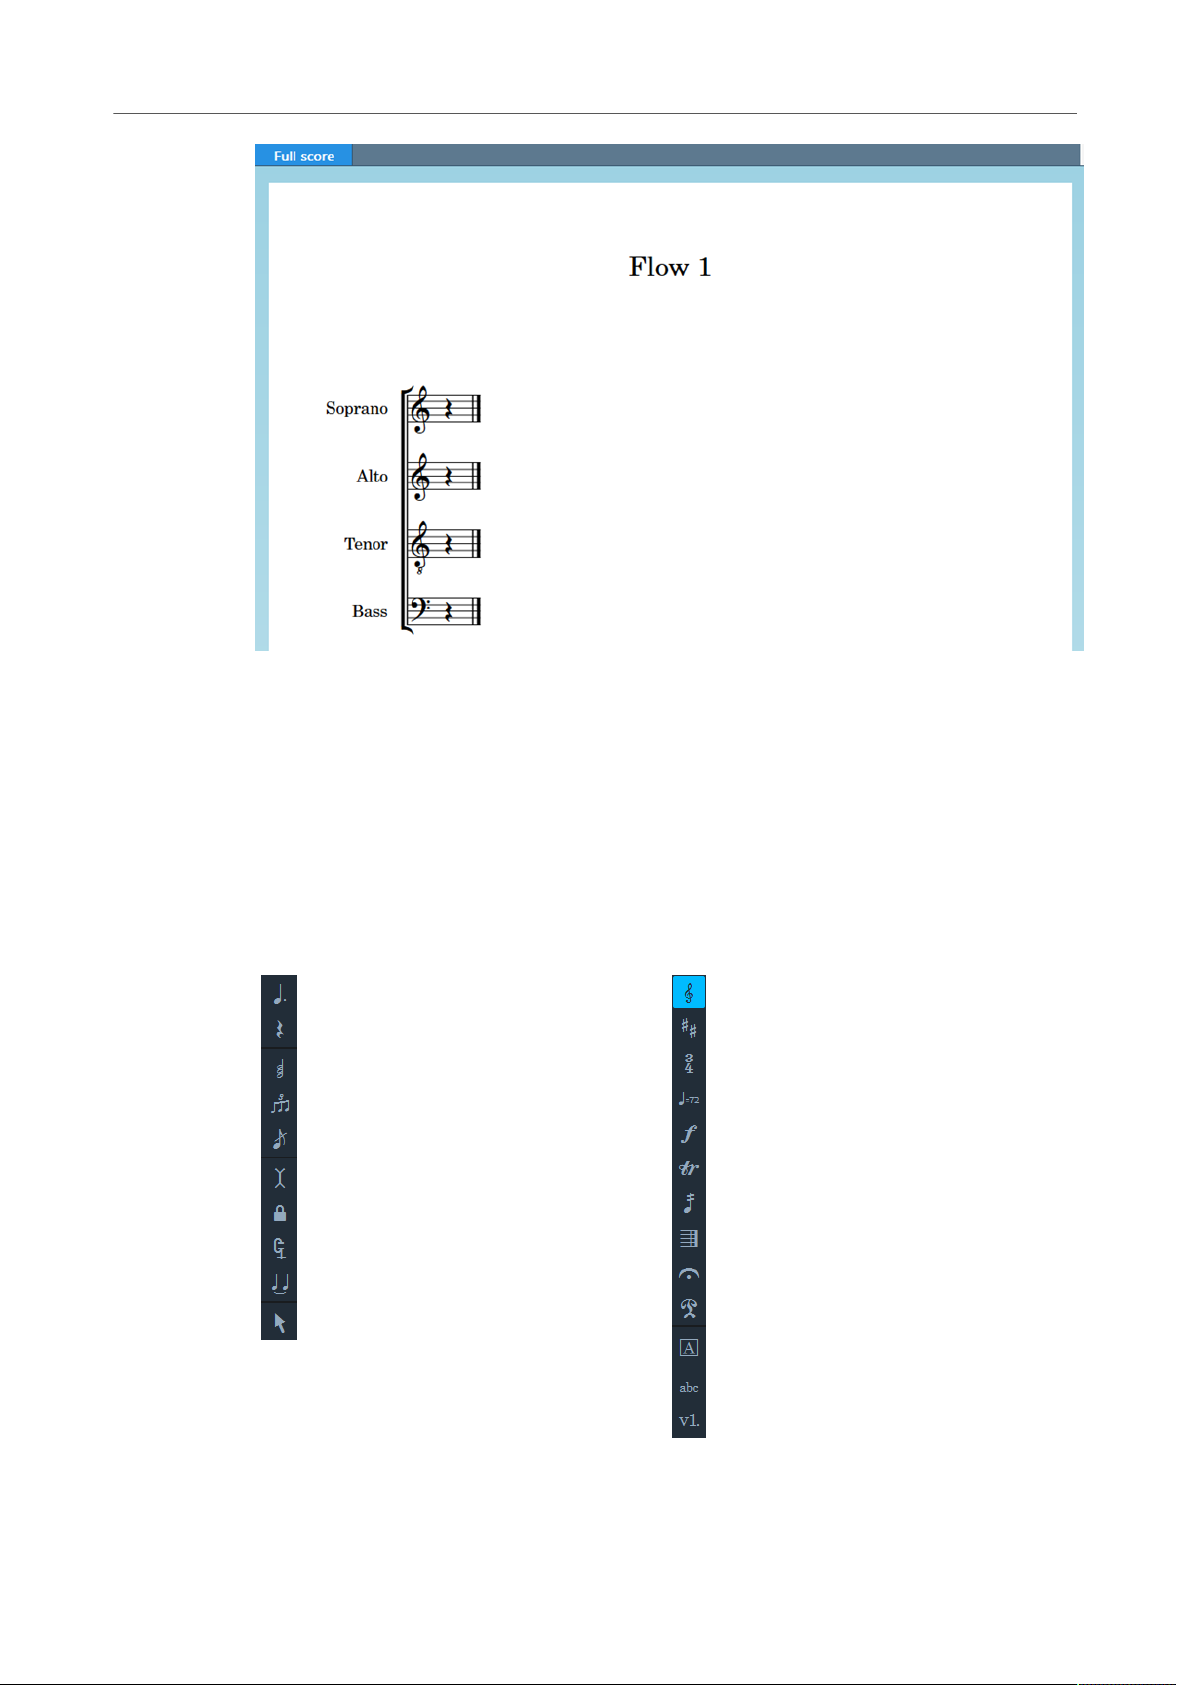
The music area displays the scores or the instrumental parts that you create. On top of
the music area you can activate several layouts in tabs and switch between them. Layouts
in Dorico allow you to show different presentations of your music. If you have a full score
with different instrumental parts, such as a violin part and a bassoon part, you can switch
between the full score layout and the layouts of each part. To save space on the screen or to
focus on a specific layout, you can hide the tabs.
Toolboxes
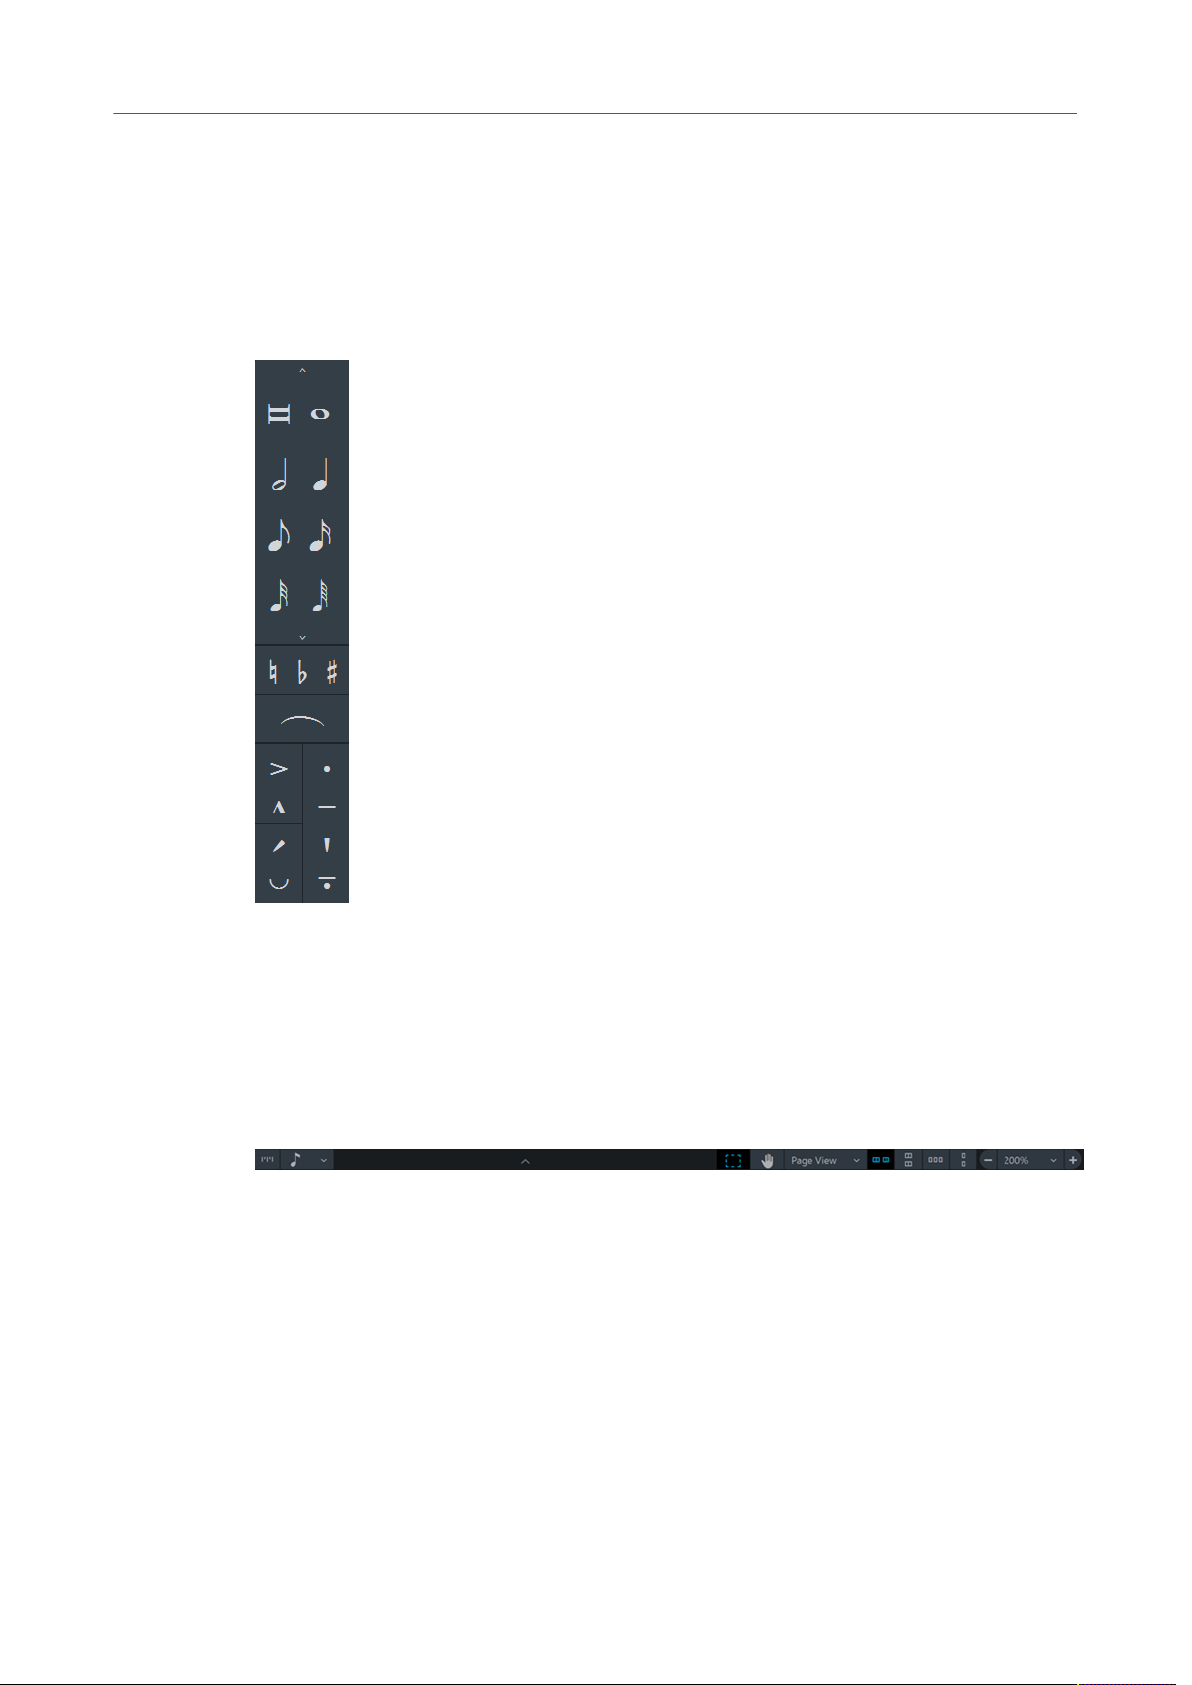
In Write mode, there are additional columns at the left and right edges of the project window.
These are called toolboxes.
Notes toolbox in Write mode
Notations toolbox in Write mode
14
Page 15
First Steps
Getting Around
The notes toolbox on the left allows you to activate or deactivate various note input tools. The
notations toolbox on the right provides tools that allow you to create and edit other notations,
such as clefs, key signatures, time signatures, etc.
Panels
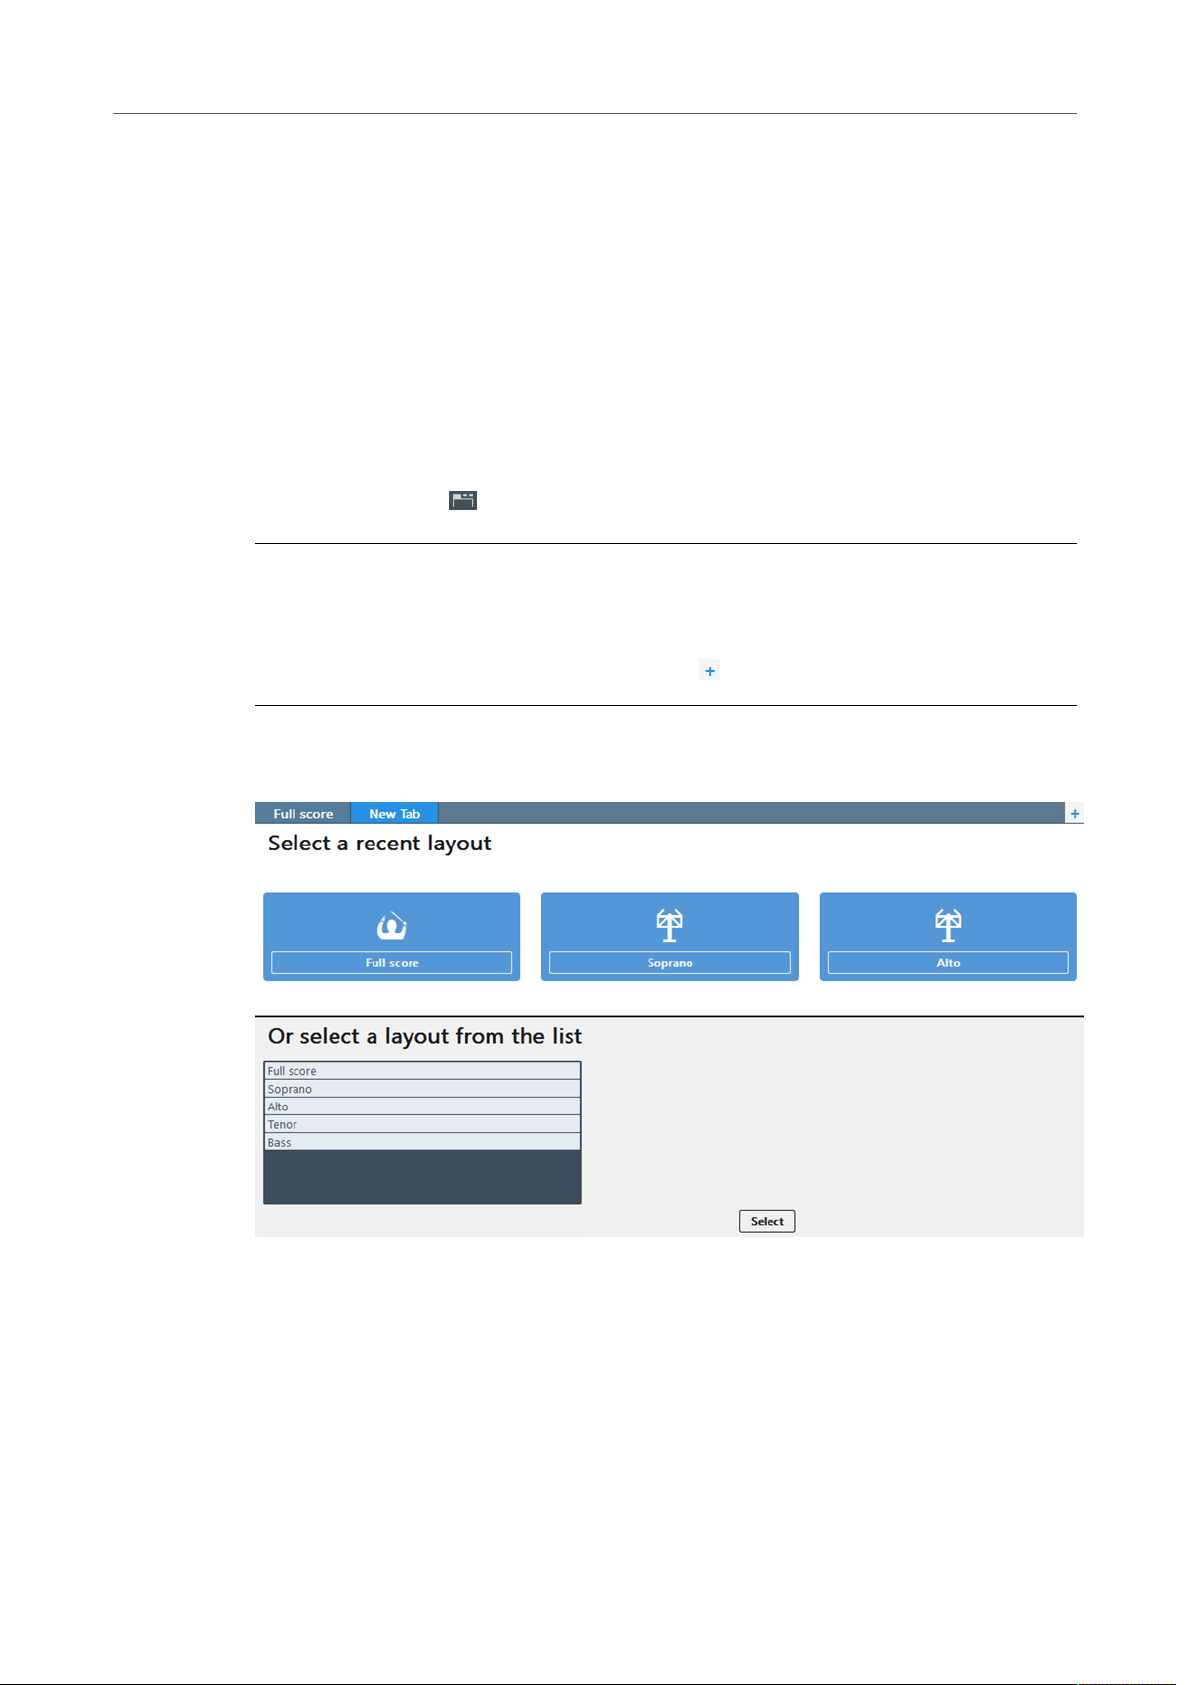
Dorico provides panels with various functions in all modes. When you open the template,
there is a panel on the left of the music area. This is the notes panel in Write mode.
Notes panel in Write mode
The notes panel contains all the durations, accidentals, slurs, and articulations that are most
commonly used when inputting notes.
Status Bar
At the bottom of the project window, a status bar allows you to select different views and
page arrangements for the music area.
RELATED LINKS
Functions of the Modes on page 15
User Interface on page 31
Functions of the Modes
Modes represent different phases in the workflow of preparing a score.
By activating a mode, you change the workspace and the available panels.
15
Page 16

First Steps
Getting Around
Setup Mode
In Setup mode, you can create players, groups of players, and assign instruments to them.
You can define different layouts for your project that you can print or export independently.
For example, you can print or export a layout for the full score and separate layouts for each
instrumental part.
Write Mode
In Write mode, you can input your music. The available toolboxes and panels allow you to
input all the notes and notation items that are most commonly used.
Engrave Mode
In Engrave mode, you can make fine adjustments to the music that you input in Write mode
and determine how the pages of your project are laid out.
Play Mode
In Play mode, you can assign virtual instruments and effects for playback to instruments and
playing techniques. You can make adjustments to how individual notes are played back in
order to produce a more realistic performance.
Print Mode
In Print mode, you can print your layouts or export them as graphic files.
Hiding/Restoring Panels
You can hide and show individual or multiple panels. This is useful if you want to see more of
the music area, for example.
PROCEDURE
• Do one of the following:
•
To show/hide the left panel, click its disclosure arrow or select Window> Show
Left Panel.
•
To show/hide the right panel, click its disclosure arrow or select Window> Show
Right Panel.
•
To show/hide the bottom panel, click its disclosure arrow or select Window>
Show Bottom Panel.
•
To show/hide all panels, click Hide/Restore Panels or select Window> Hide/
Restore Panels.
RESULT
If you hide all active panels, the button changes its look and displays which panels are
hidden. For example, the following button indicates that all panels were active and are now
hidden: .
Working with Tabs and Windows
Dorico enables you to set up your workspace according to your working style.
16
Page 17
First Steps
Getting Around
Dorico allows you to open multiple tabs to display multiple layouts in the same project within
the same window. You can also open the same project in several windows.
RELATED LINKS
Setting up Your Workspace on page 44
Opening a New Tab
You can open a new tab to display a different view or layout within the same project window.
Each tab can contain a separate layout or an additional view of a layout that is already open
in another tab or window. Whenever you open a new tab, you are prompted to select a layout
that you want to display in the tab.
You can find the tabs at the top of the music area, below the toolbar. If you do not see the
tabs, click Show Tabs in the toolbar.
PROCEDURE
• To open a new tab, do one of the following:
•
Press Ctrl/Cmd-T.
•
To the right of the tabs, click New Tab .
RESULT
A new tab opens that shows several icons at the top and a list of layouts at the bottom.
AFTER COMPLETING THIS TASK
You can click one of the icons or select a layout from the list at the bottom. Alternatively, you
can click Select Layout on the toolbar and choose one of the layouts from the pop-up menu.
The layout that you choose opens in the active tab.
Opening a New Window
You can open another window for the same project.
17
Page 18
First Steps
Starting a New Project
This may be useful if you want to see and work on multiple layouts at the same time. You can
also open multiple project windows to show different modes of the same project.
PROCEDURE
• Do one of the following:
•
Press Ctrl/Cmd-Shift-T.
•
Select Window> New Window.
RESULT
A duplicate of the window opens. It contains the same tabs and the same view options as the
original window.
RELATED LINKS
Opening Multiple Project Windows on page 47
Starting a New Project
After getting a first impression of the Dorico user interface you may want to get started with
inputting your own music. In this section, you learn how to set up a new project.
PREREQUISITE
NOTE
All inputs that are made and the images that are used to accompany the steps in this chapter
are intended merely to be helpful examples. Therefore, there is no need to make the exact
same entries in order to get the depicted results.
Close the template without saving. The Hub reopens.
PROCEDURE
• Do one of the following:
•
Select New Empty Project.
•
Press Ctrl/Cmd-N
RESULT
A new project window opens.
18
Page 19
First Steps
Starting a New Project
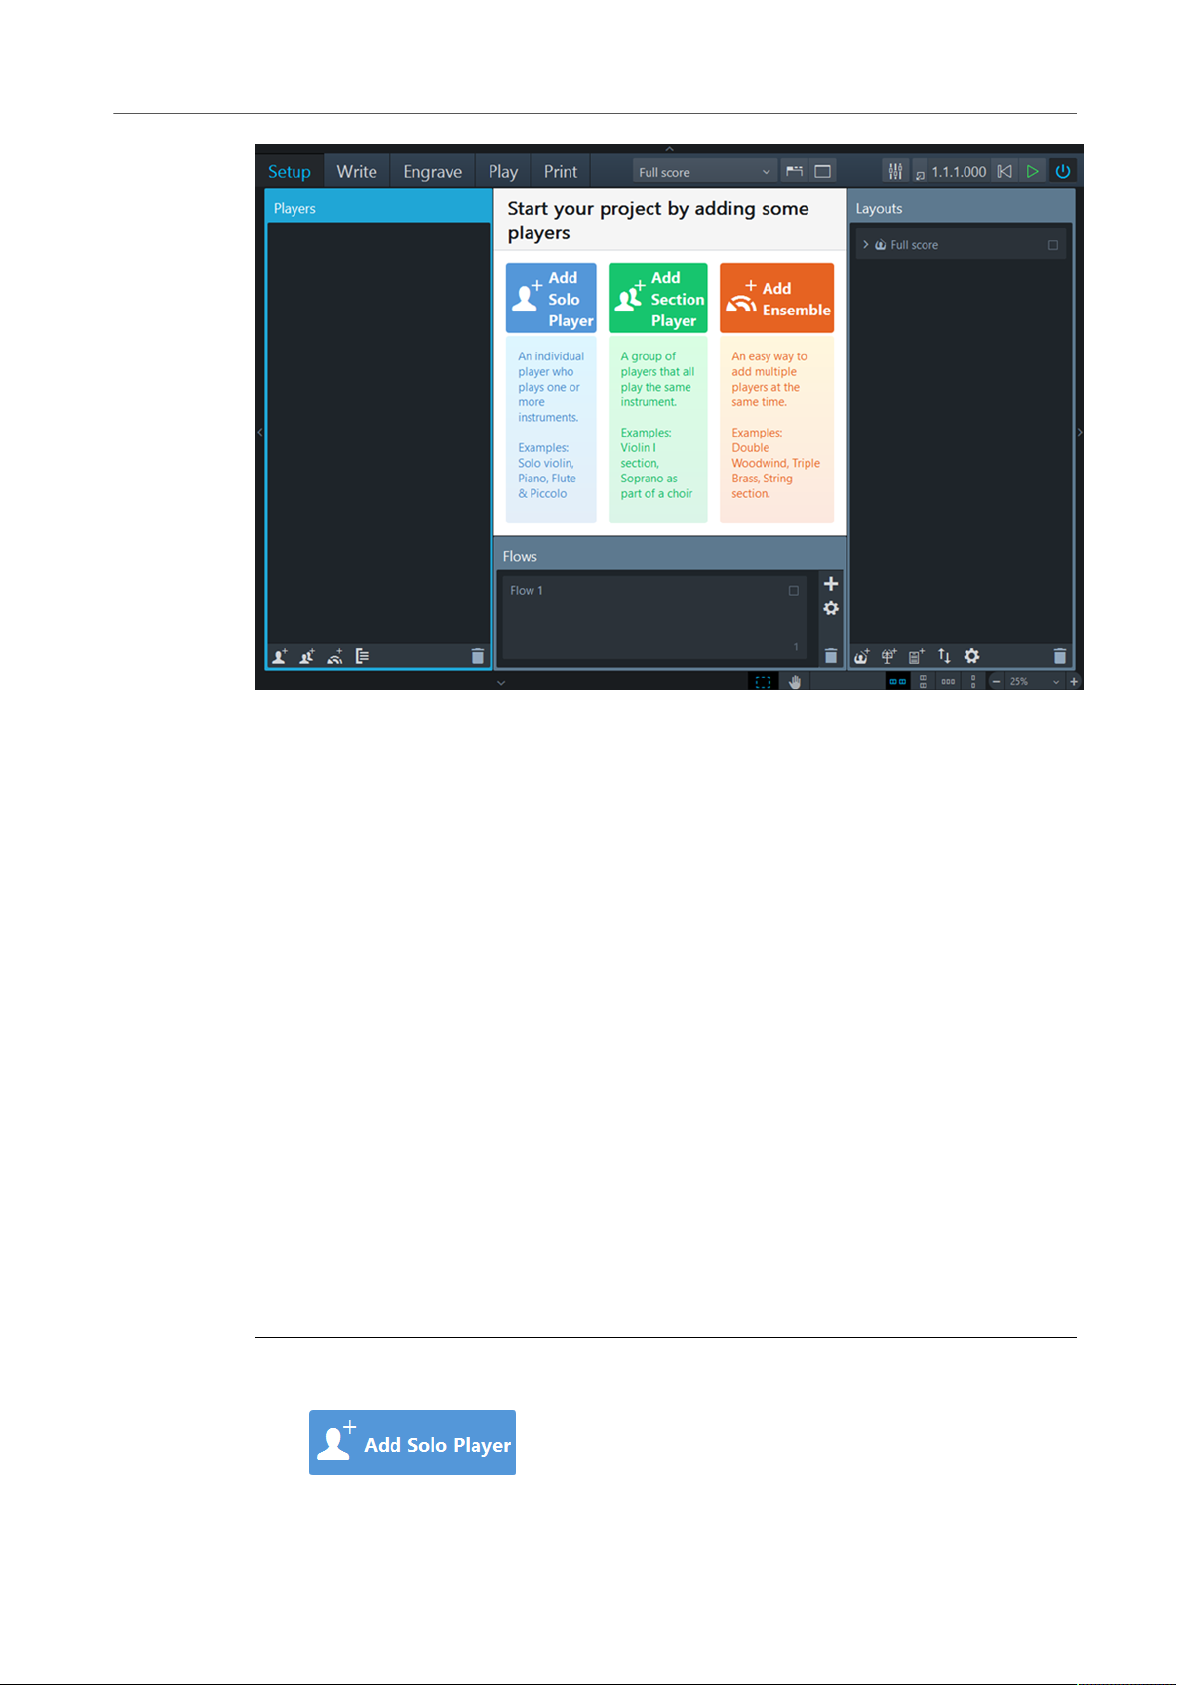
Whenever you start a new project without selecting a specific project template, Setup mode
is activated. This allows you to specify players and assign instruments right from the start.
The area in the middle, the project start area, which becomes the music area once you have
added a player, allows you to start your project with different types of players. On the right,
the Layouts panel shows a Full score entry. This entry is available in every new project. At
the bottom of the window is the Flows panel where you can specify separate spans of music
for your project.
AFTER COMPLETING THIS TASK
Start your project by adding an individual player or by adding a section player and assign
an instrument. You are free to assign any kind of instrument. In this chapter, only one piano
player is added as an example.
RELATED LINKS
Windows on page 34
Flows on page 29
Adding a Solo Player
In this section, you learn how to add a player and assign an instrument.
PREREQUISITE
You have started a new project. You are in Setup mode.
PROCEDURE
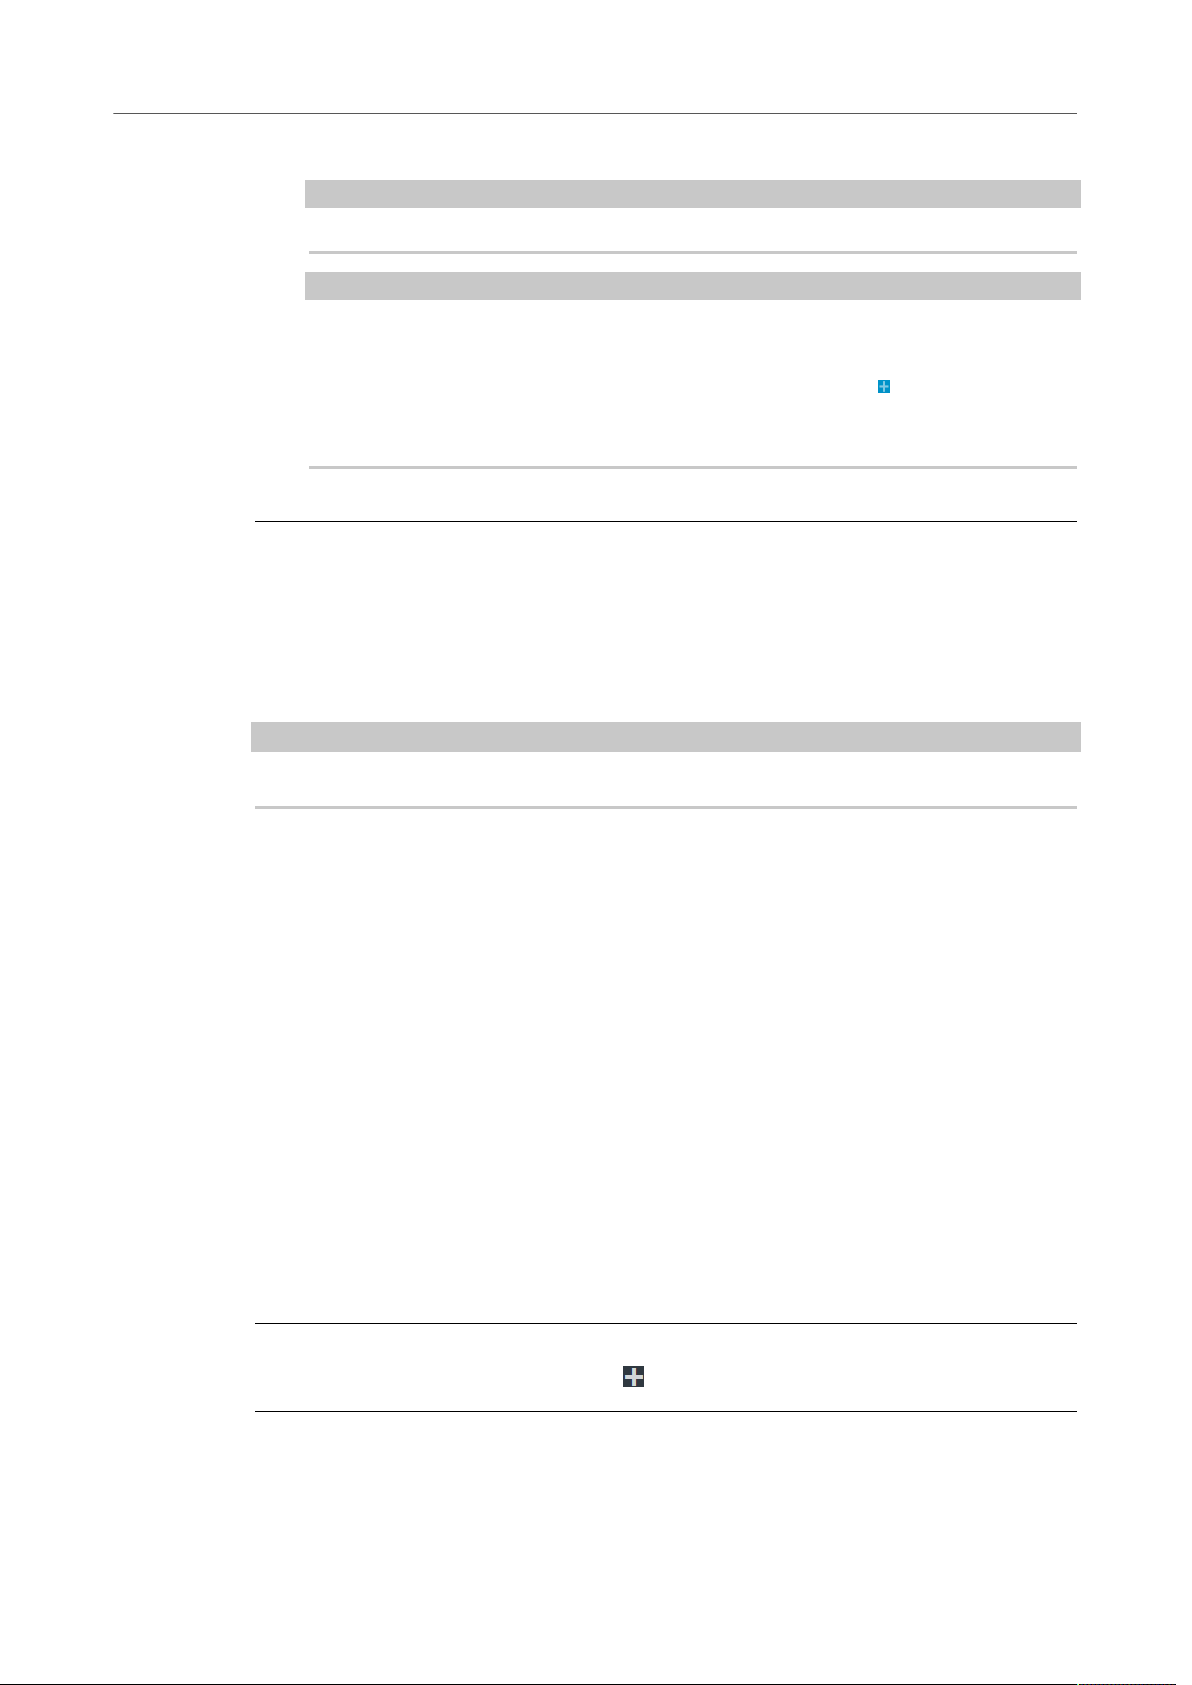
1. Click Add Solo Player.
This adds an empty-handed player on the Players panel.
19
Page 20
First Steps
Starting a New Project
2. In the popover, select an instrument.
3. Click Add.
RESULT
You have added your first player. In the music area, the required piano staves including their
respective clefs are displayed.
NOTE
For this example, select the piano player.
TIP
•
You can use the search field of the popover and start entering the name of the
instrument. The list automatically filters the names while you type.
You can also open the popover by clicking the plus symbol to the right of the
•
added empty-handed player. Alternatively, you can right-click the player and
select Add Instrument to Player.
AFTER COMPLETING THIS TASK
Save your project.
NOTE
You can save your project at any time.
Optionally, you can now edit the project title or add more players.
The following sections help you to create flows and layouts. If you want to start composing,
you can skip those sections.
RELATED LINKS
Writing Music on page 21
Adding Solo Players on page 59
Creating a Flow
Flows are separate spans of music within your project, for example, movements or songs. In
this section, you learn how to create a flow.
PREREQUISITE
You have added at least one player. You are in Setup mode.
Every project contains at least one flow, and by default, every layout includes the music from
every flow in your project. If you create a new flow in Dorico, the following happens:
PROCEDURE
• On the Flows panel, click Add Flow .
RESULT
All existing players are assigned to the new flow. The new flow is automatically added to all
existing full score and part layouts.
20
Page 21
First Steps
Writing Music
AFTER COMPLETING THIS TASK
Rename the flow if required. Optionally, on the Players panel, deactivate the checkboxes
of the players that you want to exclude from the flow. Optionally, on the Layouts panel,
deactivate the checkboxes of the layouts from which you want to exclude the flow.
RELATED LINKS
Renaming Flows on page 68
Creating Flows on page 68
Creating a Layout on page 21
Creating a Layout
Layouts define how music for one or more players in one or more flows is presented,
including page size, margins, staff size, etc. In this section, you learn how to create a new
layout.
PREREQUISITE
You have added at least one player and one flow. You are in Setup mode.
Several layouts are often used in ensembles with multiple players, where each player may
require a layout of the individual instrumental part. Dorico automatically creates a full score
layout that contains all players and all flows as well as individual part layouts that each
contain one player and all flows. If you require a different combination of players and flows,
for example, a part containing the music for two players, you can create your own layouts, as
follows:
PROCEDURE
• On the Layouts panel, click Add Instrumental Part Layout .
RESULT
An empty part is created on the Layouts panel.
AFTER COMPLETING THIS TASK
Double-click the empty part to give it a name. Optionally, on the Flows panel, select the flows
that you want to assign to the layout. On the Players panel, activate the checkboxes of the
players that you want to assign to the layout.
RELATED LINKS
Creating Layouts on page 70
Writing Music
Once you have set up your project, you can start writing music.
In Write mode, you can input notes and insert other notations into your score.
TIP
Throughout Dorico, most tasks can be accomplished using only your computer's keyboard.
You do not need to use the mouse or touchpad. Learning key commands allows you to use
Dorico most efficiently. The fastest way to input music is using a MIDI keyboard. If you do not
21
Page 22
First Steps
Writing Music
have a MIDI keyboard, you can use your computer's keyboard. Of course, you can still use the
mouse or touchpad if you want.
In the following sections, you learn how to input notes and notation items.
Inputting Your First Notes
In this section, you learn how to input notes. You can start inputting notes without having to
first add a time signature or key signature.
PREREQUISITE
• You have set up your MIDI keyboard.
NOTE
If you have not set up a MIDI keyboard yet, you can start inputting notes with the
computer keyboard.
• You have added a piano player in Setup mode.
• Write mode is active.
PROCEDURE
1. Select the rest that was automatically inserted next to the clef when you added a solo
player.
2. Do one of the following:
•
Press Shift-N or Return to activate note input.
•
Double-click the rest.
The caret is displayed.
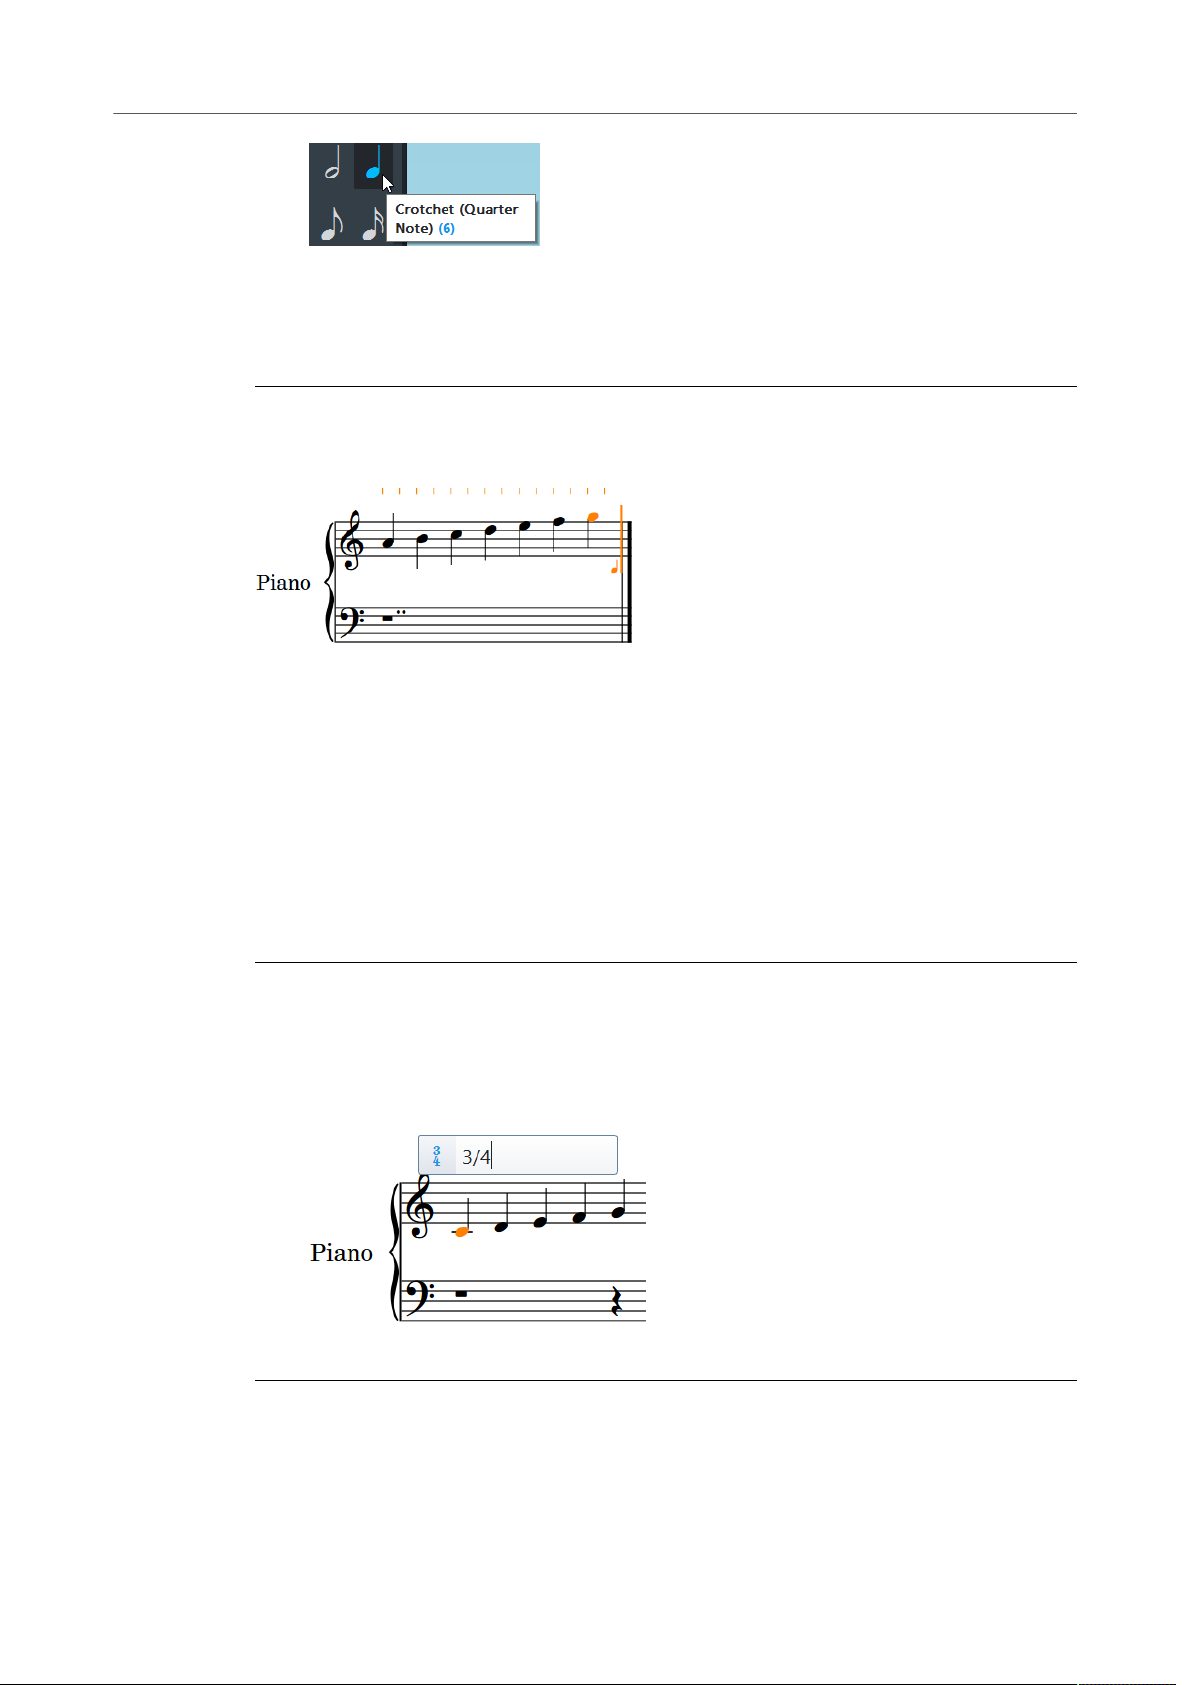
3. Select one of the durations on the notes panel.
NOTE
By default, Dorico selects a quarter note for you.
22
Page 23
First Steps
Writing Music
4. Start playing notes on the MIDI keyboard, or press the keys A, B, C, D, E, F, G on the
computer keyboard to input the corresponding pitches.
If you want higher or lower pitch for the note that Dorico inputs for you, you can force
the octave above by pressing the respective key command.
RESULT
The following is an example of input notes:
RELATED LINKS
Key Commands in Dorico on page 7
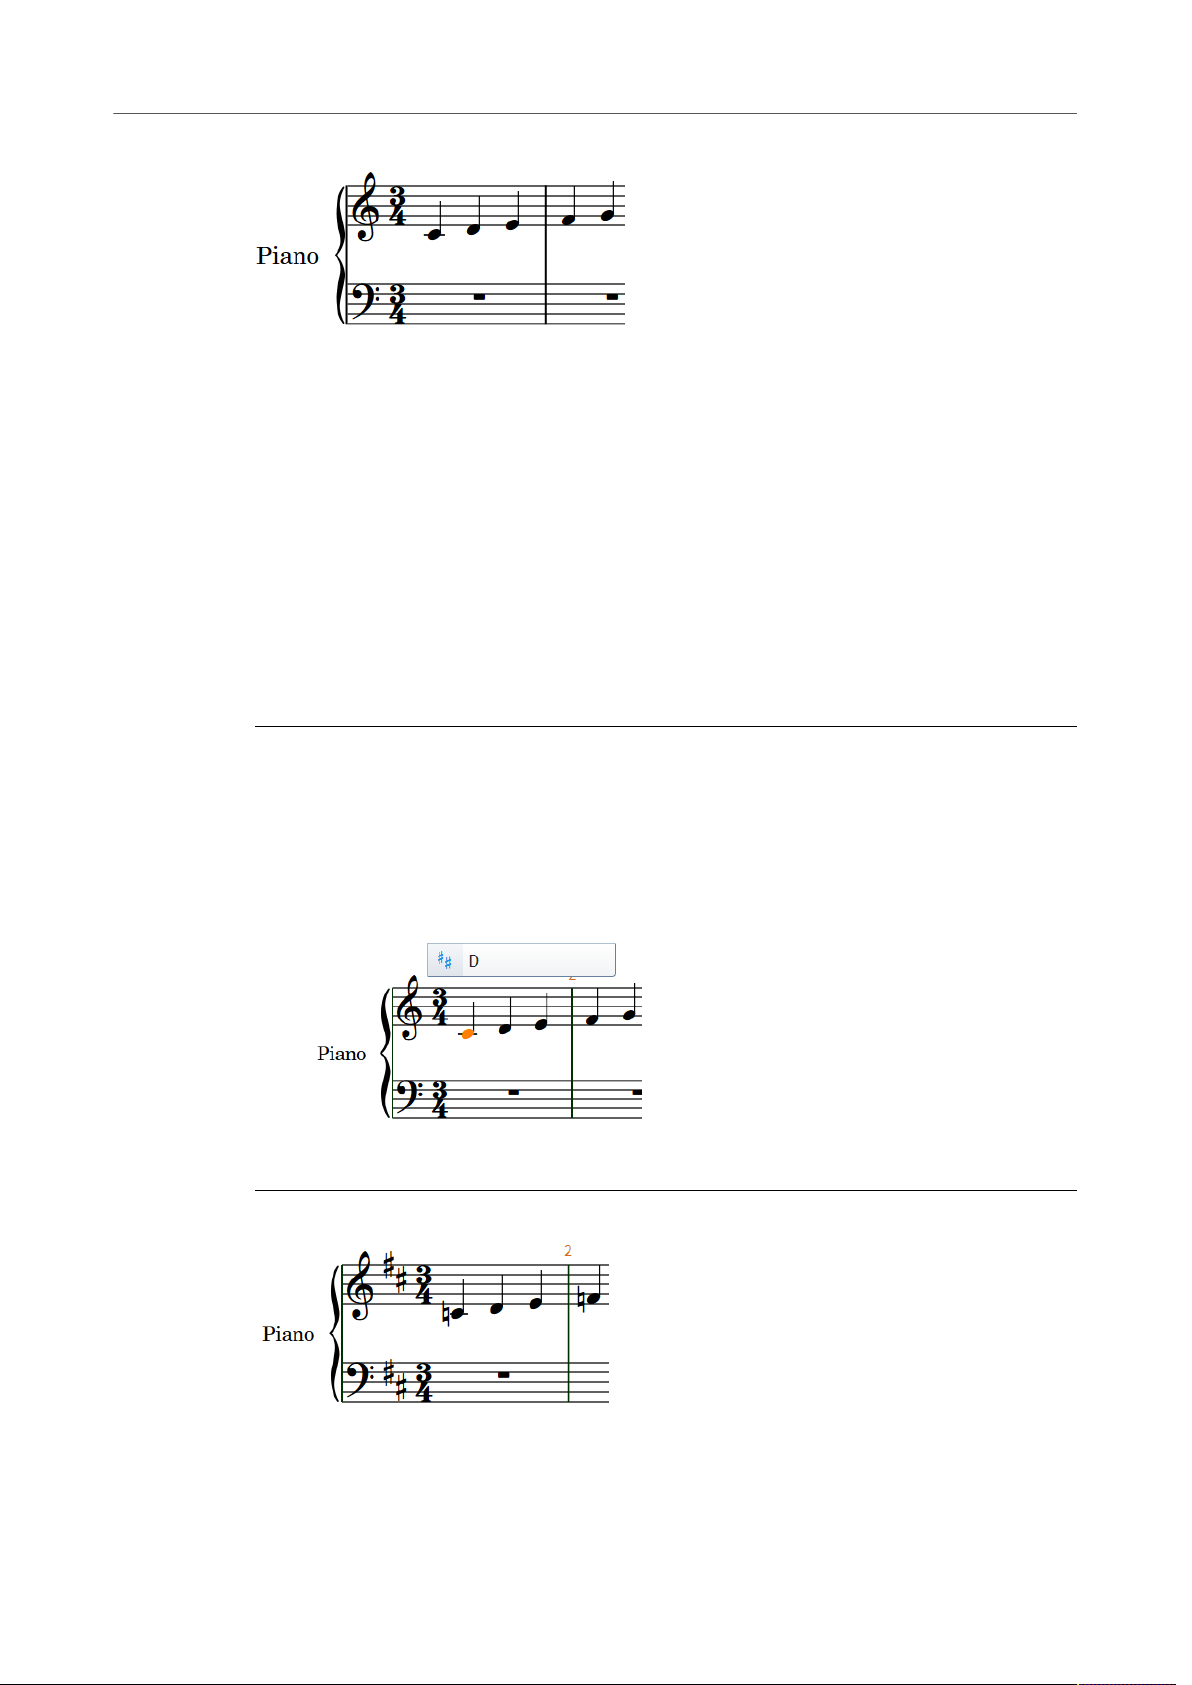
Adding a Time Signature
In this section, you learn how to add a time signature at the beginning of the staff. You can
add a time signature before or after inputting a melody.
PREREQUISITE
Press Esc to deactivate the caret.
PROCEDURE
1. Select the first note on the staff.
2. Press Shift-M.
This opens a small popover on top of the staff.
3. Enter a typical time signature, such as 3/4.
4. Press Enter.
23
Page 24
First Steps
Writing Music
RESULT
The time signature is automatically inserted to the left of the note, and the required bar
lines are automatically inserted at the correct positions. If you want to insert a key signature,
proceed to the next section.
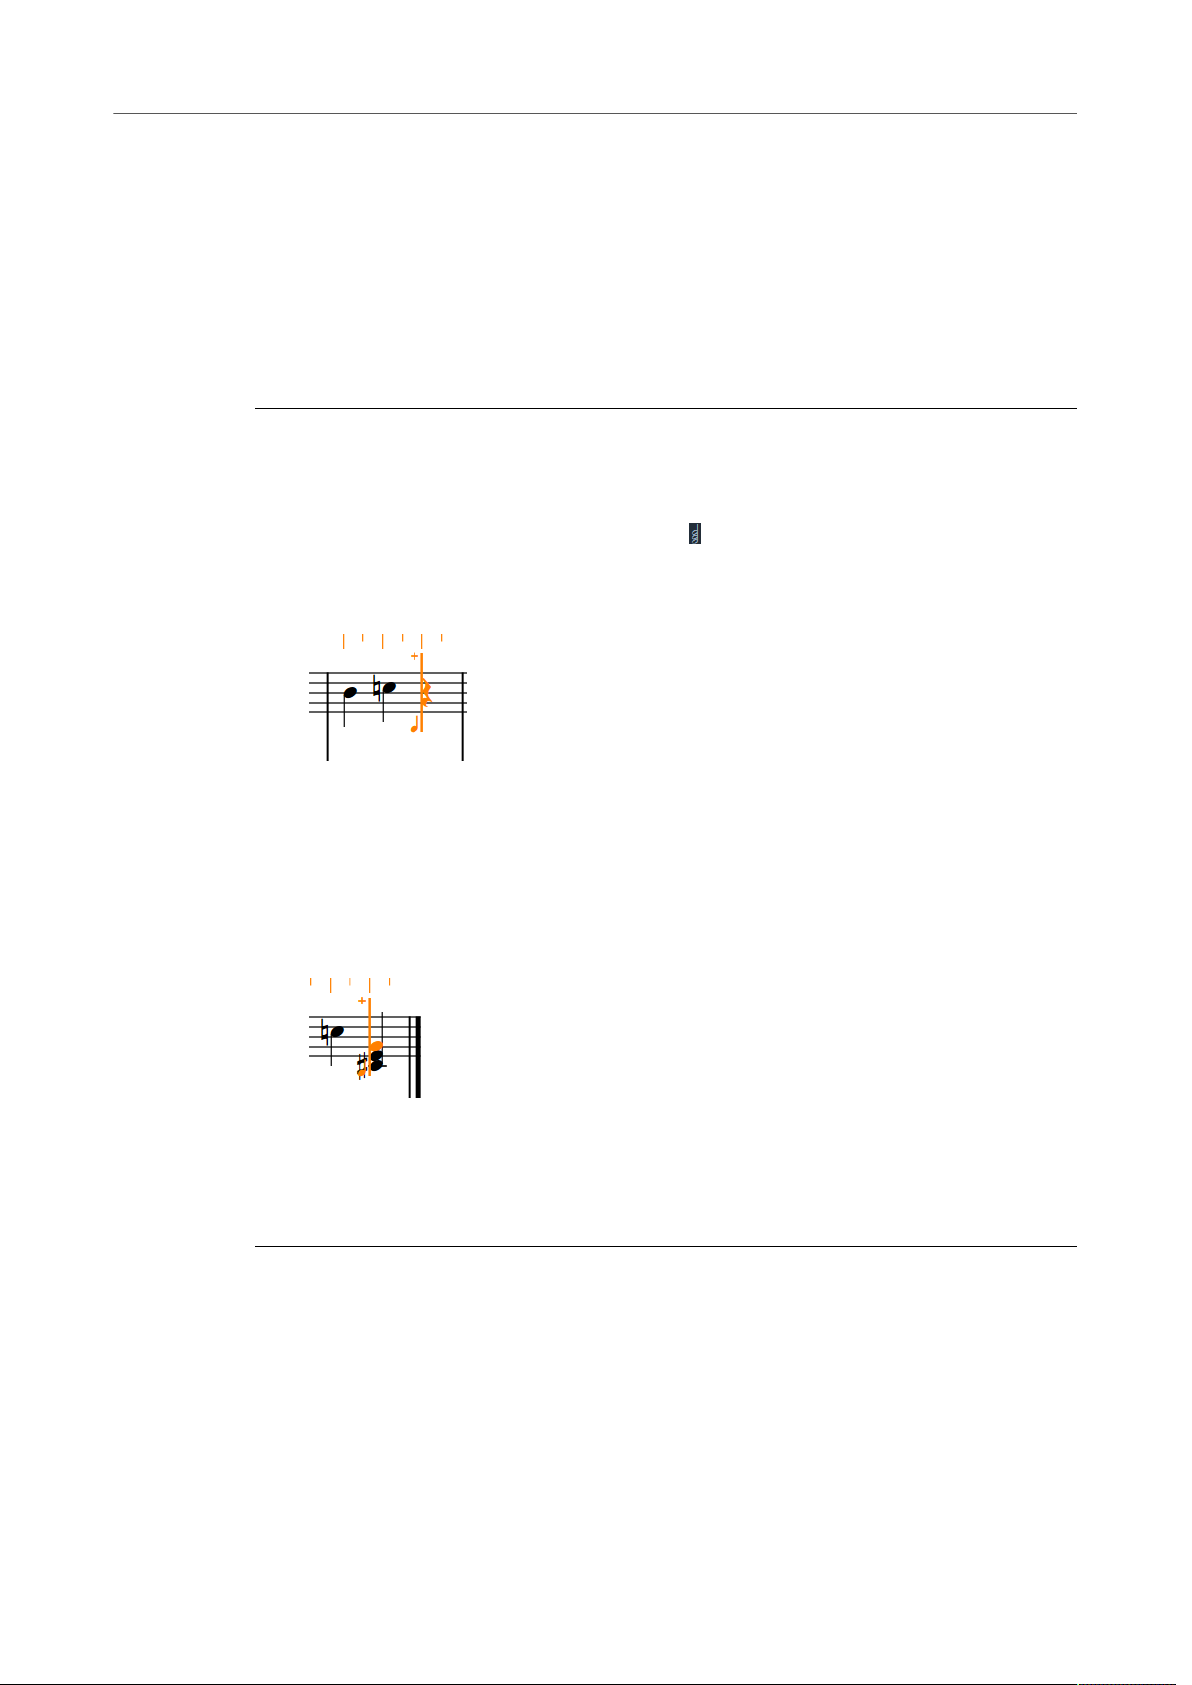
Adding a Key Signature
In this section, you learn how to add a key signature. You can add a key signature at any
rhythmic position on the staff.
When you start a new project from scratch, by default, there is no key signature shown.
Dependent on the kind of music you are writing, the key signature might be taken to mean C
major or an open key with no specific tonal center. In any case, you can change key anywhere
on the staff. To add a different key signature at the beginning of the staff, for example, D
major, proceed as follows:
PROCEDURE
1. Select the first note on the staff.
2. Press Shift-K.
This opens a small popover on top of the staff.
3. Enter a key signature. If you want to enter D major, enter an uppercase D.
For D minor, enter a lowercase d.
4. Press Enter.
RESULT
The key signature is inserted between the clef and the time signature. Dorico automatically
adds accidentals where necessary.
24
Page 25
First Steps
Writing Music
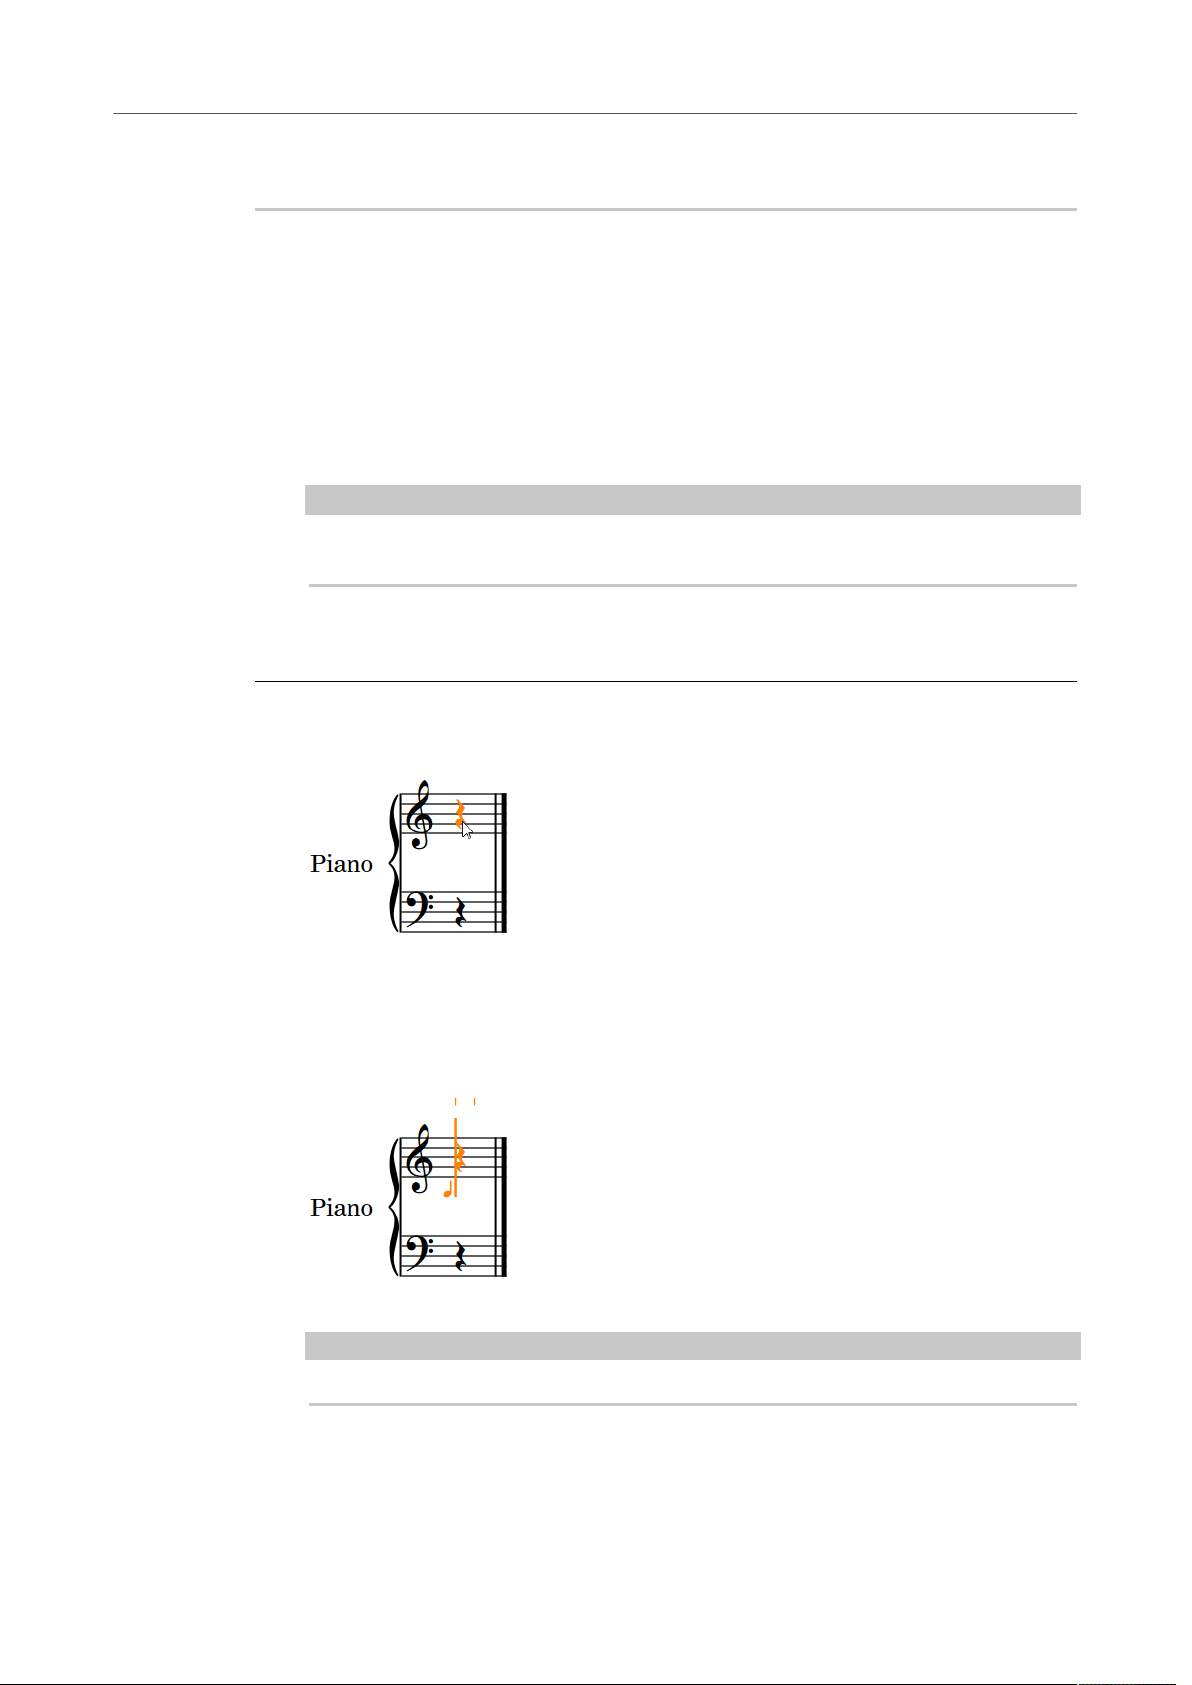
Inputting Your First Chord
In this section, you learn how to input a chord with the computer keyboard, using chord
mode. If you want to use a MIDI keyboard instead, you can input the chord with your
keyboard, and you do not need to use chord mode. Dorico automatically inputs the correct
notes for you.
PREREQUISITE
Select the last note or rest on the staff, and press Return. This shows the caret.
PROCEDURE
1. Do one of the following:
•
Press Q.
•
In the notes toolbox, activate Chords .
The caret now shows a plus sign at the top:
2. Optional: Select one of the durations on the notes panel.
3. Input the notes that should form a chord by pressing keys from A to G, one after the
other. For example, for a C major chord, press C, E, and G.
By default, Dorico adds each new note above the previous note. You can change the
octave by pressing the respective key command.
The following example shows a possible result:
4. Press Space to advance the caret to the next note position and continue with the next
chord.
Dorico expects further chord input until you deactivate it.
5. Optional: To deactivate chord input, press Q or deactivate Chords.
RELATED LINKS
Key Commands in Dorico on page 7
25
Page 26

The following sections give you an overview of the design philosophy as well as concepts on
which Dorico is based.
We recommend that you familiarize yourself with these concepts as these are often returned
to throughout the documentation.
Design Philosophy
If you are experienced with other scoring applications and are interested in learning
more about deep design considerations for scoring programs, you may find the following
discussion illuminating, but everybody can safely skip it.
Dorico has a forward-thinking design that is led by musical concepts rather than
computational convenience, and this provides many benefits.
Dorico Concepts
Higher-Level Concepts
In most graphically-orientated scoring applications, the highest-level concept is the staff or
the instrument definition that creates a staff or staves. When setting up your full score, you
start by adding the correct number of staves, and you are immediately forced into making
decisions about the layout. This means that you must know in advance whether two flutes
share a staff or have their own individual staves, or whether there should be two trumpets or
three. Many of these decisions have significant effects throughout the process of inputting,
editing, and producing individual instrumental parts.
Typically, every system of a score must contain the same number of staves, even if some are
hidden on particular systems. This requires the user to manage common conventions for
themselves, such as multiple players of the same instrument sharing staves. This can be
time-consuming and is naturally error-prone.
Dorico is designed to conform more closely to how music is performed in the real world
and to make the score a flexible expression of the practical choices that go into a musical
performance, rather than to make the musical performance subservient to the way the score
was initially prepared.
To that end, the highest-level concept of Dorico is the group of human musicians that
performs a score. A score can be written for one or more groups, for example, a double
choir or an orchestra plus off-stage chamber ensemble, etc. Each group includes one or
more players which correspond to the humans who play one or more instruments. Players
may either be individuals who can play more than one instrument, for example, an oboist
doubling cor anglais, or groups in which everyone plays only one instrument, for example,
eight desks of violinists.
26
Page 27

Dorico Concepts
Key Musical Concepts
The actual music that is played by the group in your score belongs to one or more flows. A
flow is any span of music that stands alone, for example, a whole song, a movement of a
sonata or symphony, a number in a musical show, or even a short scale or exercise. Players
may or may not have any music to play in a given flow. For example, all the brass players may
be omitted from the slow movement of a classical symphony, or certain players may have
nothing to do in some cues in a movie score. This is no problem as you can combine players
in flows in any combination.
Dorico provides several benefits. Chief among them is its ability to produce different score
layouts that share the same musical content. For example, you can create a conductor's
score with as many instruments as possible condensed onto a smaller number of staves, a
full score with each player's music on separate staves, and an instrumental part containing
only the music belonging to a specific player.
One crucial difference between Dorico and other scoring applications is that the musical
content exists independently of the score layout in which it is viewed.
Key Musical Concepts
In order to work efficiently with Dorico, it is important to understand the conceptual model of
the program.
Projects
Modes
The model is closely based on the practical considerations of how music is written and
performed by real humans.
A project is an individual document that you create within Dorico.
A project may contain many separate pieces of music, from very short to very long, written
for any combination of instruments and in different layouts.
Modes represent different phases in the workflow of preparing a score.
In the project window, the following modes are available:
Setup
In this mode, you can set up the players and instruments that are played in the
project. You can create and manage flows and set up layouts.
Write
In this mode, you can write your music. You can insert notes and rests, key
signatures, time signatures, and idiomatic notations.
Engrave
In this mode, you have access to fine-grain controls that allow you to manipulate
and modify every item in the project. You can also manage pages, master pages,
layouts, and formats.
Play
In this mode, you can set up your project for playback. You can assign VST
instruments, adjust the mix, apply automation, and optimize note data.
27
Page 28
Dorico Concepts
Key Musical Concepts
Print
Instruments
In Dorico, an instrument is an individual musical instrument, such as a piano, a flute, or a
violin.
Dorico has a database of information about properties of each instrument. These include
the playable range, common and uncommon playing techniques, notational conventions,
transposition properties, tunings, clef, number of staves, type of staff, etc. You can edit and
extend these properties according to your needs.
NOTE
Similar instruments, such as guitars with different tunings, horns in different transpositions,
or the instruments in the strings family can share common properties. This enables you to
edit the data for many instruments at the same time.
In this mode, you can define different print jobs, such as printing full conductors
scores, study scores, individual parts, etc. For every print job, you can specify
options for page size and duplex printing. You can also manage other output,
such as exports to various file types, such as PNG.
Players
Groups
RELATED LINKS
Instruments on page 63
In Dorico, a player can be an individual musician or several musicians.
In detail, a player may represent the following:
•
A solo player, which is an individual musician who can play one or more instruments,
for example, a clarinettist who doubles on alto saxophone or a percussionist who plays
bass drum, clash cymbals, and triangle.
•
A section player, which represents multiple musicians who all play the same
instrument, for example, eight desks of violins or the soprano section in a mixed voice
choir.
NOTE
Section players cannot double on different instruments, but they can play divisi. This means
that they can be divided into smaller units, which is commonly required for strings.
A group represents a collection of musicians that should be considered together, such as a
choir, orchestra, or a chamber ensemble.
In a typical project, there may be only one group that contains all of the defined players,
but in order to allow easy separation of forces in larger-scale works, you can define as
many groups as needed. It may also be necessary to assign players to these groups for
the purposes of, among other things, properly bracketing and labeling their staves in the
conductor's score.
28
Page 29
Dorico Concepts
Key Musical Concepts
EXAMPLE
A work for double choir and organ can define the two choirs as separate groups. This allows
each choir to have its own label in addition to the labels for each sectional player (soprano,
alto, tenor, bass) within the choir.
In a complex work, such as Elliott Carter's “A Symphony of Three Orchestras”, each of the
orchestras can be defined as a separate group.
Flows
Flows are separate spans of music that are completely independent in musical content.
A flow can be, for example, a song, a movement in a sonata or symphony, a number in a
stage musical, or a short scale or sight-reading exercise of only a few bars in length. A single
project can contain one or more flows.
A flow may contain music for any combination of players. For example, in a Classicalperiod symphony, it is not uncommon for the brass players to be tacet in the second, slow
movement, so the flow for the second movement would simply not contain any brass players.
In a set of cues for a movie, for example, specific players may not be required in particular
cues, and so each flow would contain only those players who have anything to play.
Layouts
NOTE
Correct assignment of players to flows allows Dorico, for example, to generate tacet sheets
automatically for individual instrumental parts.
Layouts define how music for one or more players in one or more flows is presented,
including page size, margins, staff size, etc.
Layouts combine musical content that is represented by flows with rules for page layout
and music engraving. You can have layouts for one or more players drawn from one or more
flows. You can use the layouts to produce paginated music notation that can be printed or
exported in various formats.
A typical project for an ensemble of multiple players will contain several layouts. For
example, a work for string quartet in three movements contains four solo players – two
violins, one viola, and one cello – and three flows, one for each movement. Such a project
may require five layouts:
•
Four layouts each containing the music from all three flows for one of the solo players,
that is, the individual instrumental parts
•
One layout containing the music from all three flows and all four players, that is, the
full score
Each layout provides independent control over practically every aspect of the visual
appearance of the music, including independent staff size, note spacing, and system
formatting.
Each layout may also have independent page layout properties, such as page size, margins,
running headers, and footers. These can be defined as master pages and then be applied
freely to left- or right-hand pages or to specific pages in a layout, for example, the first or
29
Page 30

Dorico Concepts
Key Musical Concepts
last page. Flow frames define where music appears on each page. To each flow frame, one
or more flows is assigned in a manner analogous to how flows of text are assigned to text
frames in desktop publishing applications. Dorico also provides for text frames, which allow
the presentation of blocks of text, such as prefatory material, critical commentary, block
lyrics, and so on.
NOTE
The page layout features of Dorico allow you to have multiple flow frames and text frames on
the same page. This enables you to combine music from multiple flows on the same page.
30
Page 31

Hub
User Interface
The user interface of Dorico is designed to be as unobtrusive as possible while keeping all of
the important tools at your fingertips.
You can explore the interface without doing any damage to your project. You can always undo
any inadvertent edits or close your project without saving it.
When you start Dorico, the Hub opens. The Hub keeps you up-to-date with the latest
information and assists you with organizing your projects. It consists of the News section and
the Projects section.
News
Displays Steinberg news.
Read More
Links you to a page on the Steinberg website with more detailed information
about the news and tutorials topic that you selected.
User Forum
Links you to the user forum on the Steinberg website.
Downloads
Links you to the download page on the Steinberg website.
31
Page 32

User Interface
Hub
Knowledge Base
Links you to the Knowledge Base on the Steinberg website.
Recent Projects
Shows a list of the projects that you worked on last. You can scroll through the
list with the Up Arrow/Down Arrow keys or with the mouse.
Orchestral, Band, Chamber, Choral and Vocal, Solo
Allow you to choose between different categories of project templates.
New Empty Project
Starts a new project.
Open Other
Allows you to open any other project file in your file system.
Open Selected Project
Opens the file that you selected in the Recent Projects list. Alternatively, you can
double-click the file name or select the file and press Enter.
Project Templates only: New from Template
Creates a new project from the project template that you selected in the list of a
project template category.
Starting New Projects
Dorico provides several ways to start new projects.
PROCEDURE
• Do one of the following:
•
In the Hub, select New Empty Project.
•
Press Ctrl/Cmd-N.
NOTE
This option is also available in the project window.
•
Select File> New.
NOTE
This option is also available in the project window.
RESULT
A new project window opens.
32
Page 33

User Interface
Hub
Starting New Projects from Project Templates
Dorico provides multiple project templates that you can use to start a new project.
PROCEDURE
1. In the Hub, select one of the project template categories:
•
Orchestral
•
Band
•
Chamber
•
Choral and Vocal
•
Solo
2. From the listed project templates of the selected category, select a project template.
3. Click New from Template.
RESULT
The project template opens in a new project window.
NOTE
Alternatively, you can also select File> New from Template. Then select a project template
from the listed project template categories.
Selecting Recent Projects
You can open a project on which you recently worked.
PROCEDURE
• Do one the following:
•
In the Recent Projects list, select a file name and press the Up Arrow and Down
Arrow keys to scroll through the list of file names. To open a file, press Enter.
•
In the Recent Projects list, double-click a project file name.
•
In the Recent Projects list, select a project file name and click Open Selected
Project.
•
Click File> Open Recent and select one of the project file names.
NOTE
This option is also available in the project window.
Opening Other Files
You can open other Dorico projects that are not listed in the Recent Projects list, or you can
import MusicXML or MIDI files.
PROCEDURE
1. Click Open Other.
33
Page 34

User Interface
Windows
Windows
NOTE
Alternatively, you can also select File> Open.
2. In the dialog that opens, browse for the file that you want to open.
TIP
To open several files at the same time, press Ctrl/Cmd and select the files, or press
Shift and select a range of files.
3. Click Open.
RESULT
If you import a MusicXML or a MIDI file, Dorico creates a new project file from the MusicXML
or MIDI content. You can save this file as a default Dorico project.
Dorico provides a project window and floating windows.
Project Window
You can open multiple project windows for the same or for different projects. The project
window consists of several areas.
Project window
1. Toolbar
Allows you to access the modes, the workspace options, the Mixer, and the basic
transport options.
2. Tab bar
Shows the tabs that are open in Setup, Write, and Engrave mode. If you split the music
area and open several tabs, tab groups are shown.
34
Page 35

User Interface
Windows
3. Project start area/music area/event display/print preview area
When you set up a new empty project, this area in Setup, Write, and Engrave mode
shows the project start area that allows you to add your first players. Once you have
added a player or an ensemble, this area becomes the music area that shows the
score or parts of the score that you set up, write, edit, and format. In Play mode, this
area contains an event display that shows the effects of manipulating the playback of
your score. In Print mode, the print preview area shows a preview of how your project
is going to be printed onto paper or exported into a graphic file format.
4. Panel
The panels provide notes and notations that you need to create and edit your music.
5. Toolbox
Write mode only:Provides access to various notation items that you can use for your
music.
6. Status bar
Allows you to choose a different view and page arrangement of the music area.
Floating Windows
Toolbar
Dorico allows you to open floating windows, such as the Mixer and the Transport windows.
These can be hidden and shown independent of the mode that is selected in the main
window. The following options open floating windows:
Show Mixer
Opens the Mixer window.
Show Transport Bar
Opens the Transport window.
RELATED LINKS
Opening Multiple Project Windows on page 47
The toolbar allows you to access the modes and workspace options as well as the Mixer and
the transport options.
The toolbar is always available independent of the mode or tool that you are using. If you
must hide the toolbar for a specific reason, click the disclosure arrow on top of the toolbar.
The toolbar consists of the following items:
1. Modes
Selectable workspaces in the project window that represent different phases in the
workflow of preparing a score.
2. Workspace options
35
Page 36

User Interface
Windows
Provide options that allow you to select different layouts and to change the working
environment.
3. Show Mixer button
Opens/Closes the Mixer window.
4. Basic transport options
Allow to you quickly access the main transport functions.
RELATED LINKS
Workspace Options on page 36
Basic Transport Options on page 36
Workspace Options
The workspace options in the middle of the toolbar provide options that allow you to select
different layouts and to change the working environment.
Select Layout
Allows you to switch back and forth between layouts.
Show Tabs
Shows/Hides the tab bar above the music area.
Hide/Restore Panels
Shows/Hides all open panels.
Basic Transport Options
The transport options to the right of the toolbar provide the main transport functions of
Dorico.
Show Transport Bar
Opens the Transport window.
Time display
Shows the position of the playhead in the score. The time display shows the units
in the following order: bars, beats, 16th notes, 120ths of a 16th note.
Rewind to Beginning
Sets the playhead to the beginning of your score.
Play
36
Page 37

User Interface
Windows
Starts/Stops playback.
Activate Project
Shows which project is activated for playback.
Tab Bar
The tab bar in Dorico allows you to display different layouts within the same project window.
Each tab may contain a separate layout, or an additional view of a layout that is already open
in another tab or window. Each tab is labeled with the name of the selected layout.
You find the tabs aligned on the tab bar at the top of the music area, directly below the
toolbar. If the tabs are not visible, click Show Tabs on the toolbar. If Show Tabs is activated,
the tabs are always displayed, even if only a single tab is open.
Project Start Area
In Setup, Write, and Engrave mode, the project start area is displayed in the middle of the
project window when you set up a new empty project.
The project start area shows cards that allow you to add your first players. To add players,
click one of the cards:
Add Solo Player
Adds an individual player to whom you can assign one or more instruments.
Add Section Player
Adds a player that represents multiple players who all play the same instrument.
Add Ensemble
Adds multiple players who play different instruments. The ensembles that you
can add represent standard combinations of musicians.
37
Page 38

User Interface
Windows
Music Area
In Setup, Write, and Engrave mode, the music area shows the editable score.
Music area showing a sample of a score
The music area can be displayed in several views. The music area tab bar allows you to open
several layouts from your project and switch between them. The scroll bars to the right and
to the bottom of the music area allow you to scroll within the layout.
38
Page 39

User Interface
Windows
Print Preview Area
The print preview area in Print mode shows a preview of what is going to be printed or
exported as a graphic.
Print preview area displaying a score as a booklet
In the print preview area, you can scroll through the pages that are shown, but you cannot
edit your layouts. If you want to make changes, you must switch to Setup, Write, or Engrave
mode.
If you select multiple layouts to be printed as part of the same print job, the print preview
area only displays the first layout. If you want to show the expected page arrangement for
each layout in the print preview, you must check each layout individually before you start
printing.
RELATED LINKS
Project Window in Print Mode on page 154
39
Page 40

User Interface
Windows
Panels
The panels in the project window provide the notes, notations, and functions that you need to
set up, write, edit, and format your music.
Notes panel (left), notations panel (right), and properties panel (bottom) in Write mode.
Every mode in Dorico has its own particular panels.
Modes and their panels
Mode Left Panel Right Panel Bottom Panel
Setup Players Layouts Flows
Write Notes Notations Properties
Engrave Formatting Pages Properties
Play Tracks VST Instruments n/a
Print Layouts Print options n/a
Some panels are displayed by default. You can hide and show each panel individually or all of
them at the same time. For a full description of each panel, refer to the documentation of the
individual modes.
RELATED LINKS
Modes on page 27
Hiding Panels on page 48
Hiding Individual Panels on page 48
40
Page 41

User Interface
Windows
Toolboxes
Status Bar
Toolboxes are available in Write mode. They provide the tools that allow you to input and
modify notes and notation items and to determine what notation items are shown in the
notations panel.
RELATED LINKS
Notes Toolbox on page 75
Notations Toolbox on page 78
The status bar at the bottom of the project window allows you to choose a different view and
page arrangement in the music area.
NOTE
The status bar is only available in Setup, Write, and Engrave modes. Not all options are
available in all modes.
Status bar in Write and Setup mode
1. Rhythmic Grid Resolution selector
Allows you to change the resolution of the rhythmic grid, which is used for inserting
notes and notations in Write mode.
2. Disclosure arrow
Allows you to show/hide the bottom panel in Setup, Write, and Engrave mode.
3. Selection tools
Allow you to switch between using the Marquee Tool and the Hand Tool in Write, and
Engrave mode.
4. View type selector
Allows you to select one of the provided view types for the music area in Setup and
Write mode.
5. Page arrangement options
Allow you to choose between different horizontal and vertical arrangements of either
individual pages or pairs of pages, which are called spreads.
6. Zoom options
Allow you to change the zoom factor of the music area and its musical contents.
RELATED LINKS
Rhythmic Grid on page 83
View Types on page 43
Selection Tools on page 42
Page Arrangements for Page View on page 43
Zoom Options on page 44
41
Page 42

User Interface
Windows
Selection Tools
Dorico allows you to choose a selection tool that you can use to select or move items within
the music area.
Pressing Shift in combination with the chosen selection tool allows you to instantly use the
other tool.
You can use the following tools:
Marquee Tool
Allows you to click and drag a rectangle to select multiple notes and notations.
Hand Tool
Allows you to click and move the view within the music area.
RELATED LINKS
Selecting Multiple Notes and Notations on page 42
Moving the View on page 42
Selecting Multiple Notes and Notations
You can select notes and notations using the Marquee Tool.
PROCEDURE
1.
2. In the music area, click at the position where you want the selection to start and keep
3. Drag to the position where you want the selection to end.
4. Release the mouse button.
RESULT
All notes and notations that you marked are selected.
Moving the View
You can move the view within the music area in Write mode and in Engrave mode.
PROCEDURE
1.
2. Click anywhere within the view and keep the mouse button pressed.
In the status bar, activate Marquee Tool .
the mouse button pressed.
A rectangle is shown to indicate which notes and notations will be selected.
On the status bar, activate Hand Tool .
Once you move the mouse pointer, it changes into a hand symbol.
3. Move the view.
4. Release the mouse button.
42
Page 43

User Interface
Windows
View Types
Dorico provides different ways to view your layouts.
Dorico saves your chosen view type for each layout, so you only need to set it once. You can
change the default view types for new projects in the preferences.
The following view types are available:
Galley View
Lays out your music on a single continuous system. It also shows all of the
instruments that are included in the active layout and flow.
This view type is most useful during the process of inputting the music as it
allows you to focus on the musical content of your project.
NOTE
Note spacing in galley view is unjustified, which means that it is neither expanded
nor contracted to fit the width of a page or a music frame. However, changes that
are made to note spacing in galley view also apply to page view.
Page View
Displays your layout paginated exactly as it will appear when you print or export
it.
This view type is useful if you want to view spreads or single pages. Spreads allow
you to work out page turns, because the performer only needs to turn the page
at the end of the right-hand page of a pair. Viewing single pages may be helpful if
the layout will be printed out as a series of single pages. This may be necessary
if you are using, for example, a fan-fold or concertina approach, in which case the
distinction between left- and right-hand pages is insignificant.
RELATED LINKS
Preferences on page 49
Changing the View Type of the Music Area on page 49
Page Arrangements for Page View on page 43
Page Arrangements for Page View
You can change the way pages are arranged for display in the music area.
Spreads Horizontally
Displays pages in pairs as two-page spreads, with each pair laid out from left to
right in a row.
Spreads Vertically
Displays pages in pairs as two-page spreads, with each pair laid out from top to
bottom in a column.
Single Pages Horizontally
43
Page 44

User Interface
Setting up Your Workspace
Displays individual pages laid out from left to right.
Single Pages Vertically
Displays individual pages laid out from top to bottom.
Zoom Options
You can change the size of notes and notations in the music area.
Zoom Out
Decreases the size of notes and notations in the music area.
Set Zoom
Allows you to select one of the available zoom scaling factors. You can set a
permanent zoom factor in the preferences.
Zoom In
Increases the size of notes and notations in the music area.
RELATED LINKS
Preferences on page 49
Setting up Your Workspace
Dorico enables you to set up your workspace according to your working style.
Dorico allows you to open multiple tabs to display multiple layouts in the same project within
the same window. You can also open the same project in several windows.
Opening Different Views or Layouts by Using Tabs
You can use tabs in order to display different views or layouts within the same project
window.
Each tab can contain a separate layout or an additional view of a layout that is already open
in another tab or window. Whenever you open a new tab, you are prompted to select a layout
that you want to display in the tab.
You can find the tabs at the top of the music area, below the toolbar. If you do not see the
tabs, click Show Tabs in the toolbar.
PROCEDURE
1. Do one of the following:
•
Press Ctrl/Cmd-T.
•
To the right of the tabs, click New Tab .
•
Select Window> New Tab.
A new tab opens that shows several icons at the top and a list of layouts at the bottom.
44
Page 45

User Interface
Setting up Your Workspace
2. Do one of the following:
•
•
•
Click one of the icons.
Select a layout from the list at the bottom.
Click Select Layout on the toolbar and choose one of the layouts from the popup menu.
RESULT
The layout that you choose opens in the active tab.
Creating Tab Groups
You can create tab groups that are vertically or horizontally split. This allows you to display
different layouts side by side or above one another.
You can also use this function to see an individual layout with a different view.
PROCEDURE
• Select the tab of the layout that you want to move to a new tab group.
•
To create a new tab group that is vertically split from the original tab group and
that shows the layouts side by side, select Window> Vertical Split.
•
To create a new tab group that is horizontally split from the original tab group
and that shows the layouts above one another, select Window> Horizontal Split.
RESULT
The selected tab is moved to the new tab group.
RELATED LINKS
Moving Tabs to Another Tab Group on page 47
45
Page 46

User Interface
Setting up Your Workspace
Closing Individual Tabs
You can close individual tabs of layouts that you no longer need.
PROCEDURE
• To close individual tabs, do one of the following:
•
Select the tab of the layout that you want to close and press Ctrl/Cmd-W.
•
Hover the mouse over the tab and click the x icon.
•
Right-click the tab and from the context menu, select Close Tab.
NOTE
You cannot close the last tab in a window. If only one tab is open and you no longer
want to see the tabs, deactivate Show Tabs in the main toolbar. The tab is no longer
displayed, but the corresponding layout is still shown.
Closing Multiple Tabs
You can close all tabs but the selected tab.
PROCEDURE
1. Right-click a tab.
2. From the context menu, select Close Other Tabs.
RESULT
The tabs and the corresponding layouts are closed.
Switching Tabs
You can switch between different tabs to show different layouts in the music area.
PROCEDURE
• To switch tabs, do one of the following:
•
Click the tab to which you want to switch.
•
Press Ctrl/Cmd-Tab to cycle through all open tabs in turn. Press Ctrl/
Cmd-Shift-Tab to cycle through all open tabs in reverse order.
•
Select Window> Next Tab/Previous Tab.
Changing the Order of Tabs
You can move tabs to a different position on the tab bar.
PROCEDURE
1. Click and drag a tab to the new position.
The other tabs move to show where the dragged tab will be positioned.
2. Release the mouse button.
46
Page 47

User Interface
Setting up Your Workspace
Moving Tabs to Another Tab Group
You can move tabs to other tab groups.
NOTE
You can only move tabs to other tab groups if you have opened at least two tabs.
PROCEDURE
1. Choose the tab that you want to move.
2. Click and drag the tab to a blank space next to the target tab group and release the
mouse button.
Moving Tabs to Other Windows
You can move tabs to another open window of the same project to show the corresponding
layouts in a new window.
NOTE
• The layouts must belong to the same project. If you attempt to move a tab to a window
of a different project, a new window is created for the project to which the layout
belongs.
• You can only move tabs to other windows if you have opened at least two tabs.
PROCEDURE
• Do one of the following:
•
To create a new window of the same project with the tab inserted, click and drag
a tab horizontally to the left or right, away from the tab bar and release it.
•
To insert the tab into the tab bar of another window of the same project, click
and drag a tab onto the tab bar.
•
Select and right-click a tab and from the context menu, select Move Tab to New
Window.
•
Select a tab and click Window> Move Tab to New Window.
Opening Multiple Project Windows
You can open multiple project windows for the same project.
This may be useful if you want to see and work on multiple layouts at the same time. You can
also open multiple project windows to show different modes of the same project.
Each window in a project is completely independent, so you can, for example, have one
window in Write mode and another in Engrave mode. During playback, all windows that
belong to the same project show the playback line and move the view to follow the playback.
PROCEDURE
• Do one of the following:
47
Page 48

User Interface
Setting up Your Workspace
•
Press Ctrl/Cmd-Shift-T.
•
Select Window> New Window.
RESULT
A duplicate of the window opens. It contains the same tabs and the same view options as the
original window.
Changing to Full Screen Mode
To maximize the amount of screen estate available for your music, you can make any project
window cover the whole screen, hiding the desktop elements provided by your operating
system, for example, the task bar in Windows or the system menu bar and Dock in Mac OS.
PROCEDURE
• Select View> Full Screen.
AFTER COMPLETING THIS TASK
To return to the default view, select View> Full Screen again.
Hiding Panels
To be able to see more of your layouts, you can hide all of the surrounding panels from the
main window completely.
PROCEDURE
• Do one of the following:
•
On the toolbar, click Hide/Restore Panels .
•
Select Window> Hide/Restore Panels.
RESULT
If you hide all active panels, the button changes its look and displays which panels are
hidden. For example, the following button indicates that all panels were active and are now
hidden: .
Hiding Individual Panels
To be able to see more of your layouts, you can hide individual panels from the main window.
NOTE
This applies equally to all modes.
PROCEDURE
• Do one of the following:
•
To hide the left panel, click its disclosure arrow or select Window> Show Left
Panel.
48
Page 49

User Interface
Setting up Your Workspace
•
To hide the right panel, click its disclosure arrow or select Window> Show Right
Panel.
•
To hide the bottom panel, click its disclosure arrow or select Window> Show
Bottom Panel.
Changing the View Type of the Music Area
You can switch between several view types of the music area.
PROCEDURE
1. In the status bar, click the view selector.
2. Choose one of the view types from the list.
•
Galley View
•
Page View
3. If you selected Page View, you can change the page arrangement using the page
RELATED LINKS
View Types on page 43
Page Arrangements for Page View on page 43
Preferences
In the Preferences dialog, you can make permanent settings for your workspace and define
key commands.
To open the Preferences dialog, press Ctrl/Cmd-, (comma) or select Edit> Preferences. On
OS X, click Dorico> Preferences.
RELATED LINKS
View Types on page 43
Zoom Options on page 44
Selection Tools on page 42
Layout Options on page 71
Key Commands on page 6
arrangement controls:
Spreads Horizontally
•
Spreads Vertically
•
Single Pages Horizontally
•
Single Pages Vertically
•
49
Page 50

User Interface
Setting up Your Workspace
General Preferences
General
Language
Allows you to select the language that is used for text in the user interface.
Preferred unit of measurement
Helps you to convert between the internal units and points that are used in Dorico
and your own preferred units. For example, the information box to the right of
Space size in the Page Setup section of the Layout Options dialog uses your
selected unit to help you determine the staff size.
Window
Theme
Allows you to switch to different program colors.
Open new windows maximized
If you activate this option and open a new window, the window is maximized to fit
the screen. This does not affect windows that are already open.
When the last window is closed
Allows you to specify what happens when you close the last project window.
View
Default zoom
Allows you to determine the zoom scaling factor that is used when you create a
new project.
Default view type
Allows you to select the view type for new projects.
Files
Show complete path for recent files
If you activate this option, the paths for recently used files are displayed in the
Hub and on the File menu together with the file names.
Editing
Enable note input using the mouse
If you activate this option, the Select tool in the notes toolbox is activated when
you open a saved or new project. This allows you to use the mouse to input notes.
You can override this option temporarily by deactivating the Select tool.
Default click-drag behavior
Allows you to select the selection tool that you want to use by default in your
projects.
50
Page 51

User Interface
Setting up Your Workspace
Play
Audio Device Setup
Opens the Device Setup dialog.
Open VST plug-in windows when opening projects
If you activate this option, the VST plug-in that you selected for your project opens
in a separate window when you open your project.
Suspend audio device in background
Allows other applications to play back via your audio hardware even though
Dorico is running. If you activate this option, the audio device that you use is
suspended when Dorico loses focus so that other applications may use it.
NOTE
Make sure that other audio applications accessing the audio hardware are set to
release the audio driver.
Enable MIDI input
If you activate this option, you can input notes using any MIDI input device, such
as a MIDI keyboard that is connected to your computer.
Play notes during note input and selection
If you activate this option, notes are played back in the following circumstances:
• Selecting notes
• Inputting notes
• Navigating through selections using the arrow keys
• Clicking the noteheads of individual notes or a stem in a chord
Follow playhead during playback
If you activate this option, the event display in Play mode advances when the
playhead reaches the right-hand side of the display. This keeps the music being
played in view.
Show playhead when stopped
If you activate this option, the playhead is displayed during playback and when
stopped. If you deactivate this option, the playhead is only displayed during
playback.
Key Commands
Most of the main menus in Dorico have key commands for certain menu items. In addition,
there are numerous other Dorico functions that can be performed using key commands.
In the Key Commands section of the Preferences dialog, you can customize existing key
commands according to your needs and also add commands for many menu items and
functions that have no key command assigned.
51
Page 52

User Interface
Setting up Your Workspace
Search
Allows you to search for menu items and functions to view, change, or add key
commands.
Assigned key commands
Shows if the selected menu item or function has a key command.
Keyboard language
Allows you to select the language of your keyboard.
New key command
Allows you to input a new key command by pressing the respective keys on your
computer keyboard.
Remove Key Command
Removes a key command from the selected menu item or function.
Add Key Command
Activates a key command that you have input for a function.
Reset Key Commands
Returns to the default key commands provided by Dorico.
Print Summary
Opens the Dorico Key Commands tool which shows the available key commands
for your keyboard layout.
52
Page 53

In Setup mode, you can determine the players and instruments for your project. You can also
create and manage flows and set up layouts.
Project Window in Setup Mode
The project window in Setup mode contains the default toolbar, the music area, and the
status bar. It provides panels with all the tools and functions that allow you to create players
and assign instruments as well as to specify the layouts and flows for your score.
To open Setup mode, you have the following options:
• Select Setup on the toolbar.
• Select Window> Setup.
Setup Mode
Panels in Setup mode
The following panels are available:
1. Players
Lists the players, instruments, and groups in your project.
2. Flows
53
Page 54

Setup Mode
Project Window in Setup Mode
Shows the flows that are created for your project.
3. Layouts
Lists the layouts that are created for players.
If you select or edit items on a panel, the panel and the selected item are highlighted in a
different color. On each of the panels, you can activate/deactivate each player, layout, or flow
to flexibly determine the following:
• The players that take part in a flow
IMPORTANT
If you exclude a player from a flow, the notes that you may have already input for that
player in that flow are deleted.
• The players that you want to show or print in an instrumental part or a full score layout
• The flows that you want to show or print in instrumental parts or full score layouts
To verify that all the players and flows that you selected are shown in a layout, select the
layout in the layout selector.
Players Panel
The Players panel lists the players, instruments, and groups in your project.
If the Players panel is not visible, do one of the following:
• Click the disclosure button on the left edge of the main window.
• Select Window> Show Left Panel.
Players panel in Setup mode
The Players panel lists all the groups, players, and ensembles in your project as cards. Each
player card shows the following:
1. Disclosure arrow
Expands/Collapses the player card.
2. Player type
54
Page 55

Setup Mode
Project Window in Setup Mode
Shows if the player is a solo player or a section player .
3. Player name
Shows the name of the player. Dorico automatically adds the names of the assigned
instruments to the player name. If required, you can rename the player.
4. Add instruments icon
Opens a popover from which you can select an instrument for the player.
5. Instrument list
If the player card is expanded, this shows all instruments that are assigned to the
player. If you move the mouse over an instrument name, an arrow appears that
allows you to open a context menu with further options.
At the bottom of the Players panel, the following options are available:
Add Solo Player
Adds an individual player to your project.
NOTE
For each solo player that you add, Dorico automatically adds an instrumental part
layout to the Layouts panel.
Add Section Player
Adds a player to your project that represents multiple players who all play the
same instrument.
NOTE
For each section player that you add, Dorico automatically adds an instrumental
part layout to the Layouts panel.
Add Ensemble
Adds multiple players to your project that represent standard combinations of
musical instruments.
NOTE
If you add an ensemble, Dorico automatically adds instrumental part layouts for
each player in the ensemble to the Layouts panel.
Add Group
Adds a group to your project to which you can assign all types of players.
Delete Player
Deletes selected players or groups from the Players panel.
55
Page 56

Setup Mode
Project Window in Setup Mode
The order in which the players are listed is the default order in which they appear in a layout.
You can change the player order for each individual layout in the layout options. In the Layout
Options dialog, select the Players category, and in the Players subcategory, activate Uses
custom player order and change the order of the listed players.
RELATED LINKS
Players on page 58
Layouts Panel on page 56
Layout Options on page 71
Layouts Panel
The Layouts panel lists all the layouts for full score and instrumental parts.
If the Layouts panel is not visible, do one of the following:
• Click the disclosure button on the right edge of the main window.
• Select Window> Show Right Panel.
The Layouts panel lists the default full score layout and all the layouts that you created for
your project as cards. Each layout card shows the following:
1. Disclosure arrow
Expands/Collapses the layout card.
2. Layout type
Shows if the layout is a full score layout , an instrumental part layout , or a custom
score layout .
3. Layout name
Shows the name of the layout. Dorico automatically adds default names depending on
the name of the instrument that is assigned to a player and on the type of layout that
is added. For example, if you assign a flute to a player, the instrumental part layout
automatically gets the same name. If you add an empty instrumental part layout, the
layout name shows Empty part and an incremental number if you add several empty
part layouts.
56
Page 57

Setup Mode
Project Window in Setup Mode
4. Space size
Shows the space size between two staff lines in points.
NOTE
You can change the space size in the layout options.
5. Page size and orientation
Shows the width and height of the pages of a layout and their orientation (portrait or
landscape).
At the bottom of the Layouts panel, the following options are available:
Add Full Score Layout
Adds a full score layout to your project. By default, every player and flow is
automatically included in the layout.
Add Instrumental Part Layout
Adds an empty instrumental part layout to your project. You can then add one or
multiple players to the layout. By default, a part layout contains all flows that are
created in your project.
Add Custom Score Layout
Adds a custom score layout that initially without players or flows.
Sort Layouts
Sorts all layouts on the Layouts panel according to their type in the following
order: full score layouts, instrumental part layouts, custom score layouts.
Layout Options
Opens the Layout Options dialog for one or multiple selected layouts.
Delete Layout
Deletes selected layouts from the Layouts panel.
RELATED LINKS
Layouts on page 69
Layout Options on page 71
Flows Panel
The Flows panel shows all the flows that are created for your project.
If the Flows panel is not visible, do one of the following:
• Click the disclosure button at the bottom of the main window.
57
Page 58

Setup Mode
Players
• Select Window> Show Bottom Panel.
The Flows panel shows the default flow and all the flows that you created for your project as
cards. Each flow card shows the following:
1. Flow name
Shows the name of the flow. If you create multiple flows without renaming them, each
flow name shows a number that increments with each new flow that you create. The
number also indicates the position of the flow in a layout.
2. Flow number
Shows the number of the flow. The number increments with each new flow that you
create. The number also indicates the position of the flow in a layout.
Players
To the right of the Flows panel, the following options are available:
Add Flow
Adds a new flow to your project. By default, every new flow is automatically
included in all layouts, and every player is added to the new flow.
Notation Options
Opens the Notation Options dialog that provides multiple options that allow you
to make changes that affect the way music is notated for each flow.
Delete Flow
Deletes one or multiple selected flows.
RELATED LINKS
Flows on page 67
Notation Options on page 103
Before you start writing music, you must specify the players that will play one or multiple
instruments.
A player may be a solo player, which represents a single human being who can play one or
more instruments. A clarinettist, for example, may double alto saxophone. A player may
also be a sectional player, which represents multiple human beings, each of whom plays
58
Page 59

Setup Mode
Players
the same instrument. This could be, for example, a violin section or the soprano section of a
choir.
Dorico uses this knowledge about players and their instruments to assist you in producing a
practical score efficiently, for example by making it very easy to handle instrument doubling,
divisi, and condensing music for multiple players onto a smaller number of staves.
If you add a player in Dorico, the following happens:
•
An instrumental part layout is created.
•
The player is added to any full score layouts that already exist. If no full score layouts
exists, a new full score layout is created.
•
The player is included in all existing flows.
Adding Solo Players
PREREQUISITE
The Players panel must be open.
PROCEDURE
1. Do one of the following:
•
If you have started a new project, click Add Solo Player in the project start area.
•
On the Players panel at the bottom, click Add Solo Player .
This adds an empty-handed player on the Players panel.
2. In the popover that opens, select an instrument:
•
In the search field, enter the first letters of the instrument to be played by the
player, then select it from the filtered list, and click Add.
•
Scroll through the popover list, select an instrument, and click Add.
•
Use Tab/Shift-Tab and the arrow keys on your computer keyboard to scroll
through the popover list. To select an instrument, press Enter.
TIP
If the popover is unavailable, click the plus symbol to the right of the added empty-
handed player. Alternatively, you can right-click the player and select Add Instrument
to Player.
RESULT
The solo player is automatically named after the selected instrument.
RELATED LINKS
Renaming Players on page 61
Project Start Area on page 37
59
Page 60

Setup Mode
Players
Adding Section Players
PREREQUISITE
The Players panel must be open.
PROCEDURE
1. Do one of the following:
•
If you have started a new project, click Add Section Player in the project start
area.
•
On the Players panel at the bottom, click Add Section Player .
This adds an empty-handed player on the Players panel.
2. In the popover that opens, select an instrument:
•
In the search field, enter the first letters of the instrument to be played by the
player, then select it from the filtered list, and click Add.
•
Scroll through the popover list, select an instrument, and click Add.
•
Use Tab/Shift-Tab and the arrow keys on your computer keyboard to scroll
through the popover list. To select an instrument, press Enter.
TIP
If the popover is unavailable, click the plus symbol to the right of the added empty-
handed player. Alternatively, you can right-click the player and select Add Instrument
to Player.
RESULT
The section player is automatically named after the selected instrument.
RELATED LINKS
Renaming Players on page 61
Project Start Area on page 37
Duplicating Players
You can duplicate a player. This adds another player of the same type.
PROCEDURE
1. Right-click the player.
2. From the context menu, select Duplicate Player.
RESULT
A new player is added, with the same instrument as the original player. The original and new
players are numbered to ensure that their names are unique.
RELATED LINKS
Renaming Players on page 61
60
Page 61

Setup Mode
Players
Renaming Players
You an change the name of a player or reset a renamed player to the default name.
PROCEDURE
• Double-click the name of the player.
You can also right-click the name of the player and select Rename from the context
menu.
•
•
Sorting Players
You can sort selected players on the Players panel.
PROCEDURE
1. Click a player card and keep the mouse button pressed.
Enter the new name and press Enter.
To return to the default name, click Reset to Default .
2. Drag the player card to a different position on the panel.
3. Release the mouse button to insert the player at the selected position.
Deleting Players
You can delete players.
PROCEDURE
1. Select the player that you want to delete.
2. Click Delete Player .
You can also right-click the player and select Delete Player from the context menu.
3. In the warning message that opens, click one of the following options:
•
•
Delete Player Only
Deletes the player and the music that you created for the instruments belonging
to that player.
Delete Player and Part Layouts
Deletes the player, the music, and all part layouts to which the player is
assigned.
NOTE
The part layout cannot be deleted if it contains more than the deleted player.
61
Page 62

Setup Mode
Players
Excluding Players from Full Score Layouts
By default, every player that you add is added to existing full score layouts. You can exclude
players that you do not want to show in a full score layout.
PROCEDURE
1. On the Layouts panel, select the full score layout.
2. On the Players panel, deactivate the checkbox of the player card for the player that you
want to exclude.
RESULT
The player is excluded from the layout.
Including Players in Instrumental Part Layouts
You can include one or multiple players in existing instrumental part layouts.
PROCEDURE
1. On the Layouts panel, select the instrumental part layout.
2. On the Players panel, activate the checkbox of the player card for the player that you
want to include.
RESULT
The name of the included player is added to the layout name.
Excluding Players from Flows
If you create a new flow, all players are automatically added to the flow. You can exclude
players from the flow.
IMPORTANT
If you exclude a player from a flow, the notes that you may have already input for that player
in that flow are deleted.
PROCEDURE
1. On the Flows panel, select the flow.
2. On the Players panel, deactivate the checkbox of the player card for the player that you
want to exclude.
RESULT
The player is excluded from the flow.
62
Page 63

Setup Mode
Ensembles
Ensembles
If you add an ensemble in Dorico, multiple players are added to your project at the same
time.
Dorico provides a set of predefined ensembles that you can use. Adding an ensemble is one
of the ways to achieve building up an instrumentation quickly. The predefined ensembles that
you can create with Dorico follow standard patterns, such as double woodwind which refers
to two flutes, two oboes, two clarinets, and two bassoons.
Adding Ensembles
PREREQUISITE
The Players panel must be open.
PROCEDURE
1. Do one of the following:
•
If you have started a new project, click Add Ensemble in the project start area.
2. In the popover that opens, select an ensemble:
RESULT
The ensemble players are added to the Players panel, either as solo or as section players.
RELATED LINKS
Renaming Players on page 61
Project Start Area on page 37
Instruments
You can assign instruments to solo and section players as well as to ensembles.
In the real world, instruments are played by humans, and this is also reflected in Dorico.
Before you can assign instruments, you must add players or ensembles, which may in turn
also be assigned to groups if needed. If you add ensembles, it is by default not necessary to
add any instruments, since these are already included when you select the type of ensemble.
However, you can add further instruments to ensembles.
On the Players panel at the bottom, click Add Ensemble .
•
•
In the search field, enter the first letters of the ensemble, then select it from the
filtered list, and click Add Ensemble to Score.
•
Scroll through the popover list, select an ensemble, and click Add Ensemble to
Score.
•
Use Tab/Shift-Tab and the arrow keys on your computer keyboard to scroll
through the popover list. To select an ensemble, press Enter.
You can always change the initial specification and add or delete instruments.
63
Page 64

Setup Mode
Instruments
Adding Instruments
You can add instruments to solo players or section players.
PREREQUISITE
You have added a solo player or section player.
PROCEDURE
1. On the Players panel, do one of the following:
•
Select the solo or section player and press Shift-I.
Click the plus symbol to the right of the added empty-handed player.
•
•
Right-click the player and select Add Instrument to Player.
2. In the popover that opens, select an instrument:
•
In the search field, enter the first letters of the instrument to be played by the
player, then select it from the filtered list, and click Add.
•
Scroll through the popover list, select an instrument, and click Add.
•
Use Tab/Shift-Tab and the arrow keys on your computer keyboard to scroll
through the popover list. To select an instrument, press Enter.
RESULT
The selected instrument is added to the player. If you selected multiple players, the
instrument is only added to the first player on the Players panel.
Adding Multiple Instruments
You can add multiple instruments to solo players.
PREREQUISITE
You have added a solo player that has already been assigned an instrument, or you have
added an ensemble with several solo players.
PROCEDURE
1. On the Players panel, do one of the following:
•
Select the player and press Shift-I.
Click the plus symbol to the right of the added empty-handed player.
•
•
Right-click the player and select Add Instrument to Player.
2. In the popover that opens, select an instrument:
•
In the search field, enter the first letters of the instrument to be played by the
player, then select it from the filtered list, and click Add.
•
Scroll through the popover list, select an instrument, and click Add.
•
Use Tab/Shift-Tab and the arrow keys on your computer keyboard to scroll
through the popover list. To select an instrument, press Enter.
64
Page 65

Setup Mode
Groups
RESULT
The selected instrument is added to the player.
Deleting Instruments
You can delete instruments from players.
IMPORTANT
If you delete an instrument from a player, any music that you have created for this
instrument is also deleted.
PROCEDURE
1. Open the player card by clicking the disclosure arrow to the left of the player name.
2. Move the mouse over the instrument name and click the disclosure arrow to the right
of the instrument name.
3. On the context menu, select Delete Instrument.
4. Click OK.
RESULT
The instrument is deleted from the player.
Groups
A group is a collection of players.
In most scores, there is a single group, for example a choir, an orchestra, or a band. In
some works for large forces, there may be multiple groups, for example, in Britten's “War
Requiem”, which has three distinct groups, or Walton's “Belshazzar's Feast” which requires
two separate off-stage brass groups. These make it necessary to be able to assign players to
these groups for the purposes of, among other things, properly bracketing and labeling their
staves in the conductor's score.
Adding Groups
You can organize players in groups.
PREREQUISITE
The Players panel must be open.
PROCEDURE
1. Optional: Select the players that you want to include in the group.
2. On the Players panel at the bottom, click Add Group .
RESULT
If you selected one or more players, they are added to the group. If no player was selected,
an empty group is added to the Players panel.
65
Page 66

Setup Mode
Groups
RELATED LINKS
Adding Players to Groups on page 66
Renaming Groups
You can change the name of a group.
PROCEDURE
1. On the Players panel, double-click the name of the group.
2. Enter the new name.
3. Press Enter.
Deleting Groups
You can delete groups of players.
NOTE
If you delete a group, you can keep the players that you added to the group.
PROCEDURE
1. On the Players panel, select the group that you want to delete.
2. Do one of the following:
•
Click Delete
•
Press Delete.
3. Do one of the following:
•
To keep the players, click Keep Players.
•
To delete the group including the players, click Delete Players.
Adding Players to Groups
You can add existing or new players to groups.
PREREQUISITE
You have added at least one player, one ensemble, or one group.
PROCEDURE
• On the Players panel, do one of the following:
•
Select one or more players and click Add Group.
•
Select a group, and click Add Solo Player, Add Section Player, or Add Ensemble.
RESULT
If you clicked Add Group, a new group is added for the selected players. If you clicked Add
Solo Player, Add Section Player or Add Ensemble, a new player or ensemble is added to the
selected group.
66
Page 67

Setup Mode
Flows
RELATED LINKS
Adding Groups on page 65
Adding Solo Players on page 59
Adding Section Players on page 60
Moving Players between Groups
You can move players from one group to another.
PROCEDURE
1. On the Players panel, select one or more players that you want to move to another
group.
2. Click and drag the selected players into the group and release the mouse at the
position where you want to add the players.
RESULT
The players are moved to the group.
Removing Players from Groups
You can remove players from groups.
PROCEDURE
1. On the Players panel, select the players that you want to remove from a group.
2. Click and drag the selected players out of the group and release the mouse button.
Flows
Flows are separate spans of music within your project, for example, movements or songs.
Every project contains at least one flow, and by default, every layout includes the music from
every flow in your project. If you create a new flow in Dorico, the following happens:
•
All music that you write for the new flow is automatically included in the existing full
score and instrumental part layouts. You can exclude any flow from any layout by
deactivating the respective flow card.
•
All players are added to the new flow. You can exclude players from the flow by
deactivating the respective player card.
IMPORTANT
If you exclude a player from a flow, the notes that you may have already input for that
player in that flow are deleted.
RELATED LINKS
Flows on page 29
Flows Panel on page 57
67
Page 68

Setup Mode
Flows
Creating Flows
If you need more than one flow in your project, you can create a new flow.
PROCEDURE
• On the Flows panel, click Add Flow .
RESULT
All existing players are assigned to the new flow. The new flow is automatically added to all
existing full score and part layouts.
Renaming Flows
You can change the name of a flow.
Whenever you add a flow to project, the default name of a flow is Flow plus an incremental
number. You can rename the flow.
PROCEDURE
1. Do one of the following:
2. Enter the new name
3. Press Enter.
Deleting Flows
You can delete flows that you no longer need.
IMPORTANT
If you delete flows, all music for all instruments belonging to all players for the flows is also
deleted.
PROCEDURE
1. On the Flows panel, select one or multiple flows.
2. Do one of the following:
•
Double-click the name of the flow.
•
Right-click the name of the flow and from the context menu, select Rename.
•
Click Delete Flow .
•
Press Delete.
•
Right-click the flow and select Delete Flow.
68
Page 69

Setup Mode
Layouts
Excluding Flows from Layouts
By default, every flow that you create is added to existing full score layouts or instrumental
part layouts. You can exclude flows that you do not want to show in a layout.
PROCEDURE
1. On the Layouts panel, select a layout.
2. On the Flows panel, deactivate the checkbox of the flow card for the flow that you want
to exclude.
RESULT
The flow is excluded from the layout.
Changing the Notation Options for Flows
You can change the notation options for one or several flows.
PROCEDURE
Layouts
1. Optional: On the Flows panel, select a flow or all flows.
2. Click Notation Options .
3. Optional: In the Notation Options dialog, you can change your flow selection if
necessary. Do one of the following:
•
Select one or several flows from the Flows list.
•
Click Select All.
4. From the Select a Category pop-up menu, select a category.
5. In the area on the right, make your changes.
6. Click Apply.
Layouts define how the music in a flow is presented.
Dorico provides three types of layouts:
•
Full score
A full score layout includes by default all players and all flows in your project. You can
remove players and flows that you do not need.
•
Instrumental part
An instrumental part layout is automatically created when you add a player to your
project. You can add further players to the instrumental part layout. You can also
create empty instrumental part layouts and add players. By default, an instrumental
part layout contains all flows. You can exclude flows that you do not need.
•
Custom score
A custom score layout initially does not contain any players or flows. This allows you
to create your score manually and to add, for example, a layout that contains only one
flow instead of all flows.
69
Page 70

Setup Mode
Layouts
RELATED LINKS
Excluding Flows from Layouts on page 69
Excluding Players from Full Score Layouts on page 62
Creating Layouts
You can create multiple layouts for full scores and instrumental parts. You can also create
multiple custom score layouts.
PROCEDURE
• At the bottom of the Layouts panel, select one of the following layout types:
•
•
•
RESULT
The layout is added to the list of layouts on the Layouts panel.
Add Full Score Layout
Add Instrumental Part Layout
Add Custom Score Layout
AFTER COMPLETING THIS TASK
You can assign players and flows to your layout.
Renaming Layouts
You can change the name of a layout.
If you add an instrumental part layout to project, its default name is Empty part. The default
names of full score and custom score layouts are Full score and Custom score. If you add
several layouts, an incremental number is added to the default names.
PROCEDURE
1. Do one of the following:
•
•
2. Enter the new name
3. Press Enter.
Switching Layouts
Double-click the name of the layout.
Right-click the name of the layout and from the context menu, select Rename.
If you have created several layouts, you can switch to another layout in every mode.
NOTE
You can only switch between layouts to which players are assigned.
PROCEDURE
• In the middle of the toolbar, from the workspace controls, click Select Layout and
select one of the available layouts.
70
Page 71

Setup Mode
Layouts
RESULT
The selected layout opens in the music area.
Sorting Layouts
You can sort selected layouts on the Layouts panel.
PROCEDURE
1. Click a layout card and keep the mouse button pressed.
2. Drag the layout card to a different position on the panel.
3. Release the mouse button.
RESULT
The layout is inserted at the selected position.
Deleting Layouts
You can delete layouts from the list of layouts on the Layouts panel.
PROCEDURE
1. Select the layout that you want to delete.
2. Do one of the following:
•
•
3. Right-click the layout and select Delete Layout.
Layout Options
The Layout Options dialog provides multiple options that allow you to make changes that
affect the way the notation is laid out on pages of each layout.
You can change the physical properties of the layout, such as page size, staff size, or
margins, and the notation, such as note spacing or staff labeling.
Click Delete Layout .
Press Delete.
NOTE
• For global changes that affect all layouts in your project, you can also make changes in
the engraving options.
• You can save all options that you set in the layout options as default values for new
projects by activating Save as defaults for and selecting a layout type.
71
Page 72

Setup Mode
Layouts
To open the Layout Options dialog, do one of the following:
• At the bottom of the Layouts panel, click Layout Options .
• Select Setup> Layout Options.
• On the Layouts panel, right-click an instrumental part or a full score, and from the
context menu, select Layout Options.
Layout Options
The Layout Options dialog features a pop-up menu that allows you to select a category. Every
category provides subcategories with options that are displayed in the area to the right. A
Layouts section below the selectable categories lists all the layouts that are available in your
project.
If you have not specified for which layout you want to make changes, the Layouts list and
further options at the bottom of the Layouts list allow you to select one, multiple, groups
of layouts, or all layouts. To select layouts, you can also use the keys on your computer
keyboard:
• To select individual layouts, Ctrl/Cmd-click the layouts in the list.
• To select all layouts, Shift-click the first and the last layout in the list.
RELATED LINKS
Engraving Options on page 143
72
Page 73

Setup Mode
Layouts
Page Setup
Bar Numbers
Note Spacing
The Page Setup category in the layout options allows you to determine basic page properties
which affect the way the notation is arranged on a page.
The Bar Numbers category in the layout options allows you to determine how bar numbers
are displayed and positioned in each layout.
The Note Spacing category in the layout options allows you to determine options that affect
the way notes are aligned on staves.
TIP
Justifications of a final system in a flow that are determined by a percentage value are
activated by default. To deactivate this, deactivate Only justify final system in flow when more
than.
Players
The Players category in the layout options allows you to determine options that affect the
way music is displayed for individual players.
Vertical Spacing
The Vertical Spacing category in the layout options allows you to determine distances
between staves and systems.
73
Page 74

In Write mode, you can create your music. You can input notes and insert notations into your
score.
Project Window in Write Mode
The project window in Write mode contains the default toolbar, the music area, and the
status bar. It provides toolboxes and panels with the tools and functions that you need to
write your music.
To open Write mode, you have the following options:
• Select Write on the toolbar.
• Select Window> Write.
Write Mode
Toolboxes and panels in Write mode
The following panels and toolboxes are available:
1. Notes toolbox
Contains all tools that allow you to modify the note input.
2. Notes panel
74
Page 75

Write Mode
Project Window in Write Mode
Provides the note types, accidentals, slur, and articulations that are most commonly
used during note input.
3. Properties panel
Contains quick access properties that are required to make specific modifications to
the notation.
4. Notations panel
Contains all the notation items that you can use for your music.
5. Notations toolbox
Allows you to select tools that determine which notation items are shown in the
notations panel.
Notes Toolbox
The tools in the notes toolbox allow you to modify the note input.
Dotted Notes
Adds/Removes rhythm dots to notes or chords.
Rests
Allows you to input rests of the duration that you select on the notes panel.
Chords
Allows you to add several notes at the same rhythmic position in order to build
a chord. This function prevents the caret from advancing automatically after
inputting a note.
Tuplets
Inserts a triplet bracket and the respective number of rests at the specified
rhythmic position. If the notes are beamed, no brackets are used. To use a
different tuplet, press the respective key command on your computer keyboard.
Grace Notes
Allows you to input grace notes at the current rhythmic position.
Insert
Inserts music instead of overwriting.
Lock to Duration
75
Page 76

Write Mode
Project Window in Write Mode
Uses the duration of existing music for note input via MIDI or computer keyboard.
This tool helps you to maintain the duration of notes while you change their
pitches.
Force Duration
Always creates the explicit duration that you have specified on the notes panel.
For example, you can activate Force Duration to force the input of a dotted
quarter note on the second quarter beat of 4/4, where Dorico, by default, splits
the note with a tie.
IMPORTANT
Any time signature changes or other edits to your music may lead to unexpected
results.
If you activated Force Duration during input, you can remove the restrictions on
how Dorico notates the music by selecting the affected passage of music and
selecting Edit> Reset Appearance.
Tie
Select
RELATED LINKS
Activating Rhythm Dots on page 88
Rests on page 85
Inputting Chords on page 85
Adding Tuplets on page 89
Inputting Grace Notes on page 90
Activating/Deactivating Mouse Input on page 82
Notes Panel
Ties the note to be input to the previous note of the same pitch. When editing
notes, you can use this tool to tie together notes in different voices or to tie grace
notes to rhythmic notes.
To activate/deactivate Tie, press T.
Activates/Deactivates mouse input.
The notes panel contains note durations, accidentals, slur, and articulations for inputting
notes.
To show/hide the notes panel, click the disclosure arrow / below the notes toolbox.
76
Page 77

Write Mode
Project Window in Write Mode
The upper part of the notes panel provides the note durations that you can input. Not all the
available note durations are visible by default. To see all note durations, click Show/Hide All
Notes / at the top or bottom of the note durations list.
In the middle part of the notes panel, you can activate accidentals and slurs.
At the bottom part of the notes panel, you can activate articulations.
Properties Panel
The properties panel in Write mode contains quick access properties that allow you to
change notes and notations during note input.
NOTE
If you need to change parts of notations, for example, the bow of a tied note, switch to
Engrave mode.
To show/hide the properties panel, click the disclosure arrow / below the notes toolbox.
Notes and Rests section on the properties panel in Write mode
RELATED LINKS
Changing the Properties of Individual Items in Write Mode on page 105
77
Page 78

Write Mode
Project Window in Write Mode
Notations Panel
The notations panel contains the notation items for your music.
Depending on the tool that you select in the notations toolbox, the choice of usable notations
in the notations panel changes.
To show/hide the notations panel, click the disclosure arrow below the notations toolbox.
Notations Toolbox
The tools in the notations toolbox allow you to determine what notation items are shown in
the notations panel.
Clefs
Opens sections in the notations panel that allow you to select different clefs and
octave lines.
Key Signatures, Tuning Systems, and Accidentals
Opens sections in the notations panel that allow you to specify and select key
signatures, and to select tuning systems and several types of accidentals.
Time Signatures (Meter)
Opens sections in the notations panel that allow you to specify and select
different time signatures.
Tempo
Opens sections in the notations panel that allow you specify and select different
tempos and tempo changes.
Dynamics
Opens sections in the notations panel that allow you to specify and select
different dynamics.
Ornaments
Opens sections in the notations panel that allow you to select different
ornaments and glissando lines.
Tremolos
Opens a section in the notations panel that allows you to select and remove
different single-note and multi-note tremolos.
78
Page 79

Write Mode
Note Input
Bars and Barlines
Opens sections in the notations panel that allow you to insert bars and to create
barlines.
Holds and Pauses
Opens sections in the notations panel that allow you to insert different types of
fermatas, breath marks, and caesuras.
Playing Techniques
Opens sections in the notations panel that allow you to insert playing techniques
for various instrument groups.
Rehearsal Marks
Text
Lyrics
RELATED LINKS
Lyrics on page 97
Note Input
There are several ways to input notes.
To input notes, you can use any of the following methods, and switch between them at any
time:
•
•
•
Inserts a rehearsal mark at the selected note.
Opens a popover that allows you to insert text at the selected rhythmic position.
Opens a popover above the selected note on the staff. This popover allows you to
input lyrics.
MIDI keyboard
Computer keyboard
Mouse or trackpad
TIP
A MIDI keyboard is the fastest way to input notes.
The procedures that you come across in this chapter are for active note input. Information
relating to note editing or the options that influence note input are handled in the notation
reference. In some cases, though, hints to editing processes may be given in this chapter.
79
Page 80

Write Mode
Note Input
RELATED LINKS
Notation Reference on page 167
Introduction to Inputting and Editing
Dorico distinguishes the processes for inputting and editing music.
Whenever you see the caret, you are inputting new music. When you do not see the caret, you
are editing existing music.
You can switch back and forth between inputting and editing.
We recommend that you spend a moment to understand the difference between how Dorico
behaves if the caret is shown and if it is not. In the latter case, all editing functions operate
on the items that you have selected in the music area.
Differentiating between Inputting and Editing Your Music
Depending on whether you input or you edit notes, the tools in the toolboxes and the panels
behave differently.
To input notes, the caret must be activated.
If the caret is activated, selecting tools or items in the notes toolbox and the notes panel
affect the note or chord that you are about to input: you specify the duration, rhythm dot,
accidentals, and articulations. Then you specify the pitch by clicking the note into the score,
by pressing the letter name of the note on your computer keyboard, or by playing the note or
chord on your MIDI keyboard.
If no notes or chords are selected in the music area and you select a duration from the notes
panel, either by pressing its key command or by clicking it with the mouse, mouse input is
activated. If you move the mouse pointer over the music, a shadow note is displayed that
indicates where the note will be input if you click.
To edit notes, one or more items must be selected in the music area. If one or more notes or
chords are selected in the music area, the notes toolbox and notes panel affect the selected
notes and chords: if you select a new duration from the notes panel, either by pressing its
key command or by clicking it with the mouse, the durations of the selected notes and chords
are all edited to match the chosen duration.
RELATED LINKS
Caret on page 82
Positioning of New Items
The input position of new items depends on whether you input or edit music.
When you input music and the caret is activated, Dorico creates any note or notation at the
caret's rhythmic position.
When you edit music and one or more notes or chords are selected in the music area, Dorico
creates a new item at the position of the first selected item in the music area. If there is no
selection, the mouse pointer is loaded with the new item. The item is then created at the
location where you click.
80
Page 81

Write Mode
Note Input
EXAMPLE
Adding a Time Signature in Front of a Selected Note
If you want to add a 3/4 time signature in front of a specific note, you have the following
options: you can select the note, press Shift-M, enter 3/4, and press Enter. If no note is
selected, select Time Signature (Metre) in the notations toolbox. Then select 3/4 from the
Common section, move the mouse pointer to the position where you want to insert the time
signature, and click.
Selecting/Deselecting Notes or Notations
You can edit your music with or without selecting notes or notations in the toolboxes or
panels.
If you select notes or notations in the toolboxes, they are inserted at the selected rhythmic
position in the music area. You can also click notations on the notations panel and position
them on a staff.
To select notes or notations in the music area, you can do one of the following:
• Click a note or notation.
• Drag a marquee around multiple notes or notations.
To deselect any items, click anywhere outside the staves within the music area or press Ctrl/
Cmd-D.
RELATED LINKS
Selecting Multiple Notes and Notations on page 42
Starting Note Input
Dorico provides several methods to start inputting notes.
NOTE
You must specify the duration, accidentals, and articulations before specifying the pitch. This
applies to all input methods.
You can use any of the following methods to start note input:
• Double-click the rhythmic position on the staff at which you want to begin inputting
notes.
• Select a note, chord, rest, or other item at the rhythmic position on the staff at which
you want to begin inputting notes, and press Shift-N or Return.
• If nothing is selected or if the caret is already visible, select a note duration on the
notes panel, or press its key command. This loads the mouse pointer with the chosen
duration. Click at the rhythmic position and pitch on the staff to insert that note
duration.
RELATED LINKS
Caret on page 82
Key Commands in Dorico on page 7
81
Page 82

Write Mode
Note Input
Activating/Deactivating Mouse Input
You can activate/deactivate mouse input.
PROCEDURE
• In the notes toolbox, do one of the following:
•
To activate mouse input, deactivate Select .
•
To deactivate mouse input, activate Select .
Activating/Deactivating Mouse Input for All Projects
You can activate/deactivate mouse input for all projects. This changes the default setting. You
can still activate/deactivate mouse input for an individual session.
PROCEDURE
1. Click Edit> Preferences.
2. In the Preferences dialog, select the General section.
3. Activate/Deactivate Enable note input using the mouse.
4. Click Apply.
Caret
The caret shows the rhythmic position at which notes, chords or notation items can be input.
A caret is a mark that is commonly used in proofreading of written text to denote the position
at which something should be inserted or added, for example, a missing letter or a word. In
software, the caret shows where something is inserted: you may also know the caret by the
names insertion point or cursor.
In Dorico, the caret is displayed as a vertical line that extends above and below the staff. If
you are inputting notes, the caret advances to the next rhythmic position automatically. If you
are inputting chords, the caret does not move on its own, and you must move it to the next
rhythmic position.
The caret changes its look depending on the tool or on the number of voices that you are
using:
Insert
The caret shows V and inverted V shapes at the top and bottom.
Chords
The caret shows a plus symbol on the left at the top.
Lock to Duration
The caret line is dashed.
Grace Notes
The caret is smaller than the default caret.
82
Page 83

Write Mode
Note Input
Voices
If you input multiple voices, the caret shows a plus symbol on the left at the
bottom, the number of the voice that you are about to input, and if the input notes
will have up-stems or down-stems.
Activating/Deactivating the Caret
If you activate the caret, you can write music. If you deactivate the caret, you can edit your
music.
To activate the caret, you have the following options:
• Select a note or rest and press Shift-N or Return.
• Double-click the rhythmic position on the staff at which you want to begin inputting
notes.
To deactivate the caret, you have the following options:
• Press Esc.
• Double-click anywhere outside the staves within the music area.
Moving the Caret Manually
When inputting chords, the caret does not move automatically. Therefore, you must move it
manually.
To move the caret, you have the following options:
• Use the Left Arrow and Right Arrow keys to move the caret to the next or previous
rhythmic position. If you hold down Ctrl/Cmd while using the arrow keys, you can move
the caret to the next or previous bar.
• Use the Up Arrow and Down Arrow keys to move the caret to the staff above and the
staff below. If you hold down Ctrl/Cmd while using the arrow keys, you can move the
caret to the top or bottom staff in the system.
RELATED LINKS
Inputting Chords on page 85
Rhythmic Grid
The rhythmic grid shows the rhythmic divisions and subdivisions of the bar in which the caret
is located.
Rhythmic grid for eighth notes
The rhythmic grid is shown above the top staff, on which the caret is visible. Longer lines
indicate beat divisions, while shorter lines indicate subdivisions of the beat.
The rhythmic grid helps you to identify the following:
•
The exact input position when using the caret or the mouse
•
The amount by which the caret moves
83
Page 84

Write Mode
Note Input
•
The amount by which the duration of a note or of a selection of notes is modified
RELATED LINKS
Caret on page 82
Moving the Caret Manually on page 83
Changing the Rhythmic Grid Resolution
You can change the resolution of the rhythmic grid.
The default grid resolution is set to eighth notes.
PROCEDURE
• Do one of the following:
•
For a coarser grid resolution, select Write> Rhythmic Grid> Decrease Grid
Resolution or press the respective key command.
•
For a finer grid resolution, select Write> Rhythmic Grid> Increase Grid
Resolution or press the respective key command.
Alternatively, you can do one of the following:
RELATED LINKS
Status Bar on page 41
Inputting Notes
When inputting notes, you must set the duration before you specify the pitch. Optionally, you
can also add accidentals and articulations before you specify the pitch.
PROCEDURE
1. Choose one of the methods to start note input.
2. Select a duration from the notes panel.
3. If required, activate a rhythm dot.
4. If required, add an accidental.
5. If required, add an articulation.
6. Do one of the following:
•
Select a grid resolution from the Rhythmic Grid Resolution selector on the
status bar.
•
Select Write> Rhythmic Grid and then select one of the available beat divisions.
•
Input the pitch with the MIDI keyboard.
•
On the computer keyboard, press one of the key commands for the different
pitches: A, B, C, D, E, F, G.
•
Click at the rhythmic position and pitch on the staff to insert the note.
RELATED LINKS
Starting Note Input on page 81
Selecting Durations on page 87
Rests on page 85
84
Page 85

Write Mode
Note Input
Activating Rhythm Dots on page 88
Adding Accidentals on page 88
Adding Articulations on page 89
Inputting Notes for Players with Multiple Instruments
Note input for players who play multiple instruments follows the rules that apply for the
default note input. To see the notes that you input for the different instruments, you can start
note input in galley view.
PREREQUISITE
You have added a solo player who plays at least two instruments.
PROCEDURE
1. In the status bar, from the view selector, select Galley View.
2. Input your notes for all instruments, one after the other.
RELATED LINKS
View Types on page 43
Inputting Chords
NOTE
When you input chords, you must advance the caret manually.
PROCEDURE
1. To activate chord input, do one of the following:
•
•
2. Input the chord notes.
3. Advance the caret to the next note position.
4. Optional: To deactivate chord input, press Q or deactivate Chords.
RELATED LINKS
Moving the Caret Manually on page 83
Rests
Dorico provides several ways to input rests.
Press Q.
In the notes toolbox, activate Chords .
You have the following options:
• While inputting notes, you can press Space or Right Arrow. These key commands move
the caret, and any gaps between notes are automatically filled with rests. You can
select a different duration on the notes panel.
85
Page 86

Write Mode
Note Input
• If you activate Rests in the notes toolbox or press , (comma), only rests instead
of notes are input into the score. Dorico automatically discerns which rests are
appropriate according to the time signature that you selected.
• If you activate Rests and Force Duration in the notes toolbox, or press , (comma)
and O, only rests of the duration that you selected on the notes panel are input into the
score.
Inputting Rests with the Rests Tool
You can input only rests if you activate the Rests tool.
PROCEDURE
1. In the notes toolbox, activate Rests .
2. Optional: On the notes panel, select a duration.
3. Input a rest by doing one of the following:
•
Play a note on the MIDI keyboard.
•
Press a key from A to G on your computer keyboard.
RESULT
A rest of the selected duration is added to the score. If you add more than one rest, Dorico
automatically combines the rests to a rest of a different duration that makes sense in
combination with the input notes.
Inputting Rests of a Specified Duration
You can force Dorico to input rests of a specified duration.
PROCEDURE
1. Do one of the following:
•
In the notes toolbox, activate Rests and Force Duration .
•
Press , (comma) and O.
2. On the notes panel, select the duration.
3. Press any key on your MIDI or computer keyboard.
RESULT
The rest of the selected duration is input into your score.
Voices
You can input multiple voices in Dorico.
By default, each staff of an instrument only uses a single voice, but you can create more
voices if necessary.
Each voice has a nominal stem direction which determines the stem direction of notes where
multiple voices are present on the same staff. The voice that is created by default for each
staff of each instrument is an up-stem voice. When you start a new voice, you can choose
whether it should be nominally up-stem or down-stem.
86
Page 87

Write Mode
Note Input
Once you have created a voice somewhere on a staff, you can input notes into that voice
anywhere else on the same staff.
Inputting New Voices
You can input multiple voices into your score.
PREREQUISITE
You have started note input. The caret is activated.
PROCEDURE
1. Move the caret to the rhythmic position where you want to start inputting a voice.
2. Press Shift-V.
The caret shows a plus symbol and a note with a specific stem direction. If you have
already input two voices, the caret additionally shows a number to indicate which voice
you are going to input next.
3. Optional: Press Shift-V again to change the stem direction of the voice.
4. Input notes for the voice.
Re-using Existing Voices
You can re-use existing voices to change or input notes.
PREREQUISITE
You have started note input. The caret is activated.
PROCEDURE
1. Move the caret to the rhythmic position where you want to start inputting into an
existing voice.
2. Press V to cycle through the existing voices.
The caret shows an up-stem or a down-stem note and additionally a number if you
have created several voices.
3. Input notes for the voice.
IMPORTANT
Existing notes in the voice are overwritten.
Selecting Durations
You can select durations either from the notes panel or by using one of the assigned key
commands.
PREREQUISITE
If you want to change which durations are listed, click Show/Hide All Notes / at the top
or bottom of the notes list.
87
Page 88

Write Mode
Note Input
PROCEDURE
• Do one of the following:
•
Activate one of the durations on the notes panel.
•
Press one of the respective key commands.
RELATED LINKS
Notes Panel on page 76
Key Commands in Dorico on page 7
Changing the Duration of Selected Notes
You can shorten or lengthen the duration of selected notes.
PROCEDURE
1. Select one or more notes.
2. Activate a different duration on the notes panel or press its key command.
NOTE
Alternatively, you can press Shift-Alt-Left Arrow/Right Arrow to shorten or lengthen
the notes by the amount determined by the resolution of the rhythmic grid. If you want
to change the grid resolution, you can do one of the following:
•
Select a grid resolution from the Rhythmic Grid Resolution selector on the
status bar.
•
Select Write> Rhythmic Grid and select a grid resolution.
Activating Rhythm Dots
The Dotted Notes tool allows you to add rhythm dots to notes.
PROCEDURE
1. Do one of the following:
•
Press . (dot).
•
In the notes toolbox, activate Dotted Notes .
NOTE
The tool remains activated until you either select a different note duration or
deactivate it.
2. Optional: Press Alt-. (dot) to increase the number of input dots.
Adding Accidentals
You can add basic accidentals to individual notes during note input.
PROCEDURE
1. To add an accidental, do one of the following:
88
Page 89

Write Mode
Note Input
•
On the notes panel, click Natural , Flat , or Sharp .
•
In Write mode, on the computer keyboard, press the respective key command.
2. Input a note.
RELATED LINKS
Key Commands in Dorico on page 7
Adding Articulations
You can add articulations to notes or chords during note input.
PROCEDURE
1. To add an articulation, do one of the following:
•
On the keyboard, press the respective key command for a duration.
•
On the notes panel, activate one of the articulations buttons.
IMPORTANT
You can add an articulation of duration and an articulation of force to the same note
or chord. If you add a second articulation of the same type to a note or chord, the new
articulation replaces the existing one.
2. Input a note.
Adding Tuplets
NOTE
To add a triplet, you can also click Tuplets .
PROCEDURE
1. Activate the tuplets function by pressing the respective key command on your
2. Add the ratio for the tuplet, for example 4:6.
3. Press Enter.
4. Input notes.
5. Optional: Deactivate tuplet input by pressing the respective key command on your
computer keyboard.
NOTE
To add a triplet, you can enter either 3:2 or 3.
computer keyboard.
RELATED LINKS
Key Commands in Dorico on page 7
89
Page 90

Write Mode
Note Input
Inputting Grace Notes
The Grace Notes tool allows you to input grace notes instead of notes. You can input slashed
and unslashed grace notes.
PROCEDURE
1. Do one of the following:
•
In the notes toolbox, activate Grace Notes .
•
Press the respective key command.
2. On the notes panel, select a duration.
3. Optional: Press the respective key command in your language to change between
slashed and unslashed grace notes.
NOTE
The type of grace note that you input is displayed within the tool icon in the notes
toolbox. You can change the grace note type after note input.
4. Input the grace note.
5. Deactivate the Grace Notes tool to continue note input.
RELATED LINKS
Changing the Grace Note Type on page 90
Key Commands in Dorico on page 7
Changing the Grace Note Type
When inputting grace notes, slashed grace notes are input by default. If you did not switch
between the different grace note types during note input, you can change the grace note type
after note input.
PROCEDURE
1. Select the grace note.
2. Open the properties panel.
3. On the properties panel, in the Grace Notes section, do one of the following:
•
Activate Unslashed to change the grace note to an unslashed grace note.
•
Activate Slashed to change the grace note to a slashed grace note.
Adding Time Signatures
When you add time signatures to your project, Dorico adds the barlines automatically at the
correct places.
PROCEDURE
1. Select the first note or rest on the staff.
2. Do one of the following:
•
Press Shift-M.
90
Page 91

Write Mode
Note Input
This opens a small popover on top of the staff.
Enter a typical time signature, such as 3/4 and press Enter.
•
In the notations toolbox, select Time Signatures (Meter) .
On the notations panel, select one of the time signatures in the Common section
or create a custom time signature in the Create Time Signature section.
RELATED LINKS
Creating Custom Time Signatures on page 91
Adding Time Signatures with a Pickup
You can define a pickup, also known as anacrusis or upbeat, in combination with time
signatures.
PROCEDURE
1. Select the first note or rest on the staff.
2. Press Shift-M.
3. In the popover, enter a time signature, press , and enter the number of notes that you
want to input as pickup, for example 3/4,1.
RESULT
When you start inputting notes, a barline is inserted automatically after the pickup. All the
notes that follow, follow the set time signature.
RELATED LINKS
Creating Custom Time Signatures on page 91
Creating Custom Time Signatures
You can create custom time signatures.
PROCEDURE
1. In the notations toolbox, select Time Signatures (Meter).
2. On the notations panel, open the Create Time Signature section.
3. From the upper pop-up menu, select the type of time signature that you want to create.
4. In the top and bottom rows of input fields below the selected time signature, which
show a sample entry for a 4/4 time signature, you have the following options:
•
To create a regular time signature, input the numerator into the first top input
field and the denominator into the first bottom input field.
•
To create interchangeable, aggregate, or alternating time signatures, start
inputting the numerators and denominators into the leftmost top and bottom
input fields and continue input further to the right.
NOTE
You can use Tab/Shift-Tab to move back and forth between the input fields.
The time signature display at the bottom of the section shows what will be input in the
score.
91
Page 92

Write Mode
Note Input
5. Optional: Activate Pickup bar of and from the pop-up menu, select the pickup, also
known as anacrusis or upbeat, that you want to use.
6. Click the displayed time signature.
7. Optional: If you did not select a note or chord, you can move the mouse pointer to the
position where you want to insert the time signature and click.
RESULT
The time signature is inserted. All the notes that follow, follow the set time signature.
RELATED LINKS
Adding Custom Time Signatures Using the Popover on page 92
Adding Custom Time Signatures Using the Popover
In the popover on top of the staff, you can enter different custom time signatures by using
different key combinations on your computer keyboard.
Each of the custom time signatures that you can create on the notes panel in the Create
Time Signature section, can also be created by using the popover (Shift-M) and the keys on
your computer keyboard, as described in the following examples:
NOTE
Default time signatures are entered as follows: numerator, slash, denominator, for example:
3/8.
Time Signatures with Beat Groupings
Enter the required numerators and plus symbols, then a slash and the denominator without
empty spaces. If you surround the numerators with brackets, these are added together and
are shown as one number.
EXAMPLE
Time Signatures with Beat Groupings
2+2+2+3/8 creates the following time signature:
Time Signatures with Beat Groupings That Are Added Together
[2+2+2+3]/8 creates the following time signature:
Alternating Time Signatures
Enter a time signature, add an empty space, a plus symbol, an empty space, and then an
alternate time signature.
92
Page 93

Write Mode
Note Input
EXAMPLE
3/8 + 2/8 creates the following time signature:
Interchangeable Time Signatures
Enter a time signature, an empty space, and then another time signature in parentheses.
EXAMPLE
3/8 (2/8) creates the following time signature:
Text
Aggregate Time Signatures
Enter a time signature, an empty space, a vertical bar, an empty space, and then another
time signature. The resulting displayed time signature is visually identical with the
alternating time signature, but it creates bars that have a length of both time signatures
added together. The bars are subdivided by a dashed barline where the first bar normally
ends.
EXAMPLE
3/8 | 2/8 creates the following time signature:
The bars are subdivided as follows:
Dorico allows you to add text that is attached to a particular position on a staff.
NOTE
To insert text that is independent of rhythmic positions and that is attached to a particular
page, you can add text frames on master pages in Engrave mode.
Any text that you add to the score is automatically added above the staff to which it is
attached, in the default paragraph style and two and a half spaces from the outside of the
staves.
93
Page 94

Write Mode
Note Input
Text Editor
RELATED LINKS
Adding Text on page 96
Changing the Position of Added Text on page 96
Text Frames on page 129
The text editor allows you to add and format text.
The text editor opens in the following circumstances:
• You add or change text that is attached to a staff.
• You enter text within a text frame.
The text editor provides the following options:
Paragraph Style
Determines the appearance and alignment of the text for a whole paragraph.
NOTE
Text that is attached to a staff is always treated as a single paragraph.
Character Style
Determines the appearance of marked text.
NOTE
If you use one of the defined character styles in the text editor, the appearance
that is defined by the selected paragraph style is overridden.
Font
Allows you to change the font family of marked text.
Font Style
Allows you to change the font style of marked text.
Font Size
Allows you to change the size of marked text.
Font Stretch
Allows you to make marked text wider or narrower.
Baseline Shift
Allows you to gradually shift the baseline of marked text up or down.
Letter Spacing
Allows you to increase/decrease the space between the characters of marked
text.
Word Spacing
Allows you to increase/decrease the space between the words of marked text.
94
Page 95

Write Mode
Note Input
Foreground Color
Allows you to change the foreground color of marked text.
Background Color
Allows you to change the background color of marked text.
Align Left
Allows you to align text to the left relative to the rhythmic position of the text in
the score. For text in a text frame, the text is aligned along the left margin of a
text frame.
Align Center
Allows you to centers the text relative to the rhythmic position of the text in the
score. For text in a text frame, the text is centered between the left and right
margins of a text frame.
Align Right
Allows you to align text to the right relative to the rhythmic position of the text in
the score. For text in a text frame, the text is aligned along the right margin of a
text frame.
Justify
For text in a text frame, the space between words is adjusted so that each line
spans the full width of a text frame.
Underline
Allows you underline selected text.
Overline
Allows you to overline selected text.
Strikethrough
Allows you to strike through selected text.
Superscript
Allows you to position selected text higher than the text on the baseline.
Subscript
Allows you to position selected text lower than the text on the baseline.
RELATED LINKS
Adding Text on page 96
Entering Text in Text Frames on page 129
Paragraph Styles on page 132
Character Styles on page 135
95
Page 96

Write Mode
Note Input
Adding Text
You can add text at a specified rhythmic position in the score.
PROCEDURE
1. Do one of the following:
•
Activate the caret and move it to the position where you want to add text.
•
Select a note or notation to determine a position.
2. Do one of the following:
Click Text .
•
•
Press Shift-X.
•
Select Write> Create Text.
The text editor opens.
3. Enter text.
4. Optional: Format the text using the text editor options.
5. Close the text editor by doing one of the following:
•
Click anywhere outside the text editor.
•
Press Esc.
•
Press Ctrl/Cmd-Enter.
Inserting Line Breaks
You can insert line breaks while entering text into the score.
NOTE
Inserting line breaks only adds new lines, but no new paragraphs.
PROCEDURE
1. Enter text.
2. Press Enter.
RESULT
A new line is inserted. The cursor jumps to the beginning of the new line.
Changing the Position of Added Text
You can position added text above or below the staves.
PREREQUISITE
The text editor is closed.
PROCEDURE
1. Select the text.
96
Page 97

Write Mode
Note Input
Lyrics
2. On the properties panel, in the Text section, change the Position option.
RESULT
The text changes its position relative to the staff position where it was created.
AFTER COMPLETING THIS TASK
If you need to move the text to a specific position, you can drag the text manually in Engrave
mode.
Dorico allows you to input multiple lines of lyrics, chorus lyrics, and translations.
You can input lyrics above or below the staves. Using a popover and a set of key commands
you can input lyrics line by line and syllable by syllable.
All lyrics are automatically horizontally aligned with the notes to which they belong. Multiple
lines of lyrics are automatically vertically aligned.
You can designate whole lines or a selection of lyrics as a chorus line. You can also enter
the chorus directly using the popover. In the popover, the chorus is marked with the letter
“c”. In the score, the chorus is written in italics without a verse number. If the chorus follows
several lines of lyrics on the same staff, the chorus is centered vertically relative to the lines
of lyrics.
You can designate any existing lines, a selection of lyrics, or a chorus line as a translation.
You can also enter translations directly using the popover. In the popover, the translation
is marked with a verse number or a “c” and an asterisk (*). In the score, the translation is
written in italics. If you have multiple lines of lyrics, every translation line can be positioned
below a line of lyrics.
If you need to make changes to the position of lyrics or if you want to activate/deactivate
verse numbers, Dorico provides several options in the properties panel or in the engraving
options that allow you to either change selected syllables, whole lines of lyrics, or to make
global changes to how lines of lyrics are aligned.
RELATED LINKS
Lyrics on page 185
Lyrics Section on page 110
Key Commands for Inputting Lyrics
Dorico provides several key commands that help you to input lyrics.
The following key commands are available by default:
Lyrics Key Commands
Task Key Command
Add lyrics. Shift-L
97
Page 98

Write Mode
Note Input
Task Key Command
NOTE
Only available if you selected a note, a rest,
or a syllable.
Finish the current word and move to the next
note or chord.
Finish the current syllable and move to the
next note or chord.
Add an extender line to indicate that a word
is sung over multiple notes.
Add several hyphens to indicate that a
syllable is sung over multiple notes.
Increase/Decrease the line number. Down Arrow/Up Arrow
Switch between lyric/chorus line and
translation line.
NOTE
The translation line shows an asterisk (*) in
the popover.
Space
- (hyphen)
Repeat Space as often as required.
Repeat - (hyphen) as often as required.
Alt-Down Arrow/Alt-Up Arrow
Adding Lyrics
Move forwards/backwards from syllable to
syllable within lines of lyrics.
Add spaces within a word or syllable. Shift-Alt-Space
Add an elision _ (underscore)
Forcing a hyphen within a single word or
syllable
You can add multiple lines of lyrics to a staff.
PROCEDURE
1. Select the note or chord where you want to start adding lyrics.
2. Do one of the following:
•
Press Shift-L.
Click Lyrics .
•
A popover opens that shows you the line number for which you input the lyrics.
Alt-Right Arrow/Alt-Left Arrow
Alt-- (hyphen)
98
Page 99

Write Mode
Note Input
3. Optional: Press Down Arrow/Up Arrow to specify the line number.
4. Input the lyrics.
AFTER COMPLETING THIS TASK
Repeat the steps to add further lines of lyrics.
Adding Chorus Lines
You can add a chorus line.
NOTE
The default key commands for adding lyrics apply.
PROCEDURE
1. Select the syllable of a line of lyrics, or a note or chord where you want to start adding
the chorus.
2. Press Shift-L.
3. In the popover that opens, press Up Arrow.
The popover now shows a “c” instead of a line number.
4. Input the chorus.
NOTE
Alternatively, you can do one of the following:
•
•
RESULT
A chorus line is added in italics. If you activated verse numbers in the engraving options, the
verse number is removed.
RELATED LINKS
Adding Verse Numbers on page 186
Lyrics Section on page 110
Adding Translations
You can add translations to lyrics and chorus lines.
NOTE
Input a lyrics line and select a word or syllable. Then right-click the lyrics line,
and from the context menu, select Lyrics> Line> Chorus.
Left-click and drag a rectangle around the whole chorus line to select it, and on
the properties panel, in the Lyrics section, activate Chorus.
The default key commands for adding lyrics apply.
PROCEDURE
1. Select the syllable of a line of lyrics or the note or chord where you want to start
adding translations.
99
Page 100

Write Mode
Note Input
2. Press Shift-L to open the popover.
3. Press Alt-Down Arrow/Up Arrow to switch from lyrics line to translation line.
NOTE
The translation line shows an asterisk (*).
4. Input the translation.
NOTE
Alternatively, you can do one of the following:
•
Add a line of lyrics or a chorus line and select a syllable. Then right-click the
line, and from the context menu, select Lyrics> Translations> Line <line
number> Translation/Chorus Translation.
•
Add a line of lyrics or a chorus line and select a syllable or a whole line. Then on
the properties panel in the Lyrics section, activate Is translation.
RESULT
A translation line is added italics. If you added verse numbers in the engraving options, the
verse number is removed.
RELATED LINKS
Adding Verse Numbers on page 186
Lyrics Section on page 110
Changing Lines of Lyrics
You can change the line numbers of whole lines of lyrics. This also changes the position of
the lines of lyrics.
NOTE
To identify, which line you are working on, select a syllable in the line of lyrics and on
the properties panel, check the Line number option. Alternatively, you can activate verse
numbers in the engraving options.
PROCEDURE
1. Select a syllable within a line of lyrics.
2. Right-click and from the context menu, select Lyrics> Line> Line <number of line>.
NOTE
Alternatively, left-click and drag a rectangle around the whole line, and on the
properties panel, in the Lyrics section, select a number in the Line number field.
RESULT
The line of lyrics is moved to the selected position within a set of multiple lines. If you
activated verse number, the line of lyrics shows a different verse number.
RELATED LINKS
Adding Verse Numbers on page 186
100
 Loading...