


HPD1
Star
Manufacturing
International Inc.
10 Sunnen Drive
St. Louis, MO 63143
Installation
and
Operating
Instructions
Phone: (314) 781-2777
Fax: (314) 781-3636
2M-Z4671 Rev. G 4/24/07
HEATED PERISTALTIC DISPENSER
HPD1, HPD1H, HPD1P, HPD1HP
HPD2, HPD2H, HPD2P, HPD2HP
1

SAFETY SYMBOL
Using any part other than genuine Star factory supplied parts relieves the
manufacturer of all liability.
Star reserves the right to change specifi cations and product design without
notice. Such revisions do not entitle the buyer to corresponding changes,
improvements, additions or replacements for previously purchased
equipment.
Due to periodic changes in designs, methods, procedures, policies and
regulations, the specifi cations contained in this sheet are subject to change
without notice. While Star Manufacturing exercises good faith efforts to provide
information that is accurate, we are not responsible for errors or omissions
in information provided or conclusions reached as a result of using the
specifi cations. By using the information provided, the user assumes all risks in
connection with such use.
These symbols are intended to alert the user to the presence of
important operating and maintenance instructions in the manual
accompanying the appliance.
RETAIN THIS MANUAL FOR FUTURE REFERENCE
NOTICE
MAINTENANCE AND REPAIRS
Contact your local authorized service agent for service or required maintenance. Please record the model
number, serial number, voltage and purchase date in the area below and have it ready when you call to
ensure faster service.
Model No.
Serial No.
Voltage
Purchase Date
Authorized Service Agent
Reference the listing provided with the unit
or
for an updated listing go to:
Website: www.star-mfg.com
E-mail Service@star-mfg.com
Telephone: (800) 807-9054 Local (314) 781-2777
The Star Service Help Desk
Business 8:00 am to 4:30 p.m. Central Standard Time
Hours:
Telephone: (800) 807-9054 Local (314) 781-2777
Fax: (800) 396-2677 Local (314) 781-2714
E-mail Parts@star-mfg.com
Service@star-mfg.com
Warranty@star-mfg.com
Website: www.star-mfg.com
Mailing Address: Star Manufacturing International Inc.
10 Sunnen Drive
St. Louis, MO 63143
U.S.A
2
2

SPECIFICATIONS
HPD1, HPD1H, HPD1P, HPD1HP
Capacity: Two 6 pound bags (Two 2.7 KG Bags)
Electrical: 120V, 60 hertz, single phase, 800 Watts; 7.10 amps
230V, 50/60 hertz, single phase, 800 Watts; 3.75 amps
Cord: 6 ft. length
Plug: 120V - NEMA 5-15P
230V - CEE7-7
Dimensions: 9 7/16" W x 20 7/16" D x 26 13/16" H (23.97 W x 51.91 D x 68.10 H cm)
Net Weight: 36 lbs. (16.34 KG)
HPD2, HPD2H, HPD2P, HPD2HP
Capacity: Four 6 pound bags (Four 2.7 KG Bags)
Electrical: 120V, 60 hertz, single phase, 950 Watts; 9 amps
230V, 50/60 hertz, single phase, 950 Watts; 4.75 amps
Cord: 6 ft. length
Plug: 120V - NEMA 5-15P
230V - CEE7-7
Dimensions: 14 5/16" W x 20 7/16" D x 26 13/16" H (36.35 W x 51.91 D x 68.10 H cm)
Net Weight: 50 lbs. (22.7 KG)
3

CAUTION
This equipment is designed and sold for commercial
use only by personnel trained and experienced in its
operation and is not sold for consumer use in and
around the home nor for use directly by the general
public in food service locations.
-IMPORTANT-
Read this manual completely before attempting
installation.
INSTALLATION
This peristaltic dispenser is equipped for the voltage
and wattage indicated on the nameplate mounted
on the back of the unit, and is designed for use on
alternating current (AC) only.
NOTE: The peristaltic dispenser should not be installed
without the four-inch (10cm) legs provided with the
machine. The legs screw into the nuts on the bottom
of the dispenser.
4. Insert the new bag into tray making sure the fi tment
rests on the block track and route the tube around
the rollers.
(Note: Make sure tube is not twisted)
5. Place the end of the tube in the slot of the bottom
bracket.
6. Slide the pump block towards the pump head.
7. Hook the tension spring onto the catch.
8. Route the tube through the hole in the tube cover
leaving 1/2" of the tube below the cover.
9. Dispense a small amount of product to insure
the tube is seated correctly, and the product is
fl owing.
WARNING
DO NOT CONNECT TO DIRECT CURRENT
(DC).
GENERAL OPERATING INSTRUCTIONS
This heated dispenser is designed to be used with a
9” x 18” (22.8 x 45.7cm) poly bag with a 1 inch (2.5cm)
outlet fi tment. The peristaltic dispenser is designed
to be used with 1/4 inch ID (.6cm) to
1/2 inch id. (1.3cm) tubing with 1/16 inch (.16cm) wall
thickness.
The dispenser is designed with a preset non-adjustable
thermostat. It is designed to maintain a product
temperature of 155°F +/- 10°F, This is not to be
confused with the thermometer temperature which
will be different.
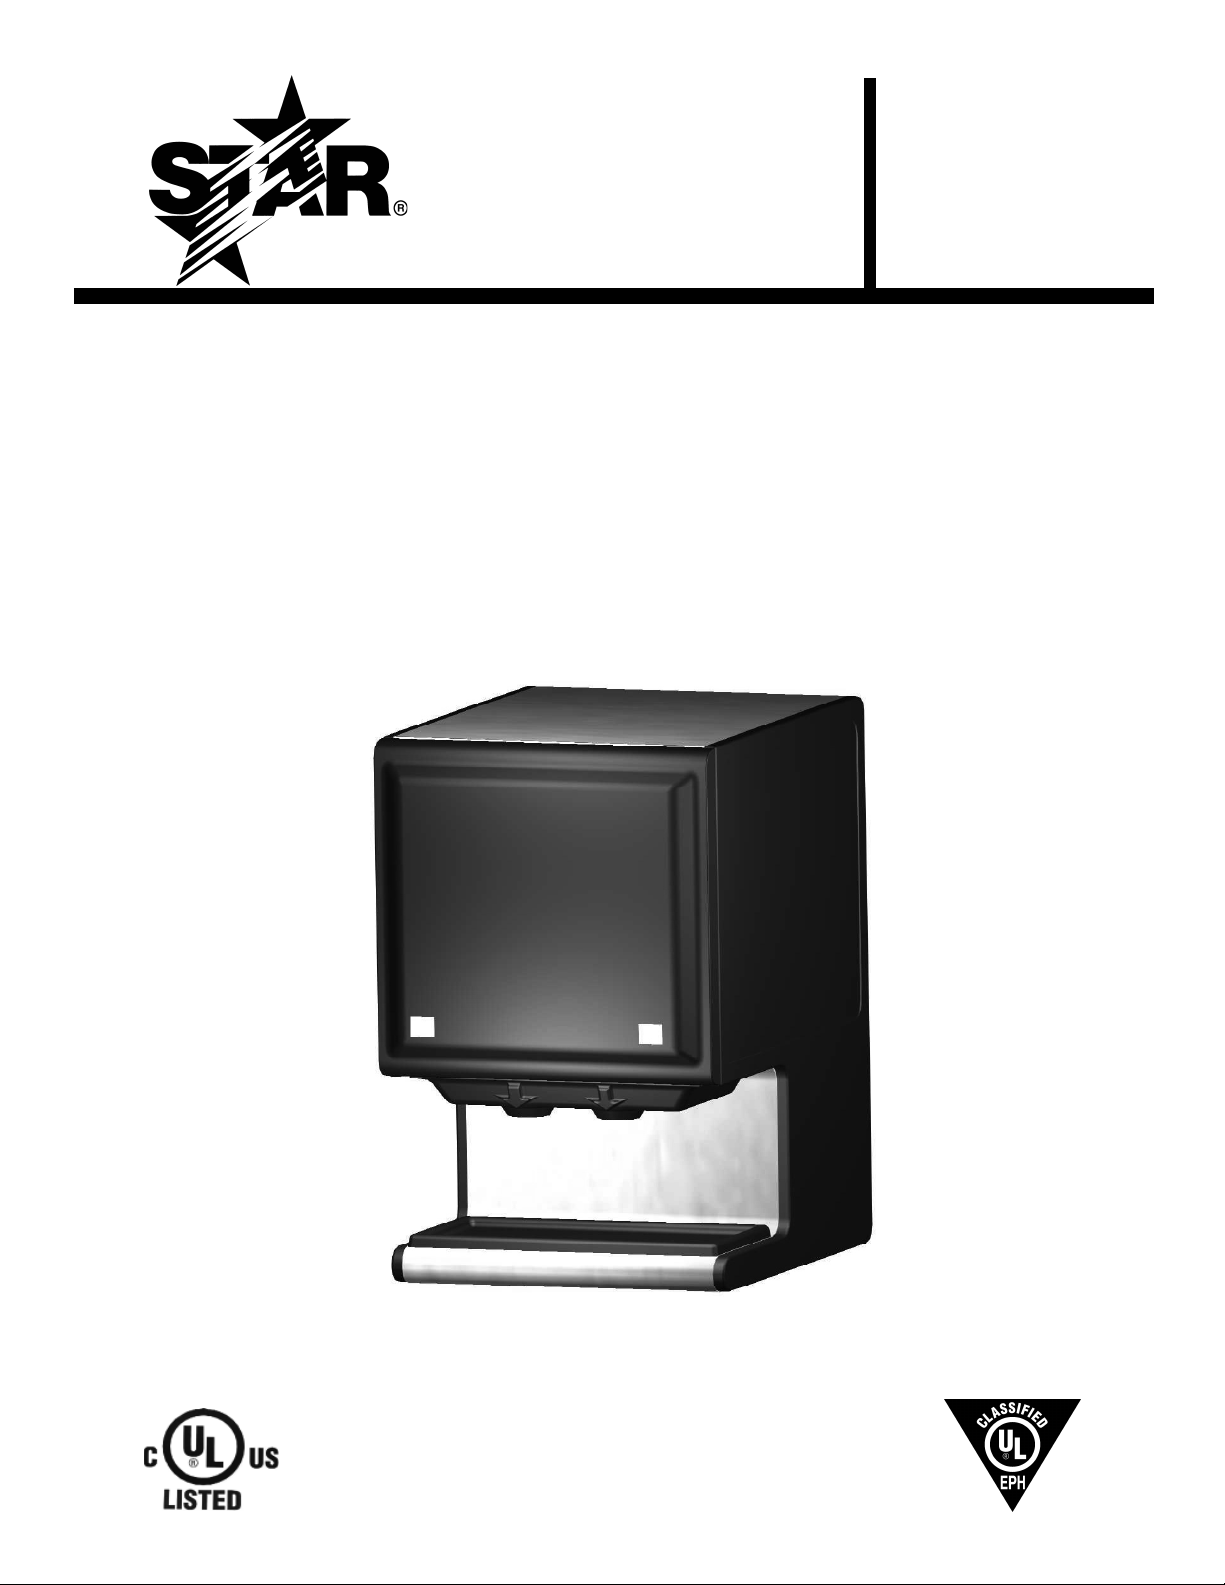
Loading Product:
1. Turn the dispenser OFF.
2. Unhook the tension spring from the catch.
3. Slide the pump block away from the pump head.
PORTION CONTROL
This dispenser is supplied with a portion control
timer. This portion control is based on a time setting.
Variations in product temperature and consistency will
affect the dispensed amount. To insure a consistent
portion, use product that is at the correct temperature
(145°F to 160°).
To set portion:
1. Load preheated product bag into dispenser.
2. Dispense product until there is a steady fl ow.
3. Dispense the product into a clean container,
and measure the product to verify the dispensed
amount.
4. Using a small screwdriver, turn the control dial
located on the back panel clockwise for more
product and counter-clockwise for less product.
5. Repeat steps 3 and 4 until the desired amount is
reached.
4
Operation Notes:
The product should be preheated according to the
manufacturer's instructions. The product should be
a minimum of 140°F before dispensing.
The dispenser will not function correctly if the product
is not at the correct temperature.
CHECKING PRODUCT TEMPERATURE
The dispenser should be plugged in and turned on
with product in the dispenser for a least 5 hours.
1. Dispense at least 3 inches of product into an
insulated cup.
2. Without hesitation, insert the thermometer to the
bottom of the cup and stir the product gently with
the stem of the thermometer.
3. Position the tip of the thermometer in the center
of the product mass.
4. The temperature should read between 140°F and
165°F.
The dispenser is designed to operate 24 hours a day.
Once the product is placed in the dispenser it should
not be removed until the bag is empty, or the holding
period of the product has expired.
Note: To increase the evacuation, open the dispenser
and pull the product towards the outlet fi tment once
or twice during operation.
If the pump drips, or does not dispense product, check
to make sure the tube is routed correctly, the spring
is latched onto the catch.
NOTE: The tube cover must be in place for
proper operation.
CLEANING INSTRUCTIONS
To clean the peristaltic dispenser:
The stainless steel body is corrosion resistant, but
may corrode if not cleaned properly. The dispenser
should be cleaned with a soft cloth with mild soap and
water and wiped dry. Do not use detergents, strong
abrasives, or metal scouring pads on the stainless
steel panels.
The pump mechanism should not need cleaning during
normal use. If product should spill onto the pump
head, it can be removed for easy cleaning. Clean the
parts in a solution of mild soap and water using a soft
cloth. Dry parts before reassembling.
The spring can also be removed for cleaning by
removing the knob and retaining washer.
5
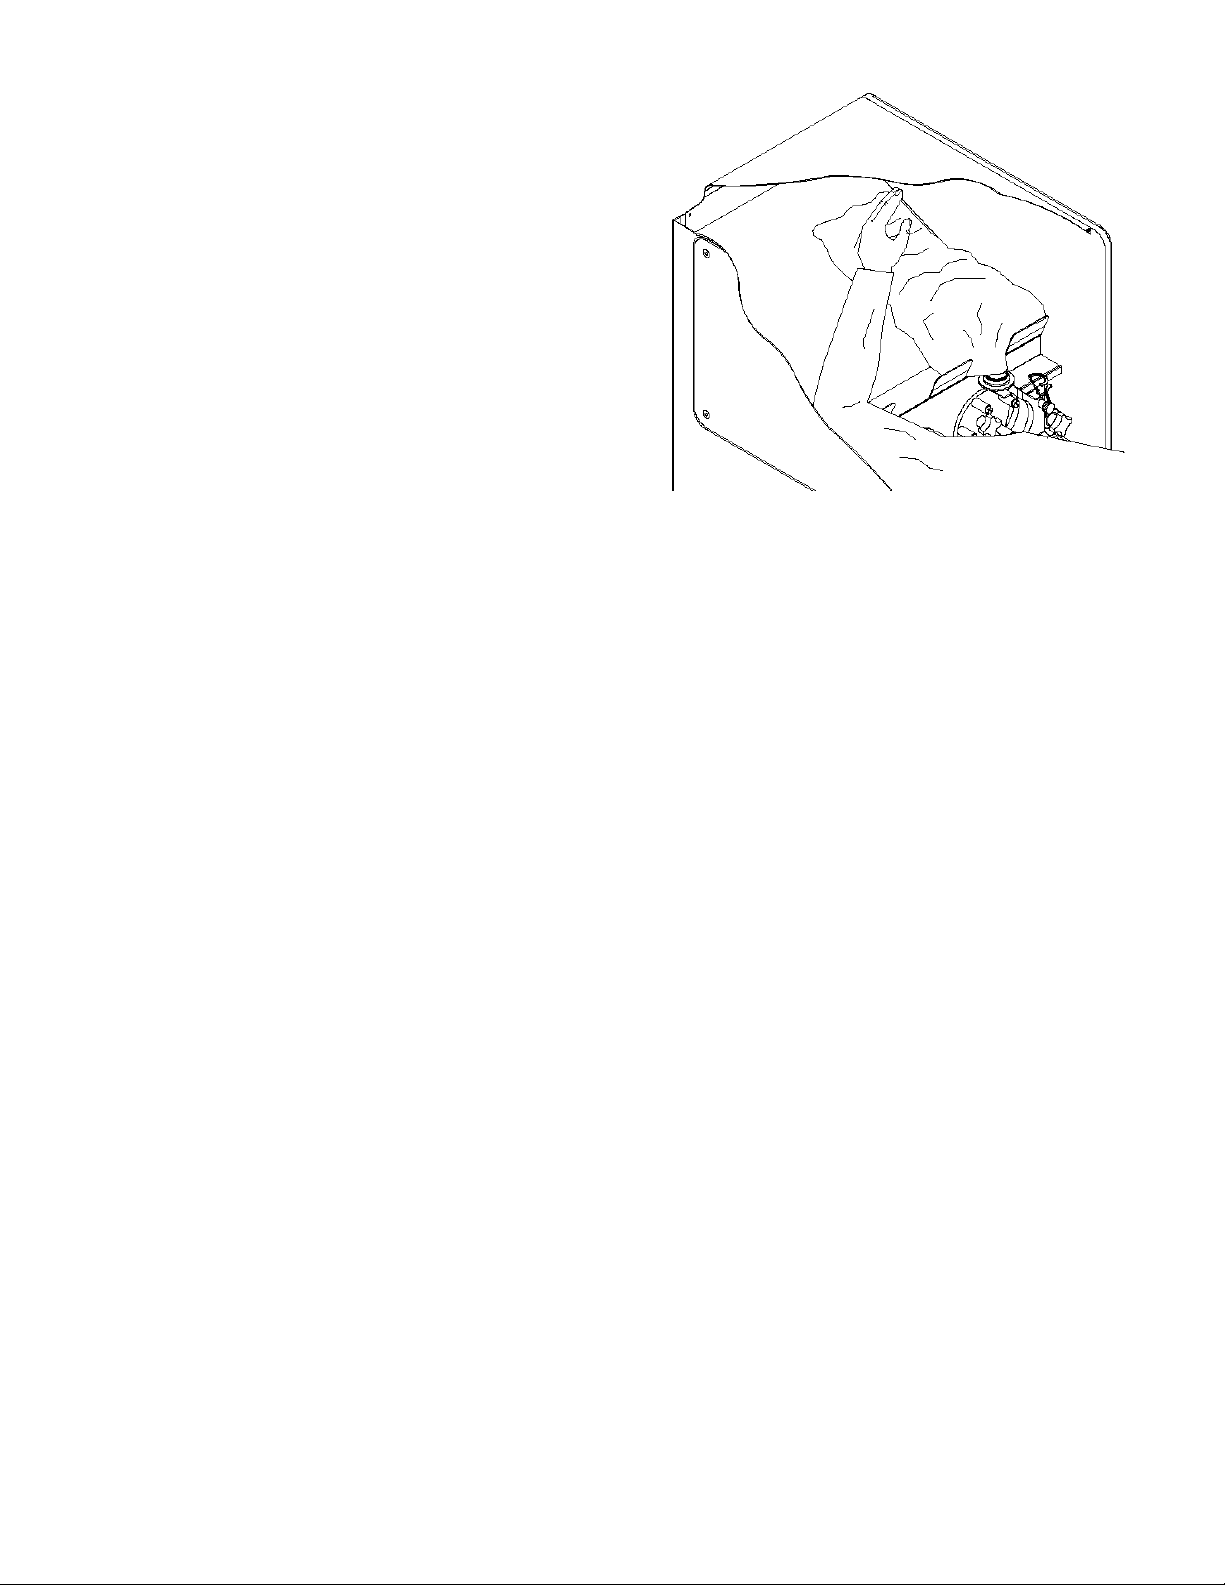
To remove and clean the pump head:
1. Open the door.
2. Remove the bag according to the instructions.
3. Unscrew the knob from the pump head.
4. Remove the pump head.
5. Slide the pump block out of the track.
6. If needed the rollers can also be disassembled
for cleaning.
Note: When installing the pump head onto the drive
shaft, make sure the pump head is fully seated onto
the square end of the drive shaft before installing
the knob.
WARNING: The drive shaft and pump head
could be damaged if the pump head is installed
incorrectly.
6
 Loading...