

Sony LINEA LV217-1, LINEA TC118, LINEA LV216, LINEA LV219, LINEA LV211 User Manual
...
Receiver operations
Receiver Operations
Selecting a Component
To listen to or watch a connected component, first
select the function on the receiver or with the remote.
Before you begin, make sure you have:
• Connected all components securely and correctly as
indicated on pages 4 to 8.
• Turned MASTER VOLUME to the leftmost position
(0) to avoid damaging your speakers.
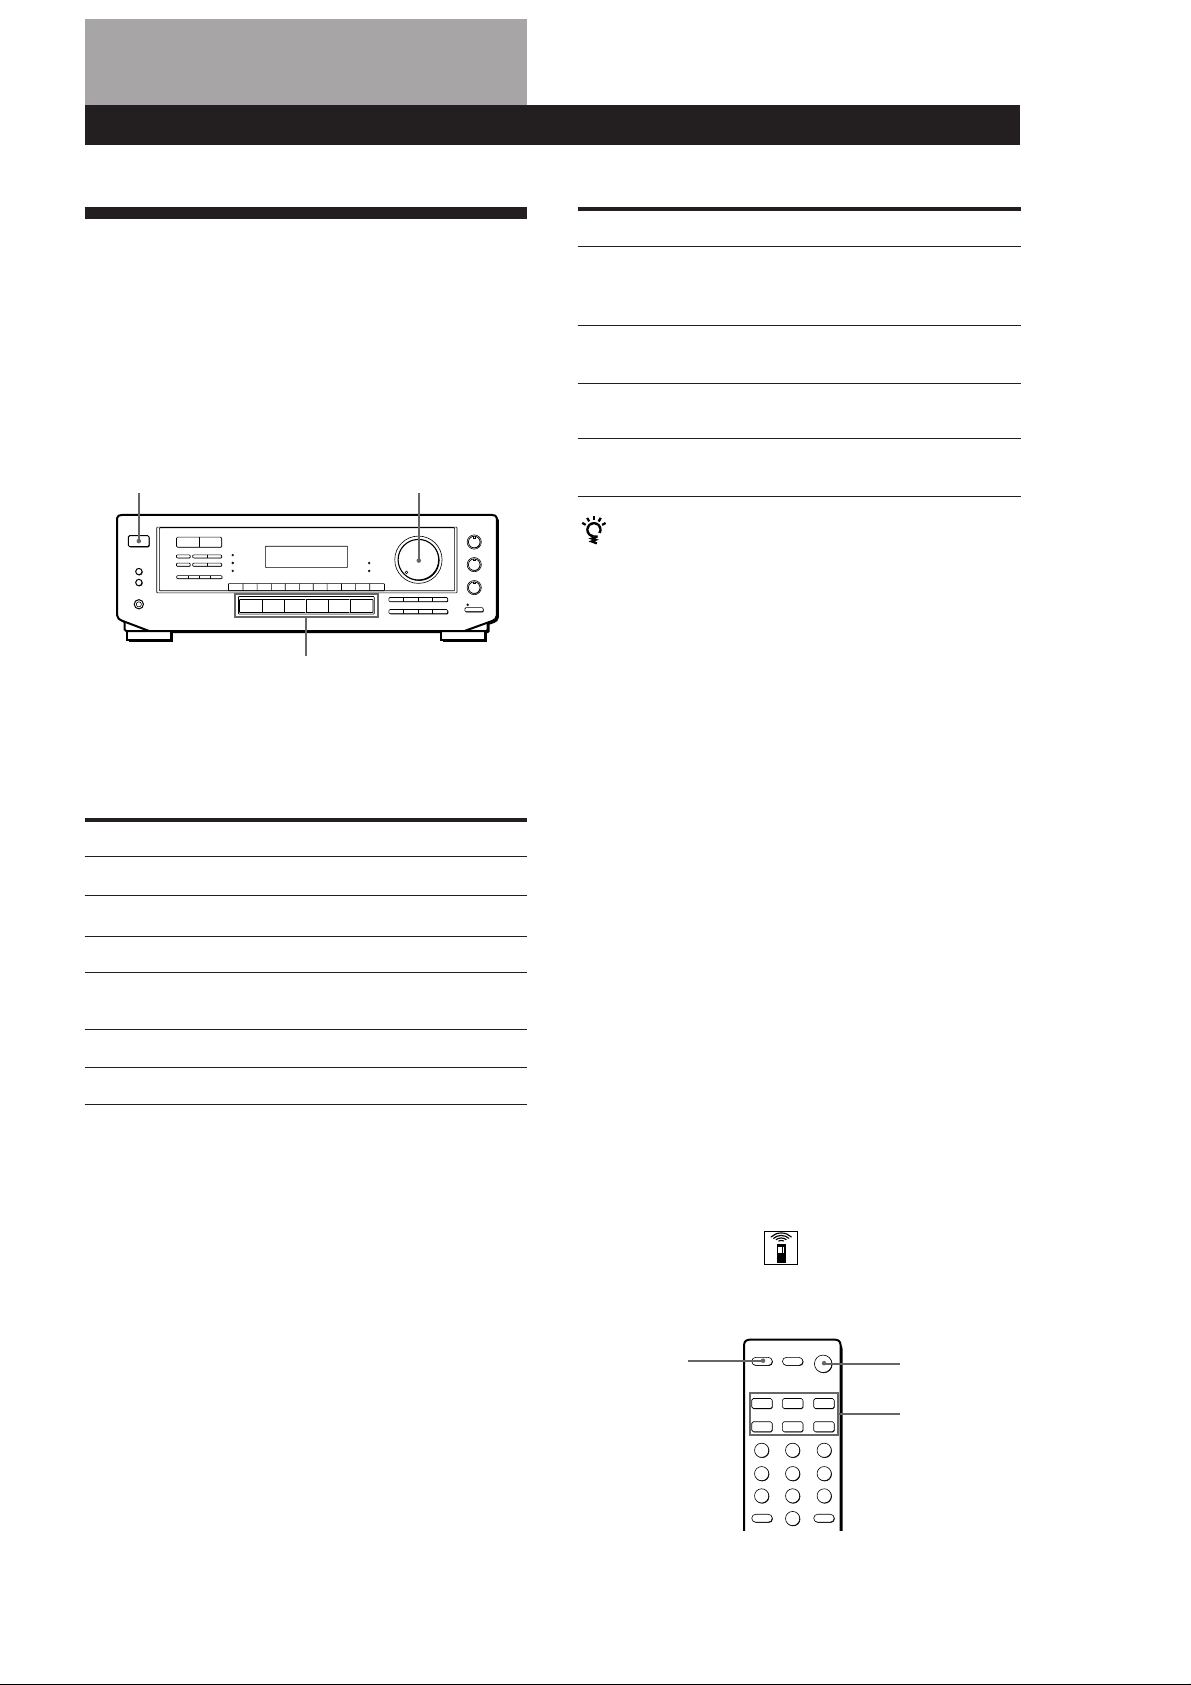
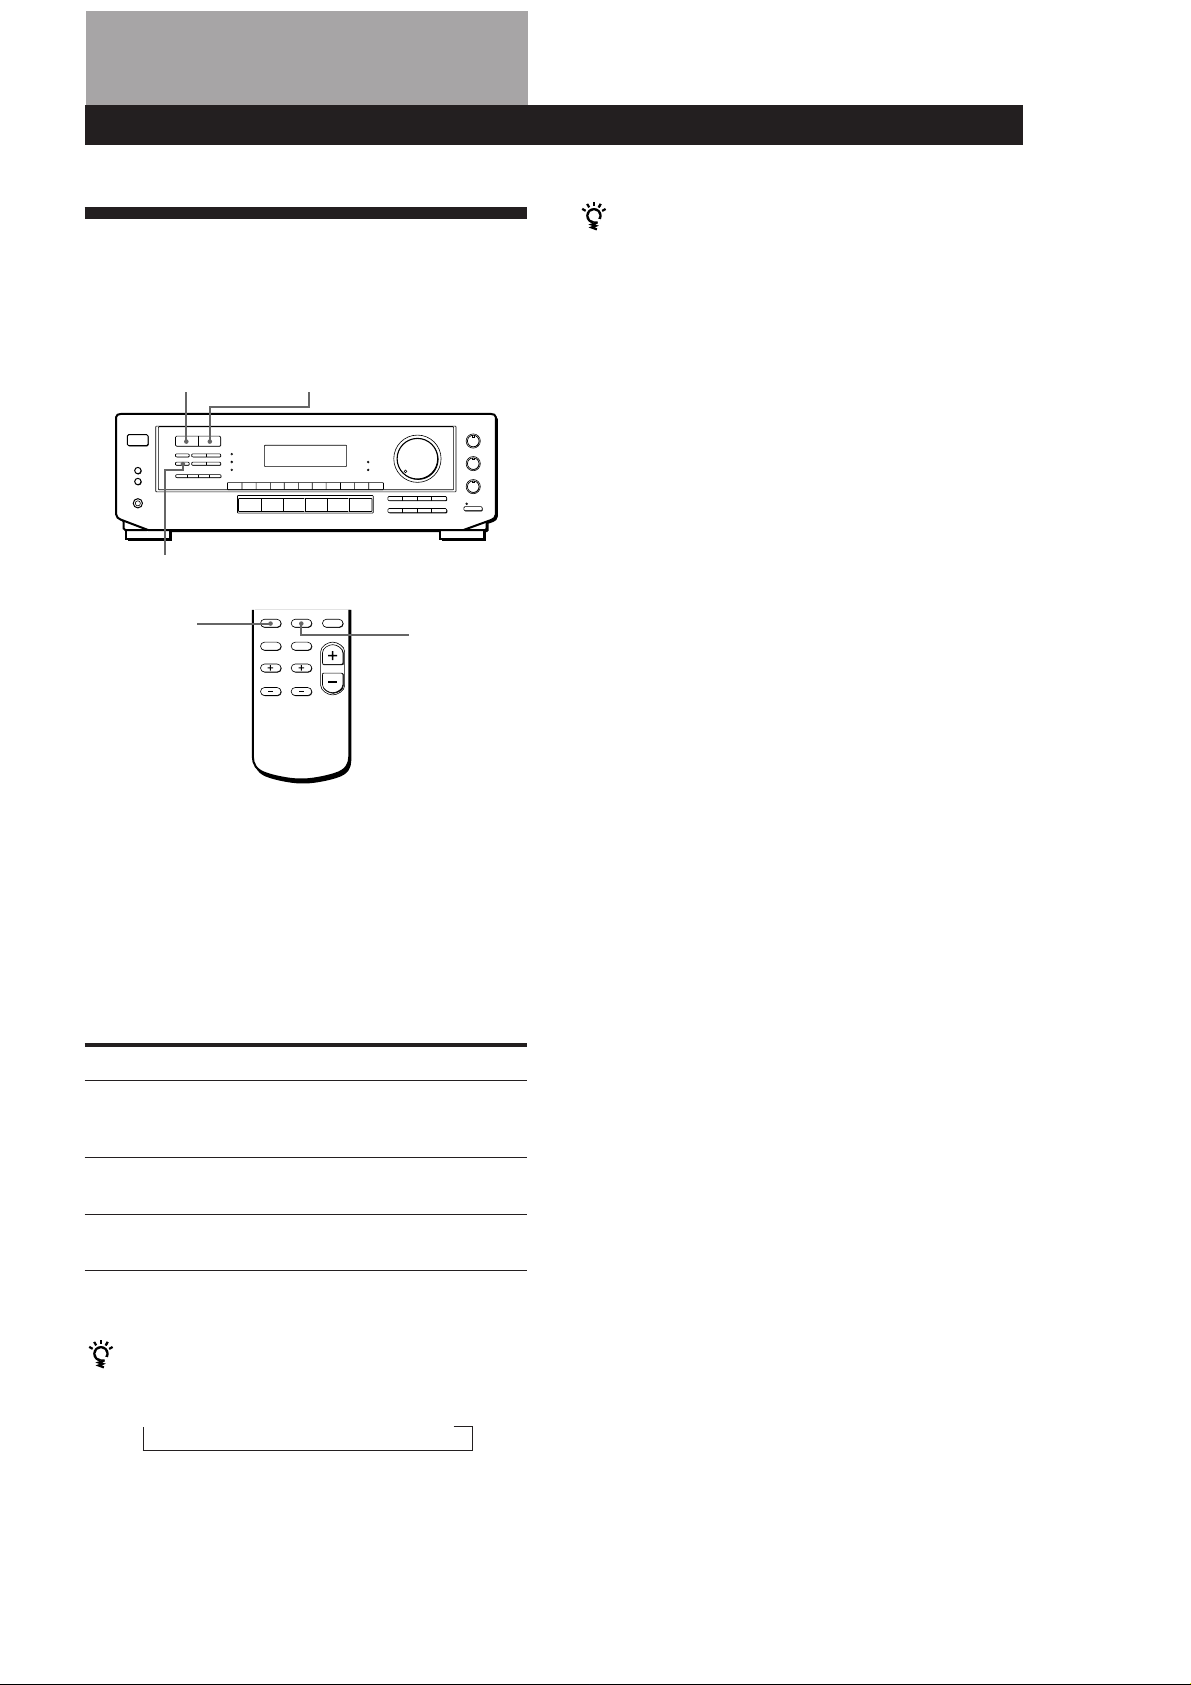
POWER
Function buttons
1 Press POWER to turn on the receiver.
2 Press a function button to select the component
you want to use:
To listen to or watch
Records
Radio programmes
Compact discs (CD)
Audio tapes or MiniDiscs
(MD)
TV programmes or Laser discs
Video tapes
3 Turn on the component, for example, a CD player,
and then start playing.
To tune in radio stations on this receiver, see
“Receiving Broadcasts” on page 11.
MASTER VOLUME
Press
PHONO
TUNER
CD
TAPE/MD
TV/LD
VIDEO
To
Mute the sound
Reinforce the bass
Adjust the balance
Adjust the tone quality
When you listen with headphones
Connect the headphones to the PHONES jack and set
the SPEAKERS buttons to OFF.
Do this
Press MUTING on the remote.
Press again to restore the
sound
Press BASS BOOST to turn on
the BASS BOOST indicator.
Turn the BALANCE control
left or right.
Adjust the BASS and TREBLE
controls.
Watching/listening to video programmes
When you watch/listening to TV or video
programmes, we recommend you play audio portion
through the receiver instead of your TV’s speaker. This
lets you take advantage of the receiver’s surround
sound effects, like Dolby Pro Logic Surround and lets
you use the receiver’s remote to control the audio.
Turn off the speakers on your TV before you start so
you can enjoy the surround sound from your receiver.
To watch/listening to TV programmes, turn on the TV, TV
tuner and the receiver and press TV/LD on the receiver.
To watch videos or laser discs, do the following:
1 Press a function button to select the component
(for example, VIDEO).
2 Turn on the TV and set the TV’s video input to
match your video component.
3 Turn on the component (VCR or LD player), and
start playback.
4 Turn MASTER VOLUME to adjust the volume.
To adjust the volume of the TV’s speakers, use the
volume control on the TV.
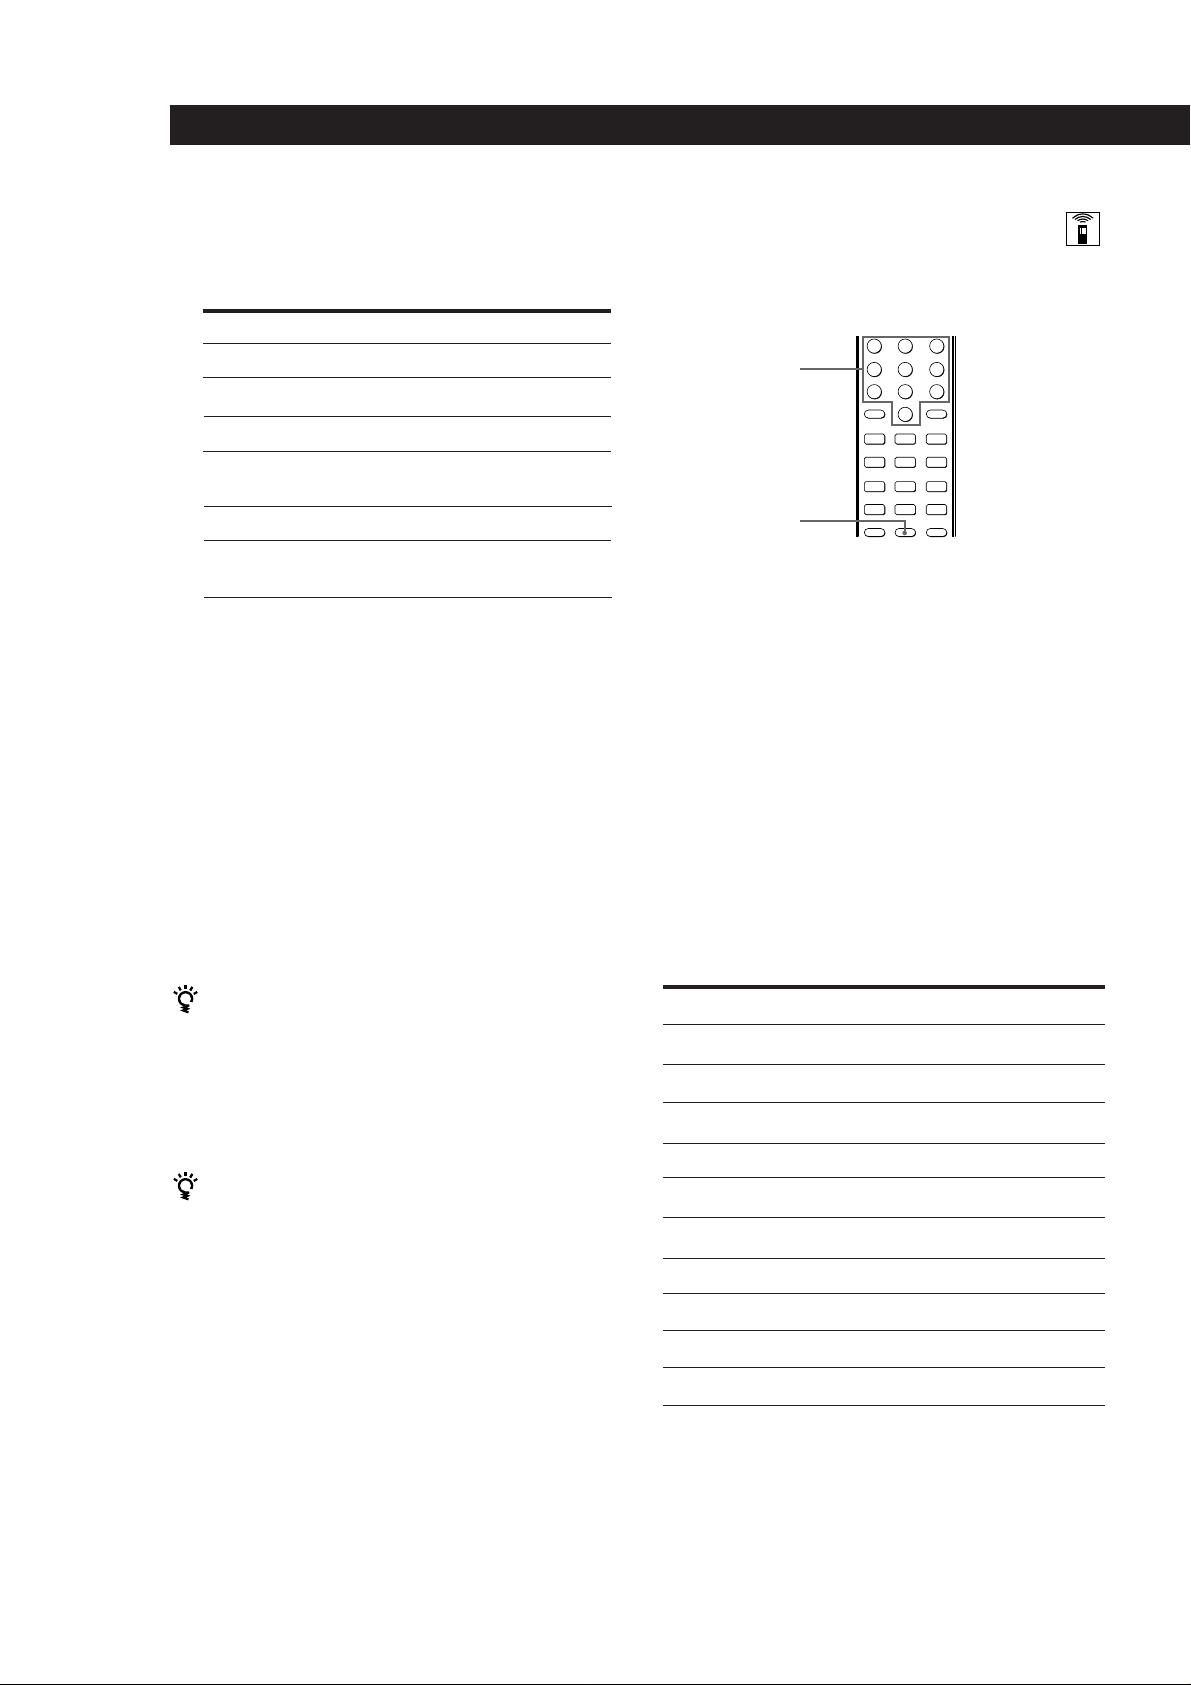
Using the remote
The remote lets you operate the receiver and the Sony
components that are connected to it.
TV CONTROL
SYSTEM OFF
SYSTEM
CONTROL/
FUNCTION
(continued)
EN
9
Receiver Operations
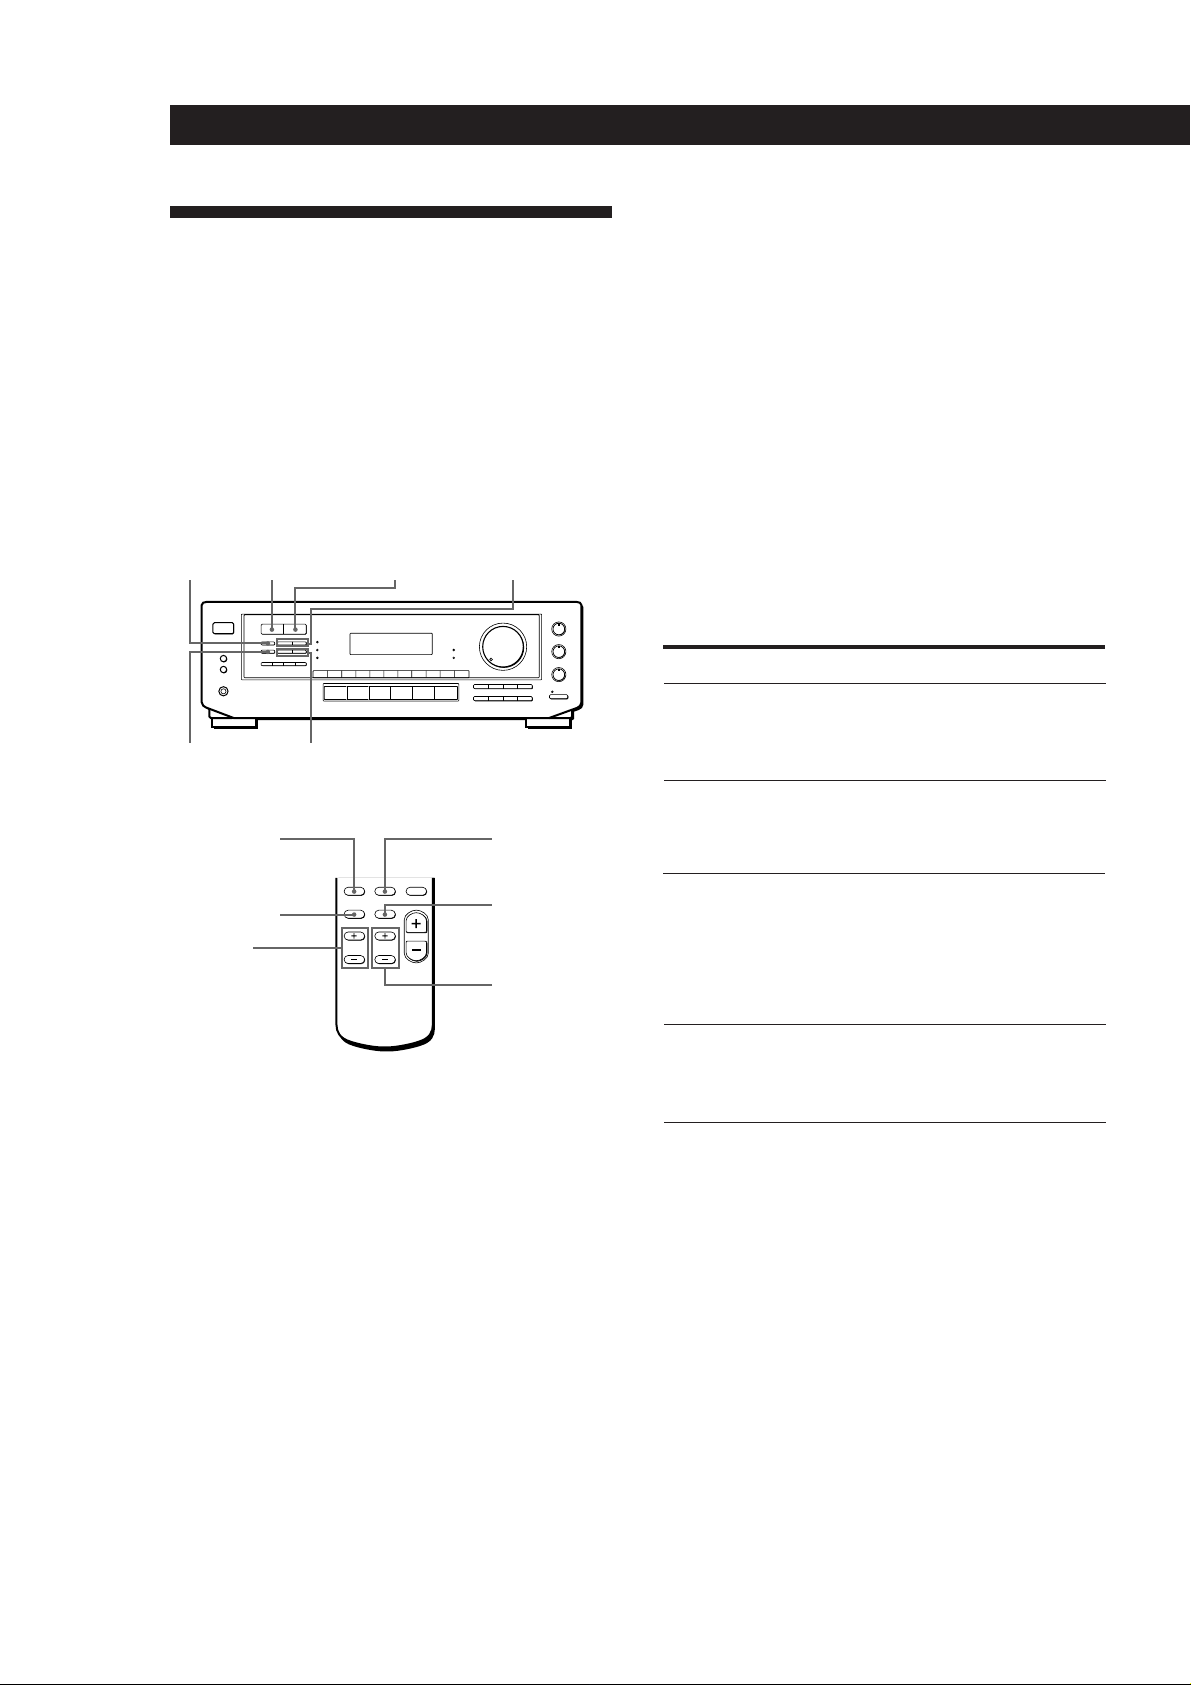
1 Press one of the SYSTEM CONTROL/FUNCTION
buttons to select the component you want to use.
The SYSTEM CONTROL/FUNCTION buttons on
the remote are factory-set as follows:
To listen to
Records
Radio programmes
Compact discs (CD)
Audio tapes or MiniDiscs
(MD)
TV programmes
VHS Video tapes
(VTR-3 mode)
Press
PHONO
TUNER
CD
TAPE/MD
TV
VIDEO
If you want to change the factory setting of a
button, see page 11.
The receiver and the selected component turn on.
If the component does not turn on
Press the power switch on the component.
2 Start playing.
Refer to “Remote Button Descriptions” on page 25
for details.
To turn off the components
Press SYSTEM OFF. You can turn off the video and audio
components connected to the SWITCHED AC OUTLET at
the same time.
Operating one component while using
another (Background Operation)
You can temporality operate other components while
listening to or watching a programme.
Numeric buttons
=+
0)
9( p
BACKGROUND
Pr
1 Hold down BACKGROUND.
2 Press both the corresponding numeric button of
the component you’re going to use (see the table
below) and one of the following buttons at the
same time; VISUAL POWER, TV/VIDEO, CH
PRESET +/–, ANT TV/VTR, D.SKIP, (, 9, p,
0 / ) , = / + , P , r .
Example:To start recording on a tape deck while
listening to a CD
While holding down BACKGROUND,
press 4 (or 5) and press r at the same
time.
The numeric buttons are assigned to select the
functions as follows:
If you use a Sony TV
When you press TV to watch a TV programme, the TV
turns on and switches to the TV input. The TV also
turns on when you press VIDEO and switches to the
appropriate video input.
If the TV does not switch to the appropriate input
automatically, press TV/VIDEO.
When you watch TV without using the receiver (only
for Sony TVs)
Press TV CONTROL to set the remote to operate only
the TV. When you press this button, the TV turns on
and switches to the TV input. If the TV does not switch
to the TV input automatically, press TV/VIDEO.
Note
Some Sony TVs can not be controlled by this remote.
Numeric button
1
2
3
4
5
6
7
8
9
0
* Sony VCRs are operated with a VTR 1, 2 or 3 setting.
These correspond to Beta, 8mm and VHS respectively.
Operates
CD player
DAT deck
MD deck
Tape deck A
Tape deck B
LD player
VCR (remote control mode VTR 1*)
VCR (remote control mode VTR 2*)
VCR (remote control mode VTR 3*)
TV
10
EN
Changing the factory setting of a
function button
Receiver Operations
Receiving Broadcasts
If the factory settings of the FUNCTION buttons (page
10) don’t match your system components, you can
change them. For example, if you have two CD players
and you don’t have a tape deck or an MD deck, you
can assign the TAPE/MD button to your second CD
player.
Note that the settings of the TUNER and PHONO
buttons cannot be changed.
SYSTEM
CONTROL/
FUNCTION
Numeric buttons
1 Hold down the SYSTEM CONTROL/FUNCTION
button whose function you want to change
(TAPE/MD, for example).
2 Press the corresponding numeric button of the
component you want to assign to the SYSTEM
CONTROL/FUNCTION button (1 - CD player,
for example).
This receiver lets you enter a station’s frequency
directly by using the numeric buttons (direct tuning). If
you don’t know the frequency of the station you want,
see “Receiving broadcasts by scanning stations
(automatic tuning)” on page 12.
Before you begin, make sure you have:
• Connected an FM/AM aerial to the receiver as
indicated on page 5.
• Selected the appropriate speaker system. (See
“Selecting the speaker system” on page 7.)
MASTER VOLUMEPOWER Numeric buttons
DIRECT TUNER
TUNING/
CHARACTER
+/–
FM/AM
1 Press POWER to turn on the receiver.
2 Press TUNER.
The last received station is tuned in.
For the numeric buttons, see the table in
“Operating one component while using another”
on page 10.
Now you can use the TAPE/MD button to control
a second CD player.
To reset the setting to the factory setting
Repeat the above procedure.
3 Press FM/AM to select FM or AM stations.
4 Press DIRECT.
5 Press the numeric buttons to enter the frequency.
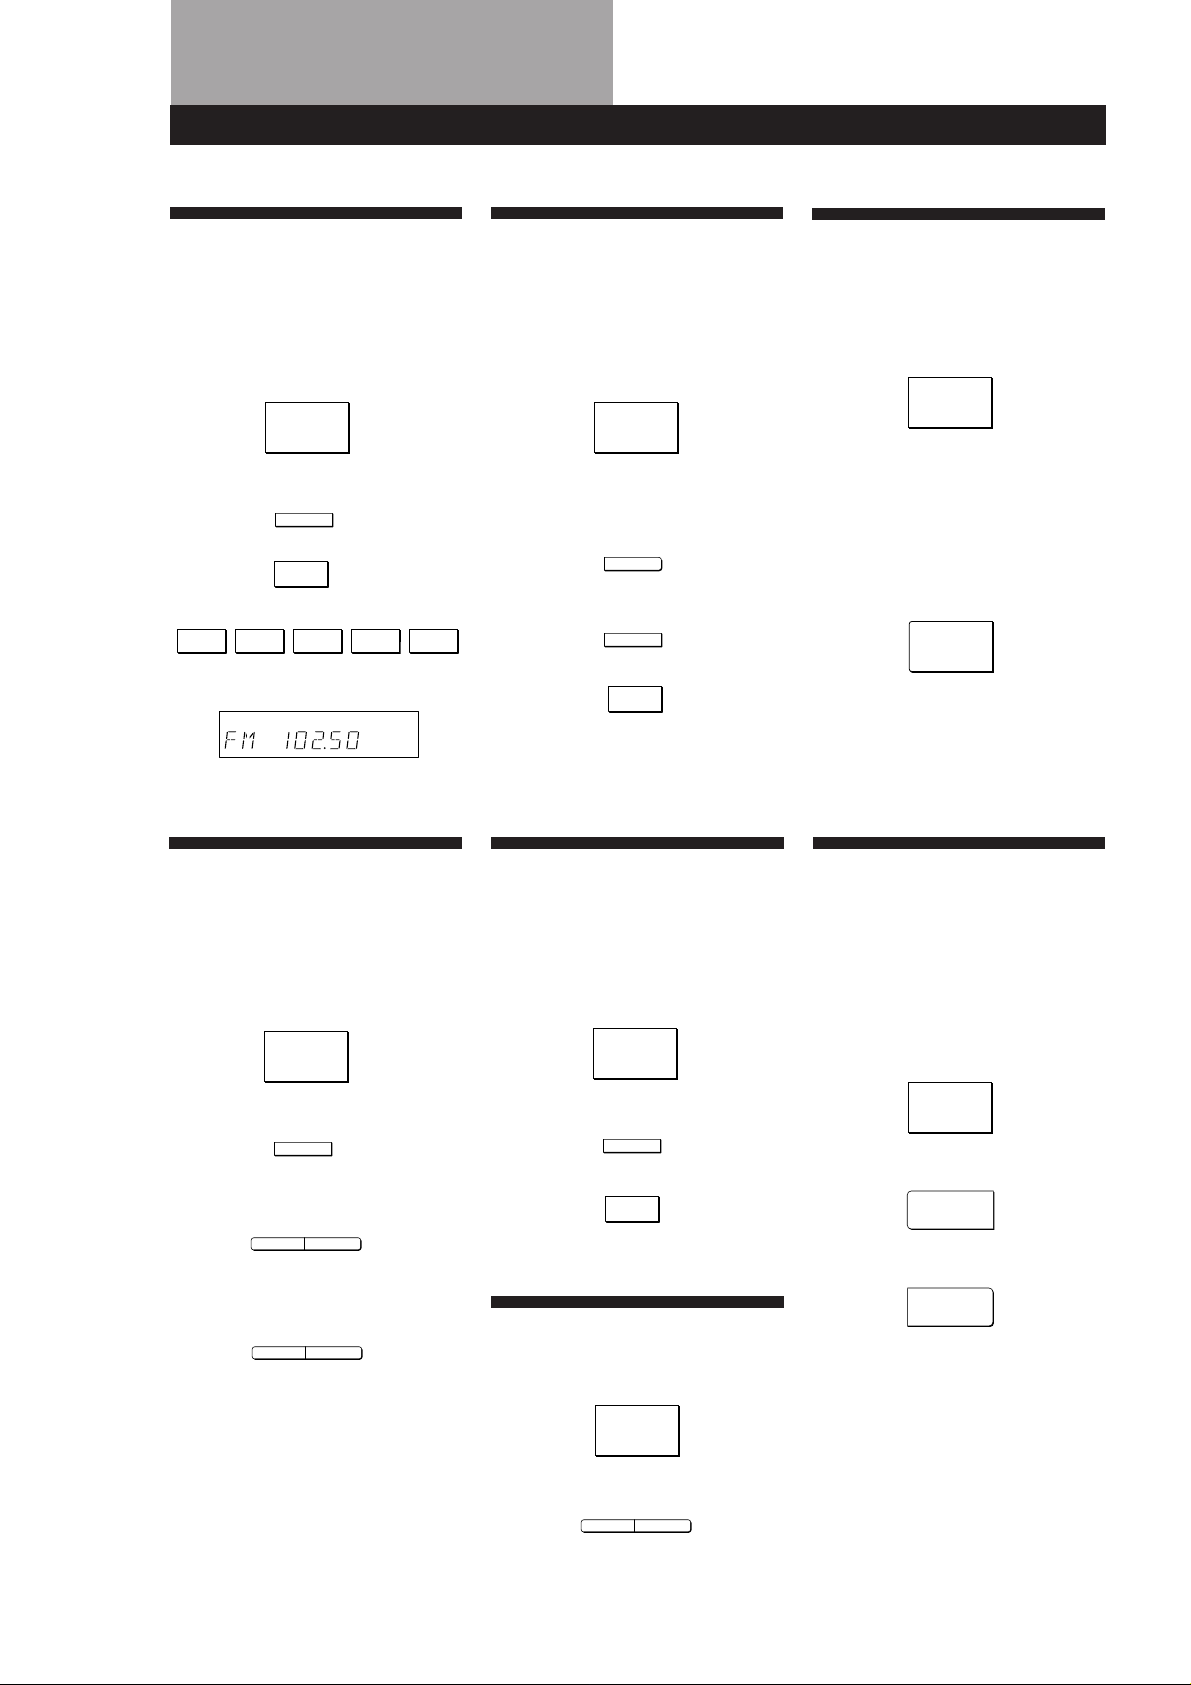
Example 1: FM 102.50 MHz Example 2: AM 1350 kHz
1 0 2 5 0
(You don’t have to enter
the last “0.”)
1 3 5
6 When you tune in AM stations, adjust the
direction of the AM loop aerial for optimum
reception.
To receive other stations
Repeat Steps 3 to 5.
If the STEREO indicator remains off
Press FM MODE when an FM stereo broadcast is
received.
(continued)
11
EN

Receiver Operations
If an FM stereo programme is distorted
The STEREO indicator flashes. Press FM MODE to
change to monaural (MONO). You will not have the
stereo effect but the distortion will be reduced. To
return to stereo mode, press this button again.
If you cannot tune in a station and the entered
numbers are flashing
Make sure you’ve entered the right frequency. If not,
press DIRECT and re-enter the frequency you want.
If the entered numbers still flash, the frequency is not
used in your area.
To watch FM simulcast TV programmes
Make sure that you tune in the simulcast programme
both on the TV (or the VCR) and on the receiver.
If you enter a frequency not covered by the tuning
interval
The entered value is automatically rounded up or down
to the closest covered value.
Tuning intervals for direct tuning are:
FM: 50 kHz intervals (87.5 - 108.0 MHz)
10 kHz intervals (65.0 - 74.0 MHz)
AM: 9 kHz intervals
Receiving broadcasts by scanning stations
(automatic tuning)
If you don’t know the frequency of the radio station
you want, you can have the receiver scan all the
receivable stations to locate the one you want.
1 Press TUNER.
The last received station is tuned in.
2 Press FM/AM to select FM or AM.
3 Press TUNING/CHARACTER + or –.
Press the + button for a higher station number;
press the – button for a lower one. When you tune
past either end of the band, the receiver
automatically jumps to the opposite end. Every
time a station is received, the receiver stops
scanning. To continue scanning, press the button
again.
Presetting Radio Stations
You’ll most likely want to preset the receiver with the
radio stations you listen to often so that you don’t have
to tune in the station every time. The receiver can store
a total of 30 FM or AM stations. You can store the
stations on preset numbers combining 3 characters (A,
B, C) and numbers (0 - 9). For example, you can store a
station as preset number A1, B6 or C9, etc.
TUNING/
SHIFT
MEMORYTUNER
CHARACTER
Numeric buttons
CHARACTER
1 Press TUNER.
The last received station is tuned in.
2 Tune in the station you want.
If you are not familiar with how to tune in a
station, see “Receiving Broadcasts” on the
previous page.
3 Press MEMORY.
“MEMORY” appears for a few seconds.
Do steps 4 and 5 before “MEMORY” goes out.
4 Press SHIFT to select a character (A, B or C).
Each time you press SHIFT, the letter “A,” “B” or
“C” appears in the display.
If “MEMORY” disappears, start again from step 3.
5 While MEMORY is displayed, press the number
you want to use (0 to 9).
6 Repeat Steps 2 to 5 to preset other stations.
To change a preset station
Preset a new station on the number you want to change.
Note
If the mains lead is disconnected for about one week, the
preset stations will be cleared from the receiver’s memory,
and you will have to preset the stations again.
12
EN

Tuning preset stations (preset tuning)
You can tune directly to a preset station by entering its
preset number. If you don’t know which stations are
preset on which numbers, you can tune by scanning
the preset stations.
1 Press TUNER.
The last received station is tuned in.
2 Press SHIFT to select a character (A, B or C), then
press the number.
For example, select A and then press 7 to tune in
the station preset as A7.
You can tune by scanning the preset stations
First press TUNER and then press PRESET TUNING +
or – to select the station you want. Each time you press
the buttons, the preset numbers change as follows:
n A1 ˜ A2 ˜… ˜ A0 ˜ B1 ˜ B2 ˜ … ˜ B0 N
n C0 ˜ … ˜ C2 ˜ C1N
Receiver Operations
Using the Radio Data System
(RDS)
What you can do with the Radio Data
System
Radio Data System (RDS) is a broadcasting service that
allows radio stations to send additional information
along with the regular radio programme signal. This
receiver offers you three convenient RDS features:
Displaying the RDS information; Monitoring of traffic,
news, or information programmes; and Locating a
station by programme type. RDS is available only on
FM stations.*
Note
RDS may not work properly if the station you are tuned to is
not transmitting the RDS signal properly or if the signal
strength is weak.
Naming preset stations
You can store names, up to 8 characters long, for your
preset stations (except for FM RDS stations). Once you
name a preset station, the name appears in the display
instead of the frequency when you tune to that preset.
The characters you can use include letters, numbers
and symbols.
1 Tune to the preset station you want to name
2 Press CHARACTER.
The cursor blinks in the display.
3 Use TUNING/CHARACTER + or – to select the
character you desire.
4 Press CHARACTER to move the cursor into
position for the next character.
5 Repeat steps 3 and 4 to enter up to 8 characters.
6 Wait a few seconds and the receiver automatically
stores the name at the previously selected preset.
If you make a mistake
Press CHARACTER repeatedly so that the character you
want to change blinks in the display, then use TUNING/
CHARACTER + or – to select the desired character.
* Not all FM stations provide RDS service, nor do they
provide the same types of services. If you are not familiar
with the RDS system, check with your local radio stations
for details on RDS services in your area.
Receiving RDS broadcasts
Simply select a station from the FM band.
When you tune in a station that provides RDS services,
the station name appears in the display.
Displaying the RDS Information
Press DISPLAY. Each time you press DISPLAY, the
display advances one step through the following
information.
Information displayed
Station Name*
Frequency*
Programme Type
You can:
Locate each station by name
(e.g., WDR) instead of
frequency.
Locate each station by
frequency
Locate a specific type of
programme being broadcast.
(See page 15 for the types of
programmes you can select.)
Radio Text
Clock (24-hour system)
* This information also appears for non-RDS FM stations.
Display the text messages sent
by the RDS station.
Display the current time
(continued)
13
EN

Receiver Operations
Notes
• If there is an emergency announcement by governmental
authorities, ALARM flashes in the display.
• When the message consists of 9 characters or more, the
message scrolls across the display.
• The following messages appear if a station is not
providing a particular RDS service:
“NO PTY” (the selected programme type is not available)
“NO TEXT” (text data is not available)
“NO TIME” (clock time data is not available)
Monitoring traffic, news, or information
programmes (EON)
Enhanced Other Networks (EON) allows the tuner to
automatically switch to a station broadcasting traffic,
news, or other information. After the programme ends,
the tuner switches back to the station you were
listening to (or the function you were using).
1 Tune to an FM station.
2 Press EON to select the programme you want to
monitor.
Each time you press EON, the indicators light as
follows:
/
TA (Traffic Announcement)
.
NEWS
.
INFO (information)
.
OFF
Locating a station by programme type
(PTY)
You can locate a station you want by selecting a
programme type. The receiver tunes in the type of
programmes currently being broadcast from the RDS
stations stored in the receiver's preset memory.
1 Press PTY repeatedly until the programme type
you want appears in the display.
See the following table for the programme types
you can select.
2 Press PRESET TUNING + or – while the
programme type appears in the display.
The tuner starts searching the preset RDS stations
for the programme (“Search” and the programme
type are displayed alternately).
When the receiver finds the programme you are
looking for, it stops searching. The preset number
of the preset station currently broadcasting the
selected programme type flashes, and the receiver
receives the station.
Note
“NO PTY” appears when the programme type that you've
selected is not being broadcast and the receiver returns to
the original station.
14
EN
The receiver enters EON standby mode.
“NO TA”, “NO NEWS”, or “NO INFO”, appears if you
press EON before tuning to an RDS station.
When a station starts broadcasting the programme you
selected, the receiver switches to the station, a message
(e.g., “NOW TA”) appears and the respective indicator
(e.g.,“TA”) flashes. After the programme ends, the
receiver switches back to the station you were listening
to (or the function you were using).
To stop monitoring the programme
Press EON once.
Turn off the EON feature when you want to record a
programme without interruptions, especially when you
want to do timer recording.
Notes
• To use this function, be sure to store the RDS stations
beforehand.
• When the selected station has a weak signal, “WEAK SIG”
appears and then, the receiver returns to the previous
station or programme source.
You can select the following programme types:
Programme
type
NONE
NEWS
AFFAIRS
INFO
SPORT
What you hear
Any programmes not defined below
News programmes
Topical programmes that expand on
current news
Programmes about consumer affairs,
medical advice, and weather
Sports programmes
Receiver Operations
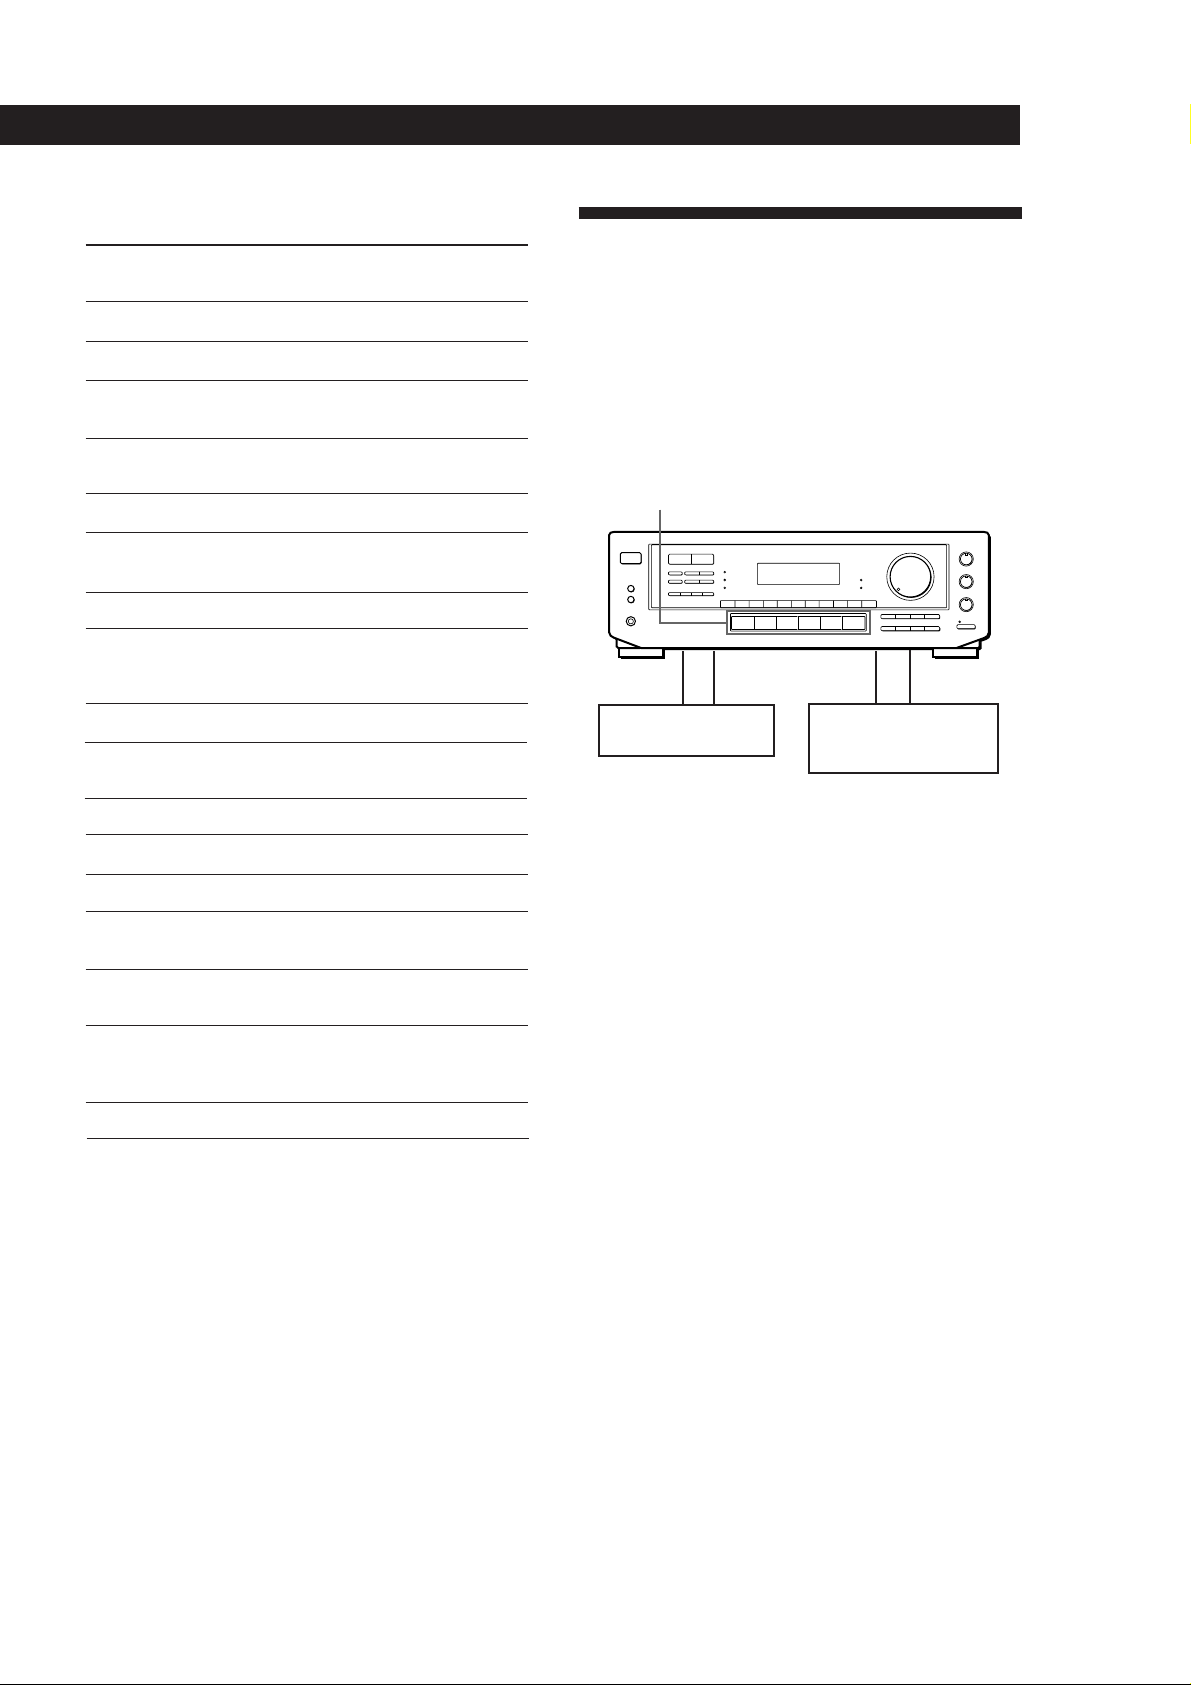
Recording
This receiver makes it easy to record to and from the
components connected to the receiver. You don’t have
to connect playback and recording components
directly: once you select a programme source on the
receiver, you can record and edit as you normally
would using the controls on each component.
Before you begin, make sure you’ve connected all
components properly.
Function buttons
EDUCATE
DRAMA
CULTURE
SCIENCE
VARIED
POP M
ROCK M
M.O.R.M
LIGHT M
CLASSICS
OTHER M
ALARM
Educational programmes, such as a
“how-to” programme and advice
Radio plays and serials
Programmes about national or regional
culture, such as religion, language, and
societal concerns
Programmes about the natural sciences
Programmes containing celebrity
interviews, panel games, and comedy
Popular music programmes
Rock music programmes
Easy Listening (middle of the road music)
Classical music, such as instrumental,
vocal, and choral
Performances of major orchestras,
chamber music, opera, etc.
Music that does not fit into any of the
above categories, such as jazz and
rhythm and blues
Emergency announcements
Note
If there is an emergency announcement by governmental
authorities, ALARM flashes in the display.
c
cçç
Playback component
(programme source)
ç: Audio signal flow
c: Video signal flow
Recording component
(Tape deck, MD deck,
VCR)
Recording on an audio tape or MiniDisc
You can record on a cassette tape or MiniDisc using the
receiver. See the instruction manual of your tape deck
or MD deck if you need help.
1 Press one of the function buttons to select the
programme source.
2 Set the component to be ready for playing.
For example, insert a CD into the CD player.
3 Insert a blank tape or disc into the recording deck
and adjust the recording level, if necessary.
4 Start recording on the recording deck and then
start playing the component.
(continued)
15
EN

Receiver Operations
Recording on a video tape
You can record from a TV or a LD player using the
receiver. You can also add audio from a variety of
audio sources when editing a video tape. See your VCR
or LD player’s instruction manual if you need help.
1 Press TV/LD to select the programme source.
2 Set the component to be ready for playing.
For example, insert the laser disc you want to
record from into the LD player.
3 Insert a blank video tape into the VCR for
recording.
4 Start recording on the VCR and then start playing
the laser disc you want to record.
You can replace audio while copying a laser disc
At the point you want to start adding different sound,
press another function button (for example, CD) and
start playback. The sound from the selected component
will be recorded over the original audio.
To resume recording the sound of the laser disc, press
the TV/LD function button.
16
EN
Using Surround Sound
Choosing a Surround Mode
You can take advantage of surround sound simply by
selecting one of the three pre-programmed surround
modes according to the type of music you wish to play.
SURROUND ON/OFF SURROUND MODE
Using Surround Sound
You can find Dolby Surround-encoded software by
looking at the packaging
However, some videos and laser discs may use Dolby
Surround sound even if it’s not indicated on the
package.
Note
Make sure to select speaker A with the SPEAKERS A button,
otherwise, you can’t obtain the surround effect.
Adjusting the Effect Level (for THEATER and
HALL only)
DELAY TIME/EFFECT
SURROUND
ON/OFF
SURROUND
MODE
1 Press SURROUND ON/OFF to turn on the
surround sound.
One of the SUR (surround) MODE indicators
lights up in the display.
2 Press SURROUND MODE repeatedly until the
indicator for the surround mode you want lights
up.
Select the appropriate surround mode as follows:
Select
PRO LOGIC*
To
Decode programmes processed with Dolby
Surround and create the atmosphere of a
movie theatre.
You can make the surround sound more prominent by
increasing the EFFECT level. This control lets you
adjust the “presence” of the surround effect in six steps
(1-6).
1 Start playing a programme source.
2 Press DELAY TIME/EFFECT to select the level
you prefer. The effect level (“EFFECT 1” …
“EFFECT 6”) appears on the display.
Note
Changing the effect level may not produce major variations
in the surround effect when used with certain playback
sources.
THEATER
HALL
* “DOLBY” appears in the display.
When you use the remote
Each time you press SURROUND MODE, surround
mode changes as follows:
* “DOLBY” appears in the display.
To turn off surround sound
Press SURROUND ON/OFF.
Add the acoustic reflections of a theatre to
decoded Dolby Surround signals.
Reproduce the acoustics of a rectangular
concert hall. Ideal for soft, acoustic sounds.
nnTHEATER n HALLPRO LOGIC*
17
EN
Using Surround Sound
Getting the Most Out of Dolby
Pro Logic Surround Sound
To obtain the best possible Dolby Pro Logic Surround
sound, first select the centre mode according to the
speaker system you have. Then, adjust each speaker
volume and delay time.
Note that you must have at least one additional pair of
speakers and/or one centre speaker to do the following
adjustments.
CENTER
MODE
SURROUND
ON/OFF
SURROUND
MODE
CENTER
LEVEL +/–
Selecting the centre mode
The receiver offers you four centre modes:
PHANTOM, 3 CH LOGIC, NORMAL, and WIDE. Each
mode is designed for a different speaker configuration.
Select the mode that best suits your speaker’s system
configuration.
1 Press SURROUND ON/OFF to turn on surround
sound.
2 Press SURROUND MODE repeatedly to select the
Dolby surround sound field (PRO LOGIC or
THEATER mode).
3 Press CENTER MODE repeatedly until the centre
mode you want appears in the display. Select the
centre mode as follows:
DELAY TIME/
EFFECT
SURROUND
ON/OFF
DELAY TIME
REAR
LEVEL +/–
REAR
LEVEL +/–
SURROUND
MODE
TEST TONE
CENTER
LEVEL +/–
If you have
Front and rear
speakers, no
centre speaker
Front and centre
speakers, no rear
speaker
Front and rear
speakers, and a
small centre
speaker
Front and rear
speakers, and a
large centre
speaker
Select
PHANTOM
3 CH LOGIC
(3 Channel
Logic)
NORMAL
WIDE
So that
The sound of the
centre channel is
output from the front
speakers.
The sound of the rear
channel is output
from the front
speakers.
The bass sound of the
centre channel is
output from the front
speakers (because a
small speaker cannot
produce enough
bass).
For “complete”
Dolby Pro Logic
Surround sound.
18
EN
Using Surround Sound
Adjusting the speaker volume
The test tone feature lets you set the volume of your
speakers to the same level. (If all of your speakers have
equal performance, you don’t have to adjust the
speaker volume.)
Using the controls on the remote lets you adjust the
volume level from your listening position.
1 Press TEST TONE on the remote.
You will hear the test tone from each speaker
sequentially.
2 Adjust the volume level so that the test tone from
each speaker is at the same level from your
listening position.
• To adjust the level of centre speaker, press
CENTER LEVEL + or – on the remote.
• To adjust the level of rear speakers, press
REAR LEVEL + or – on the remote.
3 Press TEST TONE on the remote to turn off the
test tone.
Adjusting the delay time
You can make the surround sound more effective by
delaying the output from the rear speakers (delay
time). You can select from three delay times, S (15 mS),
M (20 mS), and L (30 mS). For example, if you’ve
placed the rear speakers in a large room or apart from
your listening position, set the delay time shorter.
1 Start playing a programme source encoded with
Dolby Surround sound.
2 Press DELAY TIME on the remote or DELAY
TIME/EFFECT on the receiver repeatedly to
choose the delay time parameter. The current
delay time appears in the display, such as
“DELAY S,” “DELAY M” or “DELAY L.”
Note
Select the PRO LOGIC mode when you adjust the delay time
using DELAY TIME/EFFECT on the receiver.
You can adjust all speakers at one time
Adjust MASTER VOL on the remote or MASTER
VOLUME on the receiver.
You can also adjust the volume level with the
controls on the receiver
After pressing TEST TONE on the remote, press REAR
LEVEL + or – and CENTER LEVEL + or – to adjust the
level of the rear and centre speakers respectively.
You can increase the output level of the rear
speakers
The adjustment range of the rear speakers is preset from
–15 to +10, but you can shift the range up 5 levels (–10
to +15). Hold down CENTER MODE on the receiver
while turning on the power until “GAIN UP” appears
on the display.
The values for the rear level remain fixed at –15 to +10
in the display, but you will be able to hear the difference
in the actual output level.
To reset the rear level adjustment range, repeat this
procedure to display “NORMAL”.
19
EN

20
EN
Additional Information
Troubleshooting
If you experience any of the following difficulties while
using the receiver, use this troubleshooting guide to
help you remedy the problem. Should any problem
persist, consult your nearest Sony dealer.
There’s no sound or only a very low-level sound is heard.
/ Check that the speakers and components are
connected securely.
/ Make sure you select the correct component
on the receiver.
/ Make sure you set the SPEAKERS selector
correctly.
/ Press MUTING on the remote if “MUTING”
is displayed.
/ The protective device on the receiver has been
activated because of a short circuit.
(“PROTECT” flashes.) Turn off the receiver,
eliminate the short-circuit problem and turn
on the power again.
The left and right sounds are unbalanced or reversed.
/ Check that the speakers and components are
connected correctly and securely.
/ Adjust the BALANCE control.
Severe hum or noise is heard.
/ Check that the speakers and components are
connected securely.
/ Check that the connecting cords are away
from a transformer or motor, and at least 3
meters away from a TV set or fluorescent
light.
/ Place your TV away from the audio
components.
/ Make sure you connect a ground wire to the
aerial ground terminal.
/ The plugs and jacks are dirty. Wipe them
with a cloth slightly moistened with alcohol.
RDS isn’t working.
/ Make sure you're tuning an FM station.
/ Select a stronger FM station.
The appropriate display or information does not appear.
/ Contact the radio station and find out
whether or not they actually provide the
service in question. If so, the service may be
temporarily out of service.
The station, or programme source, was interrupted by
another station / the tuner automatically starts searching
stations.
/ The EON function is working. Turn off EON
when you don't want the current programme
interrupted.
The station name does not appear in the display.
/ Press DISPLAY until the station name
appears.
Radio stations cannot be tuned in.
/ Check that the aerials are connected securely.
Adjust the aerials and connect an outdoor
aerial if necessary.
/ The signal strength of the stations is too weak
(when you tune in with automatic tuning).
Use direct tuning.
/ No stations have been preset or the preset
stations have been cleared (when you tune in
with scanning preset stations). Preset the
stations (see page 12).
No sound or only a very low-level sound is heard from
the rear speakers.
/ Select the appropriate centre mode (see page
18).
/ Adjust the speaker volume appropriately (see
page 19).
/ Make sure you turn on the sound field
surround mode function.
No sound is heard from the centre speaker.
/ Select the appropriate centre mode (see page
18).
/ Adjust the speaker volume appropriately (see
page 19).
Surround effect cannot be obtained.
/ Make sure you turn on the sound field
function.
/ Make sure that the front speakers are
connected to the SPEAKERS A terminal.
/ Make sure that SPEAKERS A and B buttons
are depressed when two sets of front speakers
are used.
No picture or an unclear picture is seen on the TV screen.
/ Select the appropriate function on the
receiver.
/ Place your TV away from the audio
components.
Recording cannot be made.
/ Check that the components are connected
correctly.
The remote does not function.
/ Point the remote at the remote sensor g on
the receiver.
/ Remove the obstacles in the path of the
remote and the receiver.
/ Replace both batteries in the remote with new
ones if they are weak.
/ Make sure you select the correct function on
the remote.
/ Pressing TV CONTROL sets the remote to
operate the TV only. In this case, press one of
the SYSTEM CONTROL/FUNCTION buttons
before operating the receiver (etc.).

Additional Information
Specifications
Amplifier section
Power output
Stereo mode
Surround mode
Frequency
response
Inputs
Sensitivity
PHONO
(MM)
CD
TAPE/MD,
TV/LD,
VIDEO
Outputs
Muting
BASS BOOST
TONE
FM tuner section
Tuning range
Aerial terminals
Sensitivity
Usable sensitivity
(DIN 1 kHz, 4 ohms)
75 W + 75 W
(DIN 1 kHz, 4 ohms)
Front:
50 W/ch
Centre:
50 W
(only in the PRO
LOGIC mode)
Rear:
50 W
PHONO: RIAA
equalization curve
±0.5 dB
CD, TAPE/MD, VIDEO:
10 Hz - 50 kHz ±1 dB
Impedance
2.5 mV
50
kilohms
200 mV
50
150 mV
kilohms
TAPE/MD REC OUT:
Voltage 150 mV,
Impedance 10 kilohms
VIDEO AUDIO OUT:
Voltage 150 mV,
Impedance 10 kilohms
PHONES: Accepts low
and high impedance
headphones
Full mute
+10 dB at 70 Hz
±8 dB at 100 Hz and
10 kHz
65.0 - 74.0 MHz
87.5 - 108.0 MHz
75 ohms, unbalanced
Mono: 18.3 dBf, 2.2 µV
/75 ohms
Stereo: 38.3 dBf, 22.5 µV
/75 ohms
11.2 dBf, 1 µV
/75 ohms (IHF)
S/N
(weighting
network,
input level)
74 dB
72 dB*
(A, 2.5 mV)
82 dB
82 dB*
(A, 150 mV)
* ‘78 IHF
S/N
Harmonic
distortion at
1 kHz
Separation
Frequency
response
Selectivity
Mono: 76 dB
Stereo: 70 dB
Mono: 0.3 %
Stereo: 0.5 %
45 dB at 1 kHz
30 Hz - 15 kHz dB
60 dB at 400 kHz
+0.5
–2
AM tuner section
Tuning range
Aerial
Usable
sensitivity
S/N
Harmonic
distortion
Selectivity
531 - 1,611 kHz
Loop aerial
50 dB/m (at 999 kHz)
54 dB (at 50 mV/m)
0.5 % (50 mV/m,
400 Hz)
35 dB
Video section
Inputs
Outputs
VIDEO, TV/LD:
1 Vp-p 75 ohms
VIDEO:
1 Vp-p 75 ohms
MONITOR:
1 Vp-p 75 ohms
General
System
Power
requirements
Power
consumption
AC outlets
Dimensions
Mass (Approx.)
Supplied
accessories
Design and specifications are subject to
change without notice.
Tuner section: PLL
quartz-locked digital
synthesizer system
Preamplifier section:
Low-noise NF type
equalizer
Power amplifier section:
Pure-complimentary
SEPP
220-230 V AC, 50/60 Hz
160 W
Switched 100 W
430 x 145 x 300 mm
6.3 kg
FM wire aerial (1)
AM loop aerial (1)
Remote controller
(remote) (1)
Size AA (R6) batteries (2)
21
EN
Additional Information
Glossary
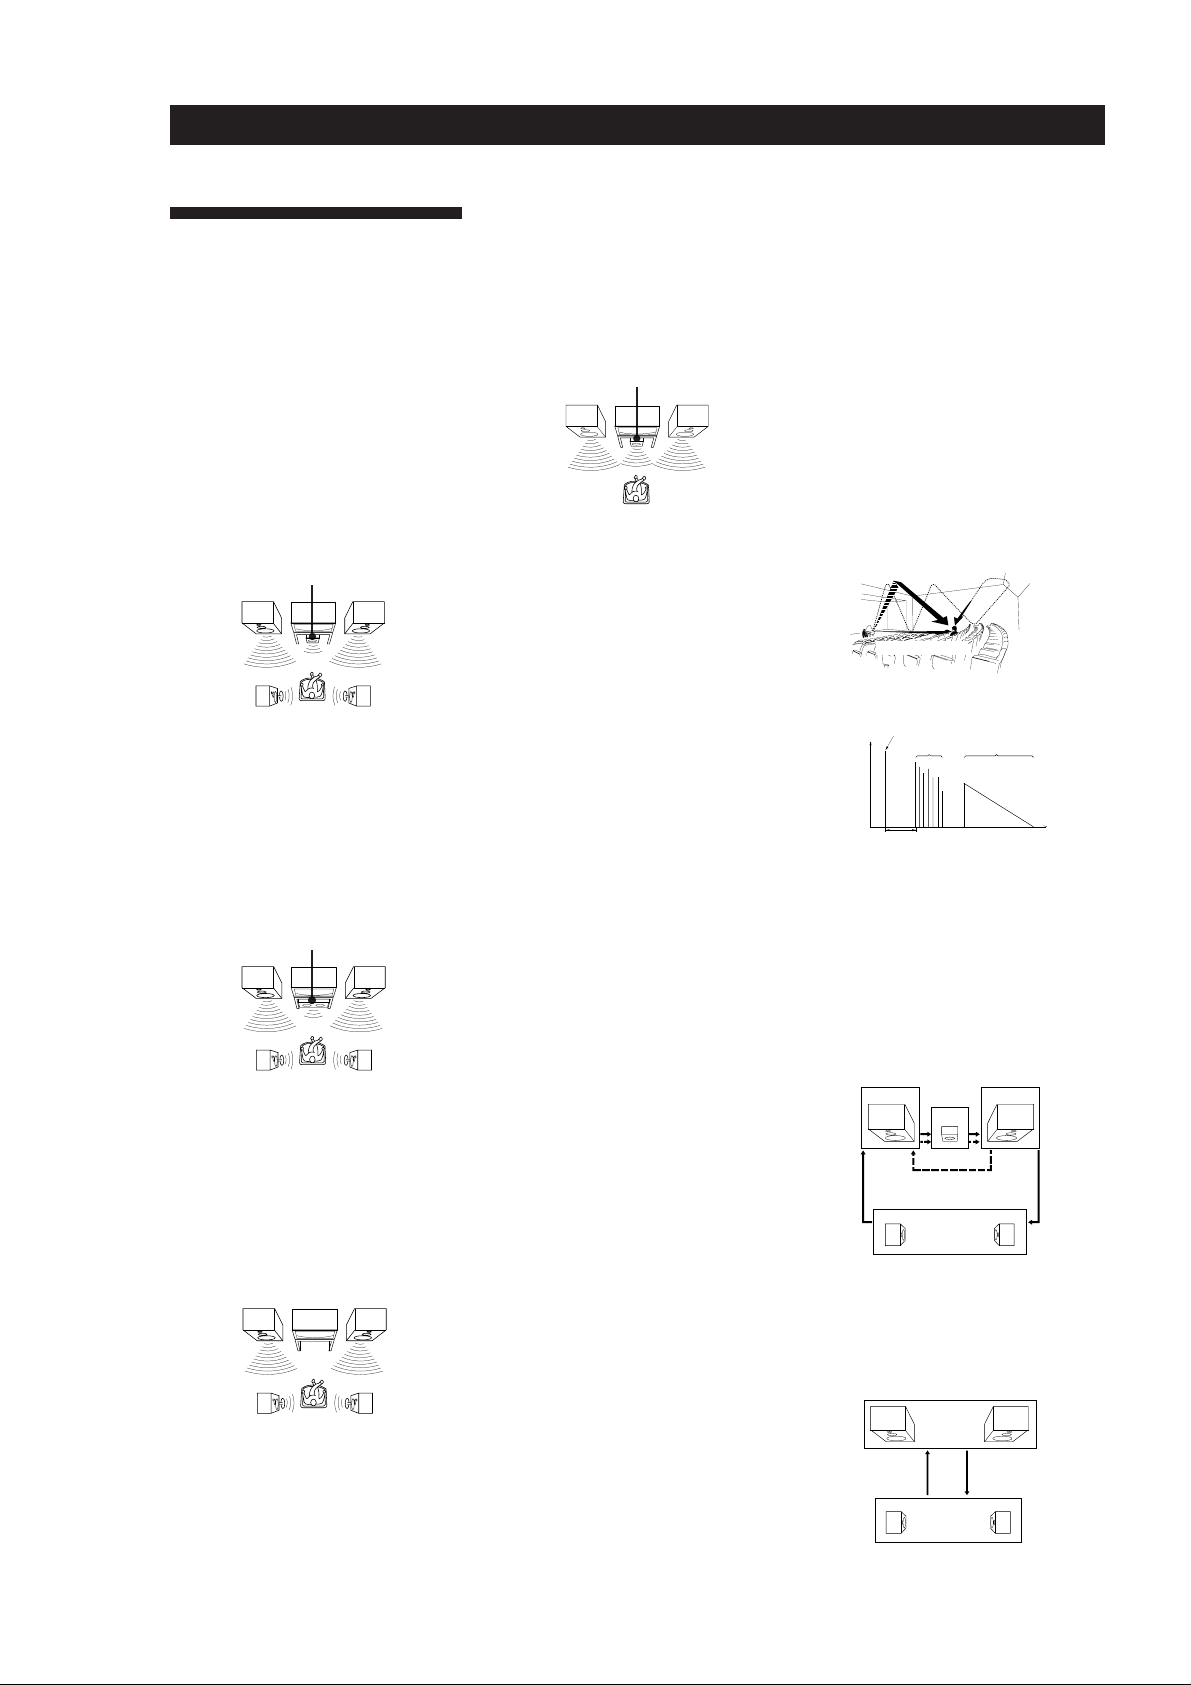
Centre mode
Setting of speakers to enhance Dolby Pro
Logic Surround mode. To obtain the best
possible surround sound, select one of the
following four centre modes according to
your speaker system.
• NORMAL mode
Select NORMAL mode if you have front
and rear speakers and a small centre
speaker. Since a small speaker cannot
produce enough bass, the bass sound of
the centre channel is output from the front
speakers.
Front
speaker (L)
speaker (L)
Centre
speaker
Rear
• WIDE mode
Select WIDE mode if you have front and
rear speakers and a large centre speaker.
With the WIDE mode, you can take full
advantage of Dolby Surround sound.
Front
speaker (L)
Center
speaker
Rear
speaker (L)
Front
speaker (R)
Rear
speaker (R)
Front
speaker (R)
Rear
speaker (R)
• 3 CH LOGIC mode
Select 3 CH LOGIC mode if you have front
and centre speakers but no rear speaker.
The sound of the rear channel is output
from the front speakers to let you
experience some of the surround sound
without using rear speakers.
Front
speaker (L)
Centre
speaker
Front
speaker (R)
Delay time
Time lag between the surround sound output
from front speakers and rear speakers. By
adjusting the delay time of the rear speakers,
you can obtain the feeling of presence. Make
the delay time longer when you have placed
the rear speakers in a small room or close to
your listening position, and make it shorter
when you have placed them in a large room
or apart from your listening position.
Direct tuning
Tuning method to let you directly enter a
station’s frequency using the numeric
buttons. Use this method if you know the
frequency of the station you want.
Dolby Pro Logic Surround
Decoding system of Dolby Surround sound
standardized in TV programmes and movies.
Compared with the former Dolby Surround
system, Dolby Pro Logic Surround improves
sound image by using four separate channels:
off-screen audio effects, on-screen dialog,
left-to-right panning, and music. These
channels manipulate the sound to be heard
and enhance the action as it happens on the
screen. To take advantage of Dolby Pro Logic,
you should have at least one pair of rear
speakers and/or one centre speaker. You also
need to select the appropriate centre mode to
enjoy a full effect.
Preset station
A radio broadcasting station that is stored in
memory of the receiver. Once you “preset”
stations, you no longer have to tune in the
stations. Each preset station is assigned its
own preset number, which lets you tune
them in quickly.
Surround sound
Sound that consists of three elements: direct
sound, early reflected sound (early
reflections) and reverberative sound
(reverberation). The acoustics where you hear
the sound affect the way these three sound
elements are heard. These sound elements are
combined in such a way that you can actually
feel the size and the type of a concert hall.
• Types of sound
Early reflections
Direct sound
Reverberation
• Transition of sound from rear speakers
Direct sound
Level
Early reflection time
Early
reflections Reverberation
Time
Test tone
Signal given out by the receiver for adjusting
the speaker volume. The test tone will come
out as follows:
• In a system with a centre speaker
(NORMAL/WIDE/3 CH LOGIC modes)
The test tone is output from the front L
(left), centre, front R (right), and rear
speakers in succession.
Front (L)
Front (R)
Centre
22
EN
• PHANTOM mode
Select PHANTOM mode if you have front
and rear speakers but no centre speaker.
The sound of the centre channel is output
from the front speakers.
Front
speaker (L)
Rear
speaker (L)
Front
speaker (R)
Rear
speaker (R)
Dolby Surround
Encoding and decoding system of Dolby
Surround sound for consumer use. Dolby
Surround decodes the extra channels on the
Dolby Surround-encoded sound tracks of
movie videos and TV programmes and
produces sound effects and echoes that make
the action seem to envelop you.
The receiver offers Dolby Surround as one of
the pre-programmed sound fields. If you
have rear or centre speaker(s), we
recommend that you customize the Dolby
Surround sound field by selecting the
appropriate centre mode to take advantage of
Dolby Pro Logic Surround sound.
3 CH LOGIC
Rear (L, R)
NORMAL/WIDE
• In a system without a centre speaker
(PHANTOM mode)
The test tone is output from the front and
the rear speakers alternately.
Front (L, R)
PHANTOM
Rear (L, R)

Index
A, B
Adjusting
delay time 19
speaker volume 19
tone 9
volume 9
Aerial hookups 5
Audio component hookups 5,
6
Automatic tuning 12
Background operation 10
C
Centre mode 18, 22
NORMAL mode 18, 22
PHANTOM mode 18, 22
3 CH LOGIC mode 18, 22
WIDE mode 18, 22
Character 13
Connecting. See Hookups
D
Delay time 19, 22
Direct tuning 11, 22
Display 13
Dolby Pro Logic
Surround 22
getting the most out of 18
Dolby Surround sound 17, 22
centre mode 18, 22
Dubbing. See Recording
E, F, G
Editing. See Recording
EON 14
H, I, J, K, L, M
Hookups
aerials 5
audio components 5, 6
mains lead 8
overview 4
speakers 6, 7
video component 7
N, O
Naming preset stations 13
NORMAL mode 18, 22
P
PHANTOM mode 18, 22
Preset station 22
Presetting
radio stations 12
Preset tuning 13
Programme source
selecting 9, 10
PTY 14
Q
Quick reference guide 26
R
Random Music Sensor 25
RDS 13
Rear panel 5, 6, 7, 8, 24
Receiving broadcasts
directly 11
using preset stations 13
Recording
on a tape 15
on a video tape 16
Remote buttons 9, 10, 25
background operation 10
S
Scanning
preset stations 13
radio stations 12
Selecting a programme source
9
using the remote 9, 10
Speakers
connection 6, 7
placement 6
selecting speaker system 7
Storing radio stations. See
Presetting
Surround sound 17, 22
T
Test tone 19, 22
3 CH LOGIC mode 18, 22
Troubleshooting 20
Tuning. See Receiving
broadcasts
U
Unpacking 4
V
Video component hookups 7
W, X, Y, Z
Watching/listening to video
programmes 9
WIDE mode 18, 22
23
EN
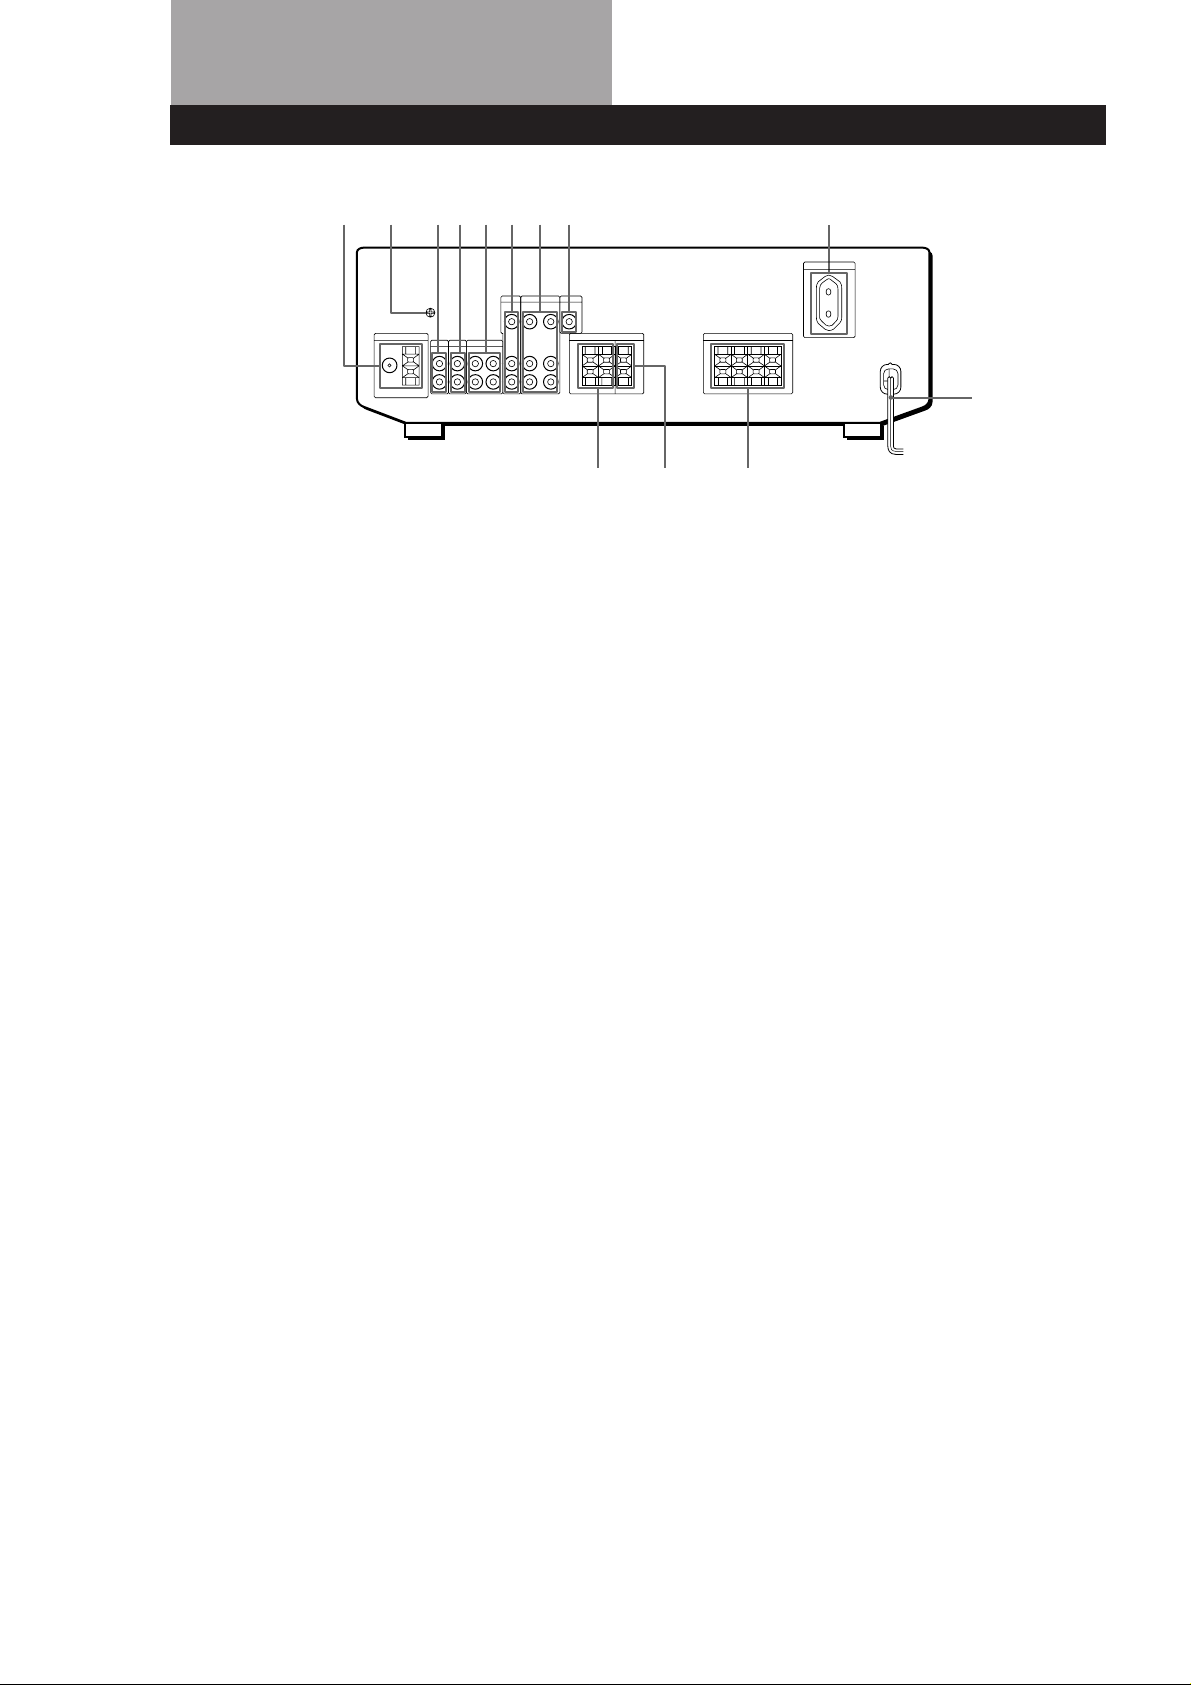
Rear Panel Descriptions
1
1 ANTENNA (AM/FM)
2y ground terminal
3 PHONO
4 CD
5 TAPE/MD
2345678
6 TV/LD
7 VIDEO
8 MONITOR
9 SWITCHED AC OUTLET
0 Mains lead
9
0
!™!£
!¡
!¡FRONT SPEAKERS (A/B)
!™ SURROUND SPEAKER
(CENTER)
!£SURROUND SPEAKERS
(REAR)
24
EN

Remote Button Descriptions
For buttons not described on previous pages and buttons with names different from the buttons on the main unit.
Remote
Button
0-9
>10
CH/PRESET
+/–
D. SKIP
0 / )
= / +
P
Operates
Receiver
CD player/MD
deck
TV/VCR
CD player/
Tape deck/
MD deck
Receiver
TV/VCR
CD player
CD player
Tape deck/MD
deck/VCR
CD player/
MD deck
CD player/
Tape deck/MD
deck/VCR
Function
Selects preset numbers.
Selects track numbers.
0 selects track 10.
Selects channel numbers.
Selects track numbers
over 10.
Scans and selects preset
stations.
Selects preset channels.
Skips discs (CD player
with multi-disc changer
only.)
Searches tracks (forward
or backward).
Fastforwards or rewinds.
Skips tracks.
Pauses play or record.
(Also starts recording
with components in
record standby.)
Remote
Button
RMS/START
ENTER
TV/VIDEO
VISUAL
POWER
TV CONTROL
-/- -
SUB CH +/–
POSITION
SWAP
P IN P
Operates
Tape deck
TV/VCR
TV/VCR
TV/VCR
TV
TV
TV
TV
TV
TV
Function
Programmes tracks (tape
deck with the RMS*
function only).
Changes channels when
used with 0-9.
Selects input signal: TV
input or video input.
Turns on or off the power.
Turns on the TV, switches
the input to “TV,” and
sets the remote to operate
the TV.
Selects the channel entry
mode, either one or two
digit.
Selects preset channels for
the small picture.**
Changes the position of
the small picture.**
Swaps the small and the
large picture.**
Activates the picture-inpicture function.**
(
p
9
r
r + (
RMS
DIRECTION
RMS CLEAR
CD player/
Tape deck/MD
deck/VCR
CD player/
Tape deck/MD
deck/VCR
Tape deck
Tape deck
Tape deck/
MD deck/
VCR
Tape deck
Tape deck
Starts play.
Stops play.
Starts play on the reverse
side.
Sets tape decks to the
record standby mode.
Starts recording when
pressed with ( (or 9
on tape deck).
Selects tape direction (for
tape decks with the RMS*
function.)
Clears RMS* programme
(for tape decks with the
RMS function.)
JUMP
MASTER VOL
+/–
MUTING
ANT TV/VTR
* RMS: Random Music Sensor
** Only for Sony TVs with the picture-in-picture function
TV
TV
TV
VCR
Jumps back and forth
between the previous and
current channels.
Normally, adjusts the
master volume of the
receiver.
If TV CONTROL was
pressed, it adjusts the
volume on the TV.
Normally, mutes the
sound from the receiver.
If TV CONTROL was
pressed, the sound on the
TV itself is muted.
Selects output signal from
the aerial terminal: TV
signal or VCR
programme.
Note
Some Sony equipment can not be controlled by this remote
as shown in the table above.
25
EN
Quick Reference Guide
Receiving Broadcasts
(direct tuning)
Example: Receiving FM
102.50 MHz
TUNER
v
FM/AM
Select FM.
v
DIRECT
v
10 250
Display
MHz
Presetting Radio
Stations
Example: Presetting a
station as A7
TUNER
v
Tune in the station you want.
v
MEMORY
v
SHIFT
Select A.
v
7
Selecting a
Component
Example 1:Playing a CD
CD
v
Turn on the CD player.
v
Start playing.
Example 2:Watching a video
tape
VIDEO
v
Turn on the VCR.
v
Start playing.
Scanning Radio
Stations
Example: Scanning FM
(automatic tuning)
stations
TUNER
v
FM/AM
TUNING/
–
CHARACTER
+
TUNING/
CHARACTER
– +
v
v
Select FM.
To continue
scanning.
Receiving Preset
Stations
Example: Receiving the
station number A7
TUNER
v
SHIFT
Select A.
v
7
Scanning Preset
Stations
TUNER
Using Pre-programmed
Sound Fields
Example: Watching the laser
disc of a Dolby
Surround-encoded
movie
TV/LD
v
SURROUND
ON/OFF
v
SURROUND
MODE
v
Turn on the LD player.
v
Start playing.
Select PRO
LOGIC.
26
v
– PRESET TUNING +
EN

OSTRZEØENIE
Aby nie dopu ciÊ do
poøaru lub poraøenia
elektrycznego, naleøy
chroniÊ urz±dzenie przed
deszczem lub dzia aniem
wilgoci.
Aby unikn±Ê poraøenia elektrycznego,
nie naleøy otwieraÊ obudowy. Naprawy
urz±dzenia naleøy powierzaÊ
specjalistom.
Nie ustawiaj urz±dzenia w ciasnym
miejscu takim jak w±ska pÛ ka na
ksi±øki, czy wnÍka w zestawie
meblowym.
¶rodki ostroøno ci
O bezpieczeÒstwie
• Jeøeli jakikolwiek obiekt sta y lub p yn
dostanie siÍ do wnÍtrza obudowy,
naleøy od ±czyÊ urz±dzenie od ºrÛd a
pr±du i przed ponownym uøyciem
zleciÊ sprawdzenie
wykwalifikowanemu personelowi.
O ºrÛdle zasilania
• Przed rozpoczÍciem uøytkowania
upewnij siÍ, czy napiÍcie wymagane
dla niniejszego odbiornika zgodne
jest z napiÍciem w lokalnej sieci.
NapiÍcie wyszczegÛlnione jest na
plakietce umieszczonej z ty u
niniejszego odbiornika.
• Nawet je li sam odbiornik jest
wy ±czony, to jednak pozostaje on
pod ±czony do ºrÛd a zasilania
pr±dem zmiennym dopÛki
pod ±czony jest do gniazdka
ciennego.
• Jeden z bolcÛw wtyczki jest grubszy,
poniewaø w celu zapewnienia
bezpieczenstwa skonstruowano go
tak, aby pasowa do gniazdka tylko w
jeden sposÛb. Jeøeli wtyczka nie
wchodzi ca kowicie do gniazdka,
skontaktuj siÍ z punktem sprzedaøy.
• Wymiany przewodu zasilania wolno
dokonywaÊ wy ±cznie w
wykfalifikowanym punkcie
us ugowym.
• W ±cznik zasilania znajduje siÍ z
przodu obudowy.
Obs uga
• Przed pod ±czaniem innych urz±dzeÒ
upewnij siÍ, øe odbiornik jest
wy ±czony i od ±czony od ºrÛd a
zasilania.
Czyszczenie
• ObudowÍ, p ytÍ czo ow± i regulatory
czy Ê miÍkk± ciereczk± lekko
zwiløon± agodnym detergentem. Nie
uøywaj szorstkiej tkaniny, proszku
czyszcz±cego oraz rodkÛw takich
jak alkohol czy benzyna.
W przypadku pytaÒ lub zaistnienia
jakichkolwiek problemÛw
dotycz±cych niniejszego
urz±dzenia, prosimy skonsultowaÊ
siÍ z najbliøszym punktem
sprzedaøy sprzÍtu Sony.
O lokalizacji
• Umie Ê odbiornik w miejscu
zapewniaj±cym dobr± wentylacjÍ,
aby zapobiegaÊ przegrzaniu
urz±dzenia i w ten sposÛb przed uøyÊ
jego øywotno Ê.
• Nie ustawiaj niniejszego odbiornika w
pobliøu ºrÛde ciep a lub w miejscu
bezpo rednio nas onecznionym,
szczegÛlnie zakurzonym lub
naraøonym na wstrz±sy
mechaniczne.
• Nie ustawiaj na obudowie nic, co
mog oby blokowaÊ otwory
wentylacyjne i powodowaÊ wadliwe
dzia anie.
PL
2
O niniejszej
SPIS TRE¶CI
instrukcji
Obja nienia w niniejszej instrukcji
opisuj± regulatory niniejszego
odbiornika. Moøna rÛwnieø korzystaÊ z
regulatorÛw pilota zdalnego sterowania,
jeøeli ich nazwy s± identyczne lub
zbliøone do nazw regulatorÛw
niniejszego odbiornika.
• Na str. 29 znajduje siÍ ÜSkrÛcony
przewodniká.
• CzÍ Ê ÜOpis regulatorÛw pilotaá na
str. 28 zapoznaje z regulatorami
pilota.
• w niniejszej instrukcji uøyte s±
nastÍpjÍce symbole:
Wskazuje moøliwo Ê korzystania
z pilota.
Wskazuje wzmianki i uwagi
u atwiaj±ce dan± czynno Ê.
Produkowane na licencji Dolby
Laboratories Licensing Corporation.
DOLBY, symbol DD a i PRO
LOGIC sa znakami towarowymi
firmy Dolby Laboratories Licensing
Corporation.
Czynno ci wstÍpne
Rozpakowywanie 4
OgÛlnie o pod ±czeniach 4
Pod ±czenie anten zewnÍtrznych 5
Pod ±czenie komponentÛw audio 5
Pod ±czenie zestawu g o nikÛw 6
Pod ±czenie komponentÛw wideo 7
Pod ±czenie zasilania pr±dem zmiennym 8
Zanim zaczniesz korzystaÊ z odbiornika 8
Automatyczne wprowadzenie do pamiÍci stacji FM w porz±dku
alfabetycznym (ÜAuto-beticalá) 9
Obs uga odbiornika
WybÛr komponentÛw 10
OdbiÛr programÛw radiowych 12
Wprowadzanie stacji do pamiÍci 13
Korzystanie z radiowego systemu danych (RDS) 14
Nagrywanie 16
PL
Korzystanie z dºwiÍku przestrzennego
WybÛr funkcji przestrzennej 18
UmiejÍtno Ê maksymalnego wykorzystania przestrzennego dºwiÍku
Dolby Pro Logic 19
Informacje dodatkowe
W razie trudno ci 21
Dane techniczne 23
S owniczek 24
Indeks 26
Opis ty u obudowy 27
Opis regulatorÛw pilota 28
SkrÛcony przewodnik 29
PL
3
Czynno ci wstÍpne
Rozpakowywanie
Sprawdº, czy w wyposaøeniu znajduj± siÍ dodatkowe
elementy zestawu:
• Przewodowa antena zewnÍtrzna FM (1)
• Ramowa antena zewnÍtrzna AM (1)
• pilot zdalnego sterowania (1)
• baterie AA (R6) (2)
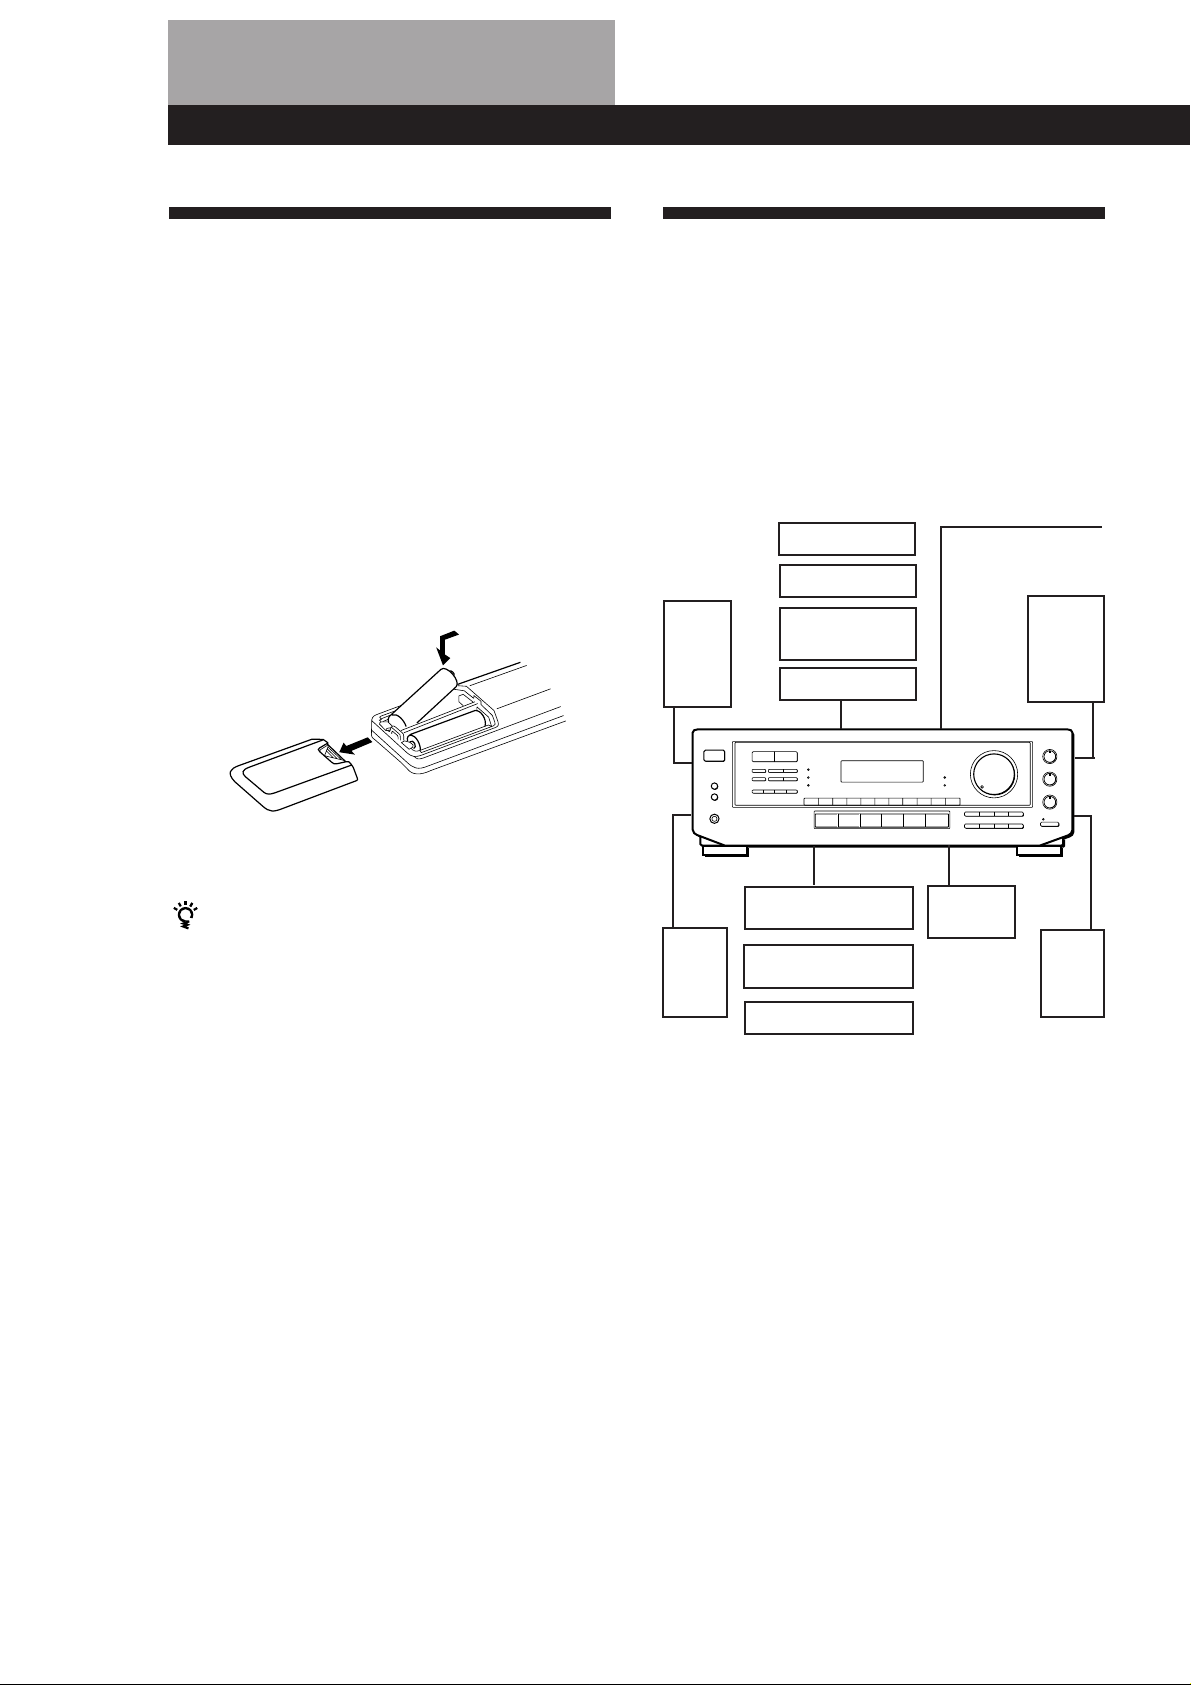
Wk adanie baterii do pilota
W Ûø dwie baterie AA (R6) zgodnie z oznaczeniami + i
â na pojemniku na baterie. Gdy uøywasz pilota, skieruj
czujnik g na odbiornik.
]
}
}
]
OgÛlnie o pod ±czeniach
Odbiornik umoøliwia pod ±czenie i korzystanie z
nastÍpuj±cych urz±dzeÒ audio/wideo. Aby pod ±czyÊ
do odbiornika poø±dane komponenty, postÍpuj
zgodnie z instrukcj± podan± na odpowiednich
stronach. Aby zapoznaÊ siÍ z umiejscowieniem i
nazw± kaødego z gniazdek, odwo aj siÍ do ÜOpisu ty u
obudowyá na str. 27.
Pod ±czenia
Pod ±czenie
zestawu
g o nikÛw (6)
g o nik
przedni
(lewy -
L)
komponentÛw
wideo (7)
monitor TV
odbiornik TV
odtwarzacz p yt
laserowych LD
magnetowid
Pod ±czenia anten
zewnÍtrznych (5)
antena AM/FM
g o nik
przedni
(prawy -
R)
Kiedy wymieniaÊ baterie
Podczas normalnego uøywania baterie powinny
wystarczyÊ na ok. 6 miesiÍcy. Jeøeli pilot przestanie
sterowaÊ odbiornikiem, zast±p obie baterie nowymi.
Uwagi
• Nie pozostawiaj pilota w miejscu szczegoÛlnie gor±cym
lub wilgotnym.
• Nie uøywaj nowej baterii ze star±.
• Nie wystawiaj czujnika na bezpo rednie dzia anie wiat a
s onecznego lub urz±dzeÒ o wietleniowych. Moøe to
powodowaÊ wadliwe funkcjonowanie.
• Jeøeli nie uøywasz pilota przez d uøszy okres czasu,
wyjmij z niego baterie, aby zapobiec uszkodzeniom, ktÛre
moøe wywo aÊ wyciek z baterii i korozja.
g o nik
rodkowy
g o nik
tylny
(prawy
R)
g o nik
tylny
(lewy
L)
odtwarzacz p yt
kompaktowych CD
magnetofon/odtwarzacz
mini p yt MD
gramofon
Pod ±czenia
komponentÛw audio
(5)
Przed rozpoczÍciem
• Zanim przyst±pisz do pod ±czania wy ±cz zasilanie
wszystkich komponentÛw.
• Nie pod ±czaj kabla zasilania przed dokonaniem
wszystkich pod ±czeÒ.
• Upewnij siÍ, czy pod ±czenia s± solidnie wykonane,
aby unikn±Ê przydºwiÍku i zak ÛceÒ.
• Podczas pod ±czania kabla audio/wideo upewnij siÍ,
øe dopasowa e oznaczone kolorami wtyki do
odpowiednich gniazdek komponentÛw: øÛ te (wideo)
do øÛ tych, bia e (lewe, audio) do bia ych, a
czerwone (prawe, audio) do czerwonych.
PL
4
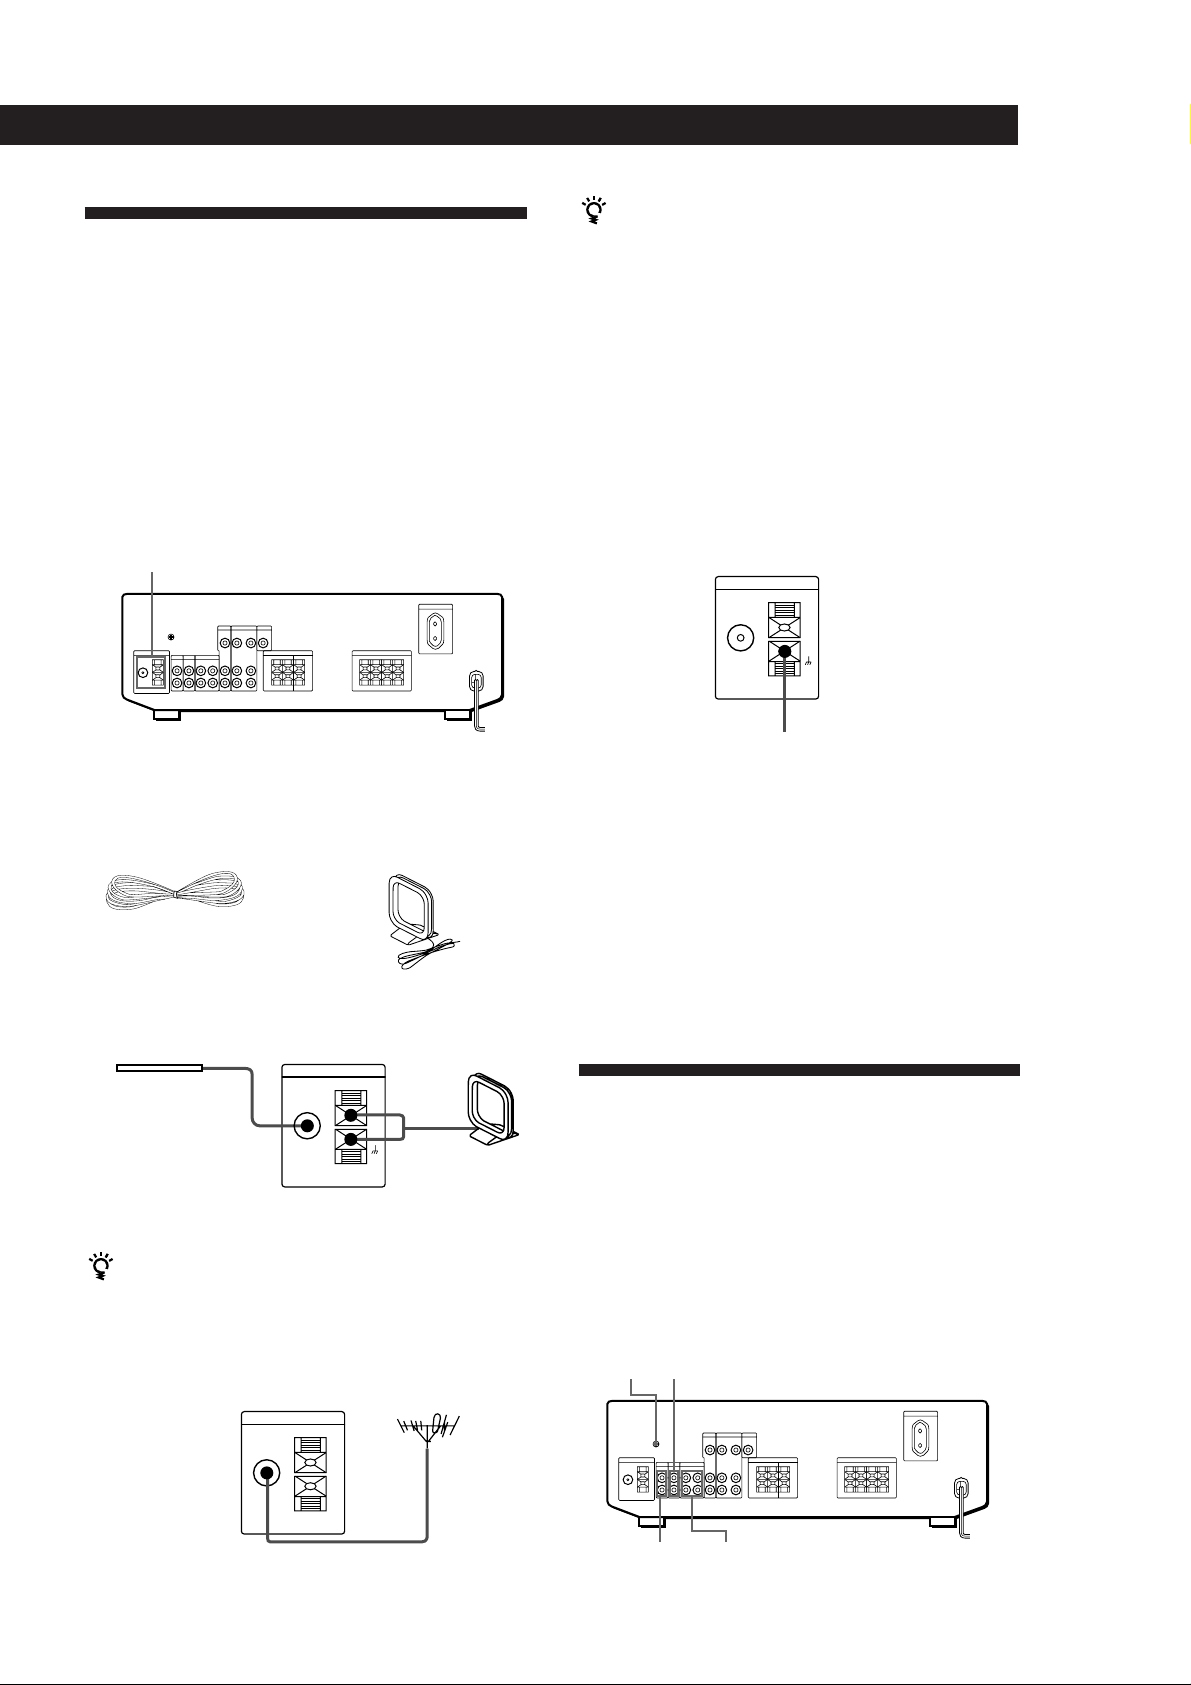
Pod ±czenie anten
ANTENNA
AM
zewnÍtrznych
OgÛlnie
Ta czÍ Ê instrukcji opisuje jak pod ±czyÊ anteny
zewnÍtrzne AM i FM do odbiornika. Jeøeli chcesz
odbieraÊ programy radiowe korzystaj±c z niniejszego
odbiornika, wykonaj to pod ±czenie w pierwszym
rzÍdzie, a nastÍpnie przejdº do dalszych obja nieÒ.
SzczegÛlna lokalizacja ±czy przedstawiona jest na
ilustracji poniøej.
ANTENNA
Czynno ci wstÍpne
Jeøeli odbiÛr AM jest niedobry
Razem z zewnÍtrzn± anten± ramow± AM , do ±cza
anteny zewnÍtrznej AM, pod ±cz dodatkowo 6-15
metrowy przewÛd izolowany (nie przewidziany w
wyposaøeniu).
Pod ±czenie uziemienia
Aby unikn±Ê przydºwiÍku, pod ±cz przewÛd
uziemienia (nie przewidziany w wyposaøeniu) do ±cza
uziemienia y. Jeøeli pod ±czy e antenÍ zamontowan±
na zewnÍtrz budynku, naleøy koniecznie pod ±czyÊ
uziemienie, aby zabezpieczyÊ siÍ przeciwko
wy adowaniom atmosferycznym.
Odbiornik
Jakich anten bÍdÍ potrzebowaÊ ?
• Przewodowa antena
zewnÍtrzna FM (w
wyposaøeniu) (1)
• Ramowa antena
zewnÍtrzna AM
(w wyposaøeniu) (1)
Pod ±czenie
Przewodowa
antena zewnÍtrzna
FM
Po pod ±czeniu
zewnÍtrznej anteny
Odbiornik
ANTENNA
FM
75Ω
COAXIAL
AM
przewodowej
zapewnij jej moøliwie
horyzontaln±
pozycjÍ.
Jeøeli odbior FM jest niedobry
Pod ±cz kabel koncentryczny o oporno ci 75 omÛw (nie
przewidziany w wyposaøeniu) do anteny FM
montowanej na zewn±trz budynku, a jego drugi koniec
pod ±cz do gniazdka FM75 Ω COAXIAL z ty u
odbiornika.
Odbiornik
ANTENNA
FM
75Ω
COAXIAL
Ramowa
antena
zewnÍtrzna
AM
.
do uziemienia
Co mam robiÊ dalej ?
Jeøeli chcesz pod ±czyÊ inne komponenty, przejdº do
nastÍpnego rozdzia u. Jeøeli zamierzasz korzystaÊ z
odbiornika tylko w celu s uchania programÛw
radiowych, przejdº do instrukcji ÜPod ±czenie zestawu
g o nikÛwá na str. 6 i 7.
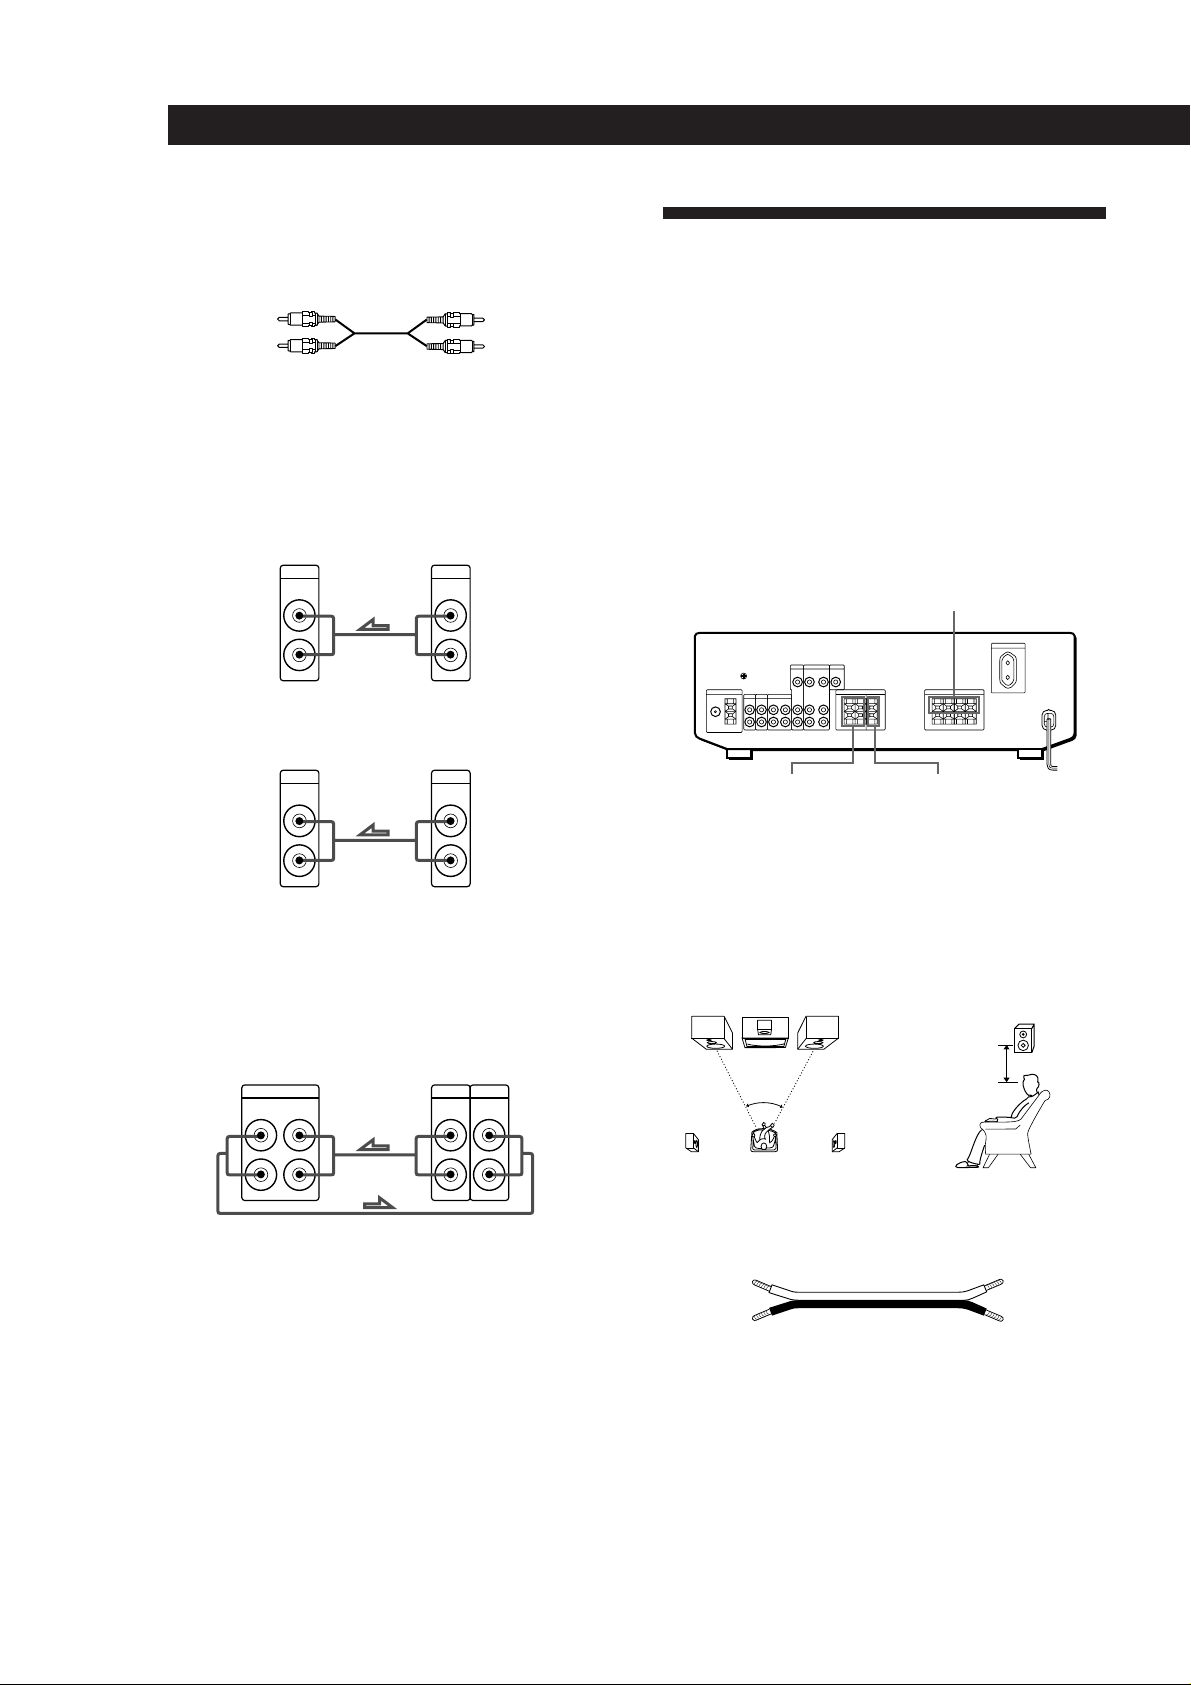
Pod ±czenie komponentÛw
audio
OgÛlnie
Ta czÍ Ê intstrukcji opisuje jak pod ±czyÊ do
odbiornika komponenty audio. Dokonaj niniejszych
pod ±czeÒ, jeøeli chcesz korzystaÊ z niniejszego
odbiornika jako wzmacniacza. SzczegÛlna lokalizacja
±czy przedstawiona jest na ilustracji poniøej.
CD
y
PHONO TAPE/MD
(c.d.n.)
PL
5
Czynno ci wstÍpne
Jakich przewodÛw bÍdÍ potrzebowaÊ ?
Kable audio (nie przewidziane w wyposaøeniu) (po 1 dla
odtwarzacza p yt kompaktowych CD lub gramofonu; po 2
dla magnetofonu i odtwarzacza mini p yt MD)
bia y (L)bia y (L)
czerwony (R)czerwony (R)
Pod ±czenia
Strza ka ç wskazuje przep yw sygna u.
Odtwarzacz CD
Odbiornik Odtwarzacz CD
CD
IN
L
OUTPUT
LINE
L
Pod ±czenie zestawu
g o nikÛw
OgÛlnie
Ta czÍ Ê opisuje jak pod ±czyÊ do odbiornika g o niki.
Tak jak g o niki przednie (lewy i prawy) s± konieczne,
dodatkowe pod ±czenie g o nika rodkowego i
g o nikÛw tylnych jest pozostawione do decyzji
uøytkownika. Dodatkowe zastosowanie g o nika
rodkowego i g o nikÛw tylnych podniesie wraøenie
przestrzenno ci dºwiÍku.
SzczegÛlna lokalizacja ±czy przedstawiona jest na
ilustracji poniøej.
FRONT SPEAKERS A
R
R
Gramofon
Odbiornik Gramofon
PHONO
IN
L
R
OUTPUT
LINE
L
R
• Jeøeli TwÛj gramofon ma przewÛd uziemienia
Aby unikn±Ê przydºwiÍku, pod ±cz przewÛd uziemienia
(nie przewidziany w wyposaøeniu) do ±cza uziemienia y.
Magnetofon lub odtwarzacz MD
Odbiornik
TAPE/MD
IN
REC OUT
Magnetofon lub odtwarzacz MD
OUTPUT
INPUT
LINE
LINE
L
R
L
R
SURROUND
SPEAKERS
REAR
(G£O¶NIKI
PRZESTRZENNE
TYLNE)
SURROUND
SPEAKER
CENTER
(G£O¶NIK
PRZESTRZENNY
¶RODKOWY)
Dla uzyskania najkorzystniejszego efektu dºwiÍkowego
umie Ê g o niki tak jak pokazano poniøej.
G o nik tylny
60 - 90 cm
45
Jakich przewodÛw bÍdÍ potrzebowaÊ ?
PrzewÛd g o nika (nie przewidziany w wyposaøeniu) (po 1
dla kaødego z g o nikÛw)
Co mam robiÊ dalej ?
Przejdº dalej, aby pod ±czyÊ g o niki.
(+)
(â)
(+)
(â)
SkrÍÊ nieos oniÍte koÒcÛwki przewodu d ugo ci ok.15 mm.
Upewnij siÍ, øe przewÛd g o nika dopasowany jest do
odpowiedniego ±cza komponentu: + do +, a â do â. Jeøeli
przewody pod ±czone s± odwrotnie, dºwiÍk bÍdzie
znieksztalcony i pozbawiony basÛw.
PL
6
 Loading...