

Page 1
KITCHEN TOOLS
4
2-Slice Toaster STO 800 EDS A1
2-Slice Toaster
Operating instructions
Toster podwójny
Instrukcja obsługi
KOMPERNASS GMBH
BURGSTRASSE 21 · D-44867 BOCHUM
www.kompernass.com
ID-Nr.: STO800EDSA1-09/10-V1
IAN: 61664
Kétrekeszes kenyérpirító
Használati utasítás
Topinkovač
Návod k obsluze
Dvojni opekač
Navodila za uporabo
Toastovač
Návod na obsluhu
Page 2
STO 800 EDS A1
1
2
9
3
7654
8
Page 3

Content Page
Intended use 2
Items supplied 2
Technical Data 2
Important safety instructions 2
Tips on usage 2
Operating Elements 3
Placement 3
Before taking into use 3
Adjusting the browning level 3
Toasting 3
Interrupting the toasting process 4
Warming function 4
Thaw function 4
Crumb tray 4
Bread roll holder 4
Cleaning and Care 5
Storage 5
Disposal 5
Warranty and Service 5
Importer 6
Read the operating instructions carefully before using the appliance for the first time and preserve this
booklet for later reference. Pass the manual on to whomsoever might acquire the appliance at a later date.
- 1 -
Page 4
2-SLICE TOASTER
Intended use
This appliance is intended for the toasting of slices
of bread, rolls and waffles in domestic environments.
It is not intended for use with other foodstuffs, other
materials or for use in commercial or industrial environments. Any other use, and modification of the
appliance, is regarded as contrary to the intended
use and could increase the risk of accidents.
Items supplied
2-Slice Toaster
Operating Instructions
Technical Data
Rated voltage: 220 - 240V ~50 Hz
Power consumption: 800 W
Important safety instructions
To avoid potentially fatal risks
through electric shock:
• NEVER insert cutlery or other metallic objects
into the toaster slots.
• Ensure that the appliance never comes into contact
with water when the power plug is inserted into
a wall socket, especially if it is being used in a
kitchen and close to the sink.
• Ensure that the power cable never becomes wet
or moist when the appliance is in use. Lay the
cable such that it does not get clamped or otherwise damaged.
• Arrange for defective power plugs and/or cables
to be replaced immediately by qualified technicians
or by our Customer Service Department.
• After use, always remove the power plug from
the wall socket, this prevents the unintentional
switching on of the appliance.
To avoid the risks of fire or injury:
• The appliance can become hot when it is in use.
Therefore, only touch the operating elements.
• Bakery products can burn! You should therefore
NEVER locate the appliance close to or underneath inflammable objects, especially not under
curtains or suspended cupboards.
• The appliance may not be used in close vicinity
to flammable material.
• NEVER cover the toaster when it is in use.
• Never leave the appliance unsupervised whilst
in use.
• This appliance is not intended for use by individuals
(including children) with restricted physical,
physiological or intellectual abilities or deficiences
in experience and/or knowledge unless they
are supervised by a person responsible for their
safety or receive from this person instruction in
how the appliance is to be used.
• Children should be supervised in order to make
sure that they do not play with the device.
• Operate the appliance only on a stable, nonslippery and level surface.
• Do not use an external timing switch or a separate
remote control system to operate the appliance.
• Unwind the power cable completely from the
cable winder before using the appliance.
Tips on usage
• Toast mixed-flour breads at higher browning
levels than white bread. Matured, dry bread
browns faster than fresh bread.
• Avoid using slices that are too big or too thick,
as these can easily become jammed in the
appliance.
- 2 -
Page 5
Attention
In the event of a malfunction and when cleaning
the appliance, remove the power plug from the
wall socket. Risk of electrical shock!
• Loosen jammed slices of bread with a blunt wooden
object (e.g. a wooden spatula or spoon).
Do NOT touch the heater elements.
• Differences in bread sorts, moisture and the thickness
of individual slices influence the browning of the
toast. Therefore the bread for toasting should be
kept in sealed packaging until required.
:
Operating Elements
Before taking into use
Heat the appliance up at least five times, at the
maximum setting, without insertion of bread slices.
For details on cleaning the appliance read the
section "Cleaning and Care".
Please take note:
The operating button
power cable is connected to a power socket.
With the first usage a slight smell may occur (minimal
smoke development is also possible). This is normal
and dissipates after a short time. Please provide for
adequate ventilation.
only engages when the
e
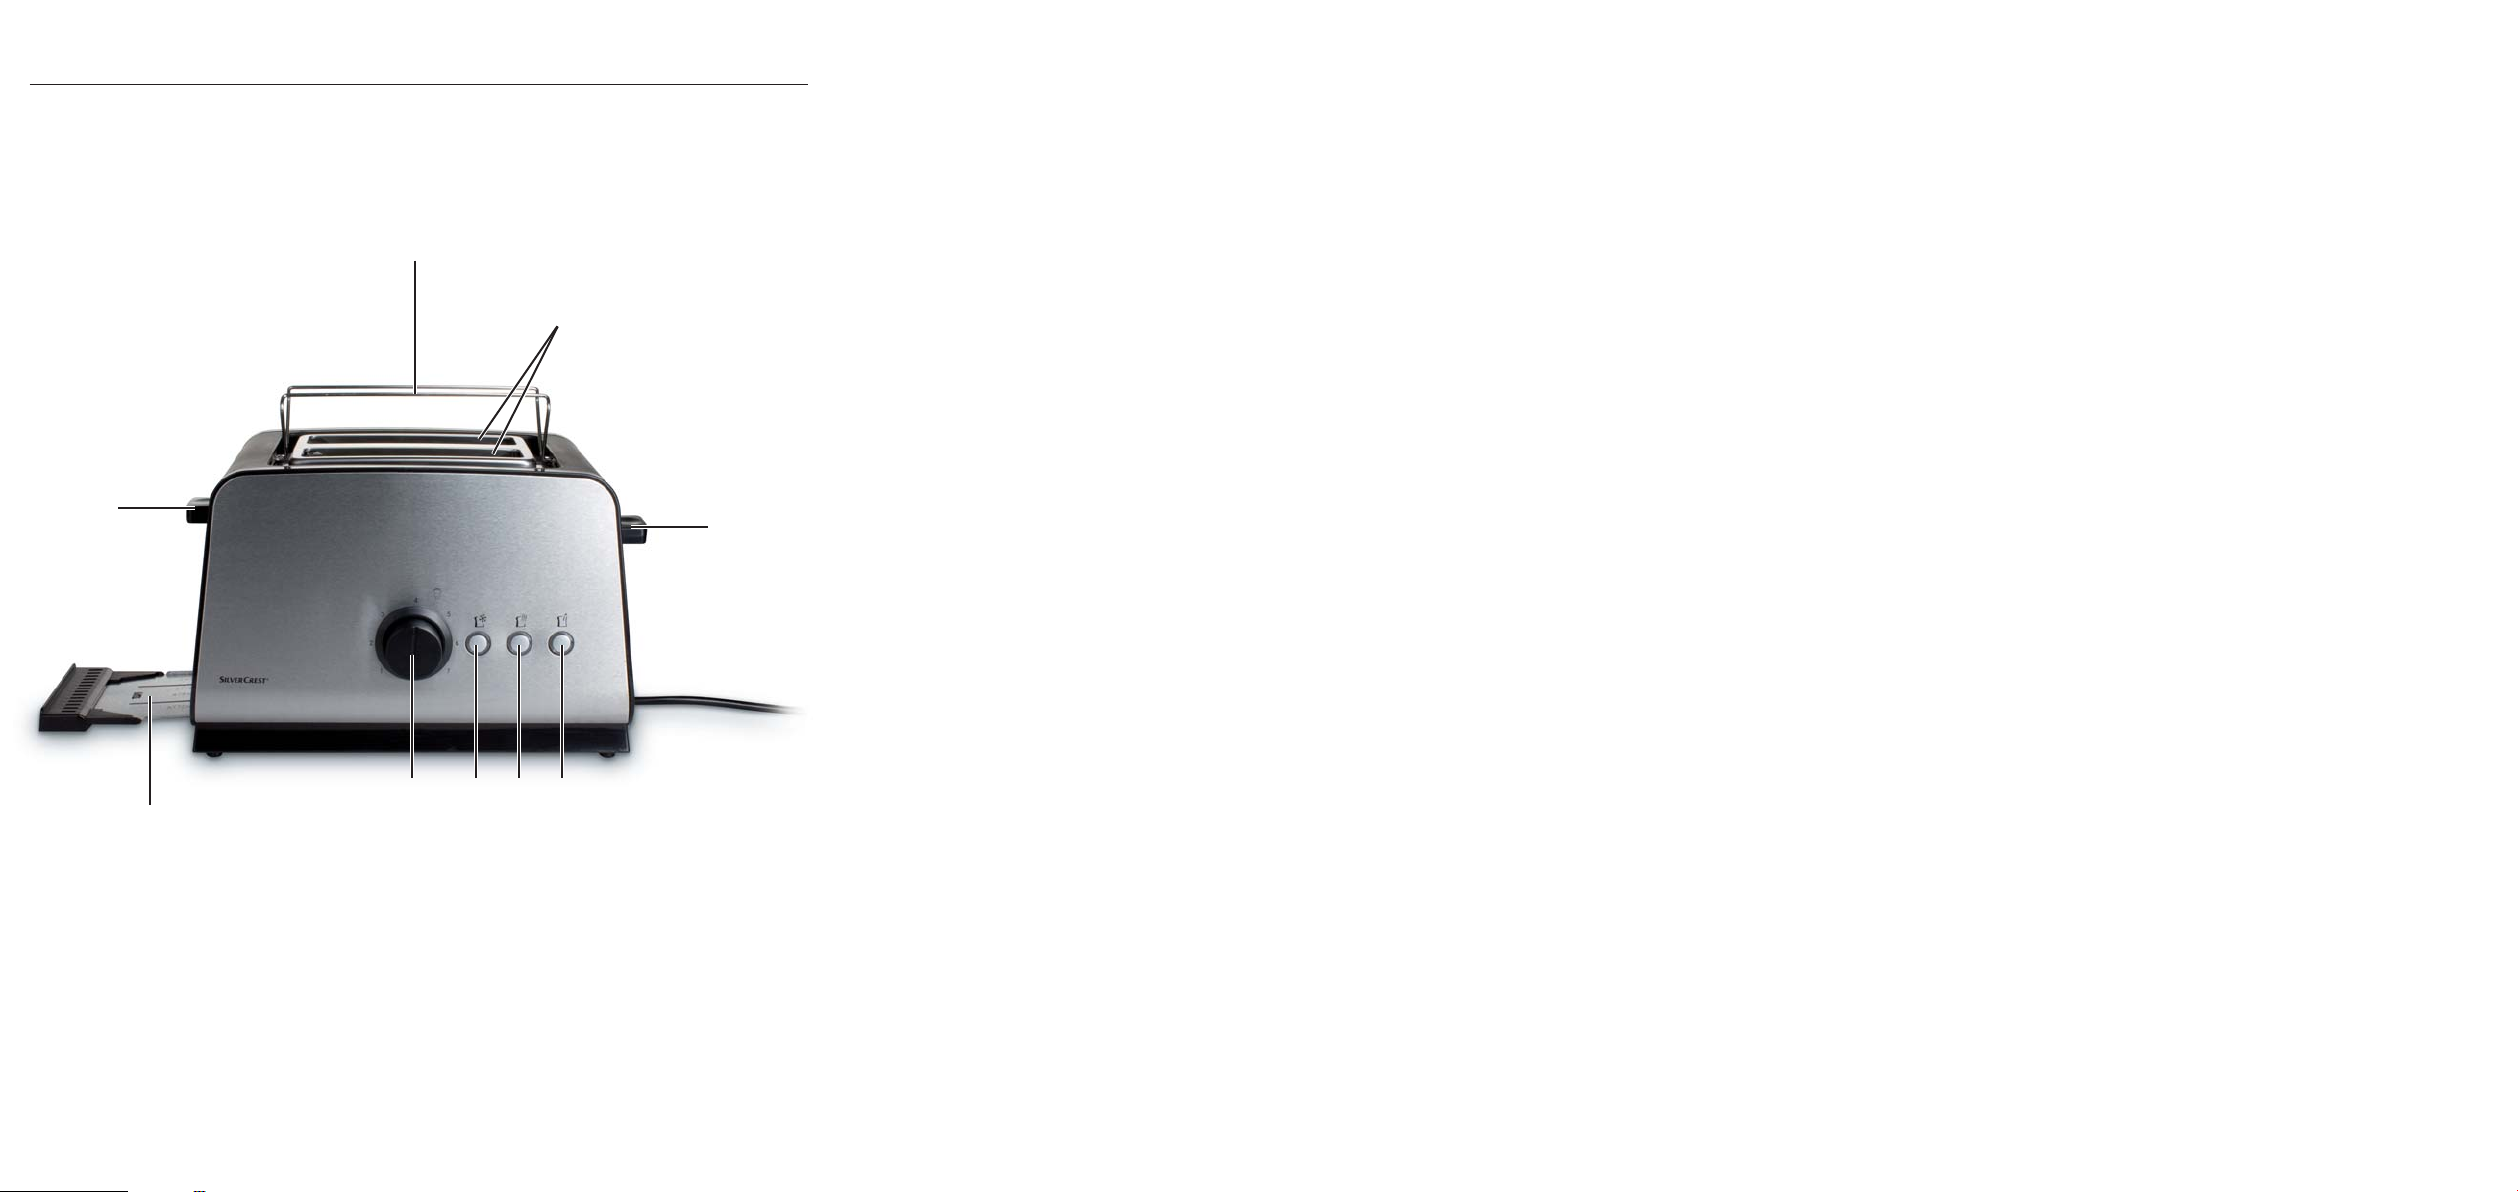
Bread roll holder
q
Toasting slots
w
Operating button
e
Stop button for interrupting the
r
toasting process
Button for the warm-up function
t
Button for the thaw function
y
Toasting dial
u
Crumb tray
i
Button for bread-roll attachment
o
Placement
• Unwrap the power cable from the cable winder
on the underside of the appliance.
• Place the toaster on a dry and level surface.
Adjusting the browning level
The desired level of browning, from "light" (1) to
"dark" (7), can be selected with the toasting dial
Take note that, subject to the demand made
on the toaster, the level of browning can vary
somewhat with an unvarying adjustment of the
browning regulator
slices inserted, the higher is the browning level.
Thus, if you are not intending to toast many slices,
always adjust the browning regulator
lower.
! The less the number of
u
u
a little
Toasting
Attention
NEVER cover the toaster slots wwhen operating
the toaster! There is a risk of fire! The appliance
could become damaged!
• After setting the desired browning level, insert
the bread into the toaster slots
• Press the operating button
control lamp integrated into the stop button
glows.
:
.
w
downwards. The
e
r
u
.
- 3 -
Page 6
• The automatic bread centering device centres
the inserted bread in the toaster slots
• When the desired level of browning has been
reached the toaster switches itself off automatically and the slices are ejected to the top.
• This appliance has a lifting function, which makes it
easier and safer for you to take the hot slices of
toast from the toaster slots
operator button
upwards.
e
. For this, slide the
w
w
.
• Activate the button for the thaw function y. The
control lamp integrated into the button for the
thaw function
• The toaster switches itself off automatically, the
control lamp extinguishes and the bread slices
are ejected.
Dependent on the setting of the browning level,
the bread is either thawed or browned.
y
glows.
Interrupting the toasting
process
If you wish to interrupt the toasting process, press
the STOP button
. The toaster switches itself off.
r
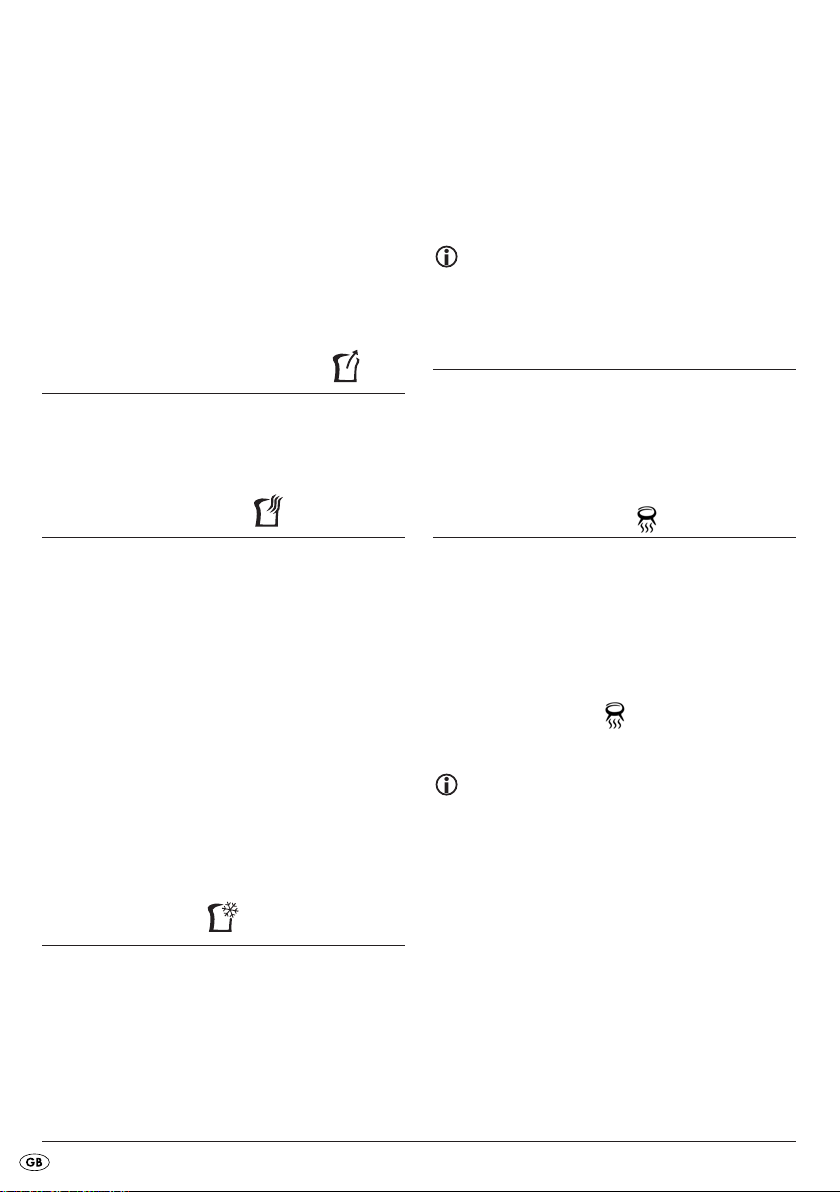
Warming function
The warming function tmakes it possible for you
to warm bread without browning it. For example,
for toast that has gone cold. The bread is only briefly
warmed.
• Insert the bread and press the operator button
down.
• Activate the button for the warming function
The control lamp integrated into the button for
the warming function
• The toaster switches itself off automatically, the
control lamp extinguishes and the bread slices
are ejected.
t
glows.
e
t
Thaw function
Through activation of the thaw function yfrozen
bread can also be thawed. Thereby, the toaster
slowly warms the bread.
• Insert the bread and press the operator button
down.
e
Crumb tray
When toasting, crumbs that fall from the bread are
collected in the crumb tray
pull the crumb tray
i
. To empty it, simply
i
out to the side.
Bread roll holder
• NEVER lay bread rolls directly onto the toaster,
ALWAYS use the bread roll holder
• Press the bread-roll attachment button
The bread-roll attachment
• Place the bread-rolls onto the holder and start the
toasting procedure. Place the toasting dial
ween levels 4 and 5 .
.
Place the rolls onto the bread roll holder
so that they cannot fall through the holder.
After toasting, the rolls will be very hot.
• As soon as the toaster switches itself off, check
the level of browning. Should the bread roll have
the desired level of browning, turn it over
to brown the other side.
• Switch the toaster back on.
• When you no longer require the bread-roll
attachment
button
folds itself away.
, pull the bread-roll attachment
q
upward. The bread-roll attachment
o
folds itself out.
q
q
.
o
down.
u
q
bet-
q
- 4 -
Page 7
Cleaning and Care
Danger!
Before cleaning, remove the power plug from the
wall socket and allow the toaster to cool down.
Risk of injury!
NEVER submerse the appliance in water or
other liquids. The appliance could be irreparably damaged!
Warning about damage to the
appliance!
Do not use aggressive or abrasive cleaning agents.
These can damage the upper surfaces of the appliance.
Disposal
Do not dispose of the appliance in your
normal domestic waste. This product is
subject to the European guideline
2002/96/EC.
Dispose of the appliance through an approved disposal centre or at your community waste facility.
Observe the currently applicable regulations.
In case of doubt, please contact your waste disposal
centre.
Dispose of packaging materials in an
environmentally responsible manner.
• Clean the appliance housing only with a dry or
lightly moistened cloth.
• If necessary, use a stainless steel cleaner.
• To avoid the risk of fire, empty the crumb tray
at regular intervals.
i
Storage
• Store the toaster at a cool and dry location.
• Clean the appliance as described in the chapter
"Cleaning and Care".
• Wrap the power cable around the cable retainer
on the underside of the toaster.
Warranty and Service
The warranty for this appliance is for 3 years from
the date of purchase. The appliance has been manufactured with care and meticulously examined before delivery. Please retain your receipt as proof of
purchase. In the event of a warranty claim, please
make contact by telephone with our Service Department. Only in this way can a post-free despatch for
your goods be assured.
The warranty covers only claims for material and
maufacturing defects, but not for transport damage,
for wearing parts or for damage to fragile components, e.g. buttons or batteries. This product is for
private use only and is not intended for commercial
use. The warranty is void in the case of abusive and
improper handling, use of force and internal tampering not carried out by our authorized service
branch. Your statutory rights are not restricted in
any way by this warranty.
- 5 -
Page 8

The warranty period will not be extended by repairs
made under warranty. This applies also to replaced
and repaired parts. Any damage and defects extant
on purchase must be reported immediately after unpacking the appliance, at the latest, two days after
the purchase date. Repairs made after the expiration of the warranty period are subject to payment.
DES UK LTD
Tel.: 0871 5000 700
e-mail: support.uk@kompernass.com
Kompernass Service Ireland
Tel: 1850 930 412 (0,082 EUR/Min.)
Standard call rates apply. Mobile operators may vary.
e-mail: support.ie@kompernass.com
(£ 0.10 / minute)
Importer
KOMPERNASS GMBH
BURGSTRASSE 21
44867 BOCHUM, GERMANY
www.kompernass.com
- 6 -
Page 9

Spis treści Strona
Użytkowanie zgodnie z przeznaczeniem 8
Zakres dostawy 8
Dane techniczne 8
Ważne wskazówki bezpieczeństwa 8
Wskazówki dotyczące obsługi 9
Opis urządzenia 9
Ustawianie 9
Przed pierwszym uruchomieniem 9
Ustawianie stopnia zbrązowienia 9
Korzystanie z tostera 10
Przerywanie pracy tostera 10
Funkcja podgrzewania 10
Funkcja rozmrażania 10
Kuweta na okruszki 10
Nasadka na bułki 10
Czyszczenie i konserwacja 11
Przechowywanie 11
Utylizacja 11
Gwarancja i serwis 12
Importer 12
Przed pierwszym użyciem zapoznaj się z instrukcją obsługi i zachowaj ją w celu późniejszego wykorzystania. W przypadku przekazania urządzenia osobom trzecim należy przekazać im także instrukcję.
- 7 -
Page 10
TOSTER PODWÓJNY
Użytkowanie zgodnie
z przeznaczeniem
Niniejsze urządzenie jest przeznaczone do domowego zapiekania chleba, bułek i tostów. Nie nadaje
się do pracy z innym produktami spożywczymi ani
innymi materiałami, a także do użytkowania komercyjnego lub zakładowego. Każde
inne użycie lub dokonanie zmiany będzie traktowane
jako użytkowania niezgodnie z przeznaczeniem i
będzie stanowiło poważne zagrożenie.
Zakres dostawy
Toster podwójny
Instrukcja obsługi
Dane techniczne
Napięcie nominalne: 220–240 V ~50 Hz
Moc: 800 W
Ważne wskazówki
bezpieczeństwa
Aby uniknąć zagrożenia życia przez
porażenie prądem elektrycznym:
• W otwory tostera nie wkładaj nigdy sztućców
ani innych metalowych przedmiotów.
• Uważaj, aby urządzenie nie miało kontaktu z
wodą, gdy wtyczka sieciowa znajduje się w
gniazdku. Szczególnie dotyczy to sytuacji, gdy
urządzenie jest używane w kuchni w pobliżu
zlewu.
• Uważaj, aby w trakcie użytkowania nie zamoczyć
kabla zasilania. Kabel należy prowadzić w taki
sposób, aby nie był on zakleszczany lub nie został
uszkodzony w inny sposób.
• Naprawę uszkodzonej wtyczki lub kabla sieciowego zleć niezwłocznie wykwalifikowanemu
personelowi lub serwisowi klienta.
• Aby uniknąć przypadkowego włączenia urządzenia, po każdym jego użyciu wyciągaj wtyczkę
z gniazdka elektrycznego.
Aby zapobiec niebezpieczeństwu
pożaru i obrażeń:
• Elementy urządzenia w czasie pracy mogą być
bardzo gorące. Z tego powodu chwytaj wyłącznie za elementy przeznaczone do obsługi.
• Pieczywo może się zapalić! Dlatego nigdy nie
stawiaj urządzenia w pobliżu lub pod łatwopalnymi przedmiotami, a w szczególności pod firanami lub zasłonami.
• Nie używaj urządzenia w pobliżu łatwopalnych
materiałów.
• Nigdy nie przykrywaj pracującego tostera.
• Nigdy nie zostawiaj pracującego urządzenia
bez nadzoru.
• Niniejsze urządzenie nie jest przeznaczone do
użytkowania przez osoby (w tym dzieci) z ograniczoną sprawnością fizyczną, sensoryczną
bądź umysłową lub nieposiadające doświadczenia i/lub wiedzy, chyba że będą one przebywały
pod opieką osoby odpowiedzialnej za ich bezpieczeństwo lub uzyskają od niej wskazówki
dotyczące właściwego używania urządzenia.
• Nie można pozwolić dzieciom na zabawę urządzeniem.
• Włączaj urządzenie wyłącznie wtedy, gdy stoi
ono na stabilnym, antypoślizgowym i płaskim
podłożu.
• Do sterowania pracą urządzenia nie próbuj używać żadnych zewnętrznych zegarów sterujących ani żadnego innego systemu zdalnego
sterowania.
- 8 -
Page 11
• Przed rozpoczęciem korzystania z urządzenia,
najpierw rozwiń do końca kabel zasilający.
Wskazówki dotyczące obsługi
Ustawianie
• Rozwiń kabel schowany pod urządzeniem.
• Toster postaw na suchej i płaskiej powierzchni.
• Ciemne pieczywo piecz na wyższym stopniu
zbrązowienia, niż jasne pieczywo. Starsze, suche
pieczywo przypieka się szybciej niż świeże.
• Nie wkładaj zbyt dużych i grubych kromek chleba,
ponieważ mogą się łatwo zablokować.
Uwaga:
W przypadku usterek lub czyszczenia wyciągaj
wtyczkę z gniazdka. Zagrożenie porażeniem prądem
elektrycznym!
• Zablokowane kromki chleba wyciągaj tępym
patykiem drewnianym (np. trzonkiem od pędzelka).
Nie dotykaj przy tym grzałek.
• Na stopień wypieczenia wpływ ma gatunek
używanego pieczywa, wilgotność i grubość
poszczególnych kromek. Z tego powodu chleb
tostowy należy przechowywać w zamkniętym
opakowaniu.
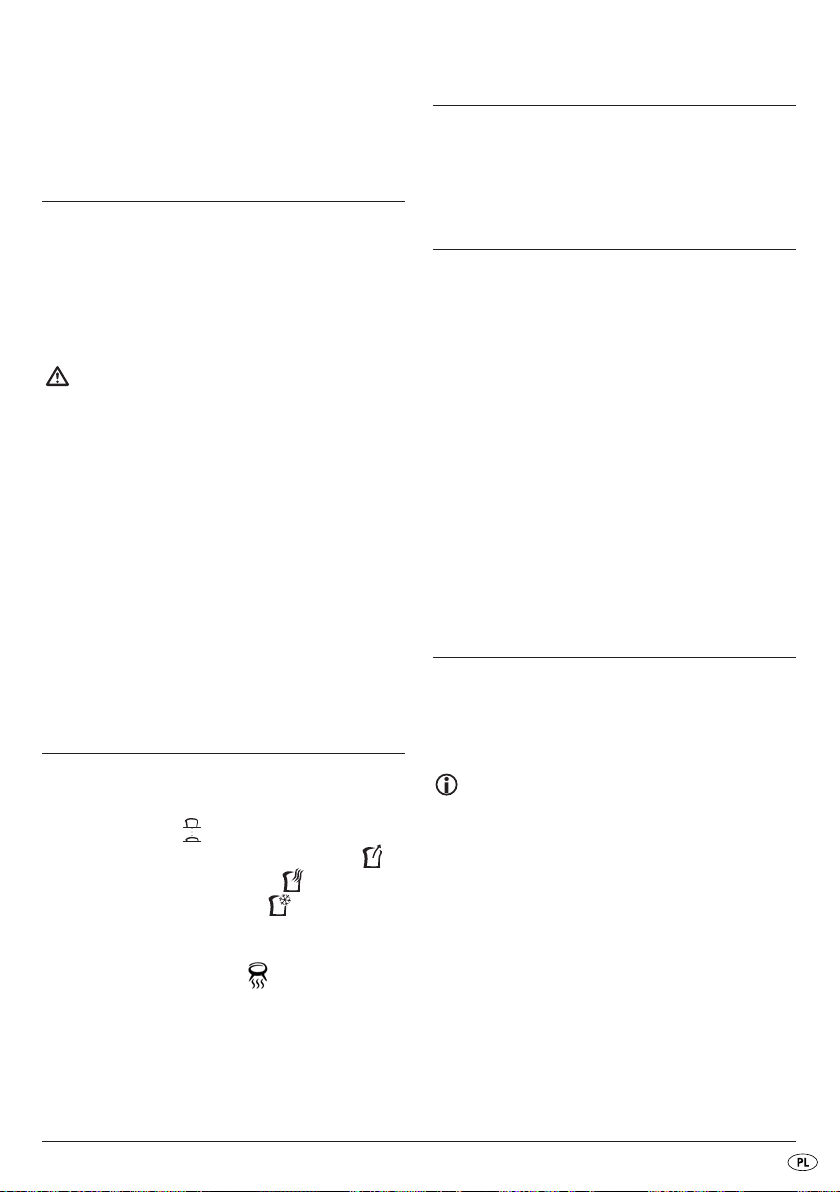
Opis urządzenia
Nasadka do bułek
q
Otwory
w
Przycisk obsługi
e
Przycisk Stop do przerywania zapiekania
r
Przycisk funkcji podgrzewania
t
Przycisk funkcji rozmrażania
y
Regulator zbrązowienia pieczywa
u
Kuweta na okruszki
i
Przycisk nasadki na bułki
o
Przed pierwszym uruchomieniem
Toster bez pieczywa włącz co najmniej pięć razy
przy ustawieniu na maksymalną moc. Wskazówki
dotyczące czyszczenia tostera podano w rozdziale
„Czyszczenie i konserwacja”.
O czym należy pamiętać:
Przycisk obsługi
kabla sieciowego do gniazdka. Przy pierwszym
użyciu, nagrzewaniu może towarzyszyć zapach
spalenizny (z możliwością powstania niewielkiej ilości
dymu). Jest to objaw normalny i z czasem ustanie.
Postaraj się o dostateczne przewietrzenie pomieszczenia.
blokuje się tylko po podłączeniu
e
Ustawianie stopnia zbrązowienia
Żądany stopień zbrązowienia pieczywa od „jasnego”
(1) po „ciemne” (7) można ustawiać bezstopniowo
regulatorem
Pamiętaj, że w zależności od rozmieszczenia
pieczywa w tosterze, stopień zbrązowienia
przy tym samym ustawieniu regulatora stopnia
zbrązowienia
kromek chleba, tym większy będzie stopień
zbrązowienia. Z tego powodu regulator zbrązowienia
ustawiaj zawsze na mniejszy zakres.
.
u
może się różnić! Im mniej
u
przy mniejszej ilości pieczywa
u
- 9 -
Page 12
Korzystanie z tostera
Uwaga:
W czasie pracy tostera otwory wnie mogą być
zakryte. Istnieje zagrożenie pożarem! Może dojść
do uszkodzenia urządzenia!
• Po ustawieniu żądanego stopnia zbrązowienia
umieść pieczywo w otworze
• Naciśnij przycisk obsługi
kontrolna w przycisku przerywania pracy
• Automatyczne centrowanie ustawia tosty równo
pośrodku otworów
• Po uzyskaniu żądanego stopnia zbrązowienia,
toster wyłączy się automatycznie i pieczywo
wyskakuje do góry.
• Urządzenie jest wyposażone w mechanizm podnoszący, który umożliwia łatwe i bezpieczne
wyjmowanie gorącego pieczywa z otworu
W tym celu podnieś przycisk obsługi
w
.
.
w
. Zapala się lampka
e
.
e
r
w
.
.
Przerywanie pracy tostera
• Naciśnij przycisk funkcji podgrzewania t.
Zapala się lampka kontrolna w przycisku funkcji
podgrzewania
• Toster wyłączy się automatycznie, lampka kontrolna zgaśnie i pieczywo wyskakuje do góry.
t
.
Funkcja rozmrażania
Po uruchomieniu funkcji rozmrażania ymożna
szybko rozmrozić zamrożony chleb. Toster ogrzewa
powoli chleb.
• Włóż pieczywo i naciśnij przycisk
• Naciśnij przycisk funkcji rozmrażania
Zapala się lampka kontrolna w przycisku funkcji
rozmrażania
• Toster wyłączy się automatycznie, lampka kontrolna zgaśnie i pieczywo wyskakuje do góry.
W zależności od ustawionego stopnia zbrązowienia, chleb zostanie rozmrożony wzgl. wypieczony.
y
.
e
y
.
.
Naciśnij przycisk rby przerwać pracę tostera.
Lampka kontrolna gaśnie.
Funkcja podgrzewania
Funkcja podgrzewania tumożliwia podgrzanie
pieczywa bez wypieczenia. Jest przydatna np. do
podgrzania zimnego już zapieczonego pieczywa.
Pieczywo podgrzewane jest przez krótki czas.
• Włóż pieczywo i naciśnij przycisk
e
.
Kuweta na okruszki
Podczas pieczenia tostów, do kuwety iwpadają
okruszki tostów. Wyciągnij kuwetę
usunąć z niej okruszki.
z boku, by
i
Nasadka na bułki
• Bułek nie można kłaść bezpośrednio na toster,
tylko na specjalną nasadkę
• Naciśnij przycisk nasadki
nosi się.
- 10 -
.
q
. Nasadka qpod-
o
Page 13

• Połóż bułki i uruchom toster. Regulator stopnia
zbrązowienia
5 .
ustaw na stopień od 4 do
u
• By uniknąć zagrożenia wywołania pożaru, regularnie usuwaj z kuwety
okruszki po tostach.
i
Bułki kładź na nasadce
nie przelatywały przez nasadkę. Gotowe bułki
są bardzo gorące.
• Gdy toster się wyłączy, sprawdź stopień zbrązowienia. Gdy pieczywo osiągnie żądany stopień
wypieczenia, obróć je na drugą stronę.
• Ponownie włącz toster.
• Nieużywaną nasadkę
ągnięcie przycisku
o
, w ten sposób, by
q
opuść poprzez wyci-
q
. Nasadka qskłada się.
Czyszczenie i konserwacja
Niebezpieczeństwo!
Przed rozpoczęciem czyszczenia wyciągnij wtyczkę
z gniazdka i zaczekaj do ostygnięcia tostera.
Niebezpieczeństwo odniesienia obrażeń!
W żadnym razie nie zanurzaj urządzenia
w wodzie ani w żadnej innej cieczy. Grozi
to trwałym uszkodzeniem urządzenia.
Ostrzeżenie przed uszkodzeniem
urządzenia!
Nie używaj ostrych ani szorujących środków czyszczących. Mogą one powodować zarysowanie
powierzchni urządzenia.
Przechowywanie
• Przechowuj toster w suchym miejscu.
• Najpierw wyczyść urządzenie, patrz rozdział
„Czyszczenie i konserwacja”.
• Zwiń kabel pod tosterem.
Utylizacja
Nie wyrzucaj urządzenia do śmieci
z innymi odpadkami domowymi.
W odniesieniu do produktu ma zastosowanie dyrektywa europejska
2002/96/EC.
Urządzenia należy poddać utylizacji w akredytowanym zakładzie utylizacji lub w komunalnym zakładzie
utylizacji odpadów.
Przestrzegaj aktualnie obowiązujących przepisów.
W razie pytań i wątpliwości odnośnie zasad utylizacji
skontaktuj się z najbliższym zakładem utylizacji.
Wszystkie materiały wchodzące w skład
opakowania należy przekazać do odpowiednich punktów zbiórki odpadów.
• Obudowę czyść suchą lub lekko zwilżona
szmatką.
• W razie konieczności użyj środków do czyszczenia stali nierdzewnej.
- 11 -
Page 14

Gwarancja i serwis
Importer
Urządzenie objęte jest trzyletnią gwarancją, licząc od
daty zakupu. Urządzenie zostało starannie wyprodukowane i dokładnie sprawdzone przed dostawą.
Paragon należy zachować jako dowód dokonania
zakupu. W przypadku napraw gwarancyjnych
skontaktuj się telefonicznie z najbliższym punktem
serwisowym. Tylko w ten sposób można zapewnić
bezpłatną wysyłkę zakupionego produktu.
Gwarancja obejmuje wyłącznie wady materiałowe i
fabryczne, natomiast nie obejmuje szkód transportowych, części ulegających zużyciu ani uszkodzeń
części łatwo łamliwych, np. przełączników lub akumulatorów. Produkt przeznaczony jest wyłącznie do
użytku domowego, nie zaś do zastosowań profesjonalnych.
Gwarancja wygasa w razie niewłaściwego lub
niezgodnego z instrukcją użycia, zastosowania
przemocy lub w przypadku ingerencji, nie podjętych
przez autoryzowaną placówkę serwisową. Niniejsza
gwarancja nie ogranicza ustawowych praw nabywcy
urządzenia.
Okres gwarancji nie ulega przedłużeniu o czas
trwania usługi gwarancyjnej. Dotyczy to również
wymienionych i naprawionych części. Ewentualne
szkody i wady stwierdzone w chwili zakupu należy
zgłosić niezwłocznie po rozpakowaniu urządzenia,
nie później niż po upływie dwóch dni od daty zakupu.
Wszystkie naprawy wykonywane po upływie okresu
gwarancji będą płatne.
KOMPERNASS GMBH
BURGSTRASSE 21
44867 BOCHUM, GERMANY
www.kompernass.com
Kompernass Service Polska
Tel.: 022 / 3972212
e-mail: support.pl@kompernass.com
- 12 -
Page 15

Tartalomjegyzék Oldalszám
Rendeltetésszerű használat 14
Tartozékok 14
Műszaki adatok 14
Fontos biztonsági utasítások 14
Tudnivalók a kezelésre vonatkozóan 15
A készülék leírása 15
Felállítás 15
Beüzemelés előtti teendők 15
A pirítási fok beállítása 15
Kenyérpirítás 16
A kenyérpirítás megszakítása 16
Felmelegítési funkció 16
Kiolvasztási funkció 16
Morzsatálca 16
Zsemletartó 16
Tisztítás és ápolás 17
Tárolás 17
Ártalmatlanítás 17
Garancia és szerviz 18
Gyártja 18
Az első használat előtt figyelmesen olvassa el a használati utasítást majd későbbi használatra tegye el.
A készülék harmadik fél részére történő továbbadásakor adja át a leírást is.
- 13 -
Page 16

KÉTREKESZES
KENYÉRPIRÍTÓ
Rendeltetésszerű használat
A készülék kenyérszelet, zsemle, és toasztkenyér
házi használatban történő pirítására szolgál. Nem
való más élelmiszerekkel vagy anyagokkal való
használatra, ill. kereskedelmi vagy üzleti területen.
Bármilyen más használat vagy változtatás nem rendeltetésszerűnek minősül és jelentős balesetveszélyt
rejt magában.
Tartozékok
Kétrekeszes kenyérpirító
Használati útmutató
Műszaki adatok
Névleges feszültség: 220240 V / 50 Hz
Teljesítményfelvétel: 800 W
Fontos biztonsági utasítások
Az elektromos áramütés által okozta
életveszély elkerülése érdekében:
• Ne dugjon evőeszközt vagy más fémtárgyat a
pirítómélyedésbe.
• Győződjön meg arról, hogy a készülék ne érintkezzen vízzel, amíg a csatlakozó a dugaszoló
aljzatban van, különösen ha konyhában mosogató
közelében használja.
• Ügyeljen arra, hogy üzemelés közben a tápkábel
ne legyen vizes vagy nedves. Úgy fektesse le,
hogy ne szoruljon be vagy másként ne sérüljön
meg.
• A sérült csatlakozót vagy kábelt azonnal engedélyezett szakemberrel vagy az ügyfélszolgálattal
cseréltesse ki, hogy elkerülje a veszélyt.
• Használat után mindig húzza ki a csatlakozót
a dugaszoló aljzatból, ha el szeretné kerülni,
hogy véletlenül bekapcsolja a készüléket.
A tűz- és sérülésveszély elkerülése
érdekében:
• A készülékrészek üzemelés közben felforrósodnak.
Ezért ne fogja meg a kezelőrészeket.
• A pirítandó élelmiszer meggyulladhat! A készüléket
ne állítsa gyúlékony tárgyak közelébe, különösképpen ne függőny vagy faliszekrény alá.
• A készüléket nem szabad gyúlékony anyagok
közelében használni.
• Ne takarja le a kenyérpirítót üzemelés közben.
• Ne hagyja a készüléket üzemelés közben felügyelet nélkül.
• A készülék nem alkalmas arra, hogy olyan személyek (ideértve a gyermekeket is) használják,
akik testi, érzékszervi vagy elmebeli képességeik
vagy tapasztalatuk és ismeretük hiánya megakadályoznának abban, hogy biztonságosan
használják a készüléket, kivéve ha a biztonságukról gondoskodó felügyelettel vannak, vagy ha
előtte nem világítosották fel őket a készülék
használatáról.
• Vigyázni kell a gyermekekre, hogy ne játsszanak
a készülékkel.
• A készüléket csak stabil, csúszásmentes és sík
felületen üzemeltesse.
• Ne használjon külső időkapcsolót vagy külön
távirányító rendszert a készülék üzemeltetésére.
- 14 -
Page 17

• Teljesen tekerje le a hálózati kábelt a kábelcsévélőről, mielőtt használná a készüléket.
Tudnivalók a kezelésre
vonatkozóan
Felállítás
• Tekerje le a kábelt a készülék alján lévő kábelcsévélőről.
• Állítsa a kenyérpirítót száraz és sík felületre.
• A barna kenyeret magasabb pirítási fokon pirítsa,
mint a fehér kenyeret. Régebbi, száraz kenyér
jobban pirul, mint a friss.
• Ne használjon túl nagy vagy túl vastag szeleteket,
mert ezek könnyen beszorulhatnak.
Figyelem:
Zavar esetén vagy tisztításkor ki kell húzni a csatlakozót a dugaszoló aljzatból. Elektromos áramütés
veszélye!
• A beszorult kenyérszeletet tompa fapálcikával
(pl. ecsettel) húzza ki. Közben ne érjen hozzá
a fűtőtesthez.
• A kenyér fajtájában, az egyes szeletek vastagságában és nedvességtartalmában rejlő különbség
befolyásolja a pirítóskenyér barnaságát. Ezért a
pirítóst lehetőleg zárt csomagolásban tároljuk.
A készülék leírása
zsemletartó
q
pirítómélyedés
w
kezelőgomb
e
stop gomb a pirítás megszakítására
r
a felmelegítési funkció gombja
t
kiengedési funkció gombja
y
pirításszabályozó
u
morzsatálca
i
zsemletartó gomb
o
Beüzemelés előtti teendők
A kenyérpirítót kenyér nélkül legalább ötször a legnagyobb beállításon üzemeltessük. A kenyérpirító
tisztítására vonatkozó tudnivalókat a »Tisztítás és
ápolás« részben találhat meg.
Kérjük vegye figyelembe:
A kezelőgomb
ha a hálózati kábel csatlakoztatva van. Első használat esetén enyhe kellemetlen szag képződhet
(csekély füst is képződhet). Ez teljesen normális és
rövid idő után alábbhagy. Ezért mindig gondoskodjon megfelelő szellőzésről.
csak akkor pattan be a helyére,
e
A pirítási fok beállítása
A "világostól" (1) "sötétig" (7) pirítási fokot a pirításszabályozóval
Vegye figyelembe, hogy attól függően, hogy
mennyi kenyér van a kenyérpirítóban, a pirításszabályozó
változhat! Minél kevesebb pirítósszeletet helyez
be, annál erősebb lesz a pirítási fok. Ezért a
pirításszabályozót
állítsa, ha nincsen benne annyi szelet kenyér.
lehet beállítani.
u
azonos beállítása esetén
u
kicsit kisebb fokozatra
u
- 15 -
Page 18

Kenyérpirítás
Figyelem:
A kenyérpirító üzemelése esetén a pirítómélyedést
nem kell lefedni. Tűzveszély áll fenn! A készülékben
helyrehozhatatlan károk keletkezhetnek!
• A kívánt pirítási fokozat beállítása után helyezze
a kenyeret a pirítómélyedésbe
• Nyomja le a kezelőgombot
beépített ellenőrző lámpa világít.
• Az automatikus kenyércentírozó középre igazítja
a behelyezett kenyeret a pirítómélyedésbe
• Ha elérte a kívánt pirítási fokozatot, a kenyérsütő
magától kikapcsol és a kenyérszereletek megint
feljönnek.
• Ez a készülék megemelő funkcióval rendelkezik,
mely lehetővé teszi, hogy a forró kenyérszereleteket egyszerűbben és biztonságosabban lehessen kivenni a pirítómélyedésből
fel a kezelőgombot
e
.
.
w
. A stop gombba
e
. Ehhez tolja
w
w
w
r
.
A kenyérpirítás megszakítása
Ha meg szeretné szakítani a pirítást, nyomja meg
a stop gombot
. A kenyérpirító kikapcsol.
r
Felmelegítési funkció
• Nyomja meg a felmelegítő funkció gombját t.
A felmelegítő funkció gombján
zőlámpa világít.
• A kenyérpirító magától kikapcsol, kialszik az
ellenőrző lámpa és a kenyérszeletek feljönnek.
lévő ellenőr-
t
Kiolvasztási funkció
A kiolvasztási funkció ymegnyomásával a mélyhűtött
toasztkenyeret is ki lehet olvasztani. A kenyérpirító
a kenyeret ilyenkor lassan melegíti fel.
• Helyezze be a kenyeret és nyomja le a kezelőgombot
• Nyomja meg a kiolvasztó funkció gombját
A felmelegítő funkció gombján
zőlámpa világít.
• A kenyérpirító magától kikapcsol, kialszik az
ellenőrző lámpa és a kenyérszeletek feljönnek.
A bekapcsolt pirítási foktól függően a kenyeret
kiolvasztja vagy pirítja.
e
.
.
y
lévő ellenőr-
y
Morzsatálca
Kenyérpirításkor a leeső morzsa a morzsatálcában
gyűlik össze. Ha ki szeretné üríteni a morzsát, húzza
ki oldalra a morzsatálcát
i
.
i
A felmelegítési funkcióval tkenyeret lehet melegíteni
anélkül, hogy pirítaná. Abban az esetben például,
ha kihűlt a már megpirított kenyér. A kenyeret csak
röviden megmelegíti.
• Helyezze be a kenyeret és nyomja le a kezelőgombot
e
.
Zsemletartó
• Ne tegye a zsemlét közvetlenül a kenyérpirítóra,
hanem mindig használja a zsemletartót
• Nyomja le a zsemletartó gombját
A zsemletartó
- 16 -
q
felugrik.
o
.
q
.
Page 19

• Helyezze rá a zsemlét és indítsa el a pirítást.
Állítsa a pirításszabályzót
4-5 fokozat közé .
u
• Rendszeres időközönként ürítse ki a morzsatálcát
, hogy elkerülje a tűzveszélyt.
i
Úgy helyezze a zsemlét a zsemletartóra
hogy ne eshessen át a tartón. A zsemle pirítás
után nagyon forró.
• Amint kikapcsol a kenyérpirító, ellenőrizze a pirítás
fokát. Ha a zsemle kellően megpirult, fordítsa át
a másik oldalra, hogy az is megpiruljon.
• Kapcsolja be megint a kenyérpirítót.
• Ha nincsen már szüksége zsemletartóra
nyomja felfele a zsemletartó gombot
A zsemletartó
megint leugrik.
q
o
,
q
,
q
.
Tisztítás és ápolás
Veszély!
Tisztítás előtt húzza ki a csatlakozót és hagyja lehűlni a kenyérpirítót. Sérülésveszély!
A készüléket ne merítse vízbe vagy más folyadékba. A készülékben helyrehozhatatlan kár
keletkezhet!
Figyelmeztetés a készüléken keletkezett sérülésre!
Ne használjon éles vagy súroló tisztítószert, mert az
megtámadja a készülék felületét.
Tárolás
• A kenyérpirítót száraz helyen tárolja.
• A kenyérpirítót a Tisztítás és ápolás fejezetben
leírtak szerint tisztítsa.
• Tekerje a kábelt a kenyérpirító alján lévő kábelcsévélőre.
Ártalmatlanítás
A készüléket semmi esetre se dobja
a rendes háztartási hulladékba. Ez a
termék a 2002/96/EC európai irányelv
hatálya alá tartozik.
A készüléket engedélyeztetett hulladékgyűjtő helyen
vagy a helyi hulladékeltávolító üzemnél tudja kidobni.
Vegye figyelembe az érvényben lévő idevonatkozó
előírásokat.
Kétség esetén vegye fel a kapcsolatot a hulladékfeldolgozó vállalattal.
Valamennyi csomagolóanyagot juttasson el
a környezetbarát hulladékhasznosítóhoz.
• A burkolatot száraz kendővel és enyhén benedvesített ronggyal tisztítsa.
• Amennyiben szükséges, használjon rozsdamentes
acélhoz való tisztítószert.
- 17 -
Page 20

Garancia és szerviz
Gyártja
A készülékre 3 év garanciát adunk a vásárlás dátumától számítva. A készüléket gondosan gyártottuk,
és szállítás előtt lelkiismeretesen ellenőriztük.
Kérjük, a vásárlás igazolására őrizze meg a pénztári blokkot. Kérjük, garanciaigény esetén vegye fel
a kapcsolatot telefonon az Ön közelében lévő szervízzel. Csak ebben az esetben garantálhatjuk, hogy
ingyen tudja beküldeni az árut.
A garancia csak anyag- és gyártási hibára vonatkozik,
nem pedig szállítási hibára, kopásra vagy törékeny
részek (pl. kapcsoló vagy elem) sérülésére. A termék
kizárólag magánhasználatra, nem pedig üzleti
használatra készült.
A garancia visszaélésszerű vagy szakavatatlan kezelés,
erőszak alkalmazása vagy olyan beavatkozások
esetén, amelyeket nem engedélyeztetett szervizelő
üzleteink hajtottak végre, érvényét veszti. Az ön
törvényes jogait ez a garancia nem korlátozza.
A garancia ideje nem hosszabbodik meg a jótállással.
Ez a cserélt és javított részekre is vonatkozik. Az
esetlegesen már megvételkor meglévő hibákat és
hiányosságokat azonnal kicsomagolás után, de
legkésőbb két nappal a vásárlás után jelezni kell.
A garancia lejárta után esedékes javításokért
költséget számítunk fel.
KOMPERNASS GMBH
BURGSTRASSE 21
44867 BOCHUM, GERMANY
www.kompernass.com
Kompernass Service Hungary
Tel.: 06 40 104680
e-mail: support.hu@kompernass.com
- 18 -
Page 21

Kazalo vsebine Stran
Predvidena uporaba 20
Vsebina kompleta 20
Tehnični podatki 20
Pomembni varnostni napotki 20
Napotki za uporabo 21
Opis naprave 21
Postavitev 21
Pred prvo uporabo 21
Nastavitev stopnje zapečenosti 21
Opekanje 22
Prekinitev postopka opekanja 22
Funkcija segrevanja 22
Funkcija odtajanja 22
Predal za drobtine 22
Nastavek za žemlje 22
Čiščenje in nega 23
Shranjevanje 23
Odstranitev 23
Garancija in servis 24
Proizvajalec 24
Pred prvo uporabo ta navodila pozorno preberite in jih shranite za poznejšo uporabo. Ob predaji naprave
tretji osebi zraven priložite tudi navodila za uporabo.
- 19 -
Page 22

DVOJNI OPEKAČ
Predvidena uporaba
Ta naprava je predvidena za opekanje rezin kruha,
žemelj in opečenca za domačo uporabo. Ni pa
predvidena za uporabo z drugimi živili ali drugimi
materiali in tudi ne za uporabo na obrtnih ali industrijskih območjih. Vsaka druga vrsta uporabe ali
sprememba velja za nepredvideno in predstavlja
pomemben vir nevarnosti nezgode.
Vsebina kompleta
Dvojni opekač
Navodila za uporabo
Tehnični podatki
Nazivna napetost: 220–240 V/50 Hz
Moč: 800 W
Pomembni varnostni napotki
Da se izognete smrtni nevarnosti
zaradi električnega udara:
• Nikoli ne vstavljajte kosov pribora ali drugih
kovinskih predmetov v reže za peko.
• Zagotovite, da naprava nikoli ne more priti v stik
z vodo, dokler je omrežni vtič v vtičnici, še posebej,
če jo uporabljate v kuhinji v bližini pomivalnega
korita.
• Pazite na to, da se omrežni kabel pri uporabi naprave nikoli ne omoči ali navlaži. Kabel speljite
tako, da se nikjer ne stisne in ga ni mogoče kako
drugače poškodovati.
• Poškodovani omrežni vtič ali omrežni kabel naj vam
takoj zamenja pooblaščeno strokovno osebje ali
servisna služba, da preprečite nevarnost.
• Po uporabi omrežni vtič zmeraj potegnite iz vtičnice, da preprečite nehoteni vklop naprave.
Da preprečite nevarnost požara in
poškodb:
• Deli naprave se med obratovanjem lahko segrejejo. Zato prijemajte samo za upravljalne elemente.
• Material za peko se lahko vname! Zato naprave
nikoli ne postavljajte v bližino ali pod goreče
predmete, še posebej pa ne pod zavese ali viseče
omarice.
• Naprave ne smete uporabljati v bližini gorečih
materialov.
• Opekača nikoli ne prekrivajte, dokler deluje.
• Naprave med obratovanjem nikoli ne pustite
nenadzorovane.
• Ta naprava ni namenjena temu, da bi jo uporabljale osebe (tudi otroci ne) z omejenimi fizičnimi, zaznavnimi ali duševnimi sposobnostmi ali
s pomanjkljivimi izkušnjami in/ali znanjem, razen
pod nadzorom osebe, ki je zanje odgovorna ali
jim je dala navodila v zvezi z uporabo izdelka.
• Otroke je treba nadzorovati, da preprečite igro
z napravo.
• Napravo uporabljajte samo na stabilni, nedrseči
in ravni površini.
• Ne uporabljajte zunanje stikalne ure ali ločenega
daljinskega sistema za upravljanje naprave.
- 20 -
Page 23

• Omrežni kabel v celoti odvijte z navitja kabla,
preden napravo začnete uporabljati.
Napotki za uporabo
• Mešani kruh opecite pri višji stopnji zapečenosti
kot beli kruh. Postan, suh kruh se zapeče hitreje
kot svež kruh.
• Ne uporabljajte prevelikih ali predebelih rezin
kruha, ker se te hitro lahko zataknejo.
Pozor:
V primeru motenj ali pred čiščenjem naprave omrežni
vtič potegnite iz vtičnice. Nevarnost električnega
udara!
• Odstranite zataknjene rezine kruha s topo leseno
palico (npr. z ročajem čopiča). Pri tem se ne
dotikajte grelnih elementov.
• Različne vrste kruha ter razlika v vlažnosti in debelini posameznih rezin vplivajo na zapečenost
kruha za opekanje. Zato opečenec po možnosti
hranite v zaprti embalaži.
Opis naprave
Postavitev
• Odvijte kabel z navitja kabla na spodnji strani
naprave.
• Opekač postavite na suho in ravno površino.
Pred prvo uporabo
Opekač pustite delovati najmanj petkrat ob najvišji
nastavitvi in brez kruha. Za napotke v zvezi s čiščenjem opekača si preberite poglavje "Čiščenje in
nega".
Prosimo, upoštevajte:
Upravljalna tipka
omrežnem kablu. Pri prvi uporabi lahko pride do
nastanka rahlega zadaha (lahko pa se pojavi tudi
malce dima). To je normalno in čez čas izgine.
Poskrbite za zadostno prezračevanje.
se zaskoči samo pri priključenem
e
Nastavitev stopnje zapečenosti
Želeno stopnjo zapečenosti od "svetlo" (1) do
"temno" (7) lahko nastavite z regulatorjem zapečenosti
.
u
Nastavek za žemlje
q
Reže za peko
w
Upravljalna tipka
e
Tipka za prekinitev postopka opekanja
r
Tipka za funkcijo segrevanja
t
Tipka za funkcijo odtajanja
y
Regulator zapečenosti
u
Predal za drobtine
i
Tipka nastavka za žemlje
o
- 21 -
Upoštevajte, da je, odvisno od napolnjenosti
opekača, stopnja zapečenosti pri isti nastavitvi
regulatorja zapečenosti
Čim manj kosov opečenca daste v opekač, tem
večja bo njihova zapečenost. Zato regulator
zapečenosti
zmeraj nastavite na malce nižjo stopnjo.
pri manjši napolnjenosti opekača
u
lahko različna!
u
Page 24

Opekanje
Pozor:
Pri delovanju opekača reže za peko wne prekrivajte.
Obstaja nevarnost požara! Naprava se lahko nepopravljivo poškoduje!
• Pritisnite tipko za funkcijo segrevanja t. Kontrolna lučka v tipki za funkcijo segrevanja
• Opekač se samodejno izklopi, kontrolna lučka
ugasne in rezine kruha se pomaknejo iz opekača.
t
sveti.
Funkcija odtajanja
• Po nastavitvi želene stopnje zapečenosti kruh
vstavite v režo za peko
• Pritisnite upravljalno tipko
lučka v tipki za zaustavitev
• Samodejno centriranje kruha vstavljeno rezino
kruha v reži za peko
• Ko je želena stopnja zapečenosti dosežena, se
opekač samodejno izklopi in rezine kruha se
pomaknejo iz opekača.
• Naprava ima dvižno funkcijo, ki vam omogoča
bolj preprosto in varno jemanje vročih rezin kruha
iz reže za peko
potisnite navzgor.
e
w
.
w
navzdol. Kontrolna
e
sveti.
r
pomakne na sredino.
w
. V ta namen upravljalno tipko
Prekinitev postopka opekanja
Če želite postopek opekanja prekiniti, pritisnite tipko za zaustavitev
. Opekač se izklopi.
r
Funkcija segrevanja
Funkcija segrevanja tvam omogoča, da kruh
segrejete, ne da bi ga zapekli. Na primer, če se
opečeni kruh ohladi. Kruh se le na kratko segreje.
• Vstavite kruh in pritisnite upravljalno tipko
navzdol.
e
S pritiskom na funkcijo odtajanja ylahko odtajate
zmrznjeni kruh. Pri tem opekač kruh počasi segreva.
• Vstavite kruh in pritisnite upravljalno tipko
navzdol.
• Pritisnite tipko za funkcijo odtajanja
lučka v tipki za funkcijo odtajanja
• Opekač se samodejno izklopi, kontrolna lučka
ugasne in rezine kruha se pomaknejo iz opekača.
Odvisno od nastavljene stopnje zapečenosti se
kruh odtaja oz. zapeče.
. Kontrolna
y
sveti.
y
e
Predal za drobtine
Pri opekanju se odpadajoče drobtine zbirajo v predalu za drobtine
za drobtine
. Za odstranitev drobtin predal
i
ob strani potegnite ven.
i
Nastavek za žemlje
• Žemelj nikoli ne polagajte neposredno na opekač,
temveč zmeraj uporabljajte nastavek za žemlje
• Pritisnite tipko nastavka za žemlje
Nastavek za žemlje
se odpre navzgor.
q
o
q
navzdol.
.
- 22 -
Page 25

• Žemljo položite na nastavek in zaženite postopek
opekanja. Nastavite regulator zapečenosti
med stopnjo 4 in 5 .
u
• V redni časovnih presledkih spraznite predal za
drobtine
, da se izognete nevarnosti požara.
i
Žemlje na nastavek za žemlje
da ne morejo pasti skozi nastavek. Po koncu
opekanja so žemlje zelo vroče.
• Kakor hitro se opekač izklopi, preverite stopnjo
zapečenosti. Ko je žemlja dosegla želeno stopnjo
zapečenosti, jo obrnite, da se bo opekla še na
drugi strani.
• Opekač ponovno vklopite.
• Ko nastavka za žemlje
tipko nastavka za žemlje
Nastavek za žemlje
navzdol.
ne uporabljate več,
q
o
se ponovno pomakne
q
položite tako,
q
potisnite navzgor.
Čiščenje in nega
Nevarnost!
Pred vsakim čiščenjem omrežni vtič potegnite iz
vtičnice in opekač pustite, da se ohladi. Nevarnost
poškodb!
Naprave nikoli ne potopite v vodo ali druge
tekočine. Naprava se lahko nepopravljivo poškoduje.
Shranjevanje
• Opekač shranite na suhem mestu.
• Opekač očistite, kot je opisano v poglavju
Čiščenje in nega.
• Ovijte kabel okrog navitja kabla na spodnji
strani opekača.
Odstranitev
Naprave v nobenem primeru ne odvrzite v običajne gospodinjske odpadke.
Za ta izdelek velja evropska direktiva
2002/96/EC.
Napravo oddajte pri podjetju, registriranem za predelavo odpadkov, ali pri svojem komunalnem podjetju za predelavo odpadkov.
Upoštevajte trenutno veljavne predpise.
V primeru dvoma se obrnite na svoje podjetje za
predelavo odpadkov.
Embalažo oddajte za okolju primerno
odstranitev.
Opozorilo pred poškodbami naprave!
Ne uporabljajte ostrih ali grobih sredstev za čiščenje.
Te bi lahko poškodovale površino naprave.
• Ohišje očistite s suho krpo ali z rahlo navlaženo
krpo.
• Po potrebi uporabite čistilo za nerjavno jeklo.
- 23 -
Page 26

Garancija in servis
1. S tem garancijskim listom jamčimo Kompernass
GmbH, da bo izdelek v garancijskem roku ob
normalni in pravilni uporabi brezhibno deloval in
se zavezujemo, da bomo ob izpolnjenih spodaj
navedenih pogojih odpravili morebitne pomanjkljivosti in okvare zaradi napak v materialu ali izdelavi oz. po svoji presoji izdelek zamenjali ali
vrnili kupnino.
2. Garancijski rok za proizvod je 3 leta od dneva
nabave.
3. Kupec je dolžan okvaro javiti pooblaščenemu ser-
visu oz. se informirati o nadaljnih postopkih na
zgoraj navedeni telefonski številki. Svetujemo vam,
da pred tem natančno preberete navodila o sestavi in uporabi izdelka.
4. Kupec je dolžan pooblaščenemu servisu predlož-
iti garancijski list in račun, kot potrdilo in dokazilo
o nakupu.
5. V primeru, da proizvod popravlja nepooblaščeni
servis ali oseba, kupec ne more uveljavljati zahtevkov iz te garancije.
6. Vzroki za okvaro oz. nedelovanje izdelka morajo
biti lastnosti stvari same, in ne vzroki, ki so zunaj
proizvajalčeve oz. prodajalčeve sfere. Kupec ne
more uveljavljati zahtevkov iz te garancije, če se
ni držal priloženih navodil za sestavo in uporabo
izdelka ali, če je izdelek kakorkoli spremenjen ali
nepravilno vzdrževan.
7. Jamčimo servisiranje in rezervne dele za dobo, ki
je minimalno zahtevana s strani zakonodaje.
8. Obrabni deli oz. potrošni material so izvzeti iz
garancije.
9. Vsi potrebni podatki za uveljaljanje garancije
se nahajajo na dveh ločenih dokumentih
(garancijski list, račun).
Proizvajalec
KOMPERNASS GMBH
BURGSTRASSE 21
44867 BOCHUM, NEMČIJA
www.kompernass.com
Prodajalec:
Lidl d.o.o.k.d., Žeje pri Komendi 100,
SI-1218 Komenda
Birotehnika
Phone:+386 (0) 2 522 16 66
Fax: +386 (0) 2 531 17 40
e-mail: support.si@kompernass.com
- 24 -
Page 27

Obsah Strana
Použití pouze podle určení 26
Rozsah dodávky 26
Technická data 26
Důležité bezpečnostní pokyny 26
Upozornění k obsluze 27
Popis přístroje 27
Postavení 27
Před prvním uvedením do provozu 27
Nastavení stupně opékání 27
Opékání 28
Přerušit opékací proces 28
Funkce ohřevu 28
Funkce rozmrazování 28
Přihrádka na drobky 28
Nástavec na housky 28
Čištění a péče 29
Uschování 29
Likvidace 29
Záruka a servis 30
Dovozce 30
Uschovejte tento návod pro případné pozdější dotazy a předejte jej v případě přenechání přístroje třetím
osobám zároveň s ním!
- 25 -
Page 28

TOPINKOVAČ
Použití pouze podle určení
Tento spotřebič je určen pro opékání plátků chleba,
housek a topinek pro použití v domácnosti. Není
určen pro použití s jinými potravinami nebo jiným
materiálem a také není určen pro použití v komerční
nebo průmyslové oblasti. Každé jiné použití nebo
změny platí jako ne dle předpisů a nese značné
nebezpečí zranění.
Rozsah dodávky
Topinkovač
Návod k obsluze
Technická data
Jmenovité napětí: 220 - 240V ~50 Hz
Příkon: 800 W
Důležité bezpečnostní pokyny
K zabránění ohrožení života v důsledku úrazu elektrickým proudem:
• Do šachty pro opékání topinek nikdy nedávejte
části příboru nebo jiné kovové předměty.
• Ujistěte se, zda spotřebič nemůže nikdy přijít do
styku s vodou po celou dobu, kdy je zástrčka
zapojená, zvláště pokud jej používáte v kuchyni
u dřezu.
• Dbejte na to, aby napájecí kabel nebyl během
provozu nikdy mokrý anebo vlhký. Veďte jej tak,
aby nemohlo dojít k jeho sevření nebo jinému
poškození.
• Poškozenou síťovou zástrčku nebo síťový kabel
nechte okamžitě vyměnit autorizovaným odborným personálem nebo službou zákazníkům
z důvodu zabránění ohrožení.
• Po použití vždy vytáhněte síťovou zástrčku ze
zásuvky k zabránění náhodnému zapnutí spotřebiče.
K zabránění nebezpečí požáru
a zranění:
• Části spotřebiče mohou být během provozu horké.
Dotýkejte se proto pouze obslužných prvků.
• Chléb a jiné pečivo se může vznítit! Spotřebič
proto nikdy neprovozujte v blízkosti a ani je nestavte pod zápalné předměty, zejména ne pod
záclony nebo závěsné skříně.
• Spotřebič se nesmí používat v blízkosti hořlavých
materiálů.
• Během provozu toustovač nikdy nezakrývejte.
• Během provozu spotřebič nikdy nenechávejte
bez dozoru.
• Tento přístroj není určen k tomu, aby jej používaly
osoby (včetně dětí) s nedostatkem fyzické, smyslové nebo duševní schopností či s nedostatkem
zkušeností a/nebo nedostatkem znalostí, ledaže,
by byly poučeni osobou, která dohlíží na jejich
bezpečnost nebo by od ní obdržely instruktáž,
jak se má výrobek používat.
• Děti by neměly být ponechány bez dozoru, aby
se zajistilo, že si nebudou s přístrojem hrát.
• Spotřebič provozujte na stabilním, proti prokluzu
odolném a rovném povrchu.
• K provozu spotřebiče nepoužívejte externí spínací
hodiny nebo separátní dálkové ovládání.
- 26 -
Page 29

• Před použitím přístroje odviňte napájecí kabel
úplně z navíjení kabelu.
Upozornění k obsluze
• Tmavý chléb opékejte při vyšším stupni opékání
než bílý chléb. Odležený, suchý chléb zhnědne
rychleji než čerstvý.
• Nepoužívejte příliš velké nebo příliš tlusté plátky,
protože tyto mohou snadno uvíznout.
Pozor:
V případě poruchy nebo při čištění vytáhněte zástrčku
ze zásuvky. Nebezpečí úrazu elektrickým proudem!
• Uvázlé plátky chleba uvolněte tupou dřevěnou
tyčkou (např. násada štětce). Při tom nesmí dojít
ke kontaktu s topným tělesem.
• Rozdíly v druhu chleba, vlhkosti a tloušťce jednotlivých plátků, mají vliv na zhnědnutí topinek. Proto
by se měl toastovací chléb uchovávat v uzavřených obalech.
Postavení
• Odviňte kabel z navíjení kabelu na spodní straně
spotřebiče.
• Postavte toustovač na suchý a rovný povrch.
Před prvním uvedením do
provozu
Toustovač bez chleba rozehřejte minimálně pětkrát
na nejvyšší stupeň opékání. Pokyny pro čištění toustovače si laskavě také přečtěte odstavec
»Čištění a péče«.
Vezměte prosím na vědomí:
Obslužné tlačítko
síťovém kabelu. Při prvním použití může dojít k mírnému zápachu (také se může vyvinout mírný kouř).
To je normální a po krátké době toto zmizí. Zajistěte dostatečné větrání.
zaskočí pouze při zapojeném
e
Nastavení stupně opékání
Popis přístroje
nástavec na housky
q
opékací šachty
w
obslužné tlačítko
e
tlačítko STOP k přerušení opékání
r
tlačítko funkce ohřevu
t
tlačítko funkce rozmrazování
y
regulátor opékání
u
přihrádka na drobky
i
tlačítko nástavce na housky
o
Požadovaný stupeň opékání od "světlý" (1) až po
"tmavý" (7), lze nastavit regulátorem opékání
Dbejte na to, že se dle naplnění toustovače
mění stupeň opečení i při stejném nastavení regulátoru opékání
vložíte do toustovače, tím vyšší je jejich stupeň
opečení. Nastavte proto regulátor opékání
při menším naplnění o stupeň níže.
- 27 -
! Čím méně plátků chleba
u
u
.
u
Page 30

Opékání
Pozor:
Při provozu toustovače nikdy nezakrývejte šachtu
pro opékání topinek
Spotřebič se může neopravitelně poškodit!
• Po nastavení požadovaného stupně opékání
vložte chléb do šachty pro opékání topinek
• Obslužné tlačítko
světlo, integrované v tlačítku STOP
• Automatické centrování plátků chleba vycentruje
vložený chléb v šachtě pro opékání topinek
• Jakmile se dosáhl požadovaný stupeň opečení,
se toustovač automaticky vypne a plátky chleba
se vysunou nahoru.
• Tento přístroj má funkci zvedání, která Vám umožní snadno a bezpečně vyjmout horké plátky
chleba ze šachty pro opékání topinek
k tomu obslužné tlačítko
. Hrozí nebezpečí požáru!
w
zatlačte dolů. Kontrolní
e
svítí.
r
w
směrem nahoru.
e
w
w
. Posuňte
Přerušit opékací proces
• Stiskněte tlačítko funkce ohřevu t. Kontrolní
světlo, integrované do tlačítka funkce ohřevu
svítí.
• Toustovač se automaticky vypne, kontrolní světlo
zhasne a plátky chleba se vysunou nahoru.
Funkce rozmrazování
.
Stisknutím tlačítka funkce rozmrazování ylze také
rozmrazit mražený toustovací chléb. Při tom toustovač
ohřívá chléb pomalu.
• Vložte chléb a zatlačte obslužné tlačítko
.
směrem dolů.
• Stiskněte tlačítko funkce rozmrazování
Kontrolní světlo, integrované do tlačítka funkce
rozmrazování
• Toustovač se automaticky vypne, kontrolní světlo
zhasne a plátky chleba se vysunou nahoru.
Dle nastaveného stupně opékání se chléb
rozmrazí resp. opeče.
y
svítí.
y
t
e
.
Pokud chcete zastavit opékání, stiskněte tlačítko
STOP
. Toustovač se vypne.
r
Funkce ohřevu
Funkce ohřevu tVám umožňuje, ohřát chléb bez
opékání. Například, když už opečený chléb zase
vychladl. Chléb se ohřeje jen krátce.
• Vložte chléb a zatlačte obslužné tlačítko
směrem dolů.
e
Přihrádka na drobky
Při opékání se padající drobky hromadí v přihrádce
na drobky
rádku na drobky
. K odstranění drobků vytáhněte přih-
i
na bok.
i
Nástavec na housky
• Housky nikdy nepokládejte přímo na toustovač,
nýbrž používejte vždy nástavec na housky
• Tlačítko nástavce na housky
dolů. Nástavec na housky
- 28 -
zatlačte směrem
o
se vyklopí nahoru.
q
q
.
Page 31

• Položte na něj housky a začněte s opékáním.
Regulátor opékání
4 a 5 .
nastavte na stupeň mezi
u
• K zabránění požáru vyprázdněte přihrádku na
drobky
v pravidelných intervalech.
i
Housky položte na nástavec na housky
aby nemohly propadnout nástavcem. Po procesu
opečení jsou housky velmi horké.
• Jakmile se toustovač vypne, zkontrolujte ihned
stupeň opečení. Je-li houska opečená dle přání,
otočte ji k opékání na druhou stranu.
• Toustovač znovu zapněte.
• Pokud nástavec na housky
stiskněte tlačítko nástavce na housky
nahoru. Nástavec na housky
dolů.
více nepotřebujete,
q
zase zaklapne
q
o
tak,
q
směrem
Čištění a péče
Nebezpečí!
Před každým čištěním vytáhněte síťovou zástrčku ze
zásuvky a nechte toustovač vychladnout. Nebezpečí
zranění!
Spotřebič nikdy neponořujte do vody nebo jiných kapalin. Spotřebič se může neopravitelně
poškodit.
Uschování
• Uchovávejte toustovač na suchém místě.
• Spotřebič vyčistěte tak, jak je popsáno v kapitole
Čištění a péče.
• Síťový kabel ovijte kolem navíjení kabelu na
spodní straně toustovače.
Likvidace
V žádném případě nevyhazujte přístroj
do normálního domovního odpadu.
Tento výrobek podléhá evropské
směrnici 2002/96/EC.
Přístroj předejte k likvidaci odborné firmě či jej
odevzdejte ve Vašem místním recyklačním zařízení.
Dodržujte aktuální platné předpisy.
V případě pochybností kontaktujte příslušnou firmu,
která se zabývá likvidací odpadu.
Zlikvidujte všechny obalové materiály
ekologicky.
Výstraha před poškozením spotřebiče!
Nepoužívejte žádné ostré nebo abrazivní čistící
prostředky. Tyto mohou napadnout a zničit povrch
spotřebiče.
• Otřete povrch krytu suchým hadříkem nebo mírně
navlhčeným hadříkem.
• Je-li to nunté, použijte čistící prostředky na nerez.
- 29 -
Page 32

Záruka a servis
Dovozce
Na tento přístroj platí tříletá záruka od data zakoupení. Přístroj byl vyroben s nejvyšší pečlivostí a před
odesláním prošel výstupní kontrolou.
Uschovejte si, prosím, pokladní lístek jako doklad o
nákupu. Budete-li uplatňovat záruku, spojte se prosím telefonicky se servisní provozovnou. Pouze tak
může být zajištěno bezplatné zaslání Vašeho zboží.
Záruční plnění se vztahuje pouze na vady materiálu
nebo výrobní závady, nikoliv však na škody, způsobené při dopravě, na opotřebované díly nebo poškození rozbitných součástí, např. spínačů nebo akumulátorů. Výrobek je určen pouze pro privátní
použití, ne průmyslové.
Záruka zaniká v případě neúčelového a neodborného zacházení, použití násilí a v případě zásahů,
které nebudou provedeny námi autorizovanou servisní pobočkou. Vaše práva vyplývající ze zákona
touto zárukou nejsou omezena.
Záručním plněním se záruční doba neprodlouží. To
samé platí i pro nahrazené a opravené díly. Poškození a nedostatky, vzniklé případně už při koupi, se
musí hlásit okamžitě po vybalení výrobku, nejpozději však do dvou dnů od data nákupu. Po uplynutí záruční doby se musí všechny provedené opravy zaplatit.
KOMPERNASS GMBH
BURGSTRASSE 21
44867 BOCHUM, GERMANY
www. kompernass. com
Ing. Martin Šimák, zprostředkovatel
servisu výrobků Kompernass
Hotline: 800 400 235
Fax: 271 722 939
e-mail: support.cz@kompernass.com
- 30 -
Page 33

Obsah Strana
Používanie zodpovedajúce určeniu 32
Obsah dodávky 32
Technické údaje 32
Dôležité bezpečnostné pokyny 32
Pokyny pre používanie 33
Opis prístroja 33
Umiestnenie 33
Pred prvým použitím 33
Nastavenie stupňa zhnednutia 33
Hriankovanie 34
Prerušenie hriankovania 34
Zohrievanie 34
Rozmrazovanie 34
Zásuvka na omrvinky 34
Nástavec na žemle 34
Čistenie a údržba 35
Uskladnenie 35
Likvidácia 35
Záruka a servis 36
Dovozca 36
Uschovajte si tento návod na použitie v budúcnosti – a pri odovzdávaní prístroja tretej osobe odovzdajte aj
návod!
- 31 -
Page 34

TOASTOVAČ
Používanie zodpovedajúce
určeniu
Tento prístroj je určený na hriankovanie plátkov
chleba a žemlí v domácnosti. Nie je určený na používanie s inými potravinami ani inými materiálmi, ani
na používanie v obchodných alebo priemyselných
prevádzkach. Akékoľvek iné použitie alebo úprava
platí ako nezodpovedajúce určeniu a predstavuje
výrazné riziko úrazu.
Obsah dodávky
Toastovač
Návod na obsluhu
Technické údaje
Menovité napätie: 220 - 240 V, 50 Hz
Príkon: 800 W
Dôležité bezpečnostné pokyny
Na zabránenie smrteľného úrazu
elektrickým prúdom:
• Nedávajte príbor ani iné kovové predmety do
hriankovacej šachty.
• Zabezpečte, aby prístroj nemohol nikdy prísť do
styku vodou, keď je zástrčka v zásuvke, predovšetkým keď ho používate v kuchyni blízko drezu.
• Dajte pozor na to, aby sieťová šnúra počas prevádzky nikdy nenavlhla. Veďte ju tak, aby sa nemohla zachytiť ani inak poškodiť.
• Poškodenú zástrčku alebo sieťovú šnúru dajte ihneď
vymeniť odborníkovi alebo v zákazníckom servise,
aby ste sa vyhli ohrozeniu.
• Po použití vždy vytiahnite zástrčku zo zásuvky,
aby ste zabránili náhodnému zapnutiu.
Vyhnutie sa nebezpečenstvu požiaru
a poranenia:
• Diely prístroja môžu byť počas prevádzky veľmi
horúce. Preto sa dotýkajte len ovládacích prvkov.
• Opekané potraviny sa môžu vznietiť! Preto nikdy
nedávajte prístroj do blízkosti ani pod horľavé
predmety, hlavne nie pod záclony alebo závesné
skrinky.
• Prístroj sa nesmie používať v blízkosti horľavých
materiálov.
• Nikdy nezakrývajte hriankovač, keď sa používa.
• Nikdy nenechávajte prístroj počas prevádzky
bez dozoru.
• Tento prístroj nie je určený na to, aby ho používali
osoby (vrátane detí) s obmedzenými fyzickými,
zmyslovými alebo duševnými schopnosťami, alebo
s nedostatkom skúseností alebo nedostatkom
znalostí, len za predpokladu, že budú pod dohľadom osoby zodpovednej za ich bezpečnosť, alebo
od nej dostanú pokyny, ako sa má prístroj používať.
• Na deti treba dohliadať, aby sa zabezpečilo, že
sa nebudú hrať s prístrojom.
• Prístroj používajte len na stabilnej, nešmykľavej
a rovnej ploche.
• Na riadenie prístroja nepoužívajte žiadne externé
spínacie hodiny ani samostatný systém diaľkového
ovládania.
- 32 -
Page 35

• Pred požívaním prístroja celkom odviňte sieťovú
šnúru.
Pokyny pre používanie
Umiestnenie
• Odviňte sieťovú šnúru zo spodnej strany prístroja.
• Postavte hriankovač na suchú a rovnú plochu.
• Pšenično-ražný chlieb hriankujte na vyšší stupeň
zhnednutia ako biely chlieb. Odležaný suchý
chlieb zhnedne rýchlejšie ako čerstvý.
• Nepoužívajte príliš veľké alebo hrubé plátky,
pretože sa ľahko zachytia.
Pozor:
Pri poruchách alebo pri čistení vytiahnite sieťovú
zástrčku zo zásuvky. Nebezpečenstvo úrazu elektrickým prúdom!
• Zachytené plátky chleba uvoľnite tupou drevenou paličkou (napr. rúčkou štetca). Nedotknite
sa pritom vyhrievacích telies.
• Rozdiely v druhu chleba, vlhkosti a hrúbke jednotlivých plátkov ovplyvňujú hnednutie. Preto by ste
mali toastový chlieb skladovať podľa možnosti
v zatvorenom balení.
Opis prístroja
Nástavec na žemle
q
Hriankovacie šachty
w
Ovládacie tlačidlá
e
Tlačidlo Stop na prerušenie hriankovania
r
Tlačidlo na zohrievanie
t
Tlačidlo na rozmrazovanie
y
Regulátor zhnednutia
u
Zásuvka na omrvinky
i
Tlačidlo nástavca na žemle
o
Pred prvým použitím
Hriankovač treba zapnúť bez hrianok aspoň päťkrát
pri maximálnom nastavení. Pokyny pre čistenie hriankovača nájdete aj v časti »Čistenie a údržba«.
Pamätajte si:
Ovládacie tlačidlo
ťovej šnúre. Pri prvom použití môže vzniknúť mierny
zápach (možné je aj mierne dymenie). Je to normálne
a po krátkom čase to zmizne. Zabezpečte dostatočné
vetranie.
zaskočí len pri zapojenej sie-
e
Nastavenie stupňa zhnednutia
Požadovaný stupeň zhnednutia od „svetlý“ (1) po
„tmavý“ (7) sa dá nastaviť regulátorom zhnednutia
Majte na pamäti, že podľa obsadenia (zaťaženia) hriankovača sa stupeň zhnednutia pri rovnakom nastavení regulátora
plátkov toastového chleba vložíte, tým vyšší
bude stupeň zhnednutia. Preto nastavte regulátor
zhnednutia
nižšie.
pri menšom zaťažení vždy mierne
u
mení! Čím menej
u
u
.
- 33 -
Page 36

Hriankovanie
Pozor:
Pri prevádzke hriankovača nezakrývajte hriankovaciu
šachtu
sa môže neopraviteľne poškodiť!
. Hrozí nebezpečenstvo požiaru! Prístroj
w
• Stlačte tlačidlo zohrievania t. V tlačidle zohrievania
• Hriankovač sa automaticky vypne, kontrolka
zhasne a plátky chleba vyjdú znova nahor.
integrovaná kontrolka svieti.
t
Rozmrazovanie
• Po nastavení požadovaného stupňa zhnednutia
vložte chlieb do hriankovacej šachty
• Stlačte ovládacie tlačidlo
Stop
integrovaná kontrolka svieti.
r
• Automatické vystredenie chleba vystredí vložený
chlieb v hriankovacej šachte
• Po dosiahnutí požadovaného stupňa zhnednutia
sa hriankovač automaticky vypne a plátky chleba
vyjdú znova nahor.
• Tento prístroj má zdvíhanie, ktoré umožňuje jednoducho a bezpečne vybrať horúce plátky chleba
z hriankovacej šachty
tlačidlo
e
nahor.
nadol. V tlačidle
e
w
. Preto posuňte ovládacie
w
.
w
.
Prerušenie hriankovania
Keď chcete prerušiť hriankovanie, stlačte tlačidlo
Stop
. Hriankovač sa vypne.
r
Zohrievanie
Zohrievanie tumožňuje zohriať chlieb bez jeho
zhnednutia. Napríklad keď opečený chlieb vychladne.
Chlieb sa len nakrátko zohreje.
• Vložte chlieb a stlačte ovládacie tlačidlo
e
nadol.
Stlačením tlačidla rozmrazovania ymôžete rozmraziť mrazený toastový chlieb. Hriankovač pritom
pomaly zohreje chlieb.
• Vložte chlieb a stlačte ovládacie tlačidlo
nadol.
• Stlačte tlačidlo rozmrazovania
rozmrazovania
• Hriankovač sa automaticky vypne, kontrolka
zhasne a plátky chleba vyjdú znova nahor.
Podľa nastaveného stupňa zhnednutia sa
chlieb rozmrazí alebo zhnedne.
integrovaná kontrolka svieti.
y
y
e
. V tlačidle
Zásuvka na omrvinky
Pri hriankovaní sa omrvinky hromadia v zásuvke na
omrvinky
zásuvku na omrvinky
. Na odstránenie omrviniek vytiahnite
i
nabok.
i
Nástavec na žemle
• Nikdy neklaďte žemle priamo na hriankovač,
ale vždy použite nástavec na žemle
• Stlačte tlačidlo nástavca na žemle
Nástavec na žemle
sa vyklopí nahor.
q
o
.
q
nadol.
- 34 -
Page 37

• Položte naň žemle a spusťte hriankovanie. Regulátor zhnednutia
5 .
nastavte medzi stupne 4 a
u
• Pravidelne vyprázdňujte zásuvku na omrvinky i,
aby ste znížili nebezpečenstvo požiaru.
Položte žemle na nástavec na žemle
aby cezeň nemohli prepadnúť dolu. Žemle sú
po opekaní veľmi horúce.
• Len čo sa hriankovač vypne, skontrolujte stupeň
zhnednutia. Ak majú žemle požadovaný stupeň
zhnednutia, otočte ich na opekanie z druhej strany.
• Znova zapnite hriankovač.
• Keď už nástavec na žemle
stlačte tlačidlo nástavca na žemle
Nástavec na žemle
q
viac nepotrebujete,
q
sa znova sklopí nadol.
o
tak,
q
nahor.
Čistenie a údržba
Nebezpečenstvo!
Pred každým čistením vytiahnite sieťovú zástrčku
a nechajte hriankovač vychladnúť. Nebezpečenstvo
poranenia!
Nikdy neponárajte prístroj do vody ani do iných tekutín. Prístroj sa môže neopraviteľne poškodiť!
Uskladnenie
• Hriankovač skladujte na suchom mieste.
• Hriankovač čistite podľa opisu v kapitole Čistenie
a údržba.
• Sieťovú šnúru oviňte okolo príchytiek na spodnej
strane hriankovača.
Likvidácia
Prístroj v žiadnom prípade nevyhadzujte
do normálneho domového odpadu.
Tento výrobok podlieha európskej
smernici 2002/96/EC.
Prístroj zlikvidujte v schválenom podniku na likvidáciu odpadu alebo cez vaše obecné zariadenie na
likvidáciu odpadu.
Dodržiavajte aktuálne platné predpisy.
V prípade pochybností sa obráťte na zariadenie
na likvidáciu odpadu.
Všetok obalový materiál zlikvidujte ekologickým spôsobom.
Varovanie pred poškodením prístroja!
Nepoužívajte ostré ani agresívne čistiace prostriedky.
Napádajú povrchové časti prístroja.
• Teleso vyčistite suchou handrou alebo mierne
navlhčenou utierkou.
• V prípade potreby použite čistidlo na nehrdzavejúci povrch.
- 35 -
Page 38

Záruka a servis
Dovozca
Na tento prístroj dostávate záruku 3 roky od dátumu
kúpy. Prístroj bol starostlivo vyrobený a pred dodaním
svedomite preskúšaný.
Prosím, uschovajte si pokladničný doklad ako dôkaz
o kúpe. V záručnom prípade sa spojte telefonicky
s vašim servisným strediskom. Iba tak môže byť
zaručené bezplatné zaslanie vášho tovaru.
Záruka platí len na chyby materiálu a výroby, nie na
poškodenia vzniknuté pri preprave, na opotrebenie,
ani na poškodenia krehkých častí, ako sú spínače
alebo akumulátory. Výrobok je určený iba na súkromné použitie a nie na priemyselné použitie.
Pri neodbornom ošetrovaní v rozpore s určením,
použití násilia a pri zásahoch, ktoré neboli vykonané
našou servisnou pobočkou, záruka zanikne.
Práva vyplývajúce zo zákona nie sú touto zárukou
obmedzené.
Záručná doba sa poskytnutím záruky nepredlžuje.
To platí aj na vymenené a opravené diely. Prípadné
poškodenia a nedostatky existujúce už pri kúpe
musíte nahlásiť ihneď po vybalení, najneskoršie
však do dvoch dní od dátumu kúpy. Opravy, ktoré
spadajú do obdobia po skončení záruky, si musíte
zaplatiť.
KOMPERNASS GMBH
BURGSTRASSE 21
44867 BOCHUM, GERMANY
www.kompernass.com
Kompernass Service Slowakia
Tel. 0850 00 10 16 (
e-mail: support.sk@kompernass.com
0,075 EUR/Min.)
- 36 -
 Loading...