

KITCHEN TOOLS
R
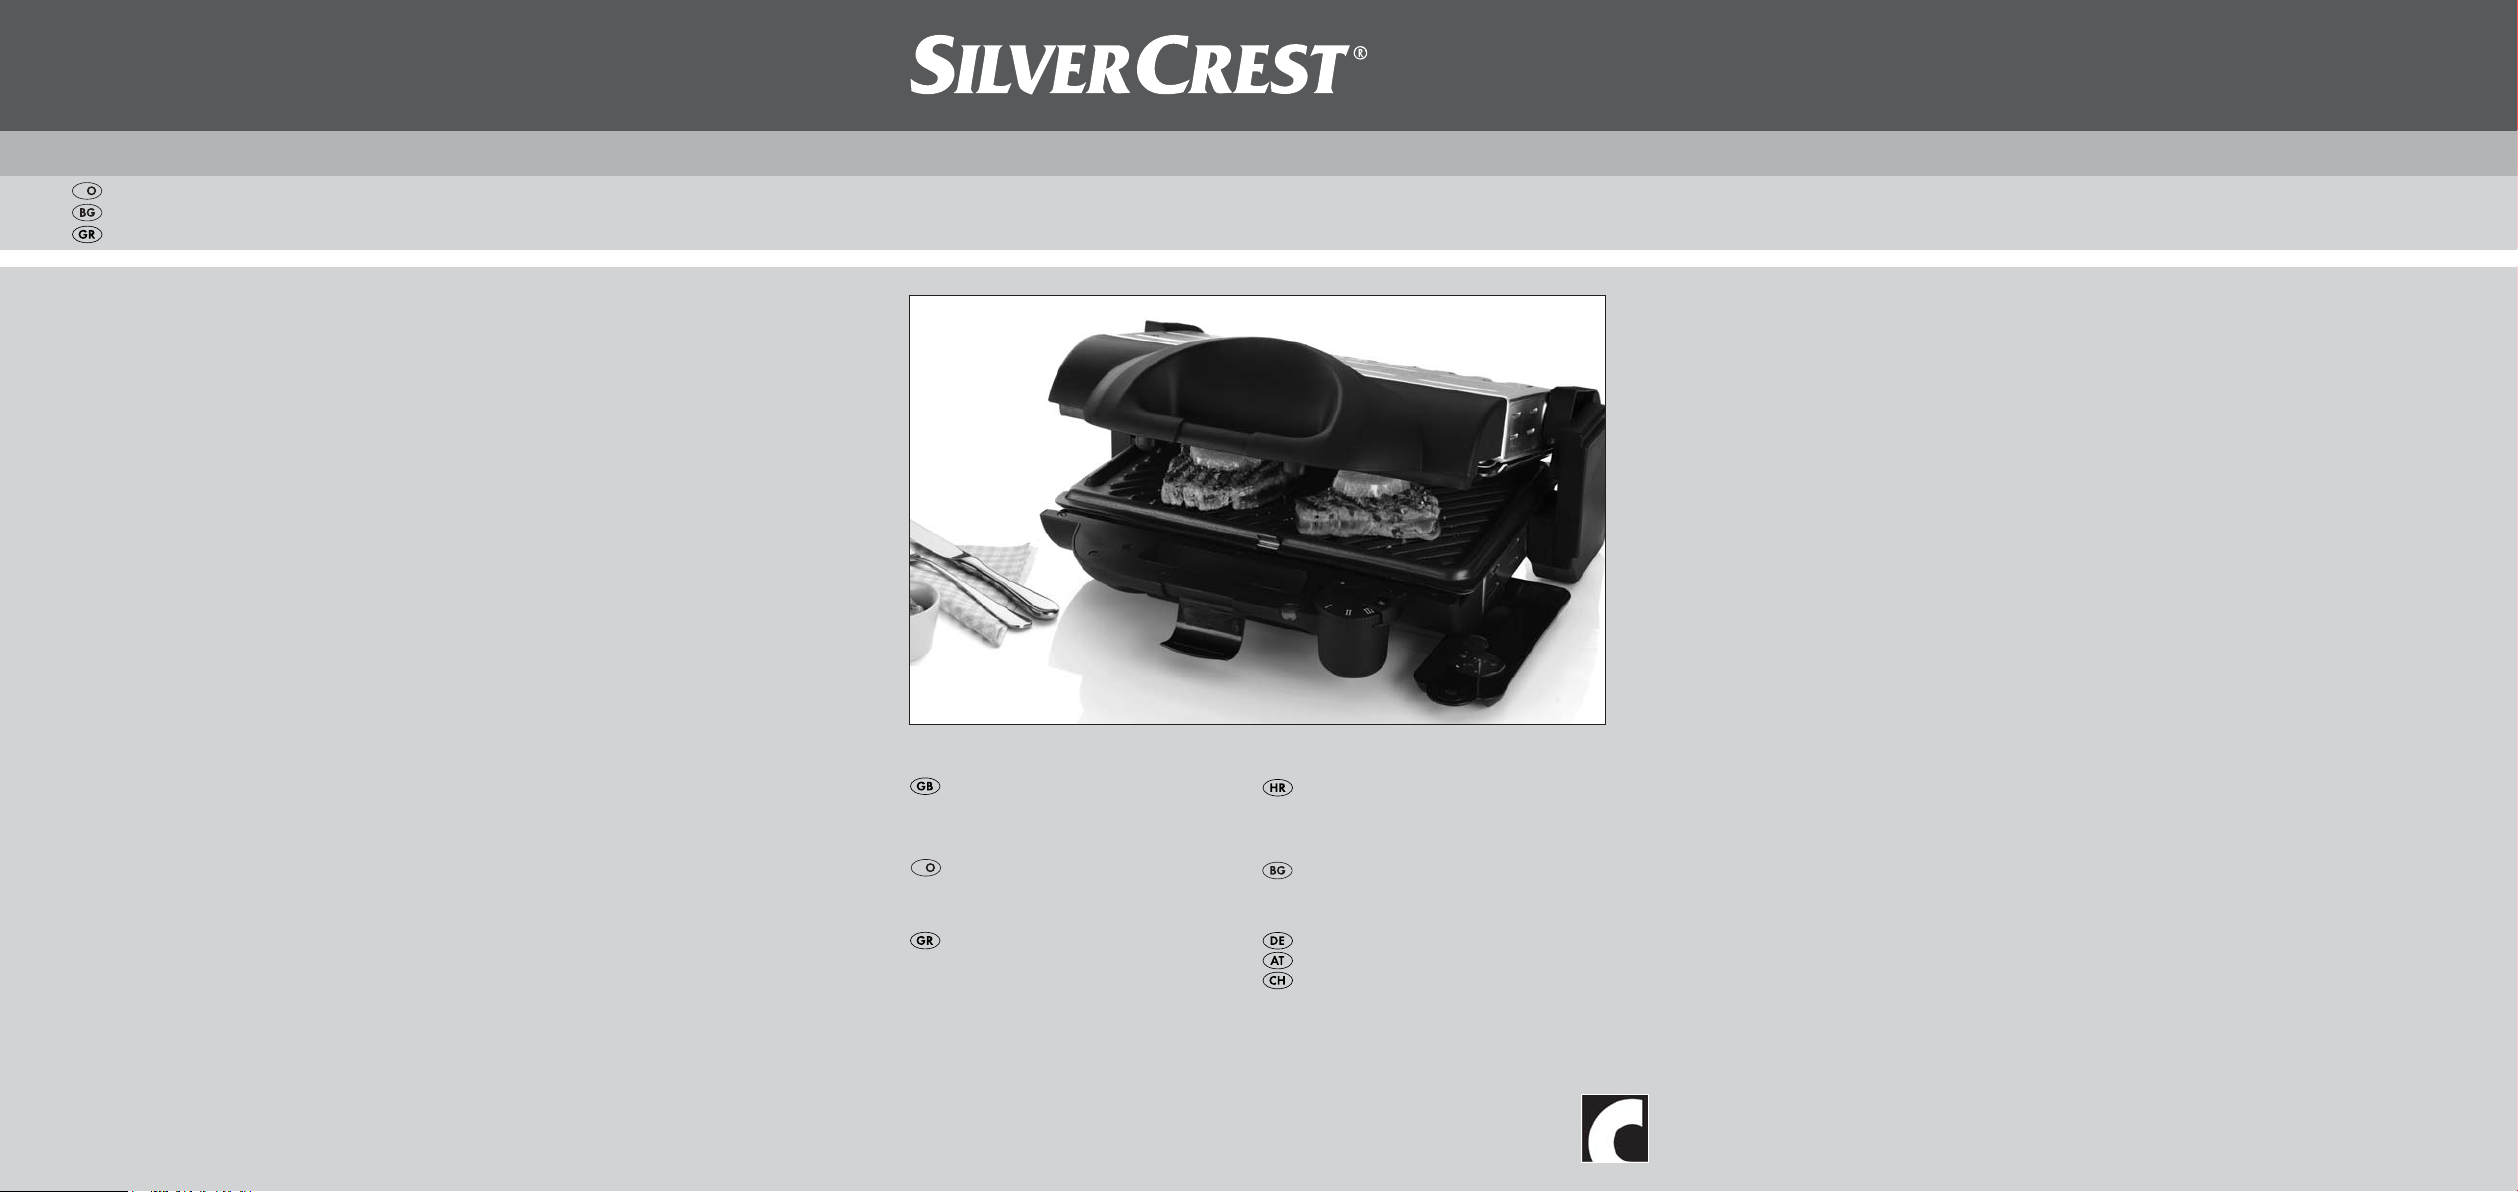
Contact Grill SKG 2000 A1
KOMPERNASS GMBH
BURGSTRASSE 21 · D-44867 BOCHUM
www.kompernass.com
ID-Nr.: SKG 2000 A1-09/11-V1
IAN: 71980
Contact Grill
Operating instructions
R
Grill
Instrucţiunile
Ψηστιέρα
Οδηγίες χρήσης
Stolni roštilj
Upute za upotrebu
Контактен грил
Ръководство за експлоатация
Kontaktgrill
Bedienungsanleitung
SKG 2000 A1
3
2
1
7
5
6
4
8
2x
9

Content Page
Intended use 2
Contents 2
Technical specifications 2
Safety first 2
Description of the appliance 3
Before you use the appliance for the first time 3
Roasting with the Contact Grill 4
Temperature control / preparation methods .................................................................................4
Hot plate positions............................................................................................................................4
Grill roasting / Plates in contact.....................................................................................................4
Barbecue / Hot plate position 180° open...................................................................................5
Oven function / Plate position parallel distance approx. 7 cm..................................................5
After roasting ....................................................................................................................................6
Recipe suggestions (contact position) 6
Mex-Tex-Burger (4 persons) ............................................................................................................6
Turkey Rolls with Serrano Ham (4 persons)...................................................................................6
Tuna with Orange Slices (4 persons).............................................................................................6
Rump Steak with Spring Onion and Herb Sauce (4 persons) ....................................................7
Cleaning & Maintenance 7
Storage 7
Disposal 8
Warranty & Service 8
Importer 8
Read the operating instructions carefully before using the device for the first time and preserve this booklet
for later reference. Pass this manual on to whoever might acquire the device at a future date.
- 1 -

Contact Grill
Intended use
This Contact Grill is intended for
• grilling food such as meat, fish, vegetables, sandwiches, etc.
• in household quantities
• in private households
Contents
Contact Grill with two grill plates
2 oil drip pans
Operating booklet
Technical specifications
Input voltage: 220-240 V ~, 50 Hz
Power consumption: 2.000 W
Safety first
• Before you start using your Contact grill, please
read the following directions for use carefully.
• Keep this instructions brochure in a safe place
near the appliance for ready reference. Pass it
on, as the case may be, to the next owner of the
appliance.
• Use the Contact grill only for its intended purpose in accordance with the instructions given here.
Prevent electrical shock hazards
• You may use the Contact Grill only in-doors in a
dry place. Keep the appliance away from splashing water even when it is switched off.
• Use the appliance only if the local power supply
voltage corresponds to the voltage specified for
the appliance (220-240 V ~ AC at 50 Hz).
• Do not connect the appliance over a multisocket
adapter, from which many other electrical devices may be simultaneously drawing power, as
this can lead to overloading of the circuit.
• After each use switch off the appliance and
unplug the unit.
• While cleaning, make sure that water does not
seep into the inner areas of the appliance. Never attempt to clean the appliance under running
water.
Never dip the appliance into water.
• Protect the power cord from damages through
entanglement with other objects. Keep it away
from hot surfaces. Do not let the power cord
hang loosely from the table or over the hot plate.
• Never open the housing of the appliance.
• To avoid the risk of injury, arrange for defective
power plugs and/or cables to be replaced as
soon as possible by a qualified technician or by
our Customer Service Department to avoid the
risk of injury.
• Only service centres authorised by the manufacturer or experienced technicians may undertake
repairs (see "Repair & Customer Service").
Prevent fire hazards and injuries
• Place your Contact Grill on an even, nonslippery
and heat-resistant base and never on or near other appliances that may radiate high levels of
heat (e.g. toaster or cooking-range).
- 2 -

• Do not operate the appliance near inflammable
objects, for example, close to curtains or near tissue paper roles in the kitchen.
Even during general use, some of the components of the appliance become very hot (e.g.
the top and bottom housing plates). Do not
touch the surface immediately after switching
off the appliance until it cools down completely.
Caution! Hot surfaces!
• To prevent possible overheating, always unwind
the power cord in its entire length.
• While operating, you can open or close the Contact Grill safely using the heatinsulated handle.
• This appliance is not intended for use by persons
(including children) with reduced physical, sensorial or mental cabilities, or lack of experience
and knowledge, unless they have been given
supervision or instruction concerning use of the
appliance by a person responsible for their safety.
• Children should be supervised to ensure that
they do not play with the appliance.
• After use, allow the appliance to cool down
completely before you clean and store it away.
• Do not use an external time switch or a separate
remote control system to operate the appliance.
• Do not use charcoal or similar fuels to operate
the appliance!
• When in use, never leave the appliance unsupervised.
Prevent damages to the appliance
• Use a plastic or wooden spatula or any other suitable non-metallic utensil to remove the food
items so as not to damage the non-stick coating
of the Contact Grill's hot plate.
• For the same reason, do not use any corrosive
detergents or pointed instruments when cleaning
the appliance.
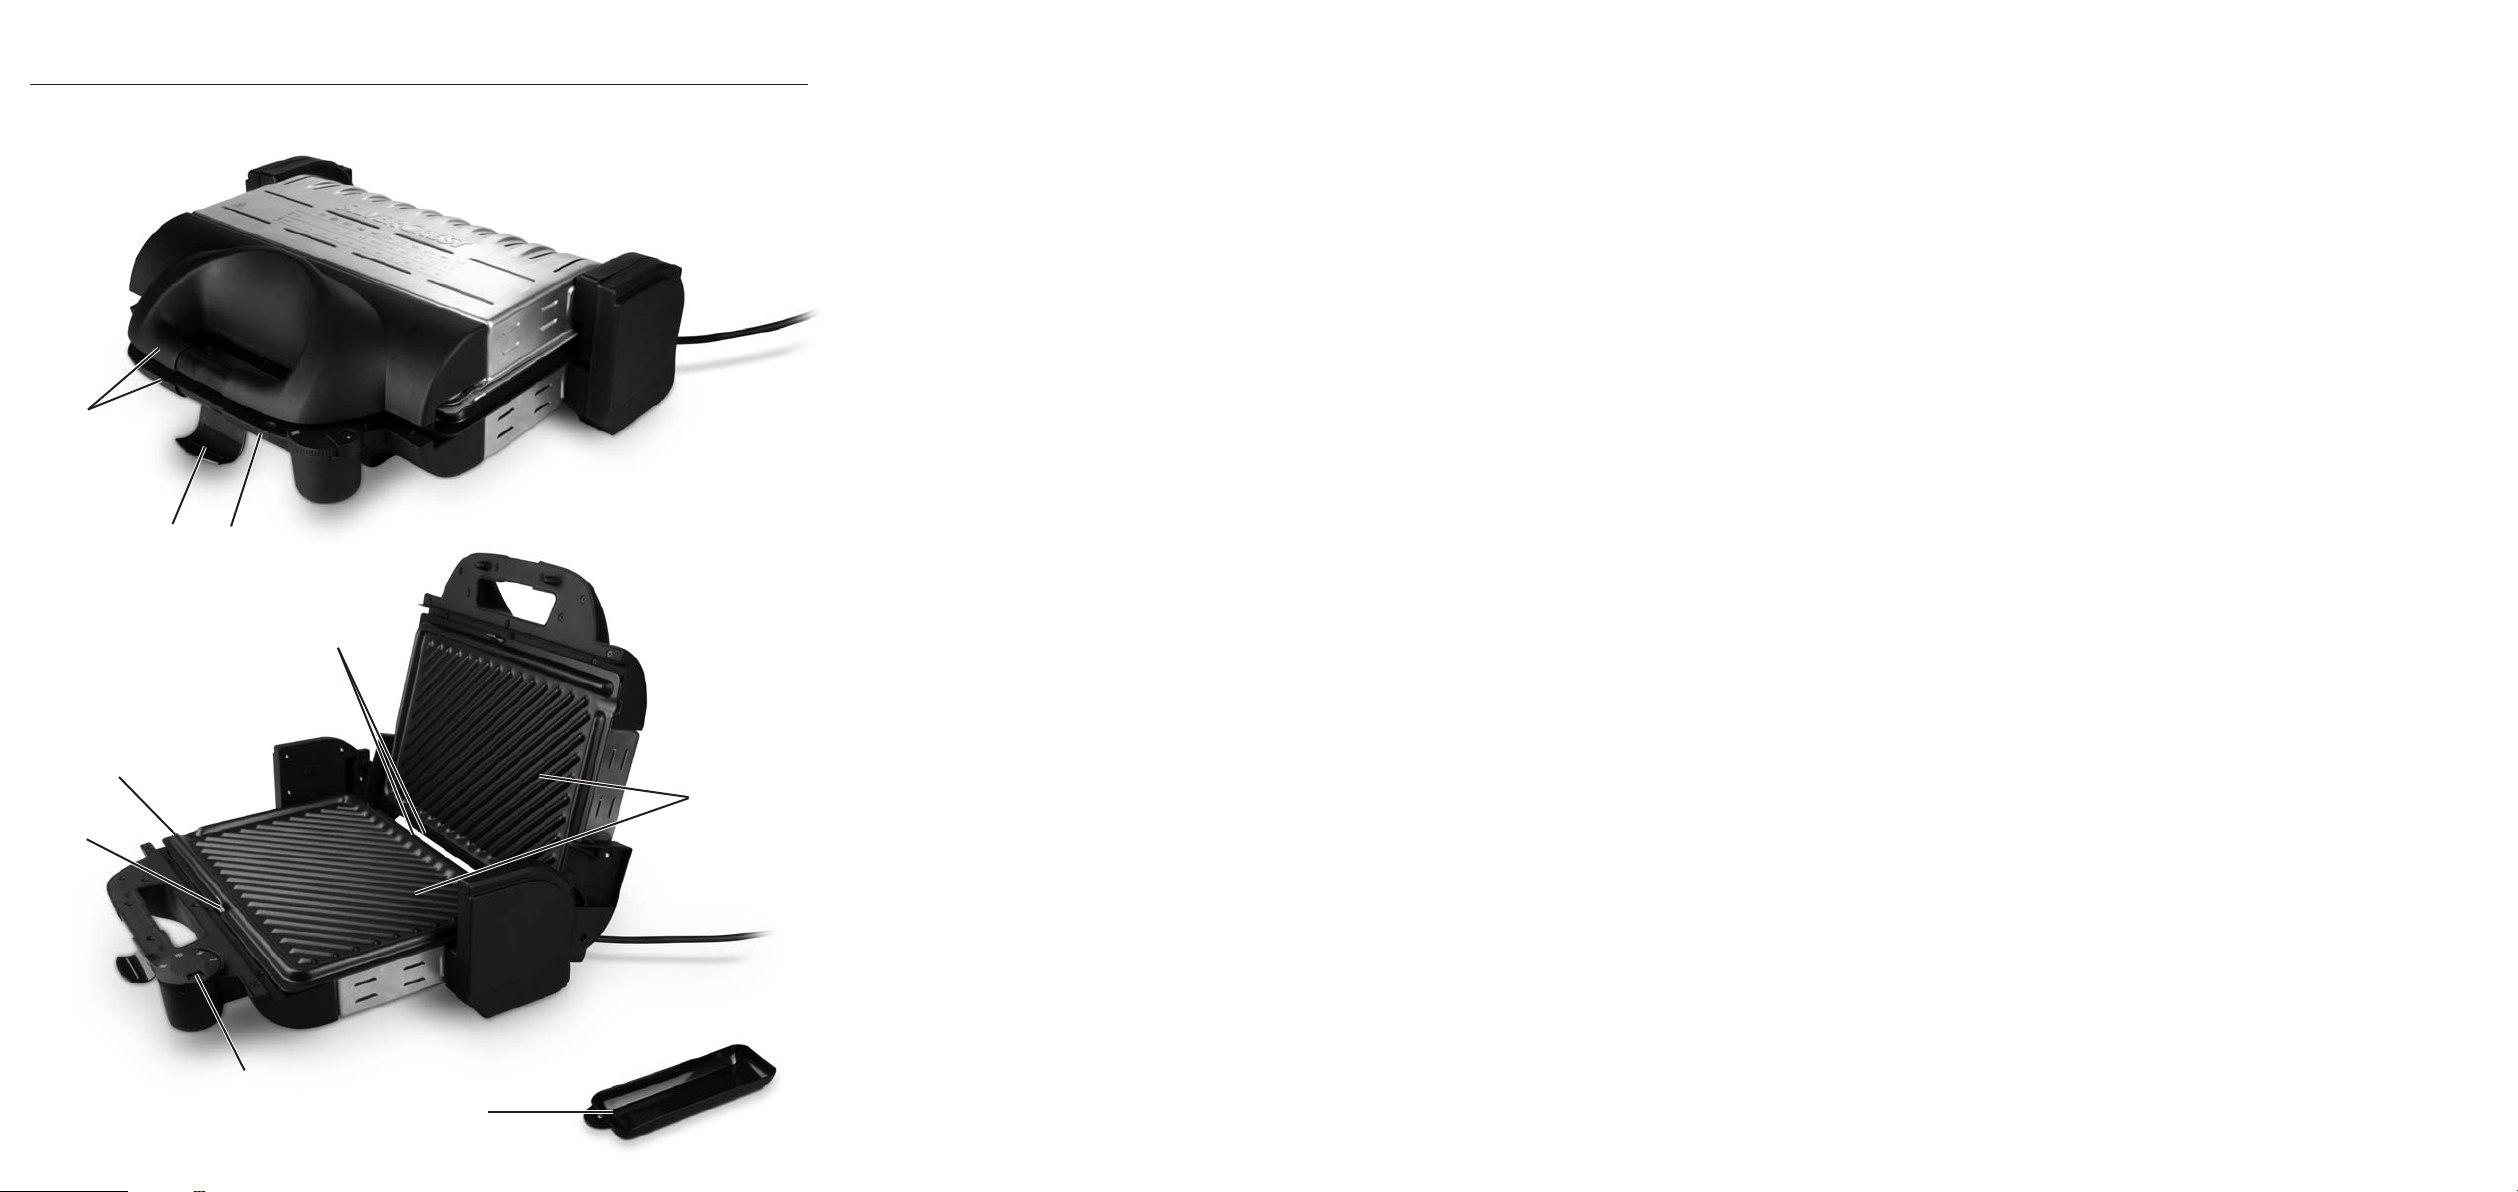
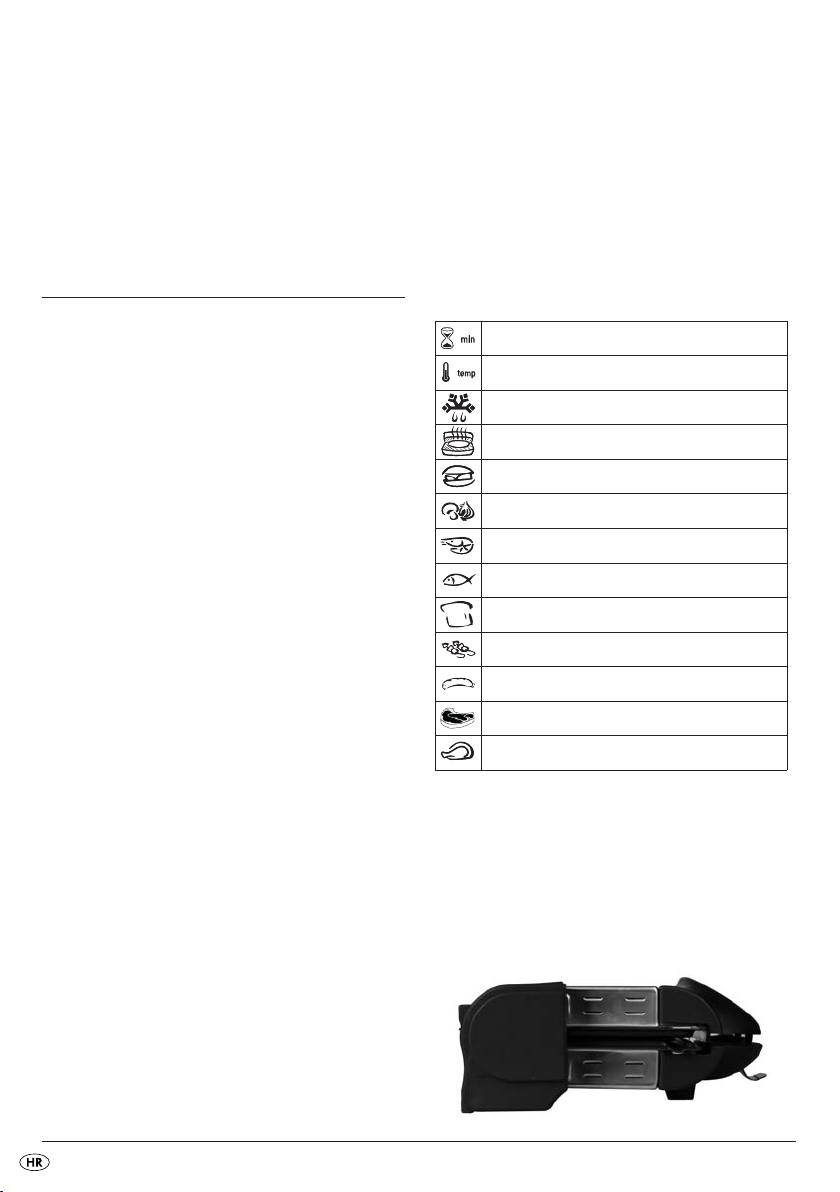
Description of the appliance
Pilot light
q
Snap locking device on the handle
w
Handles
e
Temperature control knob
r
Hot plate locking springs
t
Ridge for oil drainage
y
Leads for fixing the hotplates
u
Grill hot plates
i
Oil drip pan
o
Before you use the appliance
for the first time
1. Unpack your new Contact Grill and remove all
extra fittings such as plastic wrappers and cable
clamps meant for protection during transportation.
2. Before starting up your new Contact Grill, check
the contents for completeness and any visible
damage.
3. Read the directions for use carefully.
4. Install the appliance as described in the safety
precautions.
5. Clean the new Contact Grill with a wet cloth as
described under "Cleaning & Maintenance".
- 3 -
When using the Contact Grill for the first time,
you may notice fumes caused by heating. These
fumes are not injurious to health; however, initially they may affect the taste of your first few dishes. Therefore, before preparing any food items
for the first time, we advise you to switch on the
Contact Grill once without any food items and
allow it to heat up at the maximum temperature
setting for 15 minutes.
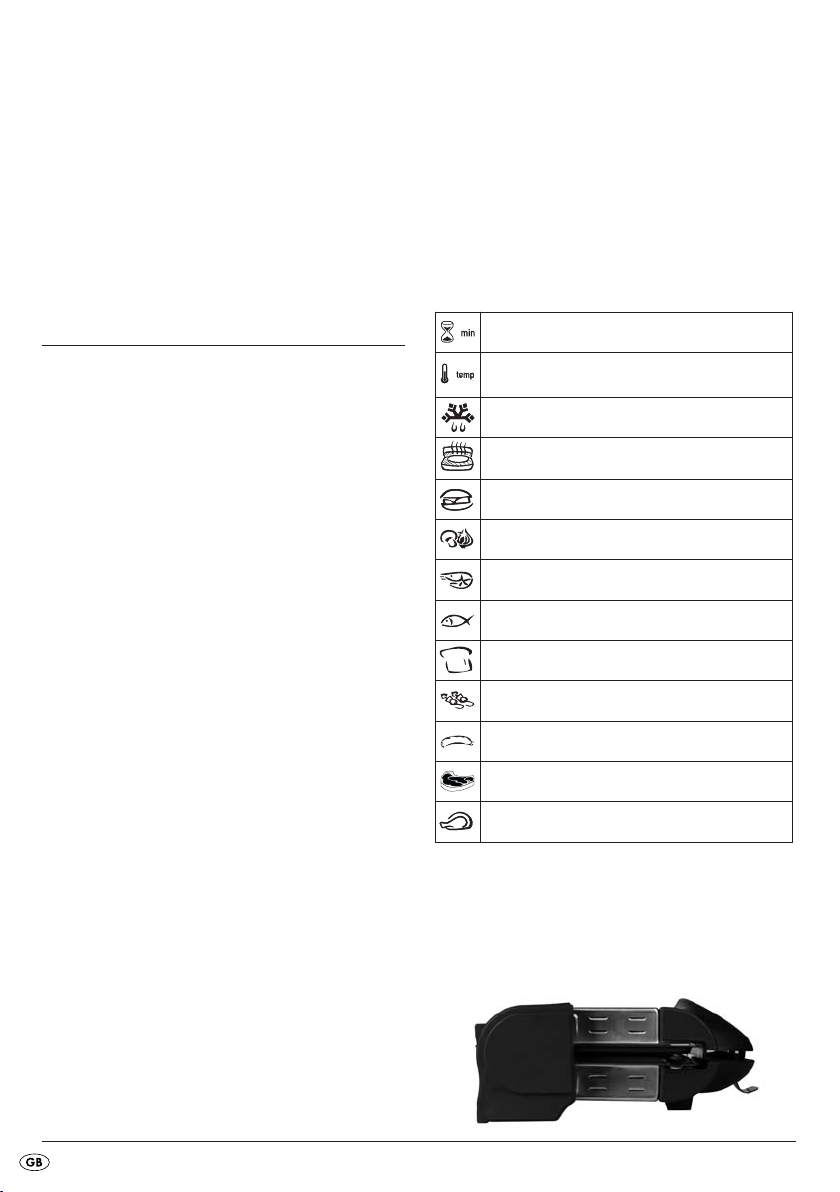
Pictograms for the most important methods of preparation that can be used with the appliance in contact position are shown on the appliance. Generally, cooking
times are based on the weight and size of the foods to
be grilled and on individual taste preferences. These
may therefore vary slightly. The values given are
guiding values based on a quantity of 100 g.
The individual symbols have the following meanings:
Roasting with the Contact Grill
1. Open the lid of the Contact Grill by pulling the
locking clasp on handle
the lid up to the stopper. If necessary, remove all
fallen food particles from the hot plate surface
using a dry cloth.
i
2. Dab some oil or butter on the surface of the hot
plate
.
i
3. Close the lid of the Contact Grill. The appliance
is fully closed when the locking clasp on handle
audibly snaps into position.
w
4. Insert the plug into a power socket to switch the
appliance on and set the temperature control
knob
Contact Grill starts heating up.
The pilot light
5. After a few minutes the pilot light
Now the Contact Grill has reached the set temperature and is ready for operation.
at the desired temperature. Now the
r
turns on.
q
Temperature control / preparation
methods
You can set the temperature control knob rat the
following positions:
• Switched off
I Defrost
II Heat up
III Medium grilling
M Fast grilling
, downwards and tilt
w
switches off.
q
Grilling or cooking time
Temperature setting to use
Thawing
Heating up
Hamburger / sandwich
Vegetables
Shrimp
Fish
Toast, etc.
Meat skewers
Sausages
Meat (cutlets, steaks)
Chicken / turkey
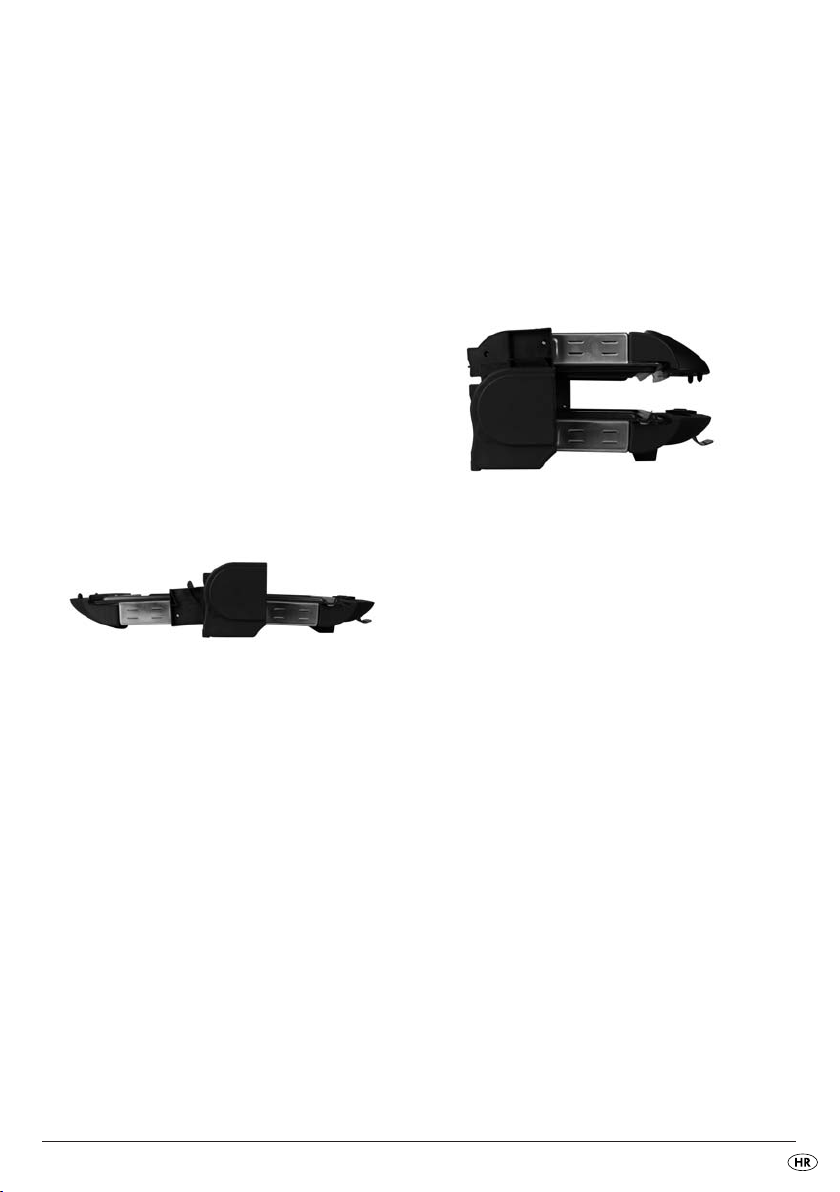
Hot plate positions
You can position the hot plates in different ways
depending on the preparation method.
Grill roasting / Plates in contact
- 4 -
This position is suitable for simultaneous and fast
roasting of foodstuffs on both sides. It is ideal for
grilling meat that needs to be seared fast at high
temperature, e.g. rump steak, filet cuts, chops,
sausages and vegetables.
1. Open the lid of the Contact Grill up to the
stopper without lifting it up.
2. Place one of the oil drip pans
for oil drainage
3. Place the food items to be grilled on the bottom
grilling hot plate
4. Close the lid gently exerting slight pressure till
the distance between both the hot plates are adjusted automatically depending on the thickness
of the food items.
y
i
.
.
under the ridge
o
With particularly fatty foods it can happen that,
when you open the lid, liquid fat on the upper
grill plate
cement area!
runs down and drips onto the pla-
i
Barbecue / Hot plate position 180°
open
This position is suitable for grilling thick foodstuffs that need to be roasted slowly and uniformly. It is ideal for preparing vegetables with
high water content, as the water can evaporate
in the beginning at low or medium temperatures.
You can also use this hot plate position to prepa-
re large quantities of food items or to cook vegetables along with meat.
Example: Pepper
Remove the stem and seeds from the pepper. Cut
the pepper into strips one centimetre wide.
Place the pepper strips on the grill
approx. 15 minutes at temperature setting "M" until
bubbles appear on the skin.
and grill for
i
1. Open the lid of the Contact Grill in vertical position, lift it up to the stopper and open it further till
it is in horizontal position.
2. Place the two oil drip pans
for oil drainage
3. Spread the grilling foodstuffs on both the grill
plates
i
.
of the grill plates i.
y
under the ridges
o
Oven function / Plate position parallel
distance approx. 7 cm
This position is suitable for preparing delicate
foodstuffs that need not be pressed or turned
over when roasting.
Example: Meat Cutlet with Melted Cheese
Pound the meat cutlet flat, then salt and pepper it.
Place the cutlet on the grill and grill evenly from
both sides. Then lay melting cheese atop the cutlet
and cook in the oven function at temperature setting
"M" for approx. 15 minutes.
1. Open the lid part of the Contact Grill up to the
stopper without lifting it up.
2. Place one of the oil drip pans
for oil drainage
3. Place the foodstuff to be grilled on the bottom
hot plate
4. Lift the lid till the stopper and turn it forward till it
rests in a parallel position with the bottom hot
plate
i
i
.
.
y
.
under the ridge
o
- 5 -

After roasting
• Set the temperature control knob rto "•"
position.
• Pull the power plug out of the socket.
• Remove the grilled food items from the hot plates
using a wooden spatula or any other suitable,
i
non-metallic utensil.
Recipe suggestions
(contact position)
The details provided for grilling times and heat
levels can, subject to the composition of the
foodstuff and personal tastes, be varied.
Mex-Tex-Burger (4 persons)
900 g hamburger
6 tbsp. barbecue sauce
6 tbsp. finely chopped onions
3 tbsp. fresh or store-bought salsa
1/2 tsp. chili powder
4 large hamburger buns
1. Mix hamburger, onions, salsa, chili powder and
barbecue sauce well in a large bowl. Form the
meat mix into four equally sized, 2 cm thick
hamburger patties.
2. Warm the appliance up (Heat level III - M).
3. Grill the hamburgers for 8 - 10 minutes on the
pre-heated grill. Then serve the hamburgers on
the hamburger buns together with ingredients
and seasonings of your choice.
Turkey Rolls with Serrano Ham
(4 persons)
8 small, thin turkey cutlets (50 g each)
Salt
Pepper
2 tsp. mustard
8 thin slices of Serrano ham
8 dried, soft apricots
1 tbsp. olive oil
8 roulade needles
1. Pound cutlets flat, salt and pepper. Coat one
side with mustard. Cut ham slices in half. Place
ham and apricots on the mustard-coated side.
2. Warm the appliance up (Heat level M).
3. Roll the cutlet up and then firmly secure it with a
skewer. Smear the roll with cooking oil, then grill
it for approx. 6 minutes at heat level M.
Tuna with Orange Slices (4 persons)
4 fresh tuna steaks (170 g each)
1 orange
1 tsp. finely chopped parsley
Salt
Pepper
1. Peel the orange and cut into slices roughly 5 mm
thick.
2. Place the tuna steaks on the preheated grill (Heat
level III - M), sprinkle with parsley and season with
salt and pepper. Lay the orange slices on the tuna
steaks and grill for approx. 6-8 minutes.
3. Remove the grilled orange slices and serve the
tuna steaks.
- 6 -

Rump Steak with Spring Onion and
Herb Sauce (4 persons)
500 g lean rump steak (125 g each)
120 g margarine
1 tsp. Worcestershire sauce
1 finely chopped garlic clove
4 tbsp. finely chopped parsley
4 finely chopped spring onions
• For this purpose, press the hot plate fixing
springs tslightly backwards to release the hot
plates
• Rinse the hot plates
tral detergent.
• In case the grill surface has become heavily incrusted, keep a wet cleaning cloth on the hard
residual matter for a while to soak the layer.
i
.
with hot water and a neu-
i
1. Mix the margarine and the Worcestershire sauce
in a small bowl. Mix in the garlic, parsley and
spring onions.
2. Warm the appliance up (Heat level M).
3. Grill the steak for 3 minutes at heat level M,
afterwards smear it with the spring onion & herb
sauce and then cook it for a further 4 minutes at
heat level I. Collect the dripping herb sauce with
the oil drip pan
4. After they finish grilling, let the steaks rest briefly
and cut into thin strips against the grain. Arrange
the meat on a pre-heated serving plate, pour the
melted herb sauce from the oil drip pan
the cut meat.
o
.
over
o
Cleaning & Maintenance
Injury hazard!
Before cleaning, unplug the appliance and wait till
it has completely cooled down. Never attempt to
clean the appliance under running water and never
dip it in water.
The grill plates
dishwasher!!
• Wash the grease catchment bowl
water and a neutral detergent.
To clean the external surface of the appliance, use
a wet cloth.
Before using the Contact Grill again, make sure that
all components are completely dry.
can even be washed in the
i
o
with hot
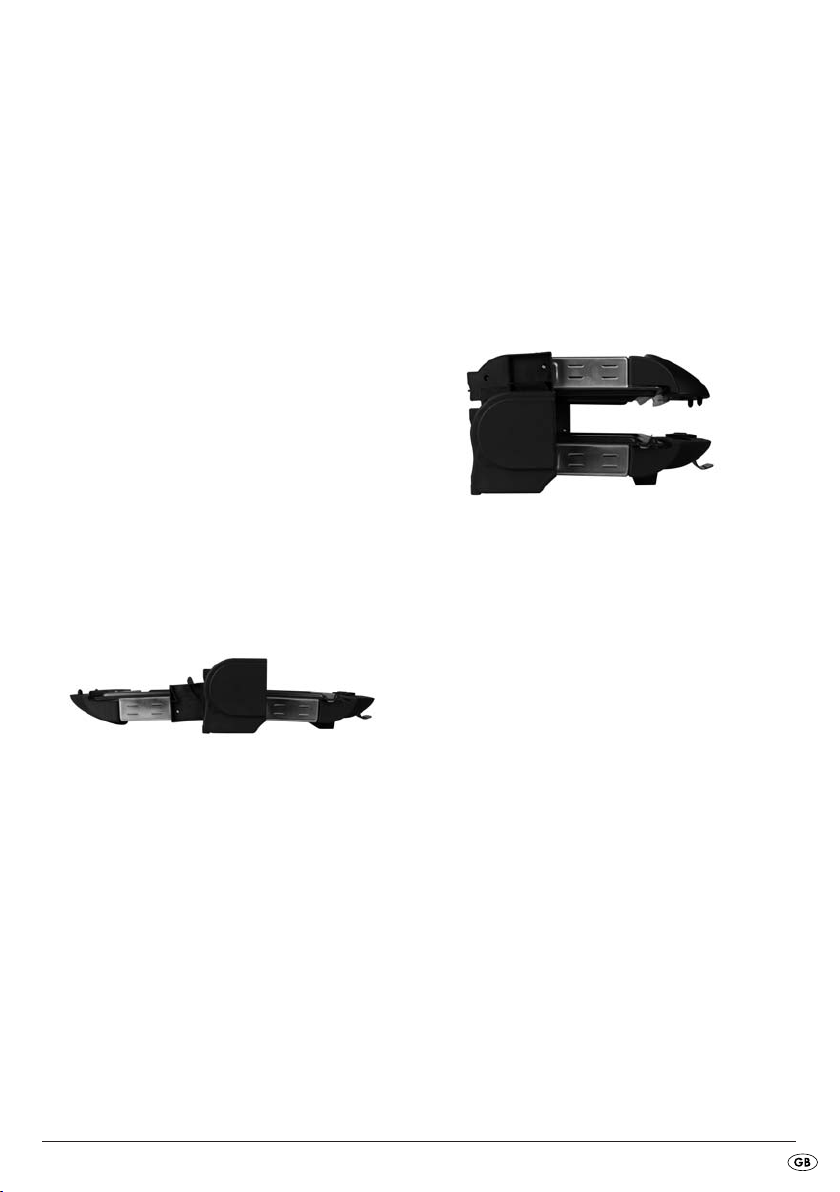
Storage
You can store away the Contact Grill in horizontal
or upright position. Your Contact Grill has an integrated compartment for storing the power cord at
the bottom of the housing. You can wind up the power cord in it when the appliance is not in use. This
way you can prevent the power cord from getting
entangled or soiled or from becoming a likely cause
of accidents.
Caution! Property damage!
So as not to destroy the nonstick coating or other
surfaces, do not use any aggressive detergents,
rough sponges or sharp objects for cleaning.
For normal cleaning, you can remove the grilling
hot plates
from the appliance.
i
- 7 -
Disposal
Do not dispose of the appliance in your
normal domestic waste. This product is
subject to the European guideline
2002/96/EC.
Dispose of the appliance through an approved disposal centre or at your community waste facility.
Observe the currently applicable regulations.
In case of doubt, please contact your waste disposal
centre.
The warranty period will not be extended by repairs
made under warranty. This applies also to replaced
and repaired parts. Any damage and defects extant
on purchase must be reported immediately after unpacking the appliance, at the latest, two days after
the purchase date. Repairs made after the expiration of the warranty period are subject to payment.
Service Great Britain
Tel.: 0871 5000 720 (£ 0.10/Min.)
E-Mail: kompernass@lidl.co.uk
IAN 71980
Dispose of all packaging materials in an
environmentally responsible manner.
Warranty & Service
The warranty for this appliance is for 3 years from
the date of purchase. The appliance has been manufactured with care and meticulously examined before delivery. Please retain your receipt as proof of
purchase. In the event of a warranty claim, please
make contact by telephone with our Service Department. Only in this way can a post-free despatch for
your goods be assured.
The warranty covers only claims for material and
maufacturing defects, but not for transport damage,
for wearing parts or for damage to fragile components, e.g. buttons or batteries. This product is for
private use only and is not intended for commercial
use. The warranty is void in the case of abusive and
improper handling, use of force and internal tampering not carried out by our authorized service
branch. Your statutory rights are not restricted in
any way by this warranty.
Service Ireland
Tel.: 1890 930 034
(0,08 EUR/Min., (peak))
(0,06 EUR/Min., (off peak))
E-Mail: kompernass@lidl.ie
IAN 71980
Importer
KOMPERNASS GMBH
BURGSTRASSE 21
44867 BOCHUM, GERMANY
www.kompernass.com
- 8 -

Sadrˇzaj Strana
Uporabna namjena 10
Obim isporuke 10
Tehnički podaci 10
Sigurnosne upute 10
Opis uređaja 11
Prije prve upotrebe 11
Pečenje sa kontaktnim roštiljem 12
Regulator temperature / Načini pripremanja . . . . . . . . . . . . . . . . . . . . . . . . . . . . . . . . . . . .12
Položaji ploča . . . . . . . . . . . . . . . . . . . . . . . . . . . . . . . . . . . . . . . . . . . . . . . . . . . . . . . . . . . . .12
Roštiljna rešetka / Pozicija ploče u kontaktu . . . . . . . . . . . . . . . . . . . . . . . . . . . . . . . . . . . . .12
Barbecue / Položaj ploče 180° otvoren . . . . . . . . . . . . . . . . . . . . . . . . . . . . . . . . . . . . . . . .13
Funkcija štednjaka / Položaj ploča paralelan uz razmak od ca. 7 cm . . . . . . . . . . . . . . . .13
Nakon pečenja . . . . . . . . . . . . . . . . . . . . . . . . . . . . . . . . . . . . . . . . . . . . . . . . . . . . . . . . . . . .14
Prijedlozi recepata (Kontaktna pozicija) 14
Mex-Tex-Burger (4 osobe) . . . . . . . . . . . . . . . . . . . . . . . . . . . . . . . . . . . . . . . . . . . . . . . . . . .14
Pureći valjušci sa Serrano-šunkom (4 osobe) . . . . . . . . . . . . . . . . . . . . . . . . . . . . . . . . . . . . .14
Tuna sa ploškama naranče (4 osobe) . . . . . . . . . . . . . . . . . . . . . . . . . . . . . . . . . . . . . . . . . .14
Rumpsteak sa umakom od proljetnog luka i biljaka (4 osobe) . . . . . . . . . . . . . . . . . . . . . . .15
Čišćenje & održavanje 15
Čuvanje uređaja 15
Zbrinjavanje 16
Jamstvo i servis 16
Uvoznik 16
Upute za rukovanje prije prve upotrebe pažljivo pročitajte i sačuvajte ih za kasnije korištenje. Ukoliko uređaj
dajete trećim osobama, priložite i ove upute.
- 9 -

Stolni roštilj
Uporabna namjena
Ovaj kontaktni roštilj je predviđen za
• roštiljanje namirnica poput mesa, ribe, povrća,
sendviča itd.
• u količinama uobičajenim za domaćinstva
• u privatnim domaćinstvima.
Obim isporuke
Kontaktni roštilj sa dvije roštiljne ploče
2 zdjele za prihvat ulja
Upute za uporabu
Tehnički podaci
Nominalan napon:220-240 V ~, 50 Hz
Snaga: 2000 W
Izjava o sukladnosti za ovaj proizvod dostupna je
na internet stranici www.lidl.hr.
Sigurnosne upute
• Prije prve uporabe Vašeg kontaktnog roštilja ove
upute za rukovanje pažljivo pročitajte.
• Upute za uporabu čuvajte na prikladnom mjestu
u blizini uređaja. Ako uređaj predajete trećoj
osobi, priložite i upute za uporabu.
• Kontaktni roštilj koristite isključivo za predviđenu
uporabnu namjenu i u skladu sa ovim uputama
za rukovanje.
Na taj način ćete spriječiti opasnosti
uslijed strujnog udara
• Kontaktni roštilj smije samo biti korišten u unutrašnjosti suhih prostorija. Uređaj držite podalje od
vode koja prska - čal i kada je on isključen.
• Uređaj koristite samo onda, kada lokalni mrežni
napon odgovara nominalnom naponu uređaja
(220-240 V ~, 50 Hz).
• Uređaj ne priključujte preko višestruke utičnice,
preko koje su istovremeno priključeni i drugi
uređaji u radu, jer to može dovesti do preopterećenja strujnog kruga.
• Uređaj isključite nakon svake uporabe. U tu svrhu
izvucite mrežni utikač.
• Prilikom čišćenja obratite pažnju na to, da voda
ne dospije u unutrašnjost uređaja. Uređaj nikada
ne smijete čistiti pod mlazom tekuće vode.
Uređaj nikada ne uronite u vodu.
• Zaštitite mrežni kabel od oštećenja. Obratite
pažnju na to, da se kabel ne gnječi i držite ga
dalje od vrućih predmeta. Mrežni kabel ne pustite
da labavo visi sa ruba stola ili radne ploče.
• Nikada ne otvarajte kućište uređaja.
• Oštećene mrežne utikače ili kablove neizostavno
dajte na popravak ovlaštenim stručnjacima ili
servisu za kupce, kako biste izbjegli nastanak
opasnosti.
• Popravke smiju vršiti isključivo od proizvođača
ovlašteni trgovci ili iskusni stručnjaci.
Ovako ćete izbjeći opasnost od požara
i od ozljeda
• Kontaktni roštilj postavite na ravnu, protukliznu
podlogu otpornu na visoke temperature, a nikako
na ili pokraj drugih uređaja koji mogu zračiti
toplotu (npr. tosteri ili štednjaci).
- 10 -

• Nikada ne radite ovim uređajem u blizini lako
zapaljivih predmeta, na primjer ispod zavjesa
ili pokraj valjaka kuhinjskog papira.
I u slučaju propisnog rukovanja pojedini dijelovi uređaja postaju vrlo vrući (primjerice
gornja i donja ploča kućišta). Obratite pažnju
na to, da ove površine ne dotaknete, sve dok
se one nakon isključivanja uređaja potpuno
ne ohlade.
Oprez! Vruća površina!
• Da biste spriječili opasno pregrijavanje, uvijek
odmotajte punu dužinu mrežnog kabela.
• Za vrijeme pogona kontaktni roštilj bez opasnosti
može biti otvoren i zatvoren pomoću toplinski
izoliranog rukohvata.
• Ne dopustite, da uređaj koriste osobe (uključujuśi djecu), čije fizičke, senzorske i mentalne
sposobnosti ili pomanjkanje iskustva i znanja ih
sprječavaju da na siguran način koriste uređaj,
ukoliko prethodno nisu nadzirani ili podučavani.
• Uputite djecu u vezi uređaja i mogućih opasnosti, kako se ona ne bi igrala sa uređajem.
• Uređaj nakon isključivanja ostavite da se potpuno
ohladi, prije nego što ga očistite i spremite.
• Ne koristite eksterni rasklopni sat ili odvojeni sustav na daljinsko upravljanje za rad sa
uređajem.
• Ne koristite ugalj ili slične vrste goriva za pogon
uređaja!
• Uređaj za vrijeme pogona nikada ne ostavite
bez nadzora.
Na taj način ćete izbjeći oštećenja uređaja
• Sve namirnice vadite isključivo pomoću plastične
ili drvene lopatice ili pomoću drugog - nemetalnog - predmeta, kako ne biste uništili sloj protiv
lijepljenja, kojim je kontaktni roštilj prevučen.
• Iz istog razloga za čišćenje ne upotrebljavajte
agresivna sredstva ili šiljate predmete.
Opis uređaja
Kontrolna lampica
q
Zatvarač na rukohvatu
w
Rukohvati
e
Regulator temperature
r
Opruge za učvršćavanje ploča
t
Ispust za masnoću
y
Vodilica za učvršćavanje ploča
u
Roštiljne ploče
i
Zdjela za prihvat ulja
o
Prije prve upotrebe
1. Novi kontaktni roštilj izvadite iz pakiranja. Otklonite sve dodatne transportne osigurače, na primjer
folije ili držače kabela.
2. Prije prvog puštanja u rad provjerite kompletnost
obima isporuke i provjerite, da li postoje vidljiva
oštećenja.
3. Ove upute za uporabu pažljivo pročitajte.
4. Uređaj postavite u skladu sa sigurnosnim napomenama.
5. Novi kontaktni roštilj očistite pomoću vlažne krpe
na način opisan u poglavlju "Čišćenje i održavanje".
- 11 -
Prvim zagrijavanjem kontaktnog roštilja može
doći do stvaranja isparenja. Pare, koje nastaju,
nisu štetne po zdravlje, ali mogu utjecati na okus
namirnica. Stoga Vam preporučavamo, da prije
prvog pripremanja namirnica uključite kontaktni
roštilj i bez namirnica zagrijete na maksimalnoj
temperaturi u trajanju od 15 minuta.
Pečenje sa kontaktnim roštiljem
1. Otvorite poklopac kontaktnog roštilja. U tu svrhu
povucite zatvarač na rukohvatu
i odklopite poklopac prema gore do kraja, bez
da ga nadignete. Sa roštiljnih ploča
eventualno prisutne čestice prašine pomoću suhe
krpe.
2. Namastite roštiljne ploče
ili maslaca.
3. Zatvorite poklopac kontaktnog roštilja. Uređaj
je zatvoren, kada je zatvarač na rukohvatu
čujno ulegao u ležište.
4. Mrežni utikač utaknite u utičnicu i pomoću regulatora temperature
Uređaj će sada početi sa zagrijavanjem, a kontrolna lampica
5. Nakon nekoliko minuta se gasi kontrolna lampica
. Kontaktni roštilj je sada dostigao željenu
q
temperaturu i spreman je za pogon.
r
q
i
postavite željenu temperaturu.
će zasvijetliti.
prema dolje
w
uklonite
i
sa nešto biljnog ulja
w
Na uređaju su navedeni piktogrami za najvažnije
načine pripremanja namirnica, koji mogu biti izvedeni sa uređajem u kontaktnoj poziciji. Vrijeme pripravljanja generalno ovisi o težini i veličini namirnica za roštiljanje, kao i o individualnom ukusu. Ovo
vrijeme stoga može u manjoj mjeri varirati.
Navedene vrijednosti predstavljaju orijentacijske
vrijednosti, koje se temelje na količinama od po 100 g.
Pojedini simboli imaju slijedeće značenje:
Vrijeme roštiljanja, odnosno pripravljanja
Stupanj temperature za podešavanje
Otapanje
Podgrijavanje
Hamburger / Sendvič
Povrće
Škampi
Riba
Tost ili sl.
Ražnjići
Hrenovke
Komadi mesa (Odrezak, steak)
Piletina / Puretina
Regulator temperature / Načini
pripremanja
Regulator temperature rmože biti postavljen na
slijedeće pozicije:
• isključen
I Otapanje
II Podgrijavanje
III srednje roštiljanje
M brzo roštiljanje
Položaji ploča
Na raspolaganju Vam stoje različite pozicije ploče,
koje možete primijeniti ovisno o načinu pripreme.
Roštiljna rešetka / Pozicija ploče
u kontaktu
- 12 -
Za istovremeno, vrlo brzo pečenje namirnica
na obje strane. Idealno za roštiljanje mesa, koje
zahtijeva vrlo brzo pečenje na visokoj temperaturi - Rumpsteak, fileti, kotleti, hrenovke ili povrće.
1. Otvorite poklopac kontaktnog roštilja do kraja,
bez da ga nadignete.
2. Postavite jednu od zdjela za prihvat ulja
ispust masnoće
3. Postavite namirnice na donju roštiljnu ploču
4. Zatvorite poklopac. Pritom blago pritisnite, da bi
se razmak dviju ploča na temelju debljine namirnica automatski regulirao.
y
.
o
pod
i
Kod posebno masnih namirnica može se dogo-
diti, da prilikom otvaranja poklopca curi mast sa
gornje roštiljne ploče
ršinu!
i kapa na stajaću pov-
i
1. Otvorite poklopac kontaktnog roštilja i dovedite
u okomit položaj, izdignite ga do kraja i dalje
ga otvorite, sve dok ne bude vodoravan.
2. Postavite dvije zdjele za prihvat ulja
izlaza za masnoću
3. Raspodijelite namirnice na dvije roštiljne ploče
roštiljnih ploča i.
y
Funkcija štednjaka / Položaj ploča
paralelan uz razmak od ca. 7 cm
.
o
ispod
i
.
Barbecue / Položaj ploče 180° otvoren
Za roštiljanje debljih komada namirnica, koje
zahtijevaju polaganije i ravnomjernije pripravljanje. Idealno za pripremanje povrća sa visokim
sadržajem vode, jer vodu možemo na početku
pustiti da ispari na niskoj ili srednjoj temperaturi.
Ovo podešenje ploče možete koristiti i za pripre-
manje veće količine namirnica, ili za istovremeno
pripremanje povrća i mesa.
Primjer: Paprika
Papriku očistiti od peteljke i koštica. Papriku isjeći u
komade široke jedan centimetar. Komade paprike
postaviti na roštiljnu
ture “M” roštiljati u trajanju od ca. 15 minuta, sve
dok se na koži ne pojave mjehuri.
rešetku i na stupnju tempera-
i
Za pripravljanje osjetljivih namirnica, koje prilikom
pečenja ne smiju biti gnječene ili okrenute.
Primjer: Prepečeni odresci
Odreske izlupati, posoliti i popapriti. Odreske staviti
na roštiljnu rešetku i sa obje strane roštiljati ravnomjerno. Nakon toga odreske obložiti sa topljenim sirom i
u funkciji štednjaka na stupnju temperature “M”, ca.
15 minuta prepeći.
1. Otvorite poklopac kontaktnog roštilja do kraja,
bez da ga nadignete.
2. Postavite jednu od zdjela za prihvat ulja
ispust masnoće
3. Postavite namirnice na donju roštiljnu ploču
4. Otvorite poklopac do kraja i okrenite ga prema
naprijed, sve dok ne bude u paralelnom položaju
u odnosu na donju roštiljnu ploču
y
.
i
pod
o
i
.
.
- 13 -

Nakon pečenja
• Postavite regulator temperature rna “•”.
• Izvucite mrežni utikač iz utičnice
• Namirnice pomoću drvene lopatice ili sličnog - nemetalnog - predmeta skinite sa roštiljne ploče
i
Prijedlozi recepata
(Kontaktna pozicija)
Navodi u pogledu vremena grilanja i stupnjeva
zagrijavanja mogu, ovisno o osobinama namirnica i osobnom ukusu, varirati.
Mex-Tex-Burger (4 osobe)
900 g mljevene govedine
6 VŽ Barbecue-umaka
6 VŽ fino isjeckanog luka
3 VŽ svježe ili gotove Salse
1/2 MŽ čilija u prahu
4 velike žemičke za hamburgere
1. Mljeveno meso, luk, Salsu, čili u prahu i umak
u velikoj zdjeli dobro promiješajte. Mesnu masu
oblikujte u četiri ploške za hamburger jednake
veličine i debljine od oko 2 cm.
2. Zagrijte uređaj (stupanj zagrijavanja III - M).
3. Hamburgere roštiljajte u trajanju 8 - 10 min.
na predgrijanom uređaju u kontaktnoj poziciji. Nakon toga hamburgere zajedno sa sastojcima i začinima po želji servirajte u žemičkama.
Pureći valjušci sa Serrano-šunkom
(4 osobe)
8 malih i tankih purećih odrezaka (po 50 g)
Sol
.
Papar
2 MŽ senfa
8 tankih ploški Serrano-šunke
8 sušenih mekanih marelica
1 VŽ (velika žlica) maslinovog ulja
8 igala za rolade
1. Odreske izlupati, posoliti i popapriti. Jednu stranu
premazati senfom. Ploške šunke prepoloviti. Sa
senfom premazanu stranu obložiti sa šunkom i
marelicama.
2. Zagrijte uređaj (stupanj zagrijavanja M).
3. Odrezak razvijte i učvrstite sa iglama za rolade.
Rolice premažite uljem i roštiljajte ca. 6 minuta
na stupnju zagrijavanja M.
Tuna sa ploškama naranče (4 osobe)
4 svježa odreska od tune (po 170 g)
1 naranča
1 MŽ fino isjeckanog peršina
Sol
Papar
1. Naranču oljuštiti i izrezati u ploške debljine ca.
5 mm.
2. Odreske od tune postaviti na predgrijani roštilj
(stupanj zagrijavanja III - M), preko njih posuti
peršin, te začiniti sa paprom i soli. Ploške naranči postaviti na odreske od tune i roštiljati u trajanju od ca 6-8 min.
3. Roštiljane ploške naranči ukloniti i odreske od
tune servirati.
- 14 -

Rumpsteak sa umakom od proljetnog
luka i biljaka (4 osobe)
500 g krtih odrezaka
(Rumpsteak, težine od po 125 g)
120 g margarina
1 MŽ umaka "Worcestershire"
1 češanj fino isjeckanog češnjaka
4 VŽ fino isjeckanog peršina
4 glavice fino isjeckanog proljetnog luka
• Opruge za pričvršćavanje ploča
malo prema natrag, da biste izvadili roštiljne
ploče
• Nakon toga isperite roštiljne ploče
vodom i neutralnim sredstvom.
• U slučaju izraženih naslaga postavite vlažnu
krpu na zapekle naslage, kako biste ih razmekšali.
Roštiljne ploče
i
.
su prikladne i za strojno pranje!
i
gurnite
t
sa vrućom
i
1. Margarin i umak Worcestershire pomiješati u
maloj zdjeli. Umiješati češnjak, peršin i proljetni luk.
2. Zagrijte uređaj (stupanj zagrijavanja M).
3. Odrezak roštiljajte 3 minute na stupnju zagrijavanja
M, zatim premažite sa umakom od proljetnog luka i
začina, te pripravljajte još 4 minute na stupnju zagrijavanja I. Umak koji pada uhvatiti u zdjeli za hvatanje ulja
4. Gotov odrezak pustiti da kratko stoji, te u smjeru
suprotnom smjeru vlakana izrezati u tanke ploške.
Meso na predgrijanom pladnju za serviranje
pripremiti, istopljeni umak od biljaka iz zdjele
za prihvat ulja
.
o
preliti preko isječenog mesa.
o
Čišćenje & održavanje
Opasnost od ozljeđivanja:
Prije čišćenja izvucite mrežni utikač i čekajte, dok se
uređaj potpuno ne ohladi. Uređaj nikada ne čistite
pod mlazom tekuće vode i nikada ga ne uranjajte u
vodu.
Pažnja! Predmetna šteta!
Za čišćenje ne koristite agresivna sredstva za čišćenje, grube spužve ili šiljate predmete, jer u protivnom može doći do oštećenja ili uništenja protuljepljivog sloja ili drugih površina.
• Isperite zdjele za prihvat ulja
dom i neutralnim sredstvom za pranje suđa.
Za čišćenje vanjskih površina uređaja dovoljna je
vlažna krpa.
Obratite pažnju na to, da prije ponovne uporabe
kontaktnog roštilja svi dijelovi budu potpuno suhi.
sa vrućom vo-
o
Čuvanje uređaja
Kontaktni roštilj možete spremiti u ležećem ili stajaćem položaju.
Uređaj raspolaže sa integriranim namatačem za
kabel na donjoj strani kućišta, na kojem možete
namotati mrežni kabel, kada ne želite koristiti uređaj.
Na taj način sprječavate, da mrežni kabel bude
ukliješten, onečišćen ili da predstavlja izvor opasnosti
kada labavo visi prema dolje.
Roštiljne ploče
ti iz uređaja.
za obično čišćenje možete izvadi-
i
- 15 -

Zbrinjavanje
Uređaj nikako ne bacajte u obično kućno smeće. Ovaj pzoizvod spada u
važnost uredbe evropske direktive
2002/96/EC.
Uređaj zbrinite preko autoriziranog poduzeća za
zbrinjavanje otpada ili preko Vašeg komunalnog
poduzeća.
Obratite pažnju na aktualno važeće propise. U
slučaju dvojbe se povežite sa svojim mjesnim
poduzećem za zbrinjavanje otpada..
Jamstveni rok se ne produžava uslijed ostvarivanja
prava na jamstvo. To vrijedi i za zamijenjene i popravljene dijelove. Eventualno već prilikom kupovine prisutna oštećenja i nedostaci moraju biti javljena neposredno nakon raspakiranja, ali najkasnije
dva dana nakon datuma kupovine. Popravke vršene
nakon isteka jamstvenog roka podliježu obavezi
plaćanja.
Servis Hrvatska
Tel.: 0800 777 999
E-Mail: kompernass@lidl.hr
IAN 71980
Sve materijale ambalaže zbrinite na način
neškodljiv za okoliš.
Jamstvo i servis
Na ovaj uređaj vrijedi jamstvo u trajanju od 3 godine od datuma kupovine. Uređaj je pažljivo proizveden i prije isporuke brižljivo kontroliran. Molimo sačuvajte blagajnički račun kao dokaz o kupnji.
Molimo da se u slučaju ostvarivanja prava na jamstvo telefonski povežete sa Vašom servisnom ispostavom. Samo na taj način vaša roba može biti besplatno uručena.
Jamstvo vrijedi samo za greške materijala i izrade,
a ne za transportne štete, potrošne dijelove ili oštećenja lomljivih dijelova, na primjer prekidača ili baterija.
Proizvod je namijenjen isključivo za privatnu, a ne
za gospodarstvenu uporabu.
U slučaju nestručnog rukovanja, rukovanja protivnog namjeni uređaja, primjene sile i zahvata, koji
nisu izvršeni od strane našeg ovlaštenog servisnog
predstavništva, važenje jamstva prestaje. Vaša zakonska prava ovim jamstvom ostaju netaknuta.
Uvoznik
Lidl Hrvatska d.o.o. k.d.,
p.p. 61
10020 Novi Zgareb
Proizvođač:
KOMPERNASS GMBH
BURGSTRASSE 21
D-44867 BOCHUM, Njemačka
www.kompernass.com
- 16 -

CUPRINS PAGINA
Scopul utilizării 18
Furnitura 18
Date tehnice 18
Indicaţii de siguranţă 18
Descrierea aparatului 19
Înainte de prima utilizare 19
Prepararea cu grilul de contact 20
Regulator de temperatură / moduri de preparare . . . . . . . . . . . . . . . . . . . . . . . . . . . . . . . . .20
Poziţiile plăcilor . . . . . . . . . . . . . . . . . . . . . . . . . . . . . . . . . . . . . . . . . . . . . . . . . . . . . . . . . . . .20
Placa de gril / poziţia plăcilor in contact . . . . . . . . . . . . . . . . . . . . . . . . . . . . . . . . . . . . . . . .20
Barbecue / poziţia plăcilor deschisă la 180° . . . . . . . . . . . . . . . . . . . . . . . . . . . . . . . . . . .21
Funcţie de coacere / poziţia plăcilor paralelă, distanţa de cca 7 cm . . . . . . . . . . . . . . . . .21
După prăjire . . . . . . . . . . . . . . . . . . . . . . . . . . . . . . . . . . . . . . . . . . . . . . . . . . . . . . . . . . . . . . .22
Reţete (poziţia de contact) 22
Burger Mex-Tex (4 persoane) . . . . . . . . . . . . . . . . . . . . . . . . . . . . . . . . . . . . . . . . . . . . . . . . .22
Rulouri de curcan cu şuncă Serrano (4 persoane) . . . . . . . . . . . . . . . . . . . . . . . . . . . . . . . . .22
Ton cu felii de portocală (4 persoane) . . . . . . . . . . . . . . . . . . . . . . . . . . . . . . . . . . . . . . . . . .22
Rump steak cu sos de ceapă verde (4 persoane) . . . . . . . . . . . . . . . . . . . . . . . . . . . . . . . . . .23
Curăţarea şi întreţinerea 23
Păstrarea 23
Eliminarea aparatelor uzate 24
Garanţia şi service-ul 24
Importator 24
Citiţi cu atenţie instrucţiunile de utilizare înainte de prima utilizare şi păstraţi-le pentru o consultare ulterioară.
Dacă înmănaţ iaparatul unor terţi, ataşaţi şi instrucţiunile de utilizare.
- 17 -
R

Grill
Scopul utilizării
Acest gril de contact este conceput pentru
• prăjirea alimentelor precum carne, peşte, legume,
sandwich-uri etc.
• în cantităţi obişnuite
• în gospodăriile particulare.
Furnitura
Gril de contact cu două plăci de gril
2 Tăvi de colectare ulei
Instrucţiuni de utilizare
Date tehnice
Tensiune nominală: 220-240 V ~, 50 Hz
Consum: 2000 W
Indicaţii de siguranţă
• Înainte de punerea în funcţiune a grilului de
contact, citiţi cu atenţie aceste instrucţiuni.
• Păstraţi aceste instrucţiuni de folosire într-un loc
accesibil, în apropierea aparatului. Dacă daţi
aparatul terţilor, înmânaţi de asemenea şi aceste
instrucţiuni.
• Utilizaţi grilul de contact în scopul prevăzut şi în
conformitate cu instrucţiunile de folosire.
Astfel evitaţi pericolul de electrocutare
• Aparatul poate fi utilizat numai în interior, în încăperi uscate. Ţineţi aparatul, chiar dacă este
oprit, departe de apa pulverizată.
• Utilizaţi aparatul numai dacă tensiunea reţelei
locale de curent coincide cu tensiunea nominală
a aparatului.(220-240 V ~, 50 Hz)
• Nu conectaţi aparatul la o priză multiplă la care
sunt conectate simultan mai multe aparate, acest
lucru putând provoca suprasolicitarea circuitului
de curent.
• Opriţi aparatul după fiecare utilizare. Scoateţi
ştecărul din priză.
• La curăţare asiguraţi-vă că în aparat nu se infiltrează apă. Nu curăţaţi aparatul niciodată sub
jet de apă.
Nu introduceţi niciodată aparatul în apă sau
alte lichide.
• Protejaţi cablul contra deteriorărilor. Fiţi atenţi să
nu strângeţi cablul şi ţineţi-l la depărtare de obiectele fierbinţi. Nu lăsaţi cablul să atârne liber
de pe masă sau blatul de lucru.
• Nu deschideţi niciodată carcasa aparatului.
• Dacă ştecărul sau cablul de alimentare se defectează, solicitaţi imediat repararea de către personal
specializat sau de către serviciul clienţi, pentru a
evita periclitările.
• Reparaţiile pot fi realizate numai în atelierele
autorizate de către producător sau de către
specialişti cu experienţă.
Astfel evitaţi pericolele de incendiu şi rănire
• Aşezaţi aparatul pe un suport plan, antiderapant
şi rezistent la căldură şi nu pe sau lângă alte aparate care emit căldură (de ex. tostere sau cuptoare).
R
- 18 -

• Nu utilizaţi aparatul în apropierea obiectelor uşor
inflamabile, de exemplu, sub draperii sau rulouri
de hârtie.
Chiar dacă aparatul este utilizat regulamentar,
componentele sale devin foarte fierbinţi (de ex.
plăcile inferioară şi superioară ale carcasei).
Evitaţi să atingeţi aceste suprafeţe până după
oprirea şi răcirea aparatului.
Atenţie! Suprafaţă fierbinte!
Astfel evitaţi defectarea aparatului
• Scoateţi alimentele din aparat numai cu o spatulă
din material sintetic sau de lemn ori cu un alt obiect
nemetalic, pentru a nu distruge stratul antiaderent
al grilului de contact.
• Din acelaşi motiv, pentru curăţare, nu utilizaţi
soluţii acide sau obiecte ascuţite.
Descrierea aparatului
• Pentru a evita supraîncălzirile periculoase, desfăşuraţi complet cablul.
• În timpul funcţionării, aparatul poate fi deschis şi
închis fără pericol cu ajutorul mânerului termoizolant.
• Acest aparat nu este destinat utilizării de către
persoane (inclusiv copii) cu capacităţi fizice, senzoriale sau mentale limitate sau cu o experienţă
limitată şi/sau cunoştinţe limitate, cu excepţia
cazului în care sunt supravegheate de către o
persoană responsabilă cu siguranţa lor sau au
primit instrucţiuni de la aceasta privind modul de
utilizare a aparatului.
• Copiii trebuie supravegheaţi, pentru a împiedica
utilizarea aparatului ca jucărie.
• Înainte de a-l curăţa sau de a-l pune la păstrare,
opriţi aparatul şi aşteptaţi să se răcească complet.
• Nu utilizaţi temporizatoare externe sau sisteme
separate de comandă de la distanţă pentru operarea aparatului.
• Nu utilizaţi cărbuni sau materiale asemănătoare
pentru exploatarea aparatului!
• Nu lăsaţi aparatul să funcţioneze nesupravegheat.
Lampă de control
q
Închizătoare la mâner
w
Mânere
e
Regulator de temperatură
r
Arcuri de fixare a plăcilor
t
Canal de scurgere a grăsimii
y
Ghidaj pentru fixarea plăcilor
u
Plăci de gril
i
Tavă de colectare a uleiului
o
Înainte de prima utilizare
1. Scoateţi noul dvs. gril de contact din ambalaj.
Îndepărtaţi toate siguranţele pentru transport,
de exemplu, folii sau coliere pentru cablu.
2. Înainte de punerea în funcţiune verificaţi dacă au
fost livrate toate componentele şi dacă aparatul
prezintă defecte vizibile.
3. Citiţi cu atenţie instrucţiunile de utilizare.
4. Amplasaţi aparatul conform indicaţiilor de siguranţă.
5. Curăţaţi aparatul cu un prosop umed în modul
descris în secţiunea „Curăţarea şi întreţinerea”.
- 19 -
R

La prima încălzire a grilului de contact se pot
forma vapori. Aceşti vapori nu pun sănătatea în
pericol, dar ar putea influenţa gustul alimentelor.
Vă recomandăm ca înainte de primul proces
de preparare să încălziţi grilul de contact la
maxim, timp de 15 minute, fără alimente.
Pe aparat sunt specificate pictograme pentru cele mai
importante moduri de preparare, care pot fi executate
cu aparatul în poziţia de contact. Timpul de preparare
diferă, în general, în funcţie de greutatea ţi dimensiunea alimentelor, precum şi de gustul individual. Prin urmare, acesta poate varia uşor. Valorile specificate
sunt orientative şi se referă la o cantitate de 100g.
Prepararea cu grilul de contact
1. Deschideţi capacul grilului de contact. Pentru
aceasta trageţi de închizătoarea de pe mâner
în jos şi deschideţi capacul în sus până la opritor,
fără a-l ridica de pe poziţie. Cu o lavetă uscată
îndepărtaţi eventualele particule de praf de pe
plăcile de gril
2. Ungeţi plăcile de gril
sau unt.
3. Închideţi capacul grilului de contact. Aparatul
este închis dacă închizătoarea de la mâner
se blochează cu clic.
4. Introduceţi ştecărul în priză şi reglaţi regulatorul
de temperatură
Aparatul incepe acum să încălzească şi lampa
de control
5. După câteva minute lampa de control
Grilul de contact a atins acum temperatura reglată
şi este gata de funcţionare.
.
i
cu puţin ulei vegetal
i
la treapta de încălzire dorită.
r
luminează.
q
q
Regulator de temperatură / moduri de
preparare
Regulatorul de temperatură rpoate fi setat în următoarele poziţii:
• oprit
I decongelare
II încălzire
III preparare medie
M preparare rapidă
w
w
se stinge.
Simbolurile au următoarea semnificaţie:
Durata de prăjire, resp. preparare
Treapta de temperatură necesară
Decongelare
Încălzire
Hamburger / Sandwich
Legume
Creveţ i
Peşte
Pâine prăjită sau similare.
Carne
Cârnăciori
Bucăţi de carne (şniţel, steaks)
Pui / curcan
Poziţiile plăcilor
Aveţi la dispoziţie diferite poziţii ale plăcilor pe care
le puteţi folosi pentru preparare.
Placa de gril / poziţia plăcilor in contact
R
- 20 -

Pentru prepararea rapidă a alimentelor, pe am-
bele părţi. Ideal pentru prepararea cărnii care
necesită o prăjire rapidă la temperatură înaltă rump steak, file tăiat, cotlet, cârnăciori şi legume.
1. Deschideţi capacul grilului de contact până la
opritor fără să-l ridicaţi din poziţie.
2. Aşezaţi o tavă de colectare a uleiului
canalul de scurgere a grăsimii
3. Aşezaţi produsele de preparat pe placa de gril
inferioară
4. Închideţi capacul. Folosiţi uşor forţa pentru ca
distanţa dintre plăci să se regleze automat ca
urmare a grosimii preparatelor.
i
.
y
sub
o
.
În cazul preparatelor deosebit de grase se poate
ca la deschiderea capacului, să se scurgă grăsime
pe placa superioară
suportului!
şi să picure pe suprafaţ a
i
Barbecue / poziţia plăcilor deschisă
la 180°
Pentru preparatele mai groase, care necesită o
prăjire mai lentă şi mai uniformă. Ideală pentru
prepararea legumelor cu conţinut ridicat de
apă , deoarece, la început, se poate evapora
apa la temepratură joasă sau medie.
Puteţi utiliza această poziţie a plăcilor pentru a
pregăti cantităţi mai mari de alimente sau pentru
a prepara în acelaşi timp legumele şi carnea.
Exemplu: ardei
Îndepărtaţi coada şi seminţele din ardei. Tăiaţi ardeiul
în fâşii de un centimetru lăţime. Aşezaţi fâşiile de ardei
pe placa de gril
“M” cca. 15 minute, până când pielea face băşici.
şi prăjiţi la treapta de temperatură
i
1. Deschideţi capacul grilului de contact în poziţie
verticală, ridicaţi-l până la opritor şi deschideţi-l
în continuare până se află în poziţie orizontală.
2. Aşezaţi cele două tăvi de colectare a uleiului
sub canalele de scurgere a grăsimii yde la plăcile
de gril
3. Aşezaţi produsele de preparat pe cele două plăci
de gril
i
i
.
.
o
Funcţie de coacere / poziţia plăcilor
paralelă, distanţa de cca 7 cm
Pentru prepararea alimentelor sensibile, care nu
pot fi presate sau întoarse la prăjire.
Exemplu: şniţel gratinat
Bateţi şniţelul, săraţi-l şi piperaţi-l. Aşezaţi şniţelul
pe placa de gril şi prăjiţi-l uniform pe ambele părţi.
În final acoperiţi şniţelul cu brânză topită şi, folosind
funcţia de coacere la treapta de temperatură “M”,
gratinaţi timp de cca. 15 minute.
1. Deschideţi capacul grilului de contact până la
opritor fără să-l ridicaţi din poziţie.
2. Aşezaţi o tavă de colectare a uleiului
canalul de scurgere a grăsimii
3. Aşezaţi produsele de preparat pe placa de gril
inferioară
4. Ridicaţi acum capacul până la opritor şi trageţi-l
în faţă, până când este în poziţie paralelă cu
placa de gril inferioară
i
.
i
y
.
sub
o
.
- 21 -
R

După prăjire
• Reglaţi butonul de temperatură r pe “•”.
• Scoateţi ştecărul din priză.
• Luaţi preparatele de pe placa de gril
unei palete din lemn sau cu un alt obiect nemetalic.
cu ajutorul
i
Reţete (poziţia de contact)
Specificaţiile timpilor de preparare şi ale treptelor
de temperatură pot varia în funcţie de proprietăţile alimentelor şi de gusturile personale.
Burger Mex-Tex (4 persoane)
900 g carne tocată de vită
6 linguri sos Barbecue
6 linguri ceapă tocată mărunt
3 linguri sos salsa proaspăt sau preparat
1/2 linguriţă praf de chili
4 chifle mari de hamburger
1. Se amestecă bine carnea tocată, ceapa, salsa,
sosul barbecue şi praful de chili într-un castron
mare. Se formează din masa de carne 4 felii
mari de hamburger, groase de 2 cm.
2. Se încălzeşte aparatul (treapta III - M).
3. Se prăjesc cca. 8 - 10 min. pe aparatul preîncălzit,
în poziţie de contact. La final, feliile de hamburger
se servesc în chifle, împreună cu ingredientele şi
condimentele dorite.
Rulouri de curcan cu şuncă Serrano
(4 persoane)
8 şniţele de curcan mici şi subţiri (a 50 g)
sare
piper
2 linguriţe muştar
8 felii subţiri de şuncă Serrano
8 caise uscate, moi
1 lingură de ulei de măsline
8 beţişoare pentru rulade
1 Se bate şniţelul, se sărează şi se piperează. Se
unge pe o parte cu muştar. Se injumătăţesc feliile
de şuncă. Pe partea unsă cu muştar se aşează
şuncă şi caise.
2. Se încălzeşte aparatul (treapta M).
3. Se rulează şniţelele şi se fixează cu beţişoare
pentru rulade. Se ung ruladele cu ulei şi se prăjesc cca 6 min. la treapta M.
Ton cu felii de portocală (4 persoane)
4 bucăţi proaspete de ton pentru friptură (a 170 g)
o portocală
o lingură pătrunjel tocat mărunt
sare
piper
1. Se curăţă portocala şi se taie în felii de cca 5 mm
grosime.
2. Se aşează bucăţile de ton pe grilul preîncălzit
(treapta III - M), se presară pătrunjelul şi se condimentează cu sare şi piper. Se aşează feliile de
portocală pe bucăţile de ton şi se prăjesc 6-8 min.
3. Se îndepărtează feliile de portocală prăjite şi se
serveşte friptura de ton.
R
- 22 -

Rump steak cu sos de ceapă verde
(4 persoane)
500 g rump steak slab (a 125 g)
120 g margarină
o linguriţă sos Worcestershire
1 căţel de usturoi tocat fin
4 linguri pătrunjel tocat mărunt
4 cepe verzi tocate fin
1. Se amestecă margarina şi sosul Worcestershire
într-un castron mic. Se adaugă usturoiul, pătrunjelul
şi ceapa verde.
2. Se încălzeşte aparatul (treapta M).
3. Se prăjeşte bucata de carne timp de 3 min. la
treapta M, apoi se unge cu sosul preparat cu
verdeaţă şi ceapă verde şi se mai lasă încă 4 min.
la treapta I. Sosul de verdeaţă scurs se strânge
în tava de colectare a uleiului
4. Steakul gata preparat se lasă scurt să se odihne-
ască şi se taie în felii subţiri, perpendicular pe
direcţia fibrelor. Carnea tăiată se aranjează pe
un platou pentru servire, preîncălzit, se toarnă
deasupra sosul de verdeaţă scurs din tava de
colectare
o
.
o
.
Curăţarea şi întreţinerea
• Apăsaţi înapoi arcurile de fixare ale plăcilor
pentru a extrage plăcile de gril
• Spălaţi plăcile de gril
detergent de vase neutru.
• Resturile întărite trebuie înmuiate prin acoperire
cu un prosop umed.
Plăcile de gril
spălat vase!
• Spălaţi tăvile de colectare a uleiului
fierbinte şi un detergent de vase neutru.
Pentru curăţarea suprafeţelor exterioare ale aparatului este suficientă ştergerea cu un prosop umed.
Înainte de a utiliza din nou aparatul, asiguraţi-vă că
toate componentele sunt complet uscate.
i
se pot spăla şi în maşina de
i
.
i
cu apă fierbinte şi un
o
t
cu apă
Păstrarea
Grilul de contact poate fi depozitat în poziţie orizontală sau verticală.
Aparatul dispune de un mosor de strângere a cablului
pe partea de jos a carcasei, pe care puteţi strânge
cablul în timpul depozitării. Prin aceasta evitaţi prinderea şi murdărirea cablului precum şi riscul de a
deveni o cauză de împiedicare.
,
Pericol de rănire!
Înainte de curăţare, scoateţi ştecărul din priză şi
aşteptaţi până când aparatul s-a răcit complet.
Este interzisă spălarea aparatului sub jet de apă
sau introducerea acestuia în apă.
Atenţie!Posibile pagube!
La curăţare nu folosiţi prafuri de curăţare abrasive,
bureţi aspri sau obiecte ascuţite, pentru a nu deteriora suprafaţa.
Pentru curăţare, puteţi extrage uşor plăcile de gril
din aparat.
i
- 23 -
R

Eliminarea aparatelor uzate
Nu aruncaţi aparatul sub nicio formă în
gunoiul menajer obişnuit. Acest produs
intră sub incidenţa directivei europene
2002/96/EC.
Eliminaţi aparatul prin intermediul unei firme specializate şi autorizate sau prin intermediul serviciului local
de eliminare a deşeurilor.
Respectaţi reglementările actuale în vigoare.
Dacă aveţi nelămuriri, contactaţi serviciul dumneavoastră local de eliminare a deşeurilor.
Eliminaţi toate materialele de ambalare
într-un mod ecologic.
Garanţia şi service-ul
Pentru acest aparat se acordă o garanţie de 3 ani
începând cu data cumpărării. Aparatul a fost produs
cu grijă şi verificat cu scrupulozitate înaintea livrării.
Păstraţi bonul de casă pentru a dovedi cumpărarea.
În cazul reparaţiilor din perioada de garanţie, contactaţi telefonic centrul dumneavoastră de service.
Numai astfel poate fi asigurată o expediere gratuită
a produsului dumneavoastră.
Garanţia acoperă numai defectele de material sau
de fabricaţie, nu şi deteriorările rezultate în urma
transportului, piesele de uzură sau deteriorările apărute la componentele fragile, de ex. comutatoare sau
acumulatoare. Aparatul este destinat numai pentru
uz privat şi nu pentru o utilizare profesională.
În cazul manevrării abuzive sau necorespunzătoare,
al uzului de forţă şi al intervenţiilor care nu au fost
realizate de către filiala noastră autorizată de service,
garanţia îşi pierde valabilitatea. Drepturile dumneavoastră legale nu sunt restrânse prin această garanţie.
Perioada de garanţie nu este prelungită după realizarea reparaţiilor din perioada de garanţie. Acest
lucru este valabil şi pentru piesele înlocuite şi reparate.
Deteriorările şi deficienţele prezente deja la cumpărare trebuie semnalate imediat după dezambalare sau
cel târziu în două zile de la data cumpărării.
Reparaţiile necesare după expirarea perioadei de
garanţie se efectuează contra cost.
R
Service România
Tel.: 0800896637
E-Mail: kompernass@lidl.ro
IAN 71980
Importator
KOMPERNASS GMBH
BURGSTRASSE 21
44867 BOCHUM, GERMANIA
www.kompernass.com
R
- 24 -

Cъдържание Cтраница
Предназначение 26
Окомплектовка на доставката 26
Технически характеристики 26
Указания за безопасност 26
Описание на уреда 27
Пред първата употреба 27
Печене с контактния грил 28
Регулатор на температурата/Начини на приготвяне . . . . . . . . . . . . . . . . . . . . . . . . . . . .28
Положения на плочите . . . . . . . . . . . . . . . . . . . . . . . . . . . . . . . . . . . . . . . . . . . . . . . . . . . . .28
Функция скара за печене на грил/Положение на плочите: контактно . . . . . . . . . . . . . .28
Функция барбекю/Положение на плочите: отворено на 180° . . . . . . . . . . . . . . . . . . .29
Функция фурна/Положение на плочите: успоредно на разстояние от около 7 см . . .29
След печенето . . . . . . . . . . . . . . . . . . . . . . . . . . . . . . . . . . . . . . . . . . . . . . . . . . . . . . . . . . . .30
Предложения за рецепти (за контактно положение на плочите) 30
Мекс-текс бургер (за 4 човека) . . . . . . . . . . . . . . . . . . . . . . . . . . . . . . . . . . . . . . . . . . . . . .30
Пуешки ролца с шунка серано (за 4 човека) . . . . . . . . . . . . . . . . . . . . . . . . . . . . . . . . . .30
Риба тон с портокалови резени (за 4 човека) . . . . . . . . . . . . . . . . . . . . . . . . . . . . . . . . . .30
Рамстек със сос от пресен лук и подправки (за 4 човека) . . . . . . . . . . . . . . . . . . . . . . . .31
Почистване и поддръжка 31
Съхранение 31
Изхвърляне 32
Гаранция и сервиз 32
Вносител 32
Прочетете внимателно ръководството за експлоатация преди да използвате уреда за първи път и го
запазете за по-нататъшна употреба. Когато предавате уреда на трети лица, предайте и това ръководство.
- 25 -

Контактен грил
Предназначение
Този контактен грил е предназначен за
• печене на грил на храни като месо, риба,
зеленчуци, сандвичи и др.
• в обичайни за домашни условия количества
• в частното домакинство.
Окомплектовка на доставката
Контактен грил с две плочи
2 тавички за събиране на мазнината
Ръководство за потребителя
За избягване на опасности от токов удар
• Контактният грил трябва да се използва само
в сухи затворени помещения. Дръжте уреда –
даже в изключено състояние – далече от
водни пръски.
• Използвайте уреда, само ако напрежението
на локалната електрическа мрежа съответства
на номиналното напрежение на уреда (220240 V ~, 50 Hz).
• Не включвайте уреда в разклонител, чрез
който се захранват едновременно и други
електрически уреди, защото това може да
доведе до претоварване на токовия кръг.
• След всяко използване изключвайте уреда. За
тази цел изключвайте щепсела от контакта.
• При почистване внимавайте във вътрешността
на уреда да не попада вода. Никога не мийте
уреда под течаща вода.
Технически характеристики
Номинално напрежение: 220-240 V ~, 50 Hz
Консумирана мощност: 2000 W
Указания за безопасност
• Преди първата употреба на контактния грил
прочетете внимателно това ръководство за
потребителя.
• Съхранявайте ръководството за потребителя
на подходящо място в близост до уреда.
Предавайте уреда на трети лица заедно с
това ръководство за потребителя.
• Използвайте контактния грил само за предвидената цел и в съответствие с това ръководство
за потребителя.
Никога не потапяйте уреда във вода или
други течности.
• Пазете мрежовия кабел от повреда. Внимавайте
да не го притискате и го дръжте далече от
горещи предмети. Не оставяйте мрежовия
кабел да виси свободно от масата или
работния плот.
• Никога не отваряйте корпуса на уреда.
• Повреденият щепсел или кабел трябва да се
сменят веднага от оторизиран електротехник
или сервиз, за да се предотвратят опасности.
• Ремонтите трябва да се извършват само от
оторизирания от производителя дилър или
друг опитен квалифициран персонал.
За избягване на опасности от пожар и
нараняване
• Инсталирайте контактния грил на равна, неплъзгаща се и устойчива на високи температури
основа, не върху или до други уреди, които
могат да излъчват силна топлина (напр. тостер,
кухненска печка).
- 26 -

• Не използвайте уреда в близост до леснозапалими предмети, напр. под пердета или
до кухненски рула.
Дори при използване съгласно инструкциите
отделни части на уреда се нагорещяват силно
(напр. горната и долната плоча на корпуса).
Внимавайте да не докосвате тези
повърхности, докато не се охладят напълно
след изключването.
Внимание! Гореща повърхност!
За избягване на повреди по
уреда
• Вземайте всички храни само с пластмасова
или дървена лопатка или друг подходящ,
неметален предмет, за да не повредите
незалепващото покритие на контактния грил.
• По същата причина за почистване не използвайте силни почистващи препарати и остри
предмети.
Описание на уреда
• За да избегнете опасно прегряване, винаги
развивайте цялата дължина на мрежовия
кабел.
• По време на работа контактният грил може
да се отваря и затваря безопасно с топлоизолираната дръжка.
• Този уред не е предвиден за използване от лица
(включително деца) с ограничени физически,
сензорни или умствени способности или от
лица, които не притежават необходимия опит
и/или знания, освен ако не са под надзора
на лица, отговорни за тяхната безопасност
или не са получили от тях указания как трябва
да се използва уредът.
• Децата трябва да се наблюдават, за да се
гарантира, че те не играят с уреда.
• След изключване оставяйте уреда да се охлади
напълно, преди да го почистите и приберете.
• За работа с уреда не използвайте външен
таймер или отделна система за дистанционно
управление.
• За работа с уреда не използвайте въглища
или други подобни горива!
• Никога не оставяйте уреда без наблюдение
по време на работа!
Контролен индикатор
q
Заключалка на дръжката
w
Дръжки
e
Регулатор на температурата
r
Пружини за закрепване на плочите
t
Отливник за мазнината
y
Водач за закрепване на плочите
u
Плочи на грила
i
Тавичка за събиране на мазнината
o
Пред първата употреба
1. Извадете новия контактен грил от опаковката.
Отстранете всички допълнителни транспортни
осигуровки, напр. фолия или кабелни
държачи.
2. Преди пускането в експлоатация проверете
комплектността на доставката и за евентуални
видими повреди.
3. Прочетете внимателно това ръководство за
потребителя.
4. Инсталирайте уреда съгласно указанията за
безопасност.
5. Почистете новия контактен грил с влажна кърпа,
както е описано в "Почистване и поддръжка".
- 27 -

При първоначалното загряване на контактния
грил могат да се получат изпарения.
Тези изпарения не са опасни за здравето, но
могат да влошат вкуса на храните. Затова ви
препоръчваме, преди първото приготвяне
на храна, да включите контактния грил и
да го загрявате без хранителни продукти в
продължените на 15 минути при настройка
за максимална температура.
Печене с контактния грил
1. Отворете капака на контактния грил. За тази
цел дръпнете ключалката на дръжката
надолу и отворете капака до упор нагоре,
без да го вдигате. Със суха кърпа отстранете
евентуалните частици прах от плочите на
грила
2. Намажете плочите на грила
растително олио или масло.
3. Затворете капака на контактния грил. Уредът е
затворен, когато ключалката на дръжката
се е фиксирала с щракване.
4. Включете щепсела в контакт и настройте
регулатора на температурата
степен на нагряване.
Уредът започва да загрява и контролният
индикатор
5. След няколко минути контролният индикатор
угасва. Контактният грил е достигнал настроената температура и е готов за работа.
i
.
i
r
светва.
q
Регулатор на температурата/Начини
на приготвяне
Регулаторът на температурата rможе да се
настрои на следните позиции:
• изключено
I размразяване
II претопляне
III средно бързо печене на грил
M бързо печене на грил
w
с малко
w
на желаната
q
На уреда са показани пиктограми за най-важните
начини на приготвяне, които могат да се използват
с уреда като контактен грил. Времето за приготвяне
се определя по принцип според теглото и размера
на продукта, и разбира се според индивидуалния
вкус. Поради това те могат да варират.
Посочените стойности са ориентировъчни
стойности при количество от 100 г.
Отделните символи имат следното значение:
Продължителност на печене на грил респ.
на приготвяне
Температурна степен, която трябва да се
настрои
Размразяване
Претопляне
Хамбургери/Сандвичи
Зеленчуци
Скариди
Риба
Тост или др.п.
Шишчета
Наденички
Месо на парчета (шницели, стекове)
Пилешко/Пуешко
Положения на плочите
На ваше разположение има различни положения
на плочите, които можете да използвате според
начина на приготвяне.
Функция скара за печене на грил/
Положение на плочите: контактно
- 28 -

За едновременно, много бързо печене на
храните от двете страни. Идеално за печене
на грил на месо, за което е необходимо много
бързо печене при висока температура - рамстек,
филета, котлети, наденички и зеленчуци.
1. Отворете капака на контактния грил до упор,
без да го вдигате.
2. Поставете една от тавичките за събиране на
мазнината
3. Поставете продукта за печене върху долната
плоча на грила
4. Затворете капака. Упражнете лек натиск, за
да се регулира автоматично разстоянието
между двете плочи според дебелината на
продукта за печене.
под отливника за мазнината y.
o
.
i
При много мазни храни е възможно при
отваряне на капака да изтече мазнина от
горната плоча на грила
повърхността за инсталиране на грила!
и да капе върху
i
1. Отворете капака на контактния грил във вертикално положение, повдигнете го до упор
и продължете да го отваряте, докато застане
хоризонтално.
2. Поставете двете тавички за събиране на мазни-
ната
под отливниците за мазнината yна
o
плочите на грила
3. Разпределете продуктите за печене върху
двете плочи на грила
i
.
.
i
Функция фурна/Положение на плочите:
успоредно на разстояние от около 7 см
Функция барбекю/Положение на
плочите: отворено на 180°
За печене на грил на по-дебели хранителни
продукти, които изискват по-бавно и поравномерно печене. Идеално за приготвяне
на зеленчуци с голямо съдържание на вода,
тъй като в началото водата може да се остави
да се изпари на ниска или средна температура.
Можете да използвате това положение на
плочите, за да приготвите по-големи количества
храни или зеленчуци заедно с месото.
Пример: Чушки
Отстранете дръжките и семената от чушките.
Нарежете чушките на ивици с ширина от един
сантиметър. Поставете ивиците чушки върху
плочата на грила
степен “M” около 15 минути, докато се образуват
мехури по кожата им.
и ги печете на температурна
i
За приготвяне на чувствителни храни, които
не трябва да се притискат или обръщат при
печенето.
Пример: Препичане на шницели
Начукайте и поръсете шницелите със сол и черен
пипер. Поставете шницелите върху скарата на
грила и ги изпечете равномерно от двете страни.
След това поставете филийки топено сирене върху
шницелите и ги препечете с функцията фурна на
температура “M” за около 15 минути.
1. Отворете капака на контактния грил до упор,
без да го вдигате.
2. Поставете една от тавичките за събиране на
мазнината
3. Поставете продукта за печене върху долната
плоча на грила
4. Повдигнете капака до упор и го дръпнете
напред, докато застане успоредно на долната
плоча на грила
- 29 -
под отливника за мазнината y.
o
.
i
.
i

След печенето
• Поставете регулатора на температурата
на “•”.
• Изключете щепсела от контакта.
• Вземете продукта за печене с дървена лопатка
или друг подходящ, неметален предмет от
плочата на грила
i
.
r
Предложения за рецепти
(за контактно положение на
плочите)
Указанията за продължителността на печене
на грил и степените на нагряване могат да
варират в зависимост от хранителните
продукти и индивидуалния вкус.
Мекс-текс бургер (за 4 човека)
900 г телешка кайма
6 с.л. сос за барбекю
6 с.л. ситно нарязан лук
3 с.л. прясно приготвена или готова салца
1/2 ч.л. чили на прах
4 големи хлебчета за хамбургери
1. Размесете добре каймата, лука, салцата,
чилито на прах и соса за барбекю в голяма
купа. Оформете омесената кайма на четири
еднакво големи кюфтета за хамбургери с
дебелина малко под 2 см.
2. Загрейте уреда (степен на нагряване III - M).
3. Печете хамбургерите около 8-10 минути в
предварително загретия уред при контактно
положение на плочите. След това сервирайте
хамбургерите заедно с гарнитури и подправки
по ваш избор в хлебчетата за хамбургери.
Пуешки ролца с шунка серано
(за 4 човека)
8 малки тънки пуешки шницела (по 50 г)
сол
черен пипер
2 ч.л. горчица
8 тънки филийки шунка серано
8 сушени меки кайсии
1 с.л. зехтин
8 игли за рулади
1. Начукайте и поръсете шницелите със сол и
черен пипер. Намаже ги от едната страна с
горчица. Разрежете на половина филийките
шунка. На намазаната с горчица страна
поставете шунка и кайсия.
2. Загрейте уреда (степен на нагряване M).
3. Навийте шницелите на ролца и ги забодете
с иглите за рулади. Намажете ролцата с олио
и ги печете около 6 минути на степен на
нагряване М.
Риба тон с портокалови резени
(за 4 човека)
4 пресни стека от риба тон (по 170 г)
1 портокал
1 с.л. ситно нарязан магданоз
сол
черен пипер
1. Обелете портокала и го нарежете на резени
с дебелина около 5 мм.
2. Поставете стековете от риба тон върху предварително загретия грил (степен на нагряване
III - M), поръсете с магданоз и подправете със
сол и пипер. Поставете резените портокал
върху стековете от риба тон и ги печете около
6-8 минути.
3. Отстранете опечените резени портокал и
сервирайте стековете от риба тон.
- 30 -

Рамстек със сос от пресен лук и
подправки (за 4 човека)
500 г постен рамстек (по 125 г)
120 г маргарин
1 ч.л. сос уорчестър
1 ситно накълцана скилидка чесън
4 с.л. ситно нарязан магданоз
4 стръка ситно накълцан пресен лук
1. Смесете маргарина и соса уорчестър в малка
купа. Прибавете и размесете чесъна, магданоза
и пресния лук.
2. Загрейте уреда (степен на нагряване M).
3. Печете стека 3 минути на степен на нагряване
М, след това намажете със соса от пресен
лук и подправки и печете още 4 минути на
степен на нагряване І. Съберете окапващия се
сос
от подправки в тавичката за събиране на
мазнината
4. Оставете опечения стек да почине малко и
го нарежете на тънки филийки напречно на
мускулните влакна. Подредете месото на
предварително затоплено плато за сервиране,
като залеете филийките месо с разтопения
сос от подправките от тавичката за събиране
на мазнината
o
.
.
o
Можете да извадите плочите на грила
за да ги почистите по-лесно.
• Натиснете малко назад пружините за закрепване на плочите
на грила
• Измийте плочите на грила
и неутрален миещ препарат.
• При силно загаряне поставете мокра кърпа
за миене върху загорелите остатъци, за да се
размекнат.
i
Плочите на грила
съдомиялна машина!
• Измийте тавичките за събиране на мазнината
препарат.
За почистване на външните повърхности на уреда
е достатъчна влажна кърпа.
Обърнете внимание на това, че преди да използвате отново контактния грил всички части трябва да
са напълно сухи.
с гореща вода и неутрален миещ
o
, за да извадите плочите
t
.
са годни за миене в
i
i
от уреда,
i
с гореща вода
Съхранение
Почистване и поддръжка
Опасност от нараняване
Преди почистване изключете щепсела от контакта
и изчакайте, докато уредът се охлади напълно.
Никога не мийте уреда под течаща вода и никога
не го потапяйте във вода.
Внимание! Материални щети!
Не използвайте агресивни препарати, груби гъби
или остри предмети, за да не повредите
противозалепващото покритие или да разрушите
другите повърхности.
Можете да прибирате контактния грил в хоризонтално или вертикално положение.
От долната страна на уреда има вградено приспособление за навиване на кабела, на което
можете да навивате мрежовия кабел, когато
не използвате уреда. По този начин избягвате
притискане и замърсяване на мрежовия кабел
и превръщането му в източник на опасност при
свободно провисване.
- 31 -

Изхвърляне
В никакъв случай не изхвърляйте
уреда с битовите отпадъци. Този уред
подлежи на европейската Директива
2002/96/EC.
Изхвърляйте уреда чрез лицензирана фирма за
изхвърляне на отпадъци или общинската служба
за изхвърляне на отпадъци.
Спазвайте действащите в момента разпоредби.
В случай на съмнение се свържете със службата
за изхвърляне на отпадъци.
Предавайте опаковъчния материал за
отпадъци съобразно екологичните
изисквания.
Гаранция и сервиз
Гаранционният срок не се удължава от гаранцията.
Това важи и за сменени и ремонтирани части. За
евентуалните, налични още при закупуването
повреди и недостатъци трябва да се съобщи веднага след разопаковането, но най-късно два
дена след датата на закупуване. След като изтече
гаранционният срок, ремонтите трябва да се
заплащат.
Сервизно обслужване България
Тел.:00800 111 4920
Е-мейл: kompernass@lidl.bg
IAN 71980
Вносител
KOMPERNASS GMBH
BURGSTRASSE 21
44867 BOCHUM, GERMANY
За този уред вие получавате гаранция от 3 години
от датата на закупуване. Уредът е произведен
старателно и е проверен добросъвестно преди
доставката.
Запазете касовата бележка като доказателство
за покупката. В гаранционен случай се свържете
по телефона с вашия сервиз. Само по този начин
може да се осигури безплатното връщане на
вашата стока.
Гаранционната претенция важи само за материални или фабрични дефекти, но не и за транспортни щети, износени части или при повреда
на лесно чупливи части, напр. прекъсвачи, акумулаторни батерии. Продуктът е предназначен само
за лична, а не за професионална употреба.
При непозволена и неправилна употреба, при
прилагане на сила или интервенции, които не
са извършени от нашия оторизиран сервизен
филиал, гаранцията отпада. Законните ви права
не се ограничават от тази гаранция.
www.kompernass.com
- 32 -

ΠΠεερριιεεχχόόμμεενναα ΣΣεελλίίδδαα
Σκοπός χρήσης 34
Σύνολο αποστολής 34
Τεχνικά στοιχεία 34
Για την προσωπική σας ασφάλεια 34
Περιγραφή της συσκευής 35
Πριν την πρώτη χρήση 35
Ψήσιμο με την ψηστιέρα 36
Ρύθμιση της θεροκρασίας .............................................................................................................36
Θέσεις ψησίματος ..........................................................................................................................36
Ψηστιέρα / Πλάκες σε επαφή........................................................................................................36
Μπάρμπεκιου / Πλάκες ανοιχτές 180° .....................................................................................37
Λειτουργία φούρνου / Πλάκες παράλληλα Απόσταση περίπου 7 εκατοστά...........................37
Μετά το ψήσιμο..............................................................................................................................38
Προτάσεις συνταγών (Θέση επαφής) 38
Μπέργκερ Mex-Tex (4 άτομα) ......................................................................................................38
Ρολά γαλοπούλας με ζαμπόν σεράνο(4 άτομα) ........................................................................38
Τόνος με φέτες πορτοκαλιού (4 άτομα) ......................................................................................38
Στέικ κιλότου με φρέσκα κρεμμύδιαΣάλτσα χορταρικών (4 άτομα)...........................................39
Καθαρισμός και συντήρηση 39
Διαφύλαξη 39
Απομάκρυνση 40
Εγγύηση & Σέρβις 40
Εισαγωγέας 40
Διαβάστε το εγχειρίδιο χειρισμού πριν από την πρώτη χρήση προσεκτικά και φυλάξτε το για μια μελλοντική
χρήση. Παραδώστε το εγχειρίδιο σε όποιον παραδοθεί στη συνέχεια η συσκευή.
- 33 -

Ψηστιέρα
Σκοπός χρήσης
Αυτό το γκρίλ προβλέπεται για
• το ψήσιμο φαγητών όπως κρέας, ψάρι, λαχανικά,
σάντουιτς κλπ.
• σε οικιακές ποσότητες
• στο νοικοκυριό.
Σύνολο αποστολής
Γκριλ επαφής με δύο πλάκες ψησίματος
2 Σκεύη συλλογής λαδιού
Εγχειρίδιο χειρισμού
Τεχνικά στοιχεία
Τάση ρεύματος: 220-240 V ~, 50 Hz
Ισχύς: 2.000 W
Για την προσωπική σας
ασφάλεια
• Διαβάστε προσεκτικά τις οδηγίες χρήσης πριν
την πρώτη χρήση.
• Διαφυλάξτε τις οδηγίες χρήσης σε μια κατάλληλη
τοποθεσία κοντά στη συσκευή και παραδώστε τις
μαζί με τη συσκευή σε περίπτωση που δώσετε την
ψηστιέρα σε τρίτο άτομο.
• Να χρησιμοποιείτε την ψηστιέρα μόνο για το
σκοπό χρήσης της σύμφωνα με τις οδηγίες
χρήσης.
ΠΠρροοςς ααπποοφφυυγγήή κκιιννδδύύννοουυ ηηλλεεκκττρροοππλληηξξίίααςς
• Η χρήση της ψηστιέρας επιτρέπεται μόνο σε
στεγνούς, εσωτερικούς χώρους. Προστατεύετε τη
συσκευή -και όταν αυτή είναι απενεργοποιη-μένηαπό πιτσιλιές.
• Να χρησιμοποιείτε τη συσκευή μόνο εάν η ισχύ
του δικτύου ρεύματος συμφωνεί με την ισχύ της
συσκευής. (220-240 V ~, 50 Hz).
• Μήν συνδέετε τη συσκευή σε πολλαπλή πρίζα,
στην οποία λειτουργούν ταυτόχρονα και άλλες
ηλεκτρικές συσκευές, διότι μπορεί να προκληθεί
παραφόρτωση του κυκλώματος.
• Να απενεργοποιείτε τη συσκευή μετά από κάθε
χρήση βγάζοντας το καλώδιο από την πρίζα.
• Όταν καθαρίζετε τη συσκευή, προσέχετε να μην
εισέλθει νερό στο εσωτερικό της. Μην καθαρίζετε
ποτέ τη συσκευή κάτω από τρεχούμενο νερό.
Μην βυθίζετε τη συσκευή ποτέ σε νερό.
• Προστατεύετε το καλώδιο από φθορά. Προσέχετε
να μην μαγκώνεται και να μην βρίσκεται κοντά σε
καυτά αντικείμενα. Μην αφήνετε το καλώδιο να
κρέμεται από τραπέζια ή άλλες υπερυψωμένες
επιφάνειες εργασίας.
• Μην ανοίγετε ποτέ το περίβλημα της συσκευής.
• Τα χαλασμένα βύσματα ή καλώδια δικτύου
πρέπει να αντικαθίστανται αμέσως από
εξουσιοδοτημένο ειδικό προσωπικό ή από το
τμήμα εξυπηρέτησης πελατών ώστε να
αποφεύγονται κίνδυνοι.
• Επισκευές πρέπει να γίνονται μόνο από
εξουσιοδοτημένα καταστήματα ή από
εξειδικευμένο προσωπικό.
ΠΠρροοςς ααπποοφφυυγγήή κκιιννδδύύννοουυ ππυυρρκκααγγιιάάςς κκααιι
ττρρααυυμμααττιισσμμοούύ
• Τοποθετήστε την ψηστιέρα σε μια επίπε-δη,
αντιολισθητική επιφάνεια, ανθεκτική στη
θερμότητα. Μην τοποθετείτε τη συ-σκευή επάνω ή
δίπλα σε συσκευές που εκπέμπουν θερμότητα
(πχ. φούρνος).
- 34 -

• Μην χρησιμοποιείτε τη συσκευή κοντά σε
εύφλεκτα αντικείμενα, όπως π.χ. δίπλα σε ρολό
από χαρτί κουζίνας.
Ακόμη και κατά τη χρήση της συσκευ-ής
σύμφωνα με τις οδηγίες χρήσης, μέρη της
συσκευής ζεσταίνονται πολύ (π.χ. η επάνω και η
κάτω εξωτερική επιφάνεια). Προσέχετε να μην
ακουμπάτε τις επιφάνειες αυτές έως ότου να
έχουν κρυώσει εντελώς μετά την
απενεργοποίηση της συσκευής.
Προσοχή! Καυτή επιφάνεια!
• Προς αποφυγή επικίνδυνης υπερθέρμανσης, να
ξετυλίγετε πάντοτε ολόκληρο το καλώδιο.
• Κατά τη διάρκεια της λειτουργίας μπορείτε να
ανοίγετε την ψηστιέρα ακίνδυνα από τις θερμομονωμένες λαβές.
• Μην επιτρέπετε το χειρισμό της συσκευής από
άτομα (συμπεριλαμβανομένων παιδιών) των
οποίων οι φυσικές, αισθητηριακές ή νοητικές
δυνατότητες ή ελλείψεις σε εμπειρία και γνώση
εμποδίζουν την ασφαλή χρήση των συσκευών,
εάν προηγουμένως δεν έχει υπάρξει
παρακολούθηση ή εκπαίδευση.
• Τα παιδιά πρέπει να επιτηρούνται ώστε να
εξασφαλίζεται ότι δεν παίζουν με τη συσκευή.
• Αφήστε τη συσκευή να κρυώσει εντελώς πριν τον
καθαρισμό και την φύλαξη.
• Μην χρησιμοποιείτε εξωτερικό χρονοδιακόπτη ή
ξεχωριστό τηλεχειρισμό για να λειτουργήσετε τη
συσκευή.
• Μη χρησιμοποιείτε κάρβουνα ή παρόμοιες
καύσιμες ύλες, για να λειτουργείτε τη συσκευή!
• Ποτέ μην αφήνετε τη συσκευή κατά τη λειτουργία
χωρίς επιτήρηση.
ΠΠρροοςς ααπποοφφυυγγήή ββλλάάββηηςς ττηηςς σσυυσσκκεευυήήςς
• Να αφαιρείτε τα τρόφιμα μόνο με πλαστική ή
ξύλινη σπάτουλα ή κάποιο άλλο κατάλληλο, μη
μεταλλικό σκεύος, για να αποφύγετε φθορές στην
αντικολλητική επίστρωση.
• Για τον ίδιο λόγο να μην χρησιμο-ποιείτε
δραστικά απορρυπαντικά ή μυτερά αντικείμενα
για τον καθαρισμό.
Περιγραφή της συσκευής
Ένδειξη λειτουργίας
q
Κούμπωμα λαβής
w
Λαβές
e
Θερμοστάτης
r
Ασφάλιση πλάκας ψησίματος
t
Ακροστόμιο απορροής λίπους
y
Κράτημα πλάκας ψησίματος
u
Πλάκες ψησίματος
i
Σκεύος συλλογής λαδιού
o
Πριν την πρώτη χρήση
1. Αφαιρέστε όλα τα υλικά της συσκευασίας καθώς
και τις ασφάλειες μεταφοράς, όπως π.χ. ταινίες ή
ασφάλειες που κρατούν το καλώδιο.
2. Ελέγξτε πριν από την θέση σε λειτουργία το
σύνολο αποστολής για την πληρότητα και
ενδεχομένως για ορατές φθορές.
3. Διαβάστε προσεκτικά τις οδηγίες χρήσης.
4. Τοποθετήστε τη συσκευή σύμφωνα με τις οδηγίες
χρήσης.
5. Καθαρίστε την καινούρια ψηστιέρα με ένα υγρό
πανί όπως περιγράφεται στο εδάφιο
«Καθαρισμός και συντήρηση».
- 35 -

Κατά την πρώτη θέρμανση της ψηστιέρας μπορεί
να δημιουργηθούν ατμοί. Οι ατμοί αυτοί είναι
ακίνδυνοι, αλλά ίσως επηρεάσουν τη γεύση των
τροφίμων. Για το λόγο αυτό συνιστούμε πριν την
πρώτη χρήση να θέσετε σε λειτουργία την
ψηστιέρα και να την θερμάνετε χωρίς τρόφιμα για
15 λεπτά στη μέγιστη θερμοκρασία.
Ψήσιμο με την ψηστιέρα
Επάνω στη συσκευή αναφέρονται εικονοδιαγράμματα
χρήσης για τους σημαντικότερους τρόπους
προετοιμασίας οι οποίοι μπορούν ν α διεξαχθούν σε
θέση επαφής με τη συσκευή. Οι χρόνοι μαγειρέματος
αντιστοιχούν γενικά στο βάρος και στο μέγεθος του
είδους ψησίματος καθώς και στο ξεχωριστό γούστο
του κάθε ανθρώπου. Γι’ αυτό οι χρόνοι αυτοί μπορεί
να ποικίλουν. Οι δοθείσες τιμές και οι παράμετροι
βασίζονται σε μια ποσότητα κάθε φορά των 100 γρ.
1. Ανοίξτε το καπάκι της ψηστιέρας. Τραβήξτε το
κούμπωμα της λαβής
ανασηκώστε το καπάκι εντελώς. Εάν είναι
αναγκαίο, αφαιρέστε σκόνες με ένα στεγνό πανί
από τις πλάκες ψησίματος
2. Λαδώστε τις πλάκες ψησίματος
βούτυρο.
3. Κατεβάστε το καπάκι της ψηστιέρας και κλείστε το
κούμπωμα
ακούσετε το κούμπωμα να κλειδώνει.
4. Βάλτε το φις στην πρίζα και ρυθμίστε το
θερμοστάτη
Η συσκευή ξεκινά άμεσα να θερμαίνε-ται, και η
ένδειξη λειτουργίας
5. Μετά από μερικά λεπτά η ένδειξη
ψηστιέρα τώρα έχει φτάσει την ρυθμισμένη
θερμοκρασία και είναι έτοιμη για χρήση.
. Η συσκευή έχει κλείσει, εάν
w
στην επιθυμητή θερμοκρασία.
r
προς τα κάτω και
w
.
i
ανάβει.
q
με λίγο λάδι ή
i
σβήνει. Η
q
Ρύθμιση της θεροκρασίας
Ο θερμοστάτης rέχει τις ακόλουθες θέσεις:
• απενεργοποίηση
I ξεπάγωμα
II Ζέσταμα
III μεσαίο ψήσιμο
M γρήγορο ψήσιμο
Τα μεμονωμένα σύμβολα έχουν την ακόλουθη
σημασία:
Χρόνος ψησίματος ή μαγειρέματος
βαθμίδα θερμοκρασίας προς ρύθμιση
Απόψυξη
Ζέσταμα
Χάμπουργκερ / Σάντουιτς
Λαχανικά
Γαρίδες
Ψάρι
Τοστ ή άλλα
Μικρά σουβλάκια
Λουκάνικο
Κομμάτια κρέατος (Σνίτσελ, στέικ)
Κοτόπουλο / Γαλοπούλα
Θέσεις ψησίματος
Σας προσφέρονται διαφορετικές θέσεις ψησίματος,
ανάλογα με τον τρόπο προετοιμασίας των τροφίμων.
Ψηστιέρα / Πλάκες σε επαφή
- 36 -

Για το ταυτόχρονο πολύ ταχύ ψήσιμο τροφίμων
και από τις δυο πλευρές. Iδανικό για το ψήσιμο
κρεάτων που απαιτούν ταχύ ψήσιμο σε υψηλή
θερμοκρασία - στέικ, φιλέτα, μπριζόλες, λουκάνικα
και λαχανικά.
1. Ανοίξτε το καπάκι της ψηστιέρας εντελώς, χωρίς
όμως να το ανασηκώσετε.
2. Θέστε ένα από τα σκεύη συλλογής λαδιού
κάτω από το στόμιο εκροής λίπους y.
3. Τοποθετήστε τα τρόφιμα στην κάτω πλάκα
ψησίματος
4. Κλείστε το καπάκι. Ασκήστε ελαφρή πίεση για να
ρυθμιστεί αυτόματα η απόσταση των πλακών
ανάλογα με το πάχος των τροφίμων.
i
.
o
Σε ιδιαίτερα λιπαρά τρόφιμα μπορεί να συμβεί
κατά το άνοιγμα του καπακιού, να τρέξει στην
επάνω πλάκα ψησίματος
στην επιφάνεια απόθεσης!
λίπος και να στάζει
i
Μπάρμπεκιου / Πλάκες ανοιχτές 180°
Για το ψήσιμο παχυών τροφίμων, που απαιτούν
ένα πιο αργό και ομοιόμορφο ψήσιμο. Ιδανικό
για την προετοιμασία λαχανικών που περιέχουν
πολύ νερό, το οποίο εξατμίζεται εάν ξεκινήσετε
το ψήσιμο σε χαμηλή θερμοκρασία.
Αυτή τη θέση ψησίματος μπορείτε επίσης να την
χρησιμοποιήσετε για να ψήσετε μεγαλύτερες
ποσότητες τροφίμων ή για να ψήσετε κρεατικά
και λαχανικά ταυτόχρονα.
ΠΠααρράάδδεειιγγμμαα:: ΠΠάάππρριικκαα
Απομακρύνετε το κοτσάνι και τα κουκούτσια από την
πάπρικα. Κόβετε την πάπρικα σε λωρίδες πλάτους
ενός εκατοστού. Τοποθετήστε τις λωρίδες πάπρικας
επάνω στην σχάρα του γκριλ και ψήστε σε
i
βαθμίδα θερμοκρασίας "Μ" περίπου για 15 λεπτά
έως ότου η πέτσα βγάλει φούσκες.
1. Ανοίξτε το καπάκι της ψηστιέρας ενελώς,
ανασηκώστε το στο τέρμα και ανοίξτε το
εν συνεχεία έως ότου βρεθεί σε οριζόντια θέση.
2. Θέστε ένα από τα σκεύη συλλογής λαδιού
κάτω από τα στόμια εκροής λίπους yτων
πλακών
3. Μοιράστε τα τρόφιμα στις δυο πλάκες
ψησίματος
του γκριλ.
i
i
.
o
Λειτουργία φούρνου / Πλάκες παράλληλα
Απόσταση περίπου 7 εκατοστά
Για την προετοιμασία ευαίσθητων τροφίμων, τα
οποία δεν πρέπει να συμπιεστούν κατά το ψήσιμο
ή που πρέπει να ψηθούν μόνο από τη μια μεριά.
ΠΠααρράάδδεειιγγμμαα:: ΨΨήήσσιιμμοο σσννίίττσσεελλ
Χτυπήστε το σνίτσελ για να λεπτύνει, βάλτε αλάτι και
πιπέρι. Τοποθετήστε το σνίτσελ επάνω στη σχάρα
του γκριλ και ψήστε ομοιόμορφα και στις δύο
πλευρές. Στη συνέχεια επιστρώστε το σνίτσελ με τυρί
που λειώνει και ψήστε στη λειτουργία του φούρνου
σε βαθμό θερμοκρασίας "Μ" περίπου 15 λεπτά.
1. Ανοίξτε το καπάκι εντελώς, χωρίς όμως να το
ανσηκώσετε.
2. Θέστε ένα από τα σκεύη συλλογής λαδιού
κάτω από το στόμιο εκροής λίπους y.
3. Τοποθετήστε τα τρόφιμα στην κάτω πλάκα
ψησίματος
4. Ανασηκώστε τώρα το καπάκι στο τέρμα και γυρίστε
το προς τα εμπρός, εως ότου σταθεί σε θέση
παράλληλη με την κάτω πλάκα ψησίματος
i
.
i
o
.
- 37 -

Μετά το ψήσιμο
• Θέστε το θερμοστάτη rστη θέση “•”.
• Τραβήξτε το βύσμα από την υποδοχή.
• Αφαιρέστε τα έτοιμα φαγητά με μια ξύλινη
κουτάλα ή κάποιο άλλο κατάλληλο, μη μεταλλικό
σκεύος από την πλάκα ψησίματος
i
.
Προτάσεις συνταγών
(Θέση επαφής)
Τα στοιχεία των χρόνων ψησίματος και των
βαθμίδων ζεστάματος μπορεί να ποικίλουν
ανάλογα με την κατάσταση και την προσωπική
προτίμηση.
Μπέργκερ Mex-Tex (4 άτομα)
900 γρ. κιμά από βοδινό
6 κ. σούπας σάλτσα μπάρμπεκιου
6 κ. σούπας ψιλοκομμένα κρεμμύδια
3 κ. σούπας φρέσκια ή έτοιμη πικάντικη σάλτσα
1/2 κ. τσ. σκόνη τσίλι
4 μεγάλα ψωμάκια για χάμ_ουργκερ
1. ναμίξτε καλά τον κιμά, τα κρεμμύδια, την
πικάντικη σάλτσα, τη σκόνη τσίλι και τη σάλτσα
μπάρμπεκιου σε ένα μεγάλο μπολ. Δημιουργείστε
την μάζα του κιμά σε τέσσερις ίσου μεγέθους
περίπου 2 εκ. πάχους φέτες χάμπουργκερ.
2. Ζεσταίνετε τη συσκευή (βαθμίδα θέρμανσης ΙΙΙ - Μ).
3. Ψήστε τα χάμπουργκερ 8 - 10 λεπτά στην
προθερμασμένη συσκευή σε θέση επαφής. Στη
συνέχεια σερβίρετε τα χάμπουργκερ μαζί με
συστατικά και καρυκεύματα της επιλογής σας στα
ψωμάκια για χάμπουργκερ.
Ρολά γαλοπούλας με ζαμπόν σεράνο
(4 άτομα)
8 μικρά λεπτά σνίτσελ γαλοπούλας (το καθένα
50 γρ.)
αλάτι
πιπέρι
2 κ. τσ. μουστάρδα
8 λεπτές φέτες ζαμπόν σεράνο
8 αποξηραμένα βερίκοκα
1 κ. σούπας ελαιόλαδο
8 βελόνες για τα ρολά
1. Χτυπήστε τα σνίτσελ , βάλτε αλάτι και πιπέρι.
Περάστε τη μια πλευρά
με μουστάρδα. Κόψτε στη μέση τις φέτες ζαμπόν.
Επικαλύψτε την πλευρά που έχετε περάσει με
μουστάρδα, με ζαμπόν και βερίκοκο.
2. Ζεσταίνετε τη συσκευή (βαθμίδα θέρμανσης Μ).
3. Τυλίξτε τα σνίτσελ και δέστε τα καλά με τις
βελόνες για τα ρολά. Επιστρώστε τα ρολάκια με
λάδι και ψήστε τα για περ. 6 λεπτά στη βαθμίδα
θέρμανσης Μ.
Τόνος με φέτες πορτοκαλιού
(4 άτομα)
4 φρέσκα στέικ τόνου (το καθένα
170 γρ.)
1 Πορτοκάλι
1 κ. σούπας ψιλοκομμένο μαϊντανό
αλάτι
πιπέρι
1. Ξεφλουδίστε το πορτοκάλι και κόψτε σε περίπου
5χιλ. πάχος φέτες.
2. Τοποθετήστε τα στέικ του τόνου στο
προθερμασμένο γκριλ (βαθμίδα θέρμανσης Μ),
ρίξτε επάνω τον μαϊντανό και καρυκέψτε με αλάτι
και πιπέρι. Τοποθετήστε τις φέτες πορτοκαλιού
στα στέικ τόνου και ψήστε περίπου για 6-8 λεπτά.
3. Απομακρύνετε τις ψημένες φέτες πορτοκαλιού και
σερβίρετε τα στέικ τόνου.
- 38 -

Στέικ κιλότου με φρέσκα κρεμμύδια
Σάλτσα χορταρικών (4 άτομα)
500 γρ. άπαχο στέικ κιλότου (το καθένα 125 γρ.)
120 γρ. μαργαρίνη
1 κ. τσ. σάλτσα Worcestershire
1 ψιλοκομμένη σκελίδα σκόρου
4 κ. σούπας ψιλοκομμένο μαϊντανό
4 ψιλοκομμένα φρέσκα κρεμμύδια
1. Αναμίξτε τη μαργαρίνη και την σάλτσα Worcestershire σε ένα μικρό μπολ. Ανακατέψτε το
σκόρδο, τον μαϊντανό και τα φρέσκα κρεμμύδια.
2. Ζεσταίνετε τη συσκευή (βαθμίδα θέρμανσης Μ).
3. Ψήστε τη μπριζόλα 3 λεπτά στη βαθμίδα
θέρμανσης Μ, στη συνέχεια επιστρώστε με την
ανοιξιάτικη σάλτσα κρεμμυδιών και βοτάνων και
τσιγαρίστε για ακόμα 4 λεπτά στη βαθμίδα Ι.
Μαζέψτε τη σάλτσα χορταρικών που εκρέει με το
σκεύος συλλογής λαδιού
4. Αφήστε στην άκρη λίγο το ψημένο στέικ και κόψτε
το σε λεπτές φέτες αντίθετα από τη φορά.
Σερβίρετε το κρέας σε μια προθερμασμένη πλάκα
σερβιρίσματος, περιχύστε τη λειωμένη σάλτσα
χορταρικών από το σκεύος συλλογής
από το κομμένο κρέας
o
.
πάνω
o
Καθαρισμός και συντήρηση
ΚΚίίννδδυυννοοςς ττρρααυυμμααττιισσμμοούύ!!
Πριν τον καθαρισμό τραβήξτε το φις από την πρίζα
και περιμένετε μέχρι η συσκευή να έχει κρυώσει
εντελώς. Μην καθαρίζετε τη συσκευή κάτω από
τρεχούμενο νερό και μην η βυθίζετε σε νερό.
• Πιέστε τις ασφαλίσεις
να αφαιρέσετε τις πλάκες
• Πλύνετε τις πλάκες ψησίματος
και ένα ουδέτερο απορρυπαντικό πιάτων.
• Για να αφαιρέσετε ξεροψημένα κατάλοιπα,
μαλακώστε τα πρώτα απλώνονας ένα βρεγμένο
πανί επάνω.
Οι πλάκες ψησίματος
πλυθούν και στο πλυντήριο πιάτων!
• Ξεπλύνετε τα περιβλήματα συλλογής λαδιού
με καυτό νερό και ένα ουδέτερο καθαριστικό
μέσο.
Για τον καθαρισμό του περιβλήματος
χρησιμοποιήστε ένα υγρό πανί.
Σιγουρευτείτε οτι όλα τα τμήματα της συσκευής
έχουν στεγνώσει καλά πριν την επόμενη χρήση.
λιγο προς τα πίσω για
t
.
i
με ζεστό νερό
i
μπορούν επίσης να
i
o
Διαφύλαξη
Μπορείτε να διαφυλάξετε την ψηστιέρα σε κάθετη ή
οριζόντια θέση.
Η ψηστιέρα διαθέτει ένα σύστημα τυλίγμτος
καλωδίου στην κάτω μεριά της, όπου μπορείτε να
τυλίξετε το καλώδιο όταν δεν χρησιμοποιείτε τη
συσκευή. Έτσι αποφεύγετε να μαγκώνεται ή να
λερώνεται το καλώδιο καθώς και κινδύνους που
μπορεί να προκύψουν από κρεμούμενο καλώδιο.
ΠΠρροοσσοοχχήή!! ΕΕμμππρράάγγμμααττεεςς ζζηημμιιέέςς!!
Για τον καθαρισμό μη χρησιμοποιείτε καυστικά
καθαριστικά μέσα, άγρια σφουγγάρια ή αιχμηρά
αντικείμενα ώστε να μην καταστρέψετε την
αντικολλητική επίστρωση ή άλλες επιφάνειες.
Για πιο εύκολο καθαρισμό μπορείτε να αφαιρέσετε
τις πλάκες από τη συσκευή
i
.
- 39 -

Απομάκρυνση
Σε καμία περίπτωση μην πετάξετε τη
συσκευή στα οικιακά απορρίμματα.
Αυτό το προϊόν υπόκειται στην
Ευρωπαϊκή Οδηγία 2002/96/EC.
Απομακρύνετε τη συσκευή μέσω μιας εγκεκριμένης
επιχείρησης απόρριψης ή μέσω της κοινοτικής
επιχείρησης απόρριψης.
Προσέχετε τις τρέχουσες ισχύουσες προδιαγραφές.
Σε περίπτωση αμφιβολιών ελάτε σε επαφή με την
επιχείρηση απόρριψης.
Απομακρύνετε όλα τα υλικά συσκευασίας
με έναν φιλικό προς το περιβάλλον τρόπο.
Εγγύηση & Σέρβις
Ο χρόνος εγγύησης δεν επεκτείνεται μέσω της
απόδοσης εγγύησης. Αυτό ισχύει και για
εξαρτήματα τα οποία έχουν αντικατασταθεί ή
επισκευαστεί. Ενδεχόμενες ήδη υπάρχουσες κατά
την αγορά, ζημιές και ελλείψεις πρέπει να
αναφέρονται αμέσως μετά την αποσυσκευασία, το
αργότερο όμως δύο ημέρες μετά την ημερομηνία
αγοράς. Επισκευές που εμφανίζονται μετά τη λήξη
του χρόνου εγγύησης χρεώνονται.
Σέρβις Ελλάδα
Tel.: 801 5000 019 (0,03 EUR/Min.)
E-Mail: kompernass@lidl.gr
IAN 71980
CY
Σέρβις Κύπρος
Tel.: 8009 4409
E-Mail: kompernass@lidl.com.cy
IAN 71980
Έχετε για αυτή τη συσκευή 3 χρόνια εγγύηση από
την ημερομηνία αγοράς. Η συσκευή κατασκευάστηκε
και ελέγχθηκε προσεκτικά πριν από την αποστολή.
Παρακαλούμε φυλάξτε την απόδειξη ταμείου ως
απόδειξη για την αγορά. Παρακαλούμε
επικοινωνήστε τηλεφωνικά με την υπηρεσία σέρβις σε
περίπτωση εγγύησης. Μόνο έτσι μπορεί να
εξασφαλιστεί μια δωρεάν αποστολή του
εμπορεύματός σας.
Η απόδοση εγγύησης ισχύει μόνο για σφάλματα
υλικού ή κατασκευής, όχι όμως για ζημιές από τη
μεταφορά, για εξαρτήματα φθοράς ή για βλάβες σε
εύθραυστα εξαρτήματα, π.χ. διακόπτες ή
συσσωρευτές. Το προϊόν προορίζεται μόνο για την
ιδιωτική και όχι για την επαγγελματική χρήση.
Σε περίπτωση κακής μεταχείρισης και ακατάλληλης
χρήσης, σε χρήση βίας και σε παρεμβάσεις οι
οποίες δεν διεξήχθησαν από το εξουσιοδοτημένο
μας τμήμα σέρβις, η εγγύηση παύει να ισχύει. Τα νομικά σας δικαιώματα δεν περιορίζονται μέσω αυτής
της εγγύησης.
Εισαγωγέας
KOMPERNASS GMBH
BURGSTRASSE 21
44867 BOCHUM, GERMANY
www.kompernass.com
- 40 -

Inhaltsverzeichnis Seite
Verwendungszweck 42
Lieferumfang 42
Technische Daten 42
Sicherheitshinweise 42
Gerätebeschreibung 43
Vor dem ersten Gebrauch 43
Braten mit dem Kontaktgrill 44
Temperaturregler / Zubereitungsarten.........................................................................................44
Plattenstellungen.............................................................................................................................44
Grillrost / Plattenstellung in Kontakt.............................................................................................44
Barbecue / Plattenstellung 180° offen.......................................................................................45
Ofenfunktion / Plattenstellung parallel Abstand ca. 7 cm ........................................................45
Nach dem Braten ..........................................................................................................................46
Rezeptvorschläge (Kontaktposition) 46
Mex-Tex-Burger (4 Personen)........................................................................................................46
Putenröllchen mit Serranoschinken (4 Personen)........................................................................46
Thunfisch mit Orangenscheiben (4 Personen).............................................................................46
Rumpsteak mit Frühlingszwiebeln-Kräuter-Sauce (4 Personen) .................................................47
Reinigen & Pflegen 47
Aufbewahren 47
Entsorgen 48
Garantie und Service 48
Importeur 48
Lesen Sie die Bedienungsanleitung vor der ersten Verwendung aufmerksam durch und heben Sie diese für
den späteren Gebrauch auf. Händigen Sie bei Weitergabe des Gerätes an Dritte auch die Anleitung aus.
- 41 -

Kontaktgrill
Verwendungszweck
Dieser Kontaktgrill ist vorgesehen für
• das Grillen von Speisen wie Fleisch, Fisch,
Gemüse, Sandwiches etc.
• in haushaltsüblichen Mengen
• im privaten Haushalt.
Lieferumfang
Kontaktgrill mit zwei Grillplatten
2 Ölauffangschalen
Bedienungsanleitung
So vermeiden Sie Gefahren durch
elektrischen Schlag
• Der Kontaktgrill darf nur in trockenen Räumen im
Innenbereich eingesetzt werden. Halten Sie das
Gerät – auch im ausgeschalteten Zustand – von
Spritzwasser fern.
• Benutzen Sie das Gerät nur dann, wenn die örtliche Netzspannung mit der Nennspannung des
Gerätes (220-240 V ~, 50 Hz) übereinstimmt.
• Schließen Sie das Gerät nicht über eine Mehrfachsteckdose an, über die gleichzeitig andere
elektrische Geräte arbeiten, denn das kann zu
einer Überlastung des Stromkreises führen.
• Schalten Sie das Gerät nach jedem Gebrauch
aus. Ziehen Sie dazu den Netzstecker.
• Achten Sie beim Reinigen darauf, dass kein
Wasser in das Innere des Gerätes gelangt. Reinigen Sie das Gerät nie unter fließendem Wasser.
Technische Daten
Nennspannung: 220-240 V ~, 50 Hz
Leistungsaufnahme: 2000 W
Sicherheitshinweise
• Lesen Sie vor dem ersten Gebrauch Ihres
Kontaktgrills diese Bedienungsanleitung aufmerksam durch.
• Bewahren Sie die Bedienungsanleitung an
einem geeigneten Ort in der Nähe des Gerätes
auf. Händigen Sie die Bedienungsanleitung bei
Weitergabe des Gerätes an Dritte ebenfalls mit
aus.
• Benutzen Sie den Kontaktgrill nur für seinen
vorgesehenen Zweck und in Übereinstimmung
mit dieser Bedienungsanleitung.
Tauchen Sie das Gerät nie in Wasser oder
andere Flüssigkeiten ein.
• Schützen Sie das Netzkabel vor Beschädigung.
Achten Sie darauf, es nicht einzuklemmen und
von heißen Gegenständen fernzuhalten. Lassen
Sie das Netzkabel nicht lose von Tisch oder
Arbeitsplatte hängen.
• Öffnen Sie nie das Gehäuse des Gerätes.
• Lassen Sie beschädigte Netzstecker oder Netzkabel sofort von autorisiertem Fachpersonal
oder dem Kundenservice austauschen, um
Gefährdungen zu vermeiden.
• Reparaturen dürfen nur im vom Hersteller
autorisierten Fachhandel oder durch erfahrenes
Fachpersonal ausgeführt werden.
So vermeiden Sie Brand- und Verletzungs-
gefahren
• Stellen Sie Ihren Kontaktgrill auf eine ebene,
rutschfeste und hitzebeständige Unterlage und
nicht auf oder neben andere Geräte, die viel
Wärme ausstrahlen können (z.B. Toaster,
Küchenherde).
- 42 -

• Betreiben Sie das Gerät nicht in der Nähe leicht
brennbarer Gegenstände, z.B. unter Gardinen
oder neben Küchenkrepp-Rollen.
Auch bei vorschriftsmäßiger Benutzung werden
einzelne Geräteteile sehr heiß (z.B. die obere
und untere Gehäuseplatte). Achten Sie darauf,
diese Oberflächen nicht zu berühren, bis sie
nach dem Ausschalten vollständig abgekühlt
sind.
Achtung! Heiße Oberfläche!
• Um eine gefährliche Überhitzung zu vermeiden,
wickeln Sie stets die gesamte Länge des Netzkabels ab.
• Während des Betriebs kann der Kontaktgrill gefahrlos am wärmeisolierten Griff geöffnet und
geschlossen werden.
• Dieses Gerät ist nicht dafür bestimmt, durch
Personen (einschließlich Kinder) mit eingeschränkten physischen, sensorischen oder
geistigen Fähigkeiten oder mangels Erfahrung
und/oder mangels Wissen benutzt zu werden,
es sei denn, sie werden durch eine für ihre
Sicherheit zuständige Person beaufsichtigt oder
erhielten von ihr Anweisungen, wie das Gerät
zu benutzen ist.
• Kinder sollten beaufsichtigt werden, um sicherzustellen, dass sie nicht mit dem Gerät spielen.
• Lassen Sie das Gerät nach dem Ausschalten vollständig abkühlen, bevor Sie es reinigen und verstauen.
• Benutzen Sie keine externe Zeitschaltuhr oder
ein separates Fernwirksystem um das Gerät zu
betreiben.
• Benutzen Sie keine Kohle oder ähnliche Brennstoffe, um das Gerät zu betreiben!
• Lassen Sie das Gerät während des Betriebs niemals unbeaufsichtigt.
So vermeiden Sie Schäden am Gerät
• Entnehmen Sie jegliche Speisen nur mit einem
Kunststoff- oder Holzspachtel oder einem anderen geeigneten, nichtmetallischen Gegenstand,
um die Antihaftbeschichtung des Kontaktgrills
nicht zu zerstören.
• Benutzen Sie – aus dem selben Grund – zur
Reinigung keine scharfen Putzmittel und spitzen
Gegenstände.
Gerätebeschreibung
Kontrollleuchte
q
Verschluss am Haltegriff
w
Griffe
e
Temperaturregler
r
Plattenbefestigungsfedern
t
Fettabflusstülle
y
Führung zur Plattenbefestigung
u
Grillplatten
i
Ölauffangschale
o
Vor dem ersten Gebrauch
1. Entnehmen Sie Ihren neuen Kontaktgrill aus der
Verpackung. Entfernen Sie alle zusätzlichen
Transportsicherungen, z.B. Folien oder Kabelhalter.
2. Überprüfen Sie vor der Inbetriebnahme den Lieferumfang auf Vollständigkeit und eventuell sichtbare Beschädigungen.
3. Lesen Sie diese Bedienungsanleitung aufmerksam durch.
4. Stellen Sie das Gerät gemäß den Sicherheitshinweisen auf.
5. Reinigen Sie Ihren neuen Kontaktgrill mit einem
feuchten Tuch wie unter “Reinigen und Pflegen”
beschrieben.
- 43 -

Durch das erstmalige Beheizen des Kontaktgrills
können Dämpfe entstehen. Diese Dämpfe sind
nicht gesundheitsgefährdend, könnten aber den
Geschmack der Speisen beeinträchtigen. Wir
empfehlen Ihnen daher vor der ersten
Essenszubereitung, den Kontaktgrill einzuschalten und ohne Lebensmittel auf maximaler
Temperatureinstellung 15 Minuten aufzuheizen.
Braten mit dem Kontaktgrill
1. Öffnen Sie den Deckel des Kontaktgrills. Ziehen
Sie dazu den Verschluss am Haltegriff
unten und klappen Sie den Deckel bis zum Anschlag nach oben, ohne diesen anzuheben. Entfernen Sie ggf. Staubpartikel mit einem trockenen Tuch von den Grillplatten
2. Fetten Sie die Grillplatten
öl oder Butter ein.
3. Schließen Sie den Deckel des Kontaktgrills. Das
Gerät ist geschlossen, wenn der Verschluss am
Haltegriff
4. Stecken Sie den Netzstecker in eine Steckdose,
und stellen Sie den Temperaturregler
gewünschte Heizstufe ein.
Das Gerät fängt nun an zu heizen, und die
Kontrollleuchte
5. Nach einigen Minuten erlischt die Kontrollleuchte
stellte Temperatur erreicht und ist betriebsbereit.
hörbar eingerastet ist.
w
leuchtet auf.
q
. Der Kontaktgrill hat nun die einge-
q
.
i
mit etwas Pflanzen-
i
r
w
auf die
nach
Auf dem Gerät sind Anwendungspiktogramme für
die wichtigsten Zubereitungsarten, die mit dem Gerät in Kontaktposition durchgeführt werden können,
angegeben. Die Garzeiten richten sich generell
nach Gewicht und Größe des Grillgutes, sowie
nach dem individuellen Geschmack. Die Angaben
können daher etwas variieren. Die angegebenen
Werte sind Richtwerte, basierend auf einer Menge
von jeweils 100 g.
Die einzelnen Symbole haben folgende Bedeutung:
Grill- bzw. Garzeit
einzustellende Temperaturstufe
Auftauen
Aufwärmen
Hamburger / Sandwich
Gemüse
Garnelen
Fisch
Toast o. ä.
Fleischspieße
Würstchen
Fleischstücke (Schnitzel, Steaks)
Hühnchen / Pute
Temperaturregler / Zubereitungsarten
Der Temperaturregler rkann auf folgende
Positionen eingestellt werden:
• ausgeschaltet
I Auftauen
II Aufwärmen
III mittleres Grillen
M schnelles Grillen
Plattenstellungen
Ihnen stehen verschiedene Plattenstellungen zur Verfügung, die Sie je nach Zubereitungsart einsetzen
können.
Grillrost / Plattenstellung in Kontakt
- 44 -

Für das gleichzeitige, sehr schnelle Braten der
Speisen auf beiden Seiten. Ideal zum Grillen
von Fleisch, das ein sehr schnelles Anbraten bei
hoher Temperatur erfordert - Rumpsteak, Filetschnitten, Koteletts, Würstchen und Gemüse.
1. Öffnen Sie den Deckel des Kontaktgrills bis zum
Anschlag, ohne diesen anzuheben.
2. Stellen Sie eine der Ölauffangschalen
die Fettabflusstülle
3. Legen Sie das Grillgut auf die untere Grillplatte
4. Schließen Sie den Deckel. Üben Sie dabei sanften Druck aus, damit sich der Abstand der beiden Platten aufgrund der Dicke des Grillgutes
automatisch reguliert.
y
.
o
unter
i
Bei besonders fettigen Speisen kann es passie-
ren, dass beim Öffnen des Deckels, Fett an der
oberen Grillplatte
Stellfläche tropft!
hinunterläuft und auf die
i
Barbecue / Plattenstellung 180° offen
Für das Grillen von dickeren Speisen, die ein
langsameres und gleichmäßigeres Braten
erfordern. Ideal für die Zubereitung von stark
wasserhaltigem Gemüse, da man das Wasser zu
Beginn auf niedriger oder mittlerer Temperatur
verdunsten lassen kann.
Diese Plattenstellung können Sie auch nutzen,
um größere Mengen an Speisen oder das Gemüse gleichzeitig mit dem Fleisch zuzubereiten.
Beispiel: Paprika
Stielansatz und Kerne aus der Paprika entfernen.
Die Paprika in ein Zentimeter breite Streifen schneiden. Die Paprikastreifen auf die Grillplatte
und bei Temperaturstufe “M” ca. 15 Minuten grillen,
bis die Haut Blasen wirft.
i
legen
1. Öffnen Sie den Deckel des Kontaktgrills in senkrechte Stellung, heben ihn bis zum Anschlag an,
und öffnen ihn weiter bis er waagerecht liegt.
2. Stellen Sie die zwei Ölauffangschalen
die Fettabflusstüllen
3. Verteilen Sie das Grillgut auf den beiden Grill-
platten
i
.
der Grillplatten i.
y
Ofenfunktion / Plattenstellung parallel
Abstand ca. 7 cm
.
Für die Zubereitung empfindlicher Speisen, die
beim Braten nicht zusammengedrückt oder gewendet werden dürfen.
Beispiel: Schnitzel überbacken
Schnitzel flachklopfen, salzen und pfeffern. Schnitzel auf den Grillrost legen und von beiden Seiten
gleichmäßig grillen. Anschließend das Schnitzel mit
Schmelzkäse belegen und in der Ofenfunktion bei
Temperaturstufe “M”, ca. 15 Minuten überbacken.
1. Öffnen Sie den Deckel des Kontaktgrills bis zum
Anschlag, ohne diesen anzuheben.
2. Stellen Sie eine der Ölauffangschalen
die Fettabflusstülle
3. Legen Sie das Grillgut auf die untere
Grillplatte
4. Heben Sie nun den Deckel bis zum Anschlag an
und ziehen ihn nach vorn, bis er parallel zur
unteren Grillplatte
i
.
y
.
aufliegt.
i
o
o
unter
unter
- 45 -

Nach dem Braten
• Stellen Sie den Temperaturregler rauf “•”.
• Ziehen Sie den Netzstecker aus der Steckdose.
• Nehmen Sie das Grillgut mit einem Holzspachtel
oder einem anderen geeigneten, nichtmetallischen Gegenstand, von der Grillplatte
i
.
Rezeptvorschläge
(Kontaktposition)
Putenröllchen mit Serranoschinken
(4 Personen)
8 kleine dünne Putenschnitzel (je 50 g)
Salz
Pfeffer
2 TL Senf
8 dünne Scheiben Serranoschinken
8 getrocknete weiche Aprikosen
1 EL Olivenöl
8 Rouladennadeln
Die Angaben der Grillzeiten und der Heizstufen
können, je nach Beschaffenheit der Lebensmittel
und persönlichem Geschmack, variieren.
Mex-Tex-Burger (4 Personen)
900 g Rinderhackfleisch
6 EL Barbecuesauce
6 EL fein gehackte Zwiebeln
3 EL frische oder fertige Salsa
1/2 TL Chilipulver
4 große Hamburgerbrötchen
1. Hackfleisch, Zwiebeln, Salsa, Chilipulver und
Barbecuesauce in einer großen Schüssel gründlich vermischen. Die Hackfleischmasse zu vier
gleich großen, knapp 2 cm dicken Hamburgerscheiben formen.
2. Gerät aufheizen (Heizstufe III - M).
3. Die Hamburger ca. 8 - 10 Min. auf dem vorgeheizten Gerät in Kontaktposition grillen. Anschließend die Hamburger zusammen mit Zutaten und
Gewürzen Ihrer Wahl in den Hamburgerbrötchen
servieren.
1. Schnitzel flachklopfen, salzen und pfeffern. Eine
Seite mit Senf bestreichen. Schinkenscheiben
halbieren. Die mit Senf bestrichene Seite mit
Schinken und Aprikose belegen.
2. Gerät aufheizen (Heizstufe M).
3. Schnitzel aufrollen und mit den Rouladennadeln
feststecken. Röllchen mit Öl bestreichen und ca.
6 Min. auf Heizstufe M grillen.
Thunfisch mit Orangenscheiben
(4 Personen)
4 frische Thunfischsteaks (je 170 g)
1 Orange
1 EL fein gehackte Petersilie
Salz
Pfeffer
1. Die Orange schälen und in etwa 5 mm dicke
Scheiben schneiden.
2. Die Thunfischsteaks auf den vorgeheizten Grill
legen (Heizstufe III - M), die Petersilie darüber
streuen und mit Salz und Pfeffer würzen. Die
Orangenscheiben auf die Thunfischsteaks legen
und ca. 6-8 Min. grillen.
3. Die gegrillten Orangenscheiben entfernen und
die Thunfischsteaks servieren.
- 46 -

Rumpsteak mit FrühlingszwiebelnKräuter-Sauce (4 Personen)
500 g mageres Rumpsteak (je 125 g)
120 g Margarine
1 TL Worcestershiresauce
1 fein gehackte Knoblauchzehe
4 EL fein gehackte Petersilie
4 fein gehackte Frühlingszwiebeln
1. Die Margarine und die Worcestershiresauce in
einer kleinen Schüssel vermischen. Den
Knoblauch, Petersilie und Frühlingszwiebeln
untermischen.
2. Gerät aufheizen (Heizstufe M).
3. Das Steak 3 Min. auf Heizstufe M grillen, anschließend mit der Frühlingszwiebel-Kräuter-Sauce bestreichen und weitere 4 Min. auf Heizstufe
I garen. Die heruntertropfende Kräutersauce mit
der Ölauffangschale
4. Das fertig gegrillte Steak kurz ruhen lassen und
gegen die Maserung in dünne Scheiben
schneiden. Das Fleisch auf einer vorgewärmten
Servierplatte anrichten, die geschmolzene
Kräutersauce aus der Ölauffangschale
das geschnittene Fleisch gießen.
sammeln.
o
o
über
Reinigen & Pflegen
Verletzungsgefahr!
Ziehen Sie vor der Reinigung den Netzstecker und
warten Sie, bis das Gerät vollständig abgekühlt ist.
Reinigen Sie das Gerät nie unter fließendem Wasser
und tauchen Sie es nie in Wasser ein.
• Drücken Sie die Plattenbefestigungsfedern tetwas zurück, um die Grillplatten
• Spülen Sie die Grillplatten
Wasser und einem neutralen Spülmittel.
• Bei starken Verkrustungen legen Sie ein nasses
Spültuch auf die festgebackenen Rückstände,
um diese aufzuweichen.
Die Grillplatten
eignet!
• Spülen Sie die Ölauffangschalen
Wasser und einem neutralen Spülmittel.
Für die Reinigung der Außenflächen des Gerätes
genügt ein feuchtes Tuch.
Achten Sie darauf, dass vor der erneuten Verwendung des Kontaktgrills alle Teile vollständig trocken
sind.
sind auch spülmaschinenge-
i
zu entnehmen.
i
nun mit heißem
i
o
mit heißem
Aufbewahren
Den Kontaktgrill können Sie liegend oder aufrecht
stehend verstauen.
Das Gerät hat eine integrierte Kabelaufwicklung an
der Gehäuseunterseite, auf die Sie das Netzkabel
bei Nichtgebrauch aufwickeln können. Sie vermeiden dadurch, dass das Netzkabel eingeklemmt,
verschmutzt oder durch das lose Herabhängen zur
Gefahrenquelle wird.
Achtung! Sachschaden!
Benutzen Sie zur Reinigung keine scharfen Putzmittel, rauen Schwämme oder spitzen Gegenstände,
um die Antihaftbeschichtung oder andere Oberflächen nicht zu zerstören.
Sie können die Grillplatten
gung aus dem Gerät entnehmen.
zur einfachen Reini-
i
- 47 -

Entsorgen
Werfen Sie das Gerät keinesfalls in den
normalen Hausmüll. Dieses Produkt
unterliegt der europäischen Richtlinie
2002/96/EC.
Entsorgen Sie das Gerät über einen zugelassenen
Entsorgungsbetrieb oder über Ihre kommunale
Entsorgungseinrichtung.
Beachten Sie die aktuell geltenden Vorschriften.
Setzen Sie sich im Zweifelsfall mit Ihrer Entsorgungseinrichtung in Verbindung.
Die Garantiezeit wird durch die Gewährleistung
nicht verlängert. Dies gilt auch für ersetzte und reparierte Teile. Eventuell schon beim Kauf vorhandene
Schäden und Mängel müssen sofort nach dem
Auspacken gemeldet werden, spätestens aber zwei
Tage nach Kaufdatum. Nach Ablauf der Garantiezeit anfallende Reparaturen sind kostenpflichtig.
Service Deutschland
Tel.: 01805 772 033 (0,14 EUR/Min. aus dem dt.
Festnetz, Mobilfunk max. 0,42 EUR/Min.)
E-Mail: kompernass@lidl.de
IAN 71980
Führen Sie alle Verpackungsmaterialien
einer umweltgerechten Entsorgung zu.
Garantie und Service
Sie erhalten auf dieses Gerät 3 Jahre Garantie ab
Kaufdatum. Das Gerät wurde sorgfältig produziert
und vor Anlieferung gewissenhaft geprüft.
Bitte bewahren Sie den Kassenbon als Nachweis
für den Kauf auf. Bitte setzen Sie sich im Garantiefall mit Ihrer Servicestelle telefonisch in Verbindung.
Nur so kann eine kostenlose Einsendung Ihrer Ware
gewährleistet werden.
Die Garantieleistung gilt nur für Material- oder
Fabrikationsfehler, nicht aber für Transportschäden,
Verschleißteile oder für Beschädigungen an zerbrechlichen Teilen, z. B. Schalter oder Akkus. Das
Produkt ist lediglich für den privaten und nicht für
den gewerblichen Gebrauch bestimmt.
Bei missbräuchlicher und unsachgemäßer Behandlung, Gewaltanwendung und bei Eingriffen, die
nicht von unserer autorisierten Service-Niederlassung vorgenommen wurden, erlischt die Garantie.
Ihre gesetzlichen Rechte werden durch diese
Garantie nicht eingeschränkt.
Service Österreich
Tel.: 0820 201 222 (0,15 EUR/Min.)
E-Mail: kompernass@lidl.at
IAN 71980
Service Schweiz
Tel.: 0842 665566 (0,08 CHF/Min.,
Mobilfunk max. 0,40 CHF/Min.)
E-Mail: kompernass@lidl.ch
IAN 71980
Importeur
KOMPERNASS GMBH
BURGSTRASSE 21
44867 BOCHUM, GERMANY
www.kompernass.com
- 48 -
 Loading...