

KITCHEN TOOLS
3
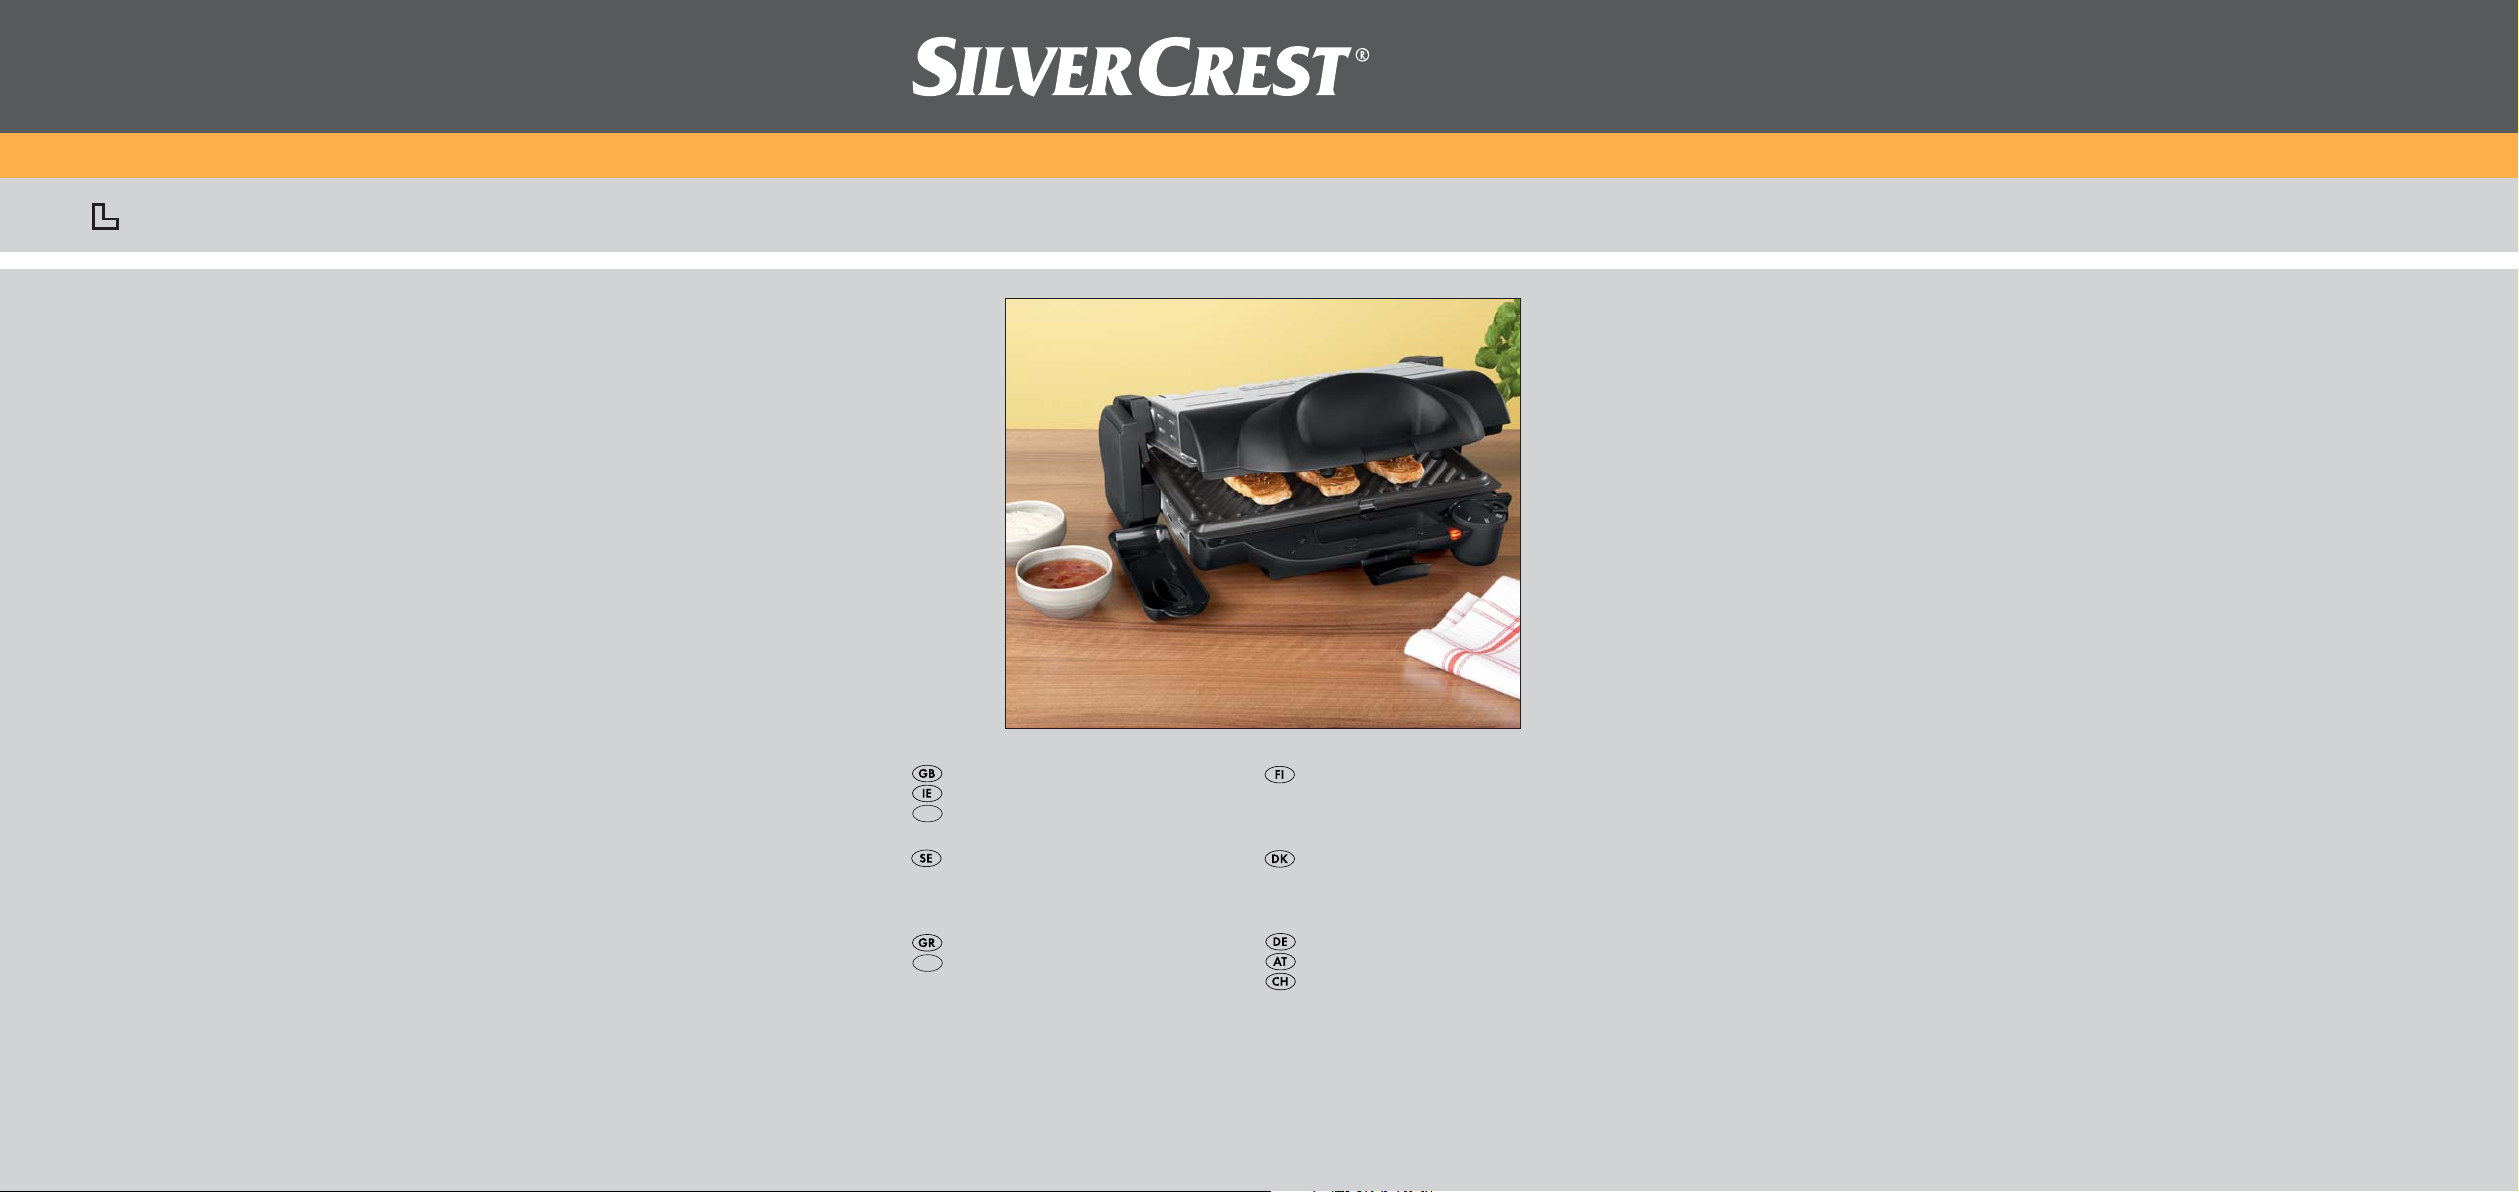
Contact Grill SKG 2000 A1
Contact Grill
Operating instructions
CY
Parilagrilli
Käyttöohje
KOMPERNASS GMBH
BURGSTRASSE 21 · D-44867 BOCHUM
www.kompernass.com
ID-Nr.: SKG 2000 A1-01/10-V3
Kontaktgrill
Bruksanvisning
Ψηστιέρα
CY
Οδηγίες χρήσης
Kontaktgrill
Betjeningsvejledning
Kontaktgrill
Bedienungsanleitung
SKG 2000 A1
3
2
1
7
5
6
4
8
2x
9

Content Page
Intended use 2
Contents 2
Technical specifications 2
Safety first 2
Description of the appliance 3
Before you use the appliance for the first time 3
Roasting with the Contact Grill 4
Temperature control / preparation methods .................................................................................4
Hot plate positions............................................................................................................................4
Grill roasting / Plates in contact.....................................................................................................4
Barbecue / Hot plate position 180° open...................................................................................5
Oven function / Plate position parallel distance approx. 7 cm..................................................5
After roasting ....................................................................................................................................6
Recipe suggestions (contact position) 6
Mex-Tex-Burger (4 persons) ............................................................................................................6
Turkey Rolls with Serrano Ham (4 persons)...................................................................................6
Tuna with Orange Slices (4 persons).............................................................................................6
Rump Steak with Spring Onion and Herb Sauce (4 persons) ....................................................7
Cleaning & Maintenance 7
Storage 7
Disposal 8
Warranty & Service 8
Importer 8
Read the operating instructions carefully before using the appliance for the first time and preserve this
booklet for later reference. Pass the manual on to whomsoever might acquire the scale at a later date.
- 1 -

Contact Grill
Intended use
This Contact Grill is intended for
• grilling food such as meat, fish, vegetables, sandwiches, etc.
• in household quantities
• in private households
Contents
Contact Grill with two grill plates
2 oil drip pans
Operating booklet
Technical specifications
Input voltage: 220-240V, ~50 Hz
Power consumption: 2.000 W
Safety first
• Before you start using your Contact grill, please
read the following directions for use carefully.
• Keep this instructions brochure in a safe place
near the appliance for ready reference. Pass it
on, as the case may be, to the next owner of the
appliance.
• Use the Contact grill only for its intended purpose in accordance with the instructions given here.
Prevent electrical shock hazards
• You may use the Contact Grill only in-doors in a
dry place. Keep the appliance away from splashing water even when it is switched off.
• Use the appliance only if the local power supply
voltage corresponds to the voltage specified for
the appliance (220-240V AC at 50 Hz).
• Do not connect the appliance over a multisocket
adapter, from which many other electrical devices may be simultaneously drawing power, as
this can lead to overloading of the circuit.
• After each use switch off the appliance and
unplug the unit.
• While cleaning, make sure that water does not
seep into the inner areas of the appliance. Never attempt to clean the appliance under running
water.
Never dip the appliance into water.
• Protect the power cord from damages through
entanglement with other objects. Keep it away
from hot surfaces. Do not let the power cord
hang loosely from the table or over the hot plate.
• Never open the housing of the appliance.
• To avoid the risk of injury, arrange for defective
power plugs and/or cables to be replaced as
soon as possible by a qualified technician or by
our Customer Service Department to avoid the
risk of injury.
• Only service centres authorised by the manufacturer or experienced technicians may undertake
repairs (see "Repair & Customer Service").
Prevent fire hazards and injuries
• Place your Contact Grill on an even, nonslippery
and heat-resistant base and never on or near other appliances that may radiate high levels of
heat (e.g. toaster or cooking-range).
- 2 -

• Do not operate the appliance near inflammable
objects, for example, close to curtains or near tissue paper roles in the kitchen.
Even during general use, some of the components of the appliance become very hot (e.g.
the top and bottom housing plates). Do not
touch the surface immediately after switching
off the appliance until it cools down completely.
Caution! Hot surfaces!
• To prevent possible overheating, always unwind
the power cord in its entire length.
• While operating, you can open or close the Contact Grill safely using the heatinsulated handle.
• This appliance is not intended for use by persons
(including children) with reduced physical, sensorial or mental cabilities, or lack of experience
and knowledge, unless they have been given
supervision or instruction concerning use of the
appliance by a person responsible for their safety.
• Children should be supervised to ensure that
they do not play with the appliance.
• After use, allow the appliance to cool down
completely before you clean and store it away.
• Do not use an external time switch or a separate
remote control system to operate the appliance.
• Do not use charcoal or similar fuels to operate
the appliance!
• When in use, never leave the appliance unsupervised.
Prevent damages to the appliance
• Use a plastic or wooden spatula or any other suitable non-metallic utensil to remove the food
items so as not to damage the non-stick coating
of the Contact Grill's hot plate.
• For the same reason, do not use any corrosive
detergents or pointed instruments when cleaning
the appliance.
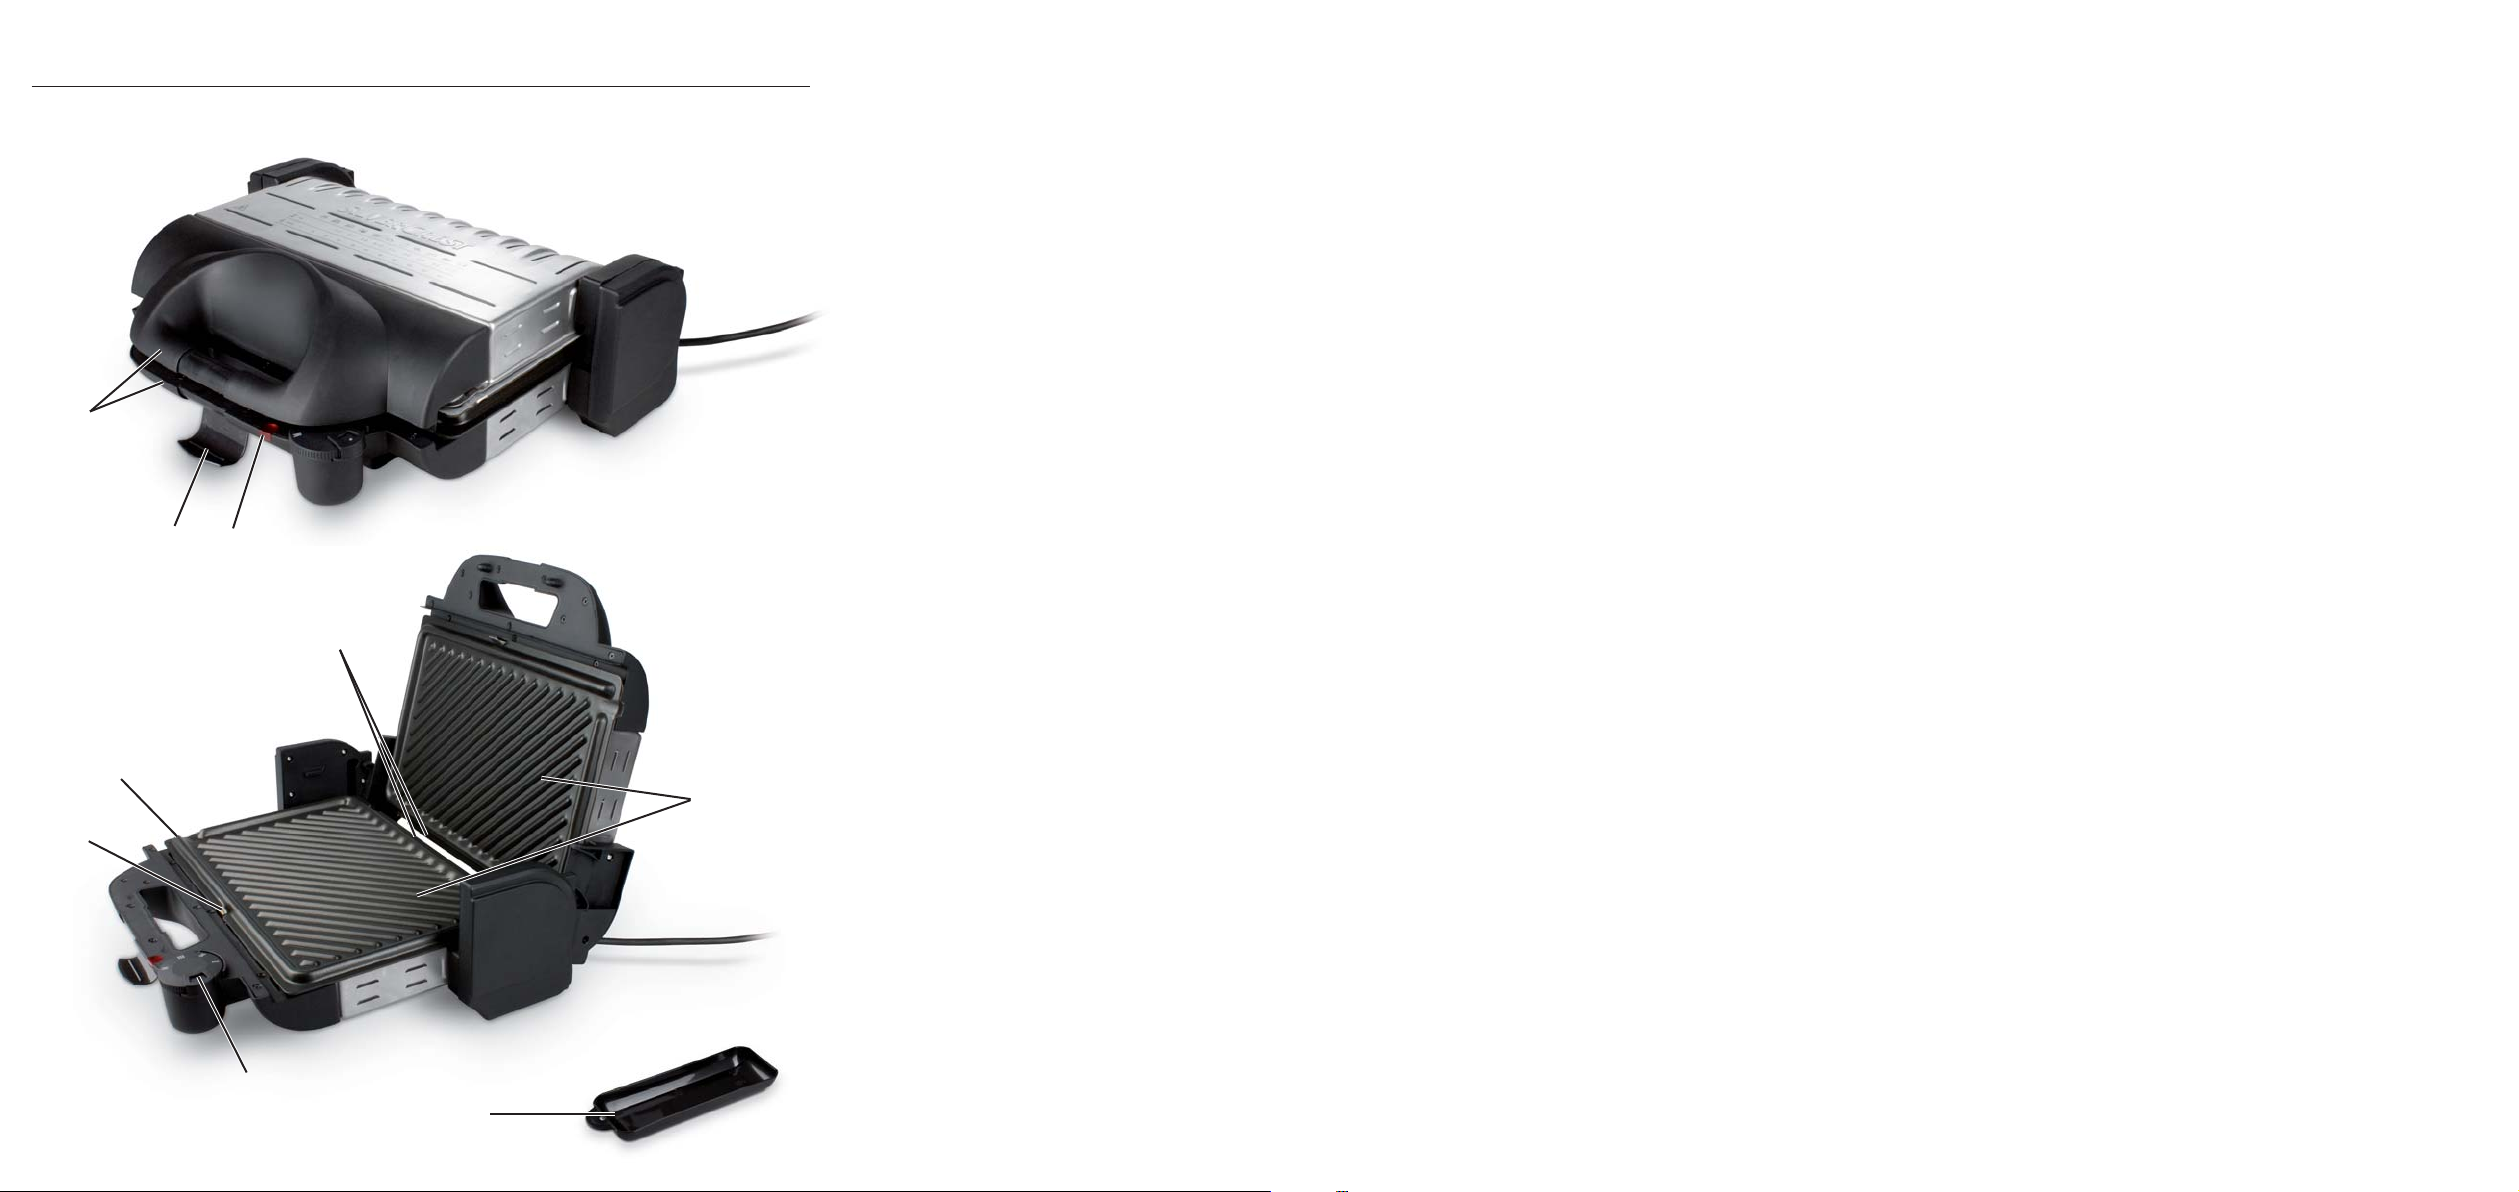
Description of the appliance
Pilot light
q
Snap locking device on the handle
w
Handles
e
Temperature control knob
r
Hot plate locking springs
t
Ridge for oil drainage
y
Leads for fixing the hotplates
u
Grill hot plates
i
Oil drip pan
o
Before you use the appliance
for the first time
1. Unpack your new Contact Grill and remove all
extra fittings such as plastic wrappers and cable
clamps meant for protection during transportation.
2. Before starting up your new Contact Grill, check
the contents for completeness and any visible
damage.
3. Read the directions for use carefully.
4. Install the appliance as described in the safety
precautions.
5. Clean the new Contact Grill with a wet cloth as
described under "Cleaning & Maintenance".
- 3 -
When using the Contact Grill for the first time,
you may notice fumes caused by heating. These
fumes are not injurious to health; however, initially they may affect the taste of your first few dishes. Therefore, before preparing any food items
for the first time, we advise you to switch on the
Contact Grill once without any food items and
allow it to heat up at the maximum temperature
setting for 15 minutes.
Pictograms for the most important methods of preparation that can be used with the appliance in contact position are shown on the appliance. The cooking times generally depend on the weight and size
of the food being grilled as well as your individual
tastes. The values given are guiding values based
on a quantity of 100 g.
The individual symbols have the following meanings:
Roasting with the Contact Grill
1. Open the lid of the Contact Grill by pulling the
locking clasp on handle
the lid up to the stopper. If necessary, remove all
fallen food particles from the hot plate surface
using a dry cloth.
i
2. Dab some oil or butter on the surface of the hot
plate
.
i
3. Close the lid of the Contact Grill. The appliance
is fully closed when the locking clasp on handle
audibly snaps into position.
w
4. Insert the plug into a power socket to switch the
appliance on and set the temperature control
knob
Contact Grill starts heating up.
The pilot light
5. After a few minutes the pilot light
Now the Contact Grill has reached the set temperature and is ready for operation.
at the desired temperature. Now the
r
turns on.
q
Temperature control / preparation
methods
You can set the temperature control knob rat the
following positions:
• Switched off
I Defrost
II Heat up
III Medium grilling
M Fast grilling
, downwards and tilt
w
switches off.
q
Grilling or cooking time
Temperature setting to use
Thawing
Heating up
Hamburger / sandwich
Vegetables
Shrimp
Fish
Toast, etc.
Meat skewers
Sausages
Meat (cutlets, steaks)
Chicken / turkey
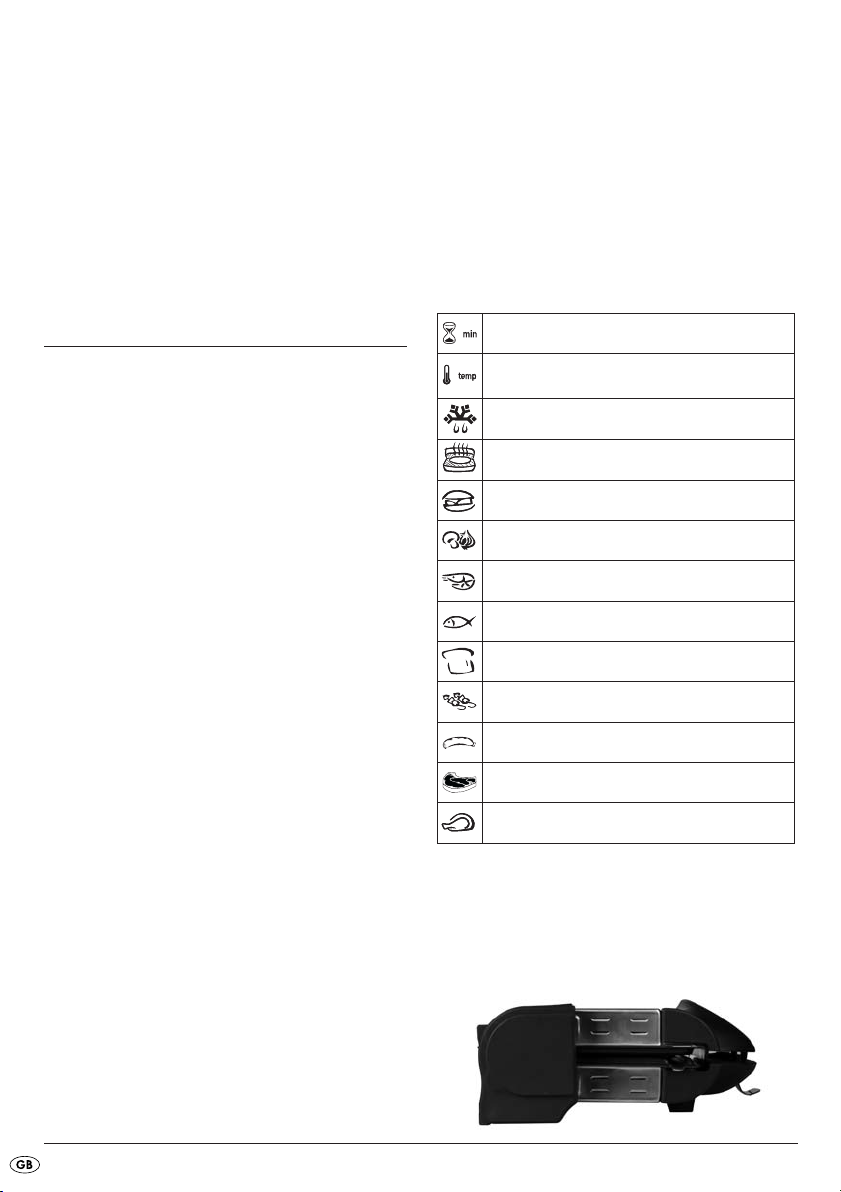
Hot plate positions
You can position the hot plates in different ways
depending on the preparation method.
Grill roasting / Plates in contact
- 4 -
This position is suitable for simultaneous and fast
roasting of foodstuffs on both sides. It is ideal for
grilling meat that needs to be seared fast at high
temperature, e.g. rump steak, filet cuts, chops,
sausages and vegetables.
1. Open the lid of the Contact Grill up to the
stopper without lifting it up.
2. Place one of the oil drip pans
for oil drainage
3. Place the food items to be grilled on the bottom
grilling hot plate
4. Close the lid gently exerting slight pressure till
the distance between both the hot plates are adjusted automatically depending on the thickness
of the food items.
y
i
.
.
under the ridge
o
With particularly fatty foods it can happen that,
when you open the lid, liquid fat on the upper
grill plate
cement area!
runs down and drips onto the pla-
i
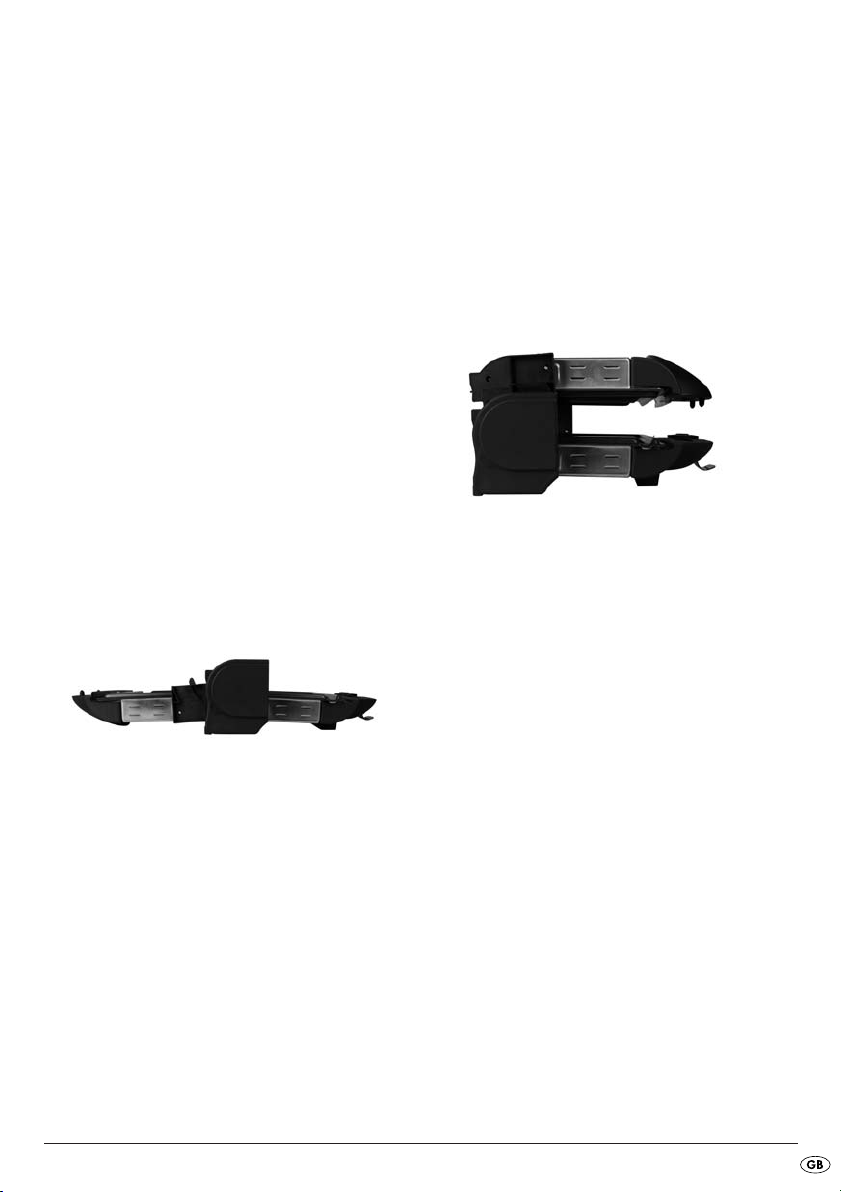
Barbecue / Hot plate position 180°
open
This position is suitable for grilling thick foodstuffs that need to be roasted slowly and uniformly. It is ideal for preparing vegetables with
high water content, as the water can evaporate
in the beginning at low or medium temperatures.
You can also use this hot plate position to prepa-
re large quantities of food items or to cook vegetables along with meat.
Example: Pepper
Remove the stem and seeds from the pepper. Cut
the pepper into strips one centimetre wide.
Place the pepper strips on the grill
approx. 15 minutes at temperature setting "M" until
bubbles appear on the skin.
and grill for
i
1. Open the lid of the Contact Grill in vertical position, lift it up to the stopper and open it further till
it is in horizontal position.
2. Place the two oil drip pans
for oil drainage
3. Spread the grilling foodstuffs on both the grill
plates
i
.
of the grill plates i.
y
under the ridges
o
Oven function / Plate position parallel
distance approx. 7 cm
This position is suitable for preparing delicate
foodstuffs that need not be pressed or turned
over when roasting.
Example: Meat Cutlet with Melted Cheese
Pound the meat cutlet flat, then salt and pepper it.
Place the cutlet on the grill and grill evenly from
both sides. Then lay melting cheese atop the cutlet
and cook in the oven function at temperature setting
"M" for approx. 15 minutes.
1. Open the lid part of the Contact Grill up to the
stopper without lifting it up.
2. Place one of the oil drip pans
for oil drainage
3. Place the foodstuff to be grilled on the bottom
hot plate
4. Lift the lid till the stopper and turn it forward till it
rests in a parallel position with the bottom hot
plate
i
i
.
.
y
.
under the ridge
o
- 5 -

After roasting
• Set the temperature control knob rto "•"
position.
• Pull the power plug out of the socket.
• Remove the grilled food items from the hot plates
using a wooden spatula or any other suitable,
i
non-metallic utensil.
Recipe suggestions
(contact position)
The details provided for grilling times and heat
levels can, subject to the composition of the
foodstuff and personal tastes, be varied.
Mex-Tex-Burger (4 persons)
900 g hamburger
6 tbsp. barbecue sauce
6 tbsp. finely chopped onions
3 tbsp. fresh or store-bought salsa
1/2 tsp. chili powder
4 large hamburger buns
1. Mix hamburger, onions, salsa, chili powder and
barbecue sauce well in a large bowl. Form the
meat mix into four equally sized, 2 cm thick
hamburger patties.
2. Warm the appliance up (Heat level III - M).
3. Grill the hamburgers for 8 - 10 minutes on the
pre-heated grill. Then serve the hamburgers on
the hamburger buns together with ingredients
and seasonings of your choice.
Turkey Rolls with Serrano Ham
(4 persons)
8 small, thin turkey cutlets (50 g each)
Salt
Pepper
2 tsp. mustard
8 thin slices of Serrano ham
8 dried, soft apricots
1 tbsp. olive oil
8 roulade needles
1. Pound cutlets flat, salt and pepper. Coat one
side with mustard. Cut ham slices in half. Place
ham and apricots on the mustard-coated side.
2. Warm the appliance up (Heat level M).
3. Roll the cutlet up and then firmly secure it with a
skewer. Smear the roll with cooking oil, then grill
it for approx. 6 minutes at heat level M.
Tuna with Orange Slices (4 persons)
4 fresh tuna steaks (170 g each)
1 orange
1 tsp. finely chopped parsley
Salt
Pepper
1. Peel the orange and cut into slices roughly 5 mm
thick.
2. Place the tuna steaks on the preheated grill (Heat
level III - M), sprinkle with parsley and season with
salt and pepper. Lay the orange slices on the tuna
steaks and grill for approx. 6-8 minutes.
3. Remove the grilled orange slices and serve the
tuna steaks.
- 6 -

Rump Steak with Spring Onion and
Herb Sauce (4 persons)
500 g lean rump steak (125 g each)
120 g margarine
1 tsp. Worcestershire sauce
1 finely chopped garlic clove
4 tbsp. finely chopped parsley
4 finely chopped spring onions
1. Mix the margarine and the Worcestershire sauce
in a small bowl. Mix in the garlic, parsley and
spring onions.
2. Warm the appliance up (Heat level M).
3. Grill the steak for 3 minutes at heat level M,
afterwards smear it with the spring onion & herb
sauce and then cook it for a further 4 minutes at
heat level I. Collect the dripping herb sauce with
the oil drip pan
4. After they finish grilling, let the steaks rest briefly
and cut into thin strips against the grain. Arrange
the meat on a pre-heated serving plate, pour the
melted herb sauce from the oil drip pan
the cut meat.
o
.
over
o
• Rinse the hot plates iwith hot water and a neutral detergent. In order to protect the non-stick
coating, do not use any corrosive detergents or
pointed objects for cleaning.
• In case the grill surface has become heavily incrusted, keep a wet cleaning cloth on the hard
residual matter for a while to soak the layer.
The grill plates
dishwasher!!
• Wash the grease catchment bowl
water and a neutral detergent. To avoid damage
to the upper surfaces, do not use aggressive cleansers, rough sponges or sharp objects when
cleaning the appliance.
To clean the external surface of the appliance, use
a wet cloth.
Before using the Contact Grill again, make sure that
all components are completely dry.
can even be washed in the
i
o
with hot
Storage
Cleaning & Maintenance
Injury hazard!
Before cleaning, unplug the appliance and wait till
it has completely cooled down. Never attempt to
clean the appliance under running water and never
dip it in water.
For normal cleaning, you can remove the grilling
hot plates
• For this purpose, press the hot plate fixing
springs tslightly backwards to release the hot
plates
from the appliance.
i
.
i
You can store away the Contact Grill in horizontal
or upright position. Your Contact Grill has an integrated compartment for storing the power cord at
the bottom of the housing. You can wind up the power cord in it when the appliance is not in use. This
way you can prevent the power cord from getting
entangled or soiled or from becoming a likely cause
of accidents.
- 7 -
Disposal
Do not dispose of the appliance in your
normal domestic waste. This product is
subject to the European guideline
2002/96/EC.
Dispose of the appliance through an approved disposal centre or at your community waste facility.
Observe the currently applicable regulations.
In case of doubt, please contact your waste disposal
centre.
Dispose of all packaging materials in an
environmentally responsible manner.
Warranty & Service
The warranty for this appliance is for 3 years from
the date of purchase. The appliance has been manufactured with care and meticulously examined before delivery. Please retain your receipt as proof of
purchase. In the event of a warranty claim, please
make contact by telephone with our Service Department. Only in this way can a post-free despatch for
your goods be assured.
The warranty covers only claims for material and
maufacturing defects, but not for transport damage,
for wearing parts or for damage to fragile components, e.g. buttons or batteries. This product is for
private use only and is not intended for commercial
use. The warranty is void in the case of abusive and
improper handling, use of force and internal tampering not carried out by our authorized service
branch. Your statutory rights are not restricted in
any way by this warranty.
The warranty period will not be extended by repairs
made under warranty. This applies also to replaced
and repaired parts. Any damage and defects extant
on purchase must be reported immediately after unpacking the appliance, at the latest, two days after
the purchase date. Repairs made after the expiration of the warranty period are subject to payment.
DES UK LTD
Tel.: 0871 5000 700
e-mail: support.uk@kompernass.com
Kompernass Service Ireland
Tel: 1850 930 412 (0,082 EUR/Min.)
Standard call rates apply. Mobile operators may vary.
e-mail: support.ie@kompernass.com
(£ 0.10 / minute)
Importer
KOMPERNASS GMBH
BURGSTRASSE 21
44867 BOCHUM, GERMANY
www.kompernass.com
- 8 -

Sisällysluettelo Sivu
Käyttötarkoitus 10
Toimitukseen kuuluvat osat 10
Tekniset tiedot 10
Turvallisuutta koskevat ohjeet 10
Laitteen kuvaus 11
Ennen ensimmäistä käyttökertaa 11
Kontaktigrillissä paistaminen 12
Lämpötilan säätäminen..................................................................................................................12
Levyjen säätäminen........................................................................................................................12
Grilliritilä / levyt kiinni toisissaan..................................................................................................12
Grillaus / levyt auki 180° ...........................................................................................................13
Uunitoiminto / levyt päällekkäin Etäisyys n. 7 cm......................................................................13
Paistamisen jälkeen........................................................................................................................14
Reseptiehdotuksia (kontaktiasento) 14
Mex-Tex –hampurilainen (neljälle henkilölle) .............................................................................14
Kalkkunarullat serranokinkun kera (neljälle henkilölle)..............................................................14
Tonnikalaa ja appelsiiniviipaleita (neljälle henkilölle)................................................................14
Häränpihvi kevätsipuliyrttikastikkeella (neljälle henkilölle) ........................................................15
Puhdistaminen ja huoltaminen 15
Säilyttäminen 15
Hävittäminen 16
Takuu & huolto 16
Maahantuoja 16
Säilytä käsikirja myöhempää käyttöä varten. Jos myyt laitteen, anna käsikirja uudelle omistajalle!
- 9 -
Parilagrilli
Käyttötarkoitus
Tämä kontaktigrilli on tarkoitettu
• erilaisten elintarvikkeiden, kuten lihan, kalan,
vihannesten, voileipien jne. grillaamiseen
• kotitalouksille tyypillisten määrien valmistukseen
• yksityisten kotitalouksien käyttöön.
Toimitukseen kuuluvat osat
Kontaktigrilli ja kaksi grillilevyä
2 öljynkeräysvatia
Käyttöohje
Tekniset tiedot
Sallittu nimellisjännite: 220-240V, ~ 50 Hz
Tehonotto: 2000 W
Turvallisuutta koskevat ohjeet
• Lue tämä käyttöohje huolellisesti läpi, ennen kuin
alat käyttää kontakti grilliä.
• Säilytä käyttöohje sopivassa paikassa laitteen
läheisyydessä. Anna käyttöohje mukaan, jos
luovutat laitteen jollekin.
• Käytä grilliä vain sille suunniteltuun tarkoitukseen
tämän käyttöohjeen mukaisesti.
Sähköiskun vaaran välttäminen
• Kontaktigrilliä saa käyttää vain kuivissa sisätiloissa. Älä päästä vettä roiskumaan laitteen päälle,
vaikka laite ei olisikaan kytkettynä päälle.
• Käytä laitetta vain silloin, kun paikallinen verkkojännite vastaa laitteelle tarkoitettua verkkojännitettä (220-240V, kun 50 Hz).
• Älä liitä laitetta moninapaiseen pistorasiaan, johon on liitetty myös muita laitteita. Muutoin seurauksena voi olla virtapiirin ylikuormittuminen.
• Kytke laite pois päältä jokaisen käytön jälkeen.
Irrota myös virtapistoke.
• Varmista puhdistuksen yhteydessä, että laitteen
sisäpuolelle ei pääse vettä. Älä puhdista laitetta
juoksevan veden alla.
Älä upota laitetta veteen.
• Suojaa virtajohto vahingoittumiselta. Varmista,
että virtajohto ei joudu puristuksiin eikä liian lähelle kuumia esineitä. Älä anna virtajohdon roikkua vapaasti pöydältä tai työtasolta.
• Älä avaa laitteen koteloa.
• Anna valtuutetun ammattihenkilöstön vaihtaa
vaurioitunut virtajohto tai verkkopistoke
välittömästi uuteen vaarojen välttämiseksi.
• Korjauksia saavat tehdä ainoastaan valmistajan
valtuuttama erikoisliike tai ammattitaitoinen
huoltohenkilö.
Paloja loukkaantumisvaaran välttäminen
• Aseta kontaktigrilli tasaiselle, luistamattomalle ja
kuumankestävälle alustalle. Älä aseta sitä muiden
laitteiden päälle tai viereen, sillä ne voivat huokua
paljon lämpöä (esim. leivänpaahdin, liesi).
- 10 -

• Älä käytä grilliä herkästi syttyvien esineiden
(esim. verhojen tai talouspaperirullien)
läheisyydessä .
Myös määräystenmukaisessa käytössä yksittäiset laitteen osat kuumenevat (esim. ylä- ja alalevyn kotelo). Älä koske kyseisiin pintoihin, ennen
kuin ne ovat tarpeeksi jäähtyneet kytkettyäsi virran pois laitteesta.
Huomio! Kuuma pinta!
• Vältä vaarallinen ylikuumeneminen kelaamalla
koko virtajohto auki.
• Käytön aikana kontaktigrilli voidaan avata ja
sulkea turvallisesti lämpöeristetystä kahvasta.
• Älä anna laitetta sellaisten henkilöiden (mukaan
lukien lapset) käyttöön, joiden fyysiset, aistilliset
tai henkiset kyvyt tai kokemuksen ja tiedon puute
estävät heitä käyttämästä laitetta turvallisesti,
jollei heitä ole aikaisemmin valvottu tai opastettu
laitteen käytössä.
• Selvitä lapsille laite ja sen vaarat, jotta he eivät
leikkisi laitteella.
• Anna laitteen jäähtyä kokonaan virran poiskytkemisen jälkeen ennen sen puhdistamista ja
säilytykseen viemistä.
• Älä käytä laitetta ulkoisen ajastimen tai erillisen
kauko-ohjausjärjestelmän avulla.
• Älä käytä hiiltä tai vastaavia polttoaineita laitteen käyttöön!
• Älä jätä laitetta koskaan ilman valvontaa sen ollessa käytössä.
Laitevahinkojen välttäminen
• Poista kaikki ruoat muovi- tai puulastalla tai muulla tarkoitukseen sopivalla ei-metallisella välineellä, jotta grillin tarttumaton pinnoite ei vahingoitu.
• Älä myöskään käytä puhdistukseen mitään teräviä välineitä tai voimakkaita puhdistusaineita.
Laitteen kuvaus
Merkkivalo
q
Kahvan lukko
w
Kahvat
e
Lämpötilansäädin
r
Levyjen kiinnitysjouset
t
Rasvanpoistonokka
y
Levykiinnityksen ohjaus
u
Grillilevyt
i
Öljynkeräysvati
o
Ennen ensimmäistä käyttökertaa
1. Poista kontaktigrilli pakkauksesta. Poista kaikki
ylimääräiset kuljetuksen aikaiset varmistimet,
kuten kalvot ja johdonpitimet.
2. Tarkista ennen käyttöönottoa, että toimitus on
täydellinen ja että tuote ei ole näkyvästi
vahingoittunut.
3. Pystytä laite turvallisuusohjeiden mukaisesti.
4. Puhdista grilli kostealla liinalla kohdan “Puhdistaminen ja huoltaminen” mukaan.
5. Puhdista uusi kontaktigrilli kostealla liinalla kappaleessa "Puhdistus ja huolto" kuvatulla tavalla.
- 11 -

Grillin ensimmäisen kuumennuksen yhteydessä
voi muodostua höyryä. Höyry ei ole terveydelle
vaarallista, mutta se voi vaikuttaa ruoan makuun. Suosittelemme sen takia, että kuumennat
grilliä suurimmalla lämpötila-asetuksella ja ilman
elintarvikkeita 15 minuutin ajan ennen
ensimmäistä ruoanvalmistusta.
Kontaktigrillissä paistaminen
Laitteessa on kuvasymbolit tärkeimmille toiminnoille,
jotka laitteella voidaan suorittaa kontaktiasennossa.
Kypsennysajat määräytyvät yleensä grillattavan
tuotteen painon ja koon sekä yksilöllisten tottumusten mukaisesti. Annetut arvot ovat ohjearvoja ja
perustuvat 100 g:n määrään
Symbolien merkitykset ovat seuraavanlaiset:
Grillaus- tai kuorrutusaika
1. Avaa grillin kansi. Vedä kahvan lukko alas wja
avaa kansi vasteeseen saakka nostamatta vastetta.
Poista tarvittaessa pöly grillilevyiltä
liinalla.
2. Voitele levyt
3. Sulje grillin kansi. Laite on kiinni, kun kahvan
lukko
w
4. Työnnä virtapistoke pistorasiaan ja aseta lämpötilasäädin
Laite alkaa kuumeta ja merkkivalo
5. Merkkivalo sammuu muutaman minuutin kuluttua
. Grilli on silloin saavuttanut asetetun
q
lämpötilan ja on käyttövalmis.
kevyesti kasvirasvalla tai voilla.
i
napsahtaa.
haluttuun lämpötilaan.
r
i
q
kuivalla
syttyy.
Lämpötilan säätäminen
Lämpötilansäädin rvoidaan asettaa seuraaviin
asentoihin:
• pois päältä
I sulatus
II Lämmittäminen
III keskinopea grillaus
M nopea grillaus
asetettava lämpötila-aste
Sulattaminen
Lämmittäminen
Hampurilainen / sämpylä
Vihannekset
Katkaravut
Kala
Paahtoleipä ym.
Lihavartaat
Makkarat
Lihapalat (leikkeet, pihvit)
Kana / kalkkuna
Levyjen säätäminen
Voit käyttää levyjen eri asentoja halutusta ruoanvalmistustavasta riippuen.
Grilliritilä / levyt kiinni toisissaan
- 12 -
Nopeaan grillaukseen, jossa ruoan molemmat
puolet grillataan samanaikaisesti. Sopii erityisesti lihan grillaukseen, joka vaatii nopean paiston
korkeassa lämpötilassa (esim. pihvit, fileet,
kyljykset, makkarat ja vihannekset).
1. Avaa grillin kansi vasteeseen saakka nostamatta
vastetta.
2. Aseta öljynkeräysvati
alle.
3. Aseta grillattava elintarvike alemmalle
grillilevylle
4. Sulje kansi. Paina samalla hieman kantta, jolloin
molempien levyjen välinen etäisyys säätyy automaattisesti grillattavan elintarvikkeen paksuuden
mukaan.
i
.
rasvanpoistonokan
o
y
Erityisen rasvaisilla elintarvikkeilla rasvaa voi
valua kantta avattaessa ylempää grillilevyä
pitkin alas ja pudota asetuspinnalle!
i
Grillaus / levyt auki 180°
Hitaampaan grillaukseen, jossa ruoka valmistetaan grillaamalla hitaammin ja tasaisemmin.
Sopii erityisesti hyvin nestepitoisten vihannesten
valmistukseen, koska neste haihtuu matalassa tai
keskitason lämpötilassa.
Voit käyttää tätä levyasentoa myös silloin, kun
haluat valmistaa suuria määriä ruokaa tai yhtä
aikaa vihanneksia ja lihaa.
Esimerkki: Paprika
Poista paprikan kanta ja siemenet. Paloittele paprika
senttimetrin levyisiksi suikaleiksi. Asettele paprikansuikaleet grillausritilälle
”M” noin 15 minuutin ajan, kunnes suikaleiden pinnalle muodostuu kuplia.
ja grillaa lämpötila-asteella
i
1. Avaa grillin kansi pystysuoraan asentoon, nosta
se vasteeseen saakka, ja käännä kantta vielä,
kunnes se on vaakasuorassa asennossa.
2. Aseta kaksi öljynkeräysvatia
rasvanpoistonokkien yalle.
3. Jaa grillattavat elintarvikkeet molemmille
grillilevyille
i
.
grillilevyjen
o
i
Uunitoiminto / levyt päällekkäin Etäisyys n. 7 cm
Arkojen ruokien valmistukseen, joita ei paiston
aikana saa kääntää tai puristaa yhteen.
Esimerkki: Leikkeen kuorrutus
Nuiji leike litteäksi, lisää suola ja pippuri. Aseta leike
grillausritilälle ja grillaa tasaisesti molemmilta puolilta.
Päällystä leike lopuksi sulatejuustolla ja kuorruta
uunitoiminnolla lämpötila-asteella ”M” noin
15 minuutin ajan.
1. Avaa grillin kansi vasteeseen saakka nostamatta
vastetta.
2. Aseta öljynkeräysvati
alle.
3. Aseta grillattava elintarvike alemmalle
grillilevylle
4. Nosta kansi vasteeseen saakka ja käännä sitä
eteenpäin, kunnes se on alemman grillilevyn
kanssa samalla tasolla.
i
.
rasvanpoistonokan
o
y
i
- 13 -

Paistamisen jälkeen
• Aseta lämpötilansäädin rasentoon “•”.
• Vedä pistoke irti pistorasiasta.
• Ota grillattu elintarvike grillilevyltä
tai muulla sopivalla ei-metallisella välineellä.
puulastalla
i
Reseptiehdotuksia
(kontaktiasento)
Grillausaika- ja lämpötasotiedot voivat vaihdella
elintarvikkeiden ominaisuuksien ja henkilökohtaisen maun mukaan.
Mex-Tex –hampurilainen (neljälle
henkilölle)
900 g naudanjauhelihaa
6 rkl barbecuekastiketta
6 rkl hienoksi silputtua sipulia
3 rkl tuoretta salsaa tai valmissalsaa
1/2 tl chilijauhetta
4 isoa hampurilaissämpylää
1. Sekoita jauheliha, sipuli, salsa, chilijauhe ja barbecuekastike huolellisesti suuressa kulhossa.
Muotoile jauhelihaseos neljäksi yhtä suureksi,
noin 2 cm paksuksi hampurilaispihviksi.
2. Lämmitä laite (lämpötaso III – M).
3. Grillaa pihvejä 8 - 10 minuuttia esilämmitetyssä
grillissä kontaktiasennossa. Laita pihvit lisäkkeiden ja haluamiesi mausteiden kera sämpylöihin
ja tarjoile.
Kalkkunarullat serranokinkun kera
(neljälle henkilölle)
8 pientä ja ohutta kalkkunaleikettä (50 g/kpl)
Suolaa
Pippuria
2 tl sinappia
8 ohutta viipaletta serranokinkkua
8 kuivattua pehmeää aprikoosia
1 rkl oliiviöljyä
8 käärylepiikkiä
1. Nuiji leike litteäksi, lisää suola ja pippuri. Päällystä toinen puoli sinapilla. Halkaise kinkkuviipaleet. Päällystä leikkeen sinapilla valeltu puoli
kinkulla ja aprikoosilla.
2. Lämmitä laite (lämpötaso M).
3. Kierrä leike rullalle ja kiinnitä kääryleneulalla. Sivele rulla öljyllä ja grillaa n. 6 minuuttia lämpötasolla M.
Tonnikalaa ja appelsiiniviipaleita
(neljälle henkilölle)
4 tuoretta tonnikalapihviä (170 g/kpl)
1 appelsiini
1 rkl hienoksi silputtua persiljaa
Suolaa
Pippuria
1. Kuori appelsiini ja paloittele noin 5 mm:n
paksuisiksi viipaleiksi.
2. Asettele tonnikalapihvit esilämmitettyyn grilliin
(lämpötaso III – M), ripottele pihvien päälle persilja ja mausta suolalla ja pippurilla. Asettele appelsiininviipaleet tonnikalapihvien päälle ja grillaa noin 6-8 min.
3. Poista grillatut appelsiininviipaleet ja tarjoile
tonnikalapihvit.
- 14 -

Häränpihvi kevätsipuliyrttikastikkeella
(neljälle henkilölle)
500 g vähärasvaista häränpihviä
(125 g/kpl)
120 g margariinia
1 tl worchestershirekastiketta
1 hienoksi silputtu valkosipulinkynsi
4 rkl hienoksi silputtua persiljaa
4 hienoksi silputtua kevätsipulia
1. Sekoita margariini ja worchestershirekastike pienessä kulhossa. Sekoita valkosipuli, persilja ja
kevätsipuli keskenään.
2. Lämmitä laite (lämpötaso M).
3. Grillaa pihviä 3 min lämpötasolla M, sivele sitten kevätsipuli-yrttikastikkeella ja kypsennä vielä
4 min lämpötasolla I. Kerää valuva yrttikastike
öljynkeräysvatiin
4. Anna kypsän pihvin vetäytyä hetken aikaa ja
leikkaa poikkisyin ohuiksi viipaleiksi. Aseta liha
esilämmitetylle tarjoiluvadille ja kaada sulanut
yrttikastike öljynkeräysvadista
päälle.
o
.
lihaviipaleiden
o
Puhdistaminen ja huoltaminen
Loukkaantumisvaara:
Irrota virtapistoke ja odota, kunnes laite on jäähtynyt
ennen sen puhdistamista. Älä puhdista laitetta juoksevan veden alla äläkä upota laitetta veteen.
• Huuhtele grillilevyt
traalilla pesuaineella. Älä käytä puhdistukseen
voimakkaita puhdistusaineita, karkeita pesusieniä tai teräviä esineitä, jotta grillin tarttumaton
pinnoite ei vahingoitu.
• Jos levyillä on paksu kiinnipalanut kerros, pehmitä se asettamalla levyjen päälle märkä tiskirätti.
Grillauslevyt
neessa.
• Pese öljynkeruuastiat okuumalla vedellä ja neutraalilla astianpesuaineella. Älä käytä puhdistukseen vahvoja puhdistusaineita, karkeita sieniä tai
teräviä esineitä, jotta pinta ei vaurioitu.
Laitteen ulkopinnat puhdistetaan kostella liinalla.
Varmista ennen seuraavaa käyttökertaa, että laitteen kaikki osat ovat kuivia.
i
kuumalla vedellä ja neu-
i
voi pestä myös astianpesuko-
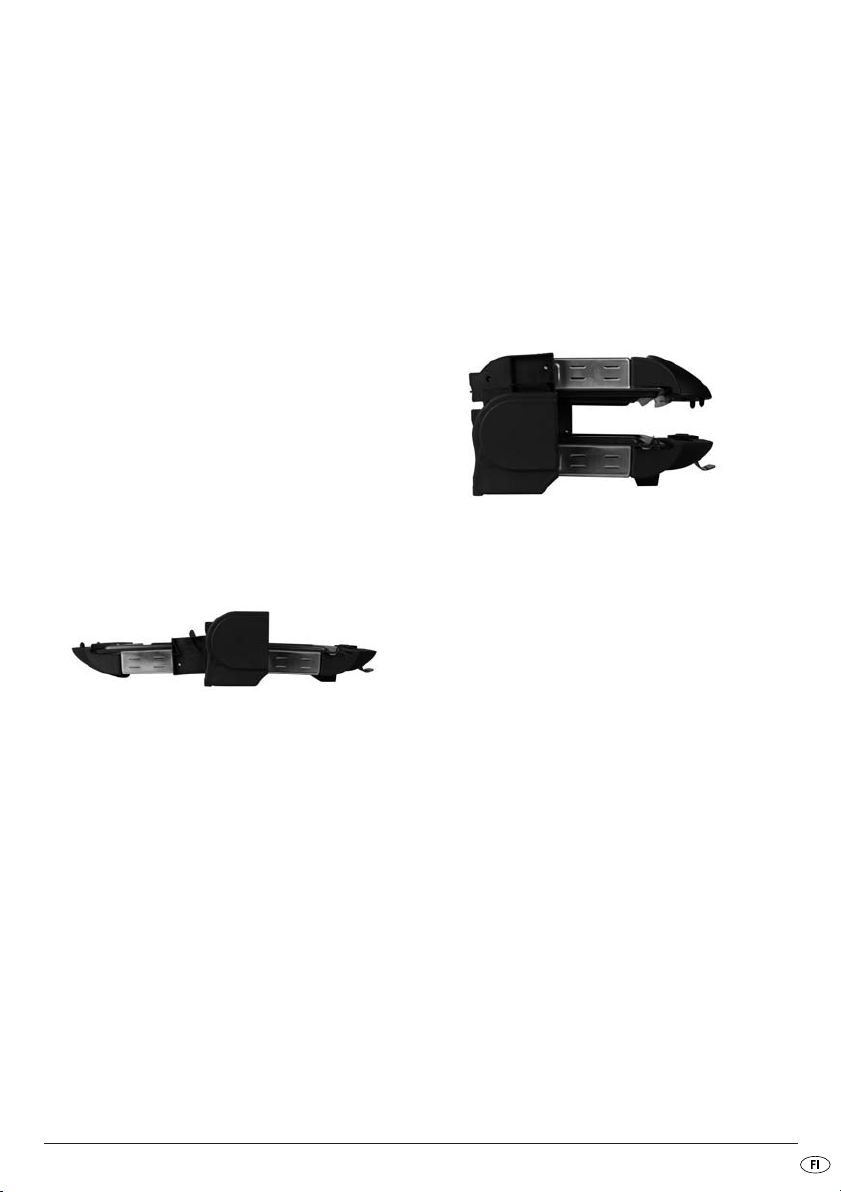
Säilyttäminen
Voit säilyttää grilliä vaaka- tai pystyasennossa.
Laitteen kotelon alapuolella on virtajohdon kelauslaite, jolla virtajohto voidaan kelata, kun laitetta ei
enää käytetä. Näin vältytään siltä, että virtajohto
jää puristuksiin tai likaantuu, eikä se jää roikkumaan
aiheuttaen näin vaaratilanteita.
Voit puhdistaa grillilevyt
laitteesta.
• Paina levyjen kiinnitysjousia thieman irrottaaksesi grillilevyt
i
helposti poistamalla ne
i
.
- 15 -

Hävittäminen
Älä missään tapauksessa heitä laitetta
tavallisen talousjätteen sekaan. Tämä
tuote on yhdenmukainen EU-direktiivin
2002/96/EC kanssa.
Anna laite hyväksytyn jätehuoltoyrityksen tai
kunnallisen jätelaitoksen hävitettäväksi.
Noudata voimassa olevia määräyksiä.
Epäselvissä tilanteissa ota yhteyttä paikalliseen
jätehuoltoviranomaiseen.
Hävitä kaikki pakkausmateriaalit
ympäristöystävällisesti.
Takuu & huolto
Laitteen takuu on 3 vuotta ostopäivästä. Laite on
valmistettu huolellisesti ja tarkistettu tarkasti ennen
toimitusta. Säilytä ostokuitti todisteeksi takuun voimassaolosta.
Ota takuutapauksessa puhelimitse yhteyttä huoltopisteeseesi. Vain näin voidaan taata tuotteesi maksuton lähettäminen huoltoon.
Takuu koskee ainoastaan materiaali- ja valmistusvirheitä, ei kuitenkaan kuljetusvaurioita, kuluvia osia tai
herkästi vaurioituvien osien, esim. kytkinten tai akkujen vaurioita.
Tuote on tarkoitettu ainoastaan yksityiseen, ei kaupalliseen käyttöön.
Väärä tai asiaton käyttö, väkivallan käyttö ja muiden kuin valtuutetun huoltopisteen suorittamat korjaukset aiheuttavat takuun raukeamisen. Tämä takuu
ei rajoita kuluttajan lakisääteisiä oikeuksia.
Takuukorjaus ei pidennä takuuaikaa. Tämä koskee
myös vaihdettuja ja korjattuja osia. Mahdollisista jo
ostettaessa olemassa olevista vahingoista ja puutteista on ilmoitettava välittömästi pakkauksesta purkamisen jälkeen, kuitenkin viimeistään kaksi päivää
ostopäiväyksen jälkeen. Takuuajan jälkeen suoritetut
korjaukset ovat maksullisia.
Kompernass Service Suomi
Tel.: 010 30 935 80
(Soittamisen hinta lankaliittymästä: 8,21 snt/puh + 5,9 snt/min /
Matkapuhelimesta: 8,21 snt/puh + 16,90 snt/min)
e-mail: support.fi@kompernass.com
Maahantuoja
KOMPERNASS GMBH
BURGSTRASSE 21
44867 BOCHUM, GERMANY
www.kompernass.com
- 16 -

Innehållsförteckning Sidan
Föreskriven användning 18
Leveransen innehåller 18
Tekniska data 18
För din egen säkerhet 18
Produktbeskrivning 19
Innan produkten används för första gången 19
Använda elgrillen 20
Temperaturinställning.....................................................................................................................20
Lägen för plattorna ........................................................................................................................20
Grillning/ihopslagna plattor.........................................................................................................20
Barbecue/öppna plattor 180° ...................................................................................................21
Ugnsfunktion/parallella plattor med ca 7 cm avstånd..............................................................21
När du har grillat färdigt ..............................................................................................................22
Receptförslag (nedfällt lock) 22
Mex-Tex-burgare (4 portioner) .....................................................................................................22
Kycklingrullader med Serranoskinka (4 portioner).....................................................................22
Tonfisk med apelsinskivor (4 portioner).......................................................................................22
Rumpstek med sås på salladslök och kryddor (4 portioner).....................................................23
Rengöring och underhåll 23
Förvaring 23
Kassering 24
Garanti & Service 24
Importör 24
Spara den här anvisningen för senare frågor – och överlämna den tillsammans med apparaten om du
överlåter den till någon annan person!
- 17 -

Kontaktgrill
Föreskriven användning
Den här elgrillen är avsedd för
• att grilla livsmedel som t ex kött, fisk, grönsaker,
varma smörgåsar, mm
• i de mängder som förekommer i ett vanligt
hushåll och
• endast användas för privat bruk.
Leveransen innehåller
en elgrill med två plattor
två uppsamlingskärl för olja och fett
en bruksanvisning
Tekniska data
Tillåten märkspänning: 220-240V, ~50 Hz
Effektförbrukning: 2000 W
För din egen säkerhet
• Läs noggrant igenom den här bruksanvisningen
innan du använder elgrillen första gången.
• Förvara bruksanvisningen på lämpligt ställe i
närheten av produkten. Bruksanvisningen ska följa med produkten om produkten byter ägare.
• Använd elgrillen endast till det den är avsedd för
och i enlighet med den här bruksanvisningen.
Så undviker du elektriska stötar
• Elgrillen får endast användas i torra utrymmen
inomhus. Skydda produkten mot vattenstänk,
även när den är avstängd.
• Produkten får endast användas om nätspänningen i vägguttaget är densamma som produktens
märkspänning (220-240V vid 50 Hz).
• Anslut inte produkten till ett grenuttag som flera
elektriska enheter samtidigt är anslutna till.
Strömkretsen kan överbelastas.
• Stäng alltid av produkten när du har använt den.
Dra även ut kontakten.
• Var försiktig så att vatten inte hamnar inuti produkten när du rengör den. Rengör inte produkten under rinnande vatten.
Produkten får heller inte sänkas ned i vatten.
• Skydda sladden mot skador. Se till att den inte
kläms och håll den borta från heta föremål. Låt
inte sladden hänga löst från bordet eller arbetsbänken.
• Höljet får inte öppnas.
• Låt genast en auktoriserad yrkesman eller kundtjänst byta ut skadade elkablar eller kontakter för
att inte utsätta dig för onödiga risker.
• Reparation får endast utföras i av tillverkaren
auktoriserad specialverkstad eller av erfaren och
utbildad personal.
Så undviker du bränder och personskador
• Ställ elgrillen på ett plant, halkfritt och värmebeständigt underlag och inte ovanpå eller nära andra enheter som kan utstråla stark värme (t.ex.
brödrost, spis).
- 18 -

• Använd inte produkten i närheten av lättantändliga föremål, t.ex. gardiner och hushållspappersrullar.
Även när produkten används enligt anvisningarna blir enskilda delar mycket heta (bl.a. det
övre och nedre platthöljet). Vidrör inte dessa
ytor förrän elgrillen är avstängd och ytorna har
svalnat.
Akta! Het yta!
Så undviker du skador på produkten
• Använd endast redskap av plast eller trä eller
annat lämpligt icke-metalliskt föremål när du
hanterar mat på elgrillen, så skadas inte non
stick-beläggningen.
• Av samma orsak får inga starka rengöringsmedel eller vassa föremål användas vid rengöring.
Produktbeskrivning
• Linda alltid av hela sladden så undviker du farlig
överhettning.
• Elgrillen kan öppnas och stängas utan risk med
det värmeisolerade handtaget när den är igång.
• Låt aldrig personer (inklusive barn) som av psykiska, sensoriska eller mentala skäl eller på grund
av bristande erfarenhet och kunskap inte kan använda apparater på ett säkert sätt använda den
här apparaten utan att de först övervakats eller
instruerats av någon ansvarig person.
• Förklara för barnen hur apparaten fungerar och
vilka risker som är förbundna med den så att de
inte leker med apparaten.
• Vänta tills produkten är helt kall innan du rengör
och ställer undan den efter användning.
• Använd inte någon extern timer eller separat
fjärrkontroll för att driva apparaten.
• Använd inte kol eller likande bränsle till den här
apparaten!
• Lämna aldrig apparaten utan uppsikt när den
används.
Kontrollampa
q
Handtagsspärr
w
Handtag
e
Temperaturreglage
r
Plattlägeslås
t
Avrinningshål
y
Fastsättning av plattorna
u
Grillplattor
i
Uppsamlingskärl för olja och fett
o
Innan produkten används för
första gången
1. Ta ut elgrillen ur förpackningen. Ta bort allt
emballage, t.ex. plast och sladdhållare.
2. Kontrollera att leveransen är komplett och att det
inte finns några synliga skador på elgrillen innan
du börjar använda den.
3. Läs noggrant igenom bruksanvisningen.
4. Ställ produkten på plats enligt säkerhetsanvisningarna.
5. Rengör elgrillen med en fuktig trasa enligt
beskrivningen under Rengöring och underhåll.
- 19 -

När elgrillen används för första gången kan
ånga uppstå. Ångan är inte hälsofarlig men den
kan påverka smaken på det som grillas. Vi rekommenderar därför att du ställer in temperaturen på max. och låter elgrillen stå på i 15 minuter innan du lägger något på grillen första
gången den används.
Använda elgrillen
På grillen finns piktogram som visar de viktigaste tillredningsmetoderna som kan användas med locket
nedfällt. Stektiderna baseras generellt på vikt
och storlek på det som ska grillas och på individuell
smak. De angivna värdena är riktvärden som alltid
baseras på 100 g.
De enskilda symbolerna har följande betydelse:
Grill- resp. stektid
1. Öppna locket på elgrillen. Dra handtagsspärren
nedåt och slå upp locket tills det tar emot
w
utan att lyfta locket. Ta bort eventuellt damm från
grillplattorna
2. Smörj in grillplattorna
margarin.
3. Stäng locket. Grillen är stängd när du hör att
handtagsspärren
4. Sätt in kontakten i ett vägguttag och ställ tempe-
raturreglaget
Grillen börjar värmas upp och kontrollampan
tänds.
5. Efter några minuter slocknar kontrollampan
Elgrillen har nu angiven temperatur och är färdig
att användas.
med en torr trasa.
i
med matolja eller
i
går i lås.
w
på önskad temperatur.
r
q
Temperaturinställning
Du kan välja följande lägen på
temperaturreglaget
• avstängd
I upptining
II Uppvärmning
III medelsnabb tillagning
M snabb tillagning
r
:
Temperatur
Upptining
Uppvärmning
Hamburgare/Sandwich
Grönsaker
Räkor
Fisk
q
.
Toast o dyl.
Grillspett
Små korvar
Kotletter, schnitzlar, o dyl.
Kyckling
Lägen för plattorna
Du kan ändra plattornas läge alltefter
tillagningssätt.
Grillning/ihopslagna plattor
- 20 -
För en mycket snabb stekning på båda sidor
samtidigt. Idealiskt vid tillagning av mat som kräver en snabb stekyta i hög temperatur, t.ex. skinkstek, filéskivor, kotletter, korv och grönsaker.
1. Öppna elgrillens lock tills det tar emot utan att
lyfta locket.
2. Sätt ett av uppsamlingskärlen för olja och fett
under avrinningshålet y.
3. Lägg det som ska grillas på den nedre grillplat-
tan
.
i
4. Stäng locket. Tryck ned locket lätt så att avstån-
det mellan plattorna justeras automatiskt efter
storleken på det som grillas.
o
När man tillagar extra fet mat kan det hända att
det rinner ner fett på den övre grillplattan
som sedan droppar ner på avställningsytan när
man öppnar locket!
i
Barbecue/öppna plattor 180°
För större matvaror som kräver en långsam och
jämn tillagning. Idealiskt vid tillagning av grönsaker som innehåller mycket vatten eftersom
vattnet tillåts avdunsta vid låga eller medelhöga
temperaturer.
Läget kan också användas när en större mängd
ska tillagas eller när grönsakerna ska tillagas
samtidigt som köttet.
Exempel: Paprika
Ta bort stjälkfäste och kärnor ur paprikan. Skär paprikan i centimeterbreda strimlor. Lägg paprikastrimlorna på grillgallret
på temperatur “M” tills det bildas blåsor på skalet.
och grilla dem i c:a 15 minuter
i
1. Öppna elgrillens lock tills det står lodrätt, lyft det
tills det tar emot och öppna det ytterligare tills
det ligger vågrätt.
2. Ställ båda uppsamlingskärlen för olja och fett
under grillplattornas iavrinningshål y.
3. Fördela matvarorna på de båda grillplattorna
o
i
Ugnsfunktion/parallella plattor med
ca 7 cm avstånd
För tillagning av ömtåliga matvaror som inte får
tryckas ihop eller vändas vid stekning.
Exempel: Gratinerad schnitzel
Banka schnitzeln platt, salta och peppra. Lägg
schnitzeln på grillgallret och stek den jämt på båda
sidor. Lägg sedan smältost på schnitzeln och gratinera i c:a 15 minuter med ugnsfunktionen på
temperatur “M”.
1. Öppna elgrillens lock tills det tar emot utan att
lyfta locket.
2. Sätt ett av uppsamlingskärlen för olja och fett
under avrinningshålet y.
3. Lägg det som ska grillas på den nedre
grillplattan
4. Lyft locket tills det tar emot och vrid det framåt
tills det ligger parallellt med den nedre
grillplattan
i
i
.
.
o
.
- 21 -

När du har grillat färdigt
• Ställ temperaturreglaget rpå “•”.
• Dra ut kontakten ur uttaget.
• Ta den grillade maten från grillplattan
ett träredskap eller annat lämpligt icke-metalliskt
föremål.
i
med
Receptförslag (nedfällt lock)
De angivna grilltiderna och värmelägena kan
variera beroende på livsmedlets beskaffenhet
och personlig smak.
Mex-Tex-burgare (4 portioner)
900 g nötfärs
6 msk barbequesås
6 msk finhackad lök
3 msk hemlagad eller färdigköpt salsa
1/2 tsk chilipulver
4 stora hamburgerbröd
1. Blanda ihop nötfärs, lök, salsa, barbequesås och
chilipulver ordentligt i en stor skål. Forma massan
till fyra lika stora, högst 2 cm tjocka burgare.
2. Värm upp apparaten (Värmeläge III - M).
3. Grilla burgarna 8 - 10 minuter på den uppvärmda grillen med locket nere Lägg sedan burgarna
i bröden och servera med de tillbehör och kryddor du vill ha.
Kycklingrullader med Serranoskinka
(4 portioner)
8 st. små, tunna kycklingschnitzlar (50 g vardera)
Salt
Peppar
2 tsk senap
8 tunna skivor Serranoskinka
8 torkade, mjuka aprikoser
1 msk olivolja
8 steknålar för att hålla ihop
rulladerna
1. Banka schnitzlarna platta och stryk
senap på ena sidan. Dela skinkskivorna på mitten. Lägg skinka och aprikoser på den sida som
bestrukits med senap.
2. Värm upp apparaten (Värmeläge M).
3. Rulla ihop schnitzlarna och stick in steknålar i
dem. Pensla rulladerna med olja och grilla i ca
6 min. på läge M.
Tonfisk med apelsinskivor
(4 portioner)
4 skivor färsk tonfiskkotlett
1 apelsin
1 msk finhackad persilja
Salt
Peppar
1. Skala apelsinen och skär den i c:a 5 mm tjocka
skivor.
2. Lägg tonfiskkotletterna på den förvärmda grillen
(Värmeläge III - M), strö över persilja och salta
och peppra. Lägg apelsinskivor på fisken och
grilla i c:a 6-8 minuter.
3. Ta bort apelsinskivorna innan du serverar
tonfisken.
- 22 -

Rumpstek med sås på salladslök och
kryddor (4 portioner)
500 g mager rumpstek (125 g vardera)
120 g margarin
1 tsk worcestershiresås
1 finhackad vitlöksklyfta
4 msk hackad persilja
4 finhackade salladslökar
• Diska grillplattorna
tralt diskmedel. Använd inte starka rengöringsmedel, grova svampar eller vassa föremål som
kan skada non stick-beläggningen.
• Torka av eventuella fastbrända rester med en
våt disktrasa.
Grillplattorna
i varmt vatten och ett neu-
i
kan också diskas i maskin
i
1. Blanda ihop margarin och worcester-shiresås i
en liten skål. Tillsätt vitlök, persilja och salladslök.
2. Värm upp apparaten (Värmeläge M).
3. Grilla biffen i 3 min. på läge M, stryk sedan på
såsen med salladslök och örter och efterstek i
ytterligare 4 min. på läge I. Samla upp den sås
som rinner av i uppsamlingskärlet
4. Låt den färdiggrillade steken vila en stund och
skär sedan upp den i tunna skivor mot köttets
fibrer. Lägg upp köttskivorna på en förvärmd
serveringstallrik och häll över kryddsåsen som
runnit ner i uppsamlingskärlet
o
.
o
.
Rengöring och underhåll
Skaderisk!
Dra ur kontakten före rengöringen och vänta tills
grillen är helt kall. Rengör inte produkten under rinnande vatten och sänk heller inte ned den i vatten.
Du kan ta ut grillplattorna
lättare att rengöra dem.
ur grillen så går det
i
• Diska fettuppsamlingsskålen
och ett neutralt diskmedel. Använd inte starka
rengöringsmedel, slipande kökssvampar eller
spetsiga föremål, då kan apparatens yta skadas.
Rengör grillens utsida med en fuktig trasa.
Se till att alla delar är helt torra innan elgrillen
används igen.
med hett vatten
o
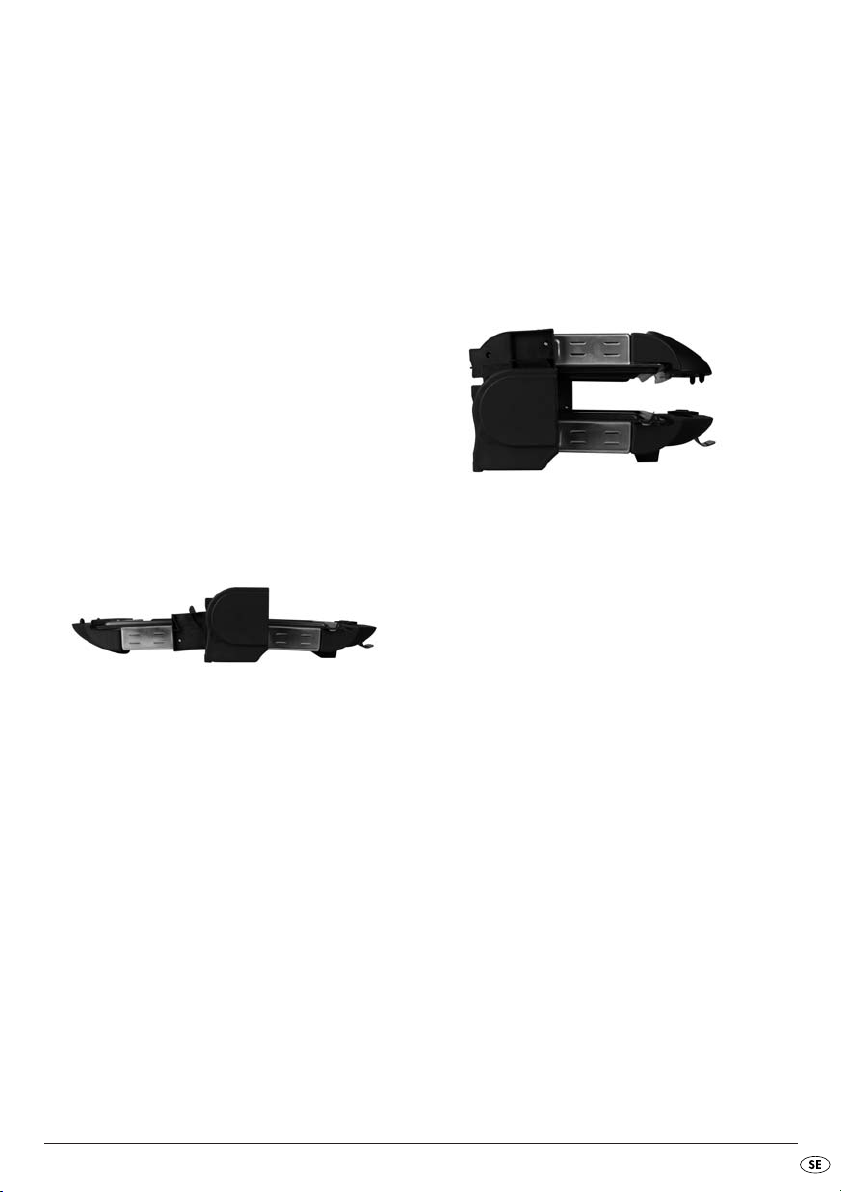
Förvaring
Elgrillen kan förvaras liggande eller stående.
På produktens undersida finns en inbyggd enhet där
sladden kan lindas upp när den inte används. På så
sätt förhindrar du att sladden kläms, blir smutsig eller utgör en olycksrisk genom att hänga löst.
• Tryck tillbaka plattlägeslåset något toch ta ur
grillplattorna
i
.
- 23 -

Kassering
Apparaten får absolut inte kastas
bland de vanliga hushållssoporna.
Denna produkt uppfyller kraven i
EU-direktiv 2002/96/EC.
Lämna in den till ett företag som har tillstånd att ta
hand om kasserade apparater av den här typen
eller till rätt återvinningsstation på din kommuns
avfallsanläggning.
Följ gällande föreskrifter. Om du är tveksam ska du
fråga den lokala avfallshanteringsmyndigheten.
Lämna in allt förpackningsmaterial till
miljövänlig återvinning.
Garanti & Service
För den här apparaten lämnar vi tre års garanti från
och med inköpsdatum. Den här apparaten har tillverkats med omsorg och genomgått en noggrann
kontroll innan leveransen. Var god bevara kassakvittot som köpbevis. Vi ber dig att kontakta ditt serviceställe per telefon vid garantifall. Endast då kan produkten skickas in fraktfritt.
Garantin gäller bara för bara för material- eller fabrikationsfel, den täcker inte transportskador, förslitningsdelar eller skador på ömtåliga delar som t ex
brytare och batterier. Produkten är endast avsedd
för privat bruk och får inte användas yrkesmässigt.
Vid missbruk och felaktig behandling, användande
av våld och vid ingrepp som inte gjorts av vår auktoriserade servicefilial upphör garantin att gälla.
Den lagstadgade garantin begränsas inte av denna
garanti.
Garantitiden förlängs inte för att man utnyttjar garantiförmånerna. Det gäller även för utbytta eller reparerade delar. Eventuella skador och brister som
upptäcks redan vid köpet måste anmälas omedelbart efter uppackningen, dock senast två dagar efter inköpsdatum. När garantitiden är slut måste man
betala för eventuella reparationer.
Kompernass Service Sverige
Tel.: 0770 93 00 35
e-mail: support.sv@kompernass.com
Kompernass Service Suomi
Tel.: 010 30 935 80
(Soittamisen hinta lankaliittymästä: 8,21 snt/puh + 5,9 snt/min /
Matkapuhelimesta: 8,21 snt/puh + 16,90 snt/min)
e-mail: support.fi@kompernass.com
Importör
KOMPERNASS GMBH
BURGSTRASSE 21
44867 BOCHUM, GERMANY
www.kompernass.com
- 24 -

Indholdsfortegnelse Side
Anvendelsesformål 26
Medfølger ved levering 26
Tekniske data 26
For din sikkerheds skyld 26
Beskrivelse af enheden 27
Før grillen bruges første gang 27
Stegning med kontaktgrillen 28
Temperaturregulator / tilberedningsmåder .................................................................................28
Pladepositioner...............................................................................................................................28
Grillrist / pladeposition med berøring.........................................................................................28
Barbecue / pladeposition 180° åben ......................................................................................29
Ovnfunktion / pladeposition parallel, afstand ca. 7 cm ...........................................................29
Efter stegning..................................................................................................................................30
Opskriftsforslag (position med berøring) 30
Mex-Tex-burger (4 personer)........................................................................................................30
Kalkunroulader med Serrano-skinke (4 personer)......................................................................30
Tun med appelsinskiver (4 personer)...........................................................................................30
Rumpsteak og dertil sovs med forårsløg og urter (4 personer) ................................................31
Rengøring og vedligeholdelse 31
Opbevaring 31
Bortskaffelse 32
Garanti & Service 32
Importør 32
Læs betjeningsvejledningen igennem før første brug, og opbevar den til senere brug. Lad vejledningen følge
med, hvis apparatet gives videre til andre."
- 25 -

Kontaktgrill
Anvendelsesformål
Denne kontaktgrill er beregnet til
• grillning af mad som f.eks. kød, fisk, grøntsager,
sandwiches etc.
• i mængder til almindelig husholdning
• i den private husholdning.
Medfølger ved levering
Kontaktgrill med to grillplader
2 skyopsamlingsbakker
Betjeningsvejledning
Sådan undgår du fare på grund af
elektrisk stød
• Kontaktgrillen må kun anvendes indendørs i tørre
rum. Hold grillen på afstand af vandsprøjt –
også når den er slukket.
• Brug kun grillen, hvis den lokale netspænding
stemmer overens med dens nominelle spænding
(220-240V, 50 Hz).
• Slut ikke grillen til en stikdåse med flere stik, hvor
der samtidig er tilsluttet andre el-apparater. Dette
kan medføre overbelastning af strømkredsen.
• Sluk grillen, hver gang du er færdig med at bruge den. Dette gør du ved at trække el-stikket ud.
• Sørg under rengøring for, at der ikke kommer
vand ind i grillen. Rengør aldrig grillen under
rindende vand.
Kom aldrig grillen ned i vand.
Tekniske data
Nominel spænding: 220-240V,~50 Hz
Effektforbrug: 2000 W
For din sikkerheds skyld
• Læs denne betjeningsvejledning grundigt, før du
bruger kontaktgrillen første gang.
• Gem betjeningsvejledningen et egnet sted i
nærheden af grillen. Giv betjeningsvejledningen
videre til modtageren, hvis du videregiver kontaktgrillen.
• Brug kun kontaktgrillen til det beregnede formål
og i overensstemmelse med denne betjeningsvejledning.
• Beskyt el-ledningen mod beskadigelse. Undgå at
den kommer i klemme, og hold den på afstand
af varme genstande. Lad ikke el-ledningen ligge
løst på bordet eller arbejdspladen.
• Åbn ikke grillens kabinet.
• Få omgående beskadigede el-stik eller el-ledninger udskiftet af autoriserede fagfolk eller af
kundenservicen, så du undgår farer.
• Reparationer må kun udføres af personer, der er
autoriseret af producenten, eller af erfarent
fagpersonale.
Sådan undgår du fare for brand og
personskade
• Stil kontaktgrillen på et jævnt, skridsikkert og varmebestandigt underlag og ikke på eller ved siden af andre apparater, som udstråler meget
varme (f.eks. brødrister, komfur).
- 26 -

• Brug ikke grillen i nærheden af letantændelige
genstande, f.eks. under gardiner eller ved siden
af køkkenruller.
Enkelte dele af grillen bliver meget varme,
også ved forskriftsmæssige anvendelse (f.eks.
øverste og nederste plade på kabinettet). Undgå at berøre disse overflader, indtil de er kølet
helt af, efter at grillen er slukket.
Obs! Varm overflade!
Sådan undgår du beskadigelse af enheden
• Tag kun maden op med en plast- eller træspatel
eller en anden egnet genstand, der ikke er lavet
af metal, så du ikke ødelægger kontaktgrillens
slip-let-belægning.
• Brug – af samme grund – ikke kraftige rengøringsmidler og spidse genstande.
Beskrivelse af enheden
• Vikl altid el-ledningen helt ud, så du undgår
farlig overophedning.
• Under brugen kan kontaktgrillen uden fare
åbnes og lukkes med det varmeisolerede greb.
• Afspilleren må ikke bruges af personer (inklusive
børn), hvis fysiske, sensoriske eller mentale evner
eller mangel på erfaring og viden forhindrer en
sikker brug af afspilleren, medmindre de er
instrueret i brug og overvåges af en ansvarlig
person.
• Forklar børnene afspilleren og risikoen ved den,
så de ikke leger med afspilleren.
• Lad grillen køle helt af, før du gør den ren og
stiller den væk.
• Brug ikke et eksternt køkkenur eller et separat
fjernbetjeningssystem til at betjene grillen med.
• Brug ikke kul eller lignende brændstoffer til grillen!
• Lad aldrig grillen være uden opsyn, når den er i
brug.
Kontrollampe
q
Lukning på holdegrebet
w
Greb
e
Temperaturregulator
r
Pladefastgørelsesfjedre
t
Fedtudløb
y
Føring til pladefastgørelse
u
Grillplader
i
Skyopsamlingsbakke
o
Før grillen bruges første gang
1. Tag den nye kontaktgrill ud af embal-lagen.
Fjern alle ekstra transportsikringer, f.eks. folie og
ledningsholdere.
2. Kontrollér, før du tager grillen i brug, om alt er
med, og om der er synlige beskadigelser.
3. Læs denne betjeningsvejledning omhyggeligt
igennem.
4. Opstil grillen i overensstemmelse med sikkerhedsanvisningerne.
5. Rengør den nye kontaktgrill med en fugtig klud
som beskrevet under "Rengøring og vedligeholdelse".
- 27 -

Der kan opstå damp, første gang kontaktgrillen
varmes op. Denne damp er ikke sundhedsfarlig,
men kan forringe madvarernes smag. Derfor anbefaler vi, at du tænder grillen og opvarmer
den på maksimal temperaturindstilling i 15
minutter uden madvarer, før du laver mad på
den første gang.
Stegning med kontaktgrillen
På grillen er der angivet piktogrammer for de vigtigste tilberedningsmåder, som kan anvendes, når grillens plader berører hinanden. Stegetiderne retter
sig generelt efter grillmadens vægt og størrelse og
efter den individuelle smag. De angivne værdier er
vejledende, baseret på en mængde på 100 g.
De enkelte symboler har følgende betydning:
Grill- eller stegetid
1. Åbn låget på kontaktgrillen. Træk lukningen på
holdegrebet
anslaget uden at løfte i det. Tør om nødvendigt
støv af grillpladerne
2. Smør grillpladerne
smør.
3. Luk låget på kontaktgrillen. Grillen er lukket, når
lukningen på holdegrebet
indgreb.
4. Sæt el-stikket i en stikkontakt, og indstil temperaturregulatoren
Grillen begynder nu at varme, og kontrollampen
tændes.
q
5. Efter nogle minutter slukkes kontrollampen
Kontaktgrillen har nu den indstillede temperatur
og er klar til brug.
nedad, og vip låget opad indtil
w
med en tør klud.
i
med lidt planteolie eller
i
er gået hørbart i
w
på den ønskede temperatur.
r
q
.
Temperaturregulator /
tilberedningsmåder
Temperaturregulatoren rkan indstilles
på følgende positioner:
• Slukket
I Optøning
II Opvarmning
III Middel grillning
M Hurtig grillning
Temperaturtrin, som skal indstilles
Optøning
Opvarmning
Hamburgere / sandwiches
Grøntsager
Rejer
Fisk
Toast o.l.
Kød på spid
Pølser
Kødstykker (schnitzler, steaks)
Kylling / kalkun
Pladepositioner
Du kan stille pladerne i forskellige positioner, som
du kan bruge afhængigt af tilberedningsmåde.
Grillrist / pladeposition med berøring
- 28 -

Til samtidig, meget hurtig stegning af madvarerne
på begge sider. Ideel til grillning af kød, som
kræver en meget hurtig stegning ved høj temperatur - rumpsteak, filetudskæringer, koteletter,
pølser og grøntsager.
1. Åbn låget på kontaktgrillen, løft det indtil anslaget,
og åbn det videre, indtil det ligger vandret.
2. Stil de to skyopsamlingsbakker
dernes
3. Fordel grillmaden på de to grillplader
fedtudløb y.
i
under grillpla-
o
i
.
1. Åbn låget på kontaktgrillen indtil anslaget uden
at løfte det.
2. Stil en af skyopsamlingsbakkerne
fedtudløbet
3. Læg grillmaden på den underste grillplade
4. Luk låget. Tryk forsigtigt på låget, så afstanden
mellem de to plader reguleres automatisk ud fra
tykkelsen på grillmaden.
y
.
o
under
i
Ved særligt fede fødevarer kan der løbe fedt
ned på den øverste grillplade
ned på pladen, når låget åbnes!
og dryppe
i
Barbecue / pladeposition 180° åben
Til grillning af tykkere madvarer, som kræver en
langsommere og mere jævn stegning. Ideel til
tilberedning af meget vandholdige grøntsager,
fordi man i starten kan lade vandet fordampe
på lav eller middel temperatur.
Du kan også bruge denne pladeposition til at
tilberede større mængder mad eller grøntsager
samtidig med kødet.
Eksempel: Peberfrugter
Fjern stilken og kernerne fra peberfrugten. Skær
peberfrugten i strimler på en centimeters bredde.
Læg peberfrugtstrimlerne på grillpladen
i ca. 15 minutter på temperaturtrin "M", indtil der
kommer bobler i skindet.
, og grill
i
Ovnfunktion / pladeposition parallel,
afstand ca. 7 cm
.
Til tilberedning af sarte madvarer, som ikke kan
tåle at blive trykket sammen eller vendt under
stegning.
Eksempel: Gratinering af schnitzel
Bank schnitzlen flad, krydr med salt og peber. Læg
schnitzlen på grillpladen, og grill den jævnt på begge sider. Læg derefter gratineringsosten på schnitzlen, og gratinér med ovnfunktionen i ca. 15 minutter
på temperaturtrin "M".
1. Åbn låget på kontaktgrillen indtil anslaget uden
at løfte det.
2. Stil en af skyopsamlingsbakkerne
tudløbet
3. Læg grillmaden på den underste grillplade
4. Løft derefter låget indtil anslaget, og drej det
fremad, indtil det ligger parallelt med den
underste grillplade
y
.
.
i
under fed-
o
i
.
- 29 -

Efter stegning
• Stil temperaturregulatoren rpå "•".
• Træk el-stikket ud af stikkontakten.
• Tag grillmaden af grillpladen
eller et andet egnet redskab, der ikke er af metal.
med en træspatel
i
Opskriftsforslag (position med
berøring)
De angivne grilltider og varmetrin kan variere
afhængigt af de anvendte fødevarer og din personlige smag.
Mex-Tex-burger (4 personer)
900 g hakket oksekød
6 spsk. barbecuesauce
6 spsk. finthakket løg
3 spsk. frisk eller færdiglavet salsa
1/2 tsk. chilipulver
4 store hamburgerboller
1. Bland det hakkede oksekød, løg, salsa, chilipulver og barbecuesauce omhyggeligt i en stor
skål. Form blandingen til fire lige store, knap
2 cm tykke hamburgerbøffer.
2. Varm grillen op (varmetrin III - M).
3. Grill hamburgerbøfferne 8 - 10 min. på den forvarmede grill, hvor pladerne berører maden.
Server derefter hamburgerne i hamburgerbollerne sammen med tilbehør og krydderier efter
eget valg.
Kalkunroulader med Serrano-skinke
(4 personer)
8 små tynde kalkunschnitzler (50 g pr. stk.)
Salt
Peber
2 tsk. sennep
8 tynde skiver Serrano-skinke
8 tørrede bløde abrikoser
1 spsk. olivenolie
8 kødnåle
1. Bank schnitzlerne flade, krydr med salt og peber. Smør den ene side med sennep. Halvér skinkeskiverne. Læg skinke og abrikos på siden med
sennep.
2. Varm grillen op (varmetrin M).
3. Rul schnitzelkødet sammen, og fastgør med kødpinde. Rullerne pensles med olie og grilles ca. 6
min. på varmetrin M.
Tun med appelsinskiver (4 personer)
4 friske tunsteaks (170 g pr. stk.)
1 appelsin
1 spsk. finthakket persille
Salt
Peber
1. Skræl appelsinen, og skær den i ca. 5 mm tykke
skiver.
2. Læg tunsteakene på den forvarmede grill (varmetrin III - M), strø persillen over, og krydr med
salt og peber. Læg appelsinskiverne på tunsteakene, og grill i ca. 6-8 min.
3. Fjern de grillede appelsinskiver, og servér
tunsteakene.
- 30 -

Rumpsteak og dertil sovs med forårsløg
og urter (4 personer)
500 g mager rumpsteak (125 g pr. person)
120 g margarine
1 tsk. Worcestershiresauce
1 finthakket fed hvidløg
4 spsk. finthakket persille
4 finthakkede forårsløg
• Skyl derefter grillpladerne
og et neutralt opvaskemiddel. Undgå at bruge
kraftige rengørings-midler, ru svampe eller spidse
genstande til rengøringen. Så ødelægger du
ikke slip-let-belægningen.
• Ved kraftige skorper kan du lægge en våd
karklud på de fastbrændte rester for at bløde
dem op.
med varmt vand
i
1. Bland margarinen og Worcestershiresauce i en
lille skål. Tilsæt hvidløg, persille og forårsløg, og
rør rundt.
2. Varm grillen op (varmetrin M).
3. Grill steaken 3 min. på varmetrin M, hvorefter
den pensles med kryddersovs med forårsløg, og
grillningen fortsættes endnu 4 min. på varmetrin
I. Opsaml urtesovsen, som drypper ned, med
skyopsamlingsbakken
4. Lad den færdiggrillede steg hvile et kort stykke
tid, og skær den i tynde skiver på tværs af fibrene. Anret kødet på et forvarmet serveringsfad,
og hæld den smeltede urtesovs fra skyopsamlingsbakken
over det udskårne kød.
o
o
.
Rengøring og vedligeholdelse
Fare for uheld!
Træk el-stikket ud af stikkontakten før rengøring, og
vent, indtil grillen er helt afkølet. Rengør aldrig grillen under rindende vand, og kom den aldrig ned i
vand.
Grillpladerne
opvaskemaskinen!
• Skyl drypskålen
et neutralt opvaskemiddel. Brug ikke kraftige
rengøringsmidler, ridsende svampe eller spidse
genstande, så overfladen ikke beskadiges.
Det er nok at rengøre grillens udvendige flader med
en fugtig klud.
Sørg for, at alle dele er helt tørre, før du bruger
kontaktgrillen igen.
kan også rengøres i
i
til olien med varmt vand og
o
Opbevaring
Du kan opbevare kontaktgrillen liggende eller
stående.
Grillen har indbygget ledningsopvikling på undersiden af huset, hvor du kan vikle el-ledningen op, når
du ikke bruger den. Dermed undgår du, at el-ledningen bliver klemt fast, tilsmudset eller kan være til
fare, fordi den hænger løst ned.
Du kan tage grillpladerne
bliver lette at rengøre.
• Tryk pladefastgørelsesfjedrene tlidt tilbage, så
du kan tage grillpladerne
op af grillen, så de
i
ud.
i
- 31 -

Bortskaffelse
Kom under ingen omstændigheder
afspilleren i det normale husholdningsaffald. Dette produkt overholder
Europa-Parlamentets og Rådets
direktiv 2002/96/EC.
Bortskaf afspilleren hos et godkendt affaldsfirma eller på dit kommunale affaldsanlæg. Følg de aktuelt
gældende regler. Kontakt affaldsordningen, hvis du
er i tvivl.
Kompernass Service Danmark
Tel.: +45 4975 8454
Fax: +45 4975 8453
e-mail: support.dk@kompernass.com
Importør
KOMPERNASS GMBH
BURGSTRASSE 21
44867 BOCHUM, GERMANY
Aflever alle emballagematerialer på et
affaldsdepot, så miljøet skånes.
Garanti & Service
På denne donkraft får du 3 års garanti fra købsdatoen. Apparatet er produceret omhyggeligt og inden levering afprøvet samvittighedsfuldt. Opbevar
kassebonen som bevis for købet.
I garantitilfælde bedes du kontakte service-afdelingen telefonisk. På denne måde kan gratis indsendelse af varen garanteres.
Garantiydelsen gælder kun for materiale- eller fabrikationsfejl, men ikke for transportskader, sliddele eller skader på skrøbelige dele som f.eks. kontakter
eller batterier. Produktet er kun beregnet til privat og
ikke til erhvervsmæssigt brug.
Ved misbrug og uhensigtsmæssig behandling, anvendelse af vold og ved indgreb, som ikke er foretaget af vores autoriserede service-afdeling, ophører
garantien. Dine juridiske rettigheder indskrænkes
ikke ved denne garanti.
Garantiperioden forlænges ikke på grund af produktansvaret. Det gælder også for udskiftede og reparerede dele. Eventuelle skader og mangler, som
allerede findes ved køb, skal straks anmeldes efter
udpakning og senest to dage efter købsdatoen.
Når garantiperioden er udløbet, skal udgifterne til
reparationer betales normalt.
www.kompernass.com
- 32 -

ΠΠεερριιεεχχόόμμεενναα ΣΣεελλίίδδαα
Σκοπός χρήσης 34
Σύνολο αποστολής 34
Τεχνικά στοιχεία 34
Για την προσωπική σας ασφάλεια 34
Περιγραφή της συσκευής 35
Πριν την πρώτη χρήση 35
Ψήσιμο με την ψηστιέρα 36
Ρύθμιση της θεροκρασίας .............................................................................................................36
Θέσεις ψησίματος ..........................................................................................................................36
Ψηστιέρα / Πλάκες σε επαφή........................................................................................................36
Μπάρμπεκιου / Πλάκες ανοιχτές 180° .....................................................................................37
Λειτουργία φούρνου / Πλάκες παράλληλα Απόσταση περίπου 7 εκατοστά...........................37
Μετά το ψήσιμο..............................................................................................................................38
Προτάσεις συνταγών (Θέση επαφής) 38
Μπέργκερ Mex-Tex (4 άτομα) ......................................................................................................38
Ρολά γαλοπούλας με ζαμπόν σεράνο(4 άτομα) ........................................................................38
Τόνος με φέτες πορτοκαλιού (4 άτομα) ......................................................................................38
Στέικ κιλότου με φρέσκα κρεμμύδιαΣάλτσα χορταρικών (4 άτομα)...........................................39
Καθαρισμός και συντήρηση 39
Διαφύλαξη 39
Απομάκρυνση 40
Εγγύηση & Σέρβις 40
Εισαγωγέας 40
Φυλάξτε αυτή την οδηγία για ερωτήσεις που θα προκύψουν αργότερα – και σε περίπτωση παράδοσης της
συσκευής δώστε την επίσης σε αυτούς που θα την αποκτήσουν!
- 33 -

Ψηστιέρα
Σκοπός χρήσης
Αυτό το γκρίλ προβλέπεται για
• το ψήσιμο φαγητών όπως κρέας, ψάρι, λαχανικά,
σάντουιτς κλπ.
• σε οικιακές ποσότητες
• στο νοικοκυριό.
Σύνολο αποστολής
Γκριλ επαφής με δύο πλάκες ψησίματος
2 Σκεύη συλλογής λαδιού
Εγχειρίδιο χειρισμού
Τεχνικά στοιχεία
Τάση ρεύματος: 220-240V , ~50 Hz
Ισχύς: 2.000 W
Για την προσωπική σας
ασφάλεια
• Διαβάστε προσεκτικά τις οδηγίες χρήσης πριν
την πρώτη χρήση.
• Διαφυλάξτε τις οδηγίες χρήσης σε μια κατάλληλη
τοποθεσία κοντά στη συσκευή και παραδώστε τις
μαζί με τη συσκευή σε περίπτωση που δώσετε την
ψηστιέρα σε τρίτο άτομο.
• Να χρησιμοποιείτε την ψηστιέρα μόνο για το
σκοπό χρήσης της σύμφωνα με τις οδηγίες
χρήσης.
ΠΠρροοςς ααπποοφφυυγγήή κκιιννδδύύννοουυ ηηλλεεκκττρροοππλληηξξίίααςς
• Η χρήση της ψηστιέρας επιτρέπεται μόνο σε
στεγνούς, εσωτερικούς χώρους. Προστατεύετε τη
συσκευή -και όταν αυτή είναι απενεργοποιη-μένηαπό πιτσιλιές.
• Να χρησιμοποιείτε τη συσκευή μόνο εάν η ισχύ
του δικτύου ρεύματος συμφωνεί με την ισχύ της
συσκευής. (220-240V , 50 Hz).
• Μήν συνδέετε τη συσκευή σε πολλαπλή πρίζα,
στην οποία λειτουργούν ταυτόχρονα και άλλες
ηλεκτρικές συσκευές, διότι μπορεί να προκληθεί
παραφόρτωση του κυκλώματος.
• Να απενεργοποιείτε τη συσκευή μετά από κάθε
χρήση βγάζοντας το καλώδιο από την πρίζα.
• Όταν καθαρίζετε τη συσκευή, προσέχετε να μην
εισέλθει νερό στο εσωτερικό της. Μην καθαρίζετε
ποτέ τη συσκευή κάτω από τρεχούμενο νερό.
Μην βυθίζετε τη συσκευή ποτέ σε νερό.
• Προστατεύετε το καλώδιο από φθορά. Προσέχετε
να μην μαγκώνεται και να μην βρίσκεται κοντά σε
καυτά αντικείμενα. Μην αφήνετε το καλώδιο να
κρέμεται από τραπέζια ή άλλες υπερυψωμένες
επιφάνειες εργασίας.
• Μην ανοίγετε ποτέ το περίβλημα της συσκευής.
• Τα χαλασμένα βύσματα ή καλώδια δικτύου
πρέπει να αντικαθίστανται αμέσως από
εξουσιοδοτημένο ειδικό προσωπικό ή από το
τμήμα εξυπηρέτησης πελατών ώστε να
αποφεύγονται κίνδυνοι.
• Επισκευές πρέπει να γίνονται μόνο από
εξουσιοδοτημένα καταστήματα ή από
εξειδικευμένο προσωπικό.
ΠΠρροοςς ααπποοφφυυγγήή κκιιννδδύύννοουυ ππυυρρκκααγγιιάάςς κκααιι
ττρρααυυμμααττιισσμμοούύ
• Τοποθετήστε την ψηστιέρα σε μια επίπε-δη,
αντιολισθητική επιφάνεια, ανθεκτική στη
θερμότητα. Μην τοποθετείτε τη συ-σκευή επάνω ή
δίπλα σε συσκευές που εκπέμπουν θερμότητα
(πχ. φούρνος).
- 34 -

• Μην χρησιμοποιείτε τη συσκευή κοντά σε
εύφλεκτα αντικείμενα, όπως π.χ. δίπλα σε ρολό
από χαρτί κουζίνας.
Ακόμη και κατά τη χρήση της συσκευ-ής
σύμφωνα με τις οδηγίες χρήσης, μέρη της
συσκευής ζεσταίνονται πολύ (π.χ. η επάνω και η
κάτω εξωτερική επιφάνεια). Προσέχετε να μην
ακουμπάτε τις επιφάνειες αυτές έως ότου να
έχουν κρυώσει εντελώς μετά την
απενεργοποίηση της συσκευής.
Προσοχή! Καυτή επιφάνεια!
• Προς αποφυγή επικίνδυνης υπερθέρμανσης, να
ξετυλίγετε πάντοτε ολόκληρο το καλώδιο.
• Κατά τη διάρκεια της λειτουργίας μπορείτε να
ανοίγετε την ψηστιέρα ακίνδυνα από τις θερμομονωμένες λαβές.
• Μην επιτρέπετε το χειρισμό της συσκευής από
άτομα (συμπεριλαμβανομένων παιδιών) των
οποίων οι φυσικές, αισθητηριακές ή νοητικές
δυνατότητες ή ελλείψεις σε εμπειρία και γνώση
εμποδίζουν την ασφαλή χρήση των συσκευών,
εάν προηγουμένως δεν έχει υπάρξει
παρακολούθηση ή εκπαίδευση.
• Τα παιδιά πρέπει να επιτηρούνται ώστε να
εξασφαλίζεται ότι δεν παίζουν με τη συσκευή.
• Αφήστε τη συσκευή να κρυώσει εντελώς πριν τον
καθαρισμό και την φύλαξη.
• Μην χρησιμοποιείτε εξωτερικό χρονοδιακόπτη ή
ξεχωριστό τηλεχειρισμό για να λειτουργήσετε τη
συσκευή.
• Μη χρησιμοποιείτε κάρβουνα ή παρόμοιες
καύσιμες ύλες, για να λειτουργείτε τη συσκευή!
• Ποτέ μην αφήνετε τη συσκευή κατά τη λειτουργία
χωρίς επιτήρηση.
ΠΠρροοςς ααπποοφφυυγγήή ββλλάάββηηςς ττηηςς σσυυσσκκεευυήήςς
• Να αφαιρείτε τα τρόφιμα μόνο με πλαστική ή
ξύλινη σπάτουλα ή κάποιο άλλο κατάλληλο, μη
μεταλλικό σκεύος, για να αποφύγετε φθορές στην
αντικολλητική επίστρωση.
• Για τον ίδιο λόγο να μην χρησιμο-ποιείτε
δραστικά απορρυπαντικά ή μυτερά αντικείμενα
για τον καθαρισμό.
Περιγραφή της συσκευής
Ένδειξη λειτουργίας
q
Κούμπωμα λαβής
w
Λαβές
e
Θερμοστάτης
r
Ασφάλιση πλάκας ψησίματος
t
Ακροστόμιο απορροής λίπους
y
Κράτημα πλάκας ψησίματος
u
Πλάκες ψησίματος
i
Σκεύος συλλογής λαδιού
o
Πριν την πρώτη χρήση
1. Αφαιρέστε όλα τα υλικά της συσκευασίας καθώς
και τις ασφάλειες μεταφοράς, όπως π.χ. ταινίες ή
ασφάλειες που κρατούν το καλώδιο.
2. Ελέγξτε πριν από την θέση σε λειτουργία το
σύνολο αποστολής για την πληρότητα και
ενδεχομένως για ορατές φθορές.
3. Διαβάστε προσεκτικά τις οδηγίες χρήσης.
4. Τοποθετήστε τη συσκευή σύμφωνα με τις οδηγίες
χρήσης.
5. Καθαρίστε την καινούρια ψηστιέρα με ένα υγρό
πανί όπως περιγράφεται στο εδάφιο
«Καθαρισμός και συντήρηση».
- 35 -
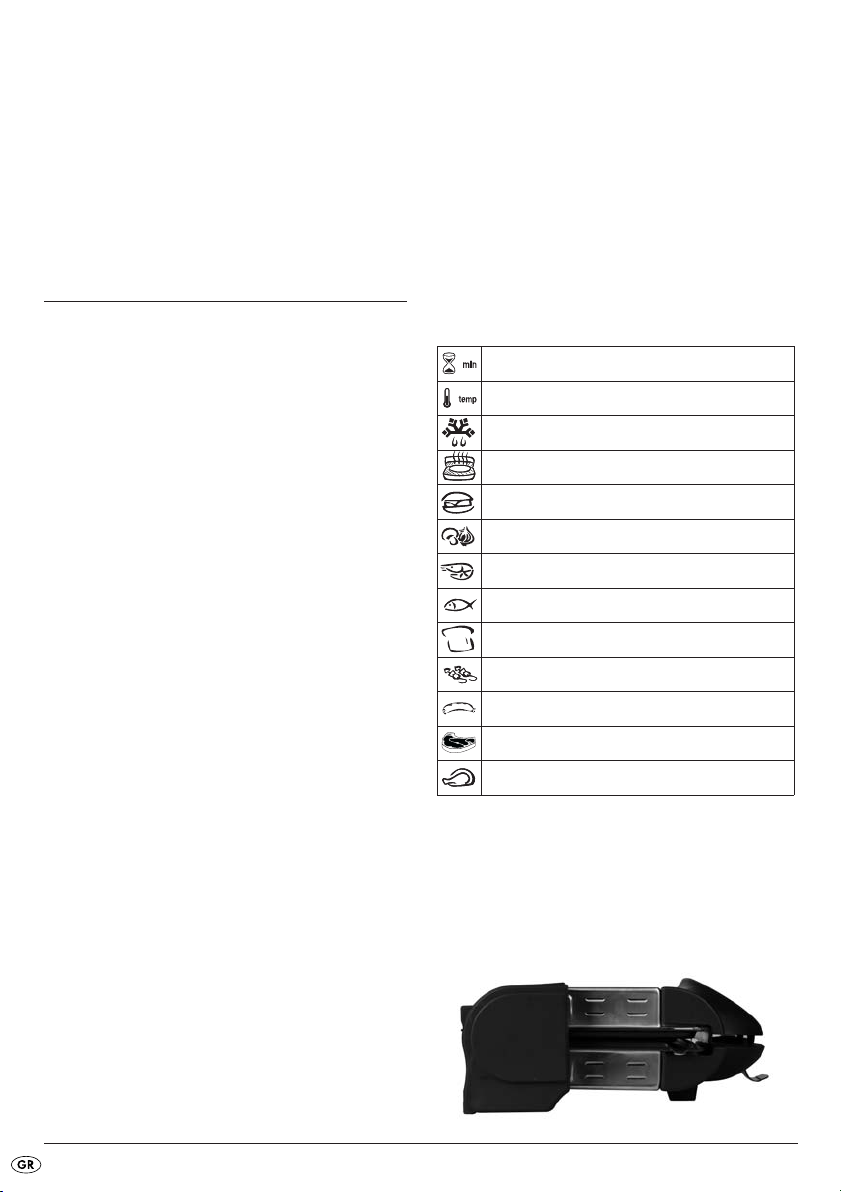
Κατά την πρώτη θέρμανση της ψηστιέρας μπορεί
να δημιουργηθούν ατμοί. Οι ατμοί αυτοί είναι
ακίνδυνοι, αλλά ίσως επηρεάσουν τη γεύση των
τροφίμων. Για το λόγο αυτό συνιστούμε πριν την
πρώτη χρήση να θέσετε σε λειτουργία την
ψηστιέρα και να την θερμάνετε χωρίς τρόφιμα
για 15 λεπτά στη μέγιστη θερμοκρασία.
Ψήσιμο με την ψηστιέρα
1. Ανοίξτε το καπάκι της ψηστιέρας. Τραβήξτε το
κούμπωμα της λαβής
ανασηκώστε το καπάκι εντελώς. Εάν είναι
αναγκαίο, αφαιρέστε σκόνες με ένα στεγνό πανί
από τις πλάκες ψησίματος
2. Λαδώστε τις πλάκες ψησίματος
βούτυρο.
3. Κατεβάστε το καπάκι της ψηστιέρας και κλείστε το
κούμπωμα
ακούσετε το κούμπωμα να κλειδώνει.
4. Βάλτε το φις στην πρίζα και ρυθμίστε το
θερμοστάτη
Η συσκευή ξεκινά άμεσα να θερμαίνε-ται, και η
ένδειξη λειτουργίας
5. Μετά από μερικά λεπτά η ένδειξη
ψηστιέρα τώρα έχει φτάσει την ρυθμισμένη
θερμοκρασία και είναι έτοιμη για χρήση.
. Η συσκευή έχει κλείσει, εάν
w
στην επιθυμητή θερμοκρασία.
r
Ρύθμιση της θεροκρασίας
Ο θερμοστάτης rέχει τις ακόλουθες θέσεις:
• απενεργοποίηση
I ξεπάγωμα
II Ζέσταμα
III μεσαίο ψήσιμο
M γρήγορο ψήσιμο
προς τα κάτω και
w
i
ανάβει.
q
.
με λίγο λάδι ή
i
q
σβήνει. Η
Επάνω στη συσκευή αναφέρονται εικονοδιαγράμματα
χρήσης για τους σημαντικότερους τρόπους
προετοιμασίας οι οποίοι μπορούν ν α διεξαχθούν σε
θέση επαφής με τη συσκευή. Οι χρόνοι μαγειρέματος
εξαρτώνται γενικά από το βάρος και το μέγεθος του
είδους προς ψήσιμο καθώς και από το προσωπικό
γούστο. Οι δοθείσες τιμές και οι παράμετροι
βασίζονται σε μια ποσότητα κάθε φορά των 100 γρ.
Τα μεμονωμένα σύμβολα έχουν την ακόλουθη
σημασία:
Χρόνος ψησίματος ή μαγειρέματος
βαθμίδα θερμοκρασίας προς ρύθμιση
Απόψυξη
Ζέσταμα
Χάμπουργκερ / Σάντουιτς
Λαχανικά
Γαρίδες
Ψάρι
Τοστ ή άλλα
Μικρά σουβλάκια
Λουκάνικο
Κομμάτια κρέατος (Σνίτσελ, στέικ)
Κοτόπουλο / Γαλοπούλα
Θέσεις ψησίματος
Σας προσφέρονται διαφορετικές θέσεις ψησίματος,
ανάλογα με τον τρόπο προετοιμασίας των τροφίμων.
Ψηστιέρα / Πλάκες σε επαφή
- 36 -

Για το ταυτόχρονο πολύ ταχύ ψήσιμο τροφίμων
και από τις δυο πλευρές. Iδανικό για το ψήσιμο
κρεάτων που απαιτούν ταχύ ψήσιμο σε υψηλή
θερμοκρασία - στέικ, φιλέτα, μπριζόλες,
λουκάνικα και λαχανικά.
1. Ανοίξτε το καπάκι της ψηστιέρας εντελώς, χωρίς
όμως να το ανασηκώσετε.
2. Θέστε ένα από τα σκεύη συλλογής λαδιού
κάτω από το στόμιο εκροής λίπους y.
3. Τοποθετήστε τα τρόφιμα στην κάτω πλάκα
ψησίματος
4. Κλείστε το καπάκι. Ασκήστε ελαφρή πίεση για να
ρυθμιστεί αυτόματα η απόσταση των πλακών
ανάλογα με το πάχος των τροφίμων.
i
.
o
Σε ιδιαίτερα λιπαρά τρόφιμα μπορεί να συμβεί
κατά το άνοιγμα του καπακιού, να τρέξει στην
επάνω πλάκα ψησίματος
στην επιφάνεια απόθεσης!
λίπος και να στάζει
i
Μπάρμπεκιου / Πλάκες ανοιχτές 180°
Για το ψήσιμο παχυών τροφίμων, που απαιτούν
ένα πιο αργό και ομοιόμορφο ψήσιμο. Ιδανικό
για την προετοιμασία λαχανικών που περιέχουν
πολύ νερό, το οποίο εξατμίζεται εάν ξεκινήσετε
το ψήσιμο σε χαμηλή θερμοκρασία.
Αυτή τη θέση ψησίματος μπορείτε επίσης να την
χρησιμοποιήσετε για να ψήσετε μεγαλύτερες
ποσότητες τροφίμων ή για να ψήσετε κρεατικά
και λαχανικά ταυτόχρονα.
ΠΠααρράάδδεειιγγμμαα:: ΠΠάάππρριικκαα
Απομακρύνετε το κοτσάνι και τα κουκούτσια από την
πάπρικα. Κόβετε την πάπρικα σε λωρίδες πλάτους
ενός εκατοστού. Τοποθετήστε τις λωρίδες πάπρικας
επάνω στην σχάρα του γκριλ και ψήστε σε
i
βαθμίδα θερμοκρασίας "Μ" περίπου για 15 λεπτά
έως ότου η πέτσα βγάλει φούσκες.
1. Ανοίξτε το καπάκι της ψηστιέρας ενελώς,
ανασηκώστε το στο τέρμα και ανοίξτε το
εν συνεχεία έως ότου βρεθεί σε οριζόντια θέση.
2. Θέστε ένα από τα σκεύη συλλογής λαδιού
κάτω από τα στόμια εκροής λίπους yτων
πλακών
3. Μοιράστε τα τρόφιμα στις δυο πλάκες
ψησίματος
του γκριλ.
i
i
.
o
Λειτουργία φούρνου / Πλάκες παράλληλα
Απόσταση περίπου 7 εκατοστά
Για την προετοιμασία ευαίσθητων τροφίμων, τα
οποία δεν πρέπει να συμπιεστούν κατά το ψήσιμο
ή που πρέπει να ψηθούν μόνο από τη μια μεριά.
ΠΠααρράάδδεειιγγμμαα:: ΨΨήήσσιιμμοο σσννίίττσσεελλ
Χτυπήστε το σνίτσελ για να λεπτύνει, βάλτε αλάτι και
πιπέρι. Τοποθετήστε το σνίτσελ επάνω στη σχάρα
του γκριλ και ψήστε ομοιόμορφα και στις δύο
πλευρές. Στη συνέχεια επιστρώστε το σνίτσελ με τυρί
που λειώνει και ψήστε στη λειτουργία του φούρνου
σε βαθμό θερμοκρασίας "Μ" περίπου 15 λεπτά.
1. Ανοίξτε το καπάκι εντελώς, χωρίς όμως να το
ανσηκώσετε.
2. Θέστε ένα από τα σκεύη συλλογής λαδιού
κάτω από το στόμιο εκροής λίπους y.
3. Τοποθετήστε τα τρόφιμα στην κάτω πλάκα
ψησίματος
4. Ανασηκώστε τώρα το καπάκι στο τέρμα και γυρίστε
το προς τα εμπρός, εως ότου σταθεί σε θέση
παράλληλη με την κάτω πλάκα ψησίματος
i
.
i
o
.
- 37 -

Μετά το ψήσιμο
• Θέστε το θερμοστάτη rστη θέση “•”.
• Τραβήξτε το βύσμα από την υποδοχή.
• Αφαιρέστε τα έτοιμα φαγητά με μια ξύλινη
κουτάλα ή κάποιο άλλο κατάλληλο, μη μεταλλικό
σκεύος από την πλάκα ψησίματος
i
.
Προτάσεις συνταγών
(Θέση επαφής)
Τα στοιχεία των χρόνων ψησίματος και των
βαθμίδων ζεστάματος μπορεί να ποικίλουν
ανάλογα με την κατάσταση και την προσωπική
προτίμηση.
Μπέργκερ Mex-Tex (4 άτομα)
900 γρ. κιμά από βοδινό
6 κ. σούπας σάλτσα μπάρμπεκιου
6 κ. σούπας ψιλοκομμένα κρεμμύδια
3 κ. σούπας φρέσκια ή έτοιμη πικάντικη σάλτσα
1/2 κ. τσ. σκόνη τσίλι
4 μεγάλα ψωμάκια για χάμ_ουργκερ
1. ναμίξτε καλά τον κιμά, τα κρεμμύδια, την
πικάντικη σάλτσα, τη σκόνη τσίλι και τη σάλτσα
μπάρμπεκιου σε ένα μεγάλο μπολ. Δημιουργείστε
την μάζα του κιμά σε τέσσερις ίσου μεγέθους
περίπου 2 εκ. πάχους φέτες χάμπουργκερ.
2. Ζεσταίνετε τη συσκευή (βαθμίδα θέρμανσης ΙΙΙ - Μ).
3. Ψήστε τα χάμπουργκερ 8 - 10 λεπτά στην
προθερμασμένη συσκευή σε θέση επαφής. Στη
συνέχεια σερβίρετε τα χάμπουργκερ μαζί με
συστατικά και καρυκεύματα της επιλογής σας στα
ψωμάκια για χάμπουργκερ.
Ρολά γαλοπούλας με ζαμπόν σεράνο
(4 άτομα)
8 μικρά λεπτά σνίτσελ γαλοπούλας (το καθένα
50 γρ.)
αλάτι
πιπέρι
2 κ. τσ. μουστάρδα
8 λεπτές φέτες ζαμπόν σεράνο
8 αποξηραμένα βερίκοκα
1 κ. σούπας ελαιόλαδο
8 βελόνες για τα ρολά
1. Χτυπήστε τα σνίτσελ , βάλτε αλάτι και πιπέρι.
Περάστε τη μια πλευρά
με μουστάρδα. Κόψτε στη μέση τις φέτες ζαμπόν.
Επικαλύψτε την πλευρά που έχετε περάσει με
μουστάρδα, με ζαμπόν και βερίκοκο.
2. Ζεσταίνετε τη συσκευή (βαθμίδα θέρμανσης Μ).
3. Τυλίξτε τα σνίτσελ και δέστε τα καλά με τις
βελόνες για τα ρολά. Επιστρώστε τα ρολάκια με
λάδι και ψήστε τα για περ. 6 λεπτά στη βαθμίδα
θέρμανσης Μ.
Τόνος με φέτες πορτοκαλιού
(4 άτομα)
4 φρέσκα στέικ τόνου (το καθένα
170 γρ.)
1 Πορτοκάλι
1 κ. σούπας ψιλοκομμένο μαϊντανό
αλάτι
πιπέρι
1. Ξεφλουδίστε το πορτοκάλι και κόψτε σε περίπου
5χιλ. πάχος φέτες.
2. Τοποθετήστε τα στέικ του τόνου στο
προθερμασμένο γκριλ (βαθμίδα θέρμανσης Μ),
ρίξτε επάνω τον μαϊντανό και καρυκέψτε με αλάτι
και πιπέρι. Τοποθετήστε τις φέτες πορτοκαλιού
στα στέικ τόνου και ψήστε περίπου για 6-8 λεπτά.
3. Απομακρύνετε τις ψημένες φέτες πορτοκαλιού και
σερβίρετε τα στέικ τόνου.
- 38 -

Στέικ κιλότου με φρέσκα κρεμμύδια
Σάλτσα χορταρικών (4 άτομα)
500 γρ. άπαχο στέικ κιλότου (το καθένα 125 γρ.)
120 γρ. μαργαρίνη
1 κ. τσ. σάλτσα Worcestershire
1 ψιλοκομμένη σκελίδα σκόρου
4 κ. σούπας ψιλοκομμένο μαϊντανό
4 ψιλοκομμένα φρέσκα κρεμμύδια
• Πλύνετε τις πλάκες ψησίματος
και ένα ουδέτερο απορρυπαντικό πιάτων. Μην
χρησιμοποιείτε δραστικά απορρυπαντικά, τραχυά
σφουγγάρια ή οξέα αντικείμενα για να μην
προκαλέσετε φθορές στις πλάκες ψησίματος.
• Για να αφαιρέσετε ξεροψημένα κατάλοιπα,
μαλακώστε τα πρώτα απλώνονας ένα βρεγμένο
πανί επάνω.
με ζεστό νερό
i
1. Αναμίξτε τη μαργαρίνη και την σάλτσα Worcestershire σε ένα μικρό μπολ. Ανακατέψτε το
σκόρδο, τον μαϊντανό και τα φρέσκα κρεμμύδια.
2. Ζεσταίνετε τη συσκευή (βαθμίδα θέρμανσης Μ).
3. Ψήστε τη μπριζόλα 3 λεπτά στη βαθμίδα
θέρμανσης Μ, στη συνέχεια επιστρώστε με την
ανοιξιάτικη σάλτσα κρεμμυδιών και βοτάνων και
τσιγαρίστε για ακόμα 4 λεπτά στη βαθμίδα Ι.
Μαζέψτε τη σάλτσα χορταρικών που εκρέει με το
σκεύος συλλογής λαδιού
4. Αφήστε στην άκρη λίγο το ψημένο στέικ και κόψτε
το σε λεπτές φέτες αντίθετα από τη φορά.
Σερβίρετε το κρέας σε μια προθερμασμένη πλάκα
σερβιρίσματος, περιχύστε τη λειωμένη σάλτσα
χορταρικών από το σκεύος συλλογής
από το κομμένο κρέας
o
.
πάνω
o
Καθαρισμός και συντήρηση
ΚΚίίννδδυυννοοςς ττρρααυυμμααττιισσμμοούύ!!
Πριν τον καθαρισμό τραβήξτε το φις από την πρίζα
και περιμένετε μέχρι η συσκευή να έχει κρυώσει
εντελώς. Μην καθαρίζετε τη συσκευή κάτω από
τρεχούμενο νερό και μην η βυθίζετε σε νερό.
Οι πλάκες ψησίματος
πλυθούν και στο πλυντήριο πιάτων!
• Ξεπλύνετε τα περιβλήματα συλλογής λαδιού
με καυτό νερό και ένα ουδέτερο καθαριστικό
μέσο. Μην χρησιμοποιείτε για τον καθαρισμό
αιχμηρά μέσα καθαρισμού, άγρια σφουγγάρια ή
μυτερά αντικείμενα για να μην φθείρετε την
εξωτερική επιφάνεια.
Για τον καθαρισμό του περιβλήματος
χρησιμοποιήστε ένα υγρό πανί.
Σιγουρευτείτε οτι όλα τα τμήματα της συσκευής
έχουν στεγνώσει καλά πριν την επόμενη χρήση.
μπορούν επίσης να
i
o
Διαφύλαξη
Μπορείτε να διαφυλάξετε την ψηστιέρα σε κάθετη ή
οριζόντια θέση.
Η ψηστιέρα διαθέτει ένα σύστημα τυλίγμτος
καλωδίου στην κάτω μεριά της, όπου μπορείτε να
τυλίξετε το καλώδιο όταν δεν χρησιμοποιείτε τη
συσκευή. Έτσι αποφεύγετε να μαγκώνεται ή να
λερώνεται το καλώδιο καθώς και κινδύνους που
μπορεί να προκύψουν από κρεμούμενο καλώδιο.
Για πιο εύκολο καθαρισμό μπορείτε να αφαιρέσετε
τις πλάκες από τη συσκευή
• Πιέστε τις ασφαλίσεις
να αφαιρέσετε τις πλάκες
.
i
λιγο προς τα πίσω για
t
.
i
- 39 -

Απομάκρυνση
Σε καμία περίπτωση μην πετάξετε τη
συσκευή στα οικιακά απορρίμματα.
Αυτό το προϊόν υπόκειται στην
Ευρωπαϊκή Οδηγία 2002/96/EC.
Απομακρύνετε τη συσκευή μέσω μιας εγκεκριμένης
επιχείρησης απόρριψης ή μέσω της κοινοτικής
επιχείρησης απόρριψης.
Προσέχετε τις τρέχουσες ισχύουσες προδιαγραφές.
Σε περίπτωση αμφιβολιών ελάτε σε επαφή με την
επιχείρηση απόρριψης.
Απομακρύνετε όλα τα υλικά συσκευασίας
με έναν φιλικό προς το περιβάλλον τρόπο.
Εγγύηση & Σέρβις
Έχετε για αυτή τη συσκευή 3 χρόνια εγγύηση από
την ημερομηνία αγοράς. Η συσκευή κατασκευάστηκε
και ελέγχθηκε προσεκτικά πριν από την αποστολή.
Παρακαλούμε φυλάξτε την απόδειξη ταμείου ως
απόδειξη για την αγορά. Παρακαλούμε
επικοινωνήστε τηλεφωνικά με την υπηρεσία σέρβις σε
περίπτωση εγγύησης. Μόνο έτσι μπορεί να
εξασφαλιστεί μια δωρεάν αποστολή του
εμπορεύματός σας.
Η απόδοση εγγύησης ισχύει μόνο για σφάλματα
υλικού ή κατασκευής, όχι όμως για ζημιές από τη
μεταφορά, για εξαρτήματα φθοράς ή για βλάβες σε
εύθραυστα εξαρτήματα, π.χ. διακόπτες ή
συσσωρευτές. Το προϊόν προορίζεται μόνο για την
ιδιωτική και όχι για την επαγγελματική χρήση.
Σε περίπτωση κακής μεταχείρισης και ακατάλληλης
χρήσης, σε χρήση βίας και σε παρεμβάσεις οι
οποίες δεν διεξήχθησαν από το εξουσιοδοτημένο
μας τμήμα σέρβις, η εγγύηση παύει να ισχύει. Τα νομικά σας δικαιώματα δεν περιορίζονται μέσω αυτής
της εγγύησης.
Ο χρόνος εγγύησης δεν επεκτείνεται μέσω της
απόδοσης εγγύησης. Αυτό ισχύει και για
εξαρτήματα τα οποία έχουν αντικατασταθεί ή
επισκευαστεί. Ενδεχόμενες ήδη υπάρχουσες κατά
την αγορά, ζημιές και ελλείψεις πρέπει να
αναφέρονται αμέσως μετά την αποσυσκευασία, το
αργότερο όμως δύο ημέρες μετά την ημερομηνία
αγοράς. Επισκευές που εμφανίζονται μετά τη λήξη
του χρόνου εγγύησης χρεώνονται.
Kompernass Service Greece
Tel.: 801 200 10 18
(local charge 0,031EUR/minute (including VAT 19 %))
e-mail: support.gr@kompernass.com
Εισαγωγέας
KOMPERNASS GMBH
BURGSTRASSE 21
44867 BOCHUM, GERMANY
www.kompernass.com
- 40 -

Inhaltsverzeichnis Seite
Verwendungszweck 42
Lieferumfang 42
Technische Daten 42
Sicherheitshinweise 42
Gerätebeschreibung 43
Vor dem ersten Gebrauch 43
Braten mit dem Kontaktgrill 44
Temperaturregler / Zubereitungsarten.........................................................................................44
Plattenstellungen.............................................................................................................................44
Grillrost / Plattenstellung in Kontakt.............................................................................................44
Barbecue / Plattenstellung 180° offen.......................................................................................45
Ofenfunktion / Plattenstellung parallel Abstand ca. 7 cm ........................................................45
Nach dem Braten ..........................................................................................................................46
Rezeptvorschläge (Kontaktposition) 46
Mex-Tex-Burger (4 Personen)........................................................................................................46
Putenröllchen mit Serranoschinken (4 Personen) ........................................................................46
Thunfisch mit Orangenscheiben (4 Personen).............................................................................46
Rumpsteak mit Frühlingszwiebeln-Kräuter-Sauce (4 Personen) .................................................47
Reinigen & Pflegen 47
Aufbewahren 47
Entsorgen 48
Garantie und Service 48
Importeur 48
Lesen Sie die Bedienungsanleitung vor der ersten Verwendung aufmerksam durch und heben Sie diese für
den späteren Gebrauch auf. Händigen Sie bei Weitergabe des Gerätes an Dritte auch die Anleitung aus.
- 41 -

Kontaktgrill
Verwendungszweck
Dieser Kontaktgrill ist vorgesehen für
• das Grillen von Speisen wie Fleisch, Fisch,
Gemüse, Sandwiches etc.
• in haushaltsüblichen Mengen
• im privaten Haushalt.
Lieferumfang
Kontaktgrill mit zwei Grillplatten
2 Ölauffangschalen
Bedienungsanleitung
So vermeiden Sie Gefahren durch
elektrischen Schlag
• Der Kontaktgrill darf nur in trockenen Räumen im
Innenbereich eingesetzt werden. Halten Sie das
Gerät – auch im ausgeschalteten Zustand – von
Spritzwasser fern.
• Benutzen Sie das Gerät nur dann, wenn die örtliche Netzspannung mit der Nennspannung des
Gerätes (220-240V, 50 Hz) übereinstimmt.
• Schließen Sie das Gerät nicht über eine Mehrfachsteckdose an, über die gleichzeitig andere
elektrische Geräte arbeiten, denn das kann zu
einer Überlastung des Stromkreises führen.
• Schalten Sie das Gerät nach jedem Gebrauch
aus. Ziehen Sie dazu den Netzstecker.
• Achten Sie beim Reinigen darauf, dass kein
Wasser in das Innere des Gerätes gelangt. Reinigen Sie das Gerät nie unter fließendem Wasser.
Technische Daten
Nennspannung: 220-240 V, ~50 Hz
Leistungsaufnahme: 2000 W
Sicherheitshinweise
• Lesen Sie vor dem ersten Gebrauch Ihres Kontaktgrills diese Gebrauchsanleitung aufmerksam durch.
• Bewahren Sie die Gebrauchsanleitung an einem
geeigneten Ort in der Nähe des Gerätes auf.
Händigen Sie die Gebrauchsanleitung bei Weitergabe des Gerätes an Dritte ebenfalls mit aus.
• Benutzen Sie den Kontaktgrill nur für seinen
vorgesehenen Zweck und in Übereinstimmung
mit dieser Gebrauchsanleitung.
Tauchen Sie das Gerät nie in Wasser oder
andere Flüssigkeiten ein.
• Schützen Sie das Netzkabel vor Beschädigung.
Achten Sie darauf, es nicht einzuklemmen und
von heißen Gegenständen fernzuhalten. Lassen
Sie das Netzkabel nicht lose von Tisch oder
Arbeitsplatte hängen.
• Öffnen Sie nie das Gehäuse des Gerätes.
• Lassen Sie beschädigte Netzstecker oder Netzkabel sofort von autorisiertem Fachpersonal
oder dem Kundenservice austauschen, um
Gefährdungen zu vermeiden.
• Reparaturen dürfen nur im vom Hersteller
autorisierten Fachhandel oder durch erfahrenes
Fachpersonal ausgeführt werden.
So vermeiden Sie Brand- und Verletzungs-
gefahren
• Stellen Sie Ihren Kontaktgrill auf eine ebene,
rutschfeste und hitzebeständige Unterlage und
nicht auf oder neben andere Geräte, die viel
Wärme ausstrahlen können (z.B. Toaster,
Küchenherde).
- 42 -

• Betreiben Sie das Gerät nicht in der Nähe leicht
brennbarer Gegenstände, z.B. unter Gardinen
oder neben Küchenkrepp-Rollen.
Auch bei vorschriftsmäßiger Benutzung werden
einzelne Geräteteile sehr heiß (z.B. die obere
und untere Gehäuseplatte). Achten Sie darauf,
diese Oberflächen nicht zu berühren, bis sie
nach dem Ausschalten vollständig abgekühlt
sind.
Achtung! Heiße Oberfläche!
• Um eine gefährliche Überhitzung zu vermeiden,
wickeln Sie stets die gesamte Länge des Netzkabels ab.
• Während des Betriebs kann der Kontaktgrill gefahrlos am wärmeisolierten Griff geöffnet und
geschlossen werden.
• Dieses Gerät ist nicht dafür bestimmt, durch
Personen (einschließlich Kinder) mit eingeschränkten physischen, sensorischen oder
geistigen Fähigkeiten oder mangels Erfahrung
und/oder mangels Wissen benutzt zu werden,
es sei denn, sie werden durch eine für ihre
Sicherheit zuständige Person beaufsichtigt oder
erhielten von ihr Anweisungen, wie das Gerät
zu benutzen ist.
• Kinder sollten beaufsichtigt werden, um sicherzustellen, dass sie nicht mit dem Gerät spielen.
• Lassen Sie das Gerät nach dem Ausschalten vollständig abkühlen, bevor Sie es reinigen und verstauen.
• Benutzen Sie keine externe Zeitschaltuhr oder
ein separates Fernwirksystem um das Gerät zu
betreiben.
• Benutzen Sie keine Kohle oder ähnliche Brennstoffe, um das Gerät zu betreiben!
• Lassen Sie das Gerät während des Betriebs niemals unbeaufsichtigt.
So vermeiden Sie Schäden am Gerät
• Entnehmen Sie jegliche Speisen nur mit einem
Kunststoff- oder Holzspachtel oder einem anderen geeigneten, nichtmetallischen Gegenstand,
um die Antihaftbeschichtung des Kontaktgrills
nicht zu zerstören.
• Benutzen Sie – aus dem selben Grund – zur
Reinigung keine scharfen Putzmittel und spitzen
Gegenstände.
Gerätebeschreibung
Kontrollleuchte
q
Verschluss am Haltegriff
w
Griffe
e
Temperaturregler
r
Plattenbefestigungsfedern
t
Fettabflusstülle
y
Führung zur Plattenbefestigung
u
Grillplatten
i
Ölauffangschale
o
Vor dem ersten Gebrauch
1. Entnehmen Sie Ihren neuen Kontaktgrill aus der
Verpackung. Entfernen Sie alle zusätzlichen
Transportsicherungen, z.B. Folien oder Kabelhalter.
2. Überprüfen Sie vor der Inbetriebnahme den Lieferumfang auf Vollständigkeit und eventuell sichtbare Beschädigungen.
3. Lesen Sie diese Gebrauchsanleitung aufmerksam
durch.
4. Stellen Sie das Gerät gemäß den Sicherheitshinweisen auf.
5. Reinigen Sie Ihren neuen Kontaktgrill mit einem
feuchten Tuch wie unter “Reinigen und Pflegen”
beschrieben.
- 43 -

Durch das erstmalige Beheizen des Kontaktgrills
können Dämpfe entstehen. Diese Dämpfe sind
nicht gesundheitsgefährdend, könnten aber den
Geschmack der Speisen beeinträchtigen. Wir
empfehlen Ihnen daher vor der ersten
Essenszubereitung, den Kontaktgrill einzuschalten und ohne Lebensmittel auf maximaler
Temperatureinstellung 15 Minuten aufzuheizen.
Auf dem Gerät sind Anwendungspiktogramme für
die wichtigsten Zubereitungsarten, die mit dem Gerät in Kontaktposition durchgeführt werden können,
angegeben. Die Garzeiten richten sich generell
nach Gewicht und Größe des Grillgutes sowie nach
dem individuellen Geschmack. Die angegebenen
Werte sind Richtwerte, basierend auf einer Menge
von jeweils 100g.
Braten mit dem Kontaktgrill
1. Öffnen Sie den Deckel des Kontaktgrills. Ziehen
Sie dazu den Verschluss am Haltegriff
unten und klappen Sie den Deckel bis zum Anschlag nach oben, ohne diesen anzuheben. Entfernen Sie ggf. Staubpartikel mit einem trockenen Tuch von den Grillplatten
2. Fetten Sie die Grillplatten
öl oder Butter ein.
3. Schließen Sie den Deckel des Kontaktgrills. Das
Gerät ist geschlossen, wenn der Verschluss am
Haltegriff
4. Stecken Sie den Netzstecker in eine Steckdose,
und stellen Sie den Temperaturregler
gewünschte Heizstufe ein.
Das Gerät fängt nun an zu heizen, und die
Kontrollleuchte
5. Nach einigen Minuten erlischt die Kontrollleuchte
stellte Temperatur erreicht und ist betriebsbereit.
hörbar eingerastet ist.
w
leuchtet auf.
q
. Der Kontaktgrill hat nun die einge-
q
.
i
mit etwas Pflanzen-
i
Temperaturregler / Zubereitungsarten
Der Temperaturregler rkann auf folgende
Positionen eingestellt werden:
• ausgeschaltet
I Auftauen
II Aufwärmen
III mittleres Grillen
M schnelles Grillen
w
r
nach
auf die
Die einzelnen Symbole haben folgende Bedeutung:
Grill- bzw. Garzeit
einzustellende Temperaturstufe
Auftauen
Aufwärmen
Hamburger / Sandwich
Gemüse
Garnelen
Fisch
Toast o. ä.
Fleischspieße
Würstchen
Fleischstücke (Schnitzel, Steaks)
Hühnchen / Pute
Plattenstellungen
Ihnen stehen verschiedene Plattenstellungen zur
Verfügung, die Sie je nach Zubereitungsart
einsetzen können.
Grillrost / Plattenstellung in Kontakt
- 44 -

Für das gleichzeitige, sehr schnelle Braten der
Speisen auf beiden Seiten. Ideal zum Grillen
von Fleisch, das ein sehr schnelles Anbraten bei
hoher Temperatur erfordert - Rumpsteak, Filetschnitten, Koteletts, Würstchen und Gemüse.
1. Öffnen Sie den Deckel des Kontaktgrills bis zum
Anschlag, ohne diesen anzuheben.
2. Stellen Sie eine der Ölauffangschalen
die Fettabflusstülle
3. Legen Sie das Grillgut auf die untere Grillplatte
4. Schließen Sie den Deckel. Üben Sie dabei sanften Druck aus, damit sich der Abstand der beiden Platten aufgrund der Dicke des Grillgutes
automatisch reguliert.
y
.
o
unter
i
Bei besonders fettigen Speisen kann es passie-
ren, dass beim Öffnen des Deckels, Fett an der
oberen Grillplatte
Stellfläche tropft!
hinunterläuft und auf die
i
Barbecue / Plattenstellung 180° offen
Für das Grillen von dickeren Speisen, die ein
langsameres und gleichmäßigeres Braten
erfordern. Ideal für die Zubereitung von stark
wasserhaltigem Gemüse, da man das Wasser zu
Beginn auf niedriger oder mittlerer Temperatur
verdunsten lassen kann.
Diese Plattenstellung können Sie auch nutzen,
um größere Mengen an Speisen oder das Gemüse gleichzeitig mit dem Fleisch zuzubereiten.
Beispiel: Paprika
Stielansatz und Kerne aus der Paprika entfernen.
Die Paprika in ein Zentimeter breite Streifen schneiden. Die Paprikastreifen auf die Grillplatte
und bei Temperaturstufe “M” ca. 15 Minuten grillen,
bis die Haut Blasen wirft.
i
legen
1. Öffnen Sie den Deckel des Kontaktgrills in senkrechte Stellung, heben ihn bis zum Anschlag an,
und öffnen ihn weiter bis er waagerecht liegt.
2. Stellen Sie die zwei Ölauffangschalen
die Fettabflusstüllen
3. Verteilen Sie das Grillgut auf den beiden Grill-
platten
i
.
der Grillplatten i.
y
Ofenfunktion / Plattenstellung parallel
Abstand ca. 7 cm
.
Für die Zubereitung empfindlicher Speisen, die
beim Braten nicht zusammengedrückt oder gewendet werden dürfen.
Beispiel: Schnitzel überbacken
Schnitzel flachklopfen, salzen und pfeffern. Schnitzel auf das Grillrost legen und von beiden Seiten
gleichmäßig grillen. Anschließend das Schnitzel mit
Schmelzkäse belegen und in der Ofenfunktion bei
Temperaturstufe “M”, ca. 15 Minuten überbacken.
1. Öffnen Sie den Deckel des Kontaktgrills bis zum
Anschlag, ohne diesen anzuheben.
2. Stellen Sie eine der Ölauffangschalen
die Fettabflusstülle
3. Legen Sie das Grillgut auf die untere
Grillplatte
4. Heben Sie nun den Deckel bis zum Anschlag an
und ziehen ihn nach vorn, bis er parallel zur
unteren Grillplatte
i
.
y
.
aufliegt.
i
o
o
unter
unter
- 45 -

Nach dem Braten
• Stellen Sie den Temperaturregler rauf “•”.
• Ziehen Sie den Netzstecker aus der Steckdose.
• Nehmen Sie das Grillgut mit einem Holzspachtel
oder einem anderen geeigneten, nichtmetallischen Gegenstand, von der Grillplatte
i
.
Rezeptvorschläge
(Kontaktposition)
Putenröllchen mit Serranoschinken
(4 Personen)
8 kleine dünne Putenschnitzel (je 50 g)
Salz
Pfeffer
2 TL Senf
8 dünne Scheiben Serranoschinken
8 getrocknete weiche Aprikosen
1 EL Olivenöl
8 Rouladennadeln
Die Angaben der Grillzeiten und der Heizstufen
können, je nach Beschaffenheit der Lebensmittel
und persönlichem Geschmack, variieren.
Mex-Tex-Burger (4 Personen)
900 g Rinderhackfleisch
6 EL Barbecuesauce
6 EL fein gehackte Zwiebeln
3 EL frische oder fertige Salsa
1/2 TL Chilipulver
4 große Hamburgerbrötchen
1. Hackfleisch, Zwiebeln, Salsa, Chilipulver und
Barbecuesauce in einer großen Schüssel gründlich vermischen. Die Hackfleischmasse zu vier
gleich großen, knapp 2 cm dicken Hamburgerscheiben formen.
2. Gerät aufheizen (Heizstufe III - M).
3. Die Hamburger ca. 8 - 10 Min. auf dem vorgeheizten Gerät in Kontaktposition grillen. Anschließend die Hamburger zusammen mit Zutaten und
Gewürzen Ihrer Wahl in den Hamburgerbrötchen
servieren.
1. Schnitzel flachklopfen, salzen und pfeffern. Eine
Seite mit Senf bestreichen. Schinkenscheiben
halbieren. Die mit Senf bestrichene Seite mit
Schinken und Aprikose belegen.
2. Gerät aufheizen (Heizstufe M).
3. Schnitzel aufrollen und mit den Rouladennadeln
feststecken. Röllchen mit Öl bestreichen und ca.
6 Min. auf Heizstufe M grillen.
Thunfisch mit Orangenscheiben
(4 Personen)
4 frische Thunfischsteaks (je 170 g)
1 Orange
1 EL fein gehackte Petersilie
Salz
Pfeffer
1. Die Orange schälen und in etwa 5 mm dicke
Scheiben schneiden.
2. Die Thunfischsteaks auf den vorgeheizten Grill
legen (Heizstufe III - M), die Petersilie darüber
streuen und mit Salz und Pfeffer würzen. Die
Orangenscheiben auf die Thunfischsteaks legen
und ca. 6-8 Min. grillen.
3. Die gegrillten Orangenscheiben entfernen und
die Thunfischsteaks servieren.
- 46 -

Rumpsteak mit FrühlingszwiebelnKräuter-Sauce (4 Personen)
500 g mageres Rumpsteak (je 125 g)
120 g Margarine
1 TL Worcestershiresauce
1 fein gehackte Knoblauchzehe
4 EL fein gehackte Petersilie
4 fein gehackte Frühlingszwiebeln
1. Die Margarine und die Worcestershiresauce in
einer kleinen Schüssel vermischen. Den
Knoblauch, Petersilie und Frühlingszwiebeln
untermischen.
2. Gerät aufheizen (Heizstufe M).
3. Das Steak 3 Min. auf Heizstufe M grillen, anschließend mit der Frühlingszwiebel-Kräuter-Sauce bestreichen und weitere 4 Min. auf Heizstufe
I garen. Die heruntertropfende Kräutersauce mit
der Ölauffangschale
4. Das fertig gegrillte Steak kurz ruhen lassen und
gegen die Maserung in dünne Scheiben
schneiden. Das Fleisch auf einer vorgewärmten
Servierplatte anrichten, die geschmolzene
Kräutersauce aus der Ölauffangschale
das geschnittene Fleisch gießen.
sammeln.
o
o
über
• Spülen Sie die Grillplatten
Wasser und einem neutralen Spülmittel.
Benutzen Sie zur Reinigung keine scharfen Putzmittel, rauen Schwämme oder spitzen Gegenstände, um die Antihaftbeschichtung nicht zu
zerstören.
• Bei starken Verkrustungen legen Sie ein nasses
Spültuch auf die festgebackenen Rückstände,
um diese aufzuweichen.
Die Grillplatten
eignet!
• Spülen Sie die Ölauffangschalen
Wasser und einem neutralen Spülmittel.
Benutzen Sie zur Reinigung keine scharfen Putzmittel, rauen Schwämme oder spitzen Gegenstände, um die Oberfläche nicht zu beschädigen.
Für die Reinigung der Außenflächen des Gerätes
genügt ein feuchtes Tuch.
Achten Sie darauf, dass vor der erneuten Verwendung des Kontaktgrills alle Teile vollständig trocken
sind.
sind auch spülmaschinenge-
i
nun mit heißem
i
mit heißem
o
Reinigen & Pflegen
Verletzungsgefahr!
Ziehen Sie vor der Reinigung den Netzstecker und
warten Sie, bis das Gerät vollständig abgekühlt ist.
Reinigen Sie das Gerät nie unter fließendem Wasser
und tauchen Sie es nie in Wasser ein.
Sie können die Grillplatten
gung aus dem Gerät entnehmen.
• Drücken Sie die Plattenbefestigungsfedern tetwas zurück, um die Grillplatten
zur einfachen Reini-
i
zu entnehmen.
i
Aufbewahren
Den Kontaktgrill können Sie liegend oder aufrecht
stehend verstauen.
Das Gerät hat eine integrierte Kabelaufwicklung an
der Gehäuseunterseite, auf die Sie das Netzkabel
bei Nichtgebrauch aufwickeln können. Sie vermeiden dadurch, dass das Netzkabel eingeklemmt,
verschmutzt oder durch das lose Herabhängen zur
Gefahrenquelle wird.
- 47 -

Entsorgen
Werfen Sie das Gerät keinesfalls in den
normalen Hausmüll. Dieses Produkt
unterliegt der europäischen Richtlinie
2002/96/EC.
Entsorgen Sie das Gerät über einen zugelassenen
Entsorgungsbetrieb oder über Ihre kommunale
Entsorgungseinrichtung.
Beachten Sie die aktuell geltenden Vorschriften.
Setzen Sie sich im Zweifelsfall mit Ihrer Entsorgungseinrichtung in Verbindung.
Führen Sie alle Verpackungsmaterialien
einer umweltgerechten Entsorgung zu.
Garantie und Service
Die Garantiezeit wird durch die Gewährleistung
nicht verlängert. Dies gilt auch für ersetzte und reparierte Teile. Eventuell schon beim Kauf vorhandene
Schäden und Mängel müssen sofort nach dem
Auspacken gemeldet werden, spätestens aber zwei
Tage nach Kaufdatum. Nach Ablauf der Garantiezeit anfallende Reparaturen sind kostenpflichtig.
Schraven
Service- und Dienstleistungs GmbH
Tel.: +49 (0) 180 5 008107
(14 Ct/Min. aus dem dt. Festnetz ggf. abweichende Preise
aus den Mobilfunknetzen)
Fax: +49 (0) 2832 3532
e-mail: support.de@kompernass.com
Kompernaß Service Österreich
Tel.: 0820 899 913 (
e-mail: support.at@kompernass.com
0,20 EUR/Min.)
Sie erhalten auf dieses Gerät 3 Jahre Garantie ab
Kaufdatum. Das Gerät wurde sorgfältig produziert
und vor Anlieferung gewissenhaft geprüft.
Bitte bewahren Sie den Kassenbon als Nachweis
für den Kauf auf. Bitte setzen Sie sich im Garantiefall mit Ihrer Servicestelle telefonisch in Verbindung.
Nur so kann eine kostenlose Einsendung Ihrer Ware
gewährleistet werden.
Die Garantieleistung gilt nur für Material- oder
Fabrikationsfehler, nicht aber für Transportschäden,
Verschleißteile oder für Beschädigungen an zerbrechlichen Teilen, z. B. Schalter oder Akkus. Das
Produkt ist lediglich für den privaten und nicht für
den gewerblichen Gebrauch bestimmt.
Bei missbräuchlicher und unsachgemäßer Behandlung, Gewaltanwendung und bei Eingriffen, die
nicht von unserer autorisierten Service-Niederlassung vorgenommen wurden, erlischt die Garantie.
Ihre gesetzlichen Rechte werden durch diese
Garantie nicht eingeschränkt.
Kompernaß Service Switzerland
Tel.: 0848 000 525 (
e-mail: support.ch@kompernass.com
max. 0,0807 CHF/Min.)
Importeur
KOMPERNASS GMBH
BURGSTRASSE 21
44867 BOCHUM, GERMANY
www.kompernass.com
- 48 -
 Loading...