


Contact SAMSUNG WORLDWIDE
If you have any questions or comments relating to Samsung products, please contact the SAMSUNG customer care centre.
Country |
Customer Care Centre |
Web Site |
AUSTRALIA |
1300 362 603 |
www.samsung.com |
NEW ZEALAND |
0800 SAMSUNG (0800 726 786) |
www.samsung.com |
CHINA |
400-810-5858 |
www.samsung.com |
HONG KONG |
(852) 3698 4698 |
www.samsung.com/hk |
|
|
www.samsung.com/hk_en/ |
INDIA |
3030 8282 |
www.samsung.com |
|
1800 3000 8282 |
|
INDONESIA |
0800-112-8888 |
www.samsung.com |
|
021-5699-7777 |
|
JAPAN |
0120-327-527 |
www.samsung.com |
MALAYSIA |
1800-88-9999 |
www.samsung.com |
PHILIPPINES |
1-800-10-SAMSUNG(726-7864) |
www.samsung.com |
|
1-800-3-SAMSUNG(726-7864) |
|
|
1-800-8-SAMSUNG(726-7864) |
|
|
02-5805777 |
|
SINGAPORE |
1800-SAMSUNG(726-7864) |
www.samsung.com |
THAILAND |
1800-29-3232 |
www.samsung.com |
|
02-689-3232 |
|
TAIWAN |
0800-329-999 |
www.samsung.com |
VIETNAM |
1 800 588 889 |
www.samsung.com |
© 2011 Samsung Electronics Co., Ltd. All rights reserved. |
BN68-03444M-01 |
|
LED TV
user manual
imagine the possibilities
Thank you for purchasing this Samsung product. To receive more complete service, please register your product at
www.samsung.com/register
Model _____________ Serial No. _____________
For more information on how to use e-Manual
Figures and illustrations in this User Manual are provided for reference only and may differ from actual product appearance. Product design and specifications may be changed without notice.
Still image warning
Avoid displaying still images (like jpeg picture files) or still image element (like TV programme logo, panorama or 4:3 image format, stock or news bar at screen bottom etc.) on the screen. Constant displaying of still picture can cause ghosting of LED screen, which will affect image quality. To reduce risk of this effect, please follow below recommendations:
•• Avoid displaying the same TV channel for long periods.
•• Always try to display image in full screen mode, use TV set picture format menu for best possible match.
•• Reduce brightness and contrast values to minimum required level to achieve desired picture quality, exceeded values may speed up the burnout process.
•• Frequently use all TV features designed to reduce image retention and screen burnout, refer to proper user manual section for details.
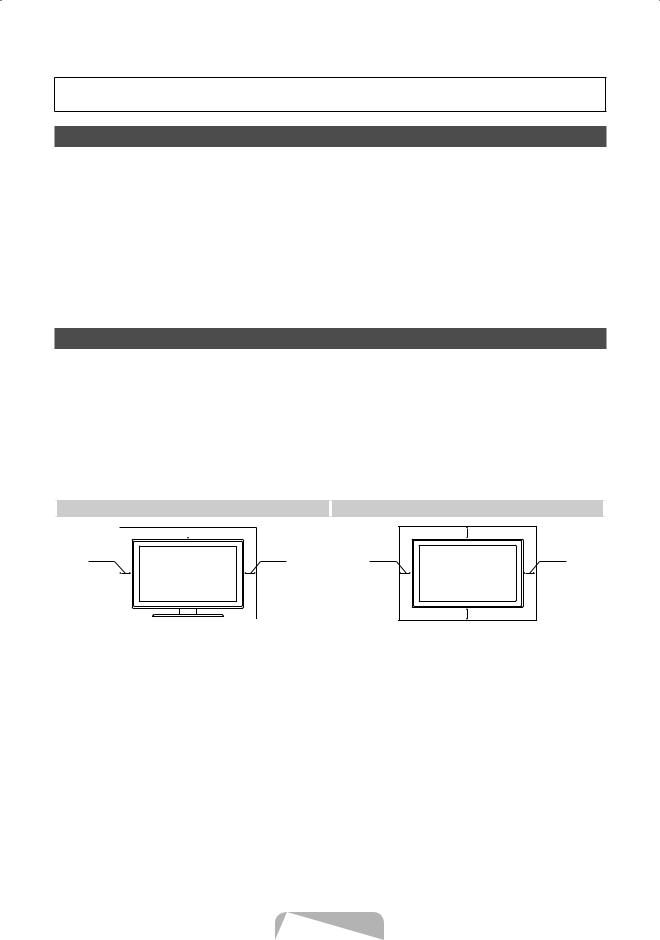
Securing the Installation Space
Keep the required distances between the product and other objects (e.g. walls) to ensure proper ventilation.
Failing to do so may result in fire or a problem with the product due to an increase in the internal temperature of the product.
When using a stand or wall-mount, use parts provided by Samsung Electronics only.
xx If you use parts provided by another manufacturer, it may result in a problem with the product or an injury due to the product falling.
The appearance may differ depending on the product.
Be careful when you contact the TV because some parts can be somewhat hot.
Installation with a stand. |
Installation with a wall-mount. |
 10 cm
10 cm
10 cm |
10 cm |
|
10 cm |
10 cm |
10 cm |
|
10 cm |
English - 2
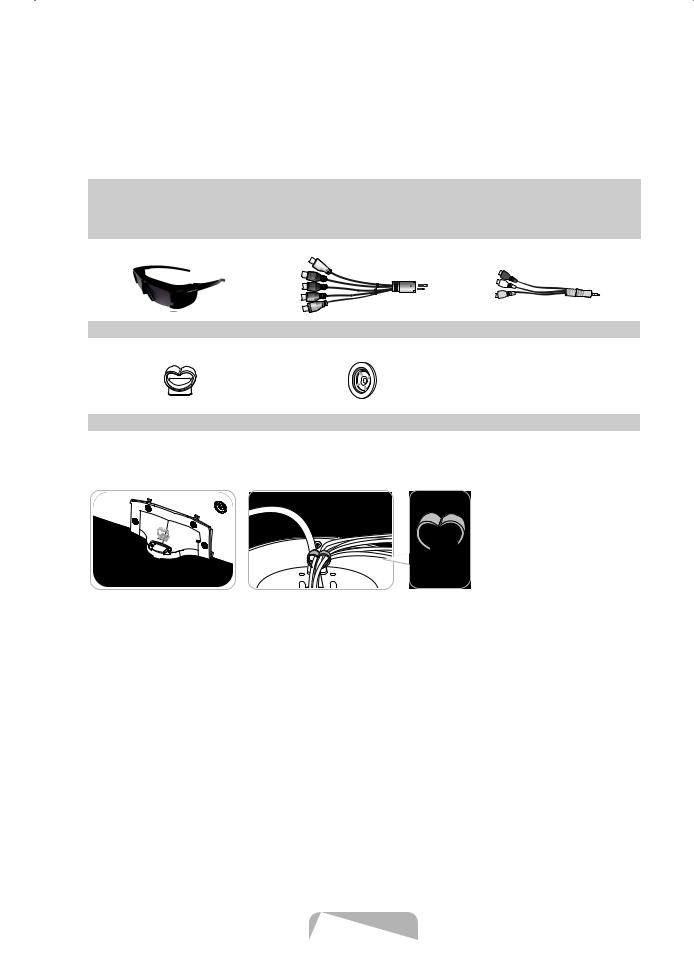
Accessories
Please make sure the following items are included with your TV. If any items are missing, contact your dealer.
The items’ colours and shapes may vary depending on the models.
Check that there is no accessory hidden behind packing materials when you open the box.
[[CAUTION: INSERT SECURELY LEST SHOULD BE DETACHED IN SET
•• QWERTY Remote & Batteries (AAA x 4) |
•• |
Power Cord |
||||
•• |
Owner’s Instructions |
•• |
Cleaning-Cloth |
|||
•• |
Warranty Card (Not available in some locations) / Safety Guide |
|||||
|
|
|
|
|
|
|
|
|
|
|
|
|
|
Samsung 3D Active Glasses |
AV/Component Adapter |
AV Adapter |
Holder-Wire stand |
Holder Ring (4EA) |
Assembling the Holder-Wire stand
English - 3
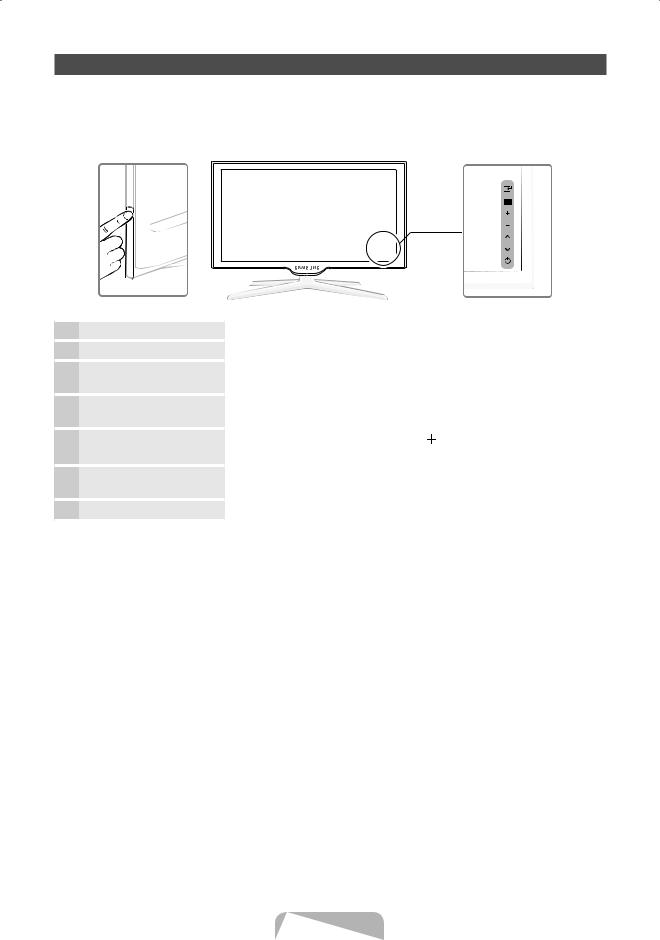
Viewing the Control Panel
The product colour and shape may vary depending on the model.
There are control buttons in rear of TV. When you touch the button, control icons appears.
Any object (an electric wire, etc.) near the control panel may cause unintended activation of the OSD.
TV Rear
Remote control sensor |
Aim the remote control towards this spot on the TV. |
Power Indicator |
Blinks and turns off when the power is on and lights up in standby mode. |
E (Source) |
Toggles between all the available input sources. In the on-screen menu, use |
|
this button as you would use the ENTERE button on the remote control. |
m (Menu)
o (Volume)
k (Channel)
Displays an on-screen menu, the OSD (on screen display) of your TV’s features.
Adjusts the volume. In the OSD, use the 

 buttons as you would use the ◄ and ► buttons on the remote control.
Changes the channels. In the OSD, use the <> buttons as you would use the ▼ and ▲ buttons on the remote control.
P (Power) |
Turns the TV on or off. |
Standby mode
Do not leave your TV in standby mode for long periods of time (when you are away on a holiday, for example). A small amount of electric power is still consumed even when the power button is turned off. It is best to unplug the power cord.
English - 4
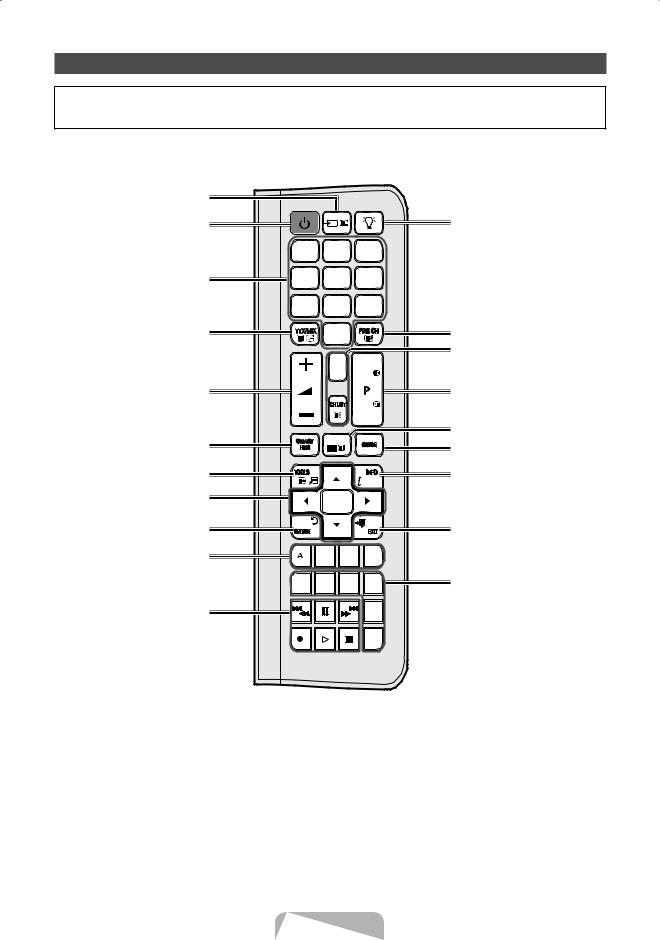
QWERTY Remote
•• Before using QWERTY Remote, it should be paired with TV.
•• How to perform the pairing process is explained in next page.
Remote Side View
Displays and selects the available video sources.
Turns the TV on and off.
Gives direct access to channels.
Alternately select Teletext ON, Double, Mix or OFF.
Adjusts the volume.
Link to various application services.
Quickly select frequently used functions.
Selects the on-screen menu items and changes the values seen on the menu.
Returns to the previous menu.
Buttons used in the Channel and SMART HUB menu, etc.
Use these buttons in a specific feature. For details, refer to e-Manual.
POWER |
SOURCE |
ON/OFF |
|
1 |
|
2 |
3 |
4 |
|
5 |
6 |
7 |
|
8 |
9 |
TTX/MIX |
|
0 |
PRE-CH |
|
|
|
|
|
MUTE |
< |
|
|
|
M |
|
|
|
|
P |
|
CH LIST |
|
|
|
|
|
< |
SMART |
MENU |
GUIDE |
|
HUB |
|
|
|
|
|
|
|
|
|
|
5 |
|
E |
|
|
9 |
|
|
7 |
|
B |
C |
D |
SOCIAL |
SEARCH |
W E-MANUAL |
|
TV |
|||
|
|
|
P.SIZE |
|
l |
|
AD/SUBT |
Turns the remote control light on or off. When on, the buttons become
illuminated for a moment when pressed. (Using the remote control with this button set to On will reduce the battery usage time.)
Returns to the previous channel.
MUTE: Cuts off the sound temporarily. CH LIST: Displays channel lists on the screen.
Changes channels.
Opens the OSD.
Displays the EPG (Electronic Programme Guide).
Displays information on the TV screen.
Exits the menu.
SOCIAL TV: Connect to Social TV application.
SEARCH: Support to recommendation search word and search function.
W: Turns the 3D image on or off.
E-MANUAL: Displays the e-Manual.
P.SIZE: Lets you select the Picture Size. AD/SUBT: Turns the audio description on and off (not available in some locations). / Displays digital subtitles.
English - 5
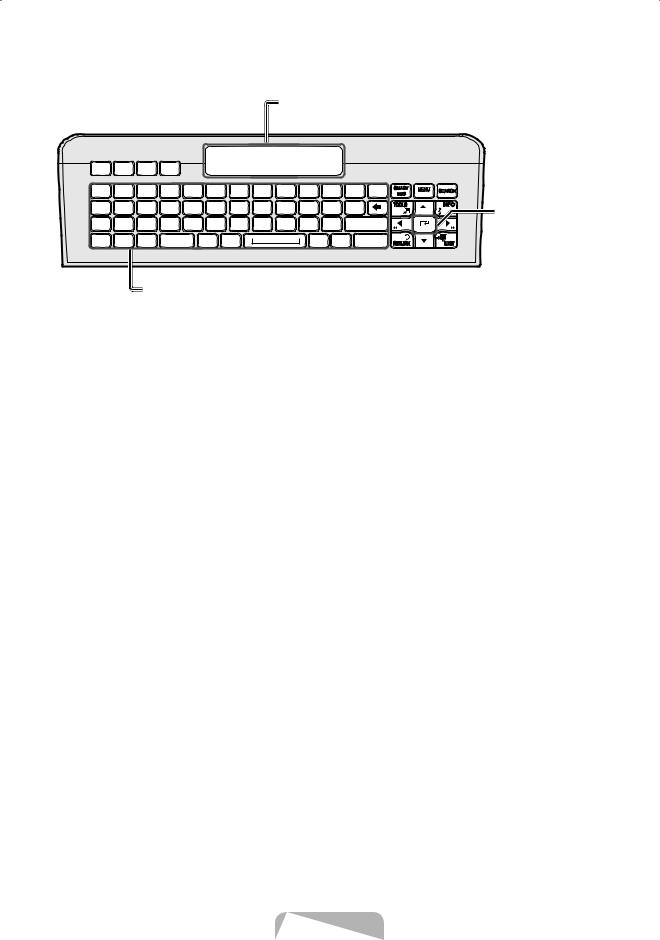
QWERTY Side View
|
|
|
|
|
|
|
|
|
|
|
|
|
Displays the characters the user typed in. |
||||||||||||
|
|
|
|
|
|
|
|
|
|
|
|
|
When the user presses ENTERE, all |
||||||||||||
|
|
|
|
|
|
|
|
|
|
|
|
|
characters on the screen are removed. |
||||||||||||
A |
|
B |
|
C |
|
D |
|
|
|
|
|
|
|
|
|
|
|
|
|
|
|
|
|
|
|
1 |
! |
2 |
@ |
3 |
# |
Q |
_ |
W |
E |
R |
T |
[ |
Y |
] |
U |
{ |
I |
} |
O |
/ |
P |
| |
SMART |
MENU |
SEARCH |
|
|
|
|
- |
+ |
= |
|
|
|
|
|
|
HUB |
m |
|
||||||||||
4 |
$ |
5 % |
6 |
^ |
A ` |
S ~ |
D |
F |
G |
|
H ; |
J : |
K ‘ |
L “ |
|
|
|
|
|
||||||
7 |
|
8 |
|
9 |
|
TAB |
Z |
X |
C |
V |
/ |
B |
, |
N |
. |
M |
? |
ENTER |
|
|
|
|
|||
|
& |
|
* |
|
( |
|
< |
> |
|
|
|
|
|
|
|
|
|||||||||
|
|
|
|
|
|
|
|
|
|
|
|
|
|
|
|
|
|||||||||
ESC |
0 |
) |
CAPS |
SHIFT |
|
SYM |
@ |
|
|
|
|
|
.COM SYM |
|
|
SHIFT |
|
|
|
|
|||||
Convenient QWERTY keyboard to type characters in
SMART HUB and SOCIAL TV menu, etc.
SYM: Enables the symbol printed on the lower right side of each button.
NOTE
•• The remote side doesn’t work when the QWERTY side is up, and vice versa.
OFN(Optical Finger Navigation) Sensor
In full browser function, it can be used as the pointer. If the user doesn’t press any button during 30 seconds, the sensor will be off automatically.
To wake up the sensor, press any button on the QWERTY side.
Initial Pairing
1.When the user inserts batteries into the QWERTY Remote, “NEED PAIRING PRESS SYM+TAB” will be displayed on the screen.
2.Press SYM and TAB buttons at the same time more than 2 seconds.
The TV can be paired with only one QWERTY remote. Start the pairing process approximately 30 seconds after turning on the TV.
Keep within 20 inches(50 cm) between the QWERTY Remote and the TV.
Performing the Pairing Process Again
Press SYM and TAB buttons at the same time more than 2 seconds.
The TV can be paired with only one QWERTY remote. Start the pairing process approximately 30 seconds after turning on the TV.
Keep within 20 inches(50 cm) between the QWERTY Remote and the TV.
English - 6
 Loading...