

Samsung SyncMaster 720T, SyncMaster 720B, SyncMaster 920T, SyncMaster 721B User Manual
Install drivers Install
prog
rams
SyncMaster 720B
SyncMaster 720B/720T/920T/721B
Downloaded from ManualMonitor.com Manuals
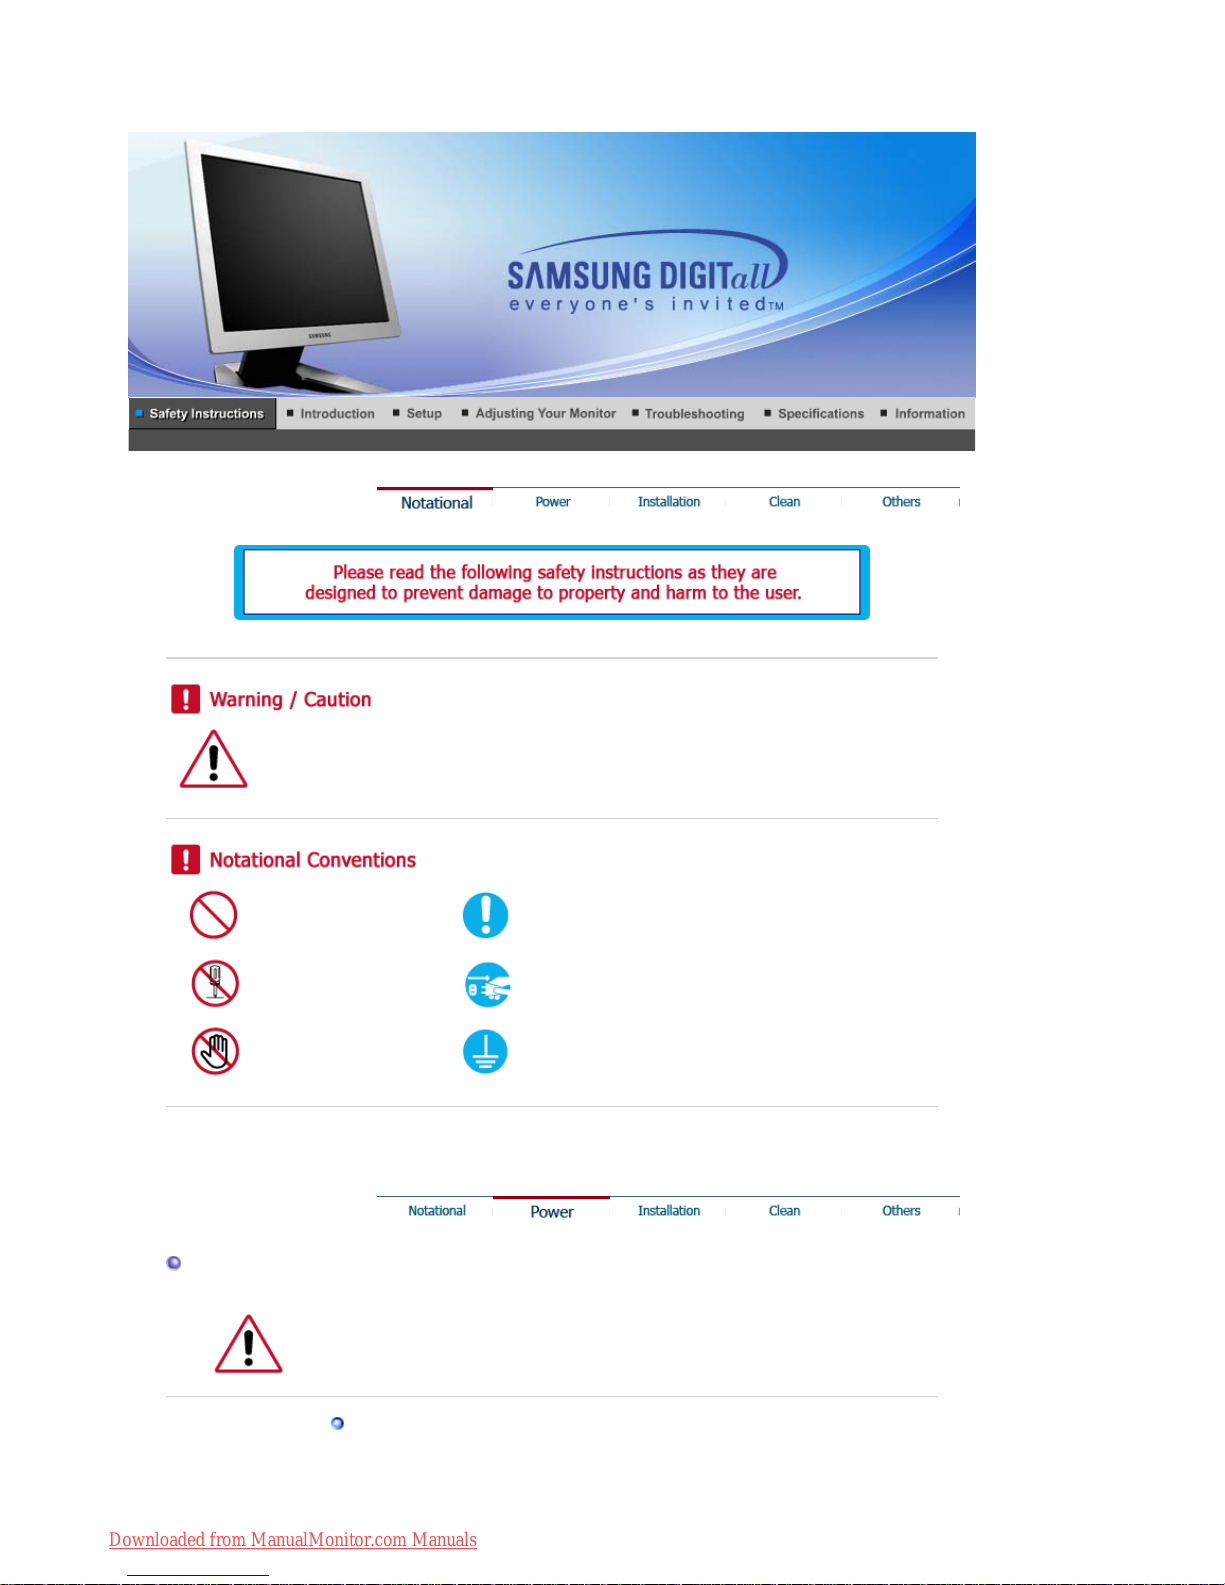
Failure to follow directions noted by this symbol could result in bodily harm or da mage to
equipment.
Prohibited Important to read and understand at all times
Do not disassemble Disconnect the plug from the outlet
Do not touch Grounding to prevent an electric shock
Power
When not used for extended period of time, set your computer to DPMS.
If using a screen saver, set it to the active screen mode.
Do not use a damaged or loose plug.
z This may cause an electric shock or fire.
Downloaded from ManualMonitor.com Manuals
Do not pull the plug out by the wire nor touch the plug with wet hands.
z This may cause an electric shock or fire.
Use only a properly grounde d plug and receptacle.
z An improper ground may cause electric shock or equipment da mag e.
Do not excessively bend the plug and wire nor place heavy objects upon
them, which could cause damage.
z
This may cause an electric shock or fire.
Do not connect too many extension cords or plugs to an outlet.
z This may cause fire.
Installation
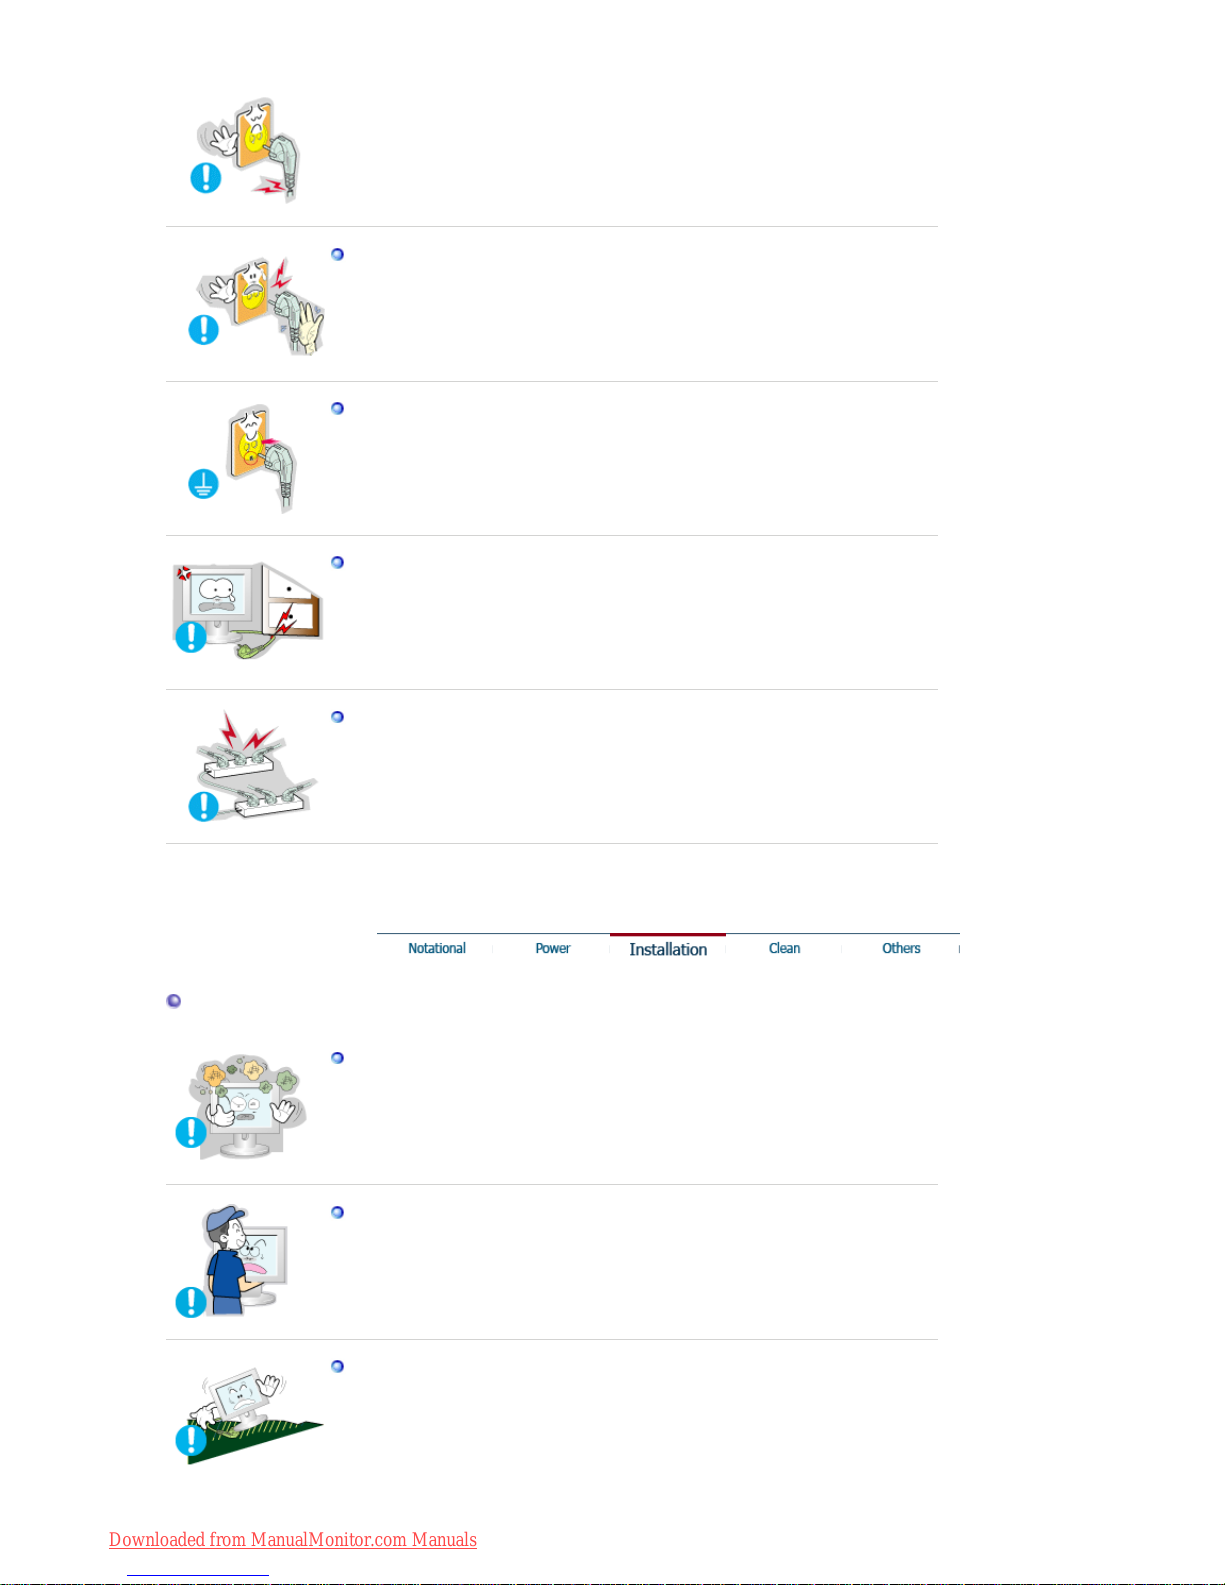
Put your monitor in a location with low humidity and a minimum of dust.
z Failure to do so may cause an electric shock or fire inside the monitor.
Do not drop the monitor when moving it.
z This may cause damage to the product or human body.
Place the monitor on a flat and stable surface.
z The monitor may cause injury by falling.
Downloaded from ManualMonitor.com Manuals
Set down the monitor carefully.
z The monitor could be damaged or broken.
Do not place the monitor face down.
z
The TFT-LCD surface may be damaged.
Installing a wall bracket must be done by a qualified professional.
z Installation by unqualified personnel may result in injury.
z Always use the mounting device specified in the owner's manual.
Leave a space for ventilation between the product and the wall.
z Poor ventilation may cause the interior temperature to rise and lead to
fire.
Clean
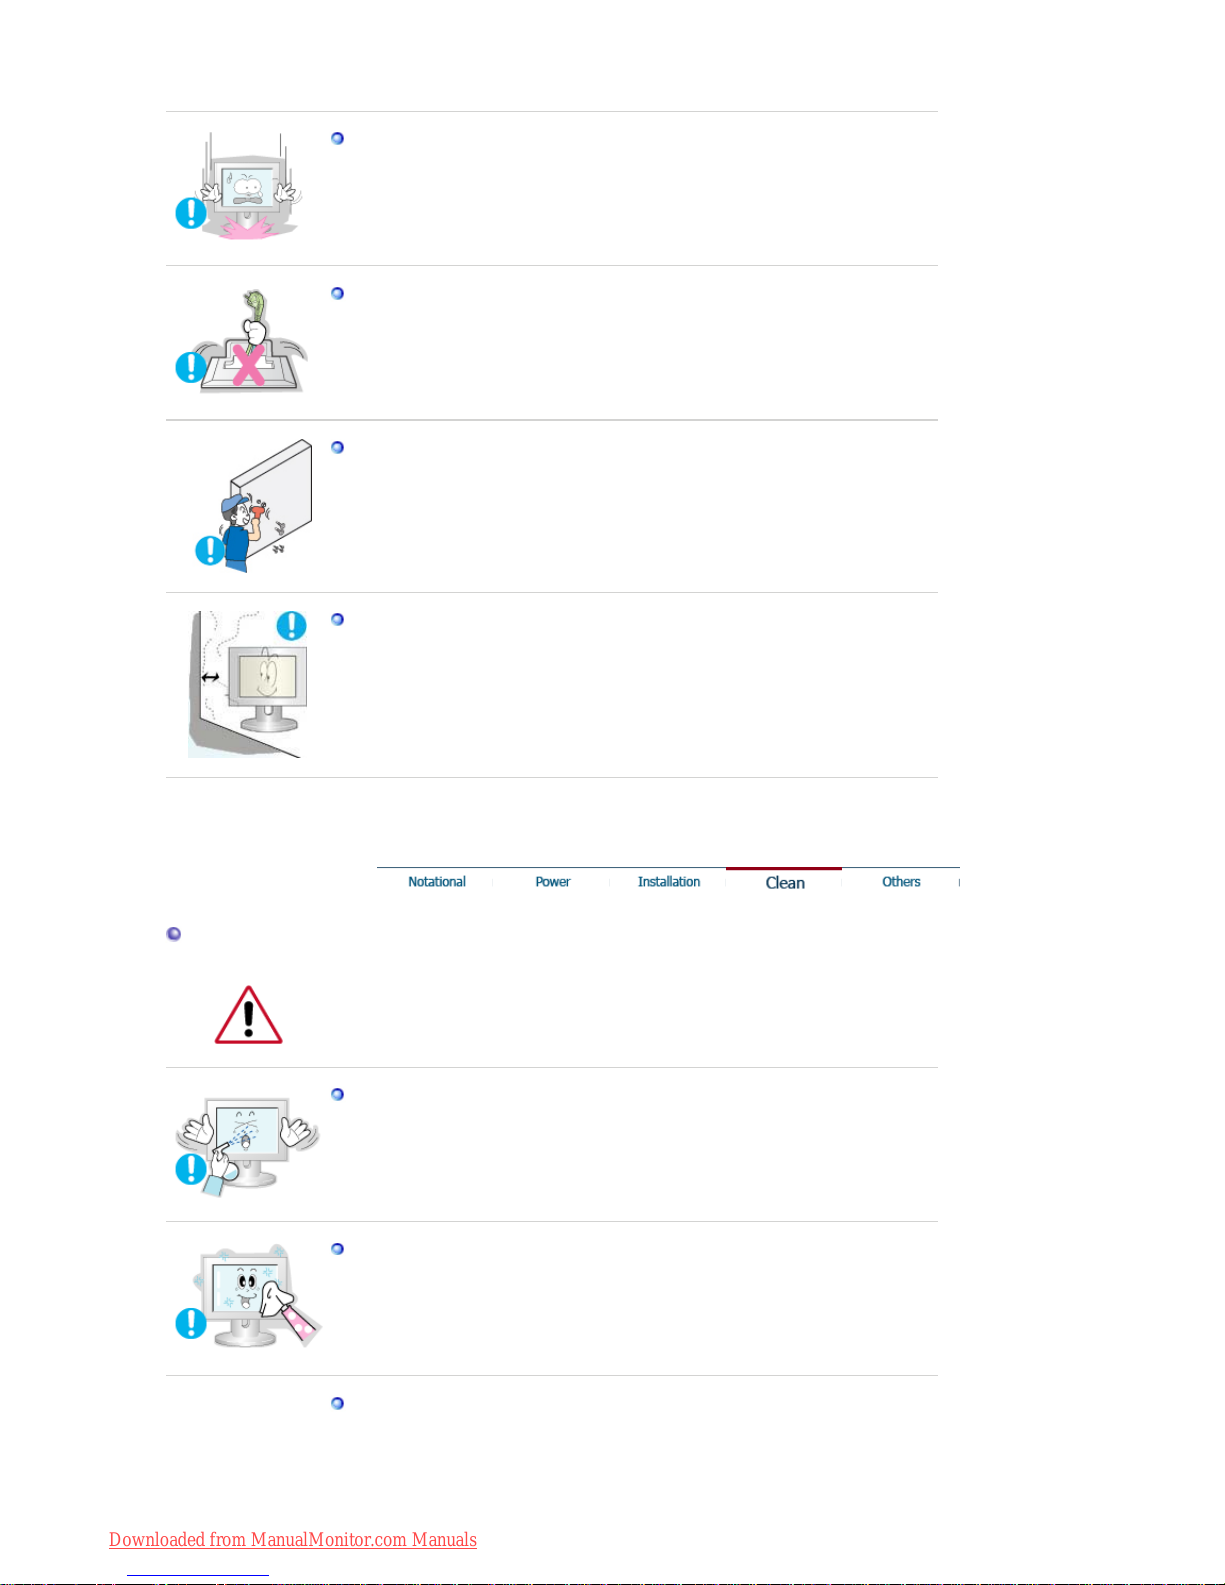
When cleaning the monitor case or the surface of the TFT-LCD screen, wipe with
a slightly moistened, soft fabric.
Do not spray water or detergent directly on the monitor.
z
This may cause damage, electric shock or fire.
Use the recommended detergent with a smooth cloth.
If the connector between the plug and the pin is dusty or dirty, clean it
properly with a dry cloth.
z A dirty connector may cause an electric shock or fire.
Downloaded from ManualMonitor.com Manuals
Contact the Service Center or Customer Center for interior cleaning
once a year.
z
Keep the product's interior clean. Dust which has accumulated in the
interior over an extended period of time may cause malfunction or fire.
Others
Do not remove cover (or back).
z This may cause an electric shock or fire.
z Refer servicing to qualified service personnel.
If your monitor does not operate normally - in particular, if there are any
unusual sounds or smells coming from it - unplug it immediately and
contact an authorized dealer or service.
z This may cause an electric shock or fire.
Be careful not to let water drip into the monitor or expose the monitor to
moisture.
z This may cause malfunction, an electric shock or fire.
z
Especially avoid operating the monitor near water or outdoors where it
could be exposed to snow or rain.
If the monitor is dropped or the casing is damaged, turn the monitor off
and unplug the power cord.
z The monitor may malfunction, causing an electric shock or fire.
z Then contact the Service Center .
Disconnect the plug from the outlet during storms or lightening or if it is
not used for a long period of time.
z Failure to do so may cause an electric shock or fire.
Do not try to move the monitor by pulling only the wire or the signal
cable.
z This may cause a breakdown, electric shock or fire due to damage to
the cable.
Downloaded from ManualMonitor.com Manuals

Do not move the monitor right or left by pulling only the wire or the
signal cable.
z
This may cause a breakdown, electric shock or fire due to damage to
the cable.
Do not cover the vents on the monitor cabinet.
z Bad ventilation may cause a breakdown or fire.
Do not place water containers, chemical products or small metal objects
on the monitor.
z
This may cause malfunction, an electric shock or fire.
z If a foreign substance enters the monitor, unplug the power cord and
contact the Service Center .
Do not use or store inflammable substances near the monitor.
z This may cause an explosion or fire.
Never insert anything metallic into the monitor openings.
z This may cause an electric shock, fire or injury.
Do not insert metal objects such as utensils, wire or drill bits or things
that catch fire easily, such as pieces of paper or matches, into the vents,
the headphone or A/V ports on the monitor.
z
This may cause malfunction, an electric shock or fire.
z Always contact the Service Center if foreign substances/objects enter
into the monitor.
If you view a fixed screen for an extended period of time, residual ima ge
or blurriness may appear.
z
Change the mode to energy save or set a screensaver to moving
picture when you need to be away from the monitor for an extended
period of time.
Be careful when adjusting the stand angle.
z Applying too much force may cause the monitor topple over or fall,
resulting in injury.
z Your hand or finger(s) may get caught between the monitor and the
Downloaded from ManualMonitor.com Manuals
stand, causing injury.
Adjust the resolution and frequency to the levels appropriate for the
model.
z Inappropriate resolution may cause undesirable picture quality.
17,19 inch - 1280 X 1024
Be careful that adapter should not be in contact with water and
therefore not be wet.
z
This may cause malfunction, an electric shock or fire.
z Do not use adapter by the waterside or outside particularly when it rains
or snows.
z Be careful that adapter should not be wet while cleaning floor with
water.
Keep all power adapters apart.
z Failure to do so may cause fire.
Keep power adapter away from any other heat source.
z Failure to do so may cause fire.
Remove and discard vinyl bag from power adapter before use.
z Failure to do so may cause fire.
Always keep power adapter in well-ventilated area.
Keep the volume at a proper level when you use the headphones.
z Excessively loud volume levels may damage hearing.
Sitting too close to the monitor on a continuous basis may damage
eyesight.
Downloaded from ManualMonitor.com Manuals
To ease eye strain, take at least a five-minute break after every hour of
using the monitor
.
Do not use the monitor where it may be exposed to strong vibrations.
z
Exposure to strong vibrations may cause fire and hazard and shorten
the life of the monitor.
When moving the monitor, turn the power switch off and unplug the
power cord.
Make sure that all cables, including the antenna cable and cables
connected to other devices, are disconnected before moving the
monitor.
z Failure to disconnect the cable may damage it and lead to fire or an
electric shock.
Downloaded from ManualMonitor.com Manuals

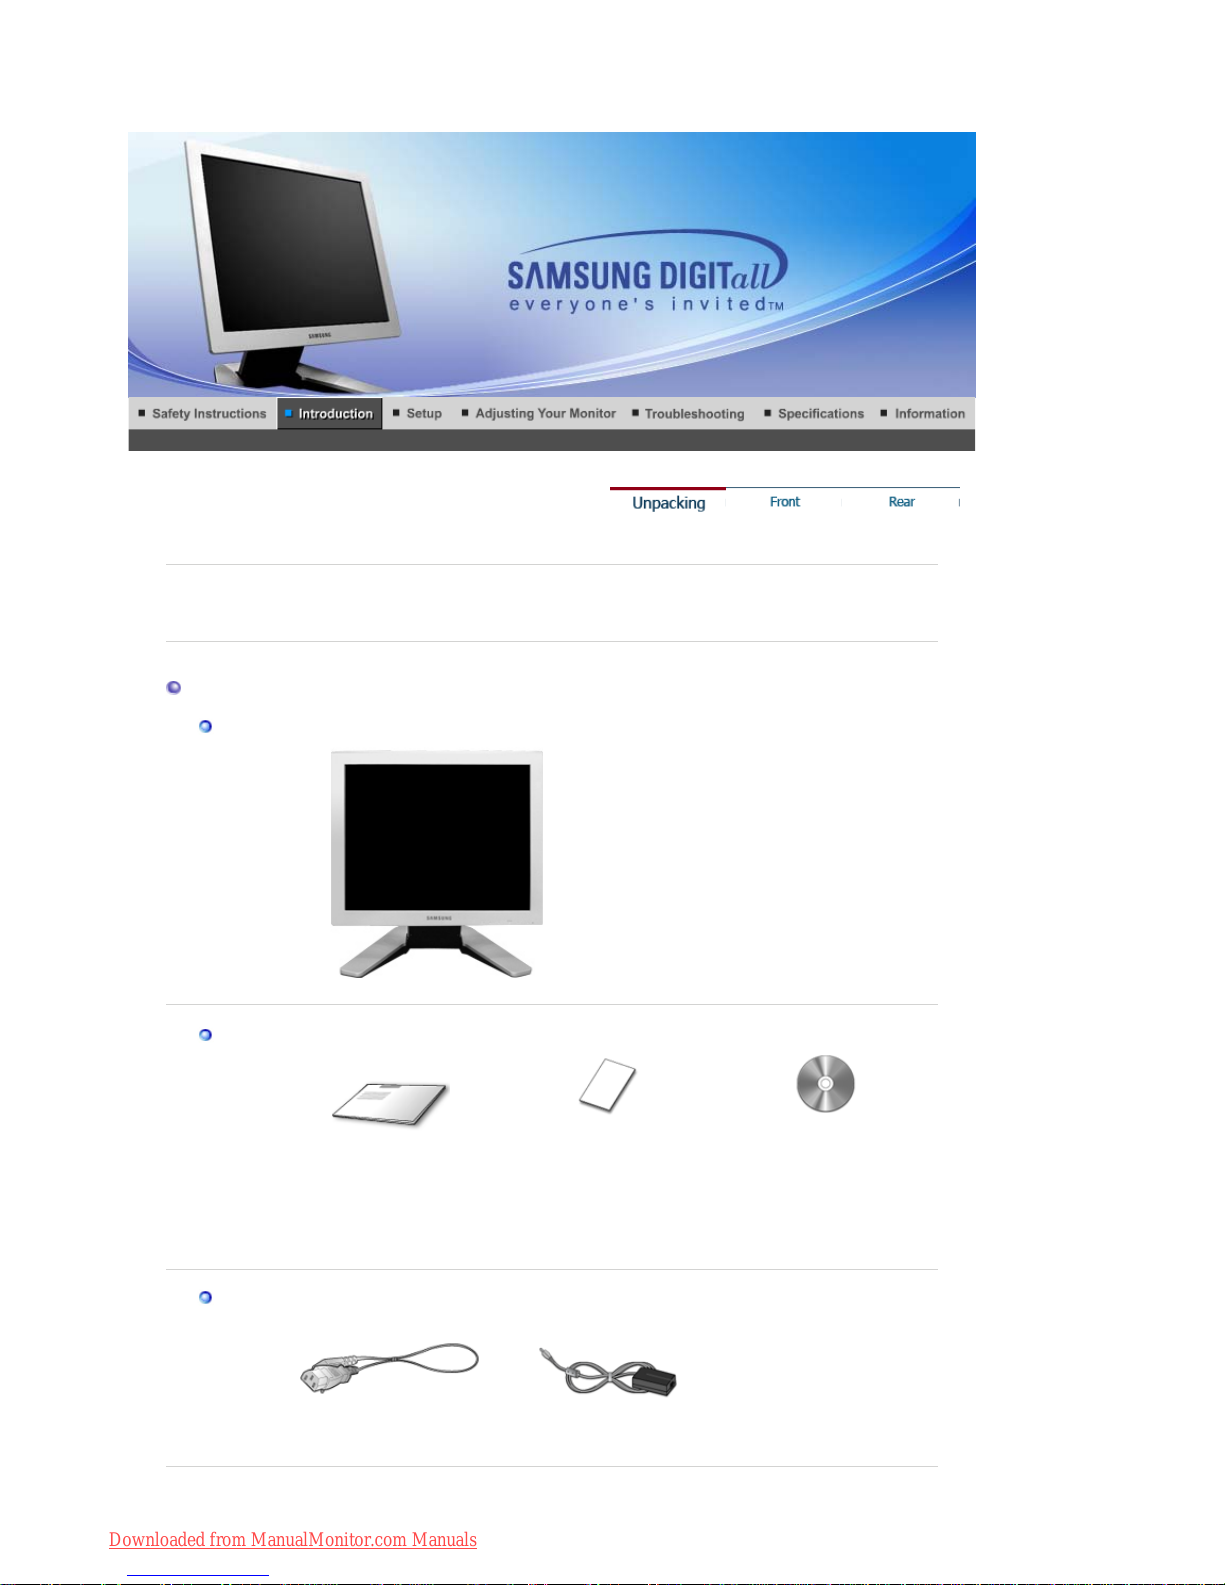
Please make sure the following items are included with your monitor.
If an
y
items are missing, contact your dealer.
Unpacking
Monitor
Manual
Quick Setup Guide
Warranty Card
(Not available in all
locations)
User's Guide,
Monitor Driver,
Natural Color software,
MagicTune™ software,
Pivot
®
Pro software
Cable
Power Cord
DC Adapte
r
SyncMaster 720B/721B
Downloaded from ManualMonitor.com Manuals

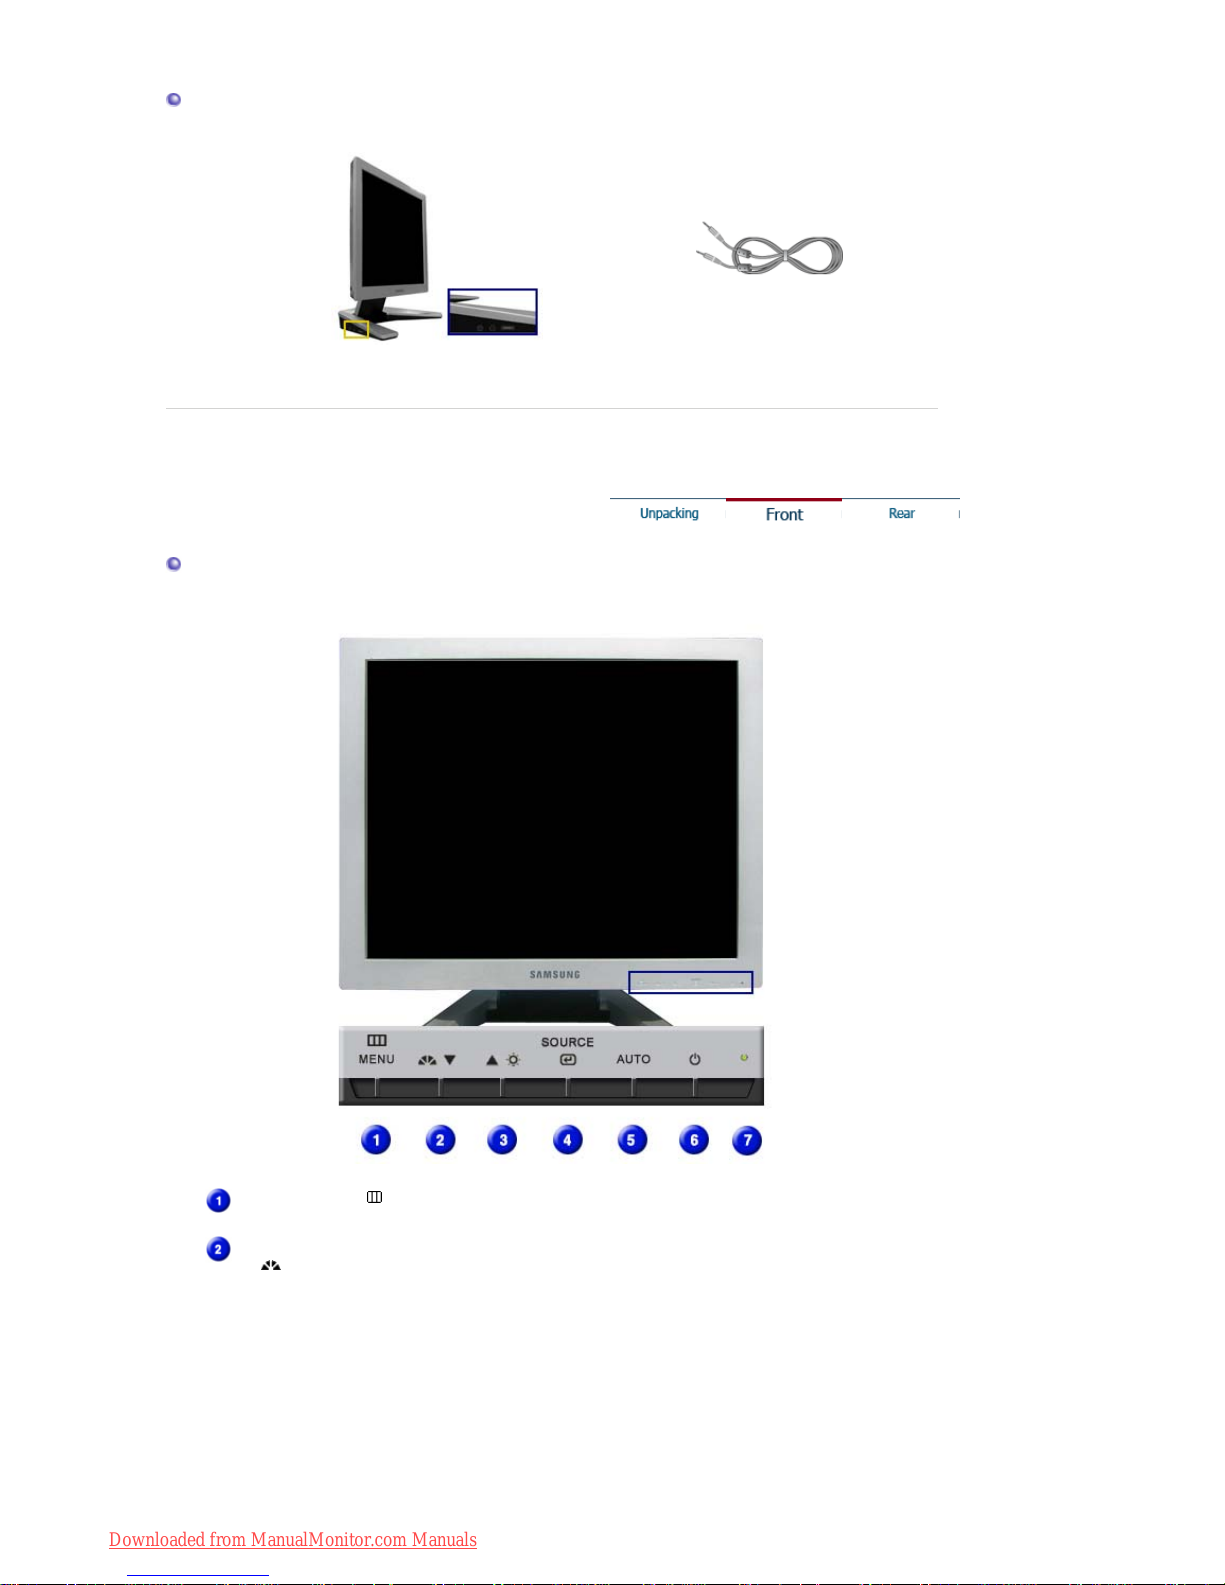
For Multimedia model (Option)
Multimedia model
A
udio Cable
Front
Menu button [ ]
Opens the OSD menu. Also use to exit the OSD menu or return
to the previous menu.
MagicBright button
[]
MagicBright is a new feature providing optimum viewing
environment depending on the contents of the image you are
watching. Currently six different modes are available: Custom,
Text, Internet, Game, Sport and Movie. Each mode has its own
pre-configured brightness value. You can easily select one of
six settings by simply pressing MagicBright control buttons.
1) Custom
Although the values are carefully chosen by our engineers,
the pre-configured values may not be comfortable to your
eyes depending on your taste.
If this is the case, adjust the Brightness and Contrast by
using the OSD menu.
Downloaded from ManualMonitor.com Manuals
2) Text
: Normal Brightness
For documentations or works involving heavy text.
3) Internet
: Medium Brightness
For working with a mixture of images such as text and
graphics.
4) Game
For watching motion pictures such as a Game.
5) Sport
For watching motion pictures such as a Sport.
6) Movie
: High Brightness
For watching motion pictures such as a DVD or Video CD.
>>Click here to see an animation clip
Brightness button [ ]
When OSD is not on the screen, Push the button to adjust
brightness.
Adjust buttons [ ]
Adjust items in the menu.
Enter button [ ]
Activates a highlighted menu item.
Auto button
Use this button for auto adjustment.
Power button
Use this button for turn the monitor on and off.
Power indicator
This light glows green during normal operation, and blinks green
once as the monitor saves your adjustments.
See PowerSaver described in the manual for further information regarding power saving
functions. For energy conservation, turn your monitor OFF when it is not needed, or when
leaving it unattended for long periods.
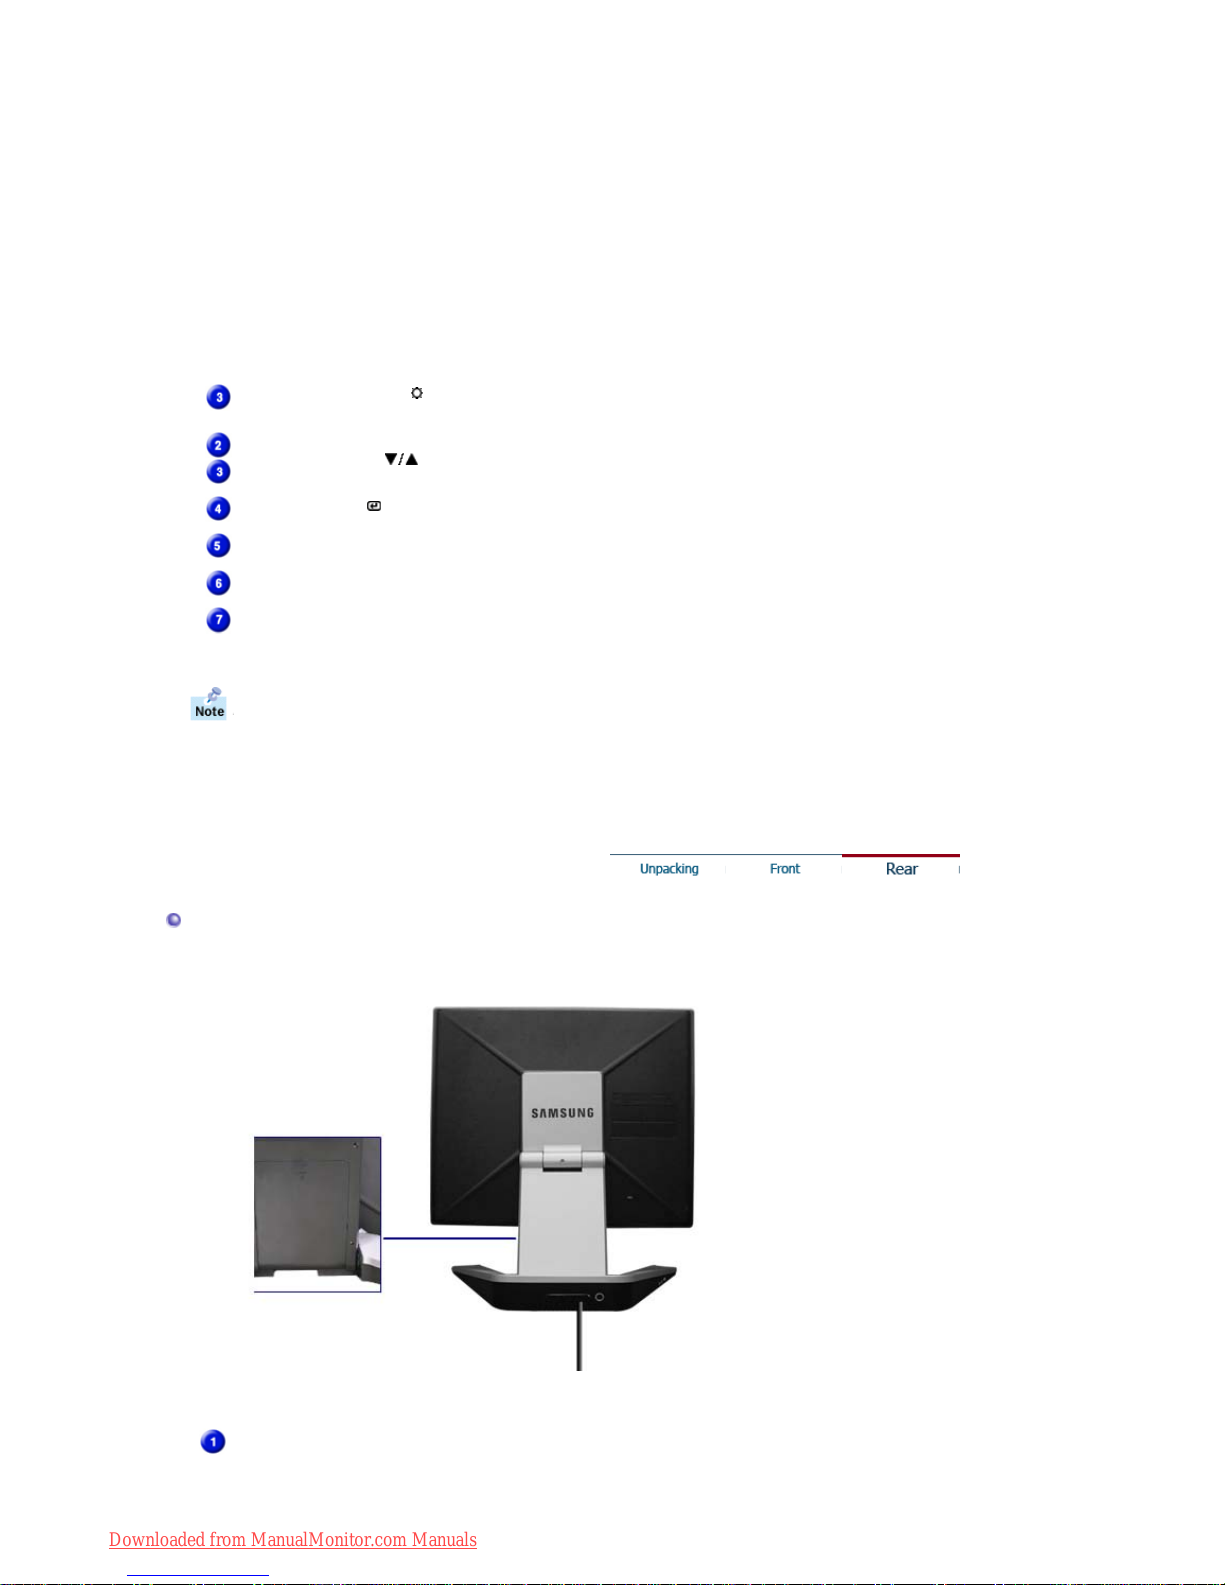
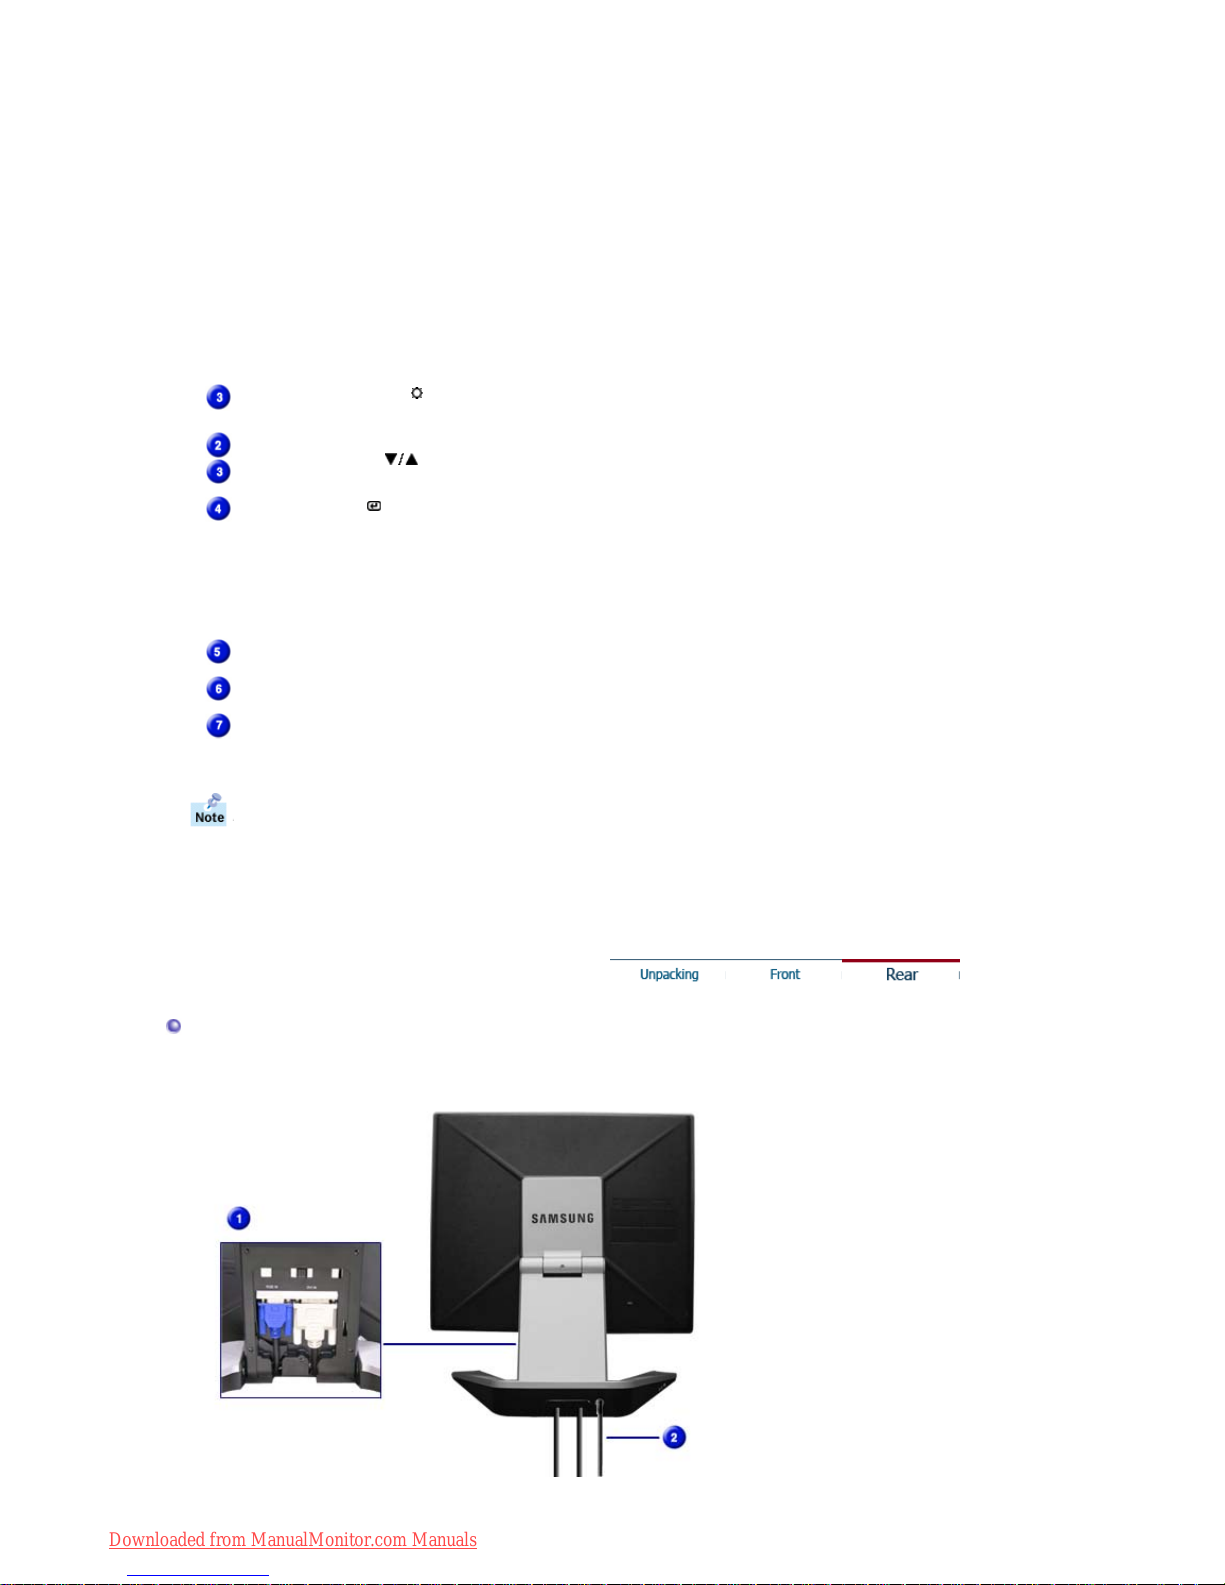
Rear
(The configuration at the back of the monitor may vary from product to product.)
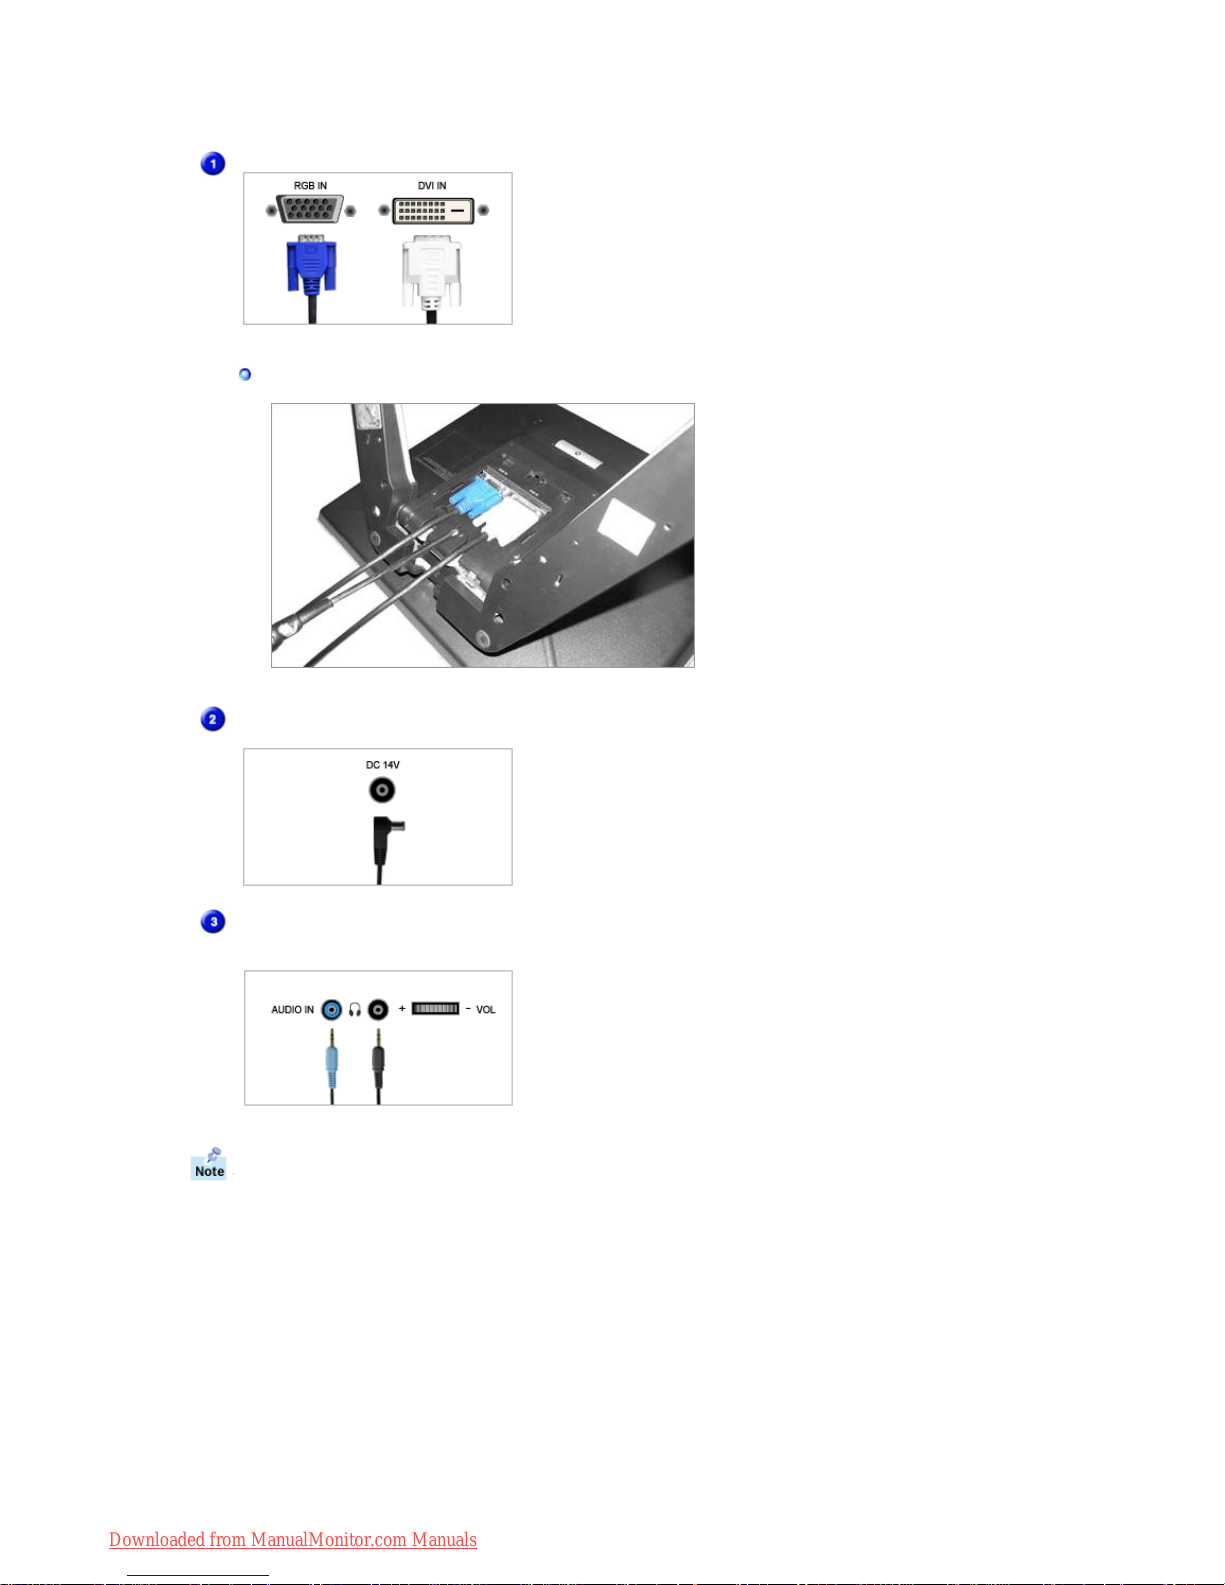
PC Connection Terminal
Computer Connection Terminal (15 Pin D-SUB)
Downloaded from ManualMonitor.com Manuals

How to disconnect a cable
DC Power Connection Terminal
(DC 14V)
This product may be used with 90 ~ 264VAC.
(Voltage is automatically adjusted by the power
adapter.)
Audio Connection Terminal
(Multimedia Model / Option)
A
udio Connection Terminal
See Connecting the Monitor for further information regarding cable connections.
Headphone connection terminal (Output)
Downloaded from ManualMonitor.com Manuals
Please make sure the following items are included with your monitor.
If an
y
items are missing, contact your dealer.
Unpacking
Monitor
Manual
Quick Setup Guide
Warranty Card
(Not available in all
locations)
User's Guide,
Monitor Driver,
Natural Color software,
MagicTune™ software,
Pivot
®
Pro software
Cable
Power Cord
DC Adapte
r
SyncMaster 720T/920T
Downloaded from ManualMonitor.com Manuals
For Multimedia model (Option)
Multimedia model
A
udio Cable
Front
Menu button [ ]
Opens the OSD menu. Also use to exit the OSD menu or return
to the previous menu.
MagicBright button
[]
MagicBright is a new feature providing optimum viewing
environment depending on the contents of the image you are
watching. Currently six different modes are available: Custom,
Text, Internet, Game, Sport and Movie. Each mode has its own
pre-configured brightness value. You can easily select one of
six settings by simply pressing MagicBright control buttons.
1) Custom
Although the values are carefully chosen by our engineers,
the pre-configured values may not be comfortable to your
eyes depending on your taste.
If this is the case, adjust the Brightness and Contrast by
using the OSD menu.
Downloaded from ManualMonitor.com Manuals
2) Text
: Normal Brightness
For documentations or works involving heavy text.
3) Internet
: Medium Brightness
For working with a mixture of images such as text and
graphics.
4) Game
For watching motion pictures such as a Game.
5) Sport
For watching motion pictures such as a Sport.
6) Movie
: High Brightness
For watching motion pictures such as a DVD or Video CD.
>>Click here to see an animation clip
Brightness button [ ]
When OSD is not on the screen, Push the button to adjust
brightness.
Adjust buttons [ ]
Adjust items in the menu.
Enter button [ ] /
Source button
Activates a highlighted menu item. /
Push the 'Source', then Selects the Video signal while the OSD
is off. (When the Source button is pressed to change the input
mode, a message appears in the center of the screen displaying
the current mode -- analog or digital input signal.) Note : If you
select the Digital mode, you must connect your monitor to the
graphic card's port using the DVI cable.
Auto button
Use this button for auto adjustment.
Power button
Use this button for turn the monitor on and off.
Power indicator
This light glows green during normal operation, and blinks green
once as the monitor saves your adjustments.
See PowerSaver described in the manual for further information regarding power saving
functions. For energy conservation, turn your monitor OFF when it is not needed, or when
leaving it unattended for long periods.
Rear
Downloaded from ManualMonitor.com Manuals
(The configuration at the back of the monitor may vary from product to product.)
PC Connection Terminal
Computer Connection Terminal (15 Pin D-SUB)
Computer Connection Terminal (DVI)
How to disconnect cables
DC Power Connection Terminal
(DC 14V)
This product may be used with 90 ~ 264VAC.
(Voltage is automatically adjusted by the power
adapter.)
Audio Connection Terminal
(Multimedia Model / Option)
A
udio Connection Terminal
See Connecting the Monitor for further information regarding cable connections.
Headphone connection terminal (Output)
Downloaded from ManualMonitor.com Manuals
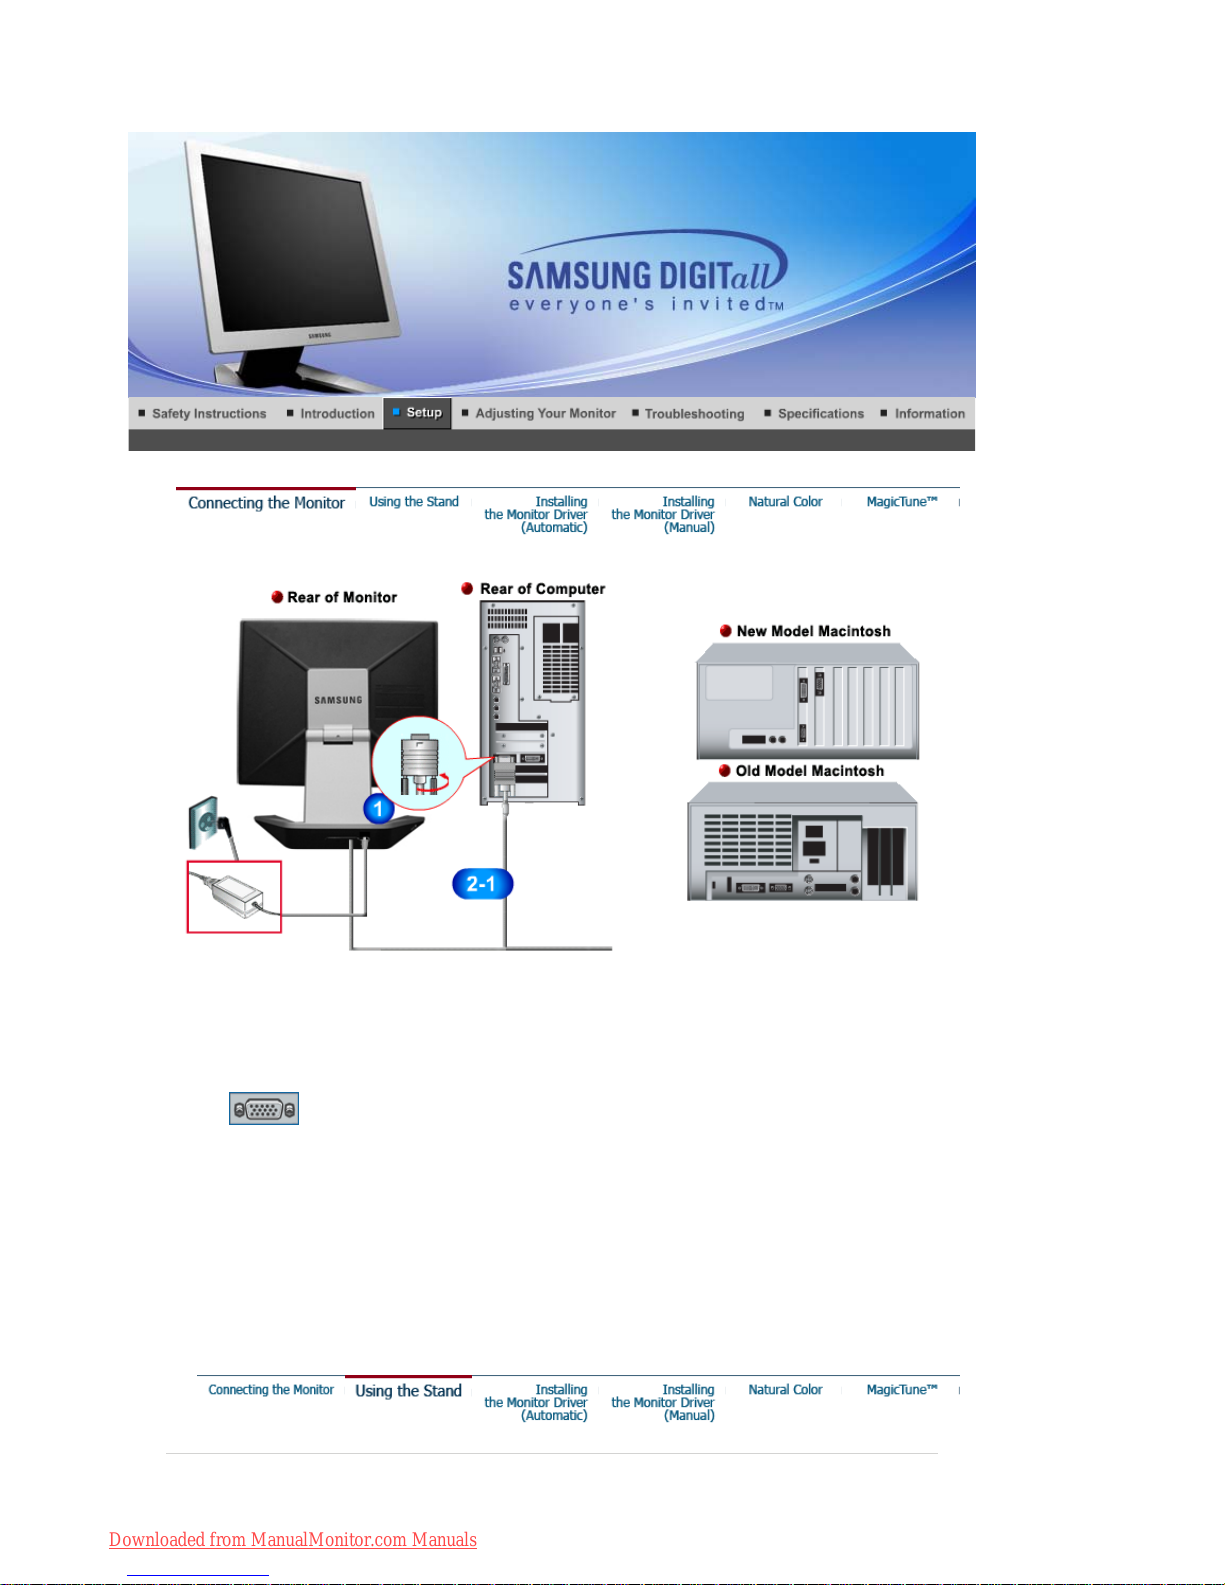
1.
Connect the power cord for your monitor to the power port on the back of the monitor.
Plug the power cord for the monitor into a nearby outlet.
2-1.
Using the D-sub (Analog) connector on the video card.
Connect the signal cable to the 15-pin, D-sub connector on the back of your monitor.
2-2.
Connected to a Macintosh.
Connect the monitor to the Macintosh computer using the D-SUB connection cable.
2-3.
In the case of an old model Macintosh, you need to connect the monitor using a special Mac
adapter.
3.
Connect the audio cable for your monitor to the audio port on the back of your computer.
4.
Turn on your computer and monitor. If your monitor displays an image, installation is
complete.
SyncMaster 720B/721B
Downloaded from ManualMonitor.com Manuals
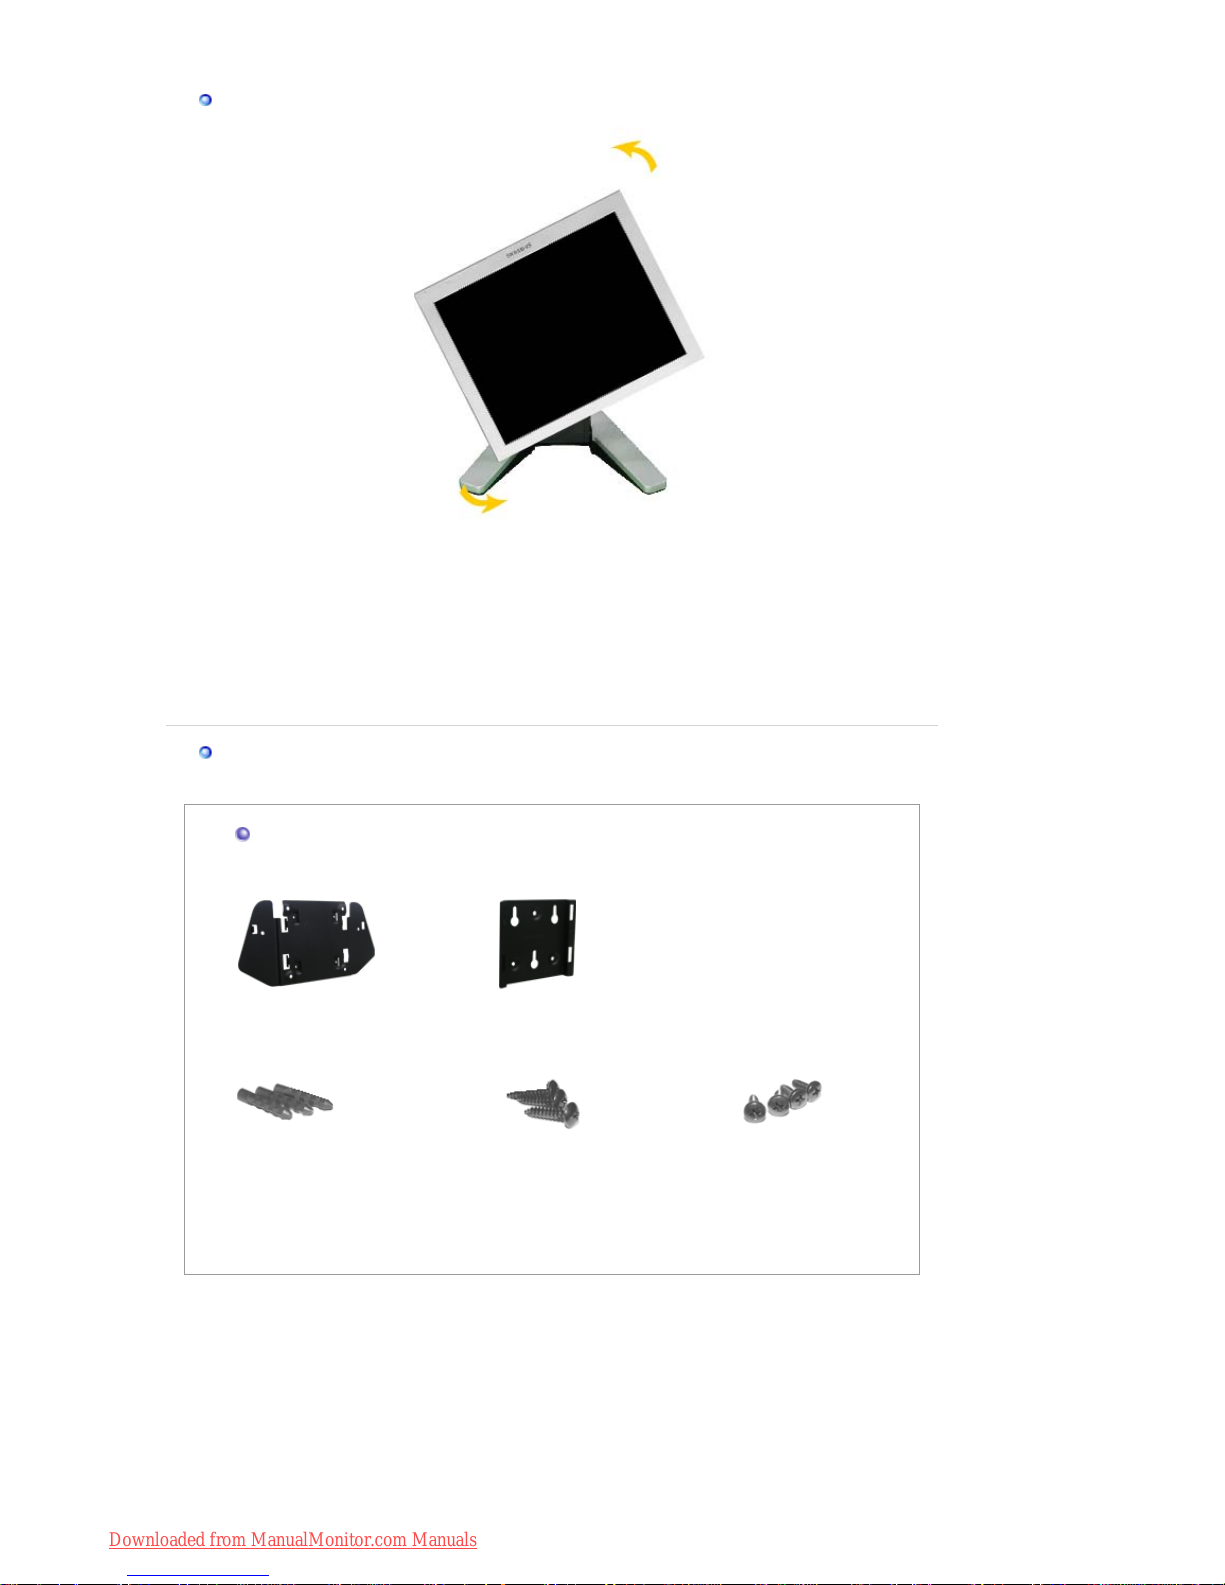
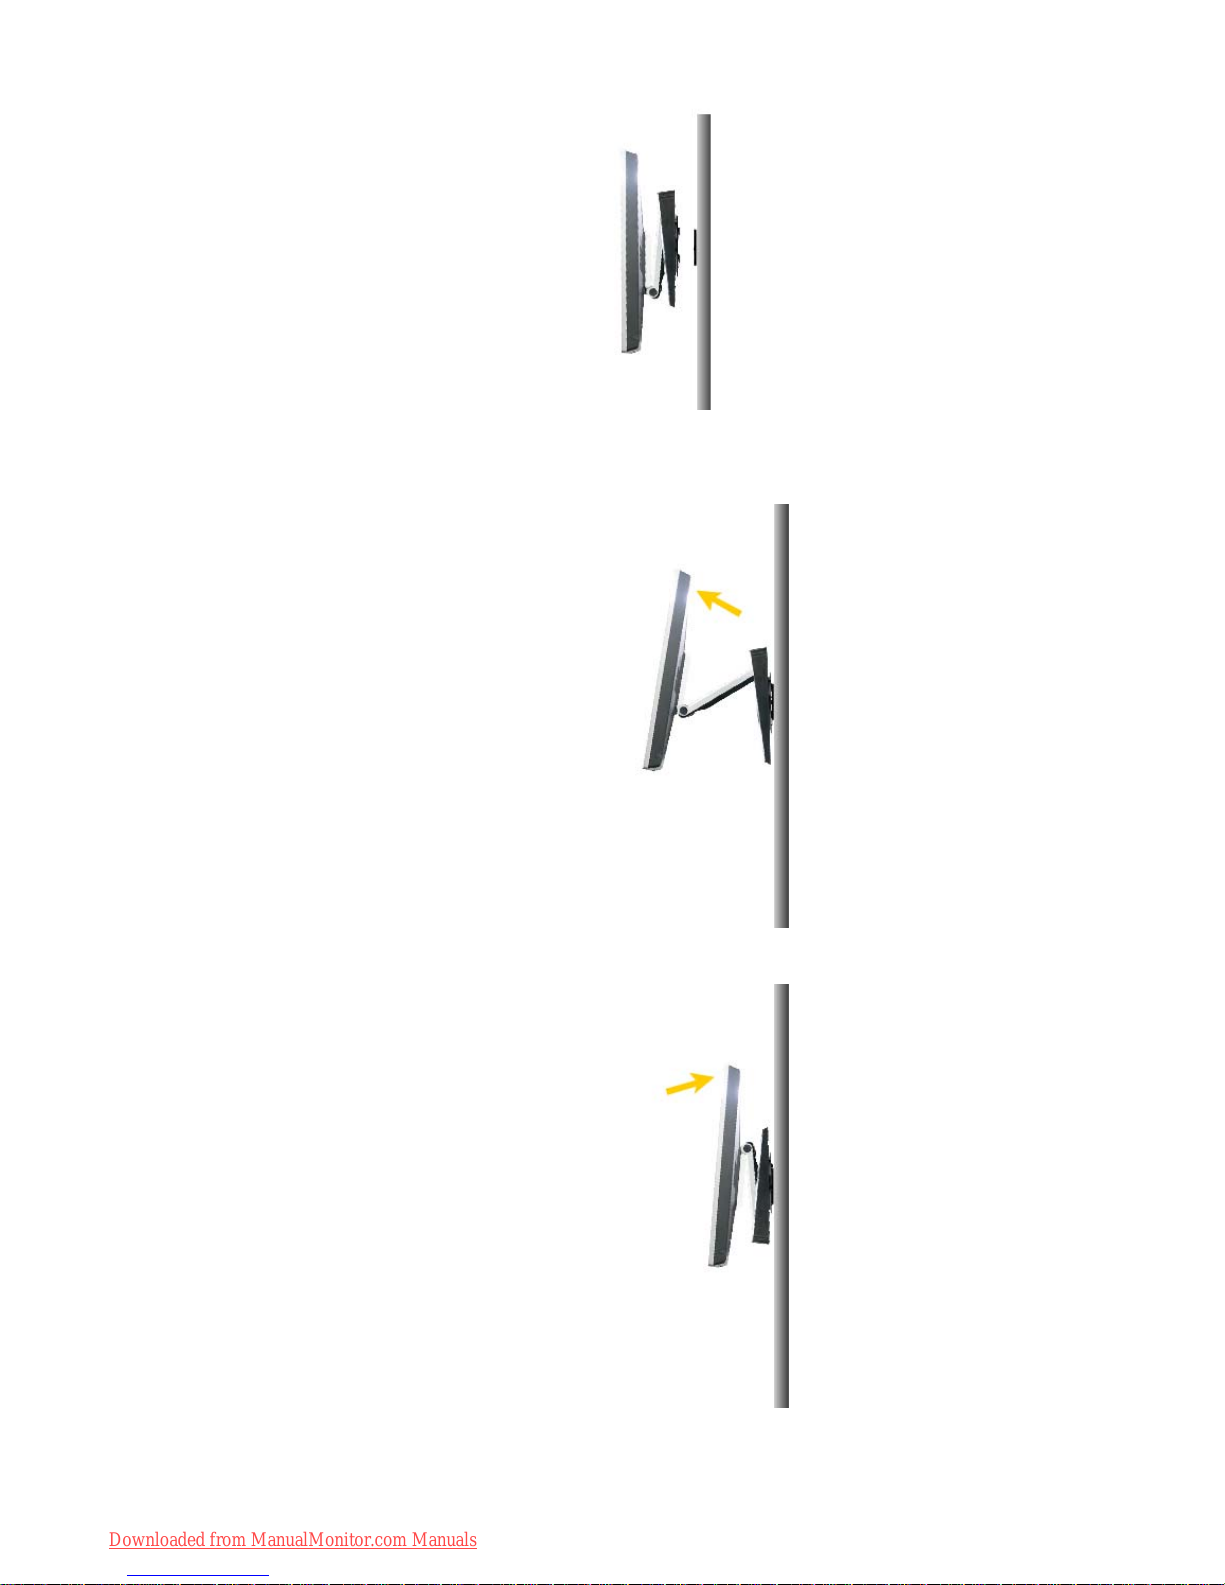
Pivot Stand
Pivot Pro Installation
Caution :
When Pivoting the monitor, the corner of the monitor may reach to the floor. Tilt the
monitor backward more than 45 degrees and then Pivot it. Failure to do so may damage
the monitor.
Installing a VESA base
Sold separately
1. Bracket
(
Set-Mount
)
2. Bracket
(
Wall-Mount
)
3. Anchors (3EA)
4. Screws (3EA)
(
Wall-Mount
)
5. Screws (4EA)
(Contact a local Samsung Electroni cs service center to buy optional items.)
1. Installing the wall-mount bracket
Downloaded from ManualMonitor.com Manuals
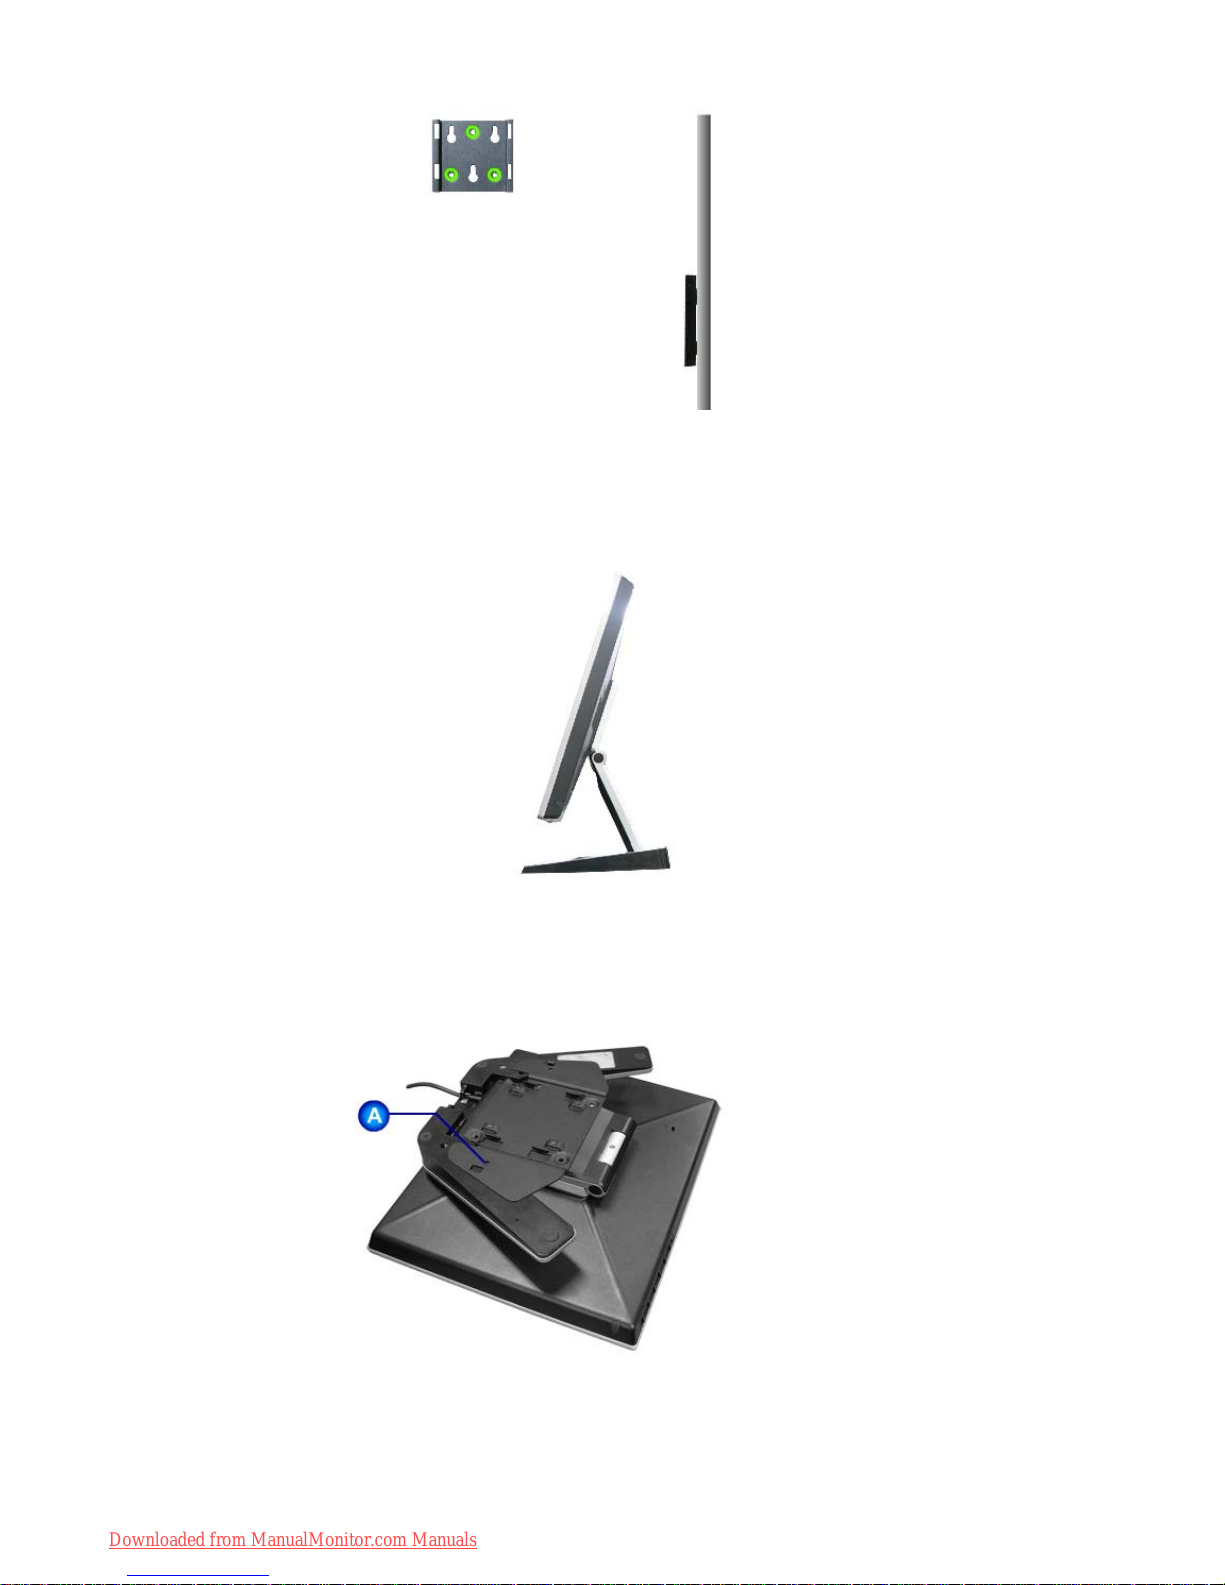
2. Installing the set-mount bracket
(1)
Fold the base and put the set-mount bracket into it. Align the set-mount interface holes with the holes
in the base A and secure it tightly with 2 screws.
(2)
Downloaded from ManualMonitor.com Manuals
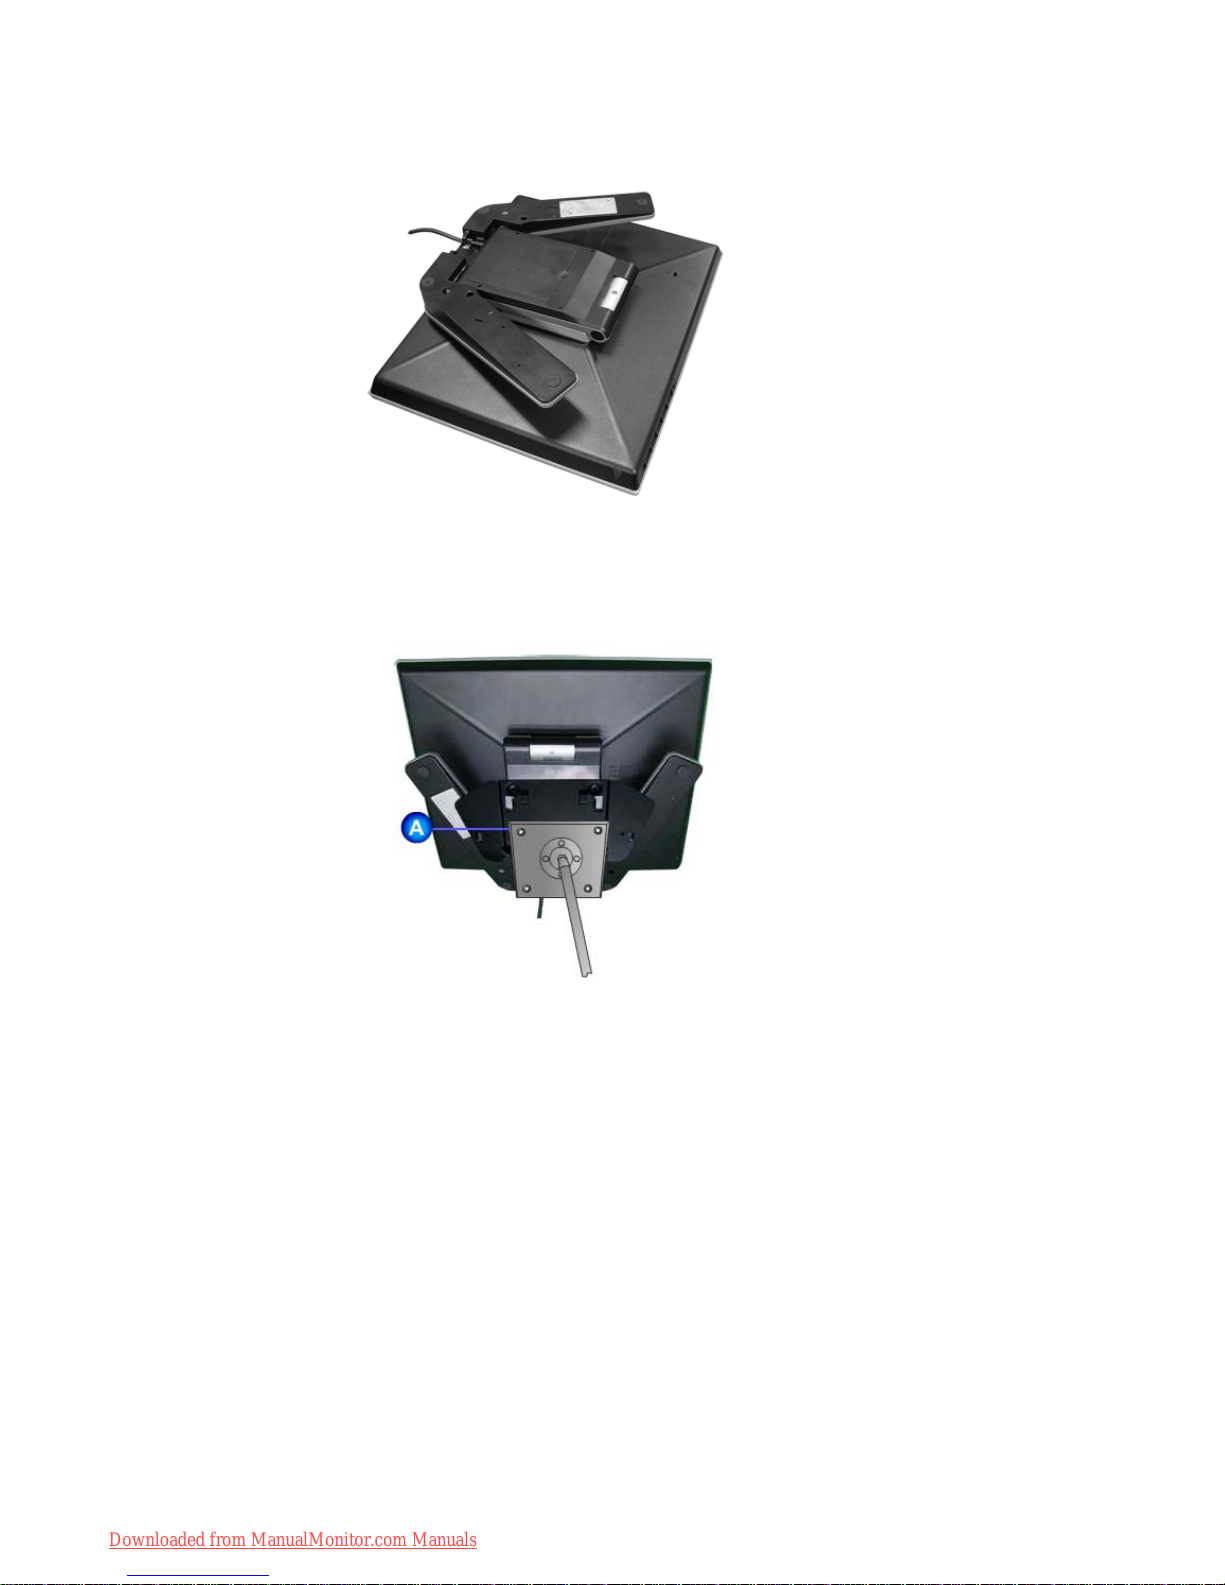
Fold the base and lay the area connected to cable face-down before putting the set-moun t bracket into
it. Align the set-mount interface holes with the holes in the base B and secure it tightly with 4 screws.
(3)
This monitor accepts a 75mm x 75mm VESA-compliant mounting interface pad.
A.
Monitor
B.
Mounting interface pad
A
lign the Mounting Interface Pad with the holes in the Rear Cover Mounting Pad and secure it with four
screws that came with the arm-type base, wall mount hanger or other base.
3. Wall Mounting the Monitor
Downloaded from ManualMonitor.com Manuals
(1)
(2)
Caution:
The stand is made of aluminum. Keep it from getting nicked or scratched.
Downloaded from ManualMonitor.com Manuals
When prompted by the operating system for the monitor driver, insert the CD-ROM
included with this monitor. Driver installation is slightly different from one operating
system to another. Follow the directions appropriate for the operating system you
have.
Prepare a blank disk and download the driver program file at the Internet web site shown
here.
z Internet web site : http://www.samsung-monitor.com/ (Worldwide)
http://www.samsungusa.com/monitor (USA)
http://www.sec.co.kr/monitor (Korea)
http://www.samsungmonitor.com.cn/ (China)
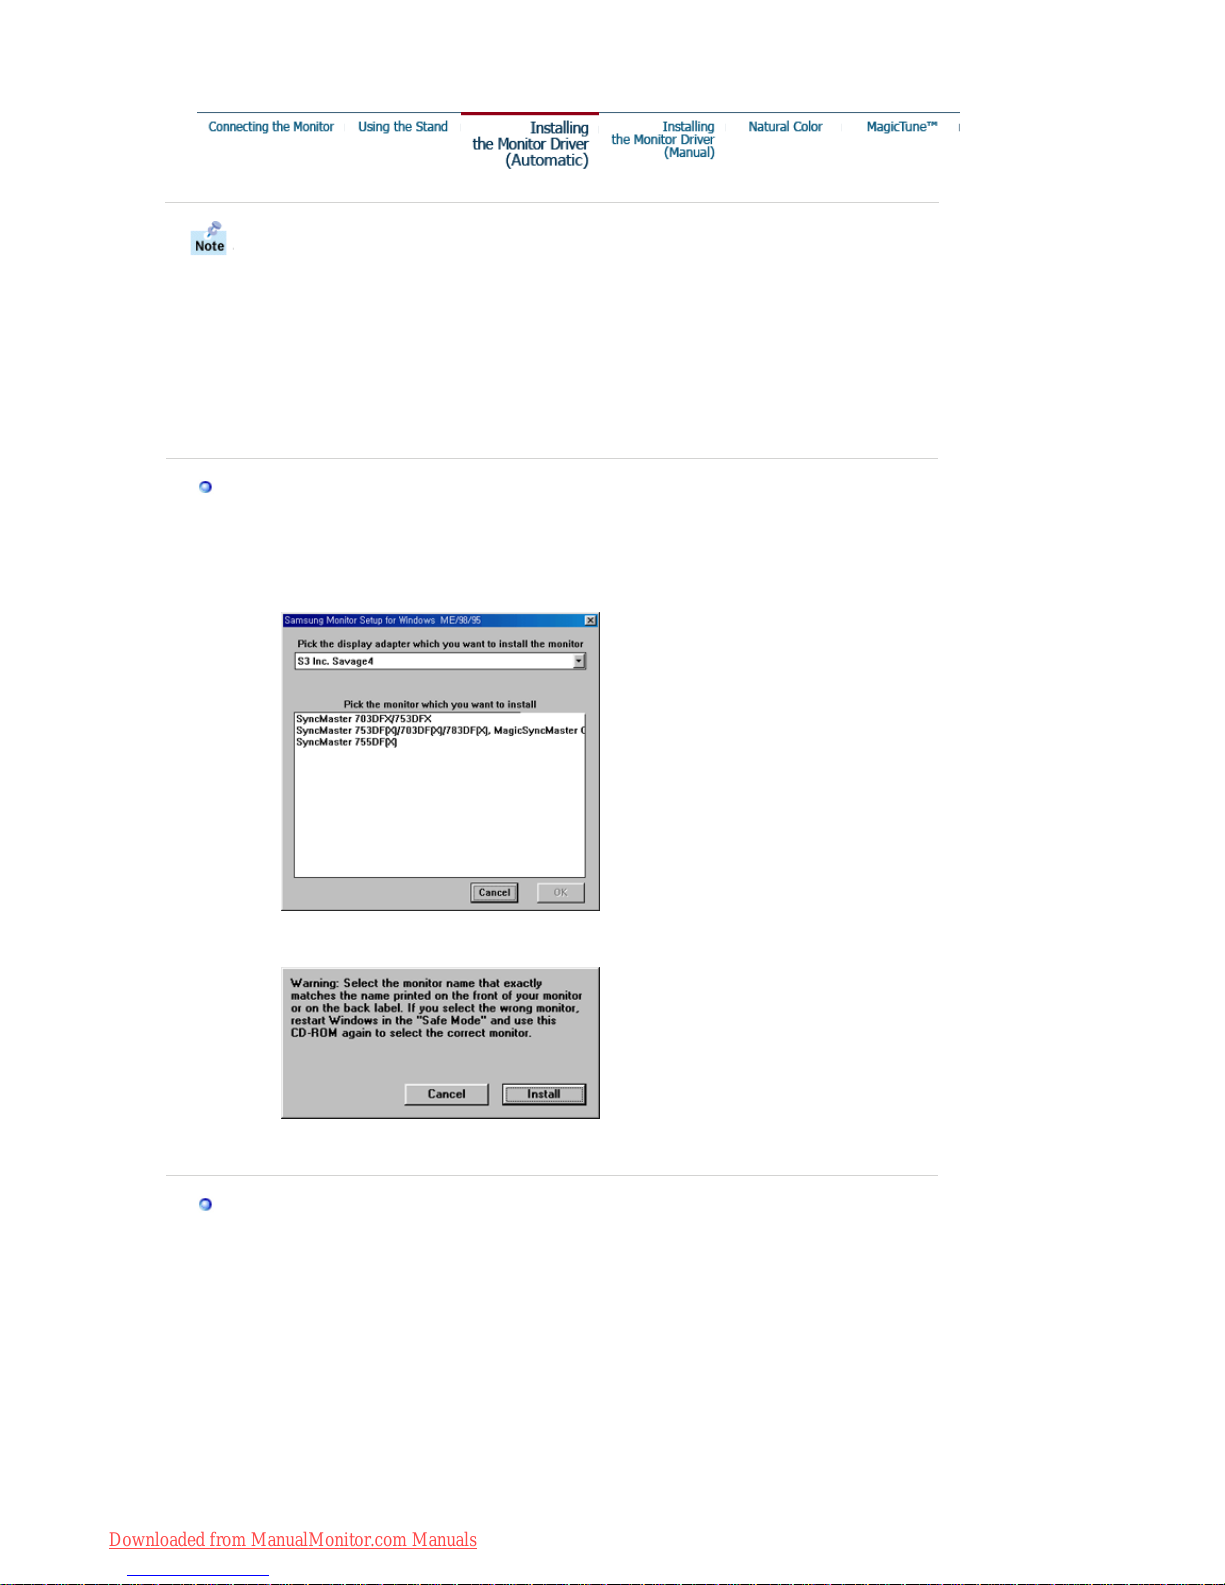
Windows ME
1. Insert CD into the CD-ROM drive.
2. Click
"Windows ME Driver"
.
3. Choose your monitor model in the model list, then click the
"OK"
button.
4. Click the
"Install"
button in the
"Warning"
window.
5. Monitor driver installation is completed.
Windows XP/2000
1. Insert CD into the CD-ROM drive.
2. Click
"Windows XP/2000 Driver"
3. Choose your monitor model in the model list, then click the
"OK"
button.
Downloaded from ManualMonitor.com Manuals
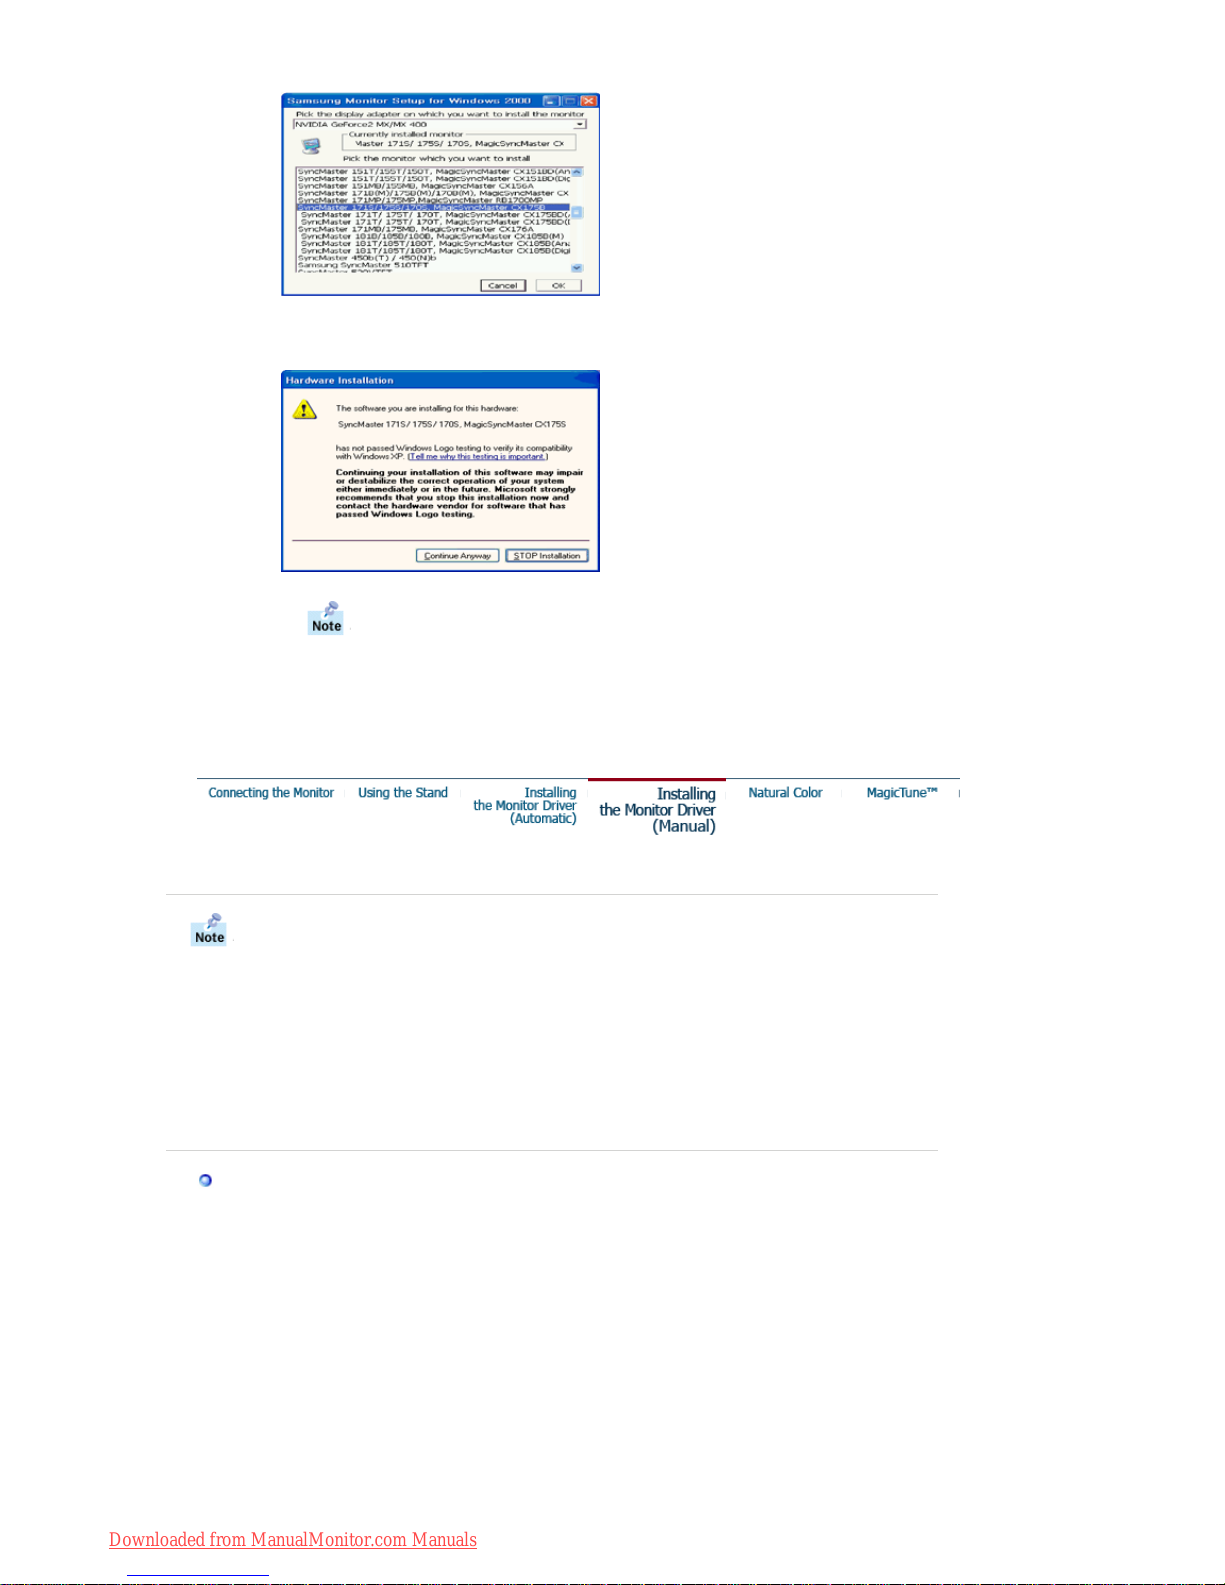
4. If you can see follo wing message window, then click the
"Continue Anyway"
button.
Then click
"OK"
button.
5. Monitor driver installation is completed.
This monitor driver is under certified MS logo and this installation doesn't
damage your system. The certified driver will be posted on Samsung
Monitor homepage.
http://www.samsung-monitor.com/.
Windows XP | Windows 2000 | Windows Me | Windows NT | Linux
When prompted by the operating system for the monitor driver, insert the CD-ROM
included with this monitor. Driver installation is slightly different from one operating
system to another. Follow the directions appropriate for the operating system you
have.
Prepare a blank disk and download the driver program file at the Internet web site shown
here.
z Internet web site : http://www.samsung-monitor.com/ (Worldwide)
http://www.samsungusa.com/monitor (USA)
http://www.sec.co.kr/monitor (Korea)
http://www.samsungmonitor.com.cn/ (China)
Microsoft® Windows® XP Operating System
1. Insert CD into the CD-ROM driver.
2. Click "
Start
" —> "
Control Panel
" then click the "
Appearance and Themes
" icon.
Downloaded from ManualMonitor.com Manuals
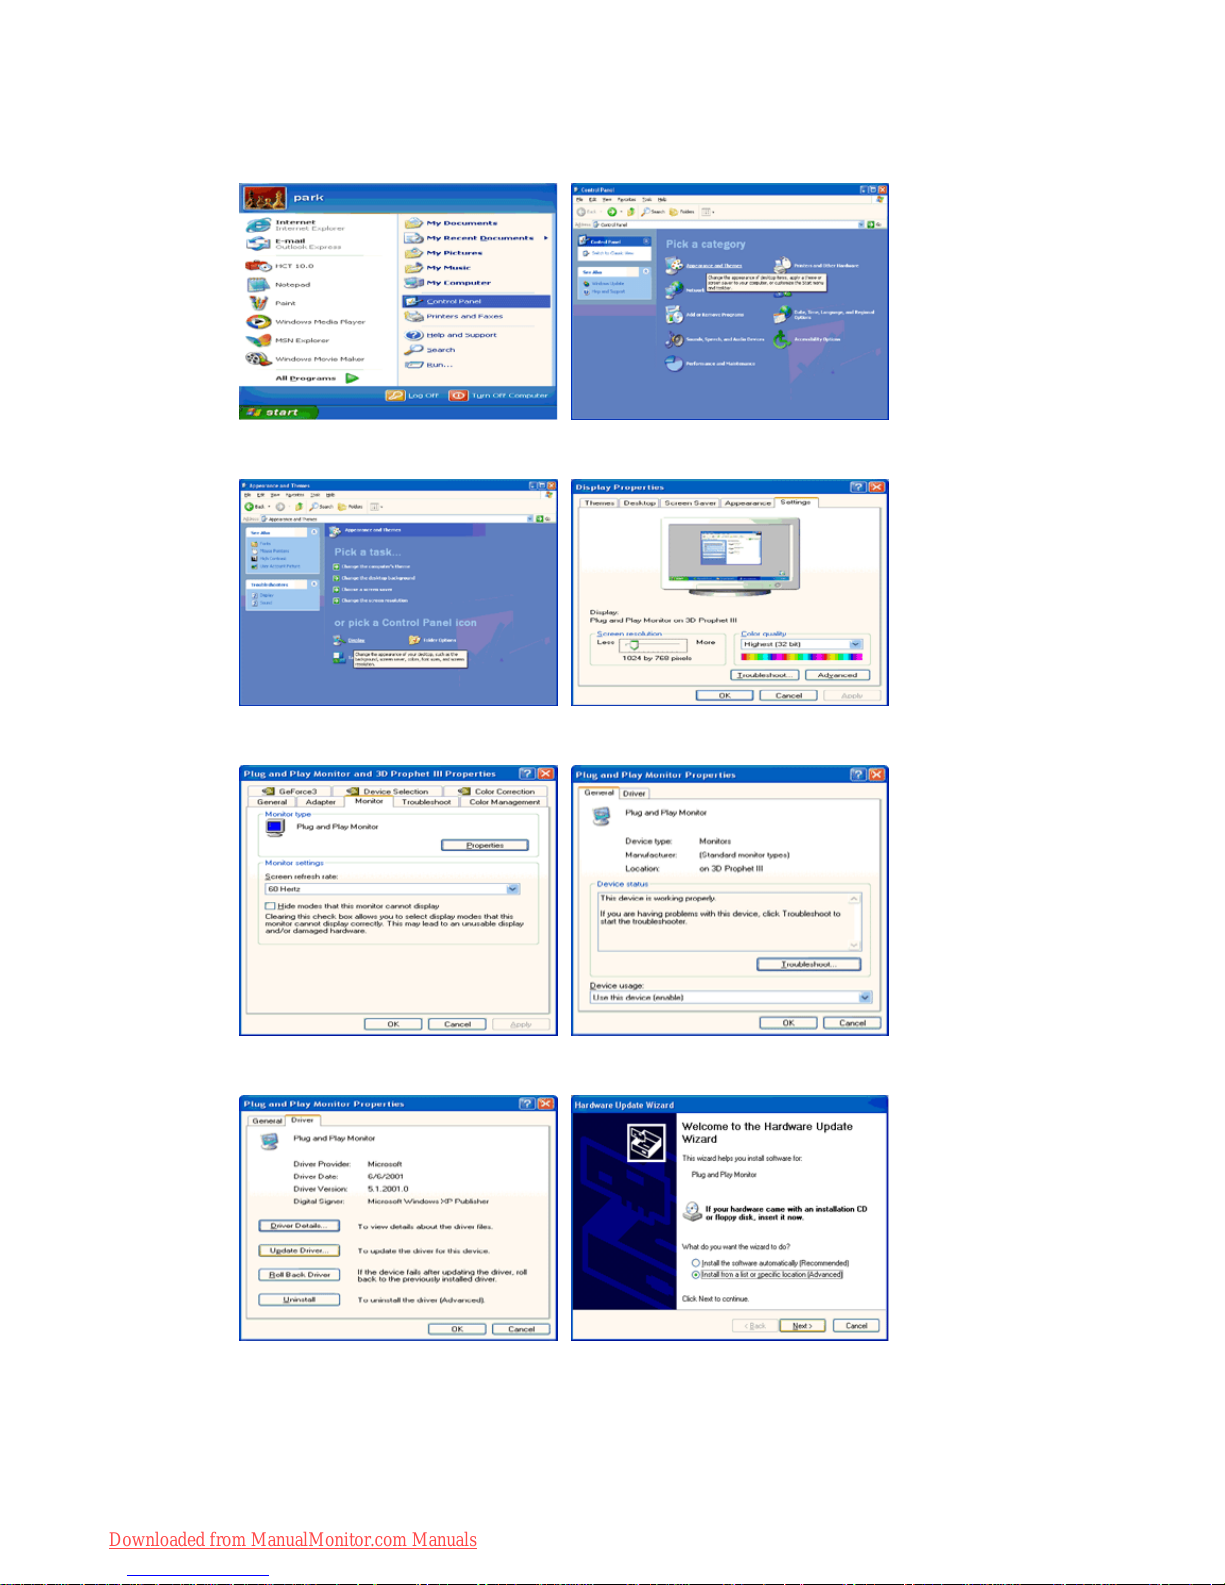
3. Click "
Display
" icon and choose the "
Settings
" tab then click "
Advanced..
".
4. Click the "
Properties
" button on the "
Monitor
" tab and select "
Driver
" tab.
5. Click "
Update Driver..
" and select "
Install from a list or..
" then click "
Next
" button.
6. Select "
Don't search ,I will..
" then click "
Next
" and then click "
Have disk
".
Downloaded from ManualMonitor.com Manuals
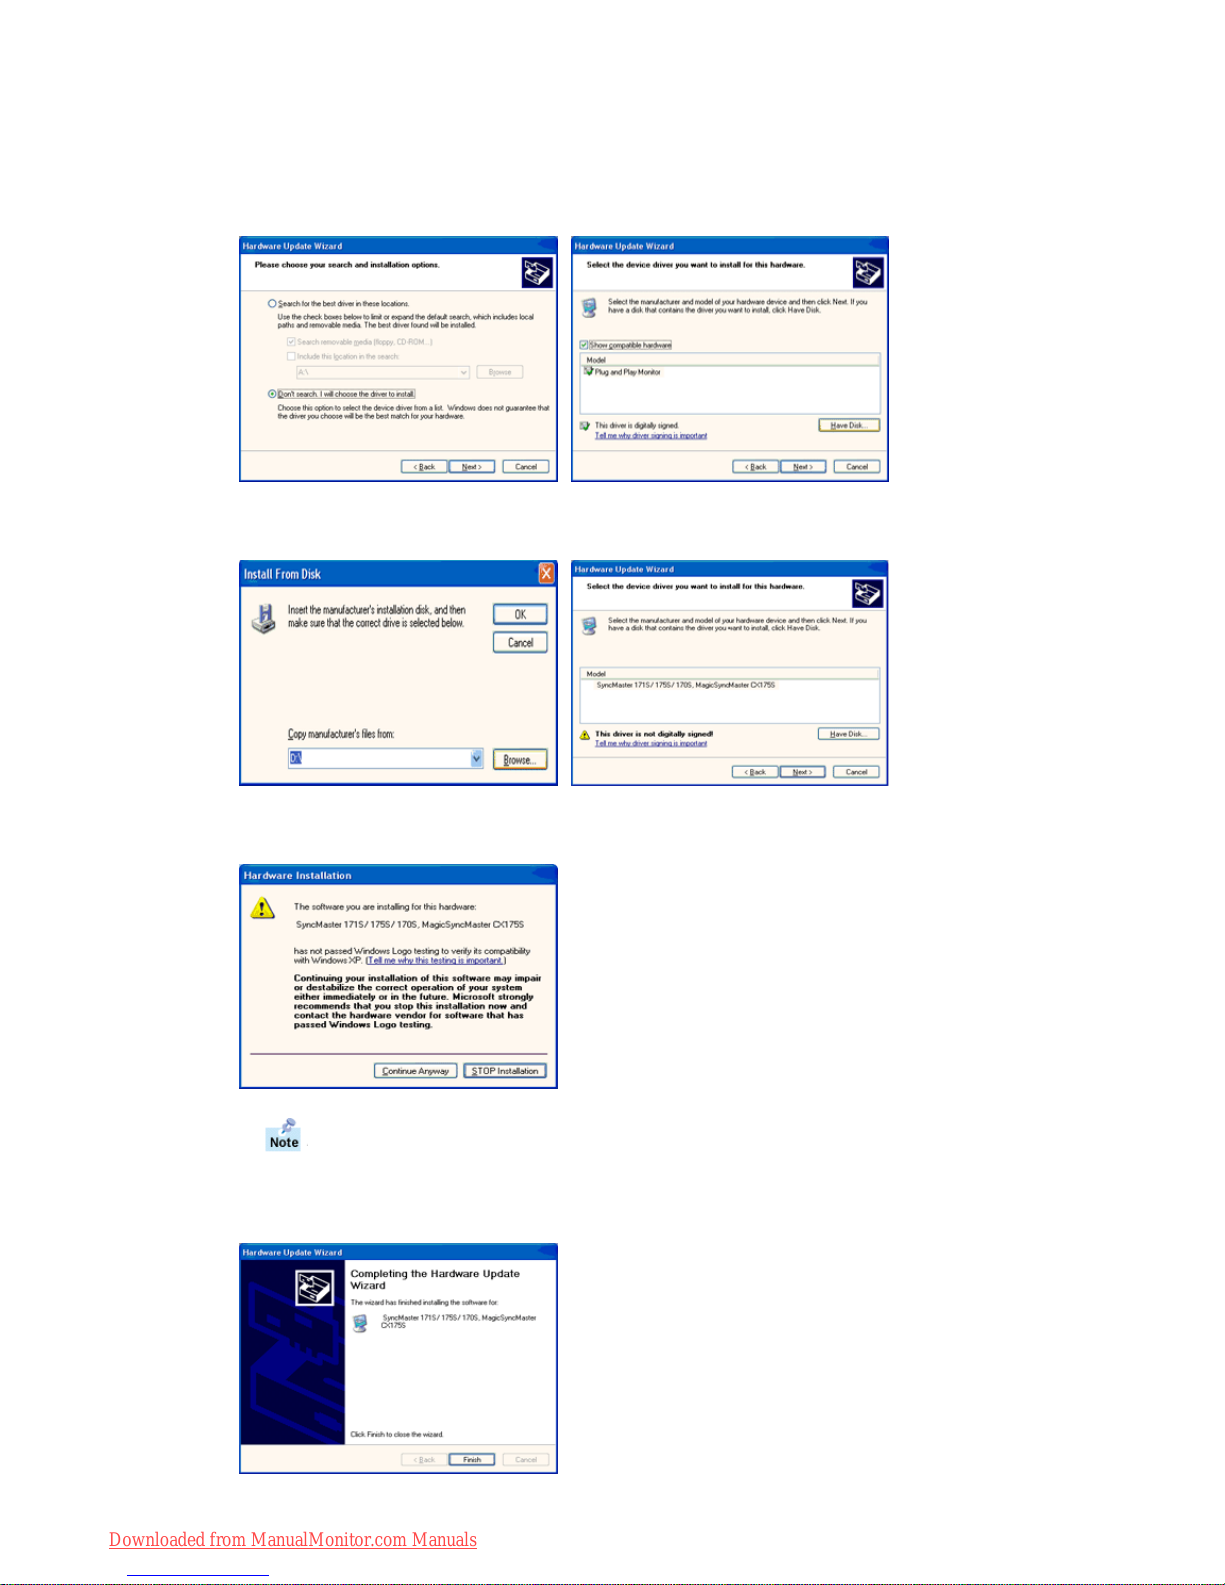
7. Click the "
Browse
" button then choose A:(D:\Driver) and choose your monitor model in the
model list and click the "
Next
" button.
8. If you can see follo wing message window, then click the "
Continue Anyway
" button. Then
click "OK" button.
9. Click the "
Close
" button, then click "OK" button continually.
This monitor driver is under certified MS logo and this installation doesn't
damage your system. The certified driver will be posted on Samsung
Monitor homepage.
http://www.samsung-monitor.com/.
Downloaded from ManualMonitor.com Manuals
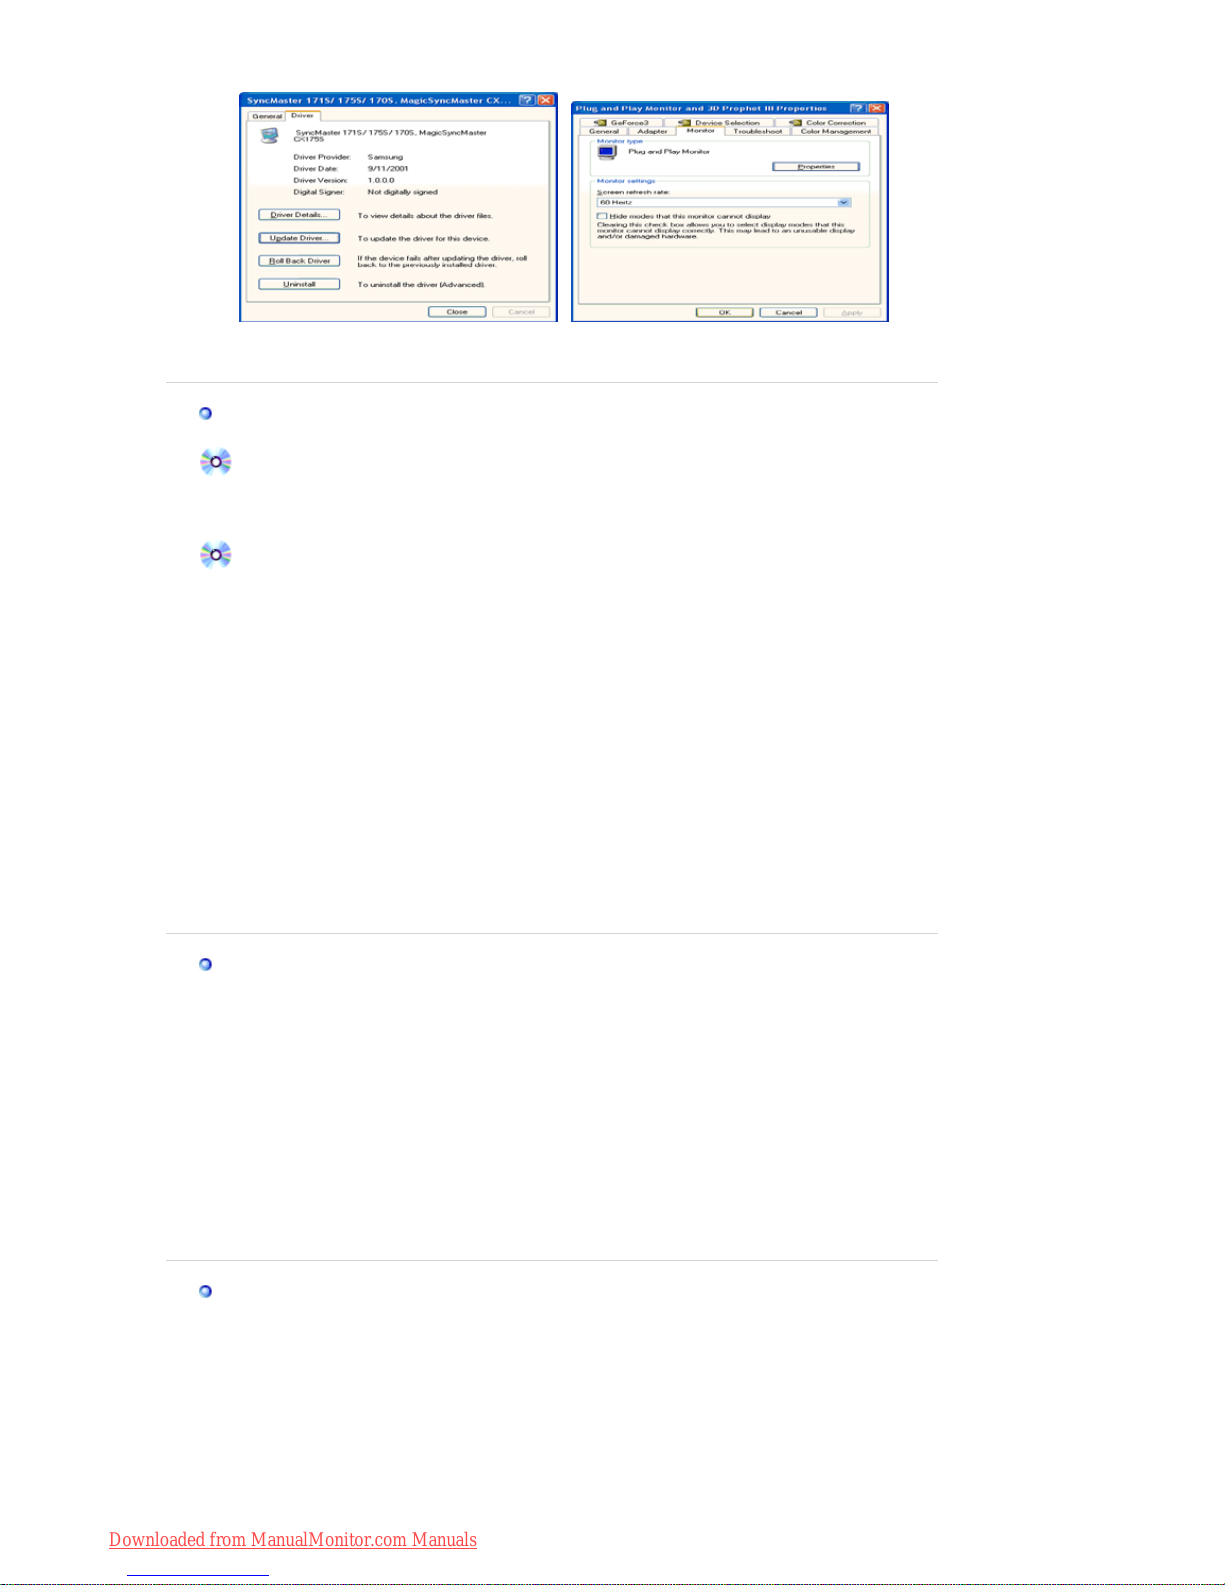
10. Monitor driver installation is completed.
Microsoft® Windows® 2000 Operating System
When you can see "Digital Signature Not Found" on your monitor, follow these steps.
1. Choose "OK" button on the "
Insert disk
" window.
2. Click the "
Browse
" button on the "
File Needed
" window.
3. Choose A:(D:\Driver) then click the "Open" button and then click "OK" button.
How to install
1. Click "
Start
" , "
Setting
" , "
Control Panel
".
2. Double click the "
Display
" Icon.
3. Choose the "
Settings
" tab and then click "
Advanced..
".
4. Choose "
Monitor
".
5. Click "
Driver
" and then click on "
Update Driver..
" then click on the "Next" button.
6. Choose "
Display a list of the known drivers for this device so that I can choose a
specific driver
" then click "
Next
" and then click "
Have disk
".
7. Click the "
Browse
" button then choose A:(D:\Driver).
8. Click the "
Open
" button, then click "OK" button.
9. Choose your monitor model and click the "
Next
" button then click "
Next
" button.
10. Click the "
Finish
" button then the "
Close
" button.
If you can see the "
Digital Signature Not Found
" window then click the "
Yes
"button.
And click the "
Finish
" button then the "
Close
" button.
Case1:If the "Properties" button is inactive, it means your monitor is properly configured.
Please stop installation
Case2:If the "Properties" button is active, click the "Properties" button then follow next steps
continually.
Microsoft
®
Windows® Millennium Operating System
1. Click "
Start
" , "
Setting
" , "
Control Panel
".
2. Double click "
Display
" icon.
3. Select the "
Settings
" tab and click "
Advanced Properties
" button.
4. Select the "
Monitor
" tab.
5. Click the "
Change
" button in the "
Monitor Type
" area.
6. Choose "
Specify the location of the driver
".
7. Choose "
Display a list of all the driver in a specific location..
" then click "
Next
" button.
8. Click the "
Have Disk
" button
9. Specify A:\(D:\driver) then click "OK" button.
10. Select "
Show all devices
" and choose the monitor that corresponds to the one you
connected to your computer and click "OK".
11. Continue choosing "
Close
" button and "OK" button until you close the Display Properties
dialogue box.
Microsoft
®
Windows® NT Operating System
1. Click
Start, Settings, Control Panel
, and then double-click
Display
icon.
2. In Display Registration Information window, click Settings Tab and then click
All Display
Modes
.
3. Select a mode that you wish to use (Resolution, Number of colors and Vertical frequency)
and then click OK.
4. Click
Apply
button if you see the screen working normally after clicking
Test
. If the screen is
not normal, change to a different mode (lower mode of resolution, colors or frequency).
If there is no Mode at
All Dis
play
Modes
, select the level of resolution and vertical
Downloaded from ManualMonitor.com Manuals
frequency by referring to the Preset Timing Modes in the user guide.
Linux Operating System
To execute X-Window, you need to make the X86Config file, which is a type of system setting file.
1. Press Enter at the first and the second screen after executing the X86Config file.
2. The third screen is for
setting your mouse
.
3. Set a mouse for your computer.
4. The next screen is for
selecting a keyboard
.
5. Set a Keyboard for your computer.
6. The next screen is for
setting your monitor
.
7. First of all, set a
horizontal frequency
for your monitor. (You can enter the frequency
directly.)
8. Set a
vertical frequency
for your monitor. (You can enter the frequency directly.)
9. Enter the
model name of your monitor
. This information will not affect the actual execution
of X-Window.
10. You h ave
finished
setting up your monitor.
Execute
X-Window after setting other requested hardware.
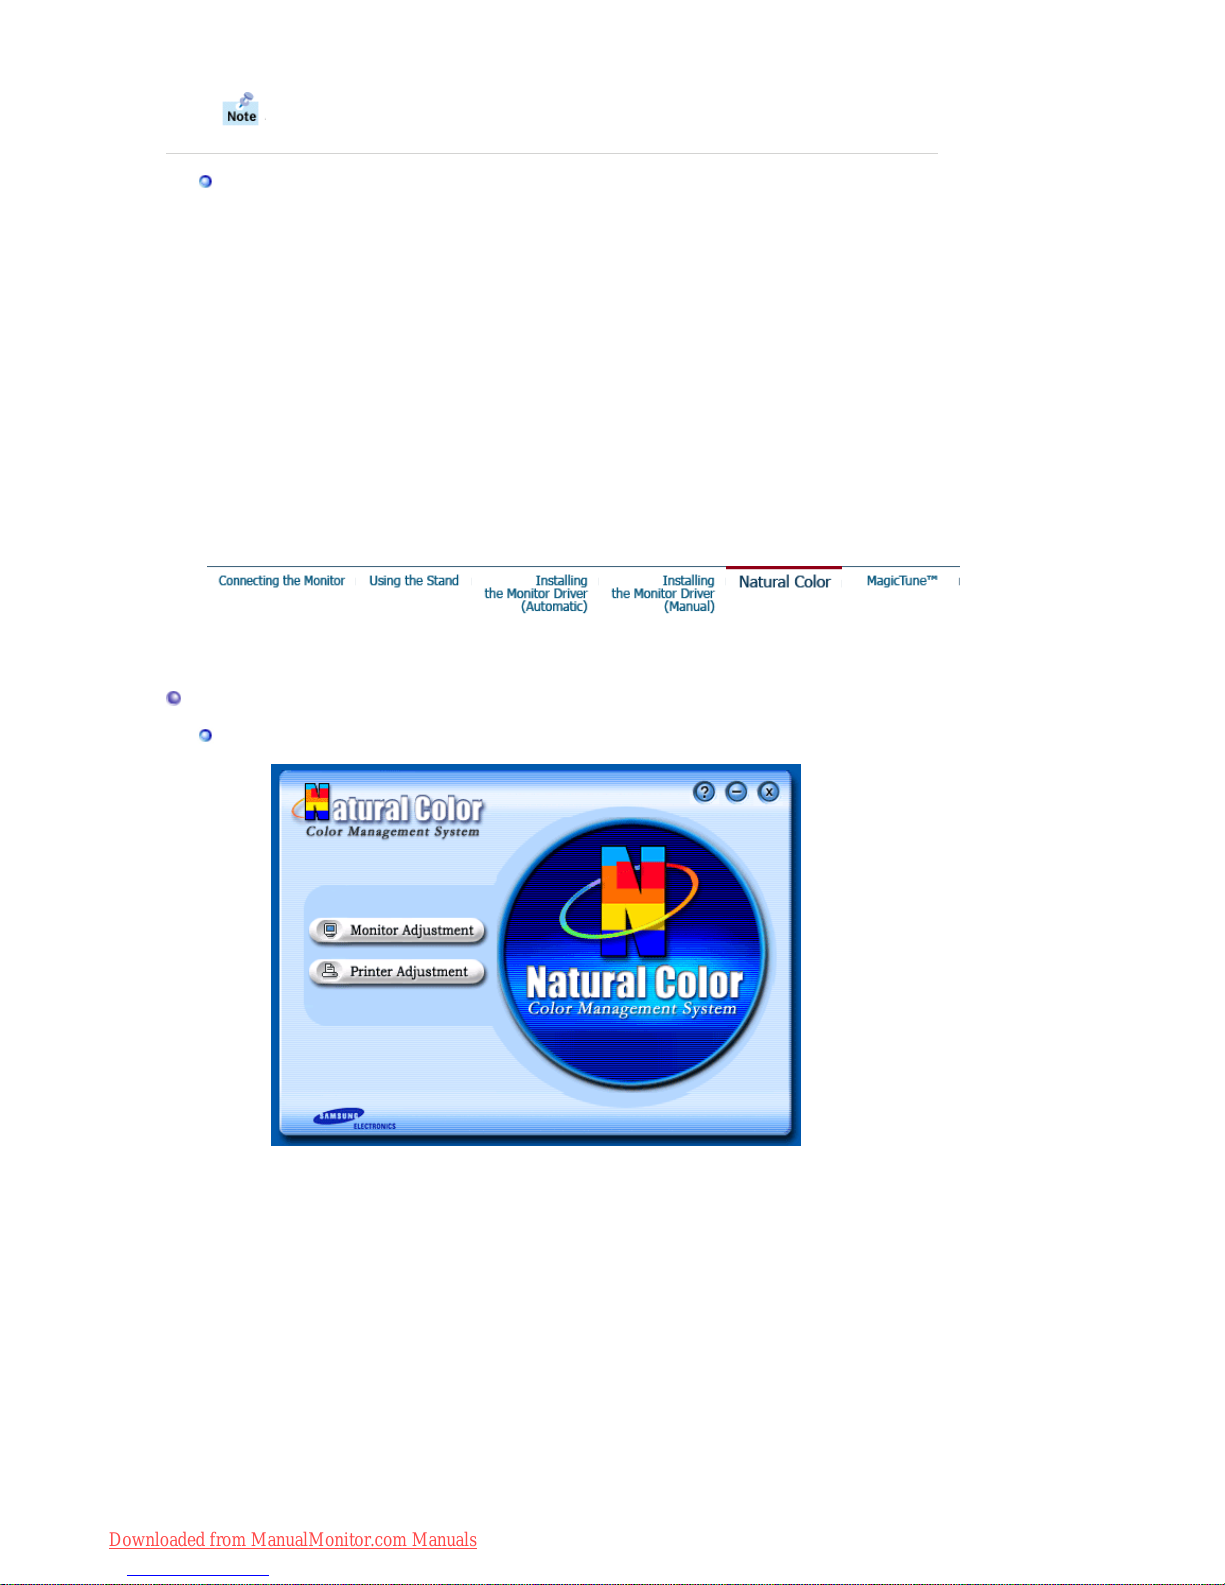
Natural Color
Natural Color Software Program
One of the recent problems in using a computer is that the color of the images printed out by a
printer or other images scanned by a scanner or a digital camera are not the same as those
shown on the monitor.
The Natural Color S/W is the very solution for this problem. It is a color administration system
developed by Samsung Electronics in association with Korea Electronics &
Telecommunications Research Institute (ETRI).
This system is available only for Samsung monitors and makes the color of the images on the
monitor the same as the printed or scanned images.
For more information, refer to Help (F1) in the software program.
How to install the Natural Color software
Insert the CD included with the Samsung monitor into the CD-ROM Drive. Then, the initial
screen of the program Natural Color will be executed. Click Natural Color on the initial screen
to install the Natural Color software.
To install the program manually, insert the CD included with the Samsung monitor into th e CDROM Drive, click the
[Start]
button of Windows and then select
[Execute]
.
Enter D:\color\eng\setup.exe and then press the
<Enter>
key.
Downloaded from ManualMonitor.com Manuals
(If the drive where the CD is inserted is not D:\, enter the applicable drive.)
How to delete the Natural Color software program
Select
[Setting]/[Control Panel]
on the
[Start]
menu and then double-click
[Add/Delete a
program]
.
Select Natural Color from the list and then click the
[
Add/Delete
]
button.
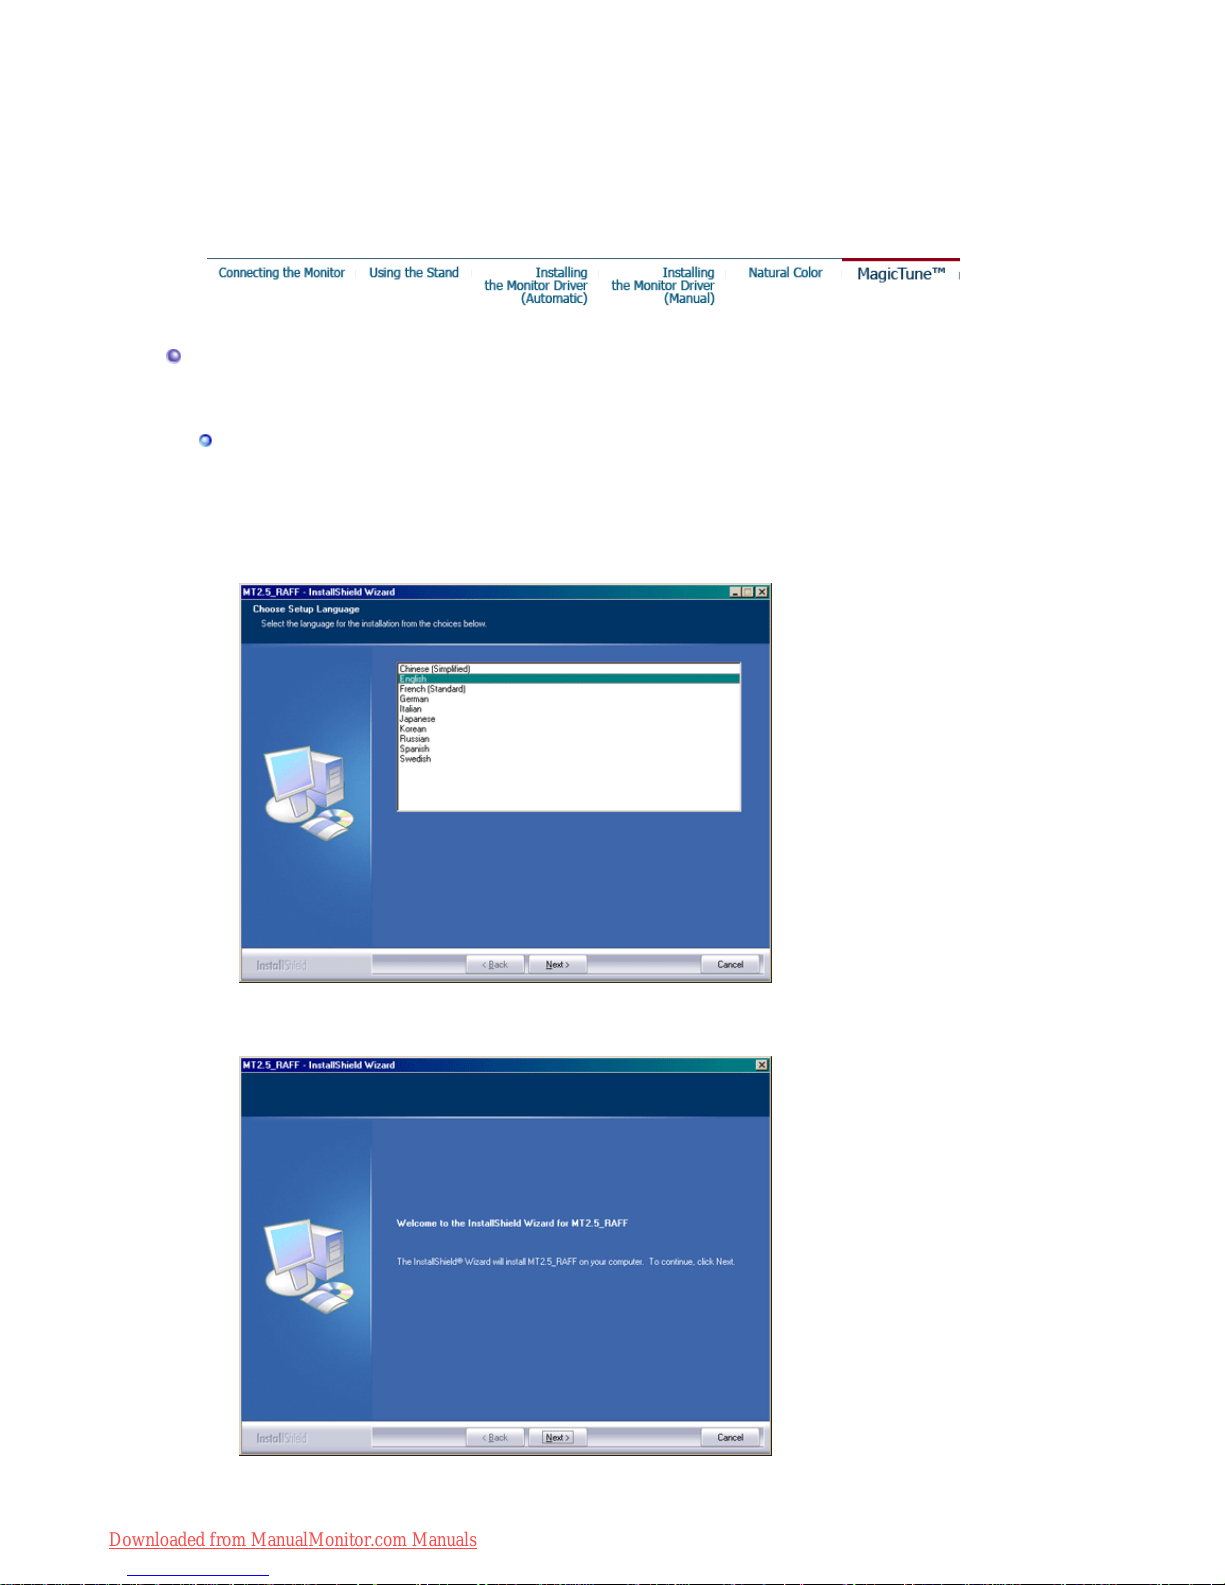
MagicTune™
Installation
1. Insert the ins ta llation CD into the CD-ROM drive.
2. Click the MagicTune™ installation file.
3. Select installation Language, Click "Next".
4. When the Insta llationShield Wizard window appears, click "Next."
Downloaded from ManualMonitor.com Manuals
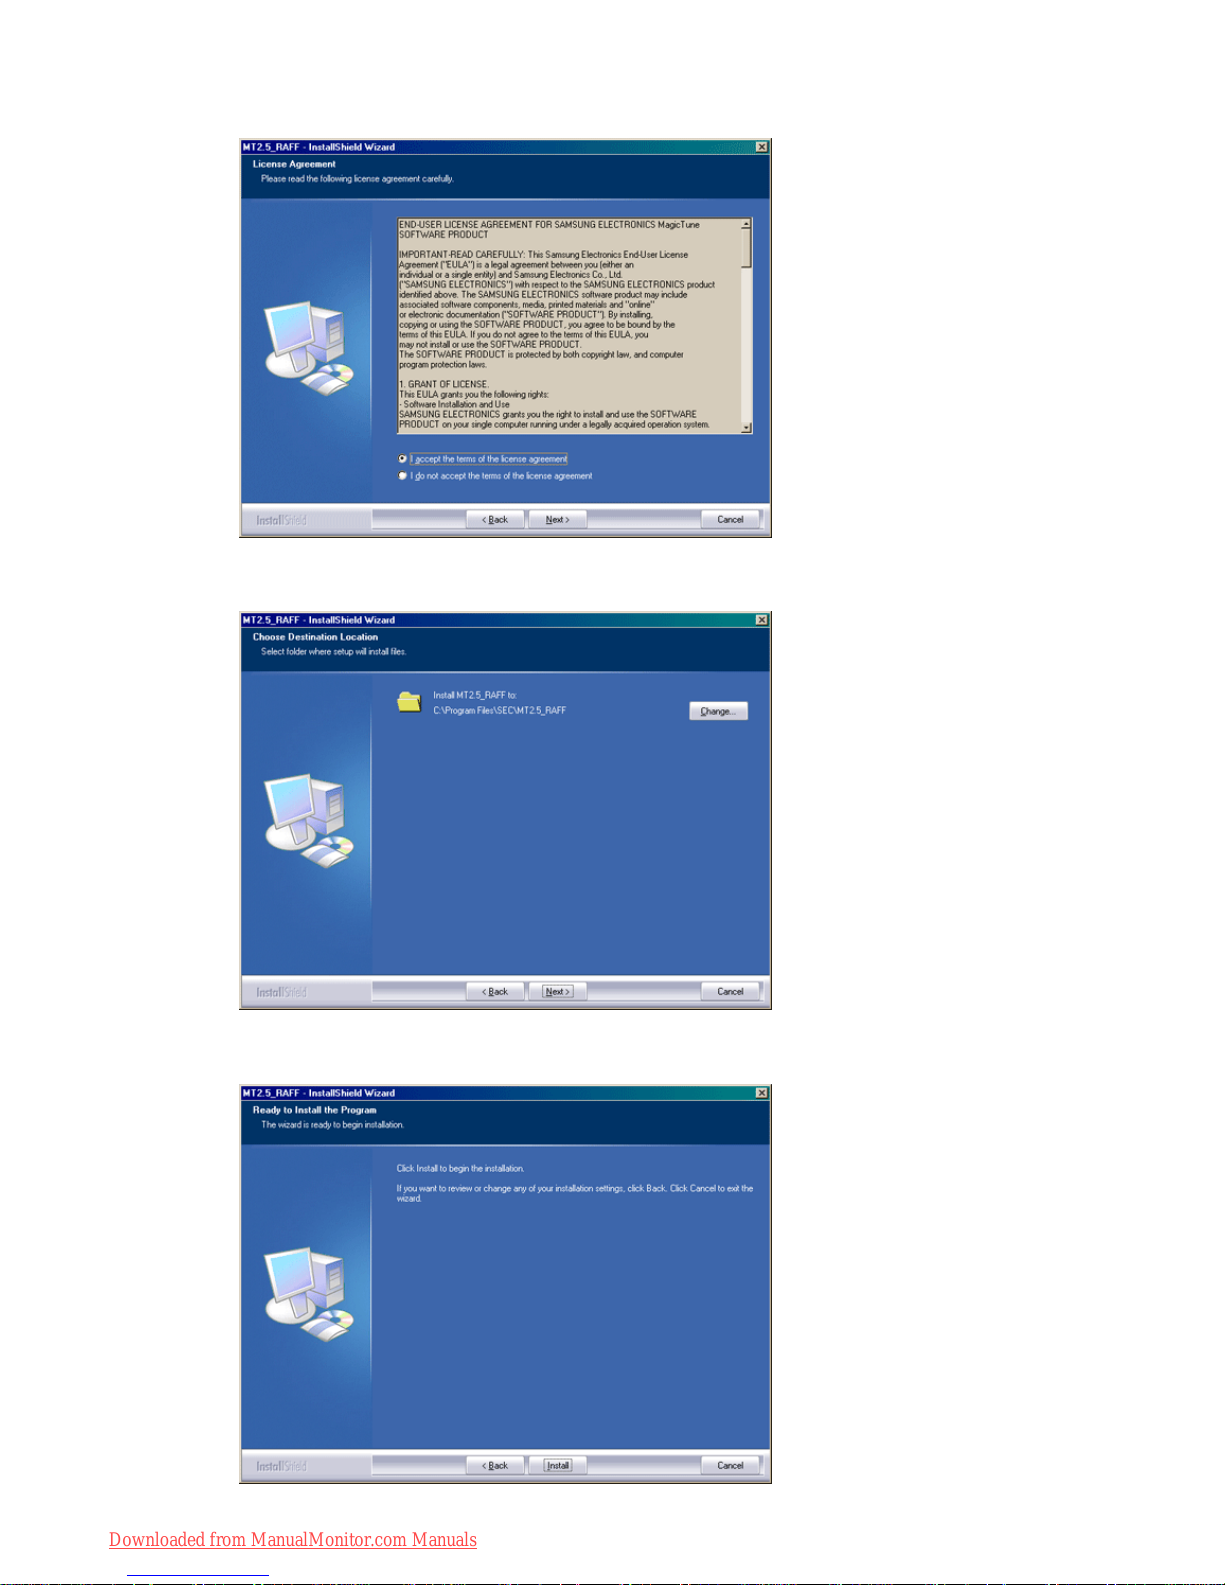
5. Select "I agree to the terms of the license agreement" to accept the terms of use.
6. Choose a folder to install the MagicTune program.
7. Click "Install."
Downloaded from ManualMonitor.com Manuals
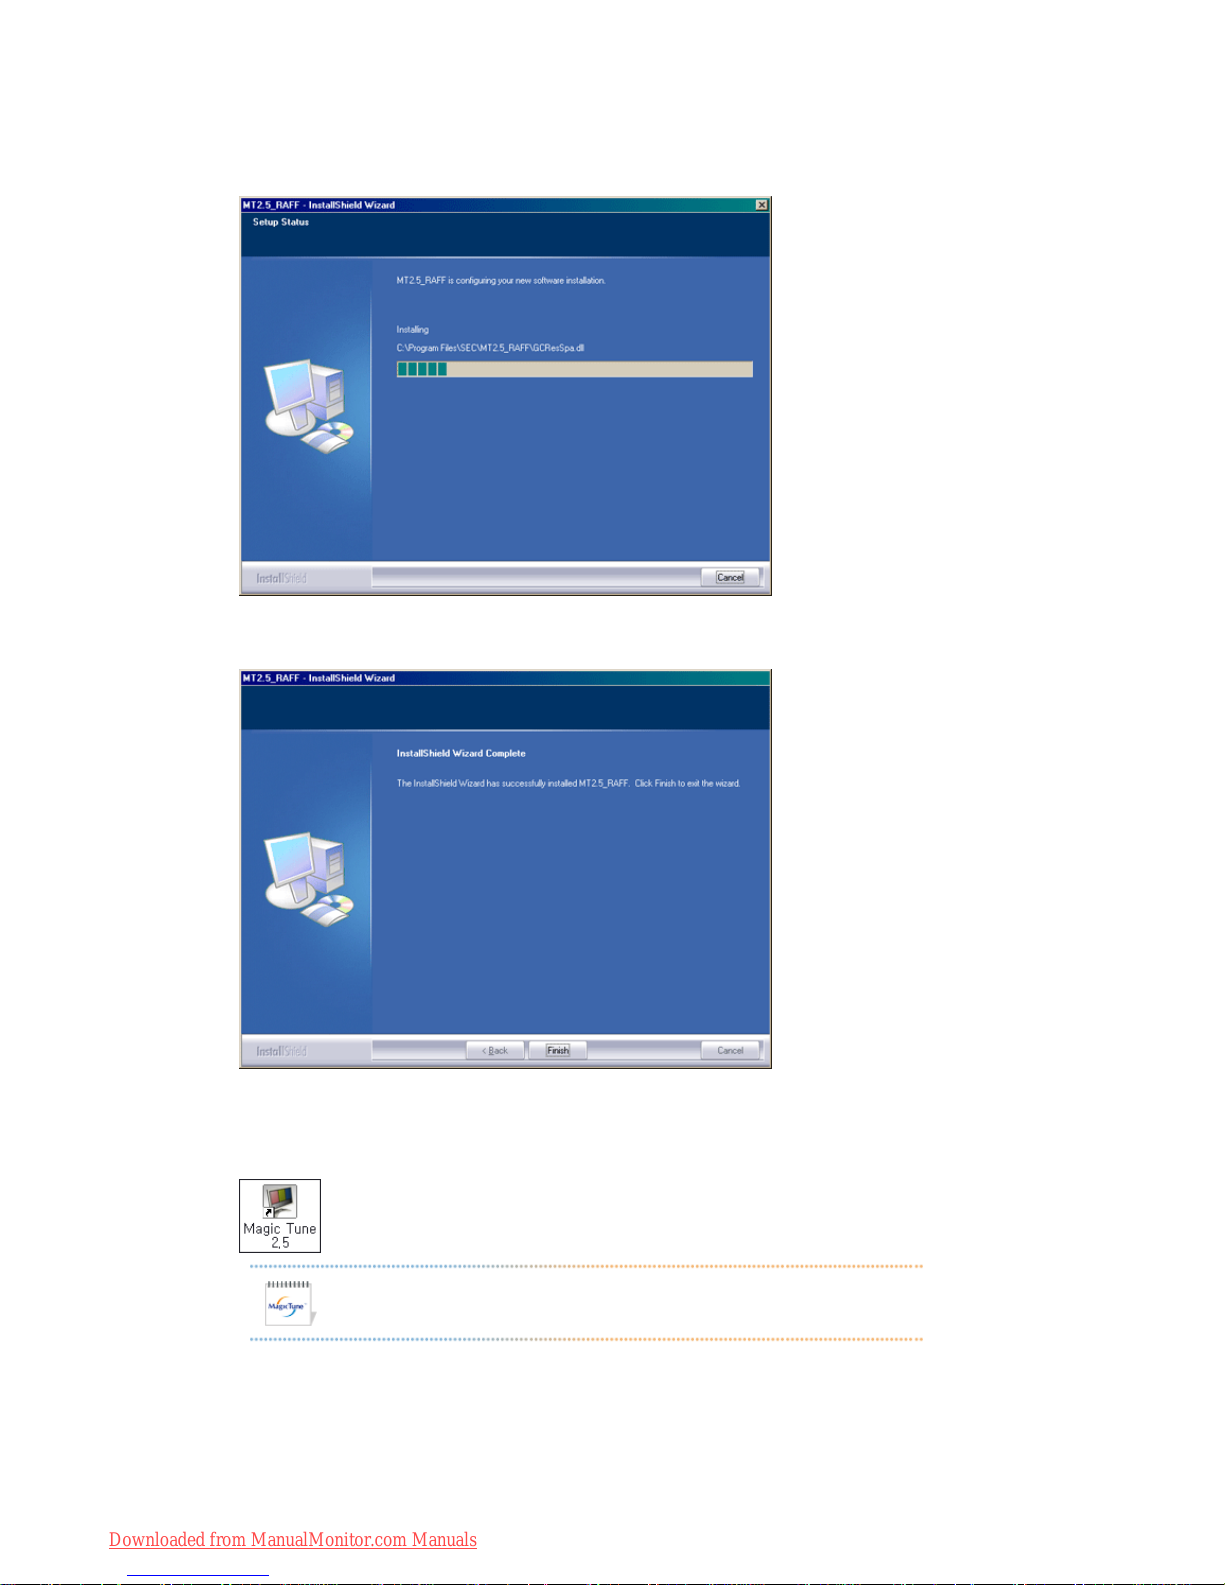
8. The "Instal lationation Status" window appears.
9. Click "Finish."
10. When the installation is complete, the MagicTune 2.5 executable icon appears on your
desktop.
Double-click the icon to start the program.
11. The following window appears if the installation is successful.
Magictune execution icon may not appear depending on specification of
computer system or monitor. If that happens, press F5 Key.
Downloaded from ManualMonitor.com Manuals
 Loading...