


User Manual
WM55H
The color and the appearance may differ depending on the product, and the content in this manual is subject to change without prior notice to improve the performance.
•• An administration fee may be charged if either
––(a) an engineer is called out at your request and there is no defect in the product (i.e. where you have failed to read this user manual).
––(b) you bring the unit to a repair center and there is no defect in the product
(i.e. where you have failed to read this user manual).
•• The amount of such administration charge will be advised to you before any work or home visit is carried out.
© Samsung Electronics
Samsung Electronics owns the copyright for this manual. Use or reproduction of this manual in parts or entirety without the authorization of Samsung Electronics is prohibited. Trademarks other than Samsung Electronics are property of their respective owners.

Table of contents
Before Using the Product
Safety Precautions |
4 |
Storage |
4 |
Electricity and safety |
4 |
Installation |
5 |
Operation |
6 |
|
|
Precautions for Use |
8 |
Preparations
Checking the Components |
9 |
|
|
Parts |
10 |
|
|
Ports |
12 |
|
|
Before Installing the Product (Installation |
|
Guide) |
13 |
Rotation |
13 |
Ventilation |
13 |
|
|
Installing the Wall Mount |
14 |
Installing the Wall Mount |
14 |
Wall Mount Kit Specifications (VESA) |
14 |
|
|
Connecting to a network |
15 |
Network Settings (Wired) |
15 |
Network Settings (Wireless) |
17 |
Use WPS |
19 |
Writing
What's a 'Roll'? |
20 |
|
|
Screen Elements |
21 |
|
|
Drawing / Erasing |
22 |
Changing pen thickness |
22 |
Changing the pen color |
22 |
Erasing |
22 |
|
|
Managing Rolls |
23 |
Opening rolls |
24 |
Deleting / Exporting rolls |
24 |
|
|
Page Viewer |
25 |
IMPORT
Connecting to a Mobile Device |
27 |
Connecting using Smart View or Screen |
|
Mirroring |
27 |
Connecting using NFC tagging |
27 |
|
|
Connecting to a Laptop |
28 |
Connecting using a cable |
28 |
Connecting via the WiFi Display function |
28 |
|
|
Importing from a USB Device |
29 |
|
|
Importing from a Network Drive |
29 |
|
|
Source Window |
30 |
EXPORT
Sending Email |
32 |
|
|
Printing |
33 |
Installing Flip Printing Software |
33 |
Setting up the printer |
33 |
|
|
Exporting to a USB Device |
35 |
|
|
Exporting from a Network Drive |
35 |
Menu
Pen |
36 |
|
|
Connect |
37 |
|
|
System |
39 |
|
|
Picture |
41 |
|
|
Support |
42 |
Troubleshooting Guide
Problems and Solutions |
43 |
2

Table of contents
Specifications
General |
48 |
|
|
Preset Timing Modes |
50 |
Appendix
Responsibility for the Pay Service (Cost to |
|
Customers) |
52 |
Not a product defect |
52 |
A Product damage caused by customer's fault 52
Others |
52 |
|
|
Prevention of Afterimage Burn-in |
53 |
What is afterimage burn-in? |
53 |
Recommended prevention practices |
53 |
|
|
License |
53 |
3

Chapter 01
Before Using the Product
Safety Precautions
Warning
A serious or fatal injury may result if instructions are not followed.
Caution
Personal injury or damage to properties may result if instructions are not followed.
Activities marked by this symbol are prohibited.
Instructions marked by this symbol must be followed.
Storage
Due to the characteristics of high-glossy products, using a UV humidifier nearby may create white-colored stains on the product.
"" Contact Customer Service Center if the inside of the product needs cleaning (service fee will be charged).
Electricity and safety
Warning
Do not use a damaged power cord or plug, or a loose power socket.
An electric shock or fire may result.
Do not use multiple products with a single power socket.
Overheated power sockets may cause a fire.
Do not touch the power plug with wet hands. Otherwise, an electric shock may result.
Do not bend or pull the power cord with force. Be careful not to leave the power cord under a heavy object.
Damage to the cord may result in a fire or electric shock.
Do not place the power cord or product near heat sources.
A fire or electric shock may result.
4

Insert the power plug all the way in so it is not loose.
An unsecure connection may cause a fire.
Connect the power plug to a grounded power socket (type1 insulated devices only).
An electric shock or injury may result.
Clean any dust around the pins of the power plug orthe power socket with a dry cloth.
A fire may result.
Caution
Do not disconnect the power cord while the product is being used.
The product may become damaged by an electric shock.
Only use the power cord provided with your product by Samsung. Do not use the power cord with other products.
A fire or electric shock may result.
Keep the power socket where the power cord is connected unobstructed.
The power cord must be disconnected to cut off power to the product when an issue occurs.
Hold the plug when disconnecting the power cord from the power socket.
An electric shock or fire may result.
Installation
Warning
DO NOT PLACE CANDLES, INSECT REPELLANTS OR CIGARETTES ON TOP OF THE PRODUCT. DO NOT INSTALL THE PRODUCT NEAR HEAT SOURCES.
A fire may result.
Do not install the product in poorlyventilated spaces such as a bookcase or closet.
An increased internal temperature may cause a fire.
Do not install the product on an unstable orvibrating surface (insecure shelf, sloped surface, etc.)
•• The product may fall and become damaged and/or cause an injury.
•• Using the product in an area with excess vibration may damage the product or cause a fire.
Do not expose the product to direct sunlight, heat, or a hot object such as a stove.
The product lifespan may be reduced or a fire may result.
Do not install the product within the reach of young children.
•• The product may fall and injure children.
•• As the front is heavy, install the product on a flat and stable surface.
Edible oil, such as soybean oil, can damage or deform the product. Do not install the product in a kitchen or near a kitchen counter.
Have a technician install the wall-mount hanger.
•• Installation by an unqualified person can result in an injury.
•• Only use approved cabinets.
Install the product at least10 cm away from the wall to allowventilation.
An increased internal temperature may cause a fire.
5
Keep the plastic packaging out of the reach of children.
Children may suffocate.
Do not install the product in a vehicle or a place exposed to dust, moisture (water drips, etc.), oil, or smoke.
A fire or electric shock may result.
Caution
Do not set down the product on its front.
The screen may become damaged.
Do not drop the product while moving.
Product failure or personal injury may result.
Set down the product gently.
Product failure or personal injury may result.
Installingtheproductinanunusualplace(aplaceexposedtoalotoffinedust,chemical substances,extremetemperaturesorasignificantpresenceofmoisture,oraplace where the product will operate continuously for an extended period of time) may seriously affect its performance.
Be sure to consult Samsung Customer Service Center if you want to install the product at such a place.
Operation
Warning
There is a high voltage inside the product. Never disassemble, repair or modify the product yourself.
•• A fire or electric shock may result.
•• Contact Samsung Customer Service Center for repairs.
Do not let children hang from the product or climb on top of it.
Children may become injured or seriously harmed.
If the product is dropped orthe outer case is damaged, turn off the power switch and disconnect the power cord. Then contact Samsung Customer Service Center.
Continued use can result in a fire or electric shock.
Do not leave heavy objects or items that children like (toys, sweets, etc.) on top of the product.
The product or heavy objects may fall as children try to reach for the toys or sweets resulting in a serious injury.
Do not move the product by pulling the power cord or any cable.
Product failure, an electric shock or fire may result from a damaged cable.
Do not lift or move the product by pulling the power cord or any cable.
Product failure, an electric shock or fire may result from a damaged cable.
Ensure the vents are not blocked by tablecloths or curtains.
An increased internal temperature may cause a fire.
Do not insert metallic objects (chopsticks, coins, hairpins, etc) or objects that burn easily (paper, matches, etc) into the product (via the vent or input/output ports, etc).
•• Be sure to power off the product and disconnect the power cord when water or other foreign substances have entered the product. Then contact Samsung Customer Service Center.
•• Product failure, an electric shock or fire may result.
6

Do not place objects containing liquid (vases, pots, bottles, etc) or metallic objects on top of the product.
•• Be sure to power off the product and disconnect the power cord when water or other foreign substances have entered the product. Then contact Samsung Customer Service Center.
•• Product failure, an electric shock or fire may result.
Before moving the product, turn off the power switch and disconnect the power cable and all other connected cables.
Damage to the cord may result in a fire or electric shock.
If the product generates abnormal sounds, a burning smell or smoke, disconnect the power cord immediately and contact Samsung Customer Service Center.
An electric shock or fire may result.
During a lightning orthunderstorm, power off the product and remove the power cable.
A fire or electric shock may result.
Do not drop objects on the product or apply impact.
A fire or electric shock may result.
If a gas leakage is found, do not touch the product or power plug. Also, ventilate the area immediately.
Sparks can cause an explosion or fire.
Donotuseorkeepcombustiblesprayoraninflammablesubstanceneartheproduct.
An explosion or fire may result.
Caution
Donotusehumidifiersorstovesaroundtheproduct.
A fire or electric shock may result.
Do not touch the screen when the product has been turned on for an extended period of time as it will become hot.
Do not place heavy objects on the product.
Product failure or personal injury may result.
Leavingthescreenfixedonastationaryimageforanextendedperiodoftimemaycause afterimage burn-in or defective pixels.
Activate power-saving mode or a moving-picture screen saver if you will not be using the product for an extended period of time.
Disconnect the power cord from the power socket if you do not plan on using the product for an extended period of time (vacation, etc).
Dust accumulation combined with heat can cause a fire, electric shock or electric leakage.
Use the product at the recommended resolution and frequency.
Your eyesight may deteriorate.
Looking at the screen too close for an extended period of time can deteriorate your eyesight.
Rest your eyes for more than 5 minutes for every1 hour of product use.
Eye fatigue will be relieved.
Store small accessories out of the reach of children.
7

Precautions for Use
Be careful that if you use the supplied pen with a load exceeding 2.5 kg, scratches may occur on the protective glass.
If you use a ballpoint pen otherthan the supplied pen, be careful that the screen may be stained with ink or damaged.
""
""
We recommend that you use the supplied pen. Do not use sharp, pointed objects other than the pen.
If dust or dirt from the supplied pen remains on the protective glass, clean it referring to the instructions below.
Cleaning the exterior and display
Wipe the surface with a slightly wet, soft cloth, and then wipe with a dry cloth.
1 |
2 |
3 |
8
Chapter 02
Preparations
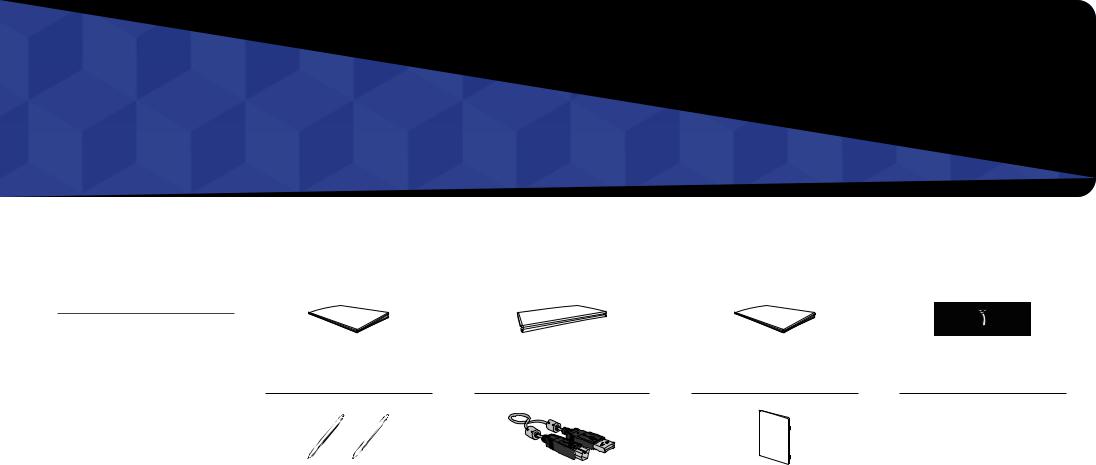
Checking the Components
"" Contact the vendor where you |
|
|
|
|
purchased the product if any |
|
Warranty card |
|
|
components are missing. |
Quick Setup Guide |
Regulatory guide |
Power cord |
|
|
(Not available in some locations) |
|||
"" The appearance of the components |
|
|
|
|
|
|
|
|
|
may differ from the images shown. |
|
|
|
|
Touch Pen X 2 |
USB cable |
Cover Terminal |
||
|
|
|
|
|
9

Parts
"" The color and shape of parts may differ from what is shown. Specifications are subject to change without notice to improve quality.
|
Parts |
Description |
|
|
|
|
|
Keep the touch pen in place. |
|
Pen holder |
•• When the product is turned off and you lift the pen from the pen holder, the |
|
screen turns on. |
|
|
|
•• When the product is in the screen saver mode and you lift the pen from the pen |
|
|
holder, the screen turns on. |
Speaker |
|
|
|
•• Tag your mobile device to the NFC pad for connection. |
|
|
|
"" In writing mode, an NFC tagging can automatically perform Smart View or |
|
|
Screen Mirroring on your mobile device. |
|
|
"" This function is supported only on Android 8.0 Oreo version or later of |
|
NFC pad |
Samsung mobile devices. |
|
|
•• Tag an NFC card to the NFC pad to enter an email address automatically. |
|
|
"" While creating an email, an email address is automatically entered if it is read |
|
|
from the encoded NFC tag. |
|
|
"" For how to enter an email address in the NFC card, refer to 'Sending Email'. |
|
|
|
|
|
•• Press and hold the button to turn off the product. |
|
Power button |
•• In writing mode, shortly press the Power button to switch to the screen saver |
|
|
mode. |
|
|
|
10
Parts |
Description |
|
|
|
|
|
|
|
|
||
|
Detects user's motions to turn the product on or off. |
||||
|
|
|
|
|
|
|
|
The screen is touched or the touch pen is lifted. |
|
||
|
|
|
|
|
|
|
|
Motion is detected. |
|
Motion is detected. |
|
|
WHITEBOARD / |
|
|
|
|
|
Screen Saver |
Power Off |
|
||
|
BLACKBOARD |
|
|||
|
|
|
|
|
|
|
|
There is no motion |
There is no motion |
|
|
|
|
for1 hour. |
for1 hour. |
|
|
|
|
|
|
|
|
"" If the product is turned off because no motion is detected, it operates as follows:
––When  →System →Advanced Settings →Auto Save is set to On: The last roll you are creating is displayed on the screen.
Motion sensor |
–– When →System →Advanced Settings →Auto Save is set to Off: A new roll |
|
is displayed on the screen. |
"" Only when  →System →Advanced Settings → Motion Sensor is set to Off, the product automatically turns off at the time set at Auto Power Off.
"" When the screen of a mobile device and laptop is displayed on the product in the full screen mode, the product does not switch to the screen saver mode.
"" When the screen is turned off, it may turn on in the screen saver mode due to the surrounding environment and illumination. To turn the product's screen on or off with the Power button only, set Motion Sensor to Off at  →System → Advanced Settings.
•• For ensuring normal operation of the motion sensor, do not install the product in a place exposed to direct sunlight.
•• Do not hide the front of the motion sensor with an object.
•• When there are any foreign substances on the motion sensor, wipe them with a soft cloth.
11

Ports
USB (1.0A) |
LAN |
RS232C IN |
HDMI IN |
TOUCH OUT |
USB |
|||
|
|
|
|
|
|
|
|
(5V 0.5A) |
|
|
|
|
|
|
|
|
|
|
|
|
|
|
|
|
|
|
|
|
|
|
|
|
|
|
|
|
|
|
|
|
|
|
|
|
"" The color and shape of parts may differ from what is shown. Specifications are subject to change without notice to improve quality.
Ports |
|
Description |
|
|
|
USB |
(1.0A) |
Connect to a USB memory device. |
"" The USB ports on the product accept a maximum constant current of 1.0A. If the maximum value is exceeded, USB ports may not work.
LAN |
|
Connects to a network using a LAN cable. (10/100 Mbps) |
|
|
"" Use Cat7(*STP Type) cable for the connection. |
|
|
*Shielded Twist Pair. |
|
|
|
RS232C IN |
Dedicated to service technicians. |
|
|
|
|
HDMI IN |
|
Connects to a source device using a HDMI cable. |
|
|
|
TOUCH OUT |
Connects to a PC using a USB cable. You can operate the PC screen by touching the |
|
|
|
product screen. |
|
|
|
USB |
(5V 0.5A) |
Connect to a USB memory device. |
|
|
"" The USB ports on the product accept a maximum constant current of 0.5A. If the |
|
|
maximum value is exceeded, USB ports may not work. |
12
Before Installing the Product (Installation
Guide)
There is a product-specific stand sold separately from Samsung, and you can install it on the wall, too.
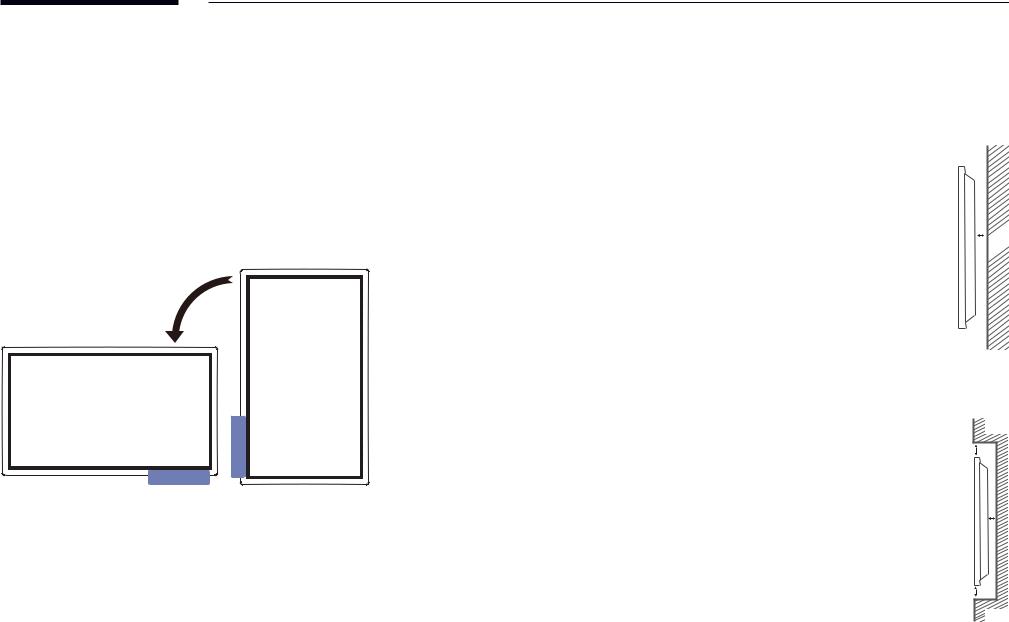
Rotation
"" Contact Samsung Customer Service Center for further details.
•• To use the product in landscape orientation, turn the product anticlockwise so that the sensor part faces downward.
Ventilation
"" Contact Samsung Customer Service Center for further details.
Installation on a PerpendicularWall
A Minimum 15 mm
B Ambienttemperature: 35 orless
"" When installing the product on a perpendicular wall, allow at least 15 mm of space between the product and wall surface for ventilation and ensure that the ambient temperature is kept below 35°C.
Installation on an Indented Wall
A Minimum 15 mm B Minimum 25 mm
C Ambienttemperature: 35 orless
"" When installing the product on an indented wall, allow at least the space specified above between the product and wall for ventilation and ensure that the ambient temperature is kept below 35°C.
A 
B
B |
A |
B |
C
13

Installing the Wall Mount
Installing the Wall Mount
•• The wall mount kit allows you to mount the product on the wall.
•• For detailed information on installing the wall mount, see the instructions provided with the wall mount.
•• We recommend you contact a technician for assistance when installing the wall mount bracket.
•• Samsung Electronics is not responsible for any damage to the product or injury to yourself or others if you elect to install the wall mount on your own.
WallMountKitSpecifications(VESA)
"" Install your wall mount on a solid wall perpendicular to the floor.
To install the product on the other wall area, contact the nearest agency.
If you install the product on a slanted wall, it may fall and result in severe personal injury.
•• Samsung wall mount kits contain a detailed installation manual and all parts necessary for assembly are provided.
•• Do not use screws that are longer than the standard length or do not comply with the VESA standard screw specifications. Screws that are too long may cause damage to the inside of the product.
•• For wall mounts that do not comply with the VESA standard screw specifications, the length of the screws may differ depending on the wall mount specifications.
•• Do not fasten the screws too firmly. This may damage the product or cause the product to fall, leading to personal injury. Samsung is not liable for these kinds of accidents.
•• Samsung is not liable for product damage or personal injury when a non-VESA or non-specified wall mount is used or the consumer fails to follow the product installation instructions.
•• Always have at least two people mount the product on a wall.
•• Standard dimensions for wall mount kits are shown in the table below.
VESA screw hole specs (A * B) in millimeters |
Standard Screw |
Quantity |
|
(inches) |
|||
|
|
||
|
|
|
|
400 × 400 (15.7 × 15.7) |
M8 |
4 |
|
|
|
|
"" Do not install your Wall Mount Kit while your product is turned on. It may result in personal injury due to electric shock.
14

Connecting to a network
Network Settings (Wired)
Connecting to a Wired Network
There are three ways to attach your product to your LAN using cable.
•• You can attach your product to your LAN by connecting the LAN port on the back of your product to an external modem using a LAN cable.
See the diagram below.
|
External Modem |
LAN |
|
The Modem Port on the Wall |
|
||
(ADSL / VDSL) |
RJ45 |
||
|
|||
Modem Cable |
|
LAN Cable |
•• You can attach your product to your LAN by connecting the LAN port on the back of your product to an IP Sharer which is connected to an external modem. Use LAN cable for the connection. See the diagram below.
The Modem Port on the Wall |
External Modem |
IP Sharer |
LAN |
|
|
||||
|
(ADSL / VDSL) |
(having DHCP server) |
RJ45 |
|
|
|
|||
Modem Cable |
LAN Cable |
|
LAN Cable |
|
•• Depending on how your network is configured, you may be able to attach your product to your LAN by connecting the LAN port on the back of your product directly to a network wall outlet using a LAN cable.
See the diagram below. Note that the wall outlet is attached to a modem or router elsewhere in your house.
LAN |
The Modem Port on the Wall |
RJ45 |
LAN Cable |
If you have a Dynamic Network, you should use an ADSL modem or router that supports the Dynamic Host Configuration Protocol (DHCP). Modems and routers that support DHCP automatically provide the IP address, subnet mask, gateway, and DNS values your product
needs to access the Internet so you do not have to enter them manually. Most home networks are Dynamic Networks.
Some networks require a Static IP address. If your network requires a Static IP address, you must enter the IP address, subnet mask, gateway, and DNS values manually on your product Cable Setup Screen when you set up the network connection. To get the IP address, subnet mask, gateway, and DNS values, contact your Internet Service Provider (ISP).
If you have a Windows computer, you can also get these values through your computer.
"" You can use ADSL modems that support DHCP if your network requires a Static IP address. "" ADSL modems that support DHCP also let you use Static IP addresses.
15

Set the network connection to use Internet services such as perform software upgrades.
Automatic Open Network Settings (Wired)
Connect to the network using a LAN cable.
Make sure a LAN cable is connected first.
How to set up automatically
1Set Network Type to Wireless from the Open Network Settings page.
2The network test screen appears and verifies the network connection.
When the connection has been verified, the “Success! Your device is connected to the Internet. If you have any problems using online services, please contact your Internet service provider.” message appears.
"" If the connection process fails, check the LAN port connection.
"" If the automatic process cannot find the network connection values or if you want to set the connection manually, go to the next section, network setup.
Manual Open Network Settings (Wired)
Offices may use static IP addresses.
If this is the case, ask the network administrator for the IP address, subnet mask, gateway and DNS server address. Enter these values manually.
Getting the Network Connection Values
To view the Network connection values on most Windows computers, follow these steps.
1Right click the Network icon on the bottom right of the screen.
2In the pop-up menu that appears, click Status.
3On the dialog that appears, click the Support tab.
4On the Support Tab, click the Details button. The Network connection values are displayed.
How to set up manually
1Set Network Type to Wireless from the Open Network Settings page.
2The network test screen appears and the verification process starts. Press Cancel. The verification process stops.
3Select IP Settings on network connection screen. The IP Settings screen appears.
4Select the field at the top, press E, and then set IP Setting to Enter manually Repeat the entry process for each field in the IP Address.
"" Setting IP Setting to Enter manually automatically changes DNS Setting to Enter manually.
5When done, select OK at the bottom of the page, and then press E. The network test screen appears and the verification process starts.
6When the connection has been verified, the “Success! Your device is connected to the Internet. If you have any problems using online services, please contact your Internet service provider.” message appears.
16
 Loading...