

PURE Evoke C-F6 User Manual
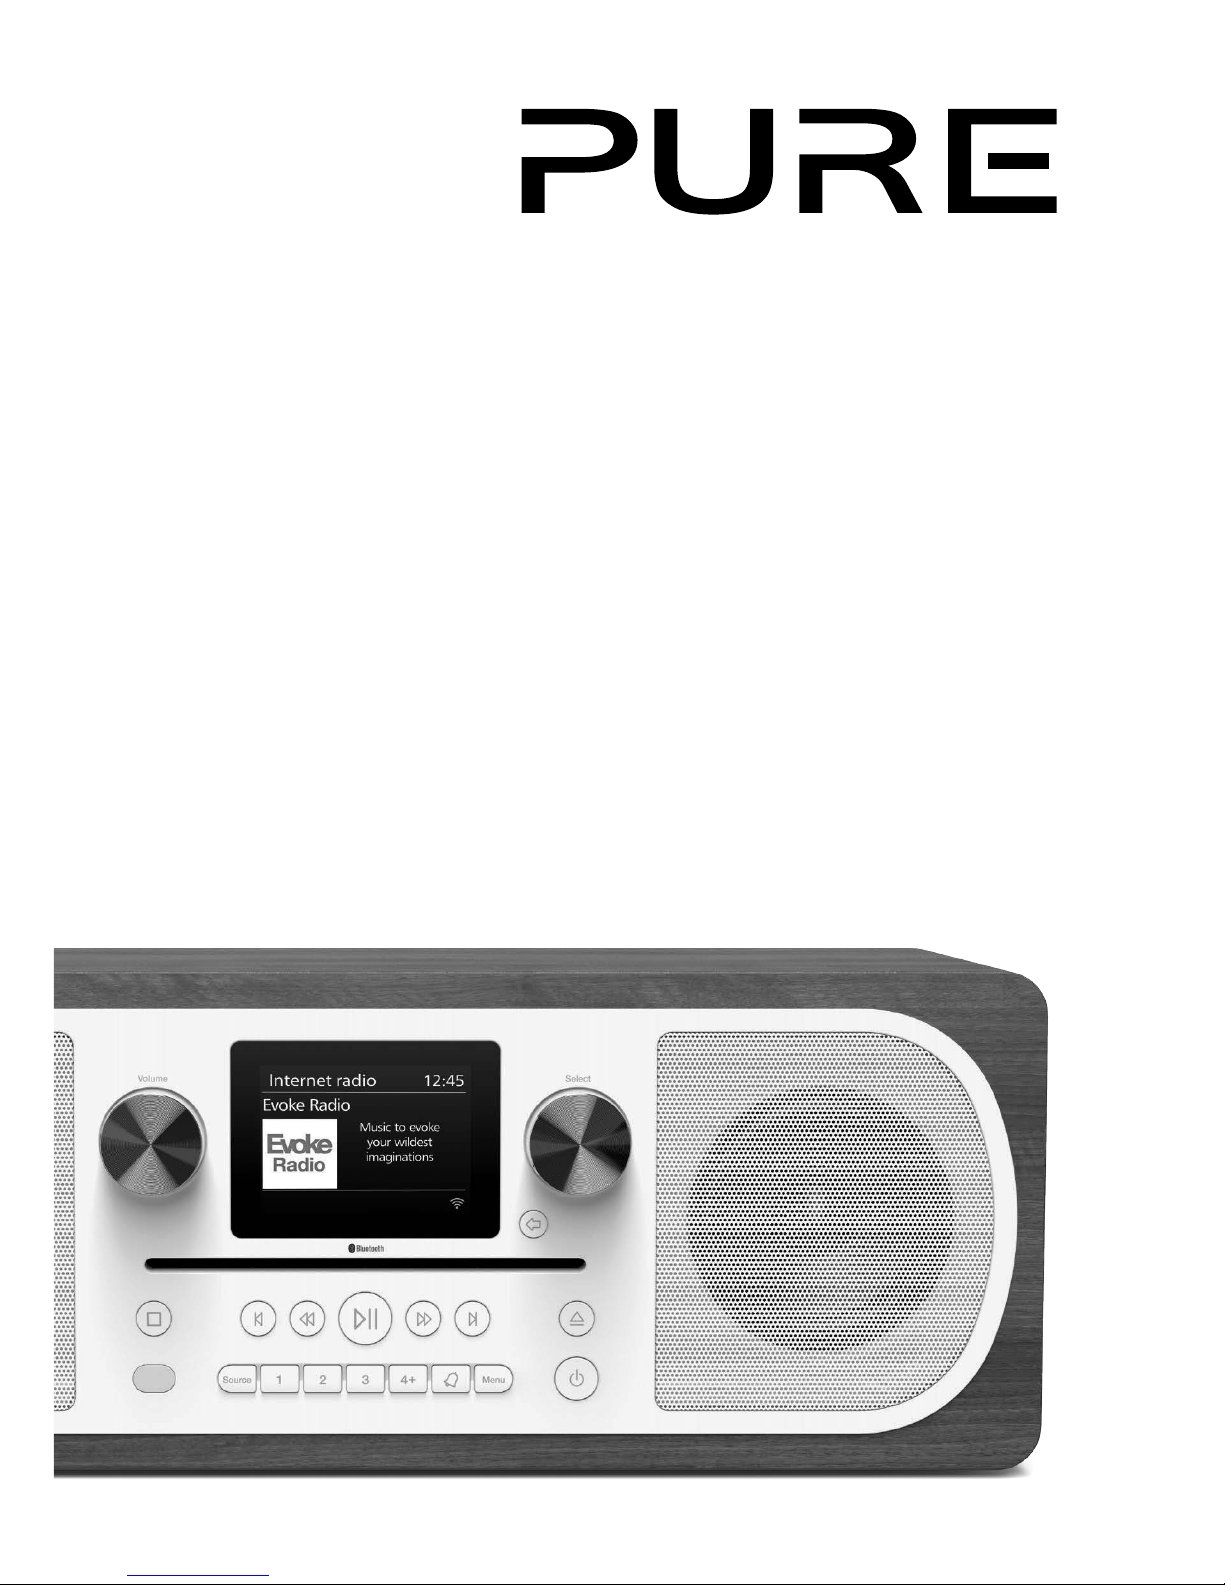
C-F6 with Bluetooth
Evoke

1
EN
NL
ES
IT
DA/NO
FR
ES
DE
Thank you for choosing Evoke C-F6. This manual will get
you up and running in no time, and explains how to make
the most of your Evoke. We’re constantly improving and
adding new features to our products. To take advantage of
any enhancements made since your product was shipped,
please visit support.pure.com where you can download the
latest version of this user guide in PDF format.
Evoke C-F6

2
1. Read, heed and retain these instructions – All the safety and operating instructions should be read before
this product is used and retained for future reference. All warnings on the appliance and in the operating
instructions should be followed
2. Failure to install or use the product in accordance with these instructions may impair the safety of the
product and invalid the warranty.
3. Use only power supply listed in these user manual/user instructions to power the equipment and do
not use the power supply for any other purpose. To be used with Pure with model number GPE036W180200Z.
4. The direct plug-in adapter is used as a disconnect device, the disconnect device shall remain readily
operable and accessible.
5. Do not immerse in water or use in a wet / moist environment, such as in the shower or bathroom if plugged
into the mains supply. The power supply shall not be exposed to dripping or splashing and no objects filled
with liquids, such as vases, placed above it.
6. Do not remove screws from or open the product casing. Product repairs are only to be carried out by
competent and authorised personnel. Do not use the product if any damage is noticed.
7. Keep the product away direct sunlight and from heat sources such as radiators, heaters or other
appliances that produce heat.
8. Remote Control - Danger of explosion if the battery is incorrectly replaced (ensure correct polarity).
Replace only with the same or equivalent type. The battery shall not be exposed to excessive heat such as
sunshine, fire or similar. Attention is drawn to the environmental aspects of battery disposal.
Warning – DO NOT INGEST BATTERY, CHEMICAL BURN HAZARD – The remote control supplied with
this product contains a coin/button cell battery. If the battery is swallowed, it can cause internal burns in
just 2 hours and can lead to death. Keep new and used batteries away from children.
9. Do not expose the product to naked flame sources, such lighted candles which should not be placed on
or near the product.
10. Ventilation should not be impaired by covering the product or power supply.
11. Clean only with a dry cloth.
12. This product is intended for use in moderate climates.
Safety instructions and cautions
Symbol Description
This WARNING symbol is used throughout this manual to indicate a potentially serious risk to your
personal safety. Obey all safety notices that accompany this symbol to avoid possible injury or death.
This symbol is used on the product to indicate a caution and that instructions should be read before
use.
This symbol indicates DC voltage.
This symbol indicates where the product is switched on or put into standby.
Symbols used on this product
Note: For information on all the other symbols used on the product, see page 5.

3
EN
EN
Contents
4 Introduction
4 Network requirements
4 Front panel
4 Front panel buttons
5 Rear connectors
5 Remote control
6 Getting started
6 Quick set up
7 Adjusting and muting the volume
7 Display
9 Internet listening
9 Listening to internet content
10 Favourite podcasts and internet radio
stations
11 Playing a CD
11 Inserting a CD
11 Playing a track
11 Playback controls
11 Repeating tracks
11 Shuffling tracks
11 Ejecting a CD
12 Listening to digital or FM
radio
12 Changing digital stations
12 Changing FM stations
13 Using radio presets
13 To quick-store a station to a preset
button (1-3)
13 To store a station to the preset list (4-
12)
13 To recall a preset when listening to
digital radio, FM radio or internet radio
14 Streaming audio to Evoke
14 Streaming using Bluetooth
15 Streaming from Spotify
15 Streaming audio from a PC or Mac
16 Controlling Evoke from your
smartphone or tablet
17 Alarms and timers
17 Setting an alarm
17 Cancelling a sounding alarm
17 Snoozing a sounding alarm
17 Setting the sleep timer
18 Options and settings
18 System settings
24 DAB settings
26 FM radio settings
27 Specifications

4
Introduction
Network requirements
To enjoy using all of Evoke’s features, you will need:
• A router, wireless access point or similar network device (802.11a/b/g/n) that is connected to a
broadband internet connection.
• A PC, tablet or smartphone, etc connected to the same Wi-Fi as your Evoke.
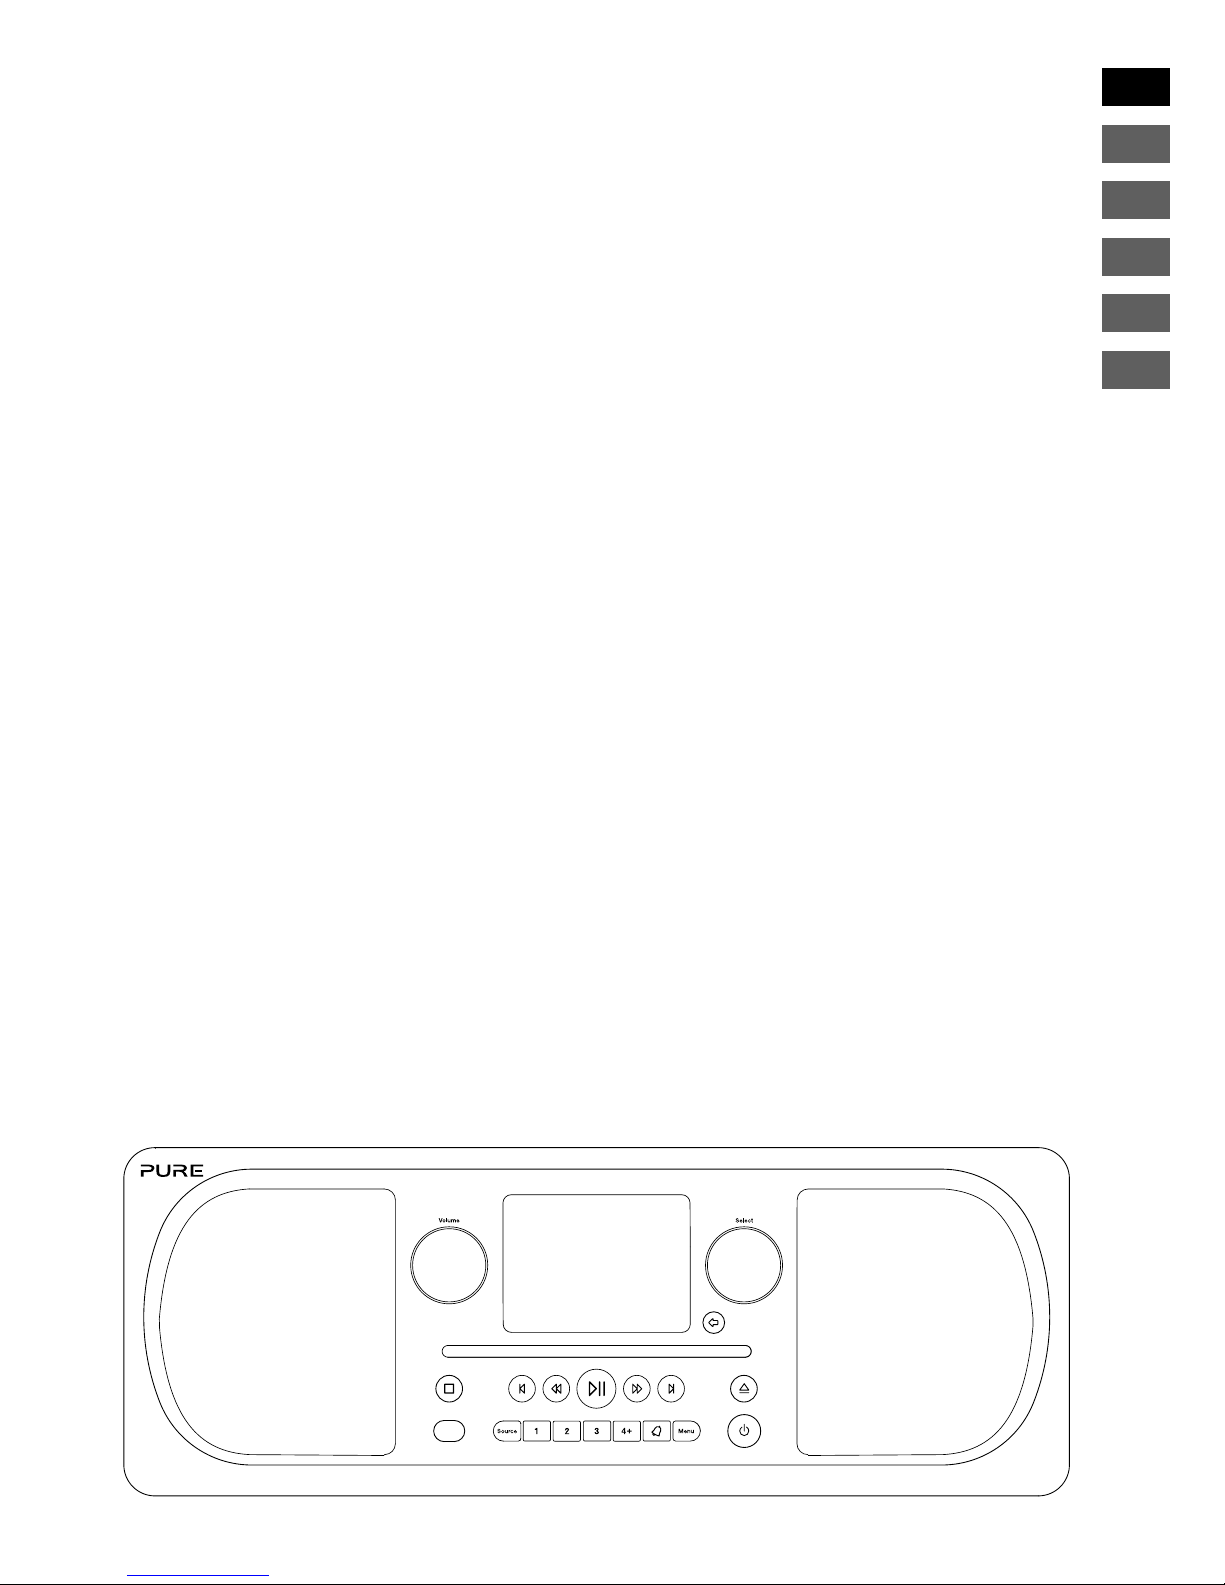
Remote
control
sensor
Front panel buttons
Source
Press to select
internet radio, digital radio,
FM radio, Bluetooth,
auxiliary input or CD (see
page 7).
Menu
Setup options
(see page 18).
Standby
Switch Evoke
between on
and standby.
Alarm
Press to set
the alarm (see
page 17).
Front panel buttons
See below for more
information.
Front panel
Volume dial
Adjust and mute volume
(see page 7).
Select dial
Turn and press to browse and select
radio stations (see page 12), select
and adjust menu options.
Presets
Store up to 12 digital,
12 FM and 12 internet
radio preset stations
(see page 13).
CD playback controls
See page 11 for more information.
Back button
Press to return to the
previous menu.
5
EN
EN
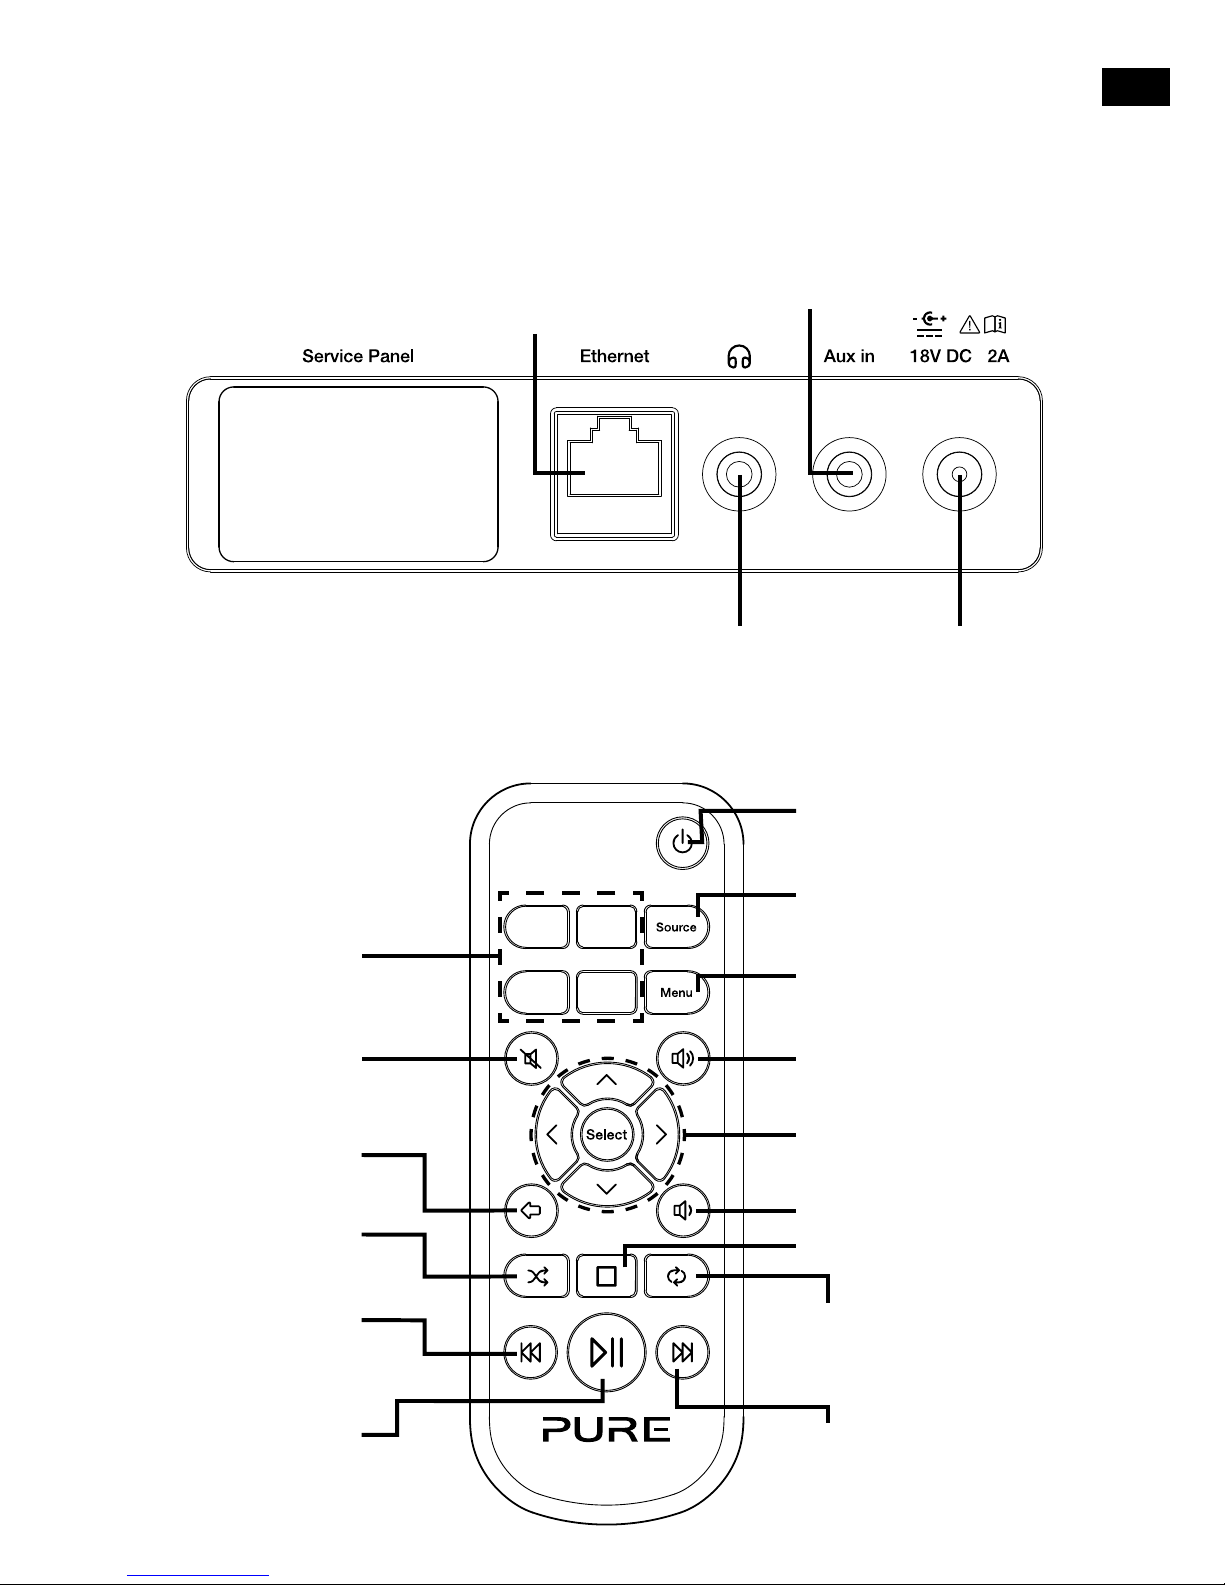
Rear connectors
Analogue stereo
input for iPod, MP3
player, etc
3.5 mm stereo
headphone socket
Connect to supplied
mains adapter only
Connector for Ethernet
network cable. Use as
an alternative to Wi-Fi
setup. See next page.
Remote control
Standby
Switch the radio between on
and standby.
Select buttons
Press to select and confirm
menu options
1 2
3 4
+
Presets 1-4+
Store up to 12
digital, 12 FM and 12
internet radio preset
stations
Source
Press to open the source
menu.
Menu
Setup options (see page 18)
Back
Press to go back to
the previous screen.
Volume down
Press to reduce the volume.
Volume up
Press to increase the volume.
Mute
Press to mute volume.
Stop
Press to stop the CD.
Random
Press to shuffle the
tracks on a CD.
Repeat
Press to repeat the
current track or CD.
Rewind/Previous track
Press to play the
previous track. Press
and hold to rewind.
Fast forward/Skip track
Press to skip to the next
track. Press and hold to fast
forward.
Play/Pause track
Press to play or pause
the track that’s playing.
6
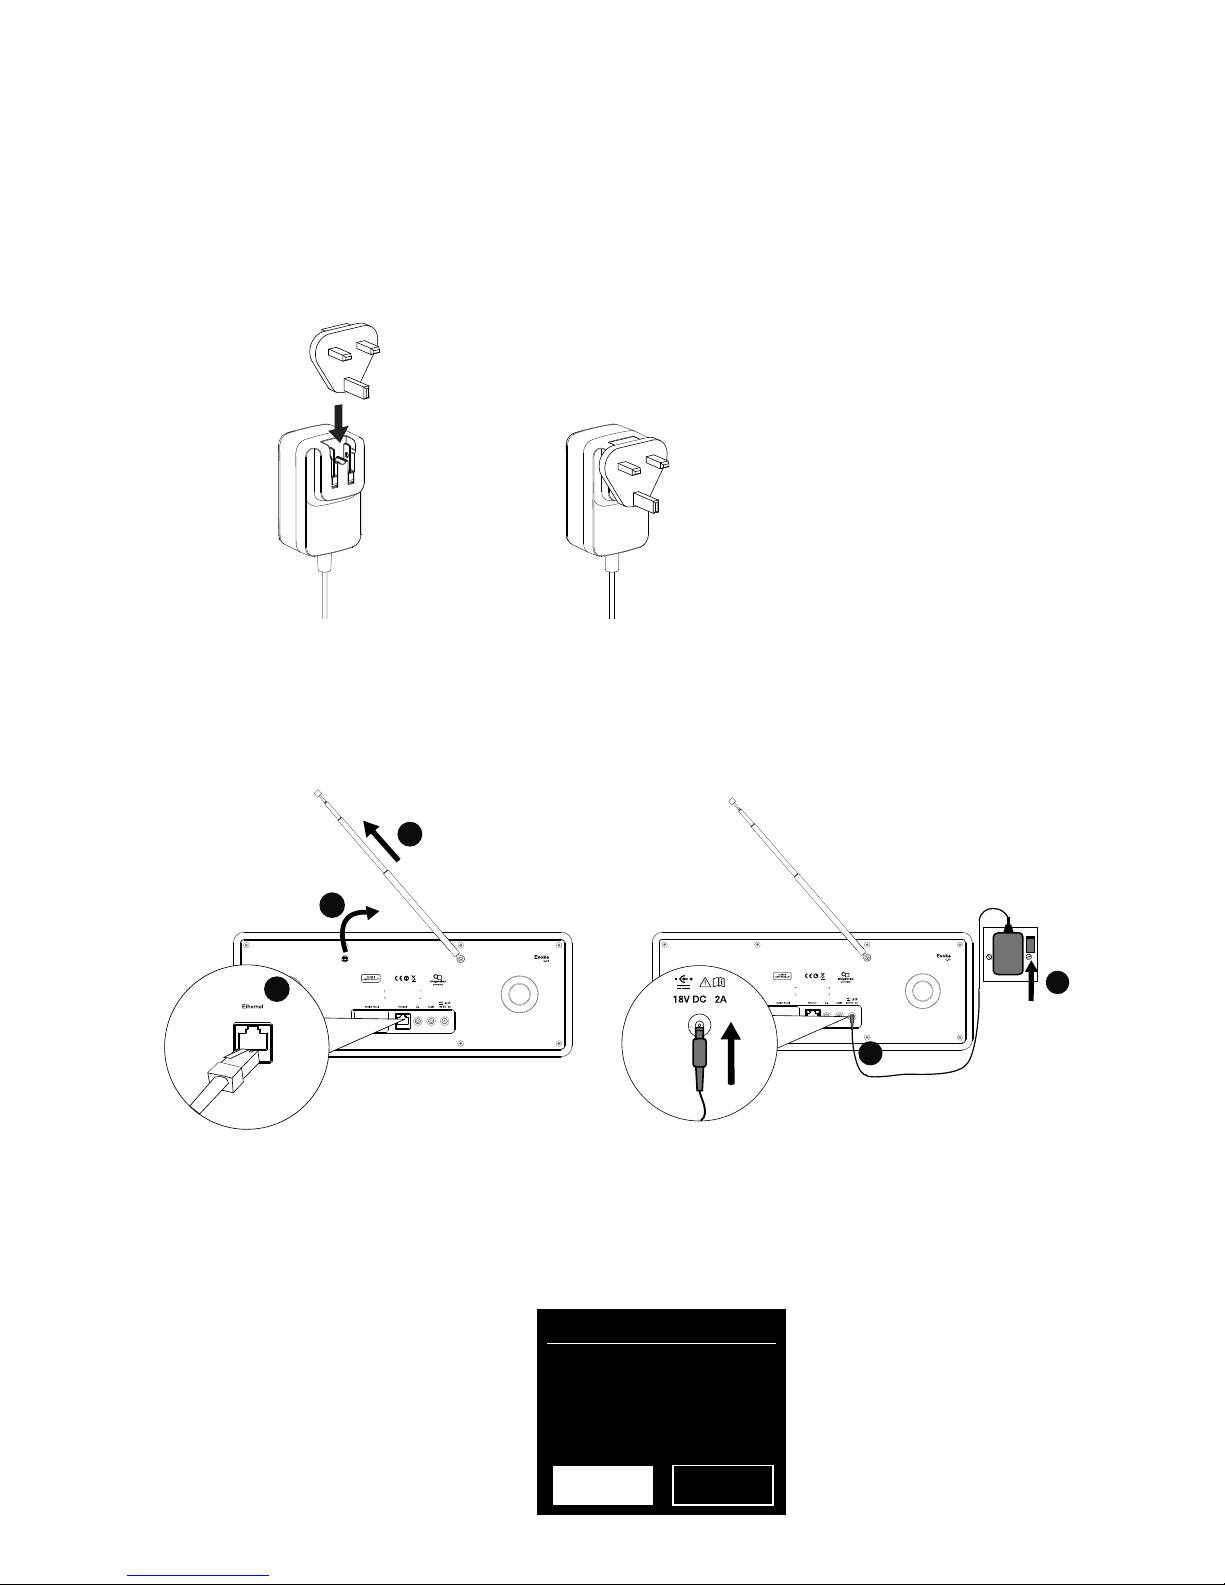
• Fit the correct pin connector to the supplied mains power adapter.
Getting started
Quick set up
1
• Unclip the aerial and fully extend it (steps A and B).
• If you want to connect Evoke to you network using an Ethernet cable, connect an Ethernet cable
from the Ethernet port on the back of Evoke to your router (C).
• Insert the jack of the supplied mains adapter into the socket on the rear of the radio (D).
• Plug the mains adapter into the mains supply (E).
2
The first time you switch on Evoke you will be asked if you would like to run the setup wizard,
which will help you connect Evoke to your network. If you want to run the setup wizard now, turn
and press the Select dial to select ‘Yes’ and follow the prompts on screen. To set up Evoke later,
turn and press the Select dial to select ‘No’.
Note: For more information on using the setup wizard see page 18.
3
Setup wizard
Start now?
YES
NO
D
E
B
A
C
7
EN
EN
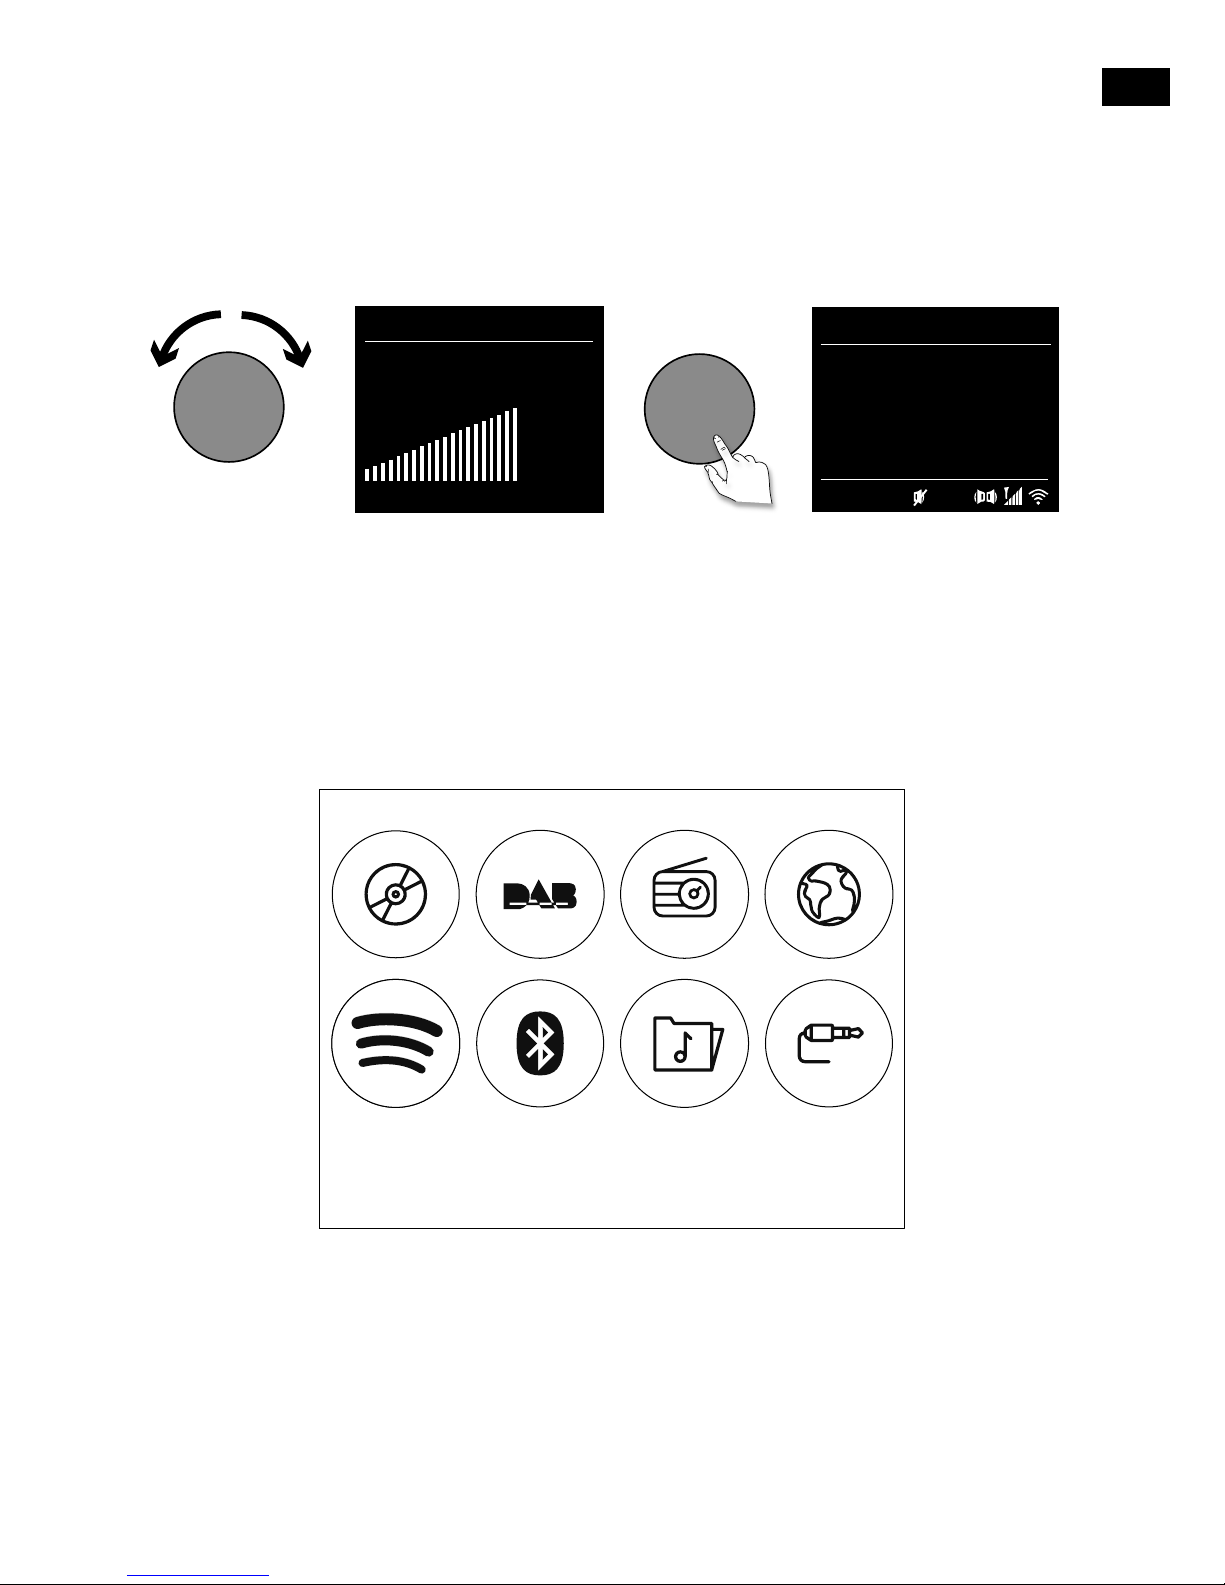
Adjusting and muting the volume
Turn the Volume dial or press the Volume buttons on the remote to increase or decrease the volume.
Press the Volume dial or press the Mute button on the remote to mute.
Note: Evoke will automatically go into standby if left in mute for 30 minutes.
Volume
Volume
Volume
Volume
Volume
Volume
20
DAB 10:05
BBC Radio 6Music
to vote for a track
that missed out on
the 6Music playlist
Display
Source menu
Press the Source button to display the ‘Source’ menu. Turn and press the Select dial to switch between
Evoke’s sources.
Description Function
CD Player Listen to a CD.
DAB Radio Listen to a digital radio station.
FM Radio Listen to an FM radio station.
Internet Radio Listen to an internet radio station or podcast.
Spotify Listen to Spotify (see page 15).
Bluetooth Listen to content streamed from your phone or tablet.
Music Player Listen to tracks from your computer.
Aux In Listen to content from a device connected to your Aux in connection.
CD Player CD Player
CD Player

8
Changing the information shown on screen
When listening to a digital radio station, FM radio station or you are streaming a track from your Bluetooth
device, you can change the information that is displayed on Evoke’s screen. When listening to an MP3 on a
CD, Evoke displays information about the track.
Internet radio
When listening to digital radio, press the Select dial to toggle the information displayed on Evoke’s screen
between ‘Scrolling text’, ‘Signal strength’, ‘Programme type’, ‘Ensemble’, ‘Frequency’, ‘Signal error’,
‘Bitrate’, ‘Time’ or ‘Date’.
Digital radio
When listening to digital radio, press the Select dial to toggle the information displayed on Evoke’s screen
between ‘Scrolling text’, ‘Signal strength’, ‘Programme type’, ‘Ensemble’, ‘Frequency’, ‘Signal error’,
‘Bitrate’, ‘Time’ or ‘Date’.
FM radio
When listening to FM radio, press the Select dial to toggle the information displayed on Evoke’s screen
between ‘Scrolling text’, ‘Programme type’, ‘Date’ or ‘Frequency’.

9
EN
EN
Internet listening
You can connect Evoke to your network (see page 19) to access to thousands of internet radio stations
and podcasts from around the world. Once connected to the internet you can also access additional
subscription services such as Spotify, which provides you with instant access to millions of music tracks.
We’re constantly improving and adding new features to our internet service. To find out more about the
latest enhancements made since your product was shipped, please visit support.pure.com.
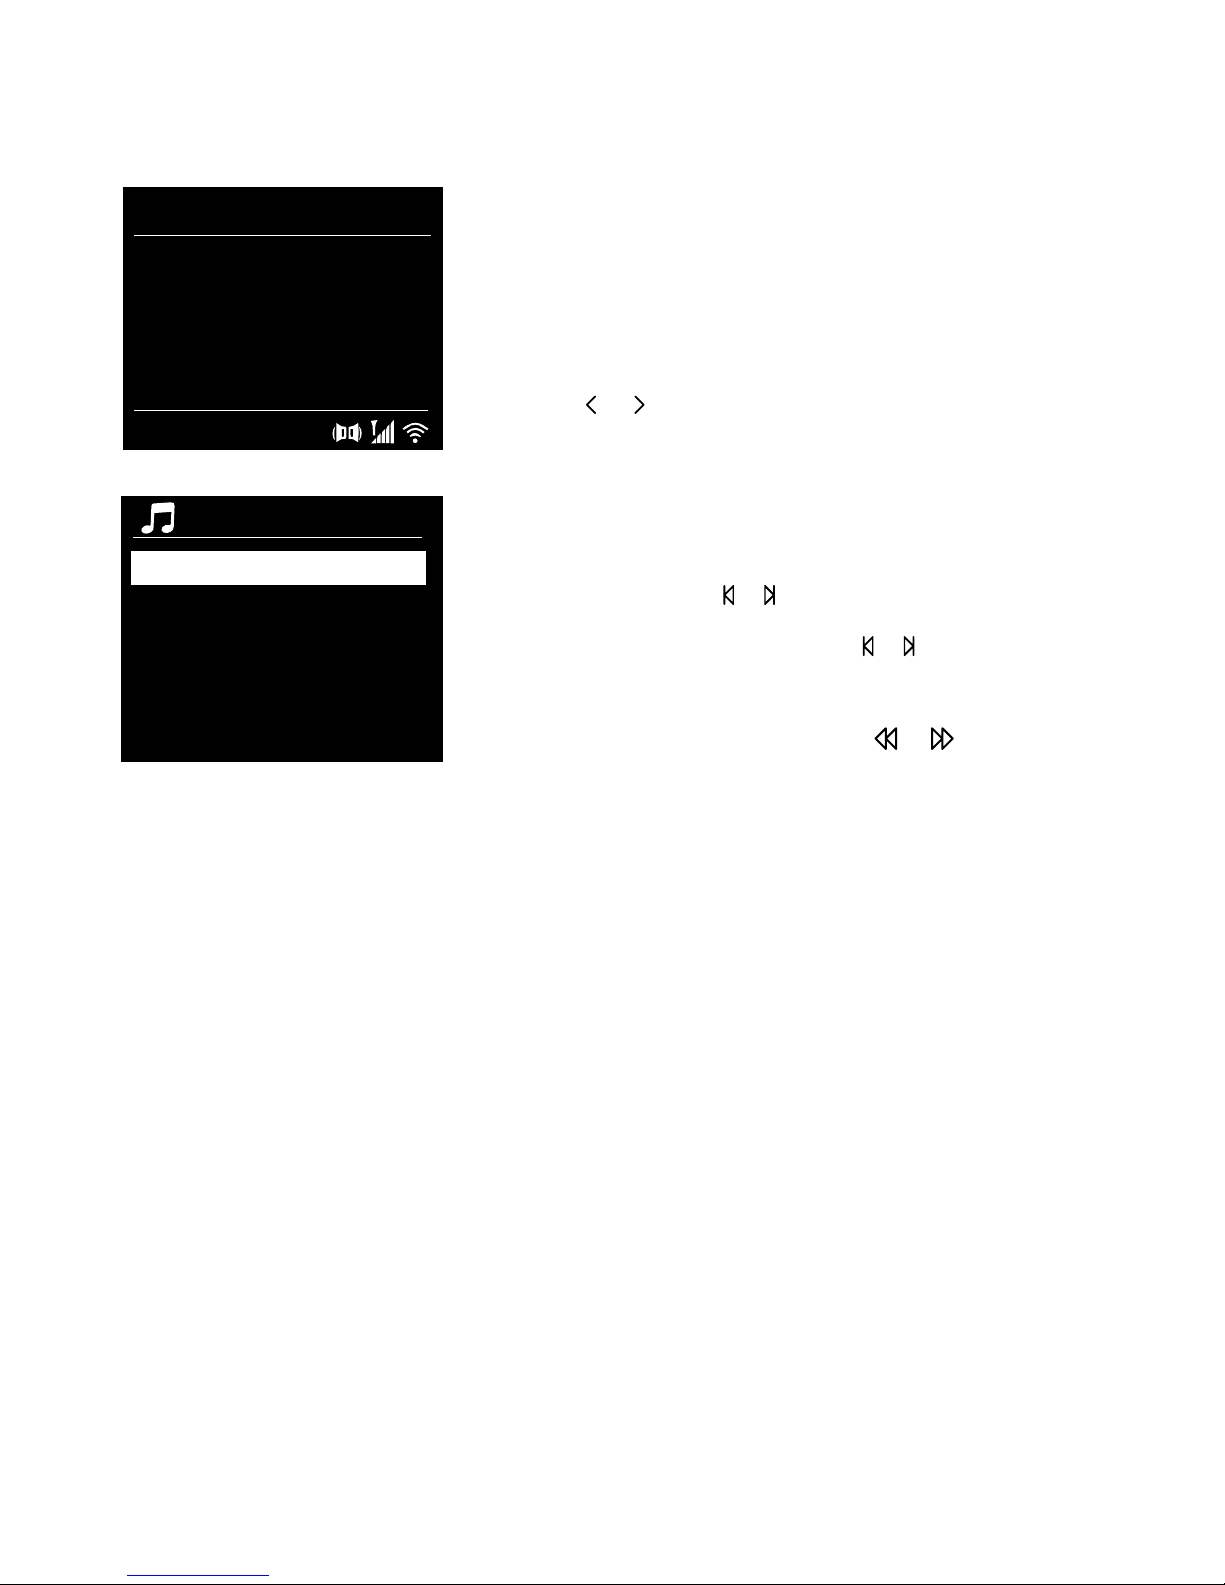
Listening to internet content
Internet radio menu
Internet radio
Last listened
Station list
Main menu
>
>
>
Thousands of radio stations around the world broadcast online. To
listen to an internet radio station or podcast:
1. Press the Source button to display the ‘Source’ menu.
2. Turn
and press the Select dial to select ‘
Internet radio
’.
3. Turn and press the Select dial to select one of the options listed
below.
My favourites
Select this option to start listening to an internet radio station that you added to your favourites list (see page
10 for more information).
Local United Kingdom
Select this option to browse for an internet radio station based in your country. Turn and press the Select
dial to select ‘All stations’ to view all local based stations in alphabetical order. To browse for a station based
on genre, turn and press the Select dial to select the genre you want to browse for.
BBC
Select this option to browse for a BBC radio station.
Stations
Select this option to browse for any internet radio station. Turn and press the Select dial to browse for a
station based on the ‘Location’ or ‘Genre’.
Search stations
Select this option to search for an internet radio station. Turn and press the Select dial to highlight and
select characters. Select ‘BKSP’ to delete a character. Turn and press the Select dial to start searching for
an internet station. To cancel your search, turn and press the Select dial to select ‘CANCEL’.
Podcasts
Podcasts are prerecorded audio shows on a wide variety of subjects such as comedy, arts, business, and
culture, for you to enjoy anytime. Turn and press the Select dial to browse for a podcast based on the
‘Location’ or ‘Genre’.
Search podcasts
Select this option to search for a podcast. Turn and press the Select dial to highlight and select characters.
Select ‘BKSP’ to delete a character. Turn and press the Select dial to start searching for an podcast. To
cancel your search, turn and press the Select dial to select ‘CANCEL’.
My added stations
Select this option to start listening to any internet radio stations that you manually added via the Flow Live
website. See the help page on www.flowlive.com to find out how to manually add radio stations on the
Flow Live website.
Help
Select this option to view some frequently asked questions relating to internet radio.

10
Favourite podcasts and internet radio stations
If you’ve found a podcast or internet radio station that you enjoy listening to, you can save it as a favourite
by registering your Evoke on the Flow Live website (www.flowlive.com). If you don’t want to register your
Evoke on Flow Live, you can still save up to 12 internet radio stations as presets and access them in the
same way as digital and FM radio presets (see page 13 for more information). Once registered on Flow
Live, Evoke will also restore your favourite podcasts and internet radio stations as soon as you’ve reconnected Evoke to the internet if you ever perform a factory reset.
Registering Evoke on Flow Live
1.
Press the Source button and turn and press the Select dial to select ‘Internet radio’ from the Home screen.
2. Press the Menu button and turn and press t
he Select dial to select ‘Station list’.
3. Turn and press the Select dial to select ‘Help’.
4. Turn and press the Select dial to select ‘Get access code’. Evoke will display an eight digit access code
along with a message that tells you the amount of time the code will be valid for.
5. Make a note of the code and go to www.flowlive.com on your web browser.
6. If you already have a Flow Live account, enter your Flow Live email address and password and click
Sign-in. If you don’t have a Flow Live account, click Create account and follow the instructions
on-screen.
7. Click on Me and then click on the Manage Devices button.
8. Enter the access code that you retrieved from Evoke in the ‘Device code’ field and press the Submit
button to register Evoke.
Congratulations! You’ve registered your Evoke on Flow Live. Any favourite internet radio stations will now
be saved to your Flow Live account.
Saving a favourite podcast or internet radio station
See the help page on www.flowlive.com to find out how to save podcasts and internet radio stations on
the Flow Live website.
Listening to a favourite internet radio station or podcast
1.
Press the Source button and turn and press the Select dial to select ‘Internet radio’ from the Home screen.
2. Press the Menu button and turn and press t
he Select dial to select ‘Station list’.
3. Turn and press the Select dial to select ‘My favourites’.
4. Turn and press the Select dial to choose between ‘
Podcasts
’ and ‘
Stations
’.
5. Turn and press the Select dial to choose the radio station or podcast that you want to listen to.

11
EN
EN
Playing a CD
Inserting a CD
Insert your CD label side up. When you first insert a CD, Evoke displays ‘Reading’ for a few seconds while
the CD loads. After a few seconds, your CD will start to play automatically.
Playing a track
During audio CD playback, Evoke’s display shows the track number and the amount of time the track has
been playing. Evoke will also display the file name if this is available.
Playback controls
You can use the following controls on the front panel or remote control to control CD playback:
Press to pause the track that is currently playing. If you have paused a track, press to resume playback.
Press to play the previous track.
Press to skip to the next track.
Press and hold to rewind the track that is currently playing.
Press and hold to fast forward the track that is currently playing.
Press to stop the CD.
Repeating tracks
You can use the ‘Repeat’ setting on Evoke to repeat the track that is currently playing or the entire CD. To
change the ‘Repeat’ setting:
1. Press the Menu button and turn and press Select dial or press the
button on the remote control to
choose ‘Repeat’.
2. Turn and press the Select dial or use the <Select> buttons on the remote control to select one of the
following repeat options:
Repeat one: Select this option if you want to repeat the track that is currently playing.
Repeat all: Select this option if you want to repeat the entire CD.
Normal: Select this option if you don’t want to repeat any tracks or the entire CD.
Shuffling tracks
You can use the ‘Shuffle’ setting on Evoke to listen to shuffle the tracks on your CD. To change the ‘Shuffle’
setting:
1. Press the Menu button and turn and press the Select dial or press the
1 2
3 4
+
button on the remote control
to choose ‘Shuffle’.
2. Turn and press the Select dial or use the <Select> buttons on the remote control to choose ‘Shuffle’ if
you want to enable track shuffling. Turn and press the Select dial tor use the <Select> buttons on the
remote control to choose ‘Normal’ if you want to disable track shuffling.
Ejecting a CD
Press the button. Wait until Evoke displays ‘Eject’ and remove the CD.
12
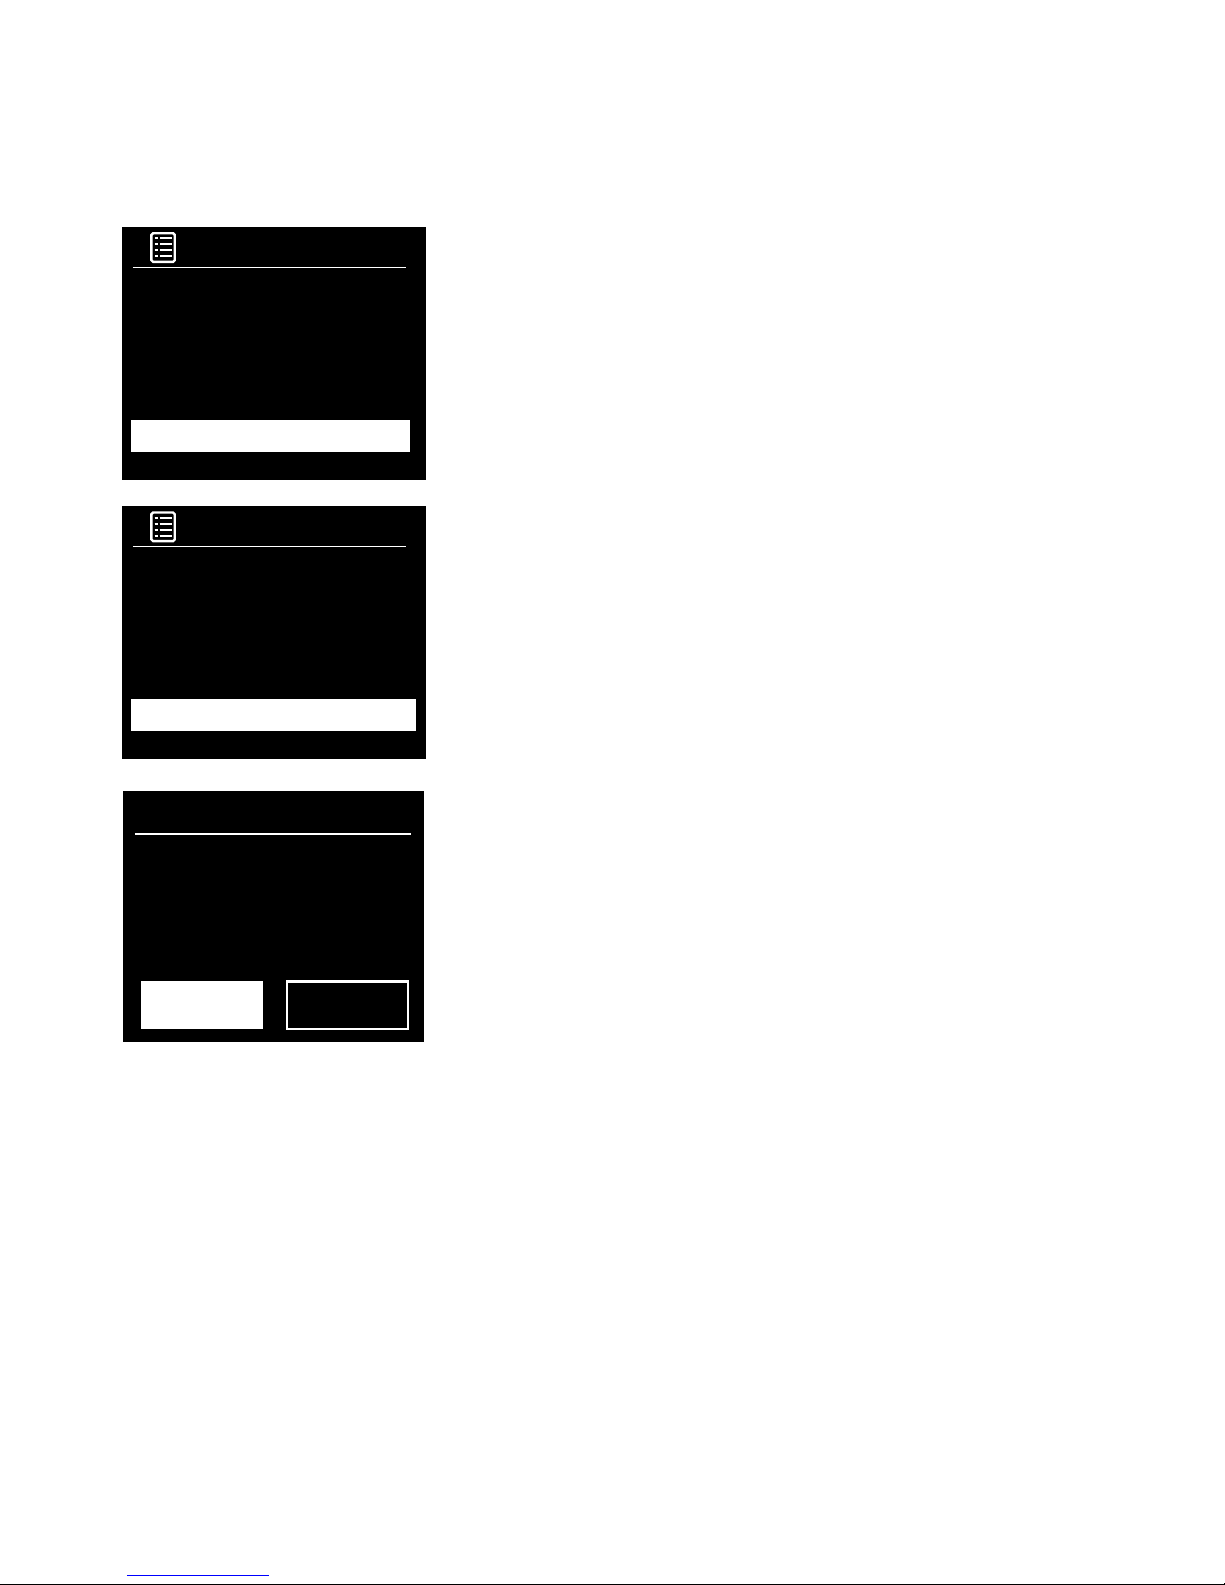
Listening to digital or FM radio
Digital radio screen
Changing digital radio station
Changing digital stations
Using the front panel controls
1. Turn the Select dial left or right to browse through the list of
available digital stations.
2. Push the Select dial to change the station.
Using the remote control
1. Press the + or
button on the remote to browse through the list
of available digital stations.
2. Press the Select button to change the station.
Changing FM stations
Seek tuning
Press the Select dial or the or buttons on the front panel to seek
to the next or previous FM radio station that has a strong signal. If
you are using the remote control press the or buttons on the
remote control to seek to the next or previous station.
Manual tuning
Turn the Select dial right or left or press the or buttons on the
front panel to step up or down 0.05 MHz. If you are using the remote
control press the < or > buttons to step up or down 0.05 MHz.
DAB 10:05
BBC Radio 6Music
to vote for a track
that missed out on
the 6Music playlist
Station list
BBC Radio 1
BBC Radio 2
BBC Radio 3
BBC Radio 4
BBC Radio 5

13
EN
EN
Using radio presets
To quick-store a station to a preset button (1-3)
Tune to the digital, FM or internet radio station you want to store. Press and hold one of the numbered
Preset buttons (1-3) for two seconds until you see a message to confirm that the preset has been stored.
To store a station to the preset list (4-12)
1. Tune to the digital, FM or internet radio station you want to store.
2. Hold the 4+ button to view the numerical list of stored presets, then turn and press the Select dial or
use the <Select> buttons on the remote control to choose any Preset number between 4 and 12. You
can overwrite existing presets.
3. Press the Select dial or the Select button on the remote control to store the preset.
To recall a preset when listening to digital radio, FM radio or
internet radio
1. To tune to Presets 1 to 3, press the corresponding numbered button on the front panel or on the remote
control (1 to 3).
2. To access presets 4 to 12 on the front panel press the 4+ button, turn the Select dial right or left to
scroll through the list of presets, then push and release the Select dial to tune to the selected preset. To
access presets 4 to 12 using the remote control, press and release the 4+ button and use the <Select>
buttons to scroll and select a preset.
You can store up to 12 digital, 12 FM and 12 internet radio stations for quick access.
Note: You can also save internet radio stations as favourites, see page 10 for more information.

14
Streaming using Bluetooth
You can use Bluetooth to stream any audio from your phone or tablet to Evoke.
Pairing a mobile device with Evoke
Before you can stream audio to Evoke, you will need to pair your phone or tablet with Evoke.
Note: Bluetooth pairing varies on different mobile devices. See your mobile device manual for specific
information.
To pair with Evoke using Bluetooth:
1. Press the
Source
button and turn and press the
Select
dial to select ‘
Bluetooth
’. Evoke will display the
Bluetooth input display and the Bluetooth icon (
) will start to flash.
Note: If the Bluetooth icon is displayed, Evoke is already connected to another Bluetooth device. See below
for more information.
2. On your mobile device, select the option to add a new Bluetooth device. On some mobile devices you may
need to select the search or scan option.
3. Start the pairing process on your mobile device. Do this by selecting ‘Evoke C-F6’ from the list of available
devices that appear on the mobile device’s screen. Your mobile device will connect to Evoke automatically
once paired.
You will now be able to start streaming audio to Evoke from your mobile device.
Disconnecting a mobile device from Evoke
You can only have one mobile device connected to Evoke via Bluetooth at any one time. If you want to stream
audio from a different mobile device, you will need to disconnect any mobile device that is currently connected
to Evoke via Bluetooth first.
To disconnect a mobile device from Evoke:
1. Press the
Menu
button and turn and press the
Select
dial to select ‘
BT disconnect
’.
2. T
urn and press the Select dial to select ‘Yes’ to disconnect your mobile device from Evoke.
If your mobile device goes out of Evoke’s Bluetooth range (this is usually around 10m (30ft)) the mobile device’s
Bluetooth connection is disconnected automatically. To manually disconnect your mobile device from Evoke,
you will need to open the Bluetooth settings on your mobile device (see your mobile device’s manual for more
information).
When you disconnect a mobile device from Evoke, Evoke will remain in the ‘
Bluetooth
’ source. To listen to
another source, e.g. digital radio, press the Source button to display the home menu and turn and press the
Select dial to choose the source you want to listen to.
Streaming audio to Evoke

15
EN
EN
Streaming from Spotify
Press the Source button and turn and press the Select dial to select ‘Spotify’ from the Home screen.
Spotify Connect
A better way to listen at home
Spotify Connect lets you play Spotify through your home speakers or TV, using the Spotify app as a
remote.
You’ll need a Spotify Premium account to use Spotify Connect. If you don’t have it, just go to
http://www.spotify.com/freetrial for your free trial.
Step 1.
Connect your device to the same Wi-Fi network as your phone, tablet or PC running the Spotify
app.
Step 2. Open the Spotify app, and play any song.
Step 3. Tap the song image in the bottom left of the screen.
Step 4. Tap the Connect icon
.
Step 5. Pick your Evoke C-F6 from the list.
For more information on how to set up and use Spotify Connect please visit www.spotify.com/connect.
Licenses
The Spotify Software is subject to third party licenses found here:
http://www.spotify.com/connect/third-party-licenses
For more information on how to setup and use Spotify Connect please visit www.spotify.com/connect.
Streaming audio from a PC or Mac
You can stream audio stored on your computer or on a UPnP-compatible Network Attached Storage
(NAS) device to Evoke. To stream audio from your computer you will need to install media server software
on it, such as Windows
®
Media Player 11. For help setting up Windows Media Player as a server, follow
our step-by-step guides at http://support.pure.com.
Listening to streamed tracks on Evoke
1. Press the
Source
button and turn and press the
Select
dial to select ‘Music player’.
2. Turn and press the
Select
dial to choose the media player that you want to stream music from.
3. Turn and press the
Select
dial to navigate and select the track or playlist.

16
Controlling Evoke from your smartphone
or tablet
Opening the Pure Select app for the first time
You will be asked to select the device that you want to stream to when you first open the app. Select
Evoke from the list of devices that are displayed on the app’s screen. If you’ve already installed the app,
select Evoke from the drop-down menu at the top of the screen.
Finding your way around the Pure Select app
The Pure Select app has three main views, which you can select by tapping the tabs at the top of the
app’s screen:
SOURCE: Tap to switch between Evoke’s sources.
NOW PLAYING: Tap to view and control the content that is currently playing on Evoke. See ‘Pure Select
app controls’ below for more information.
BROWSE: Tap to browse for an internet radio station or podcast.
Pure Select app controls
You can switch between sources, browse content and control the volume on Evoke on your smartphone
or tablet by downloading the Pure Select app. You can download the Pure Select app on your
smartphone or tablet from the Apple App Store or Google Play. To find out more about using the Pure
Select app, see the help supplied with the app.
Note: Your smartphone or tablet will need to be on the same Wi-Fi network as Evoke.
EVOKE_C-F6
21
4 5
6
3
7
8
Now playing screen in the
Pure Select app
1. Tap to tune into one of your favourite
internet stations.
2. Tap to shuffle the shuffle the track that
is currently playing when listening to a
playlist.
3. Displays any artwork associated with the
radio station or music playing.
4. Tap to share what you are listening to
with your friends on various social media,
including Facebook and Twitter.
5. Tap to repeat the current track that
is playing.
6. When playing music, displays information
about the artist and album. When
listening to a radio station, displays
information about the radio show.
7. Playback controls.
8. Volume controls.
Tap to mute Evoke’s volume.
Slide bar to adjust Evoke’s volume.

17
EN
EN
Setting an alarm
Evoke has two alarms which can switch the radio on and tune to a digital or FM radio station, play a CD or
sound an alarm tone.
1. Press the 1 button.
2. Turn and press the Select dial to select ‘Alarm 1’ or ‘Alarm 2’.
3. Turn the Select dial to scroll through each alarm setting. If you want to change a setting, press the
Select dial. You can set the following alarm options:
Enable: Turn and press the Select dial to choose when you want the alarm to repeat. The available
options are ‘Daily’, ‘Once’, ‘Weekends’ or ‘Weekdays’.
Time: Turn and press the Select dial to adjust the hour of the alarm. Note: If you have set your Evoke
to use the 12 hour time format, make sure that you select the ‘AM’ or ‘PM’ version of the hour before
pressing the Select dial. Repeat to set the minutes of the alarm.
Mode: Turn and press the Select dial to choose between ‘Buzzer’, ‘Internet radio’, ‘DAB’, ‘FM’
or ‘CD’. Note: If you select ‘CD’ as the alarm source and there is no CD in Evoke when the alarm
sounds, the ‘Buzzer’ will sound instead.
Preset: If you have set your alarm to tune into an internet, digital or FM radio station, turn and press
the Select dial to choose between the last radio station you were listening to or one of the stations in
your preset list.
Volume: Turn and press the Select dial to set the volume of Evoke when the alarm sounds.
Save: Turn and press the Select dial to save the alarm.
Evoke’s display will show the
or
icon to show that the alarm has been set.
Cancelling a sounding alarm
To cancel a sounding alarm, press any button except the Select dial. If you press the Standby button
during a sounding alarm, Evoke will enter standby.
Snoozing a sounding alarm
To snooze a sounding alarm, press the Select dial. Evoke’s display will show the snooze countdown timer and
the alarm icon (or
)
will flash to show how long the alarm will snooze for. By default, Evoke snoozes an
alarm for 5 minutes. To change the default snooze time see page 7.
Setting the sleep timer
Evoke has a sleep timer that switches your Evoke into standby after a set time period. To set the sleep
timer:
1. Press the Menu button.
2. Turn and press the Select dial or use the <Select> buttons on the remote control to choose ‘Main
menu’ and then choose ‘Sleep’.
3. Tu
rn the Select dial
or use the < > buttons on the remote control
to increase the duration of the sleep
timer from 15 to 60 minutes. Press the Select dial or the Select button on the remote control to start the
sleep timer.
Evoke’s display will show the sleep icon when the sleep timer is active.
Alarms and timers
18
Setup wizard
1. Press the Menu button.
2.
Turn and press the Select dial to select ‘Main menu’ > ‘System
settings’ > ‘Setup Wizard’.
3. To run the setup wizard now, turn and press the Select dial to select
‘YES’. To set up Evoke later, turn and press the Select dial to select
‘NO’.
4. Turn and press the Select dial to choose between a 12 or 24 hour
time format.
5. Tur n and press the Select dial to select the method that you want to
use for updating Evoke’s time. You can choose to update the time
based on the ‘DAB’ or ‘FM’ radio signal or you can update Evoke’s
time from your network. To disable automatic time updates, choose
‘No update’.
6. Turn and press the Select dial or use the <Select> buttons on the
remote control to set the day of the month. Repeat to set the month,
year, hour and minutes.
7. If you have set your Evoke to use the 12 hour time format, turn and
press the Select dial or use the <Select> buttons on the remote
control to choose the ‘AM’ or ‘PM’ version of the hour.
8. To set Evoke up so that you can use the Pure Select app to take
Evoke out of standby (‘Keep network connected’), turn and press
the Select dial to choose ‘YES’. If you want to disable this feature to
save power, turn and press the Select dial to choose ‘NO’.
9. Evoke will display a message to tell you that the Setup wizard has
completed. Press the Select dial to exit the Setup wizard.
Helpful hint: Your Wi-Fi key is case sensitive, make sure to enter it
exactly as shown.
Main menu
Bluetooth
Aux in
Sleep
Alarms
System settings >
System settings
Options and settings
Press the Menu button on Evoke or on the remote control to access the Settings menu.
Setup wizard
Start now?
YES
NO
System Settings
Time/Date >
Language >
Factory reset
Software update
Setup wizard
>
19
EN
EN
Connecting Evoke to your Wi-Fi using the network
wizard
1. Press the Menu button.
2.
Turn and press the Select dial or use the <Select> buttons on
the remote control to select ‘Main menu’ >‘System settings’ >
‘Network’ > ‘Network wizard’. Evoke will search for available Wi-Fi
networks.
3.
Turn and press the Select dial or use the <Select> buttons on the
remote control to select the name (SSID) of your Wi-Fi network. If
your network requires a key, follow steps 5-6.
4. Enter your network key or password by turning and pressing the
Select dial or use the <Select> buttons on the remote control
to highlight and select characters. If you want to delete the last
character, turn the Select dial or use the <Select> buttons on the
remote control to select ‘BKSP’ and push to confirm.
5.
Turn and press the Select dial or use the <Select> buttons on the
remote control to select ‘OK’. Evoke will connect to your network.
Helpful hint: Your Wi-Fi key is case sensitive, make sure to enter it
exactly as shown.
Connecting Evoke to your Wi-Fi using push button
connect
You can use push button connect to connect Evoke to your Wi-Fi if
your router supports WPS. Refer to your router user guide for more
information on WPS.
1. Press the Menu button.
2. Turn and press the Select dial or use the <Select> buttons on
the remote control to select ‘Main menu’ > ‘System settings’ >
‘Network’ > ‘PBC WLAN setup’.
3. Follow the steps shown on Evoke’s screen to finish push button
connect setup.
Viewing Evoke’s network settings
1. Press the Menu button.
2. Turn and press the Select dial or use the <Select> buttons on
the remote control to select ‘Main menu’ > ‘System settings’ >
‘Network’ > ‘View settings’.
3. Turn and press the Select dial or use the <Select> buttons on the
remote control to display the SSID, IP address and various other
network settings.
Viewing Evoke’s WLAN region
1. Press the Menu button.
2. Turn and press the Select dial or use the <Select> buttons on
the remote control to select ‘Main menu’ > ‘System settings’ >
‘Network’ > ‘WLAN region’.
Evoke will display the region that Evoke’s WLAN connection has been
designed to operate in.
Main menu
Bluetooth
Aux in
Sleep
Alarms
System settings >
SSID
Pure_Wi-Fi
Home-Hub
Rob-Wireless
Key:
d
BKSP
OK
CANCEL
0 1 2 3 4 5 6
7 8 9 . _ - @
, a b c d e
f g h i j k l
m n o p q r s
Network settings

20
Manually connecting Evoke to your wireless network
Manually configure your wireless network (for advanced users only).
1. Press the Menu button.
2. Turn and press the Select dial or use the <Select> buttons on the remote control to select ‘Main
menu’ > ‘System settings’ > ‘Network’ > ‘Manual settings’.
3. Follow the steps shown on Evoke’s screen to manually add Evoke to your wireless network.
NetRemote PIN Setup
If you want to restrict the devices that can connect to Evoke using the Pure Select app, you can get Evoke
to request a PIN number when you first connect to Evoke.
To set up a pin number:
1. Press the Menu button.
2. Turn and press the Select dial or use the <Select> buttons on the remote control to select ‘Main
menu’ >‘System settings’ > ‘Network’ > ‘NetRemote PIN Setup’.
3. Enter your network key or password by turning and pressing the Select dial or use the <Select>
buttons on the remote control to highlight and select the numbers. If you want to delete the last
number, turn the Select dial to select ‘BKSP’ and push to confirm.
4. Turn and press the Select dial or use the <Select> buttons on the remote control to select ‘OK’. You
will now need to enter this PIN whenever you want to connect a new device to Evoke using the Pure
Select app.
Network profile
Every time you connect Evoke to a new Wi-Fi, Evoke will store the connection information as a profile so
that if you plan to use Evoke in several locations, you won’t have to keep re-enter the Wi-Fi settings.
Evoke stores the four most recent Wi-Fi profiles and will try to connect to a Wi-Fi network using the stored
profiles. If Evoke can’t connect to the Wi-Fi using one of the stored profiles, you will need to connect Evoke
to your network using the wizard (see page 19) or manually (see above).
If you think you will only visit a Wi-Fi connection once, you can delete the profile by carrying out the
following:
1. Press the Menu button.
2. Turn and press the Select dial or use the <Select> buttons on the remote control to select ‘Main
menu’ > ‘System settings’ > ‘Network’ > ‘Network profile’.
3. Turn and press the Select dial or use the <Select> buttons on the remote control to choose the profile
that you want to delete.
4. Turn and press the Select dial or use the <Select> buttons on the remote control to choose ‘Yes’ to
delete the profile. If you want to keep the profile, turn and press the Select dial or use the <Select>
buttons on the remote control to choose ‘No’.
Note: You cannot delete a profile that is currently in use.
Clear network settings
Evoke will delete all previous Wi-Fi connections, passwords and other network settings. If using the
wireless connection method, this will also perform a fresh scan for available networks.
1. Press the Menu button.
2. Turn and press the Select dial or use the <Select> buttons on the remote control to select ‘Main
menu’ > ‘System settings’ > ‘Network’ > ‘Clear network settings’.
3. Turn and press the Select dial or use the <Select> buttons on the remote control to choose ‘Yes’ to
clear all network settings. If you want to keep the current network settings, turn and press the Select
dial or use the <Select> buttons on the remote control to choose ‘No’.

21
EN
EN
Keep network connected
To set Evoke up so that you can use the Pure Select app to take Evoke out of standby:
1. Press the Menu button.
2. Turn and press the Select dial or use the <Select> buttons on the remote control to select ‘Main
menu’ > ‘System settings’ > ‘Network’ > ‘Keep network connected’.
3. Turn and press the Select dial or use the <Select> buttons on the remote control to choose ‘Yes’ to
enable Evoke to be taken out of standby using the app. If you want to disable this feature to reduce
power consumption, turn and press the Select dial or use the <Select> buttons on the remote control
to choose ‘No’.
Note: Evoke will consume more power if you decide to maintain the network connection during standby.
Choosing an equalisation setting
Evoke includes seven equalisation audio presets and also includes a loudness setting to help improve your
listening experience when listening to Evoke at a low volume.
1. Press the Menu button.
2. Turn and press the Select dial or use the <Select> buttons on the remote control to select ‘Mani
menu’ > ‘System settings’ > ‘Equalizer’.
3. Turn and press the Select dial or
use the <Select> buttons on the remote control
to choose between
’Flat’, ‘Jazz’, ’Rock’, ‘Movie’, ‘Classic’, ‘Pop’ and ‘News’. If you want to use a custom equalisation
setting, select ‘My EQ’ (see below for more information).
Creating a custom equalisation setting
You can manually set the bass and treble levels and specify if the loudness setting is enabled to help
improve your listening experience when listening to Evoke at a low volume.
Setting the bass and treble manually
1. Press the Menu button.
2. Turn and press the Select dial or use the <Select> buttons on the remote control to select ‘Main
menu’> ‘System settings’ > ‘Equalizer’ > ‘My EQ profile setup’.
3. Turn and press the Select dial or
use the <Select> buttons on the remote control
to choose ‘Bass’
or ‘Treble’.
4. Turn and press the Select dial or
use the <Select> buttons on the remote control
to set the level from
‘-14‘ (low) to ‘14’ (high).
Switching on Evoke’s loudness setting
If listening to Evoke at low volume, you can use the loudness setting to improve your listening experience.
To switch the loudness setting on or off:
1. Press the Menu button.
2. Turn and press the Select dial or use the <Select> buttons on the remote control to select ‘Main
menu’ > ‘System settings’ > ‘Equalizer’ > ‘My EQ profile setup’.
3. Turn and the Select dial or
use the <Select> buttons on the remote control
to scroll down to ‘Loudness’.
4. Press the Select dial to toggle the loudness setting ‘On’ or ‘Off’.
Choosing a custom equalisation setting
When you have finished setting up your profile, carry out the following to listen to it on Evoke.
1. Press the Menu button.
2. Turn and press the Select dial or use the <Select> buttons on the remote control to select ‘Main
menu’ > ‘System settings’ > ‘Equalizer’.
3. Turn and press the Select dial or
use the <Select> buttons on the remote control
to choose ‘My EQ’.

22
Choosing a room equalisation setting
Evoke includes three predefined room equalisation settings that lets you optimise your listening experience
based on the type of room you have placed Evoke in.
To change the room equaliser setting on Evoke:
1. Press the Menu button.
2. Turn and press the Select dial or use the <Select> buttons on the remote control to select ‘Main
menu’ > ‘System settings’ > ‘Room EQ’.
3. Turn and press the Select dial or
use the <Select> buttons on the remote control
to choose between
one of the following room equaliser settings:
Room EQ1: Choose this option for detailed, clear audio, which is ideal for places like a lounge.
Room EQ2: Choose this option for a slightly softer audio response, which suits places with harder
materials and surfaces like kitchens and conservatories.
Room EQ3: Choose this option for rooms with lots of soft surfaces where high frequencies get
absorbed easily, like bedrooms.
Time and date settings
The clock will automatically set itself using your digital radio signal, FM radio signal or your network. If the
time or date does not update automatically, you can manually set it using this option.
Note: Any time or date updates received by a digital broadcast will override manual settings.
Setting the time and date manually
1. Press the Menu button.
2. Turn and press the Select dial or use the <Select> buttons on the remote control to select ‘Main menu’
> ‘System settings’ > ‘Time/Date’.
3. Turn and press the Select dial or use the
<Select>
buttons on the remote control to set the day of the
month. Repeat to set the month and year of the current date and hour and minutes of the current time.
4. If you have set your Evoke to use the 12 hour time format, turn and press the Select dial or use the
<Select> buttons on the remote control to choose the ‘AM’ or ‘PM’ version of the hour.
Time and date synchronization options
You can synchronize the time and date on Evoke using either the FM or digital radio signal or your internet
connection.
To specify the clock synchronization options:
1. Press the Menu button.
2. Turn and press the Select dial or use the <Select> buttons on the remote control to select ‘Main menu’
> ‘System settings’ > ‘Time/Date’.
3. Turn and press the Select dial or use the <Select> buttons on the remote control to choose ‘Auto
update’.
4. Turn and press the Select dial or use the <Select> buttons on the remote control to choose between
the ‘Update from DAB’, ‘Update from FM’, ‘Update from network’ and ‘No update’ clock synchronization
options.
Changing the time format
1. Press the Menu button.
2. Turn and press the Select dial or use the <Select> buttons on the remote control to select ‘Main menu’
> ‘System settings’ > ‘Time/Date’.
3. Turn and press the Select dial or use the <Select> buttons on the remote control to choose ‘Set
format’.
4. Turn and press the Select dial or
use the <Select> buttons on the remote control
to choose between ‘12’
and ‘24’.

23
EN
EN
Setting the time zone
1. Press the Menu button.
2. Turn and press the Select dial or use the <Select> buttons on the remote control to select ‘Main menu’
> ‘System settings’ > ‘Time/Date’.
3. Turn and press the Select dial or
use the <Select> buttons on the remote control
to choose ‘Set
timezone’.
4. Turn and press the Select dial or
use the <Select> buttons on the remote control
to choose your
timezone.
Daylight saving time options
1. Press the Menu button.
2. Turn and press the Select dial or use the <Select> buttons on the remote control to select ‘Main menu’
> ‘System settings’ > ‘Time/Date’.
3. Turn and press the Select dial or
use the <Select> buttons on the remote control
to choose ‘Daylight
savings’.
4. Turn and press the Select dial or
use the <Select> buttons on the remote control
to choose ‘Yes’ if
you want to enable daylight savings time. Turn and press the Select dial to choose ‘No’ if you want to
disable daylight savings time.
Changing your preferred language
You can select the language that your Evoke uses for menus and options.
1. Press the Menu button.
2. Turn and press the Select dial or use the <Select> buttons on the remote control to choose ‘Main
menu’ > ‘System settings’ > ‘Language’.
3. Turn and press the Select dial or use the <Select> buttons on the remote control to select a menu
language.
Carrying out a factory reset
Resetting your Evoke removes all presets, stored stations, alarms and resets all other options to default
settings.
1. Press the Menu button.
2. Turn and press the Select dial or use the <Select> buttons on the remote control to choose ‘Main
menu’ > ‘System settings’ > ‘Factory Reset’.
3. Turn and press the Select dial or use the <Select> buttons on the remote control to select ‘Yes’ to
reset Evoke to factory settings. Select ‘No’ if you do not want to reset your Evoke to factory settings.
Displaying the software version
To display the version of software and Spotify that is running on Evoke:
1. Press the Menu button.
2. Turn and press the Select dial or use the <Select> buttons on the remote control to choose ‘Main
menu’ > ‘System settings’ > ‘Info’.
3. Turn the Select dial to scroll down the screen and view all of the version information.

24
Backlight
You can adjust the duration that the screen is illuminated for and the brightness of the screen when Evoke
is switched on or in standby.
Power-on level
To specify the brightness of the screen when Evoke is switched on or in standby:
1. Press the Menu button.
2. Turn and press the Select dial or use the <Select> buttons on the remote control to choose ‘Main
menu’ > ‘System settings’ > ‘Backlight’.
3. Turn and press the Select dial or use the <Select> buttons on the remote control to choose to adjust
the screen’s brightness in ‘Operation Mode’ or ‘Standby mode’.
4. Turn and press the Select dial or use the <Select> buttons on the remote control to choose between
‘High’, ‘Medium’ or ‘Low’ for when Evoke is switched on or choose between ‘Medium’, ‘Low’ and ‘Off’
for when Evoke is in standby.
DAB settings
Note: You can only see the DAB settings when you have selected ‘DAB’ as the radio source.
Scan
You can use the scan (autotune) function to automatically scan for new digital radio stations and remove
inactive ones.
To carry out an autotune:
1. Press the Menu button.
2. Turn and press the Select dial or use the <Select> buttons on the remote control to choose ‘Scan’.The
number of stations found will be displayed during the autotune.
When the autotune has finished, Evoke will tune to the last station that you were listening to. If the last station
you were listening to is no longer available, Evoke will tune into the first station in the alphabetical list.
Manual tuning
To manually tune Evoke to a digital radio station that broadcasts on DAB Band III:
1. Press the Menu button.
2. Turn and press the Select dial or use the <Select> buttons on the remote control to choose ‘Manual
tune’.
3. Turn and press the Select dial or use the <Select> buttons on the remote control to choose the
channel that the radio station is broadcasting on.
4. Press the Menu button to return to the main menu.
Prune invalid
To remove inactive stations from the station list:
1. Press the Menu button.
2. Turn and press the Select dial or use the <Select> buttons on the remote control to choose ‘Prune
invalid’.
3. Turn and press the Select dial or use the <Select> buttons on the remote control to choose ‘Yes’.
Evoke will remove all inactive stations from the station list.

25
EN
EN
Dynamic range control
Dynamic Range Control (DRC) is used to make quieter sounds in a digital radio broadcast easier to hear at
low volume or in a noisy environment. Check with the broadcasters to find out if they use DRC.
To change the DRC settings:
1. Press the Menu button.
2. Turn and press the Select dial or use the <Select> buttons on the remote control to choose ‘DRC’.
3. Turn and press the Select dial or use the <Select> buttons on the remote control to choose between
one of the following options:
DRC high: Applies maximum compression to the DRC level.
DRC low: Applies reduced compression to the DRC level.
DRC off: Removes DRC compression.
Changing the digital radio station order
To change the order that Evoke displays digital radio stations in:
1. Press the Menu button.
2. Turn and press the Select dial or use the <Select> buttons on the remote control to choose ‘Station
Order’.
3.
Turn and press the Select dial or use the <Select> buttons on the remote control to choose between
one of the following options:
Alphanumeric: Choose this option to display digital radio stations in alphanumerical order.
Ensemble: Choose this option to list stations in groups according to their multiplex. Multiplexes or
ensembles are groups of stations owned and broadcast by a single operator.
Valid: Choose this option to only display active radio stations.

26
FM radio settings
Note: You can only see the FM radio settings when you have selected ‘FM’ as the radio source.
FM stereo option
You can choose between stereo or mono reception when listening to FM radio. Mono may improve clarity
where stereo signals are weak.
To change between Stereo or Mono reception:
1. Press the Menu button.
2. Turn and press the Select dial or use the <Select> buttons on the remote control to choose ‘Audio
Setting’.
3. To use mono reception, turn and press the Select dial or use the <Select> buttons on the remote
control to choose ‘YES’. If you want to use stereo reception turn and press the Select dial or use the
<Select> buttons on the remote control to choose ‘NO’.
FM scan
You can choose whether Evoke automatically stops at the next available FM station or the next available
FM station with a strong signal when scanning for an FM station. To change the FM scan setting:
1. Press the Menu button.
2. Turn and press the Select dial or use the <Select> buttons on the remote control to choose ‘Scan
Setting’.
3. To automatically stop at the next available FM station with a strong signal, turn and press the Select dial
or use the <Select> buttons on the remote control to choose ‘YES’. To automatically stop at the next
available FM station regardless of the signal strength, turn and press the Select dial or use the <Select>
buttons on the remote control to choose ‘NO’

27
EN
EN
Radio Digital (DAB/DAB+), FM and internet radio (via Wi-Fi).
Frequencies Digital Band III 174–240 MHz,
FM 87.5-108 MHz (with RDS).
Display 2.8", TFT colour display.
Network Wi-Fi: 802.11a, 802.11b and 802.11g supported with WEP and WPA/WPA2 encryption,
WPS.
2.412 GHz ~ 2.472 GHz (channels 1 to 13), 5 GHz.
0.5 MB broadband speed recommended.
Ethernet
Bluetooth
Media streaming Audio codecs supported include WMA, AAC, MP3, FLAC.
Media streaming requires UPnP server/DLNA
Speaker
2x 3" full range driver, 20 W output
Input connectors 18 V DC power adapter socket (adapter supplied). 3.5mm Line-in for auxiliary devices.
Ethernet socket.
Output connectors
3.5mm stereo headphone socket.
Mains power adapter Adapter: Input AC 100 - 240 V~,50/60 Hz;
Output DC 18V , 2 A;
Main unit: DC 18V , 2 A
Dimensions 380mm wide x 223mm deep x 145mm high
Weight 4.2kg
Warranty Comprehensive three year warranty.
Approvals
CE marked. Hereby, Pure, declares that this Band II LPD device is in compliance with
the essential requirements and other relevant provisions of Directive 1999/5/EC. The
Declaration of Conformity may be consulted at http://www.pure.com/about/r-tte-doc.
ETSI EN 300 401 compliant.
Specifications

28
Warranty information
Imagination Technologies Limited warrants to the end user that this product will be free from defects in
materials and workmanship in the course of normal use for a period of three years from the date of purchase.
This guarantee covers breakdowns due to manufacturing or design faults; it does not apply in cases such
as accidental damage, however caused, wear and tear, negligence, adjustment, modification or repair not
authorised by us. Should you have a problem with your unit please contact your supplier or contact Pure
Support at http://support.pure.com.
Disclaimer
Imagination Technologies Limited makes no representation or warranties with respect to the content of this
document and specifically disclaims any implied warranties of merchantability or fitness for any particular purpose.
Further, Imagination Technologies Limited reserves the right to revise this publication and to make changes in it
from time to time without obligation of Imagination Technologies Limited to notify any person or organization of
such revisions or changes.
Trademarks
Evoke C-F6, Pure, the Pure logo, Imagination Technologies, and the Imagination Technologies logo are trademarks
or registered trademarks of Imagination Technologies Limited.
Copyright
Copyright © 2016 Imagination Technologies Limited. All rights reserved. No part of this publication may be copied or
distributed, transmitted, transcribed, stored in a retrieval system, or translated into any human or computer language,
in any form or by any means, electronic, mechanical, magnetic, manual or otherwise, or disclosed to third parties
without the express written permission of Imagination Technologies Limited. Version 1 January 2016.
Correct disposal of this product
This marking indicates that this product should not be disposed with other household waste throughout
the EU. To prevent possible harm to the environment or human health from uncontrolled waste
disposal, recycle it responsibly to promote the sustainable reuse of material resources. To return your
used device, please use the return and collection system or contact the retailer where the product was
purchased. They can take this product for environmental safe recycling.
 Loading...