

Parkside PSBS 24 A1 CORDLESS HAMMER DRILL, PSBS 24 A1 Operation And Safety Notes

PSBS 24 A1
ΚΡΟΥΣΤΙΚΟ ΚΑΤΣΑΒΙΔΙ
ΜΠΑΤΑΡΙΑΣ
Υποδείξεις χειρισμού και ασφαλείας
Μετάφραση των αυθεντικών οδηγιών λειτουργίας
CORDLESS HAMMER DRILL
Operation and Safety Notes
Translation of original operation manual
3
AKKU-SCHLAGBOHRSCHRAUBER
Bedienungs- und Sicherheitshinweise
Originalbetriebsanleitung
GB / IE / CY Operation and Safety Notes Page 5
GR / CY Υποδείξεις χειρισμού και ασφαλείας Σελίδα 15
DE / AT / CH Bedienungs- und Sicherheitshinweise Seite 27
Before reading, unfold the page containing the illustrations and familiarise yourself with all functions of the
device.
Πριν ξεκινήσετε την ανάγνωση, ανοίξτε τη σελίδα με τις εικόνες και εξοικειωθείτε με όλες τις λειτουργίες της
συσκευής.
Klappen Sie vor dem Lesen die Seite mit den Abbildungen aus und machen Sie sich anschließend mit allen
Funktionen des Gerätes vertraut.
A
B
C D
1
5
6
11 12 13
87
10
4
2
3
15
16
14
9
9

5 GB/IE/CY
Table of contents
Introduction
Proper use ......................................................................................................................Page 6
Features and equipment ...............................................................................................Page 6
Included items ...............................................................................................................Page 7
Technical information ....................................................................................................Page 7
General safety advice for electrical power tools
1. Workplace safety .....................................................................................................Page 8
2.
Electrical safety .........................................................................................................Page 8
3. Personal safety ..........................................................................................................Page 8
4.
Careful handling and use of electrical power tools ...............................................Page 9
5. Use and handling of the cordless electrical power tool ........................................Page 9
Safety advice relating specifically to cordless impact drill / drivers ...........................Page 10
Original accessories / attachments ..............................................................................Page 10
Caution utility services! .................................................................................................Page 10
Preparing for use
Attaching the auxiliary handle .....................................................................................Page 10
Charging the battery pack ...........................................................................................Page 10
Inserting / removing the battery pack into / out of the device ....................................Page 11
Checking the battery charge state ...............................................................................Page 11
2-speed gear operation ................................................................................................Page 11
Torque preselection.......................................................................................................Page 11
Drilling / screwing / impact drilling ............................................................................... Page 11
Changing inserted tools ................................................................................................Page 11
Switching On / Off ........................................................................................................Page 12
Setting the speed ...........................................................................................................Page 12
Reversing the direction of rotation ...............................................................................Page 12
Tips and tricks ................................................................................................................Page 12
Maintenance and cleaning .........................................................................Page 12
Service .........................................................................................................................Page 12
Warranty ...................................................................................................................Page 12
Disposal ......................................................................................................................Page 13
Declaration of Conformity / Manufacturer....................................Page 14
6 GB/IE/CY
Introduction
Cordless hammer drill
PSBS 24 A1
For drilling and screwing into wood,
plastic and metal
Introduction
Please make sure you familiarise yourself
fully with the way the device works before
you use it for the first time and that you
understand how to handle electrical power tools
correctly. Further details can be found in the operating instructions. Keep these instructions in a safe
place. If you pass the device on to anyone else,
please
ensure that you also pass on all the documentation.
Proper use
This device is intended for drilling and screwing into
wood, plastic and metal as well as for impact drilling
into stone, brick and concrete. When drilling into
granite, we recommend the use of a drill hammer.
Use the device only as described and for the indicated purposes. Any other use or modification to
the device shall be considered as improper use and
could give rise to considerable risk of accident. The
manufacturer will not accept liability for loss or
damage arising from improper use. Not suitable
for commercial use.
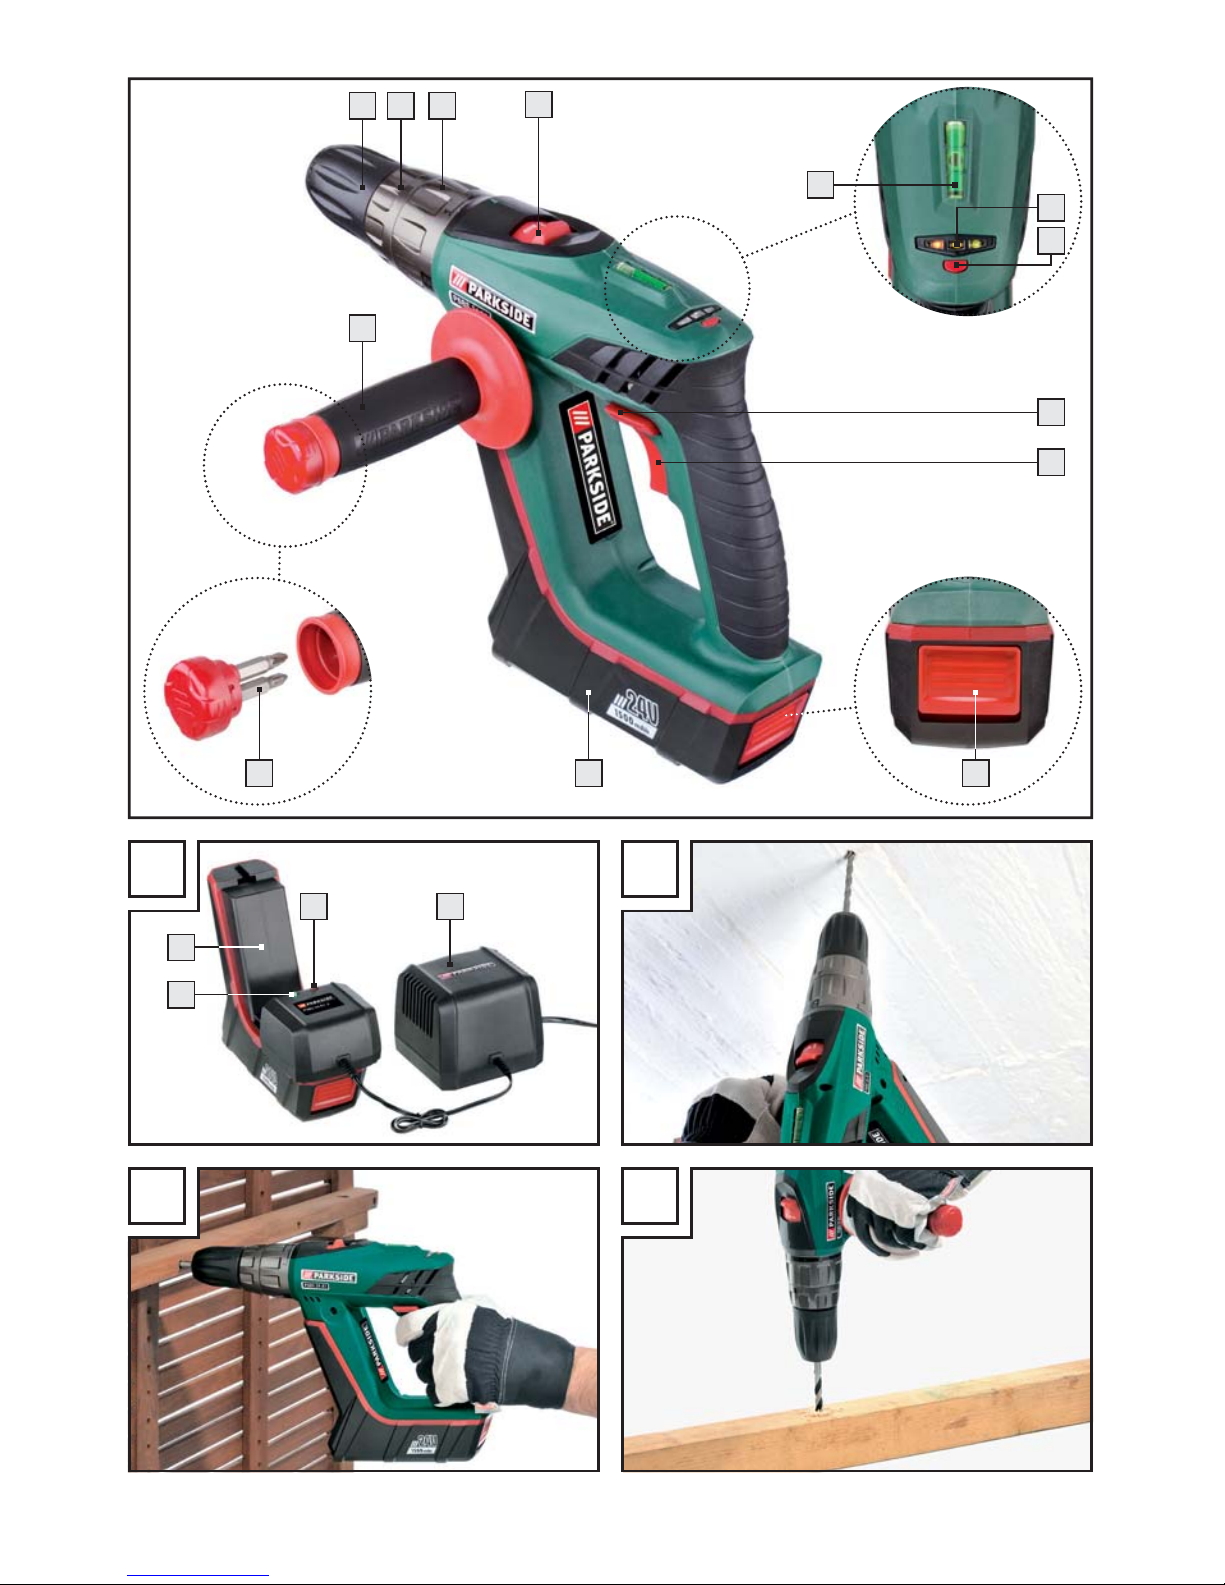
Features and equipment
1
Gear selector switch
2
LED display / battery charge state
3
Battery charge state test button
4
Spirit level
5
Direction of rotation switch / lock
6
ON / OFF switch / Speed regulator
7
Bit
8
Battery unlocking button
9
Battery pack
10
Auxiliary handle
11
Quick-release chuck
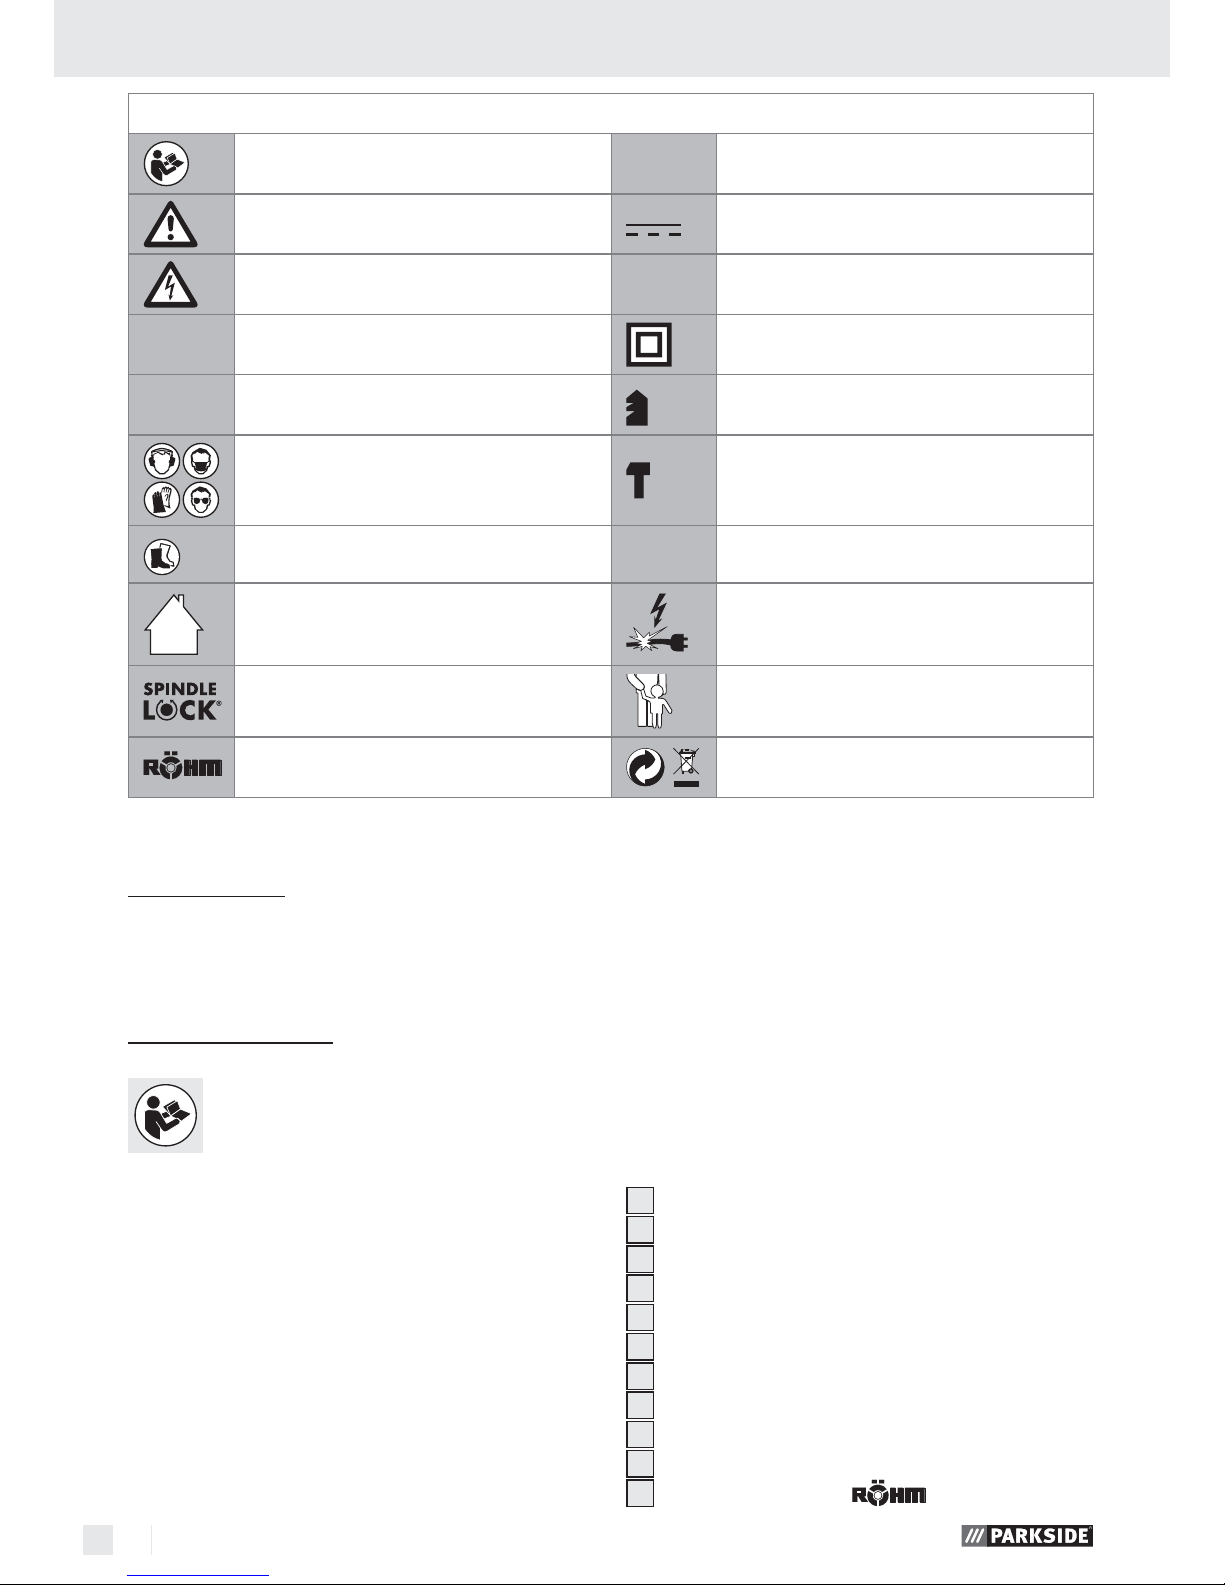
The following pictograms are used in these operating instructions / on the device:
Read instruction manual!
W
Watts (Effective power)
Observe caution and safety notes! DC (current and voltage type)
Caution – electric shock!
Danger to life!
Nm
Newton metre (torque)
n
0
Design no-load speed Safety class II
V
~
Volt (AC) Drill setting (torque preselect)
Wear hearing protection, dust
protection mask, protective glasses
and protective gloves.
Drill setting (impact drilling)
Wear appropriate footwear.
Ah
Amp (Battery capacity)
For indoor use only!
Risk of loss of life by electric shock from
damaged mains lead or mains plug!
Spindle lock
Keep children away from electrical
power tools!
Drill chuck, Made In Germany
Dispose packaging and appliance in
an environmentally-friendly way!
7 GB/IE/CY
Introduction
12
Drill / hammer drill setting ring
13
Torque preselection ring
14
Fast battery charger
15
Red charge indicator LED
16
Green charge indicator LED
Included items
1 Carrying case
1 Rechargeable impact drill / driver with
rechargeable battery pack
1 Auxiliary handle
2 Bits
1 Charger
1 Operating instructions
Technical information
Cordless hammer drill PSBS 24 A1:
Rated voltage: 24 V
No-load speed: 1st gear: n0 0 - 500 min
-1
No-load speed: 2nd gear: n0 0 - 1800 min
-1
Chuck capacity: 1.0 - 13 mm
Max. drill diameter: Metal: 13 mm
Wood: 30 mm
Masonry (concrete): 15 mm
Max. torque: 35 Nm
Dimensions: 338 x 69x 237 mm
Ni-Cd rechargeable battery pack
PSBS 24 A1-1:
Rated voltage: 24 V
Capacity: 1.5 (Ah)
Capacity: 36 Wh
Fast battery charger PSBS 24 A1-2:
Rated voltage: 230 V ~ 50 Hz, 105 W
Charging current: 3000 mA
Charging duration: 90 min
Protection class: II /
Noise and vibration data:
Measured values for noise are determined in accordance with EN 60745. The A-weighted noise level
of the electrical power tool are typically:
Sound pressure level: 76 dB(A)
Sound power level: 87 dB(A)
Sound pressure level
(Impact drilling in concrete): 87 dB(A)
Sound power level
(Impact drilling in concrete): 98 dB(A)
Uncertainty K: 3 dB
).
Wear ear protection!
Total vibration (vector sum of three directions) is
calculated in accordance with EN 60745:
Drilling in metal: Vibration emission value
a
h, D
= 1.682 m / s2,
Uncertainty K = 1.5 m / s
2
,
Screwing: Vibration emission value
a
h
= 1.109 m / s2,
Uncertainty K = 1.5 m / s
2
,
Impact drilling
in concrete: Vibration emission value
a
h, ID
= 11.25 m / s2,
Uncertainty K = 1.5 m / s
2
.
WARNING!
The vibration level given in these
instructions has been measured in accordance with
a standardised measurement procedure specified
in EN 60745 and can be used to compare devices.
Different uses of the device give rise to different
vibration levels and in many cases they may exceed
the values given in these instructions. It is easy to
underestimate the vibration load if the electrical power
tool is used regularly in particular circumstances.
Note: If you wish to make an accurate assessment
of the vibration loads experienced during a particular
period of working, you should also take into account
the intervening periods of time when the device is
switched off or is running but is not actually in use.
This can result in a much lower vibration load over
the whole of the period of working.

8 GB/IE/CY
General safety advice for electrical power tools
General safety advice for
electrical power tools
WARNING!
Read all the safety advice
and instructions! Failure to observe the safety
advice and instructions may result in electric shock,
fire and / or serious injury.
Keep all the safety advice and instructions
in a safe place for future reference!
The term “electrical tool” used in the safety advice
refers to electrical tools powered by mains electricity
(by means of a mains lead) and electrical tools
powered by rechargeable batteries (without a
mains lead).
1. Workplace safety
a) Keep your working area clean and
well lit. Untidy or poorly lit working areas
can lead to accidents.
b)
Do not work with the device
in potentially explosive environments in which there are
inflammable liquids, gases or dusts.
Electrical power tools create sparks, which can
ignite dusts or fumes.
c)
Keep children and other
people away while you are
operating the electrical tool.
Distractions can cause you to lose control of
the device.
2. Electrical safety
a)
The mains plug on the device must match
the mains socket. The plug must not be
modified in any way. Do not use an
adapter plug with devices fitted with
a protective earth. Unmodified plugs and
matching sockets reduce the risk of electric shock.
b) Avoid touching earthed surfaces such
as pipes, radiators, ovens and refrigerators with any part of your body.
There is an increased risk of electric shock if
your body is earthed
.
c) Keep the device away from rain or
moisture. Water entering an electrical device
increases the risk of electric shock.
d)
Do not use the mains lead for
any purpose for which it was
not intended, e.g. to carry the
device, to hang up the device or to pull
the mains plug out of the mains socket.
Keep the mains lead away from heat,
oil, sharp edges or moving parts of the
device. Damaged or tangled mains leads
increase the risk of electric shock.
e) When working outdoors with an
electrical power tool always use extension cables that are also approved
for use outdoors. The use of an extension
cable suitable for outdoor use reduces the risk
of electric shock.
f) Use a residual current device (RCD)
for protection if operating the electrical power tool in a moist environment
is unavoidable. The use of an RCD reduces
the risk of electric shock.
3. Personal safety
a) Remain alert at all times, watch what
you are doing and always proceed
with caution. Do not use the device if
you are tired or under the influence of
drugs, alcohol or medication. One mo
ment
of carelessness when using the device can lead
to serious injury.
b)
Wear personal protective
equipment and always
wear safety glasses.
The wearing of personal protective equipment
such as dust masks, non-slip safety shoes, safety helmets or ear protectors, appropriate to
the type of electrical power tool used and
work undertaken, reduces the risk of injury.
c) Avoid unintentional operation of the
device. Check that the electrical power
tool is switched off before you connect
it to the mains, pick it up or carry it.

9 GB/IE/CY
General safety advice for electrical power tools
Accidents can happen if you carry the device
with your finger on the ON / OFF switch or with
the device switched on.
d) Remove any setting tools or spanners
before you switch the device on. A tool
or spanner left attached to a rotating part of a
device can lead to injury.
e) Avoid placing your body in an unnat-
ural position. Keep proper footing and
balance at all times. By doing this you will
be in a better position to control the device in
unforeseen circumstances.
f) Wear suitable clothing. Do not wear
loose clothing or jewellery. Keep your
hair, clothing and gloves clear of moving parts. Loose clothing, jewellery or long
hair can become trapped in moving parts.
g) If vacuum dust extraction and collection
devices are fitted do not forget to
check
that they are properly connected and
correctly used. The use of these devices
reduces the hazard presented by dust.
4. Careful handling and use
of electrical power tools
a) Do not overload the device. Always
use an electrical power tool that is
intended for the task you are undertaking. By using the right electrical power
tool for the job you will work more safely and
achieve a better result.
b) Do not use an electrical power tool if
its switch is defective. An electrical power
tool that can no longer be switched on and off
is dangerous and must be repaired.
c) Pull the mains plug from the socket
before you make any adjustments to
the device, change accessories or when
the device is put away. This precaution is
intended to prevent you from unintentionally
starting the device.
d) When not in use always ensure that
electrical power tools are kept out of
reach of children. Do not let anyone use
the device if he or she is not familiar
with it or has not read the instructions
and advice. Electrical power tools are danger-
ous when they are used by inexperienced people.
e) Look after the device carefully. Check
that moving parts are working properly and move freely. Check for any
parts that are broken or damaged
enough to detrimentally affect the
functioning of the device. Have damaged parts repaired before you use
the device. Many accidents have their origins
in poorly maintained electrical power tools.
f) Keep cutting tools clean and sharp.
Carefully maintained cutting tools with sharp
cutting edges are less likely to jam and are
easier to control.
g) Use the electrical power tool, accesso-
ries, inserted tools etc. in accordance
with these instructions and advice, and
the stipulations drawn up for this particular type of device. In doing this, take
into account the working conditions
and the task in hand. The use of electrical
power tools for purposes other than those intended can lead to dangerous situations.
5. Use and handling of the cordless electrical power tool
a) Charge a rechargeable battery unit
using only the charger recommended
by the manufacturer. Chargers are often
designed for a particular type of rechargeable
battery unit. There is the danger of fire if other
types of rechargeable battery units are used.
b) Only the rechargeable battery units
supplied are to be used with an electrical power tool. The use of other recharge-
able battery units may lead to the danger of
injury or fire.
c) When they are not being used, store
rechargeable battery units away from
paperclips, coins, keys. nails, screws
or other small metal objects that could
cause the contacts to be bridged. Short-
circuiting the contacts of a rechargeable battery
unit may result in heat damage or fire.
10 GB/IE/CY
General safety advice for electrical power tools / Preparing for use
d) Fluids may leak out of rechargeable
battery units if they are misused. If
this happens, avoid contact with the
fluid. If contact occurs, flush the affected area with water. Seek additional
medical help if any of the fluid gets
into your eyes. Escaping battery fluid may
cause skin irritation or burns.
Safety advice relating
specifically to cordless
impact drill / drivers
Wear ear protection when
percussion drilling. Exposure
to noise can cause hearing loss.
Use the additional handle
10
that came
with the appliance. Losing control of the
machine can lead to injuries.
Hold the appliance by the insulated
handling surfaces when you are carrying out work during which the insertion
tool might hit on hidden power supply
lines or the appliance’s own power
cable. Contact with a live electrical wire can
also make metal parts of the electrical tool live
and can lead to electric shock.
Before cleaning or maintaining the
charger or battery pack always pull
the plug out of the mains socket. This
precaution is intended to prevent you from unintentionally starting the device.
Never charge the battery pack if the
ambient temperature is below 10 °C
or above 40 °C. In this way you will ensure
your battery has long working life.
The ventilation openings on the charg-
er must always be kept free. Otherwise
there is the danger of overheating.
Before you carry out any tasks on the
device, transport or store it, make sure
that the direction of rotation switch
5
is in the middle position (lock) to pre
vent
the device from starting up unintentionally.
Original accessories /
attachments
Use only the accessories detailed in
the operating instructions. The use of
inserted tools or accessories other than those
recommended in the operating instructions
could lead to you suffering an injury.
Caution utility services!
WARNING!
Ensure that you do not strike
electrical cables, gas or water pipes when you
are working with an electrical power tool.
Check a wall using a suitable detector before
you drill or cut slots.
Preparing for use
Attaching the auxiliary handle
Screw the additional handle 10 onto the left-
hand or the right-hand side of your appliance
depending on the way you work.
Charging the battery pack
Note: A battery pack that has been unused for a
while or never been charged must be charged
before reuse or first use. The battery pack requires
about 3 - 5 cycles before it can reach its full charge.
Charging takes about 90 minutes.
WARNING!
Always pull the mains plug from
the mains socket before removing the battery pack
from the charger or inserting it into the charger. This
precaution is intended to prevent you from unintentionally starting the device.
Push the coupler (see Fig. A) onto the recharge-
able battery pack
9
. Insert the mains plug
into the socket.
The red charge indicator LED
15
indicates that
the charging process has started. The red light
goes out as soon as the battery pack
9
is fully
charged.

11 GB/IE/CY
Preparing for use
The green charge indicator LED 16 shows that
the charging process is complete and the
battery pack
9
is ready for use.
Do not use the quick-charge process to charge
a battery pack
9
for a second time in close
succession. Otherwise there is the danger that
the battery pack
9
will become overcharged
and its useful life and that of the charger reduced.
Switch the charger
14
off for at least 15 minutes between successive charging processes.
To do this pull the mains plug out of the socket.
Inserting / removing the battery
pack into / out of the device
Removing the rechargeable battery pack:
In order to remove the rechargeable battery,
turn the appliance 180°.
Press the unlocking button
8
and push the re-
chargeable battery pack
9
out of the appliance.
Inserting the rechargeable battery pack:
Push the rechargeable battery pack
9
onto
the appliance.
Checking the battery
charge state
Press the battery charge state test button 3.
The remaining charge capacity is shown on the
LED display
2
.
2-speed gear operation
In first gear (gear selector switch 1 in
position: 1)
the device achieves a speed of approx. 500 min
-1
and a high torque. For example, for screwing work
with small screw diameters.
In second gear (gear selector switch
1
in
position: 2)
the device achieves a speed of approx. 1800 min
-1
and a lower torque. For example, for rapid drill
progress in masonry or large drill or screw diameters.
Torque preselection
Use the torque preselection ring 13 to set the torque.
When this set torque is reached the clutch decouples
the drive. This allows you to screw in screws to a
predetermined depth, which is ideal e.g. for screwing in a series of screws.
Select a lower setting for small screws or soft
materials.
Select a high setting for large screws, hard ma-
terials, or when screwing out screws.
For drilling tasks select drilling setting by placing
the torque preselection ring in the
position.
Drilling / screwing /
impact drilling
Drilling / screwing:
Turn the setting ring
12
to the symbol .
Impact drilling:
Turn the setting ring
12
to the symbol .
Changing inserted tools
Your cordless hammer drill has a fully automatic spindl
e
lock
and is fitted with a single-sleeve drill chuck
with radial lock “Made in Germany” by
.
Once the motor has come to a halt, the drive shaft
is automatically locked so that the quick-action drill
chuck
11
can be opened simply by turning it in the
direction of the arrow (see labelling at the front of
the drill chuck “
AUF / OPEN”).
After you have inserted the tool you wish to have, turn
the drill chuck in the direction of the arrow until you
cannot hear any click any more (see the labelling on
the front of the drill chuck “
ZU / CLOSE”). The
drill chuck will then lock automatically. The spindle
lock releases itself automatically when the motor is
started (by operation of ON / OFF switch
6
).
12 GB/IE/CY
Preparing for use / Maintenance and cleaning / Service / Warranty
Switching On / Off
To start the device, press the ON / OFF switch 6
and keep it pressed.
To switch off the device, release the ON / OFF
switch
6
.
Setting the speed
The ON / OFF switch 6 has a variable speed
regulator.
Increasing the speed:
Increase the pressure on the ON / OFF
switch
6
.
Reducing the speed:
Reduce the pressure on the ON / OFF switch
6
.
The integral motor brake quickly brings the
device to a standstill – which is ideal e.g. for
screwing in a series of screws.
Reversing the direction
of rotation
Push the direction of rotation switch 5 fully
through to the right or left to reverse the direction of rotation.
Tips and tricks
Drilling in metal: Use a metal drill bit (HSS).
For the best results, you should cool the bit with oil.
Metal drill bits can also be used to drill into plastic.
Drilling in stone: Use a hardened-metal-tipped
masonry drill bit.
Drilling in wood: Use a wood drill bit with a
centring point. For deep holes, use an auger type
bit. For large diameter holes, use a forstner bit. You
can screw small screws into soft wood without the
need for pre-drilling.
Maintenance and cleaning
The cordless impact drill / driver is maintenance-free.
Clean the device frequently. This should be done
immediately after you have finished using it.
Use a dry cloth to clean the outside of the
device - never use petrol, solvents or cleaners.
WARNING!
Never open up the device.
Always have any repairs carried out or replace-
ment parts fitted at the service centre or by an
electrical equipment repair specialist.
Service
WARNING!
Have your device repaired
at the service centre or by qualified
specialist personnel using original
manufacturer parts only. This will ensure
that your device remains safe to use.
WARNING!
If the plug or lead needs
to be replaced, always have the
replacement carried out by the manufacturer or its service centre. This will
ensure that your device remains safe to use.
Warranty
The warranty for this appliance is for 3
years from the date of purchase. The appliance has been manufactured with care
and meticulously examined before delivery. Please retain your receipt as proof
of purchase. In the event of a warranty
claim, please make contact by telephone
with our Service Department. Only in this
way can a post-free despatch for your
goods be assured.
The warranty covers only claims for material and
maufacturing defects, but not for transport damage,
for wearing parts or for damage to fragile components, e.g. buttons or batteries. This product is for
private use only and is not intended for commercial
use.
 Loading...