

Panasonic SV-AV10, SV-AV10E, SV-AV10EN, SV-AV10B User Manual
SD Multi AV Device
Operating Instructions
Model No.
SV-AV10E/B/EN
Before use, please read these instructions completely.
VQT9775

Contents
Information for Your Safety ................................. 3
Caution for AC mains lead
(SV-AV10B only) ................................................. 3
Introduction.......................................................... 4
Power supply frequency.......................................4
Preparation
Standard Accessories .........................................4
Optional Accessories........................................... 4
Controls and Components................................... 5
Attaching the Neck Strap.....................................5
Power Supply ...................................................... 6
Using AC Adaptor ................................................... 6
Using the Battery ....................................................6
Inserting a Card...................................................7
Removing the Card................................................. 7
Using the LCD Monitor........................................ 7
Turning the Power ON......................................... 8
Turning the Power OFF ..........................................8
Selecting Operation Modes .................................8
About the Operation Mode...................................... 8
Using the Menu Screen....................................... 9
List of Menus ....................................................... 9
REC MODE.............................................................9
PLAYBACK MODE ............................................... 10
Setting the power supply frequency .................. 12
To reduce the appearance of horizontal stripes con-
sisting of light and dark patterns ...........................12
Adjusting Brightness and Colour Level..............13
To Adjust...............................................................13
Setting Date and Time....................................... 13
Basic Functions
Recording the Moving Picture (MPEG4) ...........14
To stop recording..................................................14
Display in the moving picture (MPEG4) mode ...... 14
Playing the Moving Picture (MPEG4) ................ 15
To stop playback...................................................15
To find the beginning of a moving picture file .......15
To Change the Display Size .................................15
Recording Still Pictures .....................................16
Display in the Still picture mode............................ 16
Playing back Still Pictures ................................. 17
To stop playback...................................................17
To play the next (previous) file.............................. 17
Recording Voice (Voice Recording Function).... 18
To stop recording..................................................18
Display in the Voice Mode ....................................18
Hearing the Voice Recorded (Playback Sound) 19
To stop playback...................................................19
Fast forward (fast backward) playback .................19
To find the beginning of a voice file: .....................19
Listening to Music (Music Play) .........................20
To stop playback...................................................20
To find the beginning of a music file: ....................20
Using the Earphone...........................................21
Adjusting the Volume.........................................21
Advanced Functions
Backlight Compensation Function .....................22
Adjusting White Balance ....................................22
Erasing the Files Recorded on a Card...............23
To erase All Files ..................................................23
Protecting the file (Lock Setting)........................24
To release the lock setting:...................................24
To lock all files: ..................................................... 24
Writing Printing Data on a Card (DPOF Setting)25
To release all the DPOF settings:......................... 25
Playing back still pictures one by one (Slide Show)
26
To cancel the Slide Show: ....................................26
Formatting the Card...........................................26
For using SD-MovieStage
Operating environment......................................27
Installing SD-MovieStage ..................................28
Cautions for Windows XP/2000 Professional .......28
Starting SD-MovieStage ....................................28
Others
Notes & Precautions..........................................29
Charge the built-in battery for maintaining the date in-
formation...............................................................29
After Use............................................................... 29
Using a Card in a Personal Computer .................. 30
Indications..........................................................31
Cautions for Use ...................................................32
About the Lens...................................................... 33
About the AC Adaptor ...........................................33
About the LCD Monitor .........................................33
Optimal Use of the Battery.................................... 33
Notes on the SD Memory Card Write-Protect Switch
34
Cautions for Storage .............................................34
Fogging of lens ..................................................... 34
State of Power Lamp while charging ....................34
Before Requesting Service................................35
Specifications.....................................................36
Dear Customer,
We would like to take this opportunity to thank you for
purchasing this Panasonic SD Multi AV Device. Please
read these Operating Instructions carefully and keep them
handy for future reference.
Information for Your Safety
WARNING
TO REDUCE THE RISK OF FIRE OR SHOCK
HAZARD AND ANNOYING INTERFERENCE, USE
ONLY THE RECOMMENDED ACCESSORIES AND
DO NOT EXPOSE THIS EQUIPMENT TO RAIN OR
MOISTURE. DO NOT REMOVE THE COVER (OR
BACK); THERE ARE NOT USER SERVICEABLE
PARTS INSIDE. REFER SERVICING TO QUALIFIED
SERVICE PERSONNEL.
Carefully observe copyright laws.
Recording of pre-recorded tapes or discs or other
published or broadcast material for purposes other
than your own private use may infringe copyright
laws. Even for the purpose of private use, recording
of certain material may be restricted.
≥Please note that the actual controls and components,
menu items, etc. of your SD Multi AV Device may look
somewhat different from those shown in the illustrations
in these Operating Instructions.
SD Logo is a trademark.
:
≥
≥Other names, company names, and product names
printed in these instructions are trademarks or
registered trademarks of the companies concerned.
≥The SD Multi AV Device uses copyright-protected
technologies and is protected by the patented
technologies and intellectual properties of Japan and
the U.S. To use these copyright-protected technologies,
authorization of the Macrovision Company is required. It
is prohibited to disassemble or modify the SD Multi AV
Device.
≥(l 00) indicates the page to be referred to.
≥Note that the SD Multi AV Device may not play back the
data recorded or created on another product and
another product may not play back the data recorded on
the SD Multi AV Device.
≥The nameplate of the SD Multi AV Device is fixed on the
bottom of the battery holder.
Caution for AC mains lead
(SV-AV10B only)
Message to User who has Power Cable B as an
accessory. (l 4)
For your safety, please read the following text carefully.
This appliance is supplied with a moulded three-pin mains
plug for your safety and convenience. A 5-ampere fuse is
fitted in this plug.
Should the fuse need to be replaced, please ensure that
the replacement fuse has a rating of 5-amperes and it is
approved by ASTA or BSI to BS1362.
Check for the ASTA mark Ï or the BSI mark Ì on the
body of the fuse.
If the plug contains a removable fuse cover you must
ensure that it is refitted when the fuse is replaced. If you
lose the fuse cover, the plug must not be used until a
replacement cover is obtained. A replacement fuse cover
can be purchased from your local Panasonic Dealer.
IF THE FITTED MOULDED PLUG IS UNSUITABLE FOR
THE SOCKET OUTLET IN YOUR HOME THEN THE
FUSE SHOULD BE REMOVED AND THE PLUG CUT
OFF AND DISPOSED OF SAFELY.
THERE IS A DANGER OF SEVERE ELECTRICAL
SHOCK IF THE CUT OFF PLUG IS INSERTED INTO
ANY 13-AMPERE SOCKET.
As the colours of the wires in the mains lead of this
appliance may not correspond with the coloured markings
identifying the terminals in your plug, proceed as follows:
The wire which is coloured BLUE must be connected to
the terminal in the plug which is marked with the letter N
or coloured BLACK.
The wire which is coloured BROWN must be connected to
the terminal in the plug which is marked with the letter L
or coloured RED.
Under no circumstances should either of these wires be
connected to the earth terminal of the three-pin plug,
marked with the letter E or the Earth Symbol Ó.
ªBefore Use
Remove the Connector Cover as follows.
Connector
Cover
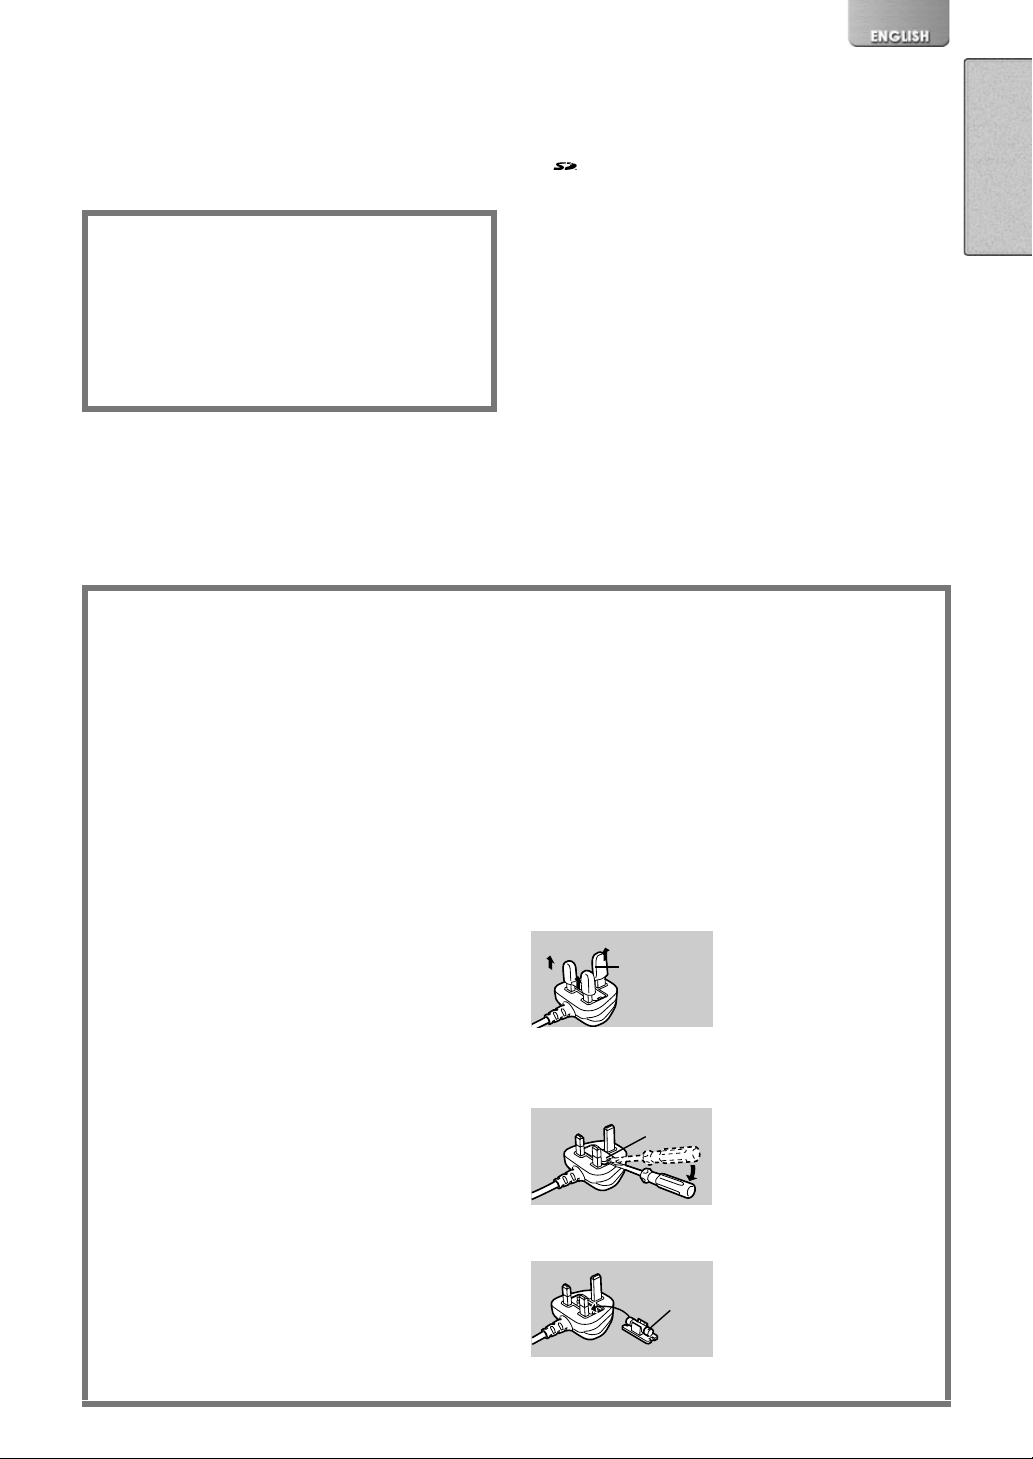
ªHow to replace the Fuse
1) Remove the Fuse Cover with a screwdriver.
Fuse
Cover
If a new plug is to be fitted, please observe the wiring
code as shown below.
If in any doubt, please consult a qualified electrician.
ªIMPORTANT
The wires in this mains lead are coloured in accordance
with the following code:
Blue: Neutral
Brown: Live
2) Replace the fuse and attach the Fuse Cover.
Fuse
1)
2)
3)
Introduction
This SD Multi AV Device can record both still picture data and MPEG4
moving picture. Additionally, it can play back a high quality music file of
the MPEG2-AAC and MP3 format (Record files with the supplied real
®
jukebox
MovieStage (supplied accessory), this SD Multi AV Device can display
the pictures recorded with it as thumbnails and edit the MPEG4 moving
picture data.
and USB Reader/Writer). And using the viewer software SD-
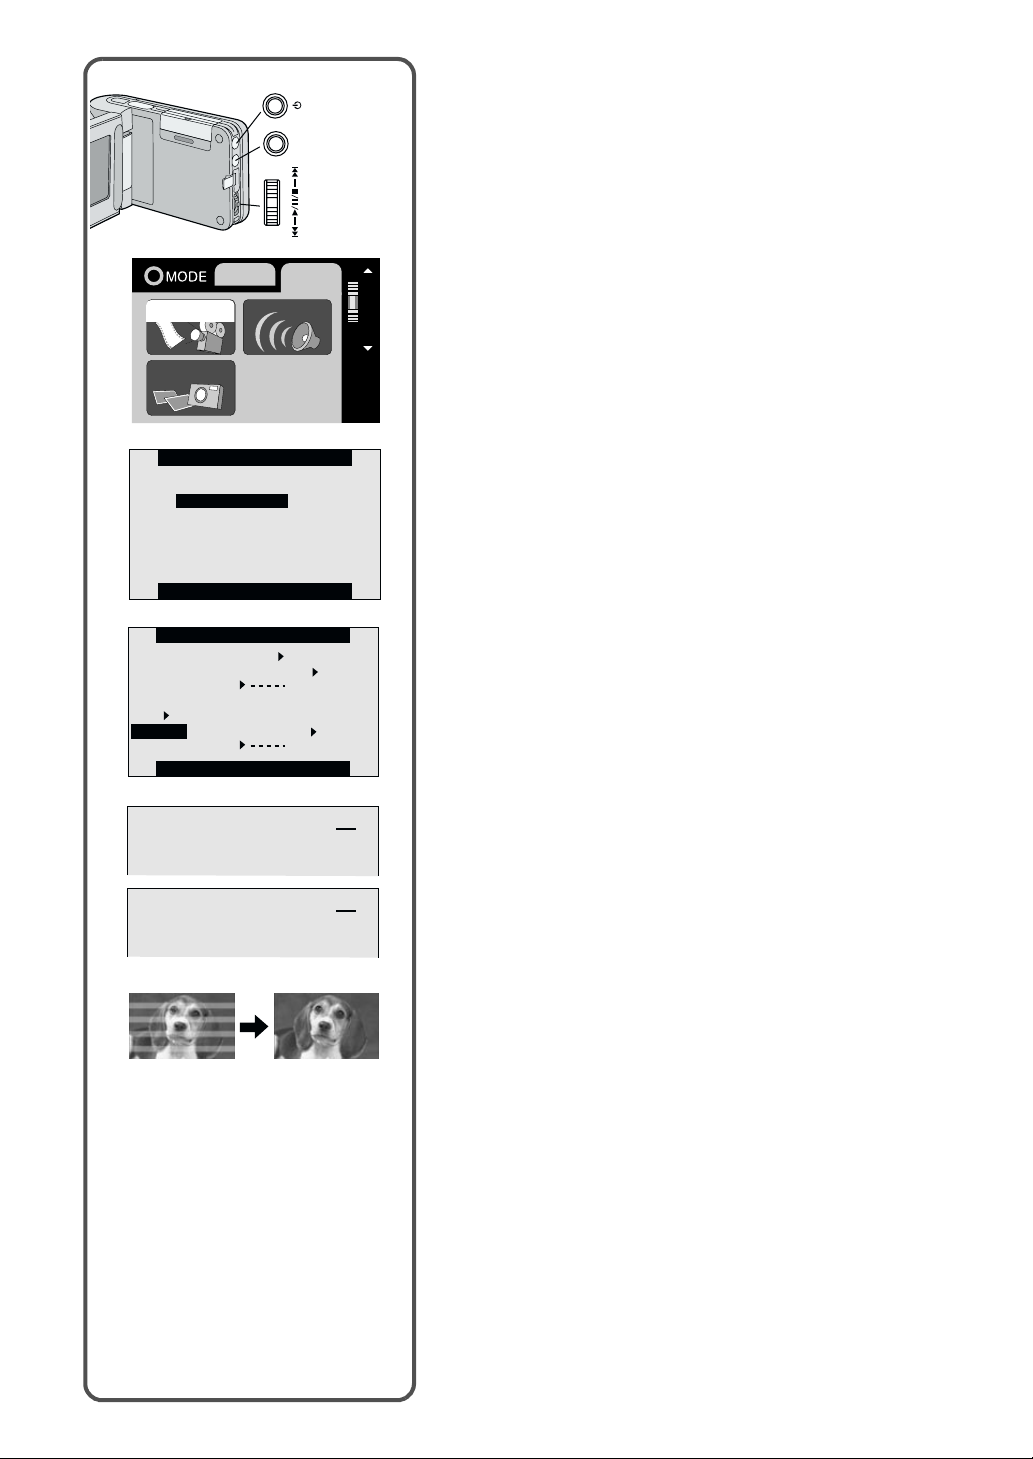
ª Power supply frequency
Under fluorescent lighting, horizontal stripes
consisting of light and dark patterns may
appear on the screen as illustrated below.
To reduce the affect of the horizontal stripes,
switch the power supply frequency to 50 Hz
or 60 Hz.(l 12)
Preparation
4)
ABC
5)
6)
7)
8)
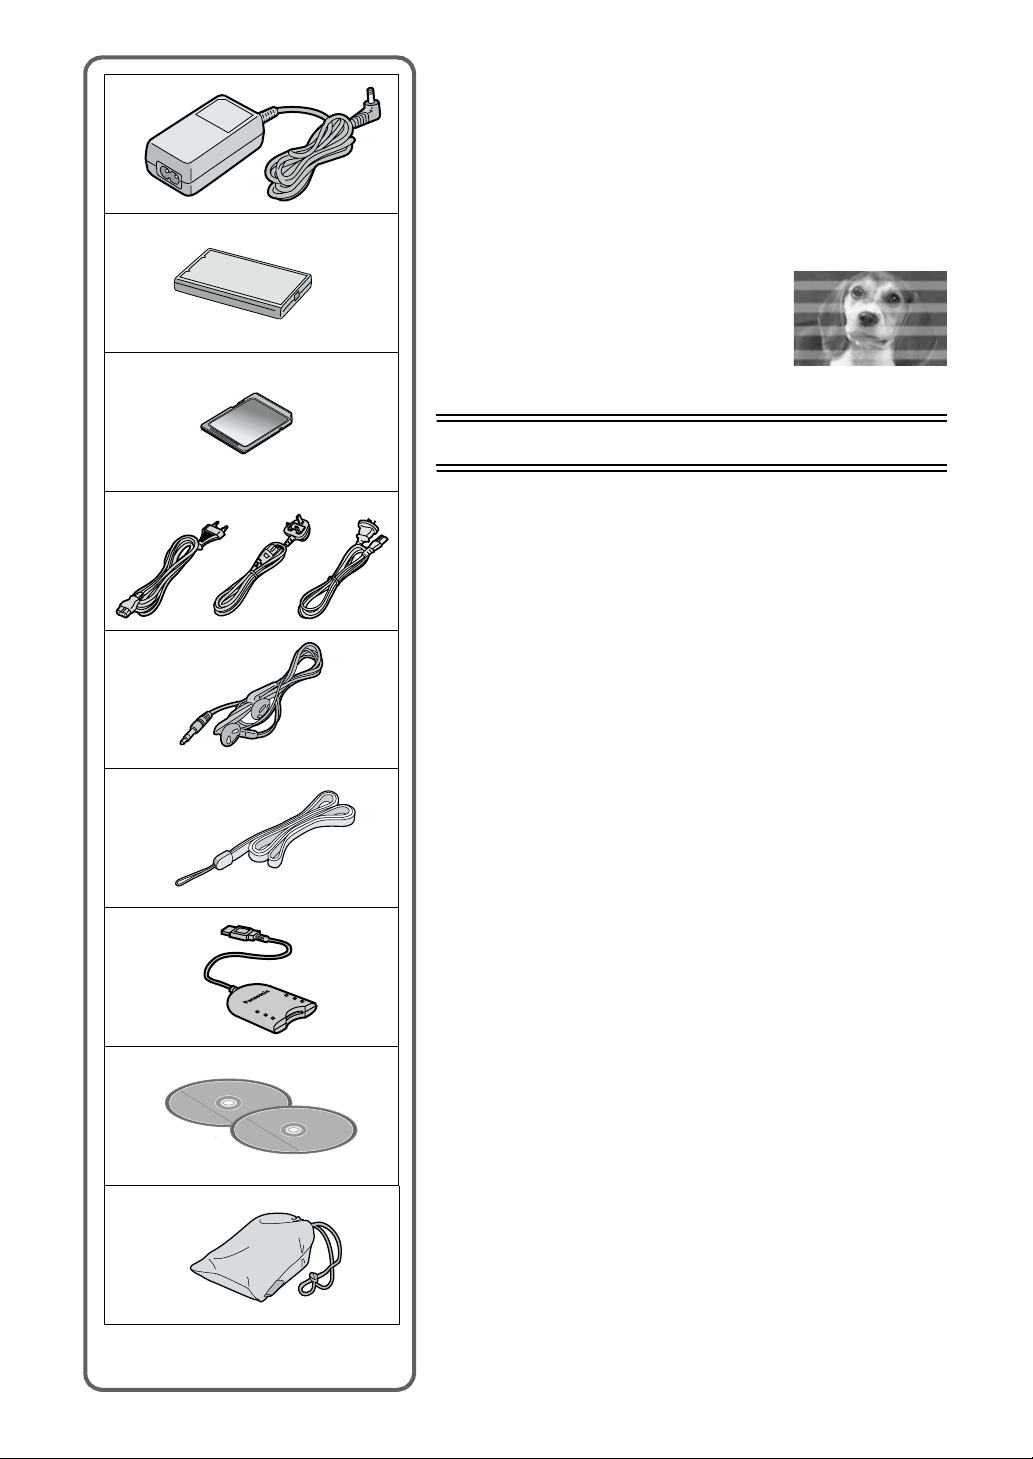
Standard Accessories
Illustrated on the left are accessories packaged with the SD Multi AV
Device (Panasonic SV-AV10E).
1) AC Adaptor (VSK0621) (l 6)
≥Supplies power to the SD Multi AV Device.
2) Battery Pack (CGA-S301E) (l 6)
≥Supplies power to the SD Multi AV Device.
3) SD Memory Card (8 MB) (RPSD008BVE0) (l 7)
4) Power Cable (l 6)
::::SV-AV10E/EN (VJA0664)
A
:SV-AV10B only (VJA0940)
B
:SV-AV10EN only (VJA0754)
C
5) Earphone (LOBAB0000172) (l 19, 20, 21)
6) Neck Strap (VFC3838) (l 5)
7) USB Reader/Writer (BN-SDCBAE)
≥For the operation of the USB ReaderWriter, refer to the additional
instruction supplied in the same package.
8) CD-ROM (l 27)
SD-MovieStage (For Windows
Home Edition/XP Professional) (VFF0143)
Panasonic Media Manager (real jukebox
(VFF0148)
≥For the installation and the operation of the Panasonic Media
Manager, refer to the additional instructions supplied in the same
package.
≥For using the SD-MovieStage software, refer to the PDF manual.
This manual describes installation only.
9) Carrying Case (RFC0069-H)
≥Put the SD Multi AV Device in the Carrying Case supplied after use
or when carrying it.
®
98SE/Me/2000 Professional/XP
®
,realplayer etc.)
9)
Optional Accessories
10) Battery Pack (CGA-S301E) (l 6)
≥Same product as that mentioned in 2).

11)
12)
13)
1)
15) 16)
2) 3)
6)
7)
8)
9)
14)
4)
/
MENU
VOL
MODE/
VOL
5)
10)
Controls and Components
1) LCD Monitor (l 7)
2) Recording Start/Stop Button (l 14, 16, 18)
3) Card Slot Cover (l 7)
4) Card Slot (l7)
5) Card Access Lamp (l 7)
6) Power ON/OFF Button [
Menu Button [MENU] (l 9)
7) Power Lamp (l 8)
8) Mode Selector Button [MODE] (l 8)
Volume Adjustment Button [VOL] (l 21)
9) Jog Lever [:s1/;/
10) Strap Holder (l5)
11) Lens
12) Microphone (built-in, monaural) (l 18)
13) Flash (l 16)
14) Card View Window
15) Battery Compartment (l 6)
16) Battery Compartment Cover (l 6)
17) Terminal Cover
18) Earphone Socket [
19) DC Input Socket [DC IN 4.8V] (l 6)
] (l 8)
_
s9/_] (l 8,22)
] (l 15, 19, 20, 21)
Attaching the Neck Strap
18)
1
Pass the shorter loop of the Neck Strap through the
17)
Ë
DC IN 4.8V
Strap Holder
2
Pass the big loop of the Strap through the small loop.
≥When using the Strap to carry the SD Multi AV Device, loop the
Strap around your neck and be careful not to accidentally hit the
SD Multi AV Device against hard objects.
.
1
19)
1
1
2
Power Supply
1
1
Using the Battery
1
2
DC IN 4.8V
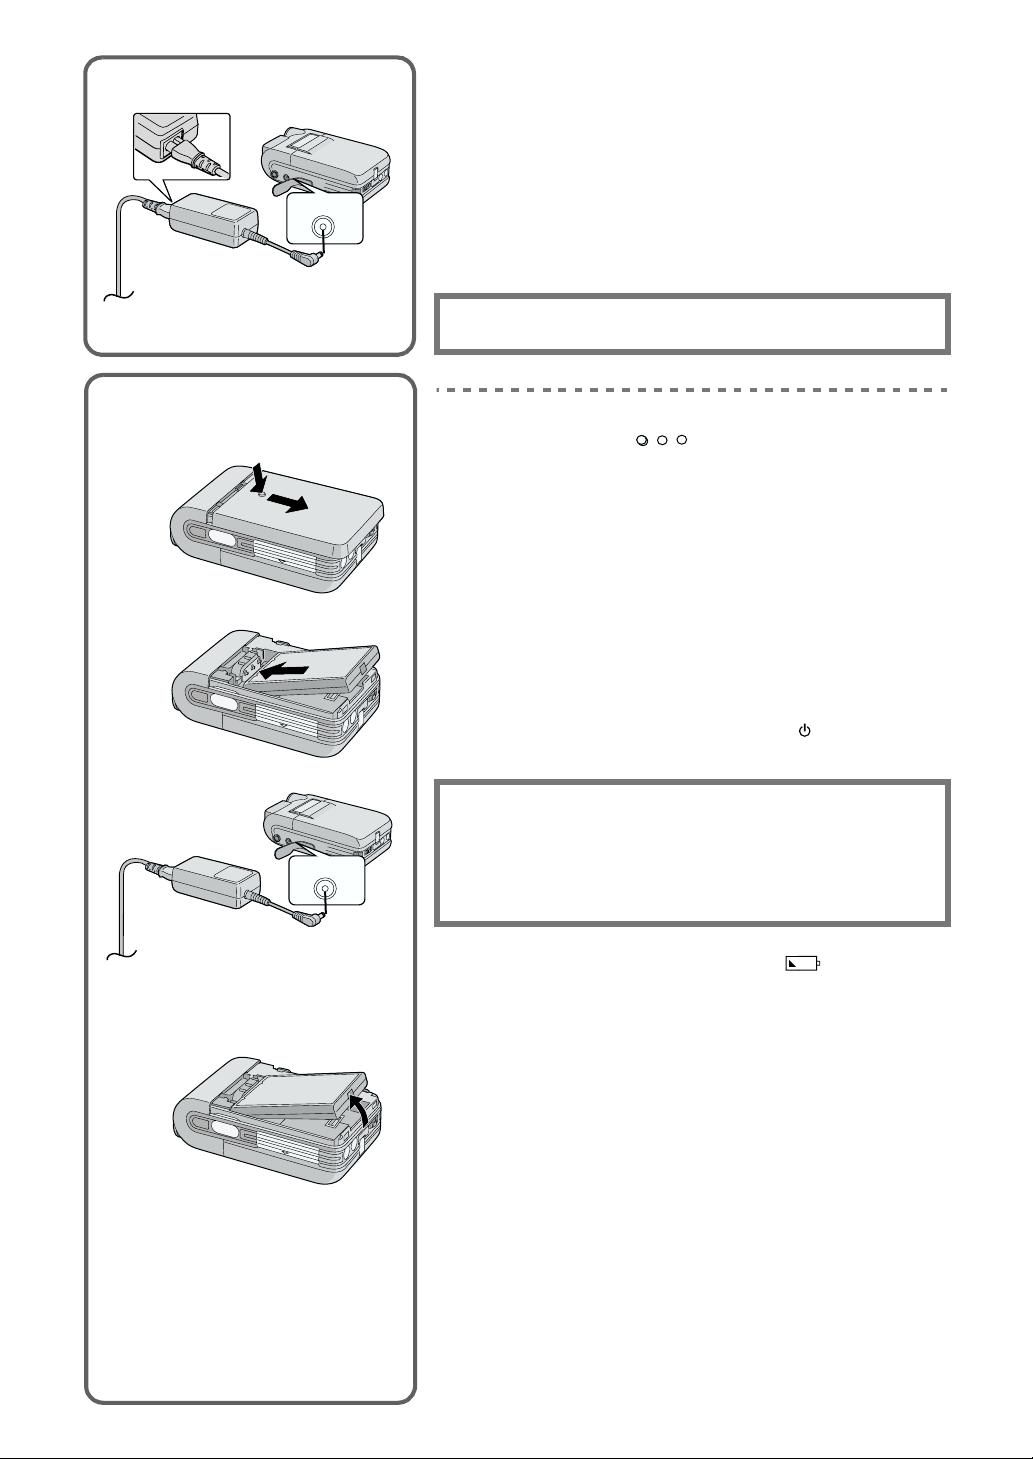
ª Using AC Adaptor
1
Connect the AC Mains Lead to the AC Adaptor and the
AC mains socket.
≥The AC Mains Lead does not fit entirely into the AC Adaptor
socket. A gap will remain as shown 1.
Connect the DC Input Lead to the [DC IN 4.8V] socket on
2
2
the SD Multi AV Device.
The SOCKET OUTLET SHALL BE INSTALLED NEAR THE
EQUIPMENT AND SHALL BE EASILY ACCESSIBLE
.
ª Using the Battery
1
While holding the [
Battery Compartment Cover.
Press the terminals of the battery onto the terminals of
2
the Battery Compartment and set the battery.
≥Fit the battery with its label facing upward.
≥After the battery is set, close the cover.
Connect the AC Mains Lead to the AC Adaptor and the
3
AC Mains socket.
Connect the DC Input Lead to the [DC IN 4.8V] socket on
4
the SD Multi AV Device.
≥ Power Lamp flashes, and Charging starts.
Wait until Power Lamp goes off.
5
≥When recharging is completed, Power Lamp goes off.
≥Disconnect the DC cord and hold down the [ ] button for two
seconds or more, and the SD Multi AV Device is turned ON.
] part, slide it to remove the
DC IN 4.8V
3
Removing the Battery
CAUTION
Danger of explosion if battery is incorrectly replaced.
Replace only with the same or equivalent type recommended by
the manufacturer.
Dispose of used batteries according to the manufacturer’s
instructions.
4
≥When the Battery Level Indicator indicates [ ], the battery
will run out in a few minutes. Recharge the battery.
≥It takes about 120 minutes, maximum for full-charging. (The charging
times are for normal ambient temperature (20° C/60%). If the Battery is
charged at a higher or lower temperature, the charging time may be
longer)
≥When recharging, turn the power of the SD Multi AV Device OFF.
≥If the Power Lamp flashes quickly (or slowly) when recharging,
recharging is not normal. (l 34)
≥When the battery is running out while the SD Multi AV Device is being
used, the Power Lamp starts to flash. Recharge the battery or use the
SD Multi AV Device with the DC cord connected.
≥If you disconnect the DC Input Lead or the AC Mains Lead while
charging the Battery, Power Lamp flashes several times and goes off.
For continuing Battery charge, wait for about 1 minutes, and then
connect the AC Mains Lead and the DC Cord.
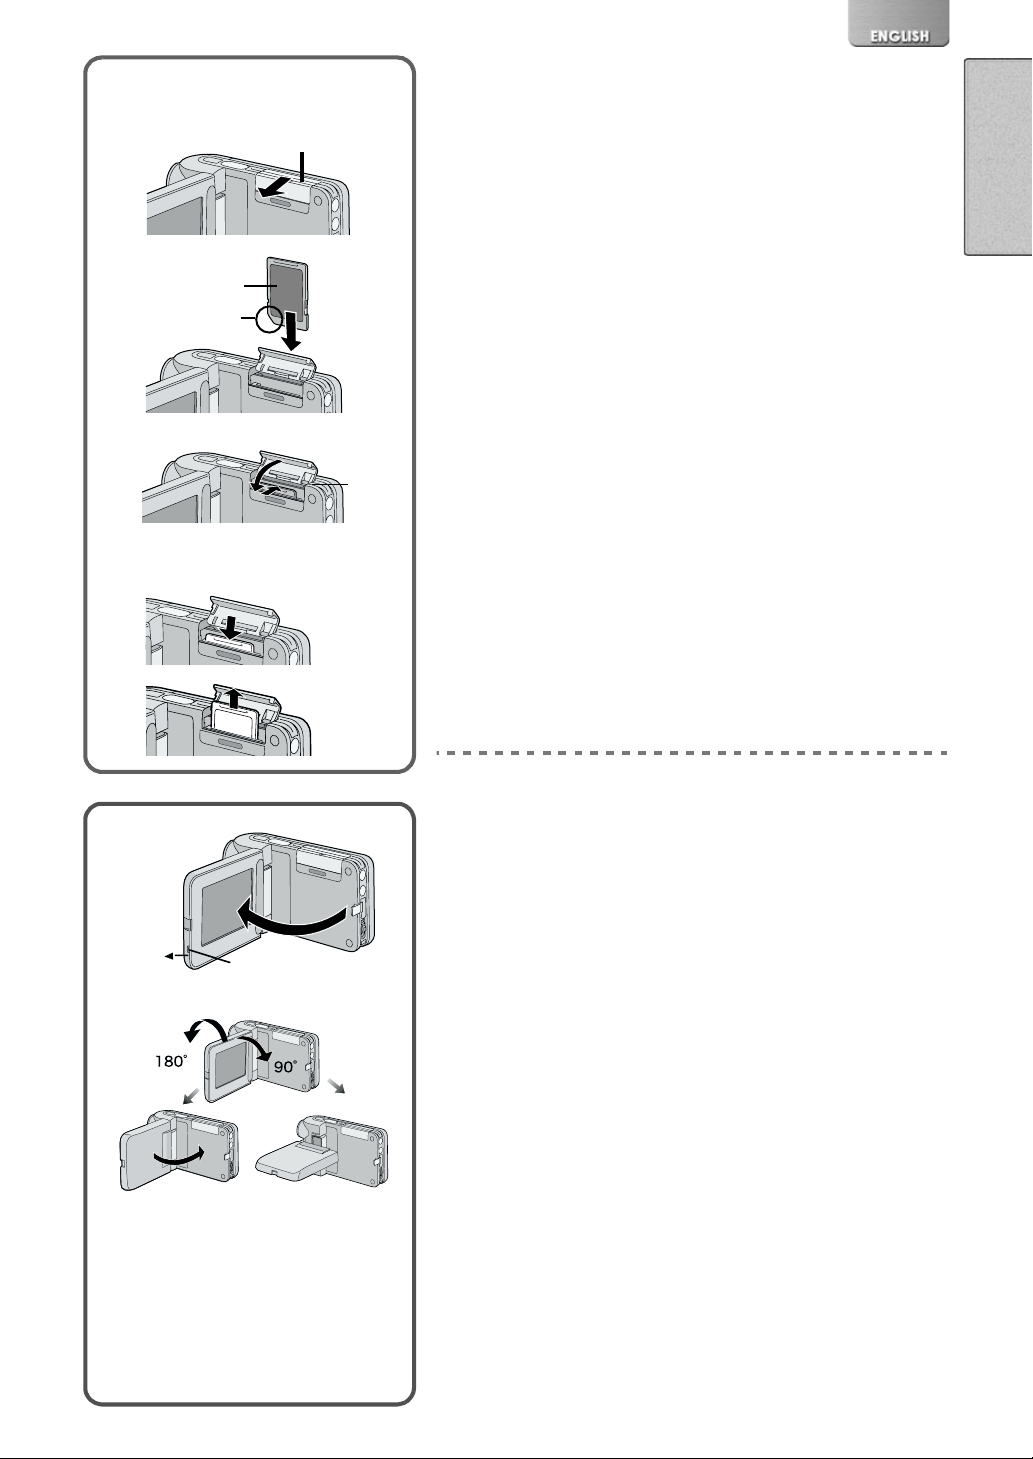
Inserting a Card
2
3
2
Removing the Card
Inserting a Card
Slide the Card Slot Cover 1, and flip it to open.
1
1
3
4
4
≥Turn off the SD Multi AV Device, when inserting a Card.
Hold the Memory Card placing the cut off corner 2 at the
2
frontward, and then insert it
left and showing the label
3
fully until it clicks.
After the Memory Card is set, close the Card Slot Cover
3
.
1
ª Removing the Card
Open the Card Slot Cover and push the top of the Card. The Card
will pop up a little and allow you to pick it up with your fingers to
remove.
≥While the Card Access Lamp 4 is on, the following operations should
not be attempted: (Such action will damage the Card, cause loss of
recorded data and cause the SD Multi AV Device to malfunction.)
-Open the Card Slot Cover.
-Remove or insert the Card.
-Operate your SD Multi AV Device.
Remove the battery or unplug the power cable.
-
-Apply vibration or shock.
≥Only an SD Memory card or MultiMediaCard can be used for this SD
Multi AV Device.
≥Do not touch the terminals on the back of the Card with your fingers.
≥If the Card Slot Cover is not closed completely, remove the Memory
Card and re-insert it.
≥Electrical noise, static electricity or failure of the SD Multi AV Device or
the card may damage the card or erase the data stored on the card. It
is recommended to save important data onto a personal computer.
Using the LCD Monitor
Record and play the video image while viewing the LCD Monitor.
Put your finger on the protrusion 1 to open the LCD
1
Monitor.
Adjust the LCD Monitor angle according to the desired
2
recording/playing angle.
OPEN
1
1
2
2
3
≥The LCD Monitor can rotate a maximum of 180
vertical position to the upward direction and a maximum of 90
to the downward direction. Forcefully rotating the LCD Monitor
beyond these ranges will damage the SD Multi AV Device.
≥The picture will be displayed upside down at some playing angles. If
[UPSIDE-DOWN] is selected for [LCD MONITOR] under the [OTHER
FUNCTIONS] menu the picture will be displayed upside down.
°
2 from the
°
3
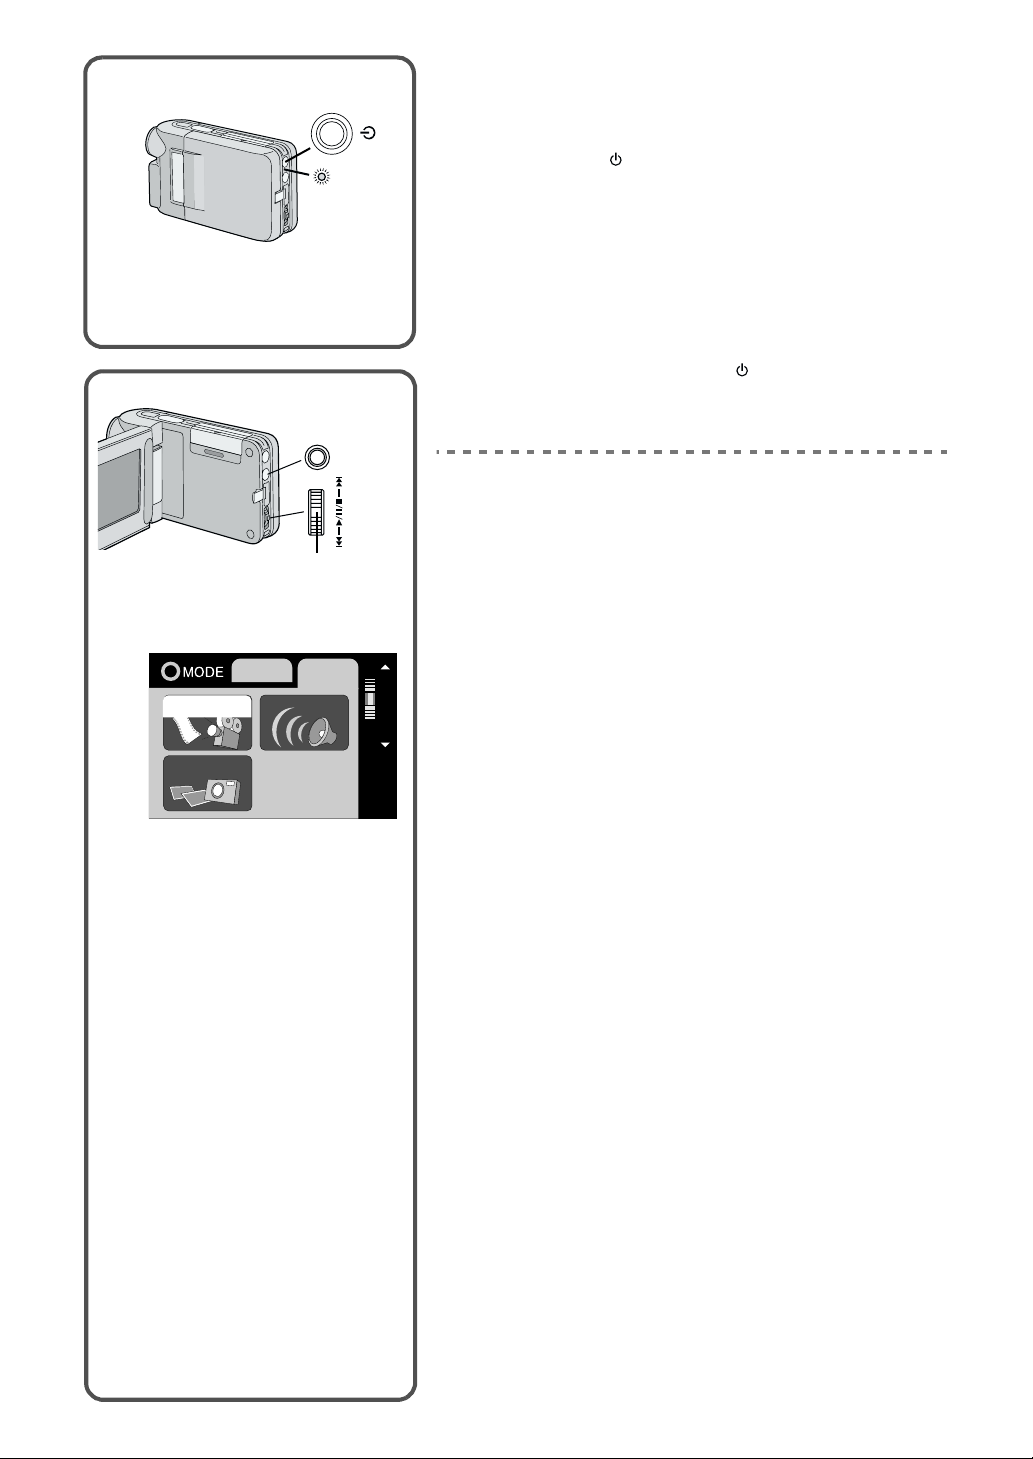
Turning the Power ON
Install the battery or plug in the AC adaptor. (l 6)
/
2
1,2
VOL
MODE/
+
3,4
VOL
-
2
1
MPEG4
PICTURE
RECPLAY
VOICE
1
MENU
Hold down the [ ] button for two seconds or more.
2
≥The SD Multi AV Device is turned on.
≥The message [PLEASE WAIT] is displayed for a while and then the
mode selection screen will be displayed.
≥
≥If the device is not used for 10 minutes or longer , the power is
automatically turned off. Press the power button again to turn it
back on.
ª Turning the Power OFF
While the Power is on, hold down the [ ] button for two seconds
or more.
Selecting Operation Modes
Select a desired mode on the mode selection screen.
Press the [MODE] Button.
1
≥The mode selection screen 1 appears.
≥The mode selection screen also appears when the power is
turned on.
Press the [MODE] Button to select [REC] or [PLAY].
2
≥Alternates between [REC] and [PLAY] by a push.
Move the Jog Lever up or down to select a desired
3
mode.
Press down the centre of the Jog Lever 2.
4
SELECT
≥The mode selection screen disappears, and the selected mode is
now set.
PUSH/SET
ª About the Operation Mode
Seven operation modes are provided as follows.
≥Moving picture (MPEG4 format) record mode [REC>>MPEG4]
≥Moving picture (MPEG4 format) play mode [PLAY>>MPEG4]
≥Still picture (JPEG format still picture) record mode [REC>>PICTURE]
≥Still picture (JPEG format still picture) play mode [PLAY>>PICTURE]
≥Sound (VOICE format) record mode [REC>>VOICE]
≥Sound (VOICE format) play mode [PLAY>>VOICE]
≥Music (MPEG2-AAC music/ MP3 format) play mode [PLAY>>MUSIC]
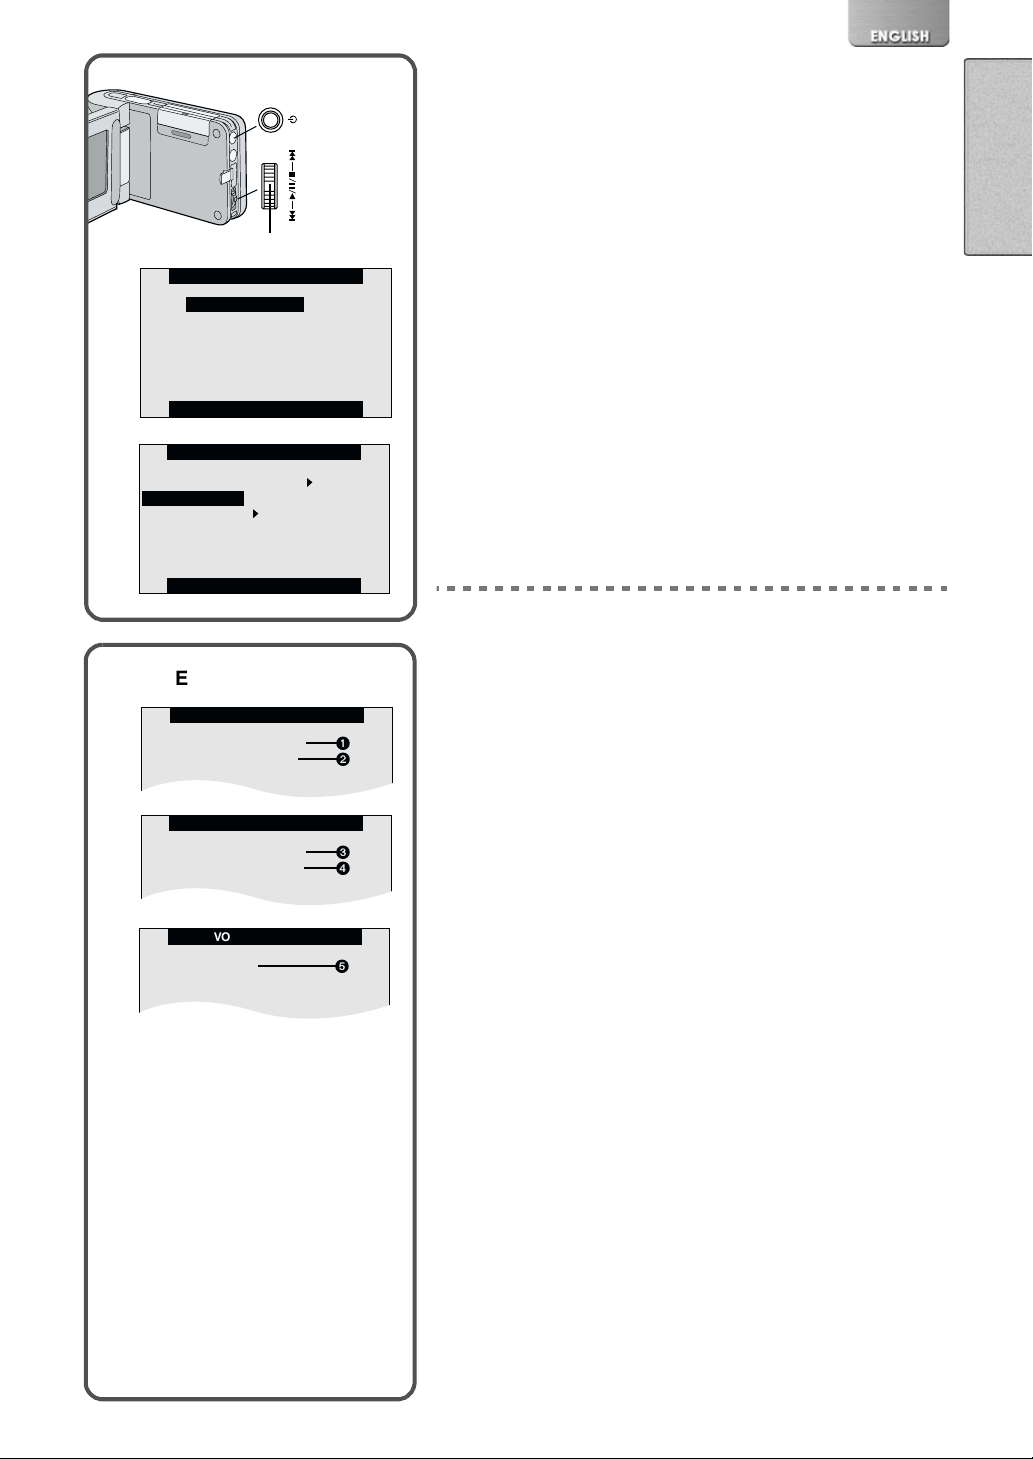
Using the Menu Screen
MPEG4 RECORD
RECORDING SETUP
OTHER FUNCTION
1
2
VOICE RECORD
FUNCTIONS
PICTURE RECORD
RECORDING SETUP
OTHER FUNCTIONS
3
4
/
2,6
MENU
+
3,4,5
VOL
-
2
3
PICTURE RECORD
RECORDING SETUP
OTHER FUNCTIONS
PRESS MENU TO RETURN
Allows the functions useable in the selected mode to be set from the
menu.
Select a desire mode. (l 8)
1
Press the [MENU] Button.
2
≥A list of menus useable in the selected mode is displayed 3.
Move the Jog Lever up or down to select a desired
3
menu.
Press down the centre of the Jog Lever 2.
4
≥Menu screen appears.4
Move the Jog Lever up or down to select a desired item
5
.
and press down the centre of the Jog Lever
≥With each press of 2, the cursor [1] moves to the next mode.
Press the [MENU] Button.
6
≥Menu screen disappears, and the selected item is now being set.
2
4
FLASH OFF ON
PICTURE QUALITY
RECORDING SETUP
FINE NORMAL ECONOMY
PRESS MENU TO RETURN
ªREC MODE
≥To abort the setting, press the [MENU] Button.
≥While a Menu is displayed, you cannot record or play back.
≥Menu operation flow is indicated in these Operating Instructions by >>.
≥Set the power supply frequency before use.
≥Press the [MENU] button when playing back the moving picture, still
picture or sound to edit the file being played back.
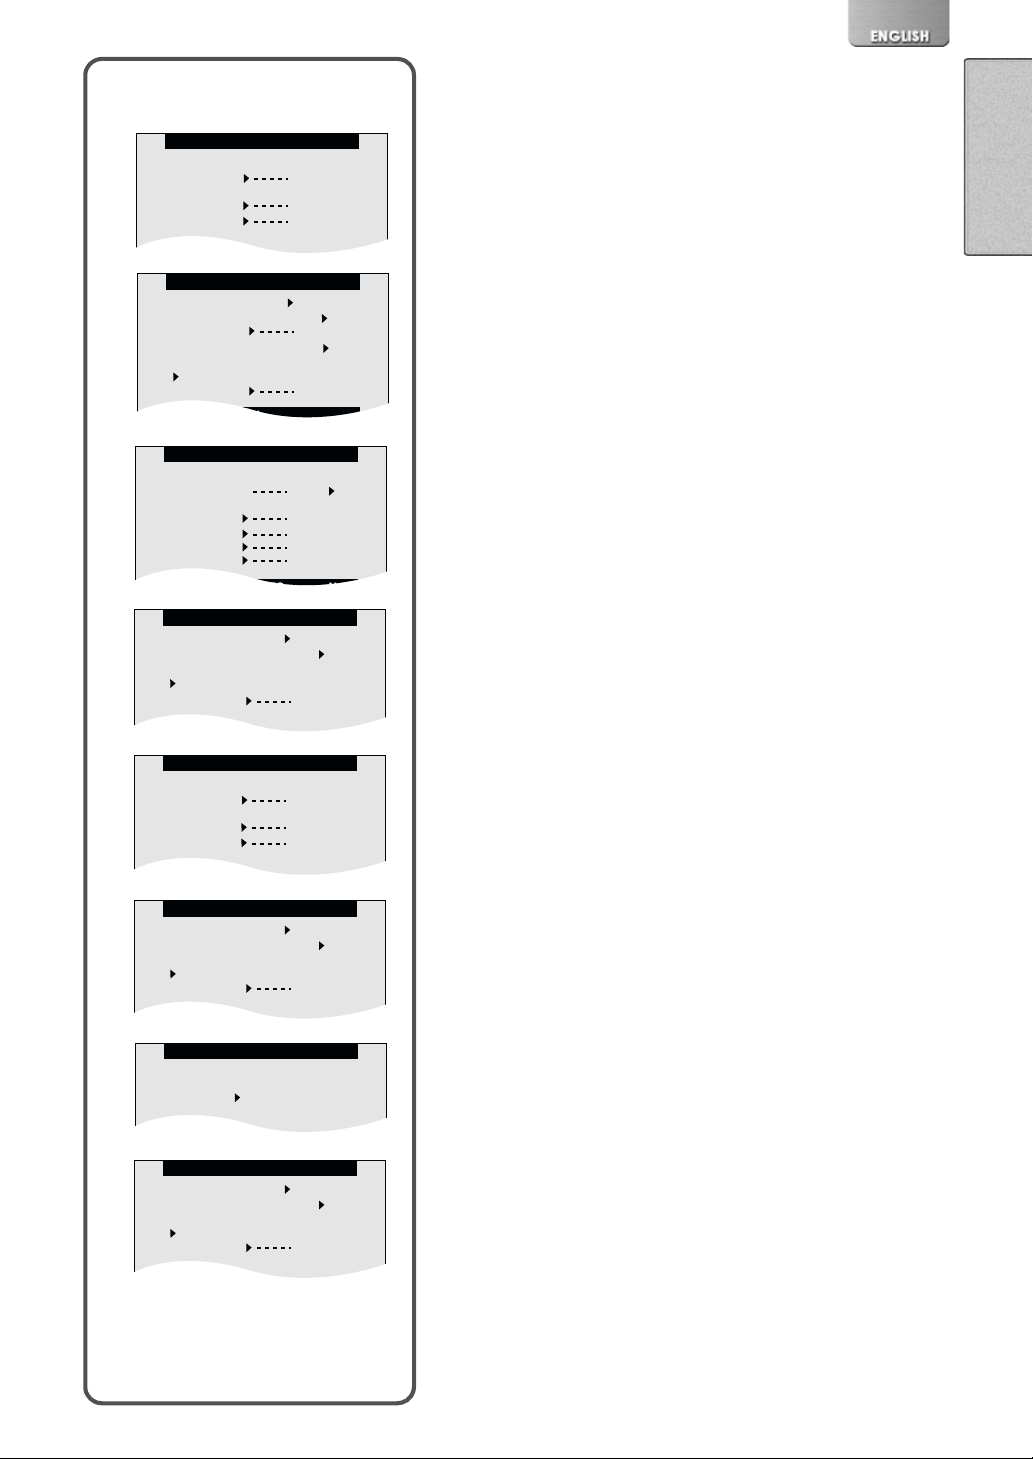
List of Menus
The figures of the Menus are for explanation purposes only, and they are
different from the actual Menus.
ª REC MODE
[MPEG4 RECORD] Menu
Recording Setup [RECORDING SETUP]
Other Functions [OTHER FUNCTIONS]
[PICTURE RECORD] Menu
Recording Setup [RECORDING SETUP]
Other Functions [OTHER FUNCTIONS]
[VOICE RECORD] Menu
Functions [OTHER FUNCTIONS]
5

RECORDING SETUP
FLASH OFF ON
PICTURE QUALITY
FINE NORMAL ECONOMY
FUNCTIONS
DATE/TIME OFF D/T TIME
DISPLAY OFF ON
LCD MONITOR
NORMAL UPSIDE-DOWN
CLOCK SET YES
Sub-Menu for REC MODE
OTHER FUNCTIONS
DATE/TIME OFF D/T TIME
DISPLAY OFF ON
LCD SET YES
LCD MONITOR
NORMAL UPSIDE-DOWN
AC MAINS 50HZ 60HZ
CLOCK SET YES
MPEG4 PLAYBACK
CARD EDITING
OTHER FUNCTIONS
1
2
PICTURE PLAYBACK
CARD EDITING
OTHER FUNCTIONS
3
4
VOICE PLAYBACK
CARD EDITING
OTHER FUNCTIONS
5
6
MUSIC PLAYBACK
REPEAT SETUP
OTHER FUNCTIONS
7
8
RECORDING SETUP
MPEG4 MODE
FINE NORMAL
ECONOMY1 ECONOMY2
OTHER FUNCTIONS
DATE/TIME OFF D/T TIME
DISPLAY OFF ON
LCD SET YES
LCD MONITOR
NORMAL UPSIDE-DOWN
AC MAINS 50HZ 60HZ
CLOCK SET YES
1
2
3
4
List of Menus (Cont.)
Sub-Menu for REC MODE
1 MPEG4 Mode [MPEG4 MODE] (llll 14)
2 Date/Time [DATE/TIME] (llll 13)
Display [DISPLAY]
LCD Set [LCD SET] (llll 13)
LCD Monitor [LCD MONITOR] (llll 9)
AC Mains [AC MAINS] (llll 12)
Clock set [CLOCK SET] (llll 13)
3 Flash [FLASH] (llll 16)
Picture Quality [PICTURE QUALITY] (llll 16)
4 Date/Time [DATE/TIME] (llll 13)
Display [DISPLAY]
LCD Set [LCD SET] (llll 13)
LCD Monitor [LCD MONITOR] (llll 9)
AC Mains [AC MAINS] (llll 12)
Clock set [CLOCK SET] (llll 13)
5 Date/Time [DATE/TIME] (llll 13)
Display [DISPLAY]
LCD Monitor [LCD MONITOR] (llll 9)
Clock set [CLOCK SET] (llll 13)
ª PLAYBACK MODE
[MPEG4 PLAYBACK] Menu
Card Editing [CARD EDITING]
Other Functions [OTHER FUNCTIONS]
5
ªPLAYBACK MODE
[PICTURE PLAYBACK] Menu
Card Editing [CARD EDITING]
Other Functions [OTHER FUNCTIONS]
[VOICE PLAYBACK] Menu
Card Editing [CARD EDITING]
Other Functions [OTHER FUNCTIONS]
[MUSIC PLAYBACK] Menu
Repeat Setup [REPEAT SETUP]
Other Functions [OTHER FUNCTIONS]
CARD EDITING
ERASE ALL FILES
YES
FILE PROTECTION
YES
DPOF SETTING YES
SLIDE SHOW YES
CARD FORMAT YES
FUNCTIONS
DATE/TIME OFF D/T TIME
DISPLAY OFF ON
LCD MONITOR
NORMAL UPSIDE-DOWN
CLOCK SET YES
OTHER FUNCTIONS
DATE/TIME OFF D/T TIME
DISPLAY OFF ON
LCD MONITOR
NORMAL UPSIDE-DOWN
CLOCK SET YES
REPEAT SETUP
REPEAT SETUP
OFF 1MUSIC ALL
Sub-Menu for PLAYBACK
CARD EDITING
ERASE ALL FILES
YES
FILE PROTECTION
YES
CARD FORMAT YES
OTHER FUNCTIONS
DATE/TIME OFF D/T TIME
DISPLAY OFF ON
LCD MONITOR
NORMAL UPSIDE-DOWN
CLOCK SET YES
CARD EDITING
ERASE ALL FILES
YES
FILE PROTECTION
YES
CARD FORMAT YES
OTHER FUNCTIONS
DATE/TIME OFF D/T TIME
DISPLAY OFF ON
LCD SET YES
DISPLAY SIZE FULL NORMAL
LCD MONITOR
NORMAL UPSIDE-DOWN
CLOCK SET YES
List of Menus (Cont.)
1
Sub-Menu for PLAYBACK MODE
1 Erase All Files [ERASE ALL FILES] (llll 23)
File Protection [FILE PROTECTIONS] (llll 24)
Card Format [CARD FORMAT] (llll 26)
2 Date/Time [DATE/TIME] (llll 13)
Display [DISPLAY]
LCD Set [LCD SET] (llll 13)
2
Display Size [DISPLAY SIZE] (llll 15)
LCD Monitor [LCD MONITOR] (llll 9)
Clock set [CLOCK SET] (llll 13)
3 Erase All Files [ERASE ALL FILES] (llll 23)
File Protection [FILE PROTECTIONS] (llll 24)
DPOF Setting [DPOF SETTING] (llll 25)
Slide Show [SLIDE SHOW] (llll 26)
Card Format [CARD FORMAT] (llll 26)
4 Date/Time [DATE/TIME] (llll 13)
3
Display [DISPLAY] (llll 10)
Display Size [DISPLAY SIZE] (llll 15)
LCD Monitor [LCD MONITOR] (llll 9)
Clock set [CLOCK SET] (llll 13)
5 Erase All Files [ERASE ALL FILES] (llll 23)
File Protection [FILE PROTECTIONS] (llll 24)
Card Format [CARD FORMAT] (llll 26)
6 Date/Time [DATE/TIME] (llll 13)
4
Display [DISPLAY] (llll 10)
LCD Monitor [LCD MONITOR] (llll 9)
Clock set [CLOCK SET] (llll 13)
7 Repeat Setup [REPEAT SETUP] (llll 20)
8 Date/Time [DATE/TIME] (llll 13)
Display [DISPLAY] (llll 10)
LCD Monitor [LCD MONITOR] (llll 9)
Clock set [CLOCK SET] (llll 13)
5
6
7
8
1
MPEG4
PICTURE
2
3
DATE/TIME OFF D/T TIME
DISPLAY OFF ON
LCD SET YES
LCD MONITOR
NORMAL UPSIDE-DOWN
AC MAINS 50HZ 60HZ
CLOCK SET YES
MPEG4 RECORD
RECORDING SETUP
OTHER FUNCTIONS
PRESS MENU TO RETURN
OTHER FUNCTIONS
PRESS MENU TO RETURN
/
RECPLAY
VOICE
2,3
MENU
1
VOL
MODE/
+
1,2,3
VOL
-
1/100
SELECT
PUSH/SET
4
Setting the power supply frequency
Set the power supply frequency before using the SD Multi AV Device.
The power supply frequency is different depending on the country or
region.
Adjustment of the frequency will help reduce the appearance of
horizontal stripes consisting of light and dark patterns under fluorescent
lighting.
Set the Operation Mode to [REC>> MPEG4] or [REC>>
1
. (l 8)
PICTURE]
Select the [OTHER FUNCTIONS] 2.
2
Set the [AC MAINS] 3 to [50 HZ] or [60 HZ].
3
≥This setting may not completely suppress the horizontal stripes
≥Irrespective of the setting, the horizontal stripes may still be presented
in the following cases.
-When using the SD Multi AV Device to record pictures under a
lighting instrument such as a high-frequency fluorescent lamp:
-When using the SD Multi AV Device to record a lighting instrument
such as a fluorescent lamp:
ª To reduce the appearance of horizontal stripes
consisting of light and dark patterns
If adjustment of the frequency does not have much effect on reducing
horizontal stripes, operate the SD Multi AV Device as follow.
Set the Operation Mode to [REC>> MPEG4] or [REC>>
1
PICTURE]
Move the Jog Lever down for about 1 second.
2
≥The [1/100] Indication 4 appears when the power supply
frequency is set to [50 Hz].
≥The [1/120] Indication 5 appears when the power supply
frequency is set to [60 Hz].
To Release this mode
Move the Jog Lever down for about 1 second.
≥Turning the power OFF will release this mode.
1
.(l 8)
1
1/120
≥It is not possible to use Backlight Compensation Mode when this mode
5
is set to ON.
≥If this mode is used for outdoor recording, the entire image on the
screen (or recording images) may be tinged with white.
≥This mode cannot be set or released while recording.
≥The SD Multi AV Device adjusts the brightness by varying the shutter
speed. However, the shutter speed is fixed in this mode and the
brightness cannot be adjusted.
 Loading...