

Page 1

Operating Instructions
offset printing
Instrukcja obsługi
Návod k obsluze
Instrucciones de funcionamiento
CD Stereo System
Zestaw stereo z CD
Stereosystém s CD
Sistema estéreo con reproductor
de discos compactos
Model No. SC-PM602
Thank you for purchasing this product.
For optimum performance and safety, please read these instructions carefully.
Please keep this manual for future reference.
Dziękujemy za zakupienie tego produktu.
Proszę dokładnie zapoznać się z tą instrukcją obsługi, aby jak najlepiej wykorzystać to urządzenie i
zapewnić jego bezpieczne użytkowanie.
Prosimy o zachowanie niniejszej instrukcji obsługi.
Děkujeme za zakoupení tohoto výrobku.
Pro dosažení optimálního výkonu a z bezpečnostních důvodu si pečlivě přečtěte tyto pokyny.
Uschovejte si prosím tento návod k obsluze.
Muchísimas gracias por haber adquirido este aparato.
Lea con atención estas instrucciones para obtener las máximas prestaciones y seguridad.
Guarde este manual para su consulta en el futuro.
EG
TQBJ0979
Page 2
Your system and the illustrations can look differently.
offset printing
These operating instructions are applicable to the
following system.
System SC-PM602
Main unit SA-PM602
Speakers SB-PM500
The symbols on this product (including the accessories)
represent the following:
AC
Class II equipment (The construction of the
product is double-insulated.)
ON
Standby
Supplied accessories
Check and identify the supplied accessories.
1 AC mains lead
1 DAB antenna
1 Remote control
(N2QAYB000984)
Table of contents
Supplied accessories . . . . . . . . . . . . . . . . . . . . . . . .2
Safety precautions . . . . . . . . . . . . . . . . . . . . . . . . . .2
Making the connections. . . . . . . . . . . . . . . . . . . . . .3
Placement of speakers. . . . . . . . . . . . . . . . . . . . . . .3
Overview of controls. . . . . . . . . . . . . . . . . . . . . . . . .4
Preparing the remote control. . . . . . . . . . . . . . . . . .4
Preparing the media . . . . . . . . . . . . . . . . . . . . . . . . .5
Media playback. . . . . . . . . . . . . . . . . . . . . . . . . . . . .6
DAB+ . . . . . . . . . . . . . . . . . . . . . . . . . . . . . . . . . . . . .8
Radio . . . . . . . . . . . . . . . . . . . . . . . . . . . . . . . . . . . . .9
Clock and timers. . . . . . . . . . . . . . . . . . . . . . . . . . .10
Sound effects . . . . . . . . . . . . . . . . . . . . . . . . . . . . .11
Others . . . . . . . . . . . . . . . . . . . . . . . . . . . . . . . . . . .11
Troubleshooting . . . . . . . . . . . . . . . . . . . . . . . . . . .12
Maintenance . . . . . . . . . . . . . . . . . . . . . . . . . . . . . .13
Specifications . . . . . . . . . . . . . . . . . . . . . . . . . . . . .14
TQBJ0979
References . . . . . . . . . . . . . . . . . . . . . . . . . . . . . . .17
2
2
Safety precautions
WARNING!
Unit
• To reduce the risk of fire, electric shock or product
damage,
– Do not expose this unit to rain, moisture, dripping or
splashing.
– Do not place objects filled with liquids, such as
vases, on this unit.
– Use only the recommended accessories.
– Do not remove covers.
– Do not repair this unit by yourself. Refer servicing to
qualified service personnel.
– Do not let metal objects fall inside this unit.
CAUTION!
Unit
• To reduce the risk of fire, electric shock or product
damage,
– Do not install or place this unit in a bookcase, built-in
cabinet or in another confined space. Ensure this
unit is well ventilated.
– Do not obstruct this unit’s ventilation openings with
newspapers, tablecloths, curtains, and similar items.
– Do not place sources of naked flames, such as
lighted candles, on this unit.
• This unit is intended for use in moderate climates.
• This unit may receive radio interference caused by
mobile telephones during use. If such interference
occurs, please increase separation between this unit
and the mobile telephone.
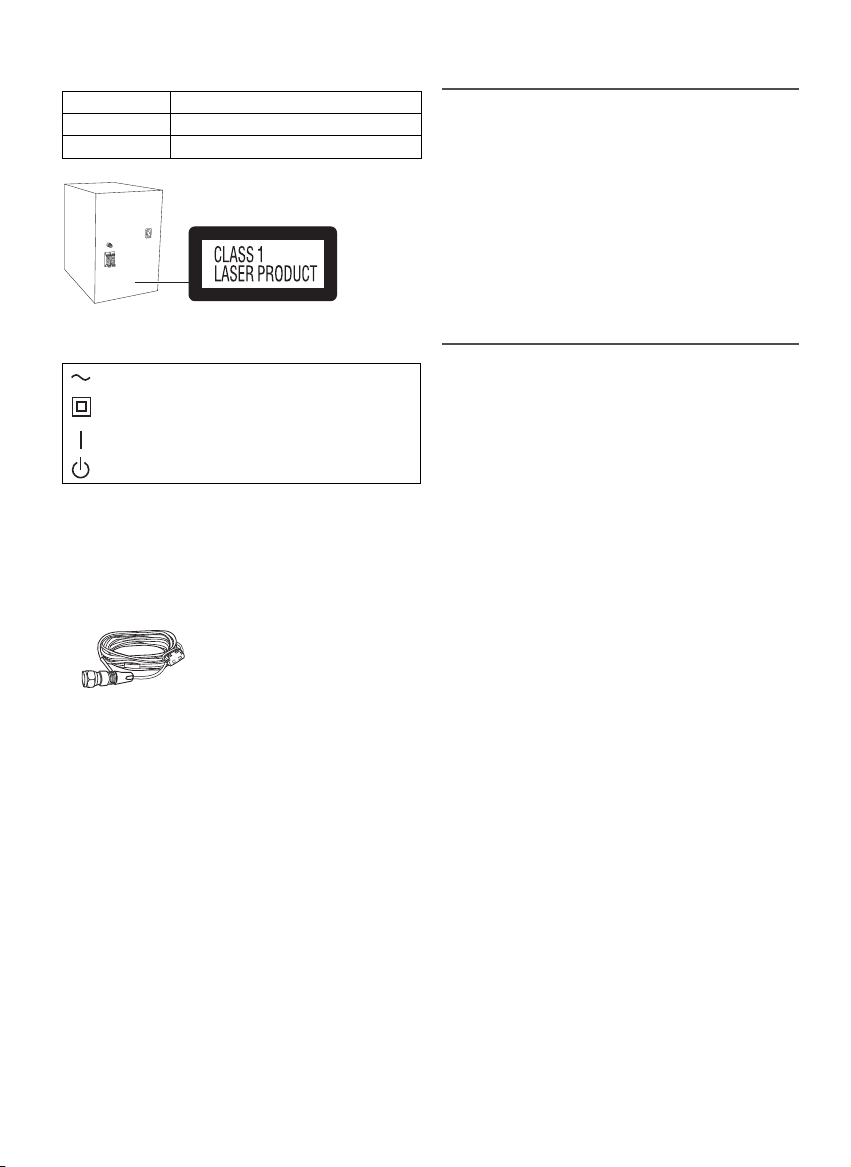
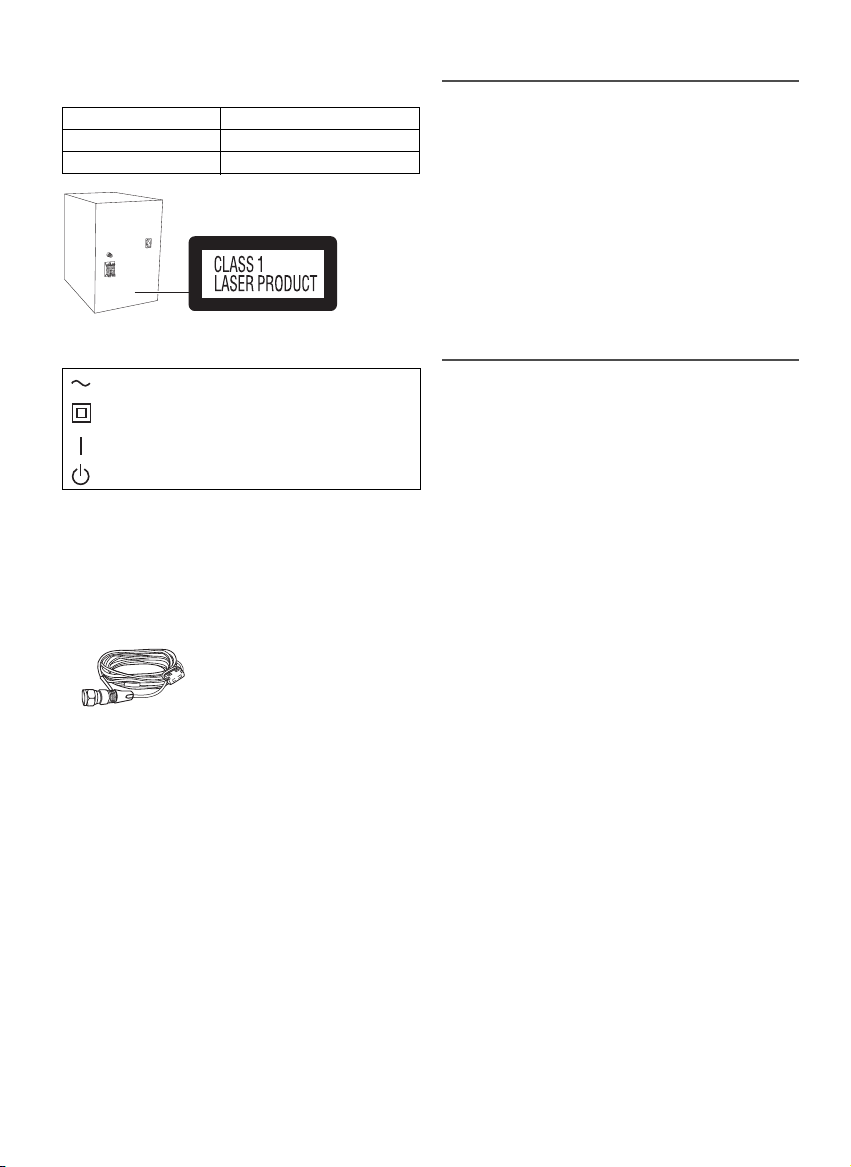
• This unit utilizes a laser. Use of controls or adjustments
or performance of procedures other than those
specified herein may result in hazardous radiation
exposure.
AC mains lead
• The mains plug is the disconnecting device. Install this
unit so that the mains plug can be unplugged from the
socket outlet immediately.
Battery
• Danger of explosion if battery is incorrectly replaced.
Replace only with the type recommended by the
manufacturer.
• When disposing of the batteries, please contact your
local authorities or dealer and ask for the correct
method of disposal.
• Do not heat or expose to flame.
• Do not leave the battery(ies) in a car exposed to direct
sunlight for a long period of time with doors and
windows closed.
• Do not break open or short-circuit the battery.
• Do not charge the alkaline or manganese battery.
• Do not use the battery if the cover has peeled off.
• Remove the battery if you do not use the remote
control for a long period of time. Keep in a cool, dark
area.
Page 3
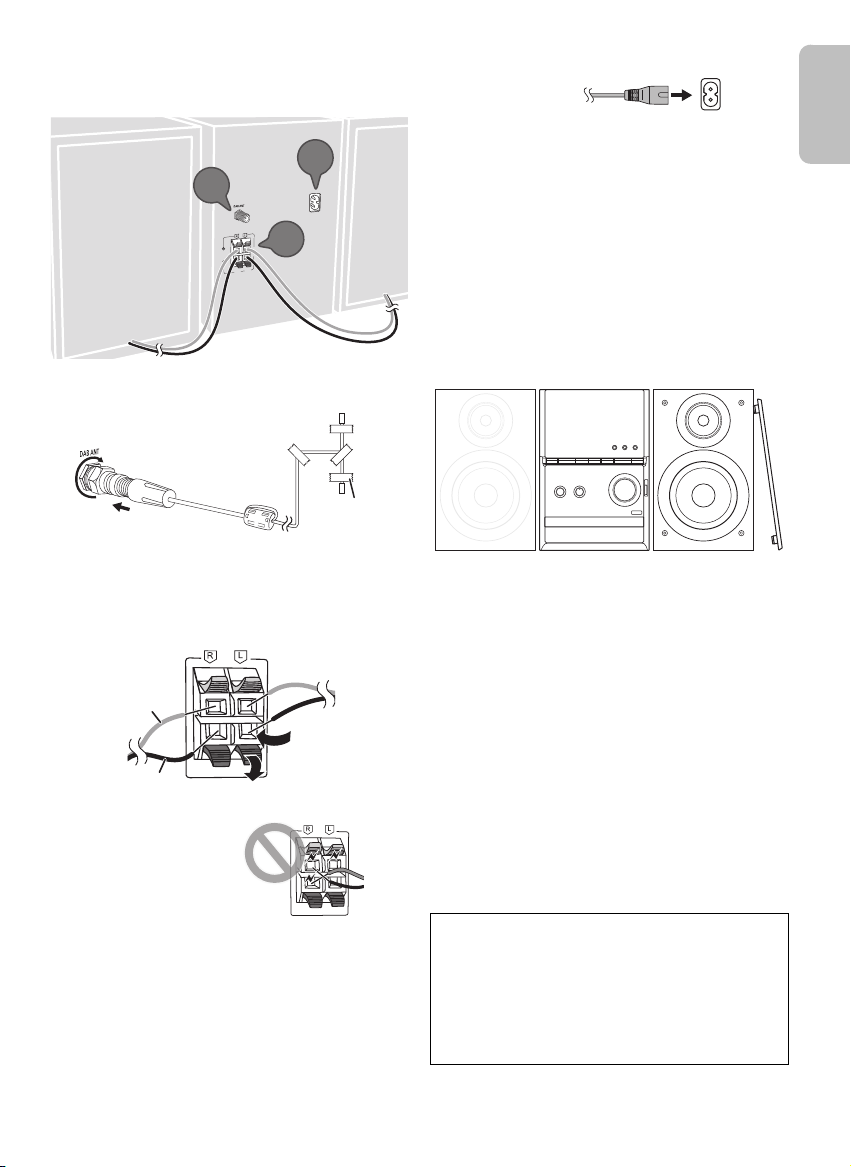
Making the connections
3
2
1
Adhesive tape
(not supplied)
B
A
Red
Black
To household
mains socket
ENGLISH
offset printing
Connect the AC mains lead only after all the other
connections have been made.
(6:)
(6:)
1 Connect the DAB antenna.
Be sure to tighten fully the nut.
Do not use any other DAB antenna except the
supplied one.
Use an outdoor antenna if the reception is poor.
2 Connect the speakers.
Be careful not to cross
(short-circuit) or reverse
the polarity of the speaker
wires as doing so may
damage the speakers.
3 Connect the AC mains lead.
Do not use an AC mains lead from other equipment.
Conserving power
The system consumes a small amount of power
(Z“Specifications”) when it is in standby mode.
Disconnect the power supply if you do not use the
system.
Some settings will be lost after you disconnect the
system. You have to set them again.
Placement of speakers
The left and right speakers are the same.
Use only the supplied speakers.
You can cause damage to the system and decrease the
sound quality if you use other speakers.
Note:
• Keep your speakers more than 10 mm from the main unit
for ventilation.
• Put the speakers on a flat safe surface.
• These speakers do not have magnetic shielding. Do not put
them near TVs, PCs or other equipment easily influenced
by magnetism.
• When you play at high levels for a long period, it can cause
damage to the speakers and decrease the life of the
speakers.
• Decrease the volume in these conditions to prevent
damage:
– When the sound is distorted.
– When you adjust the sound quality.
• To prevent damage to the speakers, do not touch the
speaker cones if you remove the nets.
CAUTION!
• Use the speakers only with the recommended
system. If not, you can cause damage to the
amplifier and speakers and can cause a fire.
Consult an approved service personnel if damage
occurs or if there is a sudden apparent change in
performance.
• Do the procedures included in these instructions
when you attach the speakers.
TQBJ0979
3
3
Page 4
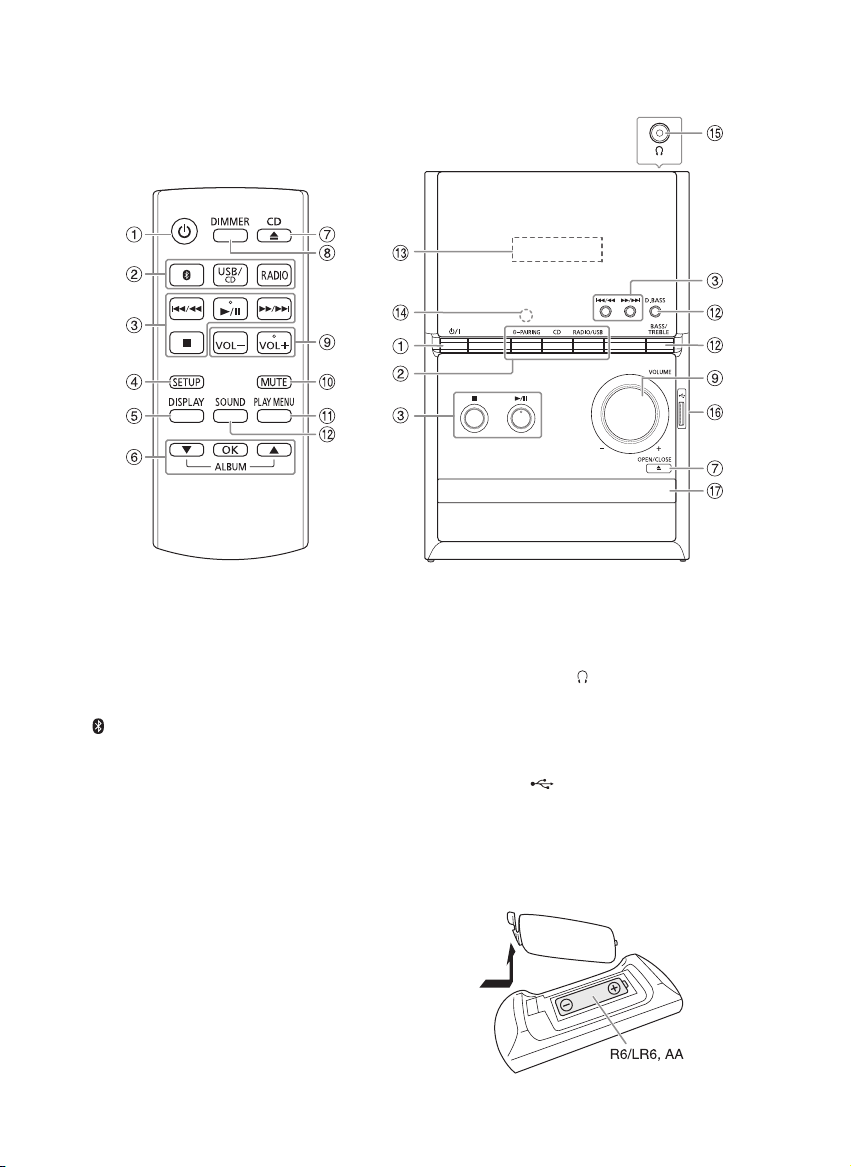
Overview of controls
(not supplied)
offset printing
Do the procedures with the remote control. You can also use the buttons on the main unit if they are the same.
A Standby/on switch [`], [1]
Press to switch the unit from on to standby mode or
vice versa. In standby mode, the unit is still
consuming a small amount of power.
B Select the audio source
On the main unit:
To start Bluetooth
[ –PAIRING].
®
pairing, press and hold
C Basic playback control
D View the setup menu
E View the content information
F Select or confirm the option
G Open or close the disc tray
H Decrease the brightness of the display panel
To cancel, press the button again.
I Adjust the volume level
J Mute the sound
To cancel, press the button again.
“MUTE” is also cancelled when you adjust the volume
or when you switch off the system.
K View the play menu
L Select the sound effects
M Display panel
TQBJ0979
4
4
N Remote control sensor
Distance: Within approximately 7 m
Angle: Approximately 20° up and down, 30° left and
right
O Headphone jack ( )
Plug type: Ø 3.5 mm stereo (not supplied)
– Excessive sound pressure from earphones and
headphones can cause hearing loss.
– Listening at full volume for long periods may
damage the user’s ears.
P USB port ( )
Q Disc tray
Preparing the remote control
Use alkaline or manganese battery.
Install the battery so that the poles (+ and –) align with
those in the remote control.
Page 5
Preparing the media
ENGLISH
offset printing
Disc
1 Press [CD x] (main unit: [x OPEN/CLOSE]) to open
the disc tray.
Put in a disc with the label facing up.
Press again to close the disc tray.
2 Press [USB/CD] to select “CD”.
USB
1 Decrease the volume and connect the USB device
to the USB port.
Hold the main unit when connecting or disconnecting
the USB device.
2 Press [USB/CD] to select “USB”.
Note:
Do not use a USB extension cable. The system cannot
recognise USB device connected through a cable.
Bluetooth
You can connect and play an audio device wirelessly
through Bluetooth
Preparation
• Switch on the Bluetooth
the device near the system.
• Read the operating instructions of the device for
details.
█ Pairing a device
Preparation
If this system is connected to a Bluetooth
disconnect it (Z“Disconnecting a device”).
1 Press [ ].
If “PAIRING” is shown, continue with step 3.
2 Press [PLAY MENU] to select “PAIRING” and then
press [OK].
Or press and hold [ –PAIRING] on the main unit
until “PAIRING” is shown.
3 Select “SC-PM602” from the Bluetooth
the device.
If prompted for a passkey, input “0000”.
The device connects with this system automatically
after pairing is complete.
The name of the connected device is shown for a few
seconds.
Note:
You can pair up to 8 devices with this system. If a 9th device
is paired, the device that has not been used for the longest
time will be replaced.
®
®
.
®
feature of the device and put
®
device,
®
menu of
█ Connecting a device
Preparation
If this system is connected to a Bluetooth
disconnect it (Z“Disconnecting a device”).
®
device,
1 Press [ ].
“BLUETOOTH READY” is shown.
2 Select “SC-PM602” from the Bluetooth
the device.
The name of the connected device is shown for a few
seconds.
®
menu of
3 Start playback on the device.
Note:
• A device must be paired to connect.
• This system can only connect to one device at a time.
• When
“BLUETOOTH” is selected as the source, this
system will automatically try to connect to the last
connected device. (
process.)
“LINKING” is shown during this
█ Disconnecting a device
1 Press [ ].
2 Press [PLAY MENU] repeatedly to select
“DISCONNECT?”.
3 Press [R, T] to select “OK? YES” and then press
[OK].
“BLUETOOTH READY” is shown.
To cancel, select “OK? NO”.
Using the main unit
Press and hold [ –PAIRING] until “PAIRING” is
shown.
Note:
A device is disconnected when you:
• Select a different source.
• Move the device out of the maximum range.
• Disable the Bluetooth
• Switch off the system or the device.
®
transmission of the device.
TQBJ0979
5
5
Page 6
Media playback
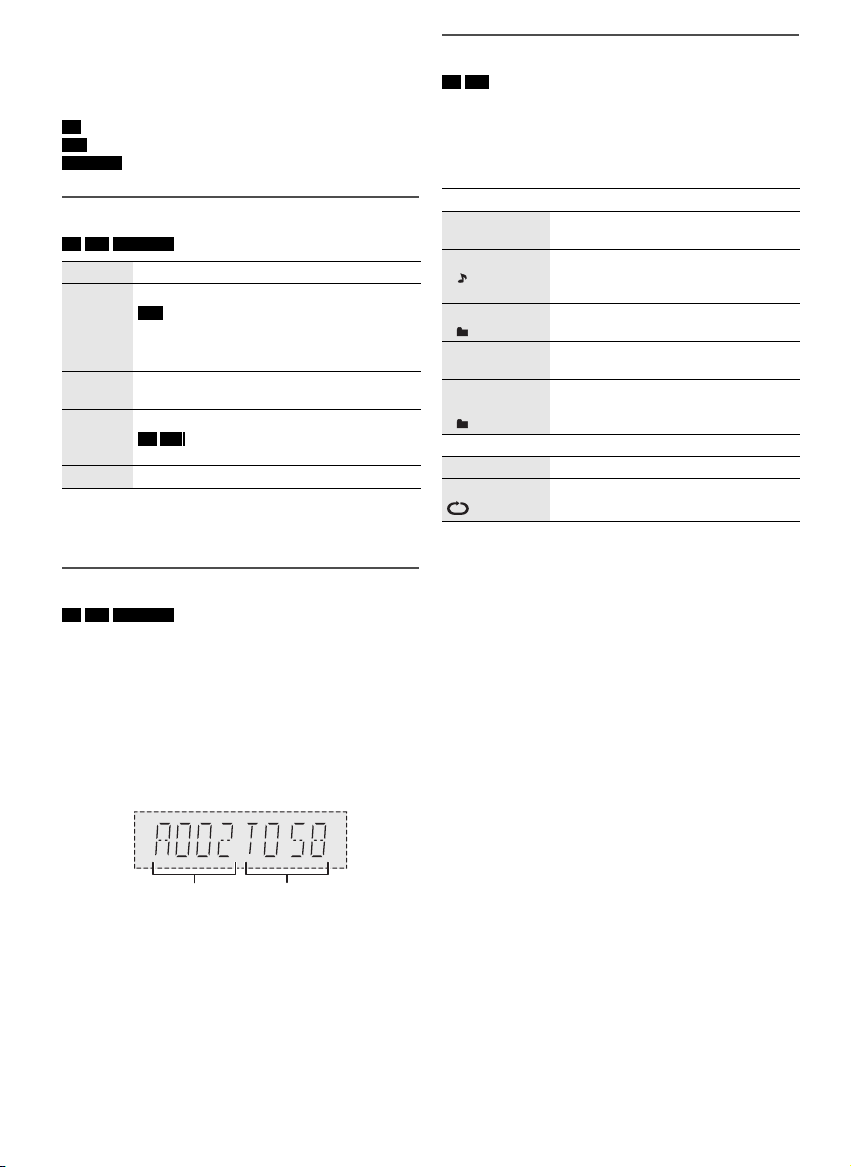
Album
number
Track
number
offset printing
The following marks indicate the availability of the
feature.
CD :
USB :
BLUETOOTH :
Basic playback
CD USB BLUETOOTH
Play Press [4/9].
Stop Press [8].
Pause Press [4/9].
Skip Press [2/3] or [5/6] to skip track.
Search Press and hold [2/3] or [5/6].
Note:
Depending on the Bluetooth
not work.
Viewing available information
CD USB BLUETOOTH
You can view the available information on the display
panel.
Press [DISPLAY].
Note:
• Maximum characters that can be shown: approximately 32
• This system supports ver. 1.0, 1.1 and 2.3 ID3 tags.
• Text data that the system does not support can show
• Example: MP3 album and track number display.
CD-R/RW in CD-DA format or with MP3 files.
USB device with MP3 files.
Bluetooth® device.
USB
The position is memorised.
“RESUME” is shown.
Press again to stop fully.
Press again to continue playback.
CD USB
Press [R, T] to skip MP3 album.
®
device, some operations may
differently.
Play menu
CD USB
1 Press [PLAY MENU] repeatedly to select
“PLAYMODE” or “REPEAT”.
2 Press [R, T] to select the setting and then press
[OK].
PLAYMODE
OFF
PLAYMODE
1-TRACK
1
1-ALBUM
1
RANDOM
RND
1-ALBUM
RANDOM
1 RND
REPEAT
OFF REPEAT Cancel the setting.
ON REPEAT Repeat playback.
Note:
• During random playback, you cannot skip to tracks which
have been played.
• The setting is cancelled when you open the disc tray or
disconnect the USB device.
Cancel the setting.
Play one selected track.
Press [2/3] or [5/6] to
select the track.
Play one selected MP3 album.
Press [R, T] to select the MP3 album.
Play all tracks randomly.
Play all tracks in one selected MP3
album randomly.
Press [R, T] to select the MP3 album.
TQBJ0979
6
6
Page 7

Link mode
(default)
ENGLISH
offset printing
BLUETOOTH
You can change the link mode to suit the connection
type.
Preparation
If this system is connected to a Bluetooth
disconnect it (Z“Disconnecting a device”).
®
device,
1 Press [PLAY MENU] repeatedly to select
“LINK MODE”.
2 Press [R, T] to select the mode and then press
[OK].
MODE 1 Emphasis on connectivity.
MODE 2
(default)
Note:
• Depending on the device, the playback image and sound
may not be synchronised. In this case, select “MODE 1”
• Select “MODE 1” if the sound is interrupted.
Emphasis on sound quality.
.
Input level
BLUETOOTH
You can change the input level setting if the sound input
level of the Bluetooth
®
transmission is too low.
1 Press [PLAY MENU] repeatedly to select
“INPUT LEVEL”.
2 Press [R, T] to select the level and then press [OK].
█ Note on disc
• This system can play CD-R/RW with CD-DA or MP3
format content.
• Before playback, finalise the disc on the device it was
recorded on.
• Some CD-R/RW cannot be played because of the
condition of the recording.
█ Note on USB device
• This system supports USB 2.0 full speed.
• This system can support USB devices of up to 32 GB.
• Only FAT 12/16/32 file system is supported.
█ Note on MP3 file
• Files are defined as tracks and folders are defined as
albums.
• Tracks must have the extension “.mp3” or “.MP3”.
• Tracks will not necessarily be played in the order you
recorded them.
• Some files can fail to work because of the sector size.
MP3 file on disc
• This system can access up to:
– 255 albums (including root folder)
– 999 tracks
– 20 sessions
• Disc must conform to ISO9660 level 1 or 2 (except for
extended formats).
MP3 file on USB device
• This system can access up to:
– 800 albums (including root folder)
– 8000 tracks
– 999 tracks in one album
Note:
Select
“LEVEL 0” if the sound is distorted.
TQBJ0979
7
7
Page 8
DAB+
Frequency
block
Frequency Reception quality
0 (poor) to 8 (excellent)
offset printing
Preparation
Press [RADIO] to select “DAB+”.
Note:
If you select
automatically.
Manual tuning
1 Press [PLAY MENU] repeatedly to select
2 Press [R, T] to select the frequency block and then
To tune automatically
1 Press [PLAY MENU] to select “AUTOSCAN” and
2 Press [OK] to start tuning.
Note:
Preset frequencies are erased after you do automatic tuning.
Memory presetting
You can preset up to 20 stations.
1 Press [PLAY MENU] repeatedly to select
2 Press [R, T] to select “STATION” and then press
3 Press [2/3] or [5/6] to tune in to the
4 Press [OK].
5 Press [R, T] to select a preset number and then
Note:
You cannot preset a station when the station is not
broadcasting or when you have selected a secondary service.
█ Selecting a preset station
1 Press [PLAY MENU] repeatedly to select
2 Press [R, T] to select “PRESET” and then press
3 Press [2/3] or [5/6] to select the preset
TQBJ0979
8
8
“DAB+” for the first time, the system will tune
“MANUAL SCAN”.
press [OK].
If no station is detected, “SCAN FAILED” is shown.
Adjust the antenna and try again.
then press [OK].
“START?” is shown.
“DAB AUTO SCAN” is shown.
If no station is detected, “SCAN FAILED” is shown.
Do manual tuning.
“TUNE MODE”.
[OK].
station.
press [OK].
Do steps 3 through 5 again to preset more stations.
The new station replaces any station that occupies
the same preset number.
“TUNE MODE”.
[OK].
station.
Secondary service
You can listen to secondary services when “ ” is
shown.
1 Press [PLAY MENU] repeatedly to select
“DAB SECONDARY”.
2 Press [R, T] to select the secondary service and
then press [OK].
To cancel, select “PRIMARY”.
Note:
The setting is cancelled when you select other stations.
Viewing available information
You can view the following information on the display
panel:
• Information about the DAB broadcast
• Programme type
• Ensemble label
•Frequency
•Time
Press [DISPLAY].
Checking the signal quality
You can check the signal quality when adjusting the
antenna.
1 Press [PLAY MENU] repeatedly to select
“SIGNAL QUALITY” and then press [OK].
The frequency block followed by the reception quality
is shown.
To select other frequency blocks, press [R, T].
2 Press [OK] again to exit.
Automatic clock adjustment
You can set the clock to update automatically.
1 Press [PLAY MENU] repeatedly to select
“AUTO CLOCK ADJ”.
2 Press [R, T] to select “ON ADJUST” and then press
[OK].
To cancel, select “OFF ADJUST”.
Page 9
Radio
ENGLISH
offset printing
Preparation
Press [RADIO] to select “FM”.
Manual tuning
1 Press [PLAY MENU] repeatedly to select
“TUNE MODE”.
2
Press [R,T] to select “MANUAL” and then press
[OK].
3 Press [2/3] or [5/6] to tune in to the
station.
To tune automatically, press and hold the button until
the frequency starts changing quickly.
“STEREO” is shown when a stereo broadcast is being
received.
Memory presetting
You can preset up to 30 FM stations.
Improving the sound quality
1 Press [PLAY MENU] repeatedly to select
“FM MODE”.
2 Press [R, T] to select “MONO” and then press
[OK].
To cancel, select “STEREO”.
“MONO” is also cancelled when you change the
frequency.
To memorise the setting
Continue with step 4 of “Manual presetting”.
Checking the signal status
Press [DISPLAY] to select “FM STATUS”.
FM – – – – The FM signal is in monaural.
FM ST The FM signal is in stereo.
FM MONO “MONO” is selected as the “FM MODE”.
The system is not tuned in to a station.
█ Automatic presetting
1 Press [PLAY MENU] to select “A.PRESET”.
2
Press [R,T] to select the setting and then press
[OK].
LOWEST Tuning begins from the lowest
CURRENT Tuning begins from the current
The tuner presets all the stations it can receive into
the channels in ascending order.
To cancel, press [8].
frequency.
frequency.
█ Manual presetting
1 Press [PLAY MENU] repeatedly to select
“TUNE MODE”.
2
Press [R,T] to select “MANUAL” and then press
[OK].
3 Press [2/3] or [5/6] to tune in to the
station.
4 Press [OK].
5 Press [R, T] to select a preset number and then
press [OK].
Do steps 3 through 5 again to preset more stations.
The new station replaces any station that occupies
the same preset number.
█ Selecting a preset station
1 Press [PLAY MENU] repeatedly to select
“TUNE MODE”.
2
Press [R,T] to select “PRESET” and then press
[OK].
3 Press [2/3] or [5/6] to select the preset
station.
RDS broadcasting
This system can show the text data transmitted by the
radio data system (RDS) available in some areas.
Press [DISPLAY] repeatedly.
PS Programme service
PTY Programme type
FREQ Frequency
Note:
RDS may not be available if reception is poor.
TQBJ0979
9
9
Page 10

Clock and timers
offset printing
Setting the clock
This is a 24-hour clock.
1 Press [SETUP] repeatedly to select “CLOCK”.
2 Press [R, T] to set the time and then press [OK].
To check the time
Press [SETUP] repeatedly to select “CLOCK” and then
press [OK].
In standby mode, press [DISPLAY].
Note:
Reset the clock regularly to maintain accuracy.
Play timer
(Except for Bluetooth® source)
You can set the timer to come on at a certain time to
wake you up.
Preparation
Set the clock.
1 Press [SETUP] repeatedly to select “TIMER ADJ”.
2 Press [R, T] to set the start time and then press
[OK].
3 Do step 2 again to set the end time.
4 Press [R, T] to select the source you want to play
and then press [OK].
To start the timer
1 Press [SETUP] repeatedly to select “TIMER SET”.
2 Press [R, T] to select “SET” and then press [OK].
“#” is shown.
To cancel, select “OFF”.
The system must be switched off for the timer to
operate.
To check the setting
Press [SETUP] repeatedly to select “TIMER ADJ” and
then press [OK].
In standby mode, press [DISPLAY] two times.
Note:
• The timer starts at a low volume and increases gradually to
the preset level.
• The timer comes on at the set time every day if the timer is
on.
• If you switch off the system and then switch on again while
a timer is in operation, the timer will not stop at the end
time.
Sleep timer
The sleep timer switches off the system after the set time.
1 Press [SETUP] repeatedly to select “SLEEP”.
2 Press [R, T] to select the setting (in minutes) and
then press [OK].
To cancel, select “OFF”.
Note:
• The remaining time is shown for a few seconds every
minute.
“SLEEP 1” is always shown when only 1 minute
remains.
• The sleep timer can be used together with the play timer.
• The sleep timer always comes first. Be sure not to set an
overlap of timers.
TQBJ0979
10
10
Page 11

Sound effects
ENGLISH
offset printing
1 Press [SOUND] repeatedly to select the sound
effect.
2 Press [R, T] to select the setting and then press
[OK].
MY SOUND “SOUND 1”, “SOUND 2” or “SOUND 3”
PRESET EQ “HEAVY” (default), “SOFT”, “CLEAR”,
BASS –4 to +4 (default: 0)
TREBLE –4 to +4 (default: 0)
D.BASS “ON D.BASS” (default) or “OFF D.BASS”
SURROUND “ON SURROUND” or
Note:
Changed settings will be kept until it is changed again, unless
otherwise indicated.
Saving the sound settings
You can save the current sound effects (up to
3 combinations).
Preparation
Select the sound effects.
1 Press [SETUP] to select “SAVE MY SOUND”.
2 Press [R, T] to select a sound setting number and
then press [OK].
“SAVED” is shown.
The new setting replaces the one existing in the same
sound setting number.
To recall the setting
1 Press [SOUND] to select “MY SOUND”.
2 Press [R, T] to select the sound setting number
and then press [OK].
(Z“Saving the sound settings”)
“VOCAL” or “FLAT”
Using the main unit
1. Press [BASS/TREBLE] to select
“BASS”.
2. Press [2/3] or [5/6].
Using the main unit
1. Press [BASS/TREBLE] to select
“TREBLE”.
2. Press [2/3] or [5/6].
Using the main unit
Press [D.BASS] repeatedly.
“OFF SURROUND” (default)
Others
Auto off
This system automatically switches off when you do not
use it for 20 minutes.
1 Press [SETUP] repeatedly to select “AUTO OFF”.
2 Press [R, T] to select “ON” and then press [OK].
To cancel, select “OFF”.
Note:
This function does not work when you are in radio source or
when a Bluetooth
Bluetooth® standby
This function automatically switches on the system when
you establish a Bluetooth
device.
1 Press [SETUP] repeatedly to select
“BLUETOOTH STANDBY”.
2 Press [R, T] to select “ON” and then press [OK].
To cancel, select “OFF”.
Checking the software version
1 Press [SETUP] repeatedly to select “SW VER.” and
then press [OK].
The software version is shown.
2 Press [OK] again to exit.
®
device is connected.
®
connection from a paired
11
11
TQBJ0979
Page 12

Troubleshooting
offset printing
Before requesting service, make the following checks. If
you are in doubt about some of the check points, or if the
solutions indicated do not solve the problem, consult
your dealer for instructions.
█ Common problems
The unit does not work.
• The safety device has been activated. Do the following:
1. Press [1] on the main unit to switch the unit to standby
mode. If the unit does not switch to standby mode,
– Press and hold the button for a minimum of
10 seconds. Or,
– Disconnect the AC mains lead and connect it again.
2. Press [1] again to switch on the unit. If the problem
persists, consult your dealer.
No operations can be done with the remote control.
• Examine that the battery is installed correctly.
Sound is distorted or no sound.
• Adjust the volume of the system.
• Switch off the system, determine and correct the cause,
and then switch on again. It can be caused by straining of
the speakers through excessive volume or power, and
when using the system in a hot environment.
A humming sound can be heard during playback.
• An AC mains lead or fluorescent light is near the cables.
Keep other appliances and cords away from the cables of
this system.
█ Disc
Display not shown correctly.
Playback does not start.
• You have not put in the disc correctly. Put it in correctly.
• Disc is dirty. Clean the disc.
• Replace the disc if it is scratched, warped, or
non-standard.
• There is condensation. Let the system dry for 1 to 2 hours.
█ USB
The USB device or the contents in it cannot be read.
• The format of the USB device or the contents in it are not
compatible with the system.
• USB devices with storage capacity of more than 32 GB
cannot work in some conditions.
Slow operation of the USB device.
• Large content size or large memory USB device takes
longer time to read.
The elapsed time shown is different from the actual
play time.
• Transfer the data to another USB device or backup the
data and reformat the USB device.
█ Radio/DAB+
DAB+ reception is poor.
• Keep the antenna away from computers, televisions, other
cables and cords.
Sound is distorted.
• Use an optional outdoor antenna. The antenna should be
installed by a competent technician.
A beat sound is heard.
• Switch off the TV or move it away from the system.
• Move mobile telephones away from the system if the
interference is apparent.
█ Bluetooth
Pairing cannot be done.
• Check the Bluetooth® device condition.
• The device is out of the 10 m communication range. Move
the device nearer to the system.
The device cannot be connected.
• The pairing of the device was unsuccessful. Do pairing
again.
• The pairing of the device has been replaced. Do pairing
again.
• This system might be connected to a different device.
Disconnect the other device and try pairing the device
again.
The device is connected but audio cannot be heard
through the system.
• For some built-in Bluetooth
audio output to “SC-PM602”
operating instructions of the device for details.
Sound from the device is interrupted.
• The device is out of the 10 m communication range. Move
the device nearer to the system.
• Remove any obstacle between the system and the device.
• Other devices that use the 2.4 GHz frequency band
(wireless router, microwaves, cordless phones, etc.) are
interfering. Move the device nearer to the system and
distance it from the other devices.
• Select
Playback image and sound are not synchronised.
• Restart the playback app of the device.
®
®
devices, you have to set the
manually. Read the
“MODE 1” for stable communication.
TQBJ0979
12
12
Page 13
█ Main unit displays
ENGLISH
offset printing
“--:--”
• You connected the AC mains lead for the first time or there
was a power failure recently. Set the clock.
ADJUST CLOCK”
“
• The clock is not set. Adjust the clock.
ADJUST TIMER”
“
• The play timer is not set. Adjust the play timer.
“
AUTO OFF”
• The system has not been used for 20 minutes and will
switch off within a minute. To cancel, press any button.
ERROR”
“
• An incorrect operation was done. Read the instructions and
try again.
F61”
“
“F77”
• Disconnect the AC mains lead and consult your dealer.
F703”
“
• Examine the Bluetooth® connection.
• Disconnect the Bluetooth
and then switch on again.
F76”
“
• There is a problem with the power supply.
• Disconnect the AC mains lead and consult your dealer.
NODEVICE”
“
• The USB device is not connected. Examine the connection.
NO DISC”
“
• You have not put in a disc.
“NO MEMORY”
• DAB memory presetting has not been done.
NO PLAY”
“
• Examine the content. You can only play supported format.
• The system may have a problem. Switch off the system and
then switch on again.
“NO SIGNAL”
• The station cannot be received. Adjust the antenna.
PLAYERROR”
“
• You played an unsupported MP3 file. The system will skip
that track and play the next one.
REMOTE 1”
“
“REMOTE 2”
• The remote control and the main unit are using different
codes. Change the code of the remote control.
– When “REMOTE 1” is shown, press and hold [OK] and
[ ] for a minimum of 4 seconds.
– When “REMOTE 2” is shown, press and hold [OK] and
[USB/CD] for a minimum of 4 seconds.
“SCAN FAILED”
• Stations cannot be received. Adjust the antenna or do
manual tuning.
SOUND 1 NOT SET”
“
“SOUND 2 NOT SET”
“SOUND 3 NOT SET”
• You have not saved the sound effects into the sound
setting number.
USB OVER CURRENT ERROR”
“
• The USB device is using too much power. Disconnect the
USB device, switch off the system and then switch on
again.
®
device. Switch off the system
“
VBR”
• The system cannot show the remaining play time for
variable bit rate (VBR) tracks.
Remote control code
When other Panasonic equipment responds to the
remote control of this system, change the remote control
code for this system.
Preparation
Press [USB/CD] to select “CD”.
█ To set the code to “REMOTE 2”
1 Press and hold [CD] on the main unit and [USB/CD]
on the remote control.
“REMOTE 2” is shown.
2 Press and hold [OK] and [USB/CD] for a minimum of
4seconds.
█ To set the code to “REMOTE 1”
1 Press and hold [CD] on the main unit and [ ] on
the remote control.
“REMOTE 1” is shown.
2 Press and hold [OK] and [ ] for a minimum of
4seconds.
System memory reset
Reset the memory when the following situations occur:
• There is no response when buttons are pressed.
• You want to clear and reset the memory contents.
1 Disconnect the AC mains lead.
2 While you press and hold [1] on the main unit,
connect the AC mains lead again.
Continue to press and hold the button until
“–––––––––” is shown.
3 Release [1].
All the settings are set back to the factory preset.
It is necessary to set the memory items again.
Maintenance
To clean this system, wipe with a soft, dry cloth.
• Never use alcohol, paint thinner or benzine to clean this
system.
• Before using chemically treated cloth, read the
instructions that came with the cloth carefully.
13
13
TQBJ0979
Page 14

Specifications
offset printing
█ Amplifier section
RMS output power
Front Ch (both ch driven)
Total RMS power 40 W
20 W per channel (6 Ω), 1 kHz, 10% THD
█ Tuner, terminals section
Preset memory FM 30 stations
Frequency modulation (FM)
Frequency range
Antenna terminals 75 Ω (unbalanced)
Headphone jack
Terminal Stereo, 3.5 mm jack
87.50 MHz to 108.00 MHz (50 kHz step)
█ DAB+ section
DAB memories 20 channels
Frequency band (wavelength)
Band III 5A to 13F (174.928 MHz to 239.200 MHz)
Sensitivity *BER 4x10
Min requirement –98 dBm
DAB external antenna
Terminal F - Connector (75 Ω)
-4
█ Disc section
Disc played (8 cm or 12 cm)
MPEG-1 Layer 3, MPEG-2 Layer 3
Pick up
Wavelength 790 nm (CD)
NORSK
Bølgelengde 790 nm (CD)
Laserstyrke Ingen farlig stråling sendes ut
CD, CD-R/RW (CD-DA, MP3 )
█ USB section
USB port DC OUT 5V, 500 mA
USB standard USB 2.0 full speed
Media file format support MP3 (*.mp3)
USB device file system FAT12, FAT16, FAT32
█ Bluetooth
Version Bluetooth® Ver. 2.1 + EDR
Class Class 2
Supported profiles A2DP, AVRCP
Operating frequency 2.4 GHz band FH-SS
Operation distance 10 m line of sight
®
section
█ Speaker section
Speaker unit(s)
Woofer 10 cm cone type x 1 per channel
Tweeter 6 cm cone type x 1 per channel
Impedance 6 Ω
Dimensions (W x H x D) 145 mm x 224 mm x 197 mm
Mass 1.9 kg
█ General
Power supply AC 220 V to 240 V, 50 Hz
Power consumption 17 W
Dimensions (W x H x D) 153 mm x 224 mm x 232 mm
Mass 1.4 kg
Operating temperature range 0°C to +40°C
Operating humidity range
Power consumption in standby mode
(With “BLUETOOTH STANDBY” set to “OFF”)
Power consumption in standby mode
(With “BLUETOOTH STANDBY” set to “ON”)
Note:
• Specifications are subject to change without notice.
Mass and dimensions are approximate.
• Total harmonic distortion is measured by the digital
spectrum analyser.
35% to 80% RH (no condensation)
0.3 W (approximate)
0.4 W (approximate)
TQBJ0979
14
14
Page 15

English
ENGLISH
offset printing
Declaration of Conformity (DoC)
Hereby, “Panasonic Corporation” declares that this
product is in compliance with the essential requirements
and other relevant provisions of Directive 1999/5/EC.
Customers can download a copy of the original DoC to
our R&TTE products from our DoC Server:
http://www.doc.panasonic.de
Contact to Authorised Representative: Panasonic
Marketing Europe GmbH, Panasonic Testing Centre,
Winsbergring 15, 22525 Hamburg, Germany
Ελληνικά
∆ήλωση συμμόρφωσης (DoC)
Με την παρούσα, η “Panasonic Corporation” δηλώνει ότι
το προϊόν αυτό είναι σύμφωνο με τις βασικές απαιτήσεις
και άλλες σχετικές διατάξεις της οδηγίας 1999/5/EC.
Οι πελάτες μπορούν να κατεβάσουν ένα αντίγραφο
τουπρωτοτύπου DoC για τα R&TTE προϊόντα μας από
τον DoC server μας:
http://www.doc.panasonic.de
Στοιχεία επικοινωνίας Eξουσιοδοτημένου Aντιπροσώπου:
Panasonic Marketing Europe GmbH, Panasonic Testing
Centre, Winsbergring 15, 22525 Hamburg, Γερμανία
Slovensko
Izjava o skladnosti (DoC)
S pričujočo izjavo podjetje “Panasonic Corporation”
izjavlja, da so svoji izdelki skladni s poglavitnimi
zahtevami in drugimi odgovarjajočimi predpisi direktive
1999/5/ES.
Stranka lahko naloži izvod izvirnega DoC o naših izdelkih
R&TTE s strežnika DoC:
http://www.doc.panasonic.de
Pooblaščeni zastopnik: Panasonic Marketing Europe
GmbH, Panasonic Testing Centre, Winsbergring 15,
22525 Hamburg, Nemčija
Slovensky
Vyhlásenie o zhode (DoC)
“Panasonic Corporation” týmto prehlasuje, že tento
výrobok je v zhode so základnými požiadavkami a ďalšími
príslušnými ustanoveniami smernice 1999/5/ES.
Zákazníci si môžu stiahnuť kópiu pôvodného DoC na
naše R&TTE výrobky z nášho servera DoC:
http://www.doc.panasonic.de
Kontakt na splnomocneného zástupcu: Panasonic
Marketing Europe GmbH, Panasonic Testing Centre,
Winsbergring 15, 22525 Hamburg, Nemecko
Português
Declaração de Conformidade (DoC)
Com o presente documento, a “Panasonic Corporation”
declara que este produto é conforme os requisitos
específicos e demais especificações referentes à
Directriz 1999/5/EC.
Os clientes podem baixar uma cópia da declaração de
conformidade (DoC) para nossos produtos R&TTE do
Server DoC:
http://www.doc.panasonic.de
Contacte o representante autorizado: Panasonic
Marketing Europe GmbH, Panasonic Testing Centre,
Winsbergring 15, 22525 Hamburg, Alemanha
Lietuviškai
Atitikties deklaracija (AD)
Bendrovė “Panasonic Corporation” patvirtina, kad šis
gaminys tenkina direktyvos 1999/5/EB esminius
reikalavimus ir kitas taikytinas nuostatas.
Mūsų R&TTE gaminių originalios atitikties deklaracijos
kopiją klientai gali atsisiųsti iš mūsų AD serverio:
http://www.doc.panasonic.de
Įgaliotojo atstovo adresas: “Panasonic Marketing Europe
GmbH”, Panasonic Testing Centre, Winsbergring 15,
22525 Hamburg, Vokietija
Norsk
Samsvarserklæring (DoC)
Herved erklærer “Panasonic Corporation” at dette
produktet samsvarer med de viktige kravene og andre
relevante deler av direktivet 1999/5/EC.
Kunder kan laste ned en kopi av det originale DoC til våre
R&TTE-produkter fra vår DoC-server:
http://www.doc.panasonic.de
Kontakt vår autoriserte representant: Panasonic
Marketing Europe GmbH, Panasonic Testing Centre,
Winsbergring 15, 22525 Hamburg, Tyskland
Eesti keel
Vastavusdeklaratsioon (DoC)
“Panasonic Corporation” kinnitab käesolevaga, et see
toode on vastavuses põhiliste nõuete ja muude direktiivi
1999/5/EÜ asjakohaste sätetega.
ndid saavad
Klie
originaalvastavusdeklaratsiooni koopia alla laadida meie
DoC serverist:
http://www.doc.panasonic.de
Võtke ühendust volitatud esindajaga: Panasonic
Marketing Europe GmbH, Panasonic Testing Centre,
Winsbergring 15, 22525 Hamburg, Germany
koopia meie R&TTE toodetele kehtiva
15
15
TQBJ0979
Page 16

Latviski
offset printing
Atbilstības deklarācija (DoC)
Kompānija “Panasonic Corporation” ar šo paziņo, ka šis
izstrādājums atbilst būtiskām prasībām un citām
saistošām Direktīvas 1999/5/EK prasībām.
Pircēji var lejupielādēt oriģinālo DoC kopiju mūsu R&TTE
izstrādājumos no mūsu DoC servera:
http://www.doc.panasonic.de
Lūdzam sazināties ar pilnvaroto parstāvi: Panasonic
Marketing Europe GmbH, Panasonic Testing Centre,
Winsbergring 15, 22525 Hamburg, Germany
Hrvatski
Deklaracija o podobnosti (DoC)
Ovime, “Panasonic Corporation” izjavljuje da je ovaj
proizvod udovoljava osnovnim zahtjevima i ostalim
relevantnim uvjetima Smjernice 1999/5/EC.
Kupci mogu preuzeti kopiju originalne DoC za naše
R&TTE proizvode s našeg DoC poslužitelja:
http://www.doc.panasonic.de
Obratite se ovlaštenom predstavniku: Panasonic
Marketing Europe GmbH, Panasonic Testing Centre,
Winsbergring 15, 22525 Hamburg, Njemačka
Български
Декларация за съответствие (DoC)
“Panasonic Corporation” декларира, че този продукт
съответства на съществените изисквания и другите
приложими разпоредби на Ди
Потребителите могат да свалят копие от оригиналните
DoC към нашите продуктите от типа R&TTE от
сървъра, на който се съхраняват DoC:
http://www.doc.panasonic.de
За контакт с оторизиран представител: Panasonic
Marketing Europe GmbH, Panasonic Testing Centre,
Winsbergring 15, 22525 Hamburg, Германия
Român
Declaraţie de Conformitate (DoC)
Prin prezenta, societatea “Panasonic Corporation”
declară că produsul este conform cu cerinţele esenţiale şi
cu alte norme corespunzătoare Directivei 1999/5/EC.
Clienţii pot descărca o copie a DoC-ului original al
produselor noastre R&TTE de la adressa noastră DoC din
Internet:
http://www.doc.panasonic.de
Contact la Reprezentanţa autorizată: Panasonic
Marketing Europe GmbH, Panasonic Testing Centre,
Winsbergring 15, 22525 Hamburg, Germania
Magyar
Megfelelőségi Nyilatkozat (DoC)
Ezennel a, “Panasonic Corporation” kijelenti, hogy a jelen
termék kielégíti az 1999/5/EK Irányelv létfontosságú
követelményeit és más vonatkozó rendelkezéseit.
A vásárlók letölthetik az R&TTE termékek eredeti DoC
másolatát a DoC szerverünkrő
://www.doc.panasonic.de
tp
ht
Forduljon a hivatalos márkaképviselethez: Panasonic
Marketing Europe GmbH, Panasonic Testing Centre,
Winsbergring 15, 22525 Hamburg, Németország
ректива 1
l:
999/5/EC.
Türkçe
Uygunluk Beyanı (DoC)
“Panasonic Corporation” işbu belge ile bu ürünün
1999/5/EC sayılı Direktif'in temel gereklerine ve diğer ilgili
hükümlerine uygun olduğunu beyan etmektedir.
Müşterilerimiz R&TTE ürünlerimizle ilgili orijinal DoC
belgesinin bir kopyasını DoC sunucumuzdan indirebilir:
http://www.doc.panasonic.de
Yetkili Temsilci ile temasa geçin: Panasonic Marketing
Europe GmbH, Panasonic Testing Centre,
Winsbergring 15, 22525 Hamburg, Germany
TQBJ0979
16
16
Page 17
References
ENGLISH
offset printing
About Bluetooth
Panasonic bears no responsibility for data and/or
information that can possibly be compromised during a
wireless transmission.
Frequency band
• This system uses the 2.4 GHz frequency band.
Certification
• This system conforms to the frequency restrictions and
has received certification based on frequency laws.
Thus, a wireless permit is not necessary.
• The actions below are punishable by law:
– Taking apart or modifying the main unit.
– Removing specification indications.
Restrictions of use
• Wireless transmission and/or usage with all Bluetooth
equipped devices is not guaranteed.
• All devices must conform to standards set by
Bluetooth SIG, Inc.
• Depending on the specifications and settings of a
device, it can fail to connect or some operations can be
different.
• This system supports Bluetooth
depending on the operating environment and/or
settings, this security is possibly not sufficient.
Transmit data wirelessly to this system with caution.
• This system cannot transmit data to a Bluetooth
device.
Range of use
• Use this device at a maximum range of 10 m.
• The range can decrease depending on the
environment, obstacles or interference.
Interference from other devices
• This system may not function properly and troubles
such as noise and sound jumps may arise due to radio
wave interference if this unit is located too close to
other Bluetooth
2.4 GHz band.
• This system may not function properly if radio waves
from a nearby broadcasting station, etc. is too strong.
Intended usage
• This system is for normal, general use only.
• Do not use this system near an equipment or in an
environment that is sensitive to radio frequency
interference (example: airports, hospitals, laboratories,
etc.).
®
®
security features. But
®
®
devices or the devices that use the
Disposal of Old Equipment and Batteries
Only for European Union and countries with recycling
systems
These symbols on the products, packaging,
and/or accompanying documents mean that
used electrical and electronic products and
batteries must not be mixed with general
household waste.
For proper treatment, recovery and recycling
of old products and used batteries, please
take them to applicable collection points in
accordance with your national legislation.
By disposing of them correctly, you will help
to save valuable resources and prevent any
potential negative effects on human health
and the environment.
For more information about collection and
recycling, please contact your local
municipality.
®
Penalties may be applicable for incorrect
disposal of this waste, in accordance with
national legislation.
Note for the battery symbol (bottom
symbol):
This symbol might be used in combination
with a chemical symbol. In this case it
complies with the requirement set by the
Directive for the chemical involved.
Licenses
®
The Bluetooth
trademarks owned by Bluetooth SIG, Inc. and any use
of such marks by Panasonic Corporation is under
license. Other trademarks and trade names are those of
their respective owners.
MPEG Layer-3 audio coding technology licensed from
Fraunhofer IIS and Thomson.
word mark and logos are registered
17
17
TQBJ0979
Page 18
Zakupione urządzenie może różnić się od przedstawionego
offset printing
na ilustracjach.
Niniejsza instrukcja obsługi ma zastosowanie do
następującego zestawu.
Zestaw
Urządzenie główne
Głośniki
Symbole na tym produkcie (włącznie z akcesoriami)
oznaczają, co następuje:
Z SIECI PRĄDU PRZEMIENNEGO
Sprzęt klasy II (konstrukcja urządzenia
zapewnia podwójną izolację).
WŁ
Gotowość
Dostarczone wyposażenie
Sprawdzić i znaleźć poszczególne elementy dostarczonego
wyposażenia.
1 Przewód zasilania
1 Antena DAB
1 Pilot zdalnego sterowania
(N2QAYB000984)
Spis treści
Dostarczone wyposażenie. . . . . . . . . . . . . . . . . . . . . . 2
Środki ostrożności . . . . . . . . . . . . . . . . . . . . . . . . . . . . 2
Podłączenie . . . . . . . . . . . . . . . . . . . . . . . . . . . . . . . . . 3
Rozmieszczenie głośników . . . . . . . . . . . . . . . . . . . . . 3
Opis elementów sterowania . . . . . . . . . . . . . . . . . . . . 4
Przygotowanie pilota zdalnego sterowania . . . . . . . . 4
Przygotowanie multimediów . . . . . . . . . . . . . . . . . . . . 5
Odtwarzanie multimediów. . . . . . . . . . . . . . . . . . . . . . 6
DAB+ . . . . . . . . . . . . . . . . . . . . . . . . . . . . . . . . . . . . . . 8
Radio . . . . . . . . . . . . . . . . . . . . . . . . . . . . . . . . . . . . . . 9
Zegar i timer . . . . . . . . . . . . . . . . . . . . . . . . . . . . . . . . 10
Efekty dźwiękowe . . . . . . . . . . . . . . . . . . . . . . . . . . . 11
Inne . . . . . . . . . . . . . . . . . . . . . . . . . . . . . . . . . . . . . . . 11
Rozwiązywanie problemów. . . . . . . . . . . . . . . . . . . . 12
Konserwacja. . . . . . . . . . . . . . . . . . . . . . . . . . . . . . . . 13
TQBJ0979
Dane techniczne . . . . . . . . . . . . . . . . . . . . . . . . . . . . 14
2
Odnośniki . . . . . . . . . . . . . . . . . . . . . . . . . . . . . . . . . . 15
18
SC-
PM602
SA-
PM602
SB-PM500
Środki ostrożności
OSTRZEŻENIE!
Urządzenie
• Aby ograniczyć niebezpieczeństwo pożaru, porażenia
prądem lub uszkodzenia urządzenia,
– Nie należy wystawiać urządzenia na działanie
deszczu, wilgoci, kapanie lub zachlapanie.
– Na urządzeniu nie należy umieszczać żadnych
przedmiotów napełnionych płynami, np. dzbanków.
– Należy stosować tylko zalecane akcesoria.
– Nie zdejmować pokrywy.
– Użytkownik nie powinien podejmować się naprawy
urządzenia na własną rękę. Serwis należy zlecić w
autoryzowanym punkcie serwisowym.
– Należy uważać, aby do wnętrza urządzenia nie
dostały się metalowe przedmioty.
UWAGA!
Urządzenie
• Aby ograniczyć niebezpieczeństwo pożaru, porażenia
prądem lub uszkodzenia urządzenia,
– Niniejszego urządzenia nie należy instalować lub
umieszczać w biblioteczce, wbudowanej szafce lub
innej ograniczonej przestrzeni. Należy zapewnić
odpowiednią wentylację urządzenia.
– Nie zasłaniaj otworów wentylacyjnych urządzenia
gazetami, obrusami, zasłonami i podobnymi
przedmiotami.
– Nie umieszczać na urządzeniu źródeł otwartego
ognia, jak np. zapalone świece.
• Urządzenie jest przeznaczone do używania w klimacie
umiarkowanym.
• To urządzenie może odbierać zakłócenia wywołane
użyciem telefonu komórkowego. Jeżeli takie
zakłócenia wystąpią, wskazane jest zwiększenie
odległości pomiędzy urządzeniem a telefonem
komórkowym.
• Urządzenie wykorzystuje promień lasera. Sterowanie,
regulacje lub postępowanie w sposób tutaj nie
określony grozi niebezpiecznym naświetleniem
promieniami lasera.
Przewód zasilania
•Wtyczka przewodu sieciowego umożliwia odłączenie
zasilania urządzenia. Urządzenie należy zamontować w
sposób umożliwiający szybkie wyjęcie wtyczki z
gniazda zasilania.
Bateria
• Istnieje niebezpieczeństwo wybuchu w przypadku, gdy
baterie zostaną nieprawidłowo założone. Baterie należy
wymieniać na takie same lub na baterie
równorzędnego typu, zalecane przez producenta.
• Zużyte baterie należy odpowiednio zutylizować.
Właściwą metodę powinny wskazać władze lokalne.
• Nie zbliżać baterii do źródeł ciepła lub ognia.
• Baterii nie należy pozostawiać przez dłuższy czas, w
pojeździe z zamkniętymi drzwiami i oknami, narażonym
na bezpośrednie promieniowanie słoneczne.
• Nie wolno zwierać biegunów baterii ani jej rozbierać.
• Nie ładować baterii alkalicznych ani manganowych.
• Nie wolno używać baterii, z których została zdjęta
warstwa ochronna.
• Jeśli pilot ma nie być używany przez dłuższy czas,
należy wyjąć z niego baterię. Przechowywać w
chłodnym, ciemnym miejscu.
Page 19

Podłączenie
3
2
1
Taśma klejąca
(nie należy do
wyposażenia)
B
A
Czerwony
Czarny
Do domowego
gniazdka
zasilającego
POLSKI
offset printing
Przewód zasilania podłączyć do gniazdka sieciowego
dopiero po wykonaniu wszystkich pozostałych połączeń.
(6:)
(6:)
1
Podłącz antenę DAB.
Należy dokładnie dokręcić nakrętkę.
3
Podłącz przewód zasilania.
Nie stosować przewodów zasilania, pochodzących z
innych urządzeń.
Oszczędzanie energii
System pozostając w trybie spoczynku zużywa małą
moc (
Z
„Dane techniczne”). Gdy system nie jest
używany, należy go odłączać od zasilania.
Po odłączeniu systemu od zasilania niektóre ustawienia
zostaną utracone. Konieczne będzie ich ponowne
ustawienie.
Rozmieszczenie głośników
Nie używać innych zasilaczy antenę DAB za wyjątkiem
dołączonego.
W przypadku słabego odbioru należy zastosować
antenę zewnętrzną.
2
Podłącz głośniki.
Uważaj, aby nie
krzyżować (zwierać) lub
odwracać polaryzacji
przewodów głośnikowych,
gdyż można w ten sposób
uszkodzić głośniki.
Zestawy głośnikowe lewy i prawy są identyczne.
Prosimy używać tylko zestawów głośnikowych
znajdujących się w wyposażeniu.
Użycie innych zestawów głośnikowych grozi uszkodzeniem
urządzenia i pogorszeniem jakości dźwięku.
Uwaga:
• Aby zapewnić odpowiednią wentylację, należy zachować
przynajmniej 10 mm odstępu między zestawami
głośnikowymi a urządzeniem głównym.
• Zestawy głośnikowe należy ustawić na płaskim, stabilnym
podłożu.
• Niniejsze zestawy głośnikowe nie mają ekranu
magnetycznego. Nie należy ich umieszczać w pobliżu
odbiorników telewizyjnych, komputerów ani innych
urządzeń wrażliwych na oddziaływanie pola
magnetycznego.
• Długotrwałe odtwarzanie przy dużym poziomie głośności
może spowodować uszkodzenia zestawów głośnikowych i
skrócić jego żywotność.
• Aby uniknąć uszkodzenia urządzenia, w następujących
przypadkach należy zmniejszyć głośność:
– W przypadku zniekształcenia dźwięku.
– Podczas regulacji brzmienia dźwięku.
• Aby zapobiec uszkodzeniu zestawów głośnikowych,
proszę nie dotykać stożków głośnikowych, jeśli siatki
zostały ściągnięte.
UWAGA!
•
Zestawów głośnikowych należy używać wyłącznie z
zalecanym systemem. W przeciwnym wypadku może
dojść do uszkodzenia wzmacniacza, zestawów
głośnikowych i do pożaru. W przypadku uszkodzenia
urządzenia lub nagłej zmiany w jakości odtwarzania
należy zwrócić się po radę do wykwalifikowanego
specjalisty.
•
W celu podłączenia zestawów głośnikowych należy
zastosować procedury opisane w niniejszej instrukcji.
TQBJ0979
3
19
Page 20

Opis elementów sterowania
(
nie należy do
wyposażenia
)
offset printing
Opisane procedury należy wykonać za pomocą pilota zdalnego sterowania. Można również użyć przycisków na panelu
przednim urządzenia, jeśli są identyczne.
A Przełącznik „STANDBY/ON”
Naciśnij ten przycisk, aby wyłączyć urządzenie
(przełączyć je w stan gotowości) lub włączyć je z
powrotem. W stanie gotowości urządzenie nadal
pobiera pewną niewielką moc.
B
Wybór źródła audio
Na urządzeniu głównym:
Aby rozpocząć parowanie Bluetooth
przytrzymaj [ –PAIRING].
C Podstawowe elementy sterowania odtwarzaniem
D Wyświetl menu konfiguracji
E Wyświetl zawartość
F Wybierz lub potwierdź opcję
G Otwieranie lub zamykanie kieszeni napędu płyt
H
Zmniejszanie jasności wyświetlacza
Ponownie naciśnij przycisk, aby anulować wybór.
I Dostosuj poziom głośności
J
Wycisz dźwięk
Ponownie naciśnij przycisk, aby anulować wybór.
„MUTE” można wyłączyć również przez regulowanie
głośności lub wyłączając system.
K Wyświetlenie menu odtwarzania
L Wybór charakterystykę dźwięku
M Wyświetlacz
N
Czujnik zdalnego sterowania
Odległość: W granicach około 7 m
TQBJ0979
Kąt: W przybliżeniu 20° w pionie, 30° w poziomie
4
20
[`], [1]
®
, naciśnij i
O
Gniazdo słuchawek (
Typ wtyku: o średnicy Ø 3,5 mm, stereo (nie należy do
– Nadmierne ciśnienie akustyczne dźwięku
– Głośne słuchanie przez dłuższy okres czasu może
wyposażenia)
wydobywającego się ze słuchawek czy słuchawek
nagłownych może powodować utratę słuchu.
doprowadzić do uszkodzeń w uchu wewnętrznym.
)
P Gniazdo USB ( )
Q Kieszeń napędu płyt
Przygotowanie pilota zdalnego
sterowania
Należy stosować baterie alkaliczne lub manganowe.
Załóż baterię tak, aby jej bieguny (+ i –) były zgodne z
oznaczeniami wewnątrz obudowy pilota zdalnego
sterowania.
Page 21

Przygotowanie multimediów
POLSKI
offset printing
Płyty kompaktowe
1
Naciśnij [CDx] (urządzenie główne: [xOPEN/CLOSE]),
aby otworzyć kieszeń napędu płyt.
Włóż płytę etykietą do góry.
Naciśnij ponownie, aby zamknąć kieszeń napędu płyt.
2
Naciśnij [USB/CD], aby wybrać „CD”.
USB
1
Zmniejszyć poziom głośności i podłącz urządzenie
USB do gniazda USB.
Przytrzymać główne urządzenie podczas podłączania
lub rozłączania urządzenia USB.
2
Naciśnij [USB/CD], aby wybrać „USB”.
Uwaga:
Nie należy używać przedłużacza USB. Nie są obsługiwane
urządzenia USB podłączane za pomocą przewodu.
Bluetooth
Można podłączyć urządzenie audio bezprzewodowo za
pomocą funkcji Bluetooth
Przygotowanie
• Włącz funkcję Bluetooth® urządzenia i umieść je w
pobliżu systemu.
• Aby uzyskać szczegółowe informacje, patrz instrukcja
obsługi.
█ Parowanie urządzenia
Przygotowanie
Jeśli system jest podłączony do urządzenia Bluetooth®,
odłącz go (
1
Naciśnij [ ].
W przypadku wyświetlenia komunikatu „PAIRING”
przejdź do kroku 3.
2
Naciśnij [PLAY MENU], aby wybrać „PAIRING”
następnie naciśnij [OK].
Lub naciśnij i przytrzymaj [ –PAIRING] na urządzeniu
głównym, dopóki nie zostanie wyświetlony symbol
„PAIRING”.
3
Wybierz w menu Bluetooth® urządzenia opcję
„SC-PM602”.
W przypadku wyświetlenia monitu o hasło wprowadź
„0000”.
Urządzenie łączy się automatycznie z tym systemem po
zakończeniu parowania.
Nazwa podłączonego urządzenia jest wyświetlona przez
kilka sekundy.
Uwaga:
Z systemem można sparować do 8 urządzeń. W przypadku
sparowania dziewiątego urządzenia to, które najdłużej nie było
używane zostanie zastąpione.
®
®
i odtwarzać na nim.
Z
„Rozłączanie urządzenia”).
█ Podłączanie urządzenia
Przygotowanie
Jeśli system jest podłączony do urządzenia Bluetooth®,
odłącz go (
1
2
3
Uwaga:
• W celu podłączenia urządzenie należy sparować.
• Urządzenie może połączyć się z tylko jednym urządzeniem
• W przypadku wybrania jako źródła
Z
„Rozłączanie urządzenia”).
Naciśnij [ ].
Wyświetlony zostanie symbol „BLUETOOTH READY”.
Wybierz w menu Bluetooth® urządzenia opcję
„SC-PM602”.
Nazwa podłączonego urządzenia jest wyświetlona przez
kilka sekundy.
Rozpocznij odtwarzanie na urządzeniu.
w danym momencie.
automatycznie próbuje połączyć się z ostatnim
podłączonym urządzeniem. (Podczas tej czynności będzie
wyświetlony komunikat „LINKING”.)
„BLUETOOTH”
system
█ Rozłączanie urządzenia
1
Naciśnij [ ].
2
Naciśnij [PLAY MENU] wielokrotnie, aby wybrać
„DISCONNECT?”.
3
Naciśnij [R,T], aby wybrać „OK? YES” następnie
naciśnij [OK].
Wyświetlony zostanie symbol „BLUETOOTH READY”.
Aby anulować, wybierz „OK? NO”.
Korzystanie z urządzenia głównego
Naciśnij i przytrzymaj [ –PAIRING] do chwili
wyświetlenia komunikatu „PAIRING”.
Uwaga:
Urządzenie zostanie odłączone, gdy:
• Zostanie wybrane inne źródło.
• Urządzenie zostanie przemieszczone poza maksymalny
zasięg sygnału.
• Transmisja Bluetooth
• System lub urządzenie zostanie wyłączone.
®
urządzenia zostanie wyłączona.
TQBJ0979
5
21
Page 22

Odtwarzanie multimediów
Numer
albumu
Numer
utworu
offset printing
Następujące symbole wskazują dostępność funkcji.
CD
: Płyta CD-R/RW w formacie CD-DA lub z
USB
BLUETOOTH
Odtwarzanie podstawowe
CD USB BLUETOOTH
Odtwarzanie Naciśnij [4/9].
Zatrzymać Naciśnij [8].
Przerywanie Naciśnij [4/9].
Pomiń Naciśnij [2/3] lub [5/6], aby
Szukaj Naciśnij i przytrzymaj [2/3] lub
Uwaga:
W zależności od urządzenia Bluetooth® niektóre operacje mogą
nie być dostępne.
Wyświetlanie dostępnych informacji
CD USB BLUETOOTH
Dostępne informacje można wyświetlać na panelu
wyświetlacza.
Naciśnij [DISPLAY].
Uwaga:
• Maksymalna liczba wyświetlanych znaków:
• Urządzenie obsługuje etykiety w formacie 1.0, 1.1 i 2.3 ID3.
• Dane tekstowe nieobsługiwane przez system mogą być
• Przykład: Wyświetlanie albumu MP3 i numeru utworu.
plikami MP3.
: Urządzenie USB z plikami MP3.
:Urządzenie Bluetooth®.
USB
Położenie zostanie zapamiętane.
Wyświetlony zostanie symbol „RESUME”.
Naciśnij ponownie, aby całkowicie
zatrzymać.
Naciśnij ponownie, aby kontynuować
odtwarzanie.
pominąć utwór.
CD USB
Naciśnij [R,T], aby pominąć album MP3.
[
5/6
].
wyświetlane odmiennie.
około 32
Menu odtwarzania
CD USB
1
Naciśnij [PLAY MENU] wielokrotnie, aby wybrać
„PLAYMODE” lub „REPEAT”.
2
Naciśnij [R,T], aby wybrać ustawienie, a następnie
naciśnij [OK].
PLAYMODE
OFF
PLAYMODE
1-TRACK
1
1-ALBUM
1
RANDOM
RND
1-ALBUM
RANDOM
1 RND
REPEAT
OFF REPEAT Anuluj ustawienie.
ON REPEAT Odtwarzanie z powtórzeniem.
Uwaga:
• Podczas odtwarzania w losowej kolejności nie można
przejść do utworów poprzednio odtworzonych.
• Ustawienie to zostanie anulowane z chwilą otwarcia
napędu płyt lub odłącz urządzenie USB.
Anuluj ustawienie.
Odtwarzanie jeden wybrany utwór.
Naciśnij [2/3] lub [5/6], aby
wybrać utwór.
Odtwarzanie jednego wybranego
albumu MP3.
R,T
Naciśnij [
], aby wybrać album MP3.
Odtwarzanie losowo wszystkich
utworów.
Odtwarzanie losowo wszystkich
utworów w jednym wybranym albumie
MP3.
R,T
Naciśnij [
], aby wybrać album MP3.
TQBJ0979
6
22
Page 23

Tryb połączenia
(
tryb domyślny
)
POLSKI
offset printing
BLUETOOTH
Tryb połączenia można zmienić, aby dostosować do rodzaju
połączenia.
Przygotowanie
Jeśli system jest podłączony do urządzenia Bluetooth®,
odłącz go (
1
2
Uwaga:
• W zależności od urządzenia odtwarzany obraz i dźwięk
• W przypadku przerwana dźwięku wybierz „MODE 1”.
Z
„Rozłączanie urządzenia”).
Naciśnij [PLAY MENU] wielokrotnie, aby wybrać
„LINK MODE”.
Naciśnij [R,T], aby wybrać tryb, a następnie naciśnij
[OK].
MODE 1 Nacisk położony na możliwość
MODE 2
(tryb domyślny)
może nie być zsynchronizowany. W takim przypadku
należy wybrać
połączenia.
Nacisk położony na jakość dźwięku.
„MODE 1”
.
Poziom sygnału wejściowego
BLUETOOTH
Można zmienić ustawienie poziomu sygnału wejściowego,
jeżeli poziom wejścia audio transmisji Bluetooth
niski.
1
Naciśnij [PLAY MENU] wielokrotnie, aby wybrać
„INPUT LEVEL”.
2
Naciśnij [R,T], aby wybrać poziom, a następnie
naciśnij [OK].
®
jest zbyt
█ Uwaga dotycząca płyty
• Urządzenie może odtwarzać płyty CD-R/RW z
zawartością CD-DA lub MP3.
• Przed odtwarzaniem, należy sfinalizować dysk na
urządzeniu, na którym był nagrywany.
• Niektóre płyty CD-R/RW mogą nie być odtwarzane z
powodu złego stanu nagrania.
█ Uwaga dotycząca urządzenia USB
• To urządzenie obsługuje tryb pracy USB 2.0 „full
speed”.
• To urządzenie może obsługiwać urządzenia USB o
pojemności do 32 GB.
• Obsługiwany jest tylko system plików FAT 12/16/32.
█ Uwaga dotycząca pliku MP3
• Pliki są zdefiniowane jako utwory i foldery są
zdefiniowane jako album.
• Utwory powinny mieć rozszerzenie
• Utwory nie zawsze odtwarzane są w kolejności
nagrywania.
• Niektóre pliki mogą nie być obsługiwane z powodu
wielkości sektora.
Plik MP3 na płycie
• Urządzenie może odtwarzać do:
– 255 albumów (włącznie z folderem nadrzędnym)
– 999 utworów
– 20 sesji
• Płyty muszą być zgodne ze standardem ISO9660
poziom 1 lub 2 (z wyjątkiem formatów rozszerzonych).
Plik MP3 na urządzeniu USB
• Urządzenie może odtwarzać do:
– 800 albumów (włącznie z folderem nadrzędnym)
– 8000 utworów
– 999 utworów w jednym albumie
„.mp3” lub „.MP3”
.
Uwaga:
W przypadku zniekształcenia dźwięku wybierz
„LEVEL 0”
.
TQBJ0979
7
23
Page 24

DAB+
Blok
częstotliwości
Częstotliwość Jakość odbioru
0 (słaby) do 8 (doskonały)
offset printing
Przygotowanie
Naciśnij [RADIO], aby wybrać „DAB+”.
Uwaga:
Po wybraniu opcji „DAB+” po raz pierwszy system wykona
automatycznie dostrajanie.
Strojenie ręczne
1
Naciśnij [PLAY MENU] wielokrotnie, aby wybrać
„MANUAL SCAN”.
2
Naciśnij [R,T], aby wybrać blok częstotliwości, a
następnie naciśnij [OK].
Jeśli nie zostanie wykrywa żadna stacja, wyświetlony
zostanie komunikat „SCAN FAILED”.
Wyreguluj antenę i spróbuj ponownie.
Strojenie automatyczne
1
Naciśnij [PLAY MENU], aby wybrać „AUTOSCAN”, a
następnie naciśnij [OK].
Wyświetlony zostanie symbol „START?”.
2
Naciśnij [OK], aby rozpocząć programowanie.
Wyświetlony zostanie komunikat „DAB AUTO SCAN”.
Jeśli nie zostanie wykrywa żadna stacja, wyświetlony
zostanie komunikat „SCAN FAILED”.
Wykonaj strojenie ręczne.
Uwaga:
Po wykonaniu automatycznego strojenia zaprogramowane
częstotliwości zostają wykasowane.
Programowanie stacji
Można zapisać do 20 stacji.
1
Naciśnij [PLAY MENU] wielokrotnie, aby wybrać
„TUNE MODE”.
2
Naciśnij [R,T], aby wybrać „STATION”, a następnie
naciśnij [OK].
3
Naciśnij [2/3] lub [5/6], aby dostroić radio
do żądanej stacji.
4
Naciśnij [OK].
5
Naciśnij [R,T], aby wybrać zapisany numer, a
następnie naciśnij [OK].
Aby zaprogramować więcej stacji, wykonaj ponownie
kroki od 3 do 5.
Nowa stacja zastąpi wcześniej zaprogramowaną
znajdującą się pod tym samym numerem.
Uwaga:
Nie można zaprogramować stacji, gdy stacja nie nadaje lub jeśli
wybrano usługę dodatkową.
█
Wybieranie zaprogramowanej stacji
1
Naciśnij [PLAY MENU] wielokrotnie, aby wybrać
„TUNE MODE”.
2
Naciśnij [R,T], aby wybrać „PRESET” następnie
naciśnij [OK].
TQBJ0979
8
24
3
Naciśnij [2/3] lub [5/6], aby wybrać
zaprogramowaną stację.
Usługa dodatkowa
Gdy pokazywany jest komunikat „ ”, możesz słuchać
serwisów pomocniczych.
1
Naciśnij [PLAY MENU] wielokrotnie, aby wybrać
„DAB SECONDARY”.
2
Naciśnij [R,T], aby wybrać usługę dodatkową, a
następnie naciśnij [OK].
Aby anulować, wybierz „PRIMARY”.
Uwaga:
Gdy zostanie wybrana inna stacja, ustawienie zostaje anulowane.
Wyświetlanie dostępnych informacji
Następujące informacje można wyświetlać na panelu
wyświetlacza:
• Informacje o transmisji DAB
• Typ programu
• Etykieta zespołu
• Częstotliwość
•Czas
Naciśnij [DISPLAY].
Kontrola jakości sygnału
Możesz sprawdzić jakość sygnału podczas dostosowywania
anteny.
1
Naciśnij [PLAY MENU] wielokrotnie, aby wybrać
„SIGNAL QUALITY”, a następnie naciśnij [OK].
Wyświetlane jest pasmo częstotliwości a po nim jakość
odbioru.
Aby wybrać inne pasmo częstotliwości, naciśnij [
2
Naciśnij ponownie [OK], aby zakończyć.
R,T
Automatyczne dostosowywanie zegara
Możesz ustawić automatyczną aktualizację zegara.
1
Naciśnij [PLAY MENU] wielokrotnie, aby wybrać
„AUTO CLOCK ADJ”.
2
Naciśnij [R,T], aby wybrać „ON ADJUST” następnie
naciśnij [OK].
Aby anulować, wybierz „OFF ADJUST”.
].
Page 25

Radio
POLSKI
offset printing
Przygotowanie
Naciśnij [RADIO], aby wybrać „FM”.
Strojenie ręczne
1
Naciśnij [PLAY MENU] wielokrotnie, aby wybrać
„TUNE MODE”.
2
Naciśnij [R,T], aby wybrać „MANUAL” następnie
naciśnij [OK].
3
Naciśnij [2/3] lub [5/6], aby dostroić radio
do żądanej stacji.
Aby uruchomić automatyczne strojenie, należy nacisnąć
i przytrzymać ten przycisk, do momentu, gdy
wyświetlana częstotliwość zacznie szybko się zmieniać.
Podczas odbioru stereofonicznego w paśmie
wyświetlany zostanie symbol „STEREO”.
Programowanie stacji
Można zapisać do 30 stacji FM.
█ Automatyczne programowanie
1
Naciśnij [PLAY MENU], aby wybrać „A.PRESET”.
2
Naciśnij [R,T], aby wybrać ustawienie, a następnie
naciśnij [OK].
LOWEST Strojenie rozpocznie się od najniższej
CURRENT Strojenie rozpocznie się od aktualnej
Tuner zaprogramuje na kanałach, w rosnącej kolejności,
wszystkie stacje, które zdoła odebrać.
Aby anulować, naciśnij [
█ Ręczne programowanie stacji
1
Naciśnij [PLAY MENU] wielokrotnie, aby wybrać
„TUNE MODE”.
2
Naciśnij [R,T], aby wybrać „MANUAL” następnie
naciśnij [OK].
3
Naciśnij [2/3] lub [5/6], aby dostroić radio
do żądanej stacji.
4
Naciśnij [OK].
5
Naciśnij [R,T], aby wybrać zapisany numer, a
następnie naciśnij [OK].
Aby zaprogramować więcej stacji, wykonaj ponownie
kroki od 3 do 5.
Nowa stacja zastąpi wcześniej zaprogramowaną
znajdującą się pod tym samym numerem.
częstotliwości.
częstotliwości.
8
].
█ Wybieranie zaprogramowanej stacji
1
Naciśnij [PLAY MENU] wielokrotnie, aby wybrać
„TUNE MODE”.
2
Naciśnij [R,T], aby wybrać „PRESET” następnie
naciśnij [OK].
3
Naciśnij [2/3] lub [5/6], aby wybrać
zaprogramowaną stację.
Poprawy brzmienia dźwięku
1
Naciśnij [PLAY MENU] wielokrotnie, aby wybrać
„FM MODE”.
2
Naciśnij [R,T], aby wybrać „MONO” następnie
naciśnij [OK].
Aby anulować, wybierz „STEREO”.
Tryb „MONO” jest również anulowany z chwilą zmiany
częstotliwości.
Zapamiętanie nastawy
Przejdź do kroku 4 funkcji „Ręczne programowanie stacji”.
Kontrola sygnału wyjściowego
Naciśnij [DISPLAY], aby wybrać „FM STATUS”.
FM – – – – Sygnał FM jest w trybie mono.
FM ST Sygnał FM jest w trybie stereo.
FM MONO Tryb „MONO” jest wybrany jako
System nie jest dostrojony do żadnej stacji.
„FM MODE”.
Odbiór RDS
System ten może wyświetlać dane tekstowe nadawane
przez rozgłośnie radiowe (RDS) dostępne w niektórych
rejonach.
Naciśnij [DISPLAY] wielokrotnie.
PS Nazwa stacji
PTY Typ programu
FREQ Częstotliwość
Uwaga:
Wiadomości RDS mogą być niedostępne, jeżeli odbiór jest słaby.
TQBJ0979
9
25
Page 26

Zegar i timer
offset printing
Ustawianie zegara
Jest to zegar 24-godzinny.
1
Naciśnij [SETUP] wielokrotnie, aby wybrać „CLOCK”.
2
Naciśnij [R,T], aby ustawić godzinę, a następnie
naciśnij [OK].
Sprawdzanie godziny
Naciśnij [SETUP] wielokrotnie, aby wybrać „CLOCK”
następnie naciśnij [OK].
W trybie spoczynku naciśnij [DISPLAY].
Uwaga:
Zegar należy regularnie nastawiać, aby zawsze była ustawiona
dokładna godzina.
Timer odtwarzania
(Z wyjątkiem źródła sygnału Bluetooth®)
Timer można ustawić w taki sposób, aby o określonej
godzinie urządzenie włączało się i budziło użytkownika.
Przygotowanie
Ustaw zegar.
1
Naciśnij [SETUP] wielokrotnie, aby wybrać
„TIMER ADJ”.
2
Naciśnij [R,T], aby ustawić czas rozpoczęcia, a
następnie naciśnij [OK].
3
Powtórz krok 2, aby ustawić godzinę zakończenia.
4
Naciśnij [R,T], aby wybrać źródło, z którego chcesz
odtwarzać, a następnie naciśnij [OK].
Aby uaktywnić timer
1
Naciśnij [SETUP] wielokrotnie, aby wybrać
„TIMER SET”.
2
Naciśnij [R,T], aby wybrać „SET” następnie naciśnij
[OK].
Wyświetlony zostanie symbol „#”.
Aby anulować, wybierz „OFF”.
Aby timer działał, system musi być wyłączone.
Sprawdzanie ustawienia
Naciśnij [SETUP] wielokrotnie, aby wybrać „TIMER ADJ”
następnie naciśnij [OK].
W trybie spoczynku naciśnij dwukrotnie [DISPLAY].
Uwaga:
• Timer rozpoczyna odtwarzanie z niskim poziomem
głośności, który stopniowo rośnie do ustawionego
poziomu.
• Jeśli timer jest aktywny, zadziała codziennie o ustawionej
godzinie.
• W przypadku wyłączenia urządzenia a następnie włączenia
go ponownie podczas pracy timera, timer nie zatrzyma się
z chwilą upływu ustawionego czasu.
Timer wyłączający
Timer wyłącza system po upływie ustawionego czasu.
1
Naciśnij [SETUP] wielokrotnie, aby wybrać „SLEEP”.
2
Naciśnij [R,T], aby wybrać ustawienie (w minutach), a
następnie naciśnij [OK].
Aby anulować, wybierz „OFF”.
Uwaga:
• Co minutę zostaje na kilka sekund wyświetlony pozostały
czas. Gdy pozostaje już tylko 1 minuta wyświetlane jest
„SLEEP 1”.
• Timer wyłączający system może być używany łącznie z
timerem odtwarzania.
• Timer wyłączający ma zawsze priorytet. Należy pamiętać,
aby czasy timerów się nie nakładały.
TQBJ0979
10
26
Page 27

Efekty dźwiękowe
POLSKI
offset printing
1
Naciśnij [SOUND] wielokrotnie, aby wybrać efekt
dźwiękowy.
2
Naciśnij [R,T], aby wybrać ustawienie, a następnie
naciśnij [OK].
MY SOUND „SOUND 1”, „SOUND 2” lub „SOUND 3”
PRESET EQ „HEAVY” (tryb domyślny), „SOFT”,
BASS –4 do +4 (tryb domyślny: 0)
TREBLE –4 do +4 (tryb domyślny: 0)
D.BASS „ON D.BASS” (tryb domyślny) lub
SURROUND „ON SURROUND” lub „OFF SURROUND”
Uwaga:
Zmienione ustawienia zostaną, jeśli nie jest wskazane inaczej,
utrzymane do czasu kolejnej ich zmiany.
Zapisywanie ustawień dźwięku
Możesz zapisać bieżące efekty dźwiękowe (do 3
kombinacji).
Przygotowanie
Wybór charakterystykę dźwięku.
1
Naciśnij [SETUP], aby wybrać „SAVE MY SOUND”.
2
Naciśnij [R,T], aby wybrać numer ustawienia
dźwięku, a następnie naciśnij [OK].
Wyświetlony zostanie komunikat „SAVED”.
Nowe ustawienie zastępuje już istniejące o tym samym
numerze ustawienia.
Przywoływanie ustawienia
1
Naciśnij [SOUND], aby wybrać „MY SOUND”.
2
Naciśnij [R,T], aby wybrać numer ustawienia
dźwięku, a następnie naciśnij [OK].
Z
„Zapisywanie ustawień dźwięku”)
(
„CLEAR”, „VOCAL” lub „FLAT”
Korzystanie z urządzenia głównego
1. Naciśnij [BASS/TREBLE], aby wybrać
„BASS”
2. Naciśnij
Korzystanie z urządzenia głównego
1. Naciśnij [BASS/TREBLE], aby wybrać
2. Naciśnij
„OFF D.BASS”
Korzystanie z urządzenia głównego
Naciśnij [D.BASS] wielokrotnie.
(tryb domyślny)
.
[2/3] lub [5/6]
„TREBLE”
.
[2/3] lub [5/6]
.
.
Inne
Automatyczne wyłączanie
Urządzenie automatycznie wyłącza się po 20 minutach
bezczynności.
1
Naciśnij [SETUP] wielokrotnie, aby wybrać
„AUTO OFF”.
2
Naciśnij [R,T], aby wybrać „ON” następnie naciśnij
[OK].
Aby anulować, wybierz „OFF”.
Uwaga:
Funkcja nie działa, gdy źródłem jest radio lub gdy podłączone
jest urządzenie Bluetooth
Bluetooth® w trybie spoczynku
Ta funkcja automatycznie włącza urządzenie, gdy zostanie
nawiązane połączenie Bluetooth
urządzeniem.
1
Naciśnij [SETUP] wielokrotnie, aby wybrać
„BLUETOOTH STANDBY”.
2
Naciśnij [R,T], aby wybrać „ON” następnie naciśnij
[OK].
Aby anulować, wybierz „OFF”.
Sprawdzanie wersji oprogramowania
1
Naciśnij [SETUP] wielokrotnie, aby wybrać „SW VER.”
następnie naciśnij [OK].
Wyświetlana jest wersja oprogramowania.
2
Naciśnij ponownie [OK], aby zakończyć.
®
.
®
ze sparowanym
11
27
TQBJ0979
Page 28

Rozwiązywanie problemów
offset printing
Przed oddaniem urządzenia do naprawy należy
przeprowadzić następujące kontrole. W przypadku
wątpliwości, co do niektórych punktów kontrolnych lub jeśli
podane rozwiązania nie eliminują problemu, należy zwrócić
się po wskazówki do sprzedawcy.
█ Typowe problemy
Urządzenie nie działa.
• Został aktywowany system bezpieczeństwa. Wykonaj
następujące czynności:
1. Naciśnij [1] na panelu urządzenia głównego, aby
przełączyć je do trybu gotowości. Jeśli urządzenie nie
przechodzi do trybu gotowości,
– Naciśnij i przytrzymaj przycisk przynajmniej przez
10 sekundy. Lub,
– Odłącz przewód zasilania i podłącz go ponownie.
2. Naciśnij [1] ponownie, aby włączyć urządzenie. Jeśli
problem nie ustąpi, skonsultuj się z dystrybutorem.
Nie działa pilot zdalnego sterowania.
• Sprawdź, czy bateria została prawidłowo włożona.
Dźwięk jest zniekształcony lub brak dźwięku.
• Regulacja głośności systemu.
• Wyłącz urządzenie, określ i usuń przyczynę, a następnie
włącz urządzenie ponownie. Może to być spowodowane
przeciążeniem głośników wskutek nadmiernego poziomu
głośności, zbyt wysokiego zasilania lub użytkowania
systemu w warunkach, w których panuje zbyt wysoka
temperatura.
Podczas odtwarzania słychać buczenie.
• Blisko urządzenia znajdują się przewody zasilania prądem
przemiennym lub oświetlenie fluorescencyjne. Utrzymywać
przewody zasilania tego urządzenia z dala od innych
urządzeń lub przewodów zasilających.
█ Płyty kompaktowe
Błędne informacje na wyświetlaczu.
Nie uruchamia się odtwarzanie.
• Płyta nie została włożona prawidłowo. Włóż prawidłowo
płytę.
• Płyta jest zabrudzona. Wyczyść plytę.
• Użyj innej płyty, jeśli jest zarysowana, wygięta lub
niestandardowa.
• Nastąpiło skroplenie pary wodnej. Odczekaj 1 - 2 godzin,
aż skroplona para wodna odparuje z systemu.
█ USB
Nie można odczytać urządzenia USB lub jego zawartości.
• Format urządzenia USB lub jego zawartość nie jest
obsługiwana przez urządzenie.
• W niektórych przypadkach nie będą obsługiwane
urządzenia USB o pojemności większej niż 32 GB.
Powolne działanie urządzenia USB.
• Pliki o dużych rozmiarach lub urządzenia USB z dużą
ilością pamięci wymagają dłuższego czasu wczytywania.
Wyświetlany czas, który upłynął jest inny niż czas
rzeczywisty.
• Skopiuj dane do innego urządzenia USB lub utwórz kopię
zapasową danych i sformatuj urządzenia USB.
TQBJ0979
12
28
█ Radio/DAB+
Odbiór DAB+ jest słaby.
• Trzymaj antenę z dala od komputerów, telewizorów i innych
kabli i przewodów.
Zniekształcenia dźwięku.
• Użyj opcjonalnej anteny zewnętrznej. Montaż anteny należy
zlecić fachowcowi.
Słychać dudnienie.
• Wyłącz telewizor lub odsuń go od urządzenia.
• W przypadku występowania zakłóceń odsuń telefon
komórkowy od urządzenia.
█ Bluetooth
®
Nie można wykonać parowania.
• Sprawdź stan urządzenia Bluetooth®.
• Urządzenie znajduje się poza zasięgiem komunikacji
wynoszącym 10 m. Przemieść urządzenie bliżej systemu.
Nie można podłączyć urządzenia.
• Parowanie urządzenia zakończyło się niepowodzeniem.
Wykonaj ponownie parowanie.
• Sparowanie urządzenia zostało zastąpione. Wykonaj
ponownie parowanie.
• System może być połączony z innym urządzeniem. Odłącz
inne urządzenie i spróbuj powtórzyć parowanie urządzenia.
Urządzenie jest podłączone, ale nie można odsłuchiwać
dźwięku przez system.
• W przypadku niektórych wbudowanych urządzeń
Dźwięk z urządzenia jest przerywany.
• Urządzenie znajduje się poza zasięgiem komunikacji
• Usuń wszystkie przeszkody spomiędzy systemu i
• Zakłócenia powodują inne urządzenia używające pasma
• W celu zapewnienia stabilnej komunikacji wybierz
Odtwarzany obraz i dźwięk nie są zsynchronizowane.
• Uruchom ponownie aplikację do odtwarzania na
®
Bluetooth
„SC-PM602”
instrukcja obsługi.
wynoszącym 10 m. Przemieść urządzenie bliżej systemu.
urządzenia.
częstotliwości 2,4 GHz (router bezprzewodowy, kuchenki
mikrofalowe, telefony bezprzewodowe itp.). Przesuń
urządzenie bliżej systemu i oddal je od innych urządzeń.
„MODE 1”
urządzeniu.
należy ręcznie ustawić wyjście audio na
. Aby uzyskać szczegółowe informacje, patrz
.
█ Wyświetlacz urządzenia
„
--:--”
• Do urządzenia po raz pierwszy podłączono przewód
zasilania lub niedawno wystąpiła przerwa w zasilaniu.
Ustaw zegar.
„
ADJUST CLOCK”
• Zegar nie jest ustawiony. Wyreguluj zegar.
„
ADJUST TIMER”
• Timer odtwarzania nie jest ustawiony. Wyreguluj timer
odtwarzania.
„
AUTO OFF”
• Urządzenie było nieużywane przez 20 minut i zostanie
wyłączone w ciągu minuty. Aby anulować, naciśnij dowolny
przycisk.
„
ERROR”
• Wykonano niewłaściwą operację. Przeczytaj instrukcję i
spróbuj ponownie.
Page 29

„
POLSKI
offset printing
F61”
„
F77”
• Odłącz przewód zasilania i skonsultuj się z dystrybutorem.
„
F703”
• Sprawdź połączenie Bluetooth®.
• Odłącz urządzenie Bluetooth
następnie włącz je ponownie.
„
F76”
• Wystąpił problem z zasilaniem.
• Odłącz przewód zasilania i skonsultuj się z dystrybutorem.
„
NODEVICE”
• Nie podłączono zewnętrznego urządzenia USB. Sprawdź
połączenie.
„
NO DISC”
• Nie włożono płyty.
„NO MEMORY”
• Nie zostało przeprowadzone programowanie pamięci DAB.
„
NO PLAY”
• Sprawdź zawartość. Odtwarzać można wyłącznie utwory o
obsługiwanym formacie.
• System może napotkać problem. Wyłącz urządzenie, a
następnie włącz je ponownie.
„NO SIGNAL”
• Nie można odebrać sygnału stacji. Wyreguluj antenę.
„
PLAYERROR”
• Próba odtworzenia nieobsługiwanego pliku MP3.
Urządzenie pominie ten utwór i odtworzy następny.
„
REMOTE 1”
„
REMOTE 2”
• Pilot zdalnego sterowania i urządzenie używają różnych
kodów. Zmień kod na pilocie zdalnego sterowania.
– Gdy wyświetlony zostanie komunikat
naciśnij i przytrzymaj [OK] i
4 sekundy.
– Gdy wyświetlony zostanie komunikat
naciśnij i przytrzymaj [OK] i [USB/CD]
4 sekundy.
„SCAN FAILED”
• Odbieranie sygnału stacji niemożliwe. Wyreguluj antenę lub
wykonaj ręczne dostrajanie.
„SOUND 1 NOT SET”
„SOUND 2 NOT SET”
„SOUND 3 NOT SET”
• Efekty dźwiękowe nie zostały zapisane z podanym
numerem ustawienia.
„
USB OVER CURRENT ERROR”
• Urządzenie USB pobiera zbyt dużo prądu. Odłącz
urządzenie USB, wyłącz urządzenie, a następnie włącz je
ponownie.
„
VBR”
• Urządzenie nie może wyświetlić pozostałego czasu
odtwarzania dla utworów o zmiennej prędkości strumienia
bitów (VBR – variable bit rate).
®
. Wyłącz urządzenie, a
[]
„REMOTE 1”,
przynajmniej przez
„REMOTE 2”,
przynajmniej przez
Kod zdalnego sterowania
Jeśli na pilota zdalnego sterowania tego systemu reagują
inne urządzenia firmy Panasonic, należy zmienić kod
zdalnego sterowania dla tego systemu.
Przygotowanie
Naciśnij [USB/CD], aby wybrać „CD”.
█ Aby zmienić kod na „REMOTE 2”
1
Naciśnij i przytrzymaj [CD] na urządzeniu głównym i
[USB/CD] na pilocie zdalnego sterowania.
Wyświetlony zostanie symbol „REMOTE 2”.
2
Naciśnij i przytrzymaj [OK] i [USB/CD] przynajmniej
przez 4 sekundy.
█ Aby zmienić kod na „REMOTE 1”
1
Naciśnij i przytrzymaj [CD] na urządzeniu głównym i
[ ] na pilocie zdalnego sterowania.
Wyświetlony zostanie symbol „REMOTE 1”.
2
Naciśnij i przytrzymaj [OK] i [ ] przynajmniej przez
4 sekundy.
Resetowanie pamięci systemu
W przypadku wystąpienia poniższych objawów należy
zresetować pamięć urządzenia:
• Brak reakcji po naciśnięciu przycisków.
• Chęć wyczyszczenia i wyzerowania zawartości
pamięci.
1
Odłącz przewód zasilania.
2
Naciskając i przytrzymując [1] na urządzeniu
głównym, podłącz ponownie przewód zasilania.
Przytrzymuj wciśnięty przycisk dopóki nie zostanie
wyświetlony symbol „––––––––– ”.
3
Zwolnij [1].
Przywrócone zostaną wszystkie ustawiania fabryczne.
Konieczne będzie ponowne zaprogramowanie pamięci.
Konserwacja
W celu oczyszczenia urządzenia należy przetrzeć je
miękką, suchą szmatką.
• Do czyszczenia urządzenia nie należy stosować
alkoholu, rozcieńczalnika ani benzyny.
• Przed użyciem chusteczki nasączonej środkiem
chemicznym należy zapoznać się z dołączoną do niej
instrukcją.
13
29
TQBJ0979
Page 30

Dane techniczne
offset printing
█ Sekcja wzmacniacza
Moc wyjściowa RMS
Kanał przedni (przy użyciu obu kanałów)
Całkowita moc RMS 40 W
20 W na kanał (6
Ω
), 1 kHz, 10% THD
█ Sekcja tunera, złączy
Pamięć zaprogramowanych stacji
Modulacja częstotliwościowa (FM)
Zakres częstotliwości 87,50 MHz do 108,00 MHz
Gniazda antenowe 75
Gniazdo słuchawek
Złącze Stereo, złącze 3,5 mm
█
Sekcja DAB+
Pamięci DAB
Pasmo częstotliwości (długość fali)
Band
III
5A do 13F (174,928 MHz do 239,200 MHz)
Czułość *BER 4x10
Minimalne wymagania –98 dBm
Antena zewnętrzna DAB
Złącze Złącze F (75 Ω)
█
Sekcja odtwarzacza płyt CD
Odtwarzane płyty (8 cm lub 12 cm)
MPEG-1 Layer 3, MPEG-2 Layer 3
Przechwytywanie
Długość fali 790 nm (CD)
-4
CD, CD-R/RW (CD-DA, MP3 )
FM 30 stacji
(w krokach co 50 kHz)
Ω
(niezrównoważone)
20 kanałów
█ Sekcja USB
Gniazdo USB
Standard USB
Obsługiwane formaty plików multimedialnych
System plików urządzenia USB
wyjście DC (prąd stały) 5 V, 500 mA
USB 2.0 pełnej prędkości
MP3 (*.mp3)
FAT12, FAT16, FAT32
█ Sekcja Bluetooth
Wersja
Klasa
Obsługiwane profile
Częstotliwość robocza
Odległość robocza
®
Bluetooth® Ver. 2.1 + EDR
Klasa 2
A2DP, AVRCP
Pasmo 2,4 GHz FH-SS
10 m w linii widzenia
█ Zestawy głośnikowe
Głośnik
Niskotonowy 10 cm typu stożkowego x 1 na kanał
Wysokotonowy 6 cm typu stożkowego x 1 na kanał
Impedancja
Wymiary (szer. x wys. x głęb.)
Masa
145 mm x 224 mm x 197 mm
6
1,9 k
█ Dane ogólne
Zasilanie
Pobór mocy
Wymiary (szer. x wys. x głęb.)
Masa
Zakres temperatur roboczych
Zakres wilgotności roboczych
Pobór mocy w trybie gotowości
(Z ustawieniem „BLUETOOTH STANDBY” spoczynku
funkcji „OFF”)
Pobór mocy w trybie gotowości
(Z ustawieniem „BLUETOOTH STANDBY” spoczynku
funkcji „ON”)
Uwaga:
• Dane techniczne mogą ulec zmianie bez powiadomienia.
Masa i wymiary podane są w przybliżeniu.
• Wartość całkowitych zniekształceń harmonicznych została
zmierzona przy użyciu cyfrowego analizatora widma.
Prąd przemienny 220 V do 240 V, 50 Hz
17 W
153 mm x 224 mm x 232 mm
1,4 k
0°C do +40°C
35% do 80% RH (bez kondensacji)
0,3 W (około)
0,4 W (około)
Ω
g
g
TQBJ0979
14
30
Page 31

Odnośniki
POLSKI
offset printing
Licencje
Informacje o technologii Bluetooth
Firma Panasonic nie ponosi odpowiedzialności za dane
i informacje, które mogą zostać ujawnione podczas
transmisji bezprzewodowej.
Pasmo częstotliwości
• System korzysta z pasma częstotliwości 2,4 GHz.
Certyfikacja
• Niniejszy system jest zgodny z ograniczeniami
częstotliwości i otrzymał certyfikat na podstawie
przepisów dotyczących częstotliwości. W związku
z tym pozwolenie na transmisję bezprzewodową nie
jest konieczne.
• Wykonywanie poniższych czynności jest karalne na
mocy prawa:
– Demontaż lub modyfikowanie urządzenia głównego.
– Usuwanie etykiet z danymi technicznymi.
Ograniczenia użytkowania
• Nie ma gwarancji, że sprzęt będzie współpracował ze
wszystkimi urządzeniami Bluetooth
bezprzewodowa za ich pomocą będzie możliwa.
• Wszystkie urządzenia muszą być zgodne z normami
wyznaczonymi przez firmę Bluetooth SIG, Inc.
• W zależności od danych technicznych urządzenia oraz
dostępnych możliwości konfiguracji nawiązanie
połączenia może nie być możliwe lub mogą istnieć
różnice w zakresie wykonywania niektórych operacji.
• System obsługuje funkcje bezpieczeństwa zgodnie ze
standardem Bluetooth
środowiska użytkowania lub ustawień te
zabezpieczenia mogą być niewystarczające. Należy
zachować ostrożność podczas bezprzewodowej
transmisji danych do systemu.
• System nie oferuje możliwości transmisji danych do
urządzenia Bluetooth
Zasięg użytkowania
• Maksymalny zasięg użytkowania urządzenia to 10 m.
• Zasięg może zmniejszyć się w zależności od warunków
otoczenia, istniejących przeszkód i zakłóceń.
Zakłócenia powodowane przez inne urządzenia
• System może nie działać poprawnie lub mogą
występować problemy, takie jak skoki dźwięku
i głośności powodowane zakłóceniami fal radiowych,
jeśli urządzenie znajdzie się zbyt blisko innych
urządzeń Bluetooth
zpasma 2,4GHz.
• System może nie działać poprawnie, jeśli sygnał
radiowy np. z pobliskich stacji nadawczych jest zbyt
silny.
Przeznaczenie
• System jest przeznaczony tylko do ogólnego użytku
w normalnych warunkach.
• Nie należy używać urządzenia w pobliżu sprzętu lub
miejsc wykazujących wrażliwość na zakłócenia
częstotliwości radiowej (na przykład: lotnisk, szpitali,
laboratoriów, itd.).
®
. Jednak zależnie od
®
.
®
lub sprzętu korzystającego
®
®
ani że transmisja
Znak ze słowem i logo Bluetooth® są zastrzeżonymi
znakami towarowymi będącymi własnością Bluetooth SIG,
Inc., a firma Panasonic Corporation używa ich na mocy
licencji. Inne znaki towarowe i nazwy towarowe są
własnością odpowiednich posiadaczy.
Technologia kodowania dźwięku MPEG Layer-3 podlega
licencji firmy Fraunhofer IIS i Thomson.
Deklaracja zgodności
Niniejszym „
produkt jest zgodny z istotnymi wymaganiami i innymi
odnośnymi postanowieniami dyrektywy 1999/5/WE.
Klienci mogą pobrać oryginalną deklarację zgodności
naszych produktów z serwera deklaracji zgodności:
http://www.doc.panasonic.de
Kontakt się z autoryzowanym przedstawicielem: Panasonic
Marketing Europe GmbH, Panasonic Testing Centre,
Winsbergring 15, 22525 Hamburg, Niemcy
Utylizacja zużytych urządzeń i baterii
Dotyczy wyłącznie Unii Europejskiej i krajów z
systemami recyklingu
Panasonic Corporation
Niniejsze symbole umieszczane na produktach,
opakowaniach i/lub w dokumentacji
towarzyszącej oznaczają, że nie wolno mieszać
zużytych urządzeń elektrycznych i
elektronicznych oraz baterii z innymi odpadami
domowymi.
W celu zapewnienia właściwego przetwarzania,
utylizacji oraz recyklingu zużytych produktów i
baterii, należy oddawać je do wyznaczonych
punktów gromadzenia odpadów zgodnie z
przepisami prawa krajowego.
Prawidłowa utylizacja pomaga oszczędzać
cenne zasoby naturalne i zapobiegać
potencjalnemu negatywnemu wpływowi na
zdrowie człowieka oraz stan środowiska
naturalnego.
Więcej informacji o zbiórce oraz recyklingu
można otrzymać od władz lokalnych.
Za niewłaściwe pozbywanie się powyższych
odpadów mogą grozić kary przewidziane
przepisami prawa krajowego.
Dotyczy symbolu baterii (symbol na dole):
Ten symbol może występować wraz z
symbolem pierwiastka chemicznego. W takim
przypadku spełnia on wymagania Dyrektywy w
sprawie określonego środka chemicznego.
” deklaruje, że ten
15
31
TQBJ0979
Page 32

Váš systém a obrázky se mohou lišit.
offset printing
Tento návod k obsluze platí pro následující systém.
Systém SC-PM602
Hlavní přístroj SA-PM602
Reproduktory SB-PM500
Symboly na tomto výrobku (včetně příslušenství)
znamenají následující:
Střídavý proud
Zařízení třídy II (Konstrukce výrobku zahrnuje
dvojitou izolaci.)
Zapnuto
Pohotovostní režim
Dodávané příslušenství
Zkontrolujte si dodávané příslušenství.
1 Kabel síťového napájení (AC)
1 DAB anténa
1 Dálkové ovládání
(N2QAYB000984)
Obsah
Dodávané příslušenství . . . . . . . . . . . . . . . . . . . . . .2
Bezpečnostní upozornění. . . . . . . . . . . . . . . . . . . . .2
Provedení zapojení . . . . . . . . . . . . . . . . . . . . . . . . . .3
Umístění reprosoustavy . . . . . . . . . . . . . . . . . . . . . .3
Přehled ovládání . . . . . . . . . . . . . . . . . . . . . . . . . . . .4
Příprava dálkového ovladače. . . . . . . . . . . . . . . . . .4
Příprava médií. . . . . . . . . . . . . . . . . . . . . . . . . . . . . .5
Přehrávání médií. . . . . . . . . . . . . . . . . . . . . . . . . . . .6
DAB+ . . . . . . . . . . . . . . . . . . . . . . . . . . . . . . . . . . . . .8
Rádio . . . . . . . . . . . . . . . . . . . . . . . . . . . . . . . . . . . . .9
Hodiny a časovače . . . . . . . . . . . . . . . . . . . . . . . . .10
Zvukové efekty . . . . . . . . . . . . . . . . . . . . . . . . . . . .11
Další funkce . . . . . . . . . . . . . . . . . . . . . . . . . . . . . .11
Odstraňování závad . . . . . . . . . . . . . . . . . . . . . . . .12
Údržba. . . . . . . . . . . . . . . . . . . . . . . . . . . . . . . . . . .13
Specifikace . . . . . . . . . . . . . . . . . . . . . . . . . . . . . . .14
TQBJ0979
Reference . . . . . . . . . . . . . . . . . . . . . . . . . . . . . . . .15
2
32
Bezpečnostní upozornění
VAROVÁNÍ!
Přístroj
• Abyste snížili nebezpečí vzniku požáru, úrazu
elektrickým proudem nebo poškození přístroje:
– Nevystavujte tento přístroj dešti, nadměrné vlhkosti,
kapající vodě a postříkání.
– Na přístroj by neměly být umisťovány žádné objekty
naplněné vodou, jako jsou například vázy.
– Používejte pouze doporučené příslušenství.
– Neodstraňujte kryt přístroje.
– Nepokoušejte se přístroj opravit sami. Opravy
přenechejte kvalifikovaným pracovníkům servisu.
– Zabraňte vniknutí kovových předmětů do přístroje.
POZOR!
Přístroj
• Abyste snížili nebezpečí vzniku požáru, úrazu
elektrickým proudem nebo poškození přístroje:
– Abyste zajistili dobré ventilační podmínky, nikdy
neinstalujte tento přístroj v knihovně, vestavěné
skříni nebo jiném uzavřeném prostoru.
– Neblokujte ventilační otvory přístroje novinami,
ubrusy, závěsy a jinými materiály.
– Nepokládejte zdroje otevřeného ohně, jako například
hořící svíčky, na přístroj.
• Tento přístroj je konstruován pro použití v mírném
klimatu.
• Tento přístroj může být během používání rušen
rádiovou interferencí, která je způsobena mobilním
telefonem. Jestliže k takovéto interferenci dojde,
zajistěte větší vzdálenost mezi tímto přístrojem a
mobilním telefonem.
• Tento přístroj pracuje s laserovým paprskem. Při
nesprávném použití ovládacích prvků, stejně jako při
provádění jiných postupů, než které jsou popsány v
tomto návodu, může dojít k nebezpečnému vyzařování.
Kabel síťového napájení (AC)
• Zástrčka je zařízení k odpojení. Tento přístroj
nainstalujte tak, aby bylo možné napájecí kabel
okamžitě vypojit ze zásuvky.
Baterie
• V případě nesprávné výměny baterie hrozí nebezpečí
výbuchu. Vyměňujte pouze za typ baterie, který
doporučuje výrobce.
• Při likvidaci baterií se obraťte na místní úřady nebo na
prodejce a informujte se o správném způsobu
likvidace.
• Nevystavujte baterie teplu nebo ohni.
• Nenechávejte baterie v automobilu vystavené přímému
slunečnímu světlu po delší dobu, když jsou zavřené
dveře a okna.
• Nerozebírejte ani nezkratujte baterie.
• Nedobíjejte alkalické nebo manganové baterie.
• Nepoužívejte baterie, u nichž se loupe obal.
• Jestliže dálkové ovládání nebudete používat delší
dobu, vyjměte z něj baterie. Skladujte na chladném a
tmavém místě.
Page 33

Provedení zapojení
3
2
1
Izolační páska
(není v
příslušenství)
B
A
Červená
Černá
Do síťové
zásuvky
ČESKY
offset printing
Připojte síťové napájení až poté, co byla provedena
všechna ostatní zapojení.
(6:)
(6:)
1 Zapojte DAB anténu.
Ujistěte se, že jste matici řádně utáhli.
Nepoužívejte žádné jiné DAB anténa s výjimkou
dodaných.
Pokud je příjem špatný, použijte venkovní anténu.
2 Zapojte reproduktory.
Dejte pozor, abyste
nepřekřížili (nezkratovali)
či neobrátili polaritu
kabelů reproduktorů –
mohlo by dojít k jejich
poškození.
3 Zapojte kabel síťového napájení (AC).
Nepoužívejte kabely síťového napájení (AC) z jiných
zařízení.
Napájení
Systém v pohotovostním režimu spotřebovává malé
množství energie (Z„Specifikace“). Jestliže systém
nepoužíváte, napájení odpojte.
Některá nastavení se mohou po odpojení systému
ztratit. Musíte je nastavit znovu.
Umístění reprosoustavy
Levý a pravý reproduktor jsou stejné.
Používejte pouze reproduktory dodávané s přístrojem.
Jestliže použijete jiné reproduktory, můžete systém
poškodit a snížit kvalitu zvuku.
Poznámka:
• Reproduktory umístěte dále než 10 mm od hlavního
přístroje, kvůli ventilaci.
• Reproduktory umístěte na rovný bezpečný povrch.
• Tyto reproduktory nemají magnetické stínění. Neumisťujte
je do blízkosti TV, PC nebo jiného zařízení snadno
ovlivnitelného magnetismem.
• Dlouhodobé přehrávání při vysoké hlasitosti může
reproduktory poškodit a snížit jeho životnost.
• Proto snižte hlasitost, abyste předešli poškození systému:
– Když je zvuk zkreslený.
– Při nastavování kvality zvuku.
• Pokud jste sejmuli ochranou síťku, nedotýkejte se
reproduktorových kuželů, aby nedošlo k jejich poškození.
POZOR!
• Reproduktory používejte pouze s doporučovaným
systémem. Jinak, můžete poškodit zesilovač a
reproduktory a způsobit tak požář. Kontaktujte
kvalifikovaného servisního pracovníka, pokud došlo
k poškození nebo pokud vnímáte zjevnou změnu ve
výkonu přístroje.
• Při připojování reproduktorů postupujte podle zde
uvedených pokynů.
TQBJ0979
3
33
Page 34

Přehled ovládání
(není v příslušenství)
offset printing
Ovládejte dálkovým ovladačem. Jsou-li stejné, můžete rovněž použít tlačítka na hlavním přístroji.
A Tlačítko přepnutí do pohotovostního režimu/zapnutí
[`], [1]
Stisknutím tohoto tlačítka se přístroj zapíná z
pohotovostního režimu, nebo naopak vypíná. V
pohotovostním režímu přístroj stále spotřebovává
malé množství el. proudu.
B Volba zdroje zvuku
Na hlavním přístroji:
Pro zahájení párování Bluetooth
[ –PAIRING].
C Základní přehrávání
D Zobrazení nabídky nastavení
E Zobrazení obsahových informací
F Výběr nebo potvrzení možnosti
G Otevření/zavření zásuvky disku
H Snížení jasu displeje
Stiskněte tlačítko znovu pro zrušení.
I Nastavení úrovně hlasitosti
J Ztišení zvuku
Stiskněte tlačítko znovu pro zrušení.
Funkce ztlumení „MUTE“ se rovněž zruší, když
změníte hlasitost nebo když systém vypnete.
K Zobrazení nabídky přehrávání
L Volba zvukových efektů
M Panel displeje
N Snímač dálkového ovladače
Vzdálenost: Přibližně 7 m
TQBJ0979
Úhel: Přibližně 20° nahoru a dolů, 30° vlevo a vpravo
4
34
®
stiskněte a přidržte
O Konektor pro sluchátka ()
Typ konektoru: Stereofonní, souosý o průměru
– Příliš hlasitá reprodukce ze sluchátek může
způsobit ztrátu sluchu.
– Dlouhodobý poslech na maximální hlasitost může
poškodit sluch uživatele.
Ø 3,5 mm (není v příslušenství)
P USB port ( )
Q Zásuvka na disk
Příprava dálkového ovladače
Použijte alkalické nebo manganové baterie.
Vložte baterii tak, aby se póly (+ a –) shodovaly s těmi v
dálkovém ovladači.
Page 35

Příprava médií
ČESKY
offset printing
Disk
1 Stiskněte [CD x] (hlavní přístroj: [x OPEN/CLOSE])
pro otevření zásuvky disku.
Vložte disk, potiskem nahoru.
Chcete-li zavřít zásuvku, znovu stiskněte.
2 Stiskněte [USB/CD] pro výběr „CD“.
USB
1 Snižte hlasitost a připojte zařízení USB k USB portu.
Při připojování nebo odpojování zařízení USB
přidržujte hlavní jednotku.
2 Stiskněte [USB/CD] pro výběr „USB“.
Poznámka:
Nepoužívejte prodlužovací USB kabel. Systém nedokáže
rozpoznat paměťové zařízení USB připojené kabelem.
Bluetooth
Pomocí technologie Bluetooth® můžete bezdrátově
připojit zvukové zařízení a spustit jeho přehrávání.
Příprava
• Zapněte funkci Bluetooth
umístěte zařízení do blízkosti systému.
• Podrobnosti si přečtěte v návodu k použití příslušného
zařízení.
█ Párování zařízení
Příprava
Pokud je tento systém připojen k zařízení Bluetooth
odpojte jej (Z„Odpojení zařízení“).
1 Stiskněte [ ].
Je-li zobrazeno „PAIRING“, pokračujte krokem 3.
2 Stiskněte [PLAY MENU] pro výběr „PAIRING“ a
potom stiskněte [OK].
Nebo stiskněte a přidržte [ –PAIRING] na hlavním
přístroji, dokud se nezobrazí „PAIRING“.
3 Vyberte „SC-PM602“ v nabídce Bluetooth
Budete-li vyzváni k zadání klíče, zadejte „0000“.
Po dokončení párování se zařízení automaticky připojí
k tomuto systému.
Zobrazí se název připojeného zařízení po dobu na pár
sekund.
Poznámka:
S tímto systémem lze spárovat až 8 zařízení. Pokud spárujete
9. zařízení, toto zařízení nahradí dříve spárované zařízení,
které bylo nejdelší dobu nepoužito.
®
®
na příslušném zařízení a
®
,
®
zařízení.
█ Připojení zařízení
Příprava
Pokud je tento systém připojen k zařízení Bluetooth
odpojte jej (Z„Odpojení zařízení“).
®
,
1 Stiskněte [ ].
Zobrazí se „BLUETOOTH READY“.
2 Vyberte „SC-PM602“ v nabídce Bluetooth
Zobrazí se název připojeného zařízení po dobu na pár
sekund.
®
zařízení.
3 Spusťte přehrávání ze zařízení.
Poznámka:
• Před připojením musí být zařízení spárováno.
• Tento systém lze připojit pouze k jednomu zařízení
najednou.
• Je-li jako zdroj vybráno
automaticky pokusí připojit k naposledy připojenému
zařízení. („LINKING“ se zobrazuje během tohoto procesu.)
„BLUETOOTH“, systém se
█ Odpojení zařízení
1 Stiskněte [ ].
2 Opakovaně stiskněte [PLAY MENU] pro výběr
„DISCONNECT?“.
3 Stiskněte [R, T] pro výběr „OK? YES“ a potom
stiskněte [OK].
Zobrazí se „BLUETOOTH READY“.
Pro zrušení vyberte „OK? NO“.
Použití hlavního přístroje
Stiskněte a přidržte [ –PAIRING], dokud se nezobrazí
„PAIRING“.
Poznámka:
Zařízení se odpojí, když:
• Vyberete jiný udroj.
• Posunete zařízení mimo dosah.
• Vypnete přenos Bluetooth
• Vypnete systém nebo zařízení.
®
v zařízení.
TQBJ0979
5
35
Page 36

Přehrávání médií
Číslo alba Číslo
skladby
offset printing
Následující označení indikuje dostupnost příslušné
funkce.
CD : CD-R/RW ve formátu CD-DA nebo se
USB : USB zařízení se soubory MP3.
BLUETOOTH : Zařízení Bluetooth
Základní přehrávání
CD USB BLUETOOTH
Přehrávání Stiskněte [4/9].
Zastavení Stiskněte [8].
Pozastavení Stiskněte [4/9].
Přeskočit Stiskněte [2/3] nebo [5/6]
Hledat Stiskněte a přidržte [2/3] nebo
Poznámka:
V závislosti na zařízení Bluetooth
fungovat.
soubory MP3.
®
.
USB
Pozice je uložena do paměti.
Zobrazí se „RESUME“.
Znovu stiskněte pro úplné zastavení.
Pro pokračování přehrávání stiskněte
znovu.
pro přeskočení skladby.
CD USB
Stiskněte [R, T] pro přeskočení alba
MP3.
[5/6].
®
nemusí některé operace
Nabídka přehrávání
CD USB
1 Opakovaně stiskněte [PLAY MENU] pro výběr
„PLAYMODE“ nebo „REPEAT“.
2 Stiskněte [R, T] pro výběr nastavení a potom
stiskněte [OK].
PLAYMODE
OFF
PLAYMODE
1-TRACK
1
1-ALBUM
1
RANDOM
RND
1-ALBUM
RANDOM
1 RND
REPEAT
OFF REPEAT Zrušení nastavení.
ON REPEAT Opakované přehrávání.
Poznámka:
• Během náhodného přehrávání nelze přeskočit na již
přehrané skladby.
• Při otevření zásuvky disku nebo odpojte zařízení USB se
nastavení zruší.
Zrušení nastavení.
Přehraje jednu zvolenou skladbu.
Stiskněte [2/3] nebo [5/6]
pro výbìr skladby.
Přehraje jedno zvolené album MP3.
Stiskněte [R, T] pro výběr alba MP3.
Přehraje všechny skladby v náhodném
pořadí.
Přehraje všechny skladby na jednom
vybraném albu MP3 v náhodném
pořadí.
Stiskněte [R, T] pro výběr alba MP3.
Zobrazení dostupných informací
CD USB BLUETOOTH
Dostupné informace můžete zobrazit na displeji.
Stiskněte [DISPLAY].
Poznámka:
• Maximální počet znaků, které lze zobrazit: přibližně 32
• Tento systém podporuje verzi 1.0, 1.1 a 2.3 ID3 tagů.
• Textové údaje, které systém nepodporuje, se mohou
zobrazit odlišně.
• Příklad: Zobrazení čísla alba MP3 a čísla skladby.
TQBJ0979
6
36
Page 37

Režim spojení
(výchozí)
ČESKY
offset printing
BLUETOOTH
Můžete změnit režim spojení, aby vyhovoval příslušnému
typu připojení.
Příprava
Pokud je tento systém připojen k zařízení Bluetooth
odpojte jej (Z„Odpojení zařízení“).
®
,
1 Opakovaně stiskněte [PLAY MENU] pro výběr
„LINK MODE“.
2 Stiskněte [R, T] pro výběr režimu a potom
stiskněte [OK].
MODE 1 Důraz na konektivitu.
MODE 2
(výchozí)
Poznámka:
• V závislosti na zařízení nemusí být přehrávání obrazu a
zvuku synchronizované. V takovém případě vyberte
„MODE 1“.
• Vyberte
„MODE 1“, když je zvuk přerušeno.
Důraz na kvalitu zvuku.
Úroveň vstupu
BLUETOOTH
Pokud je úroveň zvukového vstupu přenosu Bluetooth®
příliš nízká, můžete změnit nastavení úrovně vstupu.
1 Opakovaně stiskněte [PLAY MENU] pro výběr
„INPUT LEVEL“.
2 Stiskněte [R, T] pro výběr úrovně a potom
stiskněte [OK].
█ Poznámka k diskům
• Tento systém umí přehrávat disky CD-R/RW se
skladbami ve formátu CD-DA nebo MP3.
• Před přehráváním finalizujte disk na přístroji, na kterém
byl nahrán.
• Některé disky CD-R/RW nelze přehrávat kvůli stavu
nahrávky.
█ Poznámka k USB zařízením
• Tento systém podporuje USB zařízení formátu 2.0.
• Tento systém podporuje USB zařízení s kapacitou až
32 GB.
• Podporován je jen systém souborů FAT 12/16/32.
█ Poznámka k souborům MP3
• Soubory jsou definovány jako skladby a složky jsou
definovány jako alba.
• Skladba musí mít příponu „.mp3“ nebo „.MP3“.
• Skladby nemusí být přehrávány v pořadí, v jakém byly
pořízeny.
• Některé soubory mohou selhat kvůli velikosti sektoru.
Soubor MP3 na disku
• Tento systém umí rozpoznat až:
– 255 alb (včetně kořenové složky)
– 999 skladeb
– 20 relací
• Disk musí odpovídat normě ISO9660 úroveň 1 nebo 2
(kromě rozšířených formátů).
Soubor MP3 na USB zařízení
• Tento systém umí rozpoznat až:
– 800 alb (včetně kořenové složky)
– 8000 skladeb
– 999 skladeb na album
Poznámka:
Vyberte
„LEVEL 0“, když je zvuk zkreslený.
TQBJ0979
7
37
Page 38

DAB+
Frekvenčn
í blok
Frekvence Kvalita příjmu
0 (špatný) až 8 (výborný)
offset printing
Příprava
Stiskněte [RADIO] pro výběr „DAB+“.
Poznámka:
Při prvním výběru „DAB+“ se systém automaticky naladí.
Ruční ladění
1 Opakovaně stiskněte [PLAY MENU] pro výběr
„MANUAL SCAN“.
2 Stiskněte [R, T] pro výběr frekvenční blok a potom
stiskněte [OK].
Pokud není nalezena žádná stanice, zobrazí se
„SCAN FAILED“.
Upravte anténu a zkuste to znovu.
Pro automatické ladění
1 Stiskněte [PLAY MENU] pro výběr „AUTOSCAN“ a
potom stiskněte [OK].
Zobrazí se „START?“
2 Stiskněte [OK] pro zahájení ladění.
Zobrazí se „DAB AUTO SCAN“.
Pokud není nalezena žádná stanice, zobrazí se
„SCAN FAILED“.
Proveďte ruční ladění.
Poznámka:
Po automatickém ladění jsou přednastavené frekvence
vymazány.
Předvolba paměti
Můžete nastavit až 20 předvoleb stanic.
1 Opakovaně stiskněte [PLAY MENU] pro výběr
„TUNE MODE“.
2 Stiskněte [R, T] pro výběr „STATION“ a potom
stiskněte [OK].
3 Stiskněte [2/3] nebo [5/6] pro naladění
požadované stanice.
4 Stiskněte [OK].
5 Stiskněte [R, T] pro výběr čísla předvolby a potom
stiskněte [OK].
Pro nastavení dalších stanic zopakujte kroky 3 až 5.
Stanici, která má stejné číslo předvolby nahradí nová
stanice.
Poznámka:
Stanici nelze nastavit jako předvolbu, jestliže stanice nevysílá,
nebo když jste vybrali sekundární službu.
Sekundární služby
Pokud vidíte „ “, můžete poslouchat sekundární služby.
1 Opakovaně stiskněte [PLAY MENU] pro výběr
„DAB SECONDARY“.
2 Stiskněte [R, T] pro výběr sekundární službu a
potom stiskněte [OK].
Pro zrušení vyberte „PRIMARY“.
Poznámka:
Nastavení se zruší, když zvolíte další stanice.
Zobrazení dostupných informací
Následující informace můžete zobrazit na displeji:
• Informace o vysílání DAB
• Typ programu
• Štítek celku
•Frekvence
•Čas
Stiskněte [DISPLAY].
Kontrola kvalita signálu
Při nastavování antény můžete zkontrolovat kvalitu
signálu.
1 Opakovaně stiskněte [PLAY MENU] pro výběr
„SIGNAL QUALITY“ a potom stiskněte [OK].
Zobrazí se frekvenční blok následovaný kvalitou
příjmu.
Volbu jiných frekvenčních bloků proveďte stisknutím
tlačítka [R, T].
2 Znovu stiskněte [OK] pro ukončení.
Automatické nastavení hodin
Můžete nastavit hodiny tak, aby se sami aktualizovaly.
1 Opakovaně stiskněte [PLAY MENU] pro výběr
„AUTO CLOCK ADJ“.
2 Stiskněte [R, T] pro výběr „ON ADJUST“ a potom
stiskněte [OK].
Pro zrušení vyberte „OFF ADJUST“.
█ Volba předvolené stanice
1 Opakovaně stiskněte [PLAY MENU] pro výběr
„TUNE MODE“.
2 Stiskněte [R, T] pro výběr „PRESET“ a potom
stiskněte [OK].
3 Stiskněte [2/3] nebo [5/6] pro výběr
TQBJ0979
předvolby stanice.
8
38
Page 39

Rádio
ČESKY
offset printing
Příprava
Stiskněte [RADIO] pro výběr „FM“.
Ruční ladění
1 Opakovaně stiskněte [PLAY MENU] pro výběr
„TUNE MODE“.
2 Stiskněte [R, T] pro výběr „MANUAL“ a potom
stiskněte [OK].
3 Stiskněte [2/3] nebo [5/6] pro naladění
požadované stanice.
Pro automatické ladění tlačítko stiskněte a přidržte,
dokud se frekvence nezačne rychle měnit.
„STEREO“ zobrazí se, když je přijímáno stereo
vysílání.
Předvolba paměti
Můžete nastavit až 30 předvoleb FM stanic.
█ Automatická předvolba
1 Stiskněte [PLAY MENU] pro výběr „A.PRESET“.
2 Stiskněte [R, T] pro výběr nastavení a potom
stiskněte [OK].
LOWEST Ladění se zahájí od nejnižší frekvence.
CURRENT Ladění se zahájí od aktuální frekvence.
Tuner uloží do příslušných kanálů všechny stanice,
které může přijímat, a to ve vzestupném pořadí.
Pro zrušeni stiskněte [8].
█ Manuální předvolba
1 Opakovaně stiskněte [PLAY MENU] pro výběr
„TUNE MODE“.
2 Stiskněte [R, T] pro výběr „MANUAL“ a potom
stiskněte [OK].
3 Stiskněte [2/3] nebo [5/6] pro naladění
požadované stanice.
4 Stiskněte [OK].
5 Stiskněte [R, T] pro výběr čísla předvolby a potom
stiskněte [OK].
Pro nastavení dalších stanic zopakujte kroky 3 až 5.
Stanici, která má stejné číslo předvolby nahradí nová
stanice.
Zlepšení kvality zvuku
1 Opakovaně stiskněte [PLAY MENU] pro výběr
„FM MODE“.
2 Stiskněte [R, T] pro výběr „MONO“ a potom
stiskněte [OK].
Pro zrušení vyberte „STEREO“.
„MONO“ se při změně frekvence rovněž zruší.
Uložení nastavení
Pokračujte krokem 4 z kapitoly „Manuální předvolba“.
Kontrola stavu signálu
Stiskněte [DISPLAY] pro výběr „FM STATUS“.
FM – – – – Signál FM je monofonní.
FM ST Signál FM je stereofonní.
FM MONO „MONO“ je vybráno jako „FM MODE“.
Systém není naladěný na stanici.
RDS vysílání
Tento systém zobrazuje textové údaje přenášené
rádiovým datovým systémem (RDS), který je v určitých
oblastech k dispozici.
Opakovaně stiskněte [DISPLAY].
PS Programová služba
PTY Typ programu
FREQ Frekvence
Poznámka:
Funkce RDS nemusí být dostupná, když je příjem signálu
slabý.
█ Volba předvolené stanice
1 Opakovaně stiskněte [PLAY MENU] pro výběr
„TUNE MODE“.
2 Stiskněte [R, T] pro výběr „PRESET“ a potom
stiskněte [OK].
3 Stiskněte [2/3] nebo [5/6] pro výběr
předvolby stanice.
TQBJ0979
9
39
Page 40

Hodiny a časovače
offset printing
Nastavení hodin
Přístroj ukazuje čas ve formátu 24 hodin.
1 Opakovaně stiskněte [SETUP] pro výběr „CLOCK“.
2 Stiskněte [R, T] pro nastavení času a potom
stiskněte [OK].
Kontrola času
Opakovaně stiskněte [SETUP] pro výběr „CLOCK“ a
potom stiskněte [OK].
V pohotovostním režimu stiskněte [DISPLAY].
Poznámka:
Pro zachování přesného času pravidelně kontrolujte přesnost
času.
Časovač přehrávání
(Kromě zdroje Bluetooth®)
Můžete nastavit časovač, který zajistí zapnutí v určitou
dobu jako budík.
Příprava
Nastavte hodiny.
1 Opakovaně stiskněte [SETUP] pro výběr
„TIMER ADJ“.
2 Stiskněte [R, T] pro nastavení času zapnutí a
potom stiskněte [OK].
3 Opakujte krok 2 pro nastavení času vypnutí.
4 Stiskněte [R, T] pro výběr zdroje, který chcete
přehrávat, a potom stiskněte [OK].
Spuštění časovače
1 Opakovaně stiskněte [SETUP] pro výběr
„TIMER SET“.
2 Stiskněte [R, T] pro výběr „SET“ a potom stiskněte
[OK].
Zobrazí se „#“.
Pro zrušení vyberte „OFF“.
Systém musí být vypnutý, aby se časovač aktivoval.
Kontrola nastavení
Opakovaně stiskněte [SETUP] pro výběr „TIMER ADJ“
a potom stiskněte [OK].
V pohotovostním režimu dvakrát stiskněte [DISPLAY].
Poznámka:
• Časovač spustí přehrávání s nízkou hlasitostí, která se
bude postupně zvyšovat na nastavenou úroveň.
• Časovač se spustí každý den ve stejný čas, pokud je
zapnutý.
• Jestliže systém vypnete a potom znovu zapnete během
doby, kdy je časovač spuštěný, časovač se v době
ukončení nezastaví.
Časovač vypnutí
Časovač vypnutí vypne systém po uplynutí nastavené
doby.
1 Opakovaně stiskněte [SETUP] pro výběr „SLEEP“.
2 Stiskněte [R, T] pro výběr nastavení (v minutách) a
potom stiskněte [OK].
Pro zrušení vyberte „OFF“.
Poznámka:
• Zbývající čas se zobrazuje na několik sekund každou
minutu. „SLEEP 1“ se zobrazí vždy, když zbývá jen
1 minuta.
• Časovač vypnutí lze používat společně s časovačem
přehrávání.
• Časovač vypnutí má vždy přednost. Dávejte pozor, aby se
nastavení časovačů nepřekrývala.
TQBJ0979
10
40
Page 41

Zvukové efekty
ČESKY
offset printing
1 Opakovaně stiskněte [SOUND] pro výběr zvukového
efektu.
2 Stiskněte [R, T] pro výběr nastavení a potom
stiskněte [OK].
MY SOUND „SOUND 1“, „SOUND 2“ nebo
PRESET EQ „HEAVY“ (výchozí), „SOFT“, „CLEAR“,
BASS –4 až +4 (výchozí: 0)
TREBLE –4 až +4 (výchozí: 0)
D.BASS „ON D.BASS“ (výchozí) nebo
SURROUND „ON SURROUND“ nebo
Poznámka:
Změněná nastavení zůstanou aktivní až do příští změny,
pokud nebude indikováno jinak.
Uložení nastavení zvuku
Můžete uložit aktuální zvukové efekty (až 3 kombinace).
Příprava
Volba zvukových efektů.
1 Stiskněte [SETUP] pro výběr „SAVE MY SOUND“.
2 Stiskněte [R, T] výběr čísla nastavení zvuku a
potom stiskněte [OK].
Zobrazí se „SAVED“.
Nové nastavení nahradí nastavení, které bylo pod
tímtéž číslem nastavení zvuku.
Vyvolání nastavení
1 Stiskněte [SOUND] pro výběr „MY SOUND“.
2 Stiskněte [R, T] vyberte číslo nastavení zvuku a
stiskněte [OK].
„SOUND 3“
(Z„Uložení nastavení zvuku“)
„VOCAL“ nebo „FLAT“
Použití hlavního přístroje
1. Stiskněte [BASS/TREBLE] pro výběr
„BASS“.
2. Stiskněte [2/3] nebo
[5/6].
Použití hlavního přístroje
1. Stiskněte [BASS/TREBLE] pro výběr
„TREBLE“.
2. Stiskněte [2/3] nebo
[5/6].
„OFF D.BASS“
Použití hlavního přístroje
Opakovaně stiskněte [D.BASS].
„OFF SURROUND“ (výchozí)
Další funkce
Automatické vypnutí
Systém se automaticky vypne, když je v nečinnosti po
dobu 20 minut.
1 Opakovaně stiskněte [SETUP] pro výběr
„AUTO OFF“.
2 Stiskněte [R, T] pro výběr „ON“ a potom stiskněte
[OK].
Pro zrušení vyberte „OFF“.
Poznámka:
Tato funkce nefunguje, když je zdrojem rádio nebo když je
připojeno zařízení Bluetooth
Pohotovostní režim Bluetooth
Tato funkce automaticky zapne systém, když připojíte
spárované zařízení Bluetooth
1 Opakovaně stiskněte [SETUP] pro výběr
„BLUETOOTH STANDBY“.
2 Stiskněte [R, T] pro výběr „ON“ a potom stiskněte
[OK].
Pro zrušení vyberte „OFF“.
Kontrola verze softwaru
1 Opakovaně stiskněte [SETUP] pro výběr „SW VER.“
a potom stiskněte [OK].
Verze softwaru se zobrazí.
2 Znovu stiskněte [OK] pro ukončení.
®
.
®
®
.
11
41
TQBJ0979
Page 42

Odstraňování závad
offset printing
Před žádostí o opravu proveďte následující kontroly.
Nerozumíte-li některému z popisovaných postupů, nebo
pokud uvedený postup problém nevyřeší, poraďte se s
prodejcem.
█ Běžné problémy
Přístroj nefunguje.
• Bezpečnostní zařízení bylo aktivováno. Proveďte
následující:
1. Stiskněte [1] na hlavním přístroji pro přepnutí přístroje
do pohotovostního režimu. Pokud se přístroj nepřepne
do pohotovostního režimu,
– Stiskněte a přidržte tlačítko nejméně na 10 sekundy.
Nebo,
– Odpojte kabel síťového napájení (AC) a znovu jej
připojte.
2. Znovu stiskněte [1] pro zapnutí přístroje. Pokud
problém přetrvává, obraťte se na prodejce.
S dálkovým ovladačem nelze provést žádnou operaci.
• Zkontrolujte, zda jsou baterie vloženy správně.
Zvuk je nevyvážený nebo se neozývá žádný zvuk.
• Upravte hlasitost systému.
• Vypněte systém, zjistěte a odstraňte příčinu a potom
systém znovu zapněte. Může to být způsobeno
přetěžováním reproduktorů nadměrnou hlasitostí nebo
výkonem a používáním systému v prostředí s příliš vysokou
teplotou.
Během přehrávání je slyšet hučení.
• V blízkosti kabely je vedení síťového napájení (AC) nebo
zářivkové osvětlení. Udržujte ostatní zařízení a kabely v
dostatečné vzdálenosti od kabely tohoto systému.
█ Disk
Displej nezobrazuje správně.
Přehrávání se nespustí.
• Disk jste nevložili správně. Vložte ho správně.
• Disk je špinavý. Vyčistěte disk.
• Vyměňte disk, pokud je poškrábaný, zdeformovaný nebo
nestandardní.
• Došlo ke kondenzaci. Nechte systém vyschnout po dobu
1 až 2 hodin.
█ USB
Nelze přečíst zařízení USB nebo jeho obsah.
• Formát nebo obsah USB zařízení není kompatibilní se
systémem.
• USB zařízení s kapacitou vyšší než 32 GB není za určitých
podmínek podporováno.
Pomalá činnost USB zařízení.
• Velké soubory nebo zařízení USB s velkou kapacitou se
mohou načítat delší dobu.
Zobrazený uplynulý čas se liší od skutečné doby
přehrávání.
• Data zkopírujte na jiné paměťové zařízení USB nebo je
zazálohujte a zařízení USB zformátujte.
TQBJ0979
12
42
█ Rádio/DAB+
Špatný příjem signálu DAB+.
• Neumisťujte anténu do blízkosti počítačů, televizorů a
jiných kabelů.
Zkreslený zvuk.
• Použijte volitelnou venkovní anténu. Anténu by měl
instalovat kvalifikovaný technik.
Je slyšet dunění.
• Vypněte televizor nebo jej odsuňte od systému.
• Dochází-li k zjevnému rušení, umístěte mobilní telefony na
jiné místo.
█ Bluetooth
®
Spárování nelze provést.
• Zkontrolujte stav zařízení Bluetooth®.
• Zařízení je mimo komunikační dosah 10 m. Přesuňte
zařízení blíže k systému.
Zařízení nelze připojit.
• Spárování zařízení se nezdařilo. Zkuste to znovu.
• Párování zařízení bylo nahrazeno. Zkuste to znovu.
• Tento systém mohl být připojen k jinému zařízení. Odpojte
jiné zařízení a zkuste zařízení spárovat znovu.
Zařízení je připojeno, ale ze systému nevychází zvuk.
• U některých zařízení s integrovanou funkcí Bluetooth®
musíte nastavit zvukový výstup na „
Podrobnosti si přečtěte v návodu k použití příslušného
zařízení.
Zvuk vycházející ze zařízení je přerušovaný.
• Zařízení je mimo komunikační dosah 10 m. Přesuňte
zařízení blíže k systému.
• Odstraňte všechny překážky mezi systémem a zařízením.
• Interference jiných zařízení používajících kmitočtové pásmo
2,4 GHz (wi-fi router, mikrovlny, bezdrátové telefony apod.).
Přesuňte zařízení blíže k systému a dále od ostatních
zařízení.
• Vyberte
Obraz a zvuk přehrávání nejsou synchronizovány.
• Restartujte aplikaci přehrávání v zařízení.
„MODE 1“ pro stabilní komunikaci.
SC-PM602“ ručně.
█ Displej hlavního přístroje
„--:--“
• Poprvé jste zapojili kabel síťového napájení (AC) nebo
nedávno došlo k výpadku elektrického proudu. Nastavte
hodiny.
„
ADJUST CLOCK“
• Hodiny nejsou nastaveny. Nastavte hodiny.
ADJUST TIMER“
„
• Časovač přehrávání není nastaven. Nastavte časovač
přehrávání.
AUTO OFF“
„
• Systém byl 20 minut v nečinnosti, a proto se za jednu
minutu vypne. Pro zrušení stiskněte libovolné tlačítko.
ERROR“
„
• Byla provedena nesprávná operace. Přečtěte si instrukce a
zkuste to znovu.
„
F61“
„F77“
• Odpojte kabel síťového napájení (AC) a obraťte se na
prodejce.
Page 43

„F703“
ČESKY
offset printing
• Zkontrolujte připojení Bluetooth®.
• Odpojte zařízení Bluetooth
přístroj.
F76“
„
• Nastal problém s napájením.
• Odpojte kabel síťového napájení (AC) a obraťte se na
prodejce.
„
NODEVICE“
• Zařízení USB není připojeno. Zkontrolujte připojení.
NO DISC“
„
• Nevložili jste disk.
„NO MEMORY“
• Nebylo provedeno nastavení předvoleb paměti DAB.
NO PLAY“
„
• Zkontrolujte obsah. Můžete přehrávat pouze podporovaný
formát.
• Systém může mít problém. Vypněte a znovu zapněte
přístroj.
„NO SIGNAL“
• Stanici nelze přijímat. Upravte nastavení antény.
PLAYERROR“
„
• Přehráli jste nepodporovaný soubor MP3. Systém danou
skladbu přeskočí a přehraje další.
„
REMOTE 1“
„REMOTE 2“
• Dálkové ovládání a přístroj používají rozdílné kódy. Změňte
kód dálkového ovládání.
– Po zobrazení „REMOTE 1“ stiskněte a přidržte [OK] a
[ ] nejméně na 4 sekundy.
– Po zobrazení „REMOTE 2“ stiskněte a přidržte [OK] a
[USB/CD] nejméně na 4 sekundy.
„SCAN FAILED“
• Stanice nelze přijímat. Upravte nastavení antény nebo
proveďte ruční ladění.
„SOUND 1 NOT SET“
„SOUND 2 NOT SET“
„SOUND 3 NOT SET“
• Neuložili jste pod číslo nastavení zvuku zvukové efekty.
„
USB OVER CURRENT ERROR“
• Zařízení USB spotřebovává příliš vysoký výkon. Odpojte
zařízení USB, přístroj vypněte a znovu zapněte.
VBR“
„
• Přístroj nemůže zobrazit zbývající čas přehrávání u skladeb
s proměnnou přenosovou rychlostí skladby (VBR).
®
. Vypněte a znovu zapněte
Kód dálkového ovladače
Když další zařízení Panasonic reaguje na dálkový ovladač
tohoto systému, změňte kód ovladače pro tento systém.
Příprava
Stiskněte [USB/CD] pro výběr „CD“.
█ Nastavení kódu na „REMOTE 2“
1 Stiskněte a přidržte [CD] na hlavním přístroji a
[USB/CD] na dálkovém ovladači.
Zobrazí se „REMOTE 2“.
2 Stiskněte a přidržte [OK] a [USB/CD] nejméně na
4 sekundy.
█ Nastavení kódu na „REMOTE 1“
1 Stiskněte a přidržte [CD] na hlavním přístroji a [ ]
na dálkovém ovladači.
Zobrazí se „REMOTE 1“.
2 Stiskněte a přidržte [OK] a [ ] nejméně na
4 sekundy.
Resetování paměti systému
Dojde-li k následujícím situacím, resetujte paměť:
• Stisknutí tlačítek nevyvolá žádnou odezvu.
• Chcete vymazat a resetovat obsah paměti.
1 Odpojte kabel síťového napájení (AC).
2 Při stisknutém [1] na hlavním přístroji připojte
kabel síťového napájení (AC) zpět.
Držte stisknuté tlačítko, dokud se nezobrazí
„–––––––––“.
3 Uvolněte [1].
Všechna nastavení se vrátí na původní tovární
nastavení.
Je třeba znovu nastavit položky paměti.
Údržba
K čištění systému používejte jemný a suchý hadřík.
• Nikdy nepoužívejte k čištění systému líh, ředidlo nebo
technický benzín.
• Před použitím chemicky impregnovaného hadříku si
přečtěte instrukce přiložené k hadříku.
13
43
TQBJ0979
Page 44

Specifikace
offset printing
█ Zesilovač
Výstupní výkon RMS
Přední kanál (oba kanály napájeny)
Celkový výstupní výkon RMS 40 W
20 W na kanál (6 Ω), 1 kHz, 10% THD
█ Tuner, vstup
Pamět’ předvoleb 30 stanic FM
Frekvenční modulace (FM)
Frekvenční rozsah
Anténní konektor 75 Ω (nesymetrický)
Konektor pro sluchátka
Výstup Stereo, konektor 3,5 mm
87,50 MHz až 108,00 MHz (50 kHz/krok)
█ Sekce DAB+
Paměti DAB 20 kanálů
Kmitočtové pásmo (vlnová délka)
Band III 5A až 13F (174,928 MHz až 239,200 MHz)
Citlivost *BER 4x10
Minimální požadavky –98 dBm
Externí anténa DAB
Výstup F – Konektor (75 Ω)
-4
█ Disk
Přehrávaný disk (8 cm nebo 12 cm)
MPEG-1 Layer 3, MPEG-2 Layer 3
Čtení
Vlnová délka 790 nm (CD)
CD, CD-R/RW (CD-DA, MP3 )
█ USB
USB port DC VÝSTUPNÍ 5 V, 500 mA
Norma USB USB 2.0 plná rychlost
Podporované formáty souborů médií MP3 (*.mp3)
Systém souborů USB zařízení FAT12, FAT16, FAT32
█ Parametry Bluetooth
Verze Bluetooth® Ver. 2.1 + EDR
Třída Třída 2
Podporované profily A2DP, AVRCP
Provozní kmitočet Pásmo 2,4 GHz FH-SS
Provozní vzdálenost 10 m bez překážek
®
█ Reproduktory
Reproduktor(y)
Konektor pro sluchátka 10 cm kónický x 1 na kanál
Výškový 6 cm kónický x 1 na kanál
Impedance 6 Ω
Rozměry (Š x V x H) 145 mm x 224 mm x 197 mm
Hmotnost 1,9 kg
█ Všeobecně
Napájení AC 220 V až 240 V, 50 Hz
Spotřeba 17 W
Rozměry (Š x V x H) 153 mm x 224 mm x 232 mm
Hmotnost 1,4 kg
Rozsah provozních teplot 0°C až +40°C
Rozsah provozní vlhkosti
Spotřeba v pohotovostním režimu
(Při „BLUETOOTH STANDBY“ nastavení na „OFF“)
Spotřeba v pohotovostním režimu
(Při „BLUETOOTH STANDBY“ nastavení na „ON“)
Poznámka:
• Technické údaje podléhají změnám bez předchozího
upozornění.
Hmotnost a rozměry jsou přibližné.
• Celkové harmonické zkreslení je měřeno digitálním
spektrálním analyzátorem.
35% až 80% relativní (bez kondenzace)
0,3 W (přibližně)
0,4 W (přibližně)
TQBJ0979
14
44
Page 45

Reference
ČESKY
offset printing
O technologii Bluetooth
Panasonic nenese odpovědnost za případné prozrazení
dat a/nebo informací, ke kterému může dojít v průběhu
bezdrátového přenosu.
Kmitočtové pásmo
• Tento systém používá kmitočtové pásmo 2,4 GHz.
Certifikace
• Tento systém dodržuje frekvenční omezení a obdržel
certifikaci prokazující splnění zákonných nařízení
týkajících se kmitočtových pásem. Z toho důvodu není
zapotřebí povolení k bezdrátovému přenosu.
• Níže uvedené zásahy jsou nezákonné:
– Oddělení od hlavního přístroje.
– Odstranění štítku s parametry.
Omezení platná při používání
• Bezdrátový přenos a/nebo použití se všemi zařízeními
s technologií Bluetooth
• Všechna zařízení musí odpovídat normám stanoveným
společností Bluetooth SIG, Inc.
• V závislosti na parametrech a nastaveních zařízení se
spojení nemusí podařit nebo některé operace mohou
být odlišné.
• Tento systém podporuje funkce zabezpečení
technologie Bluetooth
provozních prostředích nebo při určitých nastaveních
toto zabezpečení nemusí být dostatečné. Při
bezdrátovém přenosu dat do tohoto systému buďte
obezřetní.
• Tento systém neumí přenášet data do zařízení
s technologií Bluetooth
Dosah při používání
• Toto zařízení používejte ve vzdálenosti maximálně
10 m.
• Různé typy prostředí, překážky nebo interference
mohou dosah snížit.
Rušení jinými zařízeními
• Je-li tento přístroj umístěn příliš blízko jiných zařízení
s technologií Bluetooth
kmitočtové pásmo 2,4 GHz, nemusí fungovat
správným způsobem a mohou se objevit potíže
v podobě šumu a zvukových výpadků způsobených
interferencí rádiových vln.
• Tento systém nemusí fungovat správným způsobem,
jsou-li rádiové vlny vysílané blízkou rádiovou stanicí
nebo podobným zařízením příliš silné.
Určené použití
• Tento systém je určen pro normální použití obecného
charakteru.
• Nepoužívejte tento systém v blízkosti zařízení nebo
v prostředí citlivém na vysokofrekvenční rušení
(např.: letiště, nemocnice, laboratoře atd.).
®
®
nelze garantovat.
®
. Nicméně v některých
®
.
®
nebo zařízení používajících
Licence
Slovní značka a loga Bluetooth® jsou registrované
obchodní značky vlastněné společností Bluetooth SIG,
Inc. a jakékoli jejich použití společností Panasonic
Corporation podléhá licenci. Ostatní obchodní značky a
obchodní názvy jsou majetkem jejich příslušných
vlastníků.
Technologie audio kódování MPEG Layer-3
licencovaná od Fraunhofer IIS a Thomson.
Prohlášení o shodě
Společnost „Panasonic Corporation“ tímto prohlašuje, že
tento výrobek je ve shodě se základními požadavky a
dalšími příslušnými ustanoveními směrnice 1999/5/EC.
Zákazníci si mohou stáhnout kopii originálu prohlášení o
shodě pro naše produkty R&TTE z našeho serveru:
http://www.doc.panasonic.de
Oprávněný zástupce: Panasonic Marketing Europe
GmbH, Panasonic Testing Centre, Winsbergring 15,
22525 Hamburg, Německo
Likvidace odpadu z elektrických a elektronických
zařízení a baterií
Platí pouze pro Evropskou unii a země se
zavedenými recyklačními systémy
Tyto symboly na výrobcích, obalech nebo v
průvodní dokumentaci znamenají, že použitá
elektrická a elektronická zařízení a baterie
nepatří do běžného domácího odpadu.
Správná likvidace, recyklace a opětovné
použití jsou možné, jen pokud odevzdáte
stará zařízení a použité baterie na sběrných
místech v souladu s platnými národními
předpisy.
Správnou likvidací pomůžete šetřit cenné
zdroje a předcházet možným negativním
účinkům na lidské zdraví a na životní
prostředí.
Další informace o sběru a recyklaci vám
poskytnou místní úřady.
Při nesprávné likvidaci odpadu vám hrozí
pokuta v souladu s národní legislativou a
místními předpisy.
Poznámka k symbolu baterie (symbol dole):
Tento symbol může být použit v kombinaci s
chemickým symbolem. V tomto případě
splňuje tento symbol legislativní požadavky,
které jsou předepsány pro chemickou látku
obsaženou v baterii.
15
45
TQBJ0979
Page 46

Su sistema y las ilustraciones pueden parecer diferentes.
offset printing
Estas instrucciones de funcionamiento se aplican al
siguiente sistema.
Sistema SC-PM602
Unidad principal SA-PM602
Altavoces SB-PM500
Los símbolos de este producto (incluidos los accesorios)
representan lo siguiente:
CA
Equipo de Clase II (La construcción del
producto presenta doble aislamiento.)
ENCENDIDO
En espera
Accesorios suministrados
Por favor, compruebe e identifique los accesorios
suministrados.
1 Cable de alimentación de CA
1 Antena DAB
1 Mando a distancia
(N2QAYB000984)
Contenido
Accesorios suministrados . . . . . . . . . . . . . . . . . . . .2
Precauciones de seguridad . . . . . . . . . . . . . . . . . . .2
Conexiones . . . . . . . . . . . . . . . . . . . . . . . . . . . . . . . .3
Colocación de los altavoces . . . . . . . . . . . . . . . . . .3
Controles. . . . . . . . . . . . . . . . . . . . . . . . . . . . . . . . . .4
Preparación del mando a distancia. . . . . . . . . . . . .4
Preparación de los medios . . . . . . . . . . . . . . . . . . .5
Reproducción de medios. . . . . . . . . . . . . . . . . . . . .6
DAB+ . . . . . . . . . . . . . . . . . . . . . . . . . . . . . . . . . . . . .8
Radio . . . . . . . . . . . . . . . . . . . . . . . . . . . . . . . . . . . . .9
Reloj y temporizadores. . . . . . . . . . . . . . . . . . . . . .10
Efectos de sonido. . . . . . . . . . . . . . . . . . . . . . . . . .11
Otros . . . . . . . . . . . . . . . . . . . . . . . . . . . . . . . . . . . .11
Solución de problemas. . . . . . . . . . . . . . . . . . . . . .12
Mantenimiento . . . . . . . . . . . . . . . . . . . . . . . . . . . .13
Especificaciones. . . . . . . . . . . . . . . . . . . . . . . . . . .14
TQBJ0979
Referencias . . . . . . . . . . . . . . . . . . . . . . . . . . . . . . .15
2
46
Precauciones de seguridad
¡ADVERTENCIA!
Unidad
• Para reducir el riesgo de incendios, descargas
eléctricas o daños en el producto,
– No exponga este aparato a la lluvia, humedad, goteo
o salpicaduras.
– No coloque encima del mismo objetos con líquidos
como, por ejemplo, floreros.
– Utilice solamente los accesorios recomendados.
– No quite las tapas.
– No reparar esta unidad usted mismo. Solicite las
reparaciones al personal de servicio cualificado.
– No permita que objetos de metal caigan dentro de la
unidad.
¡ATENCIÓN!
Unidad
• Para reducir el riesgo de incendios, descargas
eléctricas o daños en el producto,
– Para mantener bien ventilada esta unidad, no la
instale ni la ponga en un estante de libros, mueble
empotrado u otro espacio de dimensiones
reducidas.
– No obstruya las aberturas de ventilación de la
unidad con periódicos, manteles, cortinas u objetos
similares.
– No coloque objetos con llama descubierta, una vela
por ejemplo, encima de la unidad.
• Esta unidad ha sido diseñada para ser utilizada en
climas moderados.
• Esta unidad puede tener interferencias causadas por
teléfonos móviles durante su utilización. Si tales
interferencias resultan evidentes, aumente la
separación entre la unidad y el teléfono móvil.
• Esta unidad utiliza un láser. Usar los controles, hacer
los ajustes o los pasos requeridos en forma diferente
de la aquí expuesta puede suponer en exposición
peligrosa a la radiación.
Cable de alimentación de CA
• El enchufe de corriente es el dispositivo que sirve para
desconectar el aparato. Instale esta unidad de tal forma
que el enchufe de corriente pueda desenchufarse de la
toma de corriente inmediatamente.
Pila
• Hay peligro de explosión si se sustituye
incorrectamente la pila. Solo sustituir con el mismo
tipo recomendado por el fabricante.
• Al desechar las baterías, por favor contacte con sus
autoridades locales o distribuidor y consulte el método
correcto de eliminación.
• No caliente o exponga a las llamas.
• No deje la(s) pila(s) en un automóvil expuesto a luz
solar directa durante un largo período de tiempo con
las puertas y ventanas cerradas.
• No abra forzando o cortocircuitando la pila.
• No cambie la pila alcalina o de manganeso.
• No utilice la pila si la cubierta protectora está
levantada.
• Quite la pila si no utiliza el mando a distancia durante
un largo periodo de tiempo. Guárdela en una zona
fresca y oscura.
Page 47

Conexiones
3
2
1
Cinta adhesiva
(no
suministrada)
B
A
Rojo
Negro
A la toma
de CA
ESPAÑOL
offset printing
Conecte el cable de alimentación de CA solo después
de haber hecho todas las demás conexiones.
(6:)
(6:)
1 Conecte la antena de DAB.
Asegúrese de apretar bien la tuerca.
No utilice ninguna otra antena DAB que no sea la
proporcionada.
Utilice una antena exterior si la recepción es
deficiente.
2 Conecte los altavoces.
Tenga cuidado de no
cortocircuitar ni invertir
la polaridad de los
cables de los altavoces,
ya que pueden dañarse.
3 Conecte el cable de alimentación de CA.
No utilice el cable de alimentación CA de otro equipo.
Conservación de la energía
El sistema consume una pequeña cantidad de
energía (Z“Especificaciones”) cuando está en modo
en espera. Desconecte el suministro eléctrico si no
utiliza el sistema.
Se perderá alguna función después de desconectar
el sistema. Tiene que ajustarlos de nuevo.
Colocación de los altavoces
Los altavoces izquierdo e derecho son iguales.
Utilice solamente los altavoces suministrados.
Puede provocar daños al sistema y reducir la calidad del
sonido si utiliza otros altavoces.
Nota:
• Mantenga sus altavoces a más de 10 mm de la unidad
principal para que se ventilen.
• Ponga los altavoces en una superficie plana segura.
• Estos altavoces no disponen de blindaje magnético. No lo
ponga cerca de la TV, el PC u otros equipos afectados
fácilmente por el magnetismo.
• Cuando reproduzca a niveles elevados durante un largo
periodo de tiempo, puede dañar los altavoces y reducir la
vida los altavoces.
• Reduzca el volumen en estas condiciones para evitar
daños:
– Cuando se distorsiona el sonido.
– Cuando ajuste la calidad del sonido.
• Para evitar daños en los altavoces, no toque los conos de
los altavoces si quita las rejillas.
¡ATENCIÓN!
• Use los altavoces sólo con el sistema
recomendado. Si no, puede dañar el amplificador y
los altavoces y puede provocar un incendio.
Consulte a un técnico de servicio oficial si se ha
producido algún daño o un cambio repentino en su
funcionamiento.
• Realice los procedimientos incluidos en estas
instrucciones cuando una los altavoces.
TQBJ0979
3
47
Page 48

Controles
(no suministrado)
offset printing
Realice los procedimientos con el mando a distancia. También puede utilizar los botones en la unidad principal si
son los mismos.
A
Botón de alimentación en espera/conectada [`], [1]
Pulse este botón para cambiar del modo de
alimentación conectada al modo de alimentación en
espera o viceversa. En el modo de alimentación en
espera, el aparato consume una pequeña cantidad de
corriente.
B Selección de la fuente de audio
En la unidad principal:
Para iniciar el emparejamiento Bluetooth
pulsado [ –PAIRING].
C Control de reproducción básico
D Ver el menú de configuración
E Ver la información del contenido
F Selecciona o confirma la opción
G Abrir o cerrar la bandeja del disco
H Reducir el brillo del panel de visualización
Para cancelar, pulse el botón de nuevo.
I Ajusta el nivel de volumen
J Silencia el sonido
Para cancelar, pulse el botón de nuevo.
“MUTE” también se cancela cuando se ajusta el
volumen o se apaga el aparato.
K Ver el menú de reproducción
L Seleccionar los efectos de sonido
M Visualizador
TQBJ0979
4
48
®
, mantenga
N Sensor de mando a distancia
Distancia: Dentro de aproximadamente 7 m
Ángulo: Aproximadamente 20° arriba y abajo,
30° izquierda y derecha
O Entrada de auriculares ( )
Tipo de clavija: Estéreo de Ø 3,5 mm
– La presión sonora excesiva de los auriculares
puede causar pérdida de audición.
– Escuchar a alto volumen durante mucho tiempo
puede dañar sus oídos.
(no suministrado)
P Puerto USB ( )
Q Bandeja de disco
Preparación del mando a
distancia
Use una pila alcalina o de manganeso.
Instale la pila de forma que los polos (+ y –) estén
alineados con los del mando a distancia.
Page 49

Preparación de los medios
ESPAÑOL
offset printing
Disco
1 Pulse [CD x] (unidad principal: [x OPEN/CLOSE])
para abrir la bandeja del disco.
Ponga un disco con la etiqueta hacia arriba.
Vuelva a pulsar para cerrar la bandeja del disco.
2 Pulse [USB/CD] para seleccionar “CD”.
USB
1 Reduzca el volumen y conecte el dispositivo USB al
puerto USB.
Sostenga la unidad principal cuando conecte o
desconecte el dispositivo USB.
2 Pulse [USB/CD] para seleccionar “USB”.
Nota:
No use un cable de extensión USB. El sistema no puede
reconocer dispositivos USB conectados mediante cable.
Bluetooth
Puede conectar y reproducir un dispositivo de audio
inalámbricamente mediante Bluetooth
Preparación
• Encienda la función Bluetooth
el dispositivo cerca del sistema.
• Lea las instrucciones de funcionamiento del dispositivo
para más detalles.
█ Emparejamiento de un dispositivo
Preparación
Si este sistema está conectado a un dispositivo
Bluetooth
dispositivo”).
1 Pulse [ ].
Si aparece el mensaje “PAIRING”, continúe con el
paso 3.
2 Pulse [PLAY MENU] para seleccionar “PAIRING” y
después pulse [OK].
O mantenga pulsado [ –PAIRING] en la unidad
principal hasta que aparezca “PAIRING”.
3 Seleccione “SC-PM602” en el menú Bluetooth
dispositivo.
Si le pide una contraseña, introduzca “0000”.
El dispositivo se conecta con este sistema
automáticamente después de que se haya
completado el emparejamiento.
Se muestra el nombre del dispositivo conectado
durante unos segundos.
Nota:
Puede emparejar hasta 8 dispositivo con este sistema. Si se
empareja un 9º dispositivo, se sustituirá el dispositivo que no
haya sido utilizado durante más tiempo.
®
®
®
del dispositivo y ponga
®
, desconéctelo (Z“Desconexión de un
█ Conexión de un dispositivo
Preparación
Si este sistema está conectado a un dispositivo
Bluetooth
dispositivo”).
®
, desconéctelo (Z“Desconexión de un
1 Pulse [ ].
Se muestra “BLUETOOTH READY”.
2 Seleccione “SC-PM602” en el menú Bluetooth
dispositivo.
Se muestra el nombre del dispositivo conectado
durante unos segundos.
®
del
3 Inicie la reproducción en el dispositivo.
Nota:
• Debe haber emparejado un dispositivo para conectar.
• Este sistema solo puede conectarse a un dispositivo cada
vez.
• Cuando se seleccione
sistema intenta conectarse de forma automática al último
dispositivo conectado. (Durante este proceso se muestra
“LINKING”.)
“BLUETOOTH” como la fuente, el
█ Desconexión de un dispositivo
1 Pulse [ ].
2 Pulse [PLAY MENU] repetidamente para
.
®
del
seleccionar “DISCONNECT?”.
3 Pulse [R, T] para seleccionar “OK? YES” y
después pulse [OK].
Se muestra “BLUETOOTH READY”.
Para cancelar, seleccione “OK? NO”.
Utilización el unidad principal
Mantenga pulsado [ –PAIRING] hasta que aparezca
el mensaje “PAIRING”.
Nota:
Se desconecta un dispositivo cuando:
• Selecciona una fuente diferente.
• Aleja el dispositivo más allá de la distancia máxima.
• Deshabilita la transmisión Bluetooth
• Apaga el sistema o el dispositivo.
®
del dispositivo.
TQBJ0979
5
49
Page 50

Reproducción de medios
Número
de álbum
Número
de pista
offset printing
Las marcas siguientes indican si la función está
disponible.
CD : CD-R/RW en formato CD-DA o con archivos
USB : Dispositivo USB con archivos MP3.
BLUETOOTH : Dispositivo Bluetooth
Reproducción básica
CD USB BLUETOOTH
Reproducir Pulse [4/9].
Parada Pulse [8].
Pausar Pulse [4/9].
Saltar Pulse [2/3] o [5/6] para saltar
Buscar Mantenga pulsado [2/3] o
Nota:
Dependiendo del dispositivo Bluetooth
operaciones no funcionen.
Ver la información disponible
CD USB BLUETOOTH
Puede ver la información disponible en el panel de
visualización.
Pulse [DISPLAY].
Nota:
• Caracteres máximos que se pueden mostrar:
• Este sistema soporta etiquetas ID3 ver. 1.0, 1.1 y 2.3.
• Los datos de texto que no soporta el sistema se pueden
• Ejemplo: Visualización del álbum MP3 y el número de la
MP3.
USB
Se memorizará la posición.
Se muestra “RESUME”.
Vuelva a pulsar para detener por
completo.
Vuelva a pulsar para continuar la
reproducción.
una pista.
CD USB
Pulse [R, T] para saltar un álbum MP3.
[5/6].
aproximadamente 32
mostrar de manera diferente.
pista.
®
.
®
, puede que algunas
Menú de reproducción
CD USB
1 Pulse [PLAY MENU] repetidamente para
seleccionar “PLAYMODE” o “REPEAT”.
2 Pulse [R, T] para seleccionar el ajuste y, a
continuación, pulse [OK].
PLAYMODE
OFF
PLAYMODE
1-TRACK
1
1-ALBUM
1
RANDOM
RND
1-ALBUM
RANDOM
1 RND
REPEAT
OFF REPEAT Cancela el ajuste.
ON REPEAT Repetición de reproducción.
Nota:
• Durante la reproducción aleatoria, no se puede saltar a
pistas que ya hayan sido reproducidas.
• El ajuste se cancela al abrir la bandeja del disco o
desconecte el dispositivo USB.
Cancela el ajuste.
Reproduce una pista seleccionada.
Pulse [2/3] o [5/6] para
seleccionar la pista.
Reproduce el álbum MP3
seleccionado.
Pulse [R, T] para seleccionar el
álbum MP3.
Reproduce aleatoriamente todas las
pistas.
Reproduce aleatoriamente todas las
pistas del álbum MP3 seleccionado.
Pulse [R, T] para seleccionar el
álbum MP3.
TQBJ0979
6
50
Page 51

Modo de enlace
(predeterminado)
ESPAÑOL
offset printing
BLUETOOTH
Puede cambiar el modo de enlace para adecuarse al tipo
de conexión.
Preparación
Si este sistema está conectado a un dispositivo
Bluetooth
dispositivo”).
®
, desconéctelo (Z“Desconexión de un
1 Pulse [PLAY MENU] repetidamente para
seleccionar “LINK MODE”.
2 Pulse [R, T] para seleccionar el modo y, a
continuación, pulse [OK].
MODE 1 Énfasis en la conectividad.
MODE 2
(predeterminado)
Nota:
• La imagen mostrada y el sonido pueden no estar
sincronizados, dependiendo del dispositivo conectado. En
este caso, seleccione
• Seleccione “MODE 1” si el sonido se interrumpe.
Énfasis en la calidad de sonido.
“MODE 1”.
Nivel de entrada
BLUETOOTH
Puede cambiar el ajuste de nivel de entrada si el nivel de
entrada de sonido de la transmisión Bluetooth
demasiado bajo.
®
es
1 Pulse [PLAY MENU] repetidamente para
seleccionar “INPUT LEVEL”.
2 Pulse [R, T] para seleccionar el nivel y, a
continuación, pulse [OK].
█ Nota sobre el disco
• Este sistema puede reproducir CD-R/RW con
contenido de formato CD-DA o MP3.
• Antes de la reproducción, finalice el disco en el
dispositivo utilizado para grabarlo.
• Algunos CD-R/RW no se pueden reproducir debido a
la condición de la grabación.
█ Nota sobre dispositivos USB
• Este sistema admite USB 2.0 a máxima velocidad.
• Este sistema admite dispositivos USB de hasta 32 GB.
• Solo se admite el sistema de archivos FAT 12/16/32.
█ Nota sobre archivos MP3
• Los archivos se definen como pistas y las carpetas se
definen como álbum.
• La pista debe tener la extensión “.mp3” o “.MP3”.
• Las pistas no se reproducirán necesariamente en el
orden de grabación.
• Algunos archivos pueden no funcionar debido al
tamaño del sector.
Archivo MP3 en un disco
• Este sistema puede acceder a un máximo:
– 255 álbumes (incluida la carpeta raíz)
– 999 pistas
– 20 sesiones
• Los discos deben cumplir con la norma ISO9660 nivel
1 ó 2 (excepto para los formatos extendidos).
Archivo MP3 en un dispositivo USB
• Este sistema puede acceder a un máximo:
– 800 álbumes (incluida la carpeta raíz)
– 8000 pistas
– 999 pistas en un álbum
Nota:
Seleccione
“LEVEL 0” si el sonido está distorsionado.
TQBJ0979
7
51
Page 52

DAB+
Bloque de
frecuencia
Frecuencia Calidad de recepción
0 (mala) hasta 8 (excelente)
offset printing
Preparación
Pulse [RADIO] para seleccionar “DAB”.
Nota:
Si selecciona
sintonización automática.
Sintonización manual
1 Pulse [PLAY MENU] repetidamente para
2 Pulse [R, T] para seleccionar el bloque de
Para sintonizar automáticamente
1 Pulse [PLAY MENU] para seleccionar “AUTOSCAN”
2 Pulse [OK] para comenzar a sintonizar.
Nota:
Las frecuencias almacenadas previamente se borran tras la
sintonización automática.
Preajuste de memoria
Puede presintonizar hasta 20 emisoras.
1 Pulse [PLAY MENU] repetidamente para
2 Pulse [R, T] para seleccionar “STATION” y
3 Pulse [2/3] o [5/6] para sintonizar la
4 Pulse [OK].
5 Pulse [R, T] para seleccionar un número de
Nota:
No puede preseleccionar una emisora cuando dicha emisora
no esté emitiendo o cuando haya seleccionado un servicio
secundario.
█ Selección de una emisora presintonizada
1 Pulse [PLAY MENU] repetidamente para
2 Pulse [R, T] para seleccionar “PRESET” y después
TQBJ0979
8
52
“DAB+” por primera vez, el sistema iniciará la
seleccionar “MANUAL SCAN”.
frecuencias y a continuación pulse [OK].
Si no selecciona ninguna emisora, aparecerá
“SCAN FAILED”.
Ajuste la antena y vuelva a intentarlo.
y después pulse [OK].
Se muestra “START?”.
Se muestra “DAB AUTO SCAN”.
Si no selecciona ninguna emisora, aparecerá
“SCAN FAILED”.
Sintonícelas de forma manual.
seleccionar “TUNE MODE”.
después pulse [OK].
emisora.
presintonización y, a continuación, pulse [OK].
Lleve a cabo los pasos 3 al 5 de nuevo para predefinir
más emisoras.
La nueva emisora sustituye cualquier emisora que
ocupa el mismo número predefinido.
seleccionar “TUNE MODE”.
pulse [OK].
3 Pulse [2/3] o [5/6] para seleccionar la
emisora predefinida.
Canal secundario
Si se muestra “ ”, es posible escuchar componentes de
servicio secundarios.
1 Pulse [PLAY MENU] repetidamente para
seleccionar “DAB SECONDARY”.
2 Pulse [R, T] para seleccionar el componente de
servicio secundario y a continuación pulse [OK].
Para cancelar, seleccione “PRIMARY”.
Nota:
El ajuste se cancela al seleccionar otras emisoras.
Ver la información disponible
En el panel de visualización Puede ver la siguiente
información:
• Información sobre la emisión DAB
• Tipo de programa
• Nombre del multiplexado
• Frecuencia
•Hora
Pulse [DISPLAY].
Comprobar la calidad de la señal
Es posible comprobar la calidad de la señal mientras
ajusta la antena.
1 Pulse [PLAY MENU] repetidamente para
seleccionar “SIGNAL QUALITY” y después pulse
[OK].
Se muestra el bloque de frecuencias seguido de la
calidad en la recepción.
Pulse [R, T] para seleccionar bloques de
frecuencias.
2 Vuelva a pulsar [OK] para salir.
Ajuste automático del reloj
Es posible configurar el reloj para que se actualice de
forma automática.
1 Pulse [PLAY MENU] repetidamente para
seleccionar “AUTO CLOCK ADJ”.
2 Pulse [R, T] para seleccionar “ON ADJUST” y
después pulse [OK].
Para cancelar, seleccione “OFF ADJUST”.
Page 53

Radio
ESPAÑOL
offset printing
Preparación
Pulse [RADIO] para seleccionar “FM”.
Sintonización manual
1 Pulse [PLAY MENU] repetidamente para
seleccionar “TUNE MODE”.
2 Pulse [R, T] para seleccionar “MANUAL” y
después pulse [OK].
3 Pulse [2/3] o [5/6] para sintonizar la
emisora.
Para sintonizar automáticamente, mantenga pulsado
el botón hasta que la frecuencia comience a cambiar
rápidamente.
Cuando se esté recibiendo una emisión en estéreo se
visualizará “STEREO”.
Preajuste de memoria
Puede presintonizar hasta 30 emisoras de radio FM.
█ Preconfiguración automática
1 Pulse [PLAY MENU] para seleccionar “A.PRESET”.
2 Pulse [R, T] para seleccionar el ajuste y, a
continuación, pulse [OK].
LOWEST La sintonización empieza desde la
CURRENT La sintonización empieza desde la
El sintonizador presintonizará en los canales, en
orden ascendente, todas las emisoras que pueda
recibir.
Para cancelar, pulse [8].
█ Presintonización manual
1 Pulse [PLAY MENU] repetidamente para
seleccionar “TUNE MODE”.
2 Pulse [R, T] para seleccionar “MANUAL” y
después pulse [OK].
3 Pulse [2/3] o [5/6] para sintonizar la
emisora.
4 Pulse [OK].
5 Pulse [R, T] para seleccionar un número de
presintonización y, a continuación, pulse [OK].
Lleve a cabo los pasos 3 al 5 de nuevo para predefinir
más emisoras.
La nueva emisora sustituye cualquier emisora que
ocupa el mismo número predefinido.
frecuencia más baja.
frecuencia actual.
█ Selección de una emisora presintonizada
1 Pulse [PLAY MENU] repetidamente para
seleccionar “TUNE MODE”.
2 Pulse [R, T] para seleccionar “PRESET” y después
pulse [OK].
3 Pulse [2/3] o [5/6] para seleccionar la
emisora predefinida.
Mejorar la calidad de sonido
1 Pulse [PLAY MENU] repetidamente para
seleccionar “FM MODE”.
2 Pulse [R, T] para seleccionar “MONO” y después
pulse [OK].
Para cancelar, seleccione “STEREO”.
“MONO” también se cancela cuando cambia la
frecuencia.
Para memorizar la configuración
Continúe con el paso 4 de “Presintonización manual”.
Comprobar el estado de señal
Pulse [DISPLAY] para seleccionar “FM STATUS”.
FM – – – – La señal FM es monoaural.
FM ST La señal FM está en estéreo.
FM MONO “MONO” se selecciona como el
El sistema no está sintonizado en una
emisora.
“FM MODE”.
Emisiones RDS
Este sistema puede mostrar los datos de texto
transmitidos por el sistema de datos de radio (RDS)
disponible en algunas zonas.
Pulse [DISPLAY] repetidamente.
PS Servicio de programa
PTY Tipo de programa
FREQ Frecuencia
Nota:
RDS puede no estar disponible si la recepción es deficiente.
TQBJ0979
9
53
Page 54

Reloj y temporizadores
offset printing
Puesta en hora
Este es un reloj de sistema de 24 horas.
1 Pulse [SETUP] repetidamente para seleccionar
“CLOCK”.
2 Pulse [R, T] para ajustar la hora y, a continuación,
pulse [OK].
Para comprobar la hora
Pulse [SETUP] repetidamente para seleccionar
“CLOCK” y después pulse [OK].
En el modo en espera, pulse [DISPLAY].
Nota:
Vuelva a poner en hora el reloj con regularidad para mantener
su precisión.
Temporizador de reproducción
(Excepto para una fuente Bluetooth®)
Puede ajustar la hora para activarse a una hora
determinada y despertarle.
Preparación
Configure el reloj.
1 Pulse [SETUP] repetidamente para seleccionar
“TIMER ADJ”.
2 Pulse [R, T] para ajustar la hora de inicio y, a
continuación, pulse [OK].
3 Vuelva a realizar el paso 2 para ajustar la hora de
finalización.
4 Pulse [R, T] para seleccionar la fuente que desea
reproducir y después pulse [OK].
Para iniciar el temporizador
1 Pulse [SETUP] repetidamente para seleccionar
“TIMER SET”.
2 Pulse [R, T] para seleccionar “SET” y después
pulse [OK].
Se muestra “#”.
Para cancelar, seleccione “OFF”.
El sistema debe estar apagado para que funcione el
temporizador.
Para comprobar el ajuste
Pulse [SETUP] repetidamente para seleccionar
“TIMER ADJ” y después pulse [OK].
En el modo en espera, pulse [DISPLAY] dos veces.
Nota:
• El temporizador se inicia a bajo volumen y aumenta
gradualmente al nivel preestablecido.
• Si el temporizador está activo, se encenderá todos los días
a la hora fijada.
• Si apaga el sistema y lo enciende de nuevo mientras un
temporizador está en funcionamiento, el temporizador no
se detendrá a la hora de finalización.
Temporizador de dormir
El temporizador de dormir apaga el sistema después del
tiempo predefinido.
1 Pulse [SETUP] repetidamente para seleccionar
“SLEEP”.
2 Pulse [R, T] para seleccionar el ajuste (en minutos)
y, a continuación, pulse [OK].
Para cancelar, seleccione “OFF”.
Nota:
• Cada minuto se muestra el tiempo restante durante unos
pocos segundos. Cuando solo resta 1 minuto, se muestra
“SLEEP 1” continuamente.
• El temporizador de dormir se puede utilizar junto con el
temporizador de reproducción.
• El temporizador para dormir siempre va primero.
Asegúrese de no superponer los temporizadores.
TQBJ0979
10
54
Page 55

Efectos de sonido
ESPAÑOL
offset printing
1 Pulse [SOUND] repetidamente para seleccionar el
efecto de sonido.
2 Pulse [R, T] para seleccionar el ajuste y, a
continuación, pulse [OK].
MY SOUND “SOUND 1”, “SOUND 2” o “SOUND 3”
PRESET EQ “HEAVY” (predeterminado), “SOFT”,
BASS –4 a +4 (predeterminado: 0)
TREBLE –4 a +4 (predeterminado: 0)
D.BASS “ON D.BASS” (predeterminado) o
SURROUND “ON SURROUND” o
Nota:
Los ajustes modificados se mantendrán hasta que se vuelvan
a cambiar, a menos que se indique lo contrario.
Guardar los ajustes de sonido
Es posible almacenar los efectos de sonido en uso (hasta
3 combinaciones).
Preparación
Seleccionar los efectos de sonido.
1 Pulse [SETUP] para seleccionar
“SAVE MY SOUND”.
2 Pulse [R, T] para seleccionar un número de ajuste
de sonido y a continuación pulse [OK].
Se muestra “SAVED”.
El nuevo ajuste sobrescribe el que existiera en la
posición seleccionada.
Para recuperar el ajuste
1 Pulse [SOUND] para seleccionar “MY SOUND”.
2 Pulse [R, T] para seleccionar el número de ajuste
de sonido y a continuación pulse [OK].
(Z“Guardar los ajustes de sonido”)
“CLEAR”, “VOCAL” o “FLAT”
Utilización el unidad principal
1. Pulse [BASS/TREBLE] para
seleccionar “BASS”.
2. Pulse [2/3] o [5/6].
Utilización el unidad principal
1. Pulse [BASS/TREBLE] para
seleccionar “TREBLE”.
2. Pulse [2/3] o [5/6].
“OFF D.BASS”
Utilización el unidad principal
Pulse [D.BASS] repetidamente.
“OFF SURROUND” (predeterminado)
Otros
Apagado automático
El sistema se apaga automáticamente cuando no se
utiliza durante 20 minutos.
1 Pulse [SETUP] repetidamente para seleccionar
“AUTO OFF”.
2 Pulse [R, T] para seleccionar “ON” y después
pulse [OK].
Para cancelar, seleccione “OFF”.
Nota:
Esta función no está operativa cuando la radio está
seleccionada como fuente o cuando un dispositivo
®
Bluetooth
Bluetooth® en espera
Esta función enciende automáticamente el sistema
cuando se establece una conexión Bluetooth
dispositivo emparejado.
1 Pulse [SETUP] repetidamente para seleccionar
2 Pulse [R, T] para seleccionar “ON” y después
Comprobación de la versión de software
1 Pulse [SETUP] repetidamente para seleccionar
2 Vuelva a pulsar [OK] para salir.
está conectado.
“BLUETOOTH STANDBY”.
pulse [OK].
Para cancelar, seleccione “OFF”.
“SW VER.” y después pulse [OK].
Se muestra la versión de software.
®
desde un
11
55
TQBJ0979
Page 56

Solución de problemas
offset printing
Antes de solicitar el servicio de reparaciones haga las
comprobaciones indicadas abajo. Si tiene alguna duda
acerca de algunos de los puntos de comprobación o si
las soluciones indicadas no resuelven el problema,
consulte a su distribuidor para obtener instrucciones.
█ Problemas comunes
La unidad no funciona.
• La dispositivo de seguridad se ha activado. Realice lo
siguiente:
1. Pulse [1] en la unidad principal para activar el modo de
espera. Si la unidad no entra en el modo de espera,
– Mantenga pulsado el botón durante por lo menos
10 segundos. O,
– Desconecte el cable de alimentación de CA y vuelva a
conectarlo.
2. Pulse [1] otra vez para encender la unidad. Si el
problema persiste, consulte a su distribuidor.
No se puede realizar ninguna operación con el mando a
distancia.
• Compruebe que la pila está correctamente instalada.
El sonido está distorsionado o no hay sonido.
• Ajuste el volumen del sistema.
• Apague el sistema, determine y corrija la causa y, a
continuación, vuelva a encender el sistema. Se puede
causar por sobrecargar los altavoces con una potencia o
volumen excesivos, y por utilizar la unidad en un ambiente
caliente.
Se puede oír un zumbido durante la reproducción.
• Un cable de alimentación de CA o una luz fluorescente
están cerca de los cables. Mantenga otros aparatos y
cables alejados de los cables de este sistema.
█ Disco
Visualizador no mostrado correctamente.
No se inicia la reproducción.
• No ha puesto el disco correctamente. Póngalo
correctamente.
• El disco está sucio. Limpie el disco.
• Sustituya el disco si está rayado, deformado o no es un
disco convencional.
• Hay condensación. Deje secarse el sistema entre 1 y 2
horas.
█ Radio/DAB+
La recepción DAB+ es mala.
• Aleje la antena de ordenadores, de televisores y de otros
cables eléctricos.
El sonido está distorsionado.
• Utilice una antena exterior opcional. La antena deberá ser
instalada por un técnico competente.
Se oye un sonido rítmico.
• Apague el televisor o apártelo del sistema.
• Separe los teléfonos móviles del sistema si las
interferencias resultan evidentes.
█ Bluetooth
No se puede efectuar el emparejamiento.
• Compruebe el estado del dispositivo Bluetooth®.
• El dispositivo está fuera de la distancia de comunicación
de 10 m. Acerque el dispositivo al sistema.
No se puede conectar el dispositivo.
• El emparejamiento del dispositivo no ha sido exitoso. Haga
el emparejamiento de nuevo.
• Se haya sustituido el emparejamiento del dispositivo. Haga
el emparejamiento de nuevo.
• El sistema puede estar conectado a un dispositivo
diferente. Desconecte el otro dispositivo e intente
emparejar de nuevo el dispositivo.
El dispositivo está conectado pero no se puede
escuchar el audio a través del sistema.
• Para algunos dispositivos con Bluetooth® integrado ha de
configurar manualmente la salida de audio a “
Lea las instrucciones de funcionamiento del dispositivo
para más detalles.
El sonido desde el dispositivo se interrumpe.
• El dispositivo está fuera de la distancia de comunicación
de 10 m. Acerque el dispositivo al sistema.
• Aparte cualquier obstáculo entre el sistema y el dispositivo.
• Hay interferencias de otros dispositivos que utilizan la
banda de frecuencia de 2,4 GHz (router inalámbrico,
microondas, teléfonos inalámbricos, etc.). Desplace el
dispositivo más cerca del sistema y aléjelo del resto de
dispositivos.
• Seleccione
La imagen y el sonido de la reproducción no están
sincronizados.
• Reinicie la aplicación de reproducción del dispositivo.
®
SC-PM602”.
“MODE 1” para una comunicación estable.
█ USB
El dispositivo USB o los contenidos en él no se puede
reproducir.
• El formato del dispositivo USB o su contenido no es
compatible con el sistema.
• Los dispositivos USB con capacidad de almacenamiento
de más de 32 GB no pueden funcionar en las mismas
condiciones.
Funcionamiento lento del dispositivo USB.
• Lleva más tiempo leer los archivos grandes o los
dispositivos USB con mucha memoria.
El tiempo transcurrido mostrado es diferente del
tiempo real de reproducción.
• Transfiera los datos a otro dispositivo USB o haga una
copia de seguridad de los datos y reformatee el dispositivo
de USB.
TQBJ0979
12
56
█ Visualizaciones de unidad principal
“--:--”
• Conectó el cable de alimentación de CA por primera vez o
se produjo un fallo recientemente en la alimentación.
Configure el reloj.
“
ADJUST CLOCK”
• El reloj no está ajustado. Ajuste el reloj.
ADJUST TIMER”
“
• El temporizador de reproducción no está ajustado. Ajuste
el temporizador de reproducción.
AUTO OFF”
“
• La unidad no se ha utilizado aproximadamente durante
20 minutos y se apagará dentro de un minuto. Para
cancelar, pulse cualquier botón.
“
ERROR”
• Se ha llevado a cabo una operación incorrecta. Lea las
instrucciones y vuelva a intentarlo.
Page 57

“F61”
ESPAÑOL
offset printing
“F77”
• Desconecte el cable de alimentación de CA y consulte a su
distribuidor.
“
F703”
• Examine la conexión Bluetooth®.
• Desconecte el dispositivo Bluetooth
después vuelva a encenderlo.
F76”
“
• Hay un problema de suministro de corriente.
• Desconecte el cable de alimentación de CA y consulte a su
distribuidor.
“
NODEVICE”
• El dispositivo USB no está conectado. Compruebe la
conexión.
NO DISC”
“
• No ha puesto un disco.
“NO MEMORY”
• La presintonización de memorias DAB no se ha realizado.
NO PLAY”
“
• Compruebe el contenido. Solo puede reproducir formato
admitido.
• Puede que exista un problema en el sistema. Apague el
sistema y después vuelva a encenderlo.
“NO SIGNAL”
• Las emisoras no se pueden recibir. Ajuste la antena.
PLAYERROR”
“
• Ha reproducido un archivo MP3 no soportado. El sistema
omitirá esa pista y reproducirá la siguiente.
“
REMOTE 1”
“REMOTE 2”
• El mando a distancia y la unidad principal están utilizando
diferentes códigos. Cambie el código del mando a
distancia.
– Cuando se muestra
[OK] y [ ]
– Cuando se muestra
[OK] y [USB/CD]
“SCAN FAILED”
• Las emisoras no se pueden recibir. Ajuste la antena o
sintonice manualmente.
“SOUND 1 NOT SET”
“SOUND 2 NOT SET”
“SOUND 3 NOT SET”
• No ha almacenado los efectos de sonido en la posición de
ajuste de sonido.
USB OVER CURRENT ERROR”
“
• El dispositivo USB está utilizando demasiada energía.
Desconecte el dispositivo USB, apague el sistema y
vuélvalo a encender.
“
VBR”
• El sistema no puede mostrar el tiempo de reproducción
restante para las pistas con velocidad de bits variable
(VBR).
“REMOTE 1”, mantenga pulsado
durante por lo menos 4 segundos.
“REMOTE 2”, mantenga pulsado
durante por lo menos 4 segundos.
®
. Apague el sistema y
Código de mando a distancia
Cuando otro equipo Panasonic responda al mando a
distancia de este sistema, cambie el código del mando a
distancia de este sistema.
Preparación
Pulse [USB/CD] para seleccionar “CD”.
█ Para poner el código a “REMOTE 2”
1 Mantenga pulsado [CD] en la unidad principal y
[USB/CD] en el mando a distancia.
Se muestra “REMOTE 2”.
2 Mantenga pulsado [OK] y [USB/CD] durante por lo
menos 4 segundos.
█ Para poner el código a “REMOTE 1”
1 Mantenga pulsado [CD] en la unidad principal y [ ]
en el mando a distancia.
Se muestra “REMOTE 1”.
2 Mantenga pulsado [OK] y [ ] durante por lo menos
4 segundos.
Restablecer memoria sistema
Restablezca la memoria cuando ocurran las siguientes
situaciones:
• Los botones no funcionan.
• Usted desea borrar y restablecer el contenido de la
memoria.
1 Desconecte el cable de alimentación de CA.
2 Mientras mantiene pulsado [1] en la unidad
principal, conecte la cable de alimentación de CA
de nuevo.
Siga manteniendo pulsado el botón hasta que se
muestre “–––––––––”.
3 Suelte [1].
Todos los ajustes vuelven a los valores
predeterminados de fábrica.
Es necesario configurar los elementos de memoria de
nuevo.
Mantenimiento
Utilice un paño suave y seco para limpiar este sistema.
• No utilice nunca alcohol, diluyente de pintura o
gasolina para limpiar este sistema.
• Antes de utilizar un paño impregnado químicamente,
lea con atención, las instrucciones del mismo.
13
57
TQBJ0979
Page 58

Especificaciones
offset printing
█ Sección del amplificador
Potencia de salida RMS
Canal frontal (ambos canales accionados)
Potencia total RMS 40 W
20 W por canal (6 Ω), 1 kHz,
distorsión armónica total del 10%
█ Sección del sintonizador, terminales
Memoria presintonizada 30 emisoras de FM
Modulación de frecuencia (FM)
Gama de frecuencias
87,50 MHz a 108,00 MHz (en pasos de 50 kHz)
Terminales de antena 75 Ω (desequilibrado)
Entrada de auriculares
Terminal Estéreo, entrada de 3,5 mm
█ Sección DAB+
Memorias DAB 20 canales
Banda de frecuencias (longitud de onda)
Banda III 5A a 13F (174,928 MHz a 239,200 MHz)
Sensibilidad *BER 4x10
Requisito mínimo –98 dBm
Antena DAB externa
Terminal Conector F (75 Ω)
-4
█ Sección de disco
Discos reproducidos (8 cm o 12 cm)
MPEG-1 Layer 3, MPEG-2 Layer 3
Dispositivo de lectura
Longitud de onda 790 nm (CD)
CD, CD-R/RW (CD-DA, MP3 )
█ Sección USB
Puerto USB Salida de CC 5 V, 500 mA
Estándar USB USB 2.0 velocidad total
Soporte de formato de archivos de medios
Sistema de archivos de dispositivo USB
MP3 (*.mp3)
FAT12, FAT16, FAT32
█ Sección Bluetooth
Versión Bluetooth® Ver. 2.1 + EDR
Clase Clase 2
Perfiles admitidos A2DP, AVRCP
Frecuencia de funcionamiento
Distancia de funcionamiento Línea de mira 10 m
®
FH-SS de banda de 2,4 GHz
█ Sección de altavoz
Altavoz(ces)
Altavoz de bajos
Altavoz para agudos
Impedancia 6 Ω
Dimensiones (An x Al x Prf)
Peso 1,9 kg
Tipo cónico de 10 cm x 1 por canal
Tipo cónico de 6 cm x 1 por canal
145 mm x 224 mm x 197 mm
█ Generalidades
Alimentación 220 V a 240 V CA, 50 Hz
Consumo energético 17 W
Dimensiones (An x Al x Prf)
Peso 1,4 kg
Gama de temperaturas de funcionamiento
Gama de humedades de funcionamiento
35% a 80% humedad relativa (sin condensación)
Consumo en el modo de espera
(con el “BLUETOOTH STANDBY” ajustado como
“OFF”)
Consumo en el modo de espera
(con el “BLUETOOTH STANDBY” ajustado como “ON”)
Nota:
• Las especificaciones están sujetas a cambios sin previo
aviso.
El peso y las dimensiones son aproximados.
• La distorsión armónica total se mide con el analizador de
espectro digital.
153 mm x 224 mm x 232 mm
0°C a +40°C
0,3 W (aproximados)
0,4 W (aproximados)
TQBJ0979
14
58
Page 59

Referencias
ESPAÑOL
offset printing
Sobre Bluetooth
Panasonic no asume ninguna responsabilidad por los
datos que se puedan ver comprometidos durante una
transmisión inalámbrica.
Banda de frecuencia
• Este sistema utiliza la banda de frecuencia 2,4 GHz.
Certificación
• Este sistema está de acuerdo con las restricciones de
frecuencia y ha recibido la certificación basándose en
las leyes de frecuencia. De ese modo, no se necesita
un permiso inalámbrico.
• Las siguientes acciones son denunciables por la ley:
– Desmontando o modificando la unidad principal.
– Quitar la información sobre las especificaciones.
Restricciones de uso
• La transmisión inalámbrica y/o uso con todos los
dispositivos equipados con Bluetooth
garantizada.
• Todos los dispositivos han de estar acuerdo con los
estándares establecidos por Bluetooth SIG, Inc.
• Dependiendo de las especificaciones y ajustes de un
dispositivo, puede no conectarse o algunas
operaciones pueden ser diferentes.
• Este sistema soporta funciones de seguridad
Bluetooth
funcionamiento y/o ajustes, esta seguridad
posiblemente no es suficiente. Transmita datos
inalámbricamente a este sistema con cuidado.
• Este sistema no puede transmitir datos a un
dispositivo Bluetooth
Rango de uso
• Utilice este dispositivo a una distancia máxima de
10 m.
• La distancia puede disminuir dependiendo del entorno,
obstáculos o interferencias.
Interferencias de otros dispositivos
• Puede que este sistema no funcione correctamente y
que surjan ciertos problemas, como ruido y saltos en el
sonido debido a interferencias de ondas de radio, si se
coloca demasiado cerca de otros dispositivos
Bluetooth
2,4 GHz.
• Puede que este sistema no funcione correctamente si
las ondas de radio emitidas por una emisora cercana,
etc. son demasiado intensas.
Uso previsto
• Este sistema es solo para uso normal, general.
• No utilice este sistema cerca de un equipo o en un
entorno que sea sensible a interferencias de
frecuencias de radio (ejemplo: aeropuertos, hospitales,
laboratorios, etc.).
®
®
®
. Pero dependiendo del entorno de
®
.
o dispositivos que utilizan la banda de
®
no está
Licencias
La marca denominativa Bluetooth® y sus logos son
marcas comerciales registradas de Bluetooth SIG, Inc.
y cualquier uso de dichas marcas por parte de
Panasonic Corporation se realiza bajo licencia. Otros
nombres de marcas y marcas comerciales son
propiedad de sus respectivos propietarios.
Tecnología de codificación de audio MPEG Layer-3
licenciado de Fraunhofer IIS y Thomson.
Declaración de conformid (DoC)
Por la presente, “Panasonic Corporation” declara que
este producto cumple con los requerimientos esenciales
y otras provisiones pertinentes de la Directiva 1999/5/EC.
Los clientes pueden descargar una copia de la DoC
original de nuestros productos R&TTE de nuestro
servidor DoC:
http://www.doc.panasonic.de
Contacto del representante autorizado: Panasonic
Marketing Europe GmbH, Panasonic Testing Centre,
Winsbergring 15, 22525 Hamburg, Alemania
Eliminación de aparatos y baterías viejos
Solo para la Unión Europea y países con sistemas de
reciclado
Estos símbolos en los productos, embalajes
y/o documentos adjuntos, significan que los
aparatos eléctricos y electrónicos y las
baterías no deben mezclarse con los
desechos domésticos.
Para el tratamiento apropiado, la
recuperación y el reciclado de aparatos
viejos y baterías usadas, observe las normas
de recolección aplicables, de acuerdo a su
legislación nacional.
Al desecharlos correctamente, estará
ayudando a preservar recursos valiosos y a
prevenir cualquier potencial efecto negativo
sobre la salud de la humanidad y el medio
ambiente.
Para obtener más información acerca de la
recolección y reciclado, contacte con su
comunidad local.
Podrán aplicarse penas por la eliminación
incorrecta de estos residuos, de acuerdo a la
legislación nacional.
Nota sobre el símbolo de la batería
(símbolo de la parte de abajo):
Este símbolo puede ser usado en
combinación con un símbolo químico. En
este caso, el mismo cumple con los
requerimientos establecidos por la Directiva
para los químicos involucrados.
15
59
TQBJ0979
Page 60

█ NORSK
offset printing
ADVARSEL!
Produkt
• For å redusere faren for brann, elektrisk støt eller
skade på apparatet:
– Dette apparatet må ikke utsettes for regn, fuktighet,
drypp eller sprut.
– Ikke plasser objekter som er fylt med væske, som
vaser, på apparatet.
– Bruk kun anbefalt tilbehør.
– Fjern ikke deksler.
–
Dette apparatet må ikke repareres på egen hånd.
Overlat servicearbeider til kvalifisert servicepersonell.
FORSIKTIG!
Produkt
• For å redusere faren for brann, elektrisk støt eller
skade på apparatet:
– Ikke plasser apparatet i en bokhylle, et innebygget
kabinett eller et annet lukket sted. Pass på at
apparatet er godt ventilert.
– Apparatets ventilasjonsåpninger må ikke dekkes til
med aviser, duker, gardiner eller lignende.
– Plasser ikke åpen ild, slik som levende lys, oppå
apparatet.
• Dette apparatet er beregnet til bruk under moderate
klimaforhold.
• Dette apparatet anvender en laser. Betjening av
kontroller, justeringer eller andre inngrep enn de som
er beskrevet i denne bruksanvisning, kan føre til farlig
bestråling.
Vekselstrømnett
• Støpselet er frakoblende enhet. Strømuttaket må
befinne seg i nærheten slik at støpselet lett kan kobles
ut fra uttaket umiddelbart.
█ POLSKI
Infolinia (Polska):
801 003 532 – numer dla połączeń z sieci stacjonarnej
22 295 37 27 – numer dla połączeń z sieci stacjonarnej oraz komórkowej
Produkt Panasonic
Produkt objęty jest E-Gwarancją Panasonic.
Prosimy o zachowanie dowodu zakupu.
Warunki gwarancji oraz informacje o produkcie są dostępne na stronie www.panasonic.pl
lub pod numerami telefonów:
801 003 532 – numer dla połączeń z sieci stacjonarnej
22 295 37 27 – numer dla połączeń z sieci stacjonarnej oraz komórkowej
Dystrybucja w Polsce
Panasonic Marketing Europe GmbH
(Spółka z ograniczoną odpowiedzialnością)
Oddział w Polsce
ul. Wołoska 9A, 02-583 Warszawa
Manufactured by:
Importer for Europe:
Panasonic Corporation
Web Site: http://www.panasonic.com
© Panasonic Corporation 2016
Panasonic Corporation
Kadoma, Osaka, Japan
Panasonic Marketing Europe GmbH
Panasonic Testing Centre
Winsbergring 15, 22525 Hamburg, Germany
SpCzPoEn
TQBJ0979
L0816CH0
 Loading...