

Page 1

G4 Wireless Adapter
Replacement
67-2108 Rev A
For AWS, OmniRx, and CT cabinets
Page 2

This guide is CONFIDENTIAL and designed only for Omnicell Technical personnel and/or designated
representatives.
This guide and accompanying software and/or hardware described in it are protected under copyright laws and may
not be copied, wholly or in part, without the express written consent of Omnicell, Inc. The same proprietary and
copyright notices must be attached to any permitted copies as were attached to the original documents.
Omnicell, Inc.
1201 Charleston Road
Mountain View, CA 94043
(650) 251-6100
www.omnicell.com
Omnicell and the Omnicell design mark, OmniBuyer, OmniCenter, OmniRx, OmniSupplier, Pandora, PandoraVIA,
SafetyMed, SafetyStock, and Sure-Med are registered trademarks. Anesthesia TT, Anesthesia Workstation,
Anywhere RN, Executive Advisor, FlexBin, Medication Surveillance, OmniDispenser, OmniLinkRx, OmniScanner,
OmniTrack, Omni TT, Open Touch, OptiFlex, OptiFlex MobileTrack, Point-to-Point Medication Safety, ProServ1,
SecureVault, See & Touch, SinglePointe, TempCheck, Touch & Go, vSuite, and WorkflowRx are trademarks of
Omnicell, Inc. in the United States and internationally. All other trademarks and trade names are the property of their
respective owners.
Copyright 2011 Omnicell, Inc. All rights reserved.
Wireless Adapter Replacement/67-2108 Rev A © 2011 Omnicell, Inc.
Page 3

Table of Contents
AWS Wireless Adapter . . . . . . . . . . . . . . . . . . . . . . . . . . . . . . . . . . . . . . . . . . . . . . . . . . . . . . . . 1-1
Requirements . . . . . . . . . . . . . . . . . . . . . . . . . . . . . . . . . . . . . . . . . . . . . . . . . . . . . . . . . . . . . . . . 1-1
Linksys WMP600N Removal. . . . . . . . . . . . . . . . . . . . . . . . . . . . . . . . . . . . . . . . . . . . . . . . . . . 1-1
Asus PCE-N15 Installation . . . . . . . . . . . . . . . . . . . . . . . . . . . . . . . . . . . . . . . . . . . . . . . . . . . . 1-4
OmniRx Wireless Adapter . . . . . . . . . . . . . . . . . . . . . . . . . . . . . . . . . . . . . . . . . . . . . . . . . . . . . 2-1
Requirements . . . . . . . . . . . . . . . . . . . . . . . . . . . . . . . . . . . . . . . . . . . . . . . . . . . . . . . . . . . . . . . . 2-1
Linksys WMP600N Removal. . . . . . . . . . . . . . . . . . . . . . . . . . . . . . . . . . . . . . . . . . . . . . . . . . . 2-1
Asus PCE-N15 Installation . . . . . . . . . . . . . . . . . . . . . . . . . . . . . . . . . . . . . . . . . . . . . . . . . . . . 2-3
CT Cabinet Wireless Adapter. . . . . . . . . . . . . . . . . . . . . . . . . . . . . . . . . . . . . . . . . . . . . . . . . . . 3-1
Requirements . . . . . . . . . . . . . . . . . . . . . . . . . . . . . . . . . . . . . . . . . . . . . . . . . . . . . . . . . . . . . . . . 3-1
Linksys WMP600N Removal. . . . . . . . . . . . . . . . . . . . . . . . . . . . . . . . . . . . . . . . . . . . . . . . . . . 3-1
Asus PCE-N15 Installation . . . . . . . . . . . . . . . . . . . . . . . . . . . . . . . . . . . . . . . . . . . . . . . . . . . . 3-3
iii
Wireless Kit Installation . . . . . . . . . . . . . . . . . . . . . . . . . . . . . . . . . . . . . . . . . . . . . . . . . . . . . . 4-1
Requirements . . . . . . . . . . . . . . . . . . . . . . . . . . . . . . . . . . . . . . . . . . . . . . . . . . . . . . . . . . . . . . . . 4-1
Installation Procedure . . . . . . . . . . . . . . . . . . . . . . . . . . . . . . . . . . . . . . . . . . . . . . . . . . . . . . . . 4-1
Driver Installation. . . . . . . . . . . . . . . . . . . . . . . . . . . . . . . . . . . . . . . . . . . . . . . . . . . . . . . . . . . . 5-1
Documentation Feedback . . . . . . . . . . . . . . . . . . . . . . . . . . . . . . . . . . . . . . . . . . . . . . . . . . . FB-1
© 2011 Omnicell, Inc. Wireless Adapter Replacement/67-2108 Rev A
Page 4

iv Table of Contents
Wireless Adapter Replacement/67-2108 Rev A © 2011 Omnicell, Inc.
Page 5

AWS Wireless Adapter
This chapter covers the following steps for the G4 AWS:
Removing the Linksys WMP600N wireless adapter.
Installing the Asus PCE-N15 wireless adapter (#71-1325).
Installing wireless adapter driver.
Installing parts from the wireless kit.
Requirements
Wireless Network Card (Asus PCE-N15)
Asus PCE-N15 driver for Windows 7
T-10 Torx screwdriver
USB flash drive
1-1
Linksys WMP600N Removal
Replace the Linksys WMP600N wireless adapter if installed.
1. Record all wireless configuration information (network type, IP address, etc.).
2. Ensure that the system is powered down and that the AC power cord is disconnected.
3. Open the printer door.
Figure 1-1. Printer door
4. Remove the paper roll.
© 2011 Omnicell, Inc. Wireless Adapter Replacement/67-2108 Rev A
Page 6

1-2 AWS Wireless Adapter
Remove paper roll
Rotate latch counterclockwise
Linksys WMP600N Removal
5. Ensure that the rotating latch inside is in the unlocked position (turn counter clockwise).
Figure 1-2. Printer roll and latch
6. Use the 2378 key to unlock the AWS E-box and printer cover.
7. Carefully remove the AWS E-box and printer cover.
8. Unscrew the antennas from the Linksys WMP600N.
Figure 1-3. Antenna cables
9. Use a T10 Torx screwdriver to remove the screws that secure the E-box cover.
10. Remove the E-box cover.
11. Unplug the backup battery.
12. Use a T10 Torx screwdriver to remove the screw which holds the Linksys WMP600N in place.
13. Remove the Linksys WMP600N wireless adapter.
Wireless Adapter Replacement/67-2108 Rev A © 2011 Omnicell, Inc.
Page 7

AWS Wireless Adapter 1-3
Linksys WMP600N Removal
14. Use a T10 Torx screwdriver to remove the screw which holds the I/O plate that is two slots
away from where the Linksys WMP600N wireless adapter was seated.
Figure 1-4. I/O plate removal
15. Move the I/O plate to the slot that once held the Linksys WMP600N then fasten it with a screw.
© 2011 Omnicell, Inc. Wireless Adapter Replacement/67-2108 Rev A
Page 8

1-4 AWS Wireless Adapter
Asus PCE-N15 Installation
Asus PCE-N15 Installation
1. Install the Asus PCE-N15 in the open I/O slot and fasten it with a screw.
Figure 1-5. Asus PCE-N15
2. Screw on the antennas.
Figure 1-6. Connect antenna cables
3. Plug in the backup battery.
4. Place the E-box cover back on and secure it with the screws that were previously removed.
Wireless Adapter Replacement/67-2108 Rev A © 2011 Omnicell, Inc.
Page 9

5. Carefully place the E-box and printer cover back on.
Bottom groove
for cover
Top side edge for cover
Figure 1-7. Cover placement
AWS Wireless Adapter 1-5
Asus PCE-N15 Installation
6. Ensure that the rotating latch inside of the printer door is in the locked position.
Figure 1-8. Printer door latch
7. Insert the paper roll and feed the end into the printer.
8. Use the 2378 key to lock the E-box and printer cover.
9. Plug the AC power cord back in and power on the system.
10. Install the driver. See “Driver Installation” on page 5-1.
© 2011 Omnicell, Inc. Wireless Adapter Replacement/67-2108 Rev A
Page 10

1-6 AWS Wireless Adapter
Asus PCE-N15 Installation
Wireless Adapter Replacement/67-2108 Rev A © 2011 Omnicell, Inc.
Page 11

OmniRx Wireless Adapter
This chapter covers the following steps for the G4 OmniRx
Removing the Linksys WMP600N wireless adapter.
Installing the Asus PCE-N15 wireless adapter (#71-1325).
Installing wireless adapter driver.
Installing parts from the wireless kit.
Requirements
Wireless Network Card (Asus PCE-N15)
Asus PCE-N15 driver for Windows 7
T-10 Torx screwdriver
USB flash drive
2-1
Linksys WMP600N Removal
Replace the Linksys WMP600N wireless adapter if installed.
1. Record all wireless configuration information (network type, IP address, etc.).
2. Ensure that the system is powered down and that the AC power cord is disconnected.
3. Use the 2378 key to unlock the OmniRx lid.
4. Unscrew the antennas from the Linksys WMP600N.
Figure 2-1. Antenna cables
5. Use a T10 Torx screwdriver to remove the screws that secure the E-box cover.
© 2011 Omnicell, Inc. Wireless Adapter Replacement/67-2108 Rev A
Page 12

2-2 OmniRx Wireless Adapter
Linksys WMP600N Removal
6. Remove the E-box cover.
7. Unplug the backup battery.
8. Use a T10 Torx screwdriver to remove the screw which holds the Linksys WMP600N in place.
Figure 2-2. Linksys WMP600N adapter
9. Remove the Linksys WMP600N wireless adapter.
10. Use a T10 Torx screwdriver to remove the screw which holds the I/O plate that is two slots
away from where the Linksys WMP600N wireless adapter was seated.
Figure 2-3. I/O plate removal
11. Move the I/O plate to the slot that once held the Linksys WMP600N then fasten it with a screw.
Wireless Adapter Replacement/67-2108 Rev A © 2011 Omnicell, Inc.
Page 13

Asus PCE-N15 Installation
1. Install the Asus PCE-N15 in the open I/O slot and fasten it with a screw.
Figure 2-4. Asus PCE-N15 adapter
2. Screw on the antennas.
OmniRx Wireless Adapter 2-3
Asus PCE-N15 Installation
Figure 2-5. Connect antenna cables
3. Plug in the backup battery.
4. Place the E-box cover back on and secure it with the screws that were previously removed.
5. Place the lid back into its original position.
6. Use the 2378 key to lock the lid
7. Plug the AC power cord back in and power on the system.
8. Install the driver. See “Driver Installation” on page 5-1.
© 2011 Omnicell, Inc. Wireless Adapter Replacement/67-2108 Rev A
Page 14

2-4 OmniRx Wireless Adapter
Asus PCE-N15 Installation
Wireless Adapter Replacement/67-2108 Rev A © 2011 Omnicell, Inc.
Page 15

CT Cabinet Wireless Adapter
This chapter covers the following steps for G4 CT cabinets:
Removing the Linksys WMP600N wireless adapter.
Installing the Asus PCE-N15 wireless adapter (#71-1325).
Installing wireless adapter driver.
Installing parts from the wireless kit.
Requirements
Wireless Network Card (Asus PCE-N15)
Asus PCE-N15 driver for Windows 7
T-10 and T20 Torx screwdrivers
USB flash drive
3-1
Linksys WMP600N Removal
Replace the Linksys WMP600N wireless adapter if installed.
1. Record all wireless configuration information (network type, IP address, etc.).
2. Ensure that the system is powered down and that the AC power cord is disconnected.
3. Use the 2378 key to unlock the CT console.
4. If the screw that locks the CT console in place is present, use the T20 screwdriver to remove it.
5. Unscrew the antennas from the Linksys WMP600N.
Figure 3-1. Antenna cables
© 2011 Omnicell, Inc. Wireless Adapter Replacement/67-2108 Rev A
Page 16

3-2 CT Cabinet Wireless Adapter
Linksys WMP600N Removal
6. Use a T10 Torx screwdriver to remove the screws that secure the E-box cover.
7. Remove the E-box cover.
8. Unplug the backup battery.
9. Use a T10 Torx screwdriver to remove the screw which holds the Linksys WMP600N in place.
Figure 3-2. Linksys WMP600N adapter
10. Remove the Linksys WMP600N wireless adapter.
11. Use a T10 Torx screwdriver to remove the screw which holds the I/O plate that is two slots
away from where the Linksys WMP600N wireless adapter was seated.
Figure 3-3. I/O plate removal
12. Move the I/O plate to the slot that once held the Linksys WMP600N then fasten it with a screw.
Wireless Adapter Replacement/67-2108 Rev A © 2011 Omnicell, Inc.
Page 17

Asus PCE-N15 Installation
1. Install the Asus PCE-N15 in the open I/O slot and fasten it with a screw.
Figure 3-4. Asus PCE-N15 adapter
2. Screw on the antennas.
CT Cabinet Wireless Adapter 3-3
Asus PCE-N15 Installation
Figure 3-5. Connect antenna cables
3. Plug in the backup battery.
4. Place the E-box cover back on and secure it with the screws that were previously removed.
5. Push the CT console back in place.
6. If the screw which locks the CT console was present, use the T20 screwdriver to put it back in
place.
7. Use the 2378 key to lock the CT console.
8. Plug the AC power cord back in and power on the system.
9. Install the driver. See “Driver Installation” on page 5-1.
© 2011 Omnicell, Inc. Wireless Adapter Replacement/67-2108 Rev A
Page 18

3-4 CT Cabinet Wireless Adapter
Asus PCE-N15 Installation
Wireless Adapter Replacement/67-2108 Rev A © 2011 Omnicell, Inc.
Page 19

Wireless Kit Installation
Install parts from the #20-7009 wireless kit on a 15.1 imaged system.
Requirements
Wireless Network Card (Asus PCE-N15)
Asus PCE-N15 driver for Windows 7
T-10 and T20 Torx screwdrivers
USB flash drive
Installation Procedure
1. Record all wireless configuration information (network type, IP address, etc.).
2. Ensure that the system is powered down and that the AC power cord and backup battery are
disconnected.
3. Use the 2378 key to unlock, then remove the OmniRx lid, CT console, or AWS E-box cover
depending on the type of cabinet being worked on.
4. Remove the third I/O plate from the edge of the motherboard.
4-1
Figure 4-1. Motherboard
© 2011 Omnicell, Inc. Wireless Adapter Replacement/67-2108 Rev A
Page 20

4-2 Wireless Kit Installation
Installation Procedure
5. Insert the Asus PCE-N15 into the black PCIe 1x port and gently push down on it until it is
firmly seated.
Figure 4-2. Asus wireless adapter
6. Remove and save the star washer and nut from the antenna extension cable P/N 42-1343-01.
7. Slide the antenna extension cable through one of the holes provided in the plate.
8. Slide on the star washer all the way to the end of the connector then screw on the nut by hand
until it reaches the star washer.
Figure 4-3. Secure one end of the antenna cable
Wireless Adapter Replacement/67-2108 Rev A © 2011 Omnicell, Inc.
Page 21

Wireless Kit Installation 4-3
Installation Procedure
9. Use an adjustable wrench while the back side of the connector on the other side of the 53-1179
plate (this part varies with platform) to screw on the nut so that it is fits tightly against the star
washer.
Figure 4-4. Tighten the nut for the antenna
10. Repeat steps 5-8 for the second antenna extension cable.
11. Remove the plate that has the antenna extensions already in place.
12. Screw the antennas onto the antenna extension connectors.
Figure 4-5. Secure the other end of the antenna cable
13. Remount the plate.
© 2011 Omnicell, Inc. Wireless Adapter Replacement/67-2108 Rev A
Page 22

4-4 Wireless Kit Installation
Installation Procedure
14. Screw the other ends of the extension cable connectors onto the antenna connectors of the
Asus PCE-N15.
Figure 4-6. Extension cable connectors
15. Install the driver for the wireless adapter.
16. Secure the OmniRx lid, CT console, or AWS E-box cover (depending on the type of cabinet
being worked on) using the 2378 key.
17. Plug the AC power cord back in and power on the system.
18. Install the driver. See “Driver Installation” on page 5-1.
Wireless Adapter Replacement/67-2108 Rev A © 2011 Omnicell, Inc.
Page 23

Driver Installation
1. Exit out of the Omnicell software into the Windows desktop.
2. Press the Windows + r keys to display the Run window.
3. Type in
devmgmt.msc.
5-1
Figure 5-1. Run window
4. Click OK.
If a listing called ASUS PCE-N15 11n Wireless LAN PCI-E Card displays under Network Adapters, close
the Device Manager window. This section is complete.
Figure 5-2. Device Manager window - Network Adapters list w/Asus
© 2011 Omnicell, Inc. Wireless Adapter Replacement/67-2108 Rev A
Page 24

5-2 Driver Installation
If the entry Network Controller appears with a yellow exclamation point next to it, proceed with
the rest of the steps in this section.
Figure 5-3. Device Manager window - Network Adapter list w/Network Controller
5. Download the DR_PCE_N15_1006.zip file to a laptop from the Omnicell FTP address. Copy
and paste (or type in) the following IP address into a browser to access the zip file.
https://ftp.omnicell.com/human.aspx?r=1868660361&Arg12=fileview&Arg11=1
&Arg07=765002001&Arg06=764987023
6. Use a USB flash drive to transfer the DR_PCE_N15_1006.zip file to the target AWS system.
7. Extract the contents of DR_PCE_N15_1006.zip to the AWS desktop.
8. Select the Network Controller then press Appl (or right click on Network Controller).
9. Select Update Driver Software...
Figure 5-4. Network Controller options
Wireless Adapter Replacement/67-2108 Rev A © 2011 Omnicell, Inc.
Page 25

10. Select Browse my computer for driver software.
Driver Installation 5-3
Figure 5-5. Browse my computer - option
11. Select Browse...
Figure 5-6. Browse button
© 2011 Omnicell, Inc. Wireless Adapter Replacement/67-2108 Rev A
Page 26
5-4 Driver Installation
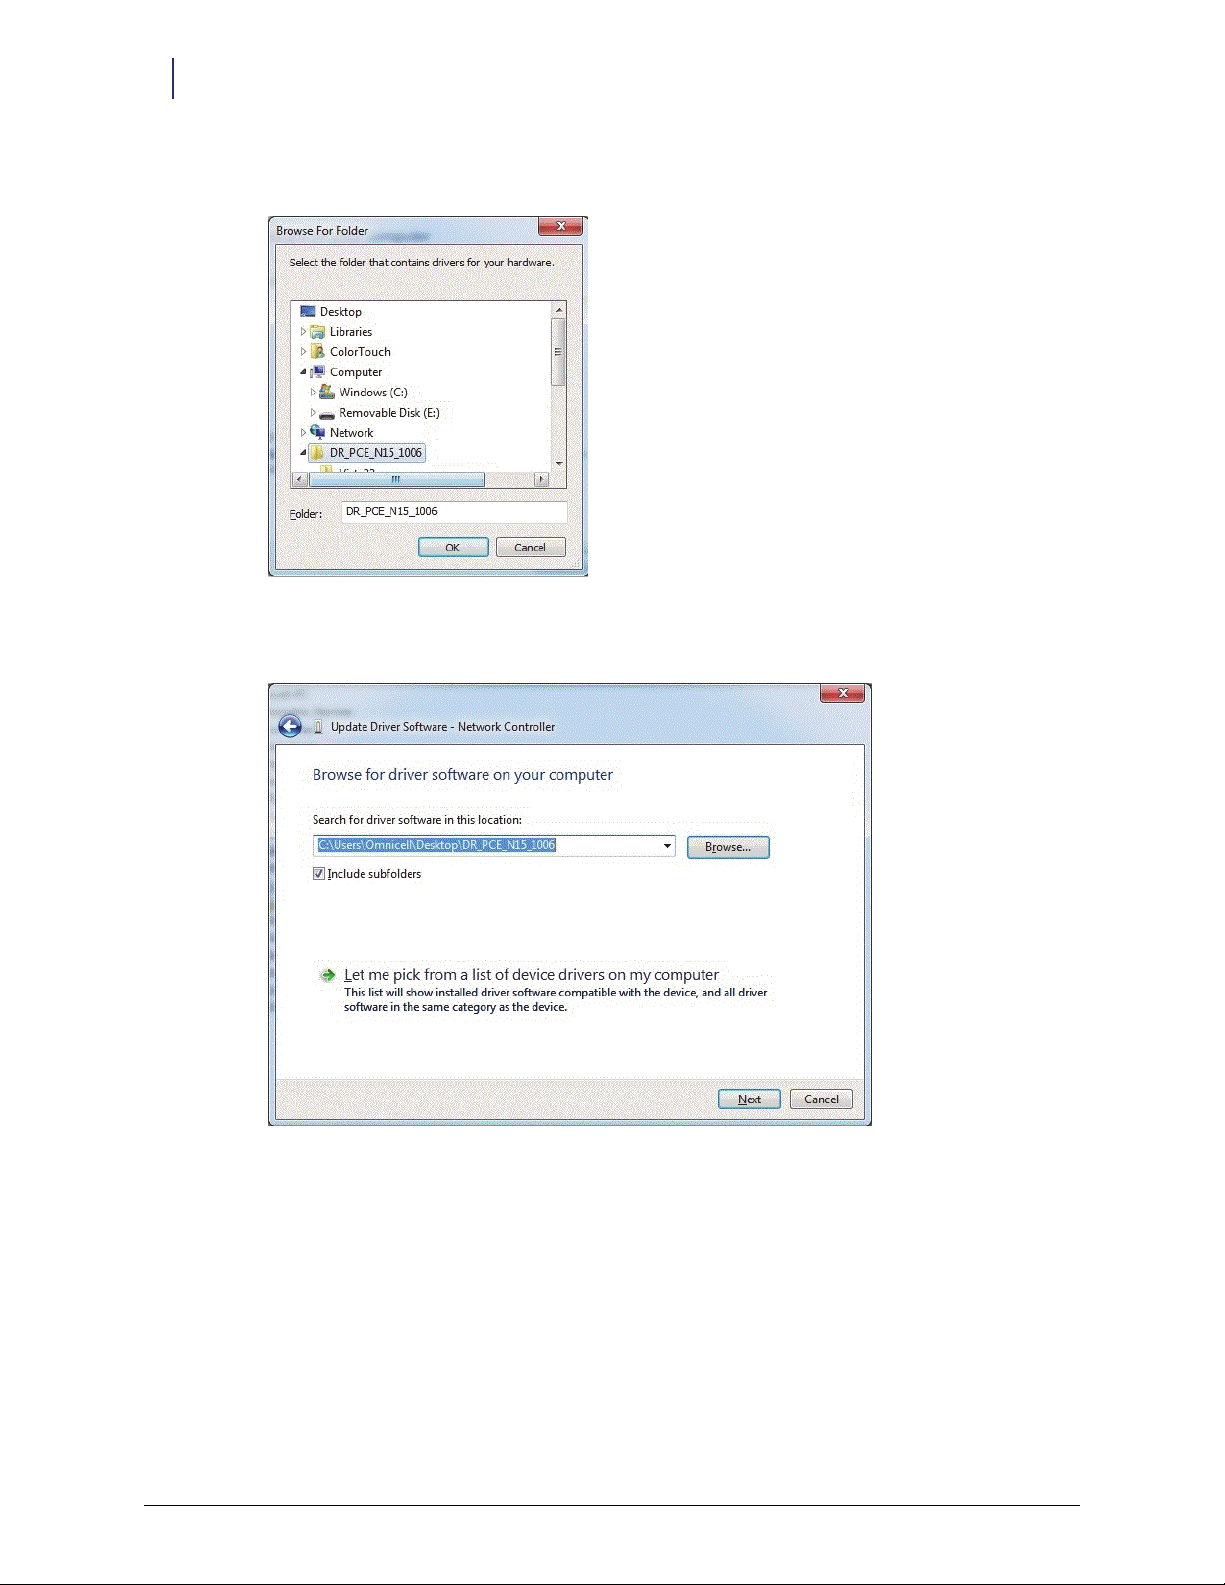
12. Navigate to the DR_PCE_N15_1006 directory, then click OK.
Figure 5-7. Browse for Folder window
13. Ensure that Include sub-folders is checked, then click Next.
Figure 5-8. Update Drives Software window
Wireless Adapter Replacement/67-2108 Rev A © 2011 Omnicell, Inc.
Page 27
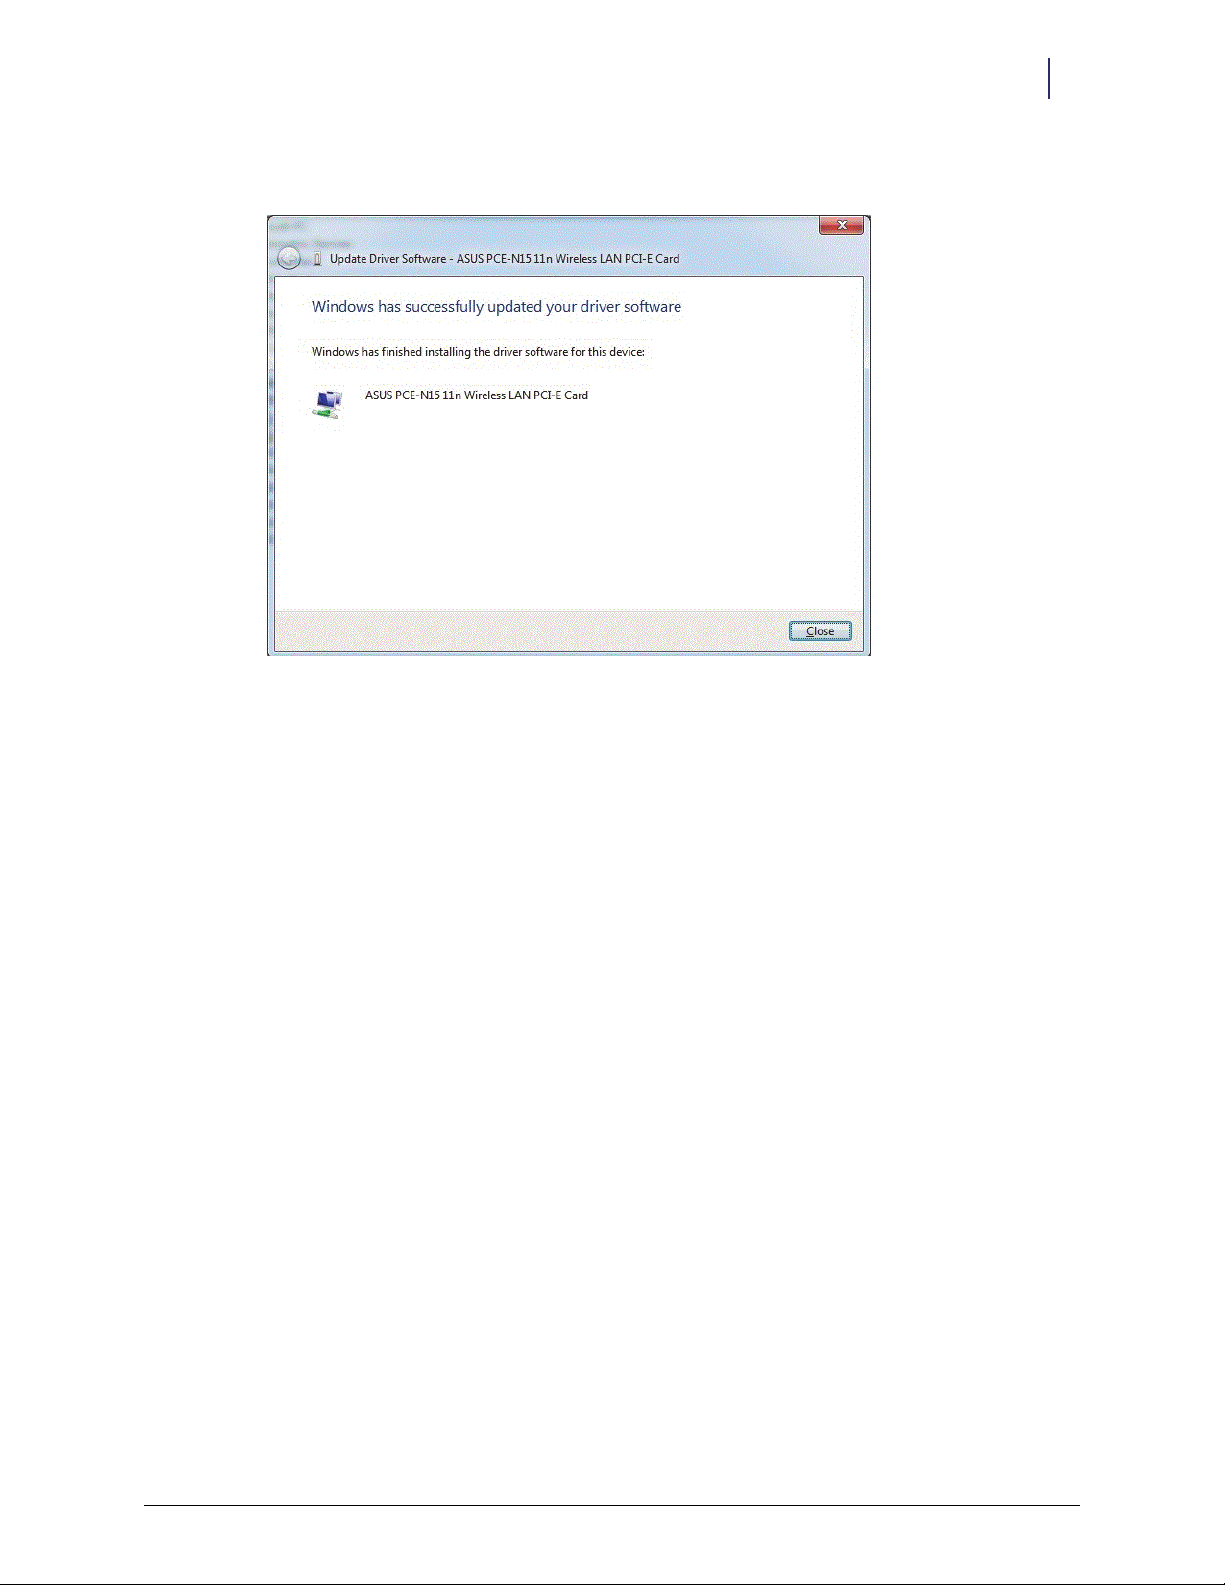
14. Click Close once the driver installation is completed.
Driver Installation 5-5
Figure 5-9. Completion message
15. Reboot the system.
16. Connect to the wireless network using the information recorded in step 1of the Linksys
WMP600N Removal section on page 1-1, 2-1, 3-1 or Installation Procedure on page 4-1.
© 2011 Omnicell, Inc. Wireless Adapter Replacement/67-2108 Rev A
Page 28

5-6 Driver Installation
Wireless Adapter Replacement/67-2108 Rev A © 2011 Omnicell, Inc.
Page 29

Documentation Feedback
This document is designed to provide relevant technical information to those responsible for the
implementation, service, and support of Omnicell products. The Documentation team needs your
input, so we can continue to improve our publications.
Sending Comments to the Technical Documentation Team
Did this document meet your needs? If so, please let us know what we’re doing right. If not, please
provide specific feedback. E-mail or fax your feedback as follows:
E-mail: Documentation Requests e-mail group at documentationrequests@omnicell.com (specify the
document title or PN).
Fax: Send this page, along with your feedback, to (650) 251-6266, attention: Documentation.
This document is designed to provide relevant technical information to Omnicell personnel
responsible for the implementation, service, and support of Omnicell Automation Systems.
Feedback Form
Name: E-mail:
Dept./Title: Phone:
Feed back:
© 2011 Omnicell, Inc. Wireless Adapter Replacement/67-2108 Rev A
Page 30

 Loading...