


Crime Guard 533i3

OPERATION MANUAL
3
533i
COPYRIGHT 1999: OMEGA RESEARCH & DEVELOPMENT, INC.
TABLE OF CONTENTS
About Your New Crime Guard System ................................. 3
Using Your Crime Guard System........................................... 4
Remote Arming By Transmitter............................................... 4-5
Arming Bypass
Last Door Arming By Exiting The Car.................................. 5-6
System Armed and Activated ................................................. 7
Disarming The System ............................................................ 7
Safety Disarm
Remote Disarming By Transmitter ........................................ 8-9
Safety Disarm Feature
Activation Alert
Automatic Rearming
Driver’s Door Priority Unlocking .......................................... 10
Disarming By Emergency Override .......................................11
Remote Panic............................................................................ 12
Other Transmitter Operations .................................................12-13
Auxiliary Output #2 / Auxiliary Output #3........................... 13
Easy Valet Mode......................................................................14
Status Indicator Light ..............................................................15
Dual-Zone Infrasonic Impact Sensor ........................................ 16
Remote Sensor Bypass ............................................................ 16
Backup Battery......................................................................... 17
2nd & 3rd Vehicle Operation ................................................. 17
Vehicle Recovery..................................................................... 18
Automatic Transmitter Verification....................................... 19
Programming The 533i3.......................................................... 20-21
The 533i3’s Programmable Features ...................................... 22-32
Transmitter “2 Button” Operation.......................................... 32-35
Replacement Transmitters....................................................... 36-37
With Transmitter Order Form
Features Programming Checklist ........................................... 38-39
Limited Lifetime Warranty .............................................. Back Cover
Page 2

ABOUT YOUR NEW CRIME GUARD SYSTEM
USING YOUR CRIME GUARD SYSTEM
Congratulations on your purchase of a new Crime Guard security system.
Crime Guard systems combine the benefits of easy-to-use convenience with
“no nonsense” protection of person and property. Please review this guide
to become familiar with your Crime Guard vehicle security system. To
operate your security system, the three principal components are first
described: the Remote Control Transmitter, the Red Status Indicator Light,
and the Easy ValetTM Switch.
The Remote Control Transmitter: Your system comes with two prelearned remote controls, or “transmitters”, and is capable of being operated
by as many as four transmitters. The transmitter has three buttons: A Large
Upper button, a Small Middle Button, and a Small Lower Button.
Every transmitter has its own unique, invisible electronic “code”. Each
time the transmitter is used, this code randomly changes, effectively protecting
your system against “code grabber” devices, like those used to copy cellular
phone security codes. Another exclusive patented feature, Automatic
Transmitter Verification (ATVTM), ensures that only your transmitters
operate your system, and is explained on page 19. These features, and many
others, ensure that Crime Guard systems are the most secure vehicle security
systems available.
The Status Indicator Light: The Red Status Indicator Light reports the
status of the security system at all times, and also serves as a visual deterrent
to break-ins and theft. In addition, the Status Indicator Light is part of the
ATVTM visual display, and is also used for the Alarm Memory Recall feature.
Specific description of the Status Indicator Light is on page 15.
The Valet Switch: The Valet Switch has three main functions:
1- The Valet Switch can be used to turn off the security operation of the
system, including the Last Door Arming feature (if used). This is
referred to as “placing the system into Easy Valet Mode”.
2- The Valet Switch can also be used, in conjunction with the vehicle’s
ignition key, to perform an emergency disarming of the security system
in the event the transmitter is lost or becomes inoperable. This is
referred to as an “Emergency Override”.
3- The Valet Switch is used in the procedure of programming operational
features and also for encoding transmitters to the system.
Page 3
Your new Crime Guard security system is designed to deter theft of both
your vehicle and its contents. Arming the system turns on the protection
operation, disables the vehicle’s starter and locks the doors provided an
interface is installed. Once the system is Armed, any intrusion attempt will
Activate it, sounding the siren and flashing the parking lights to attract
attention. Disarming the system turns off the protection, allowing normal
use of the vehicle.
There are two methods of Arming the security system:
1- The first method is to use the transmitter, by pressing and releasing its
Large Upper Button. The system must not already be armed or be in
Easy Valet Mode (page 14), and the vehicle’s ignition switch must be off.
In normal operation, each press of the Large Upper Button reverses the
system between the armed and disarmed states.
2- The second method is Last Door Arming, which configures the system to
automatically arm every time you exit the vehicle. This method of
arming is programmable, and may be used or not used as desired.
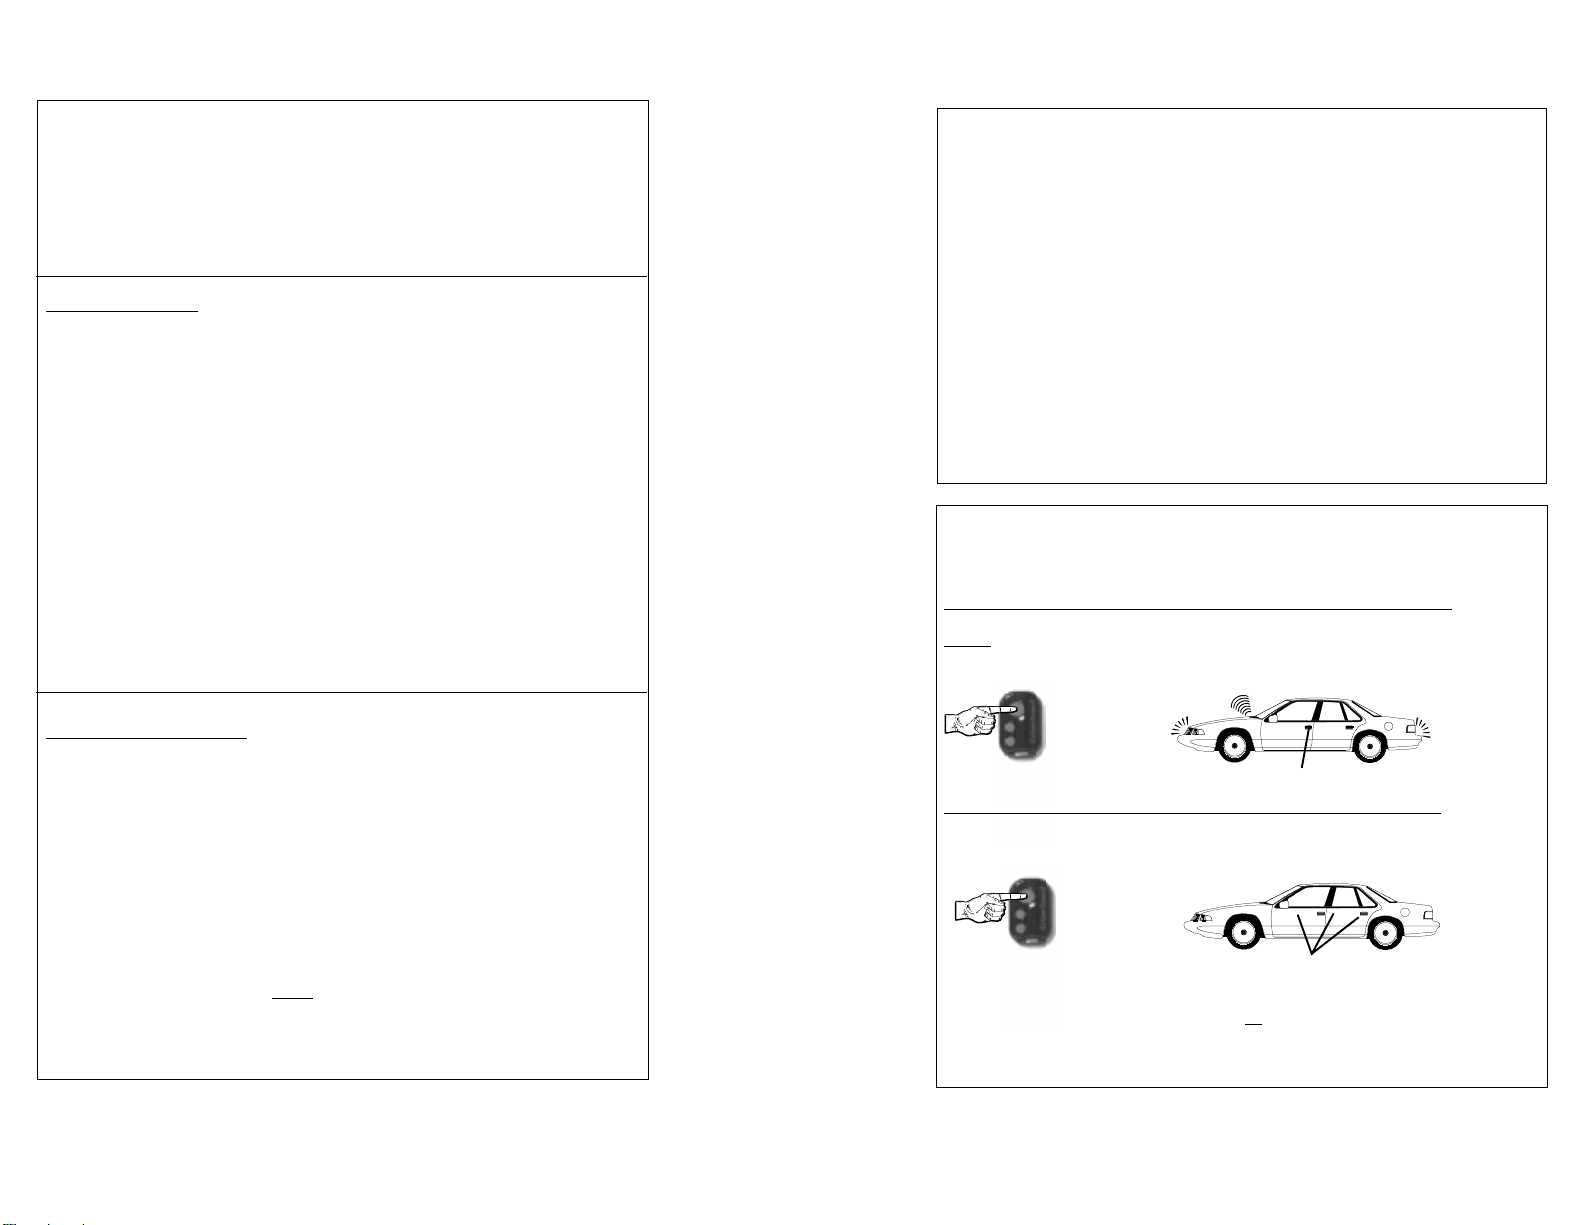
REMOTE ARMING BY TRANSMITTER
To Arm the System:
Press & Release the Large Upper Button
THE SIREN CHIRPS TWICE
TO CONFIRM ARMING
THE DOORS WILL LOCK*
To Silently Arm the System:
First Press & Release the Small Middle Button, then
Press & Release the Small Middle Button again
THE DOORS WILL LOCK*
12
* An optional doorlock interface must be installed
Page 4
THE PARKING LIGHTS
FLASH TWICE
TO CONFIRM
ARMING
THE PARKING LIGHTS
WILL FLASH TWICE

Upon Arming:
• The siren will chirp twice (or four times if a zone is bypassed) unless
the silent arming procedure is followed.
• The parking lights will flash twice (or four times if a zone is bypassed).
• The doors will lock.*
• The starter interrupt will engage.
• The Status Indicator Light will begin to flash slowly.
Three seconds after arming, the security system becomes fully armed, and
will activate to an alarm condition should an intrusion attempt be detected.
Further transmitter operations and options are discussed on page 12.
* An optional doorlock interface must be installed
Arming Bypass:
When arming the system using the transmitter, if any protected zone or
sensor circuit is in a violated condition, the affected zone or circuit will be
automatically bypassed. This is “Arming Bypass”, which allows the system to still arm and protect the other normal, non-violated zones. In the
case of a bypassed zone or circuit, should the violated condition return to
normal, 5 seconds after becoming normal the system restores protection to
the previously bypassed zone or circuit.
If the hood and trunk zone, or sensor circuit is bypassed when the system is armed, instead of the normal arming confirmation the siren will chirp
four times and the parking lights will flash four times to alert you. However, if a door zone is bypassed, the siren and light confirmation will be the
normal two chirps and flashes, as many vehicles are equipped with a delayed interior light illumination. In these vehicles, the interior light delay
would typically cause the system to indicate a bypass if the system is armed
during the delay. In these cases, the arming indication is normal, and the
door zone is protected by the system five seconds after the interior light
turns off.
LAST DOOR ARMING BY EXITING THE CAR
Last Door Arming:
Last Door Arming is a programmable feature which configures the system
to arm itself without needing a command from the transmitter. This convenient feature offers a high level of security and may entitle the vehicle owner
to an insurance discount since the user does not need to remember to arm
the system each time the vehicle is exited.
Page 5
The Last Door Arming feature may be coupled, if desired, with the automatic locking of the vehicle’s doors when the system arms itself.*
The Last Door Arming process:
1- When the vehicle’s ignition has been turned off, the system waits until a
door is opened. When the door is closed, or when the last door is closed
when more than one door is opened, the siren will chirp twice, the parking lights will flash twice, and the Status Indicator Light will begin flashing rapidly. The Last Door Arming countdown has begun.
2- Thirty seconds later the siren will again chirp twice, the parking lights
will again flash twice, the starter interrupt will engage, and the Status
Indicator Light will begin flashing slowly. If programmed to do, the
vehicle’s doors will also lock.* Three seconds after these actions occur,
the system is fully armed.
Notes:
- If a door is reopened during the thirty second period between the first
and second set of double chirps, the countdown will stop and reset. When
the reopened door is closed again, the 30 second countdown starts over
again at the beginning.
- Last Door Arming is separate from, and does not effect the operation of
arming by using the transmitter.
- All protected points must be closed or otherwise in a non-violated state
for the Last Door Arming sequence to start. Unlike active arming from
the transmitter, the system can not bypass an open or detected zone and
arm itself.
To temporarily prevent the system from arming itself:
- Place the system in Valet Mode using the Valet Switch (page 14).
- Leave a vehicle door open. Although this varies depending on the vehicle,
in many cases turning on the interior light will be detected by the system
as an open door.
- Although the system will not Last Door Arm while the ignition is on,
leaving the ignition key turned on without the engine running is not
recommended.
* An optional doorlock interface must be installed
Page 6

SYSTEM ARMED & ACTIVATED
While the system is in the Armed state:
• The Status Indicator Light will be flashing slowly to confirm that the
system is armed, and also serve as a visual deterrent.
• The starter interrupt circuit is engaged.
• Protected zones are being monitored for intrusion attempts.
Should an activation into the alarm condition occur:
• The changing-tone electronic siren will loudly sound.
• The parking and lights will flash.
• The doors will lock,* regardless of their locked or unlocked status. This
feature is unique- if the system detects that a door is opened, it waits until
the door is closed before relocking it, denying the thief reentry.
An activated alarm condition has a duration of 30 seconds (60 is optional)
unless the system is disarmed using the transmitter or the Easy Valet
switch. If all protected zones are secure at the end of the alarm condition, the
system will stop and rearm automatically, ready to detect another entry
attempt. If a protected zone is still violated at the end of the alarm condition,
the system will reactivate for up to two additional alarm cycles. After the
third alarm cycle the system will automatically rearm and bypass the open
zone until that zone returns to a normal “non-violated” state.
• Once the system resets after it has been activated, upon disarming the
audible and visual confirmation will change to indicate the activation.
This is the “Activation Alert”, which is explained on page 10.
* An optional doorlock interface must be installed
DISARMING THE SYSTEM
There are three methods of Disarming the security system:
1- The first method is to press and release the transmitter’s Large Upper
Button to disarm the system. This is the normal “daily use” method.
2- The second method is to press and release twice within 5 seconds the
transmitter’s Small Middle Button. This is “silent Disarming”.
3- The third method is for emergencies, should the transmitter become lost
or inoperable. This is the “Emergency Override”, and uses the ignition
key and Valet Switch.
Page 7
TM
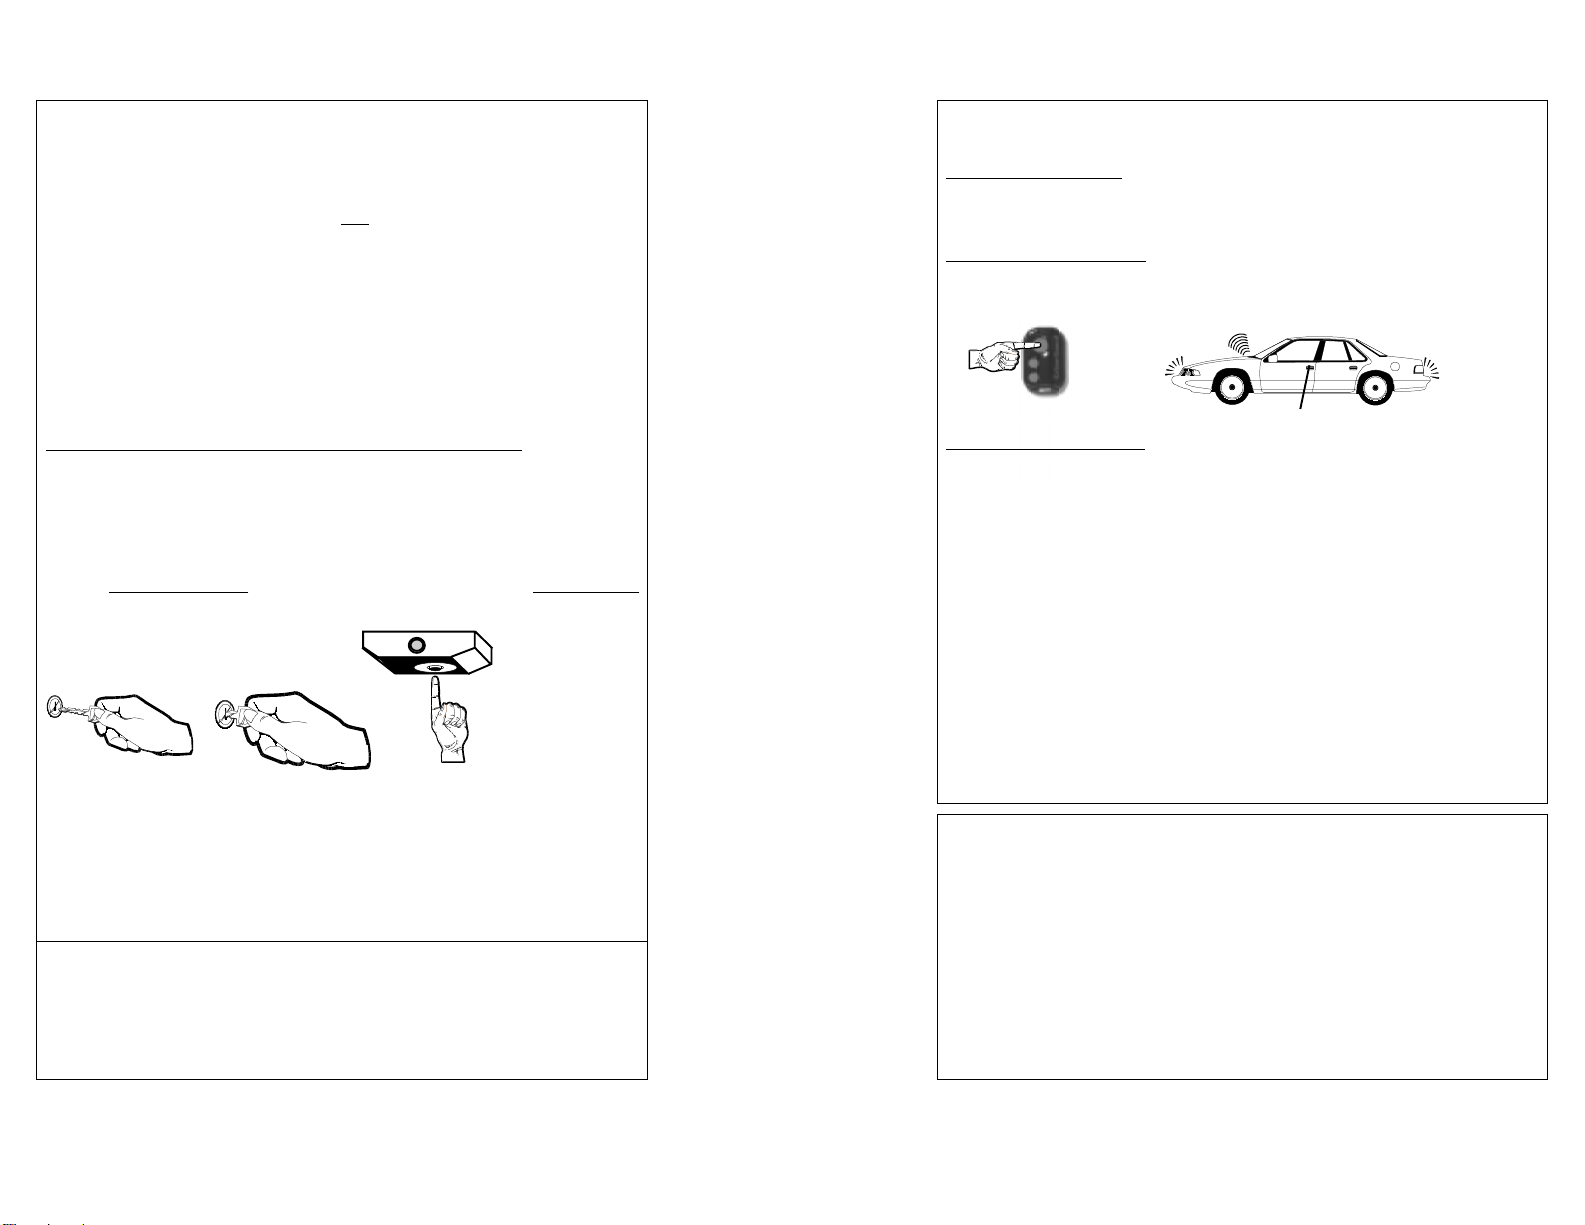
REMOTE DISARMING BY TRANSMITTER
To Disarm the System:
Press & Release the Large Upper Button
THE SIREN WILL CHIRP
ONCE TO CONFIRM
DISARMING
THE DOORS WILL UNLOCK*
To Silently Disarm the System:
First Press & Release the Small Middle Button, then
Press & Release the Small Middle Button again
12
Upon Disarming:
• The siren will chirp once (or three times if an alarm activation occurred)
unlessthe silent disarming procedure is followed.
• The parking lights will flash once (then, if programmed, illuminate for
30 seconds or until the vehicle’s ignition is turned on). Please note that
an option is having the interior lights also illuminate. Please consult
your installing dealer.
• The doors will unlock, either all doors or driver’s door only.*
• The starter interrupt will disengage.
• The Status Indicator Light will show one of these features or conditions:
-Flashing rapidly = Automatic Rearming feature is in progress.
-Off = System disarmed (Automatic Rearming feature not selected).
-Flash /Pause = Indicates violated zone if system has been activated.
* An optional doorlock interface, in either standard form or driver’s
door priority form, must be installed
Safety Disarm Feature
:
Pressing and releasing the Large Upper Button while the system is
activated into the alarm condition will disarm the system, but the doors will
remain locked. This is the “Safety Disarm” feature, which allows the vehicle to remain secure, even though an activated system has been disarmed.
THE DOORS WILL UNLOCK*
Page 8
THE PARKING LIGHTS
WILL FLASH:
ONCE TO
CONFIRM
DISARMING
THE PARKING LIGHTS
WILL FLASH:
ONCE TO
CONFIRM
DISARMING
Safety Disarm will also cancel Automatic Rearming. This feature is also
very useful when the vehicle is exposed to environmental conditions, such
as storms, trains or heavy vehicles, which may cause false activations.
Safety Disarm is a temporary “one time” operation which occurs only
while the system is activated. To remotely unlock the doors after a Safety
Disarm, simply arm, then disarm the system again.
Activation Alert
:
If the system experiences an alarm condition and resets itself, upon disarming
the siren will chirp three times and the parking lights will flash three times
instead of the normal one chirp and one light flash. Additionally, the Status
Indicator Light will be flashing a “Zone Violation Code”; when the alarm
condition activation occurred, the Status Indicator Light changes from
flashing slowly to flashing two to four times between pausing to indicate
which protected zone was violated.
- The Zone Violation Code will continue to be displayed until the vehicle’s
ignition is turned on.
- The Status Indicator Light will display the Zone Violation Code in place
of fast flashes indicating Automatic Rearming.
- Should the system be rearmed before the ignition clears the Zone Violation
Code memory, the Status Indicator Light shows the normal slow flashing.
- The system can store up to two consecutive Zone Violation Codes. If more
activations occurred, the two most recent codes are displayed.
Automatic Rearming:
Automatic Rearming is a programmable feature which ensures that your
system is never inadvertently disarmed. It is possible to accidentally or
unknowingly operate the transmitter from a pocket or purse. You may not
even be aware of an accidental disarming due to the enhanced operating
distance offered by the Extended Range Transmitter.
Automatic Rearming Notes:
- Turning the vehicle’s ignition on cancels Automatic Rearming.
- Opening a door will suspend the 90 second countdown.
- All protected zones must remain non-violated during the 90 second
Automatic Rearming period. For example, if a vehicle door is opened
during the 90 second period, the countdown will stop. When the door is
closed, the system resets and starts a new 90 second countdown period.
- The Automatic Rearming sequence is indicated by a fast flashing Status
Indicator Light, unless the system has been activated, in which case aa
Zone Violation Code will flash instead (page 15). The ignition switch
must be turned on to erase a Zone Violation Code.
- If the system is disarmed while it is activated (siren sounding and lights
flashing) Safety Disarm will cancel the Automatic Rearming for that
disarming operation only. The next time the system is armed, Automatic
Rearming will be initiated upon the subsequent disarming.
DRIVER’S DOOR PRIORITY UNLOCKING
(Requires special installation)
To Disarm the System & Unlock the Driver’s Door:
First,
DISARM normally: Press & Release the Large Upper
Button
Then, within 3 seconds of Disarming the System: Press &
Release the Large Upper Button again to Unlock the
remaining doors.
THE SIREN WILL CHIRP
ONCE TO CONFIRM
DISARMING
THE DRIVER’S DOOR WILL UNLOCK
THE PARKING LIGHTS
WILL FLASH
ONCE TO
CONFIRM
DISARMING
How It Works:
Whenever the system is disarmed by the transmitter, this feature starts a 90
second countdown, which is indicated by a rapidly flashing Status Indicator
Light. During this 90 second period, if no protected entry points are opened
and the vehicle’s ignition is NOT turned on, the system will automatically
arm itself at the end of the countdown. If desired, the system can also be
programmed to automatically relock the doors when this occurs.
Automatic Rearming Notes continued on next page . . .
Page 9
Notes:
THE REST OF THE VEHICLE’S DOORS WILL UNLOCK*
- When disarming a system configured for Driver’s Door Priority, the user
has the option of Silent Disarming or selective unlocking of the doors
(Driver’s Door Priority). These are two separate operations and not
interchangeable.
* An optional doorlock interface must be installed
Page 10
DISARMING BY EMERGENCY OVERRIDE
REMOTE PANIC
Emergency Override:
In the event that your transmitter is lost, damaged, or its batteries have
become exhausted, the Valet Switch and the vehicle’s ignition key may be
used to disarm the system. Please note that for this operation the pressing of
the Valet Switch may be customized; this is the SecureCode feature, the
programming of which is described on page 23.
The following Emergency Override instructions reflect the SecureCode
entry of the Valet Switch as the “as received” default setting of “1 press”.
Instead of “1 press” of the Valet Switch, a customized programming of the
SecureCode would require from 2 to 12 presses.
To Disarm the System without using a Transmitter:
Step 1. With the system in the armed condition, enter the vehicle via the
driver's door (be aware that the system will activate to an alarm
condition when the door is opened).
Step 2. Using the ignition key, turn the vehicle’s ignition on.
Step 3. Within 5 seconds, enter the SecureCode by pressing and releasing
the Valet Switch once. The system will disarm.
ENTER THE VEHICLE
AND USE YOUR KEY TO
TURN THE IGNITION ON
THE SYSTEM WILL DISARM
WITHIN 5
SECONDS OF
TURNING THE
IGNITION ON,
ENTER THE
SECURECODE BY
PRESSING THE
VALET SWITCH
If the SecureCode entry of the Valet Switch is the “as received” default
setting of “1 press”, the system will disarm the moment the Valet Switch is
released from the single press. If a customized SecureCode has been
programmed, the system will disarm a few seconds after the correct entry.
If an incorrect entry is made, the system will not disarm.
A procedure which separate, but similar, to an Emergency Override is the
Easy Valet mode, which prevents the system from performing any automatic
arming operations which may be programmed to occur. Easy Valet Mode
is explained on page 14.
To Activate Panic:
Press & Hold the Large Upper Button for 3 Seconds
To Deactivate Panic:
Press & Release the Large Upper Button
3
SECONDS
Upon Activating Panic:
THE SIREN SOUNDS
THE DOORS WILL
UNLOCK*
THE PARKING LIGHTS
WILL FLASH
• The electronic siren will sound.
• The vehicle’s exterior parking lights will flash.
• The vehicle’s doors will unlock.*
- The Panic feature is designed for situations in which the user feels threatened and/or a need to attract attention.
- Panic can be activated anytime, whether the vehicle’s ignition is turned
on or off, and has a 30 second duration (60 seconds is optional) unless it
is deactivated using the remote control.
- At the end of the Panic cycle the system will reset, enter the armed state,
and lock the doors.*
* An optional doorlock interface must be installed. If the vehicle has been
configured for Driver’s Door Priority, Panic will unlock the driver’s
door.
OTHER TRANSMITTER OPERATIONS
The previous sections have described the basic everyday operations of
your Crime Guard system. The transmitter is also capable of operating
several other optional functions which are explained in this section.
Two auxiliary outputs are available for use (the primary output Arms
and Disarms the system). The second output, Auxiliary Output #2, is also
capable of Disarming the system; thus it is ideally suited for remote trunk
release. Operating Auxiliary Output #2 will also unlock the doors* when it
Disarms the system, should it be armed. If desired, the unlocking of the
Page 11 Page 12
 Loading...