

Olympus C-575 User Manual
DIGITAL CAMERA
Basic Manual
ENGLISH 2
FRANÇAIS 26
ESPAÑOL 50
DEUTSCH 74
РУССКИЙ 98

ContentsContents
Preparing the Camera ...........................3
¾
Checking the contents of the box ............3
Attaching the camera strap ......................3
Charging the battery ................................3
Loading the battery and the
xD-Picture Card™ (sold separately)
into the camera ........................................4
Using the microSD card/microSDHC card
(sold separately) ......................................5
Setting the date and time .........................5
Changing the display language ...............6
¾
Shooting, Playback, and Erasing .........7
Shooting with optimum aperture value
and shutter speed (
Viewing images .......................................8
Erasing images during playback
(Single image erase) ...............................9
¾
Using Shooting Modes ........................10
Using the best mode for the shooting
M, B, E, f
scene (
Shooting with automatic settings
A
mode) .........................................10
(
Shooting movies (
P
mode) ...................7
mode) ..........10
n
mode) ..................11
Using Shooting Functions ..................12
¾
Using the zoom ......................................12
Using the fl ash .......................................12
Adjusting the brightness
(Exposure compensation) ......................12
Shooting closeups (Macro shooting) .....13
Using the self-timer ................................13
Increasing the brightness of the monitor
(Backlight boost) ....................................13
¾
Printing .................................................14
Using OLYMPUS Master 2...................15
¾
¾
Appendix ..............................................17
Using the microSD Attachment ..............17
SAFETY PRECAUTIONS ......................17
SPECIFICATIONS .................................23
● Thank you for purchasing an Olympus digital
camera. Before you start to use your new
camera, please read these instructions carefully
to enjoy optimum performance and a longer
service life. Keep this manual in a safe place for
future reference.
● We recommend that you take test shots to
get accustomed to your camera before taking
important photographs.
The reference pages are based on the Instruction Manual (provided CD-ROM). Please see the CD-ROM
Instruction Manual for your reference.
2
EN
In the interest of continually improving products,
●
Olympus reserves the right to update or modify
information contained in this manual.
●
The screen and camera illustrations shown in this
manual were produced during the development
stages and may differ from the actual product.
Preparing the Camera
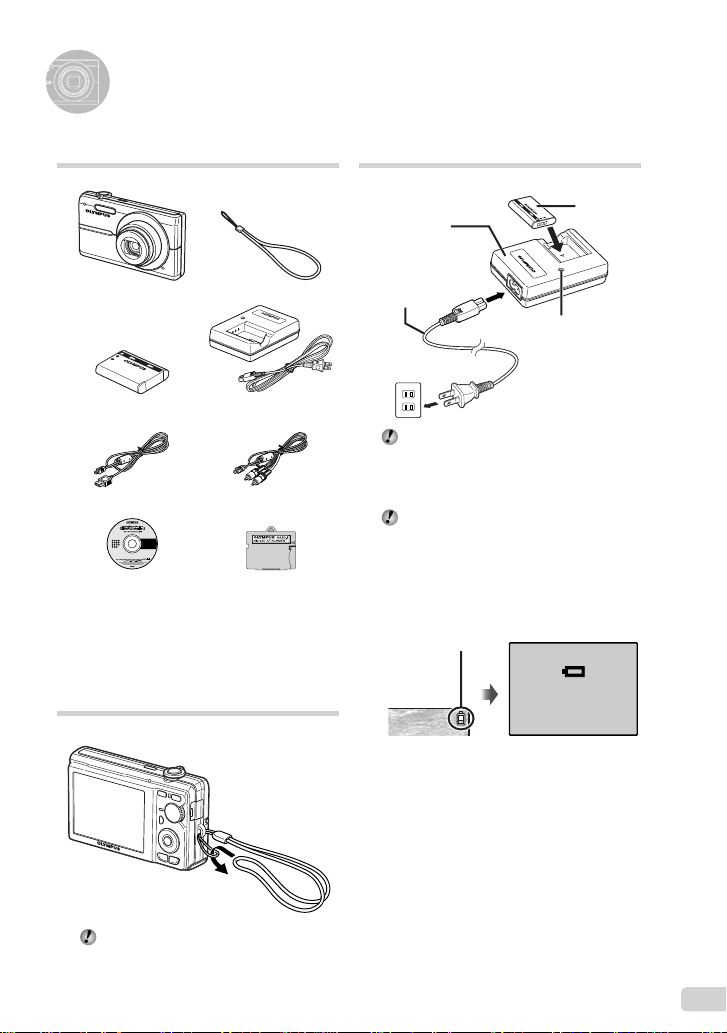
Checking the contents of the box
Digital camera Strap
LI-60B Lithium Ion Battery LI-60C Battery Charger
USB cable AV cable
OLYMPUS Master 2
CD-ROM
Other accessories not shown: Instruction Manual,
warranty card.
Contents may vary depending on purchase location.
microSD Attachment
Attaching the camera strap
Charging the battery
Lithium ion
Battery charger
AC cable
AC outlet
Battery comes partially charged. Before
use, be sure to charge the battery until the
charging indicator goes off (for approx.
2.5 hours).
For details on the battery and the charger,
see “Battery and charger” (p. 51).
When to charge the batteries
Charge the battery when the error message
shown below appears.
Flashes in red
Monitor top right Error message
battery
Charging indicator
On: Charging
Off: Charged
BATTERY EMPTY
Pull the strap tight so that it does not come
loose.
EN
3

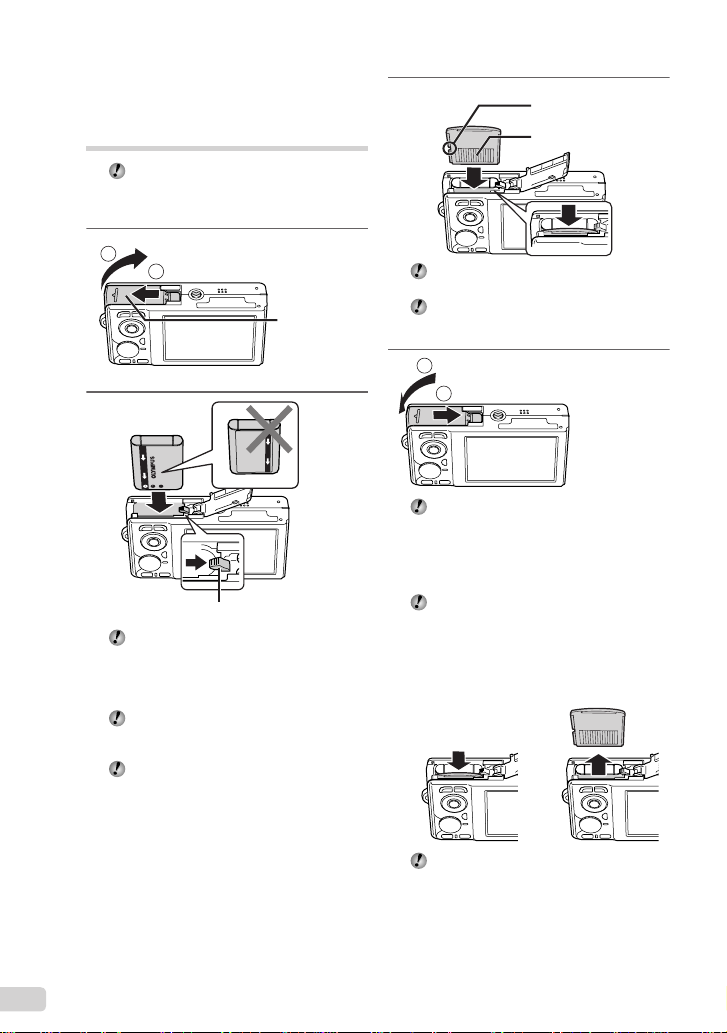
Loading the battery and the xD-Picture Card™ (sold separately) into the camera
Do not insert anything other than an
xD-Picture Card or the microSD Attachment
into the camera.
1
2
1
3
Notch
Contact area
2
Battery lock knob
The battery has a front side and a back side.
Insert the battery in the correct direction
as illustrated. If the battery is not inserted
correctly, the camera will not operate.
Insert the battery while sliding the battery
lock knob in the direction of the arrow.
Slide the battery lock knob in the direction
of the arrow to unlock, and then remove the
battery.
Battery/card
compartment
cover
Insert the card straight until it clicks into
place.
Do not touch the contact area directly.
4
1
2
This camera allows the user to take pictures
using the internal memory even when
no xD-Picture Card (sold separately) is
inserted. “Using an xD-Picture Card”
(p. 52)
“Number of storable pictures (still
pictures)/recording length (movies) in the
internal memory and xD-Picture Card”
(p. 53)
Removing the xD-Picture Card
12
Press the card in until it clicks and comes
out slightly, then grab the card and pull it
out.
4
EN
Using the microSD card/ microSDHC card (sold separately)
A microSD or microSDHC card (hereafter both
will be referred to as microSD card) is also
compatible with this camera using the microSD
Attachment.
“Using the microSD Attachment” (p. 54)
1
Insert the microSD card into the
microSD Attachment.
Insert the card
entirely into the
attachment.
2
Insert the microSD Attachment into
the camera.
Notch
Contact area
To remove the microSD card
Setting the date and time
The date and time set here are saved to image
fi le names, date prints, and other data.
1
Press the o button to turn on
the camera.
The date and time setting screen is displayed
●
when the date and time are not set.
X
YM
D TIME
-- -- -- --
----
MENU
CANCEL
Date and time setting screen
2
Use ab to select the year for
[Y].
X
YM
D TIME
-- -- -- --
2008
MENU
CANCEL
3
Press d to save the setting for [Y].
X
YM
DTIME
-- -- --
2008 10
YMD
YMD
YMD
Pull the microSD card straight out.
Do not touch the contact area of the
microSD Attachment and/or microSD card.
CANCEL
MENU
EN
5
4
RESET
CAMERA
MENU
SILENT
MODE
IMAGE
QUALITY
SETUP
SCENE
As in Steps 2 and 3, use abcd
and the o button to set [M]
(month), [D] (day), and [TIME]
(hours and minutes).
For a precise time setting, press the
o button as the time signal strikes
00 seconds.
To change the date and time, adjust the
setting from the menu. [X] (Date/time)
(p. 36)
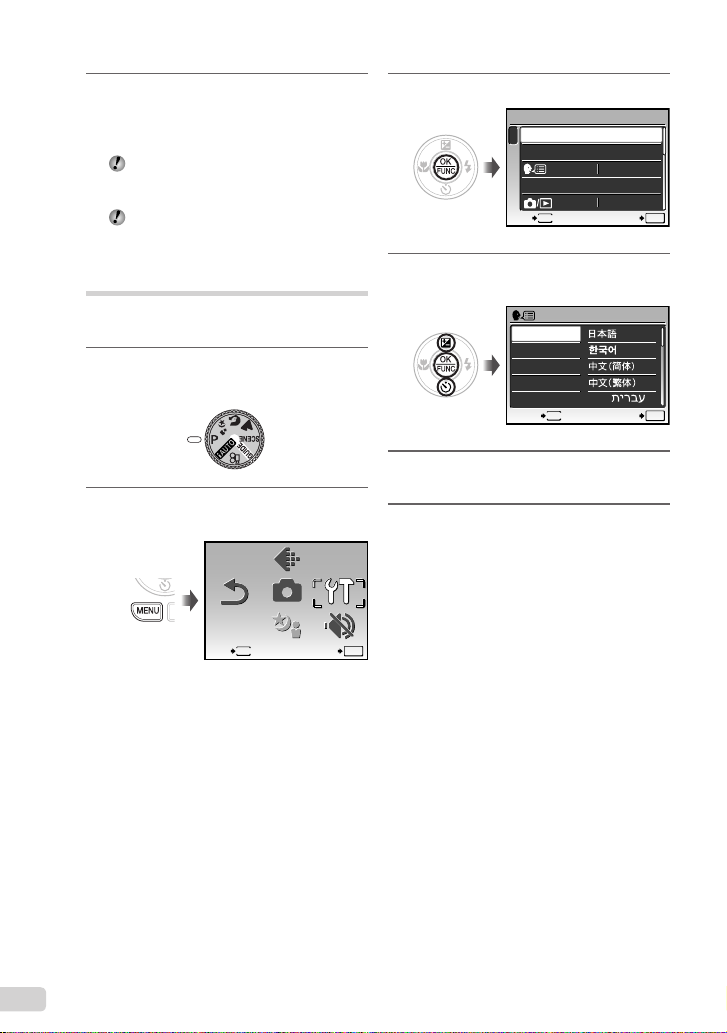
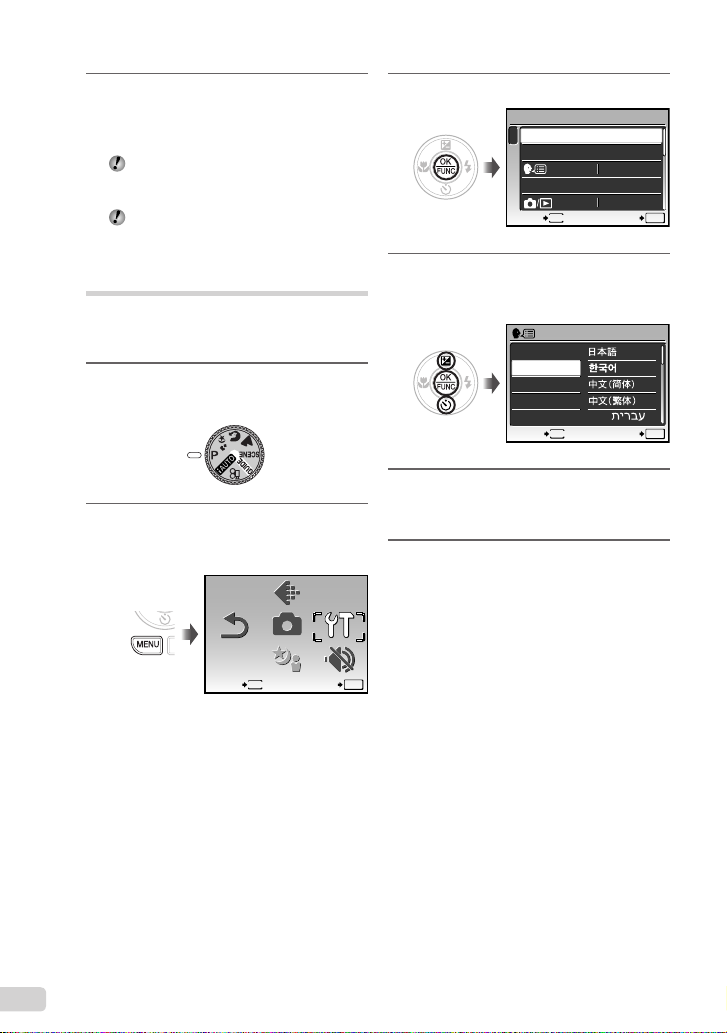
Changing the display language
The language for the menu and error messages
displayed on the monitor is selectable.
1
Set the mode dial to a position other
than R.
2
Press the m button, and press
abcd to select [x SETUP].
IMAGE
QUALITY
CAMERA
MENU
RESET
MENU
EXIT SET
SCENE
SETUP
SILENT
MODE
OK
3
Press the o button.
SETUP
1
MEMORY FORMAT
2
BACKUP
3
PIXEL MAPPING
MENU
EXIT SET
4
Use ab to select [W] and
press the o button.
ENGLISH
FRANCAIS
DEUTSCH
ESPAÑOL
ITALIANO
MENU
BACK SET
5
Use abcd to select your
language and press the o button.
6
Press the m button.
ENGLISH
NO
OK
OK
6
EN
Shooting, Playback, and Erasing
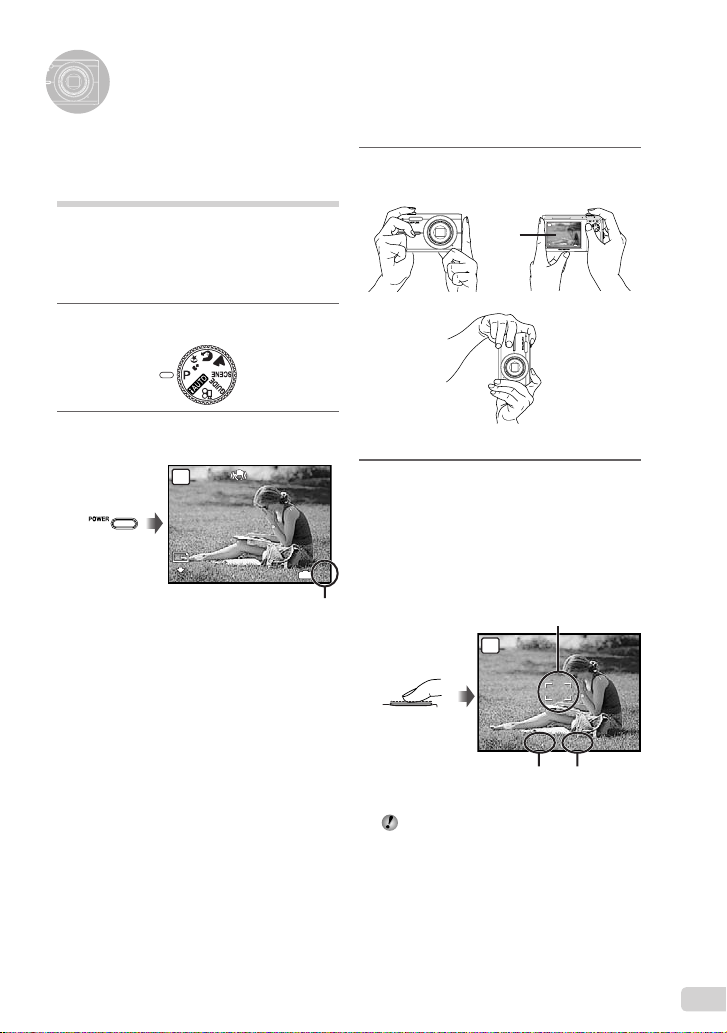
8
M
4
N
ORM
1/400
F3.5
8
M
4
N
ORM
Shooting with optimum aperture value and shutter speed (P mode)
In this mode, automatic camera shooting can
be used while also allowing changes to a wide
range of other shooting menu functions such as
exposure compensation, white balance, and so
forth as needed.
1
Set the mode dial to P.
2
Press the o button to turn on
the camera.
P
8
M
N
ORM
Number of storable still images (p. 53)
Monitor
(standby mode screen)
IN
3
Hold the camera and compose the
shot.
Monitor
Horizontal grip
Vertical grip
4
Press the shutter button halfway
down to focus on the subject.
When the camera focuses on the subject, the
●
exposure is locked (shutter speed and aperture
value are displayed), and the AF target mark
4
changes to green.
●
The camera was unable to focus if the AF target
mark fl ashes red. Try focusing again.
P
Press halfway
Shutter speed Aperture value
P
8
M
N
ORM
IN
4
AF target mark
1/400
F3.5
“Focusing” (p. 48)
7
EN
5
1/400
F3.5
1
8
M
2008.10.26
12:30
100-0001
N
ORM
2008.10.26
12:30
100-0004
4
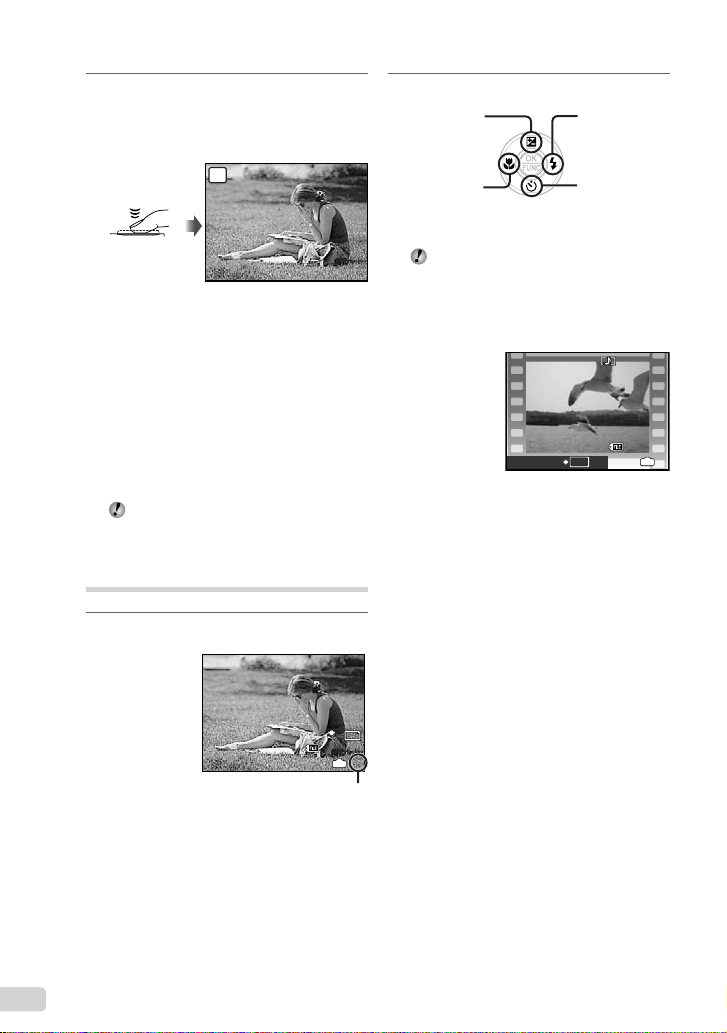
To take the picture, gently press
the shutter button all the way down
while being careful not to shake the
camera.
P
Press fully
1/400
F3.5
Image review screen
To view images during shooting
Pressing the q button enables playback of
images. To return to shooting, either press
the K button or press the shutter button
halfway down.
To shoot movies
“Shooting movies (A mode)” (p. 19)
When shooting is fi nished
Press the o button to turn off the
camera.
All shooting settings except for P mode
return to default settings when the camera is
turned off.
Viewing images
1
Press the q button.
2
Use abcd to select an image.
Displays
10 frames before
the current image
Displays previous
image
The display size of the images can be
changed. “Index view and closeup view”
(p. 23)
Displays next
image
Displays
10 frames after
the current
image
To play back movies
Select a movie, and press the o button.
2008.10.26
OK
MOVIE PLAY
Movie
12:30
100-0004
IN
4
8
EN
8
M
N
ORM
2008.10.26
12:30
Playback image
100-0001
IN
Number of frames
1
Operations during movie playback
2008.10.26
12:30
100-0004
00:12/00:34
2008.10.26
12:30
100-0004
00:14/00:34
ERASE
NO
Volume: During playback, press ab.
Fast-forward: Press and hold down d.
Rewind: Press and hold down c.
Pause: Press the o button.
2008.10.26
IN
2008.10.26
IN
During pause
00:12/00:34
00:14/00:34
Elapsed time/
Total recording time
During playback
First (last) frame/frame advance:
During pause, press a to display the fi rst
frame, and press b to display the last
frame.
Press and hold down d to play a movie, and
press and hold down c to play a movie in
reverse.
Press the o button to resume playback.
To stop movie playback
Press the m button.
12:30
100-0004
12:30
100-0004
/
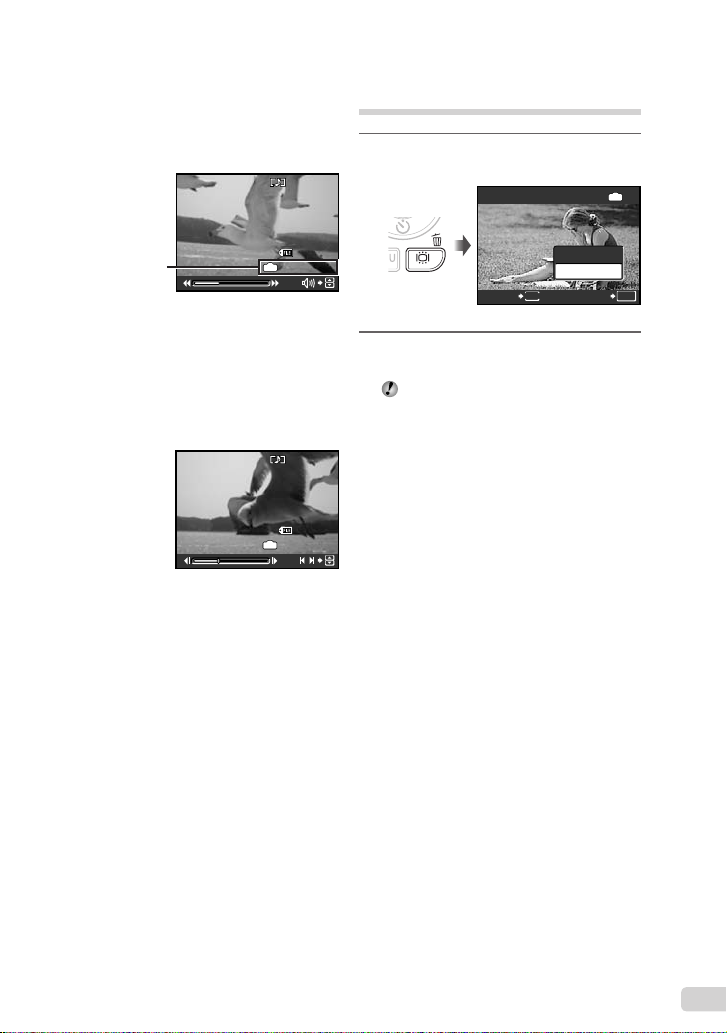
Erasing images during playback (Single image erase)
1
Press the D button when the image
to be erased is displayed.
ERASE
YES
NO
MENU
2
Press a to select [YES], and press
the o button.
[D ERASE] (p. 33)
SETCANCEL
IN
OK
EN
9
8
M
4
N
ORM
8
M
4
N
ORM
8
M
4
N
ORM
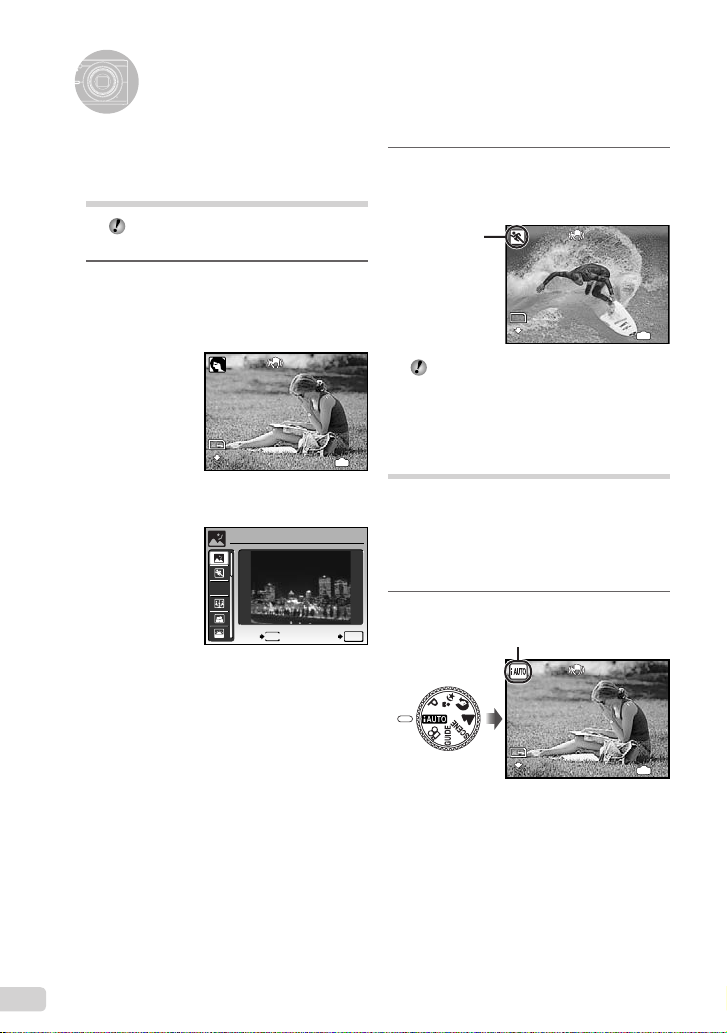
Using Shooting Modes
Using the best mode for the
shooting scene
(M, B, E, f mode)
“Selecting a scene mode according to
the shooting situation [Mf]” (p. 28)
1
Set the mode dial to M, B, E or
f.
When M, B or E is selected
8
M
N
ORM
When f is selected
NIGHT SCENE
H
MENU
EXIT
An explanation of the selected mode is displayed
●
while the E button is pressed and held.
SET
2
When f is selected, use ab
to select the best shooting mode for
the scene, and press the o button.
Icon indicating
the scene mode
that is set
8
M
N
ORM
To change to another scene mode, use the
menu.
“Selecting a scene mode according to
the shooting situation [Mf]” (p. 28)
IN
Shooting with automatic
4
settings (A mode)
The best shooting mode is automatically
selected according to the shooting scene.
This is a fully automatic mode that allows the
user to take pictures best suited for the scene by
simply pressing the shutter button.
All shooting settings cannot be changed.
1
Set the mode dial to A.
OK
A mode indicator
IN
4
8
M
N
ORM
The shooting mode automatically selected is
●
displayed when the g button is pressed or the
shutter button is pressed halfway.
10
EN
IN
4
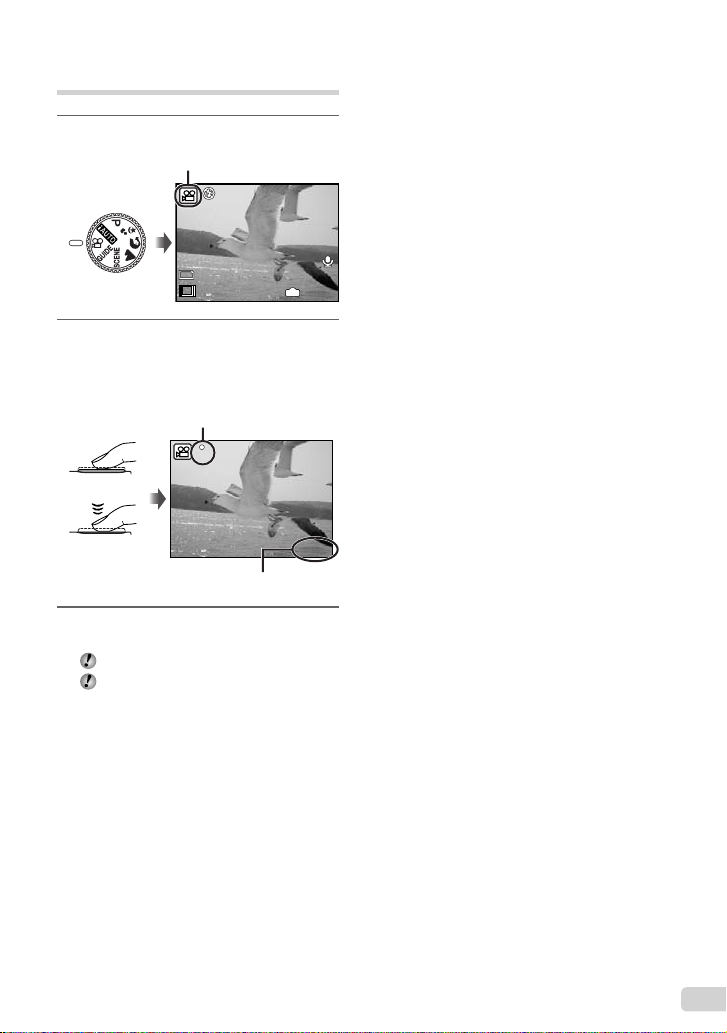
Shooting movies (n mode)
00:34
15
QVGA
00:34
REC
1
Set the mode dial to n.
A mode indicator
QVGA
15
2
Press the shutter button halfway
down to focus on the subject, and
gently press the button all the way
down to start recording.
Lights up red when recording
REC
Press halfway
IN
00:34
Press fully
Remaining recording time (p. 53)
3
Gently press the shutter button all
00:34
the way down to stop recording.
Audio is recorded with the movie.
During audio recording, only the digital
zoom can be used. To record a movie with
optical zoom, set [R](movies) (p. 27) to
[OFF].
11
EN
OK
SET
FLASH AUTO
8
M
4
N
ORM
8
M
4
N
ORM
WWT
WWT
Using Shooting Functions
Using the zoom
Using the zoom lever adjusts the shooting range.
Turn the zoom lever to
the W-side.
P
8
M
N
ORM
T
Zoom bar
Optical zoom: 5x, Digital zoom: 4x
Use of [IMAGE STABILIZER] (p. 27) is
recommended when shooting with the
telephoto zoom.
To take larger images without reducing
image quality
[FINE ZOOM] (p. 26)
The zoom bar appearance identifi es the
status of the fi ne zoom/digital zoom.
When using
optical zoom
and digital
zoom
When using
fi ne zoom
IN
4
Optical zoom
range
Turn the zoom lever to
the T-side.
P
8
M
N
ORM
T
IN
Digital zoom
range
Fine zoom range
Using the fl ash
The fl ash functions can be selected to best
match the shooting conditions.
1
Press the # button.
AUTO
P
SET
FLASH AUTO
! # $
AUTO
4
2
Use cd to select the setting option,
and press the o button to set.
Item Description
FLASH AUTO
REDEYE
FILL IN
FLASH OFF The fl ash does not fi re.
Adjusting the brightness
The fl ash fi res automatically in
low-light or backlight conditions.
Pre-fl ashes are emitted to reduce
the occurrence of red eye in your
photos.
The fl ash fi res regardless of the
available light.
(Exposure compensation)
The standard brightness (appropriate exposure)
set by the camera based on the shooting mode
(except for A) can be adjusted brighter or
darker to obtain a desired shot.
OK
12
EN
1
0.0
+0.3
+0.7
+1.0
OK
SET
OFF
OFF
OFF
OK
SET
SELFTIMER
8
M
N
ORM
Press the F button.
EXPOSURE COMP.
+0.7
Exposure compensation value
2
Use abcd to select the
0.0
+0.3
+1.0
desired brightness, and press the
o button.
Shooting closeups (Macro shooting)
This function enables the camera to focus and
shoot subjects at close distances.
1
Press the & button.
P
2
Use cd to select the setting option,
and press the o button to set.
Item Description
OFF Macro mode is deactivated.
MACRO
SUPER
MACRO
*1
When the zoom is at the widest (W) position.
*2
When the zoom is at the most telephoto (T) position.
*3
The zoom is automatically fi xed.
This enables shooting as close as
10 cm/3.9 in.
the subject.
This enables shooting as close as
*3
3 cm/1.2 in. to the subject.
The fl ash (p. 20) and zoom (p. 20) cannot
be set during macro shooting.
OFF
OK
SET
OFF
% &
OFF
*1
(60 cm/23.6 in.*2) to
Using the self-timer
After the shutter button is pressed all the way
down, the picture is taken after a time delay.
1
Press the Y button.
P
OK
SET
SELFTIMER
8
M
N
ORM
2
Use ab to select the setting
OFF
option, and press the o button to
set.
Item Description
OFF This cancels the self-timer.
The self-timer lamp turns on for
ON
Self-timer shooting is automatically canceled
approx. 10 seconds, then blinks
for approx. 2 seconds, and then
the picture is taken.
after one shot.
To cancel the self-timer after it starts
Press the Y button again.
Increasing the brightness of the monitor (Backlight boost)
Press the button in shooting mode.
The monitor becomes brighter. If there is
no operation for 10 seconds, the previous
brightness resumes.
OFF
Y
ON
EN
13
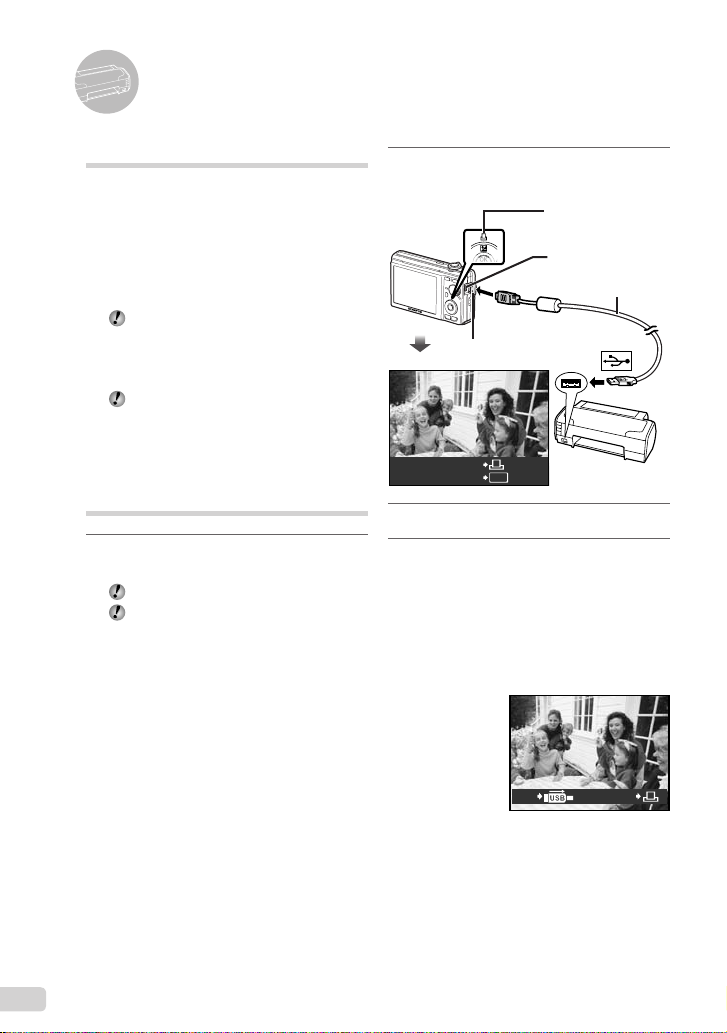
Printing
Direct printing (PictBridge*1)
By connecting the camera to a PictBridgecompatible printer, you can print images directly
without using a computer.
To fi nd out if your printer supports PictBridge,
refer to the printer’s instruction manual.
*1
PictBridge is a standard for connecting digital
cameras and printers of different makers and
printing out pictures directly.
The printing modes, paper sizes, and other
parameters that can be set with the camera
vary depending on the printer that is used.
For details, refer to the printer’s instruction
manual.
For details on the available paper types,
loading paper, and installing ink cassettes,
refer to the printer’s instruction manual.
Printing images at the printer’s standard settings [EASY PRINT]
1
Display the image to be printed on
the monitor.
“Viewing images” (p. 16)
Printing can also be started when the
camera is turned off. After performing Step
2, use ab to select [EASY PRINT],
press the o button. Use cd to select an
image, and proceed to Step 3.
2
Turn on the printer, and then
connect the printer and camera.
< button
Multi-connector
USB cable (supplied)
Connector cover
EASY PRINT START
PC/CUSTOM PRINT
3
Press the < button to start printing.
4
To print another image, use cd
OK
to select an image, and press the
< button.
To exit printing
After a selected image is displayed on the
screen, disconnect the USB cable from the
camera and printer.
PRINTEXIT
14
EN

Using OLYMPUS Master 2
System requirements and installation of OLYMPUS Master 2
Install the OLYMPUS Master 2 software by
referring to the included installation guide.
Connecting the camera to a computer
1
Make sure the camera is turned off.
The monitor is off.
●
The lens is retracted.
●
2
Connect the camera to a computer.
●
The camera automatically turns on.
Multi-connector
USB cable (supplied)
Connector cover
USB
PC
EASY PRINT
CUSTOM PRINT
EXIT
Locate the position of the USB port by
referring to your computer’s instructions
manual.
3
Use ab to select [PC], and
press the o button.
●
The computer automatically detects the camera as
a new device on the fi rst connection.
SET
OK
Windows
After the computer detects the camera, a
message indicating the completion of the
setting appears. Confi rm the message and
click “OK”. The camera is recognized as a
removable disk.
Macintosh
When iPhoto has started, exit iPhoto and start
OLYMPUS Master 2.
While the camera is connected to the
computer, shooting functions are disabled.
Connecting the camera to a computer via a
USB hub may cause unstable operation.
When [MTP] is set for the submenu that
appears by pressing d after selecting [PC]
in Step 3, images cannot be transferred to a
computer using OLYMPUS Master 2.
Starting OLYMPUS Master 2
1
Double-click the OLYMPUS Master 2
icon.
Windows
appears on the desk top.
Macintosh
appears in the OLYMPUS Master 2 folder.
Browse window appears after starting the
●
software.
When you start OLYMPUS Master 2 for the
fi rst time after installation, “Default Settings”
and “Registration” screen appear. Follow the
instructions on the screen.
EN
15

Operating OLYMPUS Master 2
When OLYMPUS Master 2 is started, Quick
Start Guide appears on the screen that
helps you to handle the camera without any
question. When the Quick Start Guide is not
displayed, click
the Guide.
For details on the operation, refer to the help
guide of the software.
in the tool bar to show
Transferring and saving images without using OLYMPUS Master 2
This camera is compatible with the USB Mass
Storage Class. You can transfer and save the
image data on your computer while the camera
and the computer are connected.
System requirements
Windows : Windows 2000 Professional/
Macintosh : Mac OS X v10.3 or later
On a computer running Windows Vista, if
Even if a computer has USB ports, proper
XP Home Edition/
XP Professional/Vista
[MTP] is set for the submenu that appears
by pressing d after selecting [PC] in Step 3
of “Connecting the camera to a computer”
(p. 44), Windows Photo Gallery will become
available.
operation is not guaranteed in the following
cases.
computers with USB ports installed using an
●
expansion card, etc.
●
computers without a factory-installed OS and
home-built computers
16
EN
Appendix
Using the microSD Attachment
Do not use the attachment with Olympus
digital cameras that do not support this
microSD Attachment, as well as with other
brands of digital cameras, computers,
printers, and other devices that support
xD-Picture Card. Doing so not only may
damage the pictures taken, but may also
result in the malfunction of the device.
If the microSD card cannot be removed,
do not use force. Contact authorized
distributors/service centers.
Cards compatible with this camera
microSD card/microSDHC card
For a list of tested microSD cards, please
visit our website (http://www.olympus.com/).
Sending images
You can send images to a computer or
printer by using the USB cable provided with
the camera.
To send data to other devices, remove
the attachment from the camera and use
a commercially available microSD card
adapter.
Handling precautions
Do not touch the contact area of the
attachment or microSD card. Doing so
may cause failure in reading the images.
When fi ngerprints or stains are found on
the contact area, wipe the area with a soft
dry cloth.
SAFETY PRECAUTIONS
CAUTION
RISK OF ELECTRIC SHOCK
DO NOT OPEN
CAUTION: TO REDUCE THE RISK OF ELECTRICAL
SHOCK, DO NOT REMOVE COVER (OR BACK).
NO USER-SERVICEABLE PARTS INSIDE.
REFER SERVICING TO QUALIFIED OLYMPUS
SERVICE PERSONNEL.
An exclamation mark enclosed in a
triangle alerts you to important operating
and maintenance instructions in the
DANGER If the product is used without observing
WARNING If the product is used without observing the
CAUTION If the product is used without observing the
WARNING!
TO AVOID THE RISK OF FIRE OR ELECTRICAL SHOCK,
NEVER DISASSEMBLE, EXPOSE THIS PRODUCT TO
WATER OR OPERATE IN A HIGH HUMIDITY ENVIRONMENT.
General Precautions
Read All Instructions — Before you use the
product, read all operating instructions. Save all
manuals and documentation for future reference.
Cleaning — Always unplug this product from the
wall outlet before cleaning. Use only a damp
cloth for cleaning. Never use any type of liquid or
aerosol cleaner, or any type of organic solvent to
clean this product.
Attachments — For your safety, and to avoid
damaging the product, use only accessories
recommended by Olympus.
Water and Moisture — For precautions on
products with weatherproof designs, read the
weatherproofi ng sections.
Location — To avoid damage to the product, mount
the product securely on a stable tripod, stand,
or bracket.
Power Source — Connect this product only to the
power source described on the product label.
Foreign Objects — To avoid personal injury, never
insert a metal object into the product.
Heat — Never use or store this product near any
heat source such as a radiator, heat register,
stove, or any type of equipment or appliance that
generates heat, including stereo amplifi ers.
documentation provided with the product.
the information given under this symbol,
serious injury or death may result.
information given under this symbol, injury
or death may result.
information given under this symbol, minor
personal injury, damage to the equipment,
or loss of valuable data may result.
EN
17

Handling the Camera
WARNING
Do not use the camera near fl ammable or
•
explosive gases.
Do not use the fl ash and LED on people
•
(infants, small children, etc.) at close range.
You must be at least 1 m (3 ft.) away from the
•
faces of your subjects. Firing the fl ash too close
to the subject’s eyes could cause a momentary
loss of vision.
Keep young children and infants away from
•
the camera.
Always use and store the camera out of the
•
reach of young children and infants to prevent
the following dangerous situations which could
cause serious injury:
Becoming entangled in the camera strap,
•
causing strangulation.
Accidentally swallowing the battery, cards or
•
other small parts.
Accidentally fi ring the fl ash into their own eyes
•
or those of another child.
Accidentally being injured by the moving parts
•
of the camera.
Do not look at the sun or strong lights with the
•
camera.
Do not use or store the camera in dusty or
•
humid places.
Do not cover the fl ash with a hand while fi ring.
•
Do not insert anything into the microSD
•
Attachment other than the microSD card.
This attachment is exclusive for use of microSD
cards only. Other types of cards cannot be
installed.
Do not insert anything other than an xD-Picture
•
Card or the microSD Attachment into the
camera.
If you insert a card by mistake, such as a microSD
card, do not use force. Contact authorized
distributors/service centers. Damages such as
scratches on the attachment or card could result in
the camera overheating and/or malfunctioning.
CAUTION
Stop using the camera immediately if you
•
notice any unusual odors, noise, or smoke
around it.
Never remove the batteries with bare hands,
•
which may cause a fi re or burn your hands.
Never hold or operate the camera with wet
•
hands.
Do not leave the camera in places where it may
•
be subject to extremely high temperatures.
Doing so may cause parts to deteriorate and, in
•
some circumstances, cause the camera to catch
fi re. Do not use the charger if it is covered (such
as a blanket). This could cause overheating,
resulting in fi re.
Handle the camera with care to avoid getting a
•
low-temperature burn.
When the camera contains metal parts,
•
overheating can result in a low-temperature
burn. Pay attention to the following:
When used for a long period, the camera will
•
get hot. If you hold on to the camera in this
state, a low-temperature burn may be caused.
In places subject to extremely cold
•
temperatures, the temperature of the camera’s
body may be lower than the environmental
temperature. If possible, wear gloves when
handling the camera in cold temperatures.
Be careful with the strap.
•
Be careful with the strap when you carry the
•
camera. It could easily catch on stray objects
and cause serious damage.
18
EN

Battery Handling Precautions
Follow these important guidelines to
prevent batteries from leaking, overheating,
burning, exploding, or causing electrical
shocks or burns.
DANGER
•
The camera uses a lithium ion battery specifi ed
by Olympus. Charge the battery with the specifi ed
charger. Do not use any other chargers.
•
Never heat or incinerate batteries.
•
Take precautions when carrying or storing
batteries to prevent them from coming into contact
with any metal objects such as jewelry, pins,
fasteners, etc.
•
Never store batteries where they will be
exposed to direct sunlight, or subjected to high
temperatures in a hot vehicle, near a heat source,
etc.
•
To prevent causing battery leaks or damaging their
terminals, carefully follow all instructions regarding
the use of batteries. Never attempt to disassemble
a battery or modify it in any way, solder, etc.
•
If battery fl uid gets into your eyes, fl ush your eyes
immediately with clear, cold running water and
seek medical attention immediately.
•
Always store batteries out of the reach of small
children. If a child accidentally swallows a battery,
seek medical attention immediately.
WARNING
Keep batteries dry at all times.
•
To prevent batteries from leaking, overheating,
•
or causing a fi re or explosion, use only batteries
recommended for use with this product.
Insert the battery carefully as described in the
•
operating instructions.
If rechargeable batteries have not been recharged
•
within the specifi ed time, stop charging them and
do not use them.
Do not use a battery if it is cracked or broken.
•
If a battery leaks, becomes discolored or
•
deformed, or becomes abnormal in any other way
during operation, stop using the camera.
If a battery leaks fl uid onto your clothing or skin,
•
remove the clothing and fl ush the affected area
with clean, running cold water immediately. If
the fl uid burns your skin, seek medical attention
immediately.
Never subject batteries to strong shocks or
•
continuous vibration.
•
CAUTION
•
Before loading, always inspect the battery carefully
for leaks, discoloration, warping, or any other
abnormality.
•
The battery may become hot during prolonged
use. To avoid minor burns, do not remove it
immediately after using the camera.
•
Always unload the battery from the camera before
storing the camera for a long period.
Caution for Usage Environment
To protect the high-precision technology contained
•
in this product, never leave the camera in the
places listed below, no matter if in use or storage:
Places where temperatures and/or humidity
•
are high or go through extreme changes.
Direct sunlight, beaches, locked cars, or near
other heat sources (stove, radiator, etc.) or
humidifi ers.
In sandy or dusty environments.
•
Near fl ammable items or explosives.
•
In wet places, such as bathrooms or in the rain.
•
When using products with weatherproof designs,
read their manuals as well.
In places prone to strong vibrations.
•
Never drop the camera or subject it to severe
•
shocks or vibrations.
When mounted on a tripod, adjust the position of
•
the camera with the tripod head. Do not twist the
camera.
Do not touch electric contacts on cameras.
•
Do not leave the camera pointed directly at the
•
sun. This may cause lens or shutter curtain
damage, color failure, ghosting on the CCD, or
may possibly cause fi res.
Do not push or pull severely on the lens.
•
Before storing the camera for a long period,
•
remove the batteries. Select a cool, dry location
for storage to prevent condensation or mold from
forming inside the camera. After storage, test the
camera by turning it on and pressing the shutter
button to make sure that it is operating normally.
Always observe the operating environment
•
restrictions described in the camera’s manual.
EN
19

Battery Handling Precautions
This camera uses a lithium ion battery specifi ed by
•
Olympus. Do not use any other type of battery. For
safe and proper use, read the battery’s instruction
manual carefully before using it.
If the battery’s terminals get wet or greasy, camera
•
contact failure may result. Wipe the battery well
with a dry cloth before use.
Always charge a battery when using it for the fi rst
•
time, or if it has not been used for a long period.
When operating the camera with battery power
•
at low temperatures, try to keep the camera and
spare battery as warm as possible. A battery that
has run down at low temperatures may be restored
after it is warmed at room temperature.
The number of pictures you can take may vary
•
depending on the shooting conditions or battery.
Before going on a long trip, and especially before
•
traveling abroad, purchase extra batteries. A
recommended battery may be diffi cult to obtain
while traveling.
Please recycle batteries to help save our planet’s
•
resources. When you throw away dead batteries,
be sure to cover their terminals and always
observe local laws and regulations.
LCD Monitor
•
Do not push the monitor forcibly; otherwise the
image may become vague, resulting in a playback
mode failure or damage to the monitor.
•
A strip of light may appear on the top/bottom of the
monitor, but this is not a malfunction.
•
When a subject is viewed diagonally in the
camera, the edges may appear zigzagged on the
monitor. This is not a malfunction; it will be less
noticeable in playback mode.
•
In places subject to low temperatures, the LCD
monitor may take a long time to turn on or its
color may change temporarily. When using the
camera in extremely cold places, it is a good idea
to occasionally place it in a warm place. An LCD
monitor exhibiting poor performance due to low
temperatures will recover in normal temperatures.
•
The LCD used for the monitor is made with
high-precision technology. However, black spots
or bright spots of light may appear constantly on
the LCD Monitor. Due to its characteristics or the
angle at which you are viewing the monitor, the
spot may not be uniform in color and brightness.
This is not a malfunction.
Legal and Other Notices
Olympus makes no representations or warranties
•
regarding any damages, or benefi t expected by
using this unit lawfully, or any request from a third
person, which are caused by the inappropriate use
of this product.
Olympus makes no representations or warranties
•
regarding any damages or any benefi t expected
by using this unit lawfully which are caused by
erasing picture data.
20
EN

Disclaimer of Warranty
Olympus makes no representations or warranties,
•
either expressed or implied, by or concerning any
content of these written materials or software, and
in no event shall be liable for any implied warranty
of merchantability or fi tness for any particular
purpose or for any consequential, incidental or
indirect damages (including but not limited to
damages for loss of business profi ts, business
interruption and loss of business information)
arising from the use or inability to use these
written materials or software or equipment. Some
countries do not allow the exclusion or limitation of
liability for consequential or incidental damages,
so the above limitations may not apply to you.
Olympus reserves all rights to this manual.
•
Warning
Unauthorized photographing or use of
copyrighted material may violate applicable
copyright laws. Olympus assumes no
responsibility for unauthorized photographing,
use or other acts that infringe upon the rights of
copyright owners.
Copyright Notice
All rights reserved. No part of these written
materials or this software may be reproduced
or used in any form or by any means, electronic
or mechanical, including photocopying and
recording or the use of any type of information
storage and retrieval system, without the prior
written permission of Olympus. No liability
is assumed with respect to the use of the
information contained in these written materials
or software, or for damages resulting from
the use of the information contained therein.
Olympus reserves the right to alter the features
and contents of this publication or software
without obligation or advance notice.
For customers in Europe
“CE” mark indicates that this product complies
with the European requirements for safety,
health, environment and customer protection.
“CE” mark cameras are intended for sales in
Europe.
This symbol [crossed-out wheeled bin WEEE
Annex IV] indicates separate collection of waste
electrical and electronic equipment in the EU
countries. Please do not throw the equipment
into the domestic refuse.
Please use the return and collection systems
available in your country for the disposal of this
product.
This symbol [crossed-out wheeled bin Directive
2006/66/EC Annex II] indicates separate
collection of waste batteries in the EU countries.
Please do not throw the batteries into the
domestic refuse. Please use the return and
collection systems available in your country for
the disposal of the waste batteries.
Use Only Dedicated Rechargeable Battery
and Battery Charger
We strongly recommend that you use only the
genuine Olympus dedicated rechargeable battery
and battery charger with this camera. Using a
non-genuine rechargeable battery and/or battery
charger may result in fi re or personal injury due
to leakage, heating, ignition or damage to the
battery. Olympus does not assume any liability for
accidents or damage that may result from the use
of a battery and/or battery charger that are not
genuine Olympus accessories.
Provisions of warranty
1 If this product proves to be defective, although it
has been used properly (in accordance with the
written Handling Care and Operating instructions
supplied with it), during a period of two years
from the date of purchase from an authorized
Olympus distributor within the business area of
Olympus Imaging Europa GmbH as stipulated
on the website: http://www.olympus.com this
product will be repaired, or at Olympus’s option
replaced, free of charge. To claim under this
warranty the customer must take the product
and this Warranty Certifi cate before the end
of the two year warranty period to the dealer
where the product was purchased or any other
Olympus service station within the business area
of Olympus Imaging Europa GmbH as stipulated
on the website: http://www.olympus.com. During
the one year period of the World Wide Warranty
the customer may turn the product in at any
Olympus service station. Please notice that not in
all countries such Olympus service station exists.
EN
21

2 The customer shall transport the product to the
dealer or Olympus authorized service station
at his own risk and shall be responsible for any
costs incurred in transporting the product.
3 This warranty does not cover the following
and the customer will be required to pay repair
charge, even for defects occurring within the
warranty period referred to above.
Any defect that occurs due to mishandling
a.
(such as an operation performed that is not
mentioned in the Handling Care or other
sections of the instructions, etc.)
Any defect that occurs due to repair,
b.
modifi cation, cleaning, etc. performed by
anyone other than Olympus or an Olympus
authorized service station.
Any defect or damage that occurs due to
c.
transport, a fall, shock, etc. after purchase of
the product.
Any defect or damage that occurs due to fi re,
d.
earthquake, fl ood damage, thunderbolt, other
natural disasters, environmental pollution and
irregular voltage sources.
Any defect that occurs due to careless or
e.
improper storage (such as keeping the
product under conditions of high temperature
and humidity, near insect repellents such as
naphthalene or harmful drugs, etc.), improper
maintenance, etc.
Any defect that occurs due to exhausted
f.
batteries, etc.
Any defect that occurs due to sand, mud, etc.
g.
entering the inside of the product casing.
When this Warranty Certifi cate is not returned
h.
with the product.
When any alterations whatsoever are made
i.
to the Warranty Certifi cate regarding the year,
month and date of purchase, the customer’s
name, the dealer’s name, and the serial
number.
When proof of purchase is not presented with
j.
this Warranty Certifi cate.
4 This Warranty applies to the product only; the
Warranty does not apply to any other accessory
equipment, such as the case, strap, lens cap and
batteries.
5 Olympus’s sole liability under this warranty shall
be limited to repairing or replacing the product.
Any liability for indirect or consequential loss or
damage of any kind incurred or suffered by the
customer due to a defect of the product, and
in particular any loss or damage caused to any
lenses, fi lms, other equipment or accessories
used with the product or for any loss resulting
from a delay in repair or loss of data, is excluded.
Compelling regulations by law remain unaffected
by this.
Notes regarding warranty
maintenance
1 This warranty will only be valid if the Warranty
Certifi cate is duly completed by Olympus or an
authorized dealer or other documents contain
suffi cient proof. Therefore, please make sure
that your name, the name of the dealer, the
serial number and the year, month and date
of purchase are all completed or the original
invoice or the sales receipt (indicating the
dealer’s name, the date of purchase and product
type) is attached to this Warranty Certifi cate.
Olympus reserves the right to refuse free-ofcharge service if neither Warranty Certifi cate is
completed nor the above document is attached or
if the information contained in it is incomplete or
illegible.
2 Since this Warranty Certifi cate will not be re-
issued, keep it in a safe place.
* Please refer to the list on the website: http://www.
olympus.com for the authorized international
Olympus service network.
Trademarks
IBM is a registered trademark of International
•
Business Machines Corporation.
Microsoft and Windows are registered trademarks
•
of Microsoft Corporation.
Macintosh is a trademark of Apple Inc.
•
xD-Picture Card™ is a trademark.
•
microSD is a trademark of the SD Association.
•
All other company and product names are
•
registered trademarks and/or trademarks of their
respective owners.
The standards for camera fi le systems referred to
•
in this manual are the “Design Rule for Camera
File System/DCF” standards stipulated by the
Japan Electronics and Information Technology
Industries Association (JEITA).
22
EN

SPECIFICATIONS
Camera
Product type : Digital camera (for shooting and displaying)
Recording system
Still pictures : Digital recording, JPEG (in accordance with Design rule for Camera File
Applicable standards : Exif 2.2, Digital Print Order Format (DPOF), PRINT Image Matching III,
Sound with still pictures : Wave format
Movie : AVI Motion JPEG
Memory : Internal memory
No. of effective pixels : 8,000,000 pixels
Image pickup device : 1/2.35” CCD (primary color fi lter), 8,500,000 pixels (gross)
Lens : Olympus lens 6.3 to 31.5 mm, f3.5 to 5.6
Photometric system : Digital ESP metering
Shutter speed : 4 to 1/2000 sec.
Shooting range :
Monitor : 2.7” TFT color LCD display, 230,000 dots
Connector : Multi-connector (USB connector, A/V OUT jack)
Automatic calendar system : 2000 up to 2099
Operating environment
Temperature : 0°C to 40°C (32°F to 104°F) (operation)/
Humidity : 30% to 90% (operation)/10% to 90% (storage)
Power supply : One Olympus lithium ion battery (LI-60B)
Dimensions : 94.7 mm (W) × 56.7 mm (H) × 25.3 mm (D) (3.7 × 2.2 × 1.0 in.)
Weight : 128 g (4.5 oz) (excluding battery and card)
system (DCF))
PictBridge
xD-Picture Card (16 MB to 2 GB) (TypeH/M/M+, Standard)
microSD card/microSDHC card (when the supplied microSD Attachment
is used.)
(equivalent to 36 to 180 mm on a 35 mm camera)
0.6 m (2.0 ft.) to
0.1 m (0.3 ft.) to
0.03 m (0.1 ft.) (super macro mode)
-20°C to 60°C (-4°F to 140°F) (storage)
(excluding protrusions)
(W), 1.0 m (3.2 ft.) to (T) (normal)
(W), 0.6 m (2.0 ft.) to (T) (macro mode)
EN
23

Lithium ion battery (LI-60B)
Product type : Lithium ion rechargeable battery
Model No. : LI-60B
Standard voltage : DC 3.7 V
Standard capacity : 680 mAh
Battery life : Approx. 300 full charges (varies on usage)
Operating environment
Temperature : 0°C to 40°C (32°F to 104°F) (charging)/
Dimensions : 26.9 mm (W) × 38.0 mm (H) × 7.5 mm (D) (1.1 × 1.5 × 0.3 in.)
Weight : Approx. 14.5 g (0.5 oz)
-10°C to 60°C (14°F to 140°F) (operation)/
-10°C to 30°C (14°F to 86°F) (storage)
Battery charger (LI-60C)
Model No. : LI-60C
Power requirements : AC 100 to 240 V (50 to 60 Hz)
Output : DC 4.2 V, 330 mA
Charging time : Approx. 2.5 hours
Operating environment
Temperature : 0°C to 40°C (32°F to 104°F) (operation)/
Dimensions : 62.0 × 23.0 × 90.0 mm (2.4 × 0.9 × 3.5 in.)
Weight : Approx. 65 g (2.3 oz)
-20°C to 60°C (-4°F to 140°F) (storage)
microSD Attachment
Product type : Attachment for microSD card
Operating Environment
Temperature : -10°C to 40°C (14°F to 104°F) (operation) /
Humidity : 95% and below (operation) / 85% and below (storage)
Dimensions : 25.0 mm (W) x 20.3 mm (H) x 1.7 mm (D) (1.0 × 0.8 × 0.07 in.)
Weight : Approx. 0.9 g (0.03 oz)
Design and specifi cations subject to change without notice.
-20°C to 65°C (-4°F to 149°F) (storage)
(Handle:2.2 mm (0.09 in.))
24
EN

MEMO
EN
25

ContenuContenu
Préparer l’appareil photo ....................27
¾
Vérifi er le contenu de la boîte ................27
Fixer la courroie .....................................27
Charger la batterie .................................27
Insérer la batterie et la carte xD-Picture
Card™ (vendue séparément) dans
l’appareil photo ......................................28
Utiliser une carte microSD/ carte
microSDHC (vendue séparément) ........29
Régler la date et l’heure ........................29
Changer la langue d’affi chage ...............30
Prise de vue, affi chage et effacement
¾
Prendre des photos avec une valeur
d’ouverture et une vitesse d’obturation
optimales (mode
P
) ...............................31
Affi cher les photos .................................32
Effacer des photos pendant la lecture
(effacement d’une seule photo) .............33
Utiliser les modes prise de vue ..........34
¾
Utiliser le mode le plus approprié pour la
scène de prise de vue
M, B, E, f
(mode
Prendre des photos avec les réglages
automatiques (mode
Enregistrer des vidéos (mode
Nous vous remercions d’avoir acheté un appareil
●
photo numérique Olympus.
à utiliser votre nouvel appareil photo, veuillez lire
attentivement ces instructions afi n d’optimiser ses
performances et sa durée de vie. Conservez ce
manuel dans un endroit sûr pour pouvoir vous y
référer ultérieurement.
● Nous vous recommandons de prendre des
photos-test pour vous habituer à votre appareil
avant de commencer à prendre de vraies photos.
) .....................34
A
)...................34
n
) .........35
Avant de commencer
Utiliser les fonctions de prise de vue
¾
Utiliser le zoom ......................................36
Utiliser le fl ash .......................................36
Ajuster la luminosité
(compensation d’exposition) ..................36
Prise de vue en gros plan ......................37
Utiliser le retardateur .............................37
Augmenter la luminosité de l’écran
(amplifi cation de rétroéclairage) ............37
¾
Imprimer ...............................................38
¾
Utiliser OLYMPUS Master 2 ................39
...31
¾
Appendice ............................................41
Utiliser un Connecteur microSD ............41
PRÉCAUTIONS DE SÉCURITÉ ...........41
CARACTÉRISTIQUES ..........................47
● En vue de l’amélioration constante de nos
produits, Olympus se réserve le droit d’actualiser
ou de modifi er les informations contenues dans
ce manuel.
● Les captures d’écran et les illustrations de
l’appareil photo présentées dans ce manuel
ont été réalisées au cours des phases de
développement et peuvent ne pas correspondre
au produit réel.
...36
Les pages de référence sont celles du Manuel d’instructions (CD-ROM fourni). Veuillez vous reporter au
Manuel d’instructions du CD-ROM.
26
FR
Préparer l’appareil photo
Vérifi er le contenu de la boîte
Appareil photo numérique Courroie
Batterie au lithium-ion
LI-60B
Câble USB Câble AV
CD-ROM
OLYMPUS Master 2
Autres accessoires non illustrés : Manuel d’instructions,
carte de garantie
Le contenu est susceptible de varier en fonction du
lieu d’achat.
Chargeur de batterie
LI-60C
Connecteur microSD
Fixer la courroie
Charger la batterie
Batterie au
Chargeur de
batterie
Câble
d’alimentation
Prise de courant
La batterie est livrée en partie chargée.
Avant l’utilisation, vous devez charger
la batterie jusqu’à ce que l’indicateur de
charge s’éteigne (au bout d’environ 2,5
heures).
Pour plus de détails sur la batterie et le
chargeur, voir “Batterie et chargeur”
(p. 51).
Quand faut-il charger les batteries ?
Chargez la batterie quand le message
d’erreur ci-dessous apparaît.
Clignote en rouge
lithium-ion
Indicateur de charge
Activé : chargement
en cours
Éteint : chargement
terminé
BATTERIE VIDE
Tendez la courroie afi n qu’elle ne soit pas
relâchée.
Coin supérieur droit
de l’écran
Message d’erreur
FR
27
Insérer la batterie et la carte
xD-Picture Card™ (vendue
séparément) dans l’appareil
photo
N’insérez dans l’appareil photo rien
d’autre que la carte xD-Picture Card ou le
Connecteur microSD.
1
2
1
Couvercle du
compartiment de
la batterie/carte
2
Touche de verrouillage de la batterie
La batterie possède une face avant et une
face arrière. Insérez la batterie dans le
bon sens, tel qu’illustré. L’appareil photo
ne fonctionnera pas si la batterie n’est pas
insérée correctement.
Insérez la batterie tout en faisant glisser la
touche de verrouillage de la batterie dans le
sens de la fl èche.
Faites glisser la touche de verrouillage de
la batterie dans le sens de la fl èche pour
déverrouiller, puis retirez la batterie.
3
Insérez la carte bien droit jusqu’à ce qu’elle
se mette en place avec un léger bruit sec.
Ne touchez pas directement la zone de
contact.
4
1
2
Cet appareil photo permet à l’utilisateur de
prendre des photos à l’aide de la mémoire
interne même lorsque aucune carte xDPicture Card (vendue séparément) n’est
insérée. “Utiliser une carte xD-Picture
Card” (p. 52)
“Nombre de photos pouvant être stockées
(images fi xes)/durée d’enregistrement
(vidéos) dans la mémoire interne et la
carte xD-Picture Card” (p. 53)
Encoche
Zone de contact
Retirer la carte xD-Picture Card
12
Enfoncez la carte jusqu’à ce qu’elle émette
un léger bruit sec et sorte légèrement, puis
saisissez-la pour l’enlever.
28
FR

Utiliser une carte microSD/
carte microSDHC (vendue
séparément)
Lorsqu’un Connecteur microSD est utilisé, cet
appareil photo prend aussi en charge les cartes
microSD et cartes microSDHC (ci-après toutes
deux dénommées carte microSD).
“Utiliser un Connecteur microSD” (p. 54)
1
Insérez la carte microSD dans le
Connecteur microSD.
Insérez la carte
à fond dans le
Connecteur.
Régler la date et l’heure
La date et l’heure que vous réglez ici sont
sauvegardées pour les noms de fi chier d’image,
les impressions de date et autres données.
1
Appuyez sur la touche o pour
allumer l’appareil photo.
L’écran de réglage de la date et de l’heure
●
s’affi che si ces dernières ne sont pas réglées.
X
AM
J HEURE
---- -- -- -- --
MENU
ANNULE
Écran de réglage de
la date et de l’heure
AMJ
2
Insérez le Connecteur microSD
dans l’appareil photo.
Encoche
Zone de contact
Pour retirer la carte microSD
Retirez la carte microSD
en la tirant bien droit.
Ne touchez pas la zone de contact du
Connecteur microSD et/ou de la carte
microSD.
2
Utilisez ab pour sélectionner
l’année sous [A].
X
AM
J HEURE
-- -- -- --
2008
MENU
ANNULE
3
Appuyez sur d pour sauvegarder le
AMJ
réglage de [A].
X
AM
J HEURE
-- -- --
2008 10
ANNULE
MENU
AMJ
FR
29
4
SCENE
RE-
INITIALI.
MENU
APPAREIL
SILENCE
QUALITE
D'IMAGE
REGLAGE
Tout comme aux étapes 2 et 3,
utilisez abcd et la touche o
pour régler [M] (mois), [J] (jour) et
[HEURE] (heures et minutes).
Pour régler l’heure avec précision, appuyez
sur la touche o lorsque le signal de temps
atteint 00 seconde.
Pour changer la date et l’heure, effectuez le
réglage depuis le menu. [X] (Date/heure)
(p. 36)
Changer la langue d’affi chage
Vous pouvez sélectionner la langue pour le
menu et les messages d’erreur qui s’affi chent
sur l’écran.
1
Réglez la molette mode sur une
position autre que R.
2
Appuyez sur la touche m,
puis appuyez sur abcd pour
sélectionner [x REGLAGE].
QUALITE
D'IMAGE
RE-
APPAREIL
MENU
MENU
SCENE
REGLAGE
SILENCE
INITIALI.
QUITTE CONF
3
Appuyez sur la touche o.
REGLAGE
1
2
3
QUITTE
4
Utilisez ab pour sélectionner
[W], puis appuyez sur la touche
o.
ENGLISH
FRANCAIS
DEUTSCH
ESPAÑOL
ITALIANO
QUITTE CONF
5
Utilisez abcd pour
sélectionner la langue et appuyez
sur la touche o.
6
Appuyez sur la touche m.
OK
FORMATER
SAUVEGARDER
PIXEL MAPPING
MENU
MENU
FRANCAIS
NON
CONF
OK
OK
30
FR
 Loading...