

Nokia 2125 User Guide

User Guide
Manual del Usuario
Nokia 2125, Nokia 2125i User Guide
Nota: La traducción en español de este manual inicia en la Página 77.
1

LEGAL INFORMATION
Part No. 9240272, Issue No. 2
Copyright ©2006 Nokia. All rights reserved.
Nokia, Nokia Connecting People, Nokia 2125, Nokia 2125i, Pop-Port, and the Nokia Original
Enhancements logos are trademarks or registered trademarks of Nokia Corporation. Other
company and product names mentioned herein may be trademarks or trade names of their
respective owners.
US Patent No. 5818437 and other pending patents. T9 text input software
Copyright ©1999-2006. Tegic Communications, Inc. All rights reserved.
Includes RSA BSAFE cryptographic or security protocol software from
RSA Security.
Java is a trademark of Sun Microsystems, Inc.
The information contained in this user guide was written for the Nokia 2125 and Nokia 2125i
products. Nokia operates a policy of ongoing development. Nokia reserves the right to make
changes to any of the products described in this document without prior notice.
UNDER NO CIRCUMSTANCES SHALL NOKIA BE RESPONSIBLE FOR ANY LOSS OF DATA OR
INCOME OR ANY SPECIAL, INCIDENTAL, AND CONSEQUENTIAL OR INDIRECT DAMAGES
HOWSOEVER CAUSED.
THE C ONTE NTS O F THIS DO CUME NT AR E PRO VIDED “A S IS. ” EXC EPT AS RE QUIR ED BY
APPLICABLE LAW, NO WARRANTIES OF ANY KIND, EITHER EXPRESS OR IMPLIED , INCLU DING,
BUT NOT LIMITED TO, THE IMPLIED WARRANTIES OF MERCHANTABILITY AND FITNESS FOR A
PARTICULAR PURPOSE, ARE MADE IN RELATION TO THE ACCURACY AND RELIABILITY OR
CONTENTS OF THIS DOCUMENT. NOKIA RESERVES THE RIGHT TO REVISE THIS DOCUMENT OR
WITHDRAW IT AT ANY TIME WITHOUT PRIOR NOTICE.
Export Controls
This device may contain commodities, technology, or software subject to export laws and
regulations from the U.S. and other countries. Diversion contrary to law is prohibited.
FCC/Industry Canada Notice
Your device may cause TV or radio interference (for example, when using a telephone in close
proximity to receiving equipment). The FCC or Industry Canada can require you to stop using
your telephone if such interference cannot be eliminated. If you require assistance, contact
your local service facility. This device complies with part 15 of the FCC rules. Operation is
subject to the condition that this device does not cause harmful interference.
2

Table of Contents
Table of Contents
For your safety..................................................................................... 4
Welcome............................................................................................... 7
1. Phone at a glance.......................................................................... 9
2. Set up your phone....................................................................... 13
3. Text entry..................................................................................... 19
4. Contacts list ................................................................................ 21
5. Messages...................................................................................... 27
6. Call log......................................................................................... 34
7. Profiles ......................................................................................... 37
8. Settings........................................................................................ 38
9. Gallery.......................................................................................... 51
10. Games........................................................................................... 52
11. Voice............................................................................................. 53
12. Minibrowser................................................................................. 56
13. Organizer...................................................................................... 58
14. PC connectivity............................................................................ 62
15. Enhancements.............................................................................. 63
16. Battery information .................................................................... 64
Care and maintenance....................................................................... 67
Additional safety information .......................................................... 68
Index ................................................................................................... 73
3
For your safety
For your safety
Read these simple guidelines. Not following them may be dangerous or illegal.
Read the complete user guide for further information.
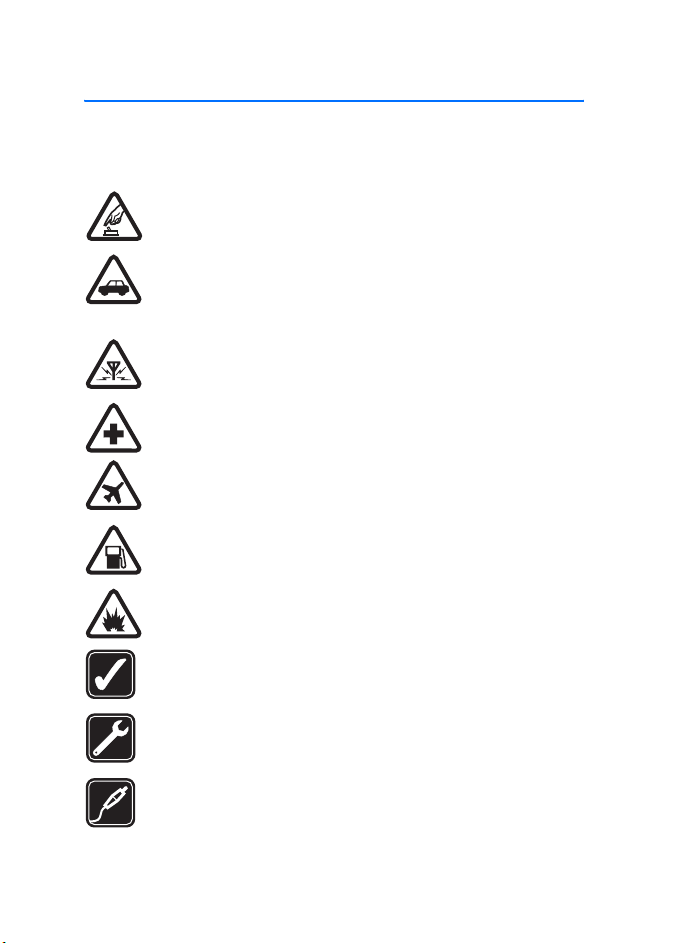
SWITCH ON SAFELY
Do not switch the phone on when wireless phone use is prohibited or
when it may cause interference or danger.
ROAD SAFETY COMES FIRST
Obey all local laws. Always keep your hands free to operate the
vehicle while driving. Your first consideration while driving should
be road safety.
INTERFERENCE
All wireless phones may be susceptible to interference, which could
affect performance.
SWITCH OFF IN HOSPITALS
Follow any restrictions. Switch the phone off near medical equipment.
SWITCH OFF IN AIRCRAFT
Follow any restrictions. Wireless devices can cause interference
in aircraft.
SWITCH OFF WHEN REFUELING
Do not use the phone at a refueling point. Do not use near fuel
or chemicals.
SWITCH OFF NEAR BLASTING
Follow any restrictions. Do not use the phone where blasting is
in progress.
USE SENSIBLY
Use only in the normal position as explained in the product
documentation. Do not touch the antenna unnecessarily.
QUALIFIED SERVICE
Only qualified personnel may install or repair this product.
ENHANCEMENTS AND BATTERIES
Use only approved enhancements and batteries. Do not connect
incompatible products.
4
For your safety
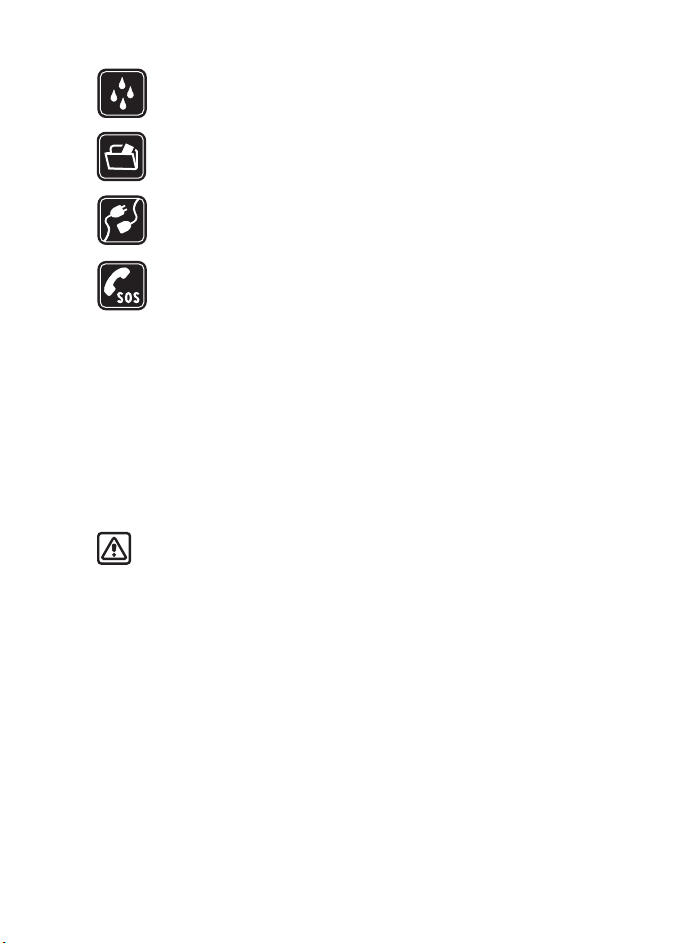
WATER-RESISTANCE
Your phone is not water-resistant. Keep it dry.
BACKUP COPIES
Remember to make back-up copies or keep a written record of all
important information stored in your phone.
CONNECTING TO OTHER DEVICES
When connecting to any other device, read its user guide for detailed
safety instructions. Do not connect incompatible products.
EMERGENCY CALLS
Ensure the phone is switched on and in service. Press the end key as
many times as needed to clear the display and return to the start
screen. Enter the emergency number, then press the call key. Give
your location. Do not end the call until given permission to do so.
■ About your device
The wireless phone described in this guide is approved for use on the CDMA 800
and 1900 and 800 AMPS networks. The Nokia 2125i also receives signals from
the GPS location system. Contact your service provider for more information
about networks.
When using the features in this device, obey all laws and respect privacy and
legitimate rights of others.
Warning: To use any features in this device, other than the alarm clock,
the phone must be switched on. Do not switch the device on when
wireless phone use may cause interference or danger.
■ Network services
To use the phone you must have service from a wireless service provider. Many of the
features in this device depend on features in the wireless network to function. These
network services may not be available on all networks or you may have to make
specific arrangements with your service provider before you can utilize network
services. Your service provider may need to give you additional instructions for their
use and explain what charges will apply. Some networks may have limitations
that affect how you can use network services. For instance, some networks may
not support all language-dependent characters and services.
5

For your safety
Your service provider may have requested that certain features be disabled or not
activated in your device. If so, they will not appear on your device menu. Your
device may also have been specially configured. This configuration may include
changes in menu names, menu order and icons. Contact your service provider for
more information.
This device supports WAP 1.1 protocols (HTTP and SSL) that run on TCP/IP protocols.
Some features of this device, such as the minibrowser, require network support for
these technologies.
■ Shared memory
The following features in this device may share memory: contacts, text messages,
images, and tones in Gallery, calendar notes, games, and applications. Use of one
or more of these features may reduce the memory available for the remaining
features sharing memory. Your phone may display a message that the memory is
fu ll w hen you try to us e a s har ed m emo ry fe atu re. In t his cas e, d ele te s ome of th e
information or entries stored in the shared memory features before continuing.
Some of the features, such as images, tones in Gallery, text messages, and
applications may have a certain amount of memory specially allotted to them in
addition to the memory shared with other features.
6
Welcome
Welcome
Congratulations on your purchase of the Nokia 2125 or Nokia 2125i mobile phone.
Your phone provides many functions that are practical for daily use, such as a
hands-free loudspeaker, alarm clock, calculator, calendar. Your phone can also
connect to a PC, laptop, or other device, using a data cable. To personalize your
phone, you can set your favorite ring tones or select an Xpress-on™ color cover.
■ Get help
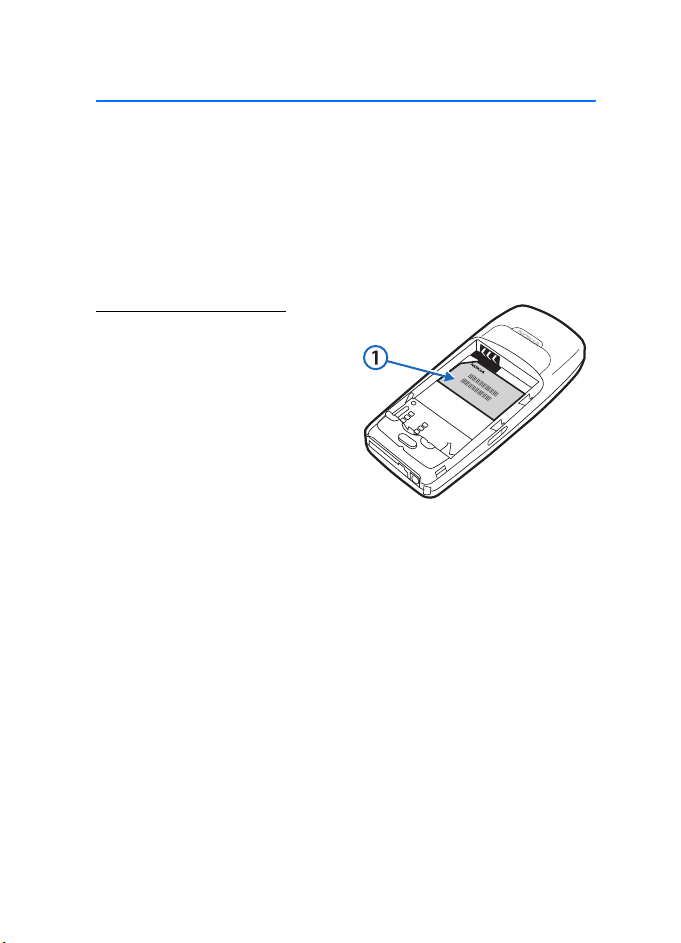
Find your phone label
If you need help, Nokia Customer Care
is available for assistance. Before calling,
we recommend that you write down
the following information and have
it available:
• Electronic serial number (ESN)
• Your zip code
The ESN is found on the type label,
which is located beneath the battery
on the back of the phone. See "Remove the back cover," p. 14 and "Remove the
battery," p. 14.
7
Welcome
Contact Nokia
Please have your product with you when contacting either of the numbers below:
Nokia Care Contact Center, USA
Nokia Inc.
4630 Woodland Corporate Blvd.
Suite #160
Tampa, Florida 33614
Tel: 1-888-NOKIA-2U
(1-888-665-4228)
Fax: 1-813-249-9619
Web site: www.nokiausa.com/support
In Canada call:
Tel: 1-888-22-NOKIA
(1-888-226-6542)
Web site: www.nokia.ca
For TTY/TDD users:
1-800-24-NOKIA (1-800-246-6542)
Updates
Check www.nokiausa.com/support or your local Nokia Web site for the latest
version of this guide, additional information, downloads, and services related
to your Nokia product.
On the Web site, you can get information on the use of Nokia products and
services. If you need to contact customer service, check the list of local Nokia
Care contact centers at www.nokia.com/customerservice
For maintenance services, check your nearest Nokia Care services location at
www.nokiausa.com/repair
.
.
Accessibility solutions
Nokia is committed to making mobile phones easy to use for all individuals,
including those with disabilities. For more information visit the Web site at
www.nokiaaccessibility.com
8
.
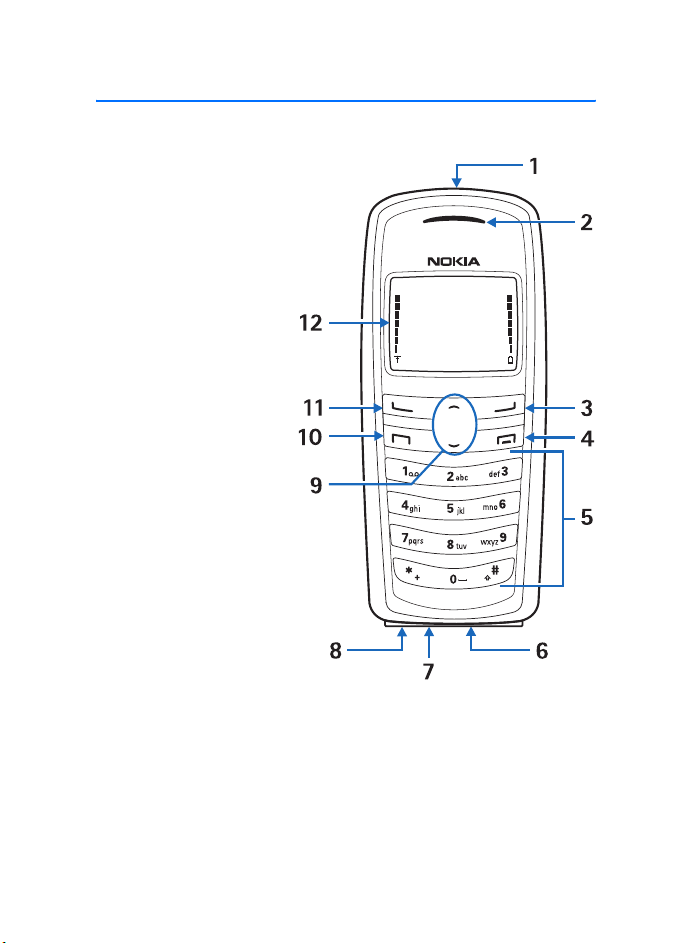
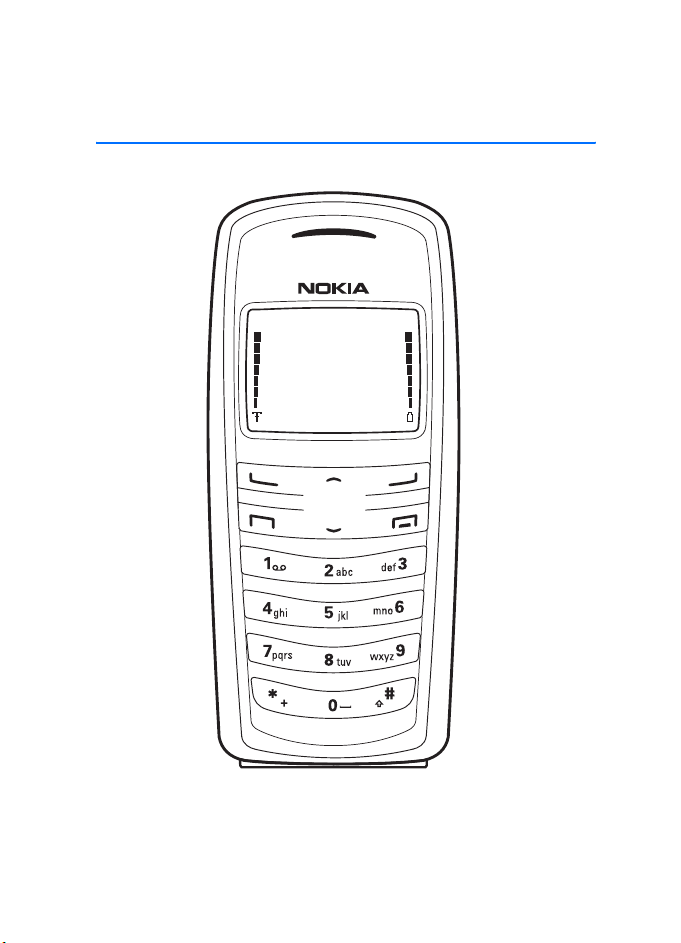
1. Phone at a glance
• Power key and flashlight (1)
• Earpiece (2)
• Right selection key (3)
• End key (4)
• Keypad (5)
• Connection port (6)
• Microphone (7)
• Charger port (8)
• Scroll up and down key (9)
• Call key (10)
• Left selection key (11)
• Display screen (12)
Phone at a glance
■ The start screen
Depending on your wireless service provider and the model number of your device,
some or all of the following selection keys may appear on the start screen.
9
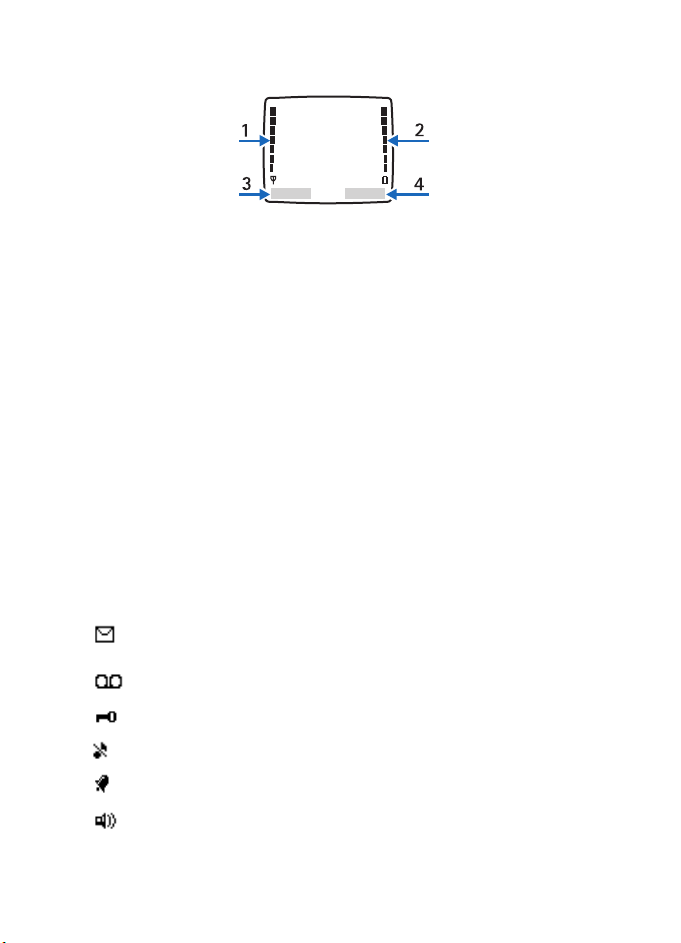
Phone at a glance
The start screen is home base and indicates that your phone is in the standby mode.
Signal strength (1)—A higher bar indicates a stronger network signal.
Battery level (2)—A higher bar indicates more charge in the battery.
Menu (3)—Press the left selection key to select this option.
Contacts (4)—Press the right selection key to select this option.
■ Quick keys
In the standby mode, scroll down to access the contacts list, and select a contact.
Press the call key to call the primary number of the contact.
Press the scroll up key to activate the flashlight momentarily. Press the scroll up
key twice to switch the flashlight on continuously. Press the scroll up key again
to switch off the flashlight.
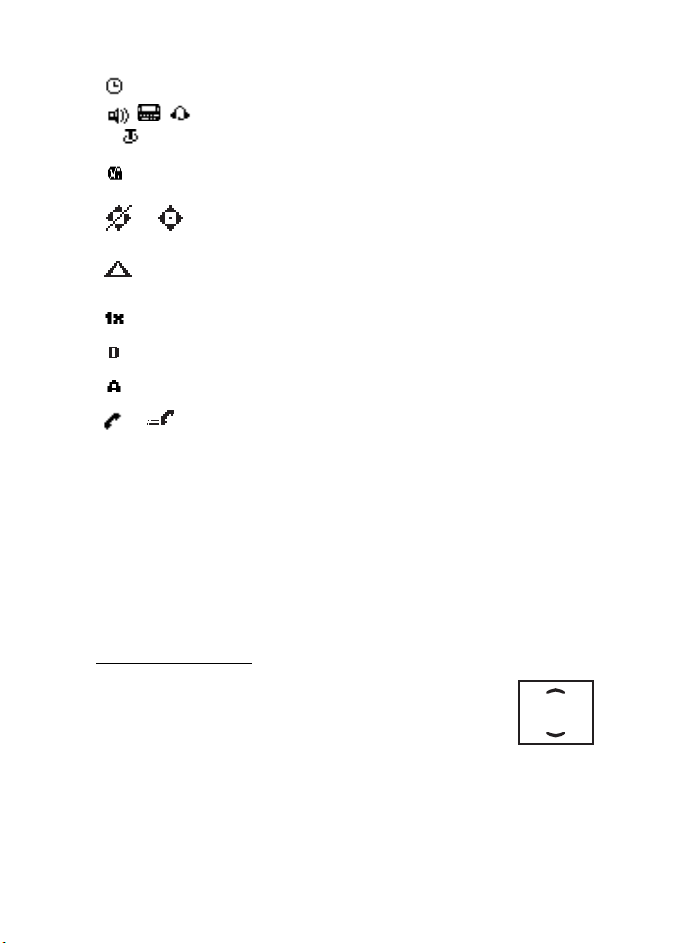
■ Indicators and icons
Depending on your wireless service provider and the model number of your
phone, some or all of the following indicators and icons may appear in the
standby mode:
10
You have new text or picture messages. See "Text
messages," p. 27.
You have new voice messages. See "Voice messages," p. 31.
Device keypad is locked. See "Keyguard," p. 18.
Device is set to the silent profile. See "Profiles," p. 37.
Alarm clock is set to on. See "Alarm clock," p. 58.
Integrated hands-free is active.
See "Use the loudspeaker," p. 17.
Phone at a glance
Timed profile is selected. See "Profiles," p. 37.
or
or
or
An enhancement is connected to the device.
See "Enhancements," p. 63.
Voice privacy encryption is active in the network.
See "Security settings,"p. 47.
Info sharing is set to Emergency or On. See "Location
information sharing (2125i only)," p. 38.
You are roaming outside your home network. See "Roaming
options," p. 48.
You are in a 1XRTT network. See "Network services," p. 5.
You are in a digital network. See "Network services," p. 5.
You are in an analog network. See "Network services," p. 5.
Off hook, call or data call in progress.
■ Phone menus
Phone features are grouped according to function and are accessed through the
main menus. Each main menu contains submenus and lists from which you can
select or view items and customize your phone features. To access these menus
and submenus use the scroll method or use a shortcut.
Some features may not be available, depending on your network. For more
information, contact your wireless provider.
The scroll method
1. In the standby mode, select Menu, and scroll up or down
through the main menus.
As you scroll through the menus, the menu number appears in
the upper right corner of the display. Below the number is a
scroll bar with a tab that moves up or down on the right side of the display
screen as you scroll through the menus. This display provides a visual
representation of your current position in the menu structure.
11

Phone at a glance
2. When you arrive at a menu, press the left selection key to enter submenus or,
when the browser appears on the display, select Connect to enter that menu.
•Select Back (the right selection key) to return to the previous menu.
• Select the end key from any submenu or select Exit from the main menu
level to return to the standby mode.
Shortcuts
To go directly to almost any menu or submenu, as well as activate most features
use a shortcut.
In the standby mode, select Menu; then within 3 seconds, press the key or keys
associated with the menu function you would like to view or activate.
For example, to select the meeting profile, select Menu 3-3-1 from standby mode
(Menu > 3 Profiles > 3 Meeting > 1 Activate). After a brief pause, the Meeting
profile is activated.
In-phone help
Many features have brief descriptions (help text) that can be viewed on the
display. In order to view the descriptions, you must first activate help text.
In the standby mode, select Menu > Settings > P hone settings > Help text
activation > On or Off.
To view these descriptions, scroll to a feature, and wait for about 15 seconds.
Select More, when necessary, to view all of the description, or select Back to exit.
12

2. Set up your phone
■ Antenna
Your phone has an internal antenna that is located
toward the top of the phone.
In the Nokia 2125i phone, the GPS antenna is
internal and is activated when you place emergency
calls or when On is selected from the Location info
sharing menu. See "Location information sharing
(2125i only)," p. 38.
Hold the phone as you would any other
telephone with the antenna area pointed up
and over your shoulder.
Note: As with any other radio transmitting
device, do not touch the antenna
unnecessarily when the device is switched
on. Contact with the antenna affects call
quality and may cause the device to operate
at a higher power level than otherwise
needed. Avoiding contact with the antenna
while operating the device optimizes the
antenna performance and the battery life.
Set up your phone
■ Change the battery
Always switch the device off, and disconnect the charger before removing
the battery.
Warning: Use only batteries, chargers, and enhancements approved by
Nokia for use with this particular model. The use of any other types may
invalidate any approval or warranty, and may be dangerous.
Check the model number of any charger before use with this device. This device is
intended for use when supplied with power from the ACP-7 and ACP-12 chargers.
13
Set up your phone
For availability of approved enhancements, please check with your dealer. When
you disconnect the power cord of any enhancement, grasp and pull the plug, not
the cord.
Note: Always switch off the power and disconnect the charger and any
other device before removing the cover. Avoid touching electronic
components while changing the cover. Always store and use the device
with the cover attached.
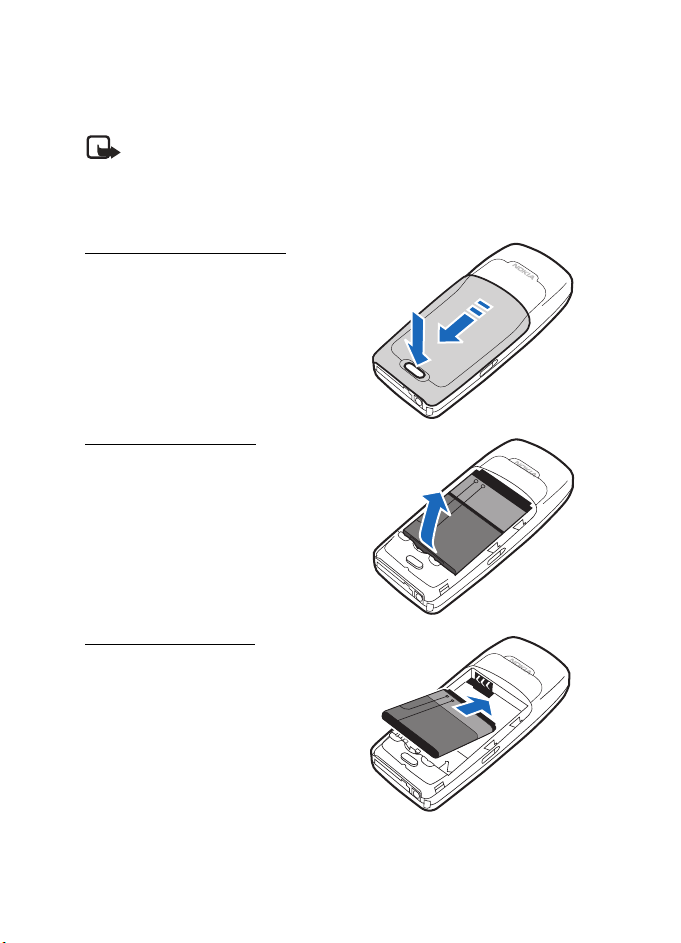
Remove the back cover
1. With the back of the phone facing
you, push down on the back cover
release button.
2. Slide the back cover toward the bottom
of the phone and remove.
Remove the battery
After you have removed the back cover,
insert your finger into the finger grip, and
lift the battery from its compartment.
Replace the battery
1. Position the battery so the positive and
negative indicators on the battery
match up with the positive and
negative indicators on the phone.
The battery label must face away
from the phone.
2. Insert the battery, gold- colored contact
end first, into the battery slot.
3. Push down on the other end of the battery to snap it into place.
14
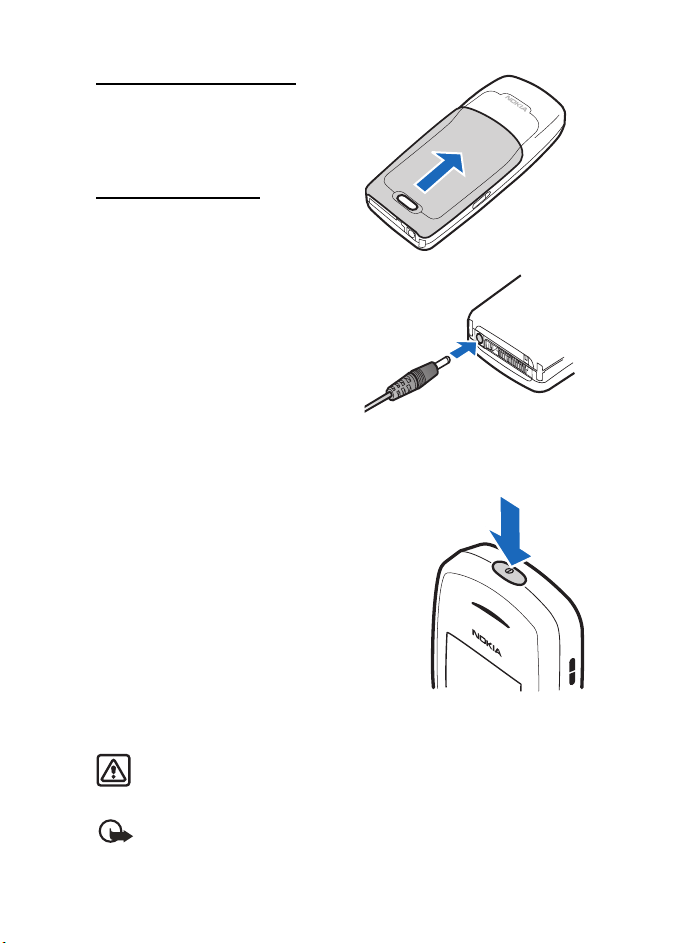
Replace the back cover
Slide the back cover toward the top
of the phone until the back cover is
securely in place.
Charge the battery
1. Plug the charger into a standard
ac outlet.
2. Insert the charger output plug into
the round jack at the bottom end of
the phone.
After a few seconds, the battery
indicator on the display starts to
scroll from bottom to top. If the
battery is completely discharged, it
may take a few minutes before the
charging indicator appears on the
display or before any calls can be made.
■ Turn your phone on or off
1. To turn your phone on or off, press and hold
the power key on top of the phone for at least
3 seconds.
2. Enter the lock code, if necessary, and select OK.
See "Security settings," p. 47.
Set up your phone
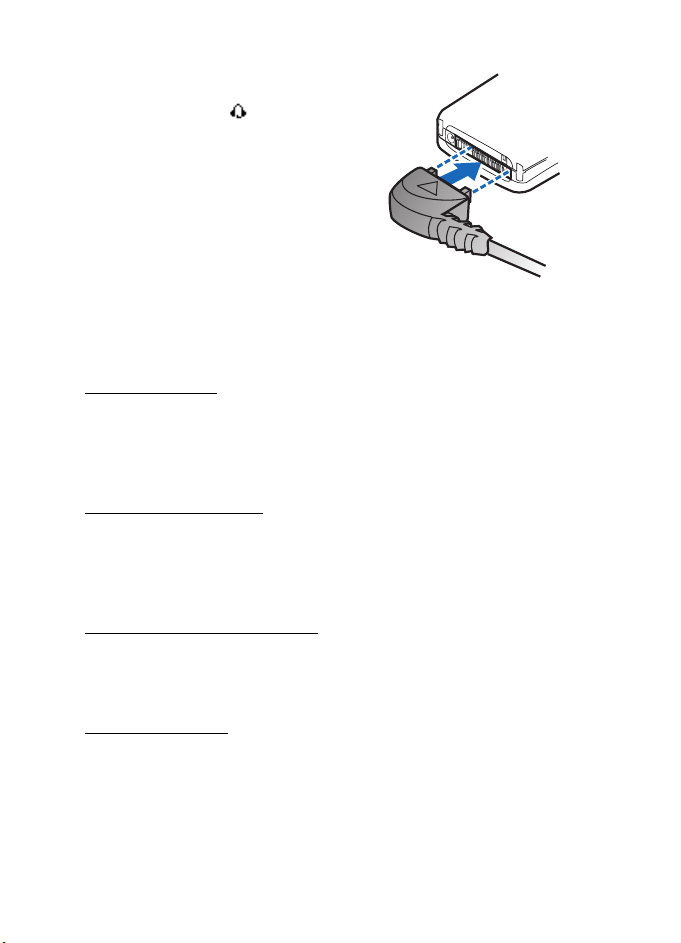
■ Connect the headset
A compatible headset, such as HS-5, may be purchased with your phone or
separately as an enhancement. See "Enhancements," p. 63.
Warning: When using the headset, your ability to hear outside
sounds may be affected. Do not use the headset where it can
endanger your safety.
Important: The headset may affect your ability to hear sounds around
you. Do not use this headset in situations that may endanger your safety.
15
Set up your phone
1. Plug the headset connector into the
Pop-Port™ connector at the bottom
end of your phone. appears in the
standby mode.
2. Position the headset on your ear.
With the headset connected, make,
answer, and end calls as usual.
• Use the keypad to enter numbers.
• Press the call key to place a call.
• Press the end key to end a call.
■ Make a call
Use the keypad
1. Enter the phone number (including the area code), and press the call key.
To delete a character to the left of the cursor, select Clear.
2. Press the end key to end the call, or select End call to cancel the call attempt.
Use the contacts list
1. In the standby mode, scroll down to the entry you wish to view.
2. Press the call key to make the call, or select Details to view details of
the entry.
Use the last dialed number
1. In the standby mode, press the call key to display the last 10 numbers dialed.
2. Scroll to the number (or name) you wish to redial, and press the call key.
Conference calls
Conference calling is a network service that allows you to take part in a
conference call with two other participants.
1. Make a call to the first participant.
2. With the first participant on the line, select Options > New call.
16

Set up your phone
3. Enter the phone number of the second participant, or select Search to
retrieve a number from the contacts list.
4. Select Flash. The first participant is put on hold.
5. When the second participant answers, press the call key to connect the calls.
6. To end the conference call, press the end key.
■ Answer calls
Answer, silence, or decline an incoming call
Silence and Decline are carrier dependent features.
1. Press the call key to answer the call.
2. To mute the ringing tone, select Silence. If you do not answer the call, the call
is forwarded to voicemail.
3. To dismiss and forward the call to voicemail (a carrier dependent feature),
select Decline after you have muted the ringing tone, or press the end key at
any time.
Answer a call with the keypad locked
To answer a call with the keypad locked, press the call key. During the call, all
features function normally. When you end, silence or decline the call, the keypad
automatically relocks. See "Keyguard," p. 18.
When the keyguard is on, calls still may be possible to the official emergency
number programed into your device.
Adjust the earpiece volume
While in a call, scroll up or down to adjust the volume of the earpiece.
When you adjust the volume, a bar chart appears in the display to indicate the
volume level.
Use the loudspeaker
You can use your phone as a loudspeaker during a call.
• To activate the loudspeaker, select Loudspeaker.
• To deactivate the loudspeaker during a call, select Handset.
The loudspeaker is deactivated automatically when a call (or a call attempt) ends,
or when certain enhancements are connected.
17

Set up your phone
Warning: Do not hold the device near y our ear when the loudspeaker is
in use, because the volume may be extremely loud.
Options during a call
Many of the options used during a call are network services. Check with your
wireless service provider for more information.
1. Select Options to display the following:
Mute or Unmute—Silence your end of the call.
Loudspeaker or Handset—Activate or deactivate the loudspeaker while in a call.
New call—Initiate a conference call. See "Conference calls," p. 16.
Save—Save the number you entered during a call.
Add to contact—Save the number you entered during a call to a contact
already in the contacts list.
End all calls—Disconnect from all active calls.
Touch tones—Enter the numbers, and select Ton es to send the numbers as tones.
Contacts—View the contacts list.
Menu—View the phone menu.
2. Select an option to activate the option or enter its submenu.
■ Keyguard
Use keyguard, to lock the keypad and prevent keys from being pressed accidentally.
Remember to lock your phone keypad to prevent accidental calls. If the keypad
is locked, it unlocks when you receive a call. After the call, the lock
automatically reactivates.
When the keyguard is on, calls still may be possible to the official emergency
number programed into your phone. Enter the emergency number, and press the
call key. See "Automatic keyguard," p. 40.
Lock the keypad
Select Menu; then press * within 2 seconds.
Unlock the keypad
Select Unlock; then press * within 2 seconds.
18

Text entry
3. Text entry
You can use two methods for entering text and numbers: standard mode and
predictive text mode.
• Select Clear to backspace the cursor and delete a character.
• Select and hold Clear to backspace continuously and delete characters.
■ Standard mode
Standard mode is the only way to enter text into the contacts list and to rename
caller groups.
Text (Abc)
Press a key once to insert the first letter on the key and twice for the second
letter, etc. If you pause briefly, the last letter in the display is accepted and your
device awaits the next entry.
• Press 0 to enter a space and accept a completed word.
• Press 1 to insert a period into your message.
• Press and hold * to display a complete list of special characters.
• Press and hold # to switch between letters and numbers.
Numbers (123)
To switch from Abc mode to 123 mode, press and hold # at any message
entry screen.
Punctuation and special characters
While at any text entry screen, press * to display special characters (press and
hold * if predictive text is on). Press * again to cycle through all available characters.
To navigate through the list of special characters, use the scroll keys. Once a
character is highlighted, select Insert to insert the character into your message.
■ Predictive text mode
To write messages quickly, use predictive text mode with your keypad and the
built-in dictionary. Predictive text mode is much faster than the standard mode
method because you do not need to scroll through the letters on each key to spell
a word. The dictionary determines which word to enter based on the keys selected.
19
Text entry
Activate or deactivate
At any text entry screen, select Options > Predictive text > English, Français,
or Español to activate predictive text; or select Prediction off to deactivate
predictive text.
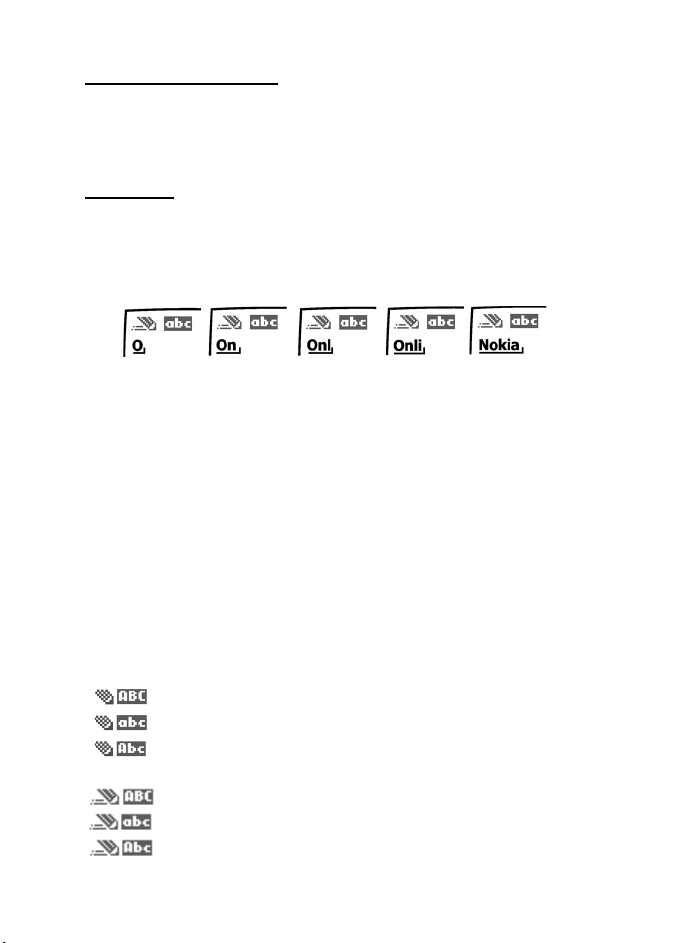
Text entry
The illustration below simulates your display each time a key is pressed. For
example, to write ’Nokia’ with predictive text on and the English dictionary
selected, press each of the following keys:
6 6 5 4 2
• Press 0 to enter a space, and begin writing the next word.
• If a displayed word is not correct, press * to see other matches. To return to
the previous word in the list of matches, select Previous.
•If ? appears after a word, select Spell to enter the word with the standard
mode, and add the word to the dictionary.
• Press 1 to insert a period into your message.
• Press and hold * to display special characters. Press * again to cycle through
all available characters.
■ Change case and mode
Press # to switch between uppercase, lowercase, and sentence case text and
between standard and predictive text mode. Case and mode are indicated by the
icons that appear in the upper left of the display screen, as follows:
Uppercase text: standard mode is on.
Lowercase text: standard mode is on.
Sentence case text: standard mode is on.
This option is available only at the beginning of a sentence.
Uppercase text: predictive text is on.
Lowercase text: predictive text is on.
Sentence case text: predictive text is on.
This option is available only at the beginning of a sentence.
20

Contacts list
4. Contacts list
The contacts list can hold up to 250 contacts with multiple numbers and text
notes for each contact. The amount of numbers and text entries that you can
save may vary, depending on length and the total number of entries in the
contacts list.
■ Search
In the standby mode, select Contacts > Search; highlight the contact you wish to
view, and select Details.
■ Add new contacts
Save a name and number
1. In the standby mode, enter the phone number you wish to save.
2. Select Options > Save.
3. Enter the contact name, and select OK.
Save (only) a number
In the standby mode, enter the phone number you wish to save; select and
hold Options.
Save multiple numbers and text items
The first number you save for any entry is automatically set as the default. The
default setting can be changed later. To save different types of phone numbers
and short text items per name to the phone memory, do the following:
1. In the standby mode, scroll down to display a list of entries. Scroll to the entry
to which you wish to add a phone number or text item.
2. Select Details > Options > Add number to add a General, Mobile, Home,
Work,or Fax number; or Add detail to add an E-mail, Web address, Street
addr., or Note.
3. Enter the number or text for the type you have selected, and select OK.
4. To change the type, select Change type > E-mail, Web address, Street addr.
To change which phone number is the default number for the contact entry:
1. In the standby mode, scroll down to the entry you wish to change, and
select Details.
2. Scroll to the number you wish to set as default, select Options > As primary no.
21

Contacts list
Set up voice tags
For more information on setting up voice tags and other voice features, see
"Voice tags," p. 54.
Caller groups
You can add contact list entries to any of five caller groups, and assign a unique
ringing tone or graphic to that group. This enables you to identify callers from the
group by their unique ringing tone or graphic.
Set up a caller group
1. In the standby mode, scroll down to display a list of entries in your
contacts list.
2. Scroll to a name you want to add to a caller group, and select Details.
3. Select Options > Caller groups.
4. Select the caller group to which you would like to add the name.
Options
1. In the standby mode, select Contacts > Caller groups > Family, VIP, Friends,
Business, or Other.
2. Select from following caller group options:
Rename group—Rename the group to your preference.
Group ringing tone—Set the ringing tone for the group.
Group logo—Turn the graphic for the caller group on or off or view the graphic.
Group members—Add or remove members from the caller group.
Set up 1-touch dialing
You can associate any entry in the contacts list with a key from 2–9; to dial these
entries by pressing and holding the assigned key. See "1-touch dialing," p. 39 to
activate or deactivate 1-touch dialing.
Assign a key to 1-touch dialing
1. In the standby mode, select Contacts > 1-touch dialin g.
If 1-touch dialing is off, the phone displays a prompt asking if you want to
turn 1-touch dialing on. Select Yes to activate 1-touch dialing.
2. Scroll to an (empty) 1-touch dialing slot, and select Assign.
3. Enter the number (including the area code) and a name for the contact, or
select Search to retrieve a number from the contacts list.
4. Select OK.
22

Contacts list
Change 1-touch dialing numbers
1. In the standby mode, select Contacts > 1-touch dialing.
2. Scroll to the 1-touch dialing entry you wish to change, and select
Options > Change.
3. Enter the new number; or search to retrieve a number from the contacts list,
and select OK.
4. Enter a name for the entry, and select OK.
Delete 1-touch dialing numbers
1. In the standby mode, select Contacts > 1-touch dialing.
2. Scroll to the 1-touch dialing location you wish to delete, and select Options.
3. Select Delete > OK.
■ Edit contacts list entries
1. In the standby mode, scroll down to display the contents of your contacts list.
2. Scroll to the entry you would like to edit; select Details and one of the
following options:
Add voice tag or Voic e tag—Add a new voice tag or Playback, Change, or
Delete an existing voice tag.
Edit number—Edit an existing contact number.
Delete number—Delete a phone number from the contact.
Use number—Display the phone number in the standby mode, ready to be called.
View—View the details of the contact.
Change type—Change the number type to General, Mobile, Home, Work, or Fax .
As primary no.—Change the default number of the contact.
Add number—Add a number to the contact.
Add detail > E-m ail, Web address, Street addr., or Note—Add an address or
note to the contact.
Caller groups—Add the contact to an existing caller group.
Custom tone—Add a custom ringing tone to the contact.
Send bus. card—Send the contact as a business card to another phone.
Send message—Create and send a message to the contact.
1-touch dialing—Add the contact to your speed dial list.
Edit name—Edit the name of the contact.
View name—View the name of the contact.
Delete—Delete the entire contact entry from your contacts list.
23

Contacts list
Edit phone number
Highlight the existing phone number you would like to edit, and select Options >
Edit number.
E-mail address entry
Highlight the existing e-mail address entry you would like to send or update,
and select Options and one of the following:
Send e-mail—Send an e-mail.
Edit detail—Edit e-mail details.
Delete detail—Delete e-mail.
View—View the details of the e-mail contact.
Change type—Change the e-mail type to E-mail, Web address, Street addr., or Note.
Add detail—Add an E-mail, Web address, Street addr., or Note to the entry.
Add number—Add a number to the entry.
Caller groups—Add the e-mail to an existing caller group.
Custom tone—Add a custom ring tone to the contact.
Send bus. card—Send the contact a business card.
Edit name—Edit the name of the contact.
View name—View the name of the contact.
Delete—Delete the entire e-mail entry from your contacts list.
Edit Web address
Highlight the Web address entry you want to edit, and select Options >
Web address, Street addr., or Note > OK.
■ Delete contacts list entries
In the standby mode, select Contacts > Delete.
• To delete individual entries, select One by one, and scroll to the entry you wish
to delete. Select Delete > OK to confirm.
• To delete the entire contents of your contacts list, select Delete all > OK.
Select OK to confirm or Back to return to Contacts. If OK, enter the security
code, and select OK. See "Security settings," p. 47.
24

Contacts list
■ View the contacts list
1. In the standby mode, select Contacts and one of the following options:
Search—Find a name or select from a list.
Add new—Add a contact to your contacts list.
Edit name—Edit an existing name.
Delete—Delete a name and its associated numbers.
Add number—Add a number to an existing name.
Settings—Change the contacts list view, check the memory status of your phone.
1-touch dialing—View or modify the list of 1-touch dialing numbers.
Voice tags—Attach, listen to, or modify a contact voice tag.
My number—View your own phone number.
Caller groups—View and edit the properties for any of the caller groups:
Family, VIP, Friends, Business, or Other.
2. Select an item to activate the feature or enter its submenu.
Fast search for a name
1. In the standby mode, scroll down to display your contacts list.
2. Press the key that corresponds to the first letter of the name for which you
are performing a search.
3. Scroll up and down to highlight a contact, and select Details to view the details.
Configure settings
You can choose how the contacts appear in your contacts list and view the
amount of memory used or available in your phone.
For more information on used and available memory, see "Shared memory," p. 6.
In the standby mode, select Contacts > Settings, and one of the following options:
Scrolling view > Name list or Name and no.—Choose how names and numbers
stored in the contacts list are viewed.
Memory status—View the amount of memory used in phone book.
■ Send and receive contacts
To send and receive an entry in your contacts list, use text messaging, if supported
by your wireless provider.
25

Contacts list
Send a business card
To send a business card as a text message to a compatible phone or other
handheld device, do the following:
1. Highlight the entry from the contacts list that you wish to send, and select
Details > Options > Send bus. card > Via text msg., and do one of the following:
•Select Primary no. or All details, if the entry has more than one number
or detail.
• Enter the number for your recipient.
•Select Search to retrieve a number from your contacts list.
2. Select OK , to send the business card.
26

Messages
5. Messages
If you have subscribed to a messaging service through your wireless provider, you
can send and receive text messages to compatible phones that also subscribe to a
compatible message service. You may also be able to send and receive picture
messages and e-mail messages.
Important: Exercise caution when opening messages. E-mail messages may
contain malicious software or otherwise be harmful to your device or PC.
Your device supports the sending of text messages beyond the 160 character
limit for a single message. Longer messages will be sent as a series of two or more
messages. Your service provider may charge accordingly. Characters that use accents
or other marks, and characters from some language options like Chinese, take up
more space, limiting the number of characters that can be sent in a single message.
The number of characters remaining in a message are indicated by counter in
upper right corner of screen. If there are special characters in your message, the
indicator may not show the message length correctly.
Note: When sending messages, your device may display Message sent.
This is an indication that the message has been sent by your device to the
message center number programed into your device. This is not an
indication that the message has been received at the intended destination.
For more details about messaging services, check with your service provider.
■ Text messages
Write and send
1. In the standby mode, select Menu > Messages > Text messages > Create
message and one of the following:
• Text > Add numbe r, Add e-mail, Edit message, List recipients, or Send to
send an alphanumeric text message.
• Numeric page > Add number, Callback no., List recipients, or Send to send
a numeric message.
2. Select Add number or Add e-mail to enter the recipient’s phone number or
e-mail address; or select Search to retrieve a number from your contacts list.
Select OK.
3. Repeat step 2 to add more recipients, and select OK.
4. Select Options > Edit message.
5. Compose a message using the keypad, and select Options > Send.
27

Messages
Messaging options
When you create or reply to a text message, depending on the mode of text input
you use and the features supported by your wireless service provider, some or all
of the following options are available:
Preview—Preview messages.Use only if a graphic is attached to the message.
Send—Send the message to recipient.
List recipients—Send the message to more than one recipient; or delete or edit
the recipient list.
Settings > Urgent, Delivery note, or Callback no.—Set or change how the message
is sent.
Save message > Sent items, Templates, or Archive—Save the message to a folder.
Clear text—Erase the text clipboard.
Exit editor—Save the message to your Sent ite ms folder automatically, and exit
the message editor.
Insert contact—Insert a name from your contacts list into your message.
Insert number—Insert a phone number or find a phone number in the contacts
list, to insert into your message.
Use template—Insert a predefined template into your message.
Insert picture or Delete pic ture—Insert or delete a picture from the message.
Pictures are inserted from the Templates folder.
Add-ins—Insert a Sound, Animation, or Picture to the text message.
Note: A picture message cannot be sent to an e-mail address.
Insert word or Edit word—Enter or edit the text of a new word that might not
appear in the predictive text dictionary. This is displayed only when the
Predictive text is on.
Insert symbol—Insert a special character into your message. This displays only
when the Predictive text is on.
Predictive text—Choose a predictive text language, and turn the dictionary on or off.
Matches—View matches found in the dictionary for the word you want to use.
Templates
Templates are short, prewritten messages that can be recalled and inserted into
new text messages.
1. Open the blank message creation screen. See "Write and send," p. 27.
28

Messages
2. Select Options > Use template.
3. Select one of the available templates.
4. Enter the text into your new message, and select Options > Send.
Read messages
Important: Exercise caution when opening messages. Messages may
contain malicious software or otherwise be harmful to your device or PC.
When you receive a text message, a notification message and are displayed
in the upper left corner in the standby mode. When you have unopened messages
in your Inbox, is displayed.
1. Select Show to read the message or Exit to remove the notification icon.
Scroll to view the whole message, if necessary.
2. Select Options > Reply.
3. Select Empty screen, and compose your reply.
4. To send your reply, select Options > Send.
Options
When you read a text message, some or all of the following options are available
depending on the text input mode and the features supported by your wireless
service provider:
Delete—Discard the message.
Reply—Reply to the message. Create the message, and select Options >Send.
Use number > Save, Add to contact, Send message, or Call.
Save—Save the message to a folder.
Use web link—Activate Web link (appears when the message contains a URL).
Save address—Save e-mail address (appears when the message contains an
e-mail address).
Forward—Forward the message to another phone number.
Rename—Edit the title of the message.
Save picture—Save picture to your Templates folder. Appears when a graphic
message is highlighted.
■ Message folders
Save messages
To save drafts or received messages to a folder, do the following:
Open the message or create a new message, and select Options > Save or Save
message > Sent items, Archive, Tem plates, or a folder you create.
29
 Loading...