Page 1
MASCHINE MK3 MANUAL
Page 2

The information in this document is subject to change without notice and does not represent a
commitment on the part of Native Instruments GmbH. The software described by this document is subject to a License Agreement and may not be copied to other media. No part of this
publication may be copied, reproduced or otherwise transmitted or recorded, for any purpose,
without prior written permission by Native Instruments GmbH, hereinafter referred to as Native
Instruments.
“Native Instruments”, “NI” and associated logos are (registered) trademarks of Native Instruments GmbH.
ASIO, VST, HALion and Cubase are registered trademarks of Steinberg Media Technologies
GmbH.
All other product and company names are trademarks™ or registered® trademarks of their respective holders. Use of them does not imply any affiliation with or endorsement by them.
Document authored by: David Gover and Nico Sidi.
Software version: 2.7.6 (05/2018)
Hardware version: MASCHINE MK3
Disclaimer
Special thanks to the Beta Test Team, who were invaluable not just in tracking down bugs, but
in making this a better product.
Page 3

Contact
NATIVE INSTRUMENTS GmbH
Schlesische Str. 29-30
D-10997 Berlin
Germany
www.native-instruments.de
NATIVE INSTRUMENTS K.K.
YO Building 3F
Jingumae 6-7-15, Shibuya-ku,
Tokyo 150-0001
Japan
www.native-instruments.co.jp
NATIVE INSTRUMENTS FRANCE SARL
113 Rue Saint-Maur
75011 Paris
France
www.native-instruments.com
NATIVE INSTRUMENTS North America, Inc.
6725 Sunset Boulevard
5th Floor
Los Angeles, CA 90028
USA
www.native-instruments.com
NATIVE INSTRUMENTS UK Limited
18 Phipp Street
London EC2A 4NU
UK
www.native-instruments.co.uk
SHENZHEN NATIVE INSTRUMENTS COMPANY Limited
203B & 201B, Nanshan E-Commerce Base Of
Innovative Services
Shi Yun Road, Shekou, Nanshan, Shenzhen
China
www.native-instruments.com
© NATIVE INSTRUMENTS GmbH, 2018. All rights reserved.
Page 4

Table of Contents
Table of Contents
1 Welcome to MASCHINE .............................................................................................
1.1 MASCHINE Documentation .......................................................................................................... 25
1.2 Document Conventions ............................................................................................................... 26
1.3 New Features in MASCHINE 2.7.4 ............................................................................................... 28
1.4 New Features in MASCHINE 2.7.3 ............................................................................................... 31
2 Basic Concepts .........................................................................................................
2.1 Important Names and Concepts ................................................................................................. 33
2.2 Adjusting the MASCHINE User Interface ..................................................................................... 36
2.3 Common Operations ................................................................................................................... 40
2.2.1 Adjusting the Size of the Interface ............................................................................. 36
2.2.2 Switching between Ideas View and Arranger View ..................................................... 37
2.2.3 Showing/Hiding the Browser ...................................................................................... 38
2.2.4 Minimizing the Mixer ................................................................................................. 38
2.2.5 Showing/Hiding the Control Lane .............................................................................. 39
2.3.1 Using the 4-Directional Push Encoder ....................................................................... 40
2.3.2 Pinning a Mode on the Controller ............................................................................... 41
2.3.3 Undo/Redo ................................................................................................................. 42
2.3.4 List Overlay for Selectors ........................................................................................... 44
2.3.5 Zoom and Scroll Overlays .......................................................................................... 45
2.3.6 Focusing on a Group or a Sound ................................................................................ 46
2.3.7 Switching Between the Master, Group, and Sound Level ........................................... 51
2.3.8 Navigating Channel Properties, Plug-ins, and Parameter Pages in the Control Area . 52
2.3.8.1 Extended Navigate Mode on Your Controller ..............................................57
2.3.9 Using Two or More Hardware Controllers ................................................................... 60
2.3.10 Touch Auto-Write Option ............................................................................................ 62
24
33
MASCHINE - Manual - 4
Page 5

2.4 Native Kontrol Standard ............................................................................................................. 64
2.5 Stand-Alone and Plug-in Mode ................................................................................................... 66
2.6 Host Integration ..........................................................................................................................69
2.7 Preferences .................................................................................................................................75
2.8 Integrating MASCHINE into a MIDI Setup .................................................................................... 111
2.9 Syncing MASCHINE using Ableton Link ....................................................................................... 114
2.5.1 Differences between Stand-Alone and Plug-in Mode ................................................. 66
2.5.2 Switching Instances .................................................................................................. 67
2.5.3 Controlling Various Instances with Different Controllers ........................................... 68
2.6.1 Setting up Host Integration ....................................................................................... 69
2.6.1.1 Setting up Ableton Live (macOS) ...............................................................69
2.6.1.2 Setting up Ableton Live (Windows) ............................................................70
2.6.1.3 Setting up Apple Logic Pro X ......................................................................71
2.6.2 Integration with Ableton Live ..................................................................................... 71
2.6.3 Integration with Apple Logic Pro X ............................................................................. 73
2.7.1 Preferences – General Page ....................................................................................... 76
2.7.2 Preferences – Audio Page .......................................................................................... 81
2.7.3 Preferences – MIDI Page ............................................................................................ 85
2.7.4 Preferences – Default Page ....................................................................................... 88
2.7.5 Preferences – Library Page ........................................................................................ 92
2.7.6 Preferences – Plug-ins Page ..................................................................................... 100
2.7.7 Preferences – Hardware Page .................................................................................... 105
2.7.8 Preferences – Colors Page ......................................................................................... 109
2.8.1 Connecting External MIDI Equipment ........................................................................ 111
2.8.2 Sync to External MIDI Clock ....................................................................................... 112
2.8.3 Send MIDI Clock ......................................................................................................... 113
Table of Contents
MASCHINE - Manual - 5
Page 6

Table of Contents
2.10 Using a Pedal with the MASCHINE Controller .............................................................................. 115
2.11 File Management on the MASCHINE Controller ........................................................................... 116
2.9.1 Connecting to a Network ............................................................................................ 114
2.9.2 Joining and Leaving a Link Session ........................................................................... 114
3 Browser ....................................................................................................................
3.1 Browser Basics ........................................................................................................................... 118
3.2 Searching and Loading Files from the Library ............................................................................ 120
3.1.1 The MASCHINE Library ............................................................................................... 118
3.1.2 Browsing the Library vs. Browsing Your Hard Disks ................................................... 119
3.2.1 Overview of the LIBRARY Pane ................................................................................... 120
3.2.2 Selecting or Loading a Product and Selecting a Bank from the Browser .................... 125
3.2.2.1 Browsing by Product Category Using MASCHINE MK3 ................................129
3.2.2.2 Browsing by Product Vendor Using MASCHINE MK3 ...................................130
3.2.3 Selecting a Product Category, a Product, a Bank, and a Sub-Bank ........................... 130
3.2.3.1 Selecting a Product Category, a Product, a Bank, and a Sub-Bank on the
3.3 Additional Browsing Tools .......................................................................................................... 150
3.2.4 Selecting a File Type .................................................................................................. 135
3.2.5 Choosing Between Factory and User Content ............................................................. 136
3.2.6 Selecting Type and Mode Tags ................................................................................... 137
3.2.7 List and Tag Overlays in the Browser ......................................................................... 143
3.2.8 Performing a Text Search ........................................................................................... 145
3.2.9 Loading a File from the Result List ............................................................................ 145
3.3.1 Loading the Selected Files Automatically .................................................................. 150
3.3.2 Auditioning Instrument Presets ................................................................................. 152
3.3.3 Auditioning Samples ................................................................................................. 153
Controller ...................................................................................................134
118
MASCHINE - Manual - 6
Page 7

Table of Contents
3.4 Using Favorites in the Browser ................................................................................................... 156
3.5 Editing the Files’ Tags and Properties ........................................................................................ 162
3.6 Loading and Importing Files from Your File System .................................................................... 168
3.7 Locating Missing Samples .......................................................................................................... 178
3.8 Using Quick Browse .................................................................................................................... 180
3.3.4 Loading Groups with Patterns ................................................................................... 154
3.3.5 Loading Groups with Routing .................................................................................... 155
3.3.6 Displaying File Information ........................................................................................ 155
3.5.1 Attribute Editor Basics .............................................................................................. 162
3.5.2 The BANK Page .......................................................................................................... 164
3.5.3 The TYPES and MODES Pages .................................................................................... 165
3.5.4 The PROPERTIES Page ............................................................................................... 167
3.6.1 Overview of the FILES Pane ........................................................................................ 168
3.6.2 Using Favorites .......................................................................................................... 170
3.6.3 Using the Location Bar .............................................................................................. 171
3.6.4 Navigating to Recent Locations ................................................................................. 172
3.6.5 Using the Result List ................................................................................................. 173
3.6.6 Importing Files to the MASCHINE Library ................................................................... 176
4 Managing Sounds, Groups, and Your Project ...............................................................
184
4.1 Overview of the Sounds, Groups, and Master .............................................................................. 184
4.2 Managing Sounds .......................................................................................................................192
4.1.1 The Sound, Group, and Master Channels ................................................................... 185
4.1.2 Similarities and Differences in Handling Sounds and Groups ................................... 186
4.1.3 Selecting Multiple Sounds or Groups ......................................................................... 187
4.2.1 Loading Sounds ......................................................................................................... 194
4.2.2 Pre-listening to Sounds ............................................................................................. 195
MASCHINE - Manual - 7
Page 8

Table of Contents
4.3 Managing Groups ....................................................................................................................... 206
4.4 Exporting MASCHINE Objects and Audio ..................................................................................... 219
4.5 Importing Third-Party File Formats ............................................................................................. 229
4.2.3 Renaming Sound Slots .............................................................................................. 196
4.2.4 Changing the Sound’s Color ...................................................................................... 196
4.2.5 Saving Sounds ........................................................................................................... 198
4.2.6 Copying and Pasting Sounds ..................................................................................... 200
4.2.7 Moving Sounds .......................................................................................................... 203
4.2.8 Resetting Sound Slots ............................................................................................... 204
4.3.1 Creating Groups ........................................................................................................ 207
4.3.2 Loading Groups ......................................................................................................... 208
4.3.3 Renaming Groups ...................................................................................................... 210
4.3.4 Changing the Group’s Color ....................................................................................... 210
4.3.5 Saving Groups ........................................................................................................... 212
4.3.6 Copying and Pasting Groups ..................................................................................... 214
4.3.7 Reordering Groups ..................................................................................................... 217
4.3.8 Deleting Groups ......................................................................................................... 218
4.4.1 Saving a Group with its Samples ............................................................................... 220
4.4.2 Saving a Project with its Samples ............................................................................. 221
4.4.3 Exporting Audio ......................................................................................................... 223
4.5.1 Loading REX Files into Sound Slots ........................................................................... 229
4.5.2 Importing MPC Programs to Groups ........................................................................... 230
5 Playing on the Controller ...........................................................................................
234
5.1 Adjusting the Pads ..................................................................................................................... 234
5.1.1 The Pad View in the Software .................................................................................... 234
5.1.2 Choosing a Pad Input Mode ....................................................................................... 236
MASCHINE - Manual - 8
Page 9

Table of Contents
5.2 Adjusting the Key, Choke, and Link Parameters for Multiple Sounds .......................................... 246
5.3 Adjusting the Base Key ............................................................................................................... 247
5.4 Playing Tools .............................................................................................................................. 248
5.5 Performance Features ................................................................................................................. 261
5.6 Using Lock Snapshots ................................................................................................................ 280
5.7 Using the Smart Strip ................................................................................................................. 285
5.1.3 Adjusting the Base Key .............................................................................................. 239
5.1.4 Using Choke Groups .................................................................................................. 241
5.1.5 Using Link Groups ..................................................................................................... 243
5.4.1 Mute and Solo ............................................................................................................ 249
5.4.2 Choke All Notes .......................................................................................................... 253
5.4.3 Groove ....................................................................................................................... 254
5.4.4 Level, Tempo, Tune, and Groove Shortcuts on Your Controller .................................... 256
5.4.5 Tap Tempo ................................................................................................................. 260
5.5.1 Overview of the Perform Features .............................................................................. 261
5.5.2 Selecting a Scale and Creating Chords ..................................................................... 264
5.5.3 Scale and Chord Parameters ..................................................................................... 264
5.5.4 Creating Arpeggios and Repeated Notes ................................................................... 275
5.5.5 Swing on Note Repeat / Arp Output ........................................................................... 279
5.6.1 Creating a Lock Snapshot .......................................................................................... 280
5.6.2 Using Extended Lock .................................................................................................. 281
5.6.3 Updating a Lock Snapshot ......................................................................................... 281
5.6.4 Recalling a Lock Snapshot ........................................................................................ 282
5.6.5 Morphing Between Lock Snapshots ........................................................................... 282
5.6.6 Deleting a Lock Snapshot .......................................................................................... 283
5.6.7 Triggering Lock Snapshots via MIDI ........................................................................... 284
MASCHINE - Manual - 9
Page 10

Table of Contents
5.7.1 Pitch Mode ................................................................................................................. 286
5.7.2 Modulation Mode ....................................................................................................... 286
5.7.3 Perform Mode ............................................................................................................ 287
5.7.4 Notes Mode ................................................................................................................ 287
6 Working with Plug-ins ...............................................................................................
6.1 Plug-in Overview ........................................................................................................................ 289
6.2 The Sampler Plug-in ................................................................................................................... 311
6.1.1 Plug-in Basics ........................................................................................................... 289
6.1.2 First Plug-in Slot of Sounds: Choosing the Sound’s Role ........................................... 293
6.1.3 Loading, Removing, and Replacing a Plug-in ............................................................ 294
6.1.3.1 Browser Plug-in Slot Selection ...................................................................300
6.1.4 Adjusting the Plug-in Parameters ............................................................................. 303
6.1.5 Bypassing Plug-in Slots ............................................................................................ 303
6.1.6 Using Side-Chain ...................................................................................................... 305
6.1.7 Moving Plug-ins ........................................................................................................ 305
6.1.8 Alternative: the Plug-in Strip ..................................................................................... 307
6.1.9 Saving and Recalling Plug-in Presets ....................................................................... 307
6.1.9.1 Saving Plug-in Presets ..............................................................................308
6.1.9.2 Recalling Plug-in Presets ..........................................................................309
6.1.9.3 Removing a Default Plug-in Preset ............................................................310
6.2.1 Page 1: Voice Settings / Engine ................................................................................. 313
6.2.2 Page 2: Pitch / Envelope ............................................................................................ 315
6.2.3 Page 3: FX / Filter ...................................................................................................... 318
6.2.4 Page 4: Modulation .................................................................................................... 320
6.2.5 Page 5: LFO ............................................................................................................... 322
6.2.6 Page 6: Velocity / Modwheel ...................................................................................... 324
289
MASCHINE - Manual - 10
Page 11

6.3 Using Native Instruments and External Plug-ins ........................................................................ 326
6.3.1 Opening/Closing Plug-in Windows ............................................................................. 326
6.3.2 Using the VST/AU Plug-in Parameters ....................................................................... 329
6.3.3 Setting Up Your Own Parameter Pages ...................................................................... 330
6.3.4 Using VST/AU Plug-in Presets .................................................................................... 335
6.3.5 Multiple-Output Plug-ins and Multitimbral Plug-ins ................................................. 337
7 Using the Audio Plug-in .............................................................................................
7.1 Loading a Loop into the Audio Plug-in ........................................................................................ 343
7.2 Using Loop Mode ........................................................................................................................ 344
7.3 Using Gate Mode ........................................................................................................................ 346
8 Using the Drumsynths ................................................................................................
8.1 Drumsynths – General Handling ................................................................................................. 349
8.2 The Kicks .................................................................................................................................... 353
8.1.1 Engines: Many Different Drums per Drumsynth ......................................................... 349
8.1.2 Common Parameter Organization .............................................................................. 349
8.1.3 Shared Parameters .................................................................................................... 352
8.1.4 Various Velocity Responses ....................................................................................... 352
8.1.5 Pitch Range, Tuning, and MIDI Notes ........................................................................ 352
8.2.1 Kick – Sub ................................................................................................................. 355
8.2.2 Kick – Tronic .............................................................................................................. 357
8.2.3 Kick – Dusty .............................................................................................................. 360
8.2.4 Kick – Grit ................................................................................................................. 361
8.2.5 Kick – Rasper ............................................................................................................ 364
8.2.6 Kick – Snappy ............................................................................................................ 365
8.2.7 Kick – Bold ................................................................................................................ 367
8.2.8 Kick – Maple .............................................................................................................. 369
Table of Contents
339
348
MASCHINE - Manual - 11
Page 12

Table of Contents
8.3 The Snares ..................................................................................................................................372
8.4 The Hi-hats .................................................................................................................................393
8.5 The Toms .................................................................................................................................... 403
8.6 The Percussions ..........................................................................................................................414
8.2.9 Kick – Push ............................................................................................................... 370
8.3.1 Snare – Volt ............................................................................................................... 374
8.3.2 Snare – Bit ................................................................................................................ 376
8.3.3 Snare – Pow .............................................................................................................. 378
8.3.4 Snare – Sharp ........................................................................................................... 379
8.3.5 Snare – Airy ............................................................................................................... 381
8.3.6 Snare – Vintage ......................................................................................................... 383
8.3.7 Snare – Chrome ......................................................................................................... 385
8.3.8 Snare – Iron ............................................................................................................... 387
8.3.9 Snare – Clap ............................................................................................................. 389
8.3.10 Snare – Breaker ......................................................................................................... 391
8.4.1 Hi-hat – Silver ........................................................................................................... 394
8.4.2 Hi-hat – Circuit ......................................................................................................... 396
8.4.3 Hi-hat – Memory ........................................................................................................ 398
8.4.4 Hi-hat – Hybrid ......................................................................................................... 400
8.4.5 Creating a Pattern with Closed and Open Hi-hats ..................................................... 402
8.5.1 Tom – Tronic .............................................................................................................. 405
8.5.2 Tom – Fractal ............................................................................................................ 407
8.5.3 Tom – Floor ................................................................................................................ 411
8.5.4 Tom – High ................................................................................................................ 413
8.6.1 Percussion – Fractal .................................................................................................. 416
8.6.2 Percussion – Kettle .................................................................................................... 419
MASCHINE - Manual - 12
Page 13

Table of Contents
8.7 The Cymbals ............................................................................................................................... 425
8.6.3 Percussion – Shaker .................................................................................................. 421
8.7.1 Cymbal – Crash ......................................................................................................... 427
8.7.2 Cymbal – Ride ........................................................................................................... 429
9 Using the Bass Synth .................................................................................................
9.1 Bass Synth – General Handling .................................................................................................. 433
9.1.1 Parameter Organization ............................................................................................. 433
9.1.2 Bass Synth Parameters ............................................................................................. 435
10 Working with Patterns ...............................................................................................
10.1 Pattern Basics ............................................................................................................................ 437
10.2 Recording Patterns in Real Time ................................................................................................ 460
10.3 Recording Patterns with the Step Sequencer .............................................................................. 467
10.1.1 Pattern Editor Overview ............................................................................................. 438
10.1.2 Navigating the Event Area ......................................................................................... 444
10.1.3 Following the Playback Position in the Pattern .......................................................... 446
10.1.4 Jumping to Another Playback Position in the Pattern ................................................. 448
10.1.5 Group View and Keyboard View .................................................................................. 449
10.1.6 Adjusting the Arrange Grid and the Pattern Length ................................................... 452
10.1.7 Adjusting the Step Grid and the Nudge Grid .............................................................. 455
10.2.1 Recording Your Patterns Live ..................................................................................... 460
10.2.2 The Record Prepare Mode .......................................................................................... 463
10.2.3 Using the Metronome ................................................................................................. 464
10.2.4 Recording with Count-in ............................................................................................ 465
10.2.5 Quantizing while Recording ....................................................................................... 467
10.3.1 Step Mode Basics ...................................................................................................... 467
10.3.2 Editing Events in Step Mode ...................................................................................... 470
432
437
MASCHINE - Manual - 13
Page 14

Table of Contents
10.4 Editing Events ............................................................................................................................ 472
10.5 Recording and Editing Modulation ............................................................................................. 504
10.6 Creating MIDI Tracks from Scratch in MASCHINE ....................................................................... 513
10.7 Managing Patterns ..................................................................................................................... 515
10.3.3 Recording Modulation in Step Mode .......................................................................... 472
10.4.1 Editing Events with the Mouse: an Overview ............................................................. 473
10.4.2 Creating Events/Notes ............................................................................................... 476
10.4.3 Selecting Events/Notes .............................................................................................. 477
10.4.4 Editing Selected Events/Notes ................................................................................... 484
10.4.5 Deleting Events/Notes ............................................................................................... 490
10.4.6 Cut, Copy, and Paste Events/Notes ............................................................................ 493
10.4.7 Quantizing Events/Notes ........................................................................................... 496
10.4.8 Quantization While Playing ........................................................................................ 498
10.4.9 Doubling a Pattern .................................................................................................... 499
10.4.10 Adding Variation to Patterns ..................................................................................... 499
10.5.1 Which Parameters Are Modulatable? ......................................................................... 505
10.5.2 Recording Modulation ................................................................................................ 506
10.5.3 Creating and Editing Modulation in the Control Lane ................................................ 508
10.7.1 The Pattern Manager and Pattern Mode .................................................................... 516
10.7.2 Selecting Patterns and Pattern Banks ....................................................................... 518
10.7.3 Creating Patterns ...................................................................................................... 520
10.7.4 Deleting Patterns ....................................................................................................... 522
10.7.5 Creating and Deleting Pattern Banks ........................................................................ 524
10.7.6 Naming Patterns ....................................................................................................... 525
10.7.7 Changing the Pattern’s Color .................................................................................... 528
10.7.8 Duplicating, Copying, and Pasting Patterns .............................................................. 529
MASCHINE - Manual - 14
Page 15

Table of Contents
10.8 Importing/Exporting Audio and MIDI to/from Patterns ................................................................ 533
10.7.9 Moving Patterns ........................................................................................................ 531
10.7.10 Adjusting Pattern Length in Fine Increments ............................................................. 532
10.8.1 Exporting Audio from Patterns ................................................................................... 533
10.8.2 Exporting MIDI from Patterns ..................................................................................... 535
10.8.3 Importing MIDI to Patterns ........................................................................................ 537
11 Audio Routing, Remote Control, and Macro Controls ....................................................
11.1 Audio Routing in MASCHINE ....................................................................................................... 547
11.2 Using MIDI Control and Host Automation .................................................................................... 571
11.3 Creating Custom Sets of Parameters with the Macro Controls ................................................... 593
11.1.1 Sending External Audio to Sounds ............................................................................. 548
11.1.2 Configuring the Main Output of Sounds and Groups ................................................. 553
11.1.3 Setting Up Auxiliary Outputs for Sounds and Groups ................................................. 558
11.1.4 Configuring the Master and Cue Outputs of MASCHINE ............................................. 562
11.1.5 Mono Audio Inputs ..................................................................................................... 567
11.1.5.1 Configuring External Inputs for Sounds in Mix View ..................................568
11.2.1 Triggering Sounds via MIDI Notes .............................................................................. 572
11.2.2 Triggering Scenes via MIDI ........................................................................................ 579
11.2.3 Controlling Parameters via MIDI and Host Automation .............................................. 580
11.2.4 Selecting VST/AU Plug-in Presets via MIDI Program Change ..................................... 588
11.2.5 Sending MIDI from Sounds ........................................................................................ 589
11.3.1 Macro Control Overview ............................................................................................. 594
11.3.2 Assigning Macro Controls Using the Software ........................................................... 595
11.3.3 Assigning Macro Controls Using the Controller .......................................................... 601
12 Controlling Your Mix ..................................................................................................
546
603
12.1 Mix View Basics .......................................................................................................................... 603
MASCHINE - Manual - 15
Page 16

Table of Contents
12.2 The Mixer .................................................................................................................................... 606
12.3 The Plug-in Chain .......................................................................................................................619
12.4 The Plug-in Strip ........................................................................................................................ 620
12.5 Controlling Your Mix from the Controller ..................................................................................... 634
12.1.1 Switching between Arrange View and Mix View ......................................................... 603
12.1.2 Mix View Elements ..................................................................................................... 604
12.2.1 Displaying Groups vs. Displaying Sounds .................................................................. 607
12.2.2 Adjusting the Mixer Layout ........................................................................................ 609
12.2.3 Selecting Channel Strips ........................................................................................... 610
12.2.4 Managing Your Channels in the Mixer ....................................................................... 611
12.2.5 Adjusting Settings in the Channel Strips ................................................................... 613
12.2.6 Using the Cue Bus ..................................................................................................... 617
12.4.1 The Plug-in Header .................................................................................................... 622
12.4.2 Panels for Drumsynths and Internal Effects .............................................................. 624
12.4.3 Panel for the Sampler ................................................................................................ 625
12.4.4 Custom Panels for Native Instruments Plug-ins ........................................................ 628
12.4.5 Undocking a Plug-in Panel (Native Instruments and External Plug-ins Only) ............ 632
12.5.1 Navigating Your Channels in Mix Mode ..................................................................... 635
12.5.2 Adjusting the Level and Pan in Mix Mode .................................................................. 636
12.5.3 Mute and Solo in Mix Mode ........................................................................................ 637
12.5.4 Plug-in Icons in Mix Mode .......................................................................................... 637
13 Using Effects .............................................................................................................
638
13.1 Applying Effects to a Sound, a Group or the Master .................................................................... 638
13.1.1 Adding an Effect ........................................................................................................ 638
13.1.2 Other Operations on Effects ....................................................................................... 647
13.1.3 Using the Side-Chain Input ....................................................................................... 649
MASCHINE - Manual - 16
Page 17

13.2 Applying Effects to External Audio .............................................................................................. 652
13.3 Creating a Send Effect ............................................................................................................... 658
13.4 Creating Multi-Effects ................................................................................................................ 666
13.2.1 Step 1: Configure MASCHINE Audio Inputs ................................................................ 652
13.2.2 Step 2: Set up a Sound to Receive the External Input ................................................ 655
13.2.3 Step 3: Load an Effect to Process an Input ................................................................ 657
13.3.1 Step 1: Set Up a Sound or Group as Send Effect ........................................................ 659
13.3.2 Step 2: Route Audio to the Send Effect ...................................................................... 663
13.3.3 A Few Notes on Send Effects ...................................................................................... 665
14 Effect Reference ........................................................................................................
14.1 Dynamics ....................................................................................................................................670
14.2 Filtering Effects .......................................................................................................................... 687
14.3 Modulation Effects ..................................................................................................................... 695
14.1.1 Compressor ............................................................................................................... 670
14.1.2 Gate ........................................................................................................................... 674
14.1.3 Transient Master ....................................................................................................... 678
14.1.4 Limiter ....................................................................................................................... 680
14.1.5 Maximizer .................................................................................................................. 684
14.2.1 EQ .............................................................................................................................. 687
14.2.2 Filter .......................................................................................................................... 690
14.2.3 Cabinet ...................................................................................................................... 694
14.3.1 Chorus ....................................................................................................................... 695
14.3.2 Flanger ...................................................................................................................... 697
14.3.3 FM ............................................................................................................................. 699
14.3.4 Freq Shifter ................................................................................................................ 700
14.3.5 Phaser ....................................................................................................................... 702
Table of Contents
669
MASCHINE - Manual - 17
Page 18

14.4 Spatial and Reverb Effects ......................................................................................................... 704
14.5 Delays .........................................................................................................................................719
14.6 Distortion Effects ........................................................................................................................ 728
14.7 Perform FX .................................................................................................................................. 737
14.4.1 Ice ............................................................................................................................. 704
14.4.2 Metaverb ................................................................................................................... 706
14.4.3 Reflex ........................................................................................................................ 707
14.4.4 Reverb (Legacy) ......................................................................................................... 709
14.4.5 Reverb ....................................................................................................................... 711
14.4.5.1 Reverb Room .............................................................................................711
14.4.5.2 Reverb Hall ................................................................................................714
14.4.5.3 Plate Reverb ..............................................................................................717
14.5.1 Beat Delay ................................................................................................................. 719
14.5.2 Grain Delay ................................................................................................................ 722
14.5.3 Grain Stretch ............................................................................................................. 724
14.5.4 Resochord .................................................................................................................. 726
14.6.1 Distortion ................................................................................................................... 728
14.6.2 Lofi ............................................................................................................................ 730
14.6.3 Saturator ................................................................................................................... 732
14.6.4 Analog Distortion ....................................................................................................... 735
14.7.1 Filter .......................................................................................................................... 738
14.7.2 Flanger ...................................................................................................................... 740
14.7.3 Burst Echo ................................................................................................................. 743
14.7.4 Reso Echo .................................................................................................................. 745
14.7.5 Ring ........................................................................................................................... 748
14.7.6 Stutter ....................................................................................................................... 750
Table of Contents
MASCHINE - Manual - 18
Page 19

Table of Contents
14.7.7 Tremolo ...................................................................................................................... 753
14.7.8 Scratcher ................................................................................................................... 756
15 Working with the Arranger .........................................................................................
15.1 Arranger Basics .......................................................................................................................... 759
15.2 Using Ideas View ........................................................................................................................ 767
15.3 Using Song View ......................................................................................................................... 784
15.1.1 Navigating the Arranger ............................................................................................ 762
15.1.2 Following the Playback Position in Your Project ......................................................... 764
15.1.3 Jumping to Other Sections ......................................................................................... 765
15.2.1 Scene Overview .......................................................................................................... 767
15.2.2 Creating Scenes ........................................................................................................ 769
15.2.3 Assigning and Removing Patterns ............................................................................. 770
15.2.4 Selecting Scenes ....................................................................................................... 773
15.2.5 Deleting Scenes ......................................................................................................... 774
15.2.6 Creating and Deleting Scene Banks .......................................................................... 776
15.2.7 Clearing Scenes ......................................................................................................... 776
15.2.8 Duplicating Scenes .................................................................................................... 777
15.2.9 Reordering Scenes ..................................................................................................... 778
15.2.10 Making Scenes Unique .............................................................................................. 780
15.2.11 Appending Scenes to Arrangement ............................................................................ 781
15.2.12 Naming Scenes .......................................................................................................... 782
15.2.13 Changing the Color of a Scene .................................................................................. 783
15.3.1 Section Management Overview .................................................................................. 784
15.3.2 Creating Sections ...................................................................................................... 789
15.3.3 Assigning a Scene to a Section .................................................................................. 790
15.3.4 Selecting Sections and Section Banks ....................................................................... 791
759
MASCHINE - Manual - 19
Page 20

Table of Contents
15.4 Playing with Sections ................................................................................................................. 812
15.5 Triggering Sections or Scenes via MIDI ....................................................................................... 813
15.6 The Arrange Grid .........................................................................................................................815
15.3.5 Reorganizing Sections ............................................................................................... 795
15.3.6 Adjusting the Length of a Section .............................................................................. 797
15.3.6.1 Adjusting the Length of a Section Using the Software ...............................798
15.3.6.2 Adjusting the Length of a Section Using the Controller .............................799
15.3.7 Clearing a Pattern in Song View ................................................................................ 800
15.3.8 Duplicating Sections ................................................................................................. 800
15.3.8.1 Making Sections Unique ............................................................................801
15.3.9 Removing Sections .................................................................................................... 802
15.3.10 Renaming Scenes ...................................................................................................... 804
15.3.11 Clearing Sections ...................................................................................................... 805
15.3.12 Creating and Deleting Section Banks ........................................................................ 806
15.3.13 Working with Patterns in Song view ........................................................................... 807
15.3.13.1 Creating a Pattern in Song View ................................................................807
15.3.13.2 Selecting a Pattern in Song View ...............................................................807
15.3.13.3 Clearing a Pattern in Song View ................................................................807
15.3.13.4 Renaming a Pattern in Song View ............................................................. 808
15.3.13.5 Coloring a Pattern in Song View ................................................................ 808
15.3.13.6 Removing a Pattern in Song View ..............................................................808
15.3.13.7 Duplicating a Pattern in Song View ...........................................................809
15.3.14 Enabling Auto Length ................................................................................................ 809
15.3.15 Looping ...................................................................................................................... 810
15.3.15.1 Setting the Loop Range in the Software .....................................................811
15.4.1 Jumping to another Playback Position in Your Project ............................................... 812
MASCHINE - Manual - 20
Page 21

15.7 Quick Grid ...................................................................................................................................817
16 Sampling and Sample Mapping ..................................................................................
16.1 Opening the Sample Editor ......................................................................................................... 819
16.2 Recording Audio ......................................................................................................................... 820
16.3 Editing a Sample ........................................................................................................................ 833
16.4 Slicing a Sample ........................................................................................................................ 847
16.5 Mapping Samples to Zones ........................................................................................................ 869
16.2.1 Opening the Record Page .......................................................................................... 820
16.2.2 Selecting the Source and the Recording Mode ........................................................... 821
16.2.3 Arming, Starting, and Stopping the Recording .......................................................... 825
16.2.5 Using the Footswitch for Recording Audio ................................................................. 827
16.2.6 Checking Your Recordings ......................................................................................... 828
16.2.7 Location and Name of Your Recorded Samples .......................................................... 832
16.3.1 Using the Edit Page ................................................................................................... 833
16.3.2 Audio Editing Functions ............................................................................................. 839
16.4.1 Opening the Slice Page .............................................................................................. 848
16.4.2 Adjusting the Slicing Settings ................................................................................... 849
16.4.3 Live Slicing ................................................................................................................ 855
16.4.3.1 Live Slicing Using the Controller ................................................................855
16.4.3.2 Delete All Slices .........................................................................................856
16.4.4 Manually Adjusting Your Slices ................................................................................. 856
16.4.5 Applying the Slicing ................................................................................................... 863
16.5.1 Opening the Zone Page .............................................................................................. 869
16.5.2 Zone Page Overview ................................................................................................... 870
16.5.3 Selecting and Managing Zones in the Zone List ........................................................ 872
16.5.4 Selecting and Editing Zones in the Map View ............................................................ 877
Table of Contents
819
MASCHINE - Manual - 21
Page 22

Table of Contents
16.5.5 Editing Zones in the Sample View ............................................................................. 881
16.5.6 Adjusting the Zone Settings ...................................................................................... 884
16.5.7 Adding Samples to the Sample Map .......................................................................... 891
17 Appendix: Tips for Playing Live ..................................................................................
17.1 Preparations ............................................................................................................................... 894
17.2 Basic Techniques ....................................................................................................................... 895
17.3 Special Tricks ............................................................................................................................. 897
17.1.1 Focus on the Hardware .............................................................................................. 894
17.1.2 Customize the Pads of the Hardware ......................................................................... 894
17.1.3 Check Your CPU Power Before Playing ....................................................................... 894
17.1.4 Name and Color Your Groups, Patterns, Sounds and Scenes ..................................... 895
17.1.5 Consider Using a Limiter on Your Master ................................................................... 895
17.1.6 Hook Up Your Other Gear and Sync It with MIDI Clock ................................................ 895
17.1.7 Improvise ................................................................................................................... 895
17.2.1 Use Mute and Solo ..................................................................................................... 895
17.2.2 Use Scene Mode and Tweak the Loop Range .............................................................. 896
17.2.3 Create Variations of Your Drum Patterns in the Step Sequencer ................................ 896
17.2.4 Use Note Repeat ........................................................................................................ 896
17.2.5 Set Up Your Own Multi-effect Groups and Automate Them ........................................ 896
17.3.1 Changing Pattern Length for Variation ...................................................................... 897
17.3.2 Using Loops to Cycle Through Samples ..................................................................... 897
17.3.3 Using Loops to Cycle Through Samples ..................................................................... 897
17.3.4 Load Long Audio Files and Play with the Start Point .................................................. 897
18 Troubleshooting ........................................................................................................
894
898
18.1 Knowledge Base ......................................................................................................................... 898
18.2 Technical Support .......................................................................................................................898
MASCHINE - Manual - 22
Page 23

18.3 Registration Support .................................................................................................................. 899
18.4 User Forum ................................................................................................................................. 899
19 Glossary ...................................................................................................................
Table of Contents
900
Index ........................................................................................................................
908
MASCHINE - Manual - 23
Page 24

Welcome to MASCHINE
1 Welcome to MASCHINE
Thank you for buying MASCHINE!
MASCHINE is a groove production studio that implements the familiar working style of classical groove boxes along with the advantages of a computer based system. MASCHINE is ideal
for making music live, as well as in the studio. It’s the hands-on aspect of a dedicated instrument, the MASCHINE hardware controller, united with the advanced editing features of the
MASCHINE software.
Creating beats is often not very intuitive with a computer, but using the MASCHINE hardware
controller to do it makes it easy and fun. You can tap in freely with the pads or use Note Repeat to jam along. Alternatively, build your beats using the step sequencer just as in classic
drum machines.
Patterns can be intuitively combined and rearranged on the fly to form larger ideas. You can try
out several different versions of a song without ever having to stop the music.
Since you can integrate it into any sequencer that supports VST, AU, or AAX plug-ins, you can
reap the benefits in almost any software setup, or use it as a stand-alone application. You can
sample your own material, slice loops and rearrange them easily.
However, MASCHINE is a lot more than an ordinary groovebox or sampler: it comes with an
inspiring 7-gigabyte library, and a sophisticated, yet easy to use tag-based Browser to give you
instant access to the sounds you are looking for.
What’s more, MASCHINE provides lots of options for manipulating your sounds via internal effects and other sound-shaping possibilities. You can also control external MIDI hardware and
3rd-party software with the MASCHINE hardware controller, while customizing the functions of
the pads, knobs and buttons according to your needs utilizing the included Controller Editor
application. We hope you enjoy this fantastic instrument as much as we do. Now let’s get going!
—The MASCHINE team at Native Instruments.
MASCHINE - Manual - 24
Page 25

Welcome to MASCHINE
MASCHINE Documentation
1.1 MASCHINE Documentation
Native Instruments provide many information sources regarding MASCHINE. The main documents should be read in the following sequence:
1. MASCHINE Getting Started: This document provides a practical approach to MASCHINE via
a set of tutorials covering easy and more advanced tasks in order to help you familiarize
yourself with MASCHINE.
2. MASCHINE Manual (this document): The MASCHINE Manual provides you with a compre-
hensive description of all MASCHINE software and hardware features.
Additional documentation sources provide you with details on more specific topics:
▪ Controller Editor Manual: Besides using your MASCHINE hardware controller together with
its dedicated MASCHINE software, you can also use it as a powerful and highly versatile
MIDI controller to pilot any other MIDI-capable application or device. This is made possible
by the Controller Editor software, an application that allows you to precisely define all MIDI
assignments for your MASCHINE controller. The Controller Editor was installed during the
MASCHINE installation procedure. For more information on this, please refer to the Controller Editor Manual available as a PDF file via the Help menu of Controller Editor.
▪ Online Support Videos: You can find a number of support videos on The Official Native In-
struments Support Channel under the following URL: https://www.youtube.com/NIsupport-
EN. We recommend that you follow along with these instructions while the respective ap-
plication is running on your computer.
Other Online Resources: If you are experiencing problems related to your Native Instruments
product that the supplied documentation does not cover, there are several ways of getting help:
▪ Knowledge Base
▪ User Forum
▪ Technical Support
▪ Registration Support
You will find more information on these subjects in the chapter Troubleshooting.
MASCHINE - Manual - 25
Page 26
Welcome to MASCHINE
Document Conventions
MASCHINE documents are available in PDF. You can also access these documents from the application’s Help menu or the following location:
www.native-instruments.com.
Please check the Native Instruments website regularly for up-to-date and localized versions of these
documents.
1.2 Document Conventions
This section introduces you to the signage and text highlighting used in this manual. This manual uses particular formatting to point out special facts and to warn you of potential issues.
The icons introducing these notes let you see what kind of information is to be expected:
This document uses particular formatting to point out special facts and to warn you of potential issues. The icons introducing the following notes let you see what kind of information can
be expected:
The speech bubble icon indicates a useful tip that may often help you to solve a task more efficiently.
The exclamation mark icon highlights important information that is essential for the given context.
The red cross icon warns you of serious issues and potential risks that require your full attention.
Furthermore, the following formatting is used:
▪ Text appearing in (drop-down) menus (such as Open…, Save as… etc.) in the software and
paths to locations on your hard disk or other storage devices is printed in italics.
▪ Text appearing elsewhere (labels of buttons, controls, text next to checkboxes etc.) in the
software is printed in blue. Whenever you see this formatting applied, you will find the
same text appearing somewhere on the screen.
MASCHINE - Manual - 26
Page 27

Welcome to MASCHINE
Document Conventions
▪ Text appearing on the displays of the controller is printed in light grey. Whenever you see
this formatting applied, you will find the same text on a controller display.
▪ Text appearing on labels of the hardware controller is printed in orange. Whenever you see
this formatting applied, you will find the same text on the controller.
▪ Important names and concepts are printed in bold.
▪ References to keys on your computer’s keyboard you’ll find put in square brackets (e.g.,
“Press [Shift] + [Enter]”).
► Single instructions are introduced by this play button type arrow.
→ Results of actions are introduced by this smaller arrow.
Naming Convention
Throughout the documentation we will refer to MASCHINE controller (or just controller) as the
hardware controller and MASCHINE software as the software installed on your computer.
The term “effect” will sometimes be abbreviated as “FX” when referring to elements in the MASCHINE software and hardware. These terms have the same meaning.
Button Combinations and Shortcuts on Your Controller
Most instructions will use the “+” sign to indicate buttons (or buttons and pads) that must be
pressed simultaneously, starting with the button indicated first. E.g., an instruction such as:
“Press SHIFT + PLAY”
means:
1. Press and hold SHIFT.
2. While holding SHIFT, press PLAY and release it.
3. Release SHIFT.
Unlabeled Buttons on the Controller
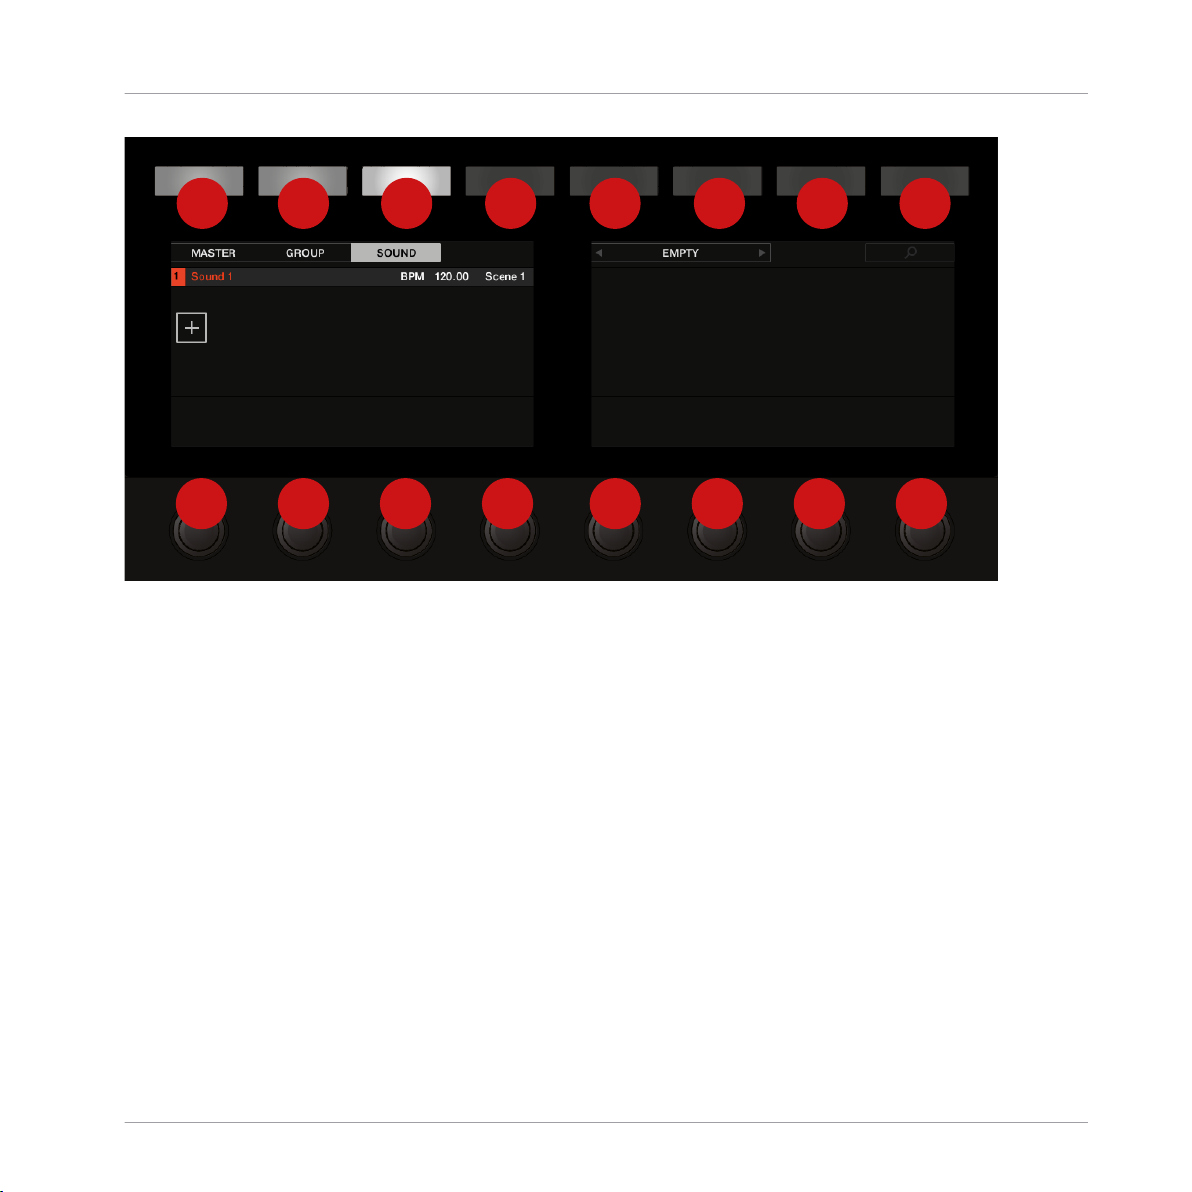
The buttons and knobs above and below the displays on your MASCHINE controller do not
have labels.
MASCHINE - Manual - 27
Page 28
1 2 3 4 5 6 7 8
1 2 3 4 5 6 7 8
The unlabeled buttons and knobs on the MASCHINE controller.
Welcome to MASCHINE
New Features in MASCHINE 2.7.4
For better reference, we applied a special formatting here: throughout the document, the elements are capitalized and numbered, so the buttons above the displays are written Button 1 to
Button 8, while the knobs under the displays are written Knob 1 to Knob 8. E.g., whenever you
see an instruction such as “Press Button 2 to open the EDIT page,” you’ll know it’s the second
button from the left above the displays.
1.3 New Features in MASCHINE 2.7.4
The following new features have been added to MASCHINE:
Audio Plug-in Improvements
▪ Added a new Target parameter to the Loop recording mode of the Sampling Page which de-
termines what should be done with a new recording when the recording is complete. Take
simply adds the new recording to the Audio Pool of the current plug-in, Sound puts the
new recording into an Audio plug-in in the next unoccupied Sound Slot (useful for layering
MASCHINE - Manual - 28
Page 29

Welcome to MASCHINE
New Features in MASCHINE 2.7.4
the recording with whatever else is in the current Pattern, like a guitar looper pedal), and
Pattern puts the new recording into an Audio plug-in in the next unoccupied Sound Slot
and additionally creates a new Pattern where only this loop is being played (useful for capturing different versions of a part and quickly reviewing them by switching Patterns). For
more information, refer to ↑16.2, Recording Audio.
▪ Added a new workflow to MASCHINE JAM which automates the use of the new Target pa-
rameter for fast sampling and layering. Holding the IN 1 button enables this new Loop Recording mode (it’s also helpful to pin this mode on by holding IN 1 and pressing the SONG
button). While this new Loop Recording mode is active, pressing an existing Pattern will
trigger a recording of a new loop which is then added as a new Sound in the existing Pattern; doing this repeatedly allows you to quickly layer recordings on top of each other. Alternatively, pressing an empty Pattern button will trigger a recording and will then place
that recording in a new Sound Slot and a new Pattern will be created where only the new
loop is playing back. When pressing the IN 1 button, External Input 1 is selected as the
source for the recording. Pressing GRP while in the Loop Recording mode will select the
focused Group as the source. Pressing MST will select MASCHINE’s Master output as the
source (for resampling what is currently playing). For more information, refer to the MASCHINE JAM Manual available from Help menu.
▪ Added footswitch control of Sampling. When in the Sampling page, or when the Loop Re-
cording mode is enabled on MASCHINE JAM, a connected footswitch can be used to control recording. Pressing the footswitch will arm a recording according to the current settings. Pressing the footswitch again before recording has actually started will cancel the recording. If recording is in progress, pressing the footswitch once will stop the recording,
double-pressing will abort the recording (any recorded audio to that point will be discarded). If the recording is complete, holding the footswitch down for a few moments will trigger Undo so you can try another take. For more information, refer to the MASCHINE JAM
Manual available from Help menu, or to the following section when using MASCHINE MK3
or MASCHINE STUDIO: ↑16.2.5, Using the Footswitch for Recording Audio.
▪ Improved the automatic tempo detection of the Audio plug-in so that it now chooses a tem-
po that’s closest to your current project tempo. For example, if your project tempo is 170
BPM and you load a loop which should be 174 BPM, MASCHINE will now set the Source
Tempo as 174 BPM instead of 87 BPM as it did previously.
MASCHINE - Manual - 29
Page 30

Welcome to MASCHINE
New Features in MASCHINE 2.7.4
▪ Added a Re-Pitch sync mode to the Audio plug-in which simply retunes/repitches the loop
(like speeding up or slowing down a record) to make it conform to the Project tempo. This
mode requires significantly less CPU power than the default mode, but you will not be able
to retune the loop at all (any pitches programmed in Gate mode will be ignored—only the
timing of the programmed notes will be used to gate the playing audio). For more information refer to ↑7, Using the Audio Plug-in.
MASCHINE MK3 Improvements
▪ Added Ableton Live DAW Integration for MASCHINE MK3 - Mixer and basic DAW Control.
Access Ableton Live Mixer via MASCHINE MK3 hardware: Volume, Pan, Mute / Solo / Arm
states are visible on screens. Also access essential controls: Play / Stop / Record / Session
record, Clip Navigation, Launch & Record, Quantize, Undo / Redo, Automation Toggle, Tap
Tempo, and Loop Toggle. For more information refer to ↑2.6, Host Integration.
General Improvements
▪ Improved the Take management system (previously called “Recording History”) for the
Sampler and Audio plug-ins such that Takes are now saved and recalled as part of the
Project.
▪ Improved external audio recording by implementing basic recording latency compensation.
This compensation will be in effect when recording from an External Input and with the
Monitoring parameter turned Off. The system currently works based upon the overall latency reported by the selected audio interface.
▪ Removed the function where a right click will remove Events in the Pattern Editor. Instead,
the context menu is opened. Events can still be deleted using double-click as well as using
the "Paint" and "Erase" tools. For more information refer to ↑10.4.5, Deleting Events/Notes.
▪ Changed the behavior of right-click in the Arranger. This no longer removes Patterns from
Scenes. It now opens a context menu with many useful options for arranging. For more information on using the Pattern context menu within Song view refer to ↑15.3.13, Working
with Patterns in Song view.
▪ Improved behavior and cursor icons for resizing Events in the Pattern Editor. The active
area for resizing Events is increased.
MASCHINE - Manual - 30
Page 31

Welcome to MASCHINE
New Features in MASCHINE 2.7.3
1.4 New Features in MASCHINE 2.7.3
The following new features have been added to MASCHINE:
Audio Plug-in Improvements
▪ Added the ability to enable and disable Audio plug-in playback per Pattern when in Loop
mode. Double-clicking the waveform will toggle playback for the selected Pattern. Alternatively, the loops can be enabled or disabled via the STEP page on the hardware controllers.
For more details see ↑7.2, Using Loop Mode.
▪ Added a Loop recording mode to the Record tab, and the Record tab is now available for
both Sampler and Audio plug-ins. When choosing the new Loop mode, the start of recording will be quantized to the start of the Pattern. Furthermore, when the recording is complete, the loop will automatically be loaded into an Audio plug-in and will immediately begin playback. For more details see ↑16.2, Recording Audio.
MASCHINE Controller Improvements
▪ Added Ideas View on MASCHINE MK3 and MASCHINE STUDIO. Access Ideas view with
the MASCHINE MK3 hardware. For more details see ↑15.2, Using Ideas View.
▪ Added Event Editing on MASCHINE MK3 with 4-Directional Encoder. Select, nudge, pitch-
shift and change the length of notes with the 4-Directional Encoder in the events window
(on hardware screens). For more details see ↑10.4, Editing Events.
▪ Added Apple Logic DAW Integration for MASCHINE MK3, Mixer and basic DAW Control.
◦ Access Logic Mixer via MASCHINE MK3 hardware (Volume, Pan, Mute / Solo states
are visible on screens).
◦ Access Essential Controls: Play / Stop / Record / Quantize, Undo / Redo, Automation
Toggle, Tap Tempo, and Loop Toggle.
▪ Added Apple Logic DAW Integration for MASCHINE MK3, Mixer and basic DAW Control.
For more details see --- MISSING LINK ---.
◦ Access Logic Mixer via MASCHINE MK3 hardware (Volume, Pan, Mute / Solo states
are visible on screens).
MASCHINE - Manual - 31
Page 32

Welcome to MASCHINE
New Features in MASCHINE 2.7.3
◦ Access Essential Controls: Play / Stop / Record / Quantize, Undo / Redo, Automation
Toggle, Tap Tempo, and Loop Toggle.
General Improvements
▪ Added additional Scales from KOMPLETE KONTROL into MASCHINE. For more details see
↑5.5.2, Selecting a Scale and Creating Chords.
▪ Added loading of Perform FX at the end of a Group plug-in chain.
▪ Fixed an issue the broke Pattern Duplicate on the MASCHINE MIKRO.
▪ Fixed an issue where the MASCHINE Transport Loop would influence Ideas View playback
when hosted in a DAW.
▪ Fixed a crash that could occur when zooming horizontally in the Arranger with special char-
acters in Section names.
▪ Fixed some issues around renaming Scenes and Sections.
▪ Removed 32-bit versions of standalone application and plug-in.
▪ Added Velocity Curves to Controller Editor for MASCHINE MK3.
▪ Removed the modal dialog at startup that suggests to download sound preview files from
Native Access. The preview files are still available for installation in Native Access.
See also
2 Host Integration [➙ 69]
MASCHINE - Manual - 32
Page 33
Basic Concepts
Important Names and Concepts
2 Basic Concepts
This chapter will reintroduce you to MASCHINE’s main elements and terminology and explain
how they relate to one another. You will also learn how to set up your audio interface and how
to connect MIDI devices.
Before reading this chapter it is strongly recommended that you read the MASCHINE Getting Started first.
2.1 Important Names and Concepts
We will start with a list defining the most important concepts and names.
Arranger View
The Arranger is the big area located in the upper part of the MASCHINE window, right under
the Header. On its left you can select Groups. The Arranger allows you to combine Sections
(references to Scenes), and arrange them into a song.
Browser
The Browser is the front end for accessing all the elements of your MASCHINE Projects:
Projects, Groups, Sounds, instruments and effect presets, and Samples. Each of these can be
stored and tagged in a way that allows you easy access to all of them. MASCHINE’s factory
library is already completely tagged, as well as factory libraries of any Native Instruments products installed on your computer. You can also import your own files to the Library and tag them
as well. To learn more about the Browser, please read chapter ↑3, Browser.
Ideas View
The Ideas view allows you to experiment with your musical ideas without being tied to a timeline or arrangement. You can create Patterns for each Group and combine them into a Scene.
Scenes can then be added to Sections in the Arranger view to create a larger musical structure.
MASCHINE - Manual - 33
Page 34

Basic Concepts
Important Names and Concepts
Project
A Project contains all data needed for a song: Groups with their Patterns, all Scenes and all
settings, modulation, effects, routings, Sounds and Samples. It’s like a snapshot of the entire
state of MASCHINE. Please read the MASCHINE Getting Started for a complete overview of
the MASCHINE Project structure.
Sound
Sounds are the building blocks of all sound content in MASCHINE. A Sound is made up of any
number of Plug-ins. Each Sound of the selected Group is mapped to one of the 16 pads on the
hardware controller, so you can play the Sounds by pressing the pads. Refer to chapter ↑4,
Managing Sounds, Groups, and Your Project for more information on Sounds.
Group
A Group contains 16 Sound slots. In addition to the Effect Plug-ins applied to each individual
Sound, a Group can have its own insert effect. These affect all the Sounds in the Group. A
Group can also contain any number of Patterns (grouped into banks of 16 Patterns each). Refer to chapter ↑4, Managing Sounds, Groups, and Your Project for more information on Groups.
Master
This is where all audio signals from each of the Groups and Sounds come together and get
mixed. The Master channel can also host any number of insert effects of its own, these effects
are applied to all Groups and the Sounds within them. More information on the Master can be
found in chapter ↑4, Managing Sounds, Groups, and Your Project.
Pattern
A Pattern is a sequence that plays Sounds from a Group. It belongs to that Group and will be
saved together with the Group. In every Scene you can choose for each Group which of its Patterns has to be played. More information on Patterns can be found in chapter ↑10, Working
with Patterns.
MASCHINE - Manual - 34
Page 35

Basic Concepts
Important Names and Concepts
Scene
A Scene is a combination of Patterns for each Group. They can be used to combine Patterns in
order to create musical ideas. Scenes are created in the Ideas view and then added to Sections
in the Arranger view to create an arrangement. Refer to chapter ↑15.3, Using Song View for
more information on Scenes.
Section
A Section is a reference to a specific Scene on the Timeline of the Arranger view. They are
used to arrange the Scenes into a larger musical structure. The benefit of using Sections is
that any changes made to a Scene are replicated in each Section where the Scene is referenced therefore making the process of changing parts of a song quick and easy.
Event
Events are the individual drum hits or notes that make up a Pattern. In the Pattern Editor,
events are visually represented by rectangles in the Event area. Depending on the current view
in the Pattern Editor, you can see events for all Sounds slots (Group view) or for the selected
Sound slot only (Keyboard view). Events are described in more detail in chapter ↑10, Working
with Patterns.
Plug-in
Each Sound, each Group, and the Master can hold any number of Plug-ins. Plug-ins can be
instruments or effects, and they can be internal (included with MASCHINE), from other Native
Instruments products (instruments or effects), or external (third-party VST/AU plug-ins). Instrument and Effect Plug-ins can be loaded in the first Plug-in slot of Sounds. The other Plug-in
slots of Sounds, as well as the Plug-in slots of Groups and of the Master can hold Effect Plugins only. At each level (Sound, Group, and Master), Plug-ins process the audio in series, according to the order in which they are stacked up. Refer to chapter ↑6, Working with Plug-ins.
Effect
MASCHINE comes with many different effects in the form of Internal Plug-ins. You may also
use Native Instruments or third-party VST/AU effect plug-ins. Each Sound, each Group, and
the Master can hold any number of effects that will be applied as insert effects. The flexible
routing system also allows you to create send effects, multi-effects, and side-chains. For more
MASCHINE - Manual - 35
Page 36

Basic Concepts
Adjusting the MASCHINE User Interface
details on using effects in MASCHINE, refer to chapter ↑13, Using Effects. You will find an
exhaustive description of all internal effects included in MASCHINE in chapter ↑14, Effect
Reference.
Please refer to chapter ↑19, Glossary at the end of this Manual for more definitions!
2.2 Adjusting the MASCHINE User Interface
The MASCHINE software user interface is very flexible. You can choose what to display and
what not, allowing you to focus on your workflow. This section shows you how to adjust the MASCHINE GUI to suit your needs.
2.2.1 Adjusting the Size of the Interface
From the View menu in the Application Menu Bar and from the View submenu in the MASCHINE menu you can select one of four different sizes to display MASCHINE’s software GUI:
The View menu in the Application Menu Bar (Windows depicted).
MASCHINE - Manual - 36
Page 37

Basic Concepts
Adjusting the MASCHINE User Interface
The View submenu in the MASCHINE menu.
Full screen view is also available from your computer keyboard via [Ctrl]+[F] (macOS: [Cmd]+[F]).
2.2.2 Switching between Ideas View and Arranger View
At any time you can quickly switch between the Ideas view and the Arranger view, using the
Arranger View button.
The Arranger View button in the top left corner.
► Click the Arranger View button to toggle between the Ideas view and Arranger view.
→ The Arrangement area switches from Ideas view (default view) to Arranger view. Click the
button again to return back to Ideas view.
MASCHINE - Manual - 37
Page 38

Basic Concepts
Adjusting the MASCHINE User Interface
For more information about Ideas view and Arranger view see ↑15.3, Using Song View.
Switching between Ideas View and Arranger View using the Controller
On your controller:
► Press SHIFT + SCENE to switch between the Ideas view and Arranger view.
→ The software switches between Ideas view and Arranger view.
2.2.3 Showing/Hiding the Browser
► Click the Browser button (with the magnifier symbol) in the Header to show and hide the
Browser. You can also select Browser from the View menu in the Application Menu Bar or
from the View submenu in the MASCHINE menu.
The Browser button in the Header.
You can also show/hide the Browser from your computer keyboard via the [F4] function key.
2.2.4 Minimizing the Mixer
When MASCHINE is in Mix view, you can minimize/maximize the Mixer in the top part of the
MASCHINE window:
► Click the arrow button at the bottom left of the Mixer to show and hide the channel de-
tails in the Mixer.
MASCHINE - Manual - 38
Page 39
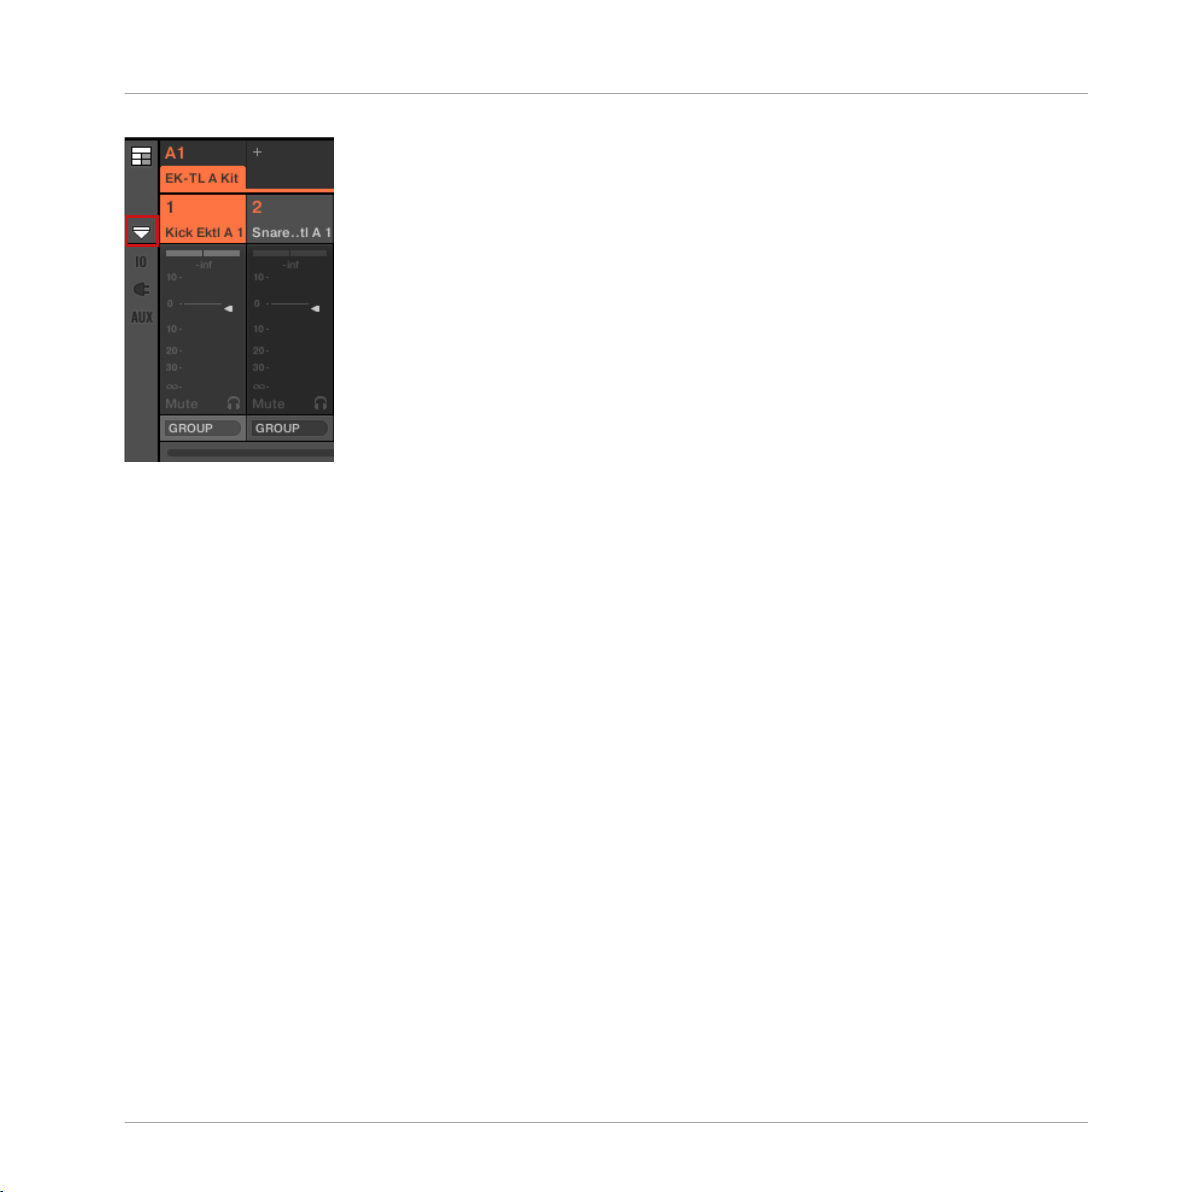
Basic Concepts
Adjusting the MASCHINE User Interface
Minimizing/maximizing the Mixer.
2.2.5 Showing/Hiding the Control Lane
When MASCHINE is in Arrange view, you can show/hide the Control Lane under the Pattern
Editor:
► Click the arrow button on the bottom left of the Pattern Editor to show and hide the Con-
trol Lane.
MASCHINE - Manual - 39
Page 40
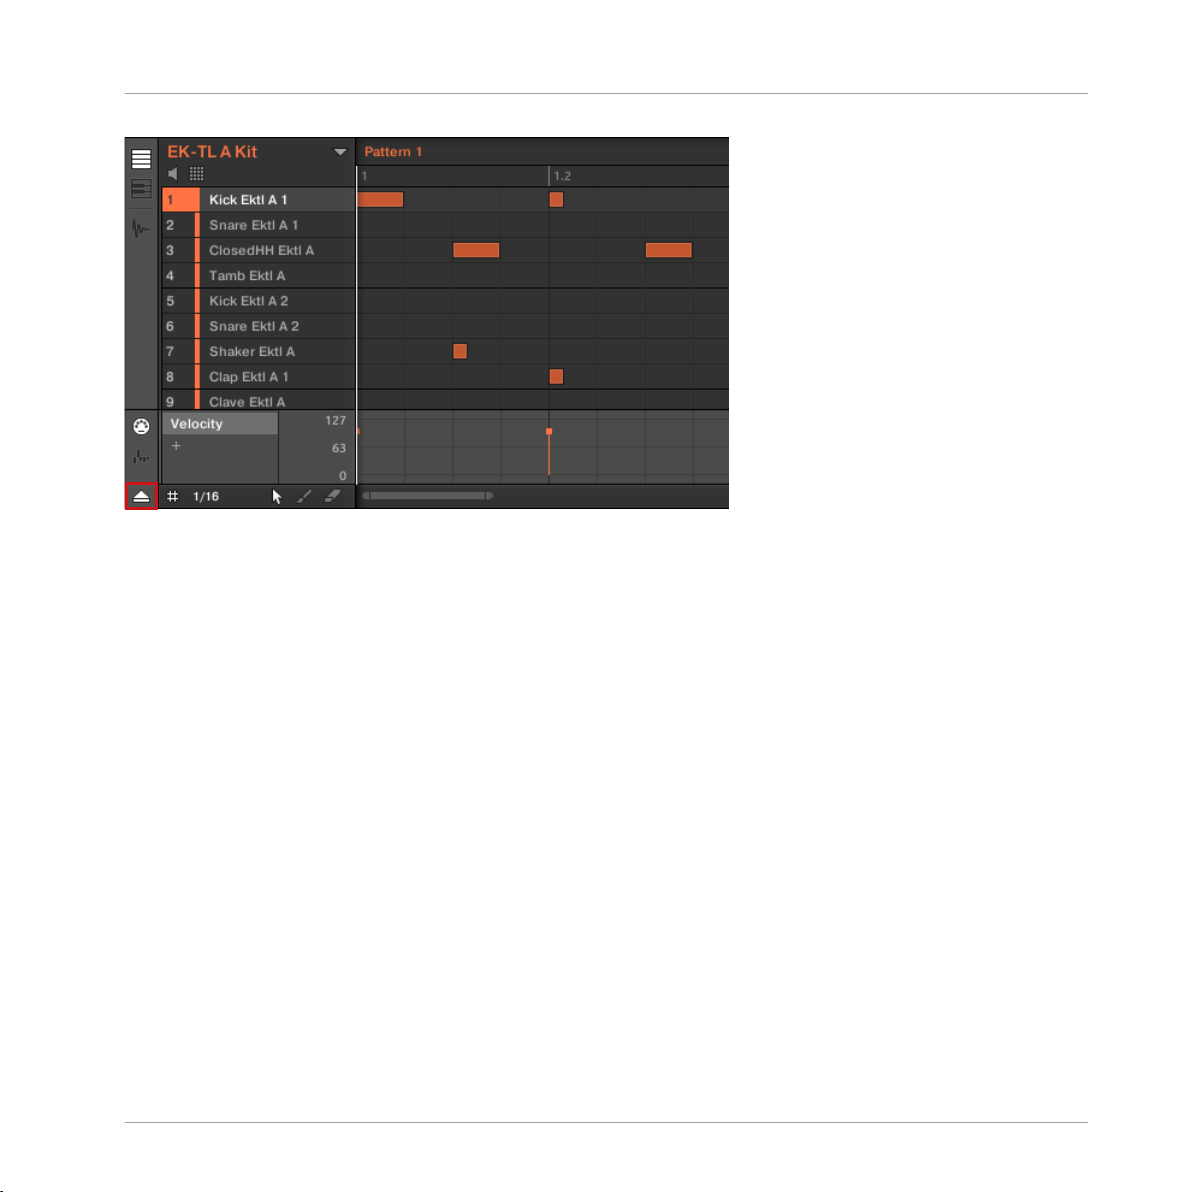
Basic Concepts
Common Operations
Click the arrow button at the bottom left of the Pattern Editor to show/hide the Control Lane.
2.3 Common Operations
This sections introduces a few very common operations in MASCHINE you will encounter in
numerous situations.
2.3.1 Using the 4-Directional Push Encoder
The 4-Directional Push Encoder (referred to as the Encoder) combines the functionalities of a
conventional joystick, of a button, and of a continuous encoder. These aspects make it into a
multi-functional control element that can be used for navigation, for adjusting values of parameters, and for controlling instruments. Hence, it can be moved to the four directions: up, down,
left, and right, as well as being pushed and rotated.
MASCHINE - Manual - 40
Page 41
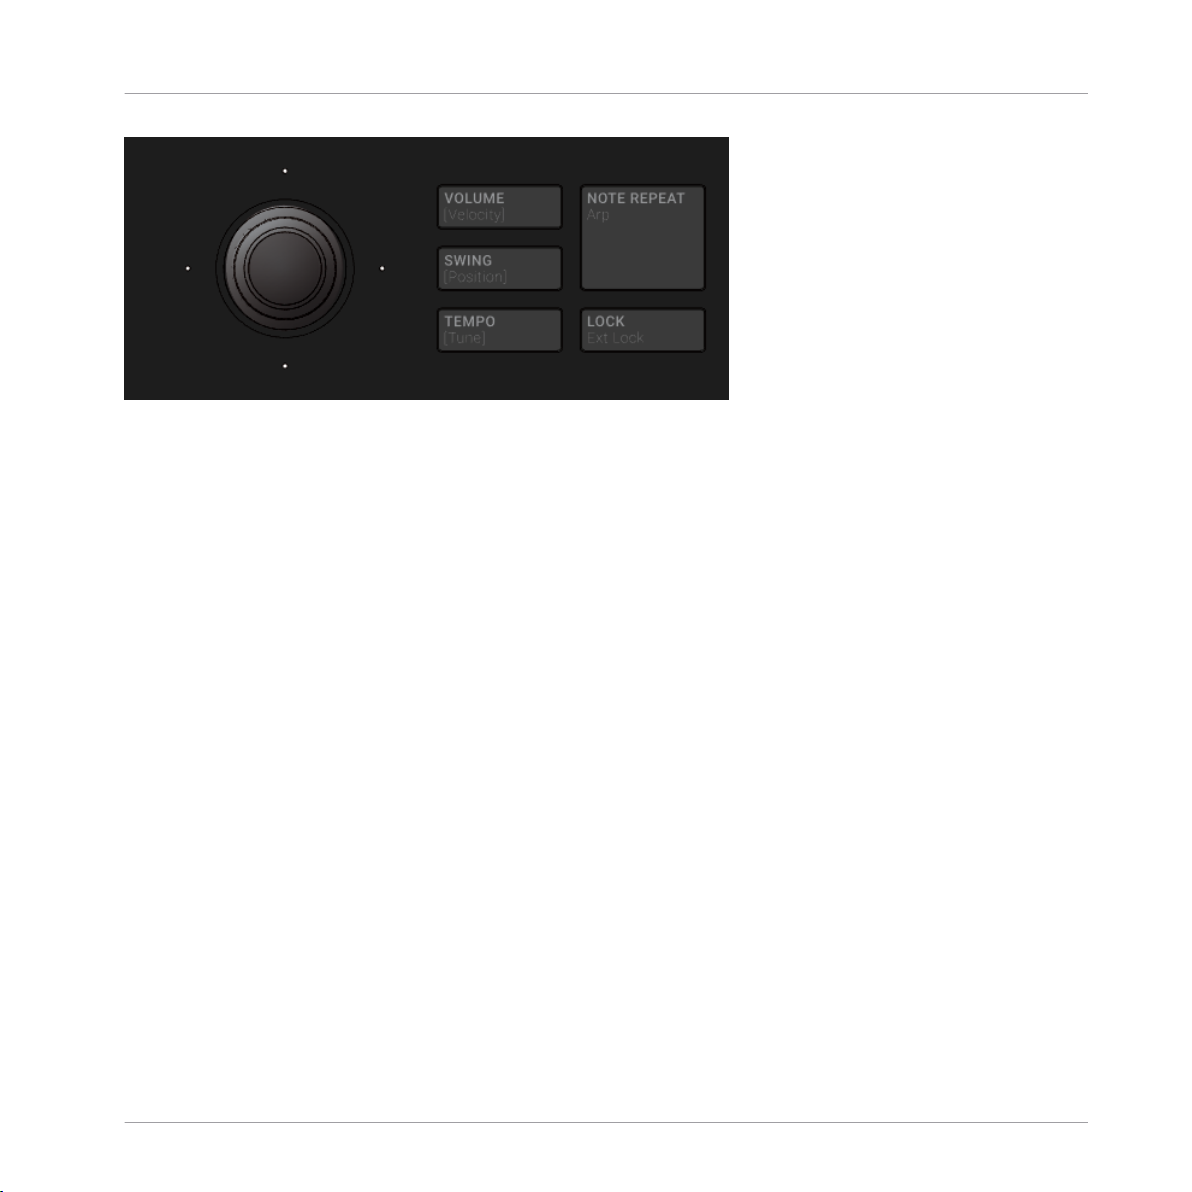
Common Operations
The Encoder situated to the left of the VOLUME, SWING and TEMPO buttons.
Depending on the menu or context, the available actions differ:
▪ The displays are navigated by moving the 4-D encoder in a direction indicated by the sur-
rounding LEDs.
▪ Entries in a list are browsed by turning the 4-D encoder.
▪ The value of a highlighted parameter is adjusted by turning the 4-D encoder.
▪ A selection is confirmed by pushing the 4-D encoder.
Basic Concepts
2.3.2 Pinning a Mode on the Controller
Besides the default Control modes (CHANNEL or PLUG-IN), where one remains lit, your controller additionally has various other modes of operation, which you can enter by pressing their
dedicated buttons. Depending on their purpose and workflow, these controller modes are of
two types:
▪ Temporary modes only stay active as long as you hold down their button on the controller.
When you release the button, your controller returns to Control mode. This is for example
the case with the MUTE button.
▪ Permanent modes stay active even if you release their button. To deactivate them, you must
press their button a second time. This is for example the case with the BROWSE button.
MASCHINE - Manual - 41
Page 42

Basic Concepts
Common Operations
But in some situations you might want to release the mode button of a temporary mode without leaving that mode, e.g., to free your hand and tweak other controls more easily. For this
purpose, MASCHINE lets you pin (or “lock”) temporary modes so that they behave like permanent modes.
► To pin a mode on your controller, press the relevant mode button (SCENE, PATTERN,
etc.) + Button 1 above the left display.
→ Now the mode is always pinned when you select it.
► To unpin a mode (i.e. make it a temporary mode again), press its mode button + Button 1
again.
→ Now the mode will only be active as long as you hold the mode button.
Here is a list of all buttons on your controller that you can pin by pressing Button 1 simultaneously:
▪ All buttons in the column at the left of the pads (SCENE, PATTERN, …, SOLO, MUTE)
▪ SHIFT + NOTE REPEAT (Arp) button
▪ AUTO button: Instead of using Button 1, press SHIFT + AUTO to pin the AUTO mode.
Moreover, when you leave this mode it is automatically unpinned — it will be temporary
again next time you press AUTO.
▪ MACRO button: Instead of using Button 1, press SHIFT + MACRO (Set) to pin Set Macro
mode.
2.3.3 Undo/Redo
Undoing and re-doing your last actions can be useful to cancel operations you have performed
or to compare two versions before and after a change. You can undo nearly everything you did
after loading or creating your Project.
Note: If you save your Project, you will no longer be able to undo or redo any actions performed before saving!
MASCHINE provides two different undo/redo features, each of them being suited for specific
situations:
MASCHINE - Manual - 42
Page 43
Basic Concepts
Common Operations
▪ Step Undo allows you to cancel your last single action.
▪ Take Undo allows you to cancel your last group of actions.
Step Undo
Step Undo/Redo is the classic undo/redo found in most applications. It cancels or re-executes
each single action you have performed.
In the software use the following keyboard shortcuts for the Step Undo and Step Redo functions:
► To cancel your last action (Step Undo), press [Ctrl]+[Shift]+[Z] ([Cmd]+ [Shift]+ [Z] on
macOS). To re-execute your last action (Step Redo), press [Ctrl]+ [Shift]+ [Y] ([Cmd]+
[Shift]+ [Y] on macOS). You can also select Undo Step and Redo Step from the Edit
menu in the Application Menu Bar or from the Edit submenu in the MASCHINE menu.
The commands in the Edit menu additionally shows which action will be undone/redone!
Take Undo
Suppose you have just recorded a 16th-note hi-hat beat over four bars, but then decide to cancel it. Normally you would have to cancel the 64 notes one at a time, repeatedly calling the
undo function 64 times in a row. This is what Take Undo has been made for!
Take Undo/Redo is an extended undo/redo available while recording that allows you to cancel
or re-execute a whole group of actions at once.
Take Undo/Redo is the default undo/redo in MASCHINE. In the software use the common keyboard shortcuts for the Undo and Redo functions:
► To cancel your last group of actions, press [Ctrl]+[Z] ([Cmd]+[Z] on macOS). To re-exe-
cute your last group of actions, press [Ctrl]+[Y] ([Cmd]+[Y] on macOS). You can also select Undo and Redo from the Edit menu in the Application Menu Bar or from the Edit
submenu in the MASCHINE menu.
The commands in the Edit menu additionally shows which action will be undone/redone!
MASCHINE - Manual - 43
Page 44

Basic Concepts
Common Operations
Undo/Redo on the Controller
Both Step Undo and Take Undo are also available on your controller:
1. On the MASCHINE hardware controller, perform the Take Undo operation by pressing
SHIFT + pad 1 (UNDO). To perform the Take Redo operation, press SHIFT + pad 2 (REDO).
2. On the MASCHINE hardware controller, perform the Step Undo operation by pressing
SHIFT + pad 3 (STEP UNDO). To perform the Step Redo operation, press SHIFT + pad 4
(STEP REDO).
Take Undo is available in following situations:
▪ Recording in Control mode
▪ Recording in Step mode
▪ Recording modulation
Outside of these three situations, Take Undo has the same effect as Step Undo (see above).
2.3.4 List Overlay for Selectors
Many MASCHINE parameters are presented in the form of a selector providing a list of possible
values for the parameter (e.g., the Mode parameter of the Saturator Plug-in or the Dest. parameter in the Audio page of the Sound’s/Group’s Output Channel settings).
A selector.
From your controller, you can adjust such a parameter by turning the corresponding Knob under the display of your controller.
MASCHINE - Manual - 44
Page 45

Basic Concepts
Common Operations
When you touch the Knob of that parameter, a list appears above the parameter on the display
of your controller. This list shows you at a glance all possible values for the parameter you are
touching along with the value currently selected, making the value selection much more intuitive.
Touch the Knob under a selector (here the MODE parameter under the left display) to open a list with the values available
for selection.
The list is displayed as long as you touch or turn the corresponding Knob. When you release
the Knob, the list disappears after a short delay.
Only one list can be displayed at a time. If you actuate two or more Knobs that control selectors,
only the list for the last-touched Knob will be shown.
2.3.5 Zoom and Scroll Overlays
When your controller is in particular modes, you can use Knob 5 and 6 to respectively zoom
and scroll horizontally through the content shown in the right display. In some cases e.g., in
Keyboard mode you can additionally use Knob 7 (in Group mode) to change the height of the
Sound lane, or Knob 8 (except in Group mode) to scroll vertically through this content.
MASCHINE - Manual - 45
Page 46

Basic Concepts
Common Operations
The zooming and scrolling functions are indicated, when available, by little icons that appear
as overlays above the relevant Knobs as soon as you touch any of them. This way, in case of
doubt, a simple touch on any Knob below the right display will indicate if some zooming and
scrolling functions are available.
When you touch any of the Knobs 5–8, little icons appear above the Knobs used for zooming/scrolling in the display.
2.3.6 Focusing on a Group or a Sound
To display the content and parameters of a particular Sound or Group, you first need to put it
in focus.
Setting the focus on a Sound or Group is slightly different than selecting it: The focus defines
what will be displayed, whereas the selection defines what will be affected by your edits. Note
that a focused Sound/Group is always selected. The distinction is of importance because you
can select multiple Sounds or Groups to apply your edits to all of them at once! See section
↑4.1.3, Selecting Multiple Sounds or Groups for more on this.
We show here how to put Sounds and Groups in focus when the MASCHINE software is in Arrange
view (default view). For instructions on putting Sounds and Groups in focus in Mix view, please refer to chapter ↑12.2.3, Selecting Channel Strips.
MASCHINE - Manual - 46
Page 47

Basic Concepts
Common Operations
Setting the Focus on a Group
► To put a Group in focus, click this Group in the Group List of the Arranger:
→ The focused Group is highlighted. The Pattern Editor displays the Sounds and Patterns of
that Group.
MASCHINE - Manual - 47
Page 48
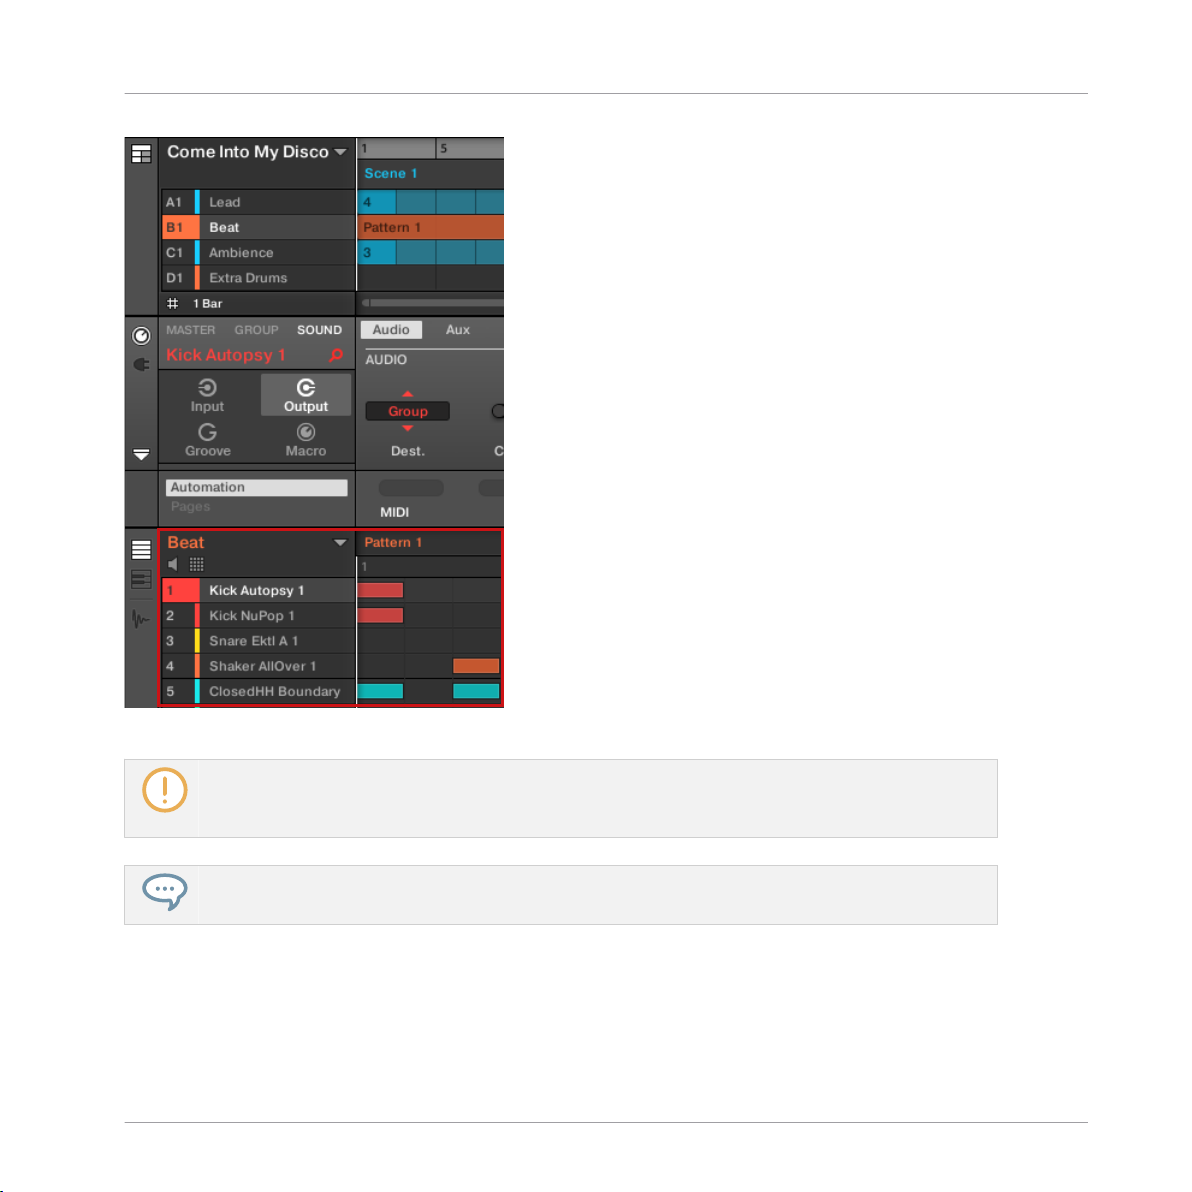
Basic Concepts
Common Operations
The focused Group is highlighted and the Pattern Editor show its content.
If the desired Group does not appear in the Group List, use the scroll bar at the right end of the
Arranger or turn your mouse wheel while hovering the Arranger to display any hidden Groups. You
can also extend the Arranger by dragging its lower right corner vertically with the mouse.
You can also select multiple Groups at once to apply changes to all of them. See section ↑4.1.3,
Selecting Multiple Sounds or Groups for more information.
Setting the Focus on a Sound
To put a Sound in focus:
MASCHINE - Manual - 48
Page 49

Basic Concepts
Common Operations
1. Set the focus to the Group containing the desired Sound by clicking it in the Group List
on the left of the Arranger (see above).
The focused Group is highlighted. The Pattern Editor displays the Sounds and Patterns of
that Group.
2. Click the desired Sound slot in the Sound List of the Pattern Editor:
→ The focused Sound slot is highlighted.
The focused Sound slot is highlighted.
MASCHINE - Manual - 49
Page 50
Basic Concepts
Common Operations
If the desired Sound does not appear in the Sound List, use the scroll bar at the right end of the
Pattern Editor or turn your mouse wheel while hovering the Pattern Editor to display any hidden
Sounds.
You can also select multiple Sounds at once to apply changes to all of them. See section ↑4.1.3,
Selecting Multiple Sounds or Groups for more information.
Focusing on a Group using the Hardware
1. If necessary, press SHIFT + the desired Group button A–H to switch to the Group bank
containing the desired Group.
2. Press the desired Group button A–H.
→ The corresponding Group is now in focus.
Once the Group is focused you can use Button 1–3 above the left display to quickly switch between
the Master, the focused Group and the last focused Sound in that Group! See section ↑2.3.7,
Switching Between the Master, Group, and Sound Level for more information.
Setting the Focus on a Sound using the Hardware
1. If you want to set the focus on a Sound located in another Group, first set the focus on its
Group as described above.
2. Press SELECT + the pad of the desired Sound (or simply press its pad if pads are in
Group mode).
→ The corresponding Sound is now in focus.
Once the Sound is focused you can use Button 1–3 above the left display to quickly switch
between the Master, the containing Group and the focused Sound! See section ↑2.3.7, Switch-
ing Between the Master, Group, and Sound Level for more information.
You can also select multiple Sounds at once to apply changes to all of them. See section ↑4.1.3,
Selecting Multiple Sounds or Groups for more information.
MASCHINE - Manual - 50
Page 51

Basic Concepts
Common Operations
2.3.7 Switching Between the Master, Group, and Sound Level
At any time you can quickly switch the Control area between the parameters of the Master, the
focused Group, and the focused Sound.
Click the desired tab to switch the display of the Control area.
► Click the MASTER, GROUP or SOUND tab in the top left corner of the Control area to dis-
play the Plug-in parameters or Channel properties of the Master, the focused Group or the
focused Sound, respectively.
→ The selected tab lights up. The name of your Project, the focused Group or the focused
Sound appears under the MASTER, GROUP, and SOUND tabs (the Muddy Matt Sound in
the picture above), and the rest of the Control area displays the Plug-in parameters and
Channel properties of the Master, the focused Group or the focused Sound, respectively.
Switching Between the Master, Group, and Sound Level using the Controller
On your controller:
1. Press the CHANNEL or PLUG-IN button to enter Control mode.
2. Press Button 1 (MASTER), Button 2 (GROUP) or Button 3 (SOUND) above the left display
to show the Plug-in parameters and Channel properties of the Master, the focused Group
or the focused Sound, respectively.
→ The selected tab lights up. The name of your Project, the focused Group or the focused
Sound appears on the left display (under the MASTER, GROUP, and SOUND tabs), and
the displays show the Plug-in parameters and Channel properties of the Master, the focused Group or the focused Sound, respectively.
MASCHINE - Manual - 51
Page 52
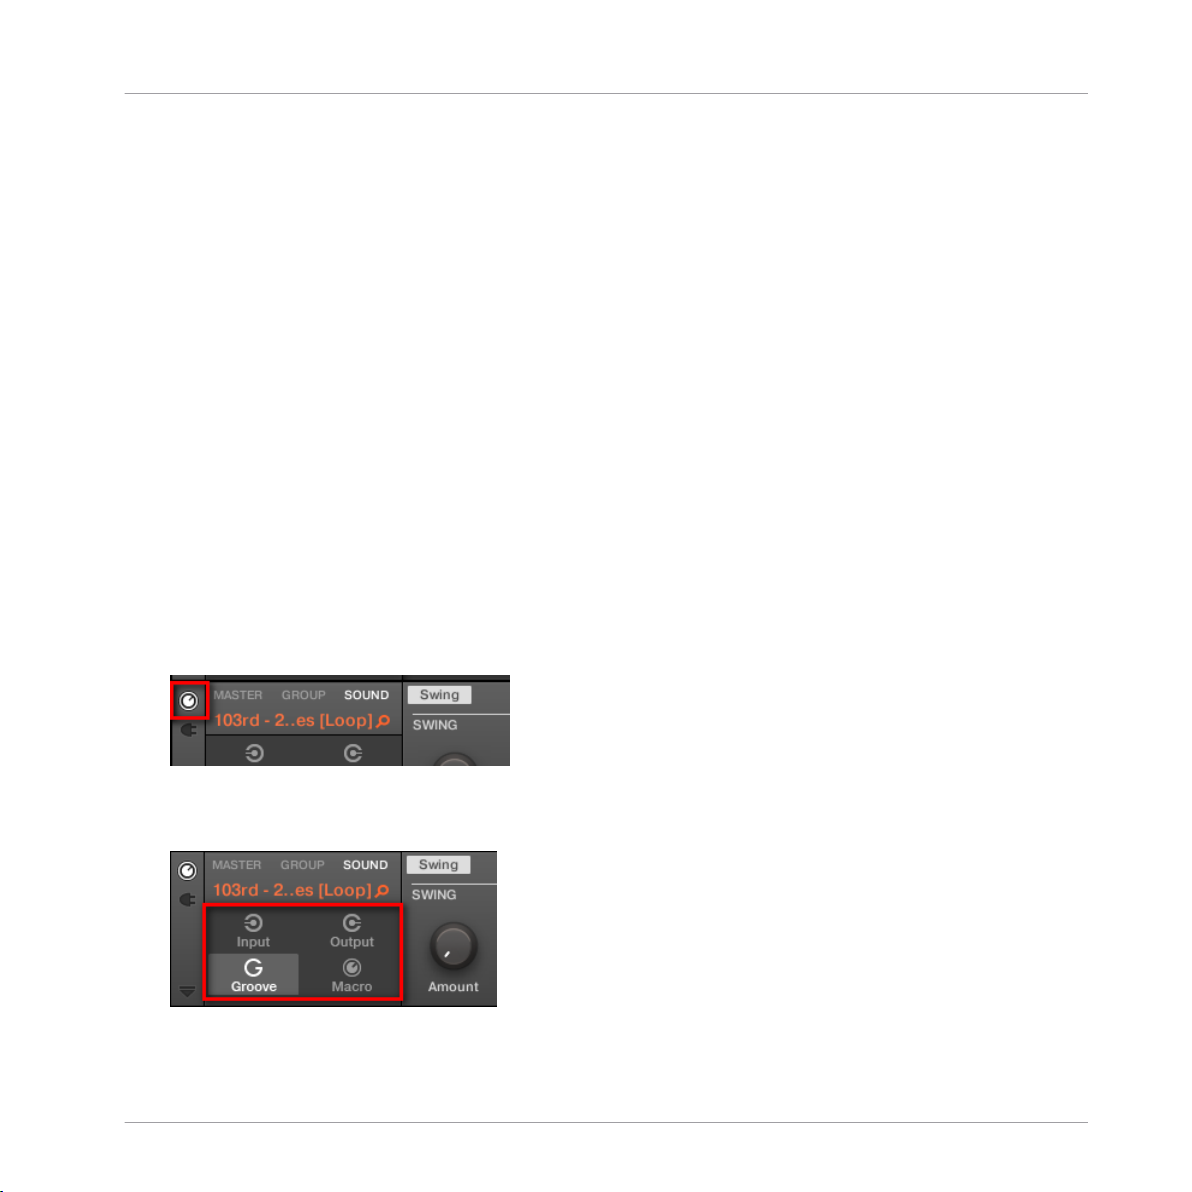
Basic Concepts
Common Operations
2.3.8 Navigating Channel Properties, Plug-ins, and Parameter Pages in the Control Area
We describe here how to display/edit any Plug-in parameters or Channel properties located in
any Sound, Group or the Master.
To select a particular Plug-in or a particular set of Channel properties, you first need to display
the parameters of the Master, the desired Group or Sound.
1. To display the parameters of a particular Group or Sound, put it in focus by clicking it in
the Group List or Sound List, respectively (see section ↑2.3.6, Focusing on a Group or a
Sound).
2. In the top left corner of the Control area, click the MASTER, GROUP or SOUND tab to
display the parameters of the Master, the focused Group or the focused Sound, respectively.
→ The Control area now displays the Plug-in parameters and Channel properties of the de-
sired Sound, desired Group or the Master.
Selecting Channel Properties
1. At the far left of the Control area, click the Channel icon (showing a little knob) to display
the Channel properties:
The button lights up. The Channel Property selector appears in the left part of the Control
area, showing a square of four buttons representing the various sets of Channel properties
available for the selected Sound, Group or the Master:
MASCHINE - Manual - 52
Page 53

Basic Concepts
Common Operations
2. Click the desired button (Input, Output, Groove, or Macro) in the Channel Property selector to select that set of Channel properties.
→ The selected button is highlighted and the parameters of the selected Channel properties
appear in the Parameter area (the right and biggest part of the Control area).
Selecting a Plug-in
1. At the far left of the Control area, click the little Plug-in icon to display the Plug-ins:
The icon lights up. The Plug-in List appears in the left part of the Control area, showing a
stack of all Plug-ins loaded in the selected Sound, Group or the Master:
2. Click the desired Plug-in slot in the Plug-in List to select that Plug-in.
→ The parameters of the selected Plug-in appear in the Parameter area (the right and biggest
part of the Control area).
If the Plug-in List only shows a “+” sign, it means that there are no Plug-ins loaded in this Sound,
Group or the Master. Clicking the “+” sign allows you to load a new Plug-in: see section ↑6.1.3,
Loading, Removing, and Replacing a Plug-in for more on this.
Navigating Parameter Pages
In some situations, the selected Plug-in or Channel properties provide more parameters than
the display(s) of your controller and the Parameter area in the software can show at once. Examples of this are the parameters for the Groups’ or Sounds’ Output properties and those for
the Sampler Plug-in. In these cases, the parameters are divided into several Parameter pages
that you can easily navigate with the hardware and software.
MASCHINE - Manual - 53
Page 54

Basic Concepts
Common Operations
In the software the names of the available pages are displayed at the top of the Parameter
area. The name of the page currently displayed is highlighted.
► Click the desired page name at the top of the Parameter area to show the corresponding
Parameter page.
The Parameter pages of the Sound’s Output properties: Audio (currently displayed), Aux, and MIDI.
If all page names cannot be displayed at once at the top of the Parameter area, two small arrows are displayed on the left to click through the pages:
► Click the left or right arrow to access additional pages.
Adjusting the Parameters
In the Parameter area, each parameter includes a control element and a label. Following types
of control elements are available:
MASCHINE - Manual - 54
Page 55
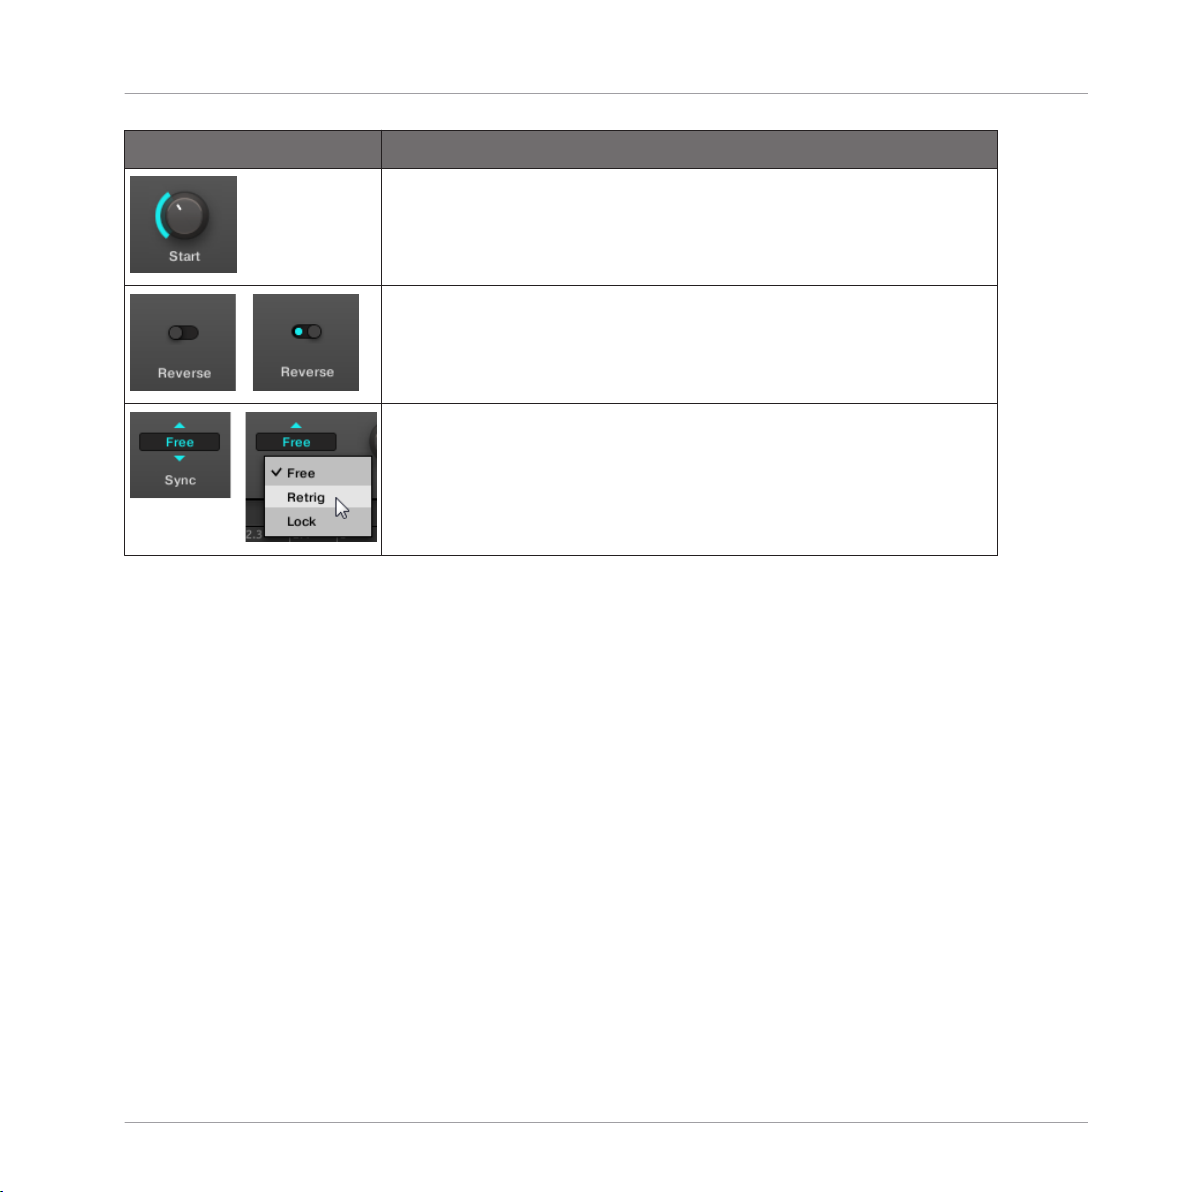
Element Action
Knob: Click the knob and drag your mouse vertically to change
the parameter value. Hold [Shift] on your computer keyboard and
drag your mouse to adjust the value in finer increments.
Button: Click the button to switch its state. When the button is
enabled, it shows a small colored LED.
Selector: Click the displayed value to open the drop-down list,
and click another value in the list to select it.
Navigating Channel Properties, Plug-ins, and Parameter Pages using the Controller
Basic Concepts
Common Operations
On the controller, do the following:
1. Set the focus on the desired Sound, Group or the Master (see section ↑2.3.6, Focusing on
a Group or a Sound).
2. At the top left of your controller, press the CHANNEL button to display the Channel properties or the PLUG-IN button to display the Plug-in slots of the selected Sound, Group or
the Master.
3. Press Button 1 (MASTER), Button 2 (GROUP) or Button 3 (SOUND) to display the Plugins and Channel properties of the Master, the focused Group or the focused Sound, respectively.
4. Use the 4-D encoder or press Button 5/6 to navigate the Channel properties or Plug-ins
(the name of the selected Channel properties or Plug-in appears between the left and
right arrows under Button 5 and 6).
Upon your selection the parameters of the selected Channel properties or Plug-in are
shown on the displays of your controller.
MASCHINE - Manual - 55
Page 56

Basic Concepts
Common Operations
5. Use the Page buttons left of the displays to navigate through the Parameter pages of the
selected Channel properties or Plug-in:
Moreover, if there is another page available to the left or to the right of the current page,
the corresponding Page button will be half lit on your controller.
6. Use Knobs 1–8 under the displays to adjust the value of the parameters available on the
selected page. For continuous parameters, hold SHIFT while turning the Knobs to adjust
the values in finer increments.
The displays showing the Audio page from the Group’s OUTPUT properties.
MASCHINE - Manual - 56
Page 57

Basic Concepts
Common Operations
Using the Navigate Mode
Alternatively, you can also navigate Channel properties and Plug-ins along with their Parameter
pages via the Navigate mode of your controller:
1. Press SHIFT + VARIATION (Navigate) to enter Navigate mode (or pin it by pressing NAVI-
GATE + Button 1).
2. Hold SHIFT + VARIATION (Navigate), then Button 2 (PAGE NAV) to enter Page Navigation mode.
3. Press the CHANNEL button to display the Channel properties or the PLUG-IN button to
display the Plug-in slots of the selected Sound, Group or the Master.
4. Press Button 5/6 to navigate the Channel properties or Plug-ins.
The name of the selected Channel properties or Plug-in appears between the left and right
arrows under Button 5 and 6. Furthermore this Plug-in or set of Channel properties is
highlighted on the left display.
5. Press the dimmed pads to select the desired Parameter pages. The names of the available
Parameter pages are shown on the right display along with the corresponding pads.
6. Upon your selection the corresponding pad turns fully lit and the page name is highlighted on the right display.
7. If there are more than 16 Parameter pages, press Button 7/8 to switch to the previous/
next 16 pages, respectively.
8. Release the VARIATION (Navigate) button to get back to Control mode (or press VARIA-
TION (Navigate) a second time if you pinned the Navigate mode).
→ The selected Parameter page now appears on the displays. Use Knobs 1–8 under the dis-
plays to adjust the parameters.
2.3.8.1 Extended Navigate Mode on Your Controller
The Navigate mode on your controller can be used to navigate the Parameter pages of Channel
properties and Plug-ins and adjust the view settings of specific areas in the software interface.
► Press and hold SHIFT + VARIATION (Navigate) to enter Navigate mode.
The Navigate mode has two distinct submodes:
MASCHINE - Manual - 57
Page 58
Basic Concepts
Common Operations
▪ The default Software Navigation mode lets you adjust the look of the software interface: You
can show/hide specific elements and change zoom/scroll settings.
▪ The Page Navigation mode allows you to navigate Channel properties, Plug-ins along with
their Parameter pages.
You can switch between Software Navigation and Page Navigation mode at any time:
► When your controller is in Navigate mode, hold SHIFT + VARIATION (Navigate) + But-
ton 2 (PAGE NAV) to switch between Software Navigation and Page Navigation mode.
When PAGE NAV is off (default setting) your controller is in Software Navigation mode. When
PAGE NAV is on your controller is in Page Navigation mode.
The Software Navigation mode allows you to customize the user interface of the MASCHINE
software by showing or hiding specific parts of the interface and changing the zoom and scroll
settings in the Ideas view, Arranger view and the Pattern Editor.
Action Shortcut
Access Ideas view Press Button 2 (IDEAS)
Access Arranger view Press Button 3 (ARRANGER)
Maximize/minimize the Mixer Press Button 4 (MIXER)
Show/hide the Browser Press Button 5 (BROWSER)
Show/hide the Control Lane Press Button 7 (MOD)
Follow Song Press Button 8 (FOLLOW)
Timeline Zoom in/out (Arranger view
Turn Knob 1 or press pad 14/10
only)
Timeline Scroll left/right (Arranger view
Turn Knob 2 or press pad 9/11
only)
Pattern Editor Zoom in/out Turn Knob 5 or press pad 6/2
Pattern Editor Scroll left/right Turn Knob 6 or press pad 1/3
MASCHINE - Manual - 58
Page 59
Action Shortcut
Sound Lane Height (Group mode only) Turn Knob 7
Basic Concepts
Common Operations
Pattern Editor Scroll up/down (Except
Turn Knob 8 or press pad 8/4
Group mode)
You can quickly switch the software between Ideas view and Arranger view by pressing SHIFT +
SCENE on your controller.
The Page Navigation mode allows you to navigate the Parameter pages available in the Channel
properties and Plug-ins of the various channels (Sounds, Groups, and Master) in your Project.
To access Page Navigation mode:
► Hold SHIFT + VARIATION (Navigate), then Button 2 (PAGE NAV) to enter Page Naviga-
tion mode.
→ When Page Navigation mode is enabled, your controller displays the Page Navigation
mode:
The left-hand display provides an overview of the selected Channels or Plug-ins for the selected Sound.
► To access each Channel or Plug-in for the selected Sound, press Buttons 5 and 6.
→ After selecting a Plug-in, the available pages are displayed in the software, and on the
right-hand display of your controller.
The right-hand display provides an overview of the available pages for the selected Channel or
Plug-in.
► To access each page of the selected Channel or Plug-in, press pads 1–16.
→ After pressing a pad the selected page is displayed in the software, and on the controller
when you exit Navigation mode by pressing the PLUG-IN button.
When there are more than sixteen pages for a Channel or Plug-in it is necessary to use the
Page Bank.
► To access another page with the Page Bank press Buttons 7 and 8.
MASCHINE - Manual - 59
Page 60

Basic Concepts
Common Operations
The pages for the selected bank are displayed in the software and the controller.
► To access Page Navigation mode press NAVIGATE + SHIFT + Button 2.
→ When Page Navigation mode is enabled, your controller displays the Page Navigation
mode:
The left-hand display provides an overview of the selected Channels or Plug-ins for the selected Sound.
► To access each Channel or Plug-in for the selected Sound, press Buttons 5 and 6.
→ After selecting a Plug-in, the available pages are displayed in the software, and on the
right-hand display of your controller.
The right-hand display provides an overview of the available pages for the selected Channel or
Plug-in.
► To access each page of the selected Channel or Plug-in, press pads 1–16.
→ After pressing a pad the selected page is displayed in the software, and on the controller
when you exit Navigation mode by pressing the NAVIGATE button.
When there are more than sixteen pages for a Channel or Plug-in it is necessary to use the
Page Bank.
► To access another page with the Page Bank press Buttons 7 and 8.
The pages for the selected bank are displayed in the software and the controller.
2.3.9 Using Two or More Hardware Controllers
If two or more MASCHINE controllers of different types (MASCHINE STUDIO, MASCHINE MK3, MASCHINE MK2, MASCHINE MIKRO MK2, MASCHINE, MASCHINE MIKRO,
and MASCHINE JAM) are connected to your computer, only one controller can be used to control the MASCHINE software at a time.
If you have more than one instance of the MASCHINE software running on your computer, you can
control each instance with a different controller. See ↑2.5.3, Controlling Various Instances with Dif-
ferent Controllers for more information.
MASCHINE - Manual - 60
Page 61

Basic Concepts
Common Operations
A controller not connected to any MASCHINE software instance can be used in MIDI mode (i.e. as a
MIDI controller) at the same time as the other controller(s). See the Controller Editor Manual for
more information on MIDI mode.
You can choose which controller you want to use with the MASCHINE software. This can be
done both from your controller and in the software.
You can select the desired controller from the Controller menu in the Application Menu Bar or
from the Controller submenu in the MASCHINE menu:
Click the MASCHINE menu and select the controller you want to use.
Hardware
On the controller you want to use with the MASCHINE software, do the following:
▪ MASCHINE (MK3) controller: Press SHIFT + PLUG-IN, turn the 4-D encoder to select the
desired instance, and press the 4-D encoder or Button 4 to load it.
MASCHINE - Manual - 61
Page 62
Basic Concepts
Common Operations
▪ MASCHINE STUDIO controller: Press SHIFT + PLUG-IN, turn the jog wheel to select the
desired instance, and press the jog wheel or Button 8 to load it.
▪ MASCHINE (MK1 & MK2) controller: Press SHIFT + STEP, turn Knob 8 (or press But-
ton 5/6) to select the desired instance, and press Button 8 to load it.
▪ MASCHINE MIKRO (MK1 & MK2) controller: Press SHIFT + F2, turn the Control encoder
to select the desired instance, and press the Control encoder to load it.
▪ MASCHINE JAM controller: Press SHIFT + H (INSTANCE), turn the Control encoder to se-
lect the desired instance, and press the Control encoder to load it.
▪ KOMPLETE KONTROL Keyboard MK1: Press INSTANCE and turn the Control encoder to
select the desired instance, and press the Control encoder to load it.
▪ KOMPLETE KONTROL Keyboard MK2: Press INSTANCE and turn the 4-D encoder to se-
lect the desired instance, and press the 4-D encoder to load it.
2.3.10 Touch Auto-Write Option
Modulation recording also benefits from the touch sensitivity of Knobs 1–8 via the Touch Autowrite option.
Reminder: To record modulation from your MASCHINE controller, activate playback, switch your
controller to Auto-write mode by pressing and holding AUTO, and then turn the Knobs 1–8 to adjust
parameters. For more information, please refer to section ↑10.5.2, Recording Modulation.
Enabled by default, the Touch Auto-write option allows you to record modulation events as
soon as you touch Knobs 1–8, even if you don’t rotate them:
▪ If Touch Auto-write is disabled, modulation events are recorded only when you rotate the
Knobs 1–8 (as in previous MASCHINE versions).
▪ If Touch Auto-write is enabled, modulation events are recorded as soon as you touch the
Knobs 1–8, whether you actually rotate them or not:
◦ If you rotate the Knobs, the new modulation values are recorded for the corresponding
parameters.
MASCHINE - Manual - 62
Page 63
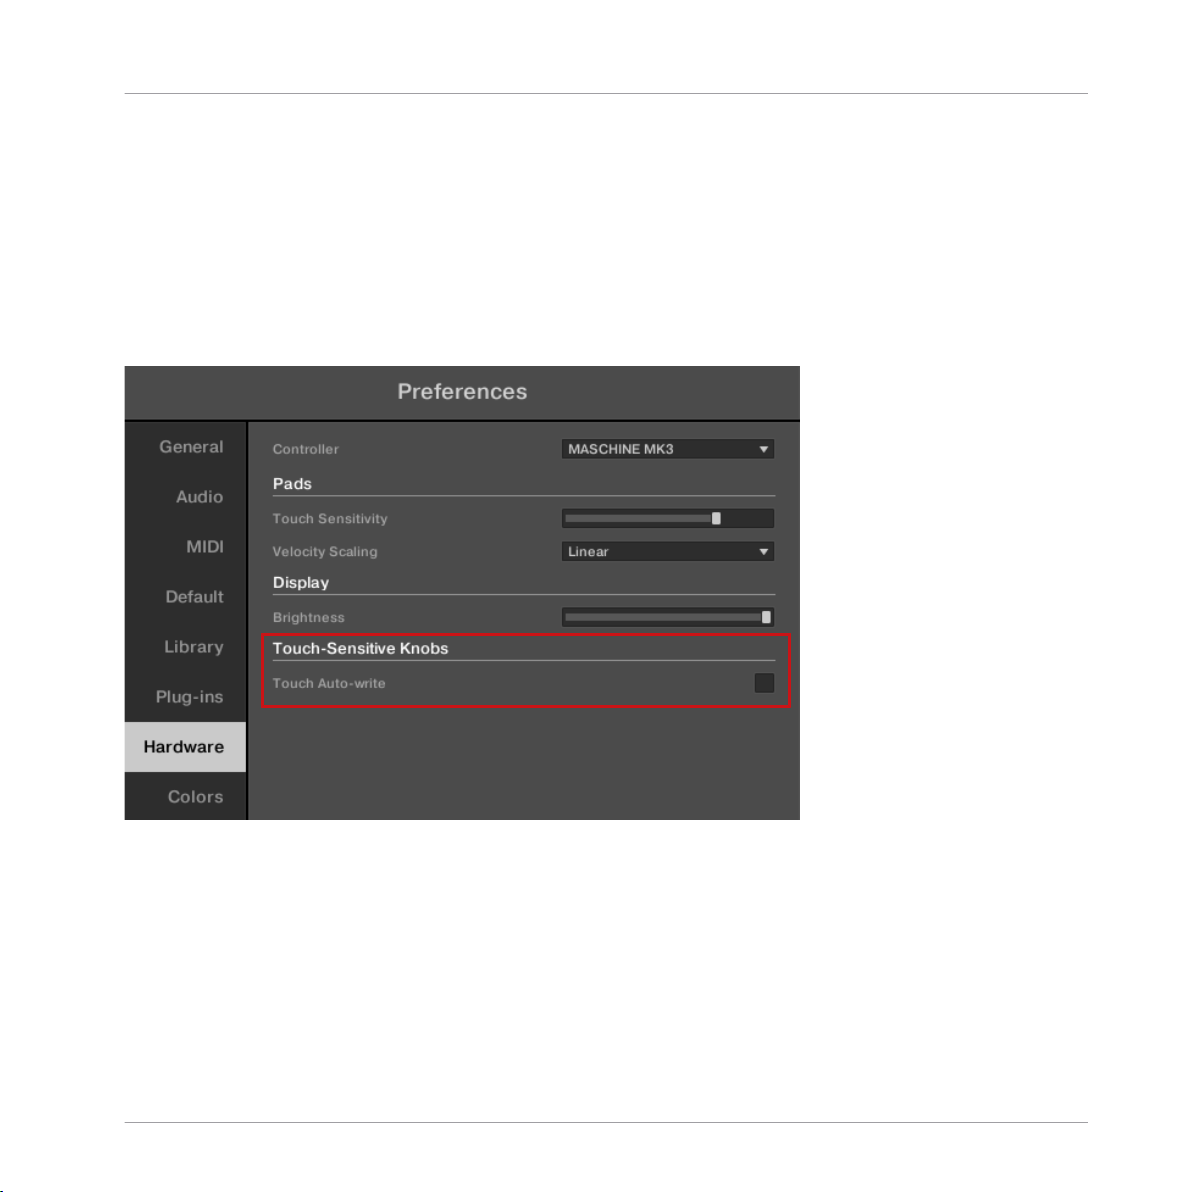
Basic Concepts
Common Operations
◦ If you touch the Knobs but don’t rotate them, the last modulation values for these pa-
rameters keep being recorded as new events as the playhead moves forward, thereby
overwriting any existing modulation events at the playhead position. Modulation stops
being recorded when you release the Knob(s).
Enabling/Disabling Touch Auto-Write
The Touch Auto-write option can be enabled or disabled in the Hardware page of the Preferen-
ces panel:
The Touch Auto-write check box in the Hardware page of the Preferences panel.
► To enable or disable the Touch Auto-write option, click the Touch Auto-write check box in
the Touch-Sensitive Knobs section of the Hardware page in the Preferences panel.
MASCHINE - Manual - 63
Page 64
Basic Concepts
Native Kontrol Standard
To access the Touch-Sensitive Knobs section in the Hardware page, your MASCHINE controller
must be connected to your computer and controlling the MASCHINE instance. Moreover if a KOMPLETE KONTROL S-Series keyboard is also focused on that MASCHINE instance, make sure that
your MASCHINE controller is selected in the Controller menu at the top of the Hardware page in
order to see its settings! For more information, see section Controller Menu in the Hardware Page of
the Preferences Panel.
Example of Use
Touch Auto-write can be very handy if a parameter already has some modulation recorded in
the Pattern, and you want to re-record modulation for this parameter, this time at a constant
value:
▪ With Touch Auto-write disabled (and in previous MASCHINE versions), you have to con-
stantly rotate the Knob to ensure that the old modulation events are actually replaced by
the new ones. To simulate a new constant modulation value, you had no other choice than
slightly rotate the Knob incessantly around the desired value.
▪ With Touch Auto-write enabled, you just need to keep a finger on the Knob: The current
modulation value is recorded in new modulation events as long as you touch the Knob, automatically replacing any old modulation events at these positions.
2.4 Native Kontrol Standard
Native Kontrol Standard (NKS) is a software instrument format that allows third-party developers to integrate with MASCHINE and KOMPLETE KONTROL hardware and software at the
same deep level as KOMPLETE Instruments.
The Native Kontrol Standard includes:
▪ Seamless integration into the MASCHINE and KOMPLETE KONTROL Browser for a unified
browsing experience.
▪ Full parameter mapping for instant hands-on control.
▪ Support of KOMPLETE KONTROL S-SERIES features such as the Light Guide.
NKS instruments can be found in the MASCHINE Browser next to your KOMPLETE Instruments. All of their presets are fully tagged, so filtering in the Browser gives you matching results from both KOMPLETE Instruments and NKS instruments (see section ↑3.2.6, Selecting
MASCHINE - Manual - 64
Page 65

Basic Concepts
Native Kontrol Standard
Type and Mode Tags). And when you load a preset from an NKS instrument, its parameters are
mapped to the controls on your KOMPLETE KONTROL S-SERIES keyboard in a meaningful
way, just like any preset from your KOMPLETE Instruments.
NKS instruments are automatically added to your Library when you start MASCHINE or KOMPLETE KONTROL for the first time after installing the instrument (except KONTAKT instruments with NKS support, see below). The folders containing the preset files for NKS support
can be managed in the Factory pane on the Library page of the Preferences (see section
↑2.7.5, Preferences – Library Page).
Installing KONTAKT Instruments with NKS Support
Third-party developers of KONTAKT instruments provide you with a folder that contains all instrument files, including presets and samples. Instead of running an installer, this folder needs
to be stored on the hard drive. The instrument can then be activated with Native Access, which
also adds it to the MASCHINE and KOMPLETE KONTROL Libraries. If you are using KONTAKT, the instrument is automatically added to your KONTAKT Browser too.
To activate your KONTAKT instrument with NKS support and add it to the MASCHINE Library,
follow the steps below:
1. Start the stand-alone version of the MASCHINE software.
2. In the File menu click on Manage Products….
3. Click on Add a serial in the top-left corner of Native Access.
4. Enter the serial number of the instrument and click ADD SERIAL.
5. Click BROWSE and open the folder containing the instrument files in the file dialog.
6. Click on INSTALL to add the instrument to your MASCHINE Library.
→ The instrument is installed. MASCHINE automatically scans for the new content and adds
it to the MASCHINE Browser.
The MASCHINE, and KOMPLETE KONTROL Libraries, and the KONTAKT Browser reference the instrument files contained in the folder. It is recommended to not delete or move the folder afterwards, or otherwise MASCHINE, KOMPLETE KONTROL, and KONTAKT will not be able to find the
instrument files. If an instrument cannot be found, use the Rescan function on the Preferences’
Library page to update the Library with the correct folder location (see section ↑2.7.5, Preferences
– Library Page).
MASCHINE - Manual - 65
Page 66
Basic Concepts
Stand-Alone and Plug-in Mode
2.5 Stand-Alone and Plug-in Mode
You can run the MASCHINE software as a stand-alone application or integrate it into your favorite host by loading it as a plug-in. The MASCHINE software is available in the VST, Audio
Unit, and AAX plug-in formats. For further information on plug-in compatibility and for a detailed description of how to use plug-ins in your host, please refer to the documentation included with your host software.
2.5.1 Differences between Stand-Alone and Plug-in Mode
Transport Functions
The most noticeable difference between the stand-alone and plug-in mode of MASCHINE relates to the interaction with MASCHINE’s sequencer. Indeed, when MASCHINE is used as a
plug-in within a host sequencer software (e.g., Cubase or Pro Tools), MASCHINE’s sequencer
is exclusively controlled by the host application: you cannot, e.g., manually start, stop or restart the playback in MASCHINE, nor modify the tempo or the time signature of your Project
within the MASCHINE plug-in itself — these are synchonized to your host’s own transport
functions and tempo settings. As a direct consequence, when MASCHINE is used as a plug-in
the Restart and Play buttons as well as the Tempo and Time Signature fields are grayed out
and inactive in the MASCHINE Header. Obviously you cannot control MASCHINE’s playback
and tempo settings from your MASCHINE controller either.
However from your controller you can directly control the transport functions of your host application instead. See section Controlling your Host’s Transport Functions in Plug-in Mode for more information.
Audio and MIDI Handling
When MASCHINE is used in stand-alone mode, it directly communicates with your audio and
MIDI interface. You can select which physical audio/MIDI ports have to be used on your interface, and configure crucial audio settings like the sample rate. All this is done via the Audio
and MIDI Settings panel (for more information on this, please refer to ↑2.8, Integrating MA-
SCHINE into a MIDI Setup).
MASCHINE - Manual - 66
Page 67
Basic Concepts
Stand-Alone and Plug-in Mode
On the contrary, When MASCHINE is used as a plug-in within a host application, the communication with your audio and MIDI interfaces is managed by the host — the MASCHINE plugin only communicates with the host. Native Instruments’ Online Knowledge Base provides
how-tos that will help you route the MASCHINE plug-in to multiple tracks/outputs in the major
hosts:
▪ How to route MASCHINE to multiple outputs in Ableton Live:
http://www.native-instruments.com/knowledge/questions/1705
▪ How to route MASCHINE to multiple outputs in Cubase:
http://www.native-instruments.com/knowledge/questions/1707
▪ How to route MASCHINE to multiple outputs in Pro Tools:
http://www.native-instruments.com/knowledge/questions/1709
▪ How to route MASCHINE to multiple outputs in Logic Pro:
http://www.native-instruments.com/knowledge/questions/1711
For all details on the audio and MIDI configuration of your host application, please refer to its documentation.
Multiple Plug-in Instances
When you are using MASCHINE as a plug-in within a host application, you can open multiple
MASCHINE instances. Actually, you can load as many instances of MASCHINE as your computer and your host application can handle CPU-wise. In contrast to the stand-alone application, they are always synced to the host. In plug-in mode you can also send MIDI Program
Change messages from your host to switch between MASCHINE’s Scenes or between patches
of other plug-ins loaded into MASCHINE, or record automation for MASCHINE parameters. To
learn more about these, have a look at chapter ↑15.5, Triggering Sections or Scenes via MIDI
and ↑11.2, Using MIDI Control and Host Automation.
2.5.2 Switching Instances
When two or more instances of the MASCHINE software are running (e.g., as plug-ins on different tracks of your DAW), you must choose which instance you want to control from your
hardware controller. You can do this both from your controller and in the software.
MASCHINE - Manual - 67
Page 68

Basic Concepts
Stand-Alone and Plug-in Mode
► To select your controller from a particular MASCHINE instance, click the Connect button
in the MASCHINE Header of that instance.
Click the Connect button to connect the controller to that instance.
Switching Instances using the Controller
To switch from one MASCHINE instance to another:
1. Press SHIFT + PLUG-IN.
2. Turn the 4-D encoder to select an instance.
3. Press the 4-D encoder to load that instance.
2.5.3 Controlling Various Instances with Different Controllers
You can use two or more MASCHINE controllers of different types (MASCHINE STUDIO, MASCHINE MK3, MASCHINE MK2, MASCHINE MIKRO MK2, MASCHINE, and MASCHINE MIKRO) simultaneously with different instances of the MASCHINE software (possibly with one instance in stand-alone mode). In doing so, the following applies:
▪ Only one MASCHINE controller of any type can be connected to an instance at a time. You
can choose which instance you want to control from each controller as described in ↑2.5.2,
Switching Instances.
▪ When you start a new instance of the MASCHINE software, it connects to one of the MA-
SCHINE controllers according to following precedence rules:
◦ Rule 1: The MASCHINE STUDIO controller focus has priority over the MK3 controller,
which takes priority over all legacy controllers (MASCHINE MK2, MASCHINE MIKRO
MK2, MASCHINE and MASCHINE MIKRO).
◦ Rule 2: The MASCHINE controllers (legacy and MK3) have priority focus over MA-
SCHINE MIKRO controllers.
◦ Rule 1 has priority over rule 2.
MASCHINE - Manual - 68
Page 69

Basic Concepts
Host Integration
2.6 Host Integration
When using advanced host integration, MASCHINE MK3 becomes the centerpiece of your studio setup. You can use it to control not only the MASCHINE software, or the loaded plug-in,
but also core functionality of supported hosts.
Advanced integration of MASCHINE is available in the following hosts:
▪ Ableton Live
▪ Apple Logic Pro X
2.6.1 Setting up Host Integration
MASCHINE integrates with a number of hosts to facilitate a fluent workflow for performing and
recording music with your MASCHINE Library.
2.6.1.1 Setting up Ableton Live (macOS)
Ableton Live must be configured for advanced integration with MASCHINE.
Installing the MIDI Remote Script
The MIDI Remote Script allows Ableton Live to recognize MASCHINE as a control surface. It
must be copied into Live’s MIDI Remote Scripts directory:
1. Ensure that Ableton Live is not running.
2. Navigate to the following folder: Macintosh HD/Library/Application Support/Native Instru-
ments/Host Integration/Ableton Live/
3. Copy the two folders named NativeInstruments and Maschine_MK3 to the clipboard.
4. Open your Applications folder and right-click the Ableton Live application symbol. In the
context menu, click Show Package Contents.
5. In the Ableton Live package, navigate to Contents > App-Resources > MIDI Re-
mote Scripts.
6. Paste the folders you have copied to the clipboard into the MIDI Remote Scripts folder.
MASCHINE - Manual - 69
Page 70

Basic Concepts
Host Integration
Configuring Ableton Live for MASCHINE
Once the MIDI Remote Script and the Instrument Rack file are installed in the correct location, you need to add MASCHINE as a control surface in Ableton Live's preferences.
1. Launch Ableton Live.
2. In Ableton Live, go to the Preferences and open the MIDI / Sync tab.
3. Assign a free Control Surface slot to MASCHINE by selecting MASCHINE Mk3 from the
drop-down menu.
4. Leave both the Input and the Output for the MASCHINE Mk3 control surface set to None.
2.6.1.2 Setting up Ableton Live (Windows)
Ableton Live must be configured for advanced integration with MASCHINE.
Installing the MIDI Remote Script
The MIDI Remote Script allows Ableton Live to recognize MASCHINE as a control surface. It
must be copied into Live’s MIDI Remote Scripts directory:
1. Ensure that Ableton Live is not running.
2. Navigate to the following folder: C:\Program Files\Common Files\Native Instruments\Host
Integration\Ableton Live\
3. Copy the Maschine_MK3 folder to the clipboard.
4. Navigate to the MIDI Remote Scripts folder in Ableton Live’s installation directory: C:\Pro-
gramData\Ableton\Live10\Resources\MIDI Remote Scripts
5. Paste the folder you have copied to the clipboard into the MIDI Remote Scripts folder.
Configuring Ableton Live for MASCHINE
Once the MIDI Remote Script and the Instrument Rack file are installed in the correct location, you need to add MASCHINE as a control surface in Ableton Live's preferences.
1. Launch Ableton Live.
2. In Ableton Live, go to the Preferences and open the MIDI / Sync tab.
MASCHINE - Manual - 70
Page 71

Basic Concepts
Host Integration
3. Assign a free Control Surface slot to MASCHINE Mk3 by selecting it from the drop-down
menu.
4. Leave both the Input and the Output for the MASCHINE Mk3 control surface set to None.
2.6.1.3 Setting up Apple Logic Pro X
Apple Logic Pro X is automatically configured for advanced integration with MASCHINE once
you launch the respective application for the first time after installing the MASCHINE software. Ensure that the controller is connected and switched on before launching the application.
A dialog asks you to confirm this after launching the application:
► When the message OSC app “Maschine” wants to connect to Logic Pro X appears on
screen, click OK.
The MASCHINE stand-alone application must be opened once before using the plug-in within your
DAW for the first time, and after installing new Instruments.
2.6.2 Integration with Ableton Live
If you own Ableton Live, you can control many of its functions directly from the MASCHINE.
The available functions are mapped to sections of the controller as listed below.
The following functionality descriptions apply to the default Ableton Live setup. If, for example, different playback settings have been selected the functionality will respect those settings.
Switching Instances using the Controller
To switch from a MASCHINE instance to controlling Ableton Live:
1. Press SHIFT + PLUG-IN.
2. Turn the 4-D encoder to select an instance.
3. Press the 4-D encoder to load that instance.
MASCHINE - Manual - 71
Page 72

Transport Control
Action in Ableton Live Control via MASCHINE
Start playback PLAY (Restart)
Start recording REC (Count-In)
Stop playback STOP
Start Arranger recording SHIFT + REC (Count-In)
Enable/disable loop mode LOOP
Enable/disable metronome SHIFT + TAP (Metro)
Tap tempo TAP
Edit Control
Basic Concepts
Host Integration
Action in Ableton Live
Undo action SHIFT + Pad 1 (Undo)
Redo action SHIFT + Pad 2 (Redo)
Toggle automation for selected Track on/off AUTO
Control via MASCHINE
Arranger Control
Action in Ableton Live
Select previous/next Track Move 4-D encoder left/right
Select previous/next Clip Slot in Track 4-D encoder down/up
Start/stop selected Clip SHIFT + push 4-D encoder
Control via MASCHINE
MASCHINE - Manual - 72
Page 73

Mixer Control
Action in Ableton Live Control via MASCHINE
Select a Track Button 1–8
Basic Concepts
Host Integration
Coarse adjust volume/panorama of selected
Knob 1–8
Track
Toggle between Volume and Pan adjust SHIFT + move 4-D encoder up/down
Switch Bank Page Left/Page Right
Select previous/next Track Move 4-D encoder left/right
Mute/unmute Channel MUTE + Button 1–8
Solo/unsolo Channel SOLO + Button 1–8
Misc. Control
Action in Ableton Live
Select previous/next Clip Move 4-D encoder up/down
Launch focus Clip/Launch focus Scene Push 4-D encoder
Stop focus Clip/Stop focus Scene SHIFT + Push 4-D encoder
Control via MASCHINE
2.6.3 Integration with Apple Logic Pro X
If you own Apple Logic Pro X, you can control many of its functions directly from the MASCHINE. The available functions are mapped to sections of the controller as listed below.
Switching an Instance using the Controller
To switch from a MASCHINE instance to Apple Logic Pro X:
1. Press SHIFT + PLUG-IN.
2. Turn the 4-D encoder to select an instance.
3. Press the 4-D encoder to load that instance.
MASCHINE - Manual - 73
Page 74
Transport Control
Action in Apple Logic Pro X Control via MASCHINE
Start playback PLAY (Restart)
Start recording REC (Count-In)
Stop playback STOP
Start Arranger recording SHIFT + REC (Count-In)
Enable/disable loop mode LOOP
Enable/disable metronome SHIFT + TAP (Metro)
Tap tempo TAP
Edit Control
Basic Concepts
Host Integration
Action in Apple Logic Pro X
Undo action SHIFT + Pad 1 (Undo)
Redo action SHIFT + Pad 2 (Redo)
Quantize to grid value SHIFT + Pad 5 (Quantize)
Toggle automation for selected Track on/off AUTO
Control via MASCHINE
Arranger Control
Action in Apple Logic Pro X
Select previous/next Track Move 4-D encoder left/right
Control via MASCHINE
MASCHINE - Manual - 74
Page 75
Mixer Control
Action in Apple Logic Pro X Control via MASCHINE
Select a Track Button 1–8
Basic Concepts
Preferences
Coarse adjust volume/panorama of selected
Knob 1–8
Track
Toggle between Volume and Pan adjust SHIFT + move 4-D encoder up/down
Switch Bank Page Left/Page Right
Select previous/next Track Move 4-D encoder left/right
Mute/unmute Channel MUTE + Button 1–8
Solo/unsolo Channel SOLO + Button 1–8
2.7 Preferences
The Preferences panel lets you specify various settings for MASCHINE.
► To open the Preferences panel, click Preferences… in the Maschine menu (macOS) or
File menu (Windows) of the Application Menu Bar, or in the File submenu of the MA-
SCHINE menu:
MASCHINE - Manual - 75
Page 76

Basic Concepts
Preferences… in the File menu of the Application Menu Bar (Windows depicted), and in the File submenu of the MASCHINE menu.
The following pages are available in the Preferences panel:
▪ General: see ↑2.7.1, Preferences – General Page.
▪ Audio: see ↑2.7.2, Preferences – Audio Page.
Preferences
▪ MIDI: see ↑2.7.3, Preferences – MIDI Page.
▪ Default: see ↑2.7.4, Preferences – Default Page.
▪ Library: see ↑2.7.5, Preferences – Library Page.
▪ Plug-ins: see ↑2.7.6, Preferences – Plug-ins Page.
▪ Hardware: see ↑2.7.7, Preferences – Hardware Page.
▪ Colors: see ↑2.7.8, Preferences – Colors Page.
2.7.1 Preferences – General Page
The General page holds all of the global settings for MASCHINE.
► To display the General page, click the General tab on the left of the Preferences panel.
MASCHINE - Manual - 76
Page 77
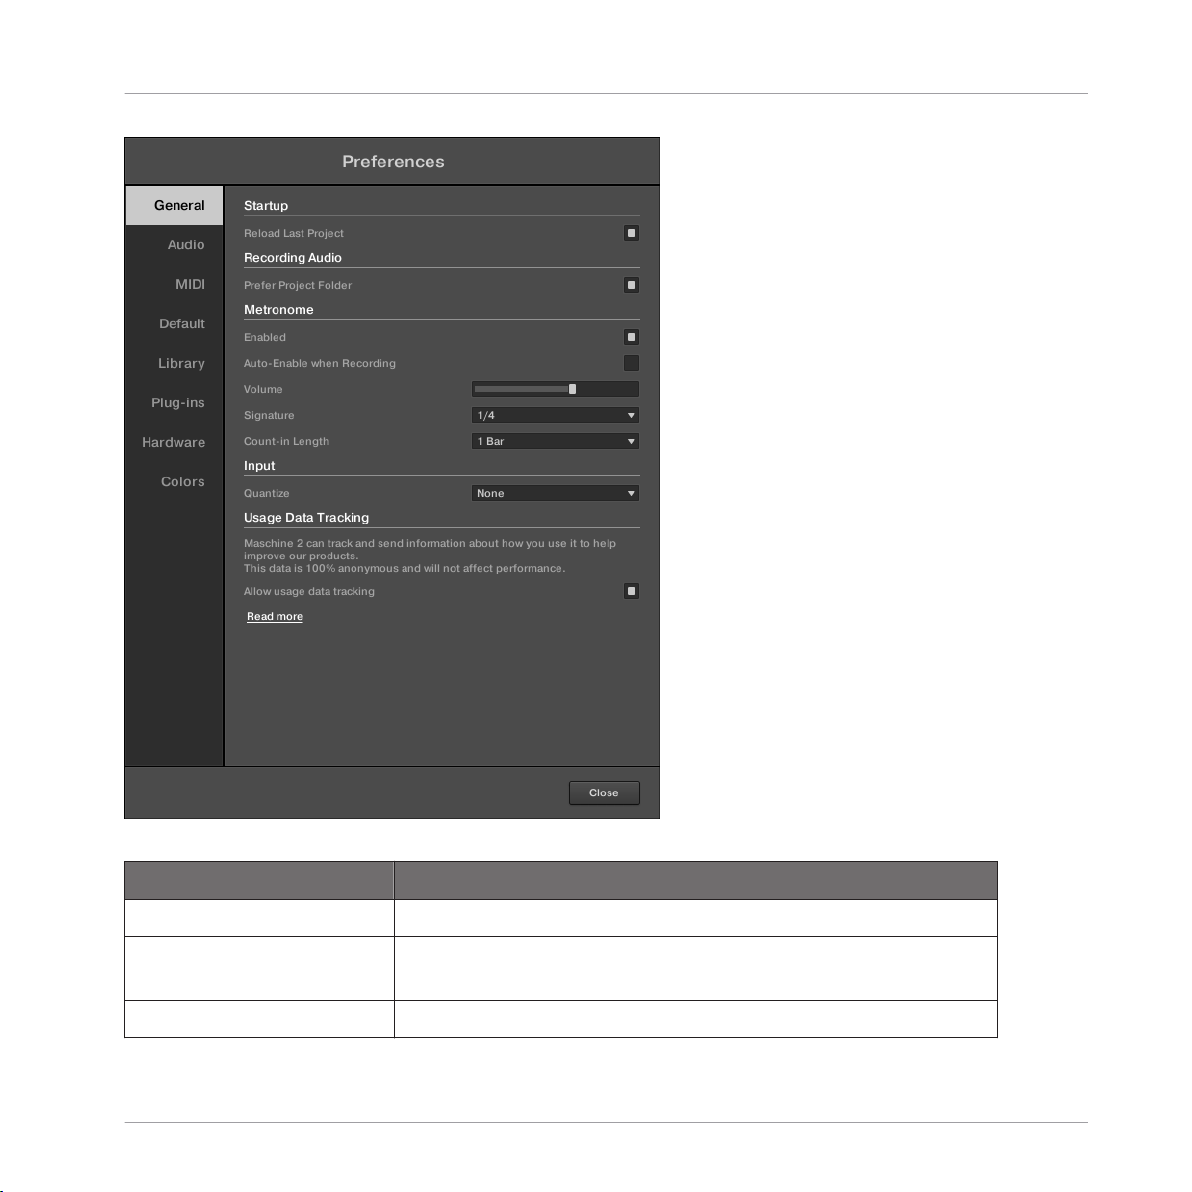
Basic Concepts
Preferences
The Preferences – General page.
Setting
Description
Startup
Reload Last Project Click this checkbox to automatically reload the last Project on
startup.
Recording Audio
MASCHINE - Manual - 77
Page 78

Setting Description
Prefer Project Folder If this checkbox is marked, the Samples you record will be put
in a subdirectory of the folder where your Project is saved. If
not, your recordings will be saved in the generic Recordings
folder in your standard user directory (see section ↑2.7.4,
Preferences – Default Page).
Metronome
Enabled Check this box to activate the metronome. You can also enable
the metronome by clicking the Metronome button in the
MASCHINE Header, for more information see section: ↑10.2.3,
Using the Metronome.
Basic Concepts
Preferences
Auto-Enable when
Recording
Click the checkbox to enable the Auto-Enable option. This
automatically turns on the metronome when you start recording
a Pattern.
When you start recording a Pattern (typically by pressing REC on
your controller), the metronome is automatically enabled. When
you exit recording (e.g., by pressing the lit REC button) the
metronome returns to its state before the recording (this can be
on or off).
The Auto-Enable option can be activated/deactivated both in the
software and from your controller.
The Auto-Enable option does not affect the Count-in: Even if
Auto-Enable is disabled, the metronome turns on when you
press SHIFT + REC to start the Count-in. For more information
on configuring Count-in, refer to section: ↑10.2.4, Recording
with Count-in.
Volume
Click the slider to adjust the volume of the metronome.
Signature Select the time interval between each tick of the metronome. By
default the metronome indicates the beats (the quarter notes,
1/4). Here you can select another note value for the ticks.
MASCHINE - Manual - 78
Page 79

Setting Description
Count-in Length Select the duration of the Count-in, i.e. how long the
metronome will sound before the recording actually starts.
Link
Enabled Click the checkbox to enable the Link protocol by default.
Applications that support Ableton Link can join a Link session
when connected to the same network. For more information on
Link please refer to section: ↑2.9, Syncing MASCHINE using
Ableton Link.
Input
Quantize Input Quantize automatically quantizes your input to
MASCHINE as you record.
Select one of the following Input Quantization modes:
None: Input Quantization is disabled. Events you play or record
on the pads are not quantized.
Record: Input Quantization is applied only when you record the
pads.
Play/Rec: Input Quantization is applied both when you play on
the pads and when you record them.
Basic Concepts
Preferences
In Play/Rec mode the quantization applied while playing is
slightly different from the quantization applied while recording:
When recording, all events are quantized to the closest step —
possibly ahead of the event. When playing, on the other hand,
events occurring in the first half of the steps are left untouched
(since you cannot bring them forward in the timeline!) whereas
events occurring in the second half of the steps are quantized to
the next step.
MASCHINE - Manual - 79
Page 80

Setting Description
Usage Data Tracking
Allow usage data tracking Here you can select to enable or disable Usage Data Tracking.
Usage Data Tracking technology enables MASCHINE to
automatically track anonymous usage data that you can choose
to share with us.
All users should keep Data Tracking enabled as it provides a
valuable tool for understanding the performance of Native
Instruments applications when they are used in real life
situations. The data sent to Native Instruments is one hundred
percent anonymous and will not affect performance.
For more detailed information about Usage Data Tracking,
please refer to the following Knowledge Base article on the
Native Instruments website:
https://support.native-instruments.com/hc/en-us/articles/
209545029
Basic Concepts
Preferences
Adjusting General Preferences Using the Controller MK3
You can access the General preferences directly from the controller. The options found here
are a replica of those found in the software.
To access the General preferences from your controller:
1. Press SETTINGS to display the Settings page.
2. Press Button 1 (GENERAL) to access the General settings.
▪ Turn Knob 1 (LEVEL) to adjust the volume level of the Metronome.
▪ Turn Knob 2 (TIME) to adjust the time interval between each tick of the Metronome.
▪ Turn Knob 3 (AUTO-ON) to automatically enable the metronome when you start recording a
Pattern.
▪ Turn Knob 4 (LENGTH) to adjust the duration of the Metronome count-in.
▪ Turn Knob 5 (MODE) to adjust the quantization mode.
MASCHINE - Manual - 80
Page 81
Basic Concepts
▪ Press Button 5 (METRONOME) to enable the Metronome.
▪ Press Button 6 (LINK) to enable Ableton Link.
► To save your settings and return to MASCHINE mode, press SETTINGS.
For more information on using Link refer to: ↑2.9, Syncing MASCHINE using Ableton Link.
2.7.2 Preferences – Audio Page
The Audio page holds settings related to your audio interface.
For information on audio configuration and basic setup scenarios, please refer to the MASCHINE
MK3 Getting Started Guide available from the Native Instruments website.
The Interface section allows you to configure the audio interface for MASCHINE.
The Routings section allows you to configure the connections between the virtual inputs/outputs of MASCHINE and the physical inputs/outputs of your audio interface.
► To display the Audio page, click the Audio tab on the left of the Preferences panel.
Preferences
MASCHINE - Manual - 81
Page 82

Basic Concepts
Preferences
Preferences – Audio page.
Setting
Description
Interface
Driver Select your audio driver from the drop-down menu.
Device Select the available devices if you have more than one audio
interface connected.
MASCHINE - Manual - 82
Page 83

Setting Description
Status This confirms whether your audio interface is currently running.
Sample Rate This displays the selected sample rate of your audio interface.
Please restart MASCHINE after changing the sample rate.
ASIO Config (Windows only) Click Open Panel to access specific controls related to your
audio interface. Please consult the documentation that came
with your audio interface for more information.
Latency macOS: This slider allows you to adjust the latency of your audio
interface in samples. Lower values result in a more immediate
playing response but are heavier on both the CPU and the audio
driver, and may result in audible clicks and pops. Larger values
are easier on the CPU, but introduce a larger latency (i.e., there
may be a small delay in sound playback when you play on the
pads). You should therefore experiment with this setting so that
it is as low as possible without overloading your CPU or
introducing any audio artifacts.
Windows: When using an ASIO driver, the Audio and MIDI
Settings panel displays an ASIO Config button instead of the
Latency slider. Click this button to open the settings window of
the selected ASIO driver.
Basic Concepts
Preferences
Routings
MASCHINE - Manual - 83
Page 84
Basic Concepts
Setting Description
Input Click Inputs to display the Routing Inputs. Here you can select
which inputs on your audio interface should be used for the four
stereo inputs of MASCHINE. Select the inputs of your audio
interface on the right column by clicking the fields: you will be
presented with a drop-down menu with all the available Inputs.
The choices made here will determine which inputs can be used
when sampling external sources, for example.
Output Click Output to display the Routing Outputs. Here you are
presented with a list of the 16 stereo outputs from MASCHINE:
In the right column, you can assign them to the outputs of your
audio interface. Click the fields in the right column to select the
desired outputs via a drop-down menu.
Adjusting Audio Preferences Using the Controller
You can access the Audio preferences directly from the controller. The options found here are
a replica of those found in the software.
Preferences
To access the Audio preferences using the controller:
1. Press SETTINGS to display the Settings page.
2. Press Button 2 (AUDIO) to access the audio settings.
3. Press the Page buttons to access the different pages: Interface (page 1), Input Routings
(page 2), Output Routings 1–4 (page 3), Output Routings 5–8 (page 4), Output Routings
9 –12 (page 5), Output Routings 13 –16 (page 6).
→ The selected page is displayed, and Knobs 1–8 will dynamically change to represent the
parameters.
Page 1: Interface
Interface settings for the selected Audio device are configured on page 1 of the Audio preferences.
To configure the Interface settings for the selected audio interface:
► Use the page buttons to select page 1: Interface.
MASCHINE - Manual - 84
Page 85

▪ Turn Knob 1 (DRIVER) to select an audio driver.
▪ Turn Knob 2 (DEVICE) to select an alternative audio device.
▪ Turn Knob 3 (SAMPLE RATE) to select a sample rate.
▪ Turn Knob 4 (BUFFER SIZE) to adjust the buffer size.
Page 2: Input Routings
Input routing is configured on page 2 of the Audio preferences.
To configure the Input routing for the selected audio interface:
▪ Use the page buttons to select page 2: Input Routing.
▪ Turn Knobs 1–8 to configure the audio input routing as required.
Page 3–8: Output Routings
Output routing ports are spread across pages 3–8 of the Audio preferences.
To configure the Output routing for each port of the selected Audio Interface:
▪ Use the page buttons to select each Output Routing port.
▪ Turn Knobs 1–8 to configure each audio output port as required.
Basic Concepts
Preferences
► To save your settings and return to MASCHINE mode, press SETTINGS.
2.7.3 Preferences – MIDI Page
The MIDI page allows you to set up the MIDI input and output ports that you want to use with
MASCHINE.
► To display the MIDI page, click the MIDI tab on the left of the Preferences panel.
MASCHINE - Manual - 85
Page 86
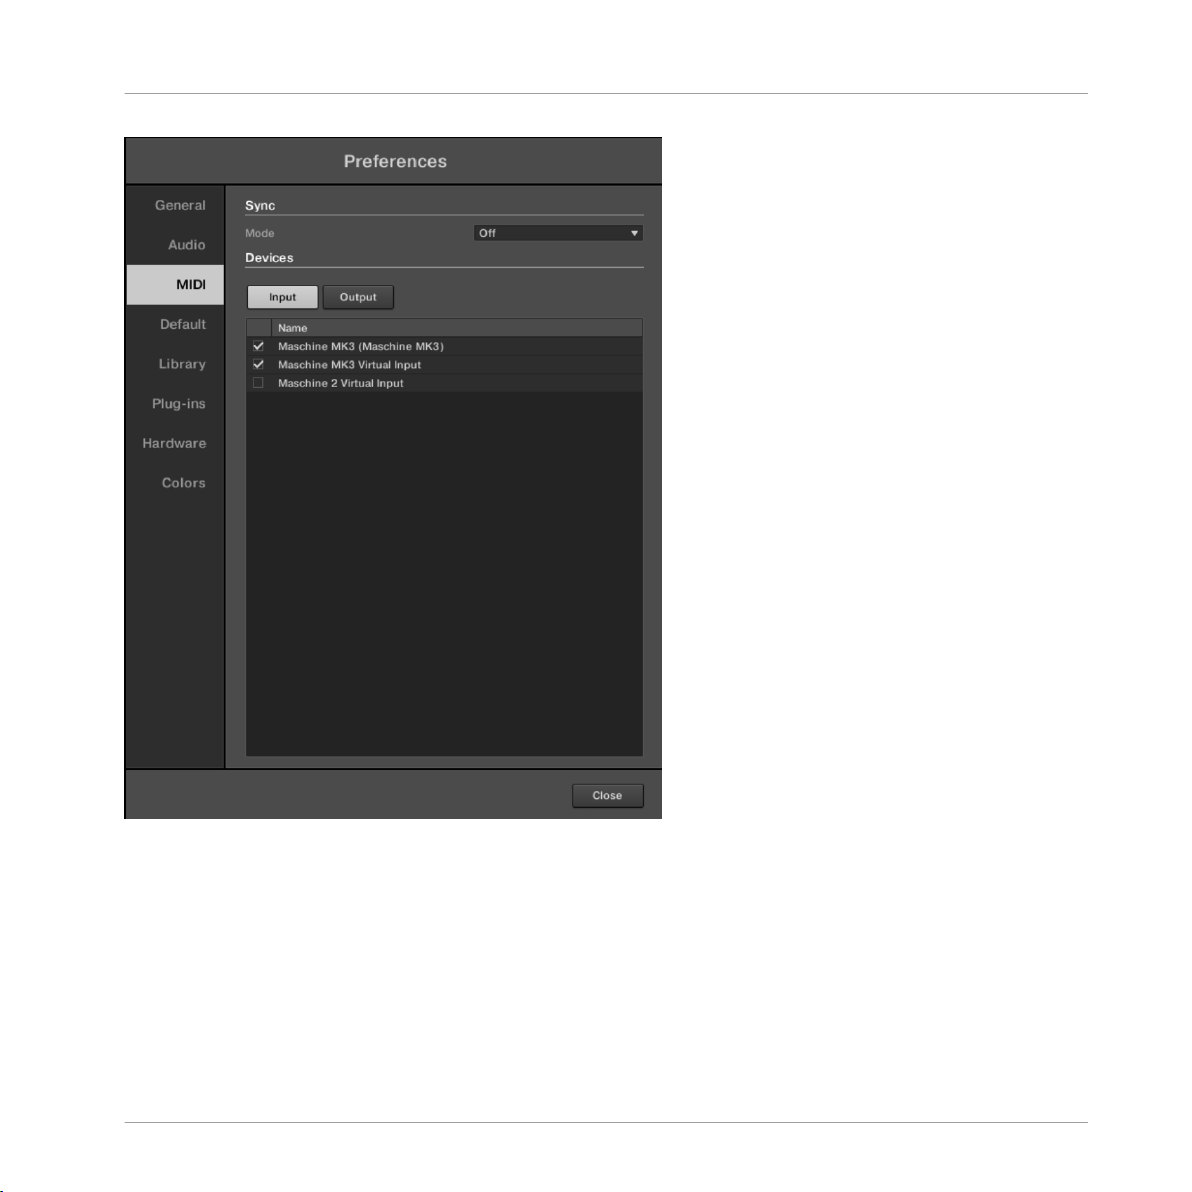
Basic Concepts
Preferences
The Preferences – MIDI page.
MASCHINE - Manual - 86
Page 87

Setting Description
Sync
Mode Click the drop-down menu to set the MIDI Sync mode preference
for MASCHINE:
Off: No MIDI sync mode is selected.
Master (Send Clock): If MASCHINE is running as a stand-alone
application, it can also send a MIDI Clock signal to any device that
is capable of receiving MIDI Clock. This could be hardware such as
a drum machine, another groove box, or even another software
sequencer.
Slave (Receive Clock): If MASCHINE is running as a stand-alone
application, it can be controlled externally via MIDI Clock by any
device that is capable of sending MIDI Clock. This could be
hardware such as a drum machine, another groove box or
sequencer, or even another software sequencer.
Please note that the Slave (Receive Clock) option is not available
when LINK is active. For more information on Link see ↑2.9,
Syncing MASCHINE using Ableton Link.
Basic Concepts
Preferences
Clock Offset (appears
when Mode is set to
Slave)
Click and move the Clock Offset slider to compensate for delay that
may occur during MIDI data transmission. Delayed MIDI Clock data
will cause external devices to respond too late, thus making your
track sound out of sync.
By adjusting the Clock Offset value you can set an amount of
latency to be compensated (in milliseconds). MASCHINE will then
send MIDI Clock events ahead of time as defined.
Devices
Inputs Click Input to display a list of all the available MIDI inputs of your
system. You can activate/deactivate each input by clicking the
fields in the Status column, which displays the current status of the
corresponding port.
MASCHINE - Manual - 87
Page 88

Basic Concepts
Setting Description
Outputs Click Output to display a list of all the available MIDI outputs of
your system. You can activate/deactivate each output by clicking
the fields in the Status column, which displays the current status of
the corresponding port.
Adjusting MIDI Preferences Using the Controller
You can access the MIDI preferences directly from the controller. The options found here are a
replica of those found in the software.
To access the MIDI preferences from your controller:
1. Press SETTINGS to display the Settings page.
2. Press Button 3 (MIDI) to access the hardware settings.
▪ Turn Knob 1 (MODE) to adjust the MIDI Sync mode preference.
▪ Turn Knob 2 (CLOCK OFFSET) to adjust the Clock Offset.
▪ Turn Knob 5 (SELECT) to select a MIDI Input Device.
Preferences
▪ Turn Knob 6 (STATUS) to enable or disable a MIDI Input Device.
▪ Turn Knob 7 (SELECT) to select a MIDI Output Device.
▪ Turn Knob 8 (STATUS) to enable or disable a MIDI Output Device.
► To save your settings and return to MASCHINE mode, press SETTINGS.
If you want MASCHINE to send other MIDI messages than MIDI Clock, in particular if you want to
control other MIDI-capable devices via the notes played in MASCHINE, please refer to section
↑11.2.5, Sending MIDI from Sounds.
2.7.4 Preferences – Default Page
The Default page allows you to define the default settings that will be used for each new
Project.
► To display the Default page, click the Default tab on the left of the Preferences panel.
MASCHINE - Manual - 88
Page 89
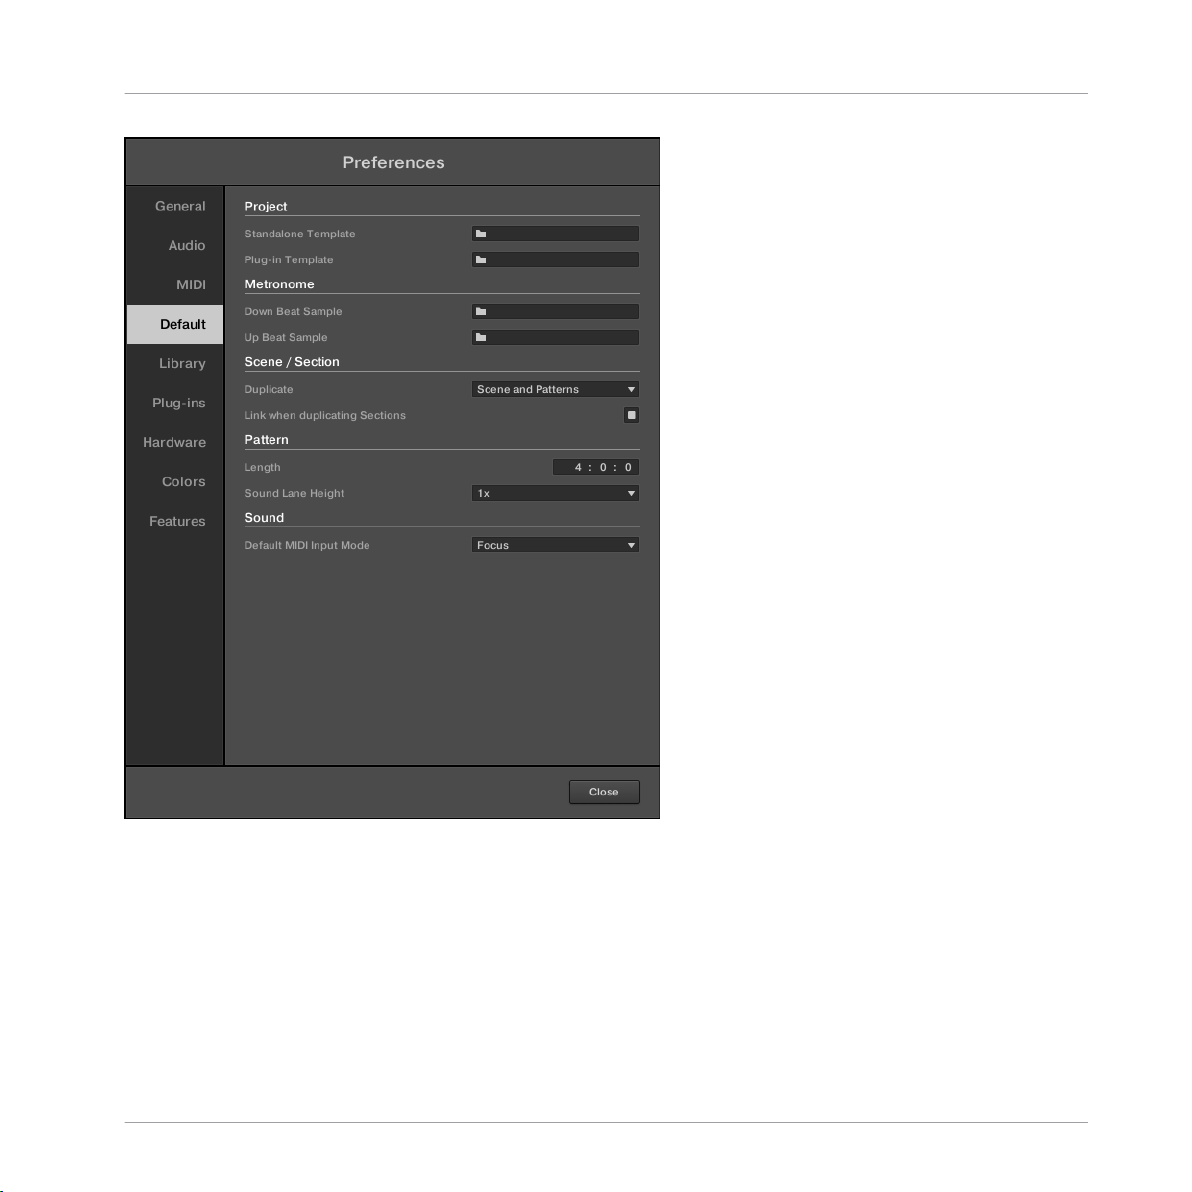
Basic Concepts
Preferences
The Preferences – Default page.
MASCHINE - Manual - 89
Page 90
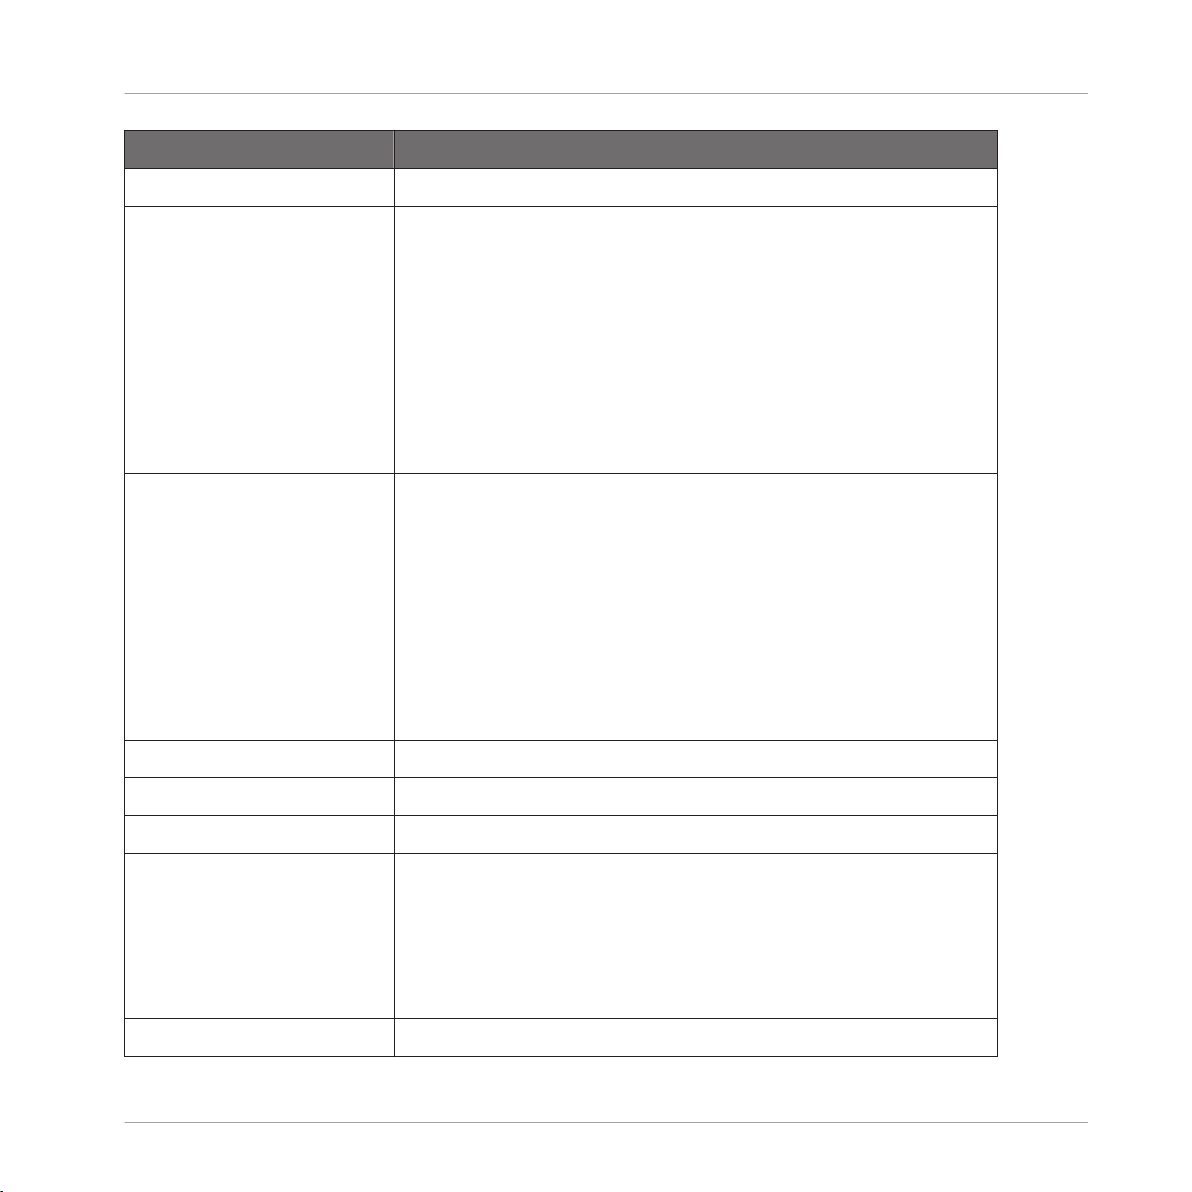
Setting Description
Project
Standalone Here you can select a Project to load automatically when you
start a new Project in MASCHINE used as a stand-alone
application. The field displays the location of the Template
Project selected for use. Click the folder icon to select another
Template Project. Any Project file can be used as a template;
this can be from the MASCHINE Library, or you could create a
file, for example with your preferred instruments and effects
already loaded into the Plug-in slots. If you have already set a
Template Project, click the cross icon to unset it and start new
Projects from scratch instead.
Plug-in Here you can select a Project to load automatically when
MASCHINE is used as a plug-in within a Digital Audio
Workstation. The field displays the location of the Template
Project selected for use. Click the folder icon to select another
Template Project. Any Project file can be used as a template;
this can be from the MASCHINE Library, or you can create a
file, for example with your preferred instruments and effects
loaded into the Plug-in slots. If you have already set a Template
Project, click the cross icon to unset it and start new Projects
from scratch instead.
Basic Concepts
Preferences
Metronome Settings
Down Beat Sample and Up
Beat Sample
Scene / Section
Here you can select audio files to be used as up and down beat
of the metronome, respectively. The fields display the locations
of the audio files selected for use. Click the fields to select
other files. Click the little crosses on the right of the fields to
remove the custom audio files and use the default metronome
sounds instead.
MASCHINE - Manual - 90
Page 91

Setting Description
Duplicate Select from the drop-down menu how the Duplicate function in
MASCHINE will operate when duplicating Scenes.
Scene Only
Only the Scene is duplicated. The result is a new unlinked
Scene with the same Patterns referenced.
Scene and Patterns
The Scene itself and additionally all Patterns are duplicated.
The new Scene and Patterns are now completely independent
from the originals.
Basic Concepts
Preferences
Link when duplicating
Sections
Click the checkbox to enable a linked copy of a Section when
using the Duplicate function. By default this feature is disabled.
When enabled, the Duplicate function will create a linked copy
of a Section. A linked copy will automatically be updated when
any instance of a linked Section is edited. This way, you don’t
need to keep track of which Section is the “original.”
Pattern
Length Enter the default length of new Patterns. The length is
measured in bars, beats, and sixteenths. To adjust the value,
click the desired number (bars, beats or sixteenths) and drag
your mouse vertically. For more information on Pattern Length
refer to: ↑10.1.6, Adjusting the Arrange Grid and the Pattern
Length.
Sound Lane Height Select the default height of the Sound lane in the Pattern Editor
by choosing between normal 1x or 2x zoom from the menu. 1x
displays all sixteen sounds, and 2x displays only the first eight
Sounds of a Group, making it easier to edit events.
MASCHINE - Manual - 91
Page 92

Basic Concepts
Setting Description
Sound
Default MIDI Input Mode MASCHINE allows you to play your Sound(s) via MIDI notes, for
example, from a MIDI keyboard. By default and without any
configuration, incoming MIDI notes on any MIDI port and any
MIDI channel will trigger the pitch of the focused Sound. In
addition, you can select that a Sound receives no MIDI input,
and also define the default setting for MIDI input by selecting
the Default MIDI Input Mode preference.
Select one of the following MIDI input mode options from the
drop-down menu:
Focus: MIDI input from any connected controller can be used to
trigger the focused (selected) Sound slot.
None: The selected Sound will not receive MIDI data.
2.7.5 Preferences – Library Page
The Library page allows you to edit the locations of all MASCHINE library files (both factory
and user) that appear in the LIBRARY pane of the Browser.
Preferences
The LIBRARY pane of the Browser is described in section ↑3.2, Searching and Loading Files from
the Library.
► To display the Library page click the Library tab on the left of the Preferences panel.
At the top of the page, the Factory and User buttons allow you to switch between the Factory
pane and the User pane.
Factory Pane
► To display the Factory pane, click the Factory button at the top of the Library page.
MASCHINE - Manual - 92
Page 93

Basic Concepts
Preferences
The Preferences panel – the Library page’s Factory pane.
The Factory pane displays all factory libraries available. These includes the MASCHINE Factory
Library, libraries imported from other NI products, as well as installed MASCHINE EXPANSIONS.
These libraries will appear in the Factory view of the Browser’s Library pane.
MASCHINE - Manual - 93
Page 94
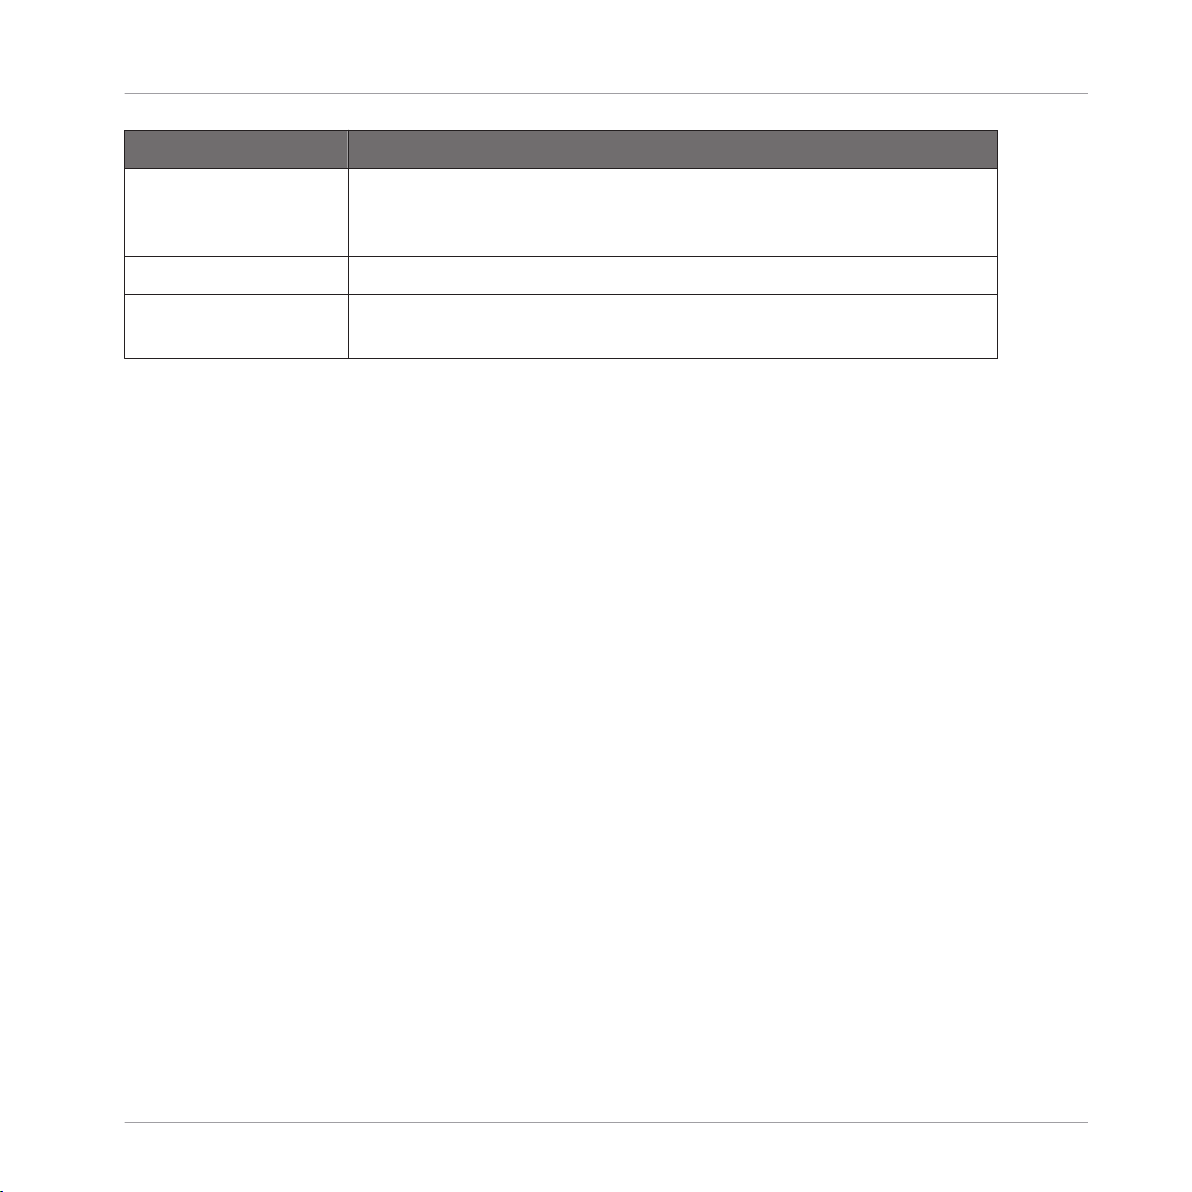
Element Description
Location column Displays the path of each library. If you have moved any library to
another location on your computer, click the folder icon on the left of
that library and select its new path.
Product column Displays the name of each product. These names cannot be edited.
Rescan button If you have made any change to a library (e.g., changed its location),
select it in the list and click the Rescan button to rescan that library.
User Pane
► To display the User pane, click the User button at the top of the Library page.
Basic Concepts
Preferences
MASCHINE - Manual - 94
Page 95
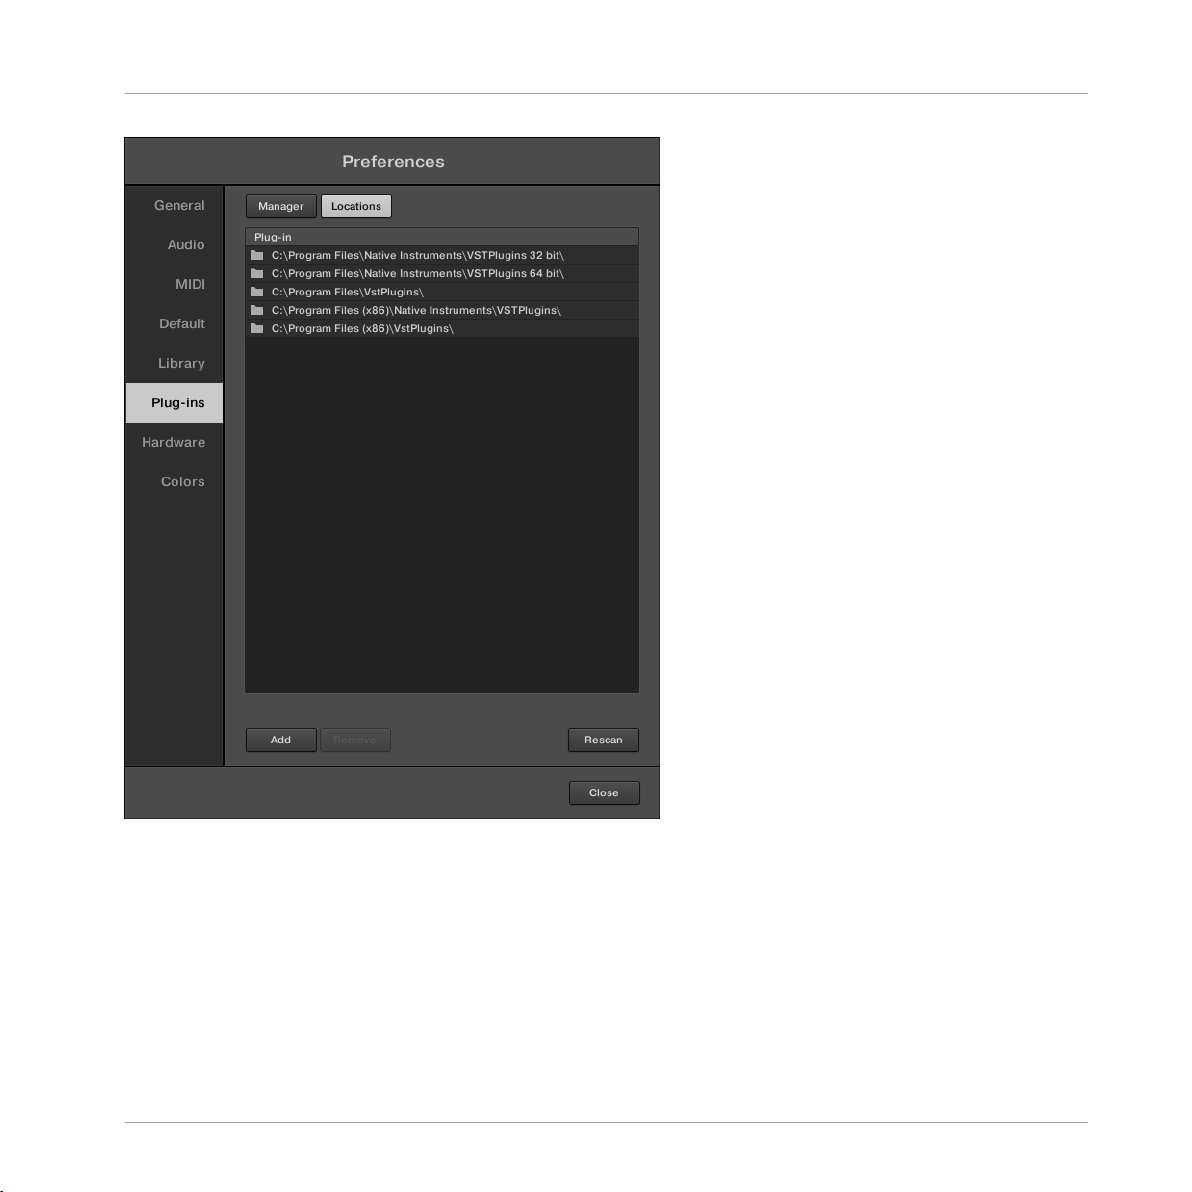
Basic Concepts
Preferences
The Preferences panel – the Library page’s User pane.
The User pane displays all user libraries currently in use. This includes the standard MASCHINE user directory as well as any other user directory you might have defined. These libraries will appear in the User view of the Browser’s Library pane.
MASCHINE - Manual - 95
Page 96

Element Description
Location column Displays the path of each library. If you have moved any library to
another location on your computer, click the folder icon on the left of
that library and select its new path.
Alias column Displays the alias stored for each library. Click an alias to edit it.
Defining aliases for your user folders is not mandatory, but it can be
of great help when working on different computers (see description
below). After adding a location (see Add below), click the field in the
new row and in the Alias column to set the alias for that new
location. The alias of the default user folder, Standard User
Directory, cannot be edited — this is the location where all your user
files will be stored by default.
Add button Click Add to manually add directories to the user library. See below
for more details.
Remove button Click Remove to remove the selected user library. Files will only be
removed from the MASCHINE Browser, not from your hard disk.
Rescan button If you have made any change to a library (e.g., added/removed files),
select it in the list and click the Rescan button to rescan that library.
Basic Concepts
Preferences
Scan user content for
changes at start-up
Click this checkbox to allow MASCHINE to scan for changes to the
User content directory during start-up.
checkbox
You can resize the Preferences panel at your convenience using the usual method on your operating
system. You can also resize each column by clicking and dragging the border between both column
headers.
User Content Folder Included in MASCHINE’s User Paths
Products from Native Instruments will store user-generated content in a centralized User Content folder. In MASCHINE this User Content folder is automatically added to the list of user
directories in the User pane of the Library page in the Preferences panel, and as a consequence its files are available in the MASCHINE Browser.
MASCHINE - Manual - 96
Page 97

Basic Concepts
The User Content folder can neither be renamed nor removed from the list. You can modify its
path in the Location column.
Standard User Directory Cannot Be Removed
The Standard User Directory can neither be renamed nor removed from the list in the User
pane of the Library page in the Preferences panel. You can modify its path in the Location column.
Cancelling Library Rescan
In the Library page of the Preferences panel, the Rescan button allows you to rescan the selected library (or all your libraries if none is selected) so that the MASCHINE Browser mirrors
any changes you have made to the files. Clicking this Rescan button triggers the scan and an
Updating Database dialog shows you the progress of the scan.
The Updating Database dialog includes a CANCEL button allowing you to interrupt the scanning process without harming the database permanently:
Preferences
The Updating Database dialog now includes a Cancel button.
MASCHINE - Manual - 97
Page 98

Basic Concepts
► Click CANCEL in the Updating Database dialog to interrupt the scan.
A Cancel Rescan dialog opens up asking you to confirm that you want to cancel the scan:
The dialog warns you that cancelling the scan may lead to inconsistencies or missing
items in your MASCHINE Library.
▪ If you still want to cancel the scan, click CANCEL RESCAN at the bottom right, and the
scan will be cancelled.
▪ If you prefer instead not to cancel the scan, click CONTINUE or press [Esc] on your com-
puter keyboard, and the scan will go on.
If you cancelled the scan, any inconsistencies or missing items in your MASCHINE Library will
be resolved by rescanning the same path(s) again (via the Rescan button mentioned above).
Preferences
In opposition to the rescan process described here, you cannot cancel the import of files into the
MASCHINE Library (via the FILES pane of the Browser or via the Library page of the Preferences
panel) nor the process of applying changes to the file tags and properties (via the Attribute Editor in
the Browser).
Using Aliases
The aliases available in the Alias column act as references to the paths shown in the Location
column. When you save a Project, the saved data includes both the path and the alias for each
file used in the Project. This will allow you to use a Project on different computers even if the
files used in the Project (e.g., Samples) are stored in different locations on each computer:
Simply define the same alias for these locations on each computer, and MASCHINE will replace the path saved on the first computer with the path set to the same alias on the second
computer in order to retrieve the files on this second computer, therefore avoiding the possibility of missing Samples.
MASCHINE - Manual - 98
Page 99

Basic Concepts
Adding Folders to the User Library
In the User pane of the Library page, you can add other folders to the user content of your MASCHINE Library. To do this:
1. Click Add at the bottom of the pane.
A folder selection dialog opens up.
2. In the dialog, navigate to the desired folder on your computer and click OK (Choose on
macOS).
→ All MASCHINE-compatible files found in the selected folder are added to your user con-
tent in MASCHINE.
Furthermore, the imported files will have their attributes (product/bank/sub-bank, Type/SubType/Mode tags, as well as properties) set as follows:
▪ For all file types, any attributes already in the files will be retained.
▪ For Samples, if the product/bank/sub-bank attributes are empty, they will be set to the
folders in which the Samples are located:
◦ The product will be set to the name of the folder you have selected.
Preferences
◦ If Samples reside in a subfolder of this folder, the subfolder name will be used as
bank.
◦ If Samples reside in a subfolder of this subfolder, the name of the lower subfolder will
be used as sub-bank.
By adding a folder to the user content of your MASCHINE Library, you make their files available in the Browser’s LIBRARY pane for quick searching and loading! For more information on
how to use the LIBRARY pane of the Browser, please refer to section ↑3.2, Searching and
Loading Files from the Library.
Paths to folders added via the IMPORT button in the Browser’s FILES pane will also show up here.
The only difference between adding folders via the Add button in Preferences panel, described
here, and via the IMPORT button in the FILES pane of the Browser is that the latter allows you to
directly tag the files as they are imported. See section ↑3.6.5, Using the Result List for more information on how to import folders via the FILES pane.
MASCHINE - Manual - 99
Page 100
Basic Concepts
Please note that the selected folder cannot contain, or be contained within, a folder already
listed in the User or Factory pane. If MASCHINE detects such a folder as you press OK
(Choose on macOS) in the folder selection dialog, a Duplicate Location message appears: Click
OK to return to the folder selection dialog and select another folder on your computer.
Removing Folders from the User Library
You can also remove any user folder from your Library — except the default user.
2.7.6 Preferences – Plug-ins Page
The Plug-ins page allows you to manage the Native Instruments and External Plug-ins you want
to use in MASCHINE.
► To display the Plug-ins page, click the Plug-ins tab on the left of the Preferences panel.
At the top of the page, the Manager and Locations buttons allow you to switch between the
Manager pane and the Locations pane.
Manager Pane
► To display the Manager pane, click the Manager button at the top of the Plug-ins page.
Preferences
In the Manager pane of the Plug-ins page, you can enable/disable VST/AU plug-ins, rescan
their directories, and set default presets for your Native Instruments and External Plug-ins.
When a Native Instruments or External Plug-in is disabled, it will not be available for loading
(from the various Plug-in menus in the software and from the Plug-in Browser on your controller). If, for example, you do not use certain VST plug-ins in MASCHINE, it could be useful to
disable them so that they do not overload the list of available Plug-ins.
For more information on Native Instruments Plug-ins, External Plug-ins, and other Plug-ins in MASCHINE, please refer to chapter ↑6, Working with Plug-ins.
MASCHINE - Manual - 100
 Loading...