How it Works
Log In / Sign Up
Buy Points
How it Works
FAQ
Contact Us
Questions and Suggestions
Users
Miele
Loading...
P
PT7136SS
3
PT7138SS
2
PT7186208V
PT7186240V
2
PT7188
3
PT7189208V
PT7189240V
PT8257 EL BSS
PT8257 WP
39
PT8303
2
PT8337 HW
4
PT8407E
3
PT8407EL
11
PT8407 HW
7
PT8407S
3
PT8507E
3
PT8507 HW
4
PT8507S
4
PT8807E
4
PT8807 HW
7
PT8807S
4
PTD 701
5
PTD 701 AE RO
PTD 701 AE RO DOS
PTD 702
6
PTD 702 AE RO
PTD 702 AE RO DOS
PTD 703
6
PTD 704
6
PTT 7189
PTT 7189 EL
5
PTT 7189 Vario
11
Pulver
PUR 60 W
2
PUR 66 W
2
PUR 67 W
PUR 68 W
36
PUR88W
9
PUR 90 D
2
PUR 90 W
2
PUR 91 D
2
PUR 96 D
PUR 96 W
2
PUR 97 W
5
PUR 98 D
33
PUR 98 W
40
PUR 98 W CH
PW 200
PW 413
46
PW 413 Lavapiu
8
PW 413S
PW 413 SES
9
PW 418
48
PW 418 Lavapiu
8
PW 418 SES
9
PW 5055
PW 5060
20
PW 5061 CH
3
PW 5062
16
PW 5062 ECO SPEED
PW 5064
6
PW 5064 MopStar 60
25
PW 5064 Professional
PW 5065
29
PW 5065 AV
8
PW 5065 AV ED
PW 5065 AV LW
PW 5065 LP
8
PW 5065 OS
3
PW 5068 CH
3
PW 5070 CH
3
PW 5082
6
PW 5082 AV
6
PW 5082 EL AV
PW 5082 EL LP
PW 5082 LP
6
PW 5082 Professional
PW 5082 XL
14
PW 5084 Mopp Professional
PW 5084 MOPSTAR 80
7
PW 5084 XL MopStar 80
15
PW 5104 Mopp Professional
PW 5104 MopStar 100
20
PW 5105
PW 5105 EL
2
PW 5105 EL AV
8
PW 5105 EL LP
8
PW 5105 Vario
25
PW 5105 Vario ISS
PW 5105 Vario Professional
PW 5105 Vario SV
2
PW 5134
2
PW 5134 MF
2
PW 5134 MOPSTAR 130
10
PW 5134 Professional
PW 5136
14
PW 5136 MF
2
PW 5136 WEK
2
PW 5243
PW 5323
Loading...
Loading...
Nothing found
PW 413 SES
Installation diagram
28 pgs
1.72 Mb
0
Installation diagram [de]
32 pgs
1.73 Mb
0
Instructions Manual
102 pgs
4.29 Mb
0
Instructions Manual
72 pgs
3.86 Mb
0
Operating instructions
74 pgs
3.65 Mb
0
User manual
70 pgs
3.61 Mb
0
User manual
74 pgs
3.83 Mb
0
User manual
74 pgs
3.89 Mb
0
User manual [pt]
72 pgs
3.86 Mb
0
Table of contents
Loading...
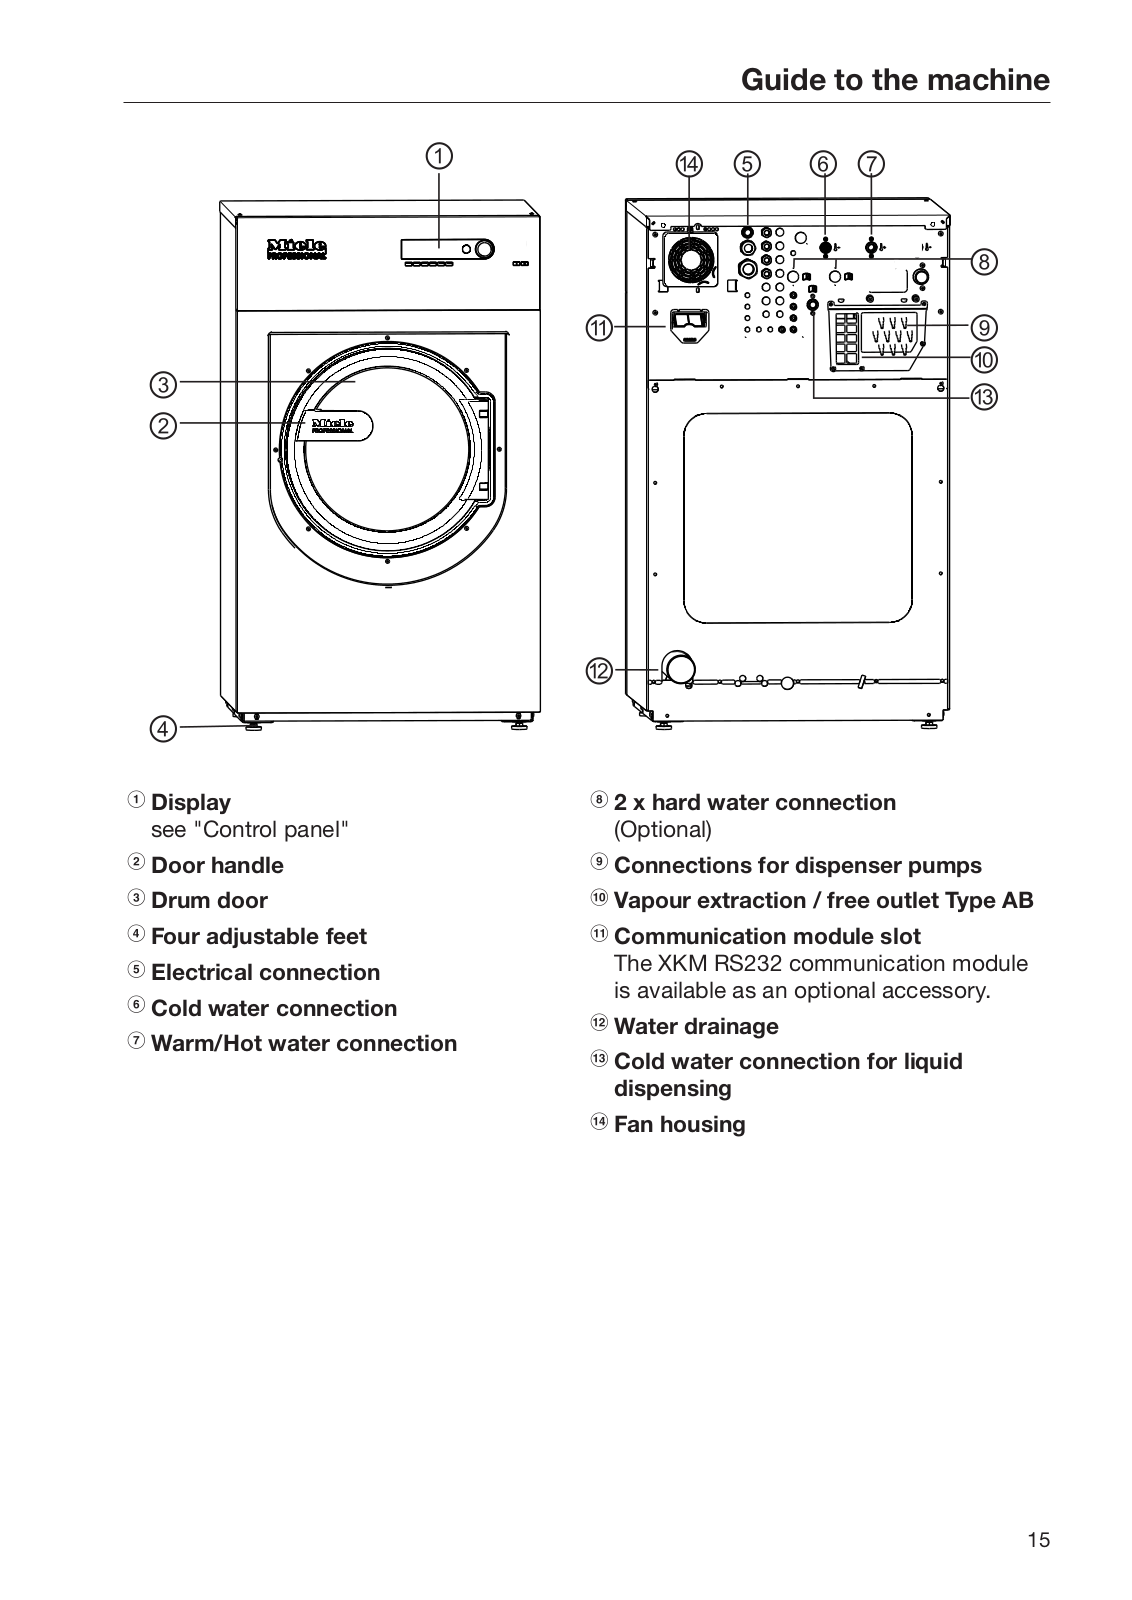
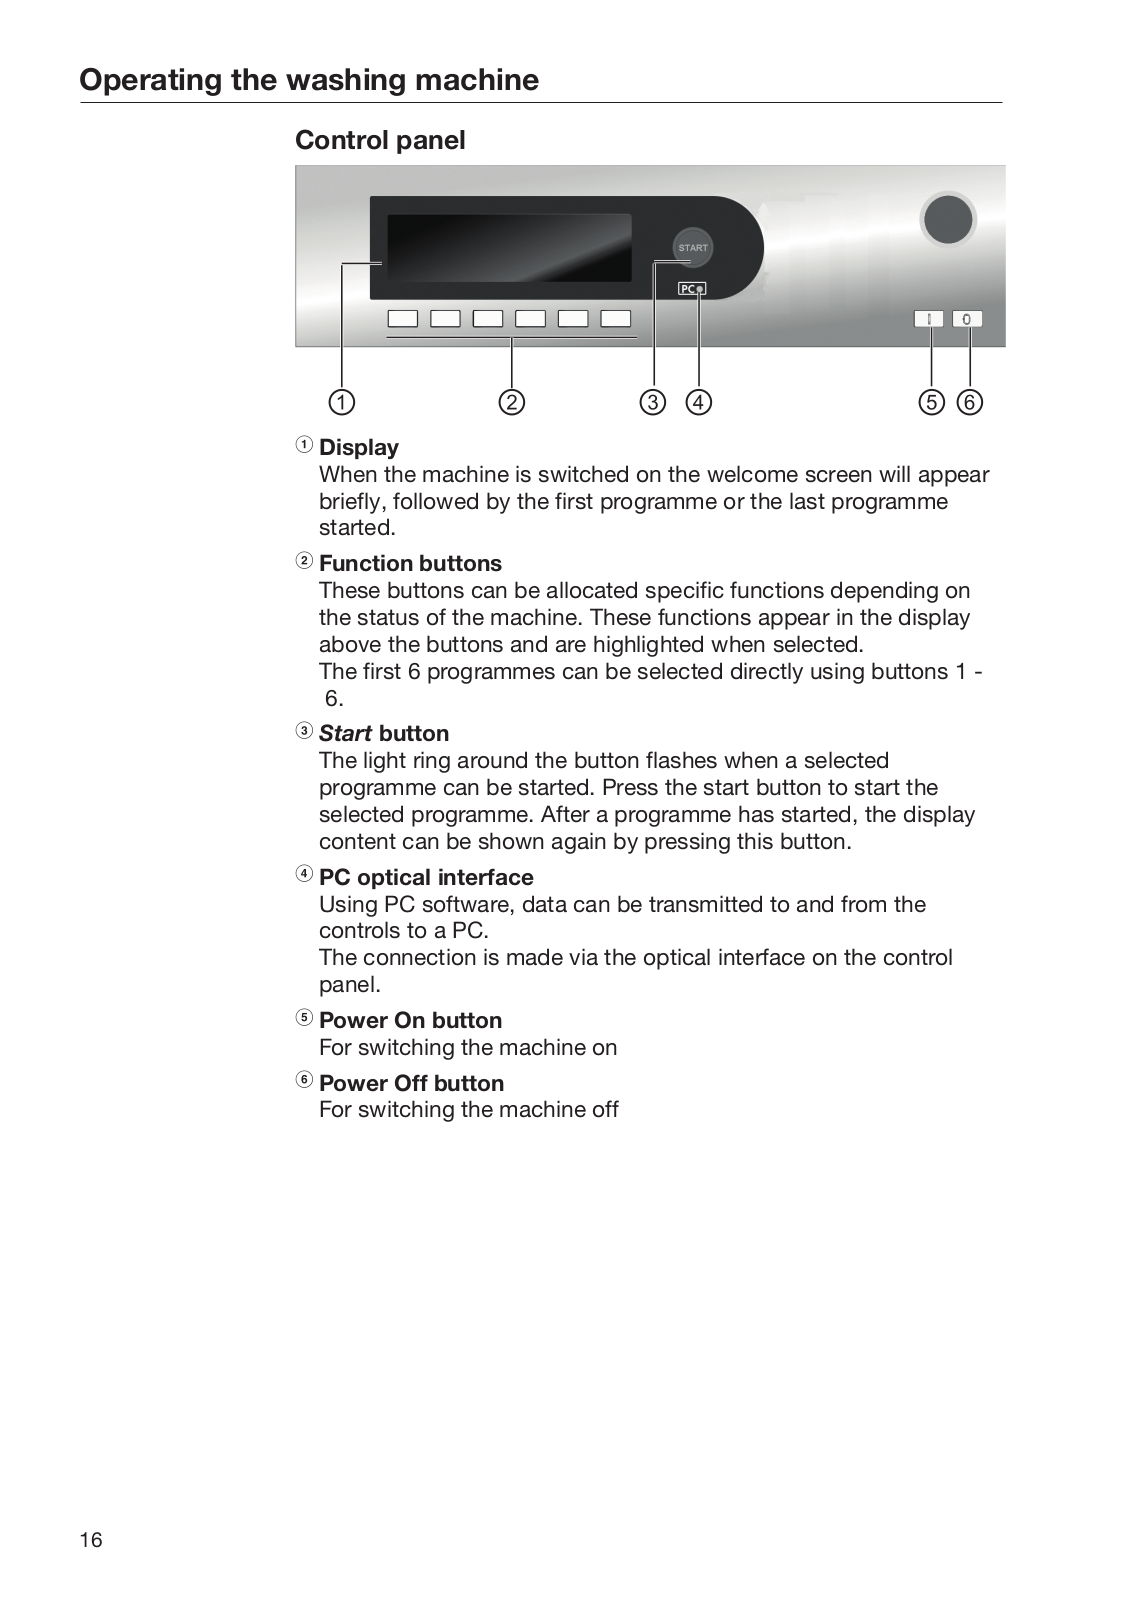
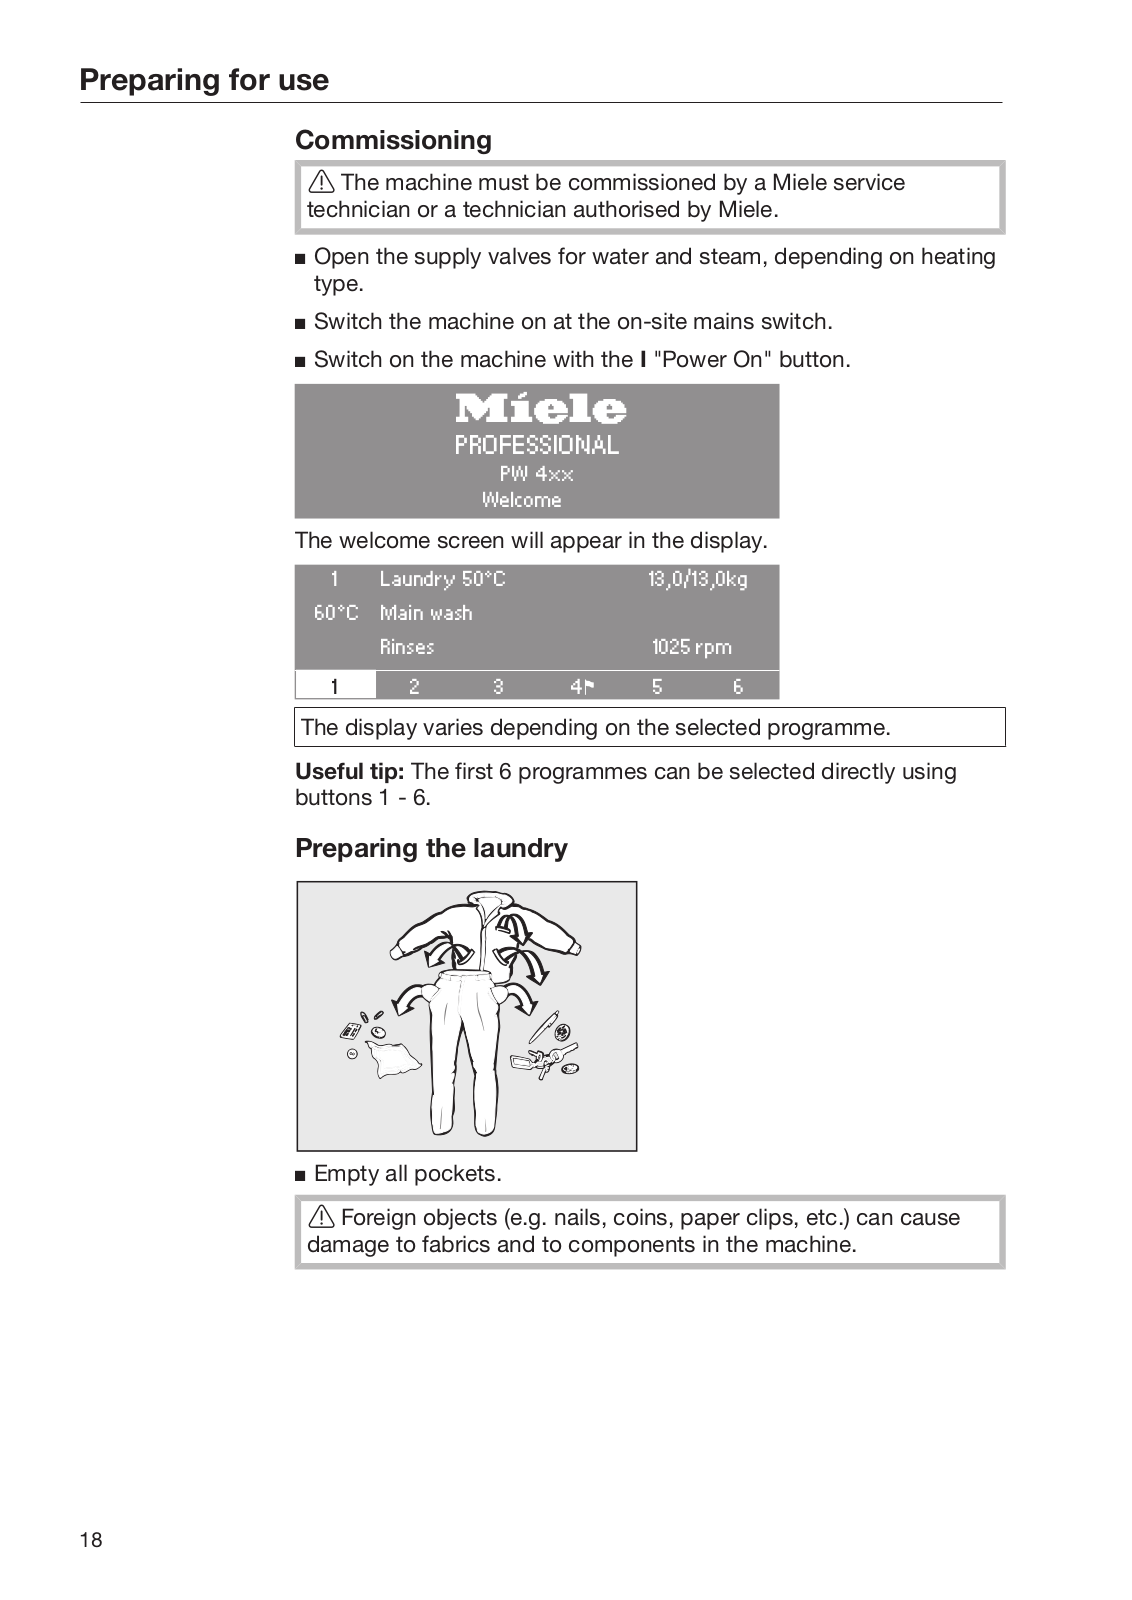
Miele PW 413 SES, PW 418 SES Operating instructions
...
Miele Operating instructions
Download
Specifications and Main Features
Frequently Asked Questions
User Manual
Download
Loading...
+
51
hidden pages
Unhide
You need points to download manuals.
1 point = 1 manual.
You can buy points or you can get point for every manual you upload.
Buy points
Upload your manuals