


Makita EVH2000 Manual
English / French / German
Italian / Dutch / Spanish / Português
Power Sprayer Super pulvérisateur Sprühgerät Spruzzatore a motore Motorsproeier
Pulverizadores Motorizados Pulverizador Motorizado
EVH2000
INSTRUCTION MANUAL |
Important: |
|
|
|
Read this instruction manual carefully before putting the |
into |
|||
operation and strictly observe the safety regulations! Preserve instruction |
||||
|
manual carefully! |
|
|
|
MANUEL D’INSTRUCTIONS |
Recommandation importante: |
|
|
|
Lire soigneusement ce manuel d’instructions avant de mettre la |
|
|||
en service et observer rigoureusement les consignes de sécurité! |
||||
|
||||
|
Conserver soigneusement ce manuel d’instructions. |
|
||
BETRIEBSANLEITUNG |
Wichtlg: |
|
|
|
Bitte lesen Sie dieses Anweisungshandbuch sorgfältig durch, bevor Sie die |
||||
in Betrieb nehmen, und beachten Sie die Sicherheitsvorschriften |
||||
|
||||
|
strikt! Bewahren Sie das Anweisungshandbuch sorgfältig auf. |
|
||
ISTRUZIONI D’USO |
Importante: |
|
|
|
Prima di mettere in funzione il |
, leggere attentamente il |
|||
presente manuale; rispettare rigorosamente le norme di sicurezza! Conservare |
||||
|
||||
|
il manuale delle istruzioni per l’uso! |
|
|
|
GEBRUIKSAANWIJZING |
Belangrijk: |
|
|
|
Lees voor het in gebruik nemen van de |
deze gebruiksaarwijzing |
|||
zorgvuldig door en neem alle veiligheidsvoorschriften in acht. Bewaar de |
||||
|
gebruiksaanwijzing voor eventuele naslag. |
|
|
|
MANUAL DE INSTRUCCIONES |
Importante: |
|
|
|
Leer cuidadosamente este manual de instrucciones antes de poner en marcha |
||||
la máquina y observar estrictamente las normas de seguridad. Conservar este |
||||
manual de instrucciones con cuidado.
MANUAL DE INSTRUÇÕES
English
Thank you very much for purchasing a MAKITA POWER SPRAYER. We are pleased to offer you a product that is the result of an extensive development program and many years of knowledge and experience.
To safely obtain the best possible results from your MAKITA POWER SPRAYER, please read this manual thoroughly before using the machine, and follow all instructions given herein to ensure proper operation.
Table of Contents |
|
|
|
|
|
Page |
|||||
Symbols |
|
2 |
|||||||||
Safety instructions |
|
3 |
|||||||||
Technical data |
|
|
|
|
|
|
|
|
7 |
||
|
|
|
|
||||||||
Designetion of parts |
|
8 |
|||||||||
Assembly instructions |
|
9 |
|||||||||
Before start of operation |
|
10 |
|||||||||
Mixing aguricultual chemicals |
|
12 |
|||||||||
Starting the engine |
|
12 |
|||||||||
Stopping the engine |
|
14 |
|||||||||
Operation |
|
15 |
|||||||||
Inspection and maintenance |
|
16 |
|||||||||
Troubleshooting |
|
19 |
|||||||||
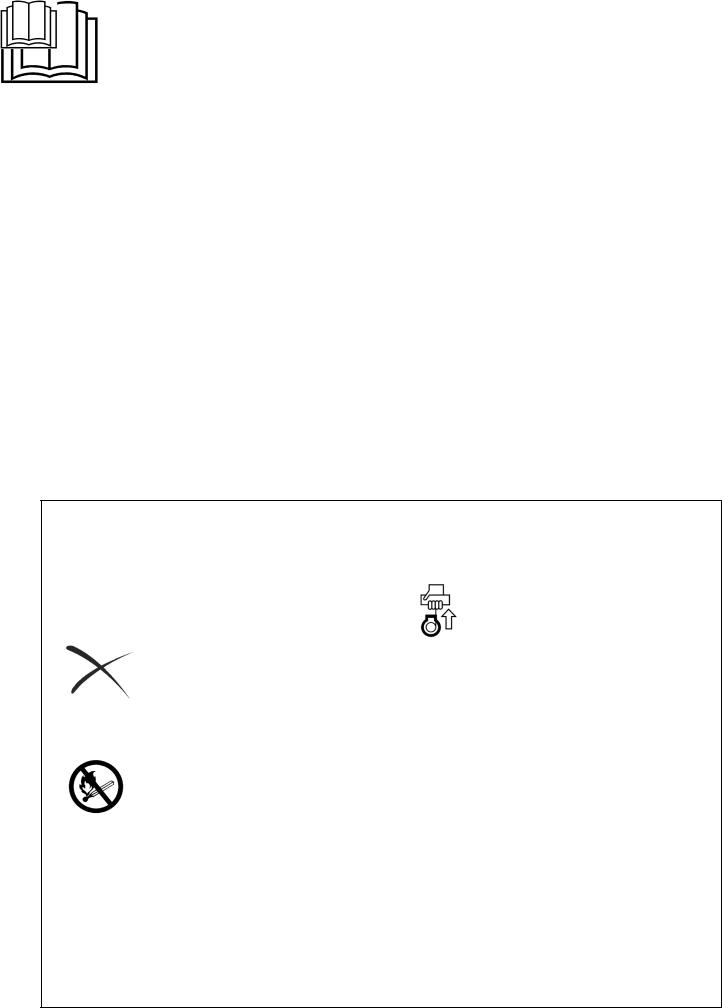
SYMBOLS
It is very important to understand the following symbols when reading this instruction manual.
Read, Understand and Follow Instruction
Manual |
Fuel(Gasoline) |
|
|
||
WARNING/DANGER |
Engine-manual Start |
|
Forbidden |
Emergency Stop |
|
No smoking |
First Aid |
|
No Open Flame |
ON/START |
|
Wear protective gloves |
OFF/STOP |
|
Keep the area of Operation |
Recycling |
|
clear of all persons and pets |
||
|
||
Wear eye protection, protective mask |
|
|
and ear protection |
|
2

SAFETY INSTRUCTIONS
General Instructions
–To ensure correct and safe operation, the user must read, understand and follow this instruction manual to assure familiarity with the handling of the power sprayer. Users insufficiently informed will risk danger to themselves as well as others due to improper handling.
–It is recommended only to loan the power sprayer to people who have proven to be experienced with power sprayers.
–Always hand over the instruction manual.
–First-time users should ask the dealer for basic instructions to familiarize oneself with the handling of a power sprayer.
–Children and young persons aged under 18 years must not be allowed to operate the power sprayer. Persons over the age of 16 years may however use the tool for the purpose of being trained only while under the direct supervision of a qualified trainer.
–Use power sprayer with the utmost care and attention.
–Operate the power sprayer only if you are in good physical condition.
–Perform all work conscientiously and carefully. The user has to accept responsibility for others.
–Never use the power sprayer while under the influence of alcohol or drugs.
–Do not use the unit when you are tired.
–Save these instructions for future referral.
Personal protective equipment
–The clothing worn should be functional and appropriate, i. e. It should be tight-fitting but not cause a hindrance. Do not wear jewelry, clothing or long hair which could be drawn into the air intake.
–In order to avoid head-, eye-, handor foot injuries as well as to protect you hearing the following protective equipment and protective clothing must be used during operation of the power sprayer.
Pay particular attention to the following regulations
–Please wear clothing that is functional and tight-fitting, without restricting movement when operating the power sprayer. Do not wear clothing or jewelry that could get tangled with foliage or the machine.
–For adequate protection against head, eye, feet, hand, and hearing injuries, the following protective equipment and clothing must be used when working with the power sprayer.
1.Always wear adequate face protection (mask, protective goggles, etc.) to protect the face, eyes and lungs from dust and chemicals.
2.To avoid hearing damage, wear adequate hearing protection at all times.
3.To protect skin from dust and chemicals, wear work clothes with long sleeves and long pants at all times.
4.Always wear rubber gloves when operating or servicing the power sprayer.
5.When using the power sprayer, always wear sturdy shoes with non-slip soles. Special work shoes are available to ensure good footing and protect against injury.
–Always secure loose clothing, hair, and accessories such as towels etc. Loose objects may become tangled in moving parts of the machine and cause serious injury.
Starting up the Power Sprayer
–Please make sure that there are no children or other people within a working range of 15 meters, also pay attention to any animals in the working vicinity. Never use the power sprayer in urban areas.
–Before operating, always check that the power sprayer is safe for operation: Check the security of the throttle lever. The throttle lever should be checked for smooth and easy action. Check for clean and dry throttle lever and test the function of the I - O switch.
Waterproof cap
Ear protection
Protective goggles
Long sleeves
Protective mask
Rubber gloves
Long pants
Work shoes
3
–Before starting the power sprayer, always make sure that the machine is in safe operational condition and check whether the throttle lever is functioning properly.
–Always check for and remove tools used during assembly of the machine. Attached tools may be flung from the engine when it is started, causing serious injury.
–Make sure that the power sprayer is clean and dry and test the STOP switch to ensure that it is functioning properly.
–Stop the engine immediately if experiencing engine problems.
–When operating the power sprayer, take extra care not to inhale exhaust fumes.
–Exhaust fumes are poisonous. Never operate the machine in an enclosed room or an area with insufficient ventilation (risk of suffocation and gas poisoning).
–Do not operate the power sprayer continuously for longer than one hour, and observe a rest time of at least 30 minutes between each working hour.
–Stop the engine when resting or when the power sprayer is left unattended. To protect other people and the power sprayer from damage, place the machine in a safe location and make sure that no combustible material is nearby. Never place a hot power sprayer onto dry grass or combustible material. Placing the machine on dry grass or near combustible material is extremely dangerous and may result in a fire.
–Never operate the engine if the muffler is malfunctioning.
–Always turn off the engine before moving the power sprayer to a new location.
–Wait until the engine has cooled down, empty the fuel tank, and securely attach the power sprayer before transporting the machine in a vehicle.
–Make sure that the fuel tank is completely empty and dry before shipping the power sprayer.
Refueling
–Shut off the engine during refuelling, keep well away from open flame and do not smoke.
–Avoid skin contact with petroleum products. Do not inhale fuel vapor. Always wear protective gloves during refuelling. Change and clean protective clothing at regular intervals.
–Take care not to spill either fuel or oil in order to prevent soil contamination (environmental protection). Clean the power sprayer immediately after fuel has been spilt. Allow wet cloths to dry before disposing in proper, covered container to prevent spontaneous combustion.
–Avoid any fuel contact with your clothing. Change your clothing immediately if fuel has been spilled on it (danger hazard).
–Inspect the fuel cap at regular intervals making sure that it stays securely fastened.
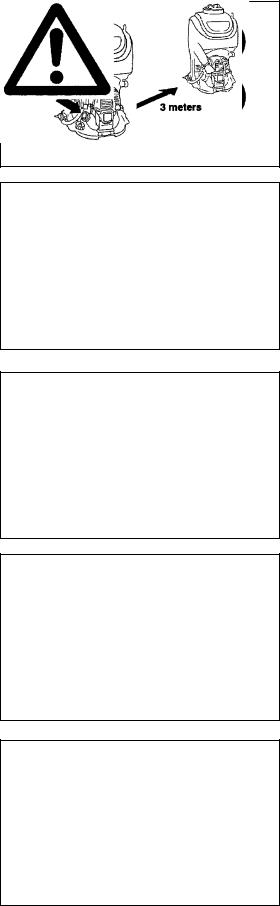
–Carefully tighten the locking screw of the fuel tank. Change locations to start the engine (at least 3 meters away from the place of refuelling).
–Never refuels in closed rooms. Fuel vapors accumulate at ground level (risk of explosions).
–Only transport and store fuel in approved containers. Make sure stored fuel is not accessible to children.
–Do not attempt to refuel a hot or a running engine.
Method of operation
–Only use the power sprayer in good light and visibility conditions. Never use the power sprayer at night. Do not use the power sprayer during rainfall or immediately after rain (danger of injury through slipping and falling in wet conditions).
–Beware of slippery and wet areas (ice and snow) as there is a danger of slipping, and always ensure secure footing.
–Never use the power sprayer while standing on a ladder.
–Never climb a tree to use the power sprayer from the tree.
–Never use the power sprayer while standing on an unstable surface.
–Do not point the nozzle of the power sprayer towards people or animals. Flying debris may cause serious injury.
–Do not touch the spark plug connector while the engine is running.
–Do not touch moving parts of the power sprayer while the engine is running.
–Do not touch the muffler or other engine parts during operation or for a period after the engine has stopped. These engine parts are extremely hot and may cause serious burns.
RestingTransportRefuellingMaintenanceTool replacement
3 meters
4

–Ensure that the toxicity of the pesticides or herbicides to be used is known before use, and carefully read related use instructions to familiarize yourself with the proper procedures for using the chemicals in question. If pesticides/herbicides come in contact with your skin, immediately rinse the affected area and thoroughly wash with soap. Firmly tighten the cap of the sprayer tank in order to avoid chemical leaks.
Maintenance instructions
–Be kind to the environment. Operate the power sprayer with as little noise and pollution as possible. In particular check the correct adjustment of the carburetor.
–Clean the power sprayer at regular intervals and check that all screws and nuts are securely tightened.
–Never service or store the power sprayer in the vicinity of open flames, sparks, etc.
–Always store the power sprayer in a well-ventilated locked room and with an emptied fuel tank.
Observe and follow all relevant accident prevention instructions issued by the trade associations and by insurance companies. Do not perform any modifications to the power sprayer as this will risk your safety.
The performance of maintenance or repair work by the user is limited to those activities as described in this instruction manual. All other work is to be done by Authorized Service Agents.
Use only genuine spare parts and accessories supplied by MAKITA.
Use of non-approved accessories and tools means increased risk of accidents and injuries. MAKITA will not accept any liability for accidents or damage caused by the use of any non-approved attachment or accessories.
First aid
In case of accident make sure that a well-stocked first-aid kit, is available in the vicinity of the operations. Immediately replace any item taken from the first aid kit.
When asking for help, please give the following information:
–Place of accident
–What happened
–Number of injured persons
–Extent of injuries
–Your name
Packaging
–The MAKITA power sprayer is delivered in a protective cardboard box to prevent shipping damage. Cardboard is a basic raw material and is therefore consequently reusable or suitable for recycling (waste paper recycling).
5

EC-DECLARATION OF CONFORMITY
Model; EVH2000
We declare under our sole responsibility that this product is in compliance with the following standards of standardized documents, EN292, EN55012 in accordance with Council Directives, 89/392/EEC, amended 98/37/EEC, 93/68/EEC, 89/336/EEC, amended 92/31/EEC.
Measured Sound Power: 98 dB
Guarantee Sound Power: 102 dB
These sound power levels wear measured in accordance with Council Directive, 2000/14/EC. Conformity assessment procedure: Annex V.
CE2007
Tomoyasu Kato
Director
Responsible Manufacturer:
Makita Corporation.
3-11-8,Sumiyoshi-cho, Anjo, Aichi, JAPAN
Authorized Representative in Europe:
Makita International Europe Ltd.
Michigan Drive, Tongwell, Milton kyenes, Bucks MK15 8JD, ENGLAND
6
TECHNICAL DATA
Model |
|
EVH2000 |
|
|
|
Dimensions: (length x width x height) |
mm |
380 x 420 x 635 |
|
|
|
Dry weight |
kg |
9.1 |
|
|
|
Chemical tank capacity |
L |
20 |
|
|
|
Pump
Type |
|
Horizontal opposed twin pistons |
|
|
|
Max. Pressure |
MPa |
2.5 |
|
|
|
Suction |
L |
7.1 |
|
|
|
Engine
Model |
|
EH025A |
|
|
|
Displacement |
cm3 |
24.5 |
|
|
|
Fuel |
|
Automobile gasoline |
|
|
|
Fuel tank capacity |
L |
0.5 |
|
|
|
Engine oil |
|
SAE 10-W-30 oil API SF or later (4-stroke automobile engine oil) |
|
|
|
Engine oil capacity |
L |
0.08 |
|
|
|
Caburetor |
type |
WALBRO WYL |
|
|
|
Ignition system |
type |
Solid state ignition |
|
|
|
Spark plag |
type |
NGK CMR6A (C type) |
|
|
|
Electrode gap |
mm |
0.7 - 0.8 |
|
|
|
Sound pressure levels
Sound pressure level (Lpa) to 98/37/EC |
dB |
84.0 |
|
|
|
Guaranteed sound power level (Lwa) to 2000/14/EC |
dB |
102.0 |
|
|
|
Note: 1. Use the oil and spark plug specified by MAKITA.
2. This specification is subject to change without prior notice.
7

DESIGNATION OF PARTS
|
|
|
|
|
|
|
|
|
|
|
|
|
|
|
|
|
|
|
|
|
|
|
|
|
|
|
|
|
|
|
|
|
|
|
|
|
No |
DESIGNATION OF PARTS |
No |
DESIGNATION OF PARTS |
No |
DESIGNATION OF PARTS |
||
|
|
|
|
|
|
|
|
|
1 |
I-O Switch |
9 |
Muffler |
17 |
Quick connector |
|||
|
|
|
|
|
|
|
|
|
2 |
Throttle lever |
10 |
Oil gauge |
18 |
Handgrip |
|||
|
|
|
|
|
|
|
|
|
3 |
Choke lever |
11 |
Primer Pump |
19 |
Nozzle lever |
|||
|
|
|
|
|
|
|
|
|
4 |
Air cleaner cover |
12 |
Chemical tank drain cap |
20 |
Nozzle pipe |
|||
|
|
|
|
|
|
|
|
|
5 |
Plug cover |
13 |
Chemical tank cap |
21 |
Nozzle pipe holder |
|||
|
|
|
|
|
|
|
|
|
6 |
Starter knob |
14 |
Chemical tank |
22 |
Nozzle (wide angle twin head) |
|||
|
|
|
|
|
|
|
|
|
7 |
Fuel tank |
15 |
Pressure dial |
23 |
|
|
||
|
|
|
|
|
|
|
|
|
8 |
Fuel tank cap |
16 |
Sprayer hose |
24 |
|
|
||
|
|
|
|
|
|
|
|
|
8
ASSEMBLY INSTRUCTIONS
CAUTION: Before performing any work on the power sprayer, always switch off the motor and pull the spark plug connectors off the spark plug. Always wear protective gloves!
CAUTION: Start the power sprayer only after having assembled it completely.
1. ASSEMBLY OF NOZZLE
Refer to the figure on the previous page (DESIGNATION OF PARTS) to assemble handgrip, nozzle lever, nozzle pipe and nozzle. Be careful to
put parts together properly to prevent leaks.
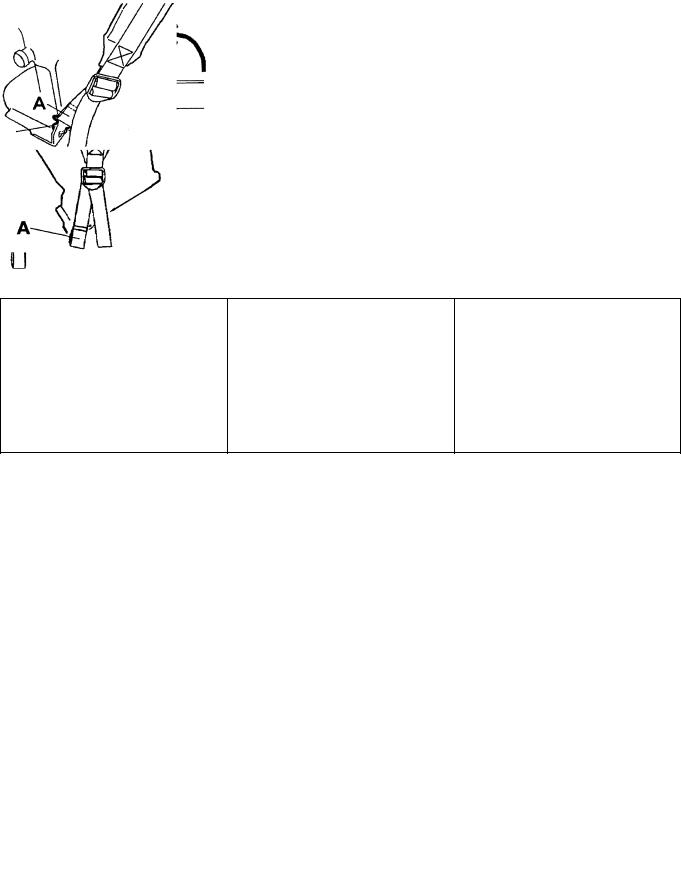
2. SETTING OF SHOULDER HARNESS
Set the two shoulder harnesses on a chemical tank in a way shown below without any twists of the shoulder harnesses. Instructions are given
about the ones for one of the shoulder harnesses.
Setting upper part of shoulder harness
|
Chemical tank |
|
|
Pull the harness in the direction of |
|
the arrow and put its folded end at |
|||||
|
|
|
|||
|
|
|
|
||
|
|
|
|
the lower end of the buckle. |
Upper buckle
Setting lower part of shoulder harness
|
|
Put the part 'A', of the harness |
|
|
through this gap of the metallic hook. |
Upper buckle |
|
|
|
|
Then raise the harness to |
|
|
the degree of 90, in the |
|
|
direction of the arrow. |
Lower buckle |
Chemical tank |
Metallic hook |
|
|
|
|
|
Repeat the same instructions for the |
|
|
other shoulder harness to finish the |
|
|
setting. |
|
Put the back harnesses 'A'. one of the |
|
|
twooverlapped harnesses, at the metallic |
|
|
hook in a way shown below at and . |
|
|
|
Metallic hook |
|
|
|
9

BEFORE START OF OPERATION
Inspection and Refill of Engine Oil
–Perform the following procedure, with the engine cooled down.
–While keeping the engine level, remove the oil gauge, and confirm that the oil is filled within the upper and lower limit marks.
When the oil is in short in such a way that the oil gauge touches the oil only by its tip, in particular with the oil gauge remaining inserted in the crankcase without screwing-in (Fig. 1), refill new oil near the port (Fig. 2).
–For reference, the oil refill time is about 10h (10 times or 10 tanks of oil refill).
–If the oil changes in color or mixes with dirt, replace it with new one. (For the interval and method of replacement, refer to P 16)
Recommended oil: SAE 10W-30 oil of API Classification, Class SF or higher (4-stroke engine for automobile)
Oil volume: Approx. 0.08 L
Note: If the engine is not kept upright, oil may go into around the engine, and may be refilled excessively.
If the oil is filled above the limit, the oil may be contaminated or may catch fire with white.
Point 1 in Replacement of Oil “Oil Gauge”
–Remove dust or dirt near the oil refill port, and detach the oil gauge.
–Keep the detached oil gauge free of sand or dust. Otherwise, any sand or dust adhering to the oil gauge may cause irregular oil circulation or wear on the engine parts, which will result in troubles.
–As an example to keep the oil gauge clean, it is recommended to insert the oil gauge on its knob side into the engine cover, as shown in Fig.3.
Upper limit
(Edge of oil refill port)
If oil adheres around this tip, refill new oil.
Fig.1 |
Fig.2 |
Oil gauge
Fig.3
10
1) Keep the engine level, and detach the oil gauge.
2)Fill oil up to the edge of the oil refill port. (Refer to Fig.2 of the preceding page).
Feed oil with the lubricant refill container.
3)Securely tighten the oil gauge. Insufficient tightening may cause oil leakage.
Point 2 in Replacement of Oil: “If oil spills out”
–If oil spills out between the fuel tank and engine main unit, the oil is sucked into through the cooling air intake port, which will contaminate the engine. Be sure to wipe out spilt oil before start of operation.
REFUELING
Handling of Fuel
It is necessary to handle fuel with utmost care. Fuel may contain substances similar to solvents. Refueling must be performed in a sufficiently ventilated room or in the open air. Never inhale fuel vapor, and keep fuel away from you. If you touch fuel repeatedly or for a long time, the skin becomes dry, which may cause skin disease or allergy. If fuel enters into the eye, clean the eye with fresh water. If your eye remains still irritated, consult your doctor.
Storage Period of Fuel
Fuel should be used up within a period of 4 weeks, even if it is kept in a special container in a well-ventilated shade. If a special container is not used or if the container is not covered, fuel may deteriorate in one day.
STORAGE OF MACHINE AND REFILL TANK
–Keep the machine and tank at a cool place free from direct sunshine.
–Never keep the fuel in the cabin or trunk.
Fuel
The engine is a four-stroke engine. Be sure to use an automobile gasoline (regular gasoline or premium gasoline).
Points for Fuel
–Never use a gasoline mixture which contains engine oil. Otherwise, it will cause excessive carbon accumulation or mechanical troubles.
–Use of deteriorated oil will cause irregular startup.
Refueling
WARNING: INFLAMMABLES STRICTLY PROHIBITED
Gasoline used: Automobile gasoline (unleaded gasoline)
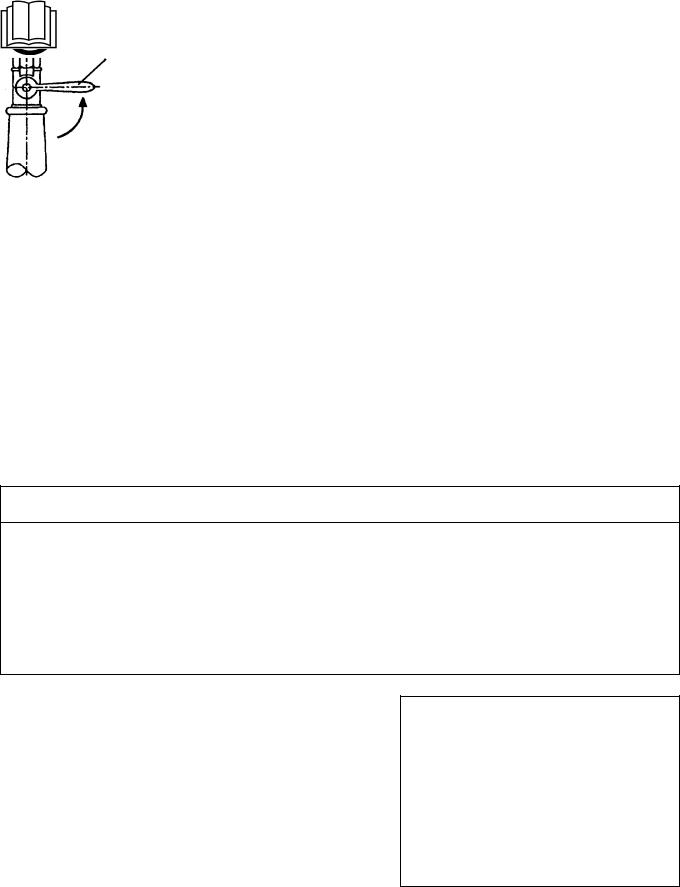
–Loosen the tank cap a little so that there will be no difference in atmospheric pressure.
–Detach the tank cap, and refuel, discharging air by tilting the fuel tank so that the refuel port will be oriented upward. (Never refill fuel full to the oil refill port.)
–Wipe well the periphery of the tank cap to prevent foreign matter from entering into the fuel tank.
–After refueling, securely tighten the tank cap.
•If there is any flaw or damage on the tank cap, replace it.
•The tank cap is consumable, and therefore should be renewed every two to three years.
Fuel tank cap
Fuel upper limit
Fuel tank
11
MIXING AGURICULTUAL CHEMICALS
1)Mixing aguricultual chemicals
1.Aguricultual chemicals are toxic. When working with aguricultual chemicals, strictly follow the instructions provided by the manufacturer at all times.
2.Always use the provided strainer when pouring aguricultual chemicals into the chemical tank.
3.Firmly tighten the chemical tank cap to prevent leaks.
4.If chemicals are to be mixed inside the chemical tank, alwys add water before other sguricultual chemicals.
CAUTION:
•Always handle agricultural chemicals with the utmost care. Should your skin come into contact with agricultural chemicals by accident, immediately rinse the affected area with large amounts of water.
2)Using a different type of chemical agent
1.Take extra care to thoroughly rinse the sprayer tank, pump and nozzle before adding different chemical agents to the sprayer tank. Mixing the residues of previously used agricultural chemicals with other chemical agents may cause toxin-induced diseases.
STARTING THE ENGINE
WARNING
•Never attempt engine start in a place where the fuel has been supplied. When starting the engine, keep a distance of at least 3m.
-Otherwise, it will may cause ignition or fire.
•Exhaust gas from the engine has toxic consequences. Do not operate the engine in a poorly-ventilated place. Such as in a tunnel, building, etc.
-Operating the engine in the poorly-ventilated place may cause poisoning by exhaust gas.
•In case of derection of any abnormality sound, odor, vibration after start, stop the engine immediately and carry out inspection.
-If the engine is operated without attending such abnomality, an accident may occur.
•Confirm that the engine stops when the stop switch is set to “O” position.
1)Before starting the engine, always confirm that the chemical tank contains fluid.
NOZZLE LEVER
2) Turn the nozzle lever to the CLOSED position. |
CLOSED |
|
12
 Loading...