


INSTALLATION INSTRUCTIONS
|
Mackie USB Driver for PC • October 2018 • V4.47.0 |
Version 4.47.0 |
First Time Installation for Windows®2 |
The Mackie USB Driver is designed to allow your Mackie USB audio interface to operate with Windows® 10 or later.
Users with Previous Driver Installations:
If you have previously installed a Mackie driver for your Mackie audio interface on your PC, refer to the “Updating Your Mackie Audio Driver” section on the following page.
System Requirements
Windows® 10 or later
Minimum Hardware Requirements
Intel Core 2 Duo 2 GHz processor 4 GB RAM
USB 2.0 port
Supported Devices
Mackie Big Knob Studio
Mackie Big Knob Studio+
Mackie Onyx Artist 1•2
Mackie Onyx Producer 2•2
Mackie DL16S
Mackie DL32S
Supported Software1
Any Windows® 10 or later ASIO/WDM host (Cubase, Nuendo, Pro Tools, Sonar, Tracktion, etc.)
Important Notes
Device Aggregation: The Mackie USB driver does not support device aggregation on Windows (i.e. using multiple Mackie audio interfaces simultaneously).
1.Make sure the Mackie audio interface is connected to the computer and turned on.
2.Unzip and extract the .zip contents of the
USB driver download to the desktop for easy installation.
3.Inside the unzipped and extracted Mackie USB folder, double-click MackieSetup.exe
4.Follow the on-screen instructions until the installation is complete. You may be prompted by the User Account Control to allow changes to your computer. If so, select 'Yes' to continue.
1 Not all software supports all OS versions. |
2 The screen shots may vary dependent on the device being used and the version of Windows being used. |
page 1 of 4
Updating Your Mackie Audio Driver
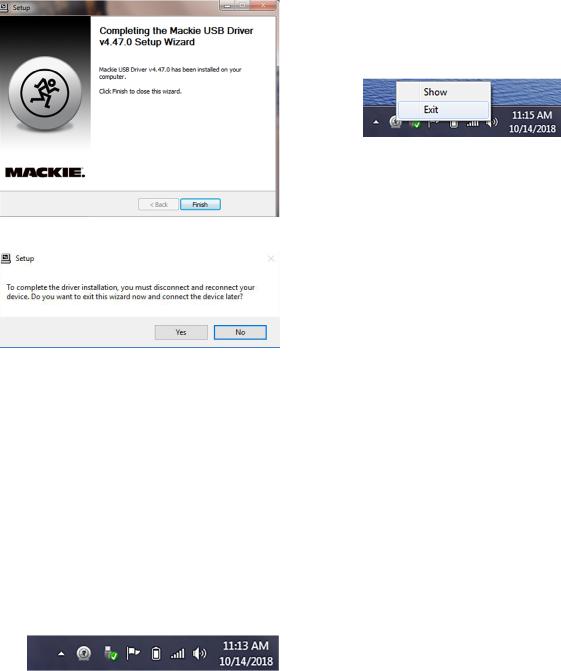
1. Right-click the Mackie Running Man icon and select 'Exit'. Then disconnect the USB cable from the device.
2. Via the Start button, navigate to Control Panel > Programs and Features and locate the previous driver installation.
3. Click the Uninstall button.
4. Follow the on-screen instructions until the un-installation is complete.
5. Download and install the new driver following the steps on page 1.
5.After a successful installation message, close the installer dialogue box and start recording!
Note: At this phase, you may also delete the .zip and extract files you downloaded from the Mackie website.
The audio interface is now ready to use with any standard ASIO Digital Audio Workstation software of your choice as well as with consumer audio applications such as iTunes® or Windows® Media Player. A Mackie Running Man icon has also been installed into the system tray for easy access to the driver Control Panel.
NOTE:
You may need to make sure the Running Man / Mackie Task Bar application stays in view in order to easily access the Control Panel where latency mode and buffer size are changed. Do this by navigating to Control
Panel > Notification Area Icons and selecting “Show icon and notifications” in the dropdown next to Mackie Task Bar. This will ensure that the Running Man logo remains in the system tray. Here it may be easily clicked to launch the driver control panel.
page 2 of 4
 Loading...