


DVD DIGITAL CINEMA SYSTEM
TH-A5
Consists of XV-THA5 and SP-THA5
STANDBY/ON
AUDIO
|
|
|
VCR |
|
|
CONTROL |
|
TV |
VCR |
OFF |
ON |
TOP MENU |
MENU |
TV CHANNEL |
|
AUDIO/ |
SUBTITLE |
TV VOLUME |
|
FM MODE |
|||
DISPLAY |
RETURN |
STEP |
TV/VIDEO |
|
TUNER PRESET |
|
|
DOWN |
|
|
UP |
REW |
|
|
FF |
|
VCR CHANNEL |
|
|
|
TUNING |
|
|
B.SEARCH |
|
|
F.SEARCH |
|
ENTER |
|
|
|
VOLUME |
|
|
DVD |
FM/AM |
AUX |
MUTING |
COMPACT
DIGITAL VIDEO
STANDBY |
|
|
|
AUDIO/FM MODE |
|
|
|
STANDBY/ON |
|
|
D I G I T A L |
DSP |
VOLUME |
SOURCE |
S U R R O U N D |
|
|
DVD DIGITAL CINEMA SYSTEM TH-A5 |
D I G I T A L |
RM-STHA5U
DVD CINEMA SYSTEM
INSTRUCTIONS
For Customer Use:
Enter below the Model No. and Serial No. which are located either on the rear, bottom or side of the cabinet. Retain this information for future reference.
Model No.
Serial No.
LVT0837-013A
[US, UB]
Warnings, Cautions and Others /
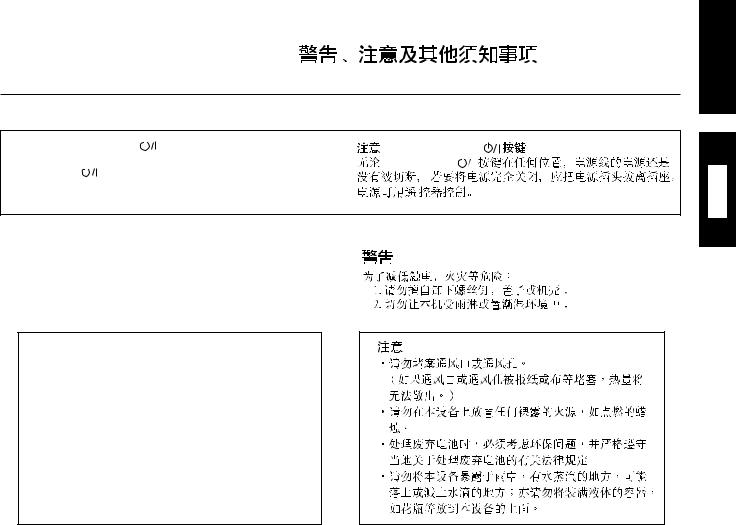
Caution –– STANDBY/ON |
|
switch! |
|
|
|
STANDBY/ON |
|||||
|
|||||||||||
|
|
|
|||||||||
Disconnect the mains plug to shut the power off completely. The |
STANDBY/ON |
|
|
|
|||||||
STANDBY/ON |
|
switch in any position does not disconnect the |
|
|
|
||||||
|
|
|
|
|
|
|
|
||||
|
|
|
|
|
|
|
|
||||
mains line. The power can be remote controlled.
CAUTION
To reduce the risk of electrical shocks, fire, etc.:
1. Do not remove screws, covers or cabinet.
2. Do not expose this appliance to rain or moisture.
CAUTION
•Do not block the ventilation openings or holes.
(If the ventilation openings or holes are blocked by a
newspaper or cloth, etc., the heat may not be able to get out.)
• Do not place any naked flame sources, such as lighted candles, on the apparatus.
•When discarding batteries, environmental problems
must be considered and local rules or laws governing the disposal of these batteries must be followed strictly.
•Do not expose this apparatus to rain, moisture,
dripping or splashing and that no objects filled with liquids, such as vases, shall be placed on the apparatus.
English
G-1
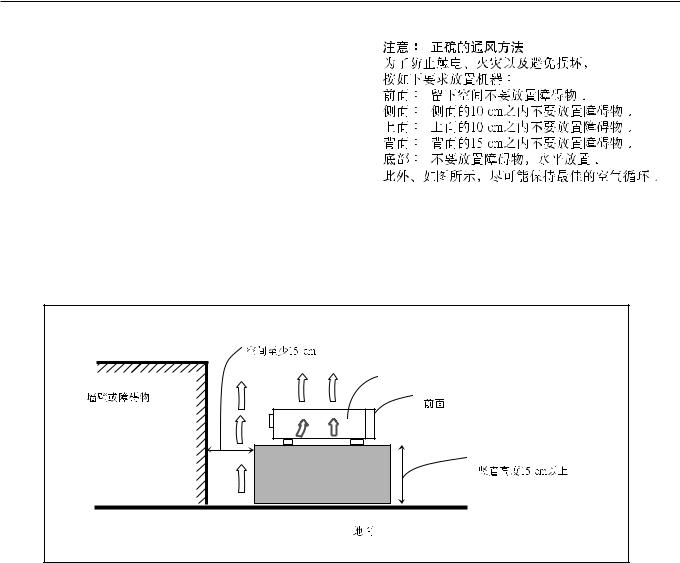
Caution: Proper Ventilation
To avoid risk of electric shock and fire and to protect from damage.
Locate the apparatus as follows:
Front: |
No obstructions open spacing. |
Sides: |
No obstructions in 10 cm from the sides. |
Top: |
No obstructions in 10 cm from the top. |
Back: |
No obstructions in 15 cm from the back |
Bottom: |
No obstructions, place on the level surface. |
In addition, maintain the best possible air circulation as illustrated.
|
Spacing 15 cm or more |
|
Wall or obstructions |
XV-THA5 |
|
Front |
||
|
||
|
Stand height 15 cm or more |
|
|
Floor |
G-2
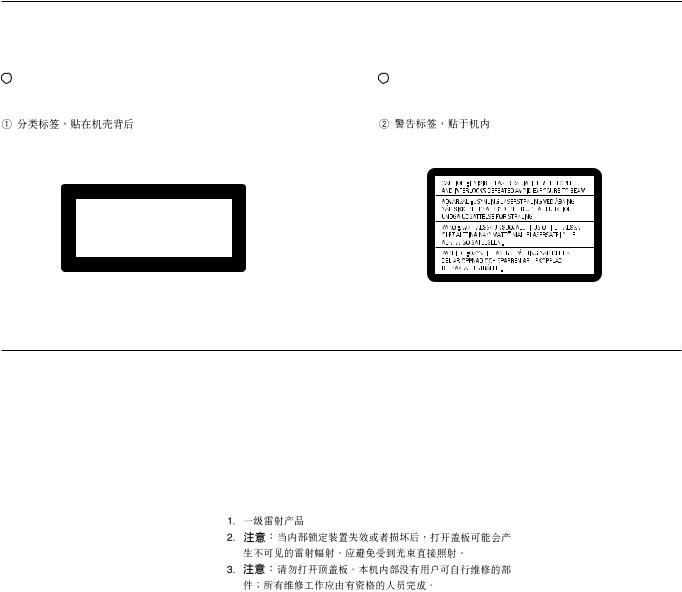
IMPORTANT FOR LASER PRODUCTS /
REPRODUCTION OF LABELS / 
1 CLASSIFICATION LABEL, PLACED ON EXTERIOR |
2 WARNING LABEL, PLACED INSIDE THE UNIT |
SURFACE |
|
CLASS 1 LASER PRODUCT
KLASSE 1 LASER PRODUKT
LUOKAN 1 LASER LAITE
KLASS 1 LASER APPARAT
PRODUCTO LASER CLASE 1
1.CLASS 1 LASER PRODUCT
2.CAUTION: Invisible laser radiation when open and interlock failed or defeated. Avoid direct exposure to beam.
3.CAUTION: Do not open the top cover. There are no user serviceable parts inside the unit; leave all servicing to qualified service personnel.
G-3

Table of Contents
Parts Identification....................................... |
2 |
|
Center Unit ................................................................................. |
2 |
|
Remote Control .......................................................................... |
3 |
|
Getting Started........................................... |
4 |
|
Before Installation ...................................................................... |
4 |
|
Checking the Supplied Accessories ........................................... |
4 |
|
Adjusting the Voltage Selector ................................................... |
4 |
|
Putting Batteries in the Remote Control .................................... |
4 |
|
Connecting the FM and AM Antennas ....................................... |
5 |
|
Speaker Layout Diagram ............................................................ |
6 |
|
Connecting the Speakers ............................................................ |
7 |
|
Connecting Audio/Video Component ........................................ |
8 |
|
Basic DVD Operations ................................ |
10 |
|
1 |
Turn On the Power ............................................................... |
10 |
2 |
Load a DVD ......................................................................... |
10 |
3 |
Start Playback ...................................................................... |
10 |
4 |
Adjust the Volume ................................................................ |
10 |
5 |
Activate Realistic Sound Field ............................................. |
11 |
6 |
Stop Playback ...................................................................... |
11 |
Basic VCD/CD Operations .......................... |
12 |
|
1 |
Turn On the Power ............................................................... |
12 |
2 |
Load a VCD/CD .................................................................. |
12 |
3 |
Start Playback ...................................................................... |
12 |
4 |
Adjust the Volume ................................................................ |
12 |
5 |
Activate Realistic Sound Field ............................................. |
13 |
6 |
Stop Playback ...................................................................... |
13 |
Basic Tuner Operations .............................. |
14 |
|
1 |
Turn On the Power ............................................................... |
14 |
2 |
Select the Band .................................................................... |
14 |
3 |
Adjust the Volume ................................................................ |
14 |
4 |
Tune into a Station ............................................................... |
14 |
Other Basic Operations .............................. |
15 |
|
Enjoying Sounds from the External Equipment ....................... |
15 |
|
Turning Off the Power with the Timer ..................................... |
15 |
|
Speaker Settings....................................... |
16 |
|
Setting the Speaker Information ............................................... |
16 |
|
Setting the Delay Time ............................................................. |
17 |
|
Creating Realistic Sound Fields ................... |
18 |
|
7 Dolby Digital and DTS Digital Surround ............................. |
18 |
|
7 Dolby Surround .................................................................... |
18 |
|
7 DSP (Digital Signal Processor) Modes ................................ |
19 |
|
Adjusting Stereo Sound ............................................................ |
20 |
|
Adjusting Dolby Digital and DTS Digital Surround ................ |
21 |
|
Activating Dynamic Range Compression ................................ |
21 |
|
Adjusting Dolby Surround ....................................................... |
22 |
|
Adjusting DSP Modes .............................................................. |
23 |
|
Adjusting DSP Sound Parameters ............................................ |
24 |
|
Disc Introduction—DVD/VCD/CD ................ |
25 |
|
Basic Disc Operations ................................ |
26 |
|
DVD Playback ........................................... |
27 |
|
Changing the Color System ..................................................... |
27 |
|
Showing the On-Screen Bar ..................................................... |
27 |
|
Selecting the Subtitles .............................................................. |
28 |
|
Selecting the Audio Languages ................................................ |
28 |
|
Selecting the Multi-Angle Views ............................................. |
28 |
|
Checking the Remaining Time ................................................. |
29 |
Disc Menu-Driven Playback .................................................... |
29 |
Moving to a Particular Portion Directly ................................... |
29 |
Searching for a Particular Point ............................................... |
30 |
Repeating Playback .................................................................. |
30 |
7 Repeat Play ........................................................................... |
30 |
7A–B Repeat ........................................................................... |
30 |
Programming the Playing Order of the Chapters |
|
—Program Play .................................................................. |
31 |
DVD Special Effect Playback .................................................. |
33 |
7 Still Picture/Frame-by-Frame Playback ............................... |
33 |
7 Slow Motion Playback ......................................................... |
33 |
7 Zoom .................................................................................... |
33 |
VCD/CD Playback...................................... |
34 |
Showing the On-Screen Bar ..................................................... |
34 |
Checking the Remaining Time ................................................. |
34 |
Disc Menu-Driven Playback (Only for VCD) .......................... |
35 |
Moving to a Particular Portion Directly ................................... |
35 |
Searching for a Particular Point ............................................... |
35 |
Repeating Playback .................................................................. |
36 |
7 Repeat Play ........................................................................... |
36 |
7A–B Repeat ........................................................................... |
36 |
Programming the Playing Order of the Tracks |
|
—Program Play .................................................................. |
37 |
Selecting Playback Channel ..................................................... |
38 |
VCD Special Effect Playback .................................................. |
39 |
7 Still Picture/Frame-by-Frame Playback ............................... |
39 |
7 Slow Motion Playback ......................................................... |
39 |
7 Zoom .................................................................................... |
39 |
MP3 Introduction ...................................... |
40 |
MP3 Playback ........................................... |
41 |
Starting Playback ..................................................................... |
41 |
Operations Using the On-Screen Display ................................ |
42 |
Moving to a Particular Track Directly ...................................... |
43 |
Repeating Playback .................................................................. |
43 |
Tuner Operations ....................................... |
44 |
Setting the AM Tuner Interval Spacing .................................... |
44 |
Tuning in Stations .................................................................... |
44 |
Using Preset Tuning ................................................................. |
45 |
Selecting the FM Reception Mode ........................................... |
45 |
Setting up the DVD Preferences ................. |
46 |
Setting the Initial Languages .................................................... |
46 |
Introducing the DVD Preference (System) .............................. |
47 |
Setting the Parental (Rating) Level .......................................... |
49 |
Operating JVC’s Components ...................... |
50 |
Operating Other Manufacturers’ TV ............ |
51 |
Maintenance ............................................. |
52 |
Troubleshooting ......................................... |
53 |
Specifications............................................ |
54 |
English
1
English
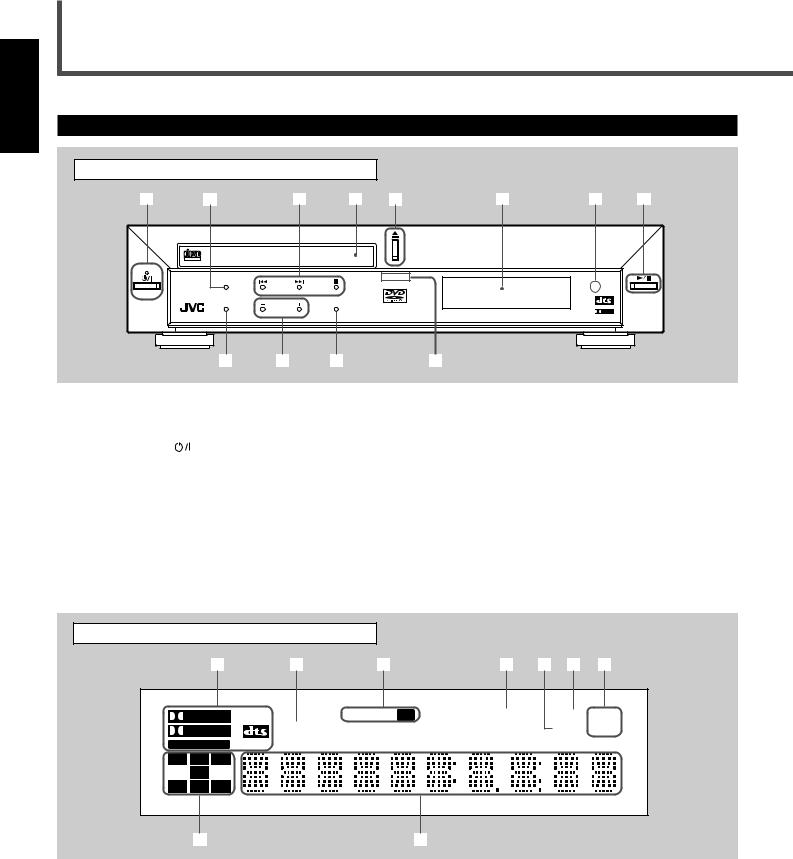
Parts Identification
Center Unit
Front Panel
1 |
2 |
3 |
4 |
5 |
6 |
7 |
8 |
COMPACT
DIGITAL VIDEO
STANDBY
AUDIO/FM MODE
STANDBY/ON
D I G I T A L
DSP |
VOLUME |
SOURCE |
S U R R O U N D |
|
|
DVD DIGITAL CINEMA SYSTEM TH-A5 |
D I G I T A L |
9 |
p |
q |
w |
See pages in the parentheses for details.
Front Panel
1 |
STANDBY/ON |
button and STANDBY lamp (10 – 14) |
7 |
Remote sensor |
2 |
AUDIO/FM MODE button (28, 38, 45) |
8 |
3/8 (play/pause) button (10, 12, 26, 41) |
|
3 |
Multi operation buttons |
|
• Pressing this button also turns on the power and |
|
|
• 4, ¢, and 7 |
|
|
changes the source to the DVD player. |
4 |
Disc tray (10, 12) |
|
9 |
DSP button (11, 13, 23) |
5 |
0(open/close) button (10 – 13, 32, 37, 41) |
p VOLUME + and – buttons (10, 12, 14) |
||
|
• Pressing this button also turns on the power and |
q SOURCE button (14, 15, 44, 45) |
||
|
changes the source to the DVD player. |
w Illumination lamp (10, 12, 14) |
||
6 |
Display window |
|
|
|
Display window
|
|
1 |
2 |
3 |
|
4 |
5 |
6 |
7 |
|
|
|
|
TUNED |
ST |
PROGRAM |
|
PBC |
MHz |
|
|
|
TITLE |
|
|
|
|
DSP |
kHz |
LINEAR PCM |
|
|
|
|
|
|
|
||
L |
C |
R |
|
|
|
|
|
|
|
|
LFE |
|
|
|
|
|
|
|
|
LS |
S |
RS |
|
|
|
|
|
|
|
|
8 |
|
|
|
|
9 |
|
|
|
See pages in the parentheses for details.
Display
1 |
Sound signal indicators (11, 13, 18) |
5 |
DSP indicator (23) |
|
• PRO LOGIC, DOLBY DIGITAL, DTS, |
6 |
PBC (Play Back Control) indicator (34, 35) |
|
and LINEAR PCM |
7 |
Frequency unit indicators |
2 |
TITLE indicator (26) |
|
• MHz (for FM station) and kHz (for AM station) |
3 |
Tuner mode indicators (14, 44, 45) |
8 |
Audio channel indicators |
|
• TUNED and ST (stereo) |
|
• Indicates audio channels currently being played back. |
4 |
PROGRAM indicator (31, 37, 45) |
9 |
Main display |
2

Remote Control
|
|
|
|
|
|
See pages in the parentheses for details. |
|||
|
Remote Control |
|
1 |
STANDBY/ON AUDIO button (10 – 14) |
|||||
|
|
|
|
|
|
2 |
VCR |
button (54) |
|
|
|
|
|
|
|
3 |
TV |
button (10, 12, 50, 51) |
|
|
STANDBY/ON |
|
|
|
|
4 |
MENU button (29, 35) |
||
1 |
AUDIO |
|
|
|
5 |
TOP MENU button (29) |
|||
|
|
|
|
|
|||||
2 |
|
|
CONTROL |
|
6 |
AUDIO/FM MODE button (28, 38, 45) |
|||
|
|
|
|
VCR |
t |
7 |
SUBTITLE button (28) |
||
3 |
TV |
VCR |
OFF |
ON |
|||||
|
|
|
|
|
8 |
DISPLAY button (27, 34, 41) |
|||
4 |
TOP MENU MENU |
TV CHANNEL |
y |
||||||
9 |
RETURN button (35, 47, 48) |
||||||||
5 |
|
|
|
|
|||||
AUDIO/ |
SUBTITLE |
TV VOLUME |
|
p 4, 7, 3/8, and ¢ buttons |
|||||
|
|
||||||||
6 |
FM MODE |
u |
|||||||
|
|
|
|
|
TUNER PRESET UP and DOWN buttons (45) |
||||
7 |
|
|
STEP |
TV/VIDEO |
|
|
|||
DISPLAY |
RETURN |
i |
|
FF (Fast-forward) and REW (Rewind) buttons |
|||||
8 |
|
|
|
|
|
||||
|
|
|
|
|
• Pressing 3/8 also turns on the power. |
||||
9 |
|
TUNER PRESET |
|
o |
|
||||
|
|
q VCR CHANNEL + and – buttons (50) |
|||||||
|
|
|
|
||||||
|
DOWN |
|
|
UP |
|
||||
p |
REW |
|
|
FF |
|
|
TUNING + and – buttons (14, 44) |
||
|
|
TUNING |
|
|
|
¡ F. (Forward) SEARCH and 1 B. (Back) SEARCH |
|||
q |
|
VCR CHANNEL |
|
|
|
|
|
||
|
|
|
|
|
|
buttons |
|
||
|
B.SEARCH |
|
|
F.SEARCH |
|
|
|
||
|
|
|
|
w Menu operation buttons |
|||||
|
|
|
|
|
|
||||
|
|
|
|
|
|
|
• 3, 2, 5, and ∞ buttons |
||
w |
|
ENTER |
|
|
|
• ENTER button |
|||
|
|
|
|
|
|
e VOLUME + and – buttons (10, 12, 14) |
|||
|
|
|
|
|
|
r Source selecting buttons (14, 15, 44) |
|||
e |
|
|
|
|
|
|
• DVD, FM/AM, AUX |
||
|
VOLUME |
|
|
|
• Pressing one of these buttons also turns on the power. |
||||
|
|
|
|
|
|||||
r |
DVD |
FM/AM |
AUX |
MUTING |
|
t VCR CONTROL ON and OFF buttons (50) |
|||
|
|
|
|
; |
|
|
|
||
|
|
|
|
|
|
IMPORTANT: |
|||
|
|
|
|
|
|
|
|||
|
|
|
|
|
|
|
If you press VCR CONTROL ON, this remote control will work |
||
|
|
|
|
|
|
|
ONLY for the JVC’s VCR. When you want to operate the system |
||
|
|
|
|
|
|
|
again, press VCR CONTROL OFF. |
||
|
|
|
|
|
|
y TV CHANNEL + and – buttons (50, 51) |
|||
|
|
|
|
|
|
u TV VOLUME + and – buttons (50, 51) |
|||
|
|
|
|
|
|
i TV/VIDEO button (10, 12, 50, 51) |
|||
|
|
|
|
|
|
o STEP button (33, 39) |
|||
|
|
|
|
|
|
; MUTING button (10, 12) |
|||
RM-STHA5U
DVD CINEMA SYSTEM
Inside of the Cover
To open the cover of the remote control, push here, then slide downward.
|
R |
|
|
|
|
ETURN |
|
TV |
VOLUME |
TUNER |
|
STEP |
|
|
PRESET |
|
TV/VIDEO |
||
|
|
|||
VCR |
|
|
|
|
TUNINGCHANNEL |
|
|
|
|
|
|
|
|
|
|
|
|
|
|
|
ENTER |
|
|
|
|
|
|
|
|
|
DVD |
FM/AM VOLUME |
|
|
|
|
|
|
|
|
|
|
|
||
|
|
|
|
|
|
|
|
|
|
|
AUX |
|
|
|
|
|
|
1 |
|
|
|
|
MUTE |
|
|
|
|
|
4 |
|
|
|
2 |
|
|
|
|
|
|
7 |
|
|
5 |
|
|
3 |
|
|
|
|
S |
|
|
|
|
|
|
|
S |
|
|
|
LOW |
|
8 |
|
|
6 |
SPK |
OUND EDIT |
|
|
|
ANGLE |
|
+10 |
|
|
9 |
PRO |
|
MODE |
|
|
REPEAT |
|
N |
TSC/PAL |
|
SET |
UP |
LOGIC |
|
||
|
|
|
|
|
T |
|
|||||
C |
LEAR |
R |
EPEAT |
|
D |
IGEST |
|
|
ESTT |
|
|
|
|
P |
ROGRAM |
D |
|
ONE |
|
|
|||
|
GO TO |
REMAIN |
FFECT |
SPMODE |
|
|
|||||
|
|
|
|
|
|
E |
|
|
|
|
|
|
|
|
|
|
S |
|
|
|
|
|
|
|
|
|
|
|
LEEP |
|
|
|
|
|
|
DVD |
RM- |
|
CINEMSTHA5U |
|
SYSTEM |
1
2
3
4
5
6
7
8
DVD FM/AM AUX MUTING
|
|
SOUND |
1 |
2 |
3 |
|
|
SETTING |
4 |
5 |
6 |
PRO LOGIC
7 |
8 |
9 |
SLOW |
SETUP |
TEST |
|
0 |
|
ANGLE |
NTSC/PAL |
D.R.C |
DSP MODE |
|
ZOOM |
|
|
REPEAT |
A-B REPEAT |
PROGRAM |
EFFECT |
CLEAR SEARCH REMAIN SLEEP
|
Inside of the Cover |
|
|
|
1 Number buttons |
p SETTING button (16, 17) |
|
|
(29, 35, 43, 50, 51) |
q PRO LOGIC button |
|
9 |
|||
2 SLOW button (33, 39) |
(15, 17, 22) |
||
|
|||
|
3 NTSC/PAL button (27) |
w SETUP button (47 – 49) |
|
p |
|||
ZOOM button (33, 39) |
e TEST button (19) |
||
|
|||
q |
|||
4 ANGLE button (28) |
r D.R.C button (21) |
||
|
|||
w |
|||
5 REPEAT button (30, 36, 43) |
t DSP MODE button |
||
|
|||
e |
|||
6 A–B REPEAT button |
(11, 13, 23, 24) |
||
r |
|||
(31, 36) |
y EFFECT button (24) |
||
|
|||
t |
|||
7 CLEAR button (29, 35, 38) |
u PROGRAM button |
||
|
|||
y |
|||
8 SEARCH button |
(31, 32, 37, 45) |
||
|
|||
u |
|||
(29, 35, 43) |
i SLEEP button (15) |
||
|
|||
i |
|||
9 SOUND button (20 – 24) |
o REMAIN button (29, 34) |
||
|
|||
o |
|||
|
|
English
3
English
Getting Started
Before Installation |
Putting Batteries in the Remote Control |
General Precautions
•DO NOT insert any metal object into the center unit.
•DO NOT disassemble the center unit or remove screws, covers, or cabinet.
•DO NOT expose the center unit to rain or moisture.
Locations
•Install the center unit in a location that is level and protected from moisture.
•The temperature around the center unit must be between 5˚C and 35˚C (41˚F and 95˚F).
•Make sure there is good ventilation around the center unit. Poor ventilation could cause overheating and damage the center unit.
Handling the center unit
•DO NOT touch the power cord with wet hands.
•DO NOT pull on the power cord to unplug the cord. When unplugging the cord, always grasp the plug so as not to damage the cord.
•Keep the power cord away from the connecting cords and the antenna. The power cord may cause noise or screen interference. It is recommended to use a coaxial cable for antenna connection, since it is well-shielded against interference.
•When a power failure occurs, or when you unplug the power cord, the preset settings such as preset FM/AM channels and sound adjustments may be erased in a few days.
Checking the Supplied Accessories
Check to be sure you have all of the following supplied accessories. The number in the parentheses indicates the quantity of the pieces supplied.
•Remote Control (1)
•Batteries (2)
•AM Loop Antenna (1)
•FM Antenna (1)
•AC Plug Adaptor (1)
•Video Cord (1)
•Speaker Cords
5 m (4)* : For left front speaker, right front speaker, center speaker, and subwoofer
10 m (2)* : For left rear speaker and right rear speaker
*The length of the speaker cords above are approximate. If anything is missing, contact your dealer immediately.
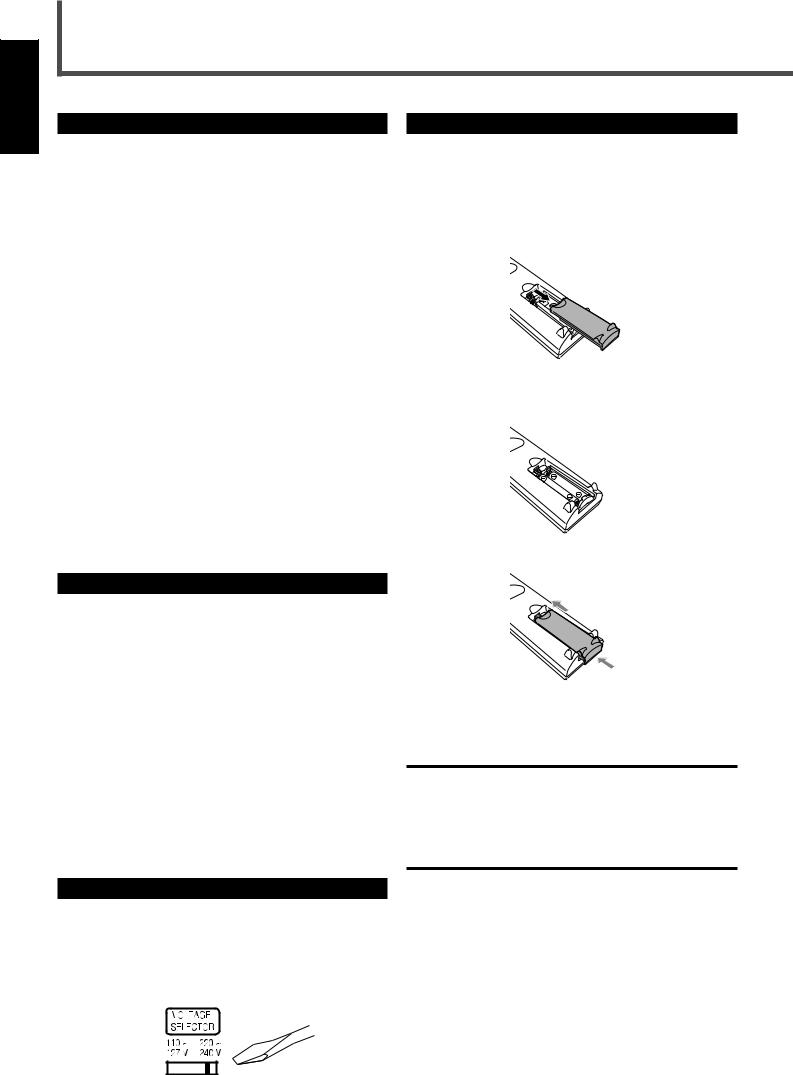
Before using the remote control, put two supplied batteries first.
•When using the remote control, aim the remote control directly at the remote sensor on the center unit.
1.On the back of the remote control, remove the battery cover.
2.Insert batteries. Make sure to match the polarity:
(+) to (+) and (–) to (–).
3. Replace the cover.
If the range or effectiveness of the remote control decreases, replace the batteries. Use two UM-4“AAA”/IEC “R03” type dry-cell batteries.
CAUTION:
Follow these precautions to avoid leaking or cracking cells:
•Place batteries in the remote control so they match the polarity: (+) to (+) and (–) to (–).
•Use the correct type of batteries. Batteries that look similar may differ in voltage.
•Always replace both batteries at the same time.
•Do not expose batteries to heat or flame.
Adjusting the Voltage Selector
Before connections, always do the following first if necessary.
Set the correct voltage for your area with the voltage selector switch on the rear panel. Slide the voltage selector using a screw driver, so the voltage number the voltage mark is set at is the same as the voltage where you are plugging in the system.
4

Connecting the FM and AM Antennas
If AM reception is poor, connect single vinyl-covered wire (not supplied).
1 |
2 |
3 |
AM Loop Antenna (supplied)
English
If FM reception is poor, connect outdoor FM antenna (not supplied).
FM Antenna (supplied)
Snap the tabs on the loop into the slots of the base to assemble the AM loop antenna.
MIN |
MIN |
MIN |
CONPONENT OUT
CR CB Y
MIN |
Center unit
Cooling fan
(See “About the cooling fan” below.)
FM antenna connection
Connect the supplied FM antenna to the FM 75 Ω COAXIAL terminal as temporary measure.
Extend the supplied FM antenna horizontally.
•If reception is poor, connect an outdoor antenna. Before attaching a 75 Ω coaxial cable (with a standard type connector), disconnect
the supplied FM antenna.
AM antenna connection
Connect the supplied AM loop antenna to the AM and H terminals. Turn the loop until you have the best reception.
•If reception is poor, connect an outdoor single vinyl-covered wire to the AM terminal. (Keep the AM loop antenna connected.)
Note:
If the AM loop antenna wire is covered with vinyl, remove the vinyl by twisting it as shown in the diagram.
About the cooling fan
A cooling fan is mounted on the rear panel of the center unit to prevent abnormal temperature inside the center unit, thus assuring normal operation of the unit. The cooling fan automatically starts rotating to supply external cool air to the inside of the center unit when the internal temperature goes up.
For safety, observe the following carefully.
•Make sure there is good ventilation around the center unit. Poor ventilation could overheat and damage the center unit.
•DO NOT block the cooling fan and the ventilation openings or holes. (If they are blocked by a newspaper or cloth, etc., the heat may not be able to get out.)
5
English
Getting Started
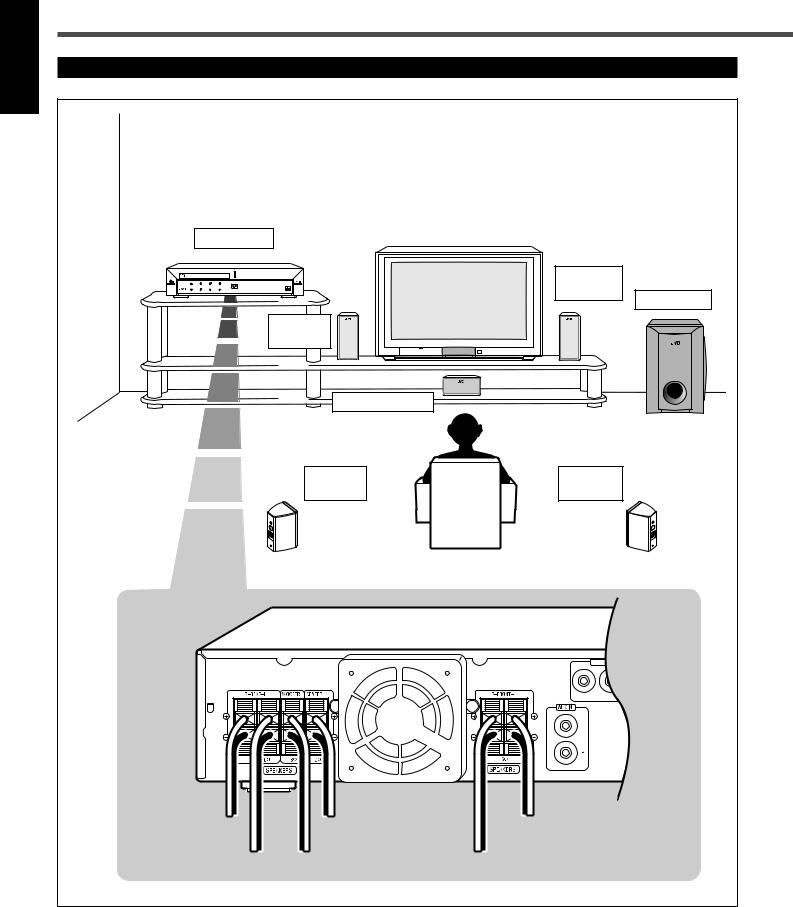
Speaker Layout Diagram
Center unit |
|
|
|
|
|
|
|
|
Right front |
|
|
|
|
|
speaker |
Subwoofer |
|
|
|
|
|
|
|
|
Left front |
|
|
|
|
|
speaker |
|
|
|
|
|
|
Center speaker |
|
|
|
|
|
Left rear |
Right rear |
|
|
|
|
speaker |
speaker |
|
|
|
|
|
CR |
CONPONENT OUT |
|
|
|
|
CB |
Y |
|
MIN |
MIN |
MIN |
MIN |
|
|
To right rear |
|
To center speaker |
To left front speaker |
||
speaker |
|
|
|
|
|
To left rear |
|
To subwoofer |
To right front speaker |
|
|
speaker |
|
|
|
|
|
6 |
|
|
|
|
|
Connecting the Speakers
Connect the satellite speakers, center speaker, and subwoofer to the terminals on the rear panel using speaker cords supplied.
Labels are attached to the speaker cords to indicate the speaker and the terminal to which each is to be connected.
•The four satellite speakers can be used for any positions—front left and right, and rear left and right.
•Connect the white cord to the red (+) terminal, and the black cord to the black (–) terminal respectively.
CAUTION:
Use speakers with the SPEAKER IMPEDANCE indicated by the speaker terminals.
Connecting speaker cords to the terminals
1 |
2 |
3 |
1Press and hold the terminal clamp.
2Insert the speaker cord.
3Release the finger from the clamp.
Note:
If the speaker cord is covered with vinyl, remove the vinyl by twisting it as shown in the diagram.
When setting the speakers
To obtain the best possible sound from this system, you need to place all the speakers except the subwoofer at the same distance from the listening position with each front faced toward the listener. Since bass sound is non-directional, you can place a subwoofer wherever you like. Normally place it in front of you.
Left front Center speaker |
Right front |
speaker |
speaker |
Subwoofer
Left rear |
Right rear |
speaker |
speaker |
If your speakers cannot be placed at the same distance from the listening position
You can adjust the delay time of the center speaker and rear speakers. For in-depth information about adjusting the delay time, see “Setting the Delay Time” on page 17.
Note:
You can change the phase of subwoofer sounds by connecting the speaker cords to the terminals inversely—the white cord to the black terminal, and the black cord to the red terminal. You may get the more effective bass sounds by changing the phase.
CAUTION:
•When attaching the satellite speakers on the wall, have them attached to the wall by a qualified person.
DO NOT attach the satellite speakers on the wall by yourself to avoid an unexpected damage of their falling from the wall, caused by incorrect attachment or weakness in the wall.
•Care is required in selecting a location for attaching speakers to the wall. Injury to personnel, or damage to equipment, may result if the speakers are attached in a location which interferes with daily activities.
English
7
English
Getting Started
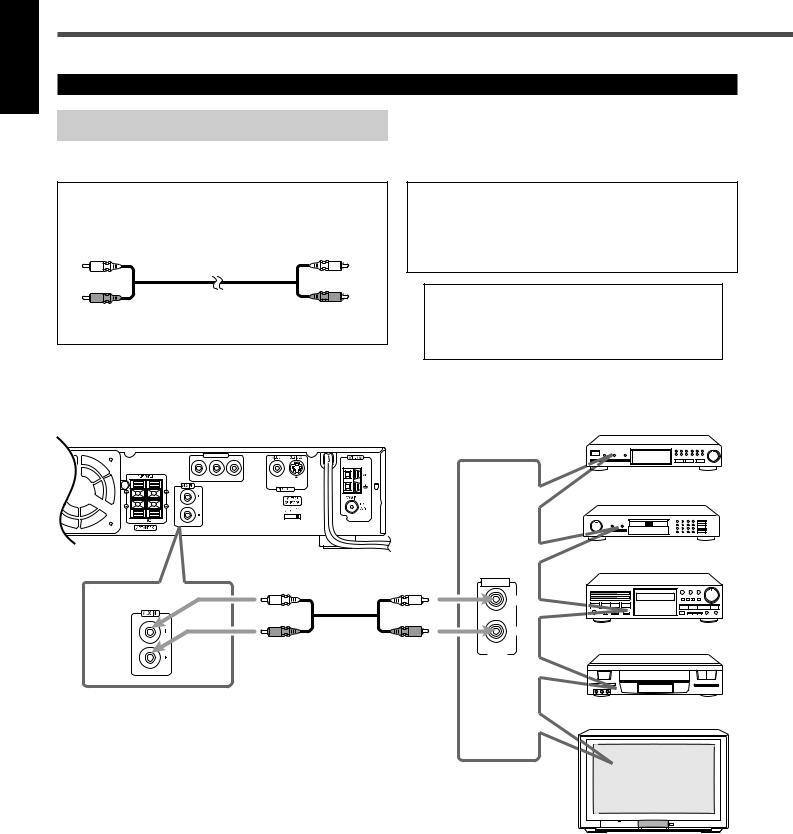
Connecting Audio/Video Component
Turn the power off to all components before connections.
Audio component connection
Connect the other component to the center unit with the audio cord.
Use the cord supplied with the other component or purchase it at an electric appliance store.
Audio cord (not supplied)
Illustrations of the input/output terminals below are typical examples.
When you connect the other component, refer also to its manuals since the terminal name actually printed on the rear vary among the components.
If you connect a sound-enhancing device such as a graphic equalizer between the source component and the center unit, the sound output through this system may be distorted.
Center unit
CONPONENT OUT
CR CB Y
MIN |
DBS Tuner
MD Recorder
Cassette Deck
AUDIO
LEFT |
RIGHT
VCR
OUT
TV
8
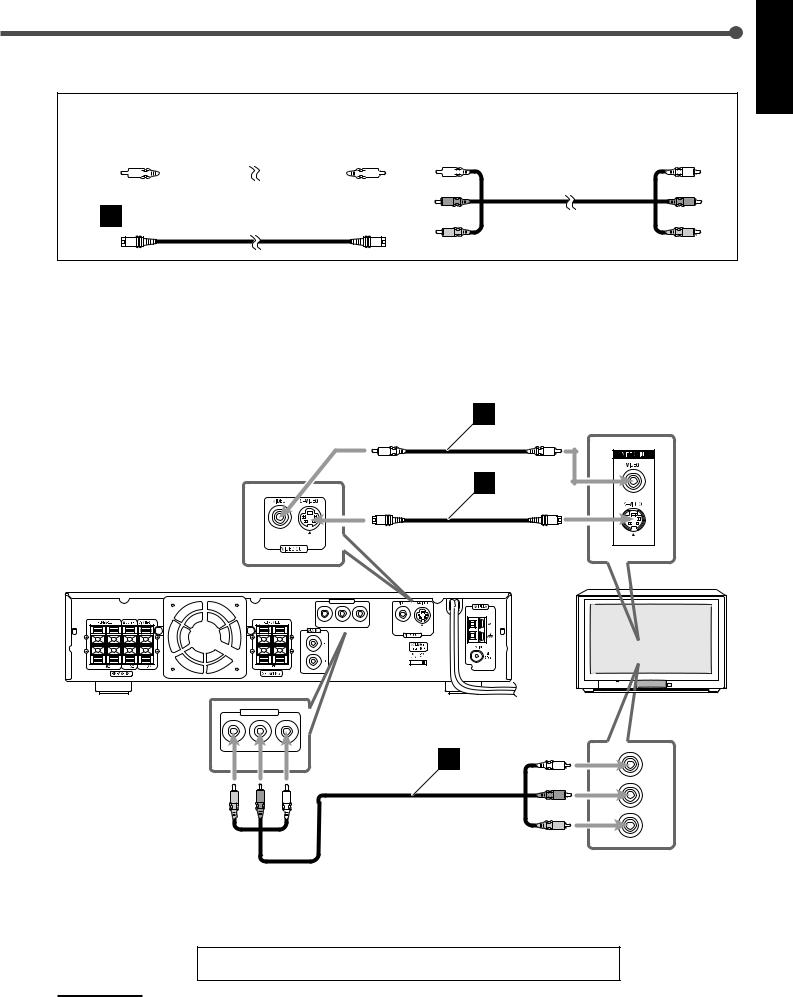
TV connection
The S-video cord and the component video cord are not supplied with this system.
Use the cords supplied with the other component or purchase them at an electric appliance store.
A |
|
|
Video cord (supplied) |
C |
|
|
Component video cord (not supplied) |
||||||||||||||||
|
|
|
|
|
|
|
|
|
|
|
|
|
|
|
|
|
|
|
|
|
|
|
|
B S-video cord (not supplied)
You can select one of three connection types— |
|
, |
|
, and |
|
. |
|
Illustrations below are typical examples. |
|||
|
|
|
|||||||||
• If your TV has S-video (Y/C-separation) and/or component video |
|
When you connect the TV, refer also to its manual since the |
|||||||||
|
terminal names actually printed on the rear vary among the |
||||||||||
(Y, CR, CB) jacks, connect them using an S-video cord (not |
|
||||||||||
|
components. |
||||||||||
supplied) |
|
and/or component video cord (not supplied) |
|
. |
|
||||||
By using these jacks, you can get a better picture quality—in the |
|
|
|||||||||
|
|
||||||||||
order : Component video > S-video > Composite video. |
|
|
|||||||||
|
|
|
|
|
|
|
|
|
|
|
|
A
B
TV
CONPONENT OUT
CR CB Y
MIN |
MIN |
MIN |
MIN |
CONPONENT OUT
CR CB Y
Y
C
CB
CR
English
Now, you can plug the power cord of the center unit into the AC outlet.
Note:
Keep the power cord away from the connecting cords and the antenna cables. The power cord may cause noise or screen interference.
9
English
Basic DVD Operations
This manual mainly explains operations using the buttons on the remote control. You can also use the buttons on the center unit if they have the similar names (or marks) as those on the remote control.
If operations using the center unit are different from those using the remote control, they are then explained.
1 STANDBY/ON |
|
|
|
|
|
AUDIO |
STANDBY/ON |
|
|
|
|
|
AUDIO |
|
|
|
|
TV |
|
|
|
VCR |
|
|
|
CONTROL |
|
||
TV |
VCR |
OFF |
ON |
|
|
|
TOP MENU MENU |
TV CHANNEL |
|
||
|
AUDIO/ |
SUBTITLE |
TV VOLUME |
|
|
|
FM MODE |
|
|||
|
DISPLAY |
RETURN |
STEP |
TV/VIDEO |
TV/VIDEO |
6 7 |
|
TUNER PRESET |
3 3/8 |
||
DOWN |
|
|
UP |
||
|
REW |
|
|
FF |
|
|
|
VCR CHANNEL |
|
|
|
|
|
TUNING |
|
|
|
|
B.SEARCH |
|
|
F.SEARCH |
|
|
|
ENTER |
|
|
|
4 VOLUME – |
|
VOLUME |
|
4 VOLUME + |
|
|
|
|
MUTING |
||
|
DVD |
FM/AM |
AUX |
MUTING |
|
|
|
|
SOUND |
1 |
2 |
3 |
|
|
|
|
SETTING |
4 |
5 |
6 |
|
|
|
|
PRO LOGIC |
7 |
8 |
9 |
|
SLOW |
|
SETUP |
TEST |
|
0 |
|
|
5 DSP MODE |
ANGLE |
NTSC/PAL |
D.R.C |
DSP MODE |
|
|
ZOOM |
|
|
|
REPEAT |
A-B REPEAT |
PROGRAM |
EFFECT |
CLEAR |
SEARCH |
REMAIN |
SLEEP |
For in-depth information about DVD operations, see pages 25 to 33.
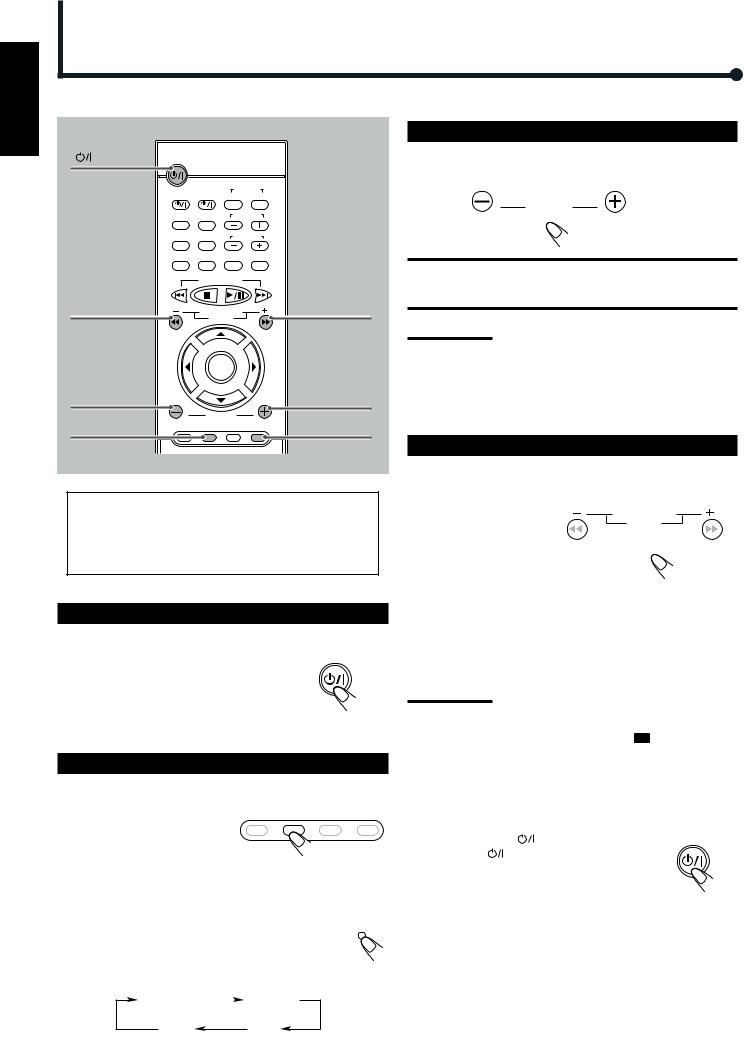
1 Turn On the Power
Before turning on the system, turn on your TV and select the correct video input. (See the manual supplied with your TV.)
•When you use a JVC’s TV, you can turn on your TV by pressing TV  on the remote control, and select the video input by pressing TV/VIDEO. (If your TV is not a JVC’s, see “Operating Other Manufacturers’ TV” on page 51.)
•For changing the OSD messages—the information on the TV screen—into the desired language, see “Setting the Initial Languages” on pages 46 and 47.
Press STANDBY/ON |
AUDIO (or |
STANDBY/ON |
|
STANDBY/ON |
on the front panel). |
AUDIO |
|
The STANDBY lamp goes off and the illumination lamp on the center unit lights up. The source indication selected previously appears on the display.
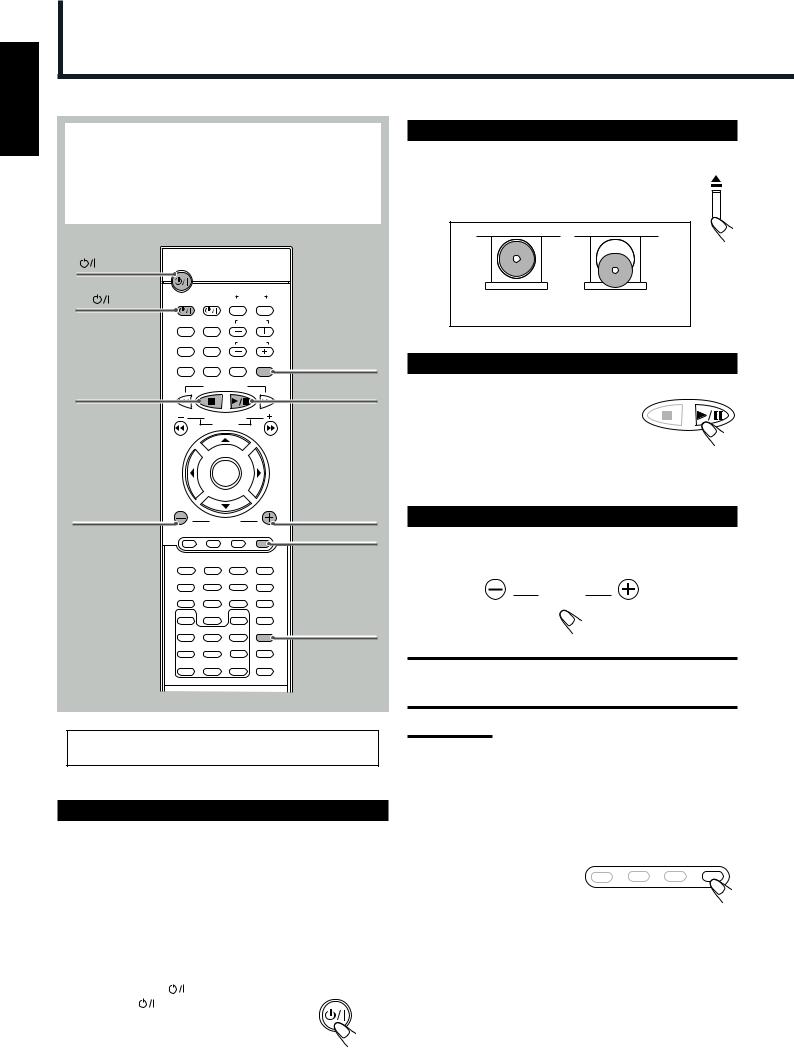
2 Load a DVD
On the front panel ONLY:
Press 0 to open the disc tray, then place a DVD correctly with its label side up.
CORRECT INCORRECT
3 Start Playback
Press 3/8. |
TUNER PRESET |
|
The disc tray closes. “LOADING” appears for a while.
•You can also start playback by closing the disc tray using 0 on the front panel.
4 Adjust the Volume
To increase the volume, press and hold VOLUME +. To decrease the volume, press and hold VOLUME –.
VOLUME
CAUTION:
Always set the volume to the minimum before starting any source. If the volume is set at its high level, the sudden blast of sound energy can permanently damage your hearing and/or ruin your speakers.
Notes:
•By pressing VOLUME + or – repeatedly, you can adjust the volume level step by step.
•The volume level can be adjusted within 71 steps—“MIN
(minimum),” 01 to 69, and “MAX (maximum).”
To turn off the sounds temporarily
From the remote control ONLY:
Press MUTING. |
DVD FM/AM AUX MUTING |
|
To restore the sound, press MUTING again.
• Pressing VOLUME + or – also restores the sound.
10
5 Activate Realistic Sound Field
You can enjoy two kinds of surround—Digital Multichannel Surround (Dolby Digital and DTS Digital Surround) and DSP modes.
Digital Multichannel Surround—Dolby Digital
and DTS Digital Surround
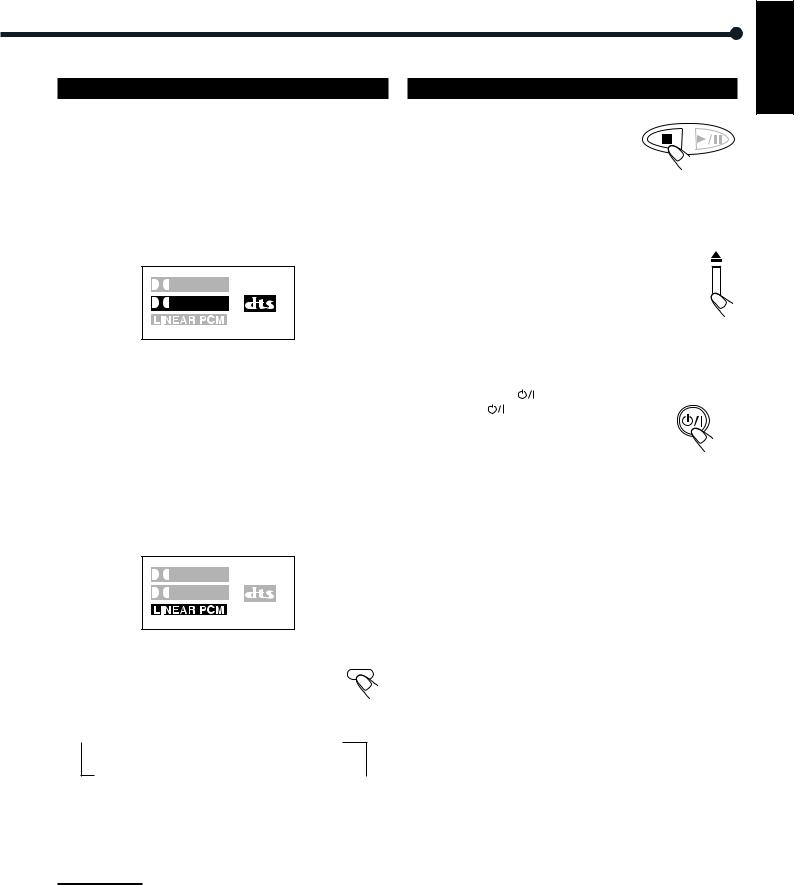
Dolby Digital or DTS Digital Surround takes effect only when you enjoy a disc encoded with its signals—the DOLBY DIGITAL or DTS indicator lights up on the display.
Sound signal indicators on the display
To activate Dolby Digital or DTS Digital Surround
When a disc encoded with the Dolby Digital or DTS Digital Surround is loaded, the system detects it and starts playing the disc automatically with Multichannel Surround activated.
–For in-depth information about surround modes, see “Creating Realistic Sound Fields” on pages 18 and 21.
DSP modes—HALL, THEATER, PAVILION, DANCE CLUB, LIVE CLUB
DSP modes take effect only when you enjoy a disc recorded using Linear PCM—the LINEAR PCM indicator lights up on the display.
Sound signal indicators on the display
To activate DSP modes
DSP MODE
Press DSP MODE (or DSP on the front panel).
The DSP indicator lights up and the current DSP mode appears on the display for a while.
• Each time you press the button, DSP mode changes as follows:
 HALL
HALL  THEATER
  PAVILION
Normal
indication  LIVE CLUB
  DANCE CLUB
  (canceled)
–For in-depth information about DSP modes, see “Creating Realistic Sound Fields” on pages 19, 23, and 24.
Note:
Before activating the realistic sound field, adjust the speaker setting to bring out the best performance from this system.
For in-depth information about adjusting the speaker setting, see “Speaker Settings” on pages 16 and 17.
6 Stop Playback
Press 7 twice. |
TUNER PRESET |
|
Playback stops completely and “DVD” appears on the display. (The DVD player goes on working for 3 minutes after playback stops.)
•This system can memorize the end point even when you press 7 once. When you start playback again by pressing 3/8, playback begins from where it has been stopped—Resume play.
To remove the loaded disc
Press 0.
“OPEN” appears on the display and the disc tray comes out.
To close the disc tray, press 0 again.
•If you do not press the button, the disc tray closes automatically after 35 seconds.
To turn off the power (into standby)
Press STANDBY/ON |
AUDIO (or |
STANDBY/ON |
|
STANDBY/ON |
on the front panel). |
AUDIO |
|
The illumination lamp goes off and the STANDBY lamp lights up.
•If you press STANDBY/ON  AUDIO (or
STANDBY/ON  on the front panel) while the disc tray is kept open, the disc tray closes automatically, then the system is turned off.
•A small amount of power is consumed even in standby mode. To turn the power off completely, unplug the AC power cord.
English
11
English
Basic VCD/CD Operations
1 STANDBY/ON |
|
|
|
|
|
AUDIO |
STANDBY/ON |
|
|
|
|
|
AUDIO |
|
|
|
|
TV |
|
|
|
VCR |
|
|
|
CONTROL |
|
||
TV |
VCR |
OFF |
ON |
|
|
|
TOP MENU MENU |
TV CHANNEL |
|
||
|
AUDIO/ |
SUBTITLE |
TV VOLUME |
|
|
|
FM MODE |
|
|||
|
DISPLAY |
RETURN |
STEP |
TV/VIDEO |
TV/VIDEO |
6 7 |
|
TUNER PRESET |
3 3/8 |
||
DOWN |
|
|
UP |
||
|
REW |
|
|
FF |
|
|
|
VCR CHANNEL |
|
|
|
|
|
TUNING |
|
|
|
|
B.SEARCH |
|
|
F.SEARCH |
|
|
|
ENTER |
|
|
|
4 VOLUME – |
|
|
|
|
4 VOLUME + |
|
|
VOLUME |
|
|
|
|
DVD |
FM/AM |
AUX |
MUTING |
MUTING |
|
|
|
|
|
|
|
|
|
SOUND |
1 |
2 |
3 |
|
|
|
|
SETTING |
4 |
5 |
6 |
|
|
|
|
PRO LOGIC |
7 |
8 |
9 |
|
SLOW |
|
SETUP |
TEST |
|
0 |
|
|
5 DSP MODE |
ANGLE |
NTSC/PAL |
D.R.C |
DSP MODE |
|
|
ZOOM |
|
|
|
REPEAT A-B REPEAT PROGRAM |
EFFECT |
|
||
CLEAR |
SEARCH |
REMAIN |
SLEEP |
For in-depth information about VCD/CD operations, see pages 25, 26, and 34 to 39.
1 Turn On the Power
Before turning on the system, turn on your TV if necessary and select the correct video input. (See the manual supplied with your TV.)
•When you use a JVC’s TV, you can turn on your TV by pressing TV  on the remote control, and select the video input by pressing TV/VIDEO. (If your TV is not a JVC’s, see “Operating Other Manufacturers’ TV” on page 51.)
•For changing the OSD messages—the information on the TV screen—into the desired language, see “Setting the Initial Languages” on pages 46 and 47.
Press STANDBY/ON |
AUDIO (or |
STANDBY/ON |
|
STANDBY/ON |
on the front panel). |
AUDIO |
|
The STANDBY lamp goes off and the illumination lamp on the center unit lights up. The source indication selected previously appears on the display.
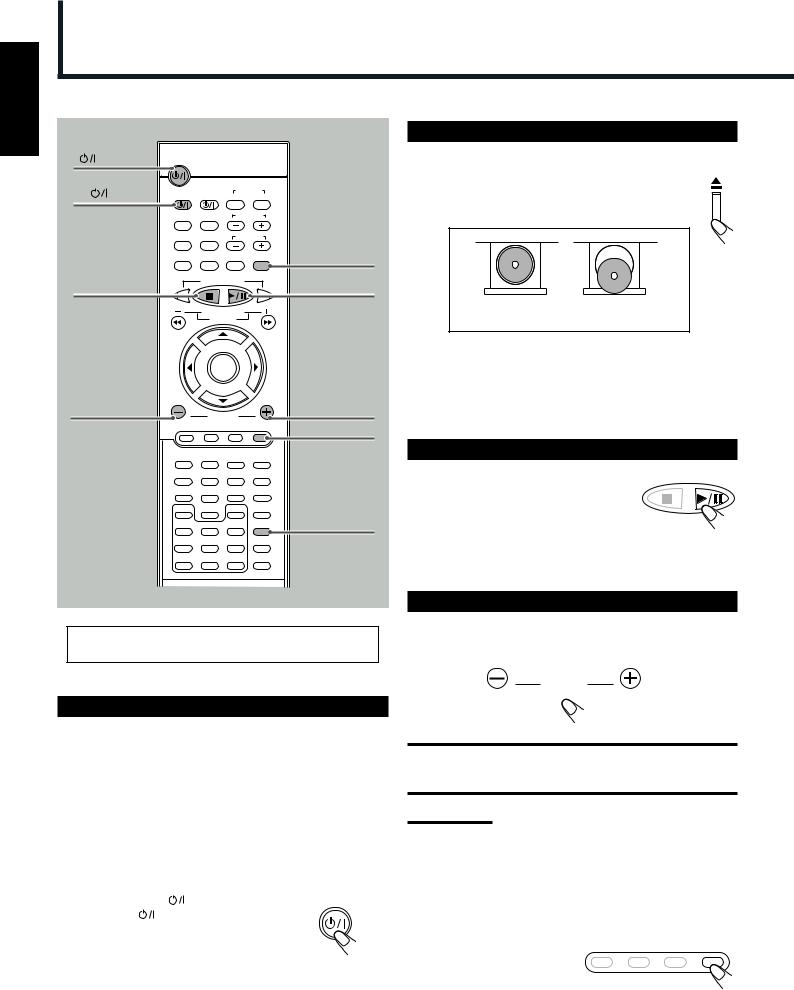
2 Load a VCD/CD
On the front panel ONLY:
Press 0 to open the disc tray, then place a disc correctly with its label side up.
CORRECT INCORRECT
•When using a CD single (8 cm), place it on the inner circle of the disc tray.
•Continued use of irregular shape CDs (heart-shape, octagonal, etc.) can damage the center unit.
3 Start Playback
TUNER PRESET
Press 3/8.
The disc tray closes. “LOADING” appears for a while.
•You can also start playback by closing the disc tray using 0 on the front panel.
4 Adjust the Volume
To increase the volume, press and hold VOLUME +. To decrease the volume, press and hold VOLUME –.
VOLUME
CAUTION:
Always set the volume to the minimum before starting any source. If the volume is set at its high level, the sudden blast of sound energy can permanently damage your hearing and/or ruin your speakers.
Notes:
•By pressing VOLUME + or – repeatedly, you can adjust the volume level step by step.
•The volume level can be adjusted within 71 steps—“MIN (minimum),” 01 to 69, and “MAX (maximum).”
To turn off the sounds temporarily
From the remote control ONLY:
Press MUTING. |
DVD FM/AM AUX MUTING |
|
To restore the sound, press MUTING again.
• Pressing VOLUME + or – also restores the sound.
12
5 Activate Realistic Sound Field
You can enjoy DSP modes.
DSP modes—HALL, THEATER, PAVILION, DANCE CLUB, LIVE CLUB
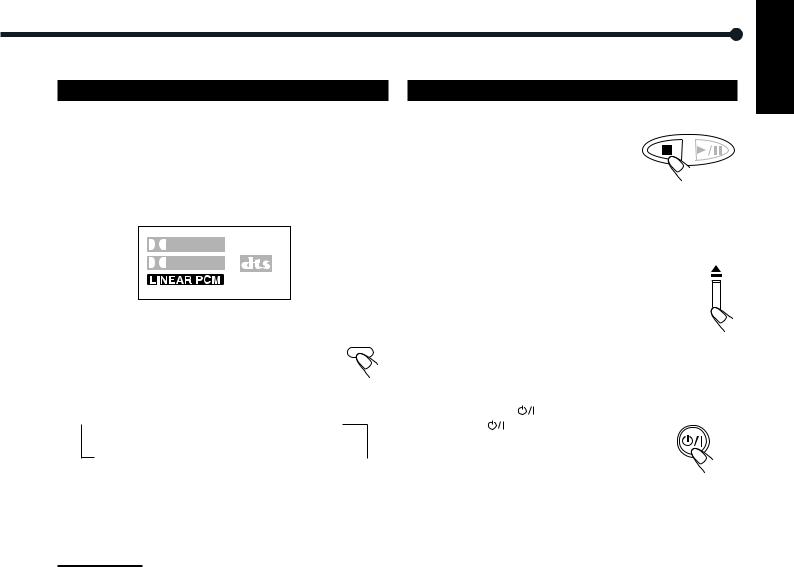
DSP modes take effect only when you enjoy a disc recorded using Linear PCM—the LINEAR PCM indicator lights up on the display.
Sound signal indicators on the display
To activate DSP modes
Press DSP MODE (or DSP on the front panel). |
DSP MODE |
The DSP indicator lights up and the current DSP mode appears on the display for a while.
•Each time you press the button, DSP mode changes as follows:
 HALL
HALL  THEATER
  PAVILION
Normal
indication  LIVE CLUB
  DANCE CLUB
  (canceled)
–For in-depth information about DSP modes, see “Creating Realistic Sound Fields” on pages 19, 23, and 24.
Note:
Before activating the realistic sound field, adjust the speaker setting to bring out the best performance from this system.
For in-depth information about adjusting the speaker setting, see
“Speaker Settings” on pages 16 and 17.
6 Stop Playback
Press 7 twice.
TUNER PRESET
Playback stops completely and “VCD” or “CD” appears on the display. (The DVD player goes on working for 3 minutes after playback stops.)
•This system can memorize the end point even
when you press 7 once. When you start playback again by pressing 3/8, playback begins from where it has been stopped— Resume play.
To remove the loaded disc
Press 0.
“OPEN” appears on the display and the disc tray comes out.
To close the disc tray, press 0 again.
•If you do not press the button, the disc tray closes automatically after 35 seconds.
To turn off the power (into standby)
Press STANDBY/ON |
AUDIO (or |
STANDBY/ON |
||
STANDBY/ON |
on the front panel). |
|||
AUDIO |
||||
|
|
|
||
The illumination lamp goes off and the STANDBY lamp lights up.
•If you press STANDBY/ON  AUDIO (or
STANDBY/ON  on the front panel) while the disc tray is kept open, the disc tray closes automatically, then the system is turned
off.
•A small amount of power is consumed even in standby mode. To turn the power off completely, unplug the AC power cord.
English
13
English
Basic Tuner Operations
1 STANDBY/ON |
|
AUDIO |
STANDBY/ON |
|
AUDIO |
|
|
VCR |
|
|
|
CONTROL |
|
TV |
VCR |
OFF |
ON |
TOP MENU |
MENU |
TV CHANNEL |
|
AUDIO/ |
SUBTITLE |
TV VOLUME |
|
FM MODE |
|||
DISPLAY |
RETURN |
STEP |
TV/VIDEO |
DOWN |
TUNER PRESET |
UP |
|
|
|
||
4 TUNING – |
REW |
FF |
4 TUNING + |
VCR CHANNEL |
|
||
|
TUNING |
|
|
B.SEARCH |
F.SEARCH |
|
ENTER |
3 VOLUME – |
3 VOLUME + |
2 FM/AM |
|
VOLUME |
|
MUTING |
DVD |
FM/AM AUX |
MUTING |
•For in-depth information about tuner operations see “Tuner Operations” on pages 44 and 45.
•9 kHz interval spacing is the initial setting for AM tuner. You can change the interval spacing. See “Setting the AM Tuner Interval Spacing” on page 44.
1 Turn On the Power
Press STANDBY/ON  AUDIO (or STANDBY/ON
  on the front panel).
The STANDBY lamp goes off and the illumination lamp lights up on the center unit. The source indication selected previously appears on the display.
STANDBY/ON
AUDIO
2 Select the Band
From the remote control:
Press FM/AM. DVD FM/AM AUX MUTE
The last received station of the selected band is tuned into.
• Each time you press the button, the band alternates between FM and AM.
On the front panel: |
|
|
Press SOURCE repeatedly until the desired band (FM |
SOURCE |
|
or AM) appears on the display. |
||
|
The last received station of the selected band is tuned into.
•Each time you press the button, the source changes as follows:
3 Adjust the Volume
To increase the volume, press and hold VOLUME +. To decrease the volume, press and hold VOLUME –.
VOLUME
CAUTION:
Always set the volume to the minimum before starting any source. If the volume is set at its high level, the sudden blast of sound energy can permanently damage your hearing and/or ruin your speakers.
Notes:
•By pressing VOLUME + or – repeatedly, you can adjust the volume level step by step.
•The volume level can be adjusted within 71 steps—“MIN
(minimum),” 01 to 69, and “MAX (maximum).”
•You can turn off the sounds temporarily by pressing MUTING.
4 Tune into a Station
From the remote control:
Press and hold TUNING + or – until the station frequency starts changing continuously on
the display.
B.SEARCH |
F.SEARCH |
The system starts searching |
|
for a station. |
|
On the front panel:
1)Press 7 so that “MANUAL” appears on the display.
2)Press and hold ¢ or 4 until the station frequency starts changing continuously on the display.
The system starts searching for a station.
Notes:
•When a station of sufficient signal strength is tuned in, the system stops searching, and the
 indicator lights up on the display.
•When an FM stereo program is received, the  indicator also lights up.
•When you press the button repeatedly, the frequency changes step by step.
To turn off the power (into standby)
Press STANDBY/ON |
AUDIO (or |
STANDBY/ON |
|
STANDBY/ON |
on the front panel) again. |
AUDIO |
|
|
|||
The illumination lamp goes off and the STANDBY lamp lights up.
•A small amount of power is consumed even in
standby mode. To turn the power off completely, unplug the AC power cord.
DVD player* |
|
AUX IN |
|
AM FM
* “WAIT” appears on the display.
14
Other Basic Operations
|
ENTER |
|
|
|
|
VOLUME |
|
AUX |
|
DVD |
FM/AM |
AUX |
MUTING |
|
|
|
|
SOUND |
|
1 |
2 |
3 |
|
|
|
|
|
SETTING |
|
4 |
5 |
6 |
|
PRO LOGIC |
7 |
8 |
9 |
PRO LOGIC |
|
|
|
|||
SLOW |
|
SETUP |
TEST |
|
0
ANGLE |
NTSC/PAL |
D.R.C |
DSP MODE |
|
ZOOM |
|
|
REPEAT |
A-B REPEAT |
PROGRAM |
EFFECT |
SLEEP
CLEAR SEARCH REMAIN SLEEP
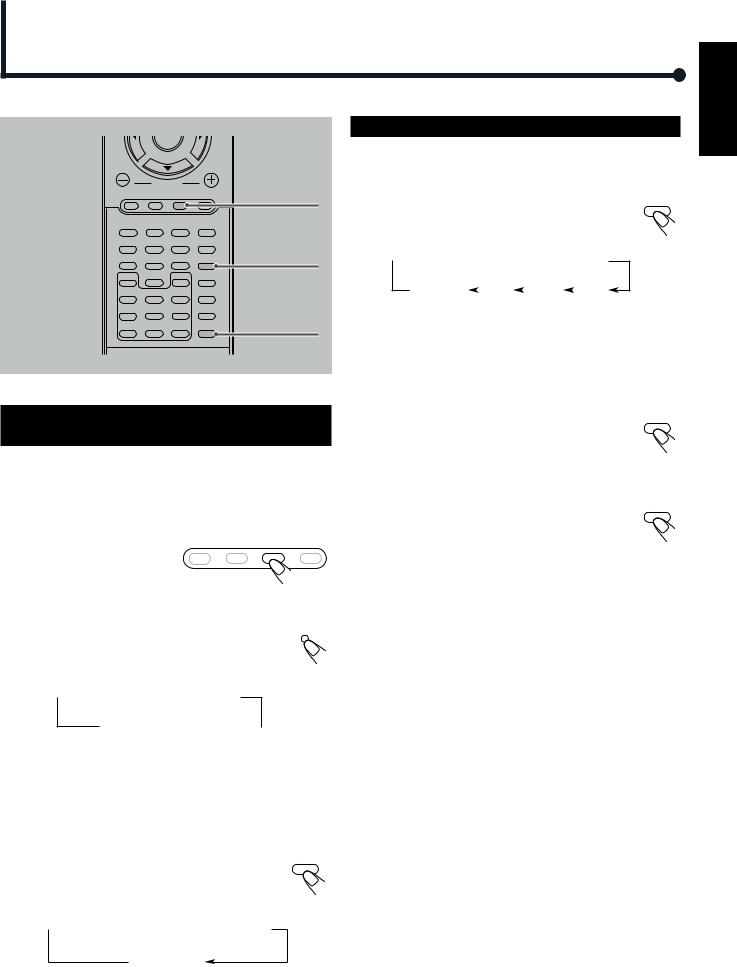
Turning Off the Power with the Timer
You can fall asleep while listening to music—Sleep Timer.
From the remote control ONLY:
SLEEP
Press SLEEP.
•Each time you press the button, the shut-off time changes as follows:
 10
10  20
20  30
30  60
60
OFF |
|
150 |
|
120 |
|
90 |
|
|
|
(Canceled)
When the shut-off time comes, the system turns off automatically.
Enjoying Sounds from the External
Equipment
You can enjoy sounds from the external equipment connected to the AUX IN jacks on the rear panel of the center unit.
•When you listen to sounds encoded with Dolby Surround, you can enjoy Dolby Surround.
1 Select AUX as the source. |
DVD FM/AM AUX MUTE |
|
|
||
From the remote control: |
|
|
Press AUX. |
|
|
On the front panel: |
|
|
Press SOURCE repeatedly until “AUX IN” |
SOURCE |
|
|
||
appears on the display. |
|
|
•Each time you press the button, the source changes as follows:
To check or change the time remaining until the shut-off time
Press SLEEP once. |
SLEEP |
The remaining time (in minutes) appears on the display.
• By pressing SLEEP, you can change the shut-off time.
To cancel the Sleep Timer
Press SLEEP repeatedly until “OFF” appears on the |
SLEEP |
|
|
display. |
|
• Turning off the power also cancels the Sleep Timer.
 DVD player*
  AUX IN
AM  FM
FM 
* “WAIT” appears on the display.
2Start playback on the external equipment.
•For in-depth information about the external equipment, see the manual supplied for it.
3 Press PRO LOGIC to activate Dolby |
PRO LOGIC |
Surround. |
|
•Each time you press the button, Dolby Surround mode changes as follows:
 PRO LOGIC
  3 STEREO
STEREO (canceled)
•When Dolby Surround activates, the PRO LOGIC indicator lights up on the display.
–For in-depth information about Pro Logic modes, see “Creating Realistic Sound Fields” on pages 18 and 22.
English
15
English
Speaker Settings
STANDBY/ON
AUDIO
|
|
VCR |
|
|
|
CONTROL |
|
TV |
VCR |
OFF |
ON |
TOP MENU |
MENU |
TV CHANNEL |
|
AUDIO/ |
SUBTITLE |
TV VOLUME |
|
FM MODE |
|||
DISPLAY |
RETURN |
STEP |
TV/VIDEO |
DOWN |
TUNER PRESET |
UP |
|
|
|
||
REW |
|
|
FF |
|
VCR CHANNEL |
|
|
|
TUNING |
|
|
B.SEARCH |
|
|
F.SEARCH |
2 3
ENTER
|
VOLUME |
|
|
|
DVD |
FM/AM |
AUX |
MUTING |
|
|
|
|
SOUND |
|
1 |
2 |
3 |
|
SETTING |
|
|
|
SETTING |
|
4 |
5 |
6 |
|
PRO LOGIC |
|
|
|
PRO LOGIC |
|
7 |
8 |
9 |
|
|
SLOW |
|
SETUP |
TEST |
|
0
ANGLE |
NTSC/PAL |
D.R.C. |
DSP MODE |
|
ZOOM |
|
|
REPEAT |
A-B REPEAT |
PROGRAM |
EFFECT |
CLEAR |
SEARCH |
REMAIN |
SLEEP |
Front speaker setting and subwoofer setting are fixed. Even you can select these items by pressing SETTING, you cannot change their settings.
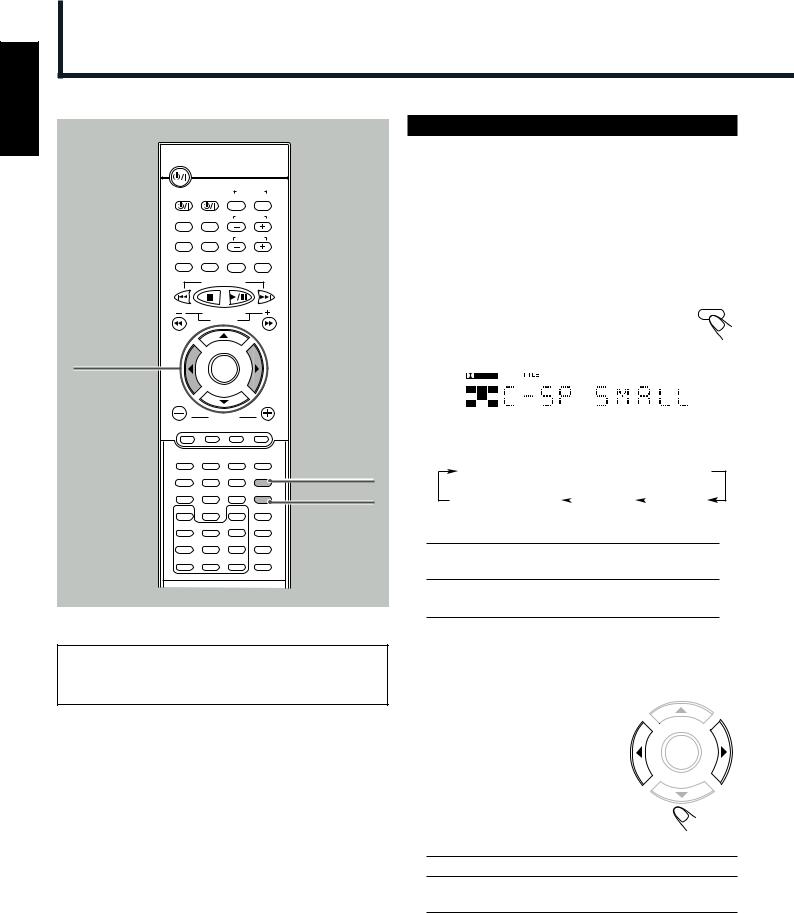
Setting the Speaker Information
To obtain best possible surround, register the center speaker (C–SP) and rear speakers (R–SP) settings after completing all the connections.
Before you start, remember...
There is a time limit in doing the following steps. If the setting is canceled before you finish, start from step 1 again.
From the remote control ONLY:
1 Press SETTING repeatedly until one of |
SETTING |
||
|
|||
following speakers (with the current |
|
||
setting*) appears on the display. |
|
||
|
|
|
|
|
|
|
|
|
|
|
|
|
|
|
|
•Each time you press the button, the indication in the main display changes as follows:
F–SP  C–SP
C–SP  R–SP
R–SP  SW–SP
SW–SP
Normal indication |
|
(R–DEL) |
|
(C–DEL) |
(canceled) |
|
|
||
|
|
|
|
C–SP (Center speaker) : To register the center speaker information.
R–SP (Rear speakers) : To register the rear speakers information.
*“SMALL” is the initial setting.
If you have already changed the setting, “NONE” will be shown.
2 Press 3 (or 2) repeatedly to select the appropriate speaker
information.
ENTER
• Each time you press the button, the speaker information changes as follows:
SMALL 
 NONE
NONE
SMALL : Normally select this.
NONE : Select this when you do not want to use the corresponding speaker.
3Repeat steps 1 and 2 to select the appropriate information for the other speaker.
16
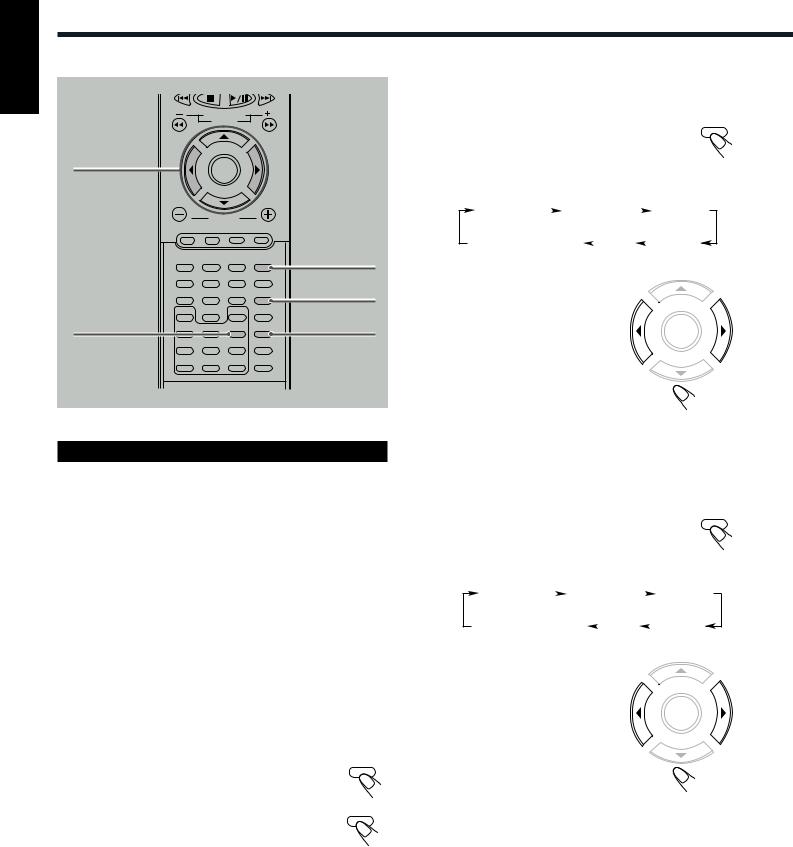
Setting the Delay Time
Adjust the delay time of the sounds from the center speaker and the rear speakers, comparing to that of the sounds from the front speakers. If the distance to the center speaker* and/or the rear speakers** from your listening point is almost the same as from the front speakers, select “00 MS (msec).”
*You can adjust the delay time only when the DOLBY DIGITAL or DTS indicator is lit on the display.
**You can adjust the delay time only when the DOLBY DIGITAL, DTS, or PRO LOGIC indicator is lit on the display.
Before you start, remember...
There is a time limit in doing the following steps. If the setting is canceled before you finish, start from step 1 again.
1 Activate Surround modes—Dolby Digital or DTS Digital Surround—or Dolby Pro Logic.
For Dolby Digital or DTS Digital Surround:
Prepare a DVD encoded with Dolby Digital or DTS Digital Surround, then start playback.
For Dolby Pro Logic:
1 Press AUX to select “ANALOG IN.”
2 Prepare a source encoded with Dolby surround, then start playback.
3 Press PRO LOGIC on the remote control so that “PRO LOGIC” appears on the display.
2 Press SETTING repeatedly until one of delay time indications (with the current setting*) appears on the display.
•Each time you press the button, the indication in the main display changes as follows:
F–SP  C–SP
C–SP  R–SP
R–SP  SW–SP
SW–SP
|
|
Normal indication |
|
R–DEL |
|
C–DEL |
|
|
|
|
|
(canceled) |
|
|
|
|
|
||
|
|
|
|
|
|
|
|
|
|
|
|
|
|
|
|
|
|
||
C–DEL (Center delay) |
: To register delay time for center |
||||||||
|
|
|
speaker—from 0 msec to 5 msec (not |
||||||
|
|
|
selectable for Dolby Pro Logic). |
||||||
|
|
|
|
|
|
|
|
||
R–DEL (Rear delay) |
: To register delay time for rear |
||||||||
speakers—from 0 msec to 15 msec for Dolby Digital and DTS Digital Surround, and from 15 msec to 30 msec for Dolby Pro Logic.
*“00 MS” is the initial setting for the center speaker.
The initial setting for the rear speakers is “00 MS” for Dolby Digital and DTS Digital Surround, “15 MS” for Dolby Pro Logic.
If you have already changed the setting, a different value will be shown.
3 Press 3 or 2 to adjust delay time.
• |
3 : Increases delay time. |
|
• |
2 : Decreases delay time. |
ENTER |
|
||
• |
1 msec increase (or decrease) in delay |
|
|
time corresponds to 30 cm increase (or |
|
|
decrease) in distance. |
|
4Repeat steps 2 and 3 to adjust the other delay time.
Left front |
Center speaker |
Right front |
speaker |
|
speaker |
Subwoofer
3.0 m
2.7 m
2.4 m
2.1 m
Left rear |
Right rear |
speaker |
speaker |
1 msec increase (or decrease) in delay time corresponds to 30 cm increase (or decrease) in distance.
Ex. : In this case, set C–DEL to “01 MS” and R–DEL to “02 MS”
English
17

English
Creating Realistic Sound Fields
You can use the following surround to reproduce a realistic sound field.
•Digital Multichannel Surround—Dolby Digital and DTS Digital Surround
•Dolby Surround
•DSP (Digital Signal Processor) modes
■ Dolby Digital and DTS Digital Surround
To enjoy surround effectively, all the speakers need to be connected and activated.
Dolby Digital*
Used to reproduce multichannel sound tracks of the software encoded with Dolby Digital ( ).
).
Dolby Digital encoding method (so-called discrete 5.1 channel digital audio format) records and digitally compresses the left front channel, right front channel, center channel, left rear channel, right rear channel, and LFE channel signals (total 6 channels, but LFE channel is counted as 0.1 channel. Therefore, called 5.1 channel). Since each channel is completely independent from the other channel signals to avoid interference, you can obtain much better sound quality with much stereo and surround effects.
In addition, Dolby Digital enables stereo rear sounds, and sets the cutoff frequency of the rear treble at 20 kHz, compared to 7 kHz for Dolby Pro Logic. These facts enhance the sound movement and being-there feelings much more than Dolby Pro Logic.
When the system detects Dolby Digital signals, the DOLBY DIGITAL indicator lights up on the display.
DTS Digital Surround**
Used to reproduce multichannel sound tracks of the software encoded with DTS Digital Surround (  ).
).
DTS Digital Surround is another discrete 5.1 channel digital audio format available on CD, LD, and DVD software.
Compared to Dolby Digital, audio compression rate is relatively low. This fact allows DTS Digital Surround format to add breadth and depth to the reproduced sounds. As a result, DTS Digital Surround features natural, solid and clear sound.
When the system detects DTS Digital Surround signals, the DTS indicator lights up on the display.
■ Dolby Surround*
Used to reproduce sound tracks of the VCR tapes encoded with Dolby Surround ( 


 ).
).
This is only used for the sound sources coming through the AUX IN jacks.
Dolby Pro Logic and Dolby 3 Stereo
Dolby Surround encoding format records the left front channel, right front channel, center channel, and rear channel signals (total 4 channels) into 2 channels.
The Dolby Pro Logic decoder built in this system decodes these 2 channel signals into original 4 channel signals—matrix-based multichannel reproduction, and allows you to enjoy a realistic stereo sound in your listening room.
When one of Dolby Surround is selected, the PRO LOGIC indicator lights up on the display.
Indications on the display for each surround
•Dolby Digital
•DTS Digital Surround
•Dolby Pro Logic
•Dolby 3 Stereo
•DSP*
* When you select FM/AM or AUX as the source, the Linear PCM indicator ( ) does not light up.
–According to the speaker settings, some speaker indicators do not light up. In this case, set the speaker setting appropriately.
*Manufactured under license from Dolby Laboratories. “Dolby,” “Pro Logic,” and the double-D symbol are trademarks of Dolby Laboratories. Confidential Unpublished Works. ©1992–1997 Dolby Laboratories, Inc. All rights reserved.
**Manufactured under license from Digital Theater Systems, Inc. US Pat. No. 5,451,942 and other world-wide patents issued and pending. “DTS” and “DTS Digital Surround” are trademarks of Digital Theater Systems, Inc. ©1996 Digital Theater Systems, Inc. All rights reserved.
18

■ DSP (Digital Signal Processor) Modes
DSP modes have been designed to create important acoustic surround elements.
The sound heard in a hall, a theater, a pavilion, a dance club, or a live club consists of direct sound and indirect sound—early reflections and reflections from behind. Direct sounds reach the listener directly without any reflection. On the other hand, indirect sounds are delayed by the distances of the ceiling and walls. These indirect sounds are important elements of the acoustic surround effects.
The following DSP modes are provided with this unit.
HALL |
: Gives clear vocal and the feeling of a concert |
|
hall. |
|
|
THEATER |
: Gives the feeling of a theater. |
|
|
PAVILION |
: Gives the spacious feeling of a pavilion with a |
|
high ceiling. |
DANCE CLUB : Gives a throbbing bass beat.
LIVE CLUB : Gives the feeling of a live music club with a low ceiling.
To check the speaker connections and settings using the test tone
1.Select and play a DVD encoded with Dolby Digital or DTS Digital Surround.
2. Press TEST on the remote control. |
TEST |
The test tone comes out from the speakers in the |
|
order. |
|
•If there is a speaker from which no sounds comes out, check the speaker’s connection (see pages 6 and 7) and setting (see page 16).
3.Press TEST again to stop the test tone.
These DSP modes can be used to add the acoustic surround effects while reproducing stereo analog software or Linear PCM digital software, and can give you a real “being there” feeling.
When one of the DSP modes is selected, the DSP indicator lights up on the display.
Available surround according to the input signal format |
|
: Possible |
: Impossible |
|||||||
|
|
|
|
|
|
|
||||
|
|
|
|
|
|
|
|
|
|
|
|
Surround |
Multichannel |
|
|
DSP |
|
|
|
(canceled) |
|
|
|
|
|
|
|
|
|
|||
|
|
|
Surround |
HALL |
THEATER |
PAVILION |
DANCE CLUB |
LIVE CLUB |
STEREO |
|
|
|
|
|
|||||||
|
|
|
|
|
|
|
|
|
|
|
format |
|
Analog |
|
|
|
|
|
|
|
|
|
|
|
||||||||
|
|
|
|
|
|
|
|
|
|
|
Signal |
|
Linear PCM |
|
|
|
|
|
|
|
|
|
|
|
|
|
|
|
|
|
|
|
|
Dolby Digital |
|
|
|
|
|
|
|
|
|
Input |
|
|
|
|
|
|
|
|
|
|
|
DTS |
|
|
|
|
|
|
|
|
|
|
|
|
||||||||
|
|
|
|
|
|
|
|
|
|
|
English
19
English
Creating Realistic Sound Fields
2 3
D.R.C
REW |
FF |
|
VCR CHANNEL |
|
TUNING |
B.SEARCH |
F.SEARCH |
|
ENTER |
VOLUME
DVD FM/AM AUX MUTING
|
|
SOUND |
1 |
2 |
3 |
|
|
SETTING |
4 |
5 |
6 |
|
|
|
PRO LOGIC |
7 |
8 |
9 |
|
SLOW |
|
SETUP |
TEST |
0
ANGLE |
NTSC/PAL |
D.R.C |
DSP MODE |
|
ZOOM |
|
|
REPEAT |
A-B REPEAT |
PROGRAM |
EFFECT |
CLEAR |
SEARCH |
REMAIN |
SLEEP |
SOUND
PRO LOGIC
DSP MODE
Adjusting Stereo Sound
3To adjust the output balance for the front speakers
1) Press SOUND repeatedly until the |
SOUND |
adjustment indication for the front |
|
speakers appears on the display. |
|
•Each time you press the button, the adjustment indication on the display changes as follows:
00 F 00 |
|
00 R 00 |
|
|
|
CEN |
||
|
|
|
|
|||||
Normal indication |
|
SW |
|
|
REAR |
|||
(canceled) |
|
|
|
|
||||
|
|
|
|
|
|
|
||
2) Press 3 or 2 to adjust the output balance.
3 : Decreases the left speaker
output, or restores the right |
ENTER |
|
|
speaker output. |
|
2 : Decreases the right speaker |
|
output, or restores the left |
|
speaker output. |
|
•The output balance changes from
OFF (silence), –06 (most reduction) to 00 (no reduction).
•“00 F 00” is the initial setting (the output balance is at the center position). If you have already changed the setting, another value will appear.
You can adjust the following settings. |
4 To adjust the output level for the subwoofer |
|
It is recommended that you make adjustments from your actual |
|
|
listening point while listening to reproduced sounds. |
1) Press SOUND repeatedly to select |
SOUND |
– Output balance for the front speakers |
“SW.” |
|
– Output level for the subwoofer |
• Each time you press the button, the indication on |
|
|
|
|
Once you adjust these items, the adjustments take effect for all the |
the display changes as follows: |
|
surround modes. |
|
|
Before you start, remember...
•There is a time limit in doing the following steps. If the setting is canceled before you finish, start from step 2 again.
1Select and play any source except Dolby Digital or DTS Digital Surround.
2Cancel Dolby Surround or DSP modes if they are
activated.
For deactivating Dolby Surround:
PRO LOGIC
Press PRO LOGIC on the remote control until “STEREO” appears on the display.
For deactivating DSP modes: |
DSP MODE |
Press DSP MODE (or DSP on the front panel) until the DSP indicator goes off from the display.
Now, you are ready to start adjustments.
•To adjust the output balance for the front speakers, go to the next step.
•To adjust the output level for the subwoofer, go to step 4.
00 F 00 |
|
00 R 00 |
|
|
|
CEN |
||
|
|
|
|
|||||
Normal indication |
|
SW |
|
|
REAR |
|||
(canceled) |
|
|
|
|
||||
|
|
|
|
|
|
|
||
2) Press 3 or 2 to adjust the output level.
3 : |
Increases the output level. |
|
2 : |
Decreases the output level. |
ENTER |
• The output level changes from –06 to +06.
• “SW –06dB” is the initial setting. If you have already changed the settings, another value will appear.
20
Adjusting Dolby Digital and
DTS Digital Surround
You can adjust the following settings while activating Dolby Digital or DTS Digital Surround.
It is recommended that you make adjustments from your actual listening point while listening to reproduced sounds.
–Output balance for the front speakers
–Output balance for the rear speakers
–Output level for the center speaker
–Output level for the rear speakers*
–Output level for the subwoofer
*The adjustment is separately memorized for Digital Multichannel Surround (Dolby Digital and DTS Digital Surround), and for Dolby Pro Logic.
Before you start, remember...
•Make sure that you have set the speaker information correctly (see page 16). You cannot adjust the speaker output balance and level when you set the speaker settings to “NONE.”
•There is a time limit in doing the following steps. If the setting is canceled before you finish, start from step 2 again.
1Select and play a DVD encoded with Dolby Digital or DTS Digital Surround.
Now, you are ready to start adjustments.
•To adjust the output balance for the front speakers and the rear speakers, go to the next step.
•To adjust the output level for the center speaker, the rear speakers, and the subwoofer, go to step 3.
2To adjust the output balance for the front speakers and the rear speakers
SOUND
1) Press SOUND repeatedly until one of the following adjustment indications appears on the display.
•Each time you press the button, the adjustment indication on the display changes as follows:
 00 F 00
  00 R 00
  CEN
CEN
Normal indication |
|
SW |
|
REAR |
(canceled) |
|
|
||
|
|
|
|
00 F (Front) 00 : To adjust the output balance for the front speakers.
00 R (Rear) 00 : To adjust the output balance for the rear speakers.
•“00 F 00” and “00 R 00” are the initial setting (the output balances are at the center position). If you have already changed the setting, another value will appear.
2) Press 3 or 2 to adjust the output balance.
3 : Decreases the left speaker
ENTER
output, or restores the right speaker output.
2 : Decreases the right speaker output, or restores the left speaker output.
•Each output balance changes from
OFF (silence), –06 (most reduction) to 00 (no reduction).
3)Repeat 1) and 2) for setting the other speaker.
3 To adjust the output levels for the center speaker, the rear speakers, and the subwoofer
1) Press SOUND repeatedly to select the SOUND
“CEN,” “REAR,” or “SW.”
•Each time you press the button, the indication on the display changes as follows:
|
|
|
00 F 00 |
|
|
00 R 00 |
|
|
|
CEN |
|
|
||||
|
|
|
|
|
|
|
||||||||||
|
|
|
Normal indication |
|
SW |
|
|
REAR |
|
|
|
|||||
|
|
|
(canceled) |
|
|
|
|
|
||||||||
|
|
|
|
|
|
|
|
|
|
|
|
|||||
|
|
|
|
|
|
|
|
|
|
|
|
|
|
|||
CEN (Center) |
: To adjust the output level for center |
|||||||||||||||
|
|
|
|
|
speaker (from –06 dB to +06 dB). |
|||||||||||
|
|
|
|
|
|
|
|
|
|
|
|
|
|
|||
REAR |
: To adjust the output level for rear |
|||||||||||||||
|
|
|
|
|
speakers (from –06 dB to +06 dB). |
|||||||||||
|
|
|
|
|
|
|
|
|
|
|
|
|
|
|
|
|
SW (Subwoofer) : To adjust the output level for subwoofer (from –06 dB to +06 dB).
•“CEN –06dB,” “REAR –06dB,” and “SW –06dB” are the initial settings. If you have already changed the settings, another value will appear.
2) Press 3 or 2 to adjust the output level.
3 : Increases the output level. |
ENTER |
2 : Decreases the output level.
3) Repeat 1) and 2) for setting the other speakers.
Activating Dynamic Range Compression
You can enjoy a powerful sound even at a low volume level by compressing the dynamic range (difference between the maximum and minimum sounds).
•This function takes effect only when Dolby Digital or DTS Digital Surround is activated.
From the remote control ONLY: |
|
Press D.R.C. |
D.R.C |
|
• Each time you press the button, the dynamic range compression mode alternates between on and off. Select “D.R.C. ON” while watching the DVD at night. (You can obtain a powerful sound at a low volume.)
English
21
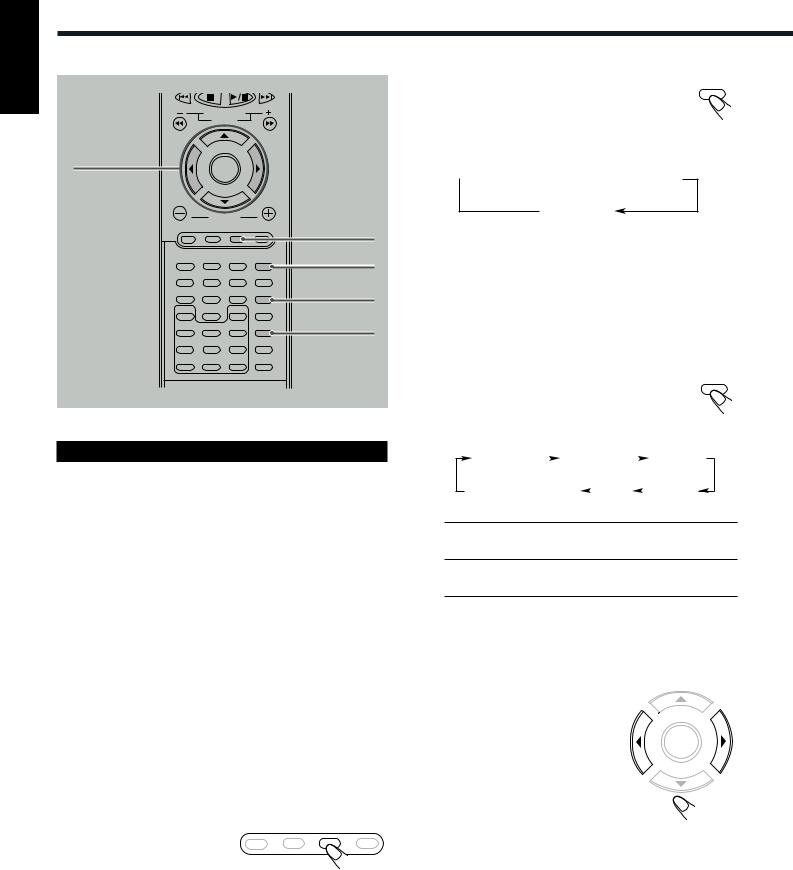
English
Creating Realistic Sound Fields
REW |
FF |
|
VCR CHANNEL |
|
TUNING |
B.SEARCH |
F.SEARCH |
2 3
ENTER
|
VOLUME |
|
AUX |
|
DVD |
FM/AM |
AUX |
MUTING |
|
1 |
2 |
3 |
SOUND |
SOUND |
|
|
|||
|
|
|
SETTING |
|
4 |
5 |
6 |
|
PRO LOGIC |
|
|
|
PRO LOGIC |
|
7 |
8 |
9 |
|
|
SLOW |
|
SETUP |
TEST |
|
0 |
DSP MODE |
|
ANGLE |
NTSC/PAL |
D.R.C |
DSP MODE |
|
ZOOM |
|
|
REPEAT |
A-B REPEAT |
PROGRAM |
EFFECT |
CLEAR |
SEARCH |
REMAIN |
SLEEP |
Adjusting Dolby Surround
You can adjust the following settings while activating Dolby Surround.
It is recommended that you make adjustments from your actual listening point while listening to reproduced sounds.
–Output balance for the front speakers
–Output balance for the rear speakers
–Output level for the rear speakers*
–Output level for the subwoofer
•When Dolby 3 Stereo is activated, you cannot adjust the rear speakers and subwoofer levels.
*The adjustment is separately memorized for Digital Multichannel Surround (Dolby Digital and DTS Digital Surround), and for Dolby Pro Logic.
•Dolby Surround cannot be used with DSP modes. Once one of Dolby Surround is activated, DSP modes in use will be canceled.
Before you start, remember...
•Make sure that you have set the speaker information correctly (see page 16). You cannot adjust the speaker output balance and levels when you have set the speaker settings to “NONE.”
•There is a time limit in doing the following steps. If the setting is canceled before you finish, start from step 3 again.
1 Press AUX to select the |
DVD FM/AM AUX MUTE |
external component as |
|
the source. |
|
2Start playing a source encoded with Dolby Surround.
3 Press PRO LOGIC repeatedly on the |
PRO LOGIC |
|
|
remote control to select Dolby Pro Logic |
|
or Dolby 3 Stereo. |
|
The PRO LOGIC indicator lights up on the display.
•Each time you press the button, the indication changes as follows:
 PRO LOGIC
  3 STEREO
STEREO (canceled)
Now, you are ready to start adjustments.
•To adjust the output balance for the front speakers and the rear speakers, go to the next step.
•To adjust the output level for the center speaker, the rear speakers, and the subwoofer, go to step 5.
4To adjust the output balance for the front speakers and the rear speakers
1) Press SOUND repeatedly until one of |
SOUND |
the following adjustment indications |
|
appears on the display. |
|
•Each time you press the button, the indication on the display changes as follows:
00 F 00 |
|
00 R 00 |
|
|
|
CEN |
||
|
|
|
|
|||||
Normal indication |
|
SW |
|
|
REAR |
|||
(canceled) |
|
|
|
|
||||
|
|
|
|
|
|
|
||
00 F (Front) 00 : To adjust the output balance for the front speakers.
00 R (Rear) 00 : To adjust the output balance for the rear speakers.
•When selecting “3 STEREO,” you cannot adjust the output balance for the rear speakers.
•“00 F 00” and “00 R 00” are the initial settings (the output balances are at the center position). If you have already changed the setting, another value will appear.
2) Press 3 or 2 to adjust the output balance.
3 : Decreases the left speaker
ENTER
output, or restores the right speaker output.
2 : Decreases the right speaker output, or restores the left speaker output.
•Each output balance changes from
OFF (silence), –06 (most reduction) to 00 (no reduction).
3)Repeat 1) and 2) for setting the other speakers.
22
5To adjust the output level for the center speaker, the rear speakers, and the subwoofer
1) Press SOUND repeatedly to select the SOUND
“CEN,” “REAR,” or “SW.”
•Each time you press the button, the indication on the display changes as follows:
|
|
|
00 F 00 |
|
|
00 R 00 |
|
|
|
CEN |
|
|
|||
|
|
|
|
|
|
|
|||||||||
|
|
|
Normal indication |
|
SW |
|
|
REAR |
|
|
|
||||
|
|
|
(canceled) |
|
|
|
|
|
|||||||
|
|
|
|
|
|
|
|
|
|
|
|
||||
|
|
|
|
|
|
|
|
|
|
|
|
|
|
||
CEN (Center) |
: To adjust the output level for center |
||||||||||||||
|
|
|
|
speaker (from –06 dB to +06 dB). |
|||||||||||
|
|
|
|
|
|
|
|
|
|
|
|
|
|
||
REAR |
: To adjust the output level for rear |
||||||||||||||
|
|
|
|
speakers (from –06 dB to +06 dB). |
|||||||||||
|
|
|
|
|
|
|
|
|
|
|
|
|
|
|
|
SW (Subwoofer) : To adjust the output level for subwoofer (from –06 dB to +06 dB).
•When selecting “3 STEREO,” you cannot adjust the output levels for the rear speakers and subwoofer.
•“CEN –06dB,” “REAR –06dB,” and “SW –06dB” are the initial settings. If you have already changed the settings, another value will appear.
2) Press 3 or 2 to adjust the output level.
3 : Increases the output level.
2 : Decreases the output level. |
ENTER |
3) Repeat 1) and 2) for setting the other speakers.
Adjusting DSP Modes
You can adjust the following settings while activating DSP modes. It is recommended that you make adjustments from your actual listening point while listening to reproduced sounds.
–Output balance for the front speakers
–Output balance for the rear speakers
–Output level for the rear speakers
–Output level for the subwoofer
–Overall level of DSP effect
•DSP modes cannot be used with Dolby Surround. Once one of DSP modes is activated, Dolby Surround in use will be canceled.
•When you play back a DVD encoded with Dolby Digital or DTS Digital Surround, DSP MODE button (or DSP button on the center unit) does not work.
Before you start, remember...
•Make sure that you have set the speaker information correctly (see page 16). You cannot adjust the speaker output balance and levels when you have set the speaker settings to “NONE.”
•There is a time limit in doing the following steps. If the setting is canceled before you finish, start from step 2 again.
1Select and play any source except Dolby Digital or DTS Digital Surround.
2 Press DSP MODE (or DSP on the front DSP MODE panel) repeatedly to select the desired  DSP mode.
The DSP indicator lights up on the display while the DSP modes are activated.
•Each time you press the button, DSP mode changes as follows:
 HALL
HALL  THEATER
  PAVILION
Normal
indication  LIVE CLUB
  DANCE CLUB
  (canceled)
Now, you are ready to start the adjustment.
•To adjust the output balance for the front speakers and the rear speakers, go to the next step.
•To adjust the output level for the rear speakers, go to step 4 on the next page.
•To adjust the overall level of DSP effect, go to step 5 on the next page.
3To adjust the output balance for the front speakers and the rear speakers
SOUND
1) Press SOUND repeatedly until one of the following adjustment indications appears on the display.
•Each time you press the button, the indication on the display changes as follows:
|
|
00 F 00 |
|
|
00 R 00 |
|
|
|
REAR |
|||
|
|
|
|
|
|
|
||||||
|
Normal |
|
REVERB |
|
LIVE |
|
|
ROOM |
||||
|
indication |
|
|
|
||||||||
|
|
|
|
|
|
|
|
|
|
|||
(canceled) |
|
|
|
|
|
|
|
|
|
|||
00 F (Front) 00 : To adjust the output balance for the front speakers.
00 R (Rear) 00 : To adjust the output balance for the rear speakers.
•“00 F 00” and “00 R 00” are the initial setting (the output balances are at the center position). If you have already changed the setting, another value will appear.
2) Press 3 or 2 to adjust the output balance.
3 : Decreases the left speaker
ENTER
output, or restores the right speaker output.
2 : Decreases the right speaker output, or restores the left
speaker output.
•Each output balance changes from
OFF (silence), –06 (most reduction) to 00 (no reduction).
3)Repeat 1) and 2) for setting the other speaker.
TO BE CONTINUED ON THE NEXT PAGE
English
23

Creating Realistic Sound Fields
English
|
|
Adjusting DSP Sound Parameters |
REW |
FF |
|
VCR CHANNEL |
|
You can fine-adjust DSP modes more minutely by changing three |
TUNING |
|
|
B.SEARCH |
F.SEARCH |
parameters—room, liveness, and reverberation. |
2 3 |
|
Before you start, remember... |
ENTER |
|
• There is a time limit in doing the following steps. If the setting is |
|
|
canceled before you finish, start from step 2 again. |
VOLUME
DVD FM/AM AUX MUTING
|
|
SOUND |
1 |
2 |
3 |
|
|
SETTING |
4 |
5 |
6 |
|
|
|
|
PRO LOGIC |
7 |
8 |
9 |
|
SLOW |
|
SETUP |
TEST |
0
ANGLE |
NTSC/PAL |
D.R.C |
DSP MODE |
|
ZOOM |
|
|
REPEAT |
A-B REPEAT |
PROGRAM |
EFFECT |
CLEAR |
SEARCH |
REMAIN |
SLEEP |
SOUND
DSP MODE
EFFECT
1 Press DSP MODE (or DSP on the front |
DSP MODE |
|
|
panel) repeatedly to select the desired |
|
DSP mode. |
|
2 Press SOUND repeatedly to select the |
SOUND |
desired DSP sound parameter. |
|
•Each time you press the button, the indication on the display changes as follows:
|
|
00 F 00 |
|
|
00 R 00 |
|
|
|
REAR |
|||
|
|
|
|
|
|
|
||||||
|
Normal |
|
REVERB |
|
LIVE |
|
|
ROOM |
||||
|
indication |
|
|
|
||||||||
|
|
|
|
|
|
|
|
|
|
|||
(canceled) |
|
|
|
|
|
|
|
|
|
|||
4To adjust the output level for the rear speakers
1)Press SOUND repeatedly until “REAR” SOUND
appears on the display.
•Each time you press the button, the indication on the display changes as follows:
|
|
00 F 00 |
|
|
00 R 00 |
|
|
|
REAR |
|||
|
|
|
|
|
|
|
||||||
|
Normal |
|
REVERB |
|
LIVE |
|
|
ROOM |
||||
|
indication |
|
|
|
||||||||
|
|
|
|
|
|
|
|
|
|
|||
(canceled) |
|
|
|
|
|
|
|
|
|
|||
REAR : To adjust the output level for rear speakers (from –06 dB to +06 dB).
•“REAR –06dB” is the initial setting. If you have already changed the setting, another value will appear.
2)Press 3 or 2 to adjust the output level.
3 : Increases the output level.
2 : Decreases the output level.
5 To adjust the overall level of DSP effect |
EFFECT |
Press EFFECT repeatedly to adjust the overall level.
“EFFECT (with the current setting)” or “DEFAULT” appears on the display.
•Each time you press the button, the effect level changes as follows:
EFFECT 1  EFFECT 2
DEFAULT  EFFECT 3
As the number increases, DSP effect becomes stronger.
•“DEFAULT” is the initial setting. For in-depth information about “DEFAULT (initial)” setting, see the table to the right.
ROOM : To adjust the resonance based on the room size. The larger this value is, the more effective the resonance is (from 04 to 16 by 2 steps).
LIVE (Liveness) : To adjust the liveness. The larger this value is, the more liveness is obtained (from 04 to 16 by 2 steps).
REVERB (Reverberation) : To adjust the reverberation time of the sound (from 0.0 msec to 1.6 msec by
0.2msec steps).
•The following diagram shows the “DEFAULT (initial)” settings of the DSP sound parameters for each DSP mode.
DSP MODE |
ROOM |
LIVE |
REVERB |
HALL |
08 |
16 |
0.4 |
|
|
|
|
THEATER |
04 |
10 |
1.0 |
|
|
|
|
PAVILION |
08 |
04 |
0.2 |
|
|
|
|
DANCE CLUB |
04 |
08 |
1.6 |
|
|
|
|
LIVE CLUB |
08 |
16 |
1.4 |
|
|
|
|
3 Press 3 or 2 to adjust the DSP sound parameter.
3 : Increases the value.
2 : Decreases the value.
4Repeat 2 and 3 for setting the other DSP sound parameters.
Note:
Pressing EFFECT to adjust overall level of DSP effect will change your fine-adjustments to the fixed level.
24
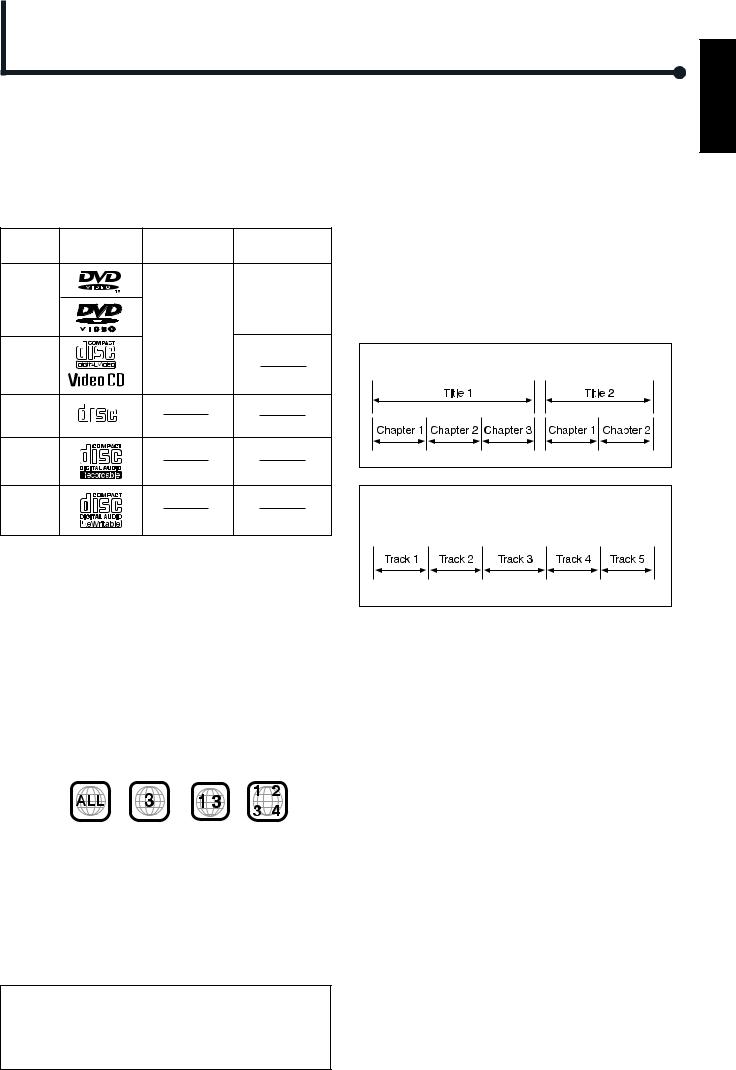
Disc Introduction—DVD/VCD/CD
This system has been designed to play back the following discs: DVD, Video CD, Audio CD, CD-R, and CD-RW.
•This system can also play back MP3 files recorded on CD-Rs and CD-RWs. For in-depth information about what MP3 is, see “MP3 Introduction” on page 40.
Discs you can play:
Disc |
Mark |
Video |
Region Code |
Type |
(Logo) |
Format |
Number* |
DVD |
|
|
3 |
Video |
|
|
ALL |
|
|
NTSC |
|
|
|
PAL |
|
Video |
|
|
|
CD |
|
|
|
Audio |
COMPACT |
|
|
|
|
|
|
CD |
DIGITAL AUDIO |
|
|
CD-R |
|
|
|
CD-RW |
|
|
|
•On some DVD or VCD discs, their actual operations may be different from what is explained in this manual. This is due to the disc programming and disc structure, but not a malfunction of this system.
•The following discs cannot be played back:
–DVD-Audio, DVD-ROM, DVD-RAM, DVD-R, DVD-RW, CD-ROM, CD-I, (CD-I Ready), Photo CD, etc.
Playing back these discs will generate noise and damage the speakers.
* Note on Region Code
DVD players and DVD Video discs have their own Region Code numbers. This system can play back DVD discs recorded with the color system of NTSC and PAL whose Region Code numbers include “3.”
Examples:
If a DVD with the inadequate Region Code numbers is loaded, “REGION ERR” appears on the display and playback cannot start.
IMPORTANT: Before performing any operations, make sure of
the following....
Disc structure—DVD, Video CD (VCD) and Audio CD (CD)
A DVD disc consists of Titles, and each title may be divided into some Chapters. (See Example 1.)
For example, if a DVD disc contains some movies, each movie may have its own title number, and it may be further divided into some chapters.
On the other hand, a VCD or CD consists of Tracks. (See Example 2.)
In general, each song has its own track number. (On some discs, each track may also be divided by Indexes.)
When playing back a VCD with Playback Control (PBC) function, you can select what to view using the menu shown on the TV screen. (While operating a Video CD using the menu, some of the functions such as Repeat and Track Search may not work.)
Example 1: DVD disc |
Example 2 : Video CD/Audio CD |
Notes on CD-R and CD-RW
User-edited CD-Rs (Recordable) and CD-RWs (Rewritable) can be played back only if they are already “finalized.”
•The system can play back CD-Rs or CD-RWs recorded on a personal computer if they have been recorded in the audio CD format or recorded in MP3 format (see page 40).
However, they may not be played back depending on their characteristics or recording conditions.
•Before playing back CD-Rs or CD-RWs, read their instructions or cautions carefully.
•Some CD-Rs or CD-RWs may not be played back on this unit because of their disc characteristics, damage or stain on them, or if the built-in lens is dirty.
•CD-RWs may require a longer readout time. This is caused by the fact that the reflectance of CD-RWs is lower than for regular CDs.
•Check the connection with the TV.
•Turn on the TV and select the correct input on the TV to view the pictures or on-screen indications on the TV screen.
•For DVD playback, you can change the Setup menu setting to your preference. (See pages 46 to 49.)
If “  ” appears on the TV screen when pressing a button, the disc cannot accept an operation you have tried to do, or information required for that operation is not recorded in the disc.
NOTICE : In some cases, without showing “  ,” operations will not be accepted.
English
25

English
Basic Disc Operations
STANDBY/ON
AUDIO
|
|
|
VCR |
|
|
CONTROL |
|
TV |
VCR |
OFF |
ON |
TOP MENU |
MENU |
TV CHANNEL |
|
AUDIO/ |
SUBTITLE |
TV VOLUME |
|
FM MODE |
|||
DISPLAY |
DISPLAY RETURN STEP |
TV/VIDEO |
|
4 |
TUNER PRESET |
|
¢ |
DOWN |
UP |
||
7 |
REW |
FF |
3/8 |
VCR CHANNEL |
|
||
|
TUNING |
|
|
B.SEARCH |
F.SEARCH |
|
ENTER |
To start playback
TUNER PRESET
Press 3/8.
The source is automatically changed to the DVD player.
“WAIT” appears on the display for a while,
then the detected disc type appears—DVD, VCD, CD, or MP3. (If your TV is turned on, the mark corresponding to the detected disc type appears on the TV screen.)
• When a disc is not loaded, “NO DISC” appears on the display.
Disc play starts from the first chapter or track of the selected disc.
•If a menu appears while playing a DVD or VCD with PBC function, see “Disc Menu-Driven Playback” (for DVD) on page 29 or “Disc Menu-Driven Playback (Only for VCD)” on page 35.
Note:
If “WRONG PARENTAL CODE” appears on the TV screen, Parental
Lock is in use. You cannot play back a DVD containing violent scenes or those not suitable for your family members.
To play back such a disc, cancel the Parental Lock. (See page 49.)
To stop playback for a moment |
TUNER PRESET |
Press 3/8.
While pausing, “PAUSE” appears on the display.
• To resume play, press 3/8.
To go to another chapter or track (except MP3)
Press ¢ or 4 repeatedly during playback.
•¢ : Skips to the beginning of the next or succeeding chapter or track.
•4 : While a DVD or a VCD with PBC is played back
Goes back to the beginning of the previous chapter or track.
While a CD or a VCD without PBC is played back
Goes back to the beginning of the current or previous track.
To go to another title (only possible on a DVD) or track (only possible on a CD and VCD) directly using the number buttons
Pressing the number buttons before or during play allows you to start playing the title/track number you want. (If your TV is turned on, the on-screen bar is pulled down automatically on the TV screen.)
•To select number 1 to 9, press the corresponding number button (then press ENTER or wait for 5 seconds).
•To select number 15, press 1, 5.
•To select number 23, press 2, 3.
To stop during playback
TUNER PRESET
Press 7.
(If your TV is turned on, “  STOP” appears on the TV screen.)
•When an MP3 disc is played back, playback stops completely.
•This system can memorize the end point even when you press 7. When you start playback again by pressing 3/8, playback begins from where it has been stopped—Resume play.
•To stop completely, press 7 twice. (“7 STOP” appears on the TV screen.) The disc type appears on the display.
The DVD player goes on working for 3 minutes after playback stops.
Playback information on the display
DVD
Title No. Chapter No. Elapsed playing time
VCD/CD
Track No. Elapsed playing time
MP3
Track No. Elapsed playing time
To remove the disc
Press 0 on the front panel.
The disc tray comes out.
To close the disc tray, press 0 again.
•If you do not press the button, the disc tray closes automatically 35 seconds after.
26
 Loading...