

Page 1
Having TROUBLE with operation?
Please reset your unit
Refer to page of How to reset your unit
Vous avez des PROBLÈMES de fonctionnement?
Réinitialisez votre appareil
Référez-vous à la page intitulée Comment réinitialiser votre appareil
ENGLISH
FRANÇAIS
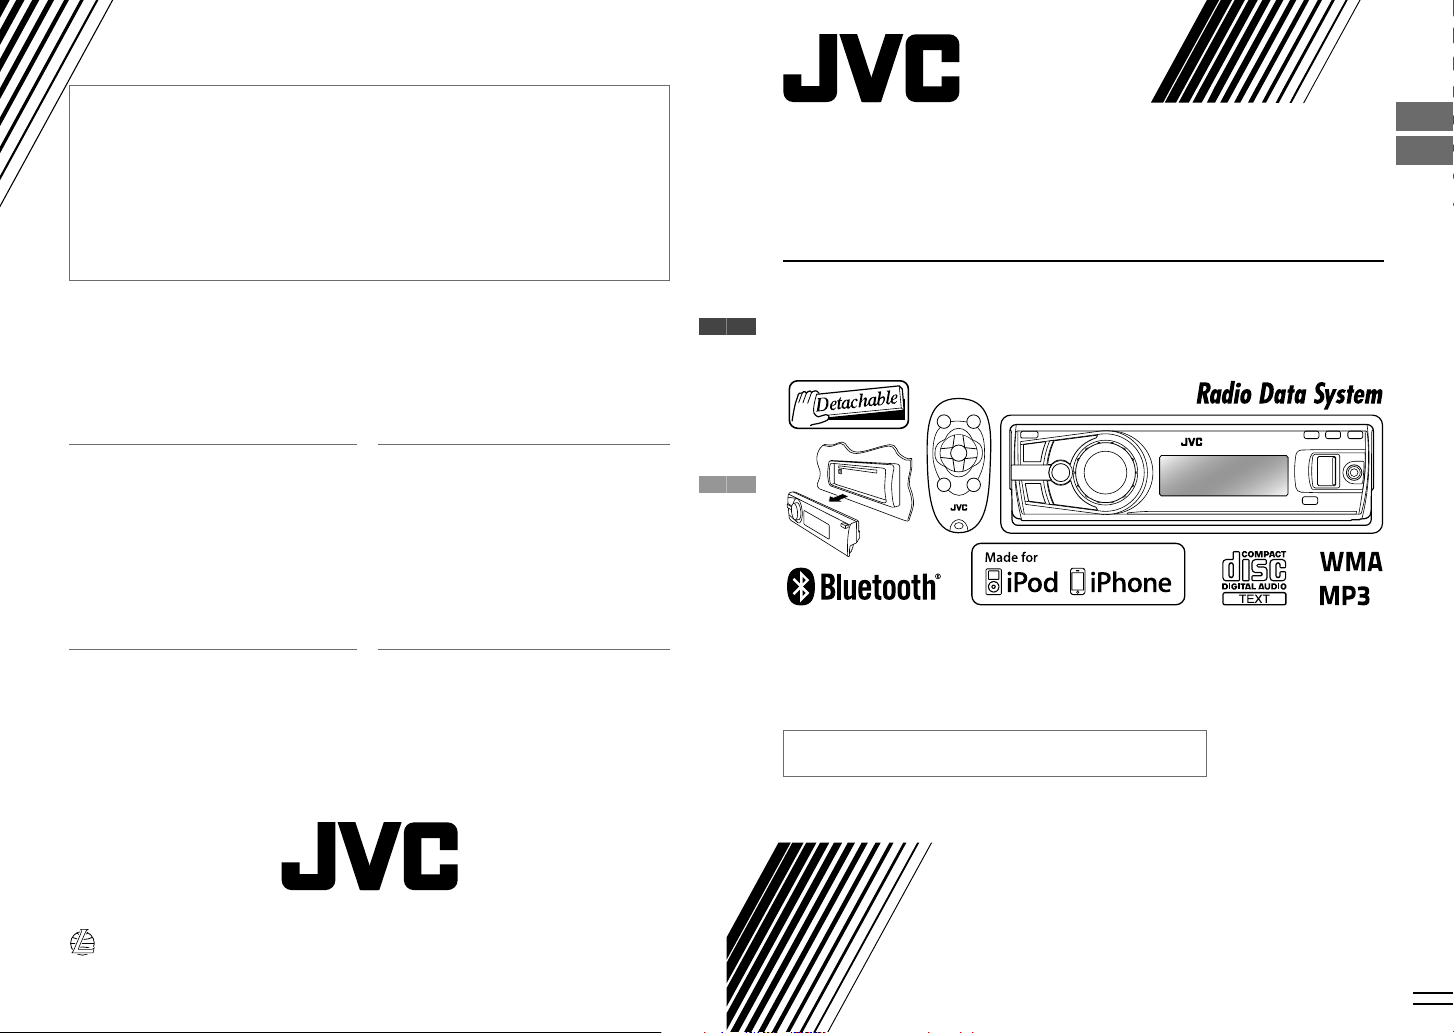
KD-R921BT
CD RECEIVER / RÉCEPTEUR CD
Dear Customer,
This apparatus is in conformance with the valid
European directives and standards regarding
electromagnetic compatibility and electrical safety.
European representative of Victor Company of
Japan, Limited is:
JVC Technical Services Europe GmbH
Postfach 10 05 04
61145 Friedberg
Germany
EN, FR
Cher(e) client(e),
Cet appareil est conforme aux directives et
normes européennes en vigueur concernant la
compatibilité électromagnétique et à la sécurité
électrique.
Représentant européen de la société Victor
Company of Japan, Limited:
JVC Technical Services Europe GmbH
Postfach 10 05 04
61145 Friedberg
Allemagne
0211DTSMDTJEIN© 2011 Victor Company of Japan, Limited
For canceling the display demonstration, see page 4. / Pour annuler la démonstration des
affichages, référez-vous à la page 4.
For installation and connections, refer to the separate manual.
Pour l’installation et les raccordements, se référer au manuel séparé.
INSTRUCTIONS
MANUEL D’INSTRUCTIONS
GET0720-003A
[E/EU]
Page 2
Thank you for purchasing a JVC product.
Please read all instructions carefully before operation, to ensure your complete understanding and
to obtain the best possible performance from the unit.
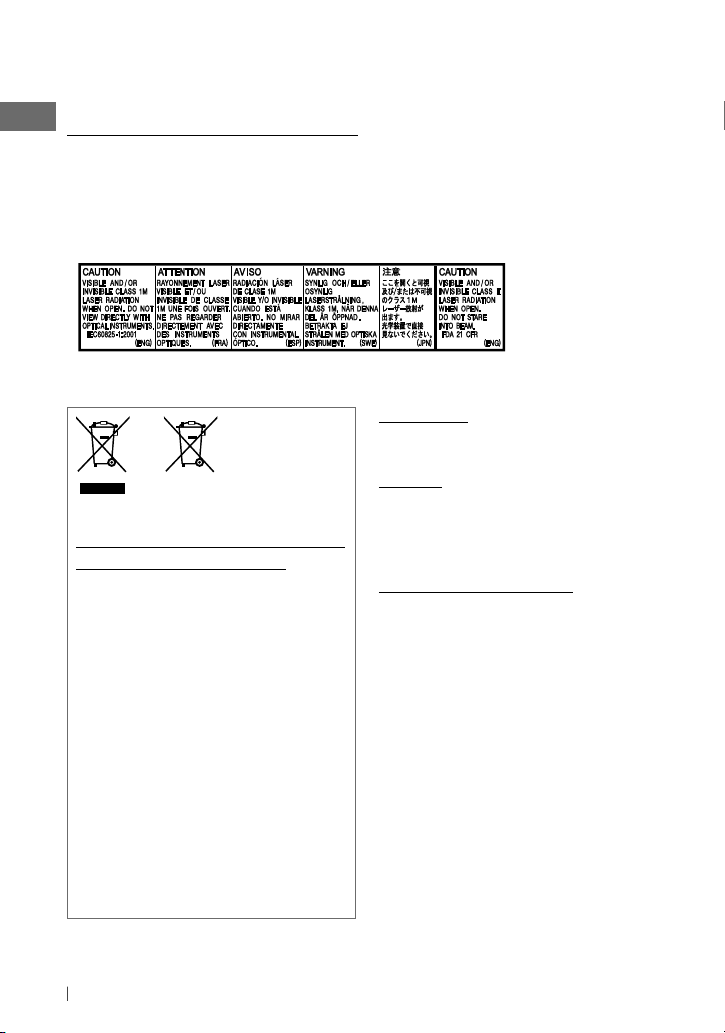
IMPORTANT FOR LASER PRODUCTS
1. CLASS 1 LASER PRODUCT
2. CAUTION: Do not open the top cover. There are no user serviceable parts inside the unit; leave
all servicing to qualified service personnel.
3. CAUTION: Visible and/or invisible class 1M laser radiation when open. Do not view directly with
optical instruments.
4. REPRODUCTION OF LABEL: CAUTION LABEL, PLACED OUTSIDE THE UNIT.
WARNING:
Stop the car before operating the unit.
Battery
Products
Information for Users on Disposal of
Old Equipment and Batteries
[European Union only]
These symbols indicate that the product and
the battery with this symbol should not be
disposed as general household waste at its
end-of-life.
If you wish to dispose of this product and
the battery, please do so in accordance with
applicable national legislation or other rules
in your country and municipality.
By disposing of this product correctly, you
will help to conserve natural resources and
will help prevent potential negative effects
on the environment and human health.
Notice:
The sign Pb below the symbol for batteries
indicates that this battery contains lead.
2 ENGLISH
Caution:
Adjust the volume so that you can hear sounds
outside the car. Driving with the volume too
high may cause an accident.
Caution on volume setting:
Digital devices (CD/USB) produce very little
noise compared with other sources. Lower the
volume before playing these digital sources to
avoid damaging the speakers by the sudden
increase of the output level.
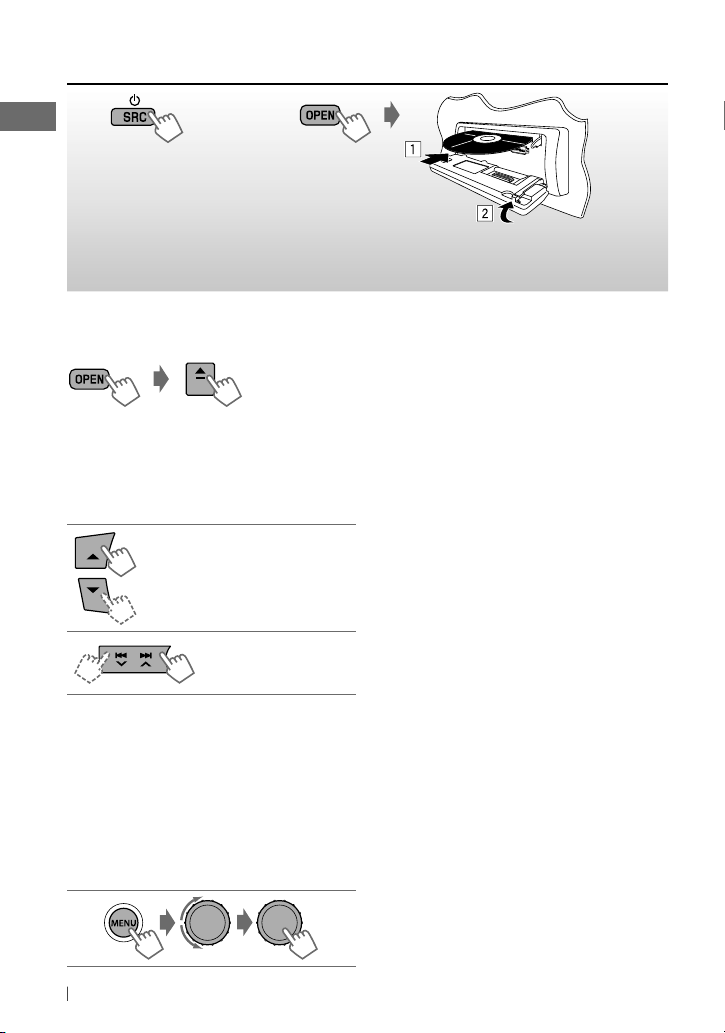
Page 3
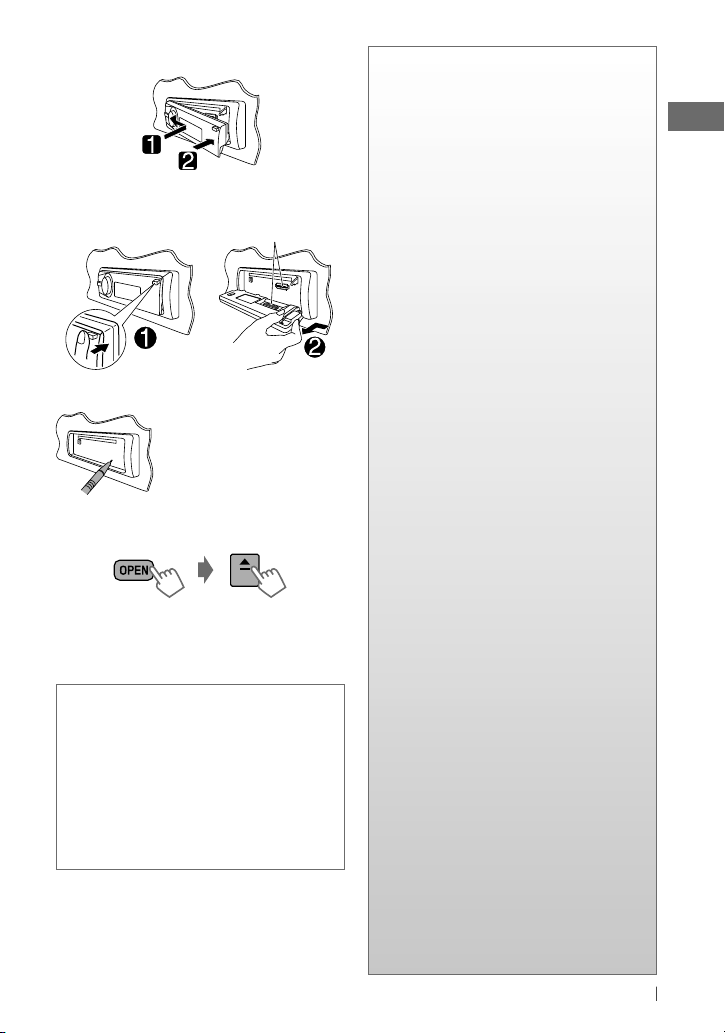
How to attach the control panel
How to detach the control panel
Avoid touching the connectors.
How to reset your unit
Your preset adjustments will
also be erased.
How to forcibly eject a disc
[Hold]
• Be careful not to drop the disc when it ejects.
• If this does not work, reset your unit.
Condensation : When the car is airconditioned, moisture may collect on the
laser lens. This may cause disc read errors. In
this case, remove the disc and wait for the
moisture to evaporate.
Temperature inside the car : If you have
parked the car for a long time in hot or cold
weather, wait until the temperature in the car
becomes normal before operating the unit.
CONTENTS
3 How to attach the control panel
3 How to detach the control panel
3 How to reset your unit
3 How to forcibly eject a disc
4 Canceling the display
demonstration
4 Setting the clock
5 Preparing the remote controller
5 About discs
6 Basic operations
8 Listening to the radio
10 Listening to a disc
11 Listening to a USB device
13 Using Bluetooth ® devices
13 Connecting a Bluetooth device
15 Using a Bluetooth mobile phone
18 Using a Bluetooth audio player
18 Changing the Bluetooth settings
19 Listening to an iPod/iPhone
22 Listening to the other external
components
23 Sound adjustment
23 Customizing the preset sound mode
—USER
23 Setting and storing “My Sound EQ”
preset sound mode
24 Setting the speaker output timing
—Time Alignment
26 Setting the crossover High/Low Pass
Filter—X’over HPF/LPF
27 Menu operations
30 Troubleshooting
33 Specifications
3ENGLISH
Page 4
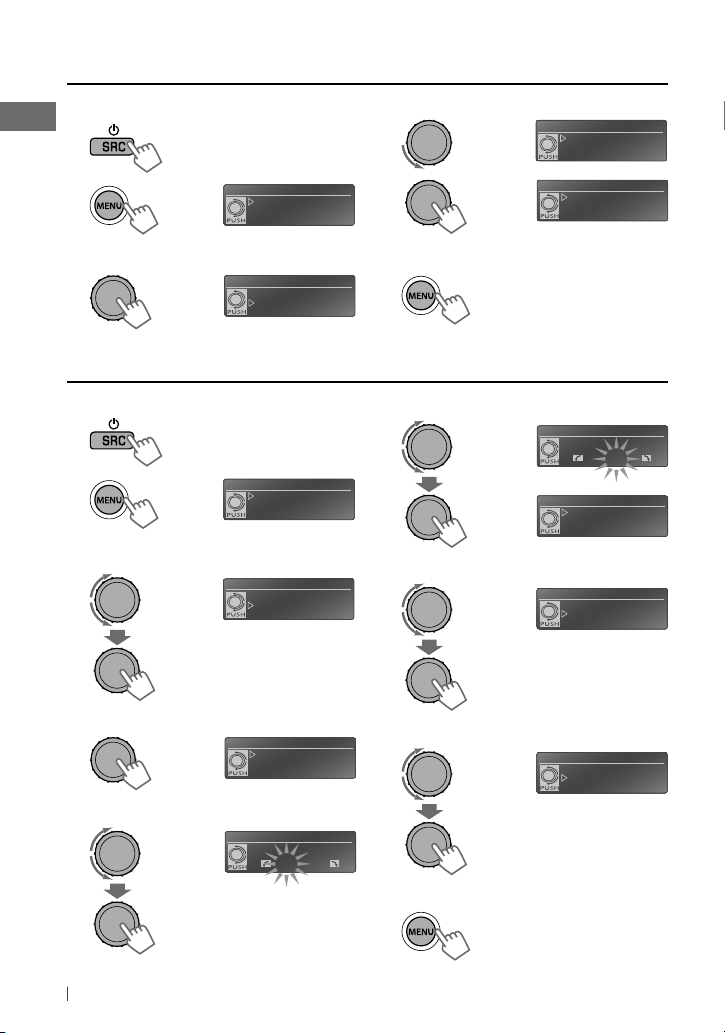
Canceling the display demonstration
1 Turn on the power.
2
[Hold]
SET UP
DEMO
Clock
Color
(Initial setting)
3 Select <DEMO>.
DEMO
Off
On
(Initial setting)
Setting the clock
1 Turn on the power.
SET UP
2
[Hold]
3 Select <Clock>.
DEMO
Clock
Color
(Initial setting)
SET UP
DEMO
Clock
Color
4 Select <Off>.
DEMO
Off
On
5
SET UP
6 Finish the procedure.
6 Adjust the minute.
Set Clock
Clock
7 Select <24H/12H>.
Clock
DEMO
Clock
Color
0 : 00
Set Clock
24H/12H
Clock Adjust
Set Clock
24H/12H
Clock Adjust
4 Select <Set Clock>.
5 Adjust the hour.
4 ENGLISH
Clock
Set Clock
24H/12H
Clock Adjust
Set Clock
0 : 00
8 Select <24Hours> or <12Hours>.
24H/12H
24Hours
12Hours
9 Finish the procedure.
Page 5
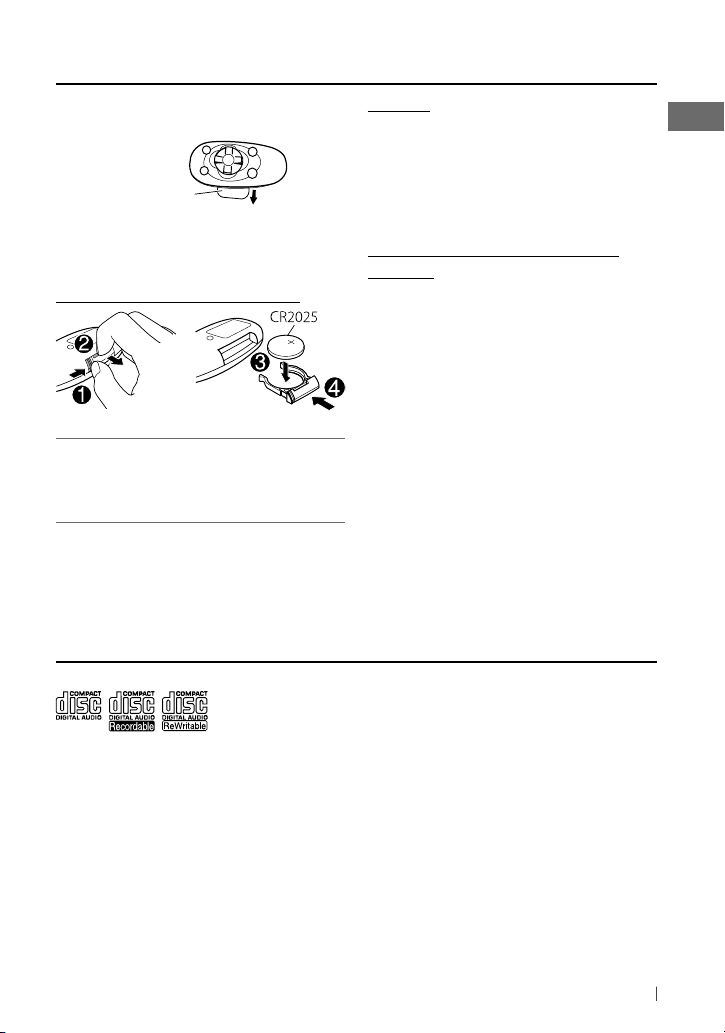
Preparing the remote controller
When you use the remote controller for the first
time, pull out the insulation sheet.
Insulation sheet
If the effectiveness of the remote controller
decreases, replace the battery.
Replacing the lithium coin battery
This unit is equipped with the steering wheel
remote control function.
• For details, refer also to the instructions
supplied with the remote adapter.
About discs
This unit can only play the CDs with:
Discs that cannot be used:
• Discs that are not round.
• Discs with coloring on the recording surface
or discs that are dirty.
• You cannot play a Recordable/ReWritable
disc that has not been finalized. (For the
finalization process refer to your disc writing
software, and your disc recorder instruction
manual.)
• 8 cm CD cannot be used. Attempt to insert
using an adapter can cause malfunction.
Caution:
• Danger of explosion if battery is incorrectly
replaced. Replace only with the same or
equivalent type.
• Battery shall not be exposed to excessive heat
such as sunshine, fire, or the like.
Warning (to prevent accidents and
damage):
• Do not install any battery other than CR2025
or its equivalent.
• Do not leave the remote controller in a place
(such as dashboards) exposed to direct
sunlight for a long time.
• Store the battery in a place where children
cannot reach.
• Do not recharge, short, disassemble, heat the
battery, or dispose of it in a fire.
• Do not leave the battery with other metallic
materials.
• Do not poke the battery with tweezers or
similar tools.
• Wrap the battery with tape and insulate when
throwing away or saving it.
Handling discs:
• Do not touch the recording surface of the
disc.
• Do not stick tape etc. on the disc, or use a disc
with tape stuck on it.
• Do not use any accessories for the disc.
• Clean from the center of the disc and move
outward.
• Clean the disc with a dry silicon or soft cloth.
Do not use any solvents.
• When removing discs from this unit, pull them
out horizontally.
• Remove the rims from the center hole and
disc edge before inserting a disc.
5ENGLISH
Page 6
Basic operations
Control dial
AUX (auxiliary) input jack
USB (Universal Serial Bus) input terminal
Display window
Remote sensor
• DO NOT expose to
bright sunlight.
Caution for DualDisc playback:
The Non-DVD side of a “DualDisc” does not comply with the “Compact Disc Digital Audio” standard.
Therefore, the use of Non-DVD side of a DualDisc on this product may not be recommended.
Caution:
If the temperature inside the car is below 0°C the movement of animation and text scroll will be
halted on the display to prevent the display from being blurred. appears on the display.
When the temperature increases, and the operating temperature is resumed, these functions will
start working again.
JVC bears no responsibility for any loss of data in an iPod/iPhone and/or USB mass storage class
device while using this System.
Maintenance
Cleaning the unit
Wipe off the dirt on the panel with a dry silicon or soft cloth. Failure to observe this precaution
may result in damage to the unit.
Cleaning the connector
Wipe off dirt on the connector of the unit and panel. Use a cotton swab or cloth.
6 ENGLISH
Page 7
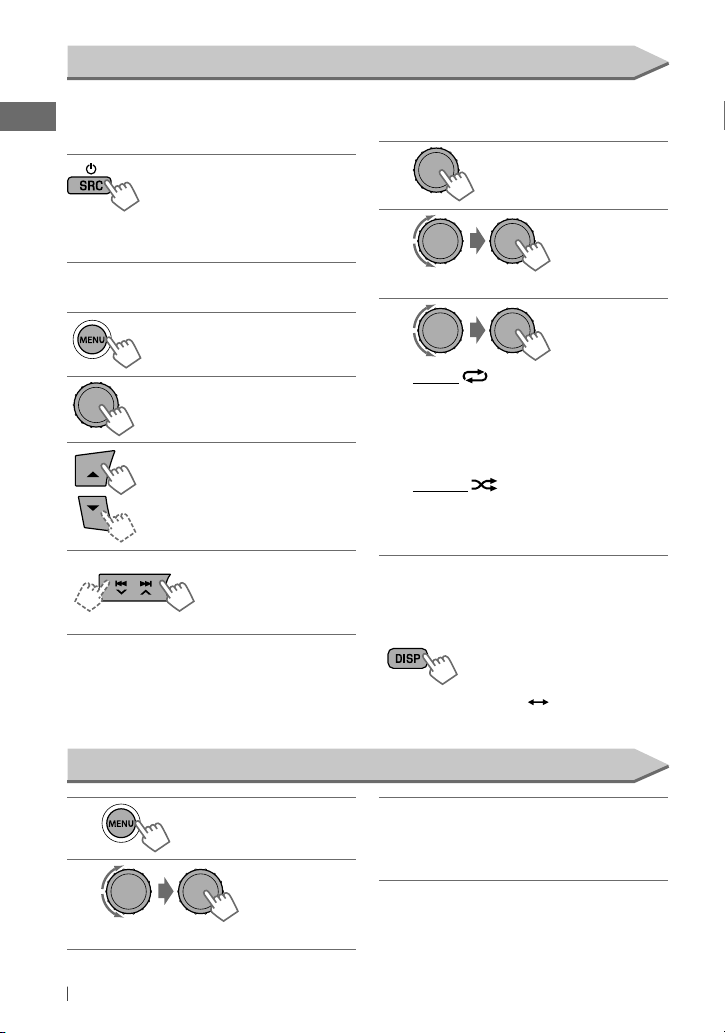
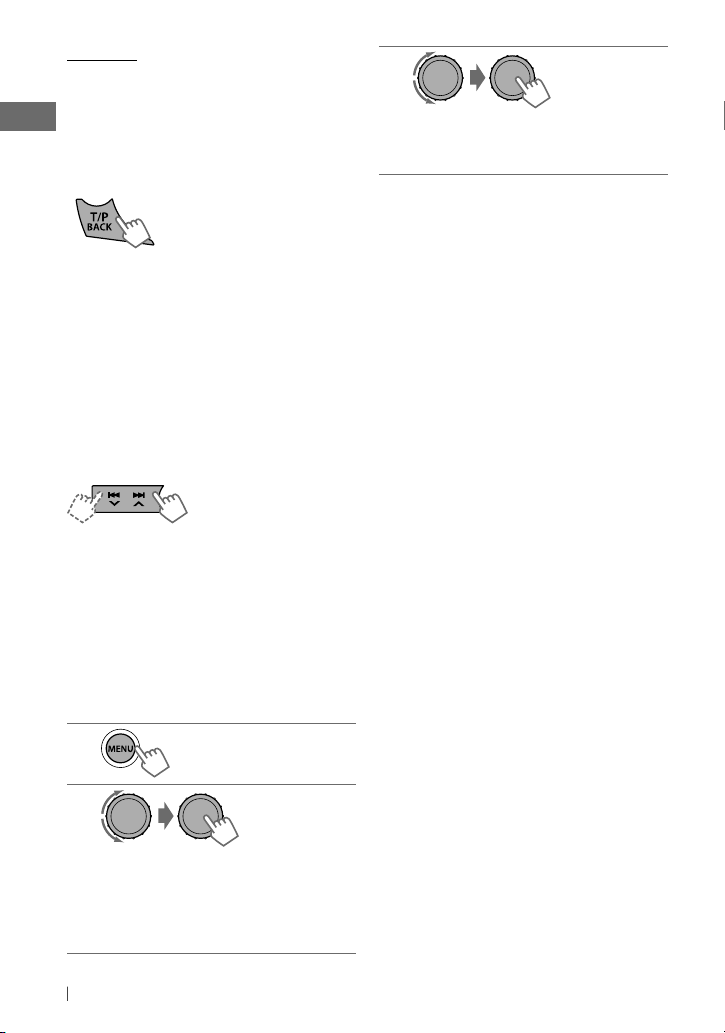
When you press or hold the following button(s)...
Main unit
SRC
Control dial
(turn)
Control dial
(press)
T/P BACK —
SOUND EQ SOUND
DISP —
BRIGHTNESS —
Remote
controller
• Turns on.
—
• Turns off [Hold].
SOURCE
VOL – / + Adjusts the volume level.
Selects the available sources (if the power is turned on).
• If the source is ready, playback also starts.
— Selects items.
Mutes the sound or pauses during playback.
• Press the button again to cancel muting or resume playback.
— Confirms selection.
• Enters “HF (hands-free) Menu” screen (page 15) or answers
—
incoming call when the unit rings. (page 17)
• Ends a call [Hold].
• Activates/deactivates TA Standby Reception. (page 9)
• Enters PTY Searching mode [Hold]. (page 9)
• Selects the controlling terminal of an iPod/iPhone [Hold]. (page 20)
• Returns to the previous menu.
Selects the sound mode.
• Hold the SOUND EQ button on the main unit to enter “My Sound
EQ Set” screen directly. (page 23)
• Changes the display information.
• Scrolls the display information [Hold].
Enters <Day Brightness> or <Night Brightness> menu directly.
(page 28)
General operation
• Microsoft and Windows Media are either registered trademarks or trademarks of Microsoft
Corporation in the United States and/or other countries.
• The Bluetooth word mark and logos are owned by the Bluetooth SIG, Inc. and any use of such
marks by Victor Company of Japan, Limited (JVC) is under license. Other trademarks and trade
names are those of their respective owners.
7ENGLISH
Page 8
Listening to the radio
~
]
“FM” or “AM”
lights up when receiving an FM stereo broadcast with sufficient signal strength.
Ÿ
• [Press] Searches for stations automatically.
• [Hold] Searches for stations manually.
“M” appears, then press the button
repeatedly.
Improving the FM reception
1
[Hold]
2
] <Tuner> ] <Stereo/Mono> ] <Mono>
Reception improves, but stereo effect will
be lost.
To restore the stereo effect, repeat the same
procedure to select <Stereo>.
Automatic presetting (FM)—
SSM (Strong-station Sequential Memory)
You can preset up to 18 stations for FM.
While listening to a station...
1
[Hold]
2
]
<Tuner> ] <SSM> ] <SSM 01 – 06 /
07 – 12 / 13 – 18>
“SSM” appears and local stations with the
strongest signal are searched and stored
automatically.
To preset another 6 stations, repeat the
above procedure by selecting one of the other
SSM setting ranges.
Manual presetting (FM/AM)
You can preset up to 18 stations for FM and
6 stations for AM.
1
]
Tune in to a station you want to
preset.
2
[Hold]
]
Shows the “Preset Mode” screen.
3
]
Selects a preset number.
Preset number flashes.
Selecting a preset station
1
or
2
Using the remote controller
5
/ ∞ : Changes the preset stations.
2
/ 3 : [Press] Searches for stations
automatically.
[Hold] Searches for stations manually.
8 ENGLISH
Page 9

The following features are available only
for FM Radio Data System stations.
Searching for your favourite
FM Radio Data System
programme—
You can tune in to a station broadcasting your
favourite programme by searching for a PTY
code.
1
The last selected PTY code appears.
PTY Search
[Hold]
2
]
Select one of your favourite
programme types or a PTY code on the
right column, and start searching.
If there is a station broadcasting a
programme of the same PTY code as you
have selected, that station is tuned in.
Standby receptions
TA Standby Reception
TA Standby Reception allows the unit to switch
temporarily to Traffic Announcement (TA) from
any source other than AM.
• If the volume is adjusted during reception of
traffic announcement, the adjusted volume
is memorized automatically. It will be applied
the next time Traffic Announcement function
is turned on.
To activate TA Standby Reception
If the TP indicator lights up, TA
Standby Reception is activated.
If the TP indicator flashes, TA
Standby Reception is not yet
activated.
• To activate the reception, tune in to another
station providing Radio Data System signals
required for TA Standby Reception.
• To deactivate the reception, press T/P BACK
again.
NEWS Standby Reception
NEWS Standby Reception allows the unit to
switch temporarily to your NEWS programme
from any source other than AM.
To activate NEWS Standby Reception, see
<News-Standby>. (page 29)
The unit will not switch to Traffic
Announcement or NEWS Standby Reception
when a call connection is established through
“BT-PHONE.”
Tracing the same programme—
Network-Tracking Reception
When driving in an area where FM reception is
not sufficient enough, this unit automatically
tunes in to another FM Radio Data System
station of the same network, possibly
broadcasting the same programme with
stronger signals.
To change the Network-Tracking Reception
setting, see <AF Regional>. (page 29)
Automatic station selection—
Programme Search
Usually when you select a preset number, the
station preset in that number is tuned in.
If the signals from the FM Radio Data System
preset station are not sufficient for good
reception, this unit, using the AF data, tunes in
to another frequency possibly broadcasting the
same programme as the original preset station
is broadcasting.
To activate Programme Search, see
<P-Search>. (page 29)
Changing the display information
Station name (PS) Station
Frequency
PTY codes:
News, Affairs, Info, Sport, Educate, Drama,
Culture, Science, Varied, Pop M (music), Rock M (music),
Easy M (music), Light M (music), Classics, Other M
(music), Weather, Finance, Children, Social, Religion,
Phone In, Travel, Leisure, Jazz, Country, Nation M (music),
Oldies, Folk M (music), Document
9ENGLISH
Page 10
Listening to a disc
~
]
Turns on the power.
Ÿ
Playback starts automatically.
All tracks will be played repeatedly until you change the
source or eject the disc.
Stopping playback and ejecting
the disc
If the ejected disc is not removed within
15 seconds, it will automatically reload into
the loading slot.
Basic operations
Selects folder of the MP3/WMA.
[Press] Selects track.
[Hold] Fast-forwards or
reverses the track.
Using the remote controller
5
/ ∞ : Selects folder of the MP3/WMA.
2
/ 3 : [Press] Selects track.
[Hold] Fast-forwards or reverses the
track.
Selecting a track/folder from the
list
• If the MP3/WMA disc contains many tracks,
you can fast search (±10, ±100, ±1 000)
through the disc by turning the control dial
quickly.
• To return to the previous menu, press
T/P BACK.
For MP3/WMA disc, you can also use the search
menu (A to Z, 0 to 9, and OTHERS) to scroll
through the list menu.
• “OTHERS” appears if the 1st character is not
A to Z, or 0 to 9, such as #, —, !, and etc.
While in list menu....
1
Press 5/∞ to show the search menu.
The first character of the current folder/file
name appears.
2
Press 5/∞ to select your desired
character. Then press the control dial to
confirm.
The track list with the selected character
appears.
3
Turn the control dial to select your
desired track. Then press the control dial
to confirm.
• Only the existing characters will be shown on
the search menu.
• Press and hold 5/∞ to continuously change
the character of the search menu.
• If your disc contains many tracks, searching
take some time.
10 ENGLISH
Page 11

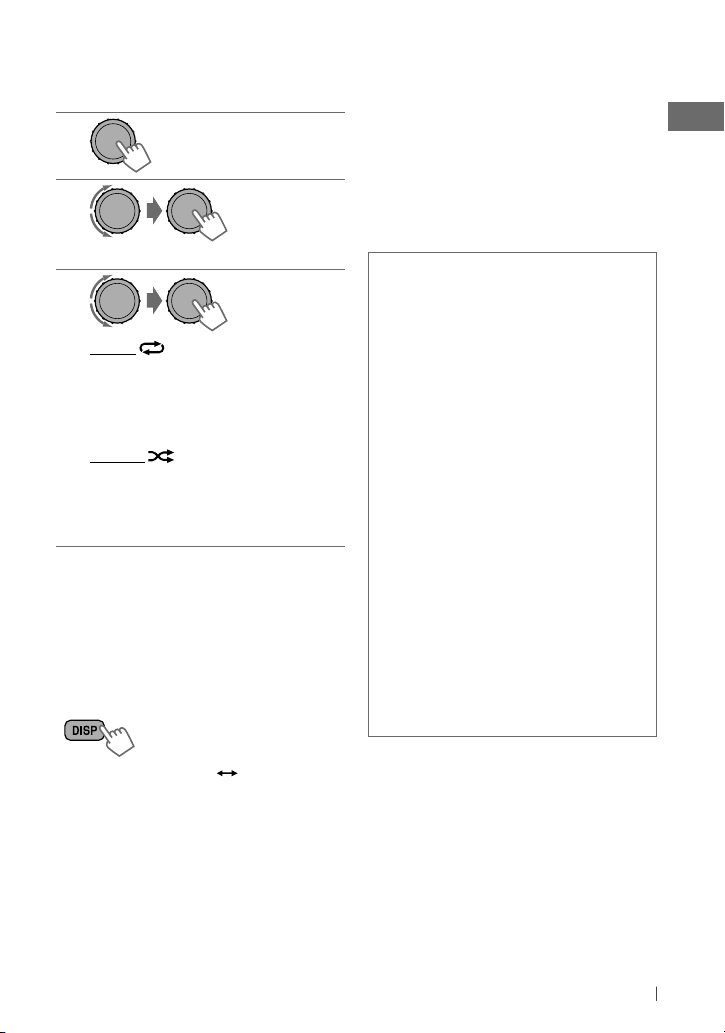
Selecting the playback modes
You can use only one of the following playback
modes at a time.
1
[Hold]
2
]
“Repeat” j “Random”
3
Repeat
Track : Repeats current track
Folder : Repeats current folder
Random
Folder : Randomly plays all tracks of
current folder, then tracks of next folders
All : Randomly plays all tracks
To cancel repeat play or random play, select
“Off.”
Changing the display information
Album name/Performer (folder name or disc
title)* Track title (file name)*
*
“No Name” appears for conventional CDs or if not
recorded.
Listening to a USB device
This unit is equipped with two USB input terminals (on the control panel and USB cable from the
rear of the unit). You can use these two terminals at the same time.
You can operate the USB device in the same way you operate the files on a disc. (page 10,
11)
• This unit can play MP3/ WMA/ WAV files stored in a USB mass storage class device (such as a USB
memory, Digital Audio Player, etc.).
~
Ÿ
USB input terminal
]
Turns on the power.
All tracks will be played repeatedly until you change the source or disconnect the USB device.
USB cable (not supplied)
USB cable from the
rear of the unit
and/or
Continued...
11ENGLISH
Page 12

Cautions:
• Make sure all important data has been backed
up.
• You cannot connect a computer or portable
HDD to the USB input terminal of the unit.
• Avoid using the USB device if it might hinder
your safety driving.
• Electrostatic shock at connecting a USB device
may cause abnormal playback of the device.
In this case, disconnect the USB device then
reset this unit and the USB device.
• Do not leave a USB device in the car, expose
to direct sunlight, or high temperature to
avoid deformation or cause damages to the
device.
• This unit may not play back files in a USB
device properly when using a USB extension
cord.
• USB devices equipped with special functions
such as data security functions cannot be
used with the unit.
Additional information
• This unit can play back multi-session discs; however,
unclosed sessions will be skipped while playing.
• This unit can play back files with the extension code
<.mp3>, <.wma>, or <.wav> (regardless of the
letter case—upper/lower).
• This unit can play back the files meeting the conditions
below:
For MP3/WMA discs:
– Bit rate: MP3/WMA: 5 kbps — 320 kbps
– Sampling frequency:
MP3: 32 kHz, 44.1 kHz, 48 kHz (for MPEG-1)
16 kHz, 22.05 kHz, 24 kHz (for MPEG-2)
WMA: 8 kHz — 48 kHz
For USB devices:
MP3: – Bit rate: 32 kbps — 320 kbps (MPEG-1)
8 kbps — 160 kbps (MPEG-2)
– Sampling frequency:
32 kHz, 44.1 kHz, 48 kHz (for MPEG-1)
16 kHz, 22.05 kHz, 24 kHz (for MPEG-2)
WMA: – Bit rate: 5 kbps — 320 kbps
– Sampling frequency: 8 kHz — 48 kHz
– Channel: 1 ch/2 ch
WAV: – Bit rate: Linear PCM at 705 kbps and
1 411 kbps
• When connecting a USB cable, use the USB
2.0 cable.
• Do not use a USB device with 2 or more
partitions.
• Depending on the shape of the USB devices
and connection ports, some USB devices may
not be attached properly or the connection
might be loose.
• This unit cannot recognize a USB device
whose rating is other than 5 V and exceeds
1 A.
• Do not pull out and attach the USB device
repeatedly while “Reading” is shown on the
display.
• This unit may not recognize a memory card
inserted into the USB card reader.
• Connect only one USB device to the unit at a
time. Do not use a USB hub.
• Operation and power supply may not work as
intended for some USB devices.
• For additional information, see below.
– Sampling frequency: 44.1 kHz
– Channel: 1 ch/2 ch
• This unit can show WMA/WAV Tag and ID3 Tag
Version 1.0/1.1/2.2/2.3/2.4 (for MP3).
• The search function works but search speed is not
constant.
• This unit can play back files recorded in VBR (variable
bit rate). (Files recorded in VBR have a discrepancy in
elapsed time indication.)
• The maximum number of characters for:
– Folder/file names : 25 characters (includes 4
extension characters—<.mp3>, <.wma>,
<.wav>)
– MP3/ WMA/ WAV Tag : 128 characters
• This unit can recognize a total of 20 000 files, 2 000
folders (999 files per folder).
• This unit cannot play back the following files:
– MP3 files: encoded in MP3i and MP3 PRO format; an
inappropriate format; layer 1/2.
– WMA files: encoded in lossless, professional, and
voice format; not based upon Windows Media®
Audio; copy-protected with DRM.
– Files which have data such as AIFF, ATRAC3, etc.
12 ENGLISH
Page 13
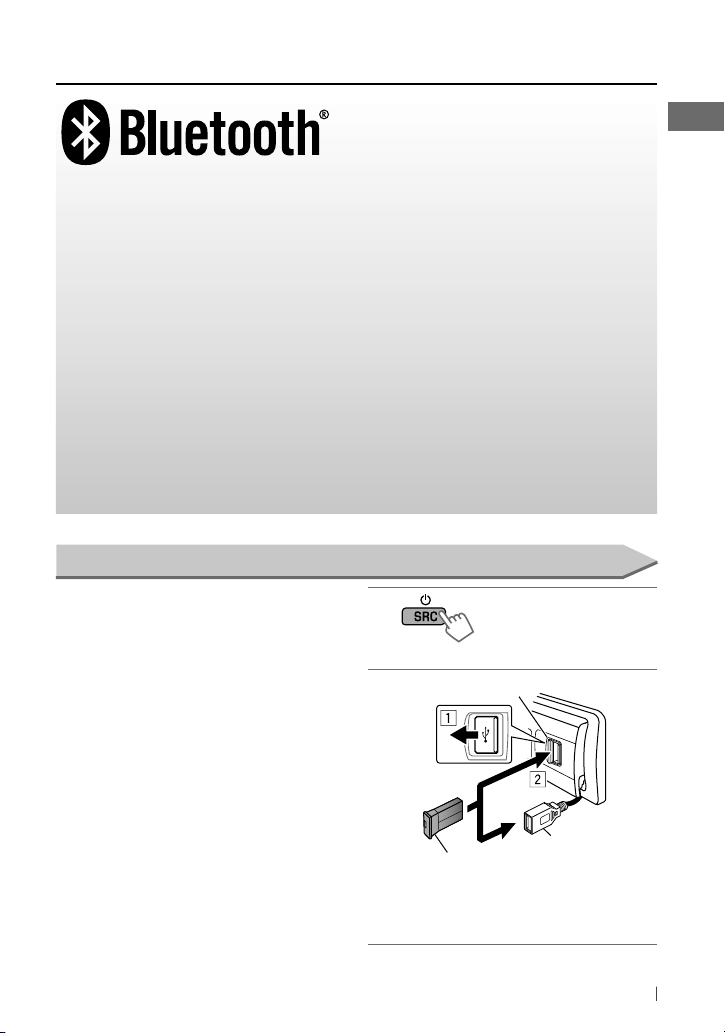
Using Bluetooth ® devices
Bluetooth is a short-range wireless radio communication technology for the mobile device such
as mobile phones, portable PCs, and other devices. The Bluetooth devices can be connected
without cables and communicate with each other.
By connecting the supplied USB Bluetooth Adapter (KS-UBT1) to one of the USB input terminals
of this unit, you can operate a Bluetooth device using this unit.
Once the USB Bluetooth Adapter is attached, this unit is always available for pairing.
• Only one USB Bluetooth Adapter can be detected at a time.
• Refer also to the instructions supplied with the Bluetooth device.
• Refer to pages i and ii at the end of the document to check the countries where you may use
the Bluetooth function.
This unit supports the following Bluetooth profiles
• HFP (Hands-Free Profile) 1.5
• OPP (Object Push Profile) 1.1
• PBAP (Phonebook Access Profile) 1.0
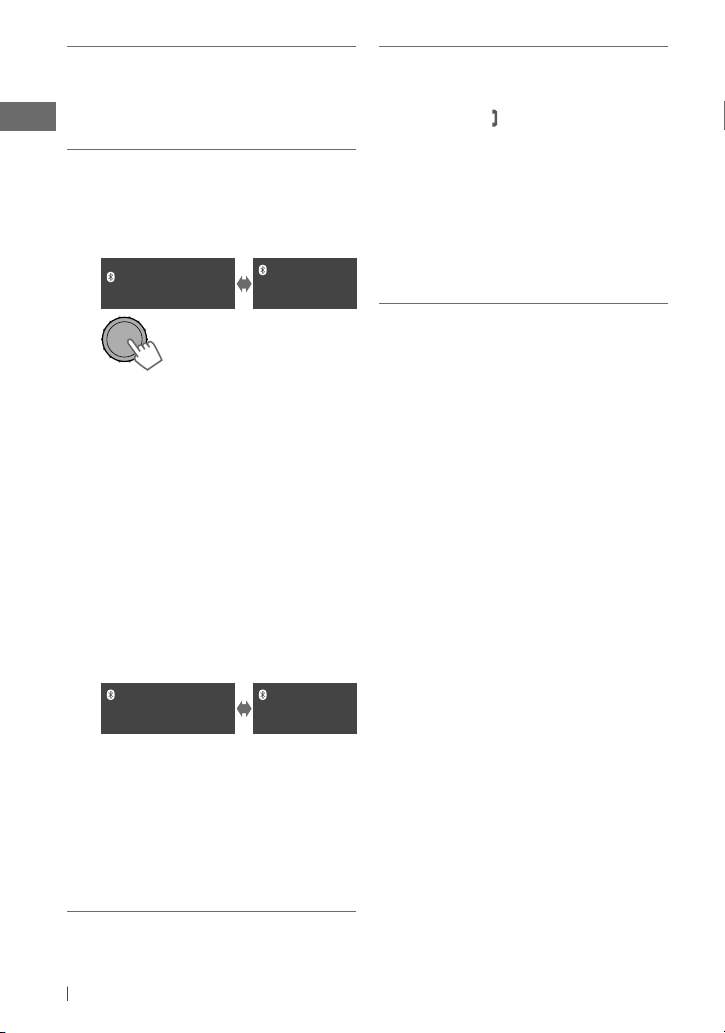
Connecting a Bluetooth device
When you connect a Bluetooth device to the
unit for the first time, make pairing between
the unit and the device.
• Once the connection is established, it is
registered in the unit even if you reset the
unit. Up to five devices can be registered in
total. “Pairing Full” appears if you try to pair
the 6th device.
• This unit supports Secure Simple Pairing (SSP).
• Pairing sequence may be different from what
is described on the following.
• A maximum of two devices for Bluetooth
phone and one for Bluetooth audio can be
connected at a time.
• A2DP (Advanced Audio Distribution Profile) 1.2
• AVRCP (Audio/Video Remote Control Profile) 1.3
1
]
Turns on the power.
2
USB input terminal
or
KS-UBT1 (supplied)
]
Make sure USB Bluetooth Adapter
is connected to one of the USB input
terminals.
USB cable from the
rear of the unit
Continued...
13ENGLISH
Page 14
Use the Bluetooth device to search and
3
select “JVC Unit.”
• For some Bluetooth devices, you may
need to enter the PIN code first after
search.
Perform one of the following pairing
4
operations (what appear depends on the
Bluetooth device pairing process).
(A) If the following appear on the
display:
Pairing ?
Device: [Device name]
]
Select “Yes” to start the pairing
Pairing ?
Yes: Press VOL
No: Press BACK
process.
If “Now Pairing...” appears...
]
Operate the Bluetooth device to
accept.
If “Now Pairing... PIN code: 0000”
appears...
]
Enter a PIN (Personal Identification
Number) code to the Bluetooth device.
•
You can change the PIN code of your choice
before pairing. (page 19) [ Initial: 0000 ]
(B) If the following appear on the
display:
Pairing ?
Device: [Device name]
Passkey: XXXXXX
]
Check to be sure the passkey appears
Pairing ?
Yes: Press VOL
No: Press BACK
on the unit and Bluetooth device is the
same. Then, confirm the passkey on the
unit by pressing the control dial. Operate
the Bluetooth device to confirm the
passkey.
•
“XXXXXX” is a 6-digit numeric code that
appear in different combination (even if the
device is the same) each time pairing is made.
After pairing is successful, the unit will
5
establish Bluetooth connection with the
Bluetooth device*. (“Pairing COMPLETED”
appears and
lights up on the display.)
• The device remains registered even
after you disconnect the device. Use
<Connect Phone/ Connect Audio> (or
activate <Auto Connect>, page 19) to
connect the same device from next time
on.
*
Some devices may not be able to connect to the
unit after pairing. Connect the device to the
unit manually.
To delete a registered device
1
Press and hold MENU.
2
Turn the control dial to select
<Bluetooth>, then press to confirm.
3
Turn the control dial to select
<Delete Pairing>, then press to confirm.
4
Turn the control dial to select a device
you want to delete, then press to confirm.
“Delete OK?” appears.
5
Press the control dial to delete the
selection.
“OK” appears when the device is deleted.
To return to the previous menu, press
T/P BACK.
To connect/disconnect a registered device
1
Press and hold MENU.
2
Turn the control dial to select
<Bluetooth>, then press to confirm.
3
Turn the control dial to select
<Connect Phone/ Connect Audio> or
<Disconnect Phone/ Disconnect Audio>,
then press to confirm.
4
Turn the control dial to select a device
you want to connect/disconnect, then
press to confirm.
“Connected [Device name]/ Disconnected
[Device name]” appears when the device is
connected/disconnected.
14 ENGLISH
Page 15
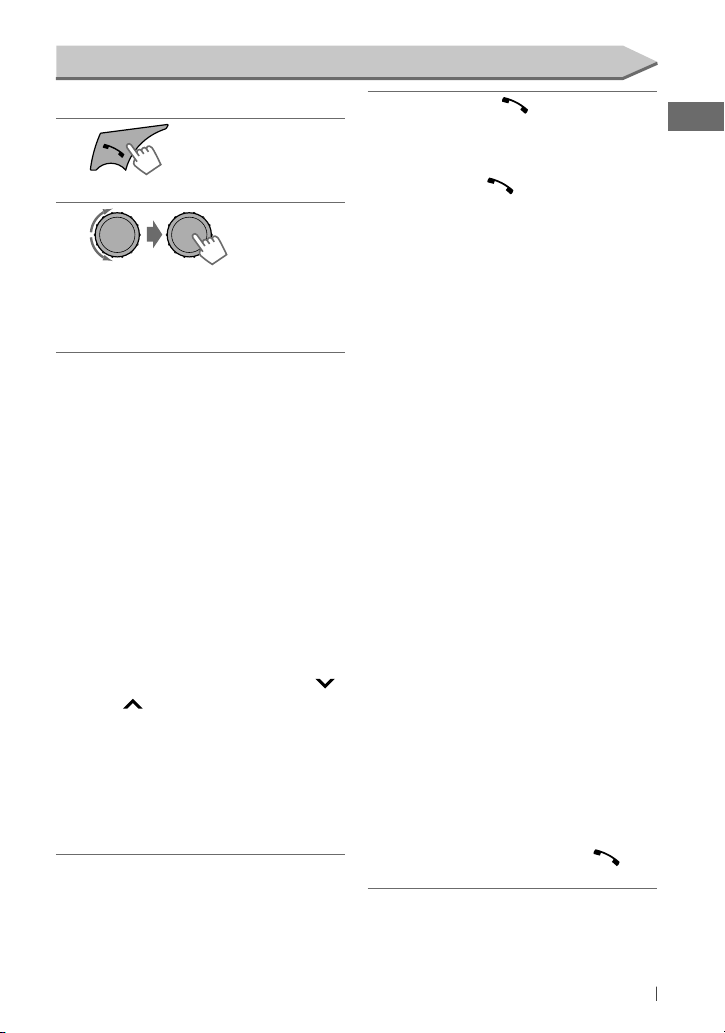
Using a Bluetooth mobile phone
Making a call
1
]
Enter “HF Menu” screen.
2
]
Select a calling method or make a
setting. (Dialed Calls/ Received Calls/
Missed Calls/ Phonebook/ Dial Number/
Voice/ Settings)
If “Dialed Calls/ Received Calls/
3
Missed Calls/ Phonebook” is selected
in step 2 ...
Turn the control dial to select the name/
phone number you want to call, then
press the control dial to confirm.
• “No History Found” appears if there is no
history stored.
• “No Entries Found” or “Send Phonebook
Manually” appears depending on the
“Phonebook Select” settings. (See the
right column.)
If “Dial Number” is selected in step 2 ...
Enter the phone number to dial.
Turn the control dial to select a number
or character (0 – 9, *, #, +), press 4
/¢ to move to the entry position.
Once you finished entering the number,
press the control dial to confirm.
If “Voice” is selected in step 2 ...
Speak the name (registered words) you
want to call when “Waiting Voice [Device
name]” appears.
• Press and hold to activate voice dial
operation directly if only one phone is
connected.
If two phones are connected, pressing
and holding will enter “Phone list”
screen. Turn the control dial to select a
phone to activate voice dial operation,
then press to confirm.
• Only accessible when the connected
mobile phone has the voice recognition
system.
• “Not Support” appears if the connected
phone does not support this feature.
If “Settings” is selected in step 2 ...
Turn the control dial to select an item (see
the following), then press the control dial
to confirm.
The following settings are applicable to
the paired device. If another device is
paired, make the settings again.
• Phonebook Select
In Phone
[Initial] : The unit browses the
phonebook of the connected phone.
In Unit
: The unit browses the phonebook
registered in the unit. (To copy the phonebook
memory, see <Phonebook Trans> on page 19.)
• If the phonebook contains many numbers, you
can fast search (±10, ±100, ±1 000) through
the phonebook by turning the control dial
quickly.
• To search through the phonebook, see page 16.
*
Selectable only when the connected phone
supports PBAP.
Auto Answer
•
On
: The unit answers the incoming calls
automatically. /
answer the calls automatically. Press or the
control dial to answer.
*
Off
[Initial] : The unit does not
Continued...
15ENGLISH
Page 16

•
Ringing Tone
In Unit
[Initial] : The unit rings to alert you
when a call/Text Message comes in.
–
Call
: Select your preferred ring tone when a
call comes in [
–
Message
Tone 1 — 5
].
: Select your preferred ring
tone when a text message comes in
[
Tone 1
— 5 ].
• Default ring tone is different according to the
paired device.
In Phone
: The unit rings using the connected
phones’ ring tone to alert you when a call/Text
Message comes in. (The connected mobile phone
rings if it does not support this feature.)
•
Ring Color
29 preset colors [ Initial:
Color 06
] : When a
call/text message comes in, the display will flash
in the selected color. (The display will change to
the original color when the call is answered or the
incoming call stops.) /
•
NR/EC Mode
On
[Initial] : The unit adjusts the Noise Reduction
Off
: Cancels.
and Echo Cancellation of the microphone
connected to the unit for clearer sound. /
Off
: Cancels.
•
MIC Setting
Adjust the sensitivity [
Level 01/ 02/ 03
of the microphone connected to the unit.
[ Initial:
Level 02
]
•
Message Notice
On [Initial] : The unit informs you of the arrival
of a message by ringing and displaying “[Device
name] Received Message.” /
Off
: The unit does
not inform you of the arrival of a message.
To select a contact from the phonebook
1
Select “Phonebook” calling method.
(page 15)
2
Press 5/∞ to show the search menu
(A to Z, 0 to 9, and OTHERS).
“OTHERS” appears if the 1st character is not
A to Z, or 0 to 9, such as #, —, !, and etc.
3
Press 5/∞ to select your desired
character, then press the control dial to
confirm.
The name list of the selected character
appears.
4
Turn the control dial to select your
desired contact, then press to confirm.
• Only the existing characters will be shown on
the search menu.
• Press and hold 5/∞ to continuously change
the character of the search menu.
• If your phonebook contains many contacts,
searching may take some time.
To delete a contact (name/phone number)
Only when “In Unit” is selected for
“Phonebook Select”. (page 15)
1
Press to enter “HF Menu” screen.
2
Display the list of name/phone numbers
using one of the calling methods.
]
(page 15)
3
Turn the control dial to select the name/
phone number you want to delete.
4
Press and hold T/P BACK to enter the
“Delete Entries” screen.
5
Turn the control dial to select “Delete” or
“Delete All.”
• If “Delete” is selected, the selected name/
phone number in step 3 is deleted.
• If “Delete All” is selected, the listed
numbers in step 2 selection are deleted.
6
Press the control dial to confirm.
16 ENGLISH
Page 17

Receiving/ending a phone call
When a call comes in, the source is
automatically changed to “BT FRONT/ BT REAR.”
• “Receiving... [Phone number/name]” appears
on the display.
• The display will flash in blue. (“Ring Color,”
page 16)
When <Auto Answer> is activated....
The unit answers the incoming calls
automatically.
• Press
the incoming call when <Auto Answer> is
deactivated.
During a phone call conversation...
• Turn the control dial to adjust the phone
volume level [ 00 – 50 ]. [ Initial: VOL 15 ]
The adjustment made will not affect the other
sources.
• Press 5/∞ to adjust the microphone
sensitivity [ 1 – 3 ]. (As the number increases,
the microphone becomes more sensitive.)
• Press 4 /¢ to turn on/off the
Noise Reduction and Echo Cancelation mode.
To end an incoming call, press and hold
or the control dial.
Using the remote controller
5
[Hold] Rejects calls.
or the control dial to answer
/ ∞ / 2 / 3 / SOURCE : [Press] Answers calls.
To switch conversation media (the unit/
mobile phone)
Press the control dial during a phone call
conversation, then continue your conversation
using the other media.
• Operations may be different according to the
connected Bluetooth device.
To switch between two connected mobile
phones
When two mobile phones are connected to the
unit, you can access to both “HF Menu” screens.
Press
“HF Menu” screen, press again to access to the
2nd phone’s “HF Menu” screen.
• To return to the 1st phone’s “HF Menu”
to access to the 1st phone’s
screen, press T/P BACK.
Arriving of a text message
When a text message comes in, the unit rings
if your mobile phone is compatible with text
message and “Message Notice” is set to “On.”
16)
(page
• “Received Message” appears and the display
illuminates in blue. (“Ring Color,” page 16)
• You cannot read, edit, or send a message
through the unit.
Additional information
• If you wish to perform complicated operations (such as dialing the numbers, using phonebook, etc.), stop your car in
a safe place.
• Some Bluetooth devices may not be connected to this unit depending on the Bluetooth version of the device.
• If you connect a different USB Bluetooth Adapter, all the registered devices and information will be cleared.
• This unit and some of the functions may not work for some Bluetooth devices.
• Connecting condition may vary depending on the circumstances around you.
• If you turn off the unit, detach the control panel, or unplug the USB Bluetooth Adapter during a phone call
conversation, the Bluetooth connection is disconnected. Continue the conversation using your mobile phone.
• When the unit is turned off, the device is disconnected.
• If you wish to receive more information about Bluetooth, visit the following JVC web site:
<http://www.jvc.co.jp/english/car/index.html> (English website only).
17ENGLISH
Page 18
Using a Bluetooth audio player
Operations and display indications differ
depending on their availability on the
connected device.
]
Select “BT FRONT” or
“BT REAR.”
If playback does not start automatically, operate
the Bluetooth audio player to start playback.
Basic operations
Starts or resumes playback.
Mutes the sound.
Selects group/folder.
[Press] Reverse skips or
forward skips.
[Hold] Fast-forwards or
reverses the track.
Using the remote controller
2
/ 3 : [Press] Reverse skips or forward skips.
[Hold] Fast-forwards or reverses the
track.
Selecting the playback modes
• For Bluetooth devices that support AVRCP 1.3.
1
[Hold]
2
]
“Repeat” j “Random”
3
Repeat
Track : Repeats current track
All : Repeats all tracks
Group : Repeats all tracks of the current
group
Random
All : Randomly plays all tracks
Group : Randomly plays all tracks of the
current group
To cancel repeat play or random play, select
“Off.”
Changing the display information
Album name/performer Track title
Changing the Bluetooth settings
1
[Hold]
2
]
<Bluetooth>
18 ENGLISH
Repeat step 2 to select a setting item
3
(see table on page 19), then repeat
the procedure to change the setting
accordingly.
• To return to the previous menu, press
T/P BACK.
• To exit from the menu, press MENU.
Page 19
Menu item
1
/
Connect Phone*
Connect Audio
Disconnect Phone/
Disconnect Audio
Delete Pairing
Phonebook Trans
Set PIN Code
Auto Connect On
Initialize Yes
Information My BT Name
1
*
Will not display if two Bluetooth phones are connected at the same time.
2
*
Displayed only when a Bluetooth phone/audio player is connected.
Turn the control dial to select a device you want to connect. “Connected [Device Name]”
appears on the display when the device is connected.
Turn the control dial to select a device you want to disconnect. “Disconnected
[Device Name]” appears on the display when the device is disconnected.
Turn the control dial to select the device you want to delete, then press the control dial to
confirm. (page 14)
You can copy the phonebook memory of a mobile phone into the unit (via OPP). You may
need to enter the PIN code or verify passkey from the mobile phone to do pairing. You can
transfer a maximum of 400 numbers.
You can change the PIN code of your choice before pairing (1-digit to 6-digit number).
[ Initial:
0000
Turn the control dial to select a number, press
position, then press the control dial to confirm the entry.
: The connection is established automatically with the registered Bluetooth device when
you turn on the unit. /
Use <Connect Phone/ Connect Audio> to connect.
: Initialize all the Bluetooth settings (including stored pairing, phonebook, and etc.). /
No
: Cancels.
USB Bluetooth Adapter. /
ConnectedAudio *2 : Shows connected audio device name.
Selectable setting, [ Initial: Underlined ]
]
4
/¢ to move to the entry
Off
: The unit does not connect the Bluetooth device automatically.
: Shows the unit name (JVC Unit). /
ConnectedPhone *2 : Shows connected phone name. /
My Address
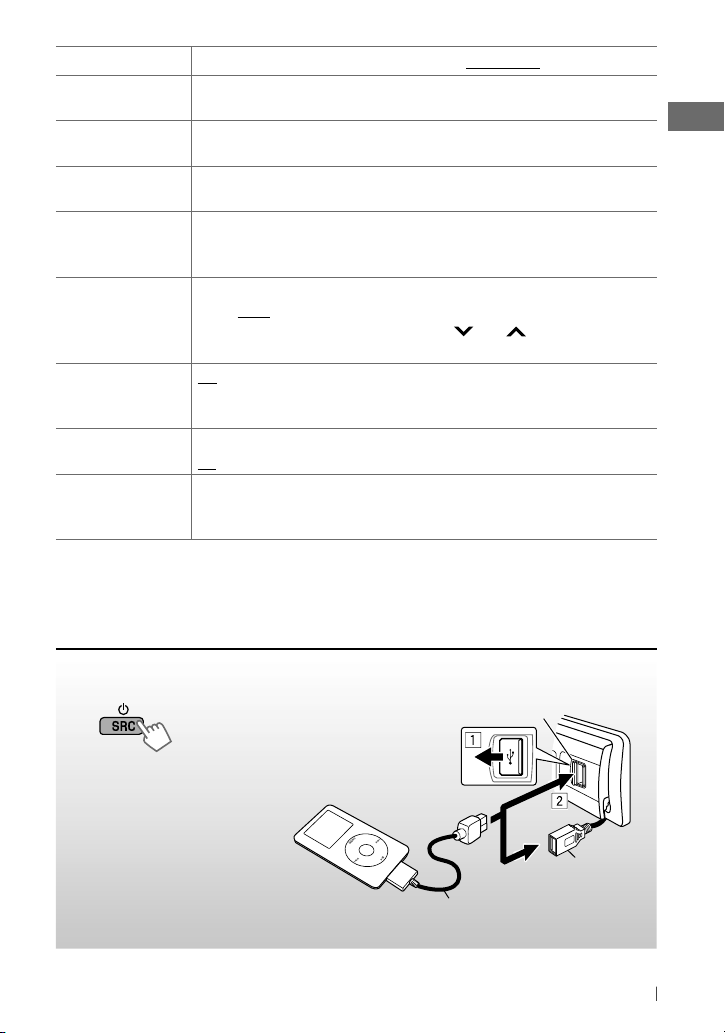
Listening to an iPod/iPhone
: Shows address of
You can connect an Apple iPod/iPhone using the USB 2.0 cable (accessory of the iPod/iPhone) to
the USB input terminal on the control panel or USB cable from the rear of the unit.
~
]
Turns on the power.
Playback starts automatically.
Ÿ
Apple iPod/iPhone
USB 2.0 cable (accessory
of the iPod/iPhone)
USB input terminal
and/or
USB cable from the
rear of the unit
Continued...
19ENGLISH
Page 20
Cautions:
• Avoid using the iPod/iPhone if it might hinder
your safety driving.
• Make sure all important data has been backed
up to avoid losing the data.
Selecting the control terminal
[Hold]
]
<Headunit Mode/ iPod Mode/
Application Mode>
• For details, see <iPod Switch> setting on
page 29.
Basic operations
Applicable under <Headunit Mode/
iPod Mode>.
For <Application Mode>, applicable only for
some audio applications.
[Press] Selects track/
chapter.
[Hold] Fast-forwards or
reverses the track.
Using the remote controller
2
/ 3 : [Press] Selects track/chapter.
[Hold] Fast-forwards or reverses the
track.
Selecting a track from the menu
Not applicable under <
Application Mode
iPod Mode/
>.
1
2
3
]
Select the desired track.
Repeat this step until the desired track is
selected.
• If the selected menu contains many tracks,
you can fast search (±10, ±100, ±1 000)
through the menu by turning the control dial
quickly.
• To return to the previous menu, press
T/P BACK.
You can also use the search menu (A to Z and
0 to 9) to scroll through the desired menu.
After you have selected your desired menu (in
step 2 on the left column)....
1
Press 5/∞ to show the search menu.
The first character of the current file name
appears.
2
Press 5/∞ to select your desired
character. Then press the control dial to
confirm.
The track list with the selected character
appears.
3
Turn the control dial to select your
desired track. Then press the control dial
to confirm.
• Only the existing characters will be shown on
the search menu.
• Press and hold 5/∞ to continuously change
the character of the search menu.
• If your iPod/iPhone contains many tracks,
searching take some time.
• Searching may not work on some of the layers
of the selected menu.
]
Select the desired menu.
Playlists j Artists j Albums j
Songs j Podcasts j Genres j
Composers j Audiobooks j (back to
the beginning)
20 ENGLISH
Page 21
Selecting the playback modes
Not applicable under <
Application Mode
iPod Mode/
>.
1
[Hold]
2
]
“Repeat” j “Random”
3
Repeat
One : Functions the same as “Repeat One”
of the iPod
All : Functions the same as “Repeat All”
of the iPod
Random
Album : Functions the same as
“Shuffle Albums” of the iPod
Song : Functions the same as
“Shuffle Songs” of the iPod
• To cancel repeat play or random play,
select “Off.”
• “Random Album” is not available for some
iPod/iPhone.
• To return to the previous menu, press
T/P BACK.
Changing the display information
Album name/ Artist name Track title
In <Application Mode> : Application Mode
Using the iPod/iPhone
application
You can operate JVC original application
(eg. JVC Drive Smart) with this unit in
<Application Mode>.
For JVC Drive Smart operations, visit JVC web
site: <http://www.jvc.co.jp/english/car/index.
html> (English website only)
Additional information
• Made for
iPod touch (1st, 2nd, 3rd, and 4th generation)
iPod classic
iPod with video * (5th generation)
iPod nano (1st *, 2nd, 3rd, 4th, 5th, and 6th
generation)
iPhone 4
iPhone 3GS
iPhone 3G
iPhone
*
<iPod Mode/ Application Mode> are not
available.
• It is not possible to browse video files on the “Videos”
menu in <Headunit Mode>.
• The song order displayed on the selection menu of
this unit may differ from that of the iPod.
• This unit can display up to 128 characters (ASCII
code).
• When operating an iPod/iPhone, some operations
may not be performed correctly or as intended. In this
case, visit the following JVC web site: <http://www.
jvc.co.jp/english/car/index.html> (English website
only).
21ENGLISH
Page 22

Listening to the other external components
You can connect an external component to the AUX (auxiliary) input jack on the control panel.
Preparation:
Make sure <Show> is selected for the <Source Select> = <AUX Source> setting. (page 30)
• For details, refer also to the instructions supplied with the external components.
~
]
“AUX IN”
Turn on the connected component
Ÿ
and start playing the source.
Connecting an external component to the AUX input jack
!
]
Adjust the volume.
Adjust the sound as you want. (page 23)
⁄
3.5 mm stereo mini plug
(not supplied)
Recommended to use a 3-terminal plug
head stereo mini plug for optimum audio
output.
Portable audio player,
etc.
22 ENGLISH
Page 23

Sound adjustment
You can select a preset sound mode suitable for the music genre.
FLAT = NATURAL = DYNAMIC = VOCAL = BASS = USER*1 =
SOUND 1*2 = SOUND 2*2 = SOUND 3*2 = (back to the beginning)
1
For settings, see “Customizing the preset sound mode — USER” below.
*
2
*
For settings, see “Setting and storing “My Sound EQ” preset sound mode” below.
Customizing the preset sound mode—USER
You can customize the preset sound mode
(FLAT/ NATURAL/ DYNAMIC/ VOCAL/ BASS).
1
[Hold]
2
]
<EQ/DSP> ] <EQ>
USER
0
50 Hz
•
If SOUND 1/ 2/ 3 is selected as the sound
mode, you cannot make any setting.
“Fix (My Sound)” appears.
3
]
Select the frequency [ 50 Hz/ 200 Hz/
800 Hz/ 3.2 kHz/ 12.5 kHz ].
]
Adjust the level [ –9 dB to +9 dB ].
• Repeat this step to select the other
frequency and adjust the level.
4
]
Confirm the settings.
The settings made will be stored and
changed to “USER.”
Setting and storing “My Sound EQ” preset sound mode
You can customize the filter setting (EQ and
LOUD) by the particular instrument sound.
1
]
My Sound EQ Set
[Hold]
Shows “My Sound EQ Set” screen.
Default Music
Optional Music
2
]
Selects a music file sample.
Default Music : Plays the internal music
file.
Optional Music : Play <.jms> files from
the connected USB device. (page 24)
Continued...
23ENGLISH
Page 24

If “Default Music” is selected in 2...
3
Sound
0
Step 1
1
Press 4 /¢ to select
the target instrumental sound
for adjustment (by referring to a
reference sound, eg. Drum).
Step 1: Plays all instrument sound.
Step 2: Plays low frequency sound
(eg. Bass).
Step 3: Plays middle frequency sound
(eg. Piano).
Step 4: Plays middle-high frequency
sound (eg. Brass).
Step 5: Plays high frequency sound
(eg. Cymbal).
2
Turn the control dial to adjust the
level [–9 to +9].
3
Press the control dial to confirm the
adjustment.
Select and Store
Sound1
Sound2
Sound3
4
Turn the control dial to select a preset
sound mode [SOUND 1/ 2/ 3]. Then
press the control dial to store.
The unit returns to playback
screen and the selected sound
mode [SOUND 1/ 2/ 3] is selected
automatically.
• If “0” is selected for all steps (1 — 5),
“FLAT” is selected.
• To store another sound mode, repeat
1 to 3.
If “Optional Music” is selected in 2...
]
Selects an item from the list. (This list
shows only <.jms> files in the root folder
of the USB device.)
• Visit the following JVC web site: <http://
www.jvc.co.jp/english/car/index.
html> (English website only) to:
– Check the downloading method.
– Download <.jms> files.
• “No External File” appears if there is no
<.jms> file in the root folder or if no USB
device attached.
• Store <.jms> files in only one of the
USB devices if two USB devices are
connected at the same time.
• “Error” appears if the file is unreadable.
Setting the speaker output timing—Time Alignment
1 2
24 ENGLISH
[Hold]
]
<EQ/DSP> ] <Time Alignment>
T.Align
CarType
User
Seat
ALL
Page 25

3
Initial settings
Speaker distance [ cm ]
]
Select the car type [ User/ Compact
Sedan M/ Sedan L/ SUV/ Sm.SUV
Truck/ X’ Over/ Wagon/ Minivan/ Van ].
]
Select the seat position [ All/ Front
L.Front/ R.Front ].
4
]
Confirm the settings and proceed to
the next screen.
T.Align
Speaker
L.Front
140 cm/
4.6 ft
5
]
Select the speaker [ L.Front/ R.Front
L.Rear/ R.Rear/ Subwoofer * ].
*
Displayed only when <On> is selected for
<Subwoofer On/Off>. (page 29)
]
Select the distance from the listening
position (seat position selected in step 3)
[ 50 cm (1.6 ft) — 500 cm (16.4 ft) ].
• To adjust the other speaker and its
distance, repeat this step.
6
]
Confirm the settings.
The settings made will be stored and
changed to “USER.”
/
/
/
/
Car type
ALL 115 115 115 115 115
Front 115 115 100 100 135
User
L. Front 100 140 80 130 140
R. Front 140 100 130 80 140
ALL 110 110 110 110 110
Front 120 120 105 105 115
Compact
L. Front 105 140 85 125 120
R. Front 140 105 125 85 120
ALL 115 115 115 115 115
Front 115 115 100 100 135
Sedan M
L. Front 100 140 80 130 140
R. Front 140 100 130 80 140
ALL 140 140 140 140 140
Front 120 120 155 155 140
Sedan L
L. Front 105 145 150 170 145
R. Front 145 105 170 150 145
ALL 150 150 150 150 150
Front 140 140 130 130 205
SUV
L. Front 125 170 110 160 210
R. Front 170 125 160 110 210
ALL 130 130 130 130 130
Front 145 145 115 115 135
Sm.SUV
L. Front 110 150 95 140 140
R. Front 150 110 140 95 140
ALL 135 135 135 135 135
Front 140 140 130 130 130
Truck
L. Front 125 170 105 160 140
R. Front 170 125 160 105 140
ALL 115 115 115 115 115
Front 120 120 105 105 120
X’ Over
L. Front 105 145 85 130 125
R. Front 145 105 130 85 125
ALL 120 120 120 120 120
Front 120 120 100 100 155
Wagon
L. Front 105 145 80 130 160
R. Front 145 105 130 80 160
ALL 165 165 165 165 165
Front 130 130 175 175 220
Minivan
L. Front 110 160 160 200 225
R. Front 160 110 200 160 225
ALL 205 205 205 205 205
Front 140 140 225 225 300
Van
L. Front 115 175 210 250 300
R. Front 175 115 250 210 300
L. Front
Seat position
R. Front
L. Rear
R. Rear
Subwoofer
25ENGLISH
Page 26

Setting the crossover High/Low Pass Filter—X’over HPF/LPF
1
[Hold]
2
]
<Audio> ] <X’over HPF/LPF>
X’over HPF/LPF
Easy
Pro
3
]
Select the adjustment method
[ Easy/ Pro ].
If “Easy” is selected in step 3...
4
HPF/LPF
1
*
Displayed only when <On> is selected for
2
3
4
Front
Full
cm/inch
Press 4 / ¢ to select the
speaker [ Front/ Rear/ Subwoofer * ].
<Subwoofer On/Off>. (page 29)
Turn the control dial to select the
speaker size.
Front/ Rear :
Full [ Initial
13cm (5-1/4”
17cm (6-3/4”
10x15cm (4x6”
15x20cm (6x8”
18x25cm (7x10”
]/
10cm (4”
)/
16cm (6-1/2”
)/
18cm (7”
)/
)/
)
)/
)/
13x18cm (5x7”
15x23cm (6x9”
Subwoofer :
Full/ 16cm (6-1/2”
25cm (10”
38cm over (15” over
) [
Initial
)/
20cm (8”
]/
30cm (12”
)
Press 5 / ∞ to select the
measurement unit [ cm/ inch ].
Press the control dial to confirm the
settings.
If “Pro” is selected in step 3...
HPF/LPF
1
Front
HPF Off
–18dB/Oct
Press 4 / ¢ to select the
speaker [ Front/ Rear/ Subwoofer * ].
*
Displayed only when <On> is selected for
<Subwoofer On/Off>. (page 29)
2
Turn the control dial to select the cut
off frequency.
Front/ Rear :
HPF 30Hz — HPF 200Hz : Activates
the High Pass Filter (HPF). Frequencies
lower than the selected frequency are
cut off from the front/rear speakers.
HPF Off [ Initial ] : Deactivates HPF
(all signals are sent to the front/rear
speakers).
Subwoofer :
LPF 30Hz — LPF 200Hz :
[ Initial: LPF 80Hz ] : Activates the Low
Pass Filter (LPF). Frequencies lower
than the selected frequency are sent
to the subwoofer.
LPF Off : Deactivates LPF (all signals
are sent to the front/rear speakers).
3
Press 5 / ∞ to select the quality of
HPF/LPF [ –12dB/oct/ –18dB/oct/
)/
)/
)/
–24dB/oct ].
[ Initial:
Front/ Rear : –18dB/oct,
Subwoofer : –12dB/oct ]
4
Press the control dial to confirm the
settings.
)/
)/
26 ENGLISH
Page 27

Menu operations
1
If no operation is done
for about 60 seconds, the
operation will be canceled.
Menu item
DEMO
Clock
Color
Color Setup
1
*
Takes effect only when CT (clock time) data is received.
[Hold]
Set Clock
24H / 12H
Clock Adjust *1Auto :
Button Zone
Display Zone
All Zone
Day Color Button Zone
Night Color
Menu Color
2 3
Selectable setting, [ Initial: Underlined ]
On :
Display demonstration will be activated automatically if no operation is done for
about 20 seconds. /
For settings, see page 4.
For settings, see page 4.
Radio Data System signal. /
29 preset colors /
buttons illumination (except for
color separately.
• If <All Zone> is selected, the button and display illumination will change to the
current/selected <Button Zone> color.
• Initial color :
Display Zone
Button Zone
Display Zone
On
: Changes the display and buttons (except for
BRIGHTNESS
Off
: Cancels.
Off :
Cancels. (page 4)
The built-in clock is automatically adjusted using the CT (clock time) data in the
Off
User / COLORFLOW 1/ 2/ 3
Button Zone
Button zone
You can create your own day and night colors for <Button Zone>
and <Display Zone> separately.
Press 5/∞ to select a primary color [
turn the control dial to adjust the level [ 00 — 31 ]. Repeat this
procedure until you have adjusted all the three primary colors. Then,
press the control dial to confirm.
• If “00” is selected for all the primary colors for <Display Zone>,
nothing appear on the display.
) illumination during menu, list search and playback mode operations. /
Repeat step 2 if necessary.
• To return to the previous
menu, press T/P BACK.
• To exit from the menu, press
MENU.
: Cancels.
: Selects your preferred color for
EQ / DISP / OPEN / BRIGHTNESS
[ 06 ],
Display Zone
Display zone
All zone
[ 01 ],
All Zone
Red/ Green/ Blue
EQ / DISP / OPEN
) and display
[ 06 ]
], then
/
Continued...
27ENGLISH
Page 28

Menu item
Dimmer Set Auto :
Changes the display and button illumination between the Day/Night adjustments in
<Brightness>/<Color Setup> setting when you turn off/on the car headlights
Time Set :
Selectable setting, [ Initial: Underlined ]
*2. /
Sets the start/end timer for dimmer. Turn the control dial to adjust the start
time, then press the control dial to confirm. Repeat this step to enter the end time. /
On :
Selects the Night adjustments in <Brightness>/<Color Setup> setting
Dimmer
Brightness Day
for the display and button illumination. /
<Brightness>/<Color Setup> setting for the display and button illumination.
[ 23 ] /
Night
[ 11 ] : Customizes the display and button illumination brightness
level [
00
— 31 ] for day and night.
• Pressing
BRIGHTNESS
can enter <Day Brightness> or <Night Brightness> menu
Off :
Selects the Day adjustments in
directly.
3
Scroll *
Tag Display On
LCD Type Negative
Display
Contrast Level 01
Once
: Scrolls the displayed information once. /
intervals). /
Off
: Cancels.
(Pressing
DISP
for more than one second can scroll the display regardless of the setting.)
Auto
: Repeats scrolling (at 5-second
: Shows the Tag information while playing MP3/WMA/WAV tracks. /
: Negative pattern of the display. /
Auto
: Positive pattern will be selected during the day time
be used during the night time
—
Level 08
*4.
[
Level 05
Positive
] : Adjust the display contrast to make the display
Off
: Cancels.
: Positive pattern of the display. /
*4; while negative pattern will
indications clear and legible.
EQ
Time
For settings, see page 23.
For settings, see page 24.
Alignment
D. T.
Expander *
EQ/DSP
On
: Digital Track Expander feature compensates high frequency sound for compressed
5
digital tracks (eg. digital music sources). /
Off
: Cancels.
• Digital Track Expander effect can be heard in the following conditions:
MP3/WMA: Bit rate: 64 kbps to 128 kbps; Sampling frequency: 44.1 kHz, 48 kHz only
iPod/iPhone music files: Sampling frequency: 44.1 kHz, 48 kHz only
Fad/Bal *6, *7Fad
Audio
2
*
The illumination control lead connection is required. (See “Installation/Connection Manual.”) This setting
may not work correctly on some vehicles (particularly on those having a control dial for dimming). In this case,
change the setting to any other than <Dimmer Auto>.
3
*
Some characters or symbols will not be shown correctly (or will be blanked) on the display.
4
*
Depends on the <Dimmer Set> setting.
5
*
No effect in case of CD-DA or Bluetooth audio.
6
*
If you are using a two-speaker system, set the fader level to <00>.
7
*
This adjustment will not affect the subwoofer output.
8
*
If SOUND 1/ 2/ 3 is selected as the sound mode (page 23), you cannot make any setting. “Fix (My Sound)”
appears.
Loud *
8
(fader) :
F6 — R6
[ 0 ] : Press 5 / ∞ to adjust the front and rear speakers output
balance. /
Bal
(balance) :
L6 — R6
and right speakers output balance.
Loud1/ 2/ 3
volume level. /
: Boost low and high frequencies to produce a well-balanced sound at a low
Off
: Cancels.
[ 0 ] : Press 4 / ¢ to adjust the left
28 ENGLISH
Page 29

Menu item
Volume
Adjust
Level –5 — Level +5
(except “FM”), compared to the FM volume level. The volume level will automatically
Selectable setting, [ Initial: Underlined ]
[
Level 0
] : Presets the volume adjustment level of each source
increase or decrease when you change the source. Before adjustment, select the source you
want to adjust. (“FIX” appears on the display if “FM” is selected as the source.)
Subwoofer
On
: Turns on the subwoofer output. /
Off
: Cancels.
On/Off
Subwoofer
Level *
Subwoofer
Audio
Phase *
X’over HPF/
Level 00 — Level 10
9
0 Deg
9
For settings, see page 26.
(normal)
[
Level 05
— 180 Deg
] : Adjusts the subwoofer output level.
(reverse) : Selects the subwoofer phase.
LPF
Beep On / Off
Amplifier
10
Gain *
SSM
IF Band Auto
: Activates or deactivates the keypress tone.
Low Power
than 50 W to prevent damaging the speakers.) /
Off
: Vol 0 – Vol 30 (Selects if the maximum power of each speaker is less
High Power
: Deactivates the built-in amplifier.
Displayed only when the source is “FM.” For settings, see page 8.
: Increases the tuner selectivity to reduce interference noises between adjacent
stations. (Stereo effect may be lost.) /
Wide
: Subject to interference noises from adjacent
: Vol 0 – Vol 50 /
stations, but sound quality will not be degraded and the stereo effect will remain.
AF
Regional *
Tuner
P-Search *11On / Off
News-
Standby *
Stereo/Mono
12
USB
*
AF
: When the currently received signals become weak, the unit switches to another
11
station (the programme may differ from the one currently received). (The AF indicator
lights up.) /
AF REG
: When the currently received signals become weak, the unit
switches to another station broadcasting the same programme. (The AF and REG
indicators light up.) /
Off
: Cancels.
: Activates Programme Search (if AF-REG is turn on) or deactivates.
On / Off
11
: Activates or deactivates News Standby Reception.
Displayed only when the source is “FM.” For settings, see page 8.
Drive Change
: Selects to change the drive when a multiple drives device is connected
to the USB input terminal (front/rear).
iPod Switch
13
*
Headunit Mode
: Controls iPod playback through the unit. /
iPod playback through the iPod/iPhone. /
Application Mode
iPod Mode
: The sound of any
: Controls
functions (musics, games, applications, etc.) running on the connected iPod/iPhone is
emitted through the speakers connected to this unit.
Audiobooks
13
*
Normal / Faster / Slower
: You can select the playback speed of the Audiobooks
sound file in your iPod/iPhone. (Initial selected item depends on your iPod/iPhone setting.)
9
*
Displayed only when <On> is selected for <Subwoofer On/Off>.
10
*
The volume level automatically changes to “Vol 30” if you change to <Low Power> with the volume level set
higher than “Vol 30.”
11
*
Only for FM Radio Data System stations.
12
*
Displayed only when “USB FRONT/ USB REAR” is selected as the source.
13
*
Displayed only when “iPod FRONT/ iPod REAR” is selected as the source.
Continued...
29ENGLISH
Page 30

Menu item
Bluetooth
If the USB Bluetooth Adapter, KS-UBT1, is not connected to the unit, “Please Connect BT
Selectable setting, [ Initial: Underlined ]
Adapter” will be shown on the display. For settings, see pages 18 and 19.
AM Source
AUX Source
Bluetooth
Select
Source
Audio
Software Version
14
*
Displayed only when any source other than “AM/ AUX IN” is selected separately.
15
*
Displayed only when the USB Bluetooth Adapter, KS-UBT1, is connected to the unit and when any source
other than “BT FRONT/ BT REAR” is selected.
*14Show / Hide
*14Show / Hide
Show / Hide
15
*
Shows the firmware version of this unit.
: Enable or disable “AM” in source selection.
: Enable or disable “AUX IN” in source selection.
: Enable or disable “BT FRONT/ BT REAR” in source selection.
Troubleshooting
Symptom Remedy/Cause
Sound cannot be heard from the speakers. Adjust the volume to the optimum level. / Make sure the unit is not
muted/paused. (page 7) / Check the cords and connections.
The unit does not work at all. Reset the unit. (page 3)
“AUX IN” cannot be selected. Check the <Source Select> setting. (see above)
Sound is sometimes interrupted while
listening to an external component
General
connected to the auxiliary input jack.
Nothing appear on the display. Check the <Color Setup> setting. (page 27)
The correct characters are not displayed
(e.g. album name).
SSM automatic presetting does not work. Store stations manually.
Static noise while listening to the radio. Connect the aerial firmly.
FM/AM
“AM” cannot be selected. Check the <Source Select>
Disc cannot be played back. Insert the disc correctly.
CD-R/CD-RW cannot be played back and
track cannot be skipped.
Disc sound is sometimes interrupted. Stop playback while driving on rough roads. / Change the disc. /
“No Disc” appears on the display. Insert a playable disc into the loading slot.
“Please Eject“ appears on the display. This occurs sometimes due to over-heating. Eject the disc or change
Disc playback
“In Disc” appears on the display. The disc cannot be ejected properly. Make sure nothing is blocking
Check to be sure the recommended stereo mini plug is used for
connection. (page 22)
A
This unit can only display letters (capital:
– Z, small: a – z),
numbers (0 – 9), a limited number of symbols ( ! / ” / # / $ / % /
&
/ ’ / ( / ) / / + / , / – / . / / / : / ; / < / = / > / ? / @ / – / ).
=
<AM Source> setting. (see above)
Insert a finalized CD-R/CD-RW (finalize with the component which
you used for recording).
Check the cords and connections.
to another playback source.
the loading slot.
30 ENGLISH
Page 31

Symptom Remedy/Cause
Disc cannot be played back. Use a disc with MP3/WMA tracks recorded in a format compliant
with ISO 9660 Level 1, Level 2, Romeo, or Joliet. / Add the
extension code <.mp3> or <.wma> to the file names.
Noise is generated. Skip to another track or change the disc.
“Reading” keeps flashing on the display. A longer readout time is required. Do not use too many
hierarchical levels and folders.
Tracks do not play back in the order you
have intended them to play.
The elapsed playing time is not correct. This sometimes occurs during playback. This is caused by how the
MP3/WMA playback
“Please Eject” appears on the display. Insert a disc that contains MP3/WMA tracks.
“Not Support” appears on the display and
track skips.
“Reading” keeps flashing on the display. A longer readout time is required. Do not use too many
Noise is generated. Skip to another file.
Tracks/folders are not played back in the
order you have intended.
While playing a track, sound is sometimes
interrupted.
” “
“USB-Error,
USB playback
“
Power OFF = ON” appears on the display.
“Cannot Play” flashes on the display. /
“No USB” appears on the display. / The unit
cannot detect the USB device.
“No File” appears on the display. Check whether the device contains playable files.
“Not Support” appears and track skips. Check whether the track is a playable file format.
“Read Failed” appears on the display. The connected USB device is not working properly. Connect the
“BT FRONT/ BT REAR” cannot be selected. Check the <Source Select> = <Bluetooth Audio> setting.
No Bluetooth device is detected. Search from the Bluetooth device again. / Reset the unit, then
Pairing cannot be made. Make sure you have entered the same PIN code to both the unit
Bluetooth
Echo or noise occurs. Adjust the microphone unit’s position.
Remove Device,
”
The playback order is determined when the files are recorded.
tracks are recorded on the disc.
Skip to the next track encoded in an appropriate format or to the
next non-copy-protected WMA track.
hierarchical levels and folders. / Turn off the power then on
again. / Reattach the USB device again.
The playback order is determined by the file name. Folders with
numbers on the initial of their names are sorted in numerical
order. However, folders with no numbers on the initial of their
names are sorted according to the file system of the USB device.
The tracks have not been properly copied into the USB device.
Copy tracks again into the USB device, and try again.
An over-current occurs. Turn off, then turn on the unit.
Check whether the connected USB device is compatible with this
unit. / Reattach the USB device again.
USB device again.
(page 30) / Check to be sure the USB Bluetooth Adapter is
attached.
search from the Bluetooth device again.
and target device. (page 14) / Disconnect the Bluetooth device
and try pairing again. (page 14)
Continued...
31ENGLISH
Page 32

Symptom Remedy/Cause
Phone sound quality is poor. Reduce the distance between the unit and the Bluetooth mobile
phone. / Move the car to a place where you can get a better signal
reception.
The unit does not response when you
tried to copy the phonebook to the unit.
The sound is interrupted or skipped
during playback of a Bluetooth audio
player.
The connected audio player cannot be
controlled.
“Voice” calling method is not successful. Use “Voice” calling method in a more quiet environment. / Reduce
Bluetooth
“Please Connect BT Adapter” appears on
the display.
“Connection Error” appears on the
display.
“Error” appears on the display. Try the operation again. If “Error” appears again, check if the
“Please Wait...” appears on the display. The unit is preparing to use the Bluetooth function. If the message
“HW Error” appears on the display. Reset the unit and try the operation again. If “HW Error” appears
You may have tried to copy the same entries (as stored) to the
DISP
or
unit. Press
Reduce the distance between the unit and the Bluetooth audio
player. / Disconnect the device connected for Bluetooth Phone. /
Turn off, then turn on the unit. / Connect the player again, when
the sound is not yet restored.
Check whether the connected audio player supports AVRCP
(Audio/Video Remote Control Profile). (Operations depend on the
connected audio player.) / Disconnect and connect the Bluetooth
player again.
the distance from the microphone when you speak the name. /
Change the “NR/EC Mode” to “Off” (page 16), then try again.
Connect the USB Bluetooth Adapter to the unit before you can
perform any operation.
The device is registered but the connection has failed. Use
<Connect Phone/ Connect Audio> to connect the device again.
device supports the function you have tried.
does not disappear, turn off and turn on the unit, then connect the
device again (or reset the unit). (page
again, consult your nearest JVC IN-CAR ENTERTAINMENT dealer.
T/P BACK
to exit.
3).
The iPod does not turn on or does not
work.
The sound is distorted. Deactivate the equalizer on the iPod/iPhone.
Noise is generated. Turn off (uncheck) the “VoiceOver” feature of the iPod. For details,
Playback stops. The headphones are disconnected during playback. Restart the
iPod/iPhone playback
“No File” appears on the display. Check whether the device contains playable files.
“Cannot Play” appears on the display. Check whether the connected iPod/iPhone is compatible with this
32 ENGLISH
Check the connecting cable and its connection. / Charge the
battery of the iPod/iPhone. / Reset the iPod/iPhone. / Check
whether <iPod Switch> setting is appropriate. (page 29)
visit <http://www.apple.com>.
playback operation. (page 19)
unit. (page 21)
Page 33

Specifications
AUDIO AMPLIFIER SECTION
Maximum Power Output :
Continuous Power Output (RMS) :
channel into 4 Ω, 40 Hz to 20 000 Hz at no
more than 1% total harmonic distortion.
Signal-to-Noise Ratio :
Load Impedance :
Frequency Response :
Line-Out or Subwoofer-Out Level/
Impedance :
Output Impedance :
Other Terminal :
cable, Auxiliary input jack, Aerial input
5.0 V/20 kΩ load (full scale)
USB input terminal, USB rear
50 W per channel
20 W per
70 dB
4 Ω (4 Ω to 8 Ω allowance)
40 Hz to 20 000 Hz
≤ 600 Ω
TUNER SECTION
Frequency Range :
FM :
87.5 MHz to 108.0 MHz
AM :
MW : 531 kHz to 1 611 kHz
LW : 153 kHz to 279 kHz
FM Tuner :
Usable Sensitivity :
50 dB Quieting Sensitivity :
16.3 dBf (1.8 μV/75 Ω)
Alternate Channel Selectivity (400 kHz) :
65 dB
Frequency Response :
Stereo Separation:
MW Tuner :
Sensitivity/Selectivity :
LW Tuner :
Sensitivity :
9.3 dBf (0.8 μV/75 Ω)
40 Hz to 15 000 Hz
40 dB
20 μV/40 dB
50 μV
CD PLAYER SECTION
Type :
Compact disc player
Signal Detection System :
pickup (semiconductor laser)
Number of Channels :
Frequency Response :
Non-contact optical
2 channels (stereo)
5 Hz to 20 000 Hz
Signal-to-Noise Ratio :
Wow and Flutter :
MP3 Decoding Format (MPEG1/2 Audio
Layer 3) :
Max. Bit Rate: 320 kbps
WMA (Windows Media® Audio) Decoding
Format :
Max. Bit Rate: 320 kbps
102 dB
Less than measurable limit
USB SECTION
USB Standard :
Data Transfer Rate (Full Speed) :
Compatible Device :
(except HDD)
Compatible File System :
Playable Audio Format :
Output Power :
terminal (front/rear)
USB 1.1, USB 2.0
Mass Storage Class
DC 5 V 1 A, USB input
BLUETOOTH SECTION
Version :
Ver 2.1 +EDR
Power Class :
Service Area :
Profile :
PBAP 1.0
Class 2
10 m
HFP 1.5, OPP 1.1, A2DP 1.2, AVRCP 1.3,
GENERAL
Power Requirement :
DC 14.4 V (11 V to 16 V allowance)
Grounding System :
Allowable Operating Temperature :
0°C to +40°C
Dimensions (W × H × D) : (approx.)
– Installation Size :
182 mm × 52 mm × 160 mm
– Panel Size :
188 mm × 59 mm × 9 mm
Mass :
1.4 kg (excluding accessories)
Subject to change without notice.
Operating Voltage :
Negative ground
Max. 12 Mbps
FAT 32/ 16/ 12
MP3/ WMA/ WAV
33ENGLISH
Page 34

Merci pour avoir acheté un produit JVC.
Veuillez lire attentivement toutes les instructions avant d’utiliser l’appareil afin de bien comprendre
son fonctionnement et d’obtenir les meilleures performances possibles.
IMPORTANT POUR PRODUITS LASER
1. PRODUIT LASER CLASSE 1
2. ATTENTION: N’ouvrez pas le couvercle supérieur. Il n’y a aucune pièce réparable par l’utilisateur
à l’intérieur de l’appareil; confiez toute réparation à un personnel qualifié.
3. ATTENTION: Rayonnement laser visible et/ou invisible de classe 1M une fois ouvert. Ne pas
regarder directement avec des instruments optiques.
4. REPRODUCTION DE L’ÉTIQUETTE: ÉTIQUETTE DE PRÉCAUTION PLACÉE À L’EXTÉRIEUR DE
L’APPAREIL.
AVERTISSEMENT:
Arrêtez la voiture avant de manipuler l’appareil.
Pile
Produits
Informations relatives à l’élimination
des appareils et des piles usagés, à
l’intention des utilisateurs
[Union européenne seulement]
Ces symboles signifient que le produit et les
piles ne doivent pas être éliminés en tant
que déchet ménager à la fin de son cycle
de vie.
Si vous souhaitez éliminer ce produit et les
piles, faites-le conformément à la législation
nationale ou autres règles en vigueur dans
votre pays et votre municipalité.
En éliminant correctement ce produit, vous
contribuez à la conservation des ressources
naturelles et à la prévention des éventuels
effets négatifs sur l’environnement et la
santé humaine.
Notification:
La marque Pb en dessous du symbole des
piles indique que cette pile contient du
plomb.
2 FRANÇAIS
Attention:
Ajustez le volume de façon à pouvoir entendre
les sons extérieurs à la voiture. Conduire avec
le volume trop haut peut être la cause d’un
accident.
Précautions sur le réglage du volume:
Les appareils numériques (CD/USB) produisent
très peut de bruit par rapport aux autres
sources. Réduisez le volume avant de
reproduire ces sources numériques afin d’éviter
d’endommager les enceintes par la soudaine
augmentation du niveau de sortie.
Page 35

Comment attacher le panneau de
commande
Comment détacher le panneau
de commande
Évitez de toucher les connecteurs.
Comment réinitialiser votre
appareil
Vos ajustements préréglés
sont aussi effacés.
Comment forcer l’éjection d’un
disque
[Maintenez
• Faites attention de ne pas faire tomber le
disque quand il est éjecté.
• Si cela ne fonctionne pas, essayez de
réinitialiser l’appareil.
Condensation : Quand une voiture est
climatisée, de la condensation peut se
produire sur la lentille du laser. Cela peut être
la cause d’une erreur de lecture du disque.
Dans ce cas, retirez le disque et attendez que
l’humidité s’évapore.
Température à l’intérieur de la voiture :
Si votre voiture est restée garée pendant
longtemps dans un climat chaud ou froid,
attendez que la température à l’intérieur de
la voiture redevienne normale avant d’utiliser
l’appareil.
pressée]
TABLE DES MATIERES
3 Comment attacher le panneau de
commande
3 Comment détacher le panneau de
commande
3 Comment réinitialiser votre appareil
Comment forcer l’éjection d’un disque
3
4 Annulation des démonstrations
des affichages
4 Réglage de l’horloge
5 Préparation de la télécommande
5 À propos des disques
6 Opérations de base
8 Écoute de la radio
10 Écoute d’un disque
11 Écoute d’un périphérique USB
13 Utilisation de périphériques
Bluetooth ®
13 Connexion d’un appareil Bluetooth
15 Utilisation d’un téléphone portable
Bluetooth
18 Utilisation d’un lecteur audio
Bluetooth
18 Modification des réglages Bluetooth
19 Écoute d’un iPod/iPhone
Écoute d’un autre appareil extérieur
22
23 Ajustements sonores
23 Personnalisation du mode sonore
préréglé—USER
23 Réglage et mémorisation d’un mode
sonore prérégle “My Sound EQ”
24 Réglage de la synchronisation de
sortie d’une enceinte
—Time Alignment
26 Réglage du filtre de transition passe
haut/bas—X’over HPF/LPF
27 Utilisation des menus
30 Guide de dépannage
33 Spécifications
3FRANÇAIS
Page 36

Annulation des démonstrations des affichages
1 Mise sous tension de l’appareil.
2
[Maintenez
pressée]
SET UP
DEMO
Clock
Color
(Réglage initial)
3 Choisissez <DEMO>.
DEMO
Off
On
(Réglage initial)
Réglage de l’horloge
1 Mise sous tension de l’appareil.
SET UP
2
[Maintenez
pressée]
3 Choisissez <Clock>.
DEMO
Clock
Color
(Réglage initial)
SET UP
DEMO
Clock
Color
4 Choisissez <Off>.
DEMO
Off
On
5
SET UP
DEMO
Clock
Color
6 Terminez la procédure.
6 Ajustez les minutes.
Set Clock
Clock
Set Clock
24H/12H
Clock Adjust
7 Choisissez <24H/12H>.
Clock
Set Clock
24H/12H
Clock Adjust
0 : 00
4 Choisissez <Set Clock>.
5 Ajustez les heures.
4 FRANÇAIS
Clock
Set Clock
24H/12H
Clock Adjust
Set Clock
0 : 00
8 Choisissez <24Hours> ou
<12Hours>.
24H/12H
24Hours
12Hours
9 Terminez la procédure.
Page 37

Préparation de la télécommande
Lorsque vous utilisez la télécommande pour la
première fois, tirez sur la feuille isolante pour
la retirer.
Feuille isolante
Si la télécommande perd de son efficacité,
remplacez la pile.
Remplacement de la pile-bouton au
lithium
L’autoradio est muni d’une fonction de
télécommande de volant.
• Pour plus d’informations, référez-vous aussi
aux instructions fournies avec l’adaptateur de
télécommande.
À propos des disques
Cet appareil ne peut lire que les CD comportant:
Disques qui ne peuvent pas être utilisés:
• Disques qui ne sont pas ronds.
• Disques avec des colorations sur la surface
d’enregistrement ou disques sales.
• Vous ne pouvez pas reproduire un disque
enregistrable/réinscriptible qui n’a pas été
finalisé. (Pour le processus de finalisation,
reportez-vous au logiciel utilisé pour graver
le disque et au mode d’emploi du graveur de
disque.)
• Les CD de 8 cm ne peuvent pas être
utilisés. Essayer d’insérer un disque à
l’aide d’un adaptateur peut entraîner un
dysfonctionnement de l’appareil.
Attention:
• Danger d’explosion si la pile est remplacée de
façon incorrecte. Remplacez-la uniquement
avec le même type de pile ou un type
équivalent.
• Les piles ne doivent en aucun cas être
exposées à une chaleur excessive (lumière du
soleil, feu, etc.).
Avertissement (pour éviter tout accident
et tout dommage):
• N’installez pas une autre pile qu’une CR2025
ou son équivalent.
•
Ne laissez pas la télécommande dans un
endroit (tel que le tableau de bord) exposé à la
lumière directe du soleil pendant longtemps.
• Rangez la pile dans un endroit hors d’atteinte
des enfants.
• Ne rechargez pas, ne court-circuitez pas, ne
chauffez pas la pile ni ne la jeter dans un feu.
• Ne laissez pas la pile avec d’autres objets
métalliques.
• Ne piquez pas la pile avec des ciseaux ou
d’autres objets similaires.
• Enveloppez la pile de ruban isolant avant de
la mettre au rebut ou de la ranger.
Manipulation des disques:
• Ne pas toucher la surface d’enregistrement du
disque.
• Ne pas coller de ruban adhésif, etc. sur les
disques et ne pas utiliser de disque avec du
ruban adhésif collé dessus.
• N’utilisez aucun accessoire pour le disque.
• Nettoyez le disque en partant du centre vers
l’extérieur.
• Nettoyez le disque avec un chiffon sec au
silicone ou un chiffon doux. N’utilisez aucun
solvant.
• Pour retirer les disques de cet appareil, tirezles horizontalement.
• Retirez les ébarbures du bord du trou central
du disque avant d’insérer un disque.
5FRANÇAIS
Page 38

Opérations de base
Molette de commande
Prise d’entrée AUX (auxiliaire)
Prise d’entrée USB (bus série universel)
Fenêtre d’affichage
Capteur de
télécommande
• NE l’exposez PAS à
la lumière directe
du soleil.
Précautions pour la lecture de disques à double face:
La face non DVD d’un disque à “DualDisc” n’est pas compatible avec le standard “Compact Disc
Digital Audio”. Par conséquent, l’utilisation de la face non DVD d’un disque à double face sur cet
appareil n’est pas recommandée.
Attention:
Si la température à l’intérieur de la voiture est inférieure à 0°C, le mouvement des animations et le
défilement des textes sur l’affichage sont interrompus pour éviter que l’affichage devienne flou.
apparaît sur l’affichage.
Quand la température augmente et atteint de nouveau la température de fonctionnement, ces
fonctions sont de nouveau accessibles.
JVC ne peut être tenu responsable pour toute perte de données dans un iPod/iPhone et/ou un
périphérique USB à mémoire de grande capacité lors de l’utilisation de ce système.
Entretien
Nettoyage de l’appareil
Essuyez la saleté sur le panneau avec un chiffon sec au silicone ou un chiffon doux. Ne pas
respecter ces précautions peut entraîner des dommages à l’appareil.
Nettoyage du connecteur
Essuyez toute les saletés sur le connecteur de l’appareil et le panneau. Utilisez une coton-tige ou
un chiffon.
6 FRANÇAIS
Page 39

Quand vous appuyez ou maintenez pressées les touches suivantes...
Appareil
principal
SRC
Molette de
commande
(tournez)
Molette de
commande
(appuyez sur
la touche)
T/P BACK —
SOUND EQ SOUND
DISP —
BRIGHTNESS —
Télécommande Opérations générales
—
SOURCE
VOL – / + Ajuste le niveau de volume.
— Choisissez les éléments.
— Valide la sélection.
—
• Met l’appareil sous tension.
• Met hors tension [Maintenez pressée].
Choisit les sources disponibles (si l’appareil est sous tension).
• Si la source est prête, la lecture démarre aussi.
Coupe le son pendant fait une pause la lecture.
• Appuyez de nouveau sur la touche pour annuler la sourdine
ou reprendre la lecture.
• Affiche l’écran “HF (Mains libres) Menu” (page 15) ou répond à
un appel quand l’appareil sonne. (page 17)
• Permet de terminer un appel [Maintenez pressée].
• Mise en/hors service de l’attente de réception TA. (page 9)
• Entrez en mode de recherche de PTY [Maintenez pressée].
(page 9)
• Permet de sélectionner la prise de commande d’un iPod/
iPhone [Maintenez pressée]. (page 20)
• Retourne au menu précédent.
Choisit les modes sonores préréglés.
• Maintenez pressée la touche SOUND EQ sur l’appareil
principal pour afficher directement l’écran “My Sound EQ Set”.
(page 23)
• Change l’information sur l’affichage.
• Fait défiler les informations de l’affichage [Maintenez pressée].
Permet d’accéder directement au menu <Day Brightness> ou
<Night Brightness>. (page 28)
• Microsoft et Windows Media est une marque déposée ou une marque de commerce de
Microsoft Corporation aux États-Unis et/ou dans les autres pays.
• La marque du mot et les logos Bluetooth sont la propriété de Bluetooth SIG, Inc. et toute
utilisation de ces marques par Victor Company of Japan, Limited (JVC) est faite sous licence. Les
autres marques et noms de commerce sont la propriété de leur propriétaire respectif.
7FRANÇAIS
Page 40

Écoute de la radio
~
]
“FM” ou “AM”
s’allume lors de la réception d’une émission FM stéréo avec un signal suffisamment fort.
Ÿ
• [Appuyez sur la touche] Recherche des
stations automatiquement.
• [Maintenez pressée] Recherche des
stations manuellement.
“M” apparaît, puis appuyez sur la touche
répétitivement.
Amélioration de la réception FM
1
[Maintenez pressée]
2
] <Tuner> ] <Stereo/Mono> ] <Mono>
La réception est améliorée, mais l’effet
stéréo est perdu.
Pour rétablir l’effet stéréo, répétez la même
procédure et choisissez <Stereo>.
Préréglage automatique
(FM)—
séquentielle des stations puissantes)
Vous pouvez prérégler un maximum de 18
stations pour FM.
Pendant l’écoute d’une station...
SSM (Mémorisation automatique
1
[Maintenez pressée]
2
]
<Tuner> ] <SSM> ] <SSM 01 – 06 /
07 – 12 / 13 – 18>
“SSM” apparaît et les stations locales avec
le signal le plus fort sont recherchées et
mémorisées automatiquement.
Pour prérégler 6 autres stations, répétez la
procédure ci-dessus en choisissant une des
autres plages de réglage SSM.
8 FRANÇAIS
Préglage manuel (FM/AM)
Vous pouvez prérégler un maximum de 18
stations pour FM et de 6 stations pour AM.
1
]
Accordez la station que vous souhaitez
prérégler.
2
[Maintenez pressée]
]
Affiche l’écran “Preset Mode”.
3
]
Permet de choisir un numéro de
préréglage.
Le numéro de préréglage clignote.
Sélection d’une station préréglée
1
ou
2
Utilisation de la télécommande
5
/ ∞ : Change les stations préréglées.
2
/ 3 : [Appuyez sur la touche] Recherche des
stations automatiquement.
[Maintenez pressée] Recherche des
stations manuellement.
Page 41

Les fonctionnalités suivantes sont
accessibles uniquement pour les stations
FM Radio Data System.
Recherche de votre programme
FM Radio Data System préféré—
Recherche PTY
Vous pouvez accorder une station diffusant
votre programme préféré en effectuant une
recherche par code PTY.
1
[Maintenez pressée]
Les derniers codes PTY choisis apparaissent.
2
]
Choisissez un de vos types de
programme favori ou un code PTY sur
la colonne de droite et démarrez la
recherche.
S’il y a une station diffusant un
programme du code PTY que vous avez
choisi, la station est accordée.
Attente de réception
Attente de réception TA
L’attente de réception TA permet à l’appareil
de commuter temporairement sur des
informations routières (TA) à partir de n’importe
quelle source autre que AM.
• Si le volume est ajusté pendant la réception
des informations routières, le volume ajusté
est automatiquement mémorisé. Il sera
appliqué la prochaine fois que la fonction
d’informations routières sera activée.
Pour mettre en service l’attente de
réception TA
Si l’indicateur TP s’allume, c’est
que l’attente de réception TA
est en service.
Si l’indicateur TP clignote, c’est
que l’attente de réception TA
• Pour mettre en service l’attente de réception,
accordez une autre station diffusant les
signaux Radio Data System nécessaire pour
l’attente de réception TA.
• Pour mettre hors service l’attente de
réception, appuyez de nouveau sur T/P BACK.
n’est pas encore en service.
Attente de réception d’informations
L’attente de réception d’informations permet
à l’appareil de commuter temporairement sur
votre programme d’informations préféré à
partir de n’importe quelle source autre que AM.
Pour mettre en service l’attente
de réception d’informations, voir
<News-Standby>. (page 29)
L’appareil ne commute pas sur une annonce
d’informations routières ou sur l’attente de
réception d’informations quand un appel est
établi par “BT-PHONE”.
Poursuite du même
programme—
en réseau
Lorsque vous conduisez dans une région où la
réception FM n’est pas suffisamment forte, cet
autoradio accorde automatiquement une autre
station FM Radio Data System du même réseau,
susceptible de diffuser le même programme
avec un signal plus fort.
Pour changer le réglage de la poursuite
de réception en réseau, référez-vous à
<AF Regional>. (page 29)
Poursuite de réception
Sélection automatique des
stations—
Habituellement, quand vous choisissez un
numéro de préréglage, la station préréglée sur
ce numéro est accordée.
Si les signaux des stations préréglés FM Radio
Data System ne permettent pas une bonne
réception, cet appareil utilise les données AF
et accorde une autre station diffusant le même
programme que la station préréglée originale.
Pour mettre en service Recherche de
programme, voir <P-Search>. (page 29)
Changement des informations sur
l’affichage
Codes PTY:
Culture, Science, Varied, Pop M (musique), Rock M
(musique), Easy M (musique), Light M (musique),
Classics, Other M (musique), Weather, Finance, Children,
Social, Religion, Phone In, Travel, Leisure, Jazz, Country,
Nation M (musique), Oldies, Folk M (musique), Document
Recherche de programme
Nom de la station (PS)
Fréquence de la station
News, Affairs, Info, Sport, Educate, Drama,
9FRANÇAIS
Page 42

Écoute d’un disque
~
]
tension.
Met l’appareil sous
Ÿ
La lecture démarre automatiquement.
Toutes les plages sont reproduites répétitivement jusqu’à ce
que vous changiez la source ou éjectiez le disque.
Arrête de la lecture et éjection du
disque
Si le disque éjecté n’est pas retiré avant 15
secondes, il est réinséré automatiquement
dans la fente d’insertion.
Opérations de base
Choisit un dossier d’un disque
MP3/WMA.
[Appuyez sur la touche]
Choisit une plage.
[Maintenez pressée]
Avance ou recule
rapidement la plage.
Utilisation de la télécommande
5
/ ∞ :
Choisit un dossier d’un disque MP3/WMA.
2
/ 3 : [Appuyez sur la touche]
[Maintenez pressée]
Choisit une plage.
Avance ou recule rapidement
la plage.
Sélection d’une plage/dossier à
partir de la liste
• Si le disque MP3/WMA contient beaucoup
de plages, vous pouvez effectuer une
recherche rapide (±10, ±100, ±1 000) sur le
disque en tournant rapidement la molette de
commande.
• Pour revenir au menu précédent, appuyez sur
T/P BACK.
Pour les disque MP3/WMA, vous pouvez aussi
utiliser le menu de recherche (A à Z, 0 à 9, et
OTHERS) pour faire défiler le menu de liste.
• “OTHERS” apparaît si le 1e caractère n’est pas
A à Z ou 0 à 9, comme par exemple #, —, ! et
etc.
Sur le menu de liste...
1
Appuyez sur 5/∞ pour afficher le menu
de recherche.
Le premier caractère du dossier/fichier
actuel apparaît.
2
Appuyez sur 5/∞ pour choisir le
caractère souhaité. Puis, appuyez sur la
molette de commande pour valider.
La liste des plages correspondant au
caractère choisi apparaît.
3
Tournez la molette de commande pour
choisir la plage souhaité. Puis, appuyez
sur la molette de commande pour valider.
• Seul les caractères existant apparaîtront sur le
menu de recherche.
• Maintenez pressée
façon continue le caractère du menu de
recherche.
• Si votre disque contient beaucoup de plages,
la recherche prend un certain temps.
5/∞
pour changer de
10 FRANÇAIS
Page 43

Sélection des modes de lecture
Vous pouvez utiliser un des modes de lecture
suivants à la fois.
1
[Maintenez pressée]
2
Random
Folder : Reproduit aléatoirement toutes
les plages du dossier actuel, puis toutes
les plages des dossiers suivants
All : Reproduit aléatoirement toutes les
plages
Pour annuler la lecture répétée ou la lecture
aléatoire, choisissez “Off”.
]
“Repeat” j “Random”
Changement des informations sur
l’affichage
3
Repeat
Track : Répète la plage actuelle
Folder : Répète le dossier actuel
Nom de l’album/interprète (nom du dossier ou
titre du disque)* Titre de la plage (nom du
fichier)*
*
“No Name” apparaît pour les CD ordinaire ou si
aucun nom n’a été enregistré.
Écoute d’un périphérique USB
Cet appareil est muni de deux prises d’entrée USB (sur le panneau de commande et sur le câble
USB provenant de l’arrière de l’appareil). Vous pouvez utiliser ces deux prises en même temps.
Vous pouvez commander le périphérique USB de la même façon que les fichiers sur un
disque. (page 10, 11)
• Cet appareil peut reproduire les fichiers MP3/ WMA/ WAV mémorisées dans un périphérique USB
à mémoire de grande capacité (tel qu’une mémoire USB, un lecteur audio numérique, etc.).
~
]
tension.
Ÿ
Met l’appareil sous
Câble USB (non fourni)
Prise d’entrée USB
Câble USB à partir de
l’arrière de l’appareil
et/ou
Toutes les plages sont reproduites répétitivement jusqu’à ce que vous changiez la source ou
déconnectiez le périphérique USB.
À suivre...
11FRANÇAIS
Page 44

Attention:
• Assurez-vous que toutes les données
importantes ont été sauvegardées.
• Vous ne pouvez pas connecter un ordinateur
ou un disque dur portable à la prise d’entrée
USB de l’appareil.
• Éviter d’utiliser le périphérique USB s’il peut
gêner une conduite une conduite en toute
sécurité.
• Un choc électrostatique à la connexion
d’un périphérique USB peut causer une
lecture anormale du périphérique. Dans ce
cas, déconnectez le périphérique USB puis
réinitialiser cet appareil et le périphérique USB.
• Ne laissez pas un périphérique USB dans la
voiture, exposé aux rayons directs du soleil
ou aux hautes températures pour éviter
toute déformation ou tout dommage du
périphérique.
• Il se peut que cet appareil ne puisse pas
reproduire correctement des fichiers d’un
périphérique USB quand celui-ci est connecté
à l’aide d’un cordon prolongateur.
• Les périphériques USB munis de fonctions
spéciales telles que des fonctions de
protection des données ne peuvent pas être
utilisés avec cet appareil.
Informations complémentaires
•
Cet appareil peut reproduire les disques multi-session;
mais les sessions non fermée sont sautées lors de la
lecture.
•
Cet appareil peut reproduire les fichiers portant le code
d’extension <.mp3>, <.wma> ou <.wav> (quel que
soit la casse des lettres—majuscules/minuscules).
•
Cet appareil peut reproduire les fichiers respectant les
conditions suivantes:
Pour les disques MP3/WMA:
–
Débit binaire: MP3/WMA: 5 kbps à 320 kbps
–
Fréquence d’échantillonnage:
MP3: 32 kHz, 44,1 kHz, 48 kHz (pour MPEG-1)
16 kHz, 22,05 kHz, 24 kHz (pour MPEG-2)
WMA: 8 kHz à 48 kHz
Pour les périphériques USB:
MP3:
–
Débit binaire: 32 kbps à 320 kbps (MPEG-1)
8 kbps à 160 kbps (MPEG-2)
–
Fréquence d’échantillonnage:
32 kHz, 44,1 kHz, 48 kHz (pour MPEG-1)
16 kHz, 22,05 kHz, 24 kHz (pour MPEG-2)
WMA:
–
Débit binaire: 5 kbps à 320 kbps
–
Fréquence d’échantillonnage: 8 kHz à 48 kHz
–
Canal: 1 ca./2 ca.
WAV:
–
Débit binaire: Linear PCM à 705 kbps et
1 411 kbps
12 FRANÇAIS
• Lors de la connexion avec un câble USB,
utilisez un câble USB 2.0.
• N’utilisez pas un périphérique USB avec 2
partitions ou plus.
• En fonction de la forme du périphérique
USB et du port de connexion, il se peut que
certains périphériques USB ne puissent pas
être connectés correctement ou que la
connexion soit lâche.
• Cet appareil ne peut pas reconnaître les
périphériques USB dont l’alimentation n’est
pas de 5 V et dépasse 1 A.
• Ne déconnectez puis ne reconnectez pas le
périphérique USB répétitivement pendant
que “Reading” apparaît sur l’affichage.
• Il se peut que cet appareil ne reconnaisse pas
la carte mémoire insérée dans le lecteur de
carte USB.
• Connectez uniquement un périphérique USB
à la fois à cet appareil. N’utilisez pas de nœud
de raccordement USB.
• Le fonctionnement et l’alimentation peuvent
ne pas fonctionner comme prévu pour
certains périphériques USB.
• Pour les informations additionnelles, référezvous à ce qui suit.
–
Fréquence d’échantillonnage: 44,1 kHz
–
Canal: 1 ca./2 ca.
•
Cet appareil peut affiché les balises WMA/WAV et ID3,
version 1,0/1,1/2,2/2,3/2,4 (pour MP3).
•
La fonction de recherche fonctionne mais la vitesse de
recherche n’est pas constante.
•
Cet appareil peut reproduire les fichiers enregistrés au
mode VBR (débit binaire variable). (Les fichiers enregistrés
en VBR affichent une durée écoulée différente.)
•
Nombre maximum de caractère pour:
–
Noms de dossier/fichier : 25 caractères (y compris les
4 caractères de l’extension—<.mp3>, <.wma>,
<.wav>)
–
Balise MP3/ WMA/ WAV : 128 caractères
•
Cet appareil peut reconnaître un maximum de 20 000
fichiers et de 2 000 dossiers (999 fichiers par dossier).
•
Cet appareil ne peut pas reproduire les fichiers suivants:
–
Fichiers MP3: codé au format MP3i et MP3 PRO, dans
un format inapproprié, couche 1/2.
–
Fichiers WMA: codés au format sans perte (lossless),
professionnel et vocal; avec un format non basé sur
Windows Media® Audio; protégé contre la copie avec
DRM.
–
Fichiers qui contiennent des données telles que AIFF,
ATRAC3, etc.
Page 45
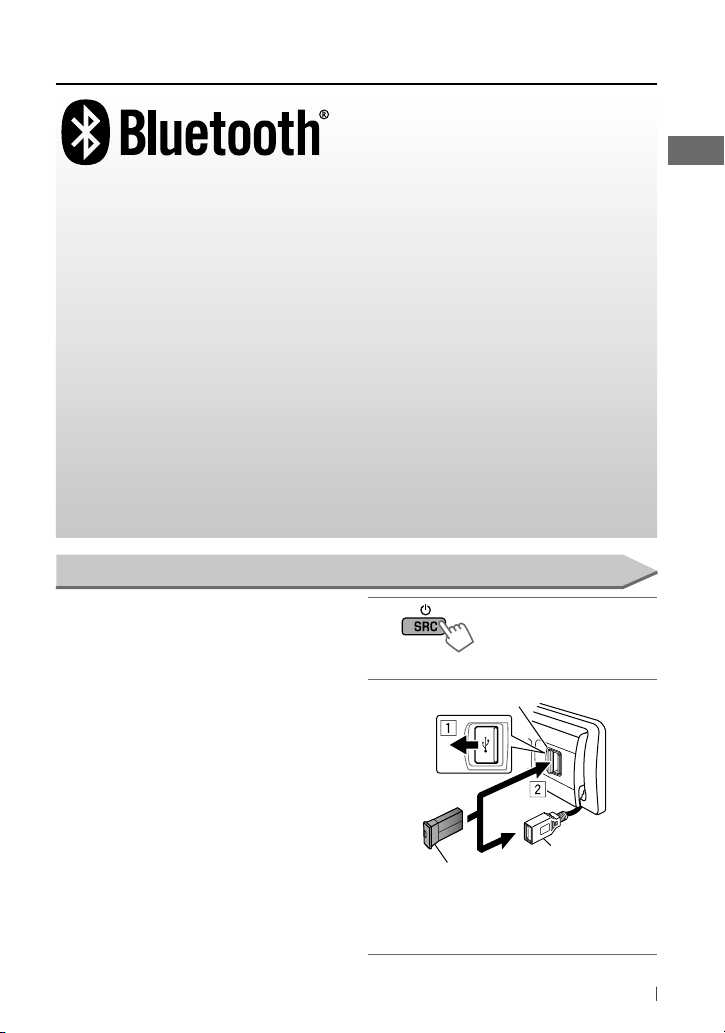
Utilisation de périphériques Bluetooth ®
Bluetooth est une technologie de communication radio à courte distance pour les appareils
portables tels que les téléphones portables, les ordinateurs portables, etc. Les appareils Bluetooth
peuvent être connectés sans câble et communiquer les uns avec les autres.
En connectant l’adaptateur USB Bluetooth fourni (KS-UBT1) à une des prises d’entrée USB de cet
appareil, vous pouvez commander un périphérique Bluetooth en utilisant cet appareil.
Une fois que l’adaptateur USB Bluetooth est attaché, cet appareil est toujours disponible pour le
pairage.
• Un seul adaptateur USB Bluetooth peut être détecté en même temps.
• Référez-vous aussi aux instructions fournies avec le périphérique Bluetooth.
• Référez-vous aux pages i et ii à la fin du document pour vérifier les pays où vous pouvez utiliser
la fonction Bluetooth.
Cet appareil prend en charge les profiles Bluetooth suivants
• HFP (Hands-Free Profile — Profile mains
libres) 1.5
• OPP (Object Push Profile — Profile de
poussée d’objet) 1.1
• PBAP (Phonebook Access Profile — Profile
d’accès au répertoire d’adresses) 1.0
Connexion d’un appareil Bluetooth
Quand vous connecter un périphérique
Bluetooth à l’appareil pour la première
fois, faites les pairage entre l’appareil et le
périphérique.
• Une fois que la connexion est établie, le
périphérique reste enregistré dans cet
appareil même si vous réinitialisez l’appareil.
Un maximum de cinq appareils peuvent être
enregistrés en tout. “Pairing Full” apparaît si
vous essayez de réaliser le pairage d’un 6e
périphérique.
• Cet appareil prend en charge le Pairage
simple sécurisé (SSP).
• L’ordre de pairage peut être différent de ce
qui est décrit ci-après.
• Un maximum de deux périphériques pour
Téléphone Bluetooth et un périphérique pour
Audio Bluetooth peuvent être connectés en
même temps.
• A2DP (Advanced Audio Distribution Profile —
Profile de distribution audio avancé) 1.2
• AVRCP (Audio/Video Remote Control Profile —
Profile de télécommande audio/vidéo) 1.3
1
]
Met l’appareil sous tension.
Prise d’entrée USB
2
ou
KS-UBT1 (fournie)
]
Assurez-vous que l’adaptateur USB
Bluetooth est connecté à une des prises
d’entrée USB.
Câble USB à partir de
l’arrière de l’appareil
À suivre...
13FRANÇAIS
Page 46

Utilisez le périphérique Bluetooth pour
3
rechercher et sélectionner “JVC Unit”.
• Pour certains périphériques Bluetooth, il
se peut que vous ayez besoin d’entrer le
code PIN juste après la recherche.
Réalisez une des opérations de pairage
4
suivantes (ce qui apparaît dépend du
processus de pairage du périphérique
Bluetooth).
(A) Si l’indication suivant apparaît sur
l’affichage:
Pairing ?
Device: [Nom du
périphérique]
]
Sélectionnez “Yes” pour démarrer le
processus de pairage.
Si “Now Pairing...” apparaît...
]
Utilisez le périphérique Bluetooth pour
accepter.
Si “Now Pairing... PIN code: 0000”
apparaît...
]
Entrez un code PIN (Numéro
d’identification personnel) sur le
périphérique Bluetooth.
•
Vous pouvez changer le code PIN sur celui
de votre choix avant le pairage. (page 19)
Réglage initial: 0000 ]
[
(B) Si l’indication suivant apparaît sur
l’affichage:
Pairing ?
Device: [
périphérique
Passkey: XXXXXX
]
Vérifiez que le code qui apparaît sur le
périphérique et le périphérique Bluetooth
est le même. Puis, validez le code sur
l’appareil en appuyant sur la molette
de commande. Utilisez le périphérique
Bluetooth pour valider le code.
•
“XXXXXX” est un code numérique à 6 chiffres
qui apparaît de façon différente (même si le
périphérique est le même) chaque fois que la
pairage est réalisé
14 FRANÇAIS
Nom du
]
Pairing ?
Yes: Press VOL
No: Press BACK
Pairing ?
Yes: Press VOL
No: Press BACK
Une fois que la pairage a réussi,
5
l’appareil établi la connexion Bluetooth
avec le périphérique Bluetooth*.
(“Pairing COMPLETED” apparaît et
s’allume sur l’affichage.)
• Le périphérique reste enregistré même
après que vous le déconnectez. Utilisez
<Connect Phone/ Connect Audio> (ou
mettez en service <Auto Connect>,
page 19) pour connecter le même
périphérique la prochaine fois.
*
Il se peut que certains périphériques ne
puissent pas se connecter avec l’appareil
après le pairage. Connectez le périphérique à
l’appareil manuellement.
Pour supprimer un périphérique enregistré
1
Maintenez pressé MENU.
2
Tournez la molette de commande pour
choisir <Bluetooth>, puis appuyez dessus
pour valider.
3
Tournez la molette de commande pour
choisir <Delete Pairing>, puis appuyez
dessus pour valider.
4
Tournez la molette de commande
pour choisir le périphérique que vous
souhaitez supprimer, puis appuyez dessus
pour valider.
“Delete OK?” apparaît.
5
Appuyez sur la molette de commande
pour supprimer la sélection.
“OK” apparaît quand le périphérique a été
supprimé.
Pour revenir au menu précédent, appuyez sur
T/P BACK.
Pour connecter/déconnecter un
périphérique enregistré
1
Maintenez pressé MENU.
2
Tournez la molette de commande pour
choisir <Bluetooth>, puis appuyez dessus
pour valider.
3
Tournez la molette de commande
pour choisir <Connect Phone/
Connect Audio> ou <Disconnect Phone/
Disconnect Audio>, puis appuyez dessus
pour valider.
4
Tournez la molette de commande
pour choisir le périphérique que vous
souhaitez connecter/déconnecter, puis
appuyez dessus pour valider.
“Connected [Nom du périphérique]/
Disconnected [Nom du périphérique]”
apparaît quand le périphérique est
connecté/déconnecté.
Page 47

Utilisation d’un téléphone portable Bluetooth
Pour faire un appel
1
]
Affichez l’écran “HF Menu”.
2
]
Choisissez une méthode d’appel
ou faite un réglage. (Dialed Calls/
Received Calls/ Missed Calls/ Phonebook/
Dial Number/ Voice/ Settings)
Si “Dialed Calls/ Received Calls/
3
Missed Calls/ Phonebook” est choisi à
l’étape 2 ...
Tournez la molette de commande pour
choisir le nom/numéro de téléphone que
vous souhaitez appeler, puis appuyez sur
la molette de commande pour valider.
• “No History Found” apparaît s’il n’y a pas
d’historique mémorisé.
• “No Entries Found” ou “Send Phonebook
Manually” apparaît en fonction du
réglage “Phonebook Select” effectué.
(Référez-vous à la colonne de droite.)
Si “Dial Number” est sélectionné à
l’étape 2 ...
Entrez le numéro de téléphone à
composer.
Tournez la molette de commande pour
choisir un numéro ou un caractère (0 – 9,
, #, +), appuyez sur 4 /¢
*
pour aller à la position d’entrée. Une fois
que vous avez fini d’entrer le numéro,
appuyez sur la molette de commander
pour valider.
Si “Voice” est sélectionné à l’étape 2 ...
Dîtes le nom (mots enregistrés) que vous
souhaitez appeler quand “Waiting Voice
[Nom du périphérique]” apparaît.
•
Maintenez pressée pour mettre en
service la composition vocale directement
si un seul téléphone est connecté.
Si deux téléphones sont connectés,
maintenir pressée
d’afficher l’écran “Phone list”. Tournez
la molette de commande pour choisir
un téléphone pour mettre en service
la composition vocale, puis appuyez
dessus pour valider.
• Accessible uniquement quand le
téléphone portable connecté possède
un système de reconnaissance vocale.
• “Not Support” apparaît si le téléphone
connecté ne prend pas en charge cette
fonction.
Si “Settings” est sélectionné à
l’étape 2 ...
Tournez la molette de commande pour
choisir un élément (voir ci-après), puis
appuyez sur la molette de commande
pour valider.
Les réglages suivants sont applicables
aux périphériques appariés. Si un autre
périphérique est apparié, réalisez de
nouveau les réglages.
• Phonebook Select
In Phone [Réglage initial] : L’appareil parcourt
le répertoire téléphonique du téléphone connecté.
In Unit
:
L’appareil parcourt le répertoire
téléphonique enregistré dans l’appareil. (Pour
copier la mémoire du répertoire téléphonique,
référez-vous à <Phonebook Trans> à la page 19.)
• Si le répertoire téléphonique contient beaucoup
de numéros, vous pouvez effectuer une
recherche rapide (±10, ±100, ±1 000) sur le
répertoire téléphonique en tournant rapidement
la molette de commande.
•
Pour faire une recherche dans le répertoire
téléphonique, référez-vous à la page 16.
*
Peut être sélectionné uniquement quand le
téléphone connecté prend en charge PBAP.
Auto Answer
•
On
: L’appareil répond automatiquement aux
appels entrant. /
ne répond pas automatiquement aux appels
entrant. Appuyez sur
commande pour répondre.
permet
*
Off
[Réglage initial] : L’appareil
ou sur la molette de
À suivre...
15FRANÇAIS
Page 48

•
Ringing Tone
In Unit
vous avertissant de l’arrivée d’un appel/message
textuel.
–
Call
de sonnerie quand un appel arrive
[
Tone 1 — 5
–
Message
de sonnerie quand un message textuel arrive
[
Tone 1
• La tonalité de sonnerie par défaut est différente
en fonction du périphérique apparié.
In Phone
tonalité de sonnerie du téléphone connecté pour
vous avertir que l’arrivé d’un appel/message
texte. (Le téléphone portable connecté sonne s’il
ne prend pas en charge cette fonction.)
•
Ring Color
29 couleurs préréglées [ Réglage
initial:
texte arrive, l’affichage clignote dans la couleur
choisie. (L’affichage change sur la couleur
d’origine si vous répondez à l’appel ou l’appel
entrant est coupé.) /
•
NR/EC Mode
On
[Réglage initial] : L’appareil ajuste la
réduction du bruit et l’annulation de l’écho du
microphone connecté à l’appareil afin de produire
un son plus clair. /
•
MIC Setting
Ajustez la sensibilité [
du microphone connecté à l’appareil. [ Réglage
initial:
•
Message Notice
On [Réglage initial] : L’appareil vous informe
de l’arrivée d’un message par une sonnerie et
en affichant “[Nom du périphérique] Received
Message”. /
de l’arrivée d’un message.
16 FRANÇAIS
[Réglage initial] : L’appareil sonne
: Choisissez votre tonalité préférée
].
: Choisissez votre tonalité préférée
— 5 ].
: L’appareil sonne en utilisant la
Color 06
] : Quand un appel/message
Off
: Annulation.
Off
: Annulation.
Level 01/ 02/ 03
Level 02
]
Off
: L’appareil ne vous informe pas
Pour choisir un contact à partir du
répertoire téléphonique
1
Choisissez la méthode d’appel
“Phonebook”. (page 15)
2
Appuyez sur 5/∞ pour afficher le menu
de recherche (A à Z, 0 à 9, et OTHERS).
“OTHERS” apparaît si le 1e caractère n’est
pas A à Z ou 0 à 9, comme par exemple #,
—, ! et etc.
3
Appuyez sur 5/∞ pour choisir le
caractère souhaité, puis appuyez sur la
molette de commande pour valider.
La liste des noms correspondant au
caractère choisi apparaît.
4
Tournez la molette de commande pour
choisir le contact souhaité, puis appuyez
dessus pour valider.
• Seul les caractères existant apparaîtront sur le
menu de recherche.
•
Maintenez pressée 5/∞ pour changer de façon
continue le caractère du menu de recherche.
• Si votre répertoire téléphonique contient
beaucoup de contacts, la recherche peut
prendre un certain temps.
Pour supprimer un contact (nom/numéro
de téléphone)
Uniquement quand “In Unit” est choisi pour
“Phonebook Select”. (page 15)
1
Appuyez sur pour afficher l’écran
“HF Menu”.
2
]
Affichez la liste des noms/numéros de
téléphone en utilisant une des méthodes
d’appel. (page 15)
3
Tournez la molette de commande pour
choisir le nom/numéro de téléphone que
vous souhaitez supprimer.
4
Maintenez pressée T/P BACK pour
afficher l’écran “Delete Entries”.
5
Tournez la molette de commande pour
choisir “Delete” ou “Delete All”.
•
Si “Delete” est choisi, le nom/numéro de
téléphone choisi à l’étape 3 est supprimé.
• Si “Delete All” est choisi, les numéros de la
liste choisis à l’étape 2 sont supprimés.
6
Appuyez sur la molette de commande
pour valider.
Page 49

Réception/terminaison d’un
appel téléphonique
Quand appel est reçu, la source change
automatiquement sur “BT FRONT/ BT REAR”.
• “Receiving... [Numéro/nom de téléphone]”
apparaît sur l’affichage.
• L’affichage clignote en bleu. (“Ring Color”,
page 16)
Quand <Auto Answer> est en service....
L’appareil répond automatiquement aux appels
entrant.
• Appuyez sur
commande pour répondre à l’appel entrant
quand <Auto Answer> est hors service.
Pendant une conversation téléphonique...
• Tournez la molette de commande pour
ajuster le niveau de volume du téléphone
[ 00 – 50 ]. [ Réglage initial: VOL 15 ]
L’ajustement réalisé n’affecte pas les autres
sources.
•
Appuyez sur 5/∞ pour ajuster la sensibilité du
microphone [ 1 – 3 ]. (Plus le numéro augmente,
plus le microphone devient sensible.)
• Appuyez sur 4 /¢ pour mettre en/
hors service le mode de réduction de bruit et
d’annulation d’écho.
Pour terminer un appel entrant, maintenez
pressée ou la molette de commande.
Utilisation de la télécommande
5
/ ∞ / 2 / 3 / SOURCE : [Appuyez sur la touche]
[Maintenez pressée]
ou sur la molette de
Répond aux appels.
Refuse les appels.
Pour commuter le support de conversation
(l’appareil/téléphone portable)
Appuyez sur la molette de commande pendant
une conversation téléphonique, puis continuez
votre conversation en utilisant l’autre appareil.
• Les opérations peuvent différer en fonction
du périphérique Bluetooth connecté.
Pour commuter entre deux téléphones
portables connectés
Quand deux téléphones portables sont
connectés à l’appareil, vous pouvez accéder
aux deux écrans “HF Menu”.
Appuyez sur
“HF Menu” du premier téléphone, appuyez de
nouveau sur la touche pour accéder à l’écran
“HF Menu” du deuxième téléphone.
• Pour retourner à l’écran “HF Menu” du premier
téléphone, appuyez sur T/P BACK.
Arrivée d’un message textuel
Quand un message texte arrive, l’appareil
sonne si votre téléphone portable est
compatible avec les messages texte et que
“Message
• “Received Message”apparaît et l’affichage
• Vous ne pouvez pas lire, modifier ou envoyer
Notice” est réglé sur “On”. (page 16)
s’allume en bleu. (“Ring Color”, page 16)
un message via cet appareil.
pour accéder à l’écran
Informations complémentaires
• Si vous souhaitez réaliser des opérations compliquées (telles que composer des numéros, utiliser le répertoire
téléphonique), arrête votre voiture dans un endroit sûr.
• Il se peut que certains périphériques Bluetooth ne puissent pas être connectés à cet appareil en fonction de la version
Bluetooth du périphérique.
• Si vous connectez un adaptateur USB Bluetooth différent, tous les périphériques et les informations enregistrés sont
effacés.
• Cet appareil et certaines de certaines des fonctions peuvent ne pas fonctionner avec certains périphériques Bluetooth.
• Les conditions de connexion peuvent varier en fonction des circonstances autour de vous.
• Si vous mettez l’appareil hors tension, détachez le panneau de commande ou débranchez l’adaptateur USB Bluetooth
pendant une conversion téléphonique, la connexion Bluetooth est déconnectée. Continuez la conversation en utilisant
votre téléphone portable.
• Quand cet appareil est mis hors tension, l’appareil extérieur est déconnecté.
• Si vous souhaitez recevoir plus d’informations sur le système Bluetooth, consultez le site web de JVC suivant:
<http://www.jvc.co.jp/english/car/index.html> (Site web en anglais uniquement).
17FRANÇAIS
Page 50

Utilisation d’un lecteur audio Bluetooth
Les opérations et les indications de l’affichage
diffèrent en fonction de leur disponibilité sur le
périphérique connecté.
]
Choisissez “BT FRONT” ou
“BT REAR”.
Si la lecture ne démarre pas automatiquement,
utilisez le lecture audio Bluetooth pour
démarrer la lecture.
Sélection des modes de lecture
• Pour les périphériques Bluetooth compatibles
avec AVRCP 1.3.
1
2
Opérations de base
Démarre ou reprend la lecture.
Cette touche coupe les sons.
Permet de choisir un groupe/
dossier.
[Appuyez sur la touche]
Permet de faire un saut
vers l’avant ou vers
l’arrière.
[Maintenez pressée]
Avance ou recule
rapidement la plage.
Utilisation de la télécommande
2
/ 3 : [Appuyez sur la touche]
[Maintenez pressée]
Permet de faire un saut vers
l’avant ou vers l’arrière.
Avance ou recule rapidement
la plage.
3
Pour annuler la lecture répétée ou la lecture
aléatoire, choisissez “Off”.
Changement des informations sur
l’affichage
Nom de l’album/interprète Titre de la plage
Modification des réglages Bluetooth
[Maintenez pressée]
]
“Repeat” j “Random”
Repeat
Track : Répète la plage actuelle
All : Répète toutes les plages
Group : Répète toutes les plages du
groupe actuel
Random
All : Reproduit aléatoirement toutes les
plages
Group : Reproduit aléatoirement toutes
les plages du groupe actuel
1
2
]
<Bluetooth>
18 FRANÇAIS
[Maintenez pressée]
Répétez l’étape 2 pour choisir une option
3
de réglage (voir le tableau de la page 19),
puis répétez la procédure pour changer le
réglage en fonction de cette option.
• Pour revenir au menu précédent, appuyez sur
T/P BACK.
• Pour quitter le menu, appuyez sur MENU.
Page 51

Article de menu
1
Connect Phone*
Connect Audio
Disconnect Phone/
Disconnect Audio
Delete Pairing
Phonebook Trans
Set PIN Code
Auto Connect On
Initialize Yes
Information My BT Name
1
*
N’apparaît pas si deux téléphones Bluetooth sont connectés en même temps.
2
*
Affiché uniquement quand un téléphone/lecteur audio Bluetooth est connecté.
/
Réglages pouvant être choisis, [ Réglage initial: Souligné ]
Tournez la molette de commande pour choisir le périphérique que vous souhaitez connecter.
“Connected [Nom du périphérique]” apparaît sur l’affichage quand le périphérique est connecté.
Tournez la molette de commande pour choisir le périphérique que vous souhaitez
déconnecter. “Disconnected [Nom du périphérique]” apparaît sur l’affichage quand le
périphérique est déconnecté.
Tournez la molette de commande pour choisir le périphérique que vous souhaitez supprimer,
puis appuyez sur la molette de commande pour valider. (page 14)
Vous pouvez copier la mémoire du répertoire téléphonique d’un téléphone portable dans cet
appareil (via OPP). Il se peut que vous ayez besoin d’entrer le code PIN ou de confirmer le code du
téléphone portable pour faire le pairage. Vous pouvez transférer un maximum de 400 numéros.
Vous pouvez choisir le code PIN de votre choix avant le pairage (1 à 6 chiffres). [ Réglage
initial:
0000
Tournez la molette de commande pour choisir un numéro, appuyez sur
pour déplacer la position d’entrée, puis appuyez sur la molette de commander pour valider
l’entrée.
enregistré quand vous mettez l’appareil sous tension. /
automatiquement à l’appareil Bluetooth. Utilisez <Connect Phone/ Connect Audio> pour
établir la connexion.
téléphonique, etc.). / No : Annulation.
de l’adaptateur USB Bluetooth. /
connecté. /
]
: La connexion est établie automatiquement avec le dernier périphérique Bluetooth
Off
: Initialise tous les réglages Bluetooth (y compris le pairage mémorisé, le répertoire
: Affiche le nom de l’appareil (JVC Unit). /
ConnectedPhone *2 : Affiche le nom du téléphone
ConnectedAudio *2 : Affiche le nom du périphérique audio connecté.
4
/¢
: L’appareil ne se connecte pas
My Address
: Affiche l’adresse
Écoute d’un iPod/iPhone
Vous pouvez connecter l’iPod/iPhone Apple en utilisant le câble USB 2.0 (accessoire du iPod/iPhone)
à la prise d’entrée USB sur le panneau de commande ou le câble USB à l’arrière de l’appareil.
~
]
Met l’appareil sous
tension.
La lecture démarre automatiquement.
Ÿ
iPod/iPhone Apple
Câble USB 2.0 (accessoire
du iPod/iPhone)
Prise d’entrée USB
et/ou
Câble USB à partir de
l’arrière de l’appareil
À suivre...
19FRANÇAIS
Page 52

Attention:
• Évitez d’utiliser un iPod/iPhone s’il peut gêner
une conduite en toute sécurité.
• Assurez-vous que toutes les données
importantes ont été sauvegardées pour éviter
toute perte de données.
Sélection de la prise de commande
[Maintenez pressée]
]
<Headunit Mode/ iPod Mode/
Application Mode>
• Pour les détails, référez-vous au réglage
<iPod Switch> à la page 29.
Opérations de base
Applicable pour <Headunit Mode/
iPod Mode>.
Pour <Application Mode>, applicable
uniquement pour certaines applications audio.
[Appuyez sur la touche]
Choisit une plage/
chapitre.
[Maintenez pressée]
Avance ou recule
rapidement la plage.
Utilisation de la télécommande
2
/ 3 : [Appuyez sur la touche]
[Maintenez pressée]
Choisit une plage/chapitre.
Avance ou recule rapidement
la plage.
Sélection d’une plage à partir du
menu
Ne s’applique pas au mode <
Application Mode
>.
iPod Mode/
1
3
]
Choisissez la plage souhaitée.
Répétez cette étape jusqu’à ce que la
plage souhaitée soit choisie.
• Si le menu choisi contient beaucoup de
plages, vous pouvez effectuer une recherche
rapide (±10, ±100, ±1 000) sur le menu
en tournant rapidement la molette de
commande.
• Pour revenir au menu précédent, appuyez sur
T/P BACK.
Vous pouvez aussi utiliser le menu de
recherche (A à Z et 0 à 9) pour faire défiler le
menu souhaité.
Après avoir choisi le menu souhaité (à l’étape 2
de la colonne de gauche)....
1
Appuyez sur 5/∞ pour afficher le menu
de recherche.
Le premier caractère du fichier actuel
apparaît.
2
Appuyez sur 5/∞ pour choisir le
caractère souhaité. Puis, appuyez sur la
molette de commande pour valider.
La liste des plages correspondant au
caractère choisi apparaît.
3
Tournez la molette de commande pour
choisir la plage souhaité. Puis, appuyez
sur la molette de commande pour valider.
• Seul les caractères existant apparaîtront sur le
menu de recherche.
• Maintenez pressée 5/∞ pour changer de
façon continue le caractère du menu de
recherche.
• Si votre iPod/iPhone contient beaucoup de
plages, la recherche prend un certain temps.
• Il se peut que la recherche ne fonctionne pas
sur certains niveaux du menu sélectionné.
2
]
Choisissez le menu souhaité.
Playlists j Artists j Albums j Songs
j
Podcasts j Genres j Composers
j
Audiobooks j (retour au début)
20 FRANÇAIS
Page 53

Sélection des modes de lecture
Ne s’applique pas au mode <
Application Mode
iPod Mode/
>.
1
[Maintenez pressée]
2
]
“Repeat” j “Random”
3
Repeat
One : Fonctionne de la même façon que
la fonction “Répéter Un” pour iPod
All : Fonctionne de la même façon que la
fonction “Répéter Tous” pour iPod
Random
Album : Fonctionne de la même façon
que la fonction “Aléatoire Albums” pour
iPod
Song : Fonctionne de la même façon
que la fonction “Aléatoire Morceaux”
pour iPod
• Pour annuler la lecture répétée ou la
lecture aléatoire, choisissez “Off”.
• “Random Album” ne peut pas être utilisé pour
certains iPod/iPhone.
• Pour revenir au menu précédent, appuyez sur
T/P BACK.
Changement des informations sur
l’affichage
Utilisation de l’application iPod/
iPhone
Vous pouvez utiliser une application originale
de JVC (par exemple JVC Drive Smart) avec cet
appareil en mode <Application Mode>.
Pour l’utilisation de JVC Drive Smart, consultez
le site Web de JVC: <http://www.jvc.co.jp/
english/car/index.html> (Site web en anglais
uniquement)
Informations complémentaires
• Fabriqué pour
iPod touch (1e, 2e, 3e & 4e Génération)
iPod classic
iPod avec vidéo * (5e Génération)
iPod nano (1e *, 2e, 3e, 4e, 5e & 6e Génération)
iPhone 4
iPhone 3GS
iPhone 3G
iPhone
*
<iPod Mode/ Application Mode> n’est pas
disponible.
• Il n’est pas possible de parcourir les fichiers vidéo sur
le menu “Videos” en mode <Headunit Mode>.
• L’ordre des morceaux affichés sur le menu de
sélection de cet appareil peut être différent de celui de
iPod.
• Cet appareil peut afficher un maximum de 128
caractères (code ASCII).
• Lors de l’utilisation d’un iPod/iPhone, certaines
opérations peuvent ne pas être réalisées correctement
ou comme prévues. Dans ce cas, consultez le site Web
JVC suivant: <http://www.jvc.co.jp/english/car/
index.html> (Site web en anglais uniquement).
Nom de l’album/ Nom de l’artiste Titre de
la plage
Dans <Application Mode> : Application Mode
21FRANÇAIS
Page 54

Écoute d’un autre appareil extérieur
Vous pouvez connecter un appareil extérieur à la prise d’entrée AUX (auxiliaire) sur le panneau de
commande.
Préparation:
Assurez-vous que <Show> est choisi pour le réglage <Source Select> = <AUX Source>. (page 30)
• Pour plus d’informations, référez-vous aussi aux instructions fournies avec les appareils
extérieurs.
~
]
“AUX IN”
Mettez l’appareil connecté sous
Ÿ
tension et démarrez la lecture de la
source.
Connexion d’un appareil extérieur à la prise d’entrée AUX
!
]
Ajuste le volume.
Ajustez le son comme vous le souhaitez.
⁄
(page 23)
Mini fiche stéréo de 3,5 mm
(non fournie)
Il est recommandé d’utiliser une mini fiche
stéréo munie d’une fiche à 3 connecteurs
pour obtenir une sortie audio optimum.
Lecteur audio portable,
etc.
22 FRANÇAIS
Page 55

Ajustements sonores
Vous pouvez sélectionner un mode sonore préréglé adapté à votre genre de musique.
FLAT = NATURAL = DYNAMIC = VOCAL = BASS = USER*1 =
SOUND 1*2 = SOUND 2*2 = SOUND 3*2 = (retour au début)
1
Pour les réglages, référez-vous à “Personnalisation du mode sonore préréglé—USER” ci-dessous.
*
2
*
Pour les réglages, référez-vous à “Réglage et mémorisation d’un mode sonore prérégle “My Sound EQ””, ci-dessous.
Personnalisation du mode sonore préréglé—USER
Vous pouvez personnaliser le mode sonore
personnalisé (FLAT/ NATURAL/ DYNAMIC/
VOCAL/ BASS).
1
[Maintenez pressée]
2
]
<EQ/DSP> ] <EQ>
USER
0
50 Hz
•
Si SOUND 1/ 2/ 3 est choisi comme mode
sonore, vous ne pouvez faire aucun réglage.
“Fix (My Sound)” apparaît.
3
]
Choisissez la fréquence [ 50 Hz/
200 Hz/ 800 Hz/ 3.2 kHz/ 12.5 kHz ].
]
Ajustez le niveau [ –9 dB à +9 dB ].
• Répétez cette étape pour choisir une
autre fréquence et ajustez le niveau.
4
]
Validez les réglages.
Les réglages réalisés sont mémorisé et
changé sur “USER”.
Réglage et mémorisation d’un mode sonore prérégle
“My Sound EQ”
Vous pouvez personnaliser le réglage du filtre
(EQ et LOUD) pour le son d’un instrument
particulier.
1
[Maintenez pressée]
]
Affiche l’écran “My Sound EQ Set”.
My Sound EQ Set
Default Music
Optional Music
2
]
Choisit un exemple de fichier de
musique.
Default Music : Reproduit le fichier de
musique interne.
Optional Music : Reproduit les fichiers
<.jms> à partir du périphérique USB
connecté. (page 24)
À suivre...
23FRANÇAIS
Page 56

Si “Default Music” est choisi à l’étape 2...
3
Sound
0
Step 1
1
Appuyez sur 4 /¢ pour
choisir le son de l’instrument cible
pour l’ajustement (en se référent à un
son de référence tel qu’une batterie).
Étape 1: Reproduisez le son de tous
les instruments.
Étape 2: Reproduisez le son des basses
fréquences (par exemple une
basse).
Étape 3: Reproduisez le son des
fréquences médium
(par exemple un piano).
Étape 4: Reproduisez le son des
moyennes hautes fréquences
(par exemple des cuivres).
Étape 5: Reproduisez le son
des hautes fréquences
(par exemple des cymbales).
2
Tournez la molette de commande
pour ajuster le niveau [–9 à +9].
3
Appuyez sur la molette de commande
pour valider l’ajustement.
Select and Store
Sound1
Sound2
Sound3
4
Tournez la molette de commande
pour choisir un mode sonore préréglé
[SOUND 1/ 2/ 3]. Puis, appuyez
sur la molette de commande pour
mémoriser.
L’appareil retourne à l’écran de
lecture et le mode sonore sélectionné
[SOUND 1/ 2/ 3] est choisi
automatiquement.
• Si “0” est sélectionné pour toutes les
étapes (1 — 5), “FLAT” est sélectionné.
• Pour mémoriser un autre mode sonore,
répétez les étapes 1 à 3.
Si “Optional Music” est choisi à l’étape
2...
]
Choisit un élément sur la liste. (Cette
liste montre uniquement les fichiers
<.jms> se trouvant dans le dossier racine
du périphérique USB.)
• Consultez le site web JVC suivant:
<http://www.jvc.co.jp/english/car/
index.html> (Site web en anglais
uniquement) pour:
– Vérifiez la méthode de téléchargement.
– Télécharger des fichiers <.jms>.
• “No External File” apparaît s’il n’y a pas
de fichier <.jms> dans le dossier racine
ou si aucun périphérique USB n’est
connecté.
• Stockez les fichiers <.jms> dans un seul
périphérique USB si deux périphériques
USB sont connectés en même temps.
• “Error” apparaît si le fichier ne peut pas
être lu.
Réglage de la synchronisation de sortie d’une enceinte—
Time Alignment
1 2
24 FRANÇAIS
[Maintenez pressée]
]
<EQ/DSP> ] <Time Alignment>
T.Align
CarType
User
Seat
ALL
Page 57

3
]
Choisissez le type de voiture [ User
Compact/ Sedan M/ Sedan L/ SUV
Sm.SUV/ Truck/ X’ Over/ Wagon
Minivan/ Van ].
]
Choisissez la position du siège [ All
Front/ L.Front/ R.Front ].
4
]
Validez les réglages et passez à l’écran
suivant.
T.Align
Speaker
L.Front
140 cm/
4.6 ft
5
]
Choisissez l’enceinte [ L.Front
R.Front/ L.Rear/ R.Rear/ Subwoofer * ].
*
Affiché uniquement quand <On> est choisi
pour <Subwoofer On/Off>. (page 29)
]
Choisissez la distance à la position
d’écoute (position du siège choisie à
l’étape 3) [ 50 cm (1.6 ft) — 500 cm
(
16.4 ft) ].
• Pour ajuster les autres enceintes et leur
distance, répétez cette étape.
6
Réglages initiaux
Distance de l’enceinte [ cm ]
siège
voiture
/
/
/
/
/
Type de
Position du
L. Front
R. Front
ALL 115 115 115 115 115
Front 115 115 100 100 135
User
L. Front 100 140 80 130 140
R. Front 140 100 130 80 140
ALL 110 110 110 110 110
Front 120 120 105 105 115
Compact
L. Front 105 140 85 125 120
R. Front 140 105 125 85 120
ALL 115 115 115 115 115
Front 115 115 100 100 135
Sedan M
L. Front 100 140 80 130 140
R. Front 140 100 130 80 140
ALL 140 140 140 140 140
Front 120 120 155 155 140
Sedan L
L. Front 105 145 150 170 145
R. Front 145 105 170 150 145
ALL 150 150 150 150 150
Front 140 140 130 130 205
SUV
L. Front 125 170 110 160 210
R. Front 170 125 160 110 210
ALL 130 130 130 130 130
Front 145 145 115 115 135
Sm.SUV
L. Front 110 150 95 140 140
R. Front 150 110 140 95 140
ALL 135 135 135 135 135
Front 140 140 130 130 130
Truck
L. Front 125 170 105 160 140
R. Front 170 125 160 105 140
ALL 115 115 115 115 115
Front 120 120 105 105 120
X’ Over
L. Front 105 145 85 130 125
R. Front 145 105 130 85 125
ALL 120 120 120 120 120
Front 120 120 100 100 155
Wagon
L. Front 105 145 80 130 160
R. Front 145 105 130 80 160
ALL 165 165 165 165 165
Front 130 130 175 175 220
Minivan
L. Front 110 160 160 200 225
R. Front 160 110 200 160 225
ALL 205 205 205 205 205
Front 140 140 225 225 300
Van
L. Front 115 175 210 250 300
R. Front 175 115 250 210 300
L. Rear
R. Rear
Subwoofer
]
Validez les réglages.
Les réglages réalisés sont mémorisé et
changé sur “USER”.
25FRANÇAIS
Page 58

Réglage du filtre de transition passe haut/bas—X’over HPF/LPF
1
[Maintenez pressée]
2
]
<Audio> ] <X’over HPF/LPF>
X’over HPF/LPF
Easy
Pro
3
]
Choisissez la méthode d’ajustement
[ Easy/ Pro ].
Si “Easy” est sélectionné à l’étape 3...
4
HPF/LPF
1
*
Affiché uniquement quand <On> est choisi
2
3
4
Front
Full
cm/inch
Appuyez sur 4 / ¢ pour
choisir l’enceinte [ Front/ Rear/
Subwoofer * ].
pour <Subwoofer On/Off>. (page 29)
Tournez la molette de commande
pour choisir la taille de l’enceinte.
Front/ Rear :
Full [ Réglage initial
13cm (5-1/4”
17cm (6-3/4”
10x15cm (4x6”
15x20cm (6x8”
18x25cm (7x10”
Subwoofer :
Full/ 16cm (6-1/2”
25cm (10”
30cm (12”
]/
10cm (4”
)/
16cm (6-1/2”
)/
18cm (7”
)/
)/
13x18cm (5x7”
)/
15x23cm (6x9”
)
)/
20cm (8”
) [
Réglage initial
)/
38cm over (15” over
]/
Appuyez sur 5 / ∞ pour choisir l’unité
de mesure [ cm/ inch ].
Appuyez sur la molette de commande
pour valider les réglages.
Si “Pro” est sélectionné à l’étape 3...
HPF/LPF
1
Front
HPF Off
–18dB/Oct
Appuyez sur 4 / ¢ pour
choisir l’enceinte [ Front/ Rear/
Subwoofer * ].
*
Affiché uniquement quand <On> est choisi
pour <Subwoofer On/Off>. (page 29)
2
Tournez la molette de commande
pour choisir la fréquence de coupure.
Front/ Rear
:
HPF 30Hz — HPF 200Hz : Met en
service le filtre passe haut (HPF). Les
fréquences inférieures à la fréquence
choisie sont coupées pour les
enceintes avant/arrières.
HPF Off [ Réglage initial ] : Met hors
service le filtre passe haut (HPF)
(tous les signaux sont envoyés aux
enceintes avant/arrière.)
Subwoofer :
LPF 30Hz — LPF 200Hz :
[ Réglage initial: LPF 80Hz ] : Met en
service le filtre passe bas (LPF). Les
fréquences inférieures à la fréquence
choisie sont envoyées sur le caisson
de grave.
)/
)/
)/
)/
LPF Off : Met hors service le filtre
passe bas (LPF) (tous les signaux sont
envoyés aux enceintes avant/arrière.)
3
Appuyez sur 5 / ∞ pour choisir
la qualité du filtre passe haut/bas
[ –12dB/oct/ –18dB/oct/ –24dB/oct ].
[ Réglage initial:
)/
)
Front/ Rear : –18dB/oct,
Subwoofer : –12dB/oct ]
4
Appuyez sur la molette de commande
pour valider les réglages.
26 FRANÇAIS
Page 59

Utilisation des menus
1
Si aucune opération n’est
effectuée pendant environ
60 secondes, l’opération est
annulée.
Article de menu
DEMO
Clock
Color
Color Setup
1
*
Prend effet uniquement quand les données CT (horloge) sont reçus.
[Maintenez
pressée]
Set Clock
24H / 12H
Clock Adjust *1Auto :
Button Zone
Display Zone
All Zone
Day Color Button Zone
Night Color
Menu Color
2 3
Réglages pouvant être choisis, [ Réglage initial: Souligné ]
On :
La démonstration des affichages entre en service si aucune opération n’est réalisée
pendant environ 20 secondes. /
Pour les réglages, voir page 4.
Pour les réglages, voir page 4.
L’horloge intégrée est ajustée automatiquement en utilisant les données CT
(horloge) comprises dans le signal Radio Data System. /
29 couleurs préréglées /
couleur préférée pour l’éclairage des touches (sauf pour
BRIGHTNESS
• Si <All Zone> est choisi, l’éclairage des touches et de l’affichage change sur la
couleur <Button Zone> actuellement choisie.
• Couleur initiale :
Display Zone
Button Zone
Display Zone
On
: Change l’éclairage de l’affichage et des touches (sauf
BRIGHTNESS
de lecture. /
) et affiche la couleur séparément.
Button Zone
Vous pouvez créer votre propre couleur de jour et de nuit séparément
pour <Button Zone> et <Display Zone>.
Appuyez sur 5/∞ pour choisir une couleur primaire [
Green/ Blue
[ 00 — 31 ]. Répétez cette procédure jusqu’à ce que vous ayez
ajustez les trois couleurs primaires. Puis, appuyez sur la molette de
commande pour valider.
• Si “00” est choisi pour toutes les couleurs primaires pour
) pendant le menu, la recherche de liste et les opérations sur le mode
Off
: Annulation.
Off:
Annulation. (page 4)
User / COLORFLOW 1/ 2/ 3
[ 06 ],
Zone d’affichage
Zone des touches
Toutes les zones
], puis tournez la molette pour juster le niveau
<Display Zone>, rien n’apparaît sur l’affichage.
Répéter l’étape 2 si nécessaire.
• Pour revenir au menu
précédent, appuyez sur
T/P BACK.
• Pour quitter le menu,
appuyez sur MENU.
Off
: Annulation.
: Choisit votre
EQ / DISP / OPEN
Display Zone
[ 01 ],
All Zone
EQ / DISP / OPEN
Red
/
[ 06 ]
/
/
À suivre...
27FRANÇAIS
Page 60

Article de menu
Dimmer Set Auto :
Réglages pouvant être choisis, [ Réglage initial: Souligné ]
Change l’éclairage de l’affichage et des touches entre les réglages Jour et Nuit
dans le réglage <Brightness>/<Color Setup> quand vous allumez ou éteignez les feux
du véhicule
*2. /
Time Set :
Permet de démarrer/arrêter la minuterie pour le gradateur.
Tournez la molette de commande pour régler l’heure de démarrage, puis appuyez sur la
molette de commande pour valider. Répétez cette étape pour entrer l’heure de fin. /
On :
Choisit le réglage Nuit dans le réglage <Brightness>/<Color Setup> pour
Dimmer
Brightness Day
l’éclairage de l’affichage et des touches. /
<Brightness>/<Color Setup> pour l’éclairage de l’affichage et des touches.
[ 23 ] /
Night
l’éclairage des touches [
• Appuyer sur
[ 11 ] : Personnalise le niveau de luminosité de l’affichage et de
00
— 31 ] pour le jour et la nuit.
BRIGHTNESS
Off :
Choisit le réglage Jour dans le réglage
permet d’accéder directement au menu <Day Brightness>
ou <Night Brightness>.
3
Scroll *
Once
: Fait défiler une fois les informations affichées. /
secondes d’intervalle). /
(Appuyer sur
Off
DISP
: Annulation.
pendant plus d’une seconde peut faire défiler l’affichage quelque que
Auto
: Répète le défilement (à 5
soit le réglage utilisé.)
Tag Display On
Display
LCD Type Negative
Contrast Level 01
: Affiche les informations des balises lors de la lecture d’une plage MP3/WMA/WAV. /
Off
: Annulation.
: L’affichage négatif est utilisé. /
Auto
: Un affichage positif est choisi pendant la journée
utilisée pendant la nuit
—
*4.
Level 08
[
Level 05
Positive
: L’affichage positif est utilisé. /
*4; alors qu’un affichage négatif est
] : Ajustez le contraste de l’affichage de façon que les
indications soient nettes et lisibles.
EQ
Time
Pour les réglages, voir page 23.
Pour les réglages, voir page 24.
Alignment
D. T.
Expander *
EQ/DSP
On
: La fonction d’extension numérique de plage compense le son haute fréquence
5
des plages compressées numériquement (par ex. les sources de musique numérique). /
Off
: Annulation.
• L’effet de la fonction d’extension numérique de plage peut être utilisé dans les conditions
suivantes:
MP3/WMA: Débit binaire: 64 kbps à 128 kbps; Fréquence d’échantillonnage: 44,1 kHz et
48 kHz uniquement
Fichiers musicaux iPod/iPhone: Fréquence d’échantillonnage: 44,1 kHz et 48 kHz uniquement
6, *7
Fad/Bal *
Audio
Loud *
2
*
La connexion du fil de commande de l’éclairage est requise. (Référez-vous au “Manuel d’installation/raccordement”).
Ce réglage peut ne pas fonctionner correctement sur certains véhicules (en particulier sur ceux qui possèdent une
bague de commander de gradation). Dans ce cas, changez le réglage sur autre chose que <Dimmer Auto>.
3
*
Certains caractères ou symboles n’apparaissent pas correctement (ou un blanc apparaît à leur place) sur l’affichage.
4
*
Dépend du réglage <Dimmer Set>.
5
*
Pas d'effet dans le cas d'un signal audio CD-DA ou Bluetooth.
6
*
Si vous utilisez un système à deux enceintes, réglez le niveau du fader sur <00>.
7
*
L’ajustement ne peut pas affecter la sortie du caisson de grave.
8
*
Si SOUND 1/ 2/ 3 est choisi comme mode sonore (page 23), vous ne pouvez faire aucun réglage.
“Fix (My Sound)” apparaît.
Fad
(fader) :
F6 — R6
enceintes avant et arrière. /
4
8
/ ¢ pour ajuster la balance de sortie des enceintes gauche et droite.
Loud1/ 2/ 3
: Accentue les basses et hautes fréquences pour produire un son plus
équilibré aux faibles niveaux de volume. /
[ 0 ] : Appuyez sur 5 / ∞ pour ajuster la balance de sortie des
Bal
(balance) :
L6 — R6
[ 0 ] : Appuyez sur
Off
: Annulation.
28 FRANÇAIS
Page 61

Article de menu
Volume
Adjust
Réglages pouvant être choisis, [ Réglage initial: Souligné ]
Level –5 — Level +5
[
Level 0
] : Préréglez le niveau d’ajustement du volume de
chaque source (sauf “FM”), en comparaison avec le niveau de volume FM. Le niveau de
volume augmente ou diminue automatiquement quand vous changez la source. Avant un
ajustement, choisissez la source que vous souhaitez ajuster. (“FIX” apparaît sur l’affichage si
“FM” est choisit comme source.)
Subwoofer
On
: Met en service la sortie du caisson de grave. /
Off
: Annulation.
On/Off
Subwoofer
Level *
Audio
Subwoofer
Phase *
X’over HPF/
Level 00 — Level 10
9
0 Deg
9
grave.
Pour les réglages, voir page 26.
(normal)
[
Level 05
— 180 Deg
] : Ajuste le niveau de sortie du caisson de grave.
(inversé) : Permet de choisir la phase du caisson de
LPF
Beep On / Off
Amplifier
10
Gain *
SSM
IF Band Auto
: Met en ou hors service la tonalité des touches.
Low Power
: Vol 0 – Vol 30 (Choisissez ce réglage si la puissance maximum de
chaque enceinte est inférieure à 50 W pour éviter tout dommage des enceintes.) /
High Power
: Vol 0 – Vol 50 /
Off
: Met hors service l’amplificateur intégré.
S’affiche uniquement quand la source est “FM”. Pour les réglages, voir page 8.
: Augmente la sélectivité du tuner pour réduire les interférences entre les stations
adjacentes. (L’effet stéréo peut être perdu.) /
Wide
: Il y a des interférences des stations
adjacentes, mais la qualité du son n’est pas dégradée et l’effet stéréo est conservé.
AF
Regional *
Tuner
P-Search *11On / Off
News-
Standby *
Stereo/Mono
12
USB
*
AF
: Quand les signaux actuellement reçus deviennent faibles, l’appareil commute sur
11
une autre station (le programme peut différer de celui actuellement reçu). (L’indicateur
AF s’allume.) /
AF REG
: Quand les signaux actuellement reçus deviennent faibles,
l’appareil commute sur une autre station diffusant le même programme. (Les indicateurs
AF et REG s’allument.) /
Off
: Annulation.
: Met en ou hors service la recherche de programme (si AF-REG est en service).
On / Off
11
: Met en ou hors service de l’attente de réception d’informations.
S’affiche uniquement quand la source est “FM”. Pour les réglages, voir page 8.
Drive Change
: Choisissez ce réglage pour changer le périphérique quand plusieurs
périphériques sont connectés à la prise d’entrée (avant/arrière).
iPod Switch
13
*
Headunit Mode
iPod Mode
: Commande la lecture du iPod à travers cet appareil. /
: Commande la lecture du iPod à travers le iPod/iPhone. /
Application Mode
: Le son de n’importe quelle fonction (musiques, jeux, applications,
etc.) exécutée sur l’iPod/iPhone connecté est sortie par les enceintes connectées à cet
appareil.
Audiobooks
13
*
Normal / Faster / Slower
: Vous pouvez choisir la vitesse de lecture du fichier sonore
des livres audio dans votre iPod/iPhone. (L’article sélectionné initialement dépend de votre
réglage iPod/iPhone.)
9
*
Affiché uniquement quand <On> est choisi pour <Subwoofer On/Off>.
10
*
Le niveau de volume change automatiquement sur “Vol 30” si vous réglez sur <Low Power> quand le niveau
de volume est plus haut que “Vol 30”.
11
*
Uniquement pour les stations FM Radio Data System.
12
*
Est affiché uniquement quand “USB FRONT/ USB REAR“ est choisi comme source.
13
*
Est affiché uniquement quand “iPod FRONT/ iPod REAR“ est choisi comme source.
À suivre...
29FRANÇAIS
Page 62

Article de menu
Bluetooth
Réglages pouvant être choisis, [ Réglage initial: Souligné ]
Si l’adaptateur USB Bluetooth, KS-UBT1, n’est pas connecté à l’appareil, “Please Connect
BT Adapter” apparaît sur l’affichage. Pour les réglages, référez-vous aux pages 18 et 19.
AM Source
AUX Source
Bluetooth
Select
Source
Audio
Software Version
14
*
S’affiche uniquement quand une source autre que “AM/ AUX IN” est choisie séparément.
15
*
Affiché uniquement quand un adaptateur USB Bluetooth, KS-UBT1, est connecté à l’appareil et quand une
autre source que “BT FRONT/ BT REAR” est choisie.
*14Show / Hide
*14Show / Hide
Show / Hide
15
*
Affiche la version du micrologiciel de cet appareil.
: Met en ou hors service “AM” pour la sélection de source.
: Met en ou hors service “AUX IN” pour la sélection de source.
: Met en ou hors service “BT FRONT/ BT REAR” pour la sélection de source.
Guide de dépannage
Symptôme Remède/Cause
Aucun son n’est entendu des enceintes. Ajustez le volume sur le niveau optimum. / Assurez-vous que le son
Cet appareil ne fonctionne pas du tout. Réinitialisez l’appareil. (page 3)
Vous ne pouvez pas choisir “AUX IN”. Cochez le réglage <Source Select>. (voir ci-dessus)
Le son est parfois interrompu pendant
l’écoute d’un appareil extérieur connecté à
la prise d’entrée auxiliaire.
Généralités
Rien n’apparaît sur l’affichage. Vérifiez le réglage <Color Setup>. (page 27)
Les caractères corrects ne sont pas affichés
(ex.: nom de l’album).
Le préréglage automatique SSM ne
fonctionne pas.
Bruit statique pendant l’écoute de la radio. Connectez l’antenne solidement.
FM/AM
Vous ne pouvez pas choisir “AM”. Cochez le réglage <Source Select>
Le disque ne peut pas être reproduit. Insérez le disque correctement.
Un CD-R/CD-RW ne peut pas être reproduit
et les plages ne peuvent pas être sautées.
Le son du disque est parfois interrompu. Arrêtez la lecture lorsque vous conduisez sur une route accidentée. /
“No Disc” apparaît sur l’affichage. Insèrez un disque reproductible dans la fente d’insertion.
“Please Eject” apparaît sur l’affichage. Cela se produit quelques fois à cause d’une surchauffe. Éjectez le
Lecture de disque
“In Disc” apparaît sur l’affichage. Le disque ne peut pas être éjecté correctement. Assurez-vous que
30 FRANÇAIS
de l’appareil n’est pas coupé et qu’il n’est pas en pause. (page 7) /
Vérifiez les cordons et les connexions.
Assurez-vous d’utiliser une fiche mini stéréo recommandée pour la
connexion. (page 22)
Cet appareil peut uniquement afficher les lettres (majuscules:
A
– Z, minuscules: a – z), les chiffres (0 – 9), un nombre limité
de symboles ( ! / ” / # / $ / % / & / ’ / ( / ) / / + / , / – / . / / /
:
/ ; / < / = / > / ? / @ / – / ).
Mémorises les stations manuellement.
=
<AM Source>.
(voir ci-dessus)
Insérez un CD-R/CD-RW finalisé (finalisez-le avec l’appareil que
vous avez utilisé pour l’enregistrement).
Changez le disque. / Vérifiez les cordons et les connexions.
disque ou choisissez une autre source de lecture.
rien ne bloque la fente d’insertion.
Page 63

Symptôme Remède/Cause
Le disque ne peut pas être reproduit. Utilisez un disque avec des plages MP3/WMA enregistrées dans
Du bruit est produit. Sautez à une autre plage ou changez le disque.
“Reading” continue de clignoter sur
l’affichage.
Les plages ne sont par reproduites dans
l’ordre dans lequel vous vouliez les
reproduire.
Lecture MP3/WMA
La durée de lecture écoulée n’est
pascorrecte.
“Please Eject” apparaît sur l’affichage. Insérez un disque contenant des plages MP3/WMA.
“Not Support” apparaît sur l’affichage et la
plage est sautée.
“Reading” continue de clignoter sur
l’affichage.
Du bruit est produit. Passez à un autre fichier.
Les plages/dossiers ne sont pas reproduites
dans l’ordre prévu.
Lors de la lecture d’une plage, le son tes
parfois interrompu.
“USB-Error”, “Remove Device”,
Lecture USB
“Power OFF = ON” apparaît sur l’affichage.
“Cannot Play” clignote sur l’affichage. /
“No USB” apparaît sur l’affichage. / L’appareil
ne peut pas détecter le périphérique USB.
“No File” apparaît sur l’affichage. Vérifiez si le périphérique contient des fichiers compatibles.
“Not Support” apparaît et la plage est sautée.
“Read Failed” apparaît sur l’affichage. Le périphérique USB connecté ne fonctionne pas correctement.
Vous ne pouvez pas choisir “BT FRONT/
BT REAR”.
Aucun périphérique Bluetooth n’est
détecté.
Le pairage ne peut pas être réalisé.
Bluetooth
Il y a un écho ou du bruit. Ajustez la position du microphone.
un format compatible avec ISO 9660 Niveau 1, Niveau 2, Romeo
ou Joliet. / Ajoutez le code d’extension <.mp3> ou <.wma> aux
noms de fichier.
Un temps d’initialisation plus long est requis. N’utilisez pas trop de
niveaux de hiérarchie et de dossiers.
L’ordre de lecture est déterminé quand les fichiers sont
enregistrés.
Cela se produit quelque fois pendant la lecture. C’est causé par la
façon don’t les plages ont été enregistrées sur le disque.
Saute à la plage codée suivante dans le format approprié ou à la
plage WMA suivante non protégée contre la copie.
Un temps d’initialisation plus long est requis. N’utilisez pas trop de
niveaux de hiérarchie et de dossiers. / Mettez l’appareil hors tension
puis de nouveau sous tension. / Réattachez le périphérique USB.
L’ordre de lecture est déterminé par le nom du fichier. Les dossiers
dont le nom débute par des chiffres sont classés par ordre numérique.
Cependant, les dossiers dont le nom ne débute pas par des chiffres
sont classés en fonction du système de fichier du périphérique USB.
Les plages n’ont pas été copiées correctement sur le périphérique
USB. Copiez de nouveau les plages sur le périphérique USB et
essayez à nouveau.
Une surintensité se produit. Mettez l’appareil hors tension, puis de
nouveau sous tension.
Vérifiez si le périphérique USB connecté est compatible avec cet
appareil. / Réattachez le périphérique USB.
Vérifiez si la plage est dans un format compatible.
Connectez de nouveau le périphérique USB.
Cochez le réglage <Source Select> = <Bluetooth Audio>.
(page 30) / Vérifiez si l’adaptateur USB Bluetooth est attaché.
Faites de nouveau une recherche à partir du périphérique
Bluetooth. / Réinitialisez l’appareil, puis cherchez de nouveau le
périphérique Bluetooth.
Assurez-vous que vous avez entré le même code PIN pour
l’appareil et le périphérique cible. (page 14) / Déconnectez le
périphérique Bluetooth et essayer de nouveau le pairage. (page 14)
À suivre...
31FRANÇAIS
Page 64

Symptôme Remède/Cause
Le son du téléphone est de mauvaise
qualité.
L’appareil ne répond pas quand vous
essayez de copier le répertoire d’adresse.
Le son est interrompu ou saute pendant
la lecture d’un lecteur audio Bluetooth.
Le lecteur audio connecté ne peut pas
être commandé.
La méthode d’appel “Voice” ne réussie
pas.
Bluetooth
“Please Connect BT Adapter” apparaît
sur l’affichage.
“Connection Error” apparaît sur
l’affichage.
“Error” apparaît sur l’affichage. Essayez de nouveau l’opération. Si “Error” apparaît de nouveau,
“Please Wait...” apparaît sur l’affichage. L’appareil se prépare pour utiliser la fonction Bluetooth. Si le
“HW Error” apparaît sur l’affichage. Réinitialiser l’appareil et essayez de nouveau l’opération.
iPod ne peut pas être mis sous tension
ou ne fonctionne pas.
Le son est déformé. Mettez hors service l’égaliseur sur l’iPod/iPhone.
Du bruit est produit. Mettez hors service (décochez) la fonction “VoiceOver” de l’iPod.
La lecture s’arrête. Le casque d’écoute a été déconnecté pendant la lecture.
“No File” apparaît sur l’affichage. Vérifiez si le périphérique contient des fichiers compatibles.
Lecture d’un iPod/iPhone
“Cannot Play” apparaît sur l’affichage. Vérifiez si le iPod/iPhone connecté est compatible avec cet
Réduisez la distance entre cet appareil et le téléphone portable
Bluetooth. / Déplacez la voiture dans un endroit où vous pouvez
obtenir un meilleur signal de réception.
Vous avez peut-être essayé de copier les mêmes entrées (déjà
mémorisées) sur l’appareil. Appuyez sur
pour quitter.
Réduisez la distance entre cet appareil et le lecteur audio Bluetooth. /
Déconnectez le périphérique connecté pour Bluetooth Phone. /
Mettez l’appareil hors tension, puis de nouveau sous tension. /
Connectez de nouveau le lecteur, si le son n’est toujours pas rétabli.
Vérifiez si le lecteur audio connecté prend en charge AVRCP
(Audio/Video Remote Control Profile). (Les opérations dépendent
du lecteur audio connecté.) / Déconnectez et reconnectez à
nouveau le lecteur Bluetooth.
Utilisez la méthode d’appel “Voice” dans un environnement plus
calme. / Réduisez la distance au microphone qua vous dites le
nom. / Changez “NR/EC Mode” sur “Off” (page 16), puis essayez
de nouveau.
Vous devez connecter l’adaptateur USB Bluetooth à l’appareil
avant de pouvoir réaliser une opération.
Le périphérique est enregistré mais la connexion a échouée.
Utilisez <Connect Phone/ Connect Audio> pour connecter de
nouveau le périphérique.
vérifiez si l’appareil extérieur prend en charge la fonction que vous
avez essayée.
message ne disparaît pas, mettez l’appareil hors tension puis sous
tension, puis connecter de nouveau le périphérique (ou réinitialisez
l’appareil). (page
Si “HW Error” apparaît de nouveau, consultez le revendeur
d’accessoires audio JVC le plus proche.
Vérifiez le câble de connexion et le raccordement. / Chargez la
batterie du iPod/iPhone. / Réinitialisez le iPod/iPhone. / Vérifiez si
le réglage <iPod Switch> est correct. (page 29)
Pour en savoir plus, consultez le site <http://www.apple.com>.
Redémarrer l’opération de lecture. (page 19)
appareil. (page 21)
3).
DISP
ou
T/P BACK
32 FRANÇAIS
Page 65

Spécifications
SECTION DE L’AMPLIFICATEUR
AUDIO
Puissance de sortie maximum :
Puissance de sortie en mode continu (RMS) :
20 W par canal pour 4 Ω, 40 Hz à 20 000 Hz
avec moins de 1% de distorsion harmonique
totale.
Rapport signal sur bruit :
Impédance de charge :
admissible)
Réponse en fréquence :
Niveau de sortie de ligne ou niveau de sortie
du caisson de grave/Impédance :
en charge (pleine échelle)
Impédance de sortie :
Autre prise :
arrière, Prise d’entrée auxiliaire, Entrée
d’antenne
Prise d’entrée USB, Câble USB
≤ 600 Ω
50 W par canal
70 dB
4 Ω (4 Ω à 8 Ω
40 Hz à 20 000 Hz
5,0 V/20 kΩ
SECTION DU TUNER
Plage de fréquences :
FM :
87,5 MHz à 108,0 MHz
AM :
PO : 531 kHz à 1 611 kHz
GO : 153 kHz à 279 kHz
Tuner FM :
Sensibilité utile :
Sensibilité utile à 50 dB :
16,3 dBf (1,8 µV/75 Ω)
Sélectivité de canal alterné (400 kHz) :
Réponse en fréquence :
40 Hz à 15 000 Hz
Séparation stéréo :
Tuner PO:
Sensibilité/Sélectivité :
Tuner GO :
Sensibilité :
9,3 dBf (0,8 µV/75 Ω)
65 dB
40 dB
20 V/40 dB
50 V
SECTION DU LECTEUR CD
Type :
Lecteur de disque compact
Système de détection du signal :
optique sans contact (laser semi-conducteur)
Nombre de canaux :
Réponse en fréquence :
2 canaux (stéréo)
Capteur
5 Hz à 20 000 Hz
Rapport signal sur bruit :
Pleurage et scintillement :
mesurable
Format de décodage MP3 (MPEG1/2 Audio
Layer 3) :
Débit binaire maximum: 320 kbps
Format de décodage WMA (Windows Media®
Audio) :
Débit binaire maximum: 320 kbps
102 dB
Inférieur à la limite
SECTION USB
Standard USB :
Vitesse de transfert de données (Full Speed) :
Max. 12 Mbps
Périphériques compatibles :
grande capacité (sauf disque dur)
Système de fichiers compatible :
FAT 32/ 16/ 12
Format audio compatible :
Puissance de sortie :
d’entrée USB (avant/arrière)
USB 1.1, USB 2.0
À mémoire de
MP3/ WMA/ WAV
CC 5 V 1 A, prise
SECTION BLUETOOTH
Version :
Ver 2.1 +EDR
Classe d’alimentation :
Zone de fonctionnement :
Profile :
HFP 1.5, OPP 1.1, A2DP 1.2, AVRCP 1.3,
PBAP 1.0
Classe 2
10 m
GÉNÉRALITÉS
Alimentation :
CC 14,4 V (11 V à 16 V admissibles)
Système de mise à la masse :
Températures de fonctionnement
admissibles :
0°C à +40°C
Dimensions (L × H × P) : (approx.)
– Taille d’installation :
182 mm × 52 mm × 160 mm
– Taille du panneau :
188 mm × 59 mm × 9 mm
Masse :
Sujet à changement sans notification.
Tension de fonctionnement :
Masse négative
1,4 kg (sans les accessoires)
33FRANÇAIS
Page 66

7
The countries where you may use the
Bluetooth® function
7
Die Länder, in denen Sie die Bluetooth® Funktion verwenden können
7
Pays où vous pouvez utiliser la fonction Bluetooth®
7
De landen waar u de Bluetooth®-functie mag gebruiken
7
Países en los que se puede utilizar la función Bluetooth®
7
Paesi nei quali è possibile utilizzare la funzione Bluetooth®
7
Länder där du kan använda Bluetooth®-funktionen
7
Lande, hvor du kan bruge Bluetooth®-funktionen
7
Land hvor du kan bruke Bluetooth®-funksjonen
7
Maat, joissa voi käyttää Bluetooth®-toimintoa
7
Países onde pode usar a função Bluetooth®
7
Οι χώρες όπου μπορείτε να χρησιμοποιήσετε τη λειτουργία Bluetooth®
7
Страны, где можно воспользоваться функцией Bluetooth®
7
Země, ve kterých můžete využívat funkci Bluetooth®
7
Azok az országok, amelyekben használhatjuk a Bluetooth®-funkciót
7
Kraje, w których można używać funkcji Bluetooth®
7
Države, kjer lahko uporabljate funkcijo Bluetooth®
7
Krajiny, v ktorých môžete využívať funkciu Bluetooth®
7
Valstis, kur jūs varat izmantot Bluetooth® funkciju
7
Šalys, kuriose galite naudotis „Bluetooth®“ funkcija
7
Il-pajjiżi fejn tista’ tuża l-funzjoni Bluetooth®
7
Lönd þar sem hægt er að nota Bluetooth®
7
Riigid, kus on võimalik kasutada Bluetooth® funktsiooni
7
Bluetooth® fonksiyonunu kullanabileceğiniz ülkeler
7
Na tíortha inar féidir leat feidhmiú Bluetooth® a úsáid
7
Länner an denen der d’Bluetooth® Funktioun benotze kënnt.
7
nhͻng quc gia mà bn có th s dͱng ch͵c nćng Bluetooth
7
Els països on podrà fer servir la funció Bluetooth®
7
Zemlje u kojima je dozvoljena upotreba Bluetooth® funkcije.
7
Zemlje u kojima možete koristiti Bluetooth® funkciju
7
Zemlje u kojima je dopušteno koristiti Bluetooth®.
7
Земји каде можете да ја користите функцијата Bluetooth®
7
Страните, в които можете да ползвате функцията Bluetooth®
7
Ţările în care puteţi utiliza funcţia Bluetooth®
7
Die lande waar u die Bluetooth®-funksie kan gebruik
7
Amazwe lapho ungasebenzisa khona uhlelo lwe-Bluetooth®
7
Ang mga bansa kung saan maaari kang gumamit ng Bluetooth® function
7
Negara-negara yang anda boleh menggunakan fungsi Bluetooth®
7
您能够使用 Bluetooth® 功能的国家
7
您能夠使用 Bluetooth® 功能的國家
7
Bluetooth® 기능을 사용할 수 있는 국가
®
7
i
Page 67

Country
Andorra
Australia
Österreich
Bosna i Hercegovina
Belgien
Belgique
България
Canada
Schweiz
Suisse
Chile
Κύπρος
Kıbrıs
Česká republika
Deutschland
Danmark
Eesti
España
Suomi
Finland
France
United Kingdom
Ελλάδα
Hong Kong
香港
香港
Hrvatska
Magyarország
Ireland
Éire
Country
Ísland
Italia
대한민국
Lichtenstein
Lietuva
Luxemburg
Luxembourg
Lëtzebuerg
Latvija
Monaco
Crna Gora
Македонија
Malta
Malaysia
Nederland
Norge
New Zealand
Perú
Philippines
Pilipinas
Polska
Portugal
România
Srbija
Росси я
Sverige
Singapore
新加坡
Singapura
Slovenija
Slovensko
Country
Türkiye
台湾
United States of America
Venezuela
Vietnam
Vit Nam
South Africa
ENingizimu Afrika
Suid-Afrika
09-1672-006
ii
 Loading...