

Page 1

KD-R992BT / KD-R899BT / KD-R891BT /
KD-R794BT / KD-R792BT
CD RECEIVER
INSTRUCTION MANUAL
RECEPTOR CON CD
MANUAL DE INSTRUCCIONES
CD-RECEIVER
GEBRUIKSAANWIJZING
RECEPTOR CD
MANUAL DE INSTRUÇÕES
ENGLISH
ESPAÑOL
NEDERLANDS
PORTUGUÊS
B5A-2126-00 [E]
Page 2
Information on Disposal of Old Electrical and Electronic Equipment and Batteries (applicable
for countries that have adopted separate waste collection systems)
Products and batteries with the symbol (crossed-out wheeled bin) cannot be disposed as household waste.
Old electrical and electronic equipment and batteries should be recycled at a facility capable of handling
these items and their waste byproducts.
Contact your local authority for details in locating a recycle facility nearest to you. Proper recycling and
waste disposal will help conserve resources whilst preventing detrimental effects on our health and the
environment.
Notice: The sign “Pb” below the symbol for batteries indicates that this battery contains lead.
Información acerca de la eliminación de equipos eléctricos, electrónicos y baterías al final de
la vida útil (aplicable a los países que hayan adoptado sistemas independientes de recogida
de residuos)
Los productos y las baterías con el símbolo de un contenedor con ruedas tachado no podrán ser desechados
como residuos domésticos.
Los equipos eléctricos, electrónicos y baterías al final de la vida útil, deberán ser reciclados en
instalaciones que puedan dar el tratamiento adecuado a estos productos y a sus subproductos residuales
correspondientes.
Póngase en contacto con su administración local para obtener información sobre el punto de recogida más
cercano. Un tratamiento correcto del reciclaje y la eliminación de residuos ayuda a conservar los recursos y
evita al mismo tiempo efectos perjudiciales en la salud y el medio ambiente.
Nota: El símbolo “Pb” debajo del (contenedor con ruedas tachado) en baterías indica que dicha batería
contiene plomo.
Informatie over het weggooien van elektrische en elektronische apparatuur en batterijen
(particulieren)
Dit symbool geeft aan dat gebruikte elektrische, elektronische producten en batterijen niet bij het normale
huishoudelijke afval mogen.
Lever deze producten in bij de aangewezen inzamelingspunten, waar ze gratis worden geaccepteerd en op
de juiste manier worden verwerkt, teruggewonnen en hergebruikt.
Voor inleveradressen zie www.nvmp.nl, www.ictmilieu.nl, www.stibat.nl. Wanneer u dit product op de
juiste manier als afval inlevert, spaart u waardevolle hulpbronnen en voorkomt u potentiële negatieve
gevolgen voor de volksgezondheid en het milieu, die anders kunnen ontstaan door een onjuiste verwerking
van afval.
Opgelet: Het teken “Pb” onder het teken van de batterijen geeft aan dat deze batterij lood bevat.
Informação sobre a forma de deitar fora Velho Equipamento Eléctrico, Electrónico e baterias
(aplicável nos países que adotaram sistemas de recolha de lixos separados)
Produtos e baterias com o símbolo (caixote do lixo com um X) não podem ser deitados fora junto com o
lixo doméstico.
Equipamentos velhos eléctricos, electrónicos e baterias deverão ser reciclados num local capaz de o fazer
bem assim como os seus subprodutos.
Contacte as autoridades locais para se informar de um local de reciclagem próximo de si. Reciclagem e
tratamento de lixo correctos ajudam a poupar recursos e previnem efeitos prejudiciais na nossa saúde e
no ambiente.
Note: o símbolo “Pb” abaixo do símbolo em baterias indica que esta bateria contém chumbo.
i
Page 3
The marking of products using lasers
The label is attached to the chassis/case and says that the component uses laser beams that have been
classified as Class 1. It means that the unit is utilizing laser beams that are of a weaker class. There is no
danger of hazardous radiation outside the unit.
La marca para los productos que utilizan láser
Esta etiqueta está colocada en el chasis e indica que el componente funciona con rayos láser de clase1. Esto
significa que el aparato utiliza rayos láser considerados como de clase débil. No existe el peligro de que este
aparato emita al exterior una radiación peligrosa.
Markering op produkten die laserstralen gebruiken
Dit label is aangebracht op de behuizing/houder en toont dat de component een laserstraal gebruikt die
als Klasse 1 is geclassificeerd. Dit betekent dat de laserstraal relatief zwak is en er geen gevaar van straling
buiten het toestel is.
A marca dos produtos utilizando laser
A etiqueta é presa no chassis/estojo e indica que o componente utiliza raios laser, classificados como sendo
de Classe 1. Isto significa que o aparelho está a utilizar raios laser que são de uma classe mais fraca. Não há
perigo de radiação maléfica fora do aparelho.
For Israel
ii
Page 4

Declaration of Conformity with regard to the RE Directive 2014/53/EU
Declaration of Conformity with regard to the RoHS Directive 2011/65/EU
Manufacturer:
JVC KENWOOD Corporation
3-12, Moriya-cho, Kanagawa-ku, Yokohama-shi, Kanagawa, 221-0022, JAPAN
EU Representative:
JVCKENWOOD Deutschland GmbH
Konrad-Adenauer-Allee 1-11, 61118 Bad Vilbel, GERMANY
Declaración de conformidad con respecto a la Directiva RE 2014/53/EU
Declaración de conformidad con respecto a la Directiva RoHS 2011/65/EU
Fabricante:
JVC KENWOOD Corporation
3-12, Moriya-cho, Kanagawa-ku, Yokohama-shi, Kanagawa, 221-0022, JAPAN
Representante en la UE:
JVCKENWOOD Deutschland GmbH
Konrad-Adenauer-Allee 1-11, 61118 Bad Vilbel, GERMANY
Conformiteitsverklaring met betrekking tot de RE-richtlijn van de Europese
Unie (2014/53/EU)
Conformiteitsverklaring met betrekking tot de RoHS richtlijn van de Europese
Unie (2011/65/EU)
Fabrikant:
JVC KENWOOD Corporation
3-12, Moriya-cho, Kanagawa-ku, Yokohama-shi, Kanagawa, 221-0022, JAPAN
EU-vertegenwoordiger:
JVCKENWOOD Deutschland GmbH
Konrad-Adenauer-Allee 1-11, 61118 Bad Vilbel, GERMANY
Declaração de conformidade relativa à Directiva RE 2014/53/EU
Declaração de conformidade relativa à Directiva RoHS 2011/65/EU
Fabricante:
JVC KENWOOD Corporation
3-12, Moriya-cho, Kanagawa-ku, Yokohama-shi, Kanagawa, 221-0022, JAPAN
Representante na UE:
JVCKENWOOD Deutschland GmbH
Konrad-Adenauer-Allee 1-11, 61118 Bad Vilbel, GERMANY
iii
English
Hereby, JVCKENWOOD declares that the radio equipment
“KD-R992BT/KD-R899BT/KD-R891BT/KD-R794BT/
KD-R792BT” is in compliance with Directive 2014/53/EU.
The full text of the EU declaration of conformity is available
at the following internet address:
http://www.jvc.net/cs/car/eudoc/
Français
Par la présente, JVCKENWOOD déclare que l’équipement
radio « KD-R992BT/KD-R899BT/KD-R891BT/KD-R794BT/
KD-R792BT » est conforme à la directive 2014/53/UE.
L’intégralité de la déclaration de conformité UE est
disponible à l’adresse Internet suivante :
http://www.jvc.net/cs/car/eudoc/
Deutsch
Hiermit erklärt JVCKENWOOD, dass das Funkgerät
“KD-R992BT/KD-R899BT/KD-R891BT/KD-R794BT/
KD-R792BT” der Richtlinie 2014/53/EU entspricht.
Der volle Text der EU-Konformitätserklärung steht unter der
folgenden Internetadresse zur Verfügung:
http://www.jvc.net/cs/car/eudoc/
Nederlands
Hierbij verklaart JVCKENWOOD dat de radioapparatuur
“KD-R992BT/KD-R899BT/KD-R891BT/KD-R794BT/
KD-R792BT” in overeenstemming is met Richtlijn
2014/53/EU.
De volledige tekst van de EU-verklaring van
overeenstemming is te vinden op het volgende
internetadres:
http://www.jvc.net/cs/car/eudoc/
Italiano
Con la presente, JVCKENWOOD dichiara che l΄apparecchio
radio “KD-R992BT/KD-R899BT/KD-R891BT/KD-R794BT/
KD-R792BT” è conforme alla Direttiva 2014/53/UE.
Il testo integrale della dichiarazione di conformità UE è
disponibile al seguente indirizzo internet:
http://www.jvc.net/cs/car/eudoc/
Español
Por la presente, JVCKENWOOD declara que el equipo de radio
“KD-R992BT/KD-R899BT/KD-R891BT/KD-R794BT/
KD-R792BT” cumple la Directiva 2014/53/EU.
El texto completo de la declaración de conformidad con la UE
está disponible en la siguiente dirección de internet:
http://www.jvc.net/cs/car/eudoc/
Português
Deste modo, a JVCKENWOOD declara que o equipamento de
rádio “KD-R992BT/KD-R899BT/KD-R891BT/KD-R794BT/
KD-R792BT” está em conformidade com a Diretiva
2014/53/UE.
O texto integral da declaração de conformidade da UE está
disponível no seguinte endereço de internet:
http://www.jvc.net/cs/car/eudoc/
Polska
Niniejszym, JVCKENWOOD deklaruje, że sprzęt radiowy
“KD-R992BT/KD-R899BT/KD-R891BT/KD-R794BT/
KD-R792BT” jest zgodny z dyrektywą 2014/53/UE.
Pełny tekst deklaracji zgodności EU jest dostępny pod
adresem:
http://www.jvc.net/cs/car/eudoc/
Český
Společnost JVCKENWOOD tímto prohlašuje, že rádiové
zařízení “KD-R992BT/KD-R899BT/KD-R891BT/KD-R794BT/
KD-R792BT” splňuje podmínky směrnice 2014/53/EU.
Plný text EU prohlášení o shodě je dostupný na následující
internetové adrese:
http://www.jvc.net/cs/car/eudoc/
Magyar
JVCKENWOOD ezennel kijelenti, hogy a „KD-R992BT/
KD-R899BT/KD-R891BT/KD-R794BT/KD-R792BT“
rádióberendezés megfelel a 2014/53/EU irányelvnek.
Az EU konformitási nyilatkozat teljes szövege az alábbi
weboldalon érhető el:
http://www.jvc.net/cs/car/eudoc/
Page 5

Svenska
Härmed försäkrar JVCKENWOOD att
radioutrustningen “KD-R992BT/KD-R899BT/
KD-R891BT/KD-R794BT/KD-R792BT” är i enlighet
med direktiv 2014/53/EU.
Den fullständiga texten av EU-försäkran
om överensstämmelse finns på följande
Internetadress :
http://www.jvc.net/cs/car/eudoc/
Suomi
JVCKENWOOD julistaa täten, että radiolaite
“KD-R992BT/KD-R899BT/KD-R891BT/KD-R794BT/
KD-R792BT” on direktiivin 2014/53/EU mukainen.
EU-vaatimustenmukaisuusvakuutusvaatimus
löytyy kokonaisuudessaan seuraavasta internetosoitteesta:
http://www.jvc.net/cs/car/eudoc/
Slovensko
S tem JVCKENWOOD izjavlja, da je radijska oprema
»KD-R992BT/KD-R899BT/KD-R891BT/KD-R794BT/
KD-R792BT« v skladu z Direktivo 2014/53/EU.
Celotno besedilo direktive EU o skladnosti je
dostopno na tem spletnem naslovu:
http://www.jvc.net/cs/car/eudoc/
Slovensky
Spoločnosť JVCKENWOOD týmto vyhlasuje, že
rádiové zariadenie „KD-R992BT/KD-R899BT/
KD-R891BT/KD-R794BT/KD-R792BT“ vyhovuje
smernici 2014/53/EÚ.
Celý text EÚ vyhlásenia o zhode nájdete na
nasledovnej internetovej adrese:
http://www.jvc.net/cs/car/eudoc/
Dansk
Herved erklærer JVCKENWOOD, at radioudstyret
“KD-R992BT/KD-R899BT/KD-R891BT/KD-R794BT/
KD-R792BT” er i overensstemmelse med Direktiv
2014/53/EU.
EU-overensstemmelseserklæringens fulde ordlyd
er tilgængelig på følgende internetadresse:
http://www.jvc.net/cs/car/eudoc/
Ελληνικά
Με το παρόν, η JVCKENWOOD δηλώνει ότι ο
ραδιοεξοπλισμός «KD-R992BT/KD-R899BT/
KD-R891BT/KD-R794BT/KD-R792BT»
συμμορφώνεται με την Οδηγία 2014/53/ΕΕ.
Το πλήρες κείμενο της δήλωσης συμμόρφωσης
της ΕΕ είναι διαθέσιμο στην ακόλουθη διεύθυνση
στο διαδίκτυο:
http://www.jvc.net/cs/car/eudoc/
Eesti
Käesolevaga JVCKENWOOD kinnitab, et
„KD-R992BT/KD-R899BT/KD-R891BT/KD-R794BT/
KD-R792BT“ raadiovarustus on vastavuses
direktiiviga 2014/53/EL.
ELi vastavusdeklaratsiooni terviktekst on
kättesaadav järgmisel internetiaadressil:
http://www.jvc.net/cs/car/eudoc/
Latviešu
JVCKENWOOD ar šo deklarē, ka radio aparatūra
„KD-R992BT/KD-R899BT/KD-R891BT/KD-R794BT/
KD-R792BT” atbilst direktīvas 2014/53/ES
prasībām.
Pilns ES atbilstības deklarācijas teksts ir pieejams
šādā tīmekļa adresē:
http://www.jvc.net/cs/car/eudoc/
Lietuviškai
Šiuo JVCKENWOOD pažymi, kad radijo įranga
„KD-R992BT/KD-R899BT/KD-R891BT/KD-R794BT/
KD-R792BT“ atitinka 2014/53/EB direktyvos
reikalavimus.
Visą EB direktyvos atitikties deklaracijos tekstą
galite rasti šiuo internetiniu adresu:
http://www.jvc.net/cs/car/eudoc/
Malti
B’dan, JVCKENWOOD jiddikjara li t-tagħmir
tar-radju “KD-R992BT/KD-R899BT/KD-R891BT/
KD-R794BT/KD-R792BT” huwa konformi madDirettiva 2014/53/UE.
It-test kollu tad-dikjarazzjoni ta’ konformità huwa
disponibbli fl-indirizz intranet li ġej:
http://www.jvc.net/cs/car/eudoc/
HRVATSKI / SRPSKI JEZIK
JVCKENWOOD ovim izjavljuje da je radio oprema
“KD-R992BT/KD-R899BT/KD-R891BT/KD-R794BT/
KD-R792BT” u skladu s Direktivom 2014/53/EU.
Cjeloviti tekst deklaracije Europske unije o
usklađenosti dostupan je na sljedećoj internet
adresi:
http://www.jvc.net/cs/car/eudoc/
ROMÂNĂ
Prin prezenta, JVCKENWOOD declară că
echipamentul radio “
KD-R891BT/KD-R794BT/KD-R792BT
conformitate cu Directiva 2014/53/UE.
Textul integral al declarației de conformitate UE este
disponibil la urmatoarea adresă de internet:
http://www.jvc.net/cs/car/eudoc/
KD-R992BT/KD-R899BT/
” este în
БЪЛГАРСКИ
С настоящото JVCKENWOOD декларира, че
радиооборудването на “
KD-R891BT/KD-R794BT/KD-R792BT
съответствие с Директива 2014/53/ЕС.
Пълният текст на ЕС декларацията за
съответствие е достъпен на следния интернет
адрес:
http://www.jvc.net/cs/car/eudoc/
Turkish
Burada, JVCKENWOOD “
KD-R891BT/KD-R794BT/KD-R792BT
ekipmanının 2014/53/AB Direktifine uygun
olduğunu bildirir.
AB uyumluluk deklarasyonunun tam metni
aşağıdaki internet adresinde mevcuttur.
http://www.jvc.net/cs/car/eudoc/
Русский
JVCKENWOOD настоящим заявляет, что
радиооборудование «KD-R992BT/KD-R899BT/
KD-R891BT/KD-R794BT/KD-R792BT»
соответствует Директиве 2014/53/EU.
Полный текст декларации соответствия
ЕС доступен по следующему адресу в сети
Интернет:
http://www.jvc.net/cs/car/eudoc/
Українська
Таким чином, компанія JVCKENWOOD заявляє,
що радіообладнання «KD-R992BT/KD-R899BT/
KD-R891BT/KD-R794BT/KD-R792BT» відповідає
Директиві 2014/53/EU.
Повний текст декларації про відповідність ЄС
можна знайти в Інтернеті за такою адресою:
http://www.jvc.net/cs/car/eudoc/
KD-R992BT/KD-R899BT/
” е в
KD-R992BT/KD-R899BT/
” radyo
iv
Page 6
CONTENTS BEFORE USE
BEFORE USE 2
BASICS 3
GETTING STARTED 5
1 Cancel the demonstration
2 Set the clock and date
3 Set the basic settings
RADIO 6
AUX 8
CD/USB/iPod/ANDROID 8
Spotify 11
BLUETOOTH® 12
AUDIO SETTINGS 21
DISPLAY SETTINGS 26
REFERENCES 28
Maintenance
More information
TROUBLESHOOTING 31
INSTALLATION/
CONNECTION 33
SPECIFICATIONS 36
IMPORTANT
• To ensure proper use, please read through this manual before using this product. It is especially important
that you read and observe Warning and Caution in this manual.
• Please keep the manual in a safe and accessible place for future reference.
Warning
• Do not operate any function that takes your attention away from safe driving.
Caution
Volume setting:
• Adjust the volume so that you can hear sounds outside the car to prevent accidents.
• Lower the volume before playing digital sources to avoid damaging the speakers by the sudden increase of
the output level.
General:
• Avoid using the external device if it might hinder safe driving.
• Make sure all important data has been backed up. We shall bear no responsibility for any loss of recorded
data.
• Never put or leave any metallic objects (such as coins or metal tools) inside the unit, to prevent a short
circuit.
• If a disc error occurs due to condensation on the laser lens, eject the disc and wait for the moisture to
evaporate.
How to read this manual
• Operations are explained mainly using buttons on the faceplate of
• English indications are used for the purpose of explanation. You can select the display language from the
menu.
( 6)
•
•
[XX]
( XX)
indicates the selected items.
indicates references are available on the stated page.
KD-R992BT
and
KD-R891BT
.
2
ENGLISH
Page 7
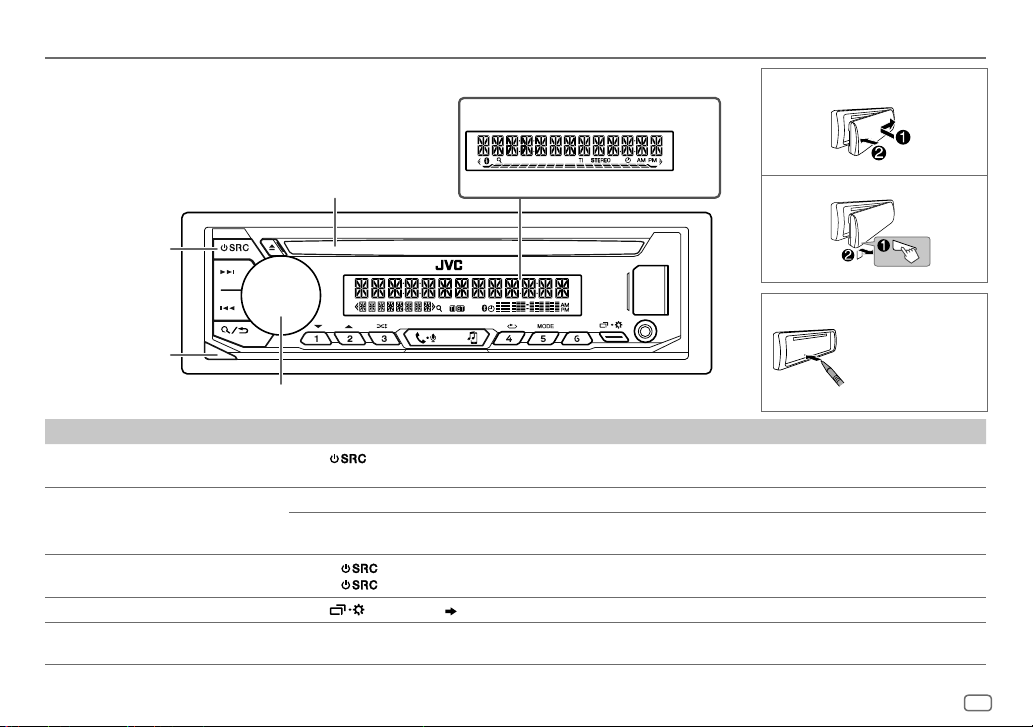
BASICS
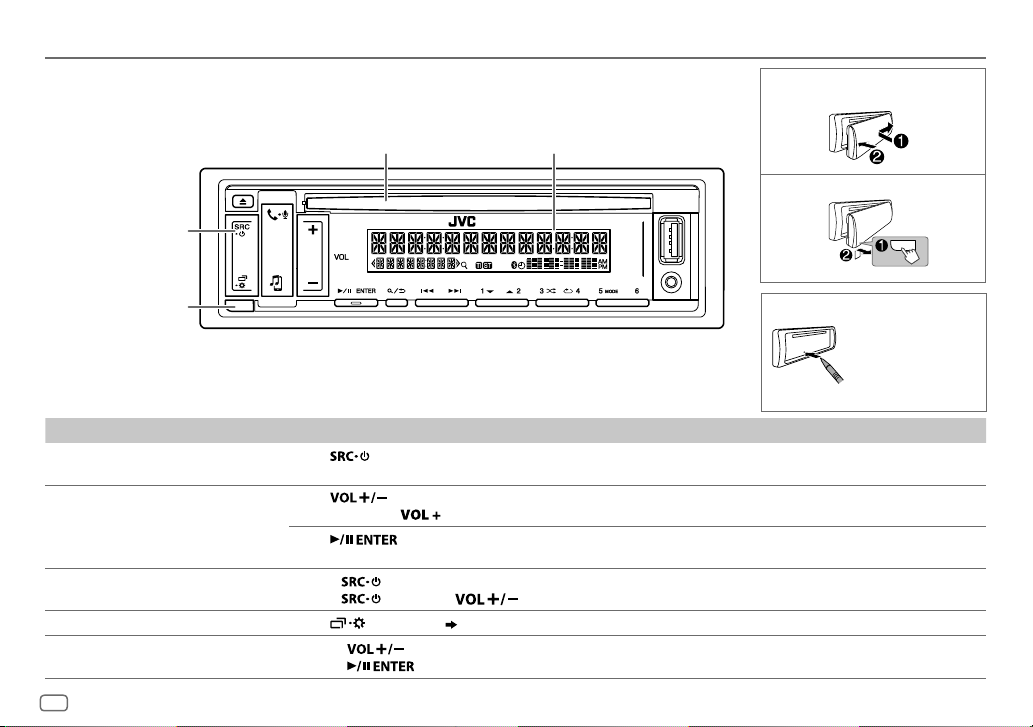
Faceplate for
KD-R992BT/KD-R899BT/KD-R794BT/KD-R792BT
Attach
Display window
Loading slot
Source button
Detach button
Volume knob
To On the faceplate
Turn on the power
Adjust the volume Turn the volume knob.
Select a source
Change the display information
Select an item
Press
• Press and hold to turn off the power.
Press the volume knob to mute the sound or pause playback.
• Press again to cancel. The volume level returns to the previous level before muting or pause.
• Press
• Press
Press
1 Turn the volume knob to select an item.
.
repeatedly.
, then turn the volume knob within 2seconds.
repeatedly.
2 Press the knob to confirm.
KD-R899BT/KD-R794BT/KD-R792BT
( 29, 30)
Detach
How to reset
Reset the unit
within 5 seconds
after detaching the
faceplate.
ENGLISH
3
Page 8
BASICS
Faceplate for
Source button
KD-R891BT
Attach
Loading slot Display window
Detach
Detach button
To On the faceplate
Turn on the power Press .
Adjust the volume Press
Select a source • Press
Change the display information
Select an item
• Press and hold to turn off the power.
• Press and hold
Press
• Press again to cancel. The volume level returns to the previous level before muting or pause.
• Press
Press
1 Press to select an item.
2 Press to confirm.
4
ENGLISH
.
to continuously increase the volume to 15.
to mute the sound or pause playback.
repeatedly.
, then press within 2 seconds.
repeatedly.
( 29, 30)
How to reset
Reset the unit
within 5 seconds
after detaching the
faceplate.
Page 9

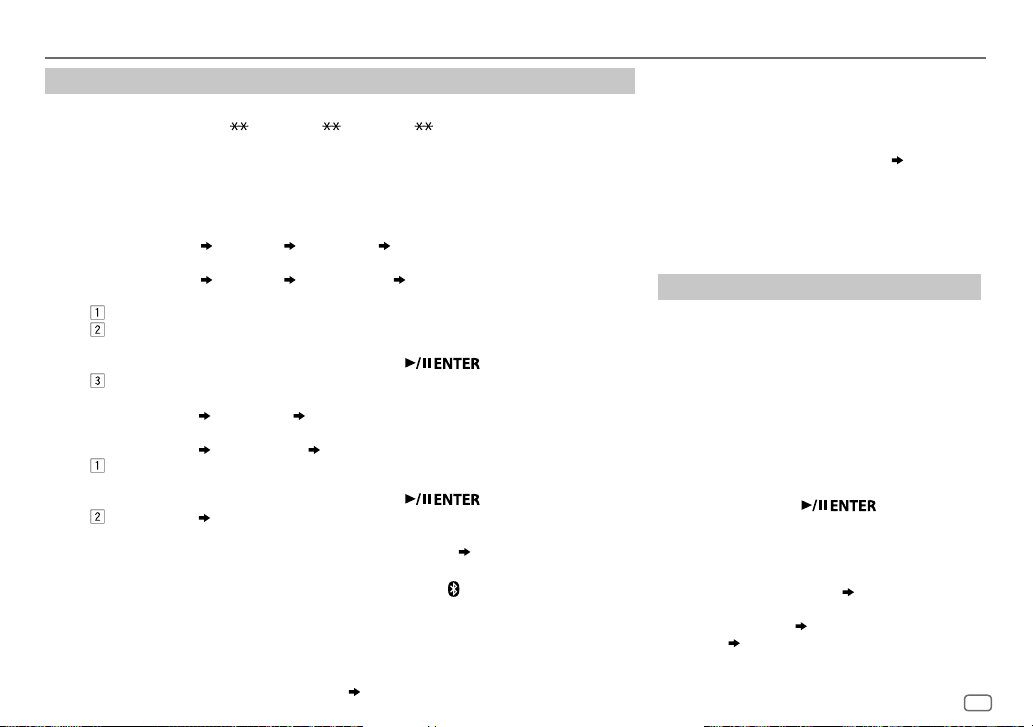
GETTING STARTED
For key layout on the faceplate, see page3 or page4.
1
Cancel the demonstration
When you turn on the power for the first time (or
[YES]
), the display shows:
KD-R992BT/KD-R899BT/KD-R794BT/KD-R792BT
“CANCEL DEMO”
“PRESS” “VOLUME KNOB”
1 Press the volume knob.
[YES]
is selected for the initial setup.
2 Press the volume knob again.
“DEMO OFF” appears.
KD-R891BT
“CANCEL DEMO”
:
“PRESS ENTER”
1 Press .
[YES]
is selected for the initial setup.
2 Press again.
“DEMO OFF” appears.
2
Set the clock and date
1
Press and hold .
2 Perform ‘select an item
3 Perform ‘select an item
[CLOCK ADJUST]
[12H]
set the hour and minute
or
[24H]
4 Perform ‘select an item
[DATE SET]
set the day, month and year
( 3 or 4)’
operation to select
( 3 or 4)’
operation to adjust the clock.
( 3 or 4)’
operation to set the date.
5 Press to exit.
To return to the previous setting item, press .
[FACTORY RESET]
:
[CLOCK FORMAT]
[CLOCK]
is set to
.
3
Set the basic settings
1
Press and hold .
2 Perform 'select an item
item (see the following table).
( 3 or 4)’
operation to select an
3 Repeat step 2 until the desired item is selected or activated.
4 Press to exit.
To return to the previous setting item, press .
Default:
SYSTEM
KEY BEEP
SOURCE SELECT
AM SRC
SPOTIFY SRC
BUILT-IN AUX
F/W UPDATE
UPDATE SYSTEM
F/W UP xxxx
FACTORY RESET YES
*
Not displayed when the corresponding source is selected.
(Not applicable when 3-way crossover is selected.)
ON
:Activates the keypress tone.;
*
ON
:Enables AM in source selection.;
*
ON
:Enables SPOTIFY in source selection.;
*
ON
:Enables AUX in source selection.;
YES
:Starts upgrading the firmware.; NO:Cancels (upgrading is not
activated).
For details on how to update the firmware, see:
<http://www.jvc.net/cs/car/>.
:Resets the settings to default (except the stored station).;
NO
:Cancels.
OFF
:Deactivates
OFF
OFF
:Disables.
OFF
:Disables.
:Disables.
( 6)
( 11)
( 8)
XX
ENGLISH
5
Page 10
GETTING STARTED
CLOCK
TIME SYNC
CLOCK DISPLAY ON
ENGLISH
РУССКИЙ
ESPANOL
ON
:The clock time is automatically set using the
Clock Time (CT) data in FM Radio Data System signal.;
OFF
:Cancels.
:The clock time is shown on the display even when the
unit is turned off.;
Select the display language for menu and music
information if applicable.
By default,
ENGLISH
OFF
:Cancels.
is selected.
RADIO
For key layout on the faceplate, see page3 or page4.
Search for a station
1
Press source button repeatedly to select FM or AM.
2 Press to search for a station automatically.
(or)
Press and hold until “M” flashes, then press repeatedly to search for a
station manually.
• “ST” or “STEREO” lights up when receiving an FM stereo broadcast with sufficient
signal strength.
Settings in memory
You can store up to 18 stations for FM and 6 stations for AM.
Store a station
While listening to a station....
Press and hold one of the number buttons (1 to 6).
(or)
1 Press and hold the following button until “PRESETMODE” flashes.
KD-R992BT/KD-R899BT/KD-R794BT/KD-R792BT
KD-R891BT
2 Perform ‘select an item
The preset number flashes and “MEMORY” appears.
:
( 3 or 4)
Select a stored station
Press one of the number buttons (1to6).
(or)
1 Press .
2 Perform ‘select an item
( 3 or 4)
: volume knob
’ operation to select a preset number.
’ operation to select a preset number.
6
ENGLISH
Page 11
RADIO
Other settings
1
Press and hold .
2 Perform 'select an item
(
see the following table).
( 3 or 4)
' operation to select an item
3 Repeat step 2 until the desired item is selected/activated or follow
the instructions stated on the selected item.
4 Press to exit.
To return to the previous setting item, press .
Default:
TUNER SETTING
RADIO TIMER
Turns on the radio at a specific time regardless of the current source.
1 ONCE/DAILY/WEEKLY/OFF
:Select how often the timer will be turned
on.
2 FM/AM
:Select the band.
3 01
to 18 (for FM)/01 to 06 (for AM):Select the preset station.
4
Set the activation day
“
M
” lights up when complete.
1
*
and time.
Radio Timer will not activate for the following cases.
•
The unit is turned off.
•
[OFF]
SSM
is selected for
AM is selected.
SSM 01–06/SSM 07–12/SSM 13–18
( 5)
[AM SRC]
in
[SOURCE SELECT]
: Automatically presets up to 18
after Radio Timer for
stations for FM. “SSM” stops flashing when the first 6 stations are stored.
Select
LOCAL SEEK ON
SSM 07–12/SSM 13–18
:Searches only FM stations with good reception.;
•
Settings made are applicable only to the selected source/station. Once you
to store the following 12 stations.
OFF
:Cancels.
change the source/station, you need to make the settings again.
IF BAND AUTO
:Increases the tuner selectivity to reduce interference noises from
adjacent FM stations. (Stereo effect may be lost.);
WIDE
interference noises from adjacent FM stations, but sound quality will not be
degraded and the stereo effect will remain.
MONO SET ON
NEWS SET
REGIONAL
XX
AF SET
2
*
:Improves the FM reception, but the stereo effect will be lost.;
OFF
:Cancels.
2
*
ON
:The unit will temporarily switch to News Programme if available.;
OFF
:Cancels.
2
*
ON
: Switches to another station only in the specific region using the “AF”
control.;
OFF
:Cancels.
ON
: Automatically searches for another station broadcasting the same
program in the same Radio Data System network with better reception
TI ON
when the current reception is poor.;
: Allows the unit to temporarily switch to Traffic Information if available
OFF
: Cancels.
(“TI” lights up) while listening to all sources except in AM. ;
2
PTY SEARCH
*
Select a PTY code (see below).
If there is a station broadcasting a program of the same PTY code as you
have selected, that station is tuned in.
1
*
Selectable only when
2
*
Only for FM source.
[ONCE]
or
[WEEKLY]
is selected in step 1.
PTY code
NEWS, AFFAIRS, INFO, SPORT, EDUCATE, DRAMA, CULTURE, SCIENCE, VARIED, POP
M
(music),
ROCK M
(music),
EASY M
(music),
LIGHT M
M
(music),
WEATHER, FINANCE, CHILDREN, SOCIAL, RELIGION, PHONE IN, TRAVEL
LEISURE, JAZZ, COUNTRY, NATION M
(music),
(music),
OLDIES, FOLK M
(music),
:Subjects to
OFF
:Cancels.
CLASSICS, OTHER
DOCUMENT
,
ENGLISH
7
Page 12
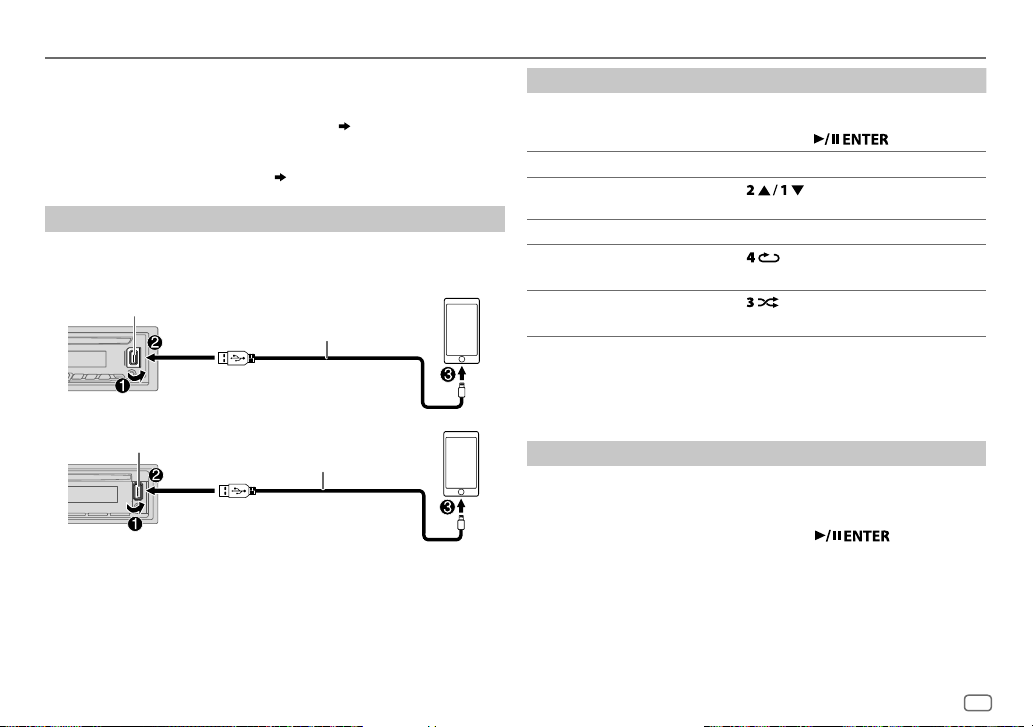
AUX CD/USB/iPod/ANDROID
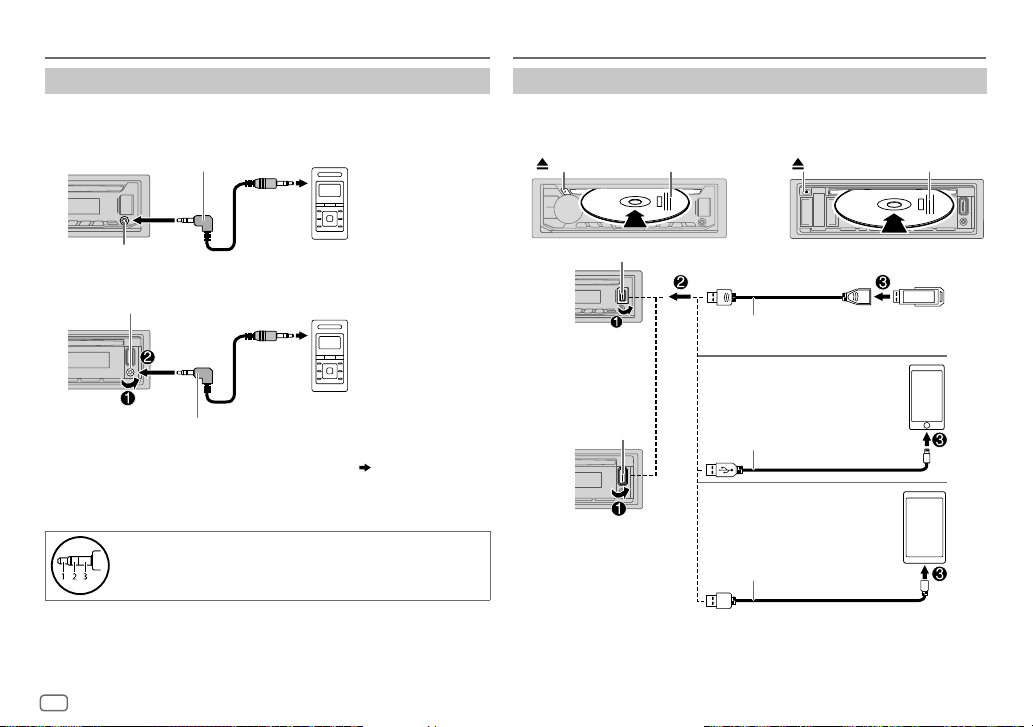
Use a portable audio player
1
Connect a portable audio player (commercially available).
KD-R992BT/KD-R899BT/KD-R794BT/KD-R792BT
:
3.5mm stereo mini plug with “L” shaped connector
(commercially available)
Portable audio player
Auxiliary input jack
KD-R891BT
:
Auxiliary input jack
Portable audio player
3.5mm stereo mini plug with “L” shaped connector
(commercially available)
2 Select
[ON]
for
[BUILT-IN AUX]
in
[SOURCE SELECT]. ( 5)
3 Press source button repeatedly to select AUX.
4 Turn on the portable audio player and start playback.
Use a 3-core plug head stereo mini plug for optimum
audio output.
8
ENGLISH
Start playback
The source changes automatically and playback starts.
CD
KD-R992BT/KD-R899BT/KD-R794BT/KD-R792BT: KD-R891BT:
Eject disc
Label side
Eject disc
Label side
USB input terminal
KD-R992BT/
KD-R899BT/
KD-R794BT/
KD-R792BT
USB
USB 2.0 cable
1
*
(commercially available)
iPod/iPhone
USB input terminal
KD-R891BT
1
*
Do not leave the cable inside the car when not using.
2
*
When connecting an Android device, “Press [VIEW] to install JVC MUSIC PLAY APP” is shown.
Accessory of the iPod/iPhone
2
ANDROID
USB cable
*
1
*
(commercially available)
1
*
Follow the instructions to install the application. You can also install the latest version of JVC
MUSIC PLAY application on your Android device before connecting. For more information, visit
<http://www.jvc.net/cs/car/>.
Page 13
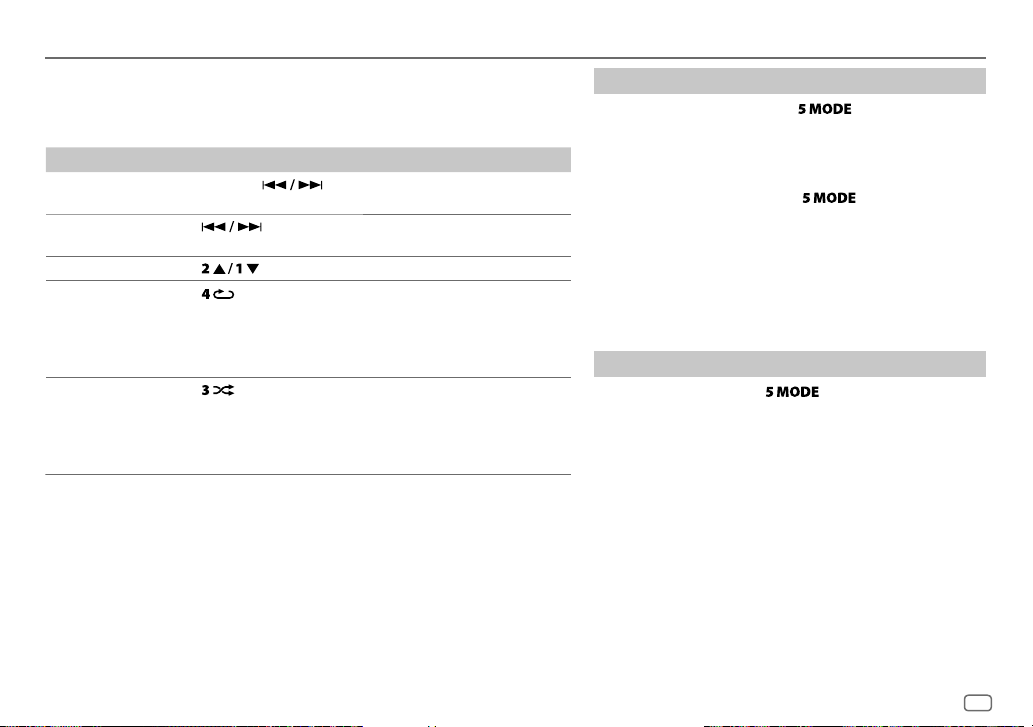
CD/USB/iPod/ANDROID
For key layout on the faceplate, see page3 or page4.
• Selectable sources:
KD-R992BT/KD-R899BT/KD-R891BT
KD-R794BT/KD-R792BT
: CD/USB/ANDROID
To On the faceplate
Reverse/
Fast-forward
Select a track/
Press and hold .
3
*
Press
file
4
Select a folder
Repeat play
*
Press .
5
*
Press repeatedly.
TRACK REPEAT/ALL REPEAT
TRACK REPEAT/FOLDER REPEAT/ALL REPEAT
ONE REPEAT/ALL REPEAT/REPEAT OFF
5
Random play
*
Press repeatedly.
ALL RANDOM/RANDOM OFF
FOLDER RANDOM/ALL RANDOM/RANDOM OFF
SONG RANDOM/ALL RANDOM/RANDOM OFF
3
*
For ANDROID: Applicable only when
4
*
For CD: Only for MP3/WMA/AAC files. This does not work for iPod/ANDROID.
5
*
For iPod/ANDROID: Applicable only when
: CD/USB/iPodUSB/ANDROID
.
: Audio CD
: iPod or ANDROID
: Audio CD
[AUTO MODE]
is selected.
[HEAD MODE]/[AUTO MODE]
: MP3/WMA/AAC/WAV/
FLAC file
: MP3/WMA/AAC/WAV/
FLAC file
: iPod or ANDROID
is selected.
Select control mode
While in iPodUSB source, press repeatedly.
HEAD MODE
IPHONE MODE
: Control iPod from this unit.
: Control iPod using the iPod itself. However, you
can still play/pause or file skip from this unit.
While in ANDROID source, press repeatedly.
AUTO MODE
: Control Android device from this unit via JVC
MUSIC PLAY application installed in the Android
device.
AUDIO MODE
: Control Android device using the Android device
itself via other media player applications installed
in the Android device. However, you can still
play/pause or file skip from this unit.
Select music drive
While in USB source, press repeatedly.
Stored songs in the following drive will be played back.
• Selected internal or external memory of a smartphone (Mass
Storage Class).
• Selected drive of a multiple drives device.
ENGLISH
9
Page 14
CD/USB/iPod/ANDROID
Settings to use JVC Remote application
(for KD-R992BT/KD-R899BT/KD-R891BT)
JVC Remote application is designed to control the JVC car receiver’s
operations from the iPhone/iPod (via USB input terminal).
Preparation:
Install the latest version of JVC Remote application on your device before
connecting. For more information, visit <http://www.jvc.net/cs/car/>.
You can make the settings in the same way as connection via Bluetooth.
( 19)
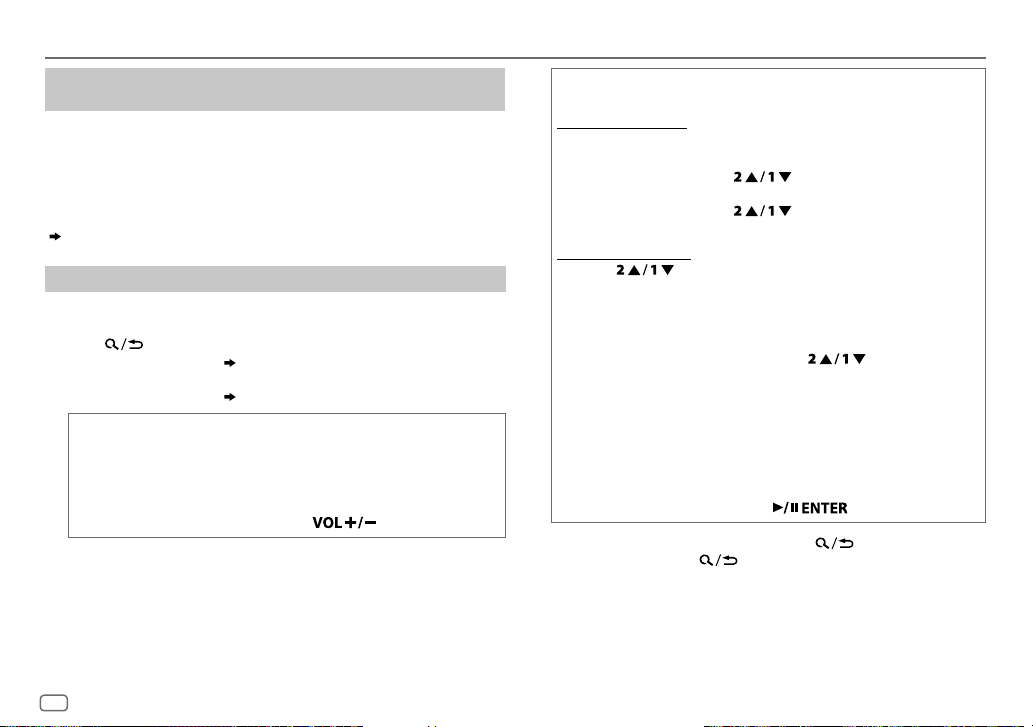
Select a file from a folder/list
For iPod/ANDROID, applicable only when
selected.
[HEAD MODE]/[AUTO MODE]
is
1 Press .
2 Perform ‘select an item
list.
3 Perform ‘select an item
Quick search
If you have many files, you can search through them quickly.
Perform the following operation to browse through the list quickly.
KD-R992BT/KD-R899BT
KD-R794BT/KD-R792BT
KD-R891BT
: Press and hold
( 3 or 4)
’ operation to select a folder/
( 3 or 4)
’ operation to select a file.
(applicable only for CD, USB and ANDROID source)
/
: Turn the volume knob quickly
Alphabet search
You can search for a file according to the first character.
For iPodUSB source
Perform the following operation to select the desired character (A
to Z, 0to9, OTHERS).
KD-R992BT/KD-R899BT:
KD-R891BT:
• Select “OTHERS” if the first character is other than AtoZ, 0to9.
For ANDROID source
(applicable only for iPod USB and ANDROID source)
Press or turn the volume knob
quickly
Press
1 Press to enter character search.
2 Perform the following operation to select the desired
character.
KD-R992BT/KD-R899BT
KD-R794BT/KD-R792BT
KD-R891BT
: Press
^A^ : Upper case (A to Z)
_A_ : Lower case (a to z)
-0- : Numbers (0 to 9)
-OTHERS- : Character other than A to Z, 0 to 9
/
: Turn the volume knob
3 Press the following to start searching.
KD-R992BT/KD-R899BT
KD-R794BT/KD-R792BT
KD-R891BT
:
• To return to the previous setting item, press .
• To cancel, press and hold
/
: volume knob
.
10
ENGLISH
Page 15
Spotify
Preparation:
Install the latest version of the Spotify application on your device (iPhone/
iPod touch), then create an account and log in to Spotify.
• Select
[ON]
for
[SPOTIFY SRC]
/
KD-R794BT
KD-R792BT
connection with an Android device.
Start listening
1
Open the Spotify application on your device.
2 Connect your device to the USB input terminal.
KD-R992BT/KD-R899BT
USB input terminal
KD-R891BT
:
USB input terminal
3 Press source button repeatedly to select SPOTIFY.
Broadcast starts automatically
*
Do not leave the cable inside the car when not using.
in
[SOURCE SELECT]. ( 5)
: You can only listen to Spotify via Bluetooth
( 20)
:
Accessory of the iPod/iPhone*
Accessory of the iPod/iPhone*
To On the faceplate
Playback/pause
KD-R992BT/KD-R899BT/KD-R794BT/KD-R792BT
Press the volume knob.
KD-R891BT
: Press .
1
Skip a track
Thumbs up or thumbs
2
*
down
Press S
Press .
*
/ T.
Start radio Press and hold 5.
3
Repeat play
Random play
*
3
*
Press repeatedly.
ALL REPEAT, ONE REPEAT
Press repeatedly
1
*
,
REPEAT OFF
1
*
.
ALL RANDOM, RANDOM OFF
1
*
Available for premium account users only.
2
*
This feature is available for tracks in Radio only. If thumbs down is selected, the current
track is skipped.
3
*
Available for tracks in Playlists only.
Save favorite song information
While listening to the Radio on Spotify...
Press and hold the following button to save the song information.
KD-R992BT/KD-R899BT/KD-R794BT/KD-R792BT
KD-R891BT
:
: volume knob
“SAVED” appears and the information is stored to “Your Music” or “Your
Library” on your Spotify account.
To unsave, repeat the same procedure.
“REMOVED” appears and the information is removed from “Your Music”
or “Your Library” on your Spotify account.
:
ENGLISH
11
Page 16
Spotify BLUETOOTH®
Search for a song or station
1
Press .
2 Perform ‘select an item
type.
The list types displayed differ depending on the information sent
from Spotify.
3 Perform ‘select an item
desired song or station.
Perform the following operation to browse through the list quickly.
KD-R992BT/KD-R899BT
KD-R794BT/KD-R792BT
KD-R891BT
To cancel, press and hold .
: Press and hold
( 3 or 4)
’ operation to select a list
( 3 or 4)
’ operation to select the
/
: Turn the volume knob quickly
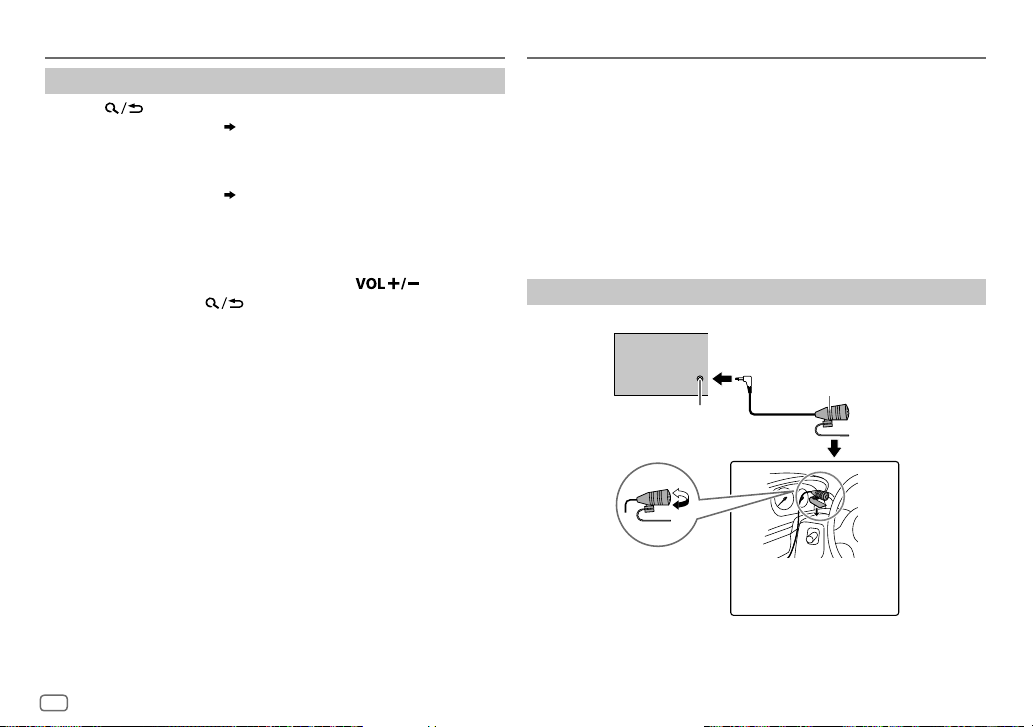
BLUETOOTH — Connection
Supported Bluetooth profiles
– Hands-Free Profile (HFP)
– Advanced Audio Distribution Profile (A2DP)
– Audio/Video Remote Control Profile (AVRCP)
– Serial Port Profile (SPP)
– Phonebook Access Profile (PBAP)
Supported Bluetooth codecs
– Sub Band Codec (SBC)
– Advanced Audio Coding (AAC)
Connect the microphone
Microphone input jack
Rear panel
Microphone (supplied)
12
ENGLISH
Adjust the
microphone angle
Secure using cord clamps
(not supplied) if necessary.
Page 17
BLUETOOTH®
Pair and connect a Bluetooth device for the first time
1
Press source button to turn on the unit.
2 Search and select “KD-R9 BT”/“KD-R8 BT”/“KD-R7 BT” on the Bluetooth device.
“BTPAIRING” flashes on the display.
• For some Bluetooth devices, you may need to enter the Personal Identification Number
(PIN) code immediately after searching.
3 Perform (A) or (B) depending on what appears on the display.
For some Bluetooth devices, pairing sequence may vary from the steps described below.
(A)
KD-R992BT/KD-R899BT/KD-R794BT/KD-R792BT
“[Device Name]”
KD-R891BT
“[Device Name]”
:
“XXXXXX” “VOL–YES” “BACK–NO”
“XXXXXX” “ENTER–YES” “BACK–NO”
“XXXXXX” is a 6-digit passkey randomly generated during each pairing.
Ensure that the passkeys appear on the unit and Bluetooth device are the same.
Press the following operation to confirm the passkey.
KD-R992BT/KD-R899BT/KD-R794BT/KD-R792BT
Operate the Bluetooth device to confirm the passkey.
(B)
• If “PAIRING” “PIN 0000” scrolls on the display, enter the PIN code “0000” into the
• If only “PAIRING” appears, operate the Bluetooth device to confirm pairing.
“PAIRING COMPLETED” appears when pairing is completed and “ ” will light up when the
Bluetooth connection is established.
• This unit supports Secure Simple Pairing (SSP).
• Up to five devices can be registered (paired) in total.
• Once the pairing is completed, the Bluetooth device will remain registered in the unit even if
KD-R891BT
KD-R992BT/KD-R899BT/KD-R794BT/KD-R792BT
“[Device Name]”
KD-R891BT
“[Device Name]”
Press the following to start pairing.
KD-R992BT/KD-R899BT/KD-R794BT/KD-R792BT
KD-R891BT
you reset the unit. To delete the paired device,
:
“VOL–YES” “BACK–NO”
:
“ENTER–YES” “BACK–NO”
:
Bluetooth device.
You can change to a desired PIN code before pairing.
:
: volume knob
:
: volume knob
17, [DEVICE DELETE]
( 17)
.
• A maximum of two Bluetooth phones and one
Bluetooth audio device can be connected at any
time.
However, while in BT AUDIO source, you can
connect to five Bluetooth audio devices and
switch between these five devices. (
• Some Bluetooth devices may not automatically
connect to the unit after pairing. Connect the
device to the unit manually.
• Refer to the instruction manual of the Bluetooth
device for more information.
19
)
Auto Pairing
When you connect the following devices to the USB
input terminal, pairing request (via Bluetooth) is
automatically activated.
KD-R992BT/KD-R899BT/KD-R891BT
KD-R794BT/KD-R792BT
Press the following to pair once you have
confirmed the device name.
KD-R992BT/KD-R899BT
KD-R794BT/KD-R792BT
KD-R891BT
Automatic pairing request is activated only if:
– Bluetooth function of the connected devcie is
–
– JVC MUSIC PLAY application is installed on
:
turned on.
[AUTO PAIRING]
the Android device
selected
( 9)
: Android device
/
: volume knob
is set to
.
[ON]. ( 18)
( 8)
and
: iPhone/iPod touch/
Android device
[AUTO MODE]
is
ENGLISH
13
Page 18
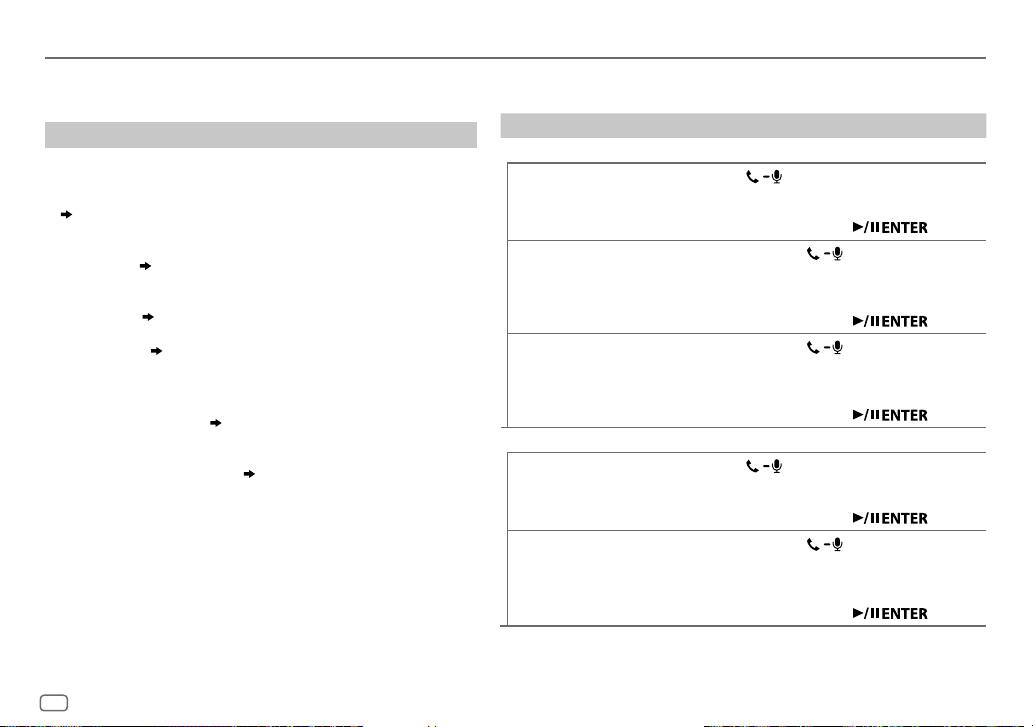
BLUETOOTH®
BLUETOOTH — Mobile phone
For key layout on the faceplate, see page3 or page4.
The following operations may differ or not available depending on the
connected phone.
Receive a call
When there is an incoming call:
•
KD-R992BT
The buttons will blink in the color you have selected in
( 15)
KD-R891BT
The symbolic button will blink in the color you have selected in
[RING COLOR]. ( 15)
KD-R899BT/KD-R794BT/KD-R792BT
The buttons will blink in the blinking pattern you have selected in
[RING ILLUMI]. ( 15)
• The unit answers the call automatically if
selected time.
During a call:
•
KD-R992BT
The buttons stop blinking and illuminate in the color you have
selected in
KD-R891BT
The symbolic button stop blinking and illuminate in the color you
have selected in
KD-R899BT/KD-R794BT/KD-R792BT
The buttons stop blinking.
• If you turn off the unit or detach the faceplate, the Bluetooth
connection is disconnected.
14
:
:
( 15)
:
[RING COLOR]. ( 15)
:
ENGLISH
:
[RING COLOR]. ( 15)
:
[AUTO ANSWER]
[RING COLOR]
is set to a
To On the faceplate
First incoming call...
Answer a call
.
Reject a call
End a call
While talking on the first incoming call...
Answer another incoming
call and hold the current call
Reject another incoming call
Press
KD-R992BT/KD-R899BT
KD-R794BT/KD-R792BT
KD-R891BT
Press and hold
button.
KD-R992BT/KD-R899BT
KD-R794BT/KD-R792BT
KD-R891BT
Press and hold
button.
KD-R992BT/KD-R899BT
KD-R794BT/KD-R792BT
KD-R891BT
Press
KD-R992BT/KD-R899BT
KD-R794BT/KD-R792BT
KD-R891BT
Press and hold
button.
KD-R992BT/KD-R899BT
KD-R794BT/KD-R792BT
KD-R891BT
or the following button.
:
:
:
or the following button.
:
:
/
: volume knob
or the following
/
: volume knob
or the following
/
: volume knob
/
: volume knob
or the following
/
: volume knob
Page 19
BLUETOOTH®
To On the faceplate
While having two active calls...
End current call and activate
held call
Swap between the current
call and held call
Adjust the phone volume
[00]
to
[35]
(Default:
[15]
Switch between hands-free
and private talk modes
1
*
This adjustment will not affect the volume of the other sources.
2
*
Press and hold
3
*
Operations may vary according to the connected Bluetooth device.
VOL +
to continuously increase the volume to 15.
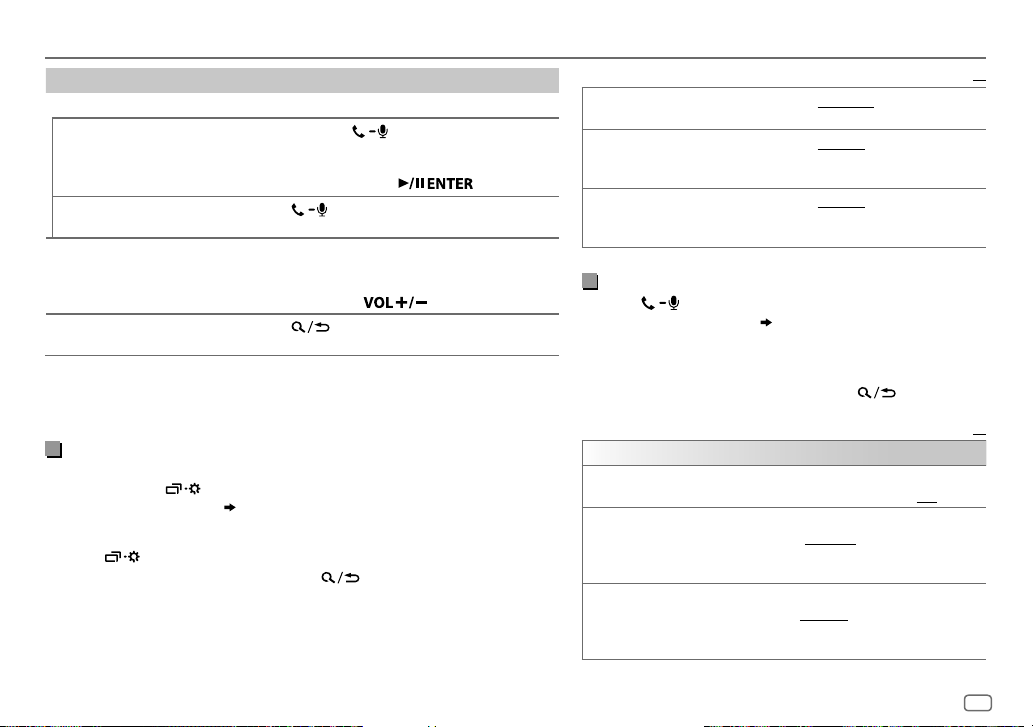
Improve the voice quality
While talking on the phone....
1 Press and hold .
2 Perform ‘select an item
following table
)
.
3 Repeat step 2 until the desired item is selected or activated.
4 Press to exit.
To return to the previous setting item, press .
Press and hold
KD-R992BT/KD-R899BT
KD-R794BT/KD-R792BT
KD-R891BT
:
Press
1
*
Perform the following operation during a call.
)
KD-R992BT/KD-R899BT/KD-R794BT/KD-R792BT
.
or the following button.
/
: volume knob
Turn the volume knob
KD-R891BT
: Press
Press during a call.
3
*
( 3 or 4)
’ operation to select an item (see the
2
*
Default:
XX
MIC GAIN LEVEL –10
to
LEVEL +10(LEVEL –04
): The sensitivity of the
microphone increases as the number increased.
NR LEVEL LEVEL –05
to
LEVEL +05(LEVEL 00
): Adjust the noise
reduction level until the least noise is being heard during a
phone conversation.
ECHO CANCEL LEVEL –05
to
LEVEL +05(LEVEL 00
): Adjust the echo
cancellation delay time until the least echo is being heard
during a phone conversation.
:
Make the settings for receiving a call
Press to enter Bluetooth mode.
1
2 Perform ‘select an item
an item
(
see the following table).
( 3 or 4)
’ operation to select
3 Repeat step 2 until the desired item is selected or
activated.
To return to the previous setting item, press
.
Default:
XX
SETTINGS
AUTO ANSWER
RING COLOR KD-R992BT/KD-R891BT
01 SEC
to
30 SEC
:The unit answers incoming call
automatically in the selected time (in seconds).;
:
COLOR 01
to
COLOR 49(COLOR 08
): Selects the illumination
OFF
:Cancels.
color for the buttons or symbolic button as notification when
there is an incoming call and during a call.;
RING ILLUMI KD-R899BT/KD-R794BT/KD-R792BT
BLINK 01
to
BLINK 05(BLINK 02
OFF
:Cancels.
:
): Selects the blinking
pattern for the buttons as notification when there is an
incoming call.;
OFF
:Cancels.
ENGLISH
15
Page 20
BLUETOOTH®
BATT/SIGNAL*KD-R992BT/KD-R891BT
*
Functionality depends on the type of the phone used.
AUTO
:Shows the strength of the battery and signal when the unit detects
a Bluetooth device and the Bluetooth device is connected.;
:
OFF
:Cancels.
Make a call
You can make a call from the call history, phonebook, or dialing the
number. Call by voice is also possible if your mobile phone has the
feature.
1 Press to enter Bluetooth mode.
“(First device name)” appears.
• If two Bluetooth phones are connected, press again to switch
to another phone.
“(Second device name)” appears.
2 Perform ‘select an item
(
see the following table).
( 3 or 4)
’ operation to select an item
3 Repeat step 2 until the desired item is selected/activated or follow
the instructions stated on the selected item.
To return to the previous setting item, press
RECENT CALL
(Applicable only if the phone supports PBAP.)
1
Press the following button to select a name or a phone number.
KD-R992BT/KD-R899BT
KD-R794BT/KD-R792BT
KD-R891BT:
• “<” indicates call received, “>“ indicates call made, “M” indicates
call missed.
• “NO HISTORY” appears if there is no recorded call history or call
number.
2
Press the following to call.
KD-R992BT/KD-R899BT
KD-R794BT/KD-R792BT
KD-R891BT:
/
: volume knob
/
: volume knob
.
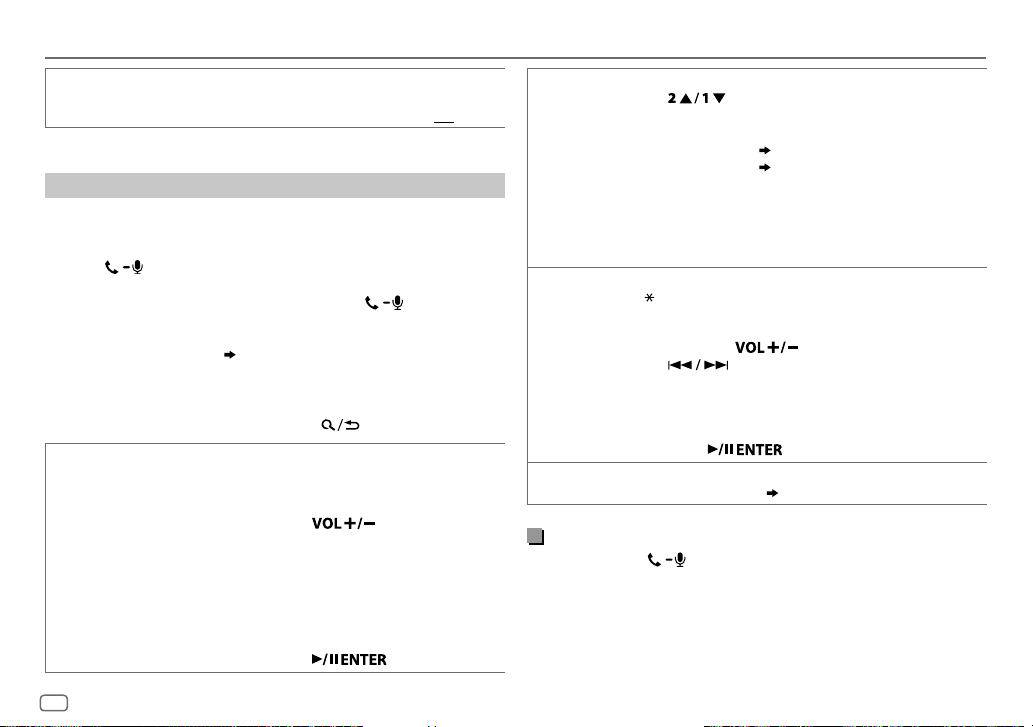
PHONEBOOK
DIAL NUMBER1 Perform the following operation to select a number (0 to 9) or character
VOICE
(Applicable only if the phone supports PBAP.)
1
Press to select the desired letter (A to Z, 0to9, and
OTHERS).
• “OTHERS” appears if the first character is other than Ato Z, 0 to 9.
2
Perform ‘select an item
3
Perform ‘select an item
number and to call.
•
The phonebook of the connected phone is automatically transferred to
the unit when pairing.
•
This unit can display only non-accent letters. (Accent letters such as “Ú”
is showns as “U”.)
(
, #, +).
KD-R992BT/KD-R899BT/KD-R794BT/KD-R792BT:
Turn the volume knob
KD-R891BT: Press
2
Press to move the entry position.
Repeat steps
3
Press the following to call.
KD-R992BT/KD-R899BT/KD-R794BT/KD-R792BT:
volume knob
KD-R891BT:
Speak the name of the contact you want to call or the voice command to
control the phone functions.
( 3 or 4)
’ operation to select a name.
( 3 or 4)
’ operation to select a phone
1
and 2 until you finish entering the phone number.
( Make a call using voice recognition)
Make a call using voice recognition
Press and hold to activate the connected phone.
1
2 Speak the name of the contact you want to call or the voice
command to control the phone functions.
• Supported Voice Recognition features vary for each phone. Refer to the
instruction manual of the connected phone for details.
• This unit also supports the intelligent personal assistant function of
iPhone.
16
ENGLISH
Page 21
BLUETOOTH®
Settings in memory
Store a contact in memory
You can store up to 6 contacts into the number buttons (1 to 6).
1 Press to enter Bluetooth mode.
2 Perform ‘select an item
[RECENT CALL], [PHONEBOOK]
3 Perform ‘select an item
contact or enter a phone number.
If a contact is selected, press the following to show the phone
number.
KD-R992BT/KD-R899BT/KD-R794BT/KD-R792BT
KD-R891BT
:
( 3 or 4)
’ operation to select
or
[DIAL NUMBER]
( 3 or 4)
’ operation to select a
.
: volume knob
4 Press and hold one of the number buttons (1 to 6).
“MEMORY P(selected preset number)” appears when the contact is
stored.
To erase a contact from the preset memory, select
and store a blank number.
[DIAL NUMBER]
in step 2
Make a call from memory
Press to enter Bluetooth mode.
1
2 Press one of the number buttons (1 to 6).
3 Press the following to call.
KD-R992BT/KD-R899BT/KD-R794BT/KD-R792BT
KD-R891BT
:
“NO PRESET” appears if there is no contact stored.
: volume knob
Bluetooth mode settings
1
Press and hold .
2 Perform ‘select an item
(
see the following table).
( 3 or 4)
’ operation to select an item
3 Repeat step 2 until the desired item is selected/activated or follow
the instructions stated on the selected item.
4 Press to exit.
To return to the previous setting item, press .
Default:
BT MODE
PHONE SELECT
AUDIO SELECT
DEVICE DELETE1 Perform ‘select an item
PIN CODE EDIT
(0000)
*
You can only connect a maximum of two Bluetooth phones and one Bluetooth audio device
at any time.
* Selects the phone or audio device to connect or disconnect.
“
” appears in front of the device name when connected.
*
“
” appears in front of the current playback audio device.
( 3 or 4)
device to delete.
2
Perform ‘select an item
or
[NO]
.
Changes the PIN code (up to 6 digits).
1
Perform the following operation to select a number.
KD-R992BT/KD-R899BT/KD-R794BT/KD-R792BT:
Turn the volume knob
KD-R891BT: Press
2
Press to move the entry position.
Repeat steps
3
Press the following to confirm.
KD-R992BT/KD-R899BT/KD-R794BT/KD-R792BT:
volume knob
KD-R891BT:
1
and 2 until you finish entering the PIN code.
( 3 or 4)
’ operation to select a
’ operation to select
[YES]
XX
ENGLISH
17
Page 22

BLUETOOTH®
RECONNECT ON
AUTO PAIRING ON
INITIALIZE YES
INFORMATION MYBTNAME
Bluetooth compatibility check mode
You can check the connectivity of the supported profile between the
Bluetooth device and the unit.
• Make sure there is no Bluetooth device paired.
1 Press and hold .
“BLUETOOTH”
PHONE”
2 Search and select “KD-R9 BT”/“KD-R8 BT”/“KD-R7 BT” on the
Bluetooth device within 3minutes.
3 Perform (A), (B) or (C) depending on what appears on the display.
(A) “PAIRING”
passkey appears on the unit and Bluetooth device, then operate
the Bluetooth device to confirm the passkey.
(B) “PAIRING”
(C) “PAIRING”: Operate the Bluetooth device to confirm pairing.
:The unit automatically reconnect when the last connected
Bluetooth device is within range.;
OFF
:Cancels.
:The unit automatically pair supported Bluetooth device (iPhone/
iPod touch/Android device) when it is connected through USB input
terminal.Depending on the operating system of the connected device,
this function may not work. ;
OFF
:Cancels.
:Initializes all the Bluetooth settings (including stored pairing,
phonebook, and etc.).;
NO
:Cancels.
: Displays the unit name (“KD-R9 BT”/
“KD-R8
BT”/“KD-R7 BT”).;
MYADDRESS
: Shows address of this unit.
“CHECK MODE” appears. “SEARCH NOW USING
“PIN IS 0000” scrolls on the display.
“XXXXXX” (6-digit passkey): Ensure that the same
“PIN IS 0000”: Enter “0000” on the Bluetooth device.
After pairing is successful, “PAIRING OK” “[Device Name]” appears and
Bluetooth compatibility check starts.
If “CONNECT NOW USING PHONE” appears, operate the Bluetooth device
to allow phonebook access to continue.
“TESTING” flashes on the display.
The connectivity result flashes on the display.
“PAIRING OK” and/or “HANDS-FREE OK”
and/or “PBAP OK”
1
*
Compatible with Hands-Free Profile (HFP)
2
*
Compatible with Advanced Audio Distribution Profile (A2DP)
3
*
Compatible with Phonebook Access profile (PBAP)
3
*
: Compatible
1
*
and/or “AUD.STREAM OK”
2
*
After 30 seconds, “PAIRING DELETED” appears to indicate that pairing has
been deleted, and the unit exits check mode.
• To cancel, press and hold source button to turn off the power, then turn
on the power again.
18
ENGLISH
Page 23
BLUETOOTH®
BLUETOOTH — Audio
For key layout on the faceplate, see page3 or page4.
While in BT AUDIO source, you can connect to five Bluetooth audio devices and
switch between these five devices.
Audio player via Bluetooth
1
Press source button repeatedly to select BTAUDIO.
• Pressing enters BT AUDIO directly.
2 Operate the Bluetooth audio player to start playback.
To On the faceplate
Playback/pause
Select group or folder Press
Reverse skip/Forward skip Press
Reverse/Fast-forward Press and hold
Repeat play Press
Random play
Select a file from a folder/
list
Switch between connected
Bluetooth audio devices
*
Pressing the “Play” key on the connected device itself also causes switching of sound output from the
device.
Operations and display indications may differ according to their availability on the
connected device.
KD-R992BT/KD-R899BT/KD-R794BT/KD-R792BT
Press the volume knob.
KD-R891BT
TRACK REPEAT, ALL REPEAT, REPEAT OFF
Press
GROUP RANDOM, ALL RANDOM, RANDOM OFF
Refer to “Select a file from a folder/list” on page10.
Press 5.
: Press .
.
.
.
repeatedly.
repeatedly.
*
:
Settings to use JVC Remote application
JVC Remote application is designed to control the JVC car
receiver’s operations from the following devices.
KD-R992BT/KD-R899BT/KD-R891BT
KD-R794BT/KD-R792BT
Preparation:
Install the latest version of JVC Remote application on your
device before connecting. For more information, visit <http://
www.jvc.net/cs/car/>.
: Android smartphone (via
: iPhone/iPod (via Bluetooth
or via USB input terminal)
or Android smartphone (via
Bluetooth)
Bluetooth)
1 Press and hold .
2 Perform ‘select an item
select an item.
( 20)
( 3 or 4)
’ operation to
3 Repeat step 2 until the desired item is selected or
activated.
4 Press to exit.
To return to the previous setting item, press .
ENGLISH
19
Page 24
BLUETOOTH®
REMOTE APP
SELECT
IOS YES
ANDROID YES
ANDROID
LIST
STATUS
*
Displayed only when
Select the device (IOS or ANDROID) to use the application.
:Selects iPhone/iPod to use the application via Bluetooth or connected via
USB input terminal.;
If IOS is selected, select iPod BT source (or iPod USB if your iPhone/iPod is
connected via USB input terminal) to activate the application.
•
The connectivity of the application will be interrupted or disconnected if:
– You change from iPod BT source to any playback source connected via the
– You change from iPod USB source to iPod BT source.
:Selects Android smartphone to use the application via Bluetooth.;
NO
:Cancels.
Selects the Android smartphone to use from the list.
*
Shows the status of the selected device.
IOS CONNECTED
connected via Bluetooth or USB input terminal.
IOS NOT CONNECTED
ANDROID CONNECTED
smartphone connected via Bluetooth.
ANDROID NOT CONNECTED
application.
NO
:Cancels.
USB input terminal.
: You are able to use the application using the iPhone/iPod
: No IOS device is connected to use the application.
: You are able to use the application using the Android
: No Android device is connected to use the
[ANDROID]
of
[SELECT]
is set to
[YES]
.
Default:
XX
Listen to iPhone/iPod via Bluetooth
KD-R891BT)
You can listen to the songs on the iPhone/iPod via Bluetooth on this
unit.
Press source button repeatedly to select iPodBT.
• You can operate the iPod/iPhone in the same way as iPod/iPhone via
USB input terminal.
• If you plug in an iPhone/iPod to the USB input terminal while listening
to iPodBT source, the source automatically change to iPodUSB. Press
source button to select iPodBT if the device is still connected via
Bluetooth.
( 8)
(for KD-R992BT/KD-R899BT/
Internet radio via Bluetooth
You can listen to Spotify on the iPhone/iPod touch/Android device via
Bluetooth on this unit.
• Make sure the USB input terminal is not connected to any device.
Listen to Spotify
Preparation:
Select
[ON]
for
[SPOTIFY SRC]
in
[SOURCE SELECT]. ( 5)
1 Open the Spotify application on your device.
2 Connect your device via Bluetooth connection.
( 13)
3 Press source button repeatedly to select SPOTIFY (for iPhone/iPod)
or SPOTIFY BT (for Android device).
The source switches and broadcast starts automatically.
• You can operate Spotify in the same way as Spotify via USB input
terminal.
( 11)
20
ENGLISH
Page 25
AUDIO SETTINGS
For key layout on the faceplate, see page3 or page4.
1 Press and hold .
2 Perform ‘select an item
(
see the following table).
3 Repeat step 2 until the desired item is selected/activated or follow
the instructions stated on the selected item.
4 Press to exit.
To return to the previous setting item, press .
EQ SETTING
PRESET EQ
Select a preset equalizer suitable to the music genre.
•
Select
FLAT/DRVN 3/DRVN 2/DRVN 1/HARD ROCK/HIP HOP/JAZZ/POP/R&B
USER/CLASSICAL
Drive equalizer (
the audio signal to reduce the noise heard from outside the car or running
noise of the tyres
EASY EQ
PRO EQ
Adjust your own sound settings.
•
The settings are stored to
•
The settings made may affect the current settings of
SUB.W SP
*
SUB.W
BASS
:
MID
:
TRE
:
Adjust your own sound settings.
•
The settings are stored to
•
The settings made may affect the current settings of
( 3 or 4)
[USER]
to use the settings made in
DRVN 3/DRVN 2/DRVN 1)
1*2
*
: 00to
1*3
:
–50
LVL–09
LVL–09
LVL–09
’ operation to select an item
[EASY EQ]
or
boosts specific frequencies in
[USER]
.
[PRO EQ]
+06
(Default:
to
+10
to
LVL+09
to
LVL+09
to
LVL+09
[USER]
.
[EASY EQ]
Default:
[PRO EQ]
+03
00
LVL 00
LVL 00
LVL 00
XX
.
/
.
)
.
62.5HZ
LEVEL –09
to
LEVEL +09 (LEVEL 00)
: Adjusts the level to memorize for each source.
(Before making an adjustment, select the source you want to adjust.)
ON
:Turns on the extended bass.;
OFF
:Cancels.
100HZ/160HZ/250HZ/400HZ/630HZ/1KHZ/1.6KHZ/2.5KHZ/4KHZ/6.3KHZ/10KHZ
16kHZ
LEVEL –09
to
LEVEL +09 (LEVEL 00):
Adjusts the level to memorize for each source.
(Before making an adjustment, select the source you want to adjust.)
Q FACTOR 1.35/1.50/2.00
:Adjust the quality factor.
AUDIO CONTROL
BASS BOOST
LOUDNESS LEVEL 01/LEVEL 02
SUB.W LEVEL
LEVEL +01
OFF
:Cancels.
balanced sound at low volume.;
1
*
SPK-OUT
2
*
to
LEVEL +05
: Selects your preferred bass boost level.;
:Boosts low or high frequencies to produce a well-
OFF
:Cancels.
(Not applicable when 3-way crossover is selected.)
SUB.W 00
to
SUB.W +06(SUB.W +03
):Adjusts the
output level of the subwoofer connected via speaker
lead.
( 35)
3
*
PRE-OUT
SUB.W –50
to
SUB.W +10(SUB.W 00
):Adjusts
the output level of the subwoofer connected to the
lineout terminals (SW or REAR/SW) through an external
amplifier.
( 35)
SUBWOOFER
3
*
SET
FADER
ON
: Turns on the subwoofer output.;
OFF
:Cancels.
(Not applicable when 3-way crossover is selected.)
POSITION R15
to
POSITION F15(POSITION 00
):Adjusts the front and
rear speaker output balance.
1
2
3
*
*
*
,
,
:
( 22)
/
ENGLISH
21
Page 26
AUDIO SETTINGS
4
*
BALANCE
POSITION L15
right speaker output balance.
VOLUMEADJUST LEVEL –15
of each source (compared to the FM volume level). Before adjustment,
select the source you want to adjust.
AMPGAIN LOWPOWER
maximum power of each speaker is less than 50W to prevent damaging
the speakers.);
SPK/PREOUT
(Not applicable when 3-way crossover is selected.)
Depending on the speaker connection method, select the appropriate
setting to get the desired output.
SPEAKER SIZE
Depending on the crossover type you have selected (
TYPE]
X ' OVER
DTA SETTINGS
CAR SETTINGS
( 23, Crossover settings)
By default, 2-way crossover type is selected.
For settings,
X ' OVER TYPE Caution
avoid the sudden increase or decrease of the output level.
2-WAY
(Displayed only when
YES
3-WAY
(Displayed only when
YES
1
*
Displayed only when
2
*
For 2-way crossover: Displayed only when
( 23)
3
*
For 2-way crossover: Displayed only when
[SUB.W/SUB.W]. ( 23)
4
*
This adjustment will not affect the subwoofer output.
to
POSITION R15(POSITION 00
to
LEVEL +06(LEVEL 00
:Limits the maximum volume level to 25. (Select if the
HIGH POWER
), 2-way crossover or 3-way crossover setting items will be shown.
25, Digital Time Alignment settings
: Adjust the volume before changing the
[3-WAY]
:Selects two way crossover type.; NO:Cancels.
[2-WAY]
:Selects three way crossover type.; NO:Cancels.
[SUBWOOFER SET]
is set to
[SPK/PRE OUT]
[SPK/PRE OUT]
):Adjusts the left and
):Preset the initial volume level
:The maximum volume level is 35.
( Speaker output settings)
[X ' OVER
.
[X ' OVER TYPE]
is selected.)
is selected.)
[ON]. ( 21)
is set to
[SUB.W/SUB.W]
is set to
[REAR/SUB.W]
SOUND EFFECT
SPACE ENHANCE
SND RESPONSE LEVEL1/LEVEL2/LEVEL3
SOUND LIFT LOW/MIDDLE/HIGH
VOL LINK EQ ON
K2 TECHNOLOGY
Speaker output settings
(Not applicable for TUNER source.)
SMALL/MEDIUM/LARGE
OFF
:Cancels.
: Virtually enhances the sound space.;
: Virtually makes the sound more realistic.;
OFF
:Cancels.
: Virtually adjust the sound position heard from
the speakers.;
OFF
:Cancels.
:Boosts the frequency to reduce the noise heard from outside the
car or running noise of the tyres.;
OFF
:Cancels.
(Not applicable for TUNER source and AUX source.)
ON
:Improve the sound quality of compressed music.;
OFF
[SPK/PRE OUT]
:Cancels.
(Applicable only if [X ‘ OVER TYPE ] is set to [2-WAY])
Select the output setting for the speakers
speaker connection method.
to
[SPK/PRE OUT]
, based on the
Connection via lineout terminals
For connections through an external amplifier.
( 35)
KD-R992BT:
Setting on
[SPK/PRE OUT]
.
or
REAR/REAR
REAR/SUB.W
SUB.W/SUB.W
(default) Front speakers output Rear speakers output Subwoofer output
Front speakers output L (left): Subwoofer
Audio signal through lineout terminal
FRONT REAR SW
( Not available ) ( Not available ) ( Not available )
Subwoofer output
output
R (right): (Mute)
22
ENGLISH
Page 27
AUDIO SETTINGS
KD-R899BT/KD-R891BT:
Setting on
[SPK/PRE OUT]
REAR/REAR
REAR/SUB.W
SUB.W/SUB.W
KD-R794BT/KD-R792BT:
Setting on
[SPK/PRE OUT]
REAR/REAR
REAR/SUB.W
SUB.W/SUB.W
Front speakers output Rear speakers output
(default) Front speakers output Subwoofer output
Front speakers output Subwoofer output
(default) Subwoofer output
Connection via speaker leads
For connections without using an external amplifier. However, with this
settings you can also enjoy the subwoofer output.
Setting on
[SPK/PRE OUT]
REAR/REAR
REAR/SUB.W
SUB.W/SUB.W
If
[SUB.W/SUB.W]
–
[120HZ]
( 24)
–
[POSITION R02]
R15]
to
is selected:
is selected in
[POSITION 00]. ( 21)
[SUBWOOFER LPF]
is selected in
Audio signal through lineout terminal
FRONT REAR/SW
Audio signal through lineout terminal
REAR/SW
Rear speakers output
Subwoofer output
( 35)
Audio signal through rear speaker lead
L (left) R (right)
Rear speakers output Rear speakers output
Rear speakers output Rear speakers output
Subwoofer output (Mute)
and
[FADER]
and selectable range is
[THROUGH]
is not available.
[POSITION
Crossover settings
Below are the available setting items for 2-way crossover and 3-way
crossover.
Caution
Select a crossover type according to how the speakers are connected.
( 35)
If you select a wrong type:
• The speakers may damage.
• The output sound level may be extremely high or low.
SPEAKER SIZE
Selects according to the connected speaker size for optimum
performance.
•
The frequency and slope settings are automatically set for the crossover
of the selected speaker.
•
When 2-way crossover is selected, if
[FRONT], [REAR]
the selected speaker is not available.
•
When 3-way crossover is selected, if
[SPEAKER SIZE]
X ‘ OVER
• [FRQ]/[F-HPF FRQ]/[R-HPF FRQ]/[SW LPF FRQ]/[HPF FRQ]/[LPF FRQ]
crossover frequency for the selected speakers (high pass filter or low
pass filter).
If
[THROUGH]
• [SLOPE]/[F-HPF SLOPE]/[R-HPF SLOPE]/[SW LPF SLOPE]/[HPF SLOPE]/[LPF SLOPE]:
Adjusts the crossover slope.
Selectable only if a setting other than
crossover frequency.
• [SW LPF PHASE]/[PHASE]:
line with the other speaker output.
•
[GAIN LEFT]/[GAIN RIGHT]/[F-HPF GAIN]/[R-HPF GAIN]/[SW LPF GAIN]/[GAIN]:
Adjusts the output volume of the selected speaker.
and
[SUBWOOFER]
, the
[X ‘ OVER]
setting of
(crossover)
is selected, all signals are sent to the selected speakers.
Selects the phase of the speaker output to be in
[NONE]
for
[SPEAKER SIZE]
[NONE]
is selected for
is selected for
[WOOFER]
[THROUGH]
[TWEETER]
, the
[X ‘ OVER]
is not available.
[WOOFER]
: Adjusts the
is selected for the
of
setting of
of
ENGLISH
23
Page 28
AUDIO SETTINGS
2-way crossover setting items
SPEAKER SIZE
FRONT SIZE
8CM/10CM/12CM/13CM/16CM/17CM/18CM
4×6/5×7/6×8/6×9/7×10
1
*
REAR
SUBWOOFER
TWEETER
8CM/10CM/12CM/13CM/16CM/17CM/18CM/4×6/5×7/6×8
6×9/7×10/NONE
3
*2*
16CM/20CM/25CM/30CM/38CM OVER/NONE
SMALL/MIDDLE/LARGE/NONE
(not connected)
X ' OVER
TWEETER FRQ
1KHZ/1.6KHZ/2.5KHZ/4KHZ/5KHZ/6.3KHZ
8KHZ/10KHZ/12.5KHZ
GAIN LEFT
GAIN RIGHT
FRONT HPF F-HPF FRQ
–08DB
–08DB
30HZ/40HZ/50HZ/60HZ/70HZ/80HZ/90HZ
100HZ/120HZ/150HZ/180HZ/220HZ/250HZ
THROUGH
–06DB/–12DB/–18DB/–24DB
–08DB
REAR HPF
F-HPF SLOPE
F-HPF GAIN
1
*
R-HPF FRQ 30HZ/40HZ/50HZ/60HZ/70HZ/80HZ/90HZ
100HZ/120HZ/150HZ/180HZ/220HZ/250HZ
THROUGH
–06DB/–12DB/–18DB/–24DB
–08DB
100HZ/120HZ/150HZ/180HZ/220HZ/250HZ
SUBWOOFER
3
*2*
LPF
R-HPF SLOPE
R-HPF GAIN
SW LPF FRQ 30HZ/40HZ/50HZ/60HZ/70HZ/80HZ/90HZ
THROUGH
SW LPF SLOPE
SW LPF PHASE
–06DB/–12DB/–18DB/–24DB
REVERSE
SW LPF GAIN –08DB
24
ENGLISH
to
00DB
to
00DB
to
00DB
to
00DB
(180°)/
to
00DB
NORMAL
(not connected)
(not connected)
(0°)
3-way crossover setting items
SPEAKER SIZE
/
TWEETER
MID RANGE
WOOFER
/
X ' OVER
SMALL/MIDDLE/LARGE
8CM/10CM/12CM/13CM/16CM/17CM/18CM/4×6/5×7/6×8/6×9
3
*
16CM/20CM/25CM/30CM/38CM OVER/NONE
TWEETER HPF FRQ
SLOPE
/
PHASE
GAIN –08DB
MID RANGE HPF FRQ
/
/
HPF SLOPE
LPF FRQ
LPF SLOPE
/
/
WOOFER
PHASE
GAIN –08DB
3
*
LPF FRQ 30HZ/40HZ/50HZ/60HZ/70HZ/80HZ/90HZ/100HZ
SLOPE
/
/
1
*
Displayed only when
( 22, 23)
2
*
Displayed only when
( 22, 23)
3
*
Displayed only when
PHASE
GAIN –08DB
1KHZ/1.6KHZ/2.5KHZ/4KHZ/5KHZ/6.3KHZ/8KHZ
10KHZ/12.5KHZ
–06DB/–12DB
REVERSE
30HZ/40HZ/50HZ/60HZ/70HZ/80HZ/90HZ/100HZ
120HZ/150HZ/180HZ/220HZ/250HZ/THROUGH
–06DB/–12DB
1KHZ/1.6KHZ/2.5KHZ/4KHZ/5KHZ/6.3KHZ/8KHZ
10KHZ/12.5KHZ/THROUGH
–06DB/–12DB
REVERSE
120HZ/150HZ/180HZ/220HZ/250HZ/THROUGH
–06DB/–12DB
REVERSE
[SPK/PRE OUT]
[SPK/PRE OUT]
[SUBWOOFER SET]
to
to
to
is set to
is set to
is set to
(180°)/
NORMAL
00DB
(180°)/
NORMAL
00DB
(180°)/
NORMAL
00DB
[REAR/REAR]
[REAR/SUB.W]
[ON]. ( 21)
(not connected)
(0°)
(0°)
(0°)
or
[REAR/SUB.W]
or
[SUB.W/SUB.W]
/
/
/
/
.
.
Page 29
AUDIO SETTINGS
Digital Time Alignment settings
Digital Time Alignment sets the delay time of the speaker output to
create a more suitable environment for your vehicle.
• For more information,
[DTA SETTINGS]
.
Determining the value for [DISTANCE] and [GAIN] of
DTA SETTINGS
POSITION
Selects your listening position (reference point).
ALL
:Not compensating;
FRONT LEFT
•
[FRONT ALL]
FRONT RIGHT:
:Front left seat;
is displayed only when
FRONT ALL
Front right seat;
:Front seat
[X ' OVER TYPE]
is set to
[2-WAY]. ( 22)
1
*
DISTANCE
GAIN
1
*
0CM
–8DB
to
610CM
:Fine adjust the distance to compensate.
to
0DB
:Fine adjust the output volume of the selected
speaker.
DTA RESET YES
CAR SETTINGS
CAR TYPE COMPACT/FULL SIZE CAR/WAGON/MINIVAN/SUV
:Resets the settings (
[POSITION]
to default.; NO:Cancels.
[DISTANCE]
and
[GAIN]
) of the selected
Identify your car type and rear speaker location in order to make the
adjustment for
[DTA SETTINGS]
.
/
MINIVAN(LONG)
:Selects the type of vehicle.;
OFF:
Not
compensating.
2
R-SP LOCATION
*
Selects the location of the rear speakers in your vehicle to calculate
the furthest distance from the listening position selected (reference
point).
•
DOOR/REAR DECK
as
[OFF], [COMPACT], [FULL SIZE CAR], [WAGON]
•
2ND ROW/3RD ROW
selected as
:Selectable only when
[MINIVAN]
:Selectable only when
or
[MINIVAN(LONG)]
[CAR TYPE]
[CAR TYPE]
.
is selected
or
[SUV]
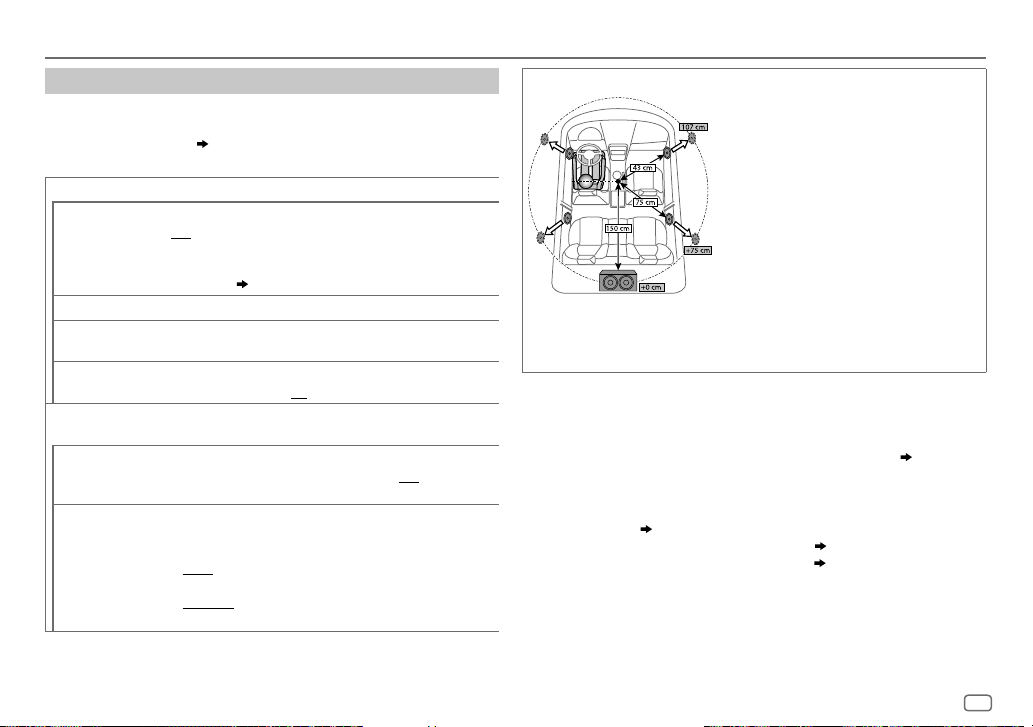
Determining the value for [DISTANCE] and [GAIN] of [DTA SETTINGS]
If you specify the distance from the center of the
currently set listening position to every speaker,
the delay time will be automatically computed
and set.
1
Determine the center of the currently set
listening position as the reference point.
2
Measure the distances from the reference
point to the speakers.
3
Calculate the differences between the distance
of the furthest speaker (rear speaker) and
other speakers.
4
Set the
[DISTANCE]
calculated in step 3 for
individual speakers.
5
Adjust
[GAIN]
for individual speakers.
Example: When
[FRONT ALL]
is selected as the
listening position
1
*
Before making an adjustment, select the speaker:
When 2-way crossover is selected:
FRONT LEFT/FRONT RIGHT/REAR LEFT/REAR RIGHT/SUBWOOFER:
–
[REAR LEFT], [REAR RIGHT]
[NONE]
is selected for
[REAR]
and
[SUBWOOFER]
and
[SUBWOOFER]
is selectable only if a setting other than
of
[SPEAKER SIZE]. ( 24)
When 3-way crossover is selected:
TWEETER LEFT/TWEETER RIGHT/MID LEFT/MID RIGHT/WOOFER:
–
[WOOFER]
[SPEAKER SIZE]. ( 24)
2
*
Displayed only when
than
[NONE]
is selectable only if a setting other than
[X ' OVER TYPE ]
is selected for [
is set to
REAR
] of
[SPEAKER SIZE]. ( 24)
[NONE]
[2-WAY] ( 22)
is selected for
and if a setting other
[WOOFER]
of
.
is
ENGLISH
25
Page 30
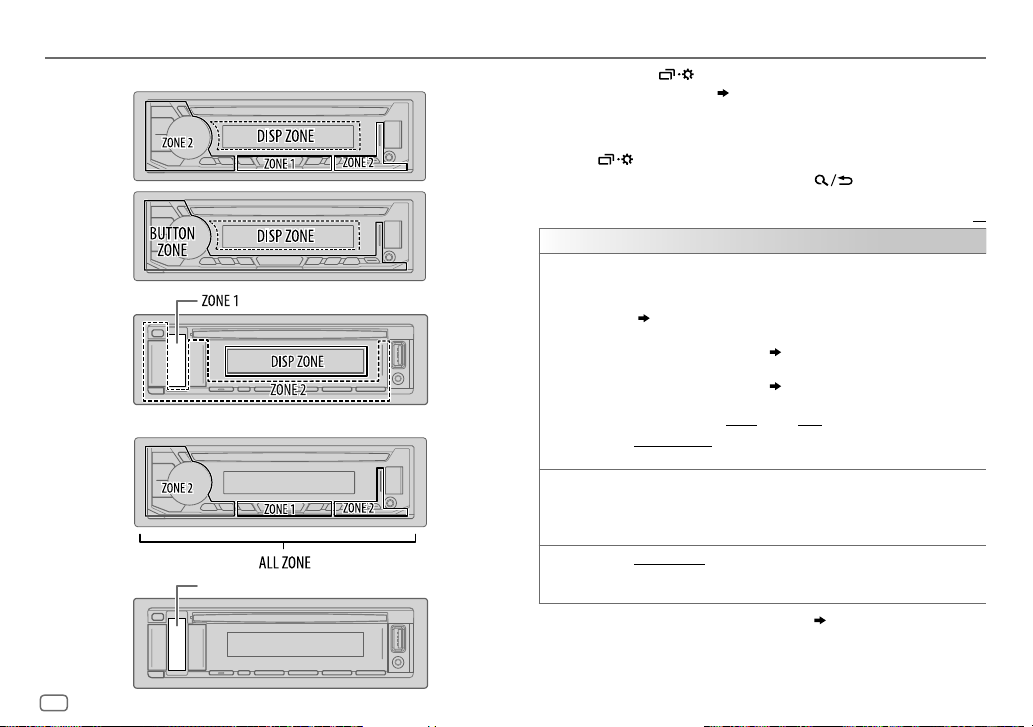
DISPLAY SETTINGS
Zone identification for brightness setting
KD-R992BT
/
KD-R899BT
KD-R794BT
/
KD-R792BT
KD-R891BT
Zone identification for color setting
KD-R992BT
KD-R891BT
(Symbolic button)
Symbolic button
1 Press and hold .
2 Perform ‘select an item
item (see the following table).
( 3 or 4)
’ operation to select an
3 Repeat step 2 until the desired item is selected/activated or
follow the instructions stated on the selected item.
4 Press to exit.
To return to the previous setting item, press .
Default:
DISPLAY
DIMMER
BRIGHTNESS
TEXT SCROLL
1
*
The illumination control wire connection is required.
2
*
Some characters or symbols will not be shown correctly (or will be blanked).
Dim the illumination.
OFF
:Dimmer is turned off. Brightness changes to
ON
:Dimmer is turned on. Brightness changes to
(
[BRIGHTNESS]
DIMMER TIME
1
Perform ‘select an item
[ON]
2
Perform ‘select an item
[OFF]
(Default:
DIMMER AUTO
off or on the car headlights.
Set the brightness for day and night separately.
1 DAY/NIGHT
2
Select a zone. (See the illustration.)
3 LEVEL 00
2
*
SCROLL ONCE
SCROLL AUTO
SCROLL OFF
)
:Set the dimmer on and off time.
time.
time.
[ON]: 18:00
to
:Scrolls the display information once.;
:Repeats scrolling at 5-second intervals.;
:Cancels.
( 3 or 4)
( 3 or 4)
;
[OFF]: 6:00
:Dimmer turns on and off automatically when you turn
1
*
:Select day or night.
LEVEL 31
: Set the brightness level.
[DAY]
[NIGHT]
’ operation to adjust the
’ operation to adjust the
)
( 35)
setting.
setting.
XX
26
ENGLISH
Page 31

DISPLAY SETTINGS
COLOR
(for
KD-R992BT
)
PRESET
DAY COLOR
NIGHT COLOR
COLOR GUIDE
3
*
If one of these color pattern is selected, the
change to the default colors.
Select illumination colors for the buttons on different zones separately.
1
Select a zone. (See the illustration on page26.)
2
Select a color for the selected zone.
•
COLOR 01
•
USER
: The color you have created for
[NIGHT COLOR]
•
COLOR FLOW01
speeds.
•
CRYSTAL/FLOWER/FOREST/GRADATION/OCEAN/SUNSET
RELAX
: The selected color pattern is shown.
when
[ALL ZONE]
Store your own day and night illumination colors for different zones.
1
Select a zone. (See the illustration on page26.)
2 RED/GREEN/BLUE
3 00
to 31:Select the level.
Repeat steps
•
•
2
Your setting is stored to
[NIGHT COLOR]
car’s headlight.
ON
:Changes the button illumination when settings are performed on
menu and list search.;
to
COLOR 49
is shown.
to
COLOR FLOW03
is selected in step
1.)
:Select a primary color.
and 3 for all the primary colors.
[USER]
in
or
[DAY COLOR]
OFF
[PRESET]
is changed by turning on or off your
:Cancels.
[ZONE 1]
and
[ZONE 2]
[DAY COLOR]
or
: Color changes at different
3
*
(Selectable only
.
illumination colors will
COLOR
(for
KD-R891BT:
PRESET
Symbolic button only)
Select an illumination color for the symbolic button. (See the illustration on
page26.)
•
COLOR 01
to
•
USER
COLOR 49
: The color you have created for
[DAY COLOR]
or
[NIGHT COLOR]
is
shown.
•
COLOR FLOW01
•
Preset color:
/
DAY COLOR
RELAX
Store your own day and night illumination colors for the symbolic button.
1 RED/GREEN/BLUE
2 00
to 31:Select the level.
NIGHT COLOR
Repeat steps
•
Your setting is stored to
•
[NIGHT COLOR]
to
COLOR FLOW03
: Color changes at different speeds.
CRYSTAL, FLOWER, FOREST, GRADATION, OCEAN, SUNSET
:Select a primary color.
1
and 2 for all primary colors.
[USER]
in
[PRESET]
or
[DAY COLOR]
.
is changed by turning on or off your car’s
,
headlight.
MENU COLOR
ON
: The color of symbolic button illumination changes to white color when
in menu mode or when selecting a music file from a folder/list.;
OFF
:Cancels.
ENGLISH
27
Page 32

REFERENCES
Maintenance
Cleaning the unit
Wipe off dirt on the faceplate with a dry silicone or soft cloth.
Cleaning the connector
Detach the faceplate and clean the connector
gently with a cotton swab, being careful not to
damage the connector.
Handling discs:
•
Do not touch the recording surface of the disc.
•
Do not stick tape etc. on the disc, or use a disc with tape stuck on it.
•
Do not use any accessories for the disc.
•
Clean from the center of the disc and move outward.
•
Clean the disc with a dry silicone or soft cloth. Do not use any solvents.
•
When removing discs from this unit, pull them out horizontally.
•
Remove burrs from the center hole and disc edge before inserting a disc.
More information
For: – Latest firmware updates and latest compatible item list
– JVC original application
– Any other latest information
Visit <http://www.jvc.net/cs/car/>.
General
•
This unit can only play the following CDs:
•
DualDisc playback:
Disc Digital Audio” standard. Therefore, the use of Non-DVD side of a DualDisc on this product
cannot be recommended.
•
For detailed information and notes about the playable audio files, visit
<http://www.jvc.net/cs/car/>.
The Non-DVD side of a “DualDisc” does not comply with the “Compact
Connector (on the reverse
side of the faceplate)
Playable files
•
Playable audio file:
For disc:
KD-R992BT/KD-R899BT/KD-R891BT
KD-R794BT/KD-R792BT
For USB mass storage class device:
KD-R992BT/KD-R899BT/KD-R891BT
AAC(.m4a), WAV (.wav), FLAC (.flac)
KD-R794BT/KD-R792BT
FLAC (.flac)
•
Playable disc media: CD-R/CD-RW/CD-ROM
•
Playable disc file format: ISO 9660 Level 1/2, Joliet, Long file name
•
Playable USB device file system: FAT12, FAT16, FAT32
Even when audio files comply with the standards listed above, playback may be impossible
depending on the types or conditions of media or device.
The AAC (.m4a) file in a CD encoded by iTunes cannot be played on this unit.
Unplayable discs
•
Discs that are not round.
•
Discs with coloring on the recording surface or discs that are dirty.
•
Recordable/ReWritable discs that have not been finalized.
•
8 cm CD. Attempting to insert using an adapter may cause malfunction.
About USB devices
•
You cannot connect a USB device via a USB hub.
•
Connecting a cable whose total length is longer than 5m may result in abnormal playback.
•
This unit cannot recognize a USB device whose rating is other than 5V and exceeds 1.5A.
About iPod/iPhone (except for KD-R794BT/KD-R792BT)
•
Via USB input terminal:
Made for
– iPod touch (5th and 6th generation)
– iPod nano (7th generation)
– iPhone 4S, 5, 5S, 5C, 6, 6 Plus, 6S, 6S Plus, SE, 7, 7 Plus
: MP3 (.mp3), WMA (.wma)
: MP3 (.mp3), WMA (.wma), WAV (.wav),
: MP3 (.mp3), WMA (.wma), AAC(.aac)
: MP3 (.mp3), WMA (.wma), AAC(.aac),
28
ENGLISH
Page 33

REFERENCES
•
Via Bluetooth:
Made for
– iPod touch (5th and 6th generation)
– iPhone 4S, 5, 5S, 5C, 6, 6 Plus, 6S, 6S Plus, SE, 7, 7 Plus
•
It is not possible to browse video files on the “Videos” menu in
•
The song order displayed on the selection menu of this unit may differ from that of the iPod/
iPhone.
•
Depending on the version of the operating system of the iPod/iPhone, some functions may
not operate on this unit.
[HEAD MODE]
.
Available Cyrillic letters
Available characters
Display indications
About Android device
•
This unit supports Android OS 4.1 and above.
•
Some Android devices (with OS4.1 and above) may not fully support Android Open Accessory
(AOA)2.0.
•
If the Android device supports both mass storage class device and AOA2.0, this unit always
playback via AOA2.0 as priority.
About Spotify
•
Spotify application supports:
– iPhone 4S, 5, 5S, 5C, 6, 6 Plus, 6S, 6S Plus, SE, 7, 7 Plus (iOS 8 or above)
– iPod touch (5th and 6th generation)
– Android OS 4.0.3 or above
•
Spotify is a third party service, therefore the specifications are subject to change without
prior notice. Accordingly, compatibility may be impaired or some or all of the services may
become unavailable.
•
Some functions of Spotify cannot be operated from this unit.
•
For issues using the application, please contact Spotify at <www.spotify.com>.
About Bluetooth
•
Depending on the Bluetooth version of the device, some Bluetooth devices may not be able
to connect to this unit.
•
This unit may not work with some Bluetooth devices.
•
Signal conditions vary, depending on the surroundings.
Change the display information
Each time you press , the display information changes.
•
If the information is unavailable or not recorded, “NO TEXT”, “NO NAME”, or other
information (eg. station name) appears or display will be blank.
Source name Display information (for KD-R992BT/KD-R891BT)
1
FM
or
AM
Frequency (Date/Clock)
synchronisation
*
Frequency (Date) with music
2
*
(back to the beginning)
(For FM Radio Data System stations only)
Station name (PS)/Program type (PTY) (Date/Clock)
(Date/Clock)
Song title (Date/Clock)
1
*
Radiotext+ (Radiotext+) Song title (Artist)
1
*
Frequency (Date/Clock)
(PS)/Program type (PTY) (Date) with music synchronisation
to the beginning)
CD
or
USB (For CD-DA)
Track title (Artist) Track title (Disc name) Track title (Date/
1
*
Clock)
Playing time (Date/Clock)
music synchronisation
2
*
(backtothebeginning)
1
*
Track title (Artist) with
(For MP3/WMA/AAC/WAV/FLAC files)
Song title (Artist) Song title (Album name) Song title (Date/
1
*
Clock)
File name (Folder name) File name (Date/Clock)
Playing time (Date/Clock)
synchronisation
1
2
*
*
,
:
( 30)
2
*
1
*
Song title (Artist) with music
(backtothebeginning)
ENGLISH
1
*
Radiotext
1
*
Station name
2
*
(back
1
*
29
Page 34

REFERENCES
Source name Display information (for KD-R992BT/KD-R891BT)
iPod USB/iPod BT
ANDROID
SPOTIFY/SPOTIFY BT
or
When
[HEAD MODE]/[AUTO MODE]
Song title (Artist)
*
Clock)
music synchronisation
Context title (Date/Clock)
(Album name)
*
Clock)
is selected
1
1
Song title (Album name) Song title (Date/
Playing time (Date/Clock)
2
*
(backtothebeginning)
1
*
Song title (Artist) Song title
Song title (Date/Clock)
Context title (Date) with music synchronisation
( 9)
1
*
Song title (Artist) with
1
*
Playing Time (Date/
(back to the beginning)
BT AUDIO
AUX
Song title (Artist) Song title (Album name) Song title (Date/
1
*
Clock)
Playing time (Date/Clock)
music synchronisation
AUX (Date/Clock)
*
2
*
(back to the beginning)
1
AUX (Date) with music synchronisation
1
*
Song title (Artist) with
(back to the beginning)
1
*
Battery and signal strength of the Bluetooth device will be shown if
to
[AUTO]. ( 16)
2
*
KD-R992BT
KD-R891BT
: The illumination color of the buttons change and synchronise with the music.
: The illumination color of the symbolic button changes and synchronises with
[BATT/SIGNAL]
the music.
Source name Display information (for KD-R899BT/KD-R794BT/KD-R792BT)
FM
or
:
AM
Frequency Clock Frequency with music synchronisation* (back
to the beginning)
(For FM Radio Data System stations only)
Station name (PS)/Program type (PTY) Radiotext Radiotext+
Radiotext+ title/Radio text+ artist
2
*
CD
or
USB (For CD-DA)
name (PS)/Program type (PTY) with music synchronisation*
to the beginning)
Frequency Clock Station
(back
Disc title/Artist Track title/Artist Playing time Clock
Disc title/Artist with music synchronisation*
2
*
(For MP3/WMA/AAC/WAV/FLAC files)
Song title/Artist Album name/Artist Folder name
(backtothebeginning))
File name Playing time Clock Song title/Artist with music
is set
iPod USB/iPod BT
or
ANDROID
synchronisation*
When
[HEAD MODE]/[AUTO MODE]
Song title/Artist
Clock
(backtothebeginning)
is selected
( 9)
Album name/Artist Playing time
Song title/Artist with music synchronisation*
:
(backtothebeginning)
SPOTIFY/
SPOTIFY BT
Context title Song title Artist name Album name Playing
Time
Clock Context title with music synchronisation* (back to
the beginning)
BT AUDIO
Song title/Artist Album name/Artist Playing time Clock
Song title/Artist with music synchronisation* (back to the
beginning)
AUX
AUX Clock AUX with music synchronisation* (back to the
beginning)
*
The brightness of the button illumination changes and synchronises with the music.
30
ENGLISH
Page 35

TROUBLESHOOTING
Symptom Remedy
Sound cannot be heard.
“MISWIRING CHECK WIRING
THEN PWR ON” appears.
General
“PROTECTING SEND
SERVICE” appears.
Source cannot be selected.
•
Radio reception is poor.
•
Static noise while
Radio
listening to the radio.
Disc cannot be ejected.
“IN DISC” appears.
“PLEASE EJECT” appears.
Playback order is not as
intended.
Elapsed playing time is not
CD/USB/iPod
correct.
“NOT SUPPORT” appears
and track skips.
“READING” keeps flashing.• Do not use too many hierarchical levels and folders.
•
Adjust the volume to the optimum level.
•
Check the cords and connections.
Turn the power off, then check to be sure the terminals
of the speaker wires are insulated properly. Turn the
power on again.
Send the unit to the nearest service center.
Check the
[SOURCE SELECT]
Connect the antenna firmly.
Press and hold to forcibly eject the disc. Be careful
not to drop the disc when it is ejected.
Make sure nothing is blocking the loading slot when
you eject the disc.
Press , then insert the disc correctly.
The playback order is determined by the file name
(USB) or the order in which files were recorded (disc).
This depends on the recording process earlier.
Check whether the track is a playable format.
( 28)
•
Reload the disc or reattach the USB device.
setting.
( 5)
Symptom Remedy
“UNSUPPORTED DEVICE”
appears.
“UNRESPONSIVE DEVICE”
appears.
“USB HUB IS NOT
SUPPORTED” appears.
“CANNOT PLAY” appears.
•
The source does not
change to “USB” when
you connect a USB
device while listening to
another source.
CD/USB/iPod
•
“USB ERROR” appears
The iPod/iPhone does not
turn on or does not work.
“LOADING” appears when
you enter search mode by
pressing
Correct characters are not
displayed.
.
•
Check whether the connected device is compatible with
this unit and ensure the file systems are in supported
formats.
•
Reattach the device.
Make sure the device is not malfunction and reattach
the device.
This unit cannot support a USB device connected via a
USB hub.
Connect a USB device that contains playable audio files.
The USB port is drawing more power than the design
limit. Turn the power off and unplug the USB device.
Then, turn on the power and reattach the USB device.
If this does not solve the problem, turn the power off
and on (or reset the unit) before replacing with another
USB device.
•
Check the connection between this unit and iPod/
iPhone.
•
Disconnect and reset the iPod/iPhone using hard reset.
This unit is still preparing the iPod/iPhone music list. It
may take some time to load, try again later.
•
This unit can only display uppercase letters, numbers,
and a limited number of symbols.
•
Depending on the display language you have selected
( 6)
correctly.
( 28)
, some characters may not be displayed
ENGLISH
31
Page 36

TROUBLESHOOTING
Symptom Remedy
•
Sound cannot be heard
during playback.
•
Sound output only from
the Android device.
Cannot playback at
[AUTO MODE]
ANDROID
“NO DEVICE” or “READING”
keeps flashing.
Playback is intermittent or
sound skips.
“CANNOT PLAY”
.
•
Reconnect the Android device.
•
If in
[AUDIO MODE]
application on the Android device and start playback.
•
If in
[AUDIO MODE]
application or use another media player application.
•
Restart the Android device.
•
If this does not solve the problem, the connected
Android device is unable to route the audio signal to
unit.
•
Make sure JVC MUSIC PLAY APP is installed on the
Android device.
•
Reconnect the Android device and select the appropriate
control mode.
•
If this does not solve the problem, the connected
Android device does not support
( 29)
•
Switch off the developer options on the Android device.
•
Reconnect the Android device.
•
If this does not solve the problem, the connected
Android device does not support
( 29)
Turn off the power saving mode on the Android device.
•
Make sure Android device contains playable audio files.
•
Reconnect the Android device.
•
Restart the Android device.
( 29)
, launch any media player
, relaunch the current media player
( 8)
( 9)
[AUTO MODE]
[AUTO MODE]
Symptom Remedy
“DISCONNECTED”
“CONNECTING”
Spotify
“CHECK APP”
No Bluetooth device is
detected.
.
.
Pairing cannot be made.
Echo or noise occurs.
Phone sound quality is
Bluetooth®
poor.
Sound is being interrupted
or skipped during playback
of a Bluetooth audio
player.
USB is disconnected from the head unit. Please make
sure the device is connected properly through USB.
•
Connected via USB input terminal: The device is
connecting to the head unit. Please wait.
•
Connected via Bluetooth: The Bluetooth is disconnected.
Please check Bluetooth connection and make sure both
the device and unit are paired and connected.
The Spotify application is not connected properly, or
user is not login. End the Spotify application and restart,
then log in to your Spotify account.
•
Search from the Bluetooth device again.
•
Reset the unit.
•
Make sure you have entered the same PIN code to both
the unit and Bluetooth device.
•
Delete pairing information from both the unit and the
Bluetooth device, then perform pairing again.
•
Adjust the microphone unit’s position.
•
Check the
•
Reduce the distance between the unit and the Bluetooth
device.
•
Move the car to a place where you can get a better
signal reception.
•
Reduce the distance between the unit and the Bluetooth
audio player.
•
Turn off, then turn on the unit and try to connect again.
•
Other Bluetooth devices might be trying to connect to
the unit.
( 3
or
[ECHO CANCEL]
4)
setting.
( 12)
( 15)
( 13)
32
ENGLISH
Page 37

TROUBLESHOOTING
INSTALLATION/CONNECTION
Symptom Remedy
The connected Bluetooth
audio player cannot be
controlled.
“PLEASE WAIT”
“NOT SUPPORT”
Bluetooth®
“ERROR”
“H/W ERROR”
“SWITCHING NG”
If you still have troubles, reset the unit.
•
Check whether the connected Bluetooth audio player
supports Audio/Video Remote Control Profile (AVRCP).
(Refer to the instructions of your audio player.)
•
Disconnect and connect the Bluetooth player again.
The unit is preparing to use the Bluetooth function. If
the message does not disappear, turn off and turn on
the unit, then connect the device again.
The connected phone does not support Voice
Recognition feature.
Try the operation again. If “ERROR” appears again, check
if the device supports the function you have tried.
Reset the unit and try the operation again. If “H/W
ERROR” appears again, consult your nearest service
center.
The connected phones might not support phone
switching feature.
( 3 or 4)
Warning
• The unit can only be used with a 12V DC power supply, negative ground.
• Disconnect the battery’s negative terminal before wiring and mounting.
• Do not connect Battery wire (yellow) and Ignition wire (red) to the car chassis or Ground wire
(black) to prevent a short circuit.
• To prevent short circuit:
– Insulate unconnected wires with vinyl tape.
– Be sure to ground this unit to the car’s chassis again after installation.
– Secure the wires with cable clamps and wrap vinyl tape around the wires that comes into
contact with metal parts to protect the wires.
Caution
• For safety’s sake, leave wiring and mounting to professionals. Consult the car audio dealer.
• Install this unit in the console of your vehicle. Do not touch the metal parts of this unit during and
shortly after use of the unit. Metal parts such as the heat sink and enclosure become hot.
• Do not connect the
them in parallel.
• Connect speakers with a maximum power of more than 50W. If the maximum power of the
speakers is lower than 50W, change the [AMP GAIN] setting to avoid damaging the speakers.
22)
(
• Mount the unit at an angle of less than 30º.
• If your vehicle wiring harness does not have the ignition terminal, connect Ignition wire (red) to
the terminal on the vehicle’s fuse box which provides 12 V DC power supply and is turned on and
off by the ignition key.
• Keep all cables away from heat dissipate metal parts.
• After the unit is installed, check whether the brake lamps, blinkers, wipers, etc. on the car are
working properly.
• If the fuse blows, first make sure the wires are not touching car’s chassis, then replace the old fuse
with one that has the same rating.
wires of speakers to the car chassis or Ground wire (black), or connect
Basic procedure
1 Remove the key from the ignition switch, then disconnect the terminal of the car
battery.
2 Connect the wires properly.
See Wiring connection. (
3 Install the unit to your car.
See Installing the unit (in-dash mounting). (
4 Connect the
5 Press source button to turn on the power.
6 Detach the faceplate and reset the unit within 5 seconds. ( 3 or 4)
35)
terminal of the car battery.
34)
ENGLISH
33
Page 38

INSTALLATION/CONNECTION
Part list for installation
(A)
Faceplate
(C)
Mounting sleeve
(E)
Extraction key
Output terminals
For 2-way crossover setting
3 pairs REAR
2 pairs FRONT
1 pair REAR/SW
For 3-way crossover setting
3 pairs REAR
2 pairs FRONT
1 pair REAR/SW
FRONT
SW
REAR/SW
FRONT
SW
REAR/SW
(B)
Trim plate
(D)
Wiring harness
:
Rear output
:
Front output
:
Subwoofer output
:
Front output
:
Rear/subwoofer output
:
Rear/subwoofer output
:
Tweeter output
:
Mid Range output
:
Woofer output
:
Mid Range output
:
Woofer output
:
Woofer output
Installing the unit (in-dash mounting)
Hook on the top side
Orientate the trim plate
as illustrated before
fitting.
1
Remove the mounting sleeve and trim plate from the unit.
2
Align the holes in the unit (on both sides) with the
vehicle mounting bracket and secure the unit with screws
(commercially available).
Use only the specified screws. Using wrong screws might damage
the unit.
Do the required wiring.
( 35)
Dashboard of
your car
Bend the appropriate tabs to
hold the sleeve firmly in place.
How to remove the unitWhen installing without the mounting sleeve
34
ENGLISH
Page 39

INSTALLATION/CONNECTION
Wiring connection
Output terminals
( 34)
KD-R992BT
KD-R899BT/KD-R891BT
KD-R794BT/KD-R792BT
When connecting to an external
amplifier, connect its ground wire to the
car’s chassis to avoid damaging the unit.
Antenna terminal
Connecting the ISO connectors on some
VW/Audi or Opel (Vauxhall) automobiles
You may need to modify the wiring of the supplied
wiring harness as illustrated below.
A7 (Red)
Vehicle
A4 (Yellow)
Default wiring
If your car does not have an ISO terminal
We recommend installing the unit with a
commercially available custom wiring harness
specific for your car and leave this job to
professionals for your safety. Consult your car
audio dealer.
Ignition wire
(Red)
Unit
Battery wire
(Yellow)
Yellow (Battery wire)
Red (Ignition wire)
Red (A7)
Yellow (A4)
ISO connectors
Microphone input jack
Fuse (10A)
Light blue/yellow
(Steering remote
control wire)
( 12)
To the steering wheel remote control adapter
Pin Color and function
A4 Yellow : Battery
A5 Blue/White : Power control (12V
A6 Orange/white : Car light control switch
A7 Red : Ignition (ACC)
A8 Black : Earth (ground) connection
B1
Purple
B2
B3
B4
B5
B6
B7
B8
*
]
Purple/black
]
Gray
Gray/black
]
White
White/black
]
Green
Green/black
You can also connect a subwoofer speaker directly without an external
subwoofer amplifier. For setting,
: Rear speaker (right)
For 3-way crossover: Tweeter (right)
[
: Front speaker (right)
For 3-way crossover: Mid range speaker (right)
[
: Front speaker (left)
For 3-way crossover: Mid range speaker (left)
[
: Rear speaker (left)
For 3-way crossover: Tweeter (left)
[
23
.
350mA)
*
ENGLISH
35
Page 40

SPECIFICATIONS
Subject to change without notice
FM Frequency Range 87.5MHz — 108.0MHz (50kHz step)
Usable Sensitivity (S/N=26dB) 0.71μV/75Ω (8.2dBf)
Quieting Sensitivity
(DINS/N=46dB)
Frequency Response (±3dB) 30Hz — 15kHz
Signal-to-Noise Ratio (MONO) 64dB
Tuner
Stereo Separation (1kHz) 40dB
AM
Frequency Range 531kHz — 1611kHz (9kHz step)
(MW)
Usable Sensitivity (S/N=20dB) 28.2μV (29dBμ)
AM
Frequency Range 153kHz — 279kHz (9kHz step)
(LW)
Usable Sensitivity (S/N=20dB) 50μV (33.9dBμ)
Laser Diode GaAIAs
Digital Filter (D/A) 8 times over sampling
Spindle Speed 500rpm — 200rpm (CLV)
Wow & Flutter Below measurable limit
Frequency Response (±1dB) 20Hz — 20kHz
Total Harmonic Distortion (1 kHz) 0.01%
Signal-to-Noise Ratio (1 kHz) 105dB
CD player
Dynamic Range 90dB
Channel Separation 85dB
MP3 Decode Compliant with MPEG-1/2 Audio Layer-3
WMA Decode Compliant with Windows Media Audio
AAC Decode AAC-LC “.aac” files
2.0μV/75Ω
(Except
KD-R794BT/KD-R792BT
USB Standard USB1.1, USB2.0 (Full speed)
Compatible Devices Mass storage class
File System FAT12/16/32
Maximum Supply Current DC5V
Digital Filter (D/A) Converter 24Bit
Frequency Response (±1dB) 20Hz — 20kHz
Signal-to-Noise Ratio (1kHz) 105dB
Dynamic Range 90dB
USB
Channel Separation 85dB
MP3 Decode Compliant with MPEG-1/2 Audio Layer-3
WMA Decode Compliant with Windows Media Audio
AAC Decode AAC-LC “.aac”, “.m4a” files
WAV Decode Linear-PCM
FLAC Decode FLAC file, up to 24bit/96kHz
Version Bluetooth 3.0
Frequency Range 2.402GHz — 2.480GHz
Output Power +4 dBm (MAX), 0 dBm (AVE) Power Class 2
Maximum Communication Range Line of sight approx. 10 m (32.8 ft)
Pairing SSP (Secure Simple Pairing)
Bluetooth
Profile HFP1.6 (Hands-Free Profile)
)
1.5A
(Except
KD-R794BT/KD-R792BT
A2DP (Advanced Audio Distribution Profile)
AVRCP1.5 (Audio/Video Remote Control
Profile)
PBAP (Phonebook Access Profile)
SPP (Serial Port Profile)
)
36
ENGLISH
Page 41

SPECIFICATIONS
Frequency Response (±3dB) 20Hz—20kHz
Input Maximum Voltage 1000mV
Auxiliary
Input Impedance 30kΩ
Maximum Output Power 50W×4 or
Full Bandwidth Power
(at less than 1% THD)
Speaker Impedance 4Ω—8Ω
Preout Level/Load (CD/USB)
Audio
Preout Impedance ≤600Ω
Operating Voltage
(10.5V—16V allowable)
Maximum Current Consumption 10A
Operating Temperature Range –10°C — +60°C
General
Installation Size (W×H×D) 182mm×53mm×158mm
Net Weight (includes Trimplate,
Mounting Sleeve)
50W×2 + 50W×1 (Subwoofer = 4Ω)
22W×4
KD-R992BT
4000mV/10kΩ load
KD-R899BT/KD-R891BT
KD-R794BT/KD-R792BT
2500mV/10kΩ load
14.4V
1.2k
:
g
/
:
ENGLISH
37
Page 42

CONTENIDO ANTES DEL USO
ANTES DEL USO 2
PUNTOS BÁSICOS 3
PROCEDIMIENTOS INICIALES 5
1 Cancele la demostración
2 Ajuste del reloj y la fecha
3 Realice los ajustes básicos
RADIO 6
AUX 8
CD/USB/iPod/ANDROID 8
Spotify 11
BLUETOOTH® 12
AJUSTES DE AUDIO 21
AJUSTES DE VISUALIZACIÓN 26
REFERENCIAS 28
Mantenimiento
Más información
LOCALIZACIÓN Y SOLUCIÓN
DE PROBLEMAS 31
INSTALACIÓN/CONEXIÓN 33
ESPECIFICACIONES 36
IMPORTANTE
• Antes de utilizar este producto y para asegurar su uso correcto, lea completamente este manual. En especial, lea y observe las
Advertencias y Precauciones incluidas en este manual.
• Guarde el manual en un lugar seguro y accesible para futuras consultas.
Advertencia
• No utilice ninguna función que pueda desviar su atención mientras está conduciendo el vehículo.
Precaución
Ajuste del volumen:
• Ajuste el volumen a un nivel que le permita oír los ruidos del exterior para impedir accidentes.
• Antes de reproducir fuentes digitales, baje el volumen para evitar que el repentino aumento del nivel de salida cause daños a
los altavoces.
General:
• Evite el uso de dispositivos externos cuando puedan afectar la seguridad de conducción.
• Asegúrese de tener una copia de respaldo de todos los datos importantes. No aceptamos responsabilidad alguna por la pérdida
de los datos grabados.
• Para evitar cortocircuitos, nunca coloque ni deje objetos metálicos (por ejemplo, monedas o herramientas metálicas) dentro de
la unidad.
• Si ocurre un error de disco debido a la condensación en el lente láser, extraiga el disco y espere hasta que se evapore la
humedad.
Cómo leer este manual
• Las operaciones se explican utilizando principalmente los botones de la placa frontal del
• Se utilizan indicaciones en inglés para las explicaciones. Puede seleccionar el idioma de visualización desde el menú.
•
[XX]
indica los elementos seleccionados.
•
( XX)
significa que hay información disponible en la página indicada.
KD-R992BT
y
KD-R891BT
.
( 6)
2
ESPAÑOL
Page 43

PUNTOS BÁSICOS
Placa frontal para
KD-R992BT/KD-R899BT/KD-R794BT/KD-R792BT
Fijar
Ventanilla de visualización
Ranura de carga
Botón fuente
Botón de liberación
Rueda de volumen
Para En la placa frontal
Encender la unidad
Ajustar el volumen
Seleccionar una fuente
Cambiar la información en pantalla
Seleccionar un elemento
Pulse .
• Pulse y mantenga pulsado para apagar la unidad.
Gire la rueda de volumen.
Pulse la rueda de volumen para enmudecer el sonido o pausar la reproducción.
• Pulse otra vez para cancelar. El nivel de volumen vuelve al nivel anterior antes del silenciamiento o la pausa.
• Pulse repetidamente.
• Pulse
Pulse repetidamente.
1
Gire la rueda de volumen para seleccionar un elemento.
2
Pulse la rueda para confirmar.
y, a continuación, gire la rueda de volumen antes de que transcurran 2 segundos.
KD-R899BT/KD-R794BT/KD-R792BT
( 29, 30)
Desmontar
Cómo reinicializar
Reinicialice la unidad en
menos de 5segundos
después de haber
extraído el placa frontal.
ESPAÑOL
3
Page 44

PUNTOS BÁSICOS
Placa frontal para
Botón fuente
KD-R891BT
Fijar
Ranura de carga Ventanilla de visualización
Desmontar
Botón de liberación
Para En la placa frontal
Encender la unidad
Ajustar el volumen
Seleccionar una fuente
Cambiar la información en pantalla
Seleccionar un elemento
4
ESPAÑOL
Pulse .
• Pulse y mantenga pulsado para apagar la unidad.
Pulse .
• Pulse y mantenga pulsado
Pulse
• Pulse otra vez para cancelar. El nivel de volumen vuelve al nivel anterior antes del silenciamiento o la pausa.
• Pulse repetidamente.
• Pulse
Pulse repetidamente.
1
Pulse para seleccionar un elemento.
2
Pulse para confirmar.
para aumentar continuamente el volumen a 15.
para enmudecer el sonido o pausar la reproducción.
y, a continuación, pulse en el lapso de 2 segundos.
( 29, 30)
Cómo reinicializar
Reinicialice la unidad
en menos de 5
segundos después de
haber extraído el placa
frontal.
Page 45

PROCEDIMIENTOS INICIALES
Con respecto a la disposición de las teclas en la placa frontal, consulte la página3 o la
página4.
1
Cancele la demostración
Cuando enciende la unidad por primera vez (o
la pantalla se muestra:
KD-R992BT/KD-R899BT/KD-R794BT/KD-R792BT
“CANCEL DEMO”
1 Pulse la rueda de volumen.
Se selecciona
2 Pulse de nuevo la rueda de volumen.
Aparece “DEMO OFF”.
KD-R891BT
“CANCEL DEMO”
1 Pulse .
Se selecciona
2 Pulse otra vez.
Aparece “DEMO OFF”.
2
1
Pulse y mantenga pulsado .
2 Realice la operación ‘seleccionar un elemento
[CLOCK]
3 Realice la operación ‘seleccionar un elemento
el reloj.
[CLOCKADJUST]
4 Realice la operación ‘seleccionar un elemento
fecha.
[DATESET]
5 Pulse para salir.
Para volver al elemento de ajuste anterior, pulse .
“PRESS” “ VOLUME KNOB”
[YES]
para la configuración inicial.
:
“PRESS ENTER”
[YES]
para la configuración inicial.
Ajuste del reloj y la fecha
.
ajustar la hora y los minutos
ajustar el día, mes y año
[FACTORY RESET]
:
( 3 o4)’
( 3 o4)’
[CLOCKFORMAT] [12H]
( 3 o4)’
está ajustado a
para seleccionar
para poner en hora
para ajustar la
[YES]
o
[24H]
3
Realice los ajustes básicos
1
Pulse y mantenga pulsado .
2 Realice la operación ‘seleccionar un elemento
), en
ajuste (consulte la siguiente tabla).
3 Repita el paso 2 hasta que se seleccione o active el elemento deseado.
4 Pulse para salir.
Para volver al elemento de ajuste anterior, pulse .
( 3 o4)’
SYSTEM
KEYBEEP
(No aplicable si se ha seleccionado crossover de 3 vías.)
ON
:Activa el tono de pulsación de teclas.;
OFF
:Se desactiva
SOURCESELECT
*
AMSRC
SPOTIFY SRC
BUILT-IN AUX
ON
:Habilita AM en la selección de la fuente.;
*
ON
:Habilita SPOTIFY en la selección de la fuente.;
*
ON
:Habilita AUX en la selección de la fuente.;
OFF
:Se deshabilita.
OFF
OFF
:Se deshabilita.
:Se deshabilita.
F/W UPDATE
UPDATESYSTEM
F/WUP xxxx
FACTORY RESET YES
*
No se visualiza cuando se ha seleccionado la fuente correspondiente.
YES
:Se empieza a actualizar el firmware.; NO:Se cancela (la actualización no se activa).
Para obtener información sobre cómo actualizar el firmware, consulte:
<http://www.jvc.net/cs/car/>.
:Se restablecen los ajustes predeterminados (excepto la emisora memorizada).;
NO
:Se cancela.
para realizar el
Predeterminado:
( 6)
( 11)
( 8)
XX
ESPAÑOL
5
Page 46

PROCEDIMIENTOS INICIALES
CLOCK
TIMESYNC
CLOCKDISPLAY ON
ENGLISH
РУССКИЙ
ESPANOL
ON
:La hora del reloj se ajusta automáticamente con los datos de la hora
del reloj (CT) de la señal FM Radio Data System.;
:La hora del reloj siempre se visualiza en la pantalla cuando la unidad
está apagada.;
Seleccione el idioma de visualización para el menú y la información de la
música, si corresponde.
Por defecto, se selecciona
OFF
:Se cancela.
ENGLISH
RADIO
Con respecto a la disposición de las teclas en la placa frontal, consulte la página3 o la página4.
OFF
:Se cancela.
.
Búsqueda de una emisora
1
Pulse repetidas veces el botón fuente para seleccionar FM o AM.
2 Pulse para la búsqueda automática de emisoras.
(o)
Pulse y mantenga pulsado hasta que parpadee “M” y, a continuación,
pulse repetidamente para realizar la búsqueda manual de emisoras.
• “ST” o “STEREO” se enciende cuando se recibe una radiodifusión FM estéreo con una intensidad de
señal suficiente.
Ajustes en la memoria
Puede almacenar hasta 18 emisoras de FM y 6 emisoras de AM en la memoria.
Almacene una emisora
Mientras escucha una emisora....
Pulse y mantenga pulsado uno de los botones numéricos (1 a 6).
(o)
1 Pulse y mantenga pulsado el siguiente botón hasta que “PRESETMODE” parpadee.
KD-R992BT/KD-R899BT/KD-R794BT/KD-R792BT
KD-R891BT
2 Realice la operación ‘seleccionar un elemento
de preajuste.
El número de preajuste parpadea y aparece “MEMORY”.
:
: Rueda de volumen
( 3
o
4)
’ para seleccionar un número
Seleccione una emisora almacenada
Pulse uno de los botones numéricos (1a6).
(o)
1 Pulse .
2 Realice la operación ‘seleccionar un elemento
de preajuste.
( 3
o 4)’ para seleccionar un número
6
ESPAÑOL
Page 47

RADIO
Otros ajustes
1
Pulse y mantenga pulsado .
2 Realice la operación ‘seleccionar un elemento
ajuste
(
3 Repita el paso 2 hasta que se seleccione o active el elemento que desee
4 Pulse para salir.
Para volver al elemento de ajuste anterior, pulse .
consulte la siguiente tabla).
o siga las instrucciones indicadas en el elemento seleccionado.
( 3 o4)’
para realizar el
Predeterminado:
TUNERSETTING
RADIO TIMER
SSM
LOCAL SEEK ON
Enciende la radio a una hora específica, independientemente de la fuente actual.
1
ONCE/DAILY/WEEKLY/OFF
2
FM/AM
:Selecciona la banda.
3
01
a 18 (para FM)/01 a 06 (para AM):Seleccione la emisora preajustada.
1
4
Se ilumina “
El temporizador de la radio no se activará en los siguientes casos.
• La unidad está apagada.
• Se ha seleccionado
SSM01–06/SSM07–12/SSM13–18
18emisoras para FM. “SSM” deja de destellar cuando se almacenan las primeras 6 emisoras.
Seleccione
• Los ajustes realizados se aplican solo a la fuente/emisora seleccionada. Una vez que se
*
Define el día
seleccionado AM para el temporizador de la radio.
la hora de activación.
M
” al finalizar.
[OFF]
SSM07–12/SSM13–18
:Busca solo emisoras FM con buena recepción de señal.;
cambie la fuente/emisora, es necesario volver a realizar los ajustes.
:Selecciona la frecuencia de activación del temporizador.
para
[AMSRC]
en
[SOURCESELECT]
( 5)
: Configura automáticamente hasta
para almacenar las 12 emisoras siguientes.
OFF
:Se cancela.
después de haber
IF BAND AUTO
MONO SET ON
NEWSSET
REGIONAL
XX
AF SET
2
*
TI ON
PTY SEARCH
1
*
Puede seleccionarse solo si se selecciona
2
*
S olo para la fuente de FM.
Código PTY
NEWS, AFFAIRS, INFO, SPORT, EDUCATE, DRAMA, CULTURE, SCIENCE, VARIED, POP M
(música),
ROCK M
(música),
WEATHER, FINANCE, CHILDREN, SOCIAL, RELIGION, PHONE IN, TRAVEL
LEISURE, JAZZ, COUNTRY, NATION M
:Aumenta la selectividad del sintonizador para reducir las interferencias con emisoras
FM adyacentes. (Se puede perder el efecto estéreo.);
emisoras FM adyacentes, pero la calidad del sonido no se degrada y se conserva el efecto
estereofónico.
:Mejora la recepción de FM pero se puede perder el efecto estéreo.;
2
*
ON
:Si estuviera disponible, la unidad cambiará temporalmente al Noticiero.;
2
*
ON
: Cambia a otra emisora sólo en la región específica que utiliza el control “AF”.;
OFF
:Se cancela.
ON
: Cuando la recepción actual es deficiente, busca automáticamente otra emisora que
transmita el mismo programa en la misma red Radio Data System con mejor recepción de
señal.;
OFF
: Se cancela.
: Permite que la unidad cambie temporalmente a Información sobre el tráfico si está
disponible (“TI” se enciende) mientras escucha todas las fuentes, excepto AM. ;
2
*
Seleccione un código PTY (véase más abajo).
Si hay una emisora que esta difundiendo un programa que tenga el mismo código PTY que el
seleccionado por usted, se sintonizará esa emisora.
[ONCE]
o
[WEEKLY]
(música),
EASY M
(música),
(música),
WIDE
en el paso 1.
LIGHT M
(música),
OLDIES, FOLK M
:Sujeto a interferencias de las
(música),
OFF
:Se cancela.
OFF
:Se cancela.
OFF
:Se cancela.
CLASSICS, OTHER M
,
DOCUMENT
ESPAÑOL
7
Page 48

AUX CD/USB/iPod/ANDROID
Uso de un reproductor de audio portátil
1
Conecte un reproductor de audio portátil (disponible en el mercado).
KD-R992BT/KD-R899BT/KD-R794BT/KD-R792BT
Miniclavija estéreo de 3,5 mm con conector en “L”
(disponible en el mercado)
Toma de entrada auxiliar
KD-R891BT
2 Seleccione
3 Pulse repetidas veces el botón fuente para seleccionar AUX.
4 Encienda el reproductor de audio portátil e inicie la reproducción.
8
:
Toma de entrada auxiliar
Miniclavija estéreo de 3,5 mm con conector en “L”
(disponible en el mercado)
[ON]
para
[BUILT-INAUX]
Para una salida de audio óptima, utilice una miniclavija estéreo
auricular de 3 contactos.
ESPAÑOL
:
Reproductor de audio portátil
Reproductor de audio portátil
en
[SOURCESELECT]. ( 5)
Inicie la reproducción
La fuente cambia automáticamente y se inicia la reproducción.
CD
KD-R992BT/KD-R899BT/KD-R794BT/KD-R792BT: KD-R891BT:
Expulsa el disco
Terminal de entrada USB
KD-R992BT/
KD-R899BT/
KD-R794BT/
KD-R792BT
Lado de la etiqueta
USB
Cable USB 2.0
Expulsa el disco
1
*
(disponible en el mercado)
iPod/iPhone
Terminal de entrada USB
KD-R891BT
Accesorio del iPod/iPhone
ANDROID
1
*
Cable USB
1
*
No deje el cable dentro del vehículo cuando no lo esté utilizando.
2
*
Cuando conecte un dispositivo Android, se mostrará “Press [VIEW] to install JVC MUSIC PLAY APP”. Siga
las instrucciones para instalar la aplicación. Antes de la conexión, también puede instalar la versión más
reciente de la aplicación JVC MUSIC PLAY en su dispositivo Android. Para obtener más información, visite
<http://www.jvc.net/cs/car/>.
1
*
2
*
(disponible en el mercado)
Lado de la etiqueta
Page 49

CD/USB/iPod/ANDROID
Con respecto a la disposición de las teclas en la placa frontal, consulte la página3 o la página4.
• Fuentes seleccionables:
KD-R992BT/KD-R899BT/KD-R891BT
KD-R794BT/KD-R792BT
: CD/USB/ANDROID
Para En la placa frontal
Retroceder/
avanzar
rápidamente
Seleccionar una
pista/archivo
Seleccionar una
*
carpeta
Repetir
reproducción
Pulse y mantenga pulsado .
3
*
Pulse
Pulse .
4
Pulse repetidamente.
5
*
TRACKREPEAT/ALLREPEAT
TRACKREPEAT/FOLDERREPEAT/ALLREPEAT
ONEREPEAT/ALLREPEAT/REPEATOFF
Reproducción
aleatoria
Pulse repetidamente.
5
*
ALLRANDOM/RANDOMOFF
FOLDERRANDOM/ALLRANDOM/RANDOMOFF
SONGRANDOM/ALLRANDOM/RANDOMOFF
3
*
Para ANDROID: Aplicable sólo cuando se selecciona
4
*
Para CD: Sólo para archivos MP3/WMA/AAC. Esto no funciona para iPod/ANDROID.
5
*
Para iPod/ ANDROID: Aplicable sólo cuando se selecciona
: CD/USB/iPodUSB/ANDROID
.
: CD de audio
: CD de audio
[AUTO MODE]
.
: Archivo MP3/WMA/AAC/
WAV/FLAC
: iPod o ANDROID
: Archivo MP3/WMA/AAC/
: iPod o ANDROID
[HEADMODE]/[AUTOMODE]
WAV/FLAC
.
Seleccionar modo de control
Pulse repetidamente mientras está en una fuente
iPodUSB.
HEAD MODE
IPHONE MODE
Pulse repetidamente mientras está en una fuente
ANDROID.
AUTO MODE
AUDIO MODE
: Controla el iPod desde esta unidad.
: Controla el iPod desde el propio iPod. No obstante, podrá
seguir controlando la reproducción/pausa o el salto de
archivos desde esta unidad.
: Controla el dispositivo Android desde esta unidad a través
de la aplicación JVC MUSIC PLAY instalada en el dispositivo
Android.
: Controla el dispositivo Android desde el propio Android
a través de otras aplicaciones del reproductor de medios
instalado en el dispositivo Android. No obstante, podrá
seguir controlando la reproducción/pausa o el salto de
archivos desde esta unidad.
Seleccionar Music drive
Pulse repetidamente mientras está en una fuente USB.
Se reproducirán las canciones almacenadas en la siguiente unidad.
• Memoria interna o externa seleccionada de un smartphone (Clase de
almacenamiento masivo).
• Unidad seleccionada de un dispositivo de múltiples unidades.
ESPAÑOL
9
Page 50

CD/USB/iPod/ANDROID
Ajustes para utilizar la JVC Remote aplicación
(para KD-R992BT/KD-R899BT/KD-R891BT)
La aplicación JVC Remote ha sido diseñada para controlar las operaciones del receptor
para automóvil JVC desde un iPhone/iPod (a través del terminal de entrada USB).
Preparativos:
Antes de la conexión, instale la versión más reciente de la aplicación JVC Remote en su
dispositivo. Para obtener más información, visite <http://www.jvc.net/cs/car/>.
Puede realizar los ajustes de la misma manera que a través de la conexión Bluetooth.
( 19)
Seleccionar un archivo de una carpeta/lista
Para iPod/ANDROID, aplicable solo cuando se selecciona
1 Pulse .
2 Realice la operación ‘seleccionar un elemento
una carpeta/lista.
3 Realice la operación ‘seleccionar un elemento
un archivo.
Búsqueda rápida
Si existen numerosos archivos, puede realizar una búsqueda rápida.
Realice la siguiente operación para navegar por la lista con rapidez.
KD-R992BT/KD-R899BT
KD-R794BT/KD-R792BT
KD-R891BT
: Pulse y mantenga pulsado
(aplicable solo para fuentes CD, USB y ANDROID)
/
: Gire rápidamente la rueda de volumen
[HEADMODE]/[AUTO MODE]
( 3
o 4)’ para seleccionar
( 3
o 4)’ para seleccionar
Búsqueda alfabética
Puede realizar la búsqueda de un archivo por el primer carácter.
Para fuente iPod USB
Realice la siguiente operación para seleccionar el carácter que desee
(A a Z, 0a9, y OTHERS).
KD-R992BT/KD-R899BT:
KD-R891BT:
• Seleccione “OTHERS” si el primer carácter no es una letra (AaZ) ni un número
Para fuente ANDROID
1 Pulse para ingresar a la búsqueda de caracteres.
.
2 Realice la siguiente operación para seleccionar el carácter que
^A^ : Mayúscula (A a Z)
_A_ : Minúscula (a a z)
-0- : Números (0 a 9)
Pulse
(0a9).
desee.
KD-R992BT/KD-R899BT
KD-R794BT/KD-R792BT
KD-R891BT
: Pulse
-
OTHERS- : Carácter distinto de A a Z y 0 a 9
(aplicable solo para fuentes iPod USB y ANDROID)
Pulse
volumen
/
: Gire la rueda de volumen
3 Pulse lo siguiente para iniciar la búsqueda.
KD-R992BT/KD-R899BT
KD-R794BT/KD-R792BT
KD-R891BT
:
• Para volver al elemento de ajuste anterior, pulse .
• Para cancelar, pulse y mantenga pulsado
/
: Rueda de volumen
o gire rápidamente la rueda de
.
10
ESPAÑOL
Page 51

Spotify
Preparativos:
Instale la última versión de la aplicación Spotify en su dispositivo (iPhone/iPod touch) y,
a continuación, cree una cuenta e inicie sesión en Spotify.
• Seleccione
KD-R794BT/KD-R792BT
través de la conexión Bluetooth.
Comience a escuchar
1
2 Conecte su dispositivo al terminal de entrada USB.
3 Pulse repetidas veces el botón fuente para seleccionar SPOTIFY.
El programa de difusión se inicia automáticamente.
* No deje el cable dentro del vehículo cuando no lo esté utilizando.
[ON]
para
[SPOTIFYSRC]
: Solo puede escuchar Spotify en un dispositivo Android a
Abra la aplicación Spotify en su dispositivo.
KD-R992BT/KD-R899BT
Terminal de entrada USB
KD-R891BT
:
Terminal de entrada USB
en
[SOURCE SELECT]. ( 5)
( 20)
:
Accesorio del iPod/iPhone*
Accesorio del iPod/iPhone*
Para En la placa frontal
Reproducción/pausa
Saltar una pista
Pulgar arriba o pulgar
2
*
abajo
Iniciar la radio
Repetir reproducción
Reproducción aleatoria
KD-R992BT/KD-R899BT/KD-R794BT/KD-R792BT
Pulse la rueda de volumen.
KD-R891BT
: Pulse .
1
*
Pulse
S
/ T.
Pulse .
Pulse y mantenga pulsado
3
*
Pulse repetidamente.
ALLREPEAT, ONE REPEAT
3
*
Pulse repetidamente.
1
*
5.
,
REPEATOFF
1
*
ALLRANDOM, RANDOMOFF
1
*
D isponible solamente para usuarios de cuenta premium.
2
*
Esta función está disponible solamente para las pistas de Radio. Si selecciona pulgar abajo, se omitirá la pista
actual.
3
*
D isponible solamente para las pistas en listas de reproducción.
Guardar información sobre canciones favoritas
Mientras escucha la Radio en Spotify...
Pulse y mantenga pulsado el siguiente botón para guardar la información
de la canción.
KD-R992BT/KD-R899BT/KD-R794BT/KD-R792BT
KD-R891BT
Aparece “SAVED” y la información se guarda en “Your Music (Tu Música)” o
“Your Library (Tu Biblioteca)” de su cuenta de Spotify.
Para no guardar, repita el mismo procedimiento.
Aparece “REMOVED” y la información se elimina de “Your Music (Tu Música)” o
“Your Library (Tu Biblioteca)” de su cuenta de Spotify.
:
: rueda de volumen
:
ESPAÑOL
11
Page 52

Spotify BLUETOOTH®
Buscar una canción o una emisora
1
Pulse .
2 Realice la operación ‘seleccionar un elemento
un tipo de lista.
Los tipos de listas visualizados difieren dependiendo de la información enviada por
Spotify.
3 Realice la operación ‘seleccionar un elemento
la canción o la emisora deseada.
Realice la siguiente operación para navegar por la lista con rapidez.
KD-R992BT/KD-R899BT
KD-R794BT/KD-R792BT
KD-R891BT
Para cancelar, pulse y mantenga pulsado .
: Pulse y mantenga pulsado
/
: Gire rápidamente la rueda de volumen
( 3
o 4)’ para seleccionar
( 3
o 4)’ para seleccionar
BLUETOOTH — Conexión
Perfiles Bluetooth compatibles
– Perfil manos libres (HFP)
– Perfil Avanzado de Distribución de Audio (A2DP)
– Perfil de mando a distancia de Audio/Video (AVRCP)
– Perfil del puerto en serie (SPP)
– Perfil de acceso a la guía telefónica (PBAP)
Códecs Bluetooth compatibles
– Códec de sub-banda (SBC)
– Codificador avanzado de audio (AAC)
Conecte el micrófono
Jack de entrada de micrófono
Panel trasero
Micrófono (suministrado)
12
ESPAÑOL
Ajuste el ángulo del
micrófono
Asegúrelo mediante abrazaderas
para cable (no suministradas) si
fuera necesario.
Page 53

BLUETOOTH®
Emparejar y conectar por primera vez un dispositivo Bluetooth
1
Pulse botón fuente para encender la unidad.
2 Busque y seleccione “KD-R9 BT”/“KD-R8 BT”/“KD-R7 BT” en el dispositivo Bluetooth.
“BTPAIRING” parpadea en la pantalla.
• En el caso de algunos dispositivos Bluetooth, puede ser necesario ingresar el número de identificación
personal (código PIN) inmediatamente después de la búsqueda.
3 Realice (A) o (B) dependiendo de los datos mostrados en la pantalla.
En el caso de algunos dispositivos Bluetooth, la secuencia de emparejamiento puede diferir de lo descrito en
los siguientes pasos.
(A)
KD-R992BT/KD-R899BT/KD-R794BT/KD-R792BT
“[Nombre del dispositivo]”
KD-R891BT
“[Nombre del dispositivo]”
“XXXXXX” es una clave de 6 dígitos que se genera aleatoriamente durante cada emparejamiento.
Opere el dispositivo Bluetooth para confirmar la clave.
(B)
KD-R992BT/KD-R899BT/KD-R794BT/KD-R792BT
“[Nombre del dispositivo]”
KD-R891BT
“[Nombre del dispositivo]”
Pulse lo siguiente para iniciar el emparejamiento.
• Si “PAIRING” “PIN 0000” aparece en la pantalla, ingrese el código PIN “0000” en el dispositivo
• Si solo aparece “PAIRING”, opere el dispositivo Bluetooth para confirmar el emparejamiento.
El mensaje “PAIRING COMPLETED” aparece cuando ha finalizado el emparejamiento; “
establezca la conexión Bluetooth.
• Esta unidad es compatible con Emparejamiento Simple y Seguro (SSP).
• Pueden registrarse (emparejarse) hasta cinco dispositivos en total.
• Una vez finalizado el procedimiento, el dispositivo Bluetooth quedará registrado en la unidad aunque la
reinicialice. Para borrar el dispositivo emparejado,
:
Asegúrese de que las claves que aparecen en la unidad coincidan con las que aparecen en el
dispositivo Bluetooth.
Pulse lo siguiente para confirmar la clave.
KD-R992BT/KD-R899BT/KD-R794BT/KD-R792BT
KD-R891BT
KD-R992BT/KD-R899BT/KD-R794BT/KD-R792BT
KD-R891BT
:
:
:
Bluetooth.
Puede cambiar el código PIN deseado antes del emparejamiento.
“XXXXXX” “VOL–YES” “BACK–NO”
“XXXXXX” “ENTER–YES” “BACK–NO”
“VOL–YES” “BACK–NO”
“ENTER–YES” “BACK–NO”
:
: rueda de volumen
:
: rueda de volumen
17, [DEVICE DELETE]
( 17)
” se iluminará cuando se
.
• Pueden conectarse dos teléfonos Bluetooth y un dispositivo
de audio Bluetooth a la vez.
No obstante, mientras está activada la fuente BT AUDIO, es
posible conectar a cinco dispositivos de audio Bluetooth y
cambiar entre los cinco dispositivos.
• Algunos dispositivos Bluetooth pueden no conectarse
automáticamente a la unidad después del emparejamiento.
Conecte el dispositivo a la unidad manualmente.
• Si desea más información, consulte el manual de
instrucciones del dispositivo Bluetooth.
( 19)
Emparejamiento automático
La solicitud de emparejamiento (a través de Bluetooth) se
activa automáticamente al conectar los siguientes dispositivos
al terminal de entrada USB.
KD-R992BT/KD-R899BT/KD-R891BT
KD-R794BT/KD-R792BT
Pulse lo siguiente para emparejar una vez confirmado
el nombre del dispositivo.
KD-R992BT/KD-R899BT
KD-R794BT/KD-R792BT
KD-R891BT
La solicitud de emparejamiento automático se activa
únicamente si:
– Está activada la función Bluetooth del dispositivo conectado.
–
– La aplicación JVC MUSIC PLAY está instalada en el dispositivo
:
[AUTO PAIRING]
Android
( 8)
: Dispositivo Android
/
: rueda de volumen
está ajustado a
y la opción
: Dispositivo iPhone/
iPod touch/Android
[ON]. ( 18)
[AUTO MODE]
seleccionada
( 9)
.
ESPAÑOL
13
Page 54

BLUETOOTH®
BLUETOOTH — Teléfono móvil
Con respecto a la disposición de las teclas en la placa frontal, consulte la página3
o la página4.
Recibir una llamada
Cuando se recibe una llamada entrante:
•
KD-R992BT
Los botones parpadean en el color que ha seleccionado en
( 15)
KD-R891BT
El botón simbólico parpadea en el color que ha seleccionado en
( 15)
KD-R899BT/KD-R794BT/KD-R792BT
Los botones parpadean en el patrón de parpadeo que ha seleccionado en
[RING ILLUMI]. ( 15)
• Si
automáticamente la llamada.
Durante una llamada:
•
KD-R992BT
Los botones dejan de parpadean y se iluminan en el color que ha seleccionado
en
KD-R891BT
El botón simbólico deja de parpadear y se ilumina en el color que ha
seleccionado en
KD-R899BT/KD-R794BT/KD-R792BT
Los botones dejan de parpadear.
• Si apaga la unidad o extrae el placa frontal, la conexión Bluetooth se interrumpe.
:
:
[AUTO ANSWER]
[RING COLOR]. ( 15)
está ajustado al tiempo seleccionado, la unidad contesta
:
:
[RING COLOR]. ( 15)
( 15)
[RING COLOR]
.
[RING COLOR]
:
:
Las siguientes operaciones pueden diferir o no estar disponibles dependiendo del teléfono
que se haya conectado.
Para En la placa frontal
Primera llamada entrante...
Contestar una llamada
Rechazar una llamada
.
Finalizar una llamada
Mientras habla con la primera llamada entrante...
Responder a otra llamada
entrante y dejar en espera la
llamada actual
Rechazar otra llamada
entrante
Pulse
KD-R992BT/KD-R899BT
KD-R794BT/KD-R792BT
KD-R891BT
Pulse y mantenga pulsado
siguiente botón.
KD-R992BT/KD-R899BT
KD-R794BT/KD-R792BT
KD-R891BT
Pulse y mantenga pulsado
siguiente botón.
KD-R992BT/KD-R899BT
KD-R794BT/KD-R792BT
KD-R891BT
Pulse
KD-R992BT/KD-R899BT
KD-R794BT/KD-R792BT
KD-R891BT
Pulse y mantenga pulsado
siguiente botón.
KD-R992BT/KD-R899BT
KD-R794BT/KD-R792BT
KD-R891BT
o el siguiente botón.
/
:
:
:
:
:
: rueda de volumen
/
: rueda de volumen
/
: rueda de volumen
o el siguiente botón.
/
: rueda de volumen
/
: rueda de volumen
o el
o el
o el
14
ESPAÑOL
Page 55

BLUETOOTH®
Para En la placa frontal
Mientras tiene dos llamadas activas...
Finalizar la llamada actual y
activar la llamada en espera
Pase de la llamada actual a la
llamada en espera y viceversa
Ajustar el volumen del
1
*
teléfono
(Predeterminado:
Cambiar entre los modos manos
libres y conversación privada
*
*
*
[00]
a
[35]
[15]
)
1
Este ajuste no influirá en el volumen del resto de las fuentes.
2
Pulse y mantenga pulsado
3
Las operaciones pueden variar dependiendo del dispositivo Bluetooth conectado.
VOL +
Mejorar la calidad de voz
Mientras habla por teléfono....
1 Pulse y mantenga pulsado .
2 Realice la operación ‘seleccionar un elemento
(
consulte la siguiente tabla).
3 Repita el paso 2 hasta que se seleccione o active el elemento deseado.
4 Pulse para salir.
Para volver al elemento de ajuste anterior, pulse .
Pulse y mantenga pulsado
botón.
KD-R992BT/KD-R899BT
KD-R794BT/KD-R792BT
KD-R891BT
Pulse
Realice la siguiente operación durante una
llamada.
KD-R992BT/KD-R899BT/KD-R794BT/KD-R792BT
Gire la rueda de volumen
KD-R891BT
Pulse durante una llamada.
3
*
para aumentar continuamente el volumen a 15.
:
: Pulse
/
: rueda de volumen
.
( 3 o4)
’ para realizar el ajuste
o el siguiente
2
*
Predeterminado:
MIC GAIN LEVEL–10
NR LEVEL LEVEL–05
ECHO CANCEL LEVEL–05
:
Realice los ajustes para recibir una llamada
Pulse para ingresar al modo Bluetooth.
1
2 Realice la operación ‘seleccionar un elemento
realizar el ajuste
3 Repita el paso 2 hasta que se seleccione o active el elemento
deseado.
Para volver al elemento de ajuste anterior, pulse .
a
aumenta a medida que aumenta el número.
ruido hasta que el ruido que se escucha durante una conversación telefónica
sea mínimo.
de cancelación de eco hasta que el eco que escucha durante una conversación
telefónica sea mínimo.
LEVEL+10(LEVEL–04
a
LEVEL+05(LEVEL00
a
LEVEL+05(LEVEL00
(
consulte la siguiente tabla).
): La sensibilidad del micrófono
): Ajuste el nivel de reducción de
): Ajuste el tiempo de retardo
( 3 o4)
Predeterminado:
XX
’ para
XX
SETTINGS
AUTO ANSWER
RING COLOR KD-R992BT/KD-R891BT
RING ILLUMI KD-R899BT/KD-R794BT/KD-R792BT
01 SEC a30 SEC
entrantes en el tiempo seleccionado (en segundos).;
COLOR01
de los botones o del botón simbólico como notificación cuando se recibe una
llamada entrante y durante la llamada.;
BLINK01
de los botones como notificación cuando se recibe una llamada entrante.;
OFF
:La unidad contesta automáticamente las llamadas
a
COLOR49(COLOR08
a
BLINK05(BLINK02
:Se cancela.
:
OFF
:Se cancela.
): Selecciona el color de iluminación
OFF
:Se cancela.
:
): Selecciona el patrón de parpadeo
ESPAÑOL
15
Page 56

BLUETOOTH®
BATT/SIGNAL*KD-R992BT/KD-R891BT
* La funcionalidad depende del tipo de teléfono en uso.
AUTO
:Muestra el estado de la carga y la intensidad de la señal cuando la unidad detecta
un dispositivo Bluetooth y se conecta el dispositivo Bluetooth.;
:
OFF
:Se cancela.
Realizar una llamada
Puede realizar una llamada desde el historial de llamadas, la guía telefónica o mediante
marcación del número. La llamada con marcación por voz también es posible si su
teléfono móvil dispone de esta función.
1 Pulse para ingresar al modo Bluetooth.
Aparece “(nombre del primer dispositivo)”.
• Si hay dos teléfonos Bluetooth conectados, pulse nuevamente para
cambiar al otro teléfono.
Aparece “(nombre del segundo dispositivo)”.
2 Realice la operación ‘seleccionar un elemento
ajuste
(
3 Repita el paso 2 hasta que se seleccione o active el elemento que desee
Para volver al elemento de ajuste anterior, pulse .
RECENT CALL
consulte la siguiente tabla).
o siga las instrucciones indicadas en el elemento seleccionado.
(Solo si el teléfono es compatible con PBAP.)
1
Pulse el siguiente botón para seleccionar un nombre o un número de teléfono.
KD-R992BT/KD-R899BT
KD-R794BT/KD-R792BT
KD-R891BT
• “<” indica llamada recibida, “>” indica llamada realizada, “M” indica llamada perdida.
• El mensaje “NO HISTORY” aparece si no existe un historial de llamadas o número de
2
Pulse lo siguiente para hacer una llamada.
KD-R992BT/KD-R899BT
KD-R794BT/KD-R792BT
KD-R891BT
:
llamada registrado.
:
( 3 o4)
/
: rueda de volumen
/
: rueda de volumen
’ para realizar el
PHONEBOOK
DIAL NUMBER
VOICE
(Solo si el teléfono es compatible con PBAP.)
1
Pulse para seleccionar la letra que desee (A a Z, 0a9, y OTHERS).
• Aparece “OTHERS” si el primer carácter no es una letra (A a Z) ni un número (0 a 9).
2
Realice la operación ‘seleccionar un elemento
3
Realice la operación ‘seleccionar un elemento
teléfono que desea llamar.
• La guía telefónica del teléfono conectado se transfiere automáticamente a la unidad
cuando se realiza el emparejamiento.
• Esta unidad puede visualizar solamente letras sin acento. (Las letras acentuadas tal como la
“Ú” se muestra como “U”.)
1
Realice la siguiente operación para seleccionar un número (0 a 9) o un carácter ( , #, +).
KD-R992BT/KD-R899BT/KD-R794BT/KD-R792BT
Gire la rueda de volumen
KD-R891BT
2
Pulse para mover la posición de ingreso.
Repita los pasos
3
Pulse lo siguiente para hacer una llamada.
KD-R992BT/KD-R899BT/KD-R794BT/KD-R792BT
rueda de volumen
KD-R891BT
Pronuncie el nombre del contacto al que desea llamar o el comando de voz para controlar
las funciones del teléfono.
de voz)
:
Pulse .
1
y 2 hasta finalizar el ingreso del número telefónico.
:
( Realice una llamada mediante reconocimiento
( 3 o4)
’ para seleccionar un nombre.
( 3 o4)
’ para seleccionar el número de
:
:
Realice una llamada mediante reconocimiento de voz
Pulse y mantenga pulsado para activar el teléfono conectado.
1
2 Pronuncie el nombre del contacto al que desea llamar o el comando de
voz para controlar las funciones del teléfono.
• Las características de reconocimiento de voz compatibles varían según el teléfono. Si
desea más información, consulte el manual de instrucciones del teléfono conectado.
• Esta unidad también es compatible con las funciones de asistente personal
inteligente de iPhone.
16
ESPAÑOL
Page 57

BLUETOOTH®
Ajustes en la memoria
Almacenar un contacto en la memoria
Puede guardar hasta 6 contactos en los botones numéricos (1 a 6).
1 Pulse para ingresar al modo Bluetooth.
2 Realice la operación ‘seleccionar un elemento
un número de preajuste
3 Realice la operación ‘seleccionar un elemento
un contacto o ingrese un número de teléfono.
Si se ha seleccionado un contacto, pulse lo siguiente para que aparezca el número
de teléfono.
KD-R992BT/KD-R899BT/KD-R794BT/KD-R792BT
KD-R891BT
4 Pulse y mantenga pulsado uno de los botones numéricos (1 a 6).
Aparece “MEMORY P(número de preajuste seleccionado)” cuando se guarda el
Para borrar un contacto de la memoria preajustada, seleccione
paso
:
contacto.
2
y almacene un número en blanco.
[RECENTCALL], [PHONEBOOK]
( 3
o 4)’ para seleccionar
o
[DIALNUMBER]
( 3
o 4)’ para seleccionar
: rueda de volumen
[DIALNUMBER]
.
en el
Realizar una llamada desde la memoria
Pulse para ingresar al modo Bluetooth.
1
2 Pulse uno de los botones numéricos (1 a 6).
3 Pulse lo siguiente para hacer una llamada.
KD-R992BT/KD-R899BT/KD-R794BT/KD-R792BT
KD-R891BT
Aparece “NO PRESET” si no hay ningún contacto guardado.
:
: rueda de volumen
Ajustes del modo Bluetooth
1
Pulse y mantenga pulsado .
2 Realice la operación ‘seleccionar un elemento
ajuste
(
3 Repita el paso 2 hasta que se seleccione o active el elemento que desee
4 Pulse para salir.
Para volver al elemento de ajuste anterior, pulse .
consulte la siguiente tabla).
o siga las instrucciones indicadas en el elemento seleccionado.
( 3 o4)
’ para realizar el
Predeterminado:
BT MODE
PHONE SELECT
AUDIO SELECT
DEVICE DELETE
PIN CODE EDIT
(0000)
* Solo se pueden conectar un máximo de dos teléfonos con Bluetooth y un dispositivo de audio con Bluetooth a la vez.
Selecciona el teléfono o el dispositivo de audio que desea conectar o desconectar.
*
Al conectarse, aparece “
*
Aparece “
1
Realice la operación ‘seleccionar un elemento
dispositivo que desea borrar.
2
Realice la operación ‘seleccionar un elemento
[NO]
Cambia el código PIN (hasta 6 dígitos).
1
Realice la siguiente operación para seleccionar un número.
KD-R992BT/KD-R899BT/KD-R794BT/KD-R792BT
Gire la rueda de volumen
KD-R891BT
2
Pulse para mover la posición de ingreso.
Repita los pasos
3
Para confirmar, pulse lo siguiente.
KD-R992BT/KD-R899BT/KD-R794BT/KD-R792BT
rueda de volumen
KD-R891BT
” delante del nombre del dispositivo.
” delante del actual dispositivo de audio para reproducción.
( 3 o4)
.
:
Pulse .
1
y 2 hasta terminar de ingresar el código PIN.
:
( 3 o4)
’ para seleccionar el
’ para seleccionar
:
:
[YES]
XX
o
ESPAÑOL
17
Page 58

BLUETOOTH®
RECONNECT ON
AUTO PAIRING ON
INITIALIZE YES
INFORMATION MYBTNAME
Modo de comprobación de compatibilidad Bluetooth
Puede comprobar la conectividad del perfil compatible entre el dispositivo Bluetooth
y la unidad.
• Asegúrese de que no haya ningún dispositivo Bluetooth emparejado.
1 Pulse y mantenga pulsado .
Aparece “BLUETOOTH” “CHECK MODE”. “SEARCH NOW USING PHONE”
“PIN IS 0000” se desplazan en la pantalla.
2 Busque y seleccione “KD-R9 BT”/“KD-R8 BT”/“KD-R7 BT” en el
dispositivo Bluetooth en el lapso de 3 minutos.
3 Realice (A), (B) o (C) dependiendo de los datos mostrados en la pantalla.
(A) “PAIRING” “XXXXXX” (Clave de paso de 6 dígitos)
la clave de paso que aparece en la unidad coincida con la que aparece en el
dispositivo Bluetooth y, a continuación, opere el dispositivo Bluetooth para
confirmar la clave de paso.
(B) “PAIRING” “PIN IS 0000”
(C) “PAIRING”
:La unidad restablecerá automáticamente la conexión cuando el dispositivo Bluetooth
conectado en último término vuelva dentro del rango.;
:La unidad empareja automáticamente el dispositivo Bluetooth compatible (iPhone/
iPod touch/dispositivo Android) cuando se lo conecta a través del terminal de entrada
USB.Esta función podrá no estar disponible, dependiendo del sistema operativo del
dispositivo conectado. ;
:Inicializa todos los ajustes Bluetooth (incluyendo el emparejamiento almacenado,
directorio telefónico y etc.).;
“KD-R7
MYADDRESS
: Opere el dispositivo Bluetooth para confirmar el emparejamiento.
OFF
:Se cancela.
NO
:Se cancela.
: Muestra el nombre de la unidad (“KD-R9 BT”/“KD-R8 BT”/
BT”).;
: Muestra la dirección de la unidad.
: Ingrese “0000” en el dispositivo Bluetooth.
OFF
:Se cancela.
: Asegúrese de que
Una vez realizado el emparejamiento, aparece “PAIRING OK” “[Nombre del
dispositivo]” y se inicia la comprobación de compatibilidad con Bluetooth.
Si aparece “CONNECT NOW USING PHONE”, opere el dispositivo Bluetooth para que se
pueda continuar el acceso al directorio telefónico.
“TESTING” parpadea en la pantalla.
El resultado de la conectividad parpadea en la pantalla.
“PAIRING OK” y/o “HANDS-FREE OK”
Compatible
1
*
1 Compatible con el Perfil Manos Libres (HFP, Hands-Free Profile)
2
*
Compatible con el Perfil Avanzado de Distribución de Audio (A2DP, Advanced Audio Distribution Profile)
3
*
Compatible con el Perfil de acceso a la guía telefónica (PBAP, Phonebook Access Profile)
Después de 30 segundos, aparece “PAIRING DELETED” para indicar que se ha eliminado
el emparejamiento y la unidad sale del modo de comprobación.
• Para cancelar, pulse y mantenga pulsado botón fuente para apagar la unidad y luego
vuélvala a encender.
1
*
y/o “AUD.STREAM OK”
2
*
y/o “PBAP OK”
3
*
:
18
ESPAÑOL
Page 59

BLUETOOTH®
BLUETOOTH — Audio
Con respecto a la disposición de las teclas en la placa frontal, consulte la página3 o la página4.
Mientras está activada la fuente BT AUDIO, es posible conectar a cinco dispositivos de audio
Bluetooth y cambiar entre los cinco dispositivos.
Reproductor de audio a través de Bluetooth
1
Pulse repetidas veces el botón fuente para seleccionar BTAUDIO.
• Si pulsa se accede directamente a BT AUDIO.
2 Opere el reproductor de audio Bluetooth para comenzar la reproducción.
Para En la plac a frontal
Reproducción/pausa
Seleccione un grupo o
carpeta
Omisión hacia atrás/omisión
hacia delante
Retroceder/avanzar
rápidamente
Repetir reproducción Pulse
Reproducción aleatoria
Seleccionar un archivo de
una carpeta/lista
Cambiar entre los
dispositivos de audio
Bluetooth conectados
* Si pulsa la tecla “Play” en el dispositivo conectado también se cambiará el sonido generado por el dispositivo.
Las operaciones y las indicaciones en pantalla difieren según su disponibilidad en el dispositivo
conectado.
KD-R992BT/KD-R899BT/KD-R794BT/KD-R792BT
Pulse la rueda de volumen.
KD-R891BT
Pulse
Pulse
Pulse y mantenga pulsado
: Pulse .
.
.
repetidamente.
:
.
TRACKREPEAT, ALLREPEAT, REPEATOFF
Pulse
repetidamente.
GROUPRANDOM, ALLRANDOM, RANDOMOFF
Consulte el apartado “Seleccionar un archivo de una carpeta/
lista” que aparece en la página 10.
*
Pulse
5.
Ajustes para utilizar la JVC Remote aplicación
La aplicación JVC Remote ha sido diseñada para controlar las operaciones
del receptor para automóvil JVC desde los siguientes dispositivos.
KD-R992BT/KD-R899BT/KD-R891BT
KD-R794BT/KD-R792BT
Preparativos:
Antes de la conexión, instale la versión más reciente de la aplicación
JVC Remote en su dispositivo. Para obtener más información, visite
<http://www.jvc.net/cs/car/>.
1 Pulse y mantenga pulsado .
2 Realice la operación ‘seleccionar un elemento
realizar el ajuste.
3 Repita el paso 2 hasta que se seleccione o active el elemento
deseado.
4 Pulse para salir.
Para volver al elemento de ajuste anterior, pulse .
: Smartphone Android (a través de
( 20)
: iPhone/iPod (a través de Bluetooth
o a través del terminal de entrada
USB) o smartphone Android (a
través de Bluetooth)
Bluetooth)
( 3 o4)
’ para
ESPAÑOL
19
Page 60

BLUETOOTH®
REMOTE APP
SELECT
IOS YES
ANDROID YES
ANDROID
LIST
STATUS
* Se visualiza sólo cuando
Seleccione el dispositivo (IOS o ANDROID) en el que desea ejecutar la aplicación.
:Seleccione iPhone/iPod para usar la aplicación a través de Bluetooth o a través del terminal de
entrada USB conectado.;
Si se selecciona IOS, seleccione la fuente iPod BT (o iPod USB si su iPhone/iPod está conectado a
través del terminal de entrada USB) para activar la aplicación.
•
La conectividad de la aplicación será interrumpida o desconectada si:
– Se cambia de la fuente iPod BT a cualquier fuente de reproducción conectada a través del
– Se cambia de la fuente iPod USB a la fuente iPod BT.
:Seleccione smartphone Android para usar la aplicación a través de Bluetooth.;
NO
:Se cancela.
Seleccione en la lista el smartphone Android a usar.
*
Muestra el estado del dispositivo seleccionado.
IOS CONNECTED
Bluetooth o del terminal de entrada USB.
IOS NOT CONNECTED
ANDROID CONNECTED
a través de Bluetooth.
ANDROID NOT CONNECTED
aplicación.
NO
:Se cancela.
terminal de entrada USB.
: Puede utilizar la aplicación mediante el iPhone/iPod conectado a través de
: No se ha conectado ningún dispositivo IOS para usar la aplicación.
: Puede usar la aplicación mediante el smartphone Android conectado
: No se ha conectado ningún dispositivo Android para usar la
[ANDROID]
de
[SELECT]
se ajusta a
[YES]
.
Predeterminado:
XX
Escuchar el iPhone/iPod a través de Bluetooth
(para KD-R992BT/KD-R899BT/KD-R891BT)
Puede escuchar las canciones en el iPhone/iPod a través de la conexión Bluetooth de
esta unidad.
Pulse repetidas veces el botón fuente para seleccionar iPodBT.
• Puede operar el iPod/iPhone de la misma forma en que lo hace cuando el iPod/
iPhone está conectado a través del terminal de entrada USB.
• Si conecta un iPhone/iPod al terminal de entrada USB mientras escucha una fuente
iPodBT, la fuente cambiará automáticamente a iPodUSB. Pulse botón fuente para
seleccionar iPodBT si el dispositivo aún está conectado a través de Bluetooth.
( 8)
Radio Internet a través de Bluetooth
Puede escuchar Spotify en el iPhone/iPod touch/dispositivo Android a través de la
conexión Bluetooth de esta unidad.
• Asegúrese de que el terminal de entrada USB no esté conectado a ningún
dispositivo.
Escuchar Spotify
Preparativos:
Seleccione
[ON]
para
1 Abra la aplicación Spotify en su dispositivo.
[SPOTIFYSRC]
2 Conecte su dispositivo a través de la conexión Bluetooth.
3 Pulse botón fuente repetidamente para seleccionar SPOTIFY (para
iPhone/iPod) o SPOTIFY BT (para el dispositivo Android).
La fuente cambia y la emisión comienza automáticamente.
• Puede operar Spotify de la misma forma en que lo hace cuando Spotify está
conectada a través del terminal de entrada USB.
en
[SOURCE SELECT]. ( 5)
( 11)
( 13)
20
ESPAÑOL
Page 61

AJUSTES DE AUDIO
Con respecto a la disposición de las teclas en la placa frontal, consulte la página3 o
la página4.
1 Pulse y mantenga pulsado .
2 Realice la operación ‘seleccionar un elemento
ajuste
(
3 Repita el paso 2 hasta que se seleccione o active el elemento que
4 Pulse para salir.
Para volver al elemento de ajuste anterior, pulse .
consulte la siguiente tabla).
desee o siga las instrucciones indicadas en el elemento seleccionado.
EQSETTING
PRESETEQ
EASYEQ
PRO EQ
Selecciona un ecualizador predefinido adecuado para el género musical.
• Seleccione
[USER]
FLAT/DRVN3/DRVN2/DRVN1/HARD ROCK/HIP HOP/JAZZ/POP/R&B
USER/CLASSICAL
El ecualizador de conducción (
de la señal de audio para reducir el ruido proveniente del exterior del vehículo o el ruido
producido por los neumáticos.
Ajuste su propia configuración de sonido.
• Los ajustes se guardan en
• Los ajustes realizados afectan a los ajustes actuales de
SUB.W SP
SUB.W
BASS
:
MID
:
TRE
:
Ajuste su propia configuración de sonido.
• Los ajustes se guardan en
• Los ajustes realizados afectan a los ajustes actuales de
para utilizar los ajustes realizados en
DRVN3/DRVN2/DRVN1
[USER]
2
*1*
: 00a
3
*1*
:
–50
LVL–09
LVL–09
LVL–09
[USER]
.
+06
(Predeterminado:
a
+10 00
a
LVL+09 LVL00
a
LVL+09 LVL00
a
LVL+09 LVL00
.
( 3 o4)
’ para realizar el
Predeterminado:
[EASYEQ] o [PROEQ]
) refuerza frecuencias específicas
[PRO EQ]
.
+03
[EASYEQ]
.
.
)
62.5HZ
LEVEL–09
a
realizar un ajuste, seleccione la fuente que desea ajustar.)
LEVEL+09 (LEVEL00)
ON
:Activa la ampliación de graves.;
: Ajusta el volumen a programarse para cada fuente. (Antes de
OFF
:Se cancela.
100HZ/160HZ/250HZ/400HZ/630HZ/1KHZ/1.6KHZ/2.5KHZ/4KHZ/6.3KHZ/10KHZ/16KHZ
LEVEL–09
a
(Antes de realizar un ajuste, seleccione la fuente que desea ajustar.)
Q FACTOR 1.35/1.50/2.00
XX
LEVEL+09 (LEVEL00):
Ajusta el volumen a programarse para cada fuente.
:Ajusta el factor de calidad.
AUDIO CONTROL
BASS BOOST
/
LOUDNESS LEVEL01/LEVEL02
SUB.W LEVEL
SUBWOOFER
3
*
SET
FADER
1
2
3
*
*
*
,
,
:
( 22)
LEVEL+01
a
OFF
bien balanceado a bajos niveles de volumen.;
1
*
SPK-OUT
PRE-OUT
ON
(No aplicable si se ha seleccionado crossover de 3 vías.)
POSITIONR15
los altavoces delanteros y traseros.
LEVEL+05
:Se cancela.
:Refuerza las frecuencias altas o bajas para producir un sonido
2
*
(No aplicable si se ha seleccionado crossover de 3 vías.)
SUB.W00
salida del subwoofer conectado a través del cable del altavoz.
3
*
SUB.W–50
salida del subwoofer conectado a los terminales de salida de línea (SW
o REAR/SW) a través del amplificador externo.
: Activa la salida del subwoofer.;
a
POSITIONF15(POSITION00
: Selecciona su nivel de refuerzo de graves preferido.;
OFF
:Se cancela.
a
SUB.W+06(SUB.W+03
a
SUB.W+10(SUB.W00
OFF
:Se cancela.
):Ajusta el nivel de
( 35)
):Ajusta el nivel de
( 35)
):Ajusta el balance de salida de
ESPAÑOL
21
Page 62

AJUSTES DE AUDIO
4
*
BALANCE
VOLUMEADJUST LEVEL–15
AMPGAIN LOWPOWER
SPK/PREOUT
SPEAKER SIZE
X ' OVER
DTA SETTINGS
CAR SETTINGS
X ' OVER TYPE
2-WAY
3-WAY
1
*
S e visualiza sólo cuando
2
*
Para crossover de 2 vías: Se visualiza sólo cuando
3
*
Para crossover de 2 vías: Se visualiza sólo cuando
[SUB.W/SUB.W]. ( 23)
4
*
El ajuste no afecta a la salida del subwoofer.
POSITIONL15
los altavoces izquierdo y derecho.
a
cada fuente (al compararse con el nivel de volumen de FM). Antes del ajuste, seleccione la
fuente que desea ajustar.
máxima de cada altavoz es inferior a 50 W, con el fin de evitar posibles daños en los
altavoces.);
(No aplicable si se ha seleccionado crossover de 3 vías.)
Dependiendo del método de conexión del altavoz, seleccione la configuración apropiada
para obtener la salida deseada.
Se muestran los elementos de ajuste de crossover de 2 vías o de 3 vías, dependiendo
del tipo de crossover seleccionado
( 23, Ajustes de crossover)
Por defecto, se ha seleccionado el tipo crossover de 2 vías.
Para los ajustes,
Precaución
repentino aumento o disminución del nivel de volumen.
(Se visualiza solo si está seleccionado
YES
(Se visualiza solo si está seleccionado
YES
LEVEL+06(LEVEL00
:Limita el nivel de volumen máximo a 25. (Selecciónelo si la potencia
HIGHPOWER
: Ajuste el volumen antes de cambiar
:Selecciona el tipo crossover de dos vías.; NO:Se cancela.
:Selecciona el tipo crossover de tres vías.; NO:Se cancela.
[SUBWOOFER SET]
a
POSITIONR15(POSITION00
:El nivel máximo de volumen es 35.
( Ajustes salida altavoz)
( [X ' OVER TYPE])
):Ajusta el balance de salida de
):Preajuste el nivel de volumen inicial de
.
25, Ajustes de la alineación del tiempo digital
[X ' OVER TYPE]
[3-WAY]
.)
[2-WAY]
.)
se ajusta a
[ON]. ( 21)
[SPK/PREOUT]
[SPK/PREOUT]
se ajusta a
[SUB.W/SUB.W]. ( 23)
se ajusta a
[REAR/SUB.W]
.
, para evitar un
o
SOUND EFFECT
SPACE ENHANCE
SND RESPONSE LEVEL1/LEVEL2/LEVEL3
SOUND LIFT LOW/MIDDLE/HIGH
VOL LINK EQ ON
K2 TECHNOLOGY
Ajustes salida altavoz
(No aplicable para la fuente TUNER.)
SMALL/MEDIUM/LARGE
OFF
:Se cancela.
OFF
:Se cancela.
emitido por los altavoces.;
:Refuerza la frecuencia para reducir el ruido proveniente del exterior del vehículo o el
rido producido por los neumáticos.;
(No aplicable para la fuente TUNER ni para la fuente AUX.)
ON
:Para mejorar la calidad del sonido de la música comprimida.;
: Aumenta virtualmente el espacio acústico.;
: Hace que el sonido sea virtualmente más realista.;
: Realiza el ajuste virtual de la posición de escucha del sonido
OFF
:Se cancela.
OFF
:Se cancela.
OFF
[SPK/PRE OUT]
(Aplicable solo si [X ‘ OVER TYPE ] está ajustado a [2-WAY])
Seleccione la configuración de salida para los altavoces
el método de conexión del altavoz.
[SPK/PRE OUT]
, basándose en
Conexión a través de los terminales de salida de línea
Para conexiones a través de un amplificador externo.
( 35)
KD-R992BT:
Configuración de
[SPK/PRE OUT]
REAR/REAR
(predeterminado)
REAR/SUB.W
SUB.W/SUB.W
Salida de los altavoces
delanteros
Salida de los altavoces
delanteros
Señal de audio a través de la terminal de salida de línea
FRONT REAR SW
Salida de los altavoces
traseros
( No disponible ) ( No disponible ) ( No disponible )
L (izquierdo): Salida del
subwoofer
R (derecho): (Silencio)
Salida del subwoofer
Salida del subwoofer
:Se cancela.
22
ESPAÑOL
Page 63

AJUSTES DE AUDIO
KD-R899BT/KD-R891BT:
Configuración de
[SPK/PRE OUT]
REAR/REAR
REAR/SUB.W
(predeterminado)
SUB.W/SUB.W
KD-R794BT/KD-R792BT:
Configuración de
[SPK/PRE OUT]
REAR/REAR
REAR/SUB.W
(predeterminado)
SUB.W/SUB.W
Conexión a través de los cables de los altavoces
Para conexiones que no utilizan un amplificador externo. No obstante, con estos ajustes
puedes gozar también de la salida del subwoofer.
Configuración de
[SPK/PRE OUT]
REAR/REAR
REAR/SUB.W
SUB.W/SUB.W
Si se selecciona
– Se selecciona
– Se selecciona
[POSITION R15]
[SUB.W/SUB.W]
[120HZ]
en
[POSITION R02]
a
[POSITION 00]. ( 21)
Señal de audio a través de la terminal de salida de línea
FRONT REAR/SW
Salida de los altavoces delanteros Salida de los altavoces traseros
Salida de los altavoces delanteros Salida del subwoofer
Salida de los altavoces delanteros Salida del subwoofer
Señal de audio a través de la terminal de salida de línea
REAR/SW
Salida de los altavoces traseros
Salida del subwoofer
Salida del subwoofer
( 35)
Señal de audio a través del cable del altavoz trasero
L (izquierdo) R (derecho)
Salida de los altavoces traseros Salida de los altavoces traseros
Salida de los altavoces traseros Salida de los altavoces traseros
Salida del subwoofer (Silencio)
:
[SUBWOOFERLPF]
en
y
[FADER]
[THROUGH]
y el rango seleccionable es de
no está disponible.
( 24)
Ajustes de crossover
A continuación se describen los elementos de ajuste disponibles para crossover de
2vías y crossover de 3 vías.
Precaución
Seleccione el tipo de crossover de acuerdo con la conexión de los altavoces.
Si selecciona un tipo incorrecto:
• Se podrán dañar los altavoces.
• El nivel de sonido de salida puede ser extremadamente alto o bajo.
SPEAKER SIZE
Selecciona, dependiendo del tamaño del altavoz conectado, el rendimiento óptimo.
•
Los ajustes de frecuencia y pendiente se definen automáticamente para el crossover
del altavoz seleccionado.
•
Cuando se ha seleccionado crossover de 2 vías, si se selecciona
[TWEETER]
de
[X ‘ OVER]
•
Cuando se ha seleccionado crossover de 3 vías, si se selecciona
[WOOFER]
X ‘ OVER (crossover)
• [FRQ]/[F-HPFFRQ]/[R-HPFFRQ]/[SWLPF FRQ]/[HPFFRQ]/[LPFFRQ]
frecuencia de cruce de los altavoces seleccionados (filtro de paso alto o de paso bajo).
Si se selecciona
• [SLOPE]/[F-HPFSLOPE]/[R-HPFSLOPE]/[SWLPF SLOPE]/[HPFSLOPE]/[LPFSLOPE]
Ajusta la pendiente de cruce.
Puede seleccionarse solo si se seleccionó un ajuste distinto de
frecuencia de cruce.
• [SW LPF PHASE]/[PHASE]
salida del otro altavoz.
•
[GAINLEFT]/[GAINRIGHT]/[F-HPFGAIN]/[R-HPFGAIN]/[SWLPF GAIN]/[GAIN]:
el volumen de salida del altavoz seleccionado.
[FRONT], [REAR]
del altavoz seleccionado no estará disponible.
en
[SPEAKER SIZE]
[THROUGH]
y
[SUBWOOFER]
, el ajuste
, todas las señales se envían a los altavoces seleccionados.
[X ‘ OVER]
en
[SPEAKER SIZE]
de
[WOOFER]
[THROUGH]
: Selecciona la fase de la salida del altavoz de acuerdo con la
( 35)
[NONE]
para
, el ajuste
[NONE]
para
no estará disponible.
: Ajusta la
para la
Ajusta
:
ESPAÑOL
23
Page 64

AJUSTES DE AUDIO
Elementos de ajuste de crossover de 2 vías
SPEAKER SIZE
FRONT SIZE
TWEETER
1
*
REAR
SUBWOOFER
8CM/10CM/12CM/13CM/16CM/17CM/18CM/4×6/5×7/6×8
6×9/7×10/NONE
3
*2*
16CM/20CM/25CM/30CM/38CM OVER/NONE
8CM/10CM/12CM/13CM/16CM/17CM/18CM
4×6/5×7/6×8/6×9/7×10
SMALL/MIDDLE/LARGE/NONE
(no conectado)
X ' OVER
TWEETER FRQ
GAIN LEFT
GAIN RIGHT
FRONT HPF F-HPF FRQ
F-HPF SLOPE
F-HPF GAIN
1
*
REAR HPF
R-HPF FRQ 30HZ/40HZ/50HZ/60HZ/70HZ/80HZ/90HZ
R-HPF SLOPE
R-HPF GAIN
SUBWOOFER
3
*2*
LPF
SW LPF FRQ 30HZ/40HZ/50HZ/60HZ/70HZ/80HZ/90HZ
SW LPF SLOPE
SW LPF PHASE
SW LPF GAIN –08DB
1KHZ/1.6KHZ/2.5KHZ/4KHZ/5KHZ/6.3KHZ
8KHZ/10KHZ/12.5KHZ
–08DB
a
00DB
–08DB
a
00DB
30HZ/40HZ/50HZ/60HZ/70HZ/80HZ/90HZ
100HZ/120HZ/150HZ/180HZ/220HZ/250HZ
THROUGH
–06DB/–12DB/–18DB/–24DB
–08DB
a
00DB
100HZ/120HZ/150HZ/180HZ/220HZ/250HZ
THROUGH
–06DB/–12DB/–18DB/–24DB
–08DB
a
00DB
100HZ/120HZ/150HZ/180HZ/220HZ/250HZ
THROUGH
–06DB/–12DB/–18DB/–24DB
REVERSE
(180°)/
NORMAL
a
00DB
(no conectado)
(no conectado)
(0°)
Elementos de ajuste de crossover de 3 vías
SPEAKER SIZE
/
TWEETER
MID RANGE
/
WOOFER
X ' OVER
TWEETER HPF FRQ
/
MID RANGE HPF FRQ
/
/
/
/
WOOFER
/
/
1
*
S e visualiza sólo cuando
2
*
S e visualiza sólo cuando
( 22, 23)
3
*
S e visualiza sólo cuando
SMALL/MIDDLE/LARGE
8CM/10CM/12CM/13CM/16CM/17CM/18CM/4×6/5×7/6×8/6×9
3
*
16CM/20CM/25CM/30CM/38CM OVER/NONE
1KHZ/1.6KHZ/2.5KHZ/4KHZ/5KHZ/6.3KHZ/8KHZ
10KHZ/12.5KHZ
SLOPE
PHASE
GAIN –08DB
HPF SLOPE
LPF FRQ
LPF SLOPE
PHASE
GAIN –08DB
3
*
LPF FRQ 30HZ/40HZ/50HZ/60HZ/70HZ/80HZ/90HZ/100HZ
SLOPE
PHASE
GAIN –08DB
[SPK/PRE OUT]
[SPK/PREOUT]
[SUBWOOFER SET]
–06DB/–12DB
REVERSE
(180°)/
NORMAL
(0°)
a
00DB
30HZ/40HZ/50HZ/60HZ/70HZ/80HZ/90HZ/100HZ
120HZ/150HZ/180HZ/220HZ/250HZ/THROUGH
–06DB/–12DB
1KHZ/1.6KHZ/2.5KHZ/4KHZ/5KHZ/6.3KHZ/8KHZ
10KHZ/12.5KHZ/THROUGH
–06DB/–12DB
REVERSE
(180°)/
NORMAL
(0°)
a
00DB
120HZ/150HZ/180HZ/220HZ/250HZ/THROUGH
–06DB/–12DB
REVERSE
(180°)/
NORMAL
(0°)
a
00DB
se ajusta a
se ajusta a
se ajusta a
[REAR/REAR]
[REAR/SUB.W]
[ON]. ( 21)
o
[REAR/SUB.W]. ( 22, 23)
o
[SUB.W/SUB.W]
(no conectado)
/
/
/
/
.
24
ESPAÑOL
Page 65

AJUSTES DE AUDIO
Ajustes de la alineación del tiempo digital
La Alineación de Tiempo Digital ajusta el tiempo de retardo de la salida de los
altavoces creando un entorno más adecuado para su vehículo.
• Para obtener más información,
[DTA SETTINGS]
.
Calculando el valor para [DISTANCE] y [GAIN] de
DTA SETTINGS
POSITION
*
DISTANCE
1
*
GAIN
DTA RESET YES
CAR SETTINGS
CAR TYPE COMPACT/FULL SIZE CAR/WAGON/MINIVAN/SUV
R-SP LOCATION
Selecciona su posición de escucha (punto de referencia).
ALL
:Sin compensación;
FRONT LEFT
•
[FRONT ALL]
[2-WAY]. ( 22)
1
0CM
a
610CM
–8DB
a
0DB
:Restablece los ajustes (
en
[POSITION]
Identifica su tipo de automóvil y la ubicación del altavoz trasero para realizar el ajuste
de
[DTA SETTINGS]
MINIVAN(LONG)
2
*
Selecciona la ubicación de los altavoces traseros en su vehículo para calcular la
distancia mayor desde la posición de escucha seleccionada (punto de referencia).
•
DOOR/REAR DECK
[CAR TYPE]
o
[SUV]
•
2ND ROW/3RD ROW
previamente
FRONT RIGHT
:Asiento delantero izquierdo;
se visualiza sólo cuando
:Ajusta con precisión la distancia a compensar.
:Ajusta con precisión el volumen de salida del altavoz seleccionado.
a sus valores predeterminados.; NO:Se cancela.
.
:Selecciona el tipo de vehículo.;
:Solo se puede seleccionar si se seleccionó previamente
como
[OFF], [COMPACT ], [FULL SIZE CAR], [WAGON]
.
[CAR TYPE]
: Asiento delantero derecho;
FRONT ALL
[X ' OVER TYPE]
[DISTANCE]
y
[GAIN]
:Solo se puede seleccionar si se seleccionó
como
[MINIVAN]
o
:Asiento delantero
se ajusta a
) de la posición seleccionada
/
OFF
: Sin compensación.
[MINIVAN(LONG)]
Calculando el valor para [DISTANCE] y [GAIN] de [DTA SETTINGS]
Si especifica la distancia desde el centro de la posición de
escucha seleccionada hacia cada altavoz, el tiempo de retraso
se calculará y ajustará automáticamente.
1
Establezca el centro de la posición de escucha seleccionada
2
Mida las distancias desde el punto de referencia hacia los
3
Calcule las diferencias entre la distancia del altavoz más
4
Ajuste la
5
Ajuste
Ejemplo: Cuando se seleccionó
posición de escucha
1
*
Antes de hacer un ajuste, seleccione el altavoz:
Cuando se ha seleccionado crossover de 2 vías:
FRONT LEFT/FRONT RIGHT/REAR LEFT/REAR RIGHT/SUBWOOFER:
– S olo se puede seleccionar
un ajuste distinto de
Cuando se ha seleccionado crossover de 3 vías:
TWEETER LEFT/TWEETER RIGHT/MID LEFT/MID RIGHT/WOOFER:
– S olo se puede seleccionar
[WOOFER]
2
*
S e visualiza solo cuando
distinto de
[NONE]
.
[REAR LEFT], [REAR RIGHT]
[NONE]
para
[REAR]
[WOOFER]
de
[SPEAKER SIZE]. ( 24)
[X ' OVER TYPE]
para
[REAR]
de
[SPEAKER SIZE]. ( 24)
y
[SUBWOOFER]
si se seleccionó previamente un ajuste distinto de
se ha ajustado a
como el punto de referencia.
altavoces.
alejado (altavoz trasero) y los demás altavoces.
[DISTANCE]
uno de los altavoces.
[GAIN]
calculada en el paso 3 para cada
para cada uno de los altavoces.
[FRONT ALL]
y
[SUBWOOFER]
de
si se seleccionó previamente
[SPEAKER SIZE]. ( 24)
[NONE]
[2-WAY] ( 22)
y se ha seleccionado un ajuste
como la
para
ESPAÑOL
25
Page 66

AJUSTES DE VISUALIZACIÓN
Identificación de zonas para los ajustes de brillo
KD-R992BT
/
KD-R899BT
KD-R794BT
/
KD-R792BT
(Botón simbólico)
KD-R891BT
Identificación de zonas para los ajustes de color
KD-R992BT
Botón simbólico
KD-R891BT
1 Pulse y mantenga pulsado .
2 Realice la operación ‘seleccionar un elemento
ajuste (consulte la siguiente tabla).
3 Repita el paso 2 hasta que se seleccione o active el elemento que
desee o siga las instrucciones indicadas en el elemento seleccionado.
4 Pulse para salir.
Para volver al elemento de ajuste anterior, pulse .
( 3 o4)
’ para realizar el
Predeterminado:
DISPLAY
DIMMER
BRIGHTNESS
TEXTSCROLL
1
*
S e requiere la conexión del cable de control de iluminación.
2
*
Algunos carac teres o símbolos no se mostrarán correctamente (o aparecerán en blanco).
Oscurece la iluminación.
OFF
:El dimmer está desactivado. El brillo cambia a la configuración
ON
:El dimmer está activado. El brillo cambia a la configuración
(
[BRIGHTNESS]
DIMMER TIME
1
Realice la operación ‘seleccionar un elemento
2
Realice la operación ‘seleccionar un elemento
(Predeterminado:
DIMMERAUTO
apagan o encienden los faros del vehículo.
Ajuste separadamente el brillo para uso diurno y nocturno.
1 DAY/NIGHT
2
Selecciona una zona. (Véase la ilustración.)
3 LEVEL00
2
*
SCROLLONCE
SCROLLAUTO
SCROLLOFF
)
:Establece el tiempo de activación y desactivación del dimmer.
[ON]: 18:00
;
:El dimmer se enciende y se apaga automáticamente cuando se
:Selecciona ajuste diurno o nocturno.
a
LEVEL31
:Desplaza una vez la información en pantalla.;
:El desplazamiento se repite a intervalos de 5 segundos.;
:Se cancela.
[OFF]: 6:00
*
: Ajusta el nivel de brillo.
( 35)
1
( 3 o4)
( 3 o4)
)
[DAY]
.
[NIGHT]
.
’ para ajustar la hora
’ para ajustar la hora
[ON]
[OFF]
XX
.
.
26
ESPAÑOL
Page 67

AJUSTES DE VISUALIZACIÓN
COLOR
(para
KD-R992BT
PRESET
DAY COLOR
NIGHT COLOR
COLOR GUIDE
3
*
Si se selecciona uno de estos patrones de color, el color de la iluminación de
color predeterminado.
)
Selecciona por separado los colores de iluminación para los botones en diferentes zonas.
1
Selecciona una zona. (Véase la ilustración en la página 26.)
2
Seleccione un color para la zona seleccionada.
•
COLOR01
a
•
•
•
Guarda sus propios colores de iluminación de día y de noche para las diferentes zonas.
1
Selecciona una zona. (Véase la ilustración en la página 26.)
2 RED/GREEN/BLUE
3 00
Repita los pasos
• Su ajuste se guarda en
•
[NIGHTCOLOR]
vehículo.
ON
:Cambia la iluminación de los botones cuando se realizan ajustes en el menú y la
búsqueda de lista.;
COLOR49
USER
: Se muestra el color que ha creado para
[NIGHTCOLOR]
COLORFLOW01
CRYSTAL/FLOWER/FOREST/GRADATION/OCEAN/SUNSET
RELAX
si se selecciona
a 31:Seleccione el nivel.
.
a
COLORFLOW03
: Se muestra el patrón del color seleccionado.
[ALLZONE]
2
y 3 para todos los colores primarios.
OFF
en el paso1.)
:Seleccione un color primario.
[USER]
para
[DAYCOLOR]
:Se cancela.
[PRESET]
cambian al encender o apagar los faros de su
o
[DAYCOLOR]
: El color cambia según las velocidades.
.
[ZONE1]
o
3
*
(Puede seleccionarse sólo
y
[ZONE2]
cambiará al
/
COLOR
(para
PRESET
DAY COLOR
NIGHT COLOR
MENU COLOR
KD-R891BT:
Solo el botón simbólico)
Seleccionar un color de iluminación para el botón simbólico. (Véase la ilustración en la
página26.)
•
COLOR01
a
•
•
• Color preajustado:
Guarda sus propios colores de iluminación diurna y nocturna para el botón simbólico.
1
2 00
Repita los pasos
• Su ajuste se guarda en
•
ON
realiza la búsqueda de un archivo de música en una carpeta/lista.;
COLOR49
USER
: Se muestra el color que ha creado para
COLORFLOW01
SUNSET, RELAX
RED/GREEN/BLUE
a 31:Seleccione el nivel.
[NIGHTCOLOR]
vehículo.
: La iluminación del botón simbólico cambia a color blanco en el modo de menú y cuando se
a
COLORFLOW03
CRYSTAL, FLOWER, FOREST, GRADATION, OCEAN
:Seleccione un color primario.
1
y 2 para todos los colores primarios.
[USER]
o
[DAYCOLOR]
[DAYCOLOR]
: El color cambia según las velocidades.
para
[PRESET]
cambian al encender o apagar los faros de su
o
[NIGHTCOLOR]
.
OFF
:Se cancela.
.
,
ESPAÑOL
27
Page 68

REFERENCIAS
Mantenimiento
Limpieza de la unidad
Limpie la suciedad de la placa frontal con un paño suave o paño de silicona seco.
Limpieza del conector
Desmonte la placa frontal y limpie el conector con un palillo de
algodón, teniendo cuidado de no dañarlo.
Cómo manipular los discos:
• No toque la superficie de grabación del disco.
• No pegue cinta etc. sobre el disco ni utilice un CD con cinta
pegada sobre él.
• No utilice accesorios para el disco.
• Limpie desde el centro del disco hacia el exterior.
• Limpie el disco con un paño seco o de silicona. No utilice disolventes.
• Cuando extraiga los discos de esta unidad, tire de estos en sentido horizontal.
• Antes de insertar un disco, quite las rebabas de los bordes del orificio central y del borde exterior.
Más información
Para: – Últimas actualizaciones de firmware y lista de los últimos elementos compatibles
– Aplicación original JVC
– Cualquier otra información más reciente
Visite <http://www.jvc.net/cs/car/>.
General
• Esta unidad puede reproducir sólo los siguientes CD:
•
Reproducción DualDisc:
Audio”. Por consiguiente, no se recomienda usar en este producto, el lado no DVD de un DualDisc.
• Para obtener información detallada y notas acerca de los archivos de audio que pueden reproducirse, visite
<http://www.jvc.net/cs/car/>.
El lado no DVD de un “DualDisc” no es compatible con la norma “Compact Disc Digital
Conector (en el reverso
de la placa frontal)
Archivos reproducibles
• Archivos de audio que pueden reproducirse:
Para discos:
KD-R992BT/KD-R899BT/KD-R891BT
KD-R794BT/KD-R792BT
Para el dispositivo de clase de almacenamiento masivo USB:
KD-R992BT/KD-R899BT/KD-R891BT
AAC(.m4a), WAV (.wav), FLAC (.flac)
KD-R794BT/KD-R792BT
FLAC (.flac)
• Medio de disco reproducible: CD-R/CD-RW/CD-ROM
• Formato de archivo de disco reproducible: ISO 9660 Nivel 1/2, Joliet, nombre de archivo largo
• Sistema de archivos del dispositivo USB reproducible: FAT12, FAT16, FAT32
Aunque los archivos de audio cumplan con los criterios mencionados arriba, la reproducción podría no ser posible
dependiendo de los tipos o condiciones del medio o dispositivo.
El archivo AAC (.m4a) contenido en un CD codificado por iTunes no puede reproducirse en esta unidad.
Discos no reproducibles
• Discos que no son redondos.
• Discos con la superficie de grabación pintada o discos sucios.
• Discos grabables/reescribibles que no hayan sido finalizados.
• CD de 8 cm. Si intenta insertarlo con un adaptador podrán causar fallos de funcionamiento.
Acerca de los dispositivos USB
• No es posible conectar un dispositivo USB a través de un concentrador USB.
• La conexión con un cable de más de 5 m de largo puede ocasionar una reproducción anormal.
• Esta unidad no puede reconocer ningún dispositivo USB cuyo régimen sea distinto de 5 V y que exceda de 1,5A.
Acerca del iPod/iPhone (excepto para KD-R794BT/KD-R792BT)
• A través del terminal de entrada USB:
Made for
– iPod touch (5th y 6th generation)
– iPod nano (7th generation)
– iPhone 4S, 5, 5S, 5C, 6, 6 Plus, 6S, 6S Plus, SE, 7, 7 Plus
: MP3 (.mp3), WMA (.wma)
: MP3 (.mp3), WMA (.wma), WAV (.wav),
: MP3 (.mp3), WMA (.wma), AAC(.aac)
: MP3 (.mp3), WMA (.wma), AAC(.aac),
28
ESPAÑOL
Page 69

REFERENCIAS
• A través de Bluetooth:
Made for
– iPod touch (5th y 6th generation)
– iPhone 4S, 5, 5S, 5C, 6, 6 Plus, 6S, 6S Plus, SE, 7, 7 Plus
• No se puede navegar a través de archivos de video en el menú “Videos” en
• El orden de canciones mostrado en el menú de selección de esta unidad puede diferir del que se encuentra en el
iPod/iPhone.
• Según la versión del sistema operativo del iPod/iPhone, algunas funciones podrían no estar disponibles en esta
unidad.
Acerca del dispositivo Android
• Esta unidad es compatible con Android OS 4.1 y superior.
• Algunos dispositivos Android (con OS 4.1 y superior) pueden no ser completamente compatibles con Android Open
Accessory (AOA) 2.0.
• Si el dispositivo Android es compatible con dispositivos de clase de almacenamiento masivo y con AOA2.0, esta
unidad siempre reproducirá con prioridad a través de AOA 2.0.
Acerca de Spotify
• La aplicación Spotify es compatible con:
– iPhone 4S, 5, 5S, 5C, 6, 6 Plus, 6S, 6S Plus, SE, 7, 7 Plus (iOS 8 o superior)
– iPod touch (5th y 6th generation)
– Android OS 4.0.3 o superior
• Debido a que Spotify es un servicio de terceros, las especificaciones se encuentran sujetas a cambios sin previo aviso.
Por consiguiente, la compatibilidad podría verse afectada, y alguno o todos los servicios podrían dejar de estar
disponibles.
• Algunas funciones de Spotify no están disponibles desde esta unidad.
• Si tiene alguna duda sobre el uso de esta aplicación, póngase en contacto con <www.spotify.com>.
Acerca de Bluetooth
• Dependiendo de la versión Bluetooth del dispositivo, algunos dispositivos Bluetooth pueden no conectarse a esta
unidad.
• Esta unidad puede no funcionar con algunos dispositivos Bluetooth.
• Las condiciones de la señal varían dependiendo del entorno.
[HEAD MODE]
.
Letras cirílicas disponibles
Caracteres disponibles
Indicaciones en pantalla
Cambiar la información en pantalla
Cada vez que pulsa , la información en pantalla cambia.
• Si la información no está disponible o no está registrada, aparecerá “NO TEXT”, “NO NAME”, u otra información
(por ej., nombre de la emisora) o la pantalla quedará en blanco.
Nombre de la
Información en pantalla (para KD-R992BT/KD-R891BT)
fuente
1
FM
o
AM
CD
o
USB (Para CD-DA)
1
2
*
*
,
:
( 30)
Frecuencia (Fecha/Reloj)
(vuelta al comienzo)
(Disponible solo para emisoras del FM Radio Data System)
Nombre de la emisora (PS)/Tipo de programa (PTY) (Fecha/Reloj)
(Fecha/Reloj)
Título de la canción (Fecha/Reloj)
emisora (PS)/Tipo de programa (PTY) (Fecha/Reloj) con sincronización de música
(vuelta al comienzo)
Título de la pista (Artista) Título de la pista (Nombre del disco) Título de la pista
(Fecha/Reloj)
(Artista) con sincronización de música
(Para archivos MP3/WMA/AAC/WAV/FLAC)
Título de la canción (Artista) Título de la canción (Nombre del álbum) Título de
la canción (Fecha/Reloj)
del archivo (Fecha/Reloj)
canción (Artista) con sincronización de música
*
Frecuencia (Fecha) con sincronización de música
1
*
Radio texto+ (Radio texto+) Título de la canción (Artista)
1
*
Tiempo de reproducción (Fecha/Reloj)
1
*
Frecuencia (Fecha/Reloj)
1
*
2
*
(vuelta al comienzo)
1
*
Nombre del archivo (Nombre de la carpeta) Nombre
1
*
Tiempo de reproducción (Fecha/Reloj)
Título de la pista
2
*
(vuelta al comienzo)
1
*
Radio texto
1
*
Nombre de la
1
*
Título de la
*
2
2
*
ESPAÑOL
29
Page 70

REFERENCIAS
Nombre de la fuente Información en pantalla (para KD-R992BT/KD -R891BT)
iPodUSB/iPodBT
ANDROID
SPOTIFY/SPOTIFYBT
BT AUDIO
AUX
1
*
La batería y la fuerza de la señal del dispositivo Bluetooth se visualizarán si
en
[AUTO]. ( 16)
*2
KD-R992BT
KD-R891BT
o
Cuando se selecciona
Título de la canción (Artista)
la canción (Fecha/Reloj)
la canción (Artista) con sincronización de música
Título del contexto (Fecha/Reloj)
canción (Título del álbum)
reproducción (Fecha/Reloj)
música
Título de la canción (Artista) Título de la canción (Nombre del álbum) Título de
la canción (Fecha/Reloj)
la canción (Artista) con sincronización de música
AUX (Fecha/Reloj)
(vuelta al comienzo)
[HEAD MODE]/[AUTO MODE] ( 9)
Título de la canción (Nombre del álbum) Título de
1
*
Tiempo de reproducción (Fecha/Reloj)
1
*
Título de la canción (Artista) Título de la
Título de la canción (Fecha/Reloj)
1
*
2
*
(vuelta al comienzo)
Título del contexto (Fecha) con sincronización de
1
*
Tiempo de reproducción (Fecha/Reloj)
1
*
AUX (Fecha) con sincronización de música
2
*
(vuelta al comienzo)
*
2
*
(vuelta al comienzo)
[BATT/SIGNAL]
: Los colores de iluminación de los botones cambian y se sincroniza con la música.
: El color de iluminación del botón simbólico cambia y se sincroniza con la música.
:
1
*
Título de
1
Tiempo de
1
*
Título de
2
*
está configurada
Nombre de la
fuente
FM
o
AM
CD
o
USB (Para CD-DA)
iPodUSB/iPodBT
ANDROID
SPOTIFY/
SPOTIFYBT
BT AUDIO
AUX
*
El brillo de iluminación de los botones cambia y se sincroniza con la música.
Información en pantalla
(para KD-R899BT/KD-R794BT/KD-R792BT)
Frecuencia Reloj Frecuencia con sincronización de música* (vuelta al comienzo)
(Disponible solo para emisoras del FM Radio Data System)
Nombre de la emisora (PS)/Tipo de programa (PTY) Radio texto Radio texto+
Radio texto+ título/Radio texto+ artista
emisora (PS)/Tipo de programa (PTY) con sincronización de música*
comienzo)
Título del disco/Artista Título de la pista/Artista Tiempo de reproducción
Reloj
Título del disco/Artista con sincronización de música* (vuelta al comienzo)
(Para archivos MP3/WMA/AAC/WAV/FLAC)
Título de la canción/Artista Nombre del álbum/Artista Nombre de la carpeta
Nombre del archivo
con sincronización de música*
o
Cuando se selecciona
Título de la canción/Artista
Reloj Título de la canción/Artista con sincronización de música* (vuelta al
comienzo)
Título del contexto Título de la canción Nombre del artista Nombre del álbum
Tiempo de reproducción Reloj Título del contexto con sincronización de música*
(vuelta al comienzo)
Título de la canción/Artista Nombre del álbum/Artista Tiempo de reproducción
Reloj Título de la canción/Artista con sincronización de música* (vuelta al
comienzo)
AUX Reloj AUX con sincronización de música* (vuelta al comienzo)
Tiempo de reproducción Reloj Título de la canción/Artista
(vuelta al comienzo)
[HEAD MODE]/[AUTO MODE] ( 9)
Nombre del álbum/Artista Tiempo de reproducción
Frecuencia Reloj Nombre de la
(vuelta al
:
30
ESPAÑOL
Page 71

LOCALIZACIÓN Y SOLUCIÓN DE PROBLEMAS
Síntoma Solución
El sonido no se escucha. • Ajuste el volumen al nivel óptimo.
Aparece “MISWIRING CHECK
WIRING THEN PWR ON”.
General
Aparece “PROTECTING SEND
SERVICE”.
La fuente no se puede seleccionar.
• Recepción de radio deficiente.
• Ruidos estáticos mientras se
Radio
escucha la radio.
El disco no puede ser expulsado.
Aparece “IN DISC”. Asegúrese de que no hay ningún obstáculo en la ranura de carga
Aparece “PLEASE EJECT”.
El orden de reproducción no es el
que se esperaba.
CD/USB/iPod
El tiempo de reproducción
transcurrido no escorrecto.
Aparece “NOT SUPPORT” y se
omiten las pistas.
El mensaje “READING” sigue
destellando.
• Inspeccione los cables y las conexiones.
Apague la unidad y luego compruebe que los terminales de los cables
de altavoz estén correctamente aislados. A continuación, vuelva a
encender la unidad.
Lleve la unidad al centro de servicio más cercano.
Verifique el ajuste
Conecte firmemente la antena.
Pulse y mantenga pulsado
Tenga cuidado de no dejar caer el disco cuando sea expulsado.
cuando se expulsa el disco.
Pulse
El orden de reproducción se determina por el nombre del archivo
(USB) o por el orden de grabación de los archivos (disco).
Esto depende del proceso de grabación anterior.
Compruebe que la pista sea de un formato reproducible.
• No utilice demasiados niveles de jerarquías y carpetas.
• Cargue el disco o vuelva a conectar el dispositivo USB.
[SOURCESELECT]. ( 5)
para forzar la expulsión del disco.
, luego inserte un disco correctamente.
( 28)
Síntoma Solución
Aparece “UNSUPPORTED DEVICE”. • Verifique si el dispositivo conectado es compatible con esta unidad
Aparece “UNRESPONSIVE DEVICE”. Asegúrese de que no exista ningún fallo de funcionamiento en el
Aparece “USB HUB IS NOT
SUPPORTED”.
Aparece “CANNOT PLAY”. Conecte un dispositivo USB que contenga archivos de audio
• La fuente no cambia a
“USB” cuando se conecta un
dispositivo USB mientras
escucha cualquier otra fuente.
CD/USB/iPod
• Aparece “USB ERROR”.
El iPod/iPhone no se enciende o
no funciona.
“LOADING” aparece al acceder al
modo búsqueda presionando
.
No se visualizan los caracteres
correctos.
y asegúrese de que los sistemas de archivos estén en formatos
compatibles.
• Vuelva a conectar el dispositivo.
No es posible conectar un dispositivo USB a través de un concentrador
El puerto USB está emitiendo más potencia que el límite de
Si con lo anterior no se soluciona el problema, apague la alimentación
• Verifique la conexión entre esta unidad y el iPod/iPhone.
• Desconecte y realice el reinicio forzado del iPod/iPhone.
Esta unidad está preparando todavía la lista de música del iPod/
• Esta unidad visualiza sólo letras mayúsculas, números, y un número
• Dependiendo del idioma en pantalla que haya seleccionado en
( 28)
dispositivo y vuelva a conectarlo.
USB a esta unidad.
reproducibles.
diseño. Apague la alimentación y desconecte el dispositivo USB.
A continuación, encienda la alimentación y vuelva a conectar el
dispositivo USB.
o vuélvala a encender (o reinicialice la unidad) antes de reemplazarlo
por otro dispositivo USB.
iPhone. Puede que tarde un poco, inténtelo de nuevo más tarde.
limitado de símbolos.
( 6)
, algunos caracteres podrían no visualizarse correctamente.
ESPAÑOL
31
Page 72

LOCALIZACIÓN Y SOLUCIÓN DE PROBLEMAS
Síntoma Solución
• El sonido no se escucha
durante la reproducción.
• El sonido se genera solo por el
dispositivo Android.
No se puede reproducir en
[AUTOMODE]
ANDROID
El mensaje “NO DEVICE” o
“READING” sigue destellando.
Reproducción intermitente o con
saltos de sonido.
“CANNOT PLAY” • Asegúrese de que el dispositivo Android contenga archivos de audio
.
• Vuelva a conectar el dispositivo Android.
• Si está en
[AUDIO MODE]
reproductor de medios en el dispositivo Android e inicie la
reproducción.
• Si está en
[AUDIO MODE]
reproductor de medios actual o utilice otra aplicación.
• Vuelva a iniciar el dispositivo Android.
• Si con esto no se consigue resolver el problema, el dispositivo Android
conectado no podrá enviar la señal de audio a la unidad.
• Asegúrese de que JVC MUSIC PLAY APP esté instalado en el dispositivo
Android.
( 8)
• Vuelva a conectar el dispositivo Android y seleccione el modo de
control apropiado.
• Si con esto no se consigue resolver el problema, el dispositivo Android
conectado no es compatible con
• Desactive las opciones del desarrollador en el dispositivo Android.
• Vuelva a conectar el dispositivo Android.
• Si con esto no se consigue resolver el problema, el dispositivo Android
conectado no es compatible con
Desactive el modo de ahorro de energía en el dispositivo Android.
que puedan reproducirse.
• Vuelva a conectar el dispositivo Android.
• Vuelva a iniciar el dispositivo Android.
, arranque la aplicación de cualquier
, vuelva a arrancar la aplicación del
( 9)
[AUTO MODE]. ( 29)
[AUTO MODE]. ( 29)
( 29)
Síntoma Solución
“DISCONNECTED” El USB está desconectado de la unidad cabezal. Por favor asegúrese de
“CONNECTING” • Conectado a través del terminal de entrada USB: El dispositivo está
Spotify
“CHECK APP” La aplicación Spotify no está conectada correctamente, o el usuario no
No se detecta ningún dispositivo
Bluetooth.
No se puede realizar el
emparejamiento.
Existe eco o ruido.
Bluetooth®
La calidad del sonido del teléfono
es baja.
El sonido se interrumpe o se
omite durante la reproducción
de un reproductor de audio
Bluetooth.
que el dispositivo esté correctamente conectado a través de USB.
conectado a la unidad cabezal. Por favor espere.
• Conectado a través de Bluetooth: El Bluetooth está desconectado. Por
favor compruebe la conexión Bluetooth y asegúrese de que tanto el
dispositivo como la unidad estén emparejados y conectados.
ha iniciado sesión. Finalice la aplicación Spotify, vuélvala a iniciar y, a
continuación, inicie sesión en su cuenta de Spotify.
• Vuelva a buscar el dispositivo Bluetooth.
• Reinicialice la unidad.
• Asegúrese de haber ingresado el mismo código PIN en la unidad y en
el dispositivo Bluetooth.
• Elimine la información de emparejamiento de la unidad y
del dispositivo Bluetooth; a continuación, vuelva a realizar el
emparejamiento.
• Ajuste la posición del micrófono.
• Verifique el ajuste
• Reduzca la distancia entre la unidad y el dispositivo Bluetooth.
• Mueva el automóvil a un lugar donde exista mejor recepción de señal.
• Reduzca la distancia entre la unidad y el reproductor de audio
Bluetooth.
• Apague la unidad y vuelva a encenderla; intente conectar
nuevamente.
• Otros dispositivos Bluetooth pueden estar intentando conectarse a la
unidad.
( 3 o 4)
( 13)
( 12)
[ECHO CANCEL]. ( 15)
32
ESPAÑOL
Page 73

LOCALIZACIÓN Y SOLUCIÓN DE PROBLEMAS
INSTALACIÓN/CONEXIÓN
Síntoma Solución
No se puede controlar el
reproductor de audio Bluetooth
conectado.
“PLEASE WAIT” La unidad se está preparando para utilizar la función Bluetooth. Si el
“NOT SUPPORT” El teléfono conectado no es compatible con la función de
Bluetooth®
“ERROR” Inténtelo nuevamente. Si vuelve a aparecer “ERROR”, verifique si el
“H/W ERROR” Reinicialice la unidad y vuelva a intentar la operación. Si vuelve a
“SWITCHING NG” Los teléfonos conectados no son compatibles con la función cambio de
Si el problema persiste, reinicialice la unidad.
• Verifique si el reproductor de audio Bluetooth conectado es compatible
con Audio/Video Remote Control Profile (AVRCP). (Consulte las
instrucciones del reproductor de audio.)
• Desconecte y vuelva a conectar el reproductor Bluetooth.
mensaje no aparece, apague y encienda la unidad; a continuación,
vuelva a conectar el dispositivo.
reconocimiento de voz.
dispositivo es compatible con la función que está intentando utilizar.
aparecer “H/W ERROR”, consulte al centro de servicio más cercano.
teléfono.
( 3 o 4)
Advertencia
• La unidad puede utilizarse solamente con una fuente de alimentación de 12 V CC con negativo a masa.
• Desconecte el terminal negativo de la batería antes de realizar el cableado y el montaje.
• Para evitar un cortocircuito, no conecte el cable de la batería (amarillo) ni el cable de encendido (rojo) al chasis del
vehículo o cable de conexión a masa (negro).
• Para evitar cortocircuitos:
– Utilice una cinta de vinilo para aislar los cables no conectados.
– Asegúrese de volver a conectar a masa esta unidad al chasis del automóvil después de la instalación.
– Para proteger los cables, asegúrelos con abrazaderas de cables y con una cinta de vinilo, enrolle los cables que
entran en contacto con partes metálicas.
Precaución
• Para fines de seguridad, deje que un profesional realice el cableado y el montaje. Consulte con un distribuidor de
productos de audio para automóviles.
• Instale esta unidad en la consola de su vehículo. No toque las partes metálicas de la unidad durante o un poco
después del uso de la unidad. Las partes metálicas, tales como el disipador de calor o la carcasa, pueden estar muy
calientes.
• No conecte los cables
• Conecte altavoces con una potencia máxima de más de 50 W. Si la potencia máxima de los altavoces es inferior a
50W, cambie el ajuste
• Monte la unidad a un ángulo de menos de 30˚.
• Si el mazo de conductores de su vehículo no dispone de terminal de encendido, conecte el cable de encendido (rojo)
al terminal de la caja de fusibles del vehículo, el cual suministrará una alimentación de 12 V CC y podrá conectarse y
desconectarse mediante la llave de encendido.
• Mantenga todos los cables alejados de las partes metálicas disipadoras de calor.
• Después de instalar la unidad, compruebe que las lámparas de freno, las luces intermitentes, el limpiaparabrisas, etc.
funcionen satisfactoriamente.
• Si se funde el fusible, en primer lugar asegúrese de que los cables no estén en contacto con el chasis del vehículo y, a
continuación, reemplace el fusible usado por otro del mismo régimen.
Procedimiento básico
1 Q uite la llave del interruptor de encendido; después, desconecte el terminal de la batería del
automóvil.
2 Conecte los cables correc tamente.
Consulte Conexión del cableado.
3 Instale la unidad en su automóvil.
Consulte Instalación de la unidad (montaje en el tablero).
4 Conecte el terminal de la batería del automóvil.
5 Pulse botón fuente para encender la unidad.
6 Ex traiga la placa frontal y reinicialice la unidad en menos de 5 segundos.
de los altavoces al chasis del vehículo, al cable de conexión a masa (negro) o en paralelo.
[AMPGAIN]
para evitar daños en los mismos.
( 22)
( 35)
( 34)
( 3 o 4)
ESPAÑOL
33
Page 74

INSTALACIÓN/CONEXIÓN
Lista de piezas para la instalación
(A)
Placa frontal
(C)
Manguito de montaje
(E)
Herramienta de extracción
Terminales de salida
Para el ajuste de crossover de 2 vías
3 pares REAR
2 pares FRONT
1 par REAR/SW : S alida posterior/subwoofer
FRONT
SW
REAR/SW
Para el ajuste de crossover de 3 vías
3 pares REAR
2 pares FRONT
1 par REAR/SW : S alida del woofer
FRONT
SW
REAR/SW
(B)
Placa embellecedora
(D)
Mazo de conductores
: Salida posterior
: Salida frontal
: Salida del subwoofer
: Salida frontal
: Salida posterior/subwoofer
: Salida del tweeter
: Salida de rango medio
: Salida del woofer
: Salida de rango medio
: Salida del woofer
Instalación de la unidad (montaje en el tablero)
Gancho en el lado superior
Antes del montaje, oriente la
placa embellecedora tal como
se muestra en la ilustración.
1 Retire de la unidad, el manguito de montaje y la placa
embellecedora.
2 Alinee los orificios de la unidad (en ambos lados) con la ménsula
de montaje del vehículo y asegure la unidad con los tornillos
(disponibles en el mercado).
Utilice solo los tornillos especificados. El uso de tornillos incorrectos puede dañar
la unidad.
Prepare el cableado
necesario.
( 35)
Salpicadero del automóvil
Doble las lengüetas apropiadas para
retener firmemente la manga en su lugar.
Cómo desmontar la unidadCuando instale sin el manguito de montaje
34
ESPAÑOL
Page 75

INSTALACIÓN/CONEXIÓN
Conexión del cableado
Terminales de salida
( 34)
KD-R992BT
KD-R899BT/KD-R891BT
KD-R794BT/KD-R792BT
Cuando conecte a un amplificador externo, conecte
su cable de tierra al chasis del vehículo para evitar
daños en la unidad.
Terminal de la antena
Conexión de los conectores ISO en algunos
automóviles VW/Audi u Opel (Vauxhall)
Puede ser necesario modificar el cableado del mazo de
conductores suministrado, como se muestra a continuación.
Cable de encendido
A7 (Rojo)
Vehículo
A4 (Amarillo)
Cableado predeterminado
Si su vehículo no tiene un terminal ISO
Se recomienda instalar la unidad con un mazo de cables
disponible en el mercado que sea adecuado para su automóvil
y, para fines de seguridad, deje esta tarea en manos de
profesionales. Consulte con un distribuidor de productos de
audio para automóviles.
(Rojo)
Unidad
Cable de la batería
(Amarillo)
Amarillo
(Cable de la batería)
Rojo
(Cable de encendido)
Rojo (A7)
Amarillo (A4)
Conectores ISO
Jack de entrada de micrófono
Fusible (10 A)
Luz azul/amarilla
(Cable del mando a distancia
para la dirección)
( 12)
Al adaptador del mando a distancia del volante de la dirección
Patilla Color y función
A4 Amarillo : Batería
A5 Azul/blanco : Control de alimentación (12V
A6 Naranja/blanco : Interruptor de control de las luces del automóvil
A7 Rojo : Encendido (ACC)
A8 Negro : Conexión a tierra (masa)
B1
B2
B3
B4
B5
B6
B7
B8
*
También es posible conectar directamente un subwoofer sin el amplificador externo para
]
Púrpura
Púrpura/negro
[
Gris
]
Gris/negro
[
Blanco
]
Blanco/negro
[
Verde
]
Verde/negro
[
subwoofer. Para la configuración,
: Altavoz trasero (derecho)
Para crossover de 3 vías: Tweeter (derecho)
: Altavoz delantero (derecho)
Para crossover de 3 vías: Altavoz de rango medio (derecho)
: Altavoz delantero (izquierdo)
Para crossover de 3 vías: Altavoz de rango medio (izquierdo)
: Altavoz trasero (izquierdo)
Para crossover de 3 vías: Tweeter (izquierdo)
23
.
350mA)
*
ESPAÑOL
35
Page 76

ESPECIFICACIONES
Sujeto a cambios sin previo aviso
FM Gama de frecuencias 87,5MHz — 108,0MHz (pasos de 50kHz)
Sensibilidad útil
(Relación señal/ruido = 26dB)
Sensibilidad de silenciamiento
(DIN S/N = 46dB)
Respuesta de frecuencia (±3 dB) 30Hz—15kHz
Relación señal a ruido (MONO) 64dB
Separación estéreo (1 kHz) 40dB
Sintonizador
AM
Gama de frecuencias 531kHz — 1 611kHz (pasos de 9kHz)
(MW)
Sensibilidad útil
(Relación señal/ruido = 20dB)
AM
Gama de frecuencias 153kHz — 279kHz (pasos de 9kHz)
(LW)
Sensibilidad útil
(Relación señal/ruido = 20dB)
Diodo láser GaAIAs
Filtro digital (D/A) 8 veces sobremuestreo
Velocidad de giro 500rpm — 200rpm (CLV)
Fluctuación y trémolo Por debajo del límite medible
Respuesta de frecuencia (±1 dB) 20Hz—20kHz
Distorsión armónica total (1 kHz) 0,01%
Relación señal a ruido (1 kHz) 105dB
Gama dinámica 90dB
Reproductor de CD
Separación de canales 85dB
MP3 decodificado Compatible con MPEG-1/2 Audio Layer-3
WMA decodificado Compatible con Windows Media Audio
AAC decodificado Archivos AAC-LC “.aac ”
36
ESPAÑOL
0,71V/75 (8,2dBf)
2,0 V/75 Ω
28,2V (29dB)
50V (33,9dB)
KD-R794BT/KD-R792BT
(Excepto para
Estándar USB USB1.1, USB2.0 (Alta velocidad)
Dispositivos compatibles Clase de almacenamiento masivo
Sistema de archivos FAT12/16/32
Corriente máxima de alimentación 5 V CC
Convertidor de filtro digital (D/A) 24 Bit
Respuesta de frecuencia (±1 dB) 20Hz—20kHz
Relación señal a ruido (1kHz) 105dB
USB
Gama dinámica 90dB
Separación de canales 85dB
MP3 decodificado Compatible con MPEG-1/2 Audio Layer-3
WMA decodificado Compatible con Windows Media Audio
AAC decodificado Archivos AAC-LC “.aac ”, “.m4a”
WAV decodificado PCM lineal
FLAC decodificado Archivo FLAC, hasta 24bit /96kHz
Versión Bluetooth 3.0
Gama de frecuencias 2,402GHz—2,480GHz
Potencia de salida Clase de potencia 2 +4 dBm (MÁX), 0 dBm (AVE)
Alcance máximo de comunicación En línea recta, aproximadamente 10 m (32,8 ft)
Emparejamiento SSP (Emparejamiento simple y seguro)
Bluetooth
Perfil HFP1.6 (Perfil manos libres)
)
1,5A
KD-R794BT/KD-R792BT
(Excepto para
A2DP (Perfil Avanzado de Distribución de Audio)
AVRCP1.5 (Perfil de mando a distancia de Audio/Video)
PBAP (Perfil de acceso a la guía telefónica)
SPP (Perfil del puerto en serie)
)
Page 77

ESPECIFICACIONES
Respuesta de frecuencia (±3 dB) 20 Hz — 20 kHz
Voltaje de entrada máximo 1 000mV
Auxiliar
Impedancia de entrada 30k
Potencia de salida máxima 50W×4 ó
Potencia en todo el ancho de banda
(a menos del 1 % THD)
Impedancia del altavoz 4—8
Audio
Nivel de salida de preamplificador/carga (CD/USB)
Impedancia de salida de preamplificador ≤600
Voltaje de trabajo (10,5V—16V admisibles) 14,4V
Consumo de corriente máxima 10A
Gama de temperaturas de funcionamiento –10°C — +60°C
General
Tamaño de instalación (An×Al× F) 182mm×53mm×158mm
Peso neto (incluyendo placa embellecedora,
manguito de montaje)
50W×2 + 50W×1 (Subwoofer = 4)
22W×4
KD-R992BT
4 000mV/10k de carga
KD-R899BT/KD-R891BT
KD-R794BT/KD-R792BT
2 500 mV/10k de carga
g
1,2k
:
/
:
ESPAÑOL
37
Page 78

INHOUD ALVORENS GEBRUIK
ALVORENS GEBRUIK 2
BASISPUNTEN 3
STARTEN 5
1 Annuleren van de demonstratie
2 Instellen van de klok en datum
3 Instellen van de basisinstellingen
RADIO 6
AUX 8
CD/USB/iPod/ANDROID 8
Spotify 11
BLUETOOTH® 12
AUDIO-INSTELLINGEN 21
DISPLAY-INSTELLINGEN 26
TER REFERENTIE 28
Onderhoud
Meer informatie
OPLOSSEN VAN PROBLEMEN 31
INSTALLEREN/VERBINDEN 33
TECHNISCHE GEGEVENS 36
BELANGRIJK
• Lees alvorens dit product in gebruik te nemen deze handleiding door voor een juist gebruik. Het is vooral belangrijk dat u de
Waarschuwingen en Voorzorgen in deze handleiding goed doorleest en opvolgt.
• Bewaar deze handleiding ter referentie op een veilige en toegankelijke plaats.
Waarschuwing
• Bedien of gebruik geen functies die uw aandacht van de verkeersveiligheid af zou kunnen leiden.
Voorzorgen
Volume-instelling:
• Voorkom ongelukken en stel het volume derhalve zodanig in dat u geluid van buiten nog goed kunt horen.
• Verlaag het volume alvorens de weergave van digitale bronnen te starten om beschadiging van de luidsprekers door een
plotselinge verhoging van het uitgangsniveau te voorkomen.
Algemeen:
• Vermijd het gebruik van externe apparatuur indien het de veiligheid tijdens het rijden in gevaar kan brengen.
• Maak beslist een back-up van alle belangrijke data. Wij zijn niet aansprakelijk voor het verlies van opgenomen data.
• Voorkom kortsluiting en steek derhalve nooit metalen voorwerpen (zoals munten en gereedschap) in het toestel.
• In geval van een storing door condensvorming op de laserlens, moet u de disc verwijderen en wachten totdat de condens is
verdampt.
Meer over deze gebruiksaanwijzing
• De bediening wordt voornamelijk uitgelegd met gebruik van de toetsen op het voorpaneel van de
KD-R891BT
• Voor de uitleg worden de aanduidingen in het Engels gebruikt. U kunt de taal voor het display veranderen met het menu.
•
•
.
( 6)
[XX]
toont de gekozen onderdelen.
( XX)
verwijst naar verwante uitleg op de aangegeven pagina.
KD-R992BT
en
2
NEDERLANDS
Page 79

BASISPUNTEN
Voorpaneel voor
KD-R992BT/KD-R899BT/KD-R794BT/KD-R792BT
Bevestigen
Displayvenster
Lade
Bronknop
Verwijdertoets
Volumeknop
Voor het Op het voorpaneel
Inschakelen van de stroom
Instellen van het volume
Een bron selecteren
Veranderen van de displayinformatie
Selecteer een onderdeel
Druk op .
• Houd even ingedrukt om de stroom uit te schakelen.
Verdraai de volumeknop.
Druk op de volumeknop om het geluid te dempen of de weergave te pauzeren.
• Druk nogmaals om te annuleren. Het volumeniveau keert terug naar het vorige niveau voor demping of pauzering.
• Druk herhaaldelijk op .
• Druk op
Druk herhaaldelijk op .
1
Draai de volumeknop om een onderdeel te kiezen.
2
Druk op de knop om te bevestigen.
KD-R899BT/KD-R794BT/KD-R792BT
en verdraai vervolgens binnen 2 seconden de volumeknop.
( 29, 30)
Verwijderen
Terugstellen
Stel het toestel terug
binnen 5 seconden na
het verwijderen van het
voorpaneel.
NEDERLANDS
3
Page 80

BASISPUNTEN
Voorpaneel voor
Bronknop
KD-R891BT
Bevestigen
Lade Displayvenster
Verwijderen
Verwijdertoets
Voor het Op het voorpaneel
Inschakelen van de stroom
Instellen van het volume
Een bron selecteren
Veranderen van de displayinformatie
Selecteer een onderdeel
4
NEDERLANDS
Druk op .
• Houd even ingedrukt om de stroom uit te schakelen.
Druk op .
• Houd
Druk op
• Druk nogmaals om te annuleren. Het volumeniveau keert terug naar het vorige niveau voor demping of pauzering.
• Druk herhaaldelijk op .
• Druk op
Druk herhaaldelijk op .
1
Druk op om een onderdeel te kiezen.
2
Druk op om te bevestigen.
even ingedrukt om het volume snel naar 15 te verhogen.
om het geluid te dempen of de weergave te pauzeren.
en vervolgens binnen 2 seconden op .
( 29, 30)
Terugstellen
Stel het toestel terug
binnen 5 seconden na
het verwijderen van het
voorpaneel.
Page 81

STARTEN
Zie pagina3 of4 voor de indeling op het voorpaneel.
1
Annuleren van de demonstratie
Wanneer u de stroom voor het eerst inschakelt (of wanneer
gesteld), verschijnt:
KD-R992BT/KD-R899BT/KD-R794BT/KD-R792BT
“CANCEL DEMO”
1 Druk op de volumeknop.
[YES]
2 Druk nogmaals op de volumeknop.
“DEMO OFF” verschijnt.
KD-R891BT
“CANCEL DEMO”
1 Druk op .
[YES]
2 Druk nogmaals op .
“DEMO OFF” verschijnt.
2
1
Houd even ingedrukt.
2 Voer ‘Selecteer een onderdeel
3 Voer ‘Selecteer een onderdeel
[CLOCKADJUST]
4 Voer ‘Selecteer een onderdeel
[DATESET]
5 Druk op om te verlaten.
Druk op om naar het voorgaande instelonderdeel terug te keren.
“PRESS” “ VOLUME KNOB”
is de basisinstelling.
:
“PRESS ENTER”
is de basisinstelling.
Instellen van de klok en datum
( 3 of4)’
stel het uur en de minuut in
stel de dag, maand en jaar in
( 3 of4)’
( 3 of4)’
[FACTORY RESET]
:
uit om
[CLOCK]
uit om de klok aan te passen.
[CLOCKFORMAT] [12H]
uit om de datum aan te passen.
te selecteren.
op
[YES]
of
3
Instellen van de basisinstellingen
1
Houd even ingedrukt.
2 Voer ‘Selecteer een onderdeel
, is
volgende tabel) te selecteren.
3 Herhaal stap 2 totdat het gewenste onderdeel is gekozen of
geactiveerd.
4 Druk op om te verlaten.
Druk op om naar het voorgaande instelonderdeel terug te keren.
( 3 of4)’
SYSTEM
KEYBEEP
(Niet van toepassing indien 3-weg crossover is gekozen.)
ON
:Activeren van de toetsdruktoon.;
OFF
SOURCESELECT
*
AMSRC
SPOTIFY SRC
BUILT-IN AUX
ON
:Activeren van AM als bronkeuze.;
*
ON
:Activeren van SPOTIFY als bronkeuze.;
*
ON
:Activeren van AUX als bronkeuze.;
OFF
OFF
F/W UPDATE
UPDATESYSTEM
[24H]
F/WUP xxxx
FACTORY RESET YES
*
Verschijnt niet wanneer de overeenkomende bron wordt gekozen.
YES
:De upgrade van de firmware wordt gestart.; NO:Geannuleerd (upgraden is niet
geactiveerd).
Ga voor details aangaande de update van firmware naar: <http://www.jvc.net/cs/car/>.
:Stelt de instellingen naar de standaardinstellingen terug
(uitgezonderd opgeslagen zenders).;
NO
uit om een onderdeel (zie de
Basisinstelling:
:Uitschakelen
:Uitschakelen.
( 6)
OFF
:Uitschakelen.
( 11)
:Uitschakelen.
( 8)
:Geannuleerd.
XX
NEDERLANDS
5
Page 82

STARTEN
CLOCK
TIMESYNC
CLOCKDISPLAY ON
ENGLISH
РУССКИЙ
ESPANOL
ON
:De kloktijd wordt automatisch ingesteld op basis van kloktijddata
(CT) van het FM Radio Data System signaal.;
:De tijd wordt op het display getoond, ook wanneer de stroom is
uitgeschakeld.;
Kies indien van toepassing de displaytaal voor het menu en
muziekinformatie.
ENGLISH
OFF
:Geannuleerd.
is de standaardinstelling.
OFF
:Geannuleerd.
RADIO
Zie pagina3 of4 voor de indeling op het voorpaneel.
Opzoeken van een zender
1
Druk herhaaldelijk op de bronknop om FM of AM te selecteren.
2 Druk op om automatisch een zender op te zoeken.
(of)
Houd even ingedrukt totdat “M” knippert en druk vervolgens
herhaaldelijk om een zender handmatig op te zoeken.
• “ST” of “STEREO” licht op tijdens ontvangst van een stereo FM-uitzending met voldoende
signaalsterkte.
Geheugeninstellingen
U kunt maximaal 18 zenders voor FM en 6 zenders voor AM opslaan.
Opslaan van een zender
Tijdens het luisteren naar een zender....
Houd een van de cijfertoetsen (1 tot 6) even ingedrukt.
(of)
1 Houd de volgende knop ingedrukt tot “PRESETMODE” knippert.
KD-R992BT/KD-R899BT/KD-R794BT/KD-R792BT
KD-R891BT
2 Voer ‘Selecteer een onderdeel
Het voorkeurnummer knippert en “MEMORY” wordt getoond.
:
( 3 of4)
Kiezen van een opgeslagen zender
Druk op een van de cijfertoetsen (1tot6).
(of)
1 Druk op .
2 Voer ‘Selecteer een onderdeel
( 3 of4)
: volumeknop
’ uit om een voorkeurnummer te selecteren.
’ uit om een voorkeurnummer te selecteren.
6
NEDERLANDS
Page 83

RADIO
Overige instellingen
1
Houd even ingedrukt.
2 Voer ‘Selecteer een onderdeel
volgende tabel
3 Herhaal stap 2 totdat het gewenste onderdeel is gekozen/geactiveerd
of volg de aanwijzingen voor het geselecteerde onderdeel.
4 Druk op om te verlaten.
Druk op om naar het voorgaande instelonderdeel terug te keren.
)
te selecteren.
( 3 of4)
’ uit om een onderdeel (zie de
Basisinstelling:
TUNERSETTING
RADIO TIMER
SSM
LOCAL SEEK ON
Inschakelen van de radio op een bepaalde tijd, ongeacht welke bron is gekozen.
1
ONCE/DAILY/WEEKLY/OFF
2
FM/AM
:Kies de golfband.
3
01
tot 18 (voor FM)/01 tot 06 (voor AM):Kies de voorkeurzender.
1
4
“
De radiotimer wordt in de volgende gevallen niet geactiveerd.
• Het toestel is uitgeschakeld.
•
SSM01–06/SSM07–12/SSM13–18
FM. “SSM” stopt te knipperen nadat de eerste 6 zenders zijn opgeslagen. Kies
SSM13–18
• De gemaakte instellingen zijn alleen van toepassing op de gekozen bron/zender. Nadat u van
*
Stel de dag
M
[OFF]
is gekozen.
bron/zender verandert, moet u de instellingen opnieuw maken.
en tijd voor het inschakelen in.
” licht op wanneer voltooid.
is gekozen voor
( 5)
voor het opslaan van de volgende 12 zenders.
:Opzoeken van uitsluitend FM-zenders met een goede ontvangst.;
:Kies hoe vaak de timer moet worden geactiveerd.
[AMSRC]
in
[SOURCESELECT]
: Automatisch opslaan van 18 zenders voor
nadat de radiotimer voor AM
SSM07–12
OFF
:Geannuleerd.
IF BAND AUTO
MONO SET ON
NEWSSET
REGIONAL
XX
2
*
AF SET
TI ON
PTY SEARCH
1
*
Alleen kiesbaar wanneer
2
*
Alleen voor FM-bron.
/
PTY-code
NEWS, AFFAIRS, INFO, SPORT, EDUCATE, DRAMA, CULTURE, SCIENCE, VARIED, POP M
(popmuziek),
muziek),
CLASSICS, OTHER M
SOCIAL, RELIGION, PHONE IN, TRAVEL, LEISURE, JAZZ, COUNTRY, NATION M
muziek),
OLDIES, FOLK M
:Verhogen van de gevoeligheid van de tuner voor minder, door in de buurt liggende FMzenders veroorzaakte storing. (Het stereo-effect gaat mogelijk verloren.);
aan ruis van in de buurt liggende FM-zenders maar de geluidskwaliteit wordt niet verslechterd
en het stereo-effect blijf behouden.
:Verbeteren van de FM-ontvangst, maar het stereo-effect gaat verloren.;
OFF
:Geannuleerd.
2
*
ON
:Het toestel schakelt tijdelijk naar het nieuwsprogramma over indien beschikbaar.;
OFF
:Geannuleerd.
2
*
ON
: Overschakelen naar een andere zender in een bepaalde regio met gebruik van “AF”.;
OFF
:Geannuleerd.
ON
: Automatisch opzoeken van een andere zender die hetzelfde programma in hetzelfde Radio
Data System netwerk uitzendt maar met een betere ontvangst indien de ontvangst van de
huidige zender slecht is.;
: Laat het toetsel tijdelijk overschakelen naar verkeersinformatie indien beschikbaar
(“TI” licht op) tijdens het luisteren naar alle bronnen, behalve AM. ;
2
*
Kies een PTY-code (zie hieronder).
Indien er een zender is die een programma van dezelfde PTY-code uitzendt, wordt op deze
zender afgestemd.
[ONCE]
ROCK M
(rockmuziek),
OFF
of
[WEEKLY]
EASY M
(overige muziek),
(folkmuziek),
: Geannuleerd.
in stap 1 is gekozen.
(easy listening muziek),
WEATHER, FINANCE, CHILDREN
DOCUMENT
OFF
LIGHT M
WIDE
:Onderhevig
:Geannuleerd.
(lichte
(nationale
,
NEDERLANDS
7
Page 84

AUX CD/USB/iPod/ANDROID
Gebruik een draagbare audiospeler
1
Verbind een draagbare audiospeler (los verkrijgbaar).
KD-R992BT/KD-R899BT/KD-R794BT/KD-R792BT
3,5mm stereo-ministekker, “L”-vormig
(los verkrijgbaar)
Aux-ingangsaansluiting
KD-R891BT
2 Kies
3 Druk herhaaldelijk op de bronknop om AUX te selecteren.
4 Schakel de draagbare audiospeler in en start de weergave.
8
:
Aux-ingangsaansluiting
3,5mm stereo-ministekker, “L”-vormig
(los verkrijgbaar)
[ON]
voor
[BUILT-IN AUX]
Gebruik een stereoministekker met 3-kernen voor een optimaal
geluid.
in
[SOURCE SELECT]. ( 5)
NEDERLANDS
:
Draagbare audiospeler
Draagbare audiospeler
Starten van de weergave
De bron verandert automatisch en de weergave start.
CD
KD-R992BT/KD-R899BT/KD-R794BT/KD-R792BT: KD-R891BT:
Uitwerpen disc
USB-ingangsaansluiting
KD-R992BT/
KD-R899BT/
KD-R794BT/
KD-R792BT
Labelkant
USB
USB 2.0 kabel
1
*
(los verkrijgbaar)
Uitwerpen disc
iPod/iPhone
USB-ingangsaansluiting
KD-R891BT
Accessoire van de iPod/iPhone
ANDROID
1
*
(los verkrijgbaar)
USB kabel
1
*
Laat de kabel wanneer niet in gebruik niet in de auto achter.
2
*
Indien verbonden met een Android apparaat verschijnt “Press [VIEW] to install JVC MUSIC PLAY APP”. Volg
de aanwijzingen voor het installeren van de app. U kunt tevens de laatste versie van de app JVC MUSIC
PLAY op uw Android apparaat installeren alvorens de verbinding te maken. Ga voor meer informatie naar
<http://www.jvc.net/cs/car/>.
1
*
2
*
Labelkant
Page 85

CD/USB/iPod/ANDROID
Zie pagina3 of4 voor de indeling op het voorpaneel.
• Kiesbare bronnen:
KD-R992BT/KD-R899BT/KD-R891BT
KD-R794BT/KD-R792BT
: CD/USB/ANDROID
Voor het Op het voorpaneel
Snel
achterwaarts/
voorwaarts
Kiezen van een
nummer/bestand
Kiezen van een
4
*
map
Afspelen
herhalen
Houd even ingedrukt.
3
*
Druk op
Druk op .
Druk herhaaldelijk op .
5
*
TRACKREPEAT/ALLREPEAT
TRACKREPEAT/FOLDERREPEAT/ALLREPEAT
ONEREPEAT/ALLREPEAT/REPEATOFF
Willekeurig
*
afspelen
Druk herhaaldelijk op .
5
ALLRANDOM/RANDOMOFF
FOLDERRANDOM/ALLRANDOM/RANDOMOFF
SONGRANDOM/ALLRANDOM/RANDOMOFF
3
*
Voor de ANDROID: Alleen mogelijk wanneer
4
*
Voor de CD: Alleen voor MP3/WMA/AAC-bestanden. Werkt niet voor een iPod/ANDROID.
5
*
Voor de iPod/ANDROID: Alleen mogelijk wanneer
: CD/USB/iPodUSB/ANDROID
.
: Audio-CD
: Audio-CD
[AUTO MODE]
is gekozen.
[HEADMODE]/[AUTOMODE]
: MP3/WMA/AAC/WAV/
FLAC-bestand
: iPod of ANDROID
: MP3/WMA/AAC/WAV/
FLAC-bestand
: iPod of ANDROID
is gekozen.
Selecteer de bedieningsfunctie
Druk met iPodUSB als bron gekozen herhaaldelijk op .
HEAD MODE
IPHONE MODE
Druk met ANDROID als bron gekozen herhaaldelijk op .
AUTO MODE
AUDIO MODE
: Regel de iPod met dit toestel.
: Regel de iPod met de iPod. Weergave/pauze en
verspringen van bestanden kan nog wel worden
uitgevoerd via dit toestel.
: Bedien het Android apparaat met dit toestel via de
JVC MUSIC PLAY app die op het Android apparaat is
geïnstalleerd.
: Bedien het Android apparaat met het Android apparaat
middels een andere mediaspeler-app die op het Android
apparaat is geïnstalleerd. Weergave/pauze en verspringen
van bestanden kan nog wel worden uitgevoerd via dit
toestel.
Selecteer het muziekstation
Druk met USB als bron gekozen herhaaldelijk op .
De in de volgende drive opgeslagen nummers worden afgespeeld.
• Geselecteerde interne of externe geheugen van een smartphone
(massa-opslagklasse).
• Geselecteerde station van een apparaat met meerdere stations.
NEDERLANDS
9
Page 86

CD/USB/iPod/ANDROID
Instellingen voor gebruik van de JVC Remote app
(voor de KD-R992BT/KD-R899BT/KD-R891BT)
De JVC Remote app is ontworpen voor bediening van functies van JVC autoreceivers via
een iPhone/iPod (via de USB-ingangsaansluiting).
Voorbereiding:
Installeer de laatste versie van de JVC Remote app op uw apparaat alvorens de
verbinding te maken. Ga voor meer informatie naar <http://www.jvc.net/cs/car/>.
U kunt de instellingen op dezelfde manier als met een verbinding via Bluetooth maken.
( 19)
Kies een bestand uit een map/lijst
Voor iPod/ANDROID alleen van toepassing wanneer
gekozen.
1 Druk op .
2 Voer ‘Selecteer een onderdeel
selecteren.
3 Voer ‘Selecteer een onderdeel
selecteren.
Snelzoeken
U kunt indien u veel bestanden heeft, snel het gewenste bestand opzoeken.
Voer de volgende handeling uit om snel door de lijst te bladeren.
KD-R992BT/KD-R899BT
KD-R794BT/KD-R792BT
KD-R891BT
(alleen van toepassing op CD, USB en ANDROID bronnen)
: Houd even ingedrukt
( 3 of4)
( 3 of4)
/
: Verdraai de volumeknop snel
[HEADMODE]/[AUTO MODE]
’ uit om een map/lijst te
’ uit om een bestand te
is
Zoeken op alfabet
bronnen)
U kunt een bestand ook aan de hand van de eerste letter of teken van de naam
opzoeken.
Voor iPodUSB bron
Voer de volgende handeling uit om het gewenste teken te selecteren
(A tot Z, 0tot9, OTHERS).
KD-R992BT/KD-R899BT:
KD-R891BT:
• Kies “OTHERS” indien het eerste teken anders dan A tot Z en 0 tot 9 is.
Voor ANDROID bron
1 Druk op om het zoeken met tekens te activeren.
2 Voer de volgende handeling uit om het gewenste teken te
^A^ : Hoofdletters (A tot Z)
_A_ : Kleine letters (a tot z)
-0- : Cijfers (0 tot 9)
Druk op
selecteren.
KD-R992BT/KD-R899BT
KD-R794BT/KD-R792BT
KD-R891BT
-
OTHERS- : Andere tekens dan A tot Z en 0 tot 9
(alleen van toepassing op iPod USB en ANDROID
Druk op of verdraai de volumeknop snel
/
: Druk op
: Verdraai de volumeknop
3 Druk op de volgende knop om te beginnen met zoeken.
KD-R992BT/KD-R899BT
KD-R794BT/KD-R792BT
KD-R891BT
:
• Druk op om naar het voorgaande instelonderdeel terug te keren.
• Houd
even ingedrukt om te annuleren.
/
: volumeknop
10
NEDERLANDS
Page 87

Spotify
Voorbereiding:
Installeer de laatste versie van de Spotify-app op uw apparaat (iPhone/iPod touch),
maak een account en meldt u aan bij Spotify.
• Kies
[ON]
voor
[SPOTIFY SRC]
KD-R794BT/KD-R792BT
verbinding met een Android-apparaat.
Starten van weergave
1
Open de Spotify-app op uw apparaat.
2 Verbind uw apparaat met de USB-ingangsaansluiting.
KD-R992BT/KD-R899BT
USB-ingangsaansluiting
KD-R891BT
3 Druk herhaaldelijk op de bronknop om SPOTIFY te selecteren.
De uitzending start automatisch.
* Laat de kabel wanneer niet in gebruik niet in de auto achter.
:
USB-ingangsaansluiting
in
[SOURCESELECT]. ( 5)
: U kunt alleen naar Spotify luisteren via een Bluetooth-
( 20)
:
Accessoire van de iPod/iPhone*
Accessoire van de iPod/iPhone*
Voor het Op het voorpaneel
Weergave/pauze
Nummer overslaan
Duim omhoog of duim
Radio starten
Afspelen herhalen
Willekeurig afspelen
*
KD-R992BT/KD-R899BT/KD-R794BT/KD-R792BT
Druk op de volumeknop.
KD-R891BT
: Druk op .
1
Druk op
2
*
Druk op .
Houd
3
Druk herhaaldelijk op .
*
S
/ T.
5 even ingedrukt.
ALLREPEAT, ONE REPEAT
3
*
Druk herhaaldelijk op
1
*
,
REPEATOFF
1
*
.
ALLRANDOM, RANDOMOFF
1
*
Alleen beschikbaar voor gebruikers met een premium account.
2
*
D eze functie is alleen beschikbaar voor radio nummers. Als duim omlaag is geselecteerd, wordt het huidige
nummer overgeslagen.
3
*
Alleen beschikbaar voor nummers op playlists.
Informatie over favoriete liederen opslaan
Tijdens het luisteren naar de radio op Spotify...
Houd de volgende knop ingedrukt om de nummerinformatie op te slaan.
KD-R992BT/KD-R899BT/KD-R794BT/KD-R792BT
KD-R891BT
“SAVED” wordt weergegeven en de informatie wordt opgeslagen in “Your Music
(Uw muziek)” of “Your Library (Uw bibliotheek)” op uw Spotify-account.
Om het opslaan ongedaan te maken, herhaalt u deze procedure.
“REMOVED” wordt weergegeven en de informatie wordt verwijderd uit “Your Music
(Uw muziek)” of “Your Library (Uw bibliotheek)” op uw Spotify-account.
:
: volumeknop
:
NEDERLANDS
11
Page 88

Spotify BLUETOOTH®
Een lied of zender zoeken
1
Druk op .
2 Voer ‘Selecteer een onderdeel
selecteren
De weergegeven lijsttypes verschillen afhankelijk van de van Spotify verkregen
informatie.
3 Voer ‘Selecteer een onderdeel
zender te selecteren.
Voer de volgende handeling uit om snel door de lijst te bladeren.
KD-R992BT/KD-R899BT
KD-R794BT/KD-R792BT
KD-R891BT
Houd
: Houd even ingedrukt
even ingedrukt om te annuleren.
( 3 of4)
’ uit om een lijsttype te
( 3 of4)
’ uit om het gewenste lied of
/
: Verdraai de volumeknop snel
BLUETOOTH — Verbinding
Ondersteunde Bluetooth profielen
– Hands-Free Profile (HFP)
– Advanced Audio Distribution Profile (A2DP)
– Audio/Video Remote Control Profile (AVRCP)
– Serial Port Profile (SPP)
– Phonebook Access Profile (PBAP)
Ondersteunde Bluetooth coderingen
– Sub Band Codec (SBC)
– Advanced Audio Coding (AAC)
Verbind de microfoon
Microfooningangsaansluiting
Stel de hoek van de
microfoon in
Achterpaneel
Microfoon (bijgeleverd)
Zet indien nodig met snoerklemmen
(niet bijgeleverd) vast.
12
NEDERLANDS
Page 89

BLUETOOTH®
Een Bluetooth apparaat voor het eerst koppelen en verbinden
1
Druk op bronknop om het toestel in te schakelen.
2 Zoek en kies “KD-R9 BT”/“KD-R8 BT”/“KD-R7 BT” met het Bluetooth apparaat.
“BT PAIRING” knippert op het display.
• Met bepaalde Bluetooth apparaten moet u mogelijk direct na het zoeken de PIN-code (persoonlijk
identificatienummer) invoeren.
3 Voer afhankelijk van wat op het display verschijnt (A) of (B) uit.
Met bepaalde Bluetooth apparaten wordt het koppelen mogelijk anders dan hieronder beschreven
uitgevoerd.
(A)
KD-R992BT/KD-R899BT/KD-R794BT/KD-R792BT
“[Naam apparaat]”
KD-R891BT
“[Naam apparaat]”
“XXXXXX” is een 6-cijferige sleutel die willekeurig tijdens het koppelen wordt gemaakt.
Bedien het Bluetooth apparaat om de sleutel te bevestigen.
(B)
KD-R992BT/KD-R899BT/KD-R794BT/KD-R792BT
“[Naam apparaat]”
KD-R891BT
“[Naam apparaat]”
Druk op de volgende knop om het koppelen te starten.
• Voer wanneer “PAIRING” “PIN 0000” over het display rolt de PIN-code “0000” in het Bluetooth
• Indien alleen “PAIRING” verschijnt, bedien dan het Bluetooth apparaat om het koppelen te
“PAIRING COMPLETED” verschijnt zodra het koppelen is voltooid en “
verbinding is gemaakt.
• Dit toestel ondersteunt Secure Simple Pairing (SSP).
• U kunt in totaal maximaal vijf apparaten registreren (koppelen).
• Nadat het koppelen is voltooid, blijft het Bluetooth apparaat geregistreerd in het toestel, zelfs wanneer u het
toestel terugstelt. Voor het wissen van een gekoppeld apparaat,
:
Controleer dat de sleutels die op het toestel en het Bluetooth apparaat verschijnen hetzelfde zijn.
Voer de volgende handeling uit om de wachtcode te bevestigen.
KD-R992BT/KD-R899BT/KD-R794BT/KD-R792BT
KD-R891BT
:
KD-R992BT/KD-R899BT/KD-R794BT/KD-R792BT
KD-R891BT
apparaat in.
U kunt alvorens te koppelen de PIN-code als gewenst veranderen.
bevestigen.
“XXXXXX” “VOL–YES” “BACK–NO”
“XXXXXX” “ENTER–YES” “BACK–NO”
:
“VOL–YES” “BACK–NO”
“ENTER–YES” “BACK–NO”
:
:
: volumeknop
:
: volumeknop
17, [DEVICE DELETE]
( 17)
” licht op wanneer de Bluetooth
.
• Tegelijkertijd kunnen er maximaal twee Bluetooth telefoons
en één Bluetooth audio-apparaat worden verbonden.
Tijdens de BT AUDIO bron, kunt u echter vijf Bluetooth
audio-apparaten verbinden en tussen deze vijf apparaten
schakelen.
• Bepaalde Bluetooth apparaten worden niet automatisch
• Zie de handleiding van het Bluetooth apparaat voor meer
( 19)
na het koppelen met het toestel verbonden. Verbind het
apparaat dan handmatig met het toestel.
informatie.
Automatisch koppelen
Wanneer u de volgende apparaten met de USBingangsaansluiting verbindt, wordt automatisch een verzoek
voor het koppelen (via Bluetooth) geactiveerd.
KD-R992BT/KD-R899BT/KD-R891BT
KD-R794BT/KD-R792BT
Druk op de volgende knop om te koppelen nadat u de
apparaatnaam heeft bevestigd.
KD-R992BT/KD-R899BT
KD-R794BT/KD-R792BT
KD-R891BT
Het verzoek voor automatisch koppelen wordt alleen
geactiveerd indien:
– De Bluetooth functie van het aangesloten apparaat is
–
– De JVC MUSIC PLAY app is op het Android apparaat
:
ingeschakeld.
[AUTO PAIRING]
geïnstalleerd
: Android apparaat
/
: volumeknop
op
[ON]
( 8)
en
[AUTO MODE]
is gesteld.
: iPhone/iPod touch/
Android apparaat
( 18)
is gekozen
( 9)
.
NEDERLANDS
13
Page 90

BLUETOOTH®
BLUETOOTH — Mobiele telefoon
Zie pagina3 of4 voor de indeling op het voorpaneel.
Ontvangst van een gesprek
Wanneer een gesprek binnenkomt:
•
KD-R992BT
De toetsen knipperen met de kleur die u heeft gekozen in
KD-R891BT
De symbolische toets knippert in de kleur die u in
( 15)
KD-R899BT/KD-R794BT/KD-R792BT
De toetsen knipperen met het patroon dat u heeft gekozen in
( 15)
• Het toestel beantwoordt automatisch het gesprek wanneer
een geselecteerde tijd is ingesteld.
Tijdens een gesprek:
•
KD-R992BT
De toetsen stoppen te knipperen en lichten op met de kleur die u heeft gekozen
in
KD-R891BT
De symbolische toets stopt te knipperen en licht op in de kleur die u in
[RING COLOR]
KD-R899BT/KD-R794BT/KD-R792BT
De toetsen stoppen te knipperen.
• De Bluetooth verbinding wordt verbroken wanneer u het toestel uitschakelt of
het voorpaneel verwijdert.
:
:
:
[RING COLOR]. ( 15)
:
heeft gekozen.
( 15)
:
( 15)
:
[RING COLOR]. ( 15)
[RING COLOR]
[AUTO ANSWER]
heeft gekozen.
[RING ILLUMI]
.
op
De volgende bediening is mogelijk verschillend of niet beschikbaar afhankelijk van de
telefoon die u heeft verbonden.
Voor het Op het voorpaneel
Eerste binnenkomende gesprek...
Beantwoorden van een
gesprek
Negeren van een gesprek
Beëindigen van een gesprek
Tijdens het beantwoorden van het eerst binnenkomende gesprek...
Een ander binnenkomend
gesprek beantwoorden het
huidige gesprek in de wacht
zetten
Negeren van een ander
binnenkomend gesprek
Druk op
KD-R992BT/KD-R899BT
KD-R794BT/KD-R792BT
KD-R891BT
Houd
KD-R992BT/KD-R899BT
KD-R794BT/KD-R792BT
KD-R891BT
Houd
KD-R992BT/KD-R899BT
KD-R794BT/KD-R792BT
KD-R891BT
Druk op
KD-R992BT/KD-R899BT
KD-R794BT/KD-R792BT
KD-R891BT
Houd
KD-R992BT/KD-R899BT
KD-R794BT/KD-R792BT
KD-R891BT
of de volgende knop.
:
of de volgende knop ingedrukt.
:
of de volgende knop ingedrukt.
:
of de volgende knop.
:
of de volgende knop ingedrukt.
:
/
: volumeknop
/
: volumeknop
/
: volumeknop
/
: volumeknop
/
: volumeknop
14
NEDERLANDS
Page 91

BLUETOOTH®
Voor het Op het voorpaneel
Gedurende twee actieve gesprekken...
Stoppen van het huidige
gesprek en activeren van het
gesprek dat in de wacht is
gezet
Overschakelen tussen het
huidige gesprek en het in de
wacht gezette gesprek
Instellen van het volume van
de telefoon
(Basisinstelling:
Afwisselend schakelen tussen
hands-free en privégesprek
1
*
D eze instelling heeft geen effect op het volume van andere bronnen.
2
*
Houd
3
*
D e bedieningen zijn mogelijk anders afhankelijk van de verbonden Bluetooth apparatuur.
1
*
[00]
tot
[35]
[15]
)
VOL +
even ingedrukt om het volume snel naar 15 te verhogen.
Verbeteren van de stemkwaliteit
Tijdens een telefoongesprek....
1 Houd even ingedrukt.
2 Voer ‘Selecteer een onderdeel
tabel
)
te selecteren.
3 Herhaal stap 2 totdat het gewenste onderdeel is gekozen of geactiveerd.
4 Druk op om te verlaten.
Druk op om naar het voorgaande instelonderdeel terug te keren.
Houd
KD-R992BT/KD-R899BT
KD-R794BT/KD-R792BT
KD-R891BT
Druk op
Voer de volgende handeling uit tijdens een
oproep.
KD-R992BT/KD-R899BT/KD-R794BT/KD-R792BT
Verdraai de volumeknop
KD-R891BT
Druk tijdens een gesprek op .
3
*
( 3 of4)
of de volgende knop ingedrukt.
/
:
: Druk op
’ uit om een onderdeel (zie de volgende
: volumeknop
.
2
*
MIC GAIN LEVEL–10
NR LEVEL LEVEL–05
ECHO CANCEL LEVEL–05
microfoon wordt hoger naarmate het nummer hoger wordt.
zodat de ruis tijdens een telefoongesprek minimaal is.
voor echo-annulering in totdat de laatste echo wordt gehoord tijdens een
telefoongesprek.
tot
LEVEL+10(LEVEL–04
tot
LEVEL+05(LEVEL00
tot
LEVEL+05(LEVEL00
Basisinstelling:
): De gevoeligheid van de
): Stel het ruisreductieniveau in
): Stel de vertragingstijd
XX
Maak de instellingen voor ontvangst van een gesprek
Druk op om de Bluetooth functie te activeren.
:
1
2 Voer ‘Selecteer een onderdeel
(
zie de volgende tabel) te selecteren.
3 Herhaal stap 2 totdat het gewenste onderdeel is gekozen of
geactiveerd.
Druk op om naar het voorgaande instelonderdeel terug te keren.
( 3 of4)
’ uit om een onderdeel
Basisinstelling:
XX
SETTINGS
AUTO ANSWER
RING COLOR KD-R992BT/KD-R891BT
RING ILLUMI KD-R899BT/KD-R794BT/KD-R792BT
01 SEC
tot
30 SEC
automatisch binnen de gekozen tijd (in seconden).;
COLOR01
van de toetsen of symbolische toets voor de waarschuwing wanneer een
gesprek wordt ontvangen en tijdens een gesprek.;
BLINK01
knipperen voor de waarschuwing wanneer een gesprek wordt ontvangen.;
OFF
:Geannuleerd.
:Het toestel beantwoordt het binnenkomende gesprek
tot
:
COLOR49(COLOR08
OFF
): Kies de kleur voor de verlichting
OFF
tot
BLINK05(BLINK02
:
): Kies het patroon voor het
:Geannuleerd.
:Geannuleerd.
NEDERLANDS
15
Page 92

BLUETOOTH®
BATT/SIGNAL*KD-R992BT/KD-R891BT
* De functionaliteit is afhankelijk van het soort telefoon.
AUTO
:Toont de kracht van de batterij en het signaal wanneer het toestel een Bluetooth
apparaat herkent en het Bluetooth apparaat wordt verbonden.;
:
OFF
:Geannuleerd.
Bellen
U kunt bellen met gebruik van de geschiedenis van gesprekken, het telefoonboek of
gewoon het intoetsen van het nummer. Het bellen met een stemcommando is tevens
mogelijk indien uw mobiele telefoon daarvoor geschikt is.
1 Druk op om de Bluetooth functie te activeren.
“(Naam van eerste apparaat)” verschijnt.
• Indien twee Bluetooth telefoons zijn verbonden, drukt u nogmaals op om
naar de andere telefoon over te schakelen.
“(Naam van tweede apparaat)” verschijnt.
2 Voer ‘Selecteer een onderdeel
volgende tabel
3 Herhaal stap 2 totdat het gewenste onderdeel is gekozen/geactiveerd
of volg de aanwijzingen voor het geselecteerde onderdeel.
Druk op om naar het voorgaande instelonderdeel terug te keren.
RECENT CALL
)
te selecteren.
(Alleen beschikbaar wanneer de aangesloten telefoon voor PBAP geschikt is.)
1
Druk op de volgende knop om een naam of een telefoonnummer te selecteren.
KD-R992BT/KD-R899BT
KD-R794BT/KD-R792BT
KD-R891BT
• “<” verwijst naar ontvangen gesprekken, “>” naar gebelde nummers en “M” naar
gemiste gesprekken.
• “NO HISTORY” verschijnt indien er geen geschiedenis of gebeld nummer van
gesprekken is.
2
Druk op de volgende knop om te bellen.
KD-R992BT/KD-R899BT
KD-R794BT/KD-R792BT
KD-R891BT
:
:
( 3 of4)
’ uit om een onderdeel (zie de
/
: volumeknop
/
: volumeknop
PHONEBOOK
DIAL NUMBER
VOICE
(Alleen beschikbaar wanneer de aangesloten telefoon voor PBAP geschikt is.)
1
Druk op om het gewenste teken (A tot Z, 0tot9 en OTHERS) te kiezen.
• “OTHERS” verschijnt indien het eerste teken anders dan A tot Z en 0 tot 9 is.
2
Voer ‘Selecteer een onderdeel
3
Voer de handeling ‘selecteer eenitem
selecteren en te bellen.
• Het telefoonboek van de aangesloten telefoon wordt automatisch tijdens het koppelen
naar het toestel gestuurd.
• Dit toestel kan alleen letters zonder accenten tonen. (“Ú” verschijnt bijvoorbeeld als “U”.)
1
Voer de volgende handeling uit om een cijfer (0 t/m 9) of teken ( , #, +) te selecteren.
KD-R992BT/KD-R899BT/KD-R794BT/KD-R792BT
Verdraai de volumeknop
KD-R891BT
2
Druk op om de invoerpositie te verplaatsen.
Herhaal stappen
3
Druk op de volgende knop om te bellen.
KD-R992BT/KD-R899BT/KD-R794BT/KD-R792BT
volumeknop
KD-R891BT
Zeg de naam van een persoon die u wilt bellen of gebruik telefoonfuncties door een
stemcommando te geven.
( 3 of4)
’ uit om een naam te selecteren.
( 3 of4)
’ uit om een telefoonnummer te
:
Druk op
1
en 2 totdat het gehele telefoonnummer is ingevoerd.
:
( Bellen met gebruik van stemherkenning)
:
:
Bellen met gebruik van stemherkenning
Houd even ingedrukt om de aangesloten telefoon te activeren.
1
2 Zeg de naam van een persoon die u wilt bellen of gebruik
telefoonfuncties door een stemcommando te geven.
• De ondersteunde stemherkenningsfuncties verschillen per telefoon. Zie de
gebruiksaanwijzing van de aangesloten telefoon voor details.
• Dit toestel ondersteunt tevens de “intelligente persoonlijke assistentiefunctie” van
iPhone.
16
NEDERLANDS
Page 93

BLUETOOTH®
Geheugeninstellingen
Opslaan van een contact in het geheugen
U kunt maximaal 6 nummers onder de cijfertoetsen (1 tot 6) vastleggen.
1 Druk op om de Bluetooth functie te activeren.
2 Voer ‘Selecteer een onderdeel
zender te selecteren
3 Voer de handeling ‘selecteer een item
selecteren of een telefoonnummer in te voeren.
Druk wanneer een contact is geselecteerd op de volgende knop om het
telefoonnummer weer te geven.
KD-R992BT/KD-R899BT/KD-R794BT/KD-R792BT
KD-R891BT
4 Houd een van de cijfertoetsen (1 tot 6) even ingedrukt.
“MEMORY P(gekozen voorkeurnummer)” verschijnt wanneer het contact is
Kies voor het wissen van een contact uit het geheugen
een blanco nummer op.
:
opgeslagen.
( 3 of4)
[RECENTCALL], [PHONEBOOK]
’ uit om het gewenste lied of
( 3 of4)
: volumeknop
of
[DIALNUMBER]
’ uit om een contact te
[DIALNUMBER]
in stap 2 en sla
Bellen vanuit het geheugen
Druk op om de Bluetooth functie te activeren.
1
2 Druk op een van de cijfertoetsen (1 tot 6).
3 Druk op de volgende knop om te bellen.
KD-R992BT/KD-R899BT/KD-R794BT/KD-R792BT
KD-R891BT
“NO PRESET” verschijnt indien er geen contactpersoon is vastgelegd.
:
: volumeknop
Bluetooth functie-instellingen
1
Houd even ingedrukt.
2 Voer ‘Selecteer een onderdeel
volgende tabel
3 Herhaal stap 2 totdat het gewenste onderdeel is gekozen/geactiveerd
of volg de aanwijzingen voor het geselecteerde onderdeel.
.
4 Druk op om te verlaten.
Druk op om naar het voorgaande instelonderdeel terug te keren.
)
te selecteren.
( 3 of4)
’ uit om een onderdeel (zie de
Basisinstelling:
XX
BT MODE
PHONE SELECT
AUDIO SELECT
DEVICE DELETE
PIN CODE EDIT
(0000)
* Tegelijkertijd kunnen er maximaal twee Bluetooth telefoons en één Bluetooth audio-apparaat worden verbonden.
Kiezen van de telefoon of het audiotoestel die/dat u wilt verbinden of ontkoppelen.
*
“
” verschijnt voor het apparaat wanneer een verbinding is gemaakt.
*
“
” verschijnt voor het huidig spelende audio-apparaat.
1
Voer ‘Selecteer een onderdeel
selecteren.
2
Voer ‘Selecteer een onderdeel
Verandert de PIN-code (maximaal 6 cijfers).
1
Voer de volgende handeling uit om een nummer te selecteren.
KD-R992BT/KD-R899BT/KD-R794BT/KD-R792BT
Verdraai de volumeknop
KD-R891BT
2
Druk op om de invoerpositie te verplaatsen.
Herhaal stappen
3
Druk op de volgende knop om te bevestigen.
KD-R992BT/KD-R899BT/KD-R794BT/KD-R792BT
volumeknop
KD-R891BT
( 3 of4)
’ uit om het te wissen apparaat te kiezen te
( 3 of4)
’ uit om
[YES]
:
Druk op
1
en 2 totdat de gehele PIN-code is ingevoerd.
:
of
[NO]
te selecteren.
:
:
NEDERLANDS
17
Page 94

BLUETOOTH®
RECONNECT ON
AUTO PAIRING ON
INITIALIZE YES
INFORMATION MYBTNAME
Controlefunctie Bluetooth compatibiliteit
U kunt de verbinding van het ondersteunde profiel tussen het Bluetooth apparaat en
het toestel controleren.
• Controleer of er geen Bluetooth apparaat is gekoppeld.
1 Houd even ingedrukt.
“BLUETOOTH” “CHECK MODE” verschijnt. “SEARCH NOW USING PHONE”
“PIN IS 0000” verschijnt rollend op het display.
2 Zoek en kies binnen 3 minuten “KD-R9 BT”/“KD-R8 BT ”/
“KD-R7
3 Voer afhankelijk van wat op het display verschijnt (A), (B) of (C) uit.
(A) “PAIRING” “XXXXXX” (6- cijferig wachtwoord)
wachtwoord op het toestel en het Bluetooth apparaat verschijnt en bedien
vervolgens het Bluetooth apparaat om het wachtwoord te bevestigen.
(B) “PAIRING” “PIN IS 0000”
(C) “PAIRING”
:Het toestel maakt automatisch weer een verbinding met het laatst verbonden
Bluetooth apparaat wanneer het binnen bereik is.;
:Het toestel koppelt automatisch het ondersteunde Bluetooth apparaat (iPhone/
iPod touch/Android apparaat) wanneer het via de USB-ingangsaansluiting is
verbonden.Afhankelijk van het besturingssysteem van het aangesloten apparaat werkt
deze functie mogelijk niet. ;
:Terugstellen van alle Bluetooth instellingen (inclusief opgeslagen koppeling,
telefoonboek, etc.).;
“KD-R7
BT”).;
MYADDRESS
BT” met het Bluetooth apparaat.
: Bedien het Bluetooth apparaat om het koppelen te bevestigen.
OFF
:Geannuleerd.
NO
:Geannuleerd.
: Tonen van de naam van het toestel (“KD-R9 BT”/“KD-R8 BT” /
: Tonen van het adres van dit toestel.
: Voer “0000” op het Bluetooth apparaat in.
OFF
:Geannuleerd.
: Controleer dat hetzelfde
Wanneer het koppelen geslaagd is, verschijnt “PAIRING OK” “[Naam apparaat]” en
wordt de Bluetooth compatibiliteit gecontroleerd.
Bedien het Bluetooth apparaat wanneer “CONNECT NOW USING PHONE” verschijnt voor
verdere toegang tot het telefoonboek.
“TESTING” knippert op het display.
Het resultaat van de verbinding knippert op het display.
“PAIRING OK” en/of “HANDS-FREE OK”
Compatibel
1
*
Compatibel met Hands-Free Profile (HFP)
2
*
Compatibel met Advanced Audio Distribution Profile (A2DP)
3
*
Compatibel met Phonebook Access Profile (PBAP)
Na 30 seconden verschijnt “PAIRING DELETED” ten teken dat de koppeling is gewist en
wordt de controlefunctie van het toestel geannuleerd.
• Houd voor het annuleren bronknop even ingedrukt om de stroom uit te schakelen en
schakel de stroom vervolgens weer in.
1
*
en/of “AUD.STREAM OK”
2
*
en/of “PBAP OK”
3
*
:
18
NEDERLANDS
Page 95

BLUETOOTH®
BLUETOOTH — Audio
Zie pagina3 of4 voor de indeling op het voorpaneel.
Tijdens de BT AUDIO bron, kunt u vijf Bluetooth audio-apparaten verbinden en tussen deze vijf
apparaten schakelen.
Audiospeler via Bluetooth
1
Druk herhaaldelijk op de bronknop om BTAUDIO te selecteren.
• Druk op en voer BT AUDIO direct in.
2 Bedien de Bluetooth audiospeler om de weergave te starten.
Voor het Op het voorpaneel
Weergave/pauze
Kiezen van een groep of
map
Achterwaarts verspringen/
Voorwaarts verspringen
Snel achterwaarts/Snel
voorwaarts
Afspelen herhalen Druk herhaaldelijk op
Willekeurig afspelen
Kies een bestand uit een
map/lijst
Schakelen tussen verbonden
Bluetooth audio-apparaten
* Door een druk op de “Play (weergavetoets)” van het aangesloten apparaat zelf, kunt u tevens de geluidsweergave van het apparaat
veranderen.
De bediening en display-aanduidingen verschillen mogelijk afhankelijk van de verbonden
apparatuur.
KD-R992BT/KD-R899BT/KD-R794BT/KD-R792BT
Druk op de volumeknop.
KD-R891BT
Druk op
Druk op
Houd
: Druk op .
.
.
even ingedrukt.
.
:
TRACKREPEAT, ALLREPEAT, REPEATOFF
Druk herhaaldelijk op
.
GROUPRANDOM, ALLRANDOM, RANDOMOFF
Zie “Kies een bestand uit een map/lijst” op bladzijde 10.
Druk op
*
5.
Instellingen voor gebruik van de JVC Remote app
De JVC Remote app is ontworpen voor bediening van JVC autoreceivers
met gebruik van de volgende apparaten.
KD-R992BT/KD-R899BT/KD-R891BT
KD-R794BT/KD-R792BT
Voorbereiding:
Installeer de laatste versie van de JVC Remote app op uw apparaat alvorens
de verbinding te maken. Ga voor meer informatie naar
<http://www.jvc.net/cs/car/>.
1 Houd even ingedrukt.
2 Voer ‘Selecteer een onderdeel
te selecteren.
3 Herhaal stap 2 totdat het gewenste onderdeel is gekozen of
geactiveerd.
4 Druk op om te verlaten.
Druk op om naar het voorgaande instelonderdeel terug te keren.
: Android smartphone (via Bluetooth)
( 20)
: iPhone/iPod (via Bluetooth of via
USB-ingangsaansluiting) of Android
smartphone (via Bluetooth)
( 3 of4)
’ uit om een onderdeel
NEDERLANDS
19
Page 96

BLUETOOTH®
REMOTE APP
SELECT
IOS YES
ANDROID YES
ANDROID
LIST
STATUS
* Verschijnt alleen wanneer
Kies het apparaat (IOS of ANDROID) voor het gebruik van de app.
:Kiezen van de iPhone/iPod voor het gebruik van de app via Bluetooth of indien deze is
verbonden met de USB-ingangsaansluiting.;
Met IOS gekozen, moet u iPod BT bron kiezen (of iPod USB indien uw iPhone/iPod via de USBingangsaansluiting is verbonden) om de app te activeren.
•
De verbinding van de app wordt onderbroken of ontkoppeld indien:
– U van de iPod BT bron naar een andere weergavebron overschakelt die via de USB-
– U van de iPod USB bron naar de iPod BT bron overschakelt.
:Kiezen van de Android smartphone voor gebruik van de app via Bluetooth.;
NO
:Geannuleerd.
Kiezen van de Android smartphone voor gebruik van de lijst.
*
Toont de status van het gekozen apparaat.
IOS CONNECTED
ingangsaansluiting is verbonden.
IOS NOT CONNECTED
ANDROID CONNECTED
Bluetooth is verbonden.
ANDROID NOT CONNECTED
de app.
NO
:Geannuleerd.
ingangsaansluiting is verbonden.
: U kunt de app gebruiken met de iPhone/iPod die via Bluetooth of de USB-
: Er is geen IOS apparaat verbonden voor het gebruik van de app.
: U kunt de app gebruiken met de Android smartphone die via
: Er is geen Android apparaat verbonden voor het gebruik van
[ANDROID]
of
[SELECT]
op
[YES]
is gesteld.
Basisinstelling:
XX
Luisteren naar een iPhone/iPod via Bluetooth
(voor KD-R992BT/KD-R899BT/KD-R891BT)
U kunt naar de liederen op de iPhone/iPod via Bluetooth met dit toestel luisteren.
Druk herhaaldelijk op de bronknop om iPodBT te selecteren.
• U kunt de iPod/iPhone op dezelfde manier bedienen als met een iPod/iPhone die via
de USB-ingangsaansluiting is verbonden.
• Indien u een iPhone/iPod met de USB-ingangsaansluiting verbindt tijdens het
luisteren naar de iPod BT bron, verandert de bron automatisch naar iPod USB.
Druk op bronknop om iPod BT te kiezen indien het apparaat nog via Bluetooth is
verbonden.
( 8)
Internetradio via Bluetooth
U kunt naar Spotify luisteren op uw iPhone/iPod touch/Android-apparaat via
Bluetooth op dit toestel.
• Zorg dat de USB-poort niet is verbonden met een apparaat.
Naar Spotify luisteren
Voorbereiding:
Kies
[ON]
voor
1 Open de Spotify-app op uw apparaat.
[SPOTIFY SRC]
2 Verbind uw apparaat via een Bluetooth-verbinding.
3 Druk herhaaldelijk op bronknop om SPOTIFY te selecteren (voor
iPhone/iPod) of SPOTIFY BT (voor Android-apparaten).
De bron verandert en de uitzending start automatisch.
• U kunt Spotify op dezelfde manier bedienen als Spotify via de USB-poort.
in
[SOURCESELECT]. ( 5)
( 13)
( 11)
20
NEDERLANDS
Page 97

AUDIO-INSTELLINGEN
Zie pagina3 of4 voor de indeling op het voorpaneel.
1 Houd even ingedrukt.
2 Voer ‘Selecteer een onderdeel
volgende tabel
3 Herhaal stap 2 totdat het gewenste onderdeel is gekozen/geactiveerd
of volg de aanwijzingen voor het geselecteerde onderdeel.
4 Druk op om te verlaten.
Druk op om naar het voorgaande instelonderdeel terug te keren.
)
te selecteren.
EQSETTING
PRESETEQ
EASYEQ
PRO EQ
Kiezen van een geschikte, vooringestelde equalizer voor het muziekgenre.
• Kies
[USER]
voor gebruik van de instellingen die met
gemaakt.
FLAT/DRVN3/DRVN2/DRVN1/HARD ROCK/HIP HOP/JAZZ/POP/R&B
USER/CLASSICAL
De Drive equalizer (
audiosignaal zodat ruis van buiten de auto of het geluid van de banden wordt gereduceerd.
Leg uw eigen geluidsinstellingen vast.
• De instellingen wordt onder
• De gemaakte instellingen hebben mogelijk invloed op de huidige instellingen voor
[PROEQ]
.
*1*
SUB.W SP
3
*1*
SUB.W
:
BASS
:
MID
:
TRE
:
Leg uw eigen geluidsinstellingen vast.
• De instellingen wordt onder
• De gemaakte instellingen hebben mogelijk invloed op de huidige instellingen voor
[EASYEQ]
.
( 3 of4)
DRVN3/DRVN2/DRVN1
[USER]
vastgelegd.
2
: 00tot
+06
(Basisinstelling:
–50
tot
+10 00
LVL–09
tot
LVL+09 LVL00
LVL–09
tot
LVL+09 LVL00
LVL–09
tot
LVL+09 LVL00
[USER]
vastgelegd.
’ uit om een onderdeel (zie de
Basisinstelling:
[EASYEQ]
of
[PROEQ]
zijn
) versterkt specifieke frequenties in het
+03
)
/
62.5HZ
LEVEL–09
tot
(Kies alvorens de instelling te maken eerst de gewenste bron.)
ON
LEVEL+09 (LEVEL00)
:Activeren van verlengde lage tonen.;
: Instellen van het vast te leggen niveau voor iedere bron.
OFF
:Geannuleerd.
100HZ/160HZ/250HZ/400HZ/630HZ/1KHZ/1.6KHZ/2.5KHZ/4KHZ/6.3KHZ/10KHZ/16KHZ
LEVEL–09
tot
(Kies alvorens de instelling te maken eerst de gewenste bron.)
XX
Q FACTOR 1.35/1.50/2.00
LEVEL+09 (LEVEL00):
Instellen van het vast te leggen niveau voor iedere bron.
:Stel de kwaliteitsfactor in.
AUDIO CONTROL
BASS BOOST
LOUDNESS LEVEL01/LEVEL02
SUB.W LEVEL
SUBWOOFER
3
*
SET
FADER
1
2
3
*
*
*
,
,
:
( 22)
LEVEL+01
tot
lage tonen.;
gebalanceerd geluid bij een laag volumeniveau.;
1
*
SPK-OUT
PRE-OUT
ON
(Niet van toepassing indien 3-weg crossover is gekozen.)
POSITIONR15
weergavebalans tussen de voor- en achterluidspreker.
LEVEL+05
OFF
:Geannuleerd.
:Versterkt de lage en hoge frequenties voor een goed-
2
*
(Niet van toepassing indien 3-weg crossover is gekozen.)
SUB.W00
uitgangsniveau in van de subwoofer die met een luidsprekerdraad is
verbonden.
3
*
SUB.W–50
uitgangsniveau in van de subwoofer die via een externe versterker met
de lijnuitgangsaansluitingen (SW of REAR/SW) is verbonden.
: Activeren van de subwooferuitgang.;
tot
POSITIONF15(POSITION00
: Kiezen van het gewenste versterkingsniveau voor de
OFF
:Geannuleerd.
tot
SUB.W+06(SUB.W+03
( 35)
tot
SUB.W+10(SUB.W00
OFF
:Geannuleerd.
):Stelt het
):Stelt het
( 35)
):Instellen van de
NEDERLANDS
21
Page 98

AUDIO-INSTELLINGEN
4
*
BALANCE
VOLUMEADJUST LEVEL–15
AMPGAIN LOWPOWER
SPK/PREOUT
SPEAKER SIZE
X ' OVER
DTA SETTINGS
CAR SETTINGS
X ' OVER TYPE
2-WAY
3-WAY
1
*
Verschijnt alleen wanneer
2
*
Voor 2-weg crossover: Verschijnt alleen wanneer
( 23)
3
*
Voor 2-weg crossover: Verschijnt alleen wanneer
[SUB.W/SUB.W]
4
*
D e instelling heeft geen effect op de subwooferuitgang.
POSITIONL15
weergavebalans tussen de linker- en rechterluidspreker.
bron vast (in overeenstemming met het FM-volumeniveau). Kies alvorens de instelling te
maken eerst de gewenste bron.
maximale vermogen van iedere luidspreker minder dan 50 W is ter bescherming van de
luidsprekers.);
(Niet van toepassing indien 3-weg crossover is gekozen.)
Kies in overeenstemming met de gemaakte luidsprekerverbinding de juiste instelling voor
de gewenste weergave.
Afhankelijk van het gekozen type voor crossover
de 2-weg crossover of 3-weg crossover instelbare onderdelen.
( 23, Crossover-instellingen)
2-weg crossover is de standaardinstelling.
Voor instellingen,
Voorzorgen
voorkomen dat het uitgangsniveau plotseling verhoogt of verlaagt.
(Verschijnt alleen wanneer
YES
(Verschijnt alleen wanneer
YES
tot
tot
LEVEL+06(LEVEL00
:Beperken van het maximale volumeniveau tot 25. (Kies indien het
HIGHPOWER
25, Digital Time Alignment instellingen
: Stel het volume in alvorens
:Kiest het twee-weg crossovertype.; NO:Geannuleerd.
:Kiest het drie-weg crossovertype.; NO:Geannuleerd.
[SUBWOOFERSET]
is gesteld.
( 23)
POSITIONR15(POSITION00
:Het maximale volumeniveau is 35.
( Luidsprekeruitgangsinstellingen)
):Instellen van de
):Legt het basisvolumeniveau voor iedere
( [X ' OVER TYPE])
[3-WAY]
is gekozen.)
[2-WAY]
is gekozen.)
op
[ON]
is gesteld.
[SPK/PREOUT]
[SPK/PREOUT]
[X ' OVER TYPE]
op
op
te veranderen om te
( 21)
[SUB.W/SUB.W]
[REAR/SUB.W]
.
is gesteld.
of
, verschijnen
SOUND EFFECT
SPACE ENHANCE
SND RESPONSE LEVEL1/LEVEL2/LEVEL3
SOUND LIFT LOW/MIDDLE/HIGH
VOL LINK EQ ON
K2 TECHNOLOGY
Luidsprekeruitgangsinstellingen
(Niet van toepassing op de TUNER bron.)
SMALL/MEDIUM/LARGE
OFF
:Geannuleerd.
OFF
:Geannuleerd.
virtueel ingesteld.;
:De frequentie wordt versterkt zodat lawaai van buiten de auto of van de banden van
de auto wordt gereduceerd.;
(Niet van toepassing op de TUNER bron en AUX bron.)
ON
:Verbeteren van de geluidskwaliteit van gecomprimeerde muziek.;
OFF
:Geannuleerd.
: Het ruimtelijk geluid wordt virtueel verbeterd.;
: Het geluid wordt virtueel realistischer.;
: De positionering van het geluid van de luidsprekers wordt
OFF
:Geannuleerd.
OFF
:Geannuleerd.
[SPK/PRE OUT]
(Alleen van toepassing indien [X ‘ OVER TYPE ] op [2-WAY] is gesteld)
Kies de uitgangsinstelling voor de luidsprekers
met de gemaakte luidsprekerverbinding.
[SPK/PRE OUT]
, in overeenstemming
Verbinden via de lijnuitgangsaansluitingen
Voor een verbinding via een externe versterker.
( 35)
KD-R992BT:
Instelling op
[SPK/PRE OUT]
REAR/REAR
(basisinstelling)
REAR/SUB.W
SUB.W/SUB.W
Voorluidsprekersuitgang Achterluidsprekersuitgang Subwooferuitgang
( Niet mogelijk ) ( Niet mogelijk ) ( Niet mogelijk )
Voorluidsprekersuitgang L (links): Subwooferuitgang
Audiosignaal via lijnuitgangsaansluiting
FRONT REAR SW
R (rechts): (Demping)
Subwooferuitgang
22
NEDERLANDS
Page 99

AUDIO-INSTELLINGEN
KD-R899BT/KD-R891BT:
Instelling op
[SPK/PRE OUT]
REAR/REAR
REAR/SUB.W
(basisinstelling)
SUB.W/SUB.W
Voorluidsprekersuitgang Achterluidsprekersuitgang
Voorluidsprekersuitgang Subwooferuitgang
Voorluidsprekersuitgang Subwooferuitgang
KD-R794BT/KD-R792BT:
Instelling op
[SPK/PRE OUT]
REAR/REAR
REAR/SUB.W
SUB.W/SUB.W
(basisinstelling)
Achterluidsprekersuitgang
Subwooferuitgang
Subwooferuitgang
Verbinden via luidsprekerdraden
Voor een verbinding zonder een externe versterker. Met deze instelling kunt u echter
ook genieten van de subwooferuitgang.
Instelling op
[SPK/PRE OUT]
REAR/REAR
REAR/SUB.W
SUB.W/SUB.W
[SUB.W/SUB.W]
Met
–
[120HZ]
is gekozen in
–
[POSITION R02]
[POSITION 00]. ( 21)
Achterluidsprekersuitgang Achterluidsprekersuitgang
Achterluidsprekersuitgang Achterluidsprekersuitgang
Subwooferuitgang (Demping)
gekozen:
[SUBWOOFERLPF]
is gekozen in
Audiosignaal via lijnuitgangsaansluiting
FRONT REAR/SW
Audiosignaal via lijnuitgangsaansluiting
REAR/SW
( 35)
Audiosignaal via achterluidsprekerdraad
L (links) R (rechts)
en
[FADER]
en het instelbereik is
[THROUGH]
is niet beschikbaar.
[POSITION R15]
( 24)
tot
Crossover-instellingen
Hieronder vindt u de instelbare onderdelen voor 2-weg crossover en 3-weg crossover.
Voorzorgen
Kies het type crossover dat overeenkomt met de luidsprekerverbindingen.
Indien u een verkeerd type kiest:
• De luidsprekers worden mogelijk beschadigd.
• Het uitgangsniveau is mogelijk zeer hoog of laag.
SPEAKER SIZE
Kies in overeenstemming met het formaat van de aangesloten luidsprekers voor een
optimaal geluid.
•
De instellingen voor de frequentie en helling worden automatisch gemaakt voor de
crossover van de gekozen luidspreker.
•
Indien 2-weg crossover en
zijn
[REAR]
en
luidspreker niet beschikbaar.
•
Indien 3-weg crossover en
is
[X’OVER]
X ‘ OVER (crossover)
• [FRQ]/[F-HPFFRQ]/[R-HPFFRQ]/[SWLPF FRQ]/[HPFFRQ]/[LPFFRQ]
crossover-frequentie voor de gekozen luidsprekers in (hoog-doorlaatfiler of laagdoorlaatfilter).
Met
gestuurd.
• [SLOPE]/[F-HPFSLOPE]/[R-HPFSLOPE]/[SWLPF SLOPE]/[HPFSLOPE]/[LPFSLOPE]
Stel de crossover-helling in.
Alleen kiesbaar indien een andere instelling dan
crossover-frequentie.
• [SW LPF PHASE]/[PHASE]
overeenstemming met de andere luidsprekeruitgang.
•
[GAINLEFT]/[GAINRIGHT]/[F-HPFGAIN]/[R-HPFGAIN]/[SWLPF GAIN]/[GAIN]:
het uitgangsvolume van de gekozen luidspreker in.
[SUBWOOFER]
van
[THROUGH]
[NONE]
zijn gekozen voor
voor
[SPEAKER SIZE]
[NONE]
[WOOFER]
gekozen, worden alle signalen naar de gekozen luidsprekers
zijn gekozen voor
niet beschikbaar.
: Kies de fase van de luidsprekeruitgang in
[TWEETER]
en
[X ‘ OVER]
[WOOFER]
[THROUGH]
is gekozen voor de
( 35)
van
[FRONT]
van de gekozen
van
,
[SPEAKER SIZE]
: Stel de
Stel
,
:
NEDERLANDS
23
Page 100

AUDIO-INSTELLINGEN
Instelbare onderdelen voor 2-weg crossover
SPEAKER SIZE
FRONT SIZE
TWEETER
1
*
REAR
SUBWOOFER
8CM/10CM/12CM/13CM/16CM/17CM/18CM/4×6/5×7/6×8
6×9/7×10/NONE
3
*2*
16CM/20CM/25CM/30CM/38CM OVER/NONE
8CM/10CM/12CM/13CM/16CM/17CM/18CM
4×6/5×7/6×8/6×9/7×10
SMALL/MIDDLE/LARGE/NONE
(niet verbonden)
X ' OVER
TWEETER FRQ
GAIN LEFT
GAIN RIGHT
FRONT HPF F-HPF FRQ
F-HPF SLOPE
F-HPF GAIN
1
*
REAR HPF
R-HPF FRQ 30HZ/40HZ/50HZ/60HZ/70HZ/80HZ/90HZ
R-HPF SLOPE
R-HPF GAIN
SUBWOOFER
3
*2*
LPF
SW LPF FRQ 30HZ/40HZ/50HZ/60HZ/70HZ/80HZ/90HZ
SW LPF SLOPE
SW LPF PHASE
SW LPF GAIN –08DB
1KHZ/1.6KHZ/2.5KHZ/4KHZ/5KHZ/6.3KHZ
8KHZ/10KHZ/12.5KHZ
–08DB
tot
00DB
–08DB
tot
00DB
30HZ/40HZ/50HZ/60HZ/70HZ/80HZ/90HZ
100HZ/120HZ/150HZ/180HZ/220HZ/250HZ
THROUGH
–06DB/–12DB/–18DB/–24DB
–08DB
tot
00DB
100HZ/120HZ/150HZ/180HZ/220HZ/250HZ
THROUGH
–06DB/–12DB/–18DB/–24DB
–08DB
tot
00DB
100HZ/120HZ/150HZ/180HZ/220HZ/250HZ
THROUGH
–06DB/–12DB/–18DB/–24DB
REVERSE
(180°)/
NORMAL
tot
00DB
(niet verbonden)
(niet verbonden)
(0°)
Instelbare onderdelen voor 3-weg crossover
SPEAKER SIZE
/
TWEETER
MID RANGE
/
WOOFER
X ' OVER
TWEETER HPF FRQ
/
MID RANGE HPF FRQ
/
/
/
/
WOOFER
/
/
1
*
Verschijnt alleen wanneer
( 22, 23)
2
*
Verschijnt alleen wanneer
( 22, 23)
3
*
Verschijnt alleen wanneer
SMALL/MIDDLE/LARGE
8CM/10CM/12CM/13CM/16CM/17CM/18CM/4×6/5×7/6×8/6×9
3
*
16CM/20CM/25CM/30CM/38CM OVER/NONE
1KHZ/1.6KHZ/2.5KHZ/4KHZ/5KHZ/6.3KHZ/8KHZ
10KHZ/12.5KHZ
SLOPE
PHASE
GAIN –08DB
HPF SLOPE
LPF FRQ
LPF SLOPE
PHASE
GAIN –08DB
3
*
LPF FRQ 30HZ/40HZ/50HZ/60HZ/70HZ/80HZ/90HZ/100HZ
SLOPE
PHASE
GAIN –08DB
[SPK/PREOUT]
[SPK/PREOUT]
[SUBWOOFER SET]
–06DB/–12DB
REVERSE
(180°)/
NORMAL
(0°)
tot
00DB
30HZ/40HZ/50HZ/60HZ/70HZ/80HZ/90HZ/100HZ
120HZ/150HZ/180HZ/220HZ/250HZ/THROUGH
–06DB/–12DB
1KHZ/1.6KHZ/2.5KHZ/4KHZ/5KHZ/6.3KHZ/8KHZ
10KHZ/12.5KHZ/THROUGH
–06DB/–12DB
REVERSE
(180°)/
NORMAL
(0°)
tot
00DB
120HZ/150HZ/180HZ/220HZ/250HZ/THROUGH
–06DB/–12DB
REVERSE
(180°)/
NORMAL
(0°)
tot
00DB
op
[REAR/REAR]
op
[REAR/SUB.W]
op
[ON]
of
is gesteld.
[REAR/SUB.W]
of
[SUB.W/SUB.W]
( 21)
(niet verbonden)
/
/
/
/
is gesteld.
is gesteld.
24
NEDERLANDS
 Loading...