


Y7 Prime 2018
Table of contents
 Loading...
User Guide

Contents
Exciting Features
Use Shortcuts to Access Frequently Used Features 1
More Features 1
New Device
Connecting to the Internet 4
Smart Charging: Charge Your Device Faster and Safer 4
Legal Notice 5
Gestures and Operation
Screenshots and Screen Recording
8
Home Screen
Quick Switch
11
Notication and Status Bar 12
Screen Lock and Unlock 16
Go Back to Basics with Simple Mode 18
Home Screen Management 18
Contacts
Managing Business Cards
22
Managing Contacts 23
Dialing
Basic Calling Functions
26
Block Nuisance Calls: Get the Peace and Quiet You Deserve 28
Message
Basic Messaging Functions
29
Camera
Basic Camera Functions
31
Panorama 33
Beautication 34
Discover New Possibilities with Customized Shooting Modes 35
Gallery
Photo Management
36
Phone Manager
Use One-touch Optimization
39
Manage Your Mobile Data 39
Optimize Power Consumption 40
Use Virus Scan to Keep Your Phone Safe 41
i

Email
Add Email Accounts 42
Manage Email Accounts 42
Manage VIP Email Contacts 43
Set Auto Response for Exchange Email 43
Calendar
Calendar: Your Event Management Center 44
Navigate the Calendar 44
Import To-Dos to Keep Your Work Organized 45
View Global Holidays 46
Clock
Use the Clock
47
Notepad
Manage Your Notes to Keep Your Records in Order
49
Utilities
Use Recorder to Make Audio Notes
50
Device Connection
Bluetooth
51
Transfer Data Between Your Phone and Computer 53
Security and Privacy
Fingerprint
54
Face Unlock 56
Location Information Protection 58
Use App Lock to Lock Important Apps 59
Enhanced Data Protection: Defend Your Privacy 59
Backup and Restoration
Data Backup: Prevent Data Loss
61
Back Up Your Data to a microSD Card 61
Back Up Your Data to Internal Storage 61
Back Up Your Data to a USB Storage Device 62
Wi-Fi and Network
Wi-Fi
63
Connecting to the Internet 65
Share Your Mobile Network with Other Devices 66
Sound and Display
Congure
Do Not Disturb Mode 68
Congure Your Sound Settings 68
Contents
ii

Enable Eye Comfort Mode to Prevent Eye Strain 69
More Display Settings 70
Storage
Storage Cleaner 75
System
Language and Input Method 77
Accessibility 77
General Settings 80
System Update
Performing an Online Update
85
Contents
iii

Exciting Features
Use Shortcuts to Access Frequently Used Features
Touch and hold an app icon to display a menu of frequently used features for quick access. You can
also touch and hold a feature and drag it to your home screen to create a shortcut.
If you touch and hold an app icon and a shortcut is not created, the app does not support home
screen shortcuts.
Quickly access frequently used app features: Touch and hold an app icon on your home screen,
and then touch a frequently used feature to access it. Each app supports up to four frequently used
features. These are preset by the app and cannot be changed. For example, to take a sele, touch and
hold the camera icon, and then touch Sele in the pop-up menu.
Add shortcuts to your home screen: Touch and hold an app icon on your home screen to bring up
the menu. Touch and hold the desired feature, and then drag it to your home screen to create a
shortcut. For example, you can add a shortcut for the camera's sele feature for quick access to the
sele camera.
More Features
Wi-Fi+: Your Smart Connectivity Assistant
Wi-Fi+ intelligently connects to Wi-Fi networks to save mobile data consumption. When your device
detects a known or free Wi-Fi network, it will automatically turn on Wi-Fi and connect to the network.
Your device will also automatically select the optimal network in the area for the best Internet
connection.
1
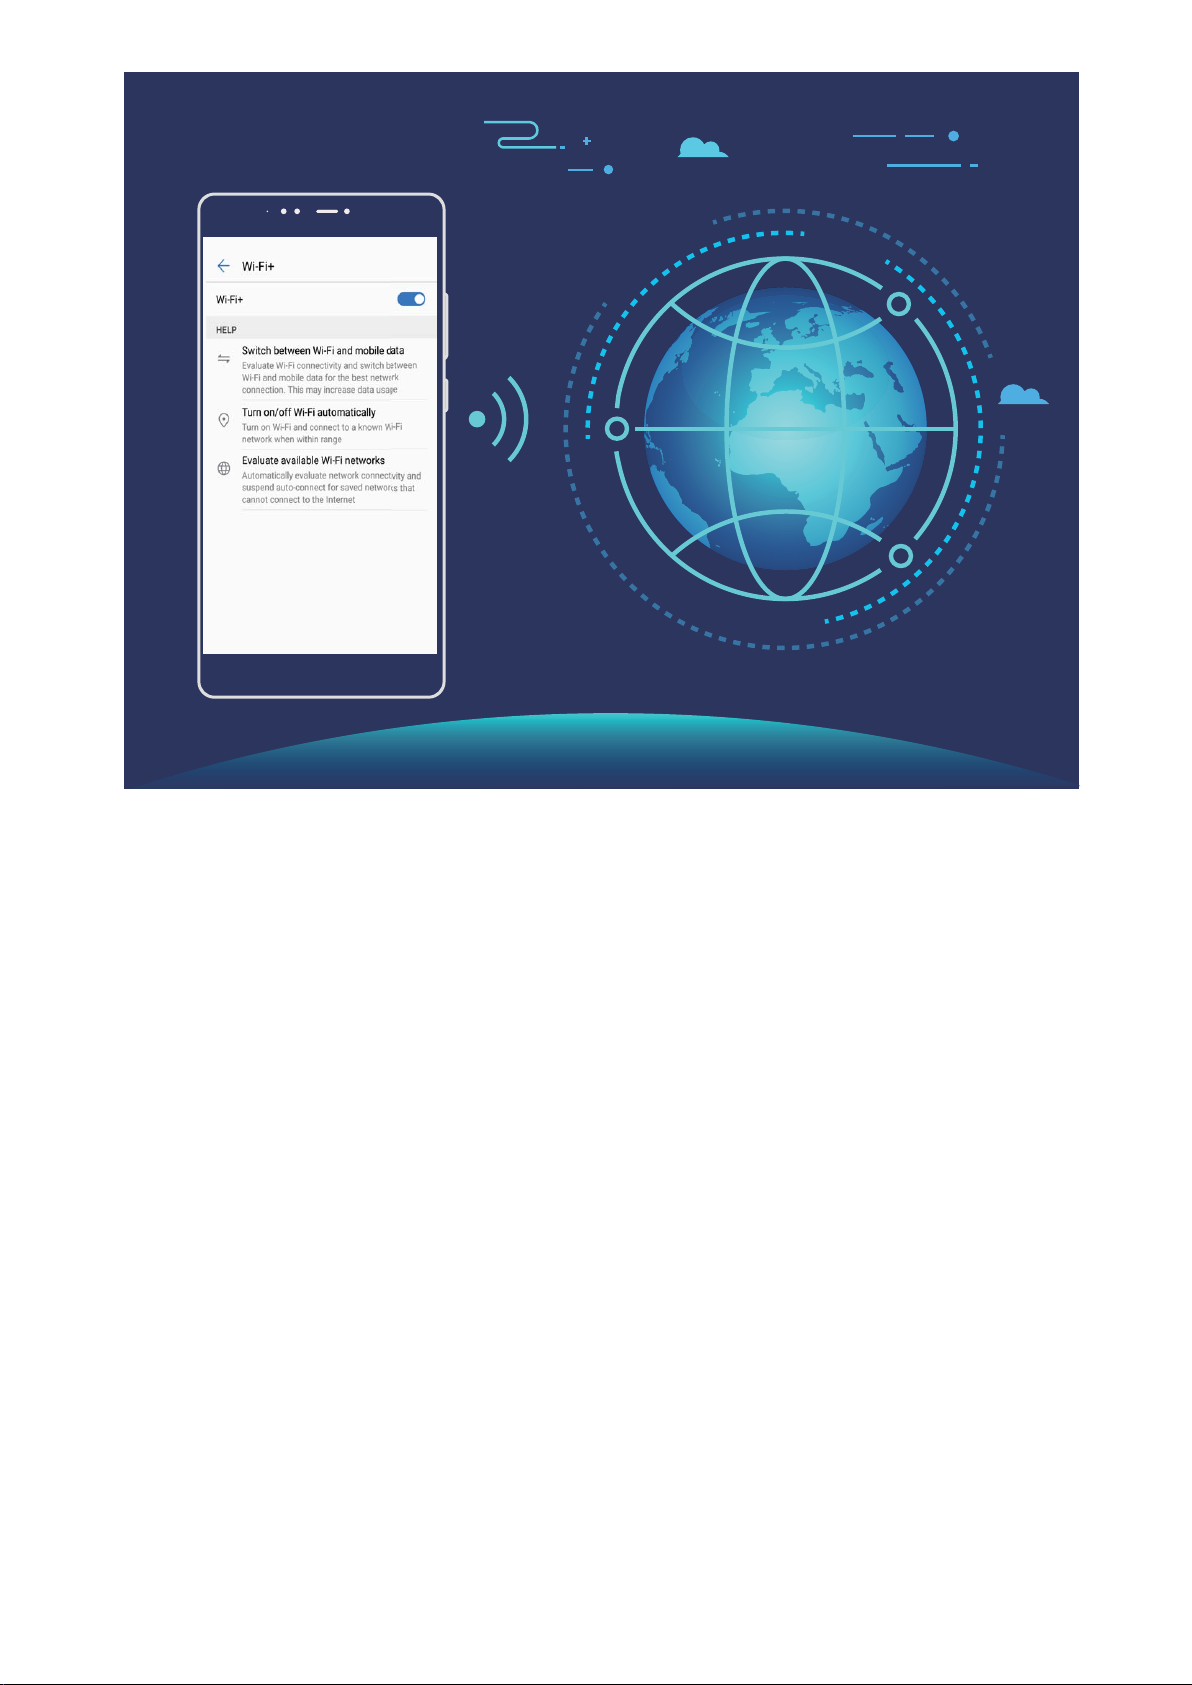
Once you have enabled Wi-Fi+, your device will:
l Automatically select and connect to the optimal network: Automatically select and connect to
Wi-Fi networks you've previously connected to, free networks, or your mobile data network,
depending on the signal strength at your current location.
l Automatically turn Wi-Fi on and off: Depending on the Wi-Fi networks you have connected to
previously, Wi-Fi will be automatically enabled or disabled in specic locations. This will prevent your
device from constantly searching for new networks.
l Assess the quality of available networks: Evaluate currently available network hotspots and
prevent your device from automatically connecting to networks with no Internet connection.
Clean Up Memory for Faster Performance
Does your Phone slow down over time? Do you want to clean up your system storage but are unsure
which les to delete? Memory cleanup helps you quickly clear your cache, large and residual les, and
unused app les to speed up system performance and keep your Phone in top shape.
When your system performance slows down or remaining storage space is low, Phone Manager will
remind you to clean up. You can follow the onscreen prompts to clean up your Phone's memory and
free up storage space.
Clean: Scan for and clean up trash les and system cache to quickly free up memory and internal
storage space without affecting your Phone usage.
Deep clean: Scan for redundant les including WeChat les, large les, videos, images, app residual
les, music les, unnecessary installation packages, unused les, and les that take up a lot of space,
Exciting Features
2

and obtain cleaning suggestions based on the scan results. This helps you free up storage space
without accidentally deleting important les.
Exciting Features
3
New Device
Connecting to the Internet
Connect to Wi-Fi networks effortlessly with your device.
Connecting to a Wi-Fi network
1 Swipe down from the status bar to open the notication panel.
2 Touch and hold to open the Wi-Fi settings screen.
3 Switch on Wi-Fi. Your device will list all available Wi-Fi networks at your location.
4 Select the Wi-Fi network you want to connect to. If you select an encrypted network, you will also
need to enter the Wi-Fi password.
Connecting using mobile data
Before using mobile data, ensure that you have a data plan with your carrier to avoid incurring
excessive data charges.
1 Swipe down from the status bar to open the notication panel.
2 Touch to enable mobile data.
When you don't need to access the Internet, disable mobile data to save battery power and
reduce data usage.
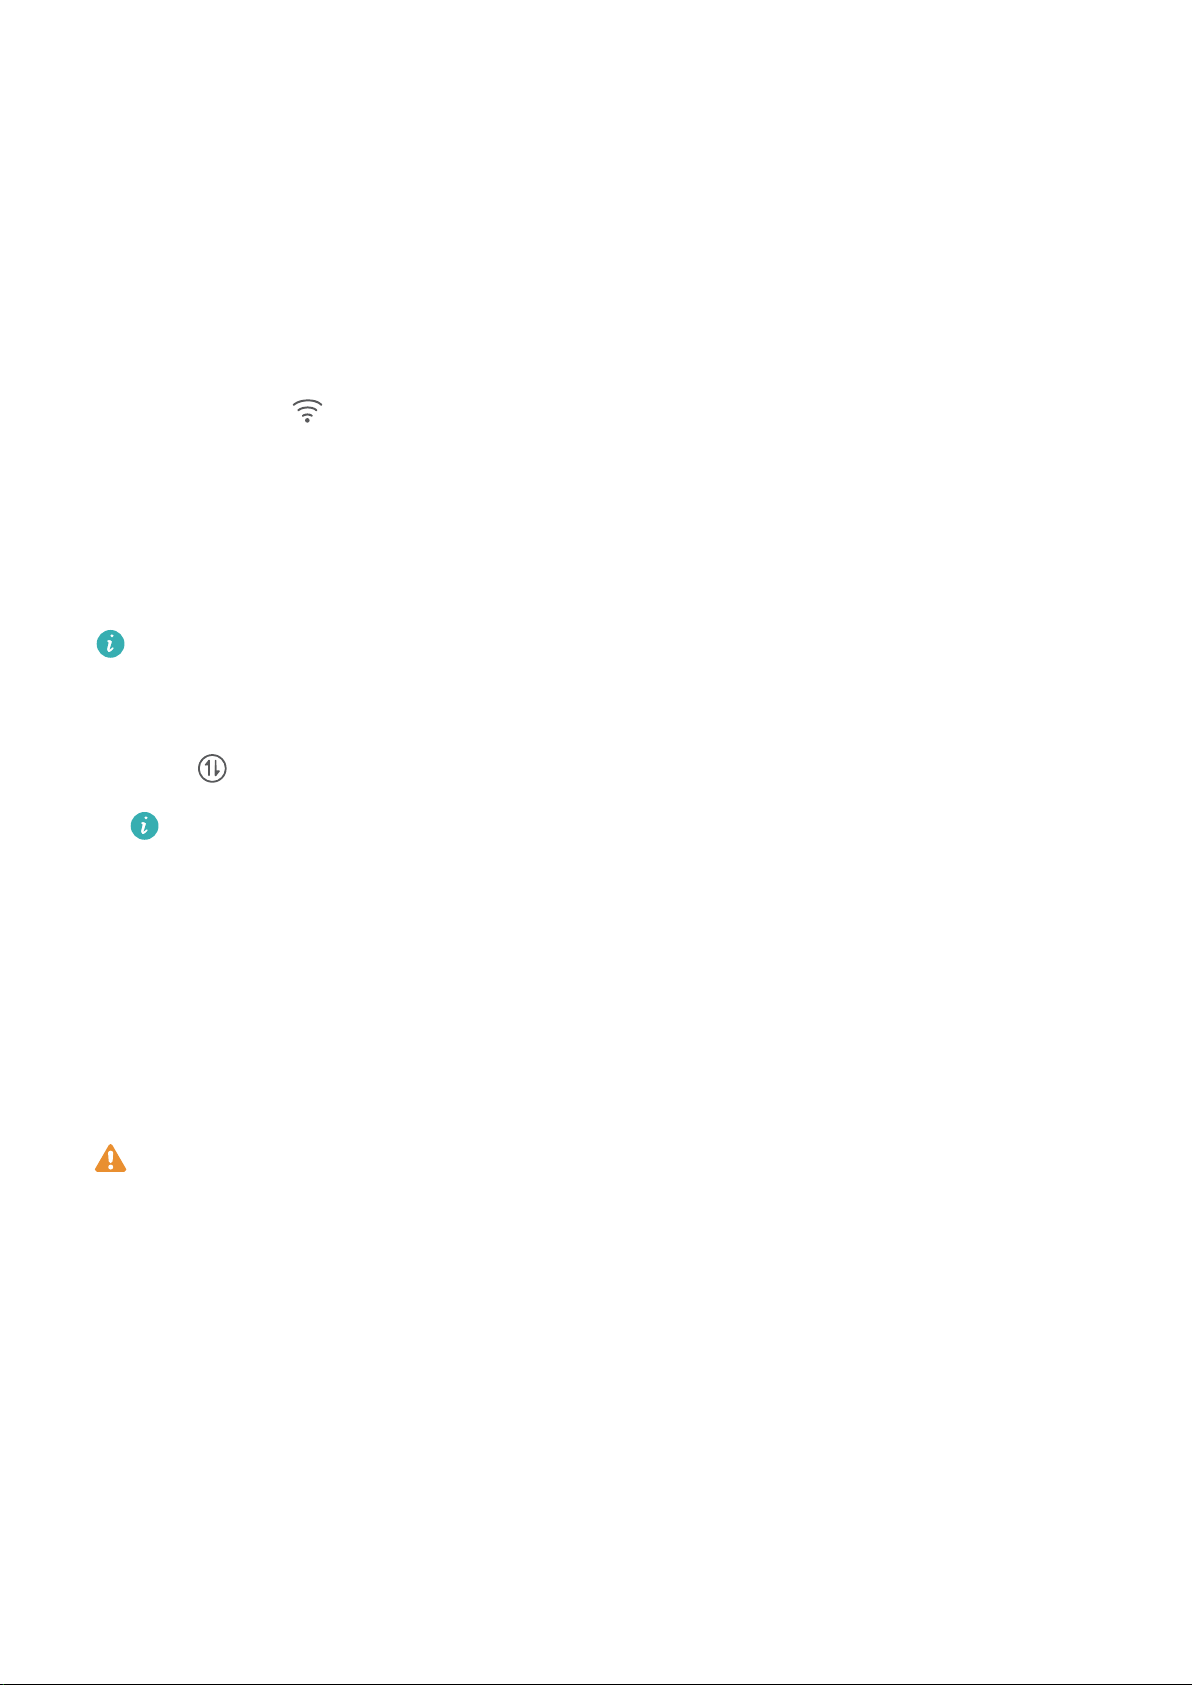
Smart Charging: Charge Your Device Faster and Safer
Many people
nd ordinary charging too slow, but worry about the safely of fast-charging. Worry no
more: SmartCharge has you covered. SmartCharge establishes a direct connection between the Phone
and the charger and intelligently coordinates the charging voltage and current based on the battery
power of the Phone to provide a smarter, faster, and safer charge.
Make sure you are using the original charger and USB cable when charging your Phone. Using a
third-party charger or USB cable may cause repeated restarts, longer charges, overheating, and in
extreme cases, Phone battery damage or even explosion.
4
Legal Notice
Copyright © Huawei Technologies Co., Ltd. 2018. All rights reserved.
No part of this manual may be reproduced or transmitted in any form or by any means without prior
written consent of Huawei Technologies Co., Ltd. and its afliates ("Huawei").
The product described in this manual may include copyrighted software of Huawei and possible
licensors. Customers shall not in any manner reproduce, distribute, modify, decompile, disassemble,
decrypt, extract, reverse engineer, lease, assign, or sublicense the said software, unless such
restrictions are prohibited by applicable laws or such actions are approved by respective copyright
holders.
Trademarks and Permissions
, , and are trademarks or registered trademarks of Huawei Technologies Co., Ltd.
Android™ is a trademark of Google Inc.
The Bluetooth
®
word mark and logos are registered trademarks owned by Bluetooth SIG, Inc. and any
use of such marks by Huawei Technologies Co., Ltd. is under license.
and are registered trademarks of Qualcomm Inc.
(NASDAQ: QCOM).
New Device
5

is a registered trademark of Sony Corporation.
Other trademarks, product, service and company names mentioned may be the property of their
respective owners.
Notice
Some features of the product and its accessories described herein rely on the software installed,
capacities and settings of local network, and therefore may not be activated or may be limited by
local network operators or network service providers.
Thus, the descriptions herein may not exactly match the product or its accessories which you
purchase.
Huawei reserves the right to change or modify any information or specications contained in this
manual without prior notice and without any liability.
Third-Party Software Statement
Huawei does not own the intellectual property of the third-party software and applications that are
delivered with this product. Therefore, Huawei will not provide any warranty of any kind for third
party software and applications. Neither will Huawei provide support to customers who use third-
party software and applications, nor be responsible or liable for the functions or performance of third-
party software and applications.
Third-party software and applications services may be interrupted or terminated at any time, and
Huawei does not guarantee the availability of any content or service. Third-party service providers
provide content and services through network or transmission tools outside of the control of Huawei.
To the greatest extent permitted by applicable law, it is explicitly stated that Huawei shall not
compensate or be liable for services provided by third-party service providers, or the interruption or
termination of third-party contents or services.
Huawei shall not be responsible for the legality, quality, or any other aspects of any software installed
on this product, or for any uploaded or downloaded third-party works in any form, including but not
limited to texts, images, videos, or software etc. Customers shall bear the risk for any and all effects,
including incompatibility between the software and this product, which result from installing software
or uploading or downloading the third-party works.
This product is based on the open-source Android™ platform. Huawei has made necessary changes to
the platform. Therefore, this product may not support all the functions that are supported by the
standard Android platform or may be incompatible with third-party software. Huawei does not
provide any warranty or representation in connect with any such compatibility and expressly excludes
all liability in connection with such matters.
DISCLAIMER
ALL CONTENTS OF THIS MANUAL ARE PROVIDED "AS IS". EXCEPT AS REQUIRED BY APPLICABLE
LAWS, NO WARRANTIES OF ANY KIND, EITHER EXPRESS OR IMPLIED, INCLUDING BUT NOT LIMITED
New Device
6

TO, THE IMPLIED WARRANTIES OF MERCHANTABILITY AND FITNESS FOR A PARTICULAR PURPOSE,
ARE MADE IN RELATION TO THE ACCURACY, RELIABILITY OR CONTENTS OF THIS MANUAL.
TO THE MAXIMUM EXTENT PERMITTED BY APPLICABLE LAW, IN NO EVENT SHALL HUAWEI BE
LIABLE FOR ANY SPECIAL, INCIDENTAL, INDIRECT, OR CONSEQUENTIAL DAMAGES, OR LOSS OF
PROFITS, BUSINESS, REVENUE, DATA, GOODWILL SAVINGS OR ANTICIPATED SAVINGS REGARDLESS
OF WHETHER SUCH LOSSES ARE FORSEEABLE OR NOT.
THE MAXIMUM LIABILITY (THIS LIMITATION SHALL NOT APPLY TO LIABILITY FOR PERSONAL INJURY
TO THE EXTENT APPLICABLE LAW PROHIBITS SUCH A LIMITATION) OF HUAWEI ARISING FROM THE
USE OF THE PRODUCT DESCRIBED IN THIS MANUAL SHALL BE LIMITED TO THE AMOUNT PAID BY
CUSTOMERS FOR THE PURCHASE OF THIS PRODUCT.
Import and Export Regulations
Customers shall comply with all applicable export or import laws and regulations and be responsible
to obtain all necessary governmental permits and licenses in order to export, re-export or import the
product mentioned in this manual including the software and technical data therein.
New Device
7
Gestures and Operation
Screenshots and Screen Recording
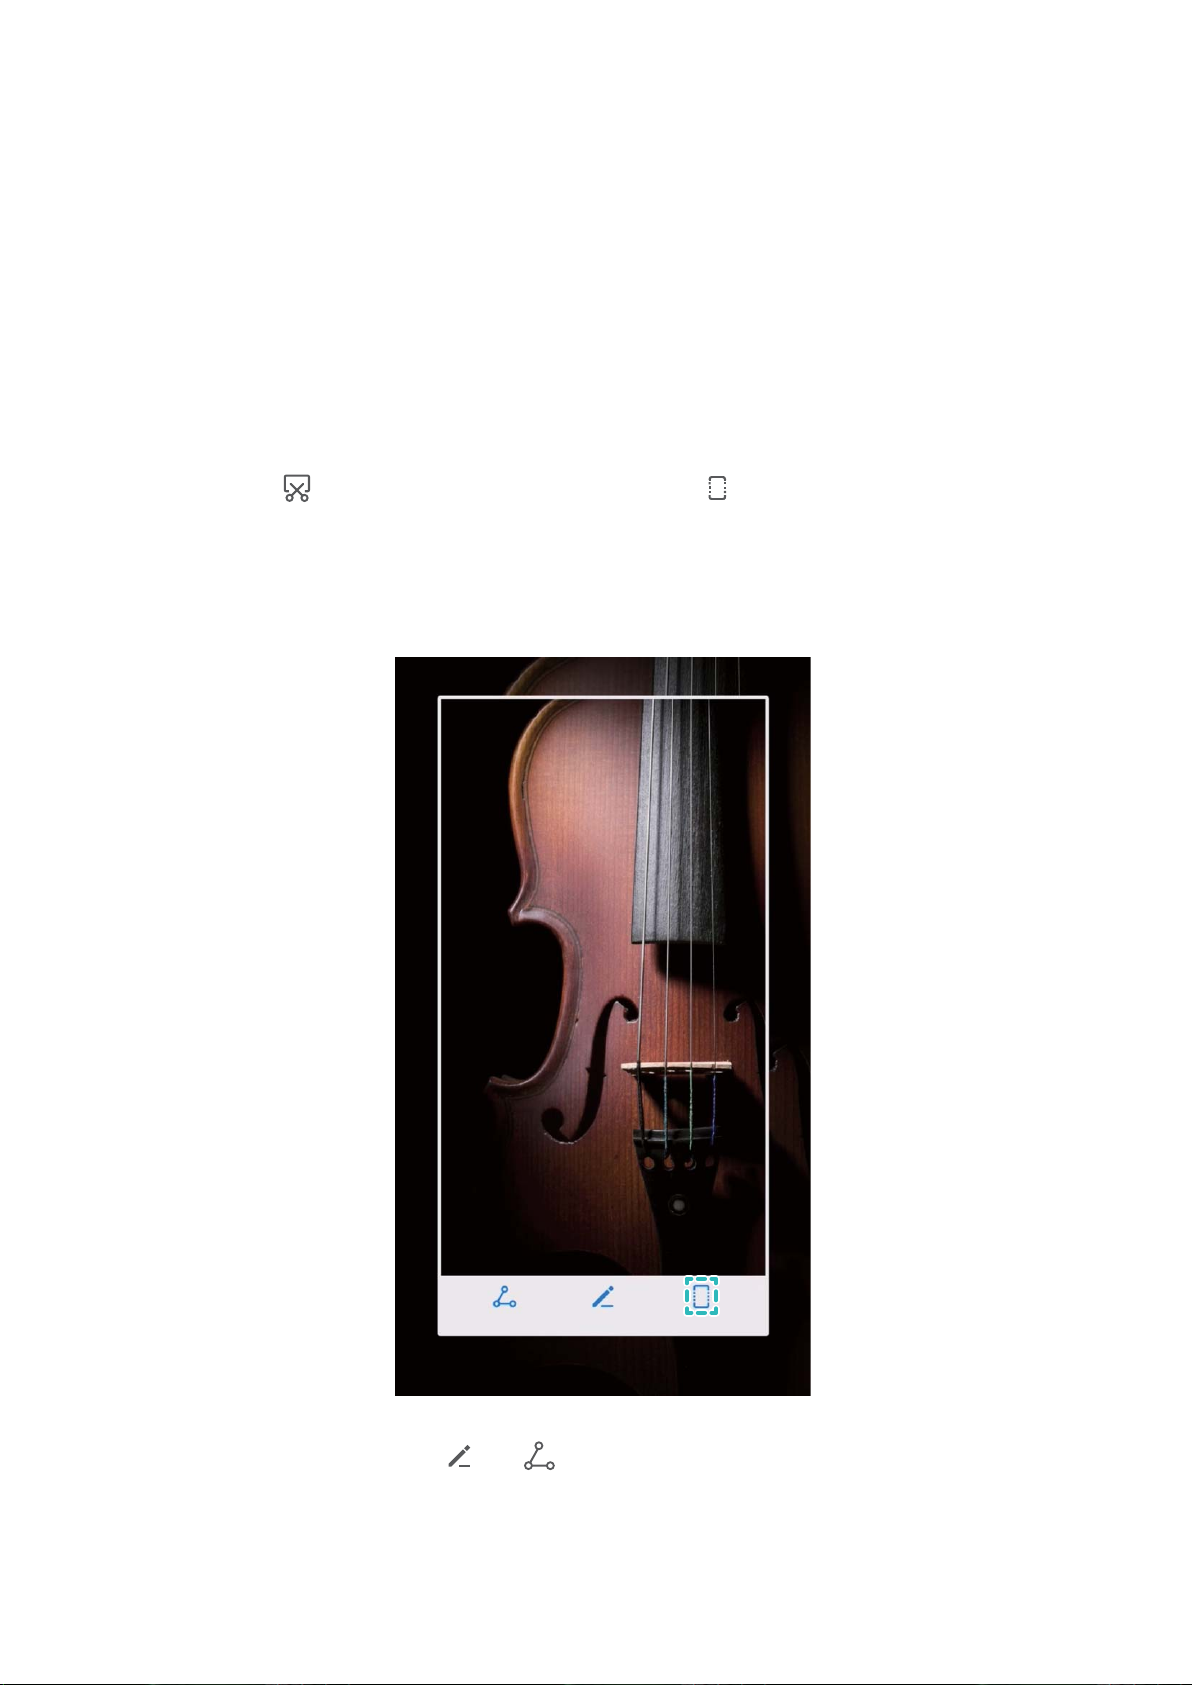
Take Scrolling Screenshots to Capture Entire Pages
Tired of having to take several screenshots to capture long articles or chat records? You can use your
Phone's scrolling screenshot feature to take a screenshot that scrolls down to the bottom of the page,
capturing all the information on the page in a single screenshot.
Use shortcuts to take scrolling screenshot: Swipe down from the status bar, open the shortcuts
panel, then touch to take a scrolling screenshot. Touch within three seconds of taking the
screenshot and the screen will automatically scroll down and keep taking the screenshot. During the
scrolling process, touch the scrolling area to end the screenshot.
After taking the screenshot, touch or to edit or share the screenshot. The screenshot will be
saved in Gallery by default.
8
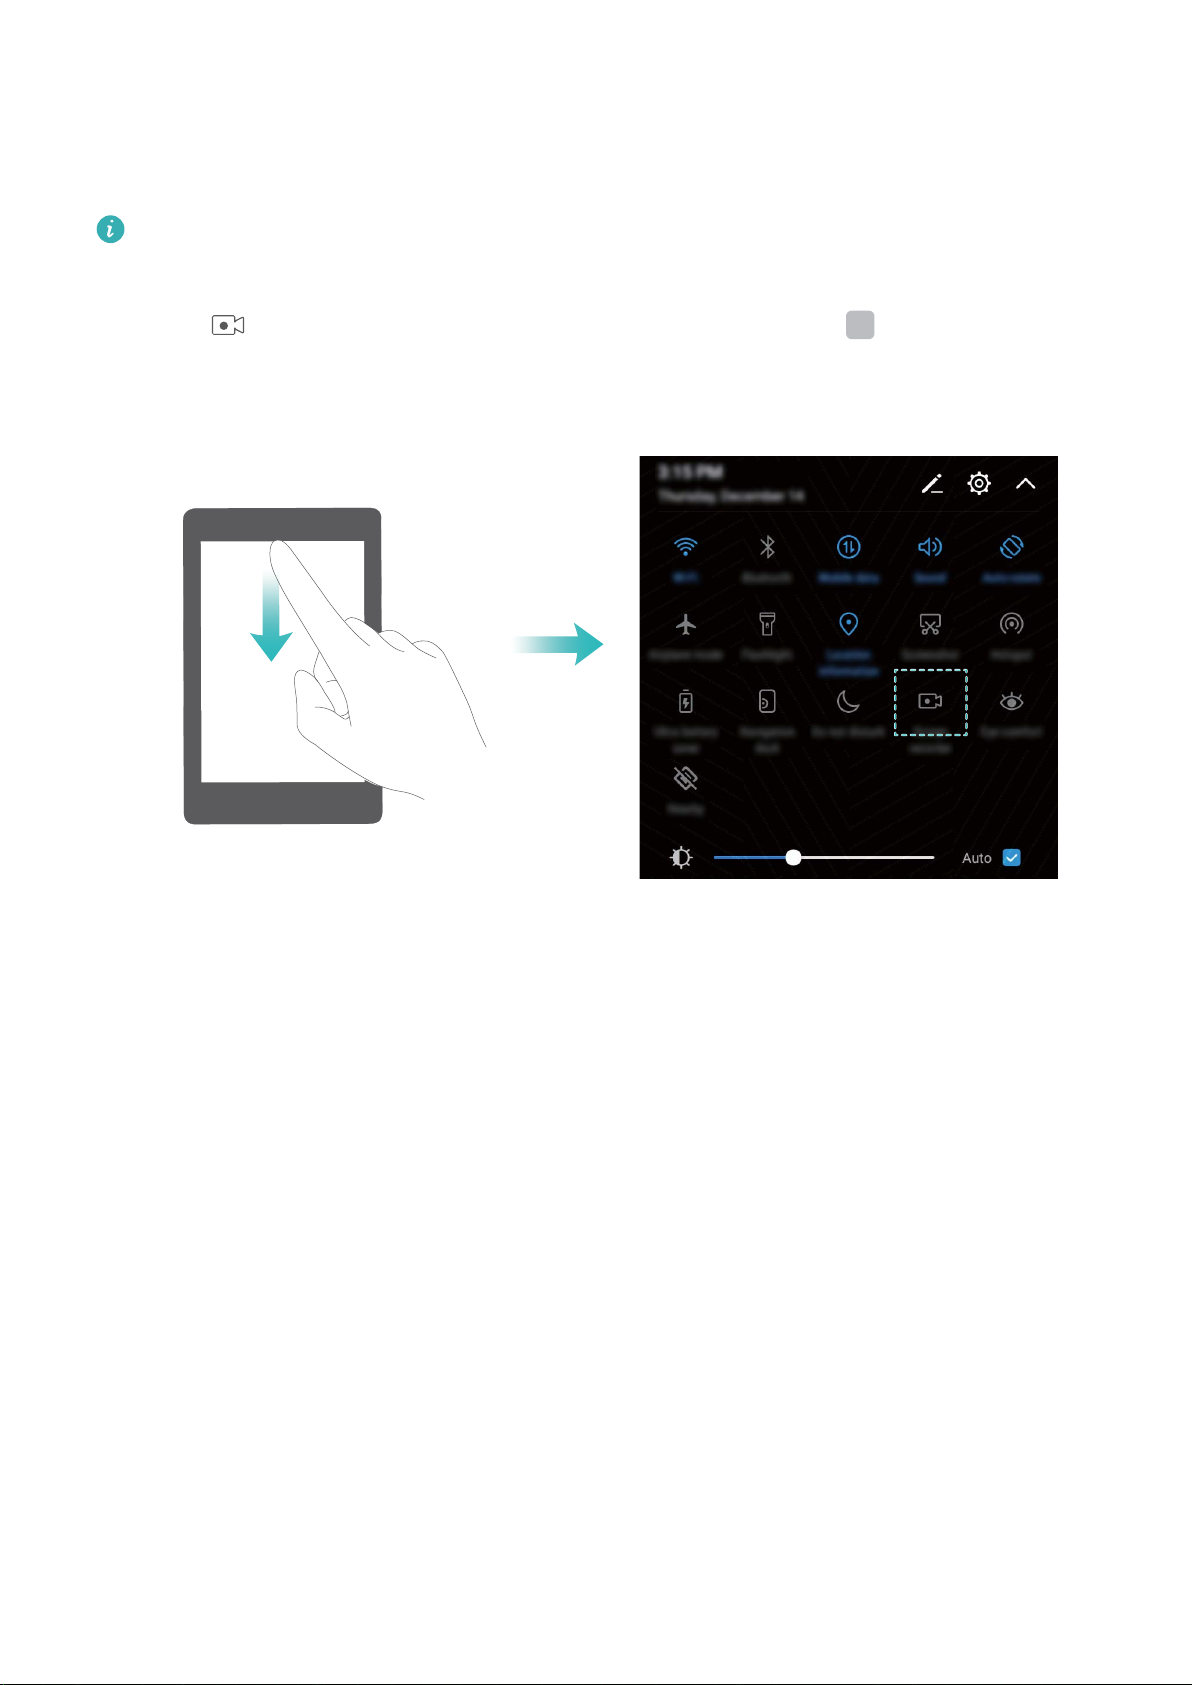
Record Exciting Moments on Your Screen
The screen recording feature comes in handy when you are making tutorial videos or want to record
exciting gaming moments on your Phone.
Screen recording will end if you make or answer a call.
Use shortcut to start recording: Swipe down from the status bar and open the shortcuts panel,
then touch to start recording the screen. To end the recording, touch in the upper left
corner of the screen.
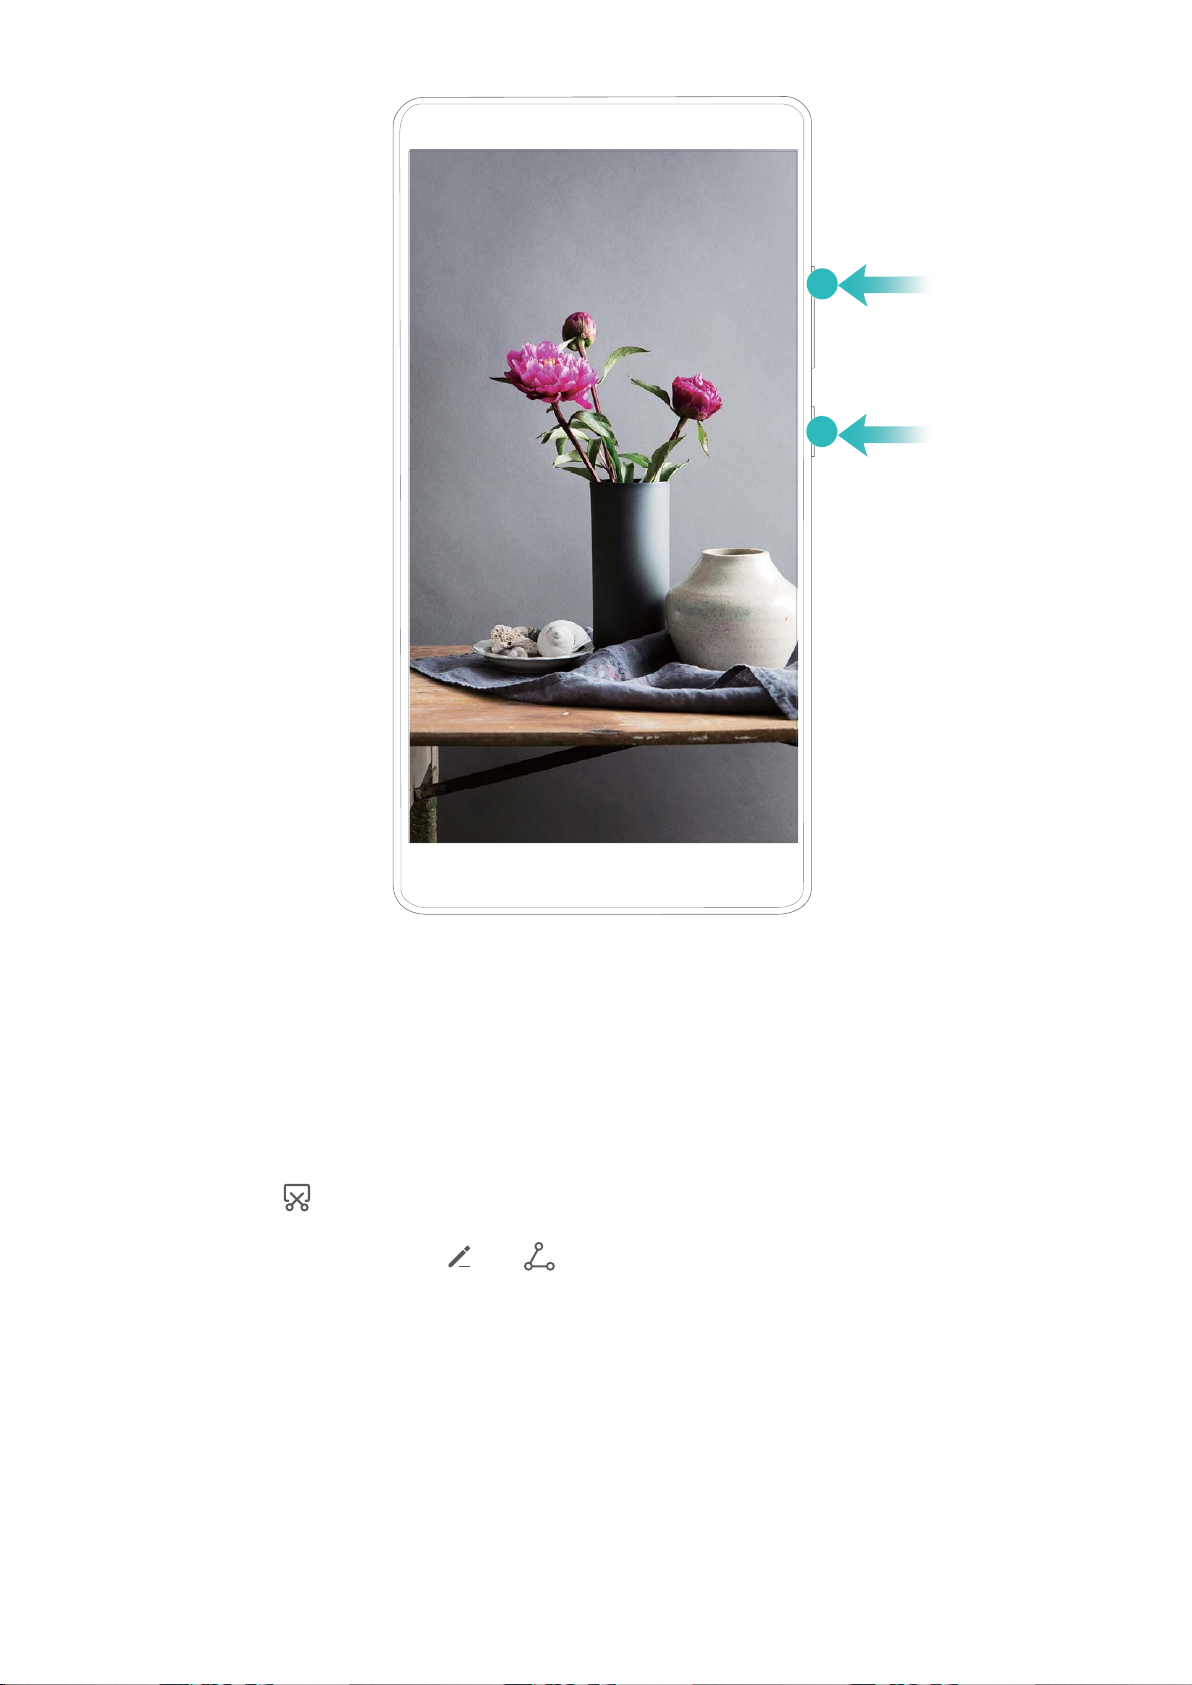
Use combo key to start recording: Simultaneously press the Power button and the Volume up
button to begin recording. To end the recording, simultaneously press the Power button and the
Volume up button again.
Gestures and Operation
9
You can view screen recordings in Gallery.
Take a Screenshot of Your Entire Screen
Use combo key to take screenshot: Simultaneously press and hold the Power button and the
Volume down button to take a screenshot of the full screen.
Use shortcut switch to take screenshot: Swipe down from the status bar and open the shortcuts
panel, then touch to take a screenshot of the full screen.
After taking the screenshot, touch or to edit or share the screenshot. The screenshot will be
saved in Gallery by default.
Gestures and Operation
10

Home Screen
Quick Switch
Use Shortcut Switches to Quickly Enable Frequently Used Features
Want to quickly enable or disable mobile data or hotspot? You can enable frequently used features by
using shortcut switches.
Swipe down from the status bar to open the notication panel. You can:
l Quickly enable frequently used features: You can turn on shortcut switches to enable the
relevant functions. For example, touch to enable the bluetooth function.
l Touch and hold shortcut switch icon to access function settings: If you want to perform more
settings for a function, touch and hold the corresponding shortcut switch to open the function
settings page.
This method does not work for part of shortcut switches, such as Flashlight, Screenshot, and
Screen recorder.
l Display more shortcut switches: Touch to display more switches.
%JTQMBZBMMTIPSUDVU
TXJUDIFT
5PVDIUIFTIPSUDVU
TXJUDIUPFOBCMF
UIFGFBUVSF
5PVDIBOEIPMEUP
FOUFSTFUUJOHT
3FBSSBOHFTIPSUDVU
TXJUDIFT
Adjust the Positions of the Shortcut Switches to Your Liking
Adjust the positions of the shortcut switches to put the ones you use regularly at the top.
Swipe down from the status bar, open the shortcuts panel, and touch . From the shortcuts panel,
you can:
Rearrange shortcut switches: Touch and hold a shortcut switch and then drag the icon to a
position of your choice.
Add a shortcut switch: Drag a shortcut switch from the hidden area of the panel to the displayed
area, then touch BACK.
11
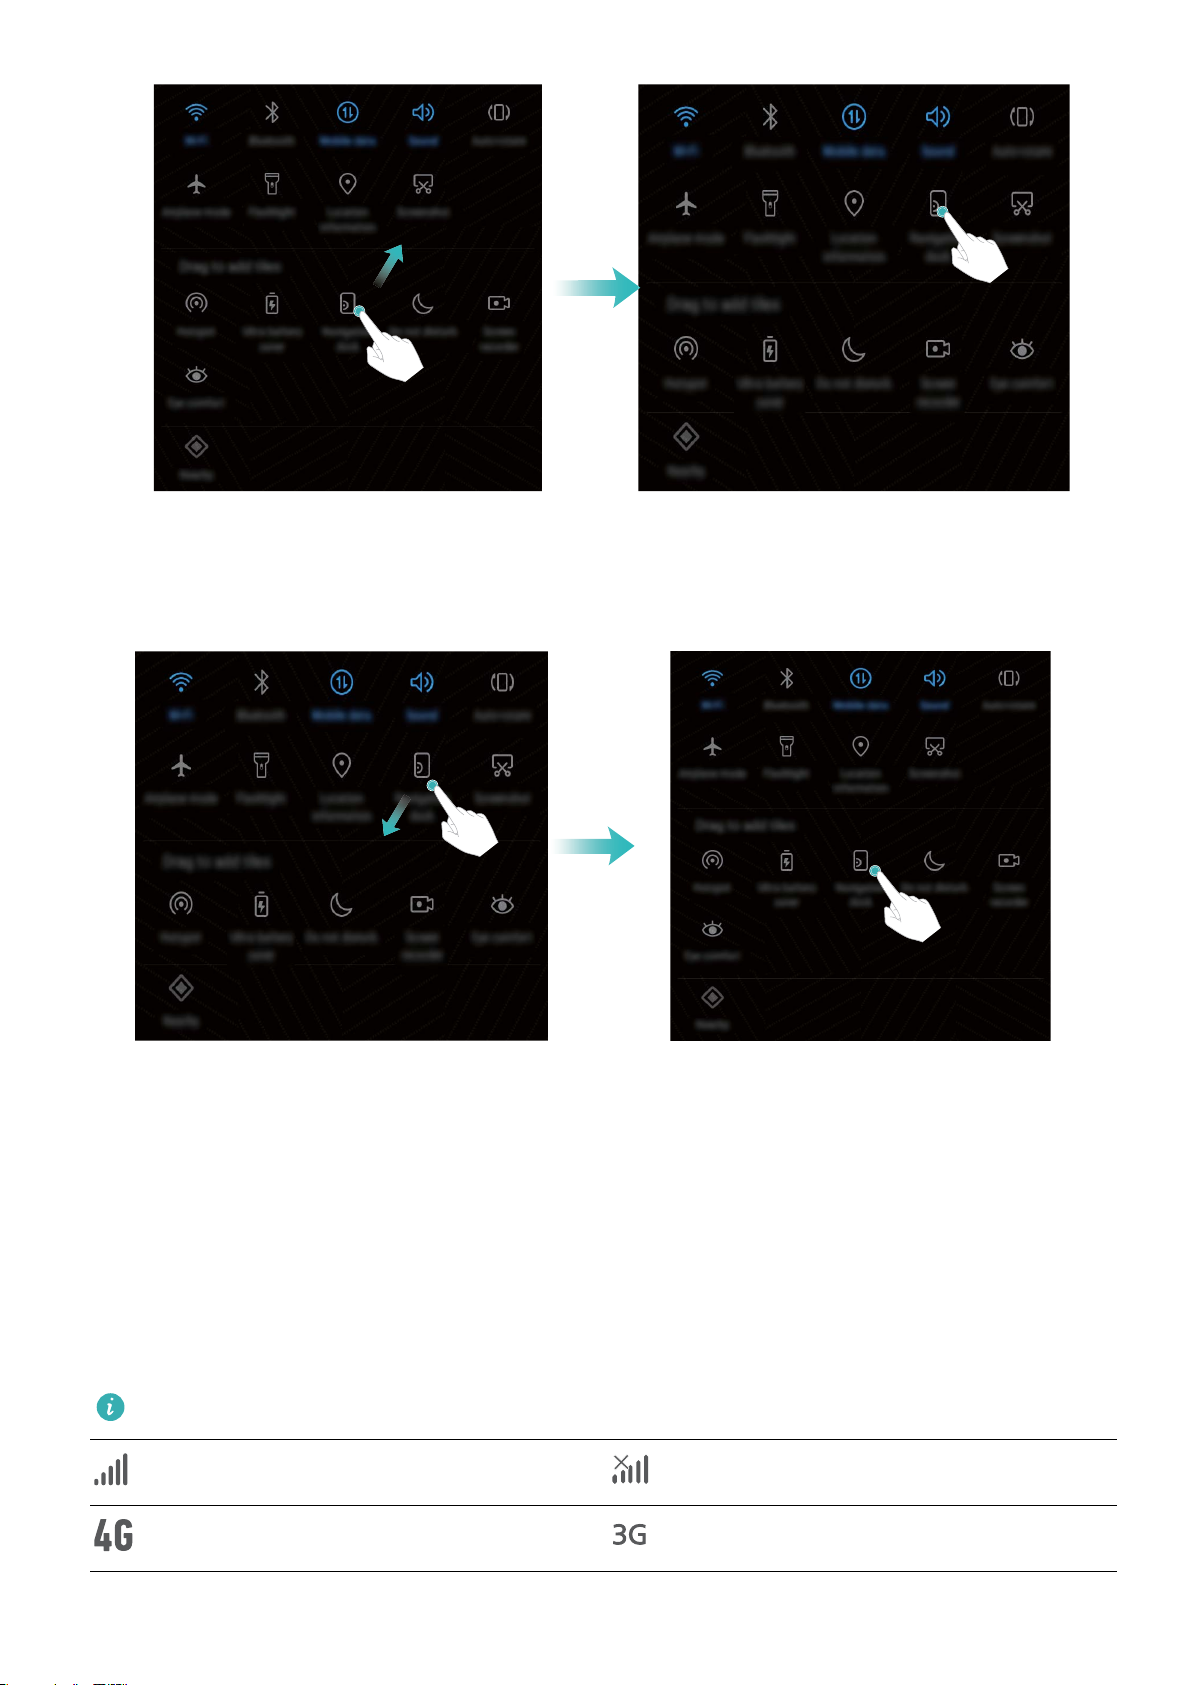
Remove shortcut switch: Drag a shortcut switch from the displayed area of the panel to the hidden
area, then touch BACK.
Notication and Status Bar
Understanding Status Bar Icons
Use the status bar to view connection information, check the remaining battery level, and check for
new
notications.
Status icons: Status icons tell you about your Phone's status, including network connections, signal
strength, battery level, and time.
Status icons may vary according to your region or carrier.
Signal strength No signal
Connected over 4G Connected over 3G
Home Screen
12
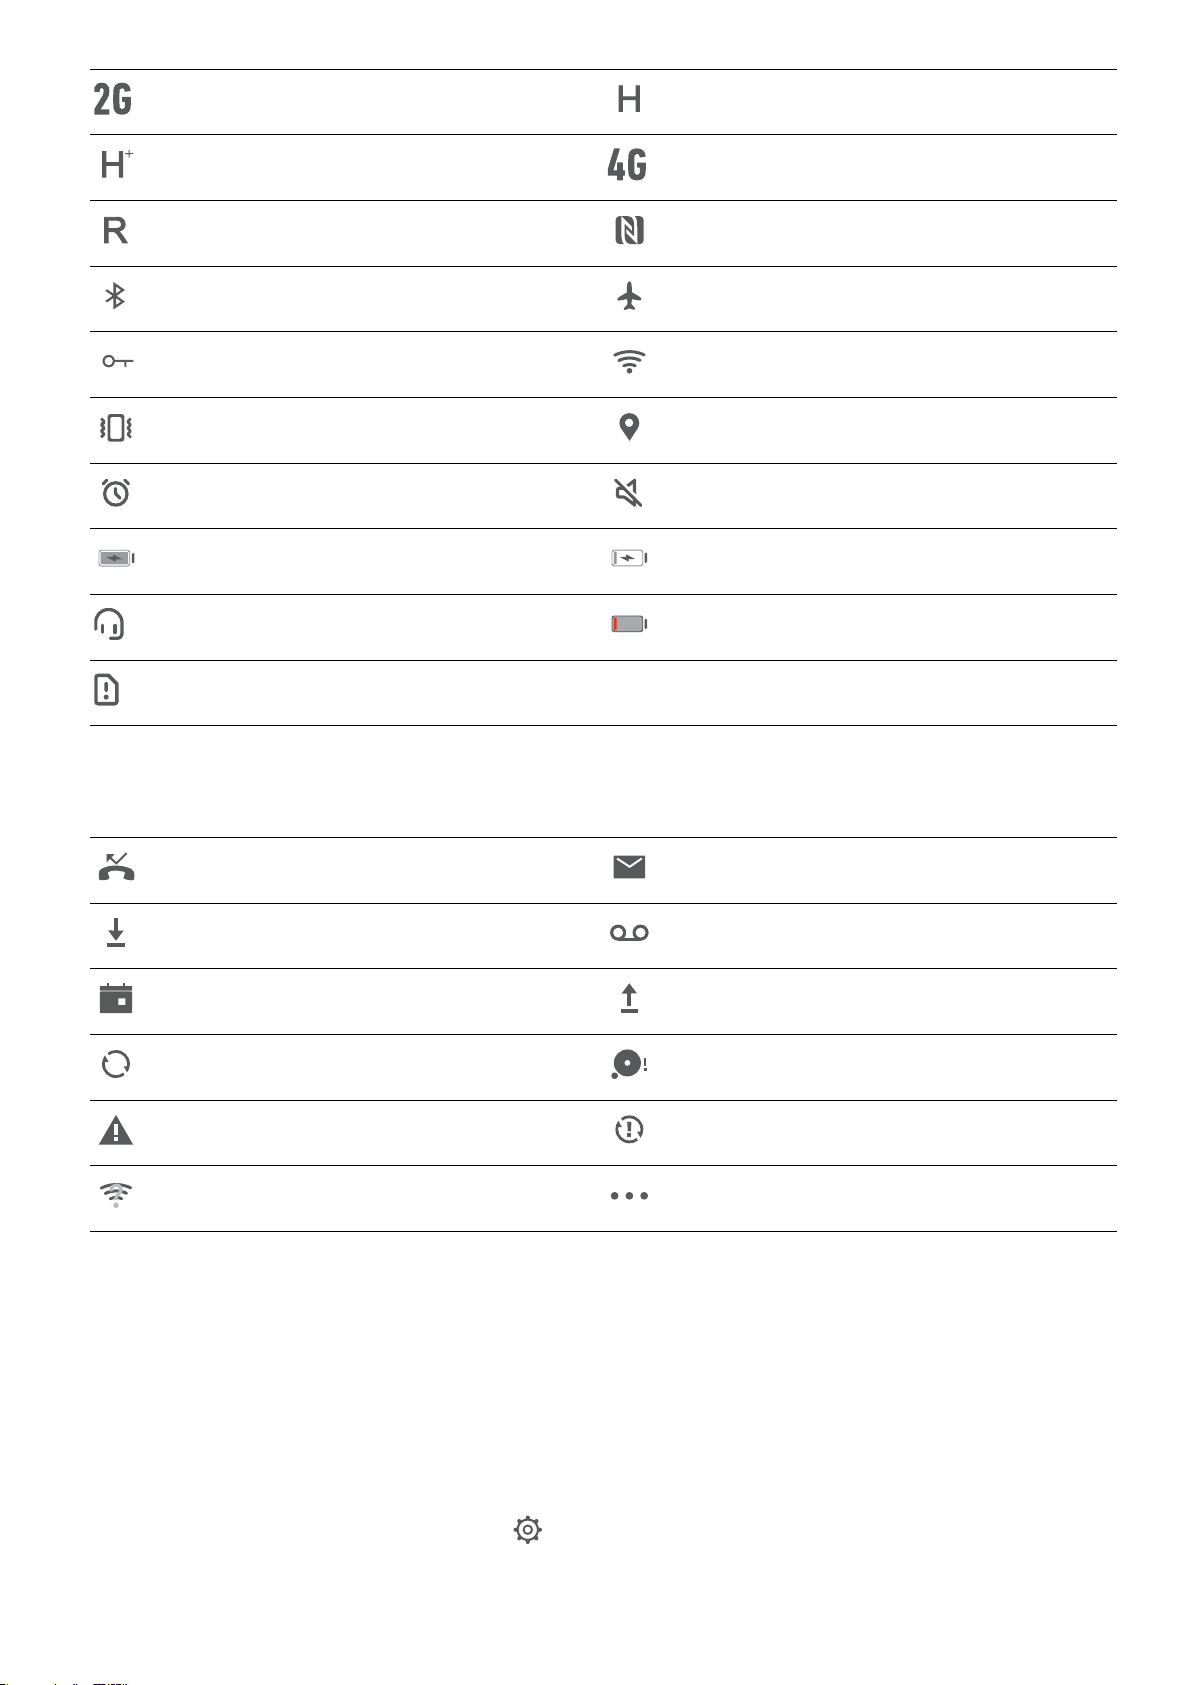
Connected over 2G Connected over HSPA
Connected over HSPA+ Connected over LTE
Roaming NFC enabled
Bluetooth enabled Airplane mode enabled
Connected to a VPN Connected over Wi-Fi
Vibration mode enabled Receiving location data from GPS
Alarms activated Silent mode enabled
Battery full Charging
Headset plugged in Battery low
No SIM card found
Notication icons: Notication icons are displayed on the left-hand side of the status bar when you
receive a new message, notication, or reminder.
Missed calls
New emails
Downloading data New voicemail
Upcoming events Uploading data
Synchronizing data Phone memory full
Log in or synchronization error Synchronization failed
Wi-Fi network available More notications
Open the Notication Panel to Get Important Information
Want to ensure that you do not miss out on any important notications? From your Phone's status
bar, you can view real time notication information and your device's operating status.
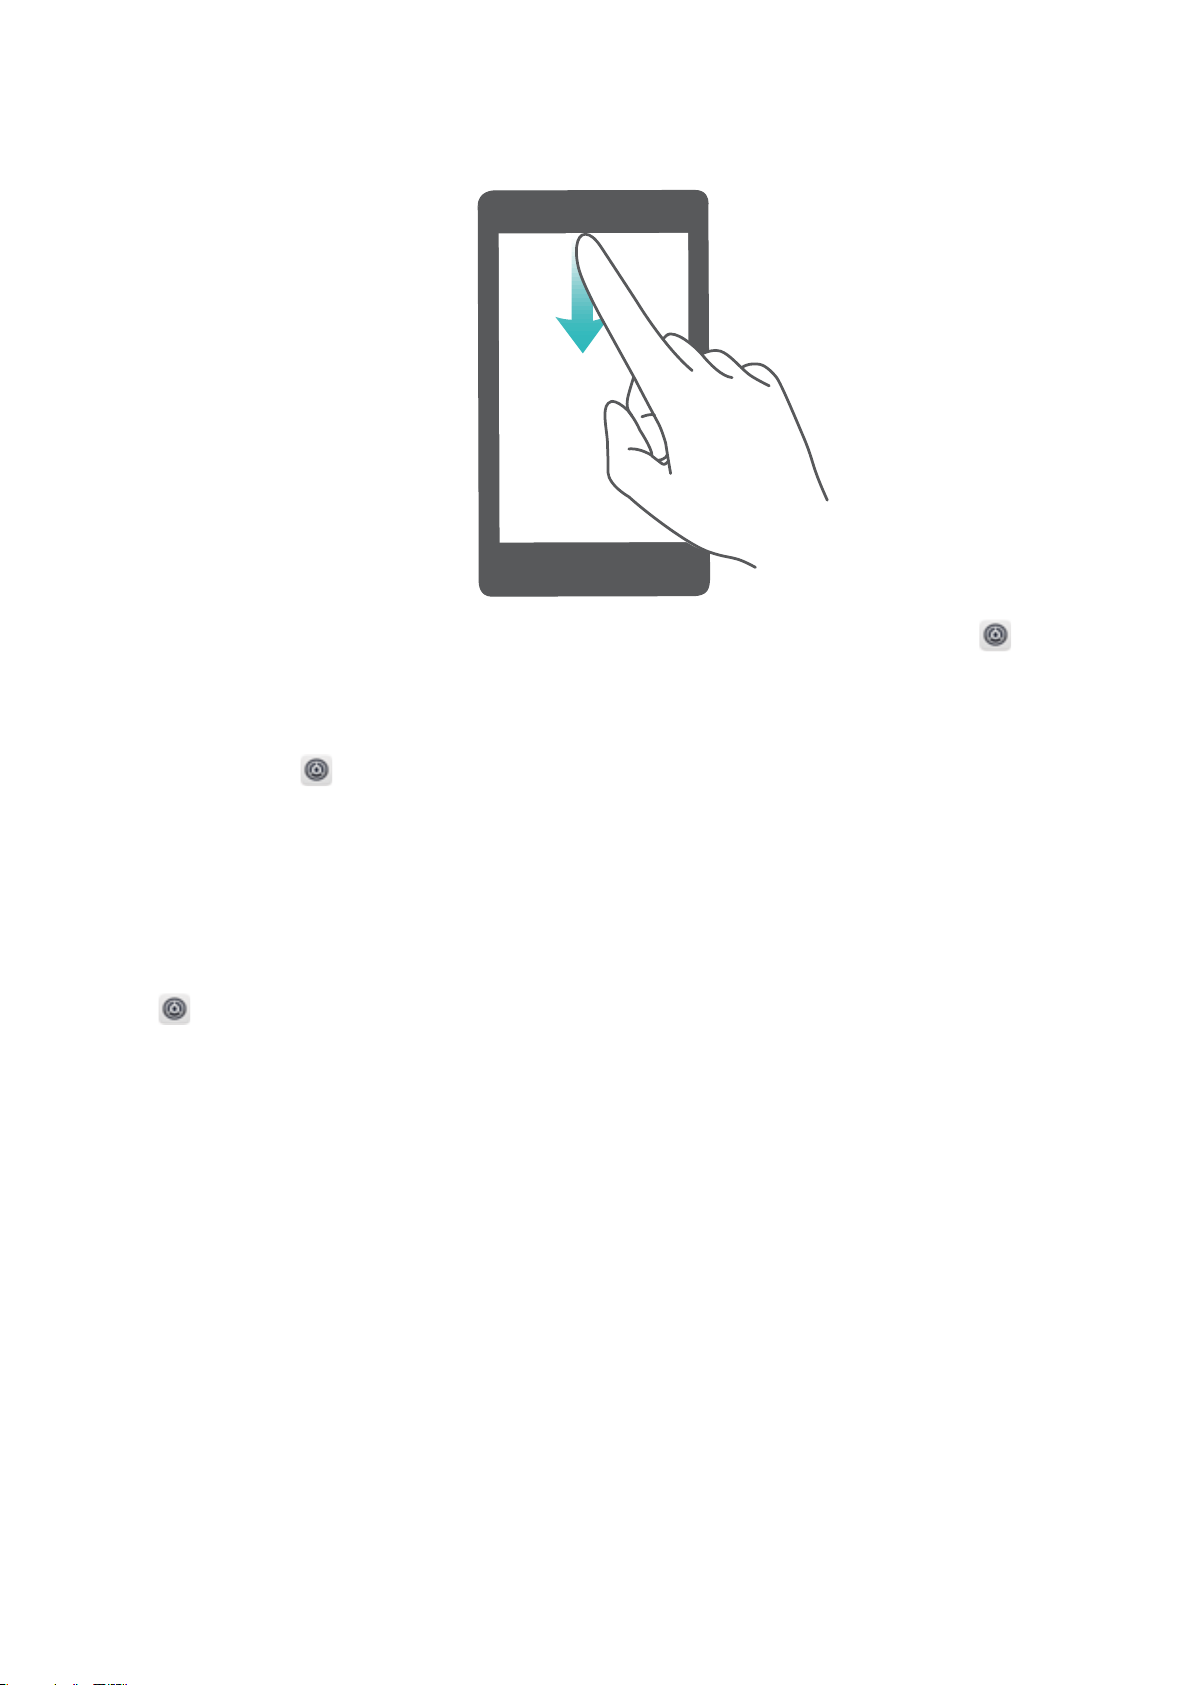
When there is a notication reminder, you can turn on the screen and swipe down from the status bar
to view the notication. You can access notication and status bar settings in the following ways:
l Access notication and status bar settings when the screen is locked: Turn on the screen and
swipe down from the status bar, touch , enter your password, and then go to Apps &
notications > Notications & status bar.
Home Screen
13
l Access notication and status bar settings when the screen is unlocked: Go to Settings
and then go to Apps & notications > Notications & status bar.
Want the notication and status bar to display only the number of notications or to display no
notications? Touch Settings, and go to Apps & notications > Notications & status bar >
Notication method. Then, select Numbers or None as required.
Disable Disruptive App
Notications
Find it annoying to receive so many different types of app notications? You can set and disable app
notications to prevent this from happening.
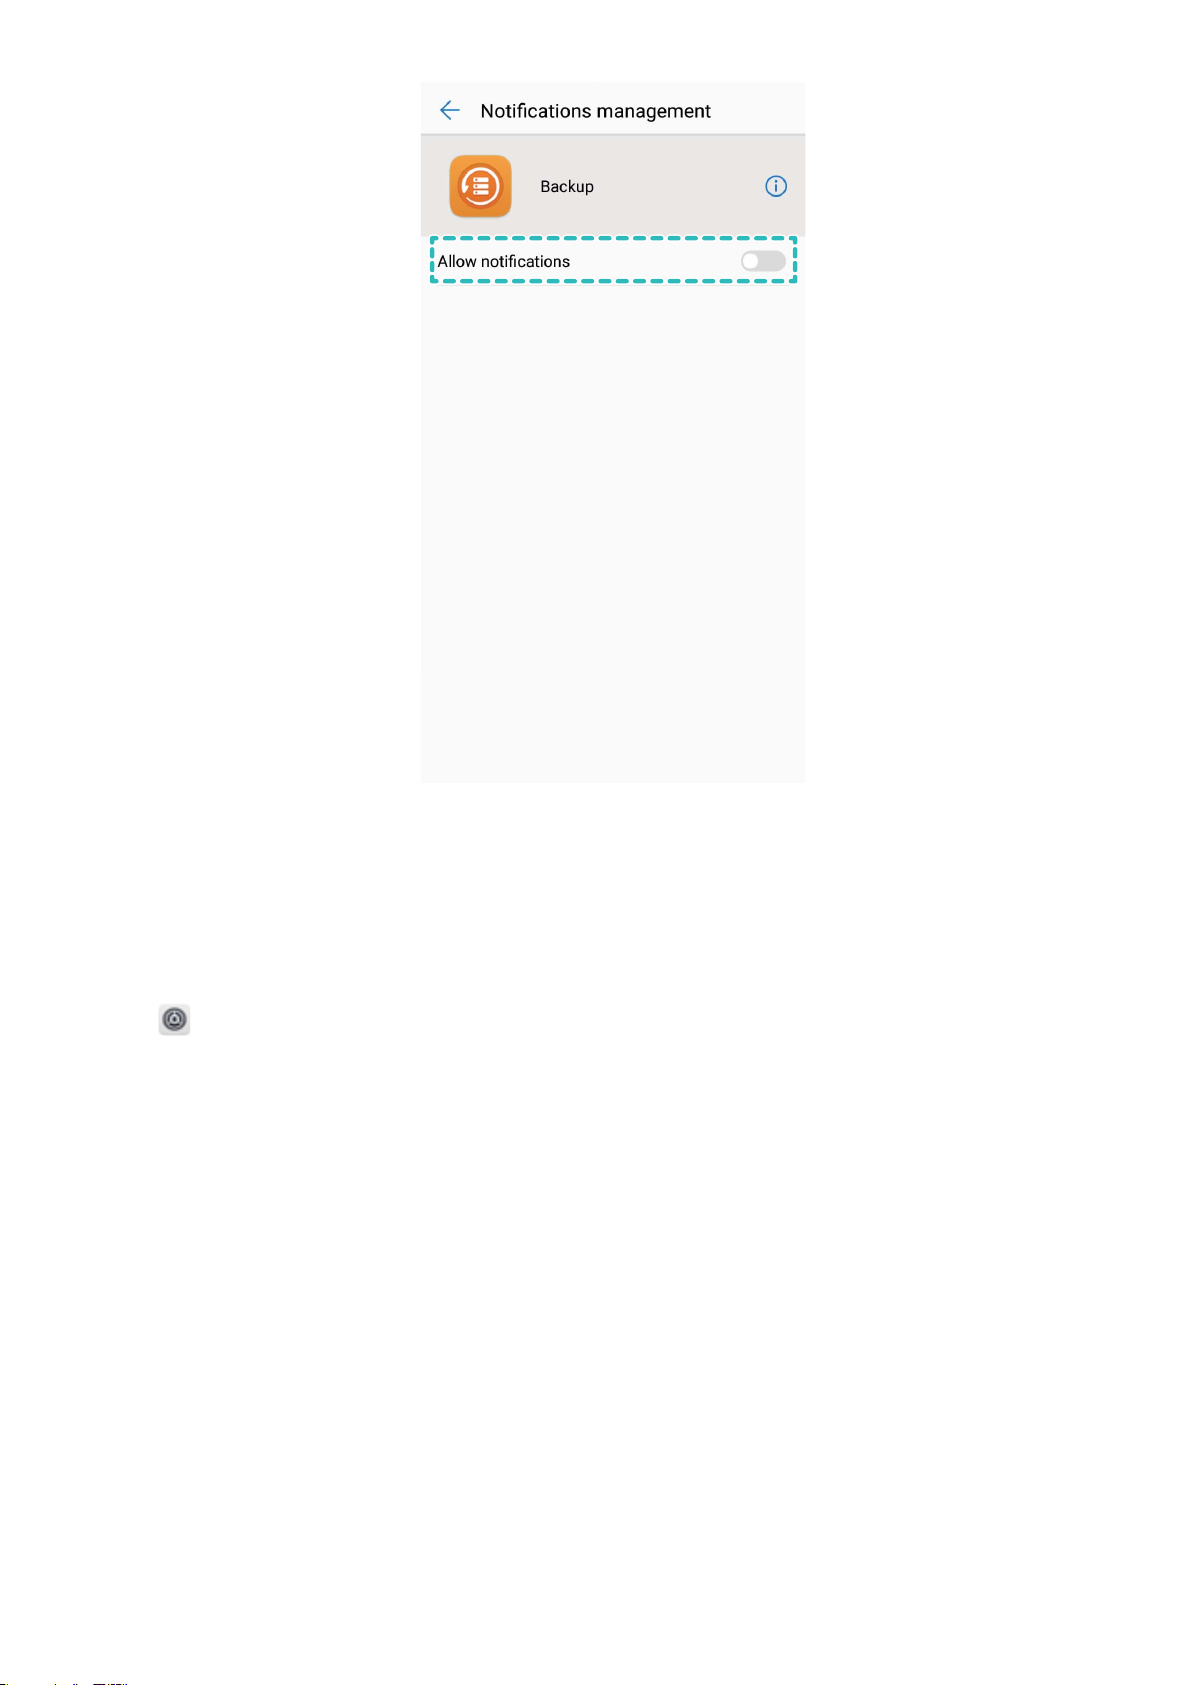
Go to Settings, and then go to Apps & notications > Notications management. You can:
l Prevent an app from pushing notications: On the Notications management screen,nd the
desired app and touch it, and then turn off Allow notications.
Home Screen
14
l Prevent all apps from pushing notications: Touch Batch management, and then turn off All.
Customize Notications to Your Liking
Not a fan of the default
notication reminders? You can customize notication reminders so that you
get notications the way you want them.
Go to Settings, then go to Apps & notications > Notications & status bar. You can:
l Enable Notications turn on screen: Turn on Notications turn on screen. When your Phone
screen is off, it will turn on when a notication is received.
l Set notications light to pulse: Turn on Pulse notication light, and the Phone notication
light will icker when you receive new notications.
l Display more information in the status bar: Depending on your preferences, you can turn on
Display carrier name or Display network speed.
l Set notication method: Touch Notication method. Depending on your preferences, you can
select Icons, Numbers, or None.
l Set battery percentage display mode: Touch Battery percentage. Depending on your
preferences, you can select Next to battery icon, Inside battery icon, or Do not show.
Home Screen
15

Screen Lock and Unlock
Set up Magazine Unlock
Magazine unlock displays a fresh image on your lock screen each time you unlock your device, so that
you never get bored of the same old background.
To display the Magazine Unlock shortcut panel, swipe up from the bottom of the lock screen.
Add your own images as covers: Touch . Touch and select the images you want to add,
and then touch .
Set a Lock Screen Password to Protect Your Privacy
Personal photos, contact information, and banking apps, your Phone stores a lot of sensitive
information. Set a lock screen password so that a password is required each time you unlock your
Phone. A lock screen password helps to protect your private information if your Phone is lost or
accessed by an unauthorized user.
Set a lock screen password: Open Settings, go to Security & privacy > Screen lock &
passwords, and set the type of lock screen password you prefer.
l Set a PIN: A PIN number is a sequence of digits. Entering a PIN to unlock your device is quick and
simple. For better security, use a long sequence of random numbers as your PIN. Go to Password >
PIN, follow the prompts to set up a PIN, then touch OK.
l Set a pattern: Unlock your device by drawing a preset pattern on the screen. For better security,
use a pattern that includes overlapping line segments. Go to Password > Pattern and draw the
same pattern twice. The pattern must connect at least 4 dots.
l Set a password: A password made up of numbers, letters, and special characters is more secure
than a PIN or pattern. For better security, use a password with 8 or more characters that includes
numbers, letters, and special characters. Please memorize the password so that you don't get
locked out of your device if you forget it. Go to Password > Password, follow the prompts to set
up a password, then touch OK.
l Unlock your device using a smart band: If your device supports unlocking with a smart band,
the screen will automatically light up when the band comes within 80 cm of your device. Swiping
on the screen will instantly unlock the device. Touch Smart unlock, and follow the onscreen
prompts to complete the setup.
Home Screen
16

l Unlock your device using a ngerprint: If your device supports ngerprint unlock, this is the
recommended unlock method. Using a ngerprint is a secure and quick way to unlock the
device. After setting a lock screen password, touch Enroll in the dialog box that pops up and
follow the onscreen prompts to enroll your ngerprints.
l For security reasons, please do not disable the lock screen password: A lock screen
password prevents unauthorized access to your device. For the security of your device, do not
select None as the screen lock method.
l Regular password prompts help you to remember your password: If you have not
entered your screen lock password for 3 days, the system will require that you enter the
password to unlock your device.
Lock the Screen to Quickly Secure Your Phone
If you don't use your Phone for a set period of time, the screen will turn off and lock. As long as the
screen stays on, you can use your Phone without needing to unlock the screen. Lock your screen
when you are not using your Phone to protect your privacy and prevent mistaken inputs.
Set a lock screen password to help protect your privacy. You can lock your device in the following
ways:
Lock the screen instantly with the Power button: Press the Power button to lock the screen at
any time.
Lock the screen with one-touch screen lock: Pinch two ngers together on the home screen to
enter the editing screen. Touch Widgets > Screen Lock and add the Screen Lock widget to your
home screen. This helps reduce wear and tear on your power button. After leaving the home screen
editing mode, touch the Screen Lock widget to instantly lock your screen. To lock your screen this
way, rst switch to the home screen page where the Screen Lock widget is located.
Set automatic screen lock: When reading a novel or the news, you need to keep your Phone's
screen on continuously to read. In order to keep the screen from locking immediately after it turns off,
you can set an automatic lock screen time. This allows you to keep reading without interruption.
Open Settings, go to Security & privacy > Screen lock & passwords > Secure lock settings
> Automatically lock, and set the amount of time for the screen to stay on before it automatically
locks.
You can also customize the lock screen style according to your preferences:
Change the lock screen style: Your device uses Magazine unlock by default. Open Settings. Go
to Security & privacy > Screen lock & passwords > Lock screen style and select the lock screen
style you that suits you.
Set a custom message as your lock screen signature:
Touch Lock screen signature to
display a custom message on the lock screen each time the screen lights up.
Home Screen
17
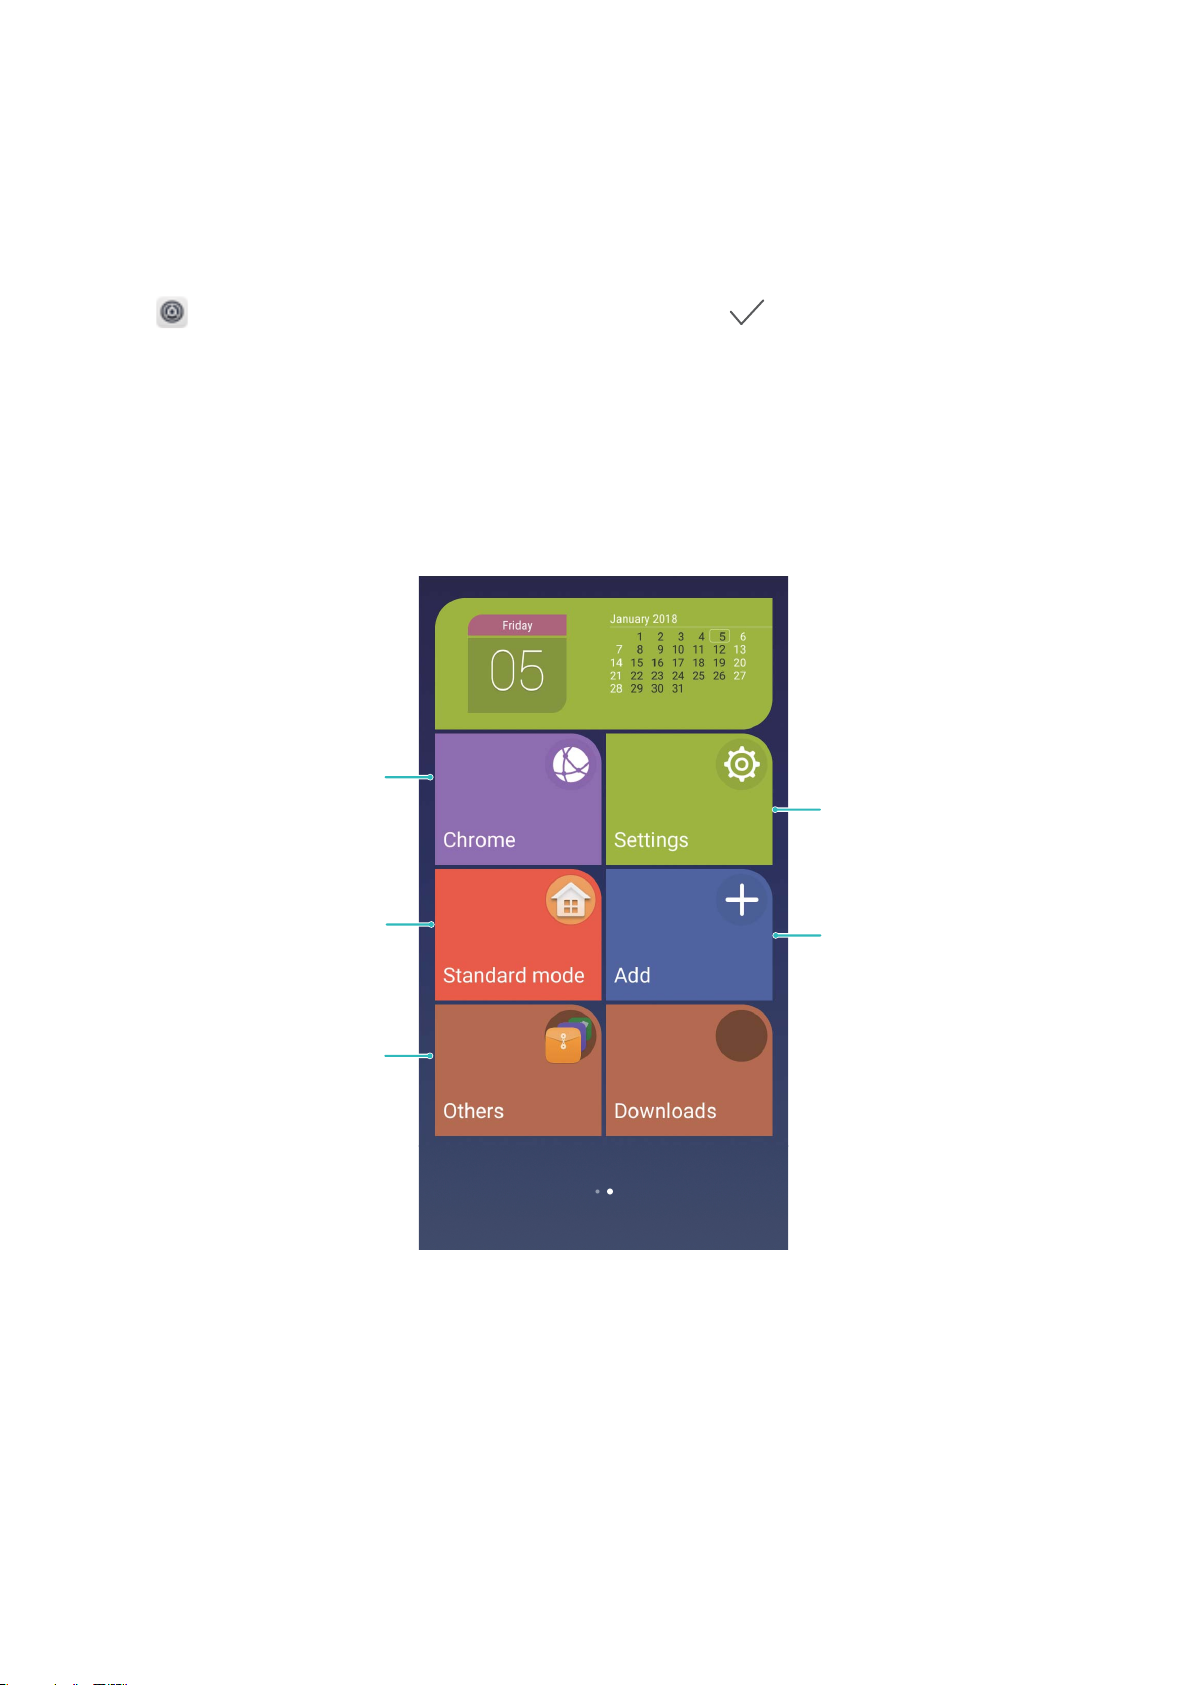
Go Back to Basics with Simple Mode
Does your home screen look cluttered with app icons and small text? Simple mode displays larger
icons and fonts on the home screen, adopting a more concise layout that allows you to navigate more
easily.
Open Settings, go to System > Simple mode, and touch .
In Simple mode, you can:
l Edit home screen icons: Touch and hold any of the icons to enter home screen editing mode, then
you can add or remove app icons accordingly.
l Exit Simple mode: To exit Simple mode, touch Standard mode.
Open app
Add contact/app
Exit Simple mode
Press and hold
the icon to enter
editing mode
View/open more apps
Home Screen Management
Manage home screen icons
Is your home screen cluttered with app icons? You can move or delete icons from the home screen or
sort and move them to folders for more convenient use.
Move a home screen icon: From the home screen, touch and hold an app icon until your Phone
vibrates, then drag it to any position on the home screen.
Home Screen
18

Delete an app: From the home screen, touch and hold the icon of the app you want to uninstall until
your Phone vibrates, then drag it to . Follow the onscreen prompts to delete the app.
To ensure that the system runs normally, some preinstalled system apps cannot be uninstalled.
Create a folder to store app icons: From the home screen, touch and hold an app icon until your
Phone vibrates, then drag it on top of another icon. The two icons will now be placed in a new folder.
Delete a folder: Open the folder, touch , deselect all the apps, then touch OK. The folder will be
deleted automatically and all the apps in the folder will be moved to your home screen.
Rename a folder: Open the folder, touch the folder name and enter a new name.
Add or delete app icons from a folder: Open the folder, touch , select or deselect apps as
required and then touch OK. The selected apps will be automatically added to the folder while the
deselected apps will be removed from the folder.
Another way to remove an app icon from a folder is to touch and hold the icon in the folder until
your Phone vibrates, and then drag it to the home screen.
Manage Your Home Screen
Too many icons on your home screen? You can add a new page to your home screen and customize it
to your liking.
Home Screen
19

Touch and hold an empty area on the home screen to enter home screen editing mode. Do the
following:
l Add a new home screen page: Touch at the left or right side of the screen to add a new
home screen page.
l Delete an empty home screen page: Touch at the bottom of a home screen page to delete
the page.
Home screen pages with app icons or widgets on them cannot be deleted.
l Modify home screen page order: Touch and hold the home screen page you want to shift, then
drag it to the position of your choice.
l Set a default home screen page: Touch
in the upper part of the home screen to set the
selected home screen page as your default home screen page.
Set Your Home Screen Wallpaper
Want to set a picture you like as your home screen wallpaper? Personalize your wallpaper to make
your home screen stand out.
Go to Settings, then go to Display > Wallpaper. You can:
l Set a picture as your home screen wallpaper: Touch Set wallpaper. From More or Gallery,
select a picture that you like and follow the onscreen instructions to select Lock screen, Home
screen or Both.
Set a picture in your Gallery as your wallpaper: Have a great picture you want to set as your
wallpaper? Open Gallery, open the picture that you like and then go to > Set as >
Wallpaper(Gallery) to set the picture as your home screen wallpaper.
Manage Your Home Screen Widgets
Want to quickly add widgets such as one-touch lock screen, memo browser, or calendar to your home
screen? You can add, move or delete home screen widgets to tidy up your home screen and make it
easier to use.
Add widgets: Touch and hold an empty area on the home screen to enter home screen editing
mode. Touch Widgets, select a widget and drag it to an empty area on the home screen.
Home Screen
20
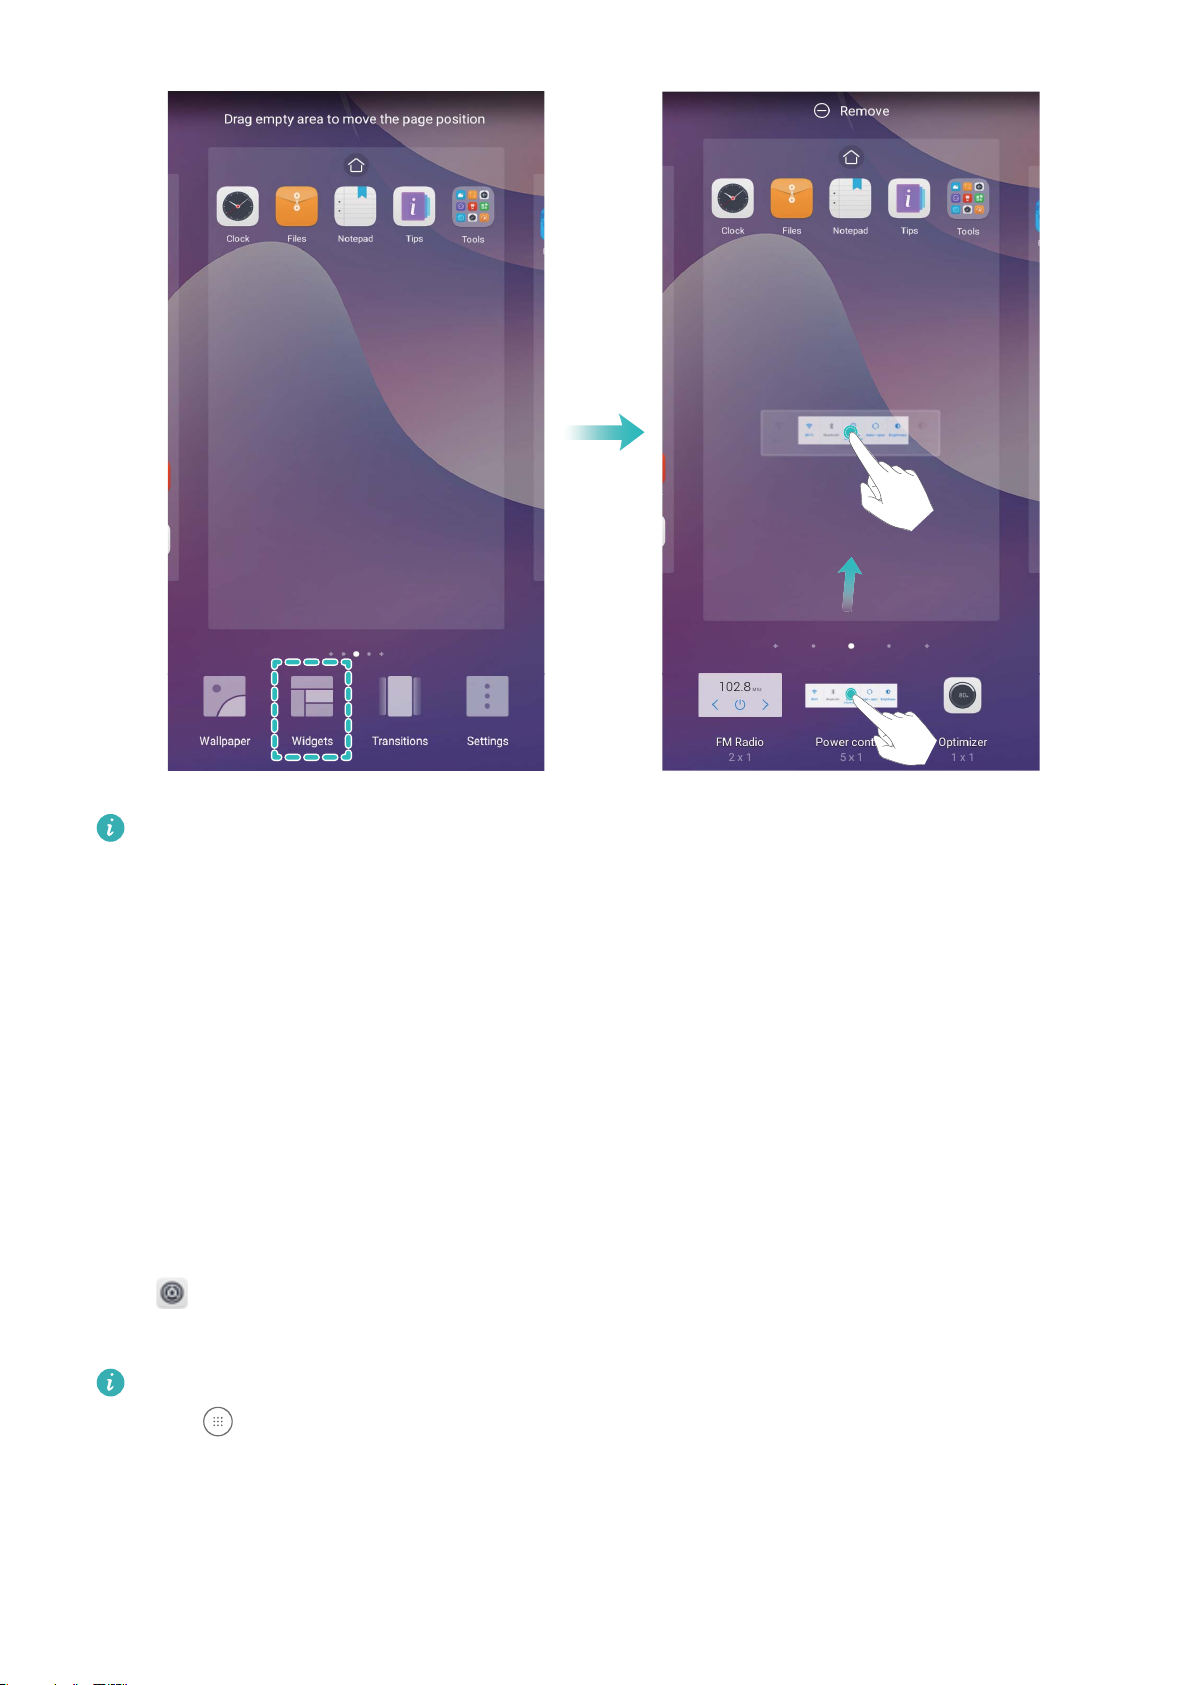
Check that there is enough empty space on the home screen to put the widget. If there is not
enough space, add an empty home screen page or free up some space on the current home
screen page.
Delete widgets: Touch and hold a widget on the home screen until your Phone vibrates. Drag the
widget to Remove at the top of the screen.
Move widgets: Touch and hold a widget on the home screen until your Phone vibrates. Drag the
widget to any position of the screen.
Use App Drawer to Store Apps
Want to store your apps in one location on your home screen to give your home screen a neater look?
You can enable the app drawer on your home screen to store all your apps and free up space on your
home screen.
Open Settings, go to Display > Home screen style, and select Drawer. If you want to switch
back to a standard home screen, select Standard.
Add an app icon from the app drawer to the home screen
: After you enable the app drawer,
touch on the home screen to enter the app list. From the app list, touch and hold the app
icon that you want to add until your Phone vibrates, and then drag it to the desired position on
the home screen.
Home Screen
21
Contacts
Managing Business Cards
Business Card Management: Share Business Cards with Ease
Find it laborious to enter the content of paper business cards into your Phone contacts? Want an
easier way to share your Phone contacts with friends? Business card management allows you to
conveniently share business cards.
Business card management supports the following features:
l Share your personal business card: Create your personal business card in your contacts and your
device will automatically generate a QR code. You can then quickly share your business card using
the QR code.
l Share contacts: Select the contact you want to share and touch the QR code at the top of the
contact details screen to quickly share the contact.
Share Contacts Using Electronic Business Cards
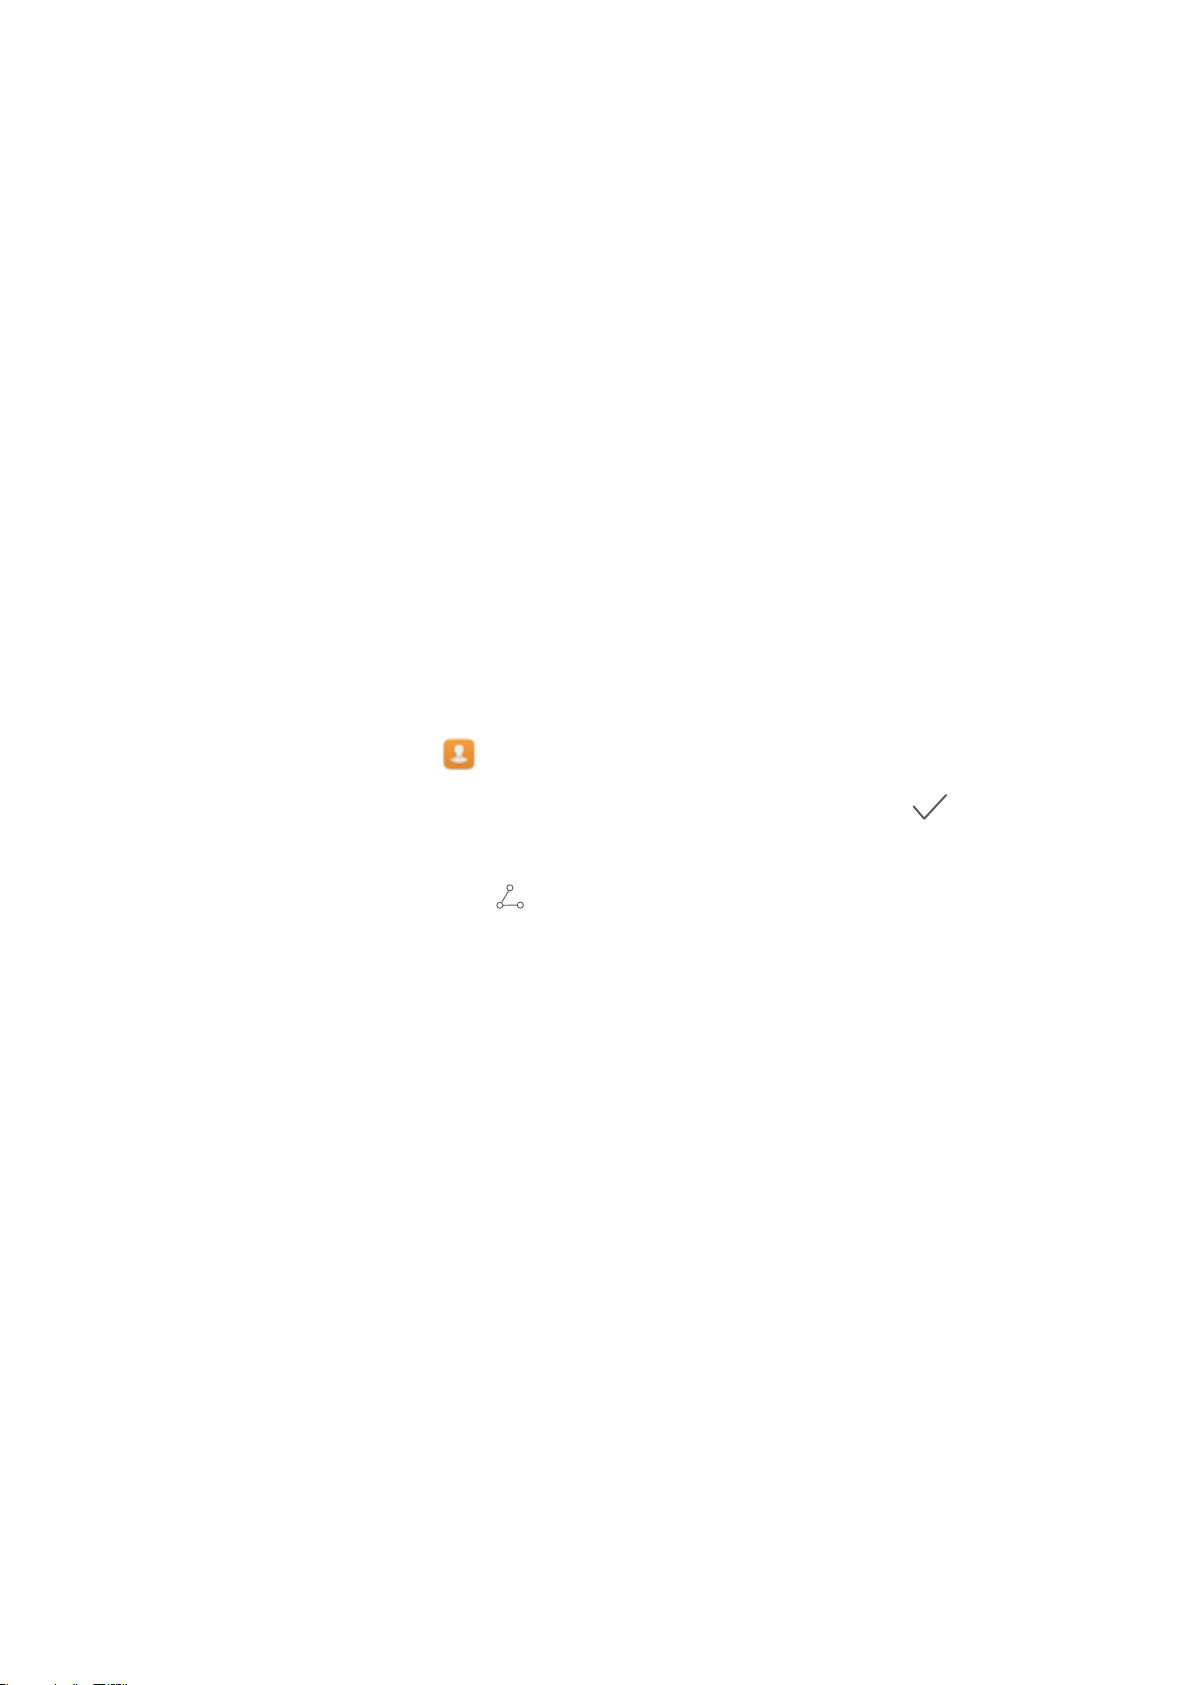
Share your business card: Open
Contacts and touch Me to set your prole picture and enter
your name, work address, telephone number, and other information. Then touch and your device
will automatically generate your QR code business card. You can share your business card directly
using the QR code. Alternatively, touch , select a sharing method, and follow the onscreen
instructions to share.
22
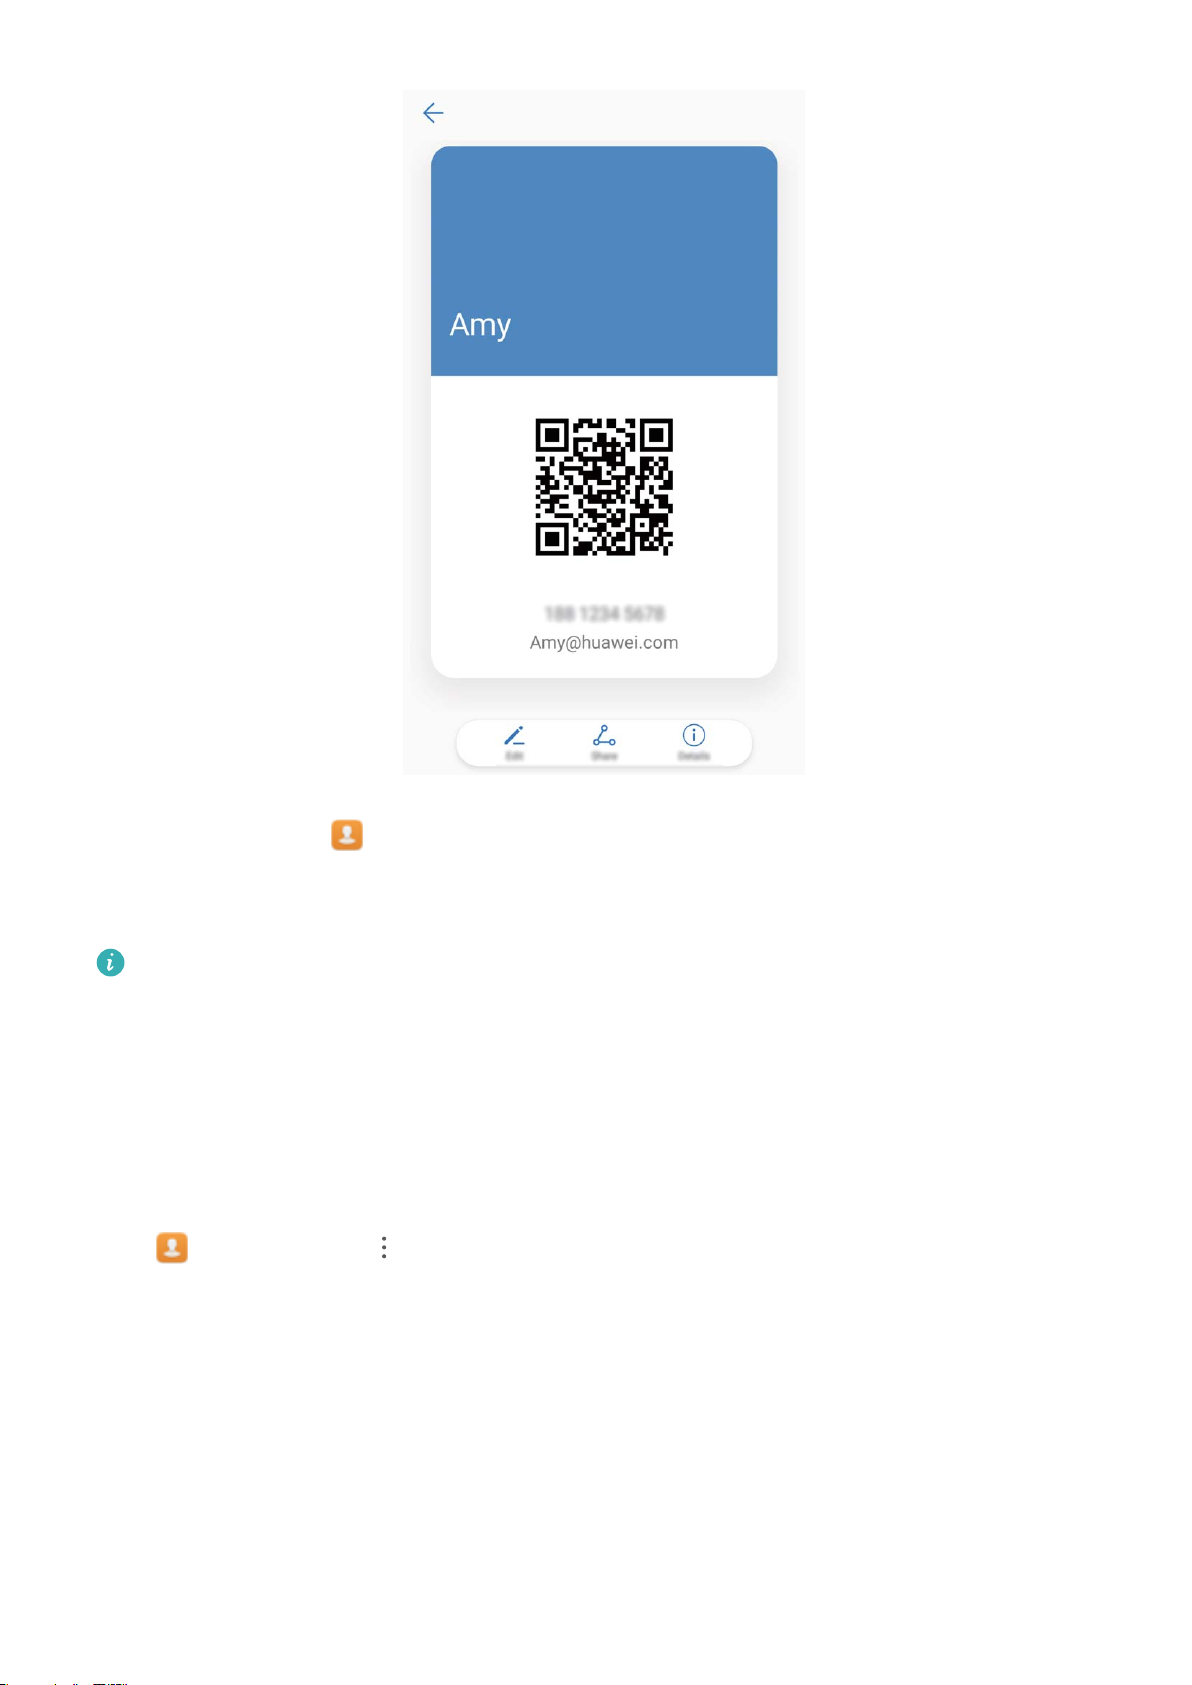
Share contacts: Open Contacts, select the contact you want to share, and touch the QR code
icon in the upper right corner to share the contact using the QR code. You can also touch Share,
select a sharing method, and follow the onscreen instructions to complete the sharing process.
If the other party's device supports QR code analysis, they can directly take pictures of or scan QR
codes to add contacts.
Managing Contacts
Import and Export Contacts
When you switch to a new Phone, you'll need to transfer your existing contacts.
Open Contacts, go to > Import/Export, and then select one of the following:
l Import contacts: Select Import from storage , Import from SIM , Import from another device
and follow the instructions.
l Export contacts: Select Export to storage or Export to SIM , Share contacts and follow the
onscreen instructions. By default, .vcf les exported through Export to storage are saved in the
root directory of your device's internal storage. Open Files to view exported les.
You can also import or export contacts using the Backup feature. Backup records are saved in the
Huawei folder of Files > Local > Internal storage by default.
Contacts
23
Loading...