

Hp PHOTOSMART 8400 User Manual [ko]

요약 설명서
Quick Start
HP Photosmart 8400 series
2
HP Photosmart 프린터 포장 풀기
Unpack the HP Photosmart printer
1
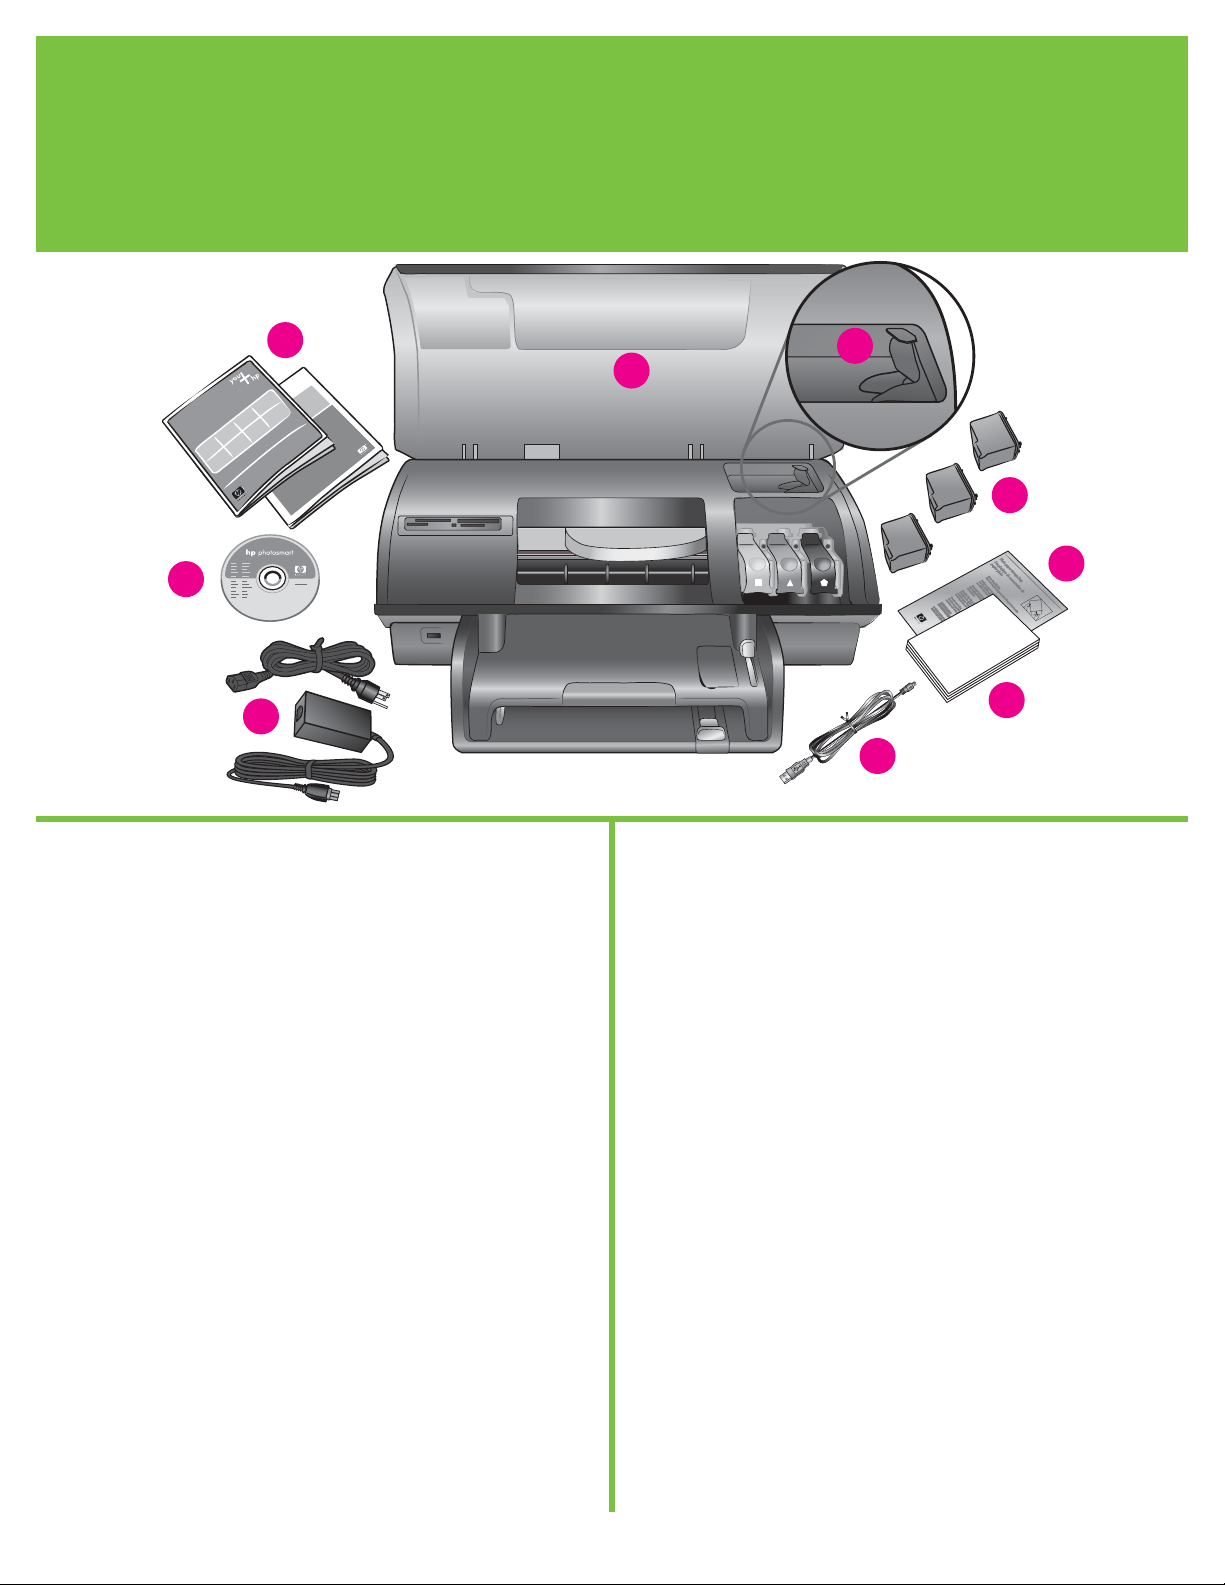
1. 프린터의 내부와 몸체에서 테이프와 판지 포장을 제거합니다.
2. 상자의 내용물을 확인하십시오:
a. HP Photosmart 8400 series 프린터
b. 잉크 카트리지 보호기
c. 잉크 카트리지
d. 인화지 보관 주머니
e. 용지 샘플
f. USB 케이블
g. 전원 공급 장치 및 전원 어댑터
h. HP Photosmart 소프트웨어 CD
i. 사용 설명서
1. Remove the tape and cardboard packaging from inside and
around the printer.
2. Check the contents of the box:
a. HP Photosmart 8400 series printer
b. Print cartridge protector
c. Print cartridges
d. Photo paper storage bag
e. Paper sampler
f. USB cable
g. Power supply and power adapter
h. HP Photosmart software on CD
i. User documentation
d
e
f
g
h
a
b
c
i

3
1. 전원 코드를 프린터 후면과 전원 콘센트에 연결합니다.
!
중요: 설치 소프트웨어에 메시지가 나타나기 전까지 USB
케이블을 연결하지 마십시오.
2. 전원 버튼을 눌러 프린터를 켭니다.
3. 프린터 화면에 Select Language[언어 선택]가 나타나면, 탐색
버튼
또는 를눌러사용할 언어를 강조 표시합니다.
4. OK를눌러사용자의 언어를 선택합니다.
5. 탐색 버튼
또는 를 사용하여 예를강조표시하여 확인한
후 OK를 누릅니다. 확인 화면이 나타납니다.
6. 국가/지역 선택이 프린터 화면에 나타나면 국가/지역을 강조
표시한 후 OK를 누릅니다. 확인 화면이 나타납니다.
1. Connect the power cord to the printer and to a wall outlet.
!
Important: Do not connect the USB cable until prompted
during software installation.
2. Press On to turn on the printer.
3. When Select Language appears on the printer screen, use
Navigation
or to highlight your language.
4. Press OK to select your language.
5. Use Navigation
or to highlight Yes to confirm, then press
OK. A confirmation screen appears.
6. When Select Country/Region appears on the printer screen,
highlight your country/region, then press OK. A confirmation
screen appears.
전원 연결 및 언어설정
Connect the power and set your language
2
a
b
c
전원 버튼
On button
탐색 버튼
및
Navigation and
OK 버튼
OK button
메뉴 버튼
Menu button
4
일반 용지 공급
Load plain paper
3
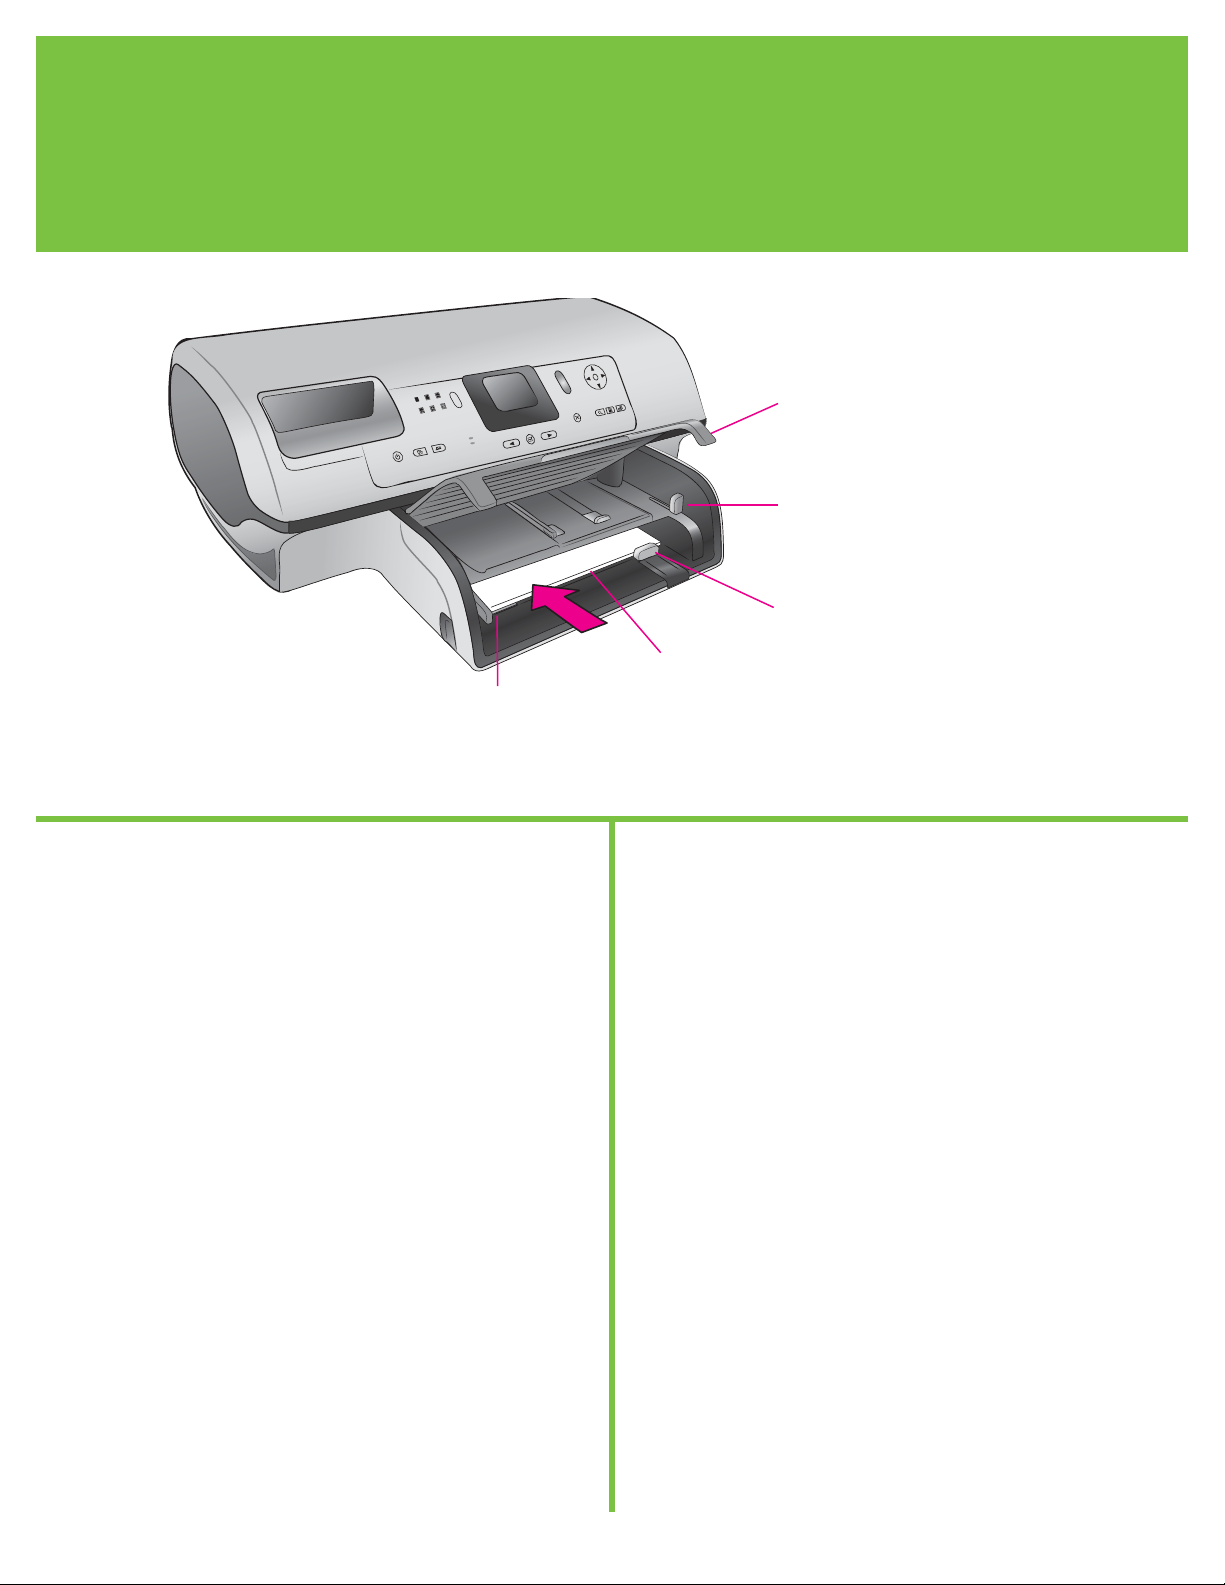
잉크 카트리지를 정렬하기 위해 일반 용지를 공급합니다.
1. 출력 용지함을 올립니다.
2. 용지 급지함의 용지 길이 조정대를 바깥쪽으로 빼내고 용지
너비 조정대를 최대한 왼쪽으로 밉니다.
3. 일반 레터 용지(100장이하)를용지급지함에 올려 놓습니다.
4. 용지 너비 조정대와 용지 길이 조정대를 용지가 구부러지지
않게 용지의 가장자리에 맞춰 조정합니다.
5. 출력 용지함을 내립니다.
6. 사진 용지함 슬라이더를 프린터 앞쪽으로 당기십시오. 사진
용지함이 분리됩니다.
주: 10x15cm(4x6인치) 크기의 아름다운 사진을 인쇄하려면 사진
용지함을 사용하십시오. 자세한 내용은 본 소책자의 12 페이지
또는 사용 설명서를 참조하십시오.
Load plain paper to align the print cartridges.
1. Raise the Out tray.
2. Pull out the paper-length guide on the In tray and slide the
paper-width guide as far to the left as it will go.
3. Place a stack of plain letter paper (no more than 100 sheets) in
the In tray.
4. Adjust the paper-width guide and the paper-length guide to fit
close to the edges of the paper without bending the paper.
5. Lower the Out tray.
6. Make sure the photo tray slider is pulled toward the front of the
printer. This disengages the photo tray.
Note: To print beautiful 10x15 cm (4x6 inch) photos, use the
Photo tray. See page 12 of this booklet or the User’s Guide for
more information.
출력 용지함
Out tray
사진 용지함 슬라이더
Photo tray slider
용지 길이 조정대
Paper-length guide
용지 너비 조정대
Paper-width guide
용지 급지함
In tray

5
1. 윗면 덮개를 올린 후, 잉크 카트리지 걸쇠를 아래로 눌렀다
바깥쪽으로 빼냅니다.
2. 포토 잉크 카트리지의 포장을 벗긴 후, 분홍색 탭을 잡아당겨
잉크 카트리지에서 투명 테이프를 제거합니다. 잉크 노즐 또는
구리판을 건드리지 마십시오.
3. 구리판 쪽이 프린터에 먼저 들어가도록 카트리지를 잡습니다.
카트리지를 금속 봉 아래의 왼쪽 카트리지함에 밀어 넣습니다.
카트리지가 딸깍 소리가 나도록 밀어 넣습니다.
4. 카트리지 걸쇠를 아래로 눌러 잠급니다.
5. 같은 절차를 반복하여 컬러 및 그레이 포토 잉크 카트리지를
설치합니다.
6. 윗면 덮개를 내립니다. 프린터 화면에 정렬 페이지을 요청하는
메시지가 표시되면 제어판에서 OK를 누릅니다.
* 사용하지 않은 잉크 카트리지는 여기에 보관하십시오.
추가 옵션인 검정 잉크 카트리지를 구입할 수 있습니다. 인쇄물에
따른 최적의 잉크 카트리지에 대해 알아보려면 본 소책자의
뒷표지를 참조하십시오.
1. Raise the top cover, then push down and pull out the print
cartridge latch.
2. Unwrap the Photo print cartridge, then pull the pink tab to
remove the clear tape. Do not touch the ink nozzles or
copper-colored contacts.
3. Hold the cartridge so the copper-colored contacts go into the
printer first. Slide the cartridge into the left side of the cradle
under the metal bar. Push the cartridge until it snaps into place.
4. Push down on the cartridge latch until it locks.
5. Repeat this process to install the Tri-color and Gray Photo print
cartridges.
6. Lower the top cover. Press OK on the control panel when the
printer screen prompts you to print an alignment page.
* Store any unused print cartridge here.
You can purchase an optional Black print cartridge. Check the
back cover of this booklet to find the best cartridges to use for your
print projects.
잉크 카트리지 설치
Install the print cartridges
4
* 추가 옵션인 잉크 카트리지 및 보호기 보관
* Store the optional print cartridge and protector.
 Loading...