

Page 1
HP LaserJet M9040/M9050 MFP Series – Manage and Maintain
Load staples
How do I? Steps to perform
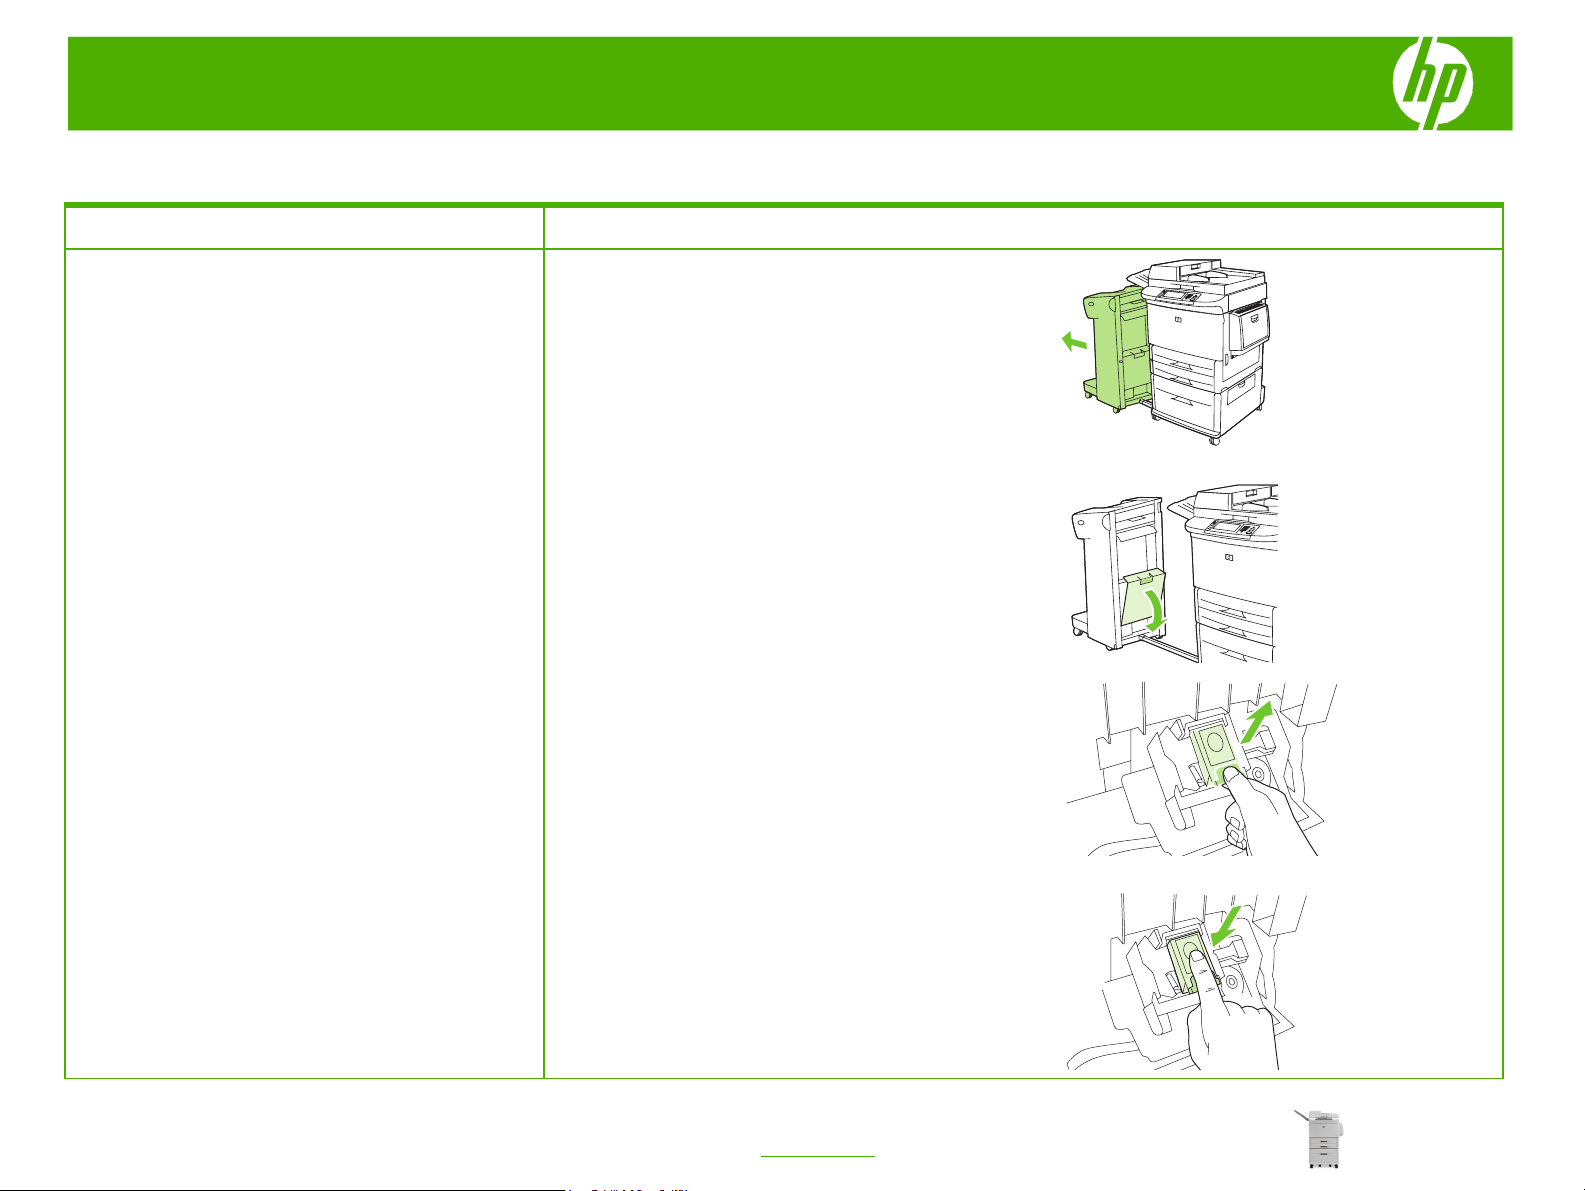
1 Move the stapler/stacker away from the MFP.
Load staples
Load staples in the stapler/stacker
2 Open the stapler unit door.
3 On the empty staple cartridge, pull up on the green tab,
and then pull the empty cartridge out.
4 Insert the new staple cartridge, and push down on the
green tab so that the cartridge locks into place.
1
© 2008 Copyright Hewlett-Packard
Development Company, L.P.
www.hp.com
Page 2
HP LaserJet M9040/M9050 MFP Series – Manage and Maintain
How do I? Steps to perform
5 Close the stapler unit door and push the stapler/stacker
Load staples in the stapler/stacker (continued)
Load staples in the multifunction finisher
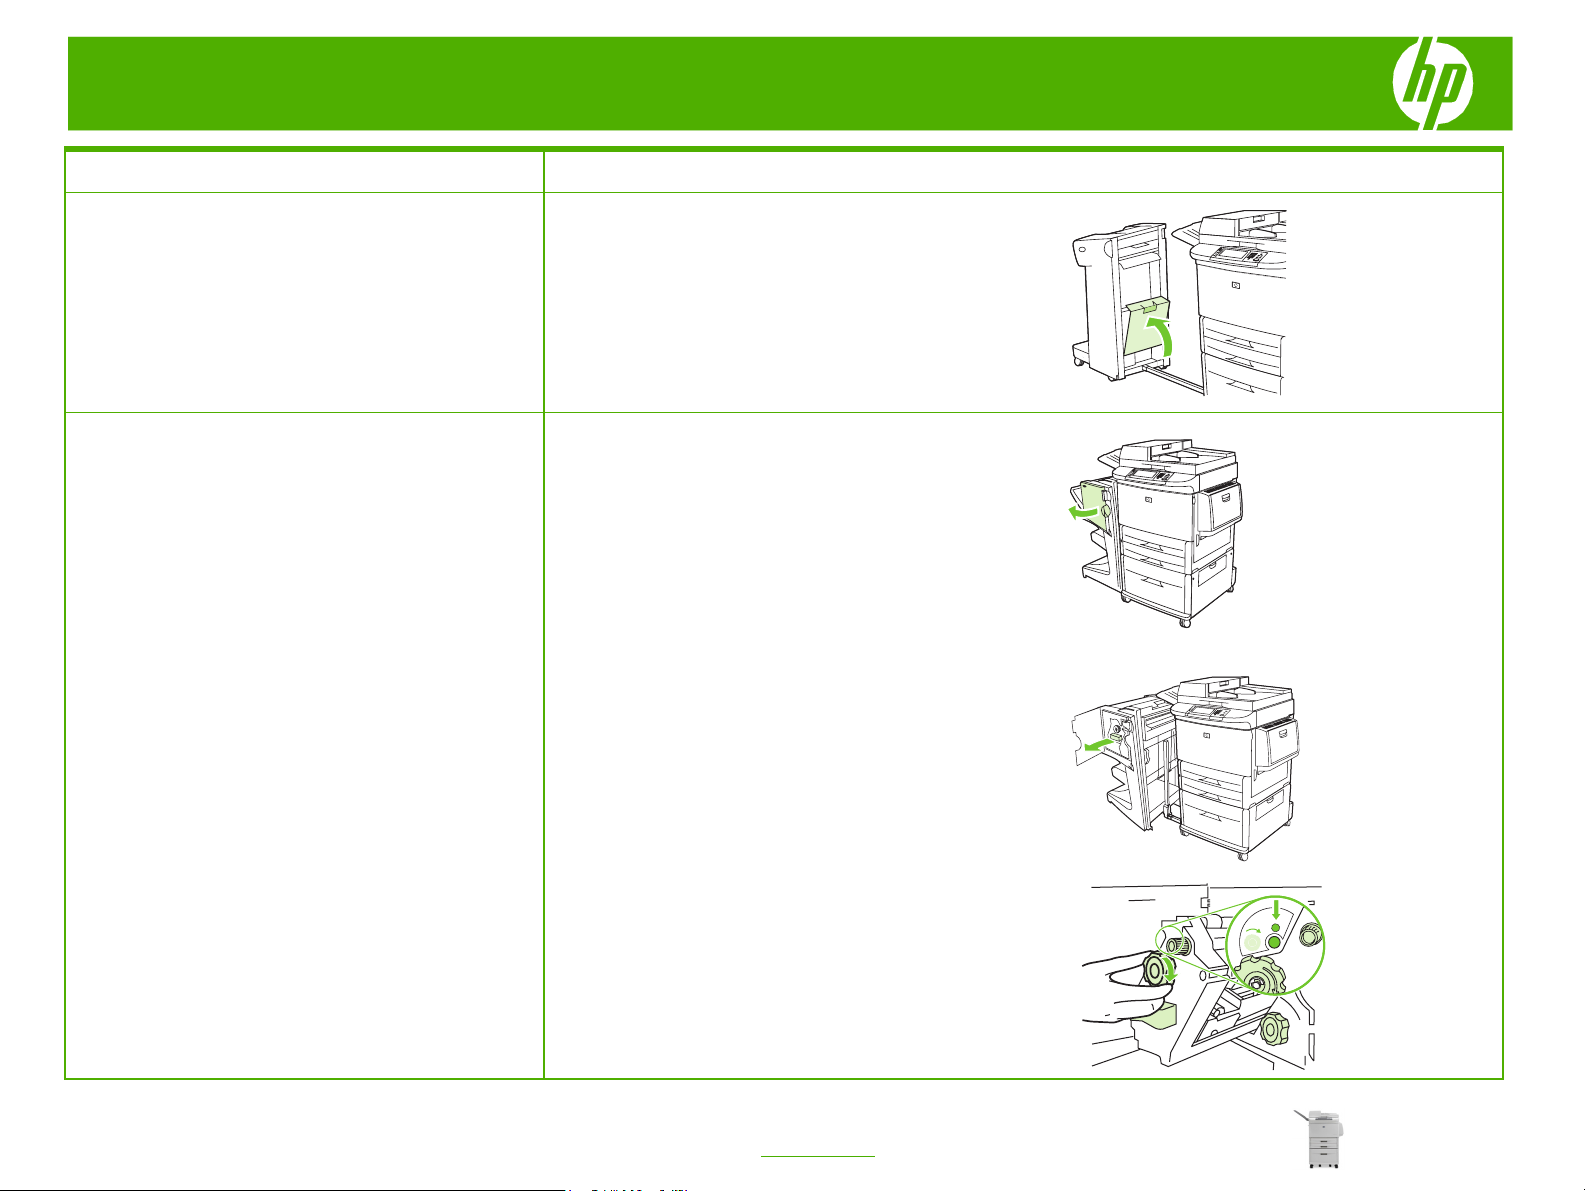
2 Slide the stapler unit toward you.
back into place.
1 Open the stapler unit door.
3 Turn the large green knob until the blue dot appears in the
window of the stapler unit.
2
© 2008 Copyright Hewlett-Packard
Development Company, L.P.
www.hp.com
Page 3

HP LaserJet M9040/M9050 MFP Series – Manage and Maintain
How do I? Steps to perform
4 Turn the small green knob at the top of the stapler unit
Load staples in the multifunction finisher
(continued)
CAUTION: The blue dot must appear in the window of the
stapler unit before you remove the staple cartridge. If you
try to remove the staple cartridge before the blue dot
appears in the window, you could damage the finisher.
clockwise until the staple cartridge moves to the left of the
stapler unit.
5 On the empty staple cartridge, squeeze the tabs together
and pull the empty cartridge out.
6 Insert the new staple cartridge so that it locks into place.
© 2008 Copyright Hewlett-Packard
Development Company, L.P.
7 Slide the stapler unit into the finisher.
3
www.hp.com
Page 4

HP LaserJet M9040/M9050 MFP Series – Manage and Maintain
How do I? Steps to perform
8 Close the stapler unit door and realign the multifunction
Load staples in the multifunction finisher
(continued)
finisher against the MFP.
© 2008 Copyright Hewlett-Packard
Development Company, L.P.
4
www.hp.com
Page 5

HP LaserJet M9040/M9050 MFP Series – Manage and Maintain
Replace print cartridges
How do I? Steps to perform
Remove
Replace print cartridges
1 Open the front cover.
WARNING! To prevent damage, do not expose the print
cartridge to light. Put it in its print cartridge bag, or, if the
bag is not available, cover it with a piece of paper.
2 Rotate the cartridge release lever downward.
Reinstall
3 Grasp the front handle with one hand, and pull the print
cartridge out of the device until the top handle is visible.
4 Grasp the top handle with your other hand, and continue
pulling the print cartridge until it is out of the device.
1 Align the print cartridge with the print cartridge guides,
and make sure that you insert it completely.
© 2008 Copyright Hewlett-Packard
Development Company, L.P.
1
www.hp.com
Page 6

HP LaserJet M9040/M9050 MFP Series – Manage and Maintain
How do I? Steps to perform
2 Press and hold the white button (on the green lever), and
Replace print cartridges (continued)
3 Close the front door.
rotate the green lever clockwise until it locks into place.
© 2008 Copyright Hewlett-Packard
Development Company, L.P.
2
www.hp.com
 Loading...