

Page 1
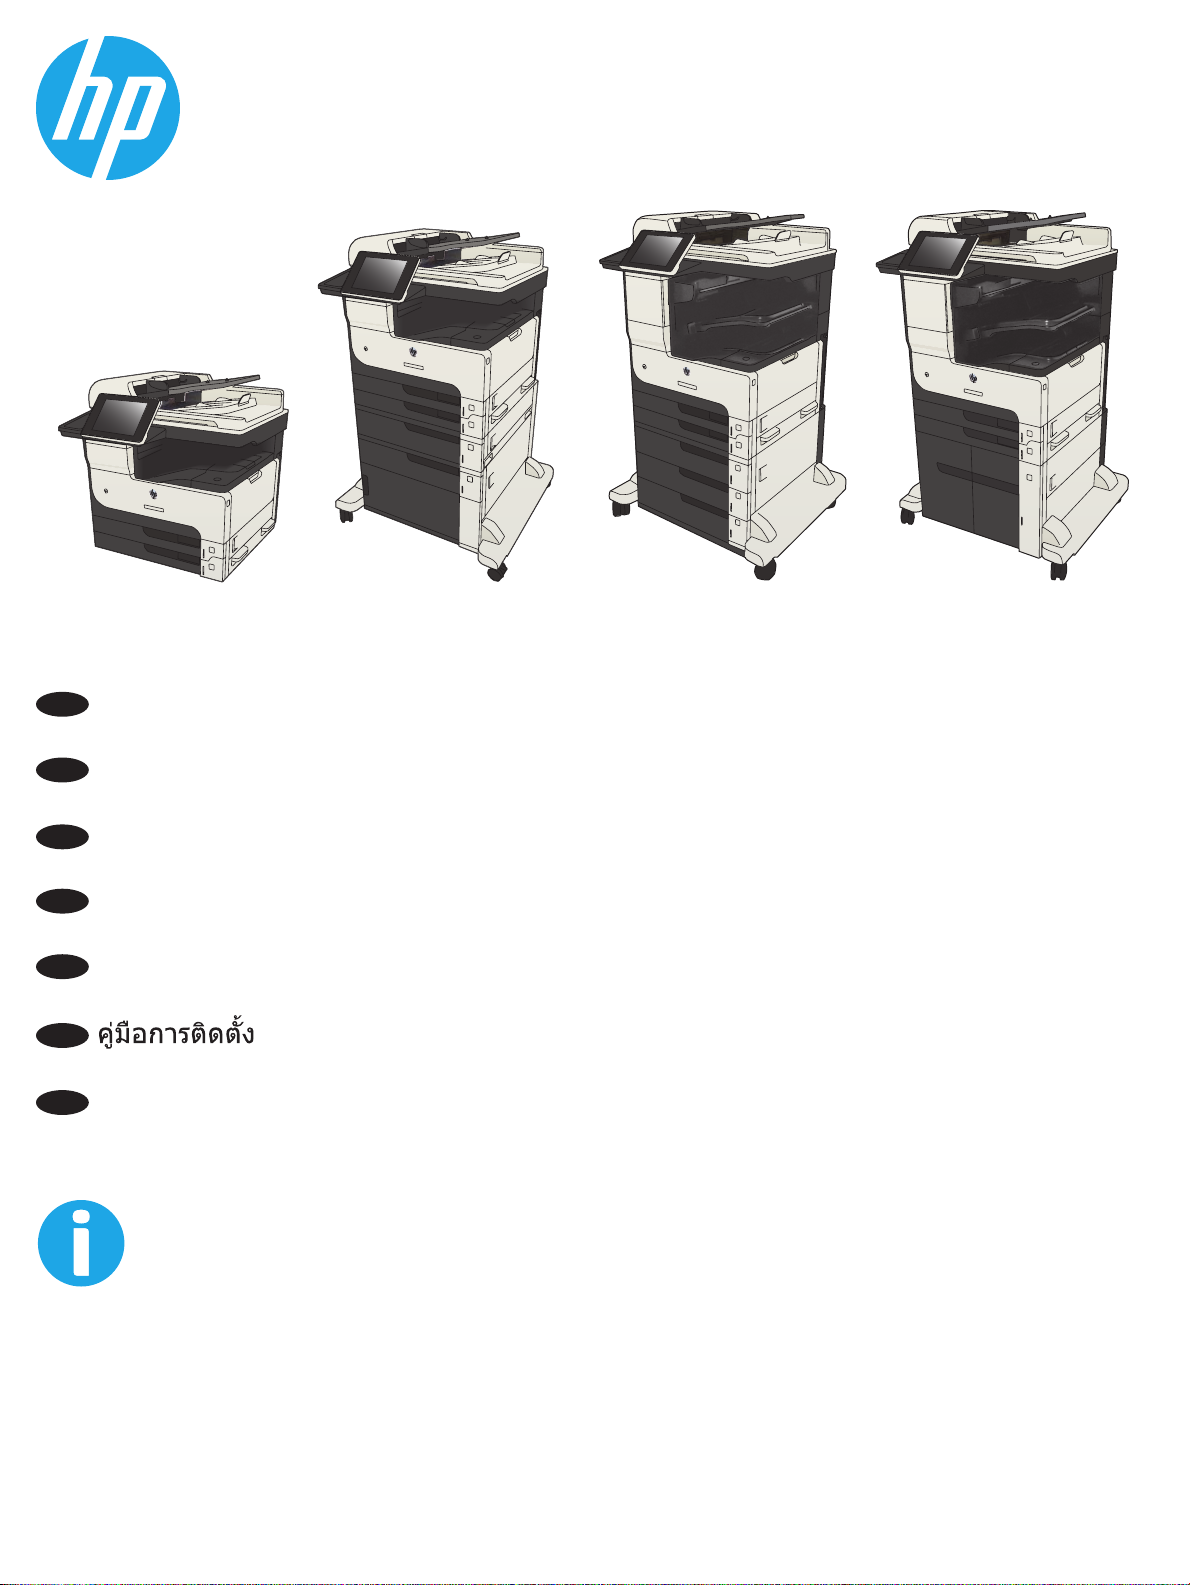
LASERJET ENTERPRISE MFP 725
M725dn M725f M725z M725z+
EN
Installation Guide
ZHCN
安装指南
ID
Panduan Penginstalan
JA
設置ガイド
KO
설치 설명서
TH
ZHTW
安裝指南
www.hp.com/support/ljMFPM725
Page 2
1
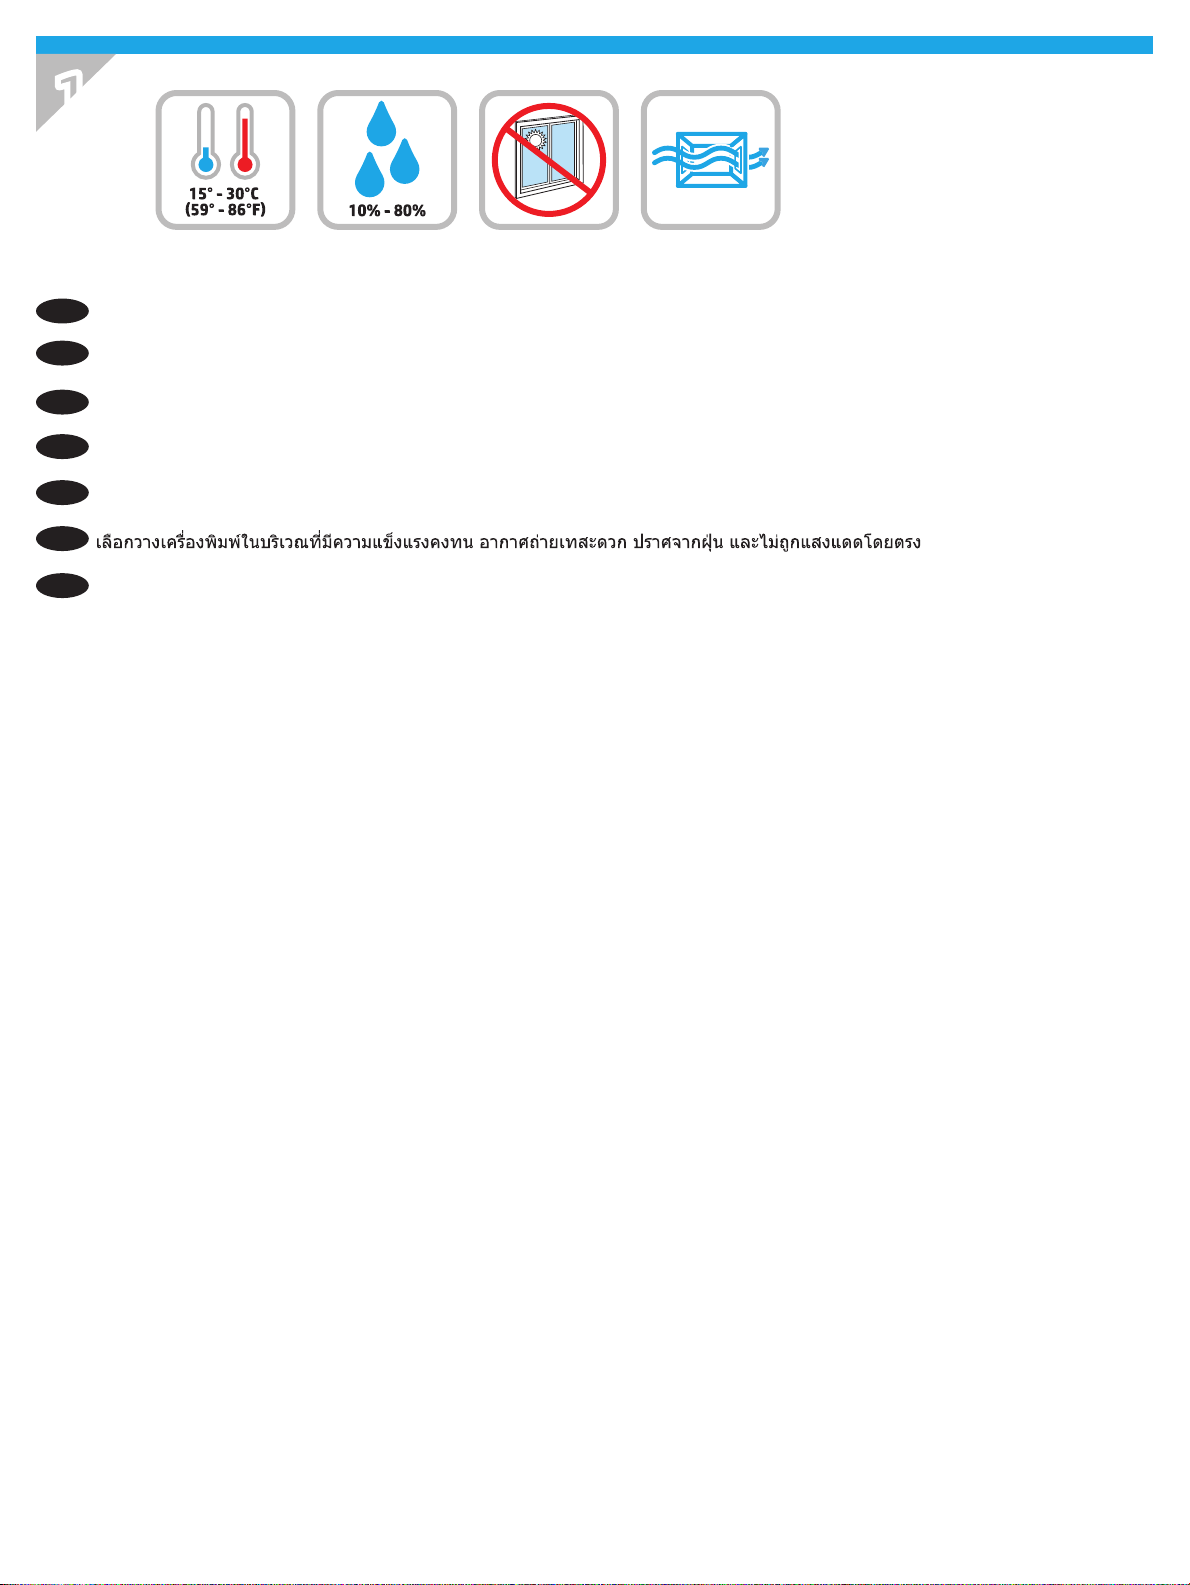
Select a sturdy, well-ventilated, dust-free area, away from direct sunlight to position the product.
EN
选择一个稳固、通风良好、无尘且远离直射日光的区域放置产品。
ZHCN
Untuk meletakkan produk, pilih tempat yang kokoh, berventilasi baik, bebas debu, dan jauh dari sinar matahari langsung.
ID
プリンタの設置場所には、直射日光を避け、通気がよく埃の少ない、しっかりした場所を選んでください。
JA
직사광선을 피하여 바닥이 단단하고 환기가 잘 되며 먼지가 없는 장소를 선택하여 제품을 내려 놓습니다.
KO
TH
請選擇一個平整穩固、通風良好且沒有灰塵的區域放置本產品,並避免陽光直射。
ZHTW
1
Page 3

2
M725dn
LASE
R
J
E
T ENTERP
R
I
SE
700
MFP
M
725d
n M72
E
N
I
nst
all
at
io
5f
n
E
N
Gui
de
I
n
st
al
l
a
tion
E
N
M
G
u
72
i
d
5z
e
I
n
st
a
l
lati
o
EN
n
E
N
Guide
I
n
I
n
M
st
s
al
72
t
all
l
a
5z
atio
t
ion
+
E
n Gu
N
G
E
N
u
i
d
i
d
e
I
n
e
I
nst
s
t
al
a
l
l
a
lati
t
i
on
o
E
n G
N
Gu
EN
u
i
d
id
e
In
e
I
n
st
s
al
t
a
l
l
at
la
ion
t
i
o
n Gui
Gu
E
EN
N
i
d
d
e
e
I
In
nst
s
t
a
al
ll
l
a
a
t
t
i
io
o
n G
n
E
N
G
E
N
u
uid
id
e
e
In
I
n
st
st
a
al
ll
l
at
at
i
io
o
n
n
E
N
Gu
Gui
E
N
ide
d
I
e
I
nst
n
s
t
all
al
l
a
a
ti
t
ion
o
n
E
EN
Gu
N
Gu
i
i
d
d
e
I
e
I
n
n
s
s
t
t
a
al
ll
l
at
at
io
ion
n
E
G
EN
G
N
u
uid
i
d
e
I
e
I
n
n
s
s
t
t
a
al
l
la
l
at
t
ion Gu
ion
EN
E
G
N
u
id
id
e
I
e
I
nst
n
s
t
a
al
l
lati
l
a
t
i
o
on
n
Guid
EN
Gui
d
e
e
I
n
st
al
l
at
io
n
Gu
E
N
id
e
I
n
st
a
l
l
a
t
ion
G
u
id
e
E
S
L
e
a
e
st
o
p
r
im
e
r
o
M725f
LASE
R
J
E
T ENTERP
R
I
SE
700
MFP
M
725d
n M72
E
N
I
nst
all
at
io
5f
n
E
N
Gui
d
e
I
n
st
al
l
a
t
ion
E
N
M
G
u
72
i
d
5z
e
I
n
sta
l
lati
o
EN
n
E
N
Guide
I
n
I
n
M
st
s
al
72
t
all
l
a
5z
atio
t
ion
+
E
n Gu
N
G
E
N
u
i
d
i
d
e
I
n
e
I
nst
s
t
al
a
l
l
a
lati
t
i
on
on G
E
N
Gu
EN
u
i
d
id
e
In
e
I
n
st
s
al
t
a
l
l
at
la
ion
t
i
o
n Gui
Gu
E
EN
N
i
d
d
e
e
In
I
nst
s
t
a
al
ll
l
a
a
t
t
i
io
o
n G
n
E
N
G
E
N
uid
u
id
e
e
In
I
n
st
st
a
al
ll
l
at
at
i
io
o
n
n
E
N
Gu
G
E
N
ui
ide
d
I
e
I
nst
n
s
t
all
al
l
a
a
ti
t
ion
o
n
E
EN
Gu
N
Gu
i
i
d
d
e
I
e
I
n
n
s
s
t
t
a
al
ll
l
at
at
io
ion
n
E
G
EN
G
N
u
uid
i
d
e
I
e
I
n
n
s
s
t
t
a
al
l
la
l
at
t
ion Gu
ion
EN
E
G
N
u
id
id
e
I
e
I
nst
n
s
t
a
al
l
lati
l
a
t
i
o
on
n
Guid
EN
Guid
e
e
I
n
st
al
l
at
io
n
Gu
E
N
id
e
I
n
st
a
l
l
a
t
ion
G
u
id
e
E
S
L
e
a
e
st
o
p
r
im
e
ro
2
Page 4
M725z
LASE
R
J
E
T ENTERP
R
I
SE
700
MFP
M
725d
n M72
E
N
I
nst
all
at
io
5f
n
E
N
Gui
de
I
n
st
al
l
a
tion
E
N
M
G
u
72
i
d
5z
e
I
n
st
a
l
lati
o
EN
n
E
N
Guide
I
n
I
n
M
st
s
al
72
t
all
l
a
5z
atio
t
ion
+
E
n Gu
N
G
E
N
u
i
d
i
d
e
I
n
e
I
nst
s
t
al
a
l
l
a
lati
t
i
on
o
E
n G
N
Gu
EN
u
i
d
id
e
In
e
I
n
st
s
al
t
a
l
l
at
la
ion
t
i
o
n Gui
Gu
E
EN
N
i
d
d
e
e
I
In
nst
s
t
a
al
ll
l
a
a
t
t
i
io
o
n G
n
E
N
G
E
N
u
uid
id
e
e
In
I
n
st
st
a
al
ll
l
at
at
i
io
o
n
n
E
N
Gu
Gui
E
N
ide
d
I
e
I
nst
n
s
t
all
al
l
a
a
ti
t
ion
o
n
E
EN
Gu
N
Gu
i
i
d
d
e
I
e
I
n
n
s
s
t
t
a
al
ll
l
at
at
io
ion
n
E
G
EN
G
N
u
uid
i
d
e
I
e
I
n
n
s
s
t
t
a
al
l
la
l
at
t
ion Gu
ion
EN
E
G
N
u
id
id
e
I
e
I
nst
n
s
t
a
al
l
lati
l
a
t
i
o
on
n
Guid
EN
Gui
d
e
e
I
n
st
al
l
at
io
n
Gu
E
N
id
e
I
n
st
a
l
l
a
t
ion
G
u
id
e
E
S
L
e
a
e
st
o
p
r
im
e
r
o
M725z+
LASE
R
J
E
T ENTERP
R
I
SE
700
MFP
M
725d
n M72
E
N
I
nst
all
at
io
5f
n
E
N
Gui
d
e
I
n
st
al
l
a
t
ion
E
N
M
G
u
72
i
d
5z
e
I
n
sta
l
lati
o
EN
n
E
N
Guide
I
n
I
n
M
st
s
al
72
t
all
l
a
5z
atio
t
ion
+
E
n Gu
N
G
E
N
u
i
d
i
d
e
I
n
e
I
nst
s
t
al
a
l
l
a
lati
t
i
on
on G
E
N
Gu
EN
u
i
d
id
e
In
e
I
n
st
s
al
t
a
l
l
at
la
ion
t
i
o
n Gui
Gu
E
EN
N
i
d
d
e
e
In
I
nst
s
t
a
al
ll
l
a
a
t
t
i
io
o
n G
n
E
N
G
E
N
u
uid
id
e
e
In
I
n
st
st
a
al
ll
l
at
at
i
io
o
n
n
E
N
Gu
G
E
N
ui
ide
d
I
e
I
nst
n
s
t
all
al
l
a
a
ti
t
ion
o
n
E
EN
Gu
N
Gu
i
i
d
d
e
I
e
I
n
n
s
s
t
t
a
al
ll
l
at
at
io
ion
n
E
G
EN
G
N
u
uid
i
d
e
I
e
I
n
n
s
s
t
t
a
al
l
la
l
at
t
ion Gu
ion
EN
E
G
N
u
id
id
e
I
e
I
nst
n
s
t
a
al
l
lati
l
a
t
i
o
on
n
Guid
EN
Guid
e
e
I
n
st
al
l
at
io
n
Gu
E
N
id
e
I
n
st
a
l
l
a
t
ion
G
u
id
e
E
S
L
e
a
e
st
o
p
r
im
e
ro
3
Page 5
3
M725dn
3.1
3.4
3.2
3.5
3.3
3.6
3.7
4
Page 6
M725f
3.2
3.4
3.1
3.5
3.3
3.6
3.7
3.8
3.9
5
Page 7

M725z
3.1
3.2
3.3
3.4
3.7
3.5
3.6
3.8
6
Page 8

M725z+
3.2
3.4
3.1
3.3
3.5
3.6
3.7
3.8
748
Page 9

1) If you are connecting to a network, connect the network cable now. Caution! Do not connect the USB cable now.
EN
2) If you are using the fax feature, connect the fax cable to a fax or phone line (all models except M725dn). A country/region specic adapter for
the RJ11 telephone cord might be required to connect to the telephone jack.
NOTE: The M725dn requires a fax card accessory to set up the fax feature.
ZHCN
1) 如果要连接到网络,则现在连接网络电缆。注意!现在请勿连接 USB 电缆。
2) 如果使用传真功能,则将传真电缆连接到传真或电话线(除 M725dn 以外的所有型号)。可能需要国家/
地区特定的
RJ11 电话线适配器才能连接到电话插孔。
注:M725dn 需要传真卡附件才能设置传真功能。
1) Jika Anda tersambung ke jaringan, sambungkan kabel jaringan sekarang. Perhatian! Jangan sambungkan kabel USB sekarang.
ID
2) Jika Anda menggunakan tur faks, sambungkan kabel faks ke saluran faks atau telepon (semua model kecuali M725dn). Adaptor khusus
negara/kawasan tertentu untuk kabel telepon RJ11 mungkin diperlukan untuk menyambung ke soket telepon.
CATATA N: M725dn memerlukan aksesori kartu faks untuk mengkongurasi tur faks.
1) ネットワークに接続している場合は、ネットワーク ケーブルを接続します。
JA
ください。
2) ファックス機能を使用している場合は、ファックス ケーブルをファックスまたは電話回線に接続します (M725dn を除くすべての
モデルを対象)。国/地域によっては、RJ11 電話コード用の特別なアダプタを電話のジャックに接続する必要があります。
注意! この時点では、USB ケーブルを接続しないで
注記:M725dn でファックス機能をセットアップするには、ファックス カード アクセサリが必要です。
1) 네트워크에 연결 중인 경우 바로 네트워크 케이블을 연결합니다.
KO
2) 팩스 기능을 사용하고 있다면 팩스 케이블을 팩스 또는 전화선에 연결합니다(M725dn을 제외한 모든 모델). 전화기 잭에 연결하려면 RJ11
전화 코드의 국가/지역별 어댑터가 필요할 수 있습니다.
주의! 지금 USB 케이블을 연결해서는 안 됩니다.
참고: M725dn의 경우 팩스 기능을 설정하려면 팩스 카드 부속품이 필요합니다.
TH
1) 如果您要連接至網路,請立即連接網路纜線。注意! 請勿現在連接 USB 纜線。
ZHTW
2) 如果您要使用傳真功能,請將傳真纜線連接至傳真線路或電話線路(M725dn 以外的所有機型)。可能需要有特定國家/地區適用的
RJ11 電話線配接器,以連接至電話插孔。
附註:M725dn 需要有傳真卡附件才可設定傳真功能。
Page 10

5
Connect the power cable between the product and a grounded ac outlet. Turn on the product. On the control panel, set the language, the
EN
keyboard layout, the date/time format, and the time zone. When the Home screen
functions.
NOTE: For advanced setup, enter the product IP address in the address bar of a Web browser after software installation is complete.
CAUTION: Make sure your power source is adequate for the product voltage rating. The voltage rating is on the product label. The product
uses either 100-127 Vac or 220-240 Vac and 50/60 Hz. To prevent damage to the product, use only the power cable that is provided with the
product.
用电源线将本产品连接到接地的交流电源插座。打开产品。在控制面板上,设置语言、键盘布局、日期/时
ZHCN
间格式以及时区。显示主屏幕时,轻触
初始设置以启用基本产品功能。
注:要进行高级设置,请在软件安装完毕后在 Web 浏览器的地址栏中输入 IP 地址。
警告:确保电源符合产品的额定电压要求。额定电压标注在产品标签上。本产品使用 100-127 伏(交流)或
220-240
伏(交流)电压,频率为 50/60 赫兹。为防止损坏本产品,请仅使用本产品附带的电源线。
appears, touch Initial Setup to enable basic product
Sambungkan kabel daya antara produk dan stopkontak AC yang diarde. Hidupkan produk. Pada panel kontrol, atur bahasa, tata letak keyboard,
ID
format tanggal/waktu, dan zona waktu.
fungsi dasar produk.
CATATA N: Untuk pengaturan lanjutan, masukkan alamat IP produk di baris alamat browser Web setelah penginstalan perangkat lunakselesai.
PERHATIAN: Pastikan catu daya telah memadai untuk tingkat tegangan produk. Tingkat tegangan tercantum pada label produk. Produk
ini menggunakan 100-127 Vac atau 220-240 Vac dan 50/60 Hz. Untuk mencegah kerusakan pada produk, gunakan hanya kabel daya yang
disertakan bersama produk.
電源ケーブルで、プリンタをアース付き AC コンセントに接続します。プリンタの電源を入れます。コントロール パネルで、言
JA
語、キーボードのレイアウト、日付/時刻の形式、タイムゾーンを設定します。
プ] にタッチし、基本的なプリンタ機能を有効にします。
注記:高度なセットアップを行う場合は、ソフトウェアのインストール完了後、Web ブラウザのアドレス バーにプリンタの IP ア
ドレスを入力します。
注意:使用する電源が、プリンタの定格電圧に適しているか確認してください。定格電圧は、プリンタのラベルに記載されていま
す。プリンタで使用する電圧は 100~127VAC または 220~240VAC、周波数は 50/60Hz です。プリンタの損傷を防ぐため、プリンタ
に付属の電源ケーブル以外は使用しないでください。
전원 케이블을 제품과 접지된 AC 콘센트 사이에 연결합니다. 전원을 켭니다. 제어판에서 언어, 키보드 레이아웃, 날짜/시간 형식 및 시간대를
KO
설정합니다. 홈 화면이 나타나면
참고: 고급 설정을 수행하려면 소프트웨어 설치를 완료한 후 웹 브라우저의 주소 표시줄에 제품 IP 주소를 입력합니다.
주의: 콘센트의 전압이 제품 전압에 맞는지 확인합니다. 전압은 제품 레이블에 나와 있습니다. 제품에는 100-127Vac 또는
220-240Vac 및 50/60Hz를 사용합니다. 제품의 손상을 방지하려면 제품과 함께 제공된 전원 케이블만 사용합니다.
Bila layar Awal ditampilkan, sentuh Initial Setup (Pengaturan Awal) untuk mengaktifkan
[ホーム] 画面が表示されたら、[初期セットアッ
초기 설정을 눌러 기본 제품 기능을 활성화합니다.
9
Page 11

TH
使用電源線連接產品及接地的 AC 插座。開啟本產品電源。在控制面板上設定語言、鍵盤配置、日期/時間格式與時區。當主畫面出現
ZHTW
時,點選起始設定以啟用基本的產品功能。
附註:若要進行進階設定,請在軟體安裝完成後,於網頁瀏覽器的位址列輸入產品 IP 位址。
注意:確定電源適合本產品的電壓額定。電壓額定請見產品標籤。本產品使用 100-127 Vac 或 220-240 Vac 和 50/60 Hz。為了避免產
品損壞,請僅使用產品隨附的電源線。
10
Page 12

6
6.2
6.1
6.3
6.5
6.4
6.6
The default paper orientation shown here, with the short edge toward the front of the tray, results in the best printing performance.
EN
此处显示的默认纸张方向(短边朝向纸盘正面)可产生最佳的打印性能。
ZHCN
Orientasi kertas default yang ditunjukkan di sini, dengan tepi pendek menghadap ke bagian depan baki, akan memberikan kualitas hasil cetak
ID
terbaik.
上記はデフォルトの用紙の方向です。用紙の短辺をトレイの正面に向けてセットすると、最高の印刷パフォーマンスを実現できます。
JA
11
Page 13

트레이 정면에서 짧은 모서리 쪽으로, 여기서 제시된 기본 용지 방향이 최상의 인쇄 성능을 나타냅니다.
KO
TH
此處所示的預設紙張方向(短邊朝向紙匣前方)可產生最佳列印效能。
ZHTW
12
Page 14

7
Mac: Connect the USB cable now.
EN
Windows: Do not connect the USB cable until prompted during the software installation in the next step.
Windows and Mac: When the product is connected with a USB cable, the software installation process requires that the product is turned on and
in the Ready state. Congure the following setting so the product wakes from Sleep mode during the software installation process and whenever
it receives a print job: From the Home screen on the product control panel, scroll to and touch Administration. Touch General Settings > Energy
Settings > Sleep Timer Settings. Under Wake/Auto On to These Events, select All events, and then touch Save.
Mac:现在连接 USB 电缆。
ZHCN
Windows:直到软件安装过程的下一步中出现提示后,再连接 USB 电缆。
Windows 和 Mac:
便在软件安装过程中以及每次收到打印作业时将产品从睡眠模式唤醒:从产品控制面板的主屏幕中,滚动
管理并轻触。轻触常规设置 > 节能设置 > 睡眠计时器设置。在发生以下事件时唤醒/自动开机下方,选择
至
所有事件,然后轻触保存。
如果产品连接了
USB
电缆,软件安装过程要求打开产品并处于就绪状态。请配置以下设置,以
Mac: Sambungkan kabel USB sekarang.
ID
Windows: Jangan sambungkan kabel USB hingga diminta saat penginstalan perangkat lunak berlangsung pada langkah berikutnya.
Windows dan Mac: Bila produk tersambung menggunakan kabel USB, proses penginstalan perangkat lunak mengharuskan agar produk
dihidupkan dan berada dalam mode Siap. Kongurasikan pengaturan berikut agar produk beralih dari mode Tidur ke mode aktif saat proses
penginstalan perangkat lunak berlangsung dan setiap kali produk menerima tugas cetak: Dari layar Awal di panel kontrol produk, gulir ke dan
sentuh Administration (Administrasi). Sentuh General Settings (Pengaturan Umum) > Energy Settings (Pengaturan Daya) > Sleep Timer
Settings (Pengaturan Timer Tidur). Dalam Wake/Auto On to These Events (Aktifkan Otomatis Pada Aktivitas Ini), pilih All events (Semua
aktivitas), lalu sentuh Save (Simpan).
Mac:USB ケーブルを接続します。
JA
Windows:次の手順でソフトウェアのインストール中にメッセージが表示されるまで、USB ケーブルを接続しないでください。
Windows
いて準備完了状態になっている必要があります。ソフトウェアのインストール中および印刷ジョブの受信時にプリンタがスリープ
モードから復帰するように、次の設定を行います。プリンタのコントロール パネルのホーム画面で、
ッチします。[General Settings] (全般設定) - [Energy Settings] (電源設定) - [Sleep Timer Settings] (スリープ タイマ設定) にタッチしま
す。[Wake/Auto On to These Events] (スリープ復帰/オートオンの対象イベント) で、[All events] (すべてのイベント) を選択し、[Save] (
保存) にタッチします。
Mac: USB 케이블을 지금 연결하십시오.
KO
Windows: 다음 단계에서 소프트웨어를 설치하는 동안 메시지가 나타날 때까지 USB 케이블을 연결하지 마십시오.
Windows 및 Mac: 제품에 USB 케이블을 연결하면 소프트웨어 설치 프로세스를 위해 제품이 켜져 있고 준비 상태에 있어야 합니다. 소프트웨어
설치 프로세스가 실행 중이거나 인쇄 작업이 수신될 때마다 제품이 절전 모드에서 해제될 수 있도록 다음 설정을 구성합니다. 제품 제어판의 홈
화면에서 스크롤하여
를 누릅니다. Wake/Auto On to These Events(이벤트에서 절전 모드 해제/자동 설정)에서 All events(모든 이벤트)를 선택한 후 Save(저장)를
누릅니다.
および
Mac
:プリンタが USB ケーブルで接続されている場合、ソフトウェアのインストール中はプリンタの電源が入って
운영을 누릅니다. General Settings(일반 설정) > Energy Settings(에너지 설정) > Sleep Timer Settings(절전 타이머 설정)
[管理] までスクロールしてタ
13
Page 15

TH
Mac:立即連接 USB 纜線。
ZHTW
Windows:請勿連接 USB 纜線,直到下一步驟中的軟體安裝期間出現提示。
Windows
和
Mac
:如果是使用 USB 纜線連接產品,軟體安裝程序要求產品必須開啟電源並進入「就緒」狀態。設定下列設定,
讓產品於軟體安裝程序期間或是每當收到列印工作時,從「睡眠」模式喚醒:在產品控制面板的主畫面中,捲動至管理並點選。
點選一般設定 > 能源設定 > 睡眠時間設定。在發生這些事件時喚醒/自動開啟下方,選取所有事件,然後點選儲存。
14
Page 16

8
Download or locate the driver software installation les
EN
Method 1: Download from Product Support Web Site (Windows and OS X)
1. Go to www.hp.com/support/ljMFPM725.
2. Select software and drivers.
3. Download the software for your printer model and operating system.
4. Launch the installation le by clicking on the .exe or .zip le as necessary.
Method 2: Install from the printer CD (Windows only)
Insert the printer CD into the computer and follow the on-screen instructions. See the Install Notes le on the product CD for more specic
software installation instructions.
IT managed setup (Windows only)
Visit hp.com/go/upd to download and install the HP Universal Print Driver.
ZHCN
下载或找到驱动程序软件安装文件
方法 1:从产品支持网站下载(Windows 和 OS X)
1. 访问 www.hp.com/support/ljMFPM725。
2. 选择软件和驱动程序。
3. 下载适用于您的打印机型号和操作系统的软件。
4. 通过单击所需的 .exe 或 .zip 文件,启动安装文件。
方法 2:从打印机 CD 安装(仅限 Windows)
将打印机 CD 插入计算机,然后按照屏幕上的说明进行操作。有关更具体的软件安装说明,请参阅产品 CD
上的安装说明文件。
IT 管理的设置(仅限 Windows)
访问 hp.com/go/upd 以下载并安装 HP 通用打印驱动程序。
Men-download atau mencari le penginstalan perangkat lunak driver
ID
Metode 1: Download dari Situs Web Dukungan Produk (Windows dan OS X)
1. Kunjungi www.hp.com/support/ljMFPM725.
2. Pilih software and drivers (perangkat lunak dan driver).
3. Download perangkat lunak untuk model printer dan sistem operasi Anda.
4. Jalankan le penginstalan dengan mengklik le .exe atau .zip bila perlu.
Metode 2: Instal dari CD printer (hanya Windows)
Masukkan CD printer ke komputer, lalu ikuti petunjuk di layar. Lihat le Catatan Penginstalan di CD produk untuk petunjuk lebih rinci tentang
penginstalan perangkat lunak.
Kongurasi terkelola TI (hanya Windows)
Kunjungi hp.com/go/upd untuk men-download dan menginstal HP Universal Print Driver.
ドライバ ソフトウェアのインストール ファイルをダウンロードする、または見つける
JA
方法 1:プリンタ サポート Web サイトからダウンロードする (Windows および OS X)
1. www.hp.com/support/ljMFPM725 にアクセスします。
2. [Software and Drivers] (ソフトウェアとドライバ) を選択します。
3. お使いのプリンタ モデルとオペレーティング システムに適したソフトウェアをダウンロードします。
4. 必要に応じて .exe ファイルまたは .zip ファイルをクリックし、インストール ファイルを実行します。
方法 2:プリンタ CD からインストールする (Windows のみ)
プリンタ CD をコンピュータに挿入し、画面の指示に従います。特定のソフトウェアの詳細なインストール手順については、プリン
タ CD のインストール メモ ファイルを参照してください。
IT 管理下でのセットアップ (Windows のみ)
hp.com/go/upd にアクセスし、HP Universal Print Driver をダウンロードしてインストールします。
15
Page 17

드라이버 소프트웨어 설치 파일 다운로드 또는 찾기
KO
방법 1: 제품 지원 웹 사이트에서 다운로드(Windows 및 OS X)
1. www.hp.com/support/ljMFPM725로 이동합니다.
2. 소프트웨어 및 드라이버를 선택합니다.
3. 해당 프린터 모델 및 운영 체제용 소프트웨어를 다운로드합니다.
4. 필요에 따라 .exe 또는 .zip 파일을 클릭하여 설치 파일을 실행합니다.
방법 2: 프린터 CD에서 설치(Windows만 해당)
프린터 CD를 컴퓨터에 넣고 화면의 안내를 따릅니다. 특정 소프트웨어 설치 안내에 대한 자세한 내용은 제품 CD의 설치 참고 사항 파일을 참조
하십시오.
IT 관리 설정(Windows만 해당)
hp.com/go/upd로 이동하여 HP Universal Print Driver를 다운로드하고 설치합니다.
TH
下載或找出驅動程式軟體安裝檔
ZHTW
方法 1:從產品支援網站下載(Windows 及 OS X)
1. 前往 www.hp.com/support/ljMFPM725。
2. 選擇軟體和驅動程式。
3. 下載適用於您印表機型號和作業系統的軟體。
4. 視需要按一下 .exe 或 .zip 檔案以啟動安裝檔。
方法 2:從印表機光碟安裝(僅限 Windows)
將印表機光碟放入電腦中,然後依照螢幕上的指示進行。請參閱產品光碟中的安裝注意事項檔案,以進一步瞭解特定的軟體安裝說
明。
IT 管理型設定(僅限 Windows)
造訪 hp.com/go/upd 以下載並安裝 HP 通用列印驅動程式。
16
Page 18

9
EN
For more information, see the User Guide on the printer CD or go to www.hp.com/support/ljMFPM725. Press the Help button on the
printer control panel to access Help topics.
ZHCN
有关详细信息,请参阅打印机 CD 上的《用户指南》或访问 www.hp.com/support/ljMFPM725。按
打印机控制面板上的“帮助”按钮以访问帮助主题。
ID
Untuk informasi lebih lanjut, lihat Panduan Pengguna di CD printer atau kunjungi www.hp.com/support/ljMFPM725. Tekan tombol
Help (Bantuan) pada panel kontrol printer untuk mengakses topik Help (Bantuan).
JA
詳細については、プリンタ CD に収録されているユーザー ガイドを参照するか、www.hp.com/support/ljMFPM725 を参照し
てください。プリンタのコントロール パネル上の [ヘルプ] ボタンを押すと、ヘルプ トピックにアクセスできます。
KO
자세한 내용은 프린터 CD의 사용 설명서를 참조하거나 www.hp.com/support/ljMFPM725로 이동하십시오. 도움말 항목을
이용하려면 프린터 제어판의 도움말 버튼을 누르십시오.
TH
ZHTW
如需詳細資訊,請參閱印表機光碟中的使用指南,或前往 www.hp.com/support/ljMFPM725。按下印表機控制面板上的「說
明」按鈕以存取「說明」主題。
17
Page 19

18
Page 20

www.hp.com
Copyright and License
© 2015 Copyright HP Development Company, L.P.
Reproduction, adaptation or translation without prior written permission
is prohibited, except as allowed under the copyright laws.
The information contained herein is subject to change without notice.
The only warranties for HP products and services are set forth in the
express warranty statements accompanying such products and services.
Nothing herein should be construed as constituting an
additional warranty. HP shall not be liable for technical or editorial
errors or omissions contained herein.
Part number: CF066-91061
Edition 1, 11/2015
FCC Regulations
This equipment has been tested and found to comply with the limits
for a Class A digital device, pursuant to Part 15 of the FCC rules. These
limits are designed to provide reasonable protection against harmful
interference in a residential installation. This equipment generates, uses,
and can radiate radio frequency energy, and if not installed and used in
accordance with the instruction manual, may cause harmful interference
to radio communications. Operation of this equipment in a residential
area is likely to cause harmful interference in which case the user will be
required to correct the interference at his own expense.
NOTE: Any changes or modifications to the printer that are not
expressly approved by HP could void the users authority to operate
this equipment. Use of a shielded interface cable is required to
comply with the Class A limits of Part 15 of FCC rules.
Trademark Credits
Windows® is a U.S. registered trademark of Microsoft Corporation.
版权与许可
© 2015 Copyright HP Development Company, L.P.
未经事先书面许可,严禁进行任何形式的复制、改编
或翻译,除非版权法另有规定。
此处包含的信息如有更改,恕不另行通知。
HP 产品和服务的所有保修事项已在产品和服务
所附带的保修声明中列出。本文档中的任何内容均不
应理解为构成
任何额外保证。
编辑错误或遗漏之处概不负责。
部件号:
Edition 1, 11/2015
CF066-91061
FCC 规则
本设备经测试,确认符合 FCC 规则第 15 部分有关 A 类数
字设备的限制规定。这些限制旨在为防止住宅安装中
的有害干扰提供合理保护。本设备会产生、使用并可
能辐射射频能量;如果不按照说明手册进行安装和使
用,可能会对无线电通信造成有害干扰。在住宅区使
用本设备可能会产生有害干扰,排除此类干扰所需的
费用应由用户自行承担。
注:未经
改动本打印机,将使用户失去操作
此设备的授权。根据
制规定,
用户必须使用屏蔽的接口电缆。
HP 公司的明确同意而擅自更改或
HP 对本文档中出现的技术错误、
FCC 规则第 15 部分的 A 类设备的限
商标说明
Windows® 是 Microsoft Corporation 在美国注册的商标。
 Loading...