

Page 1
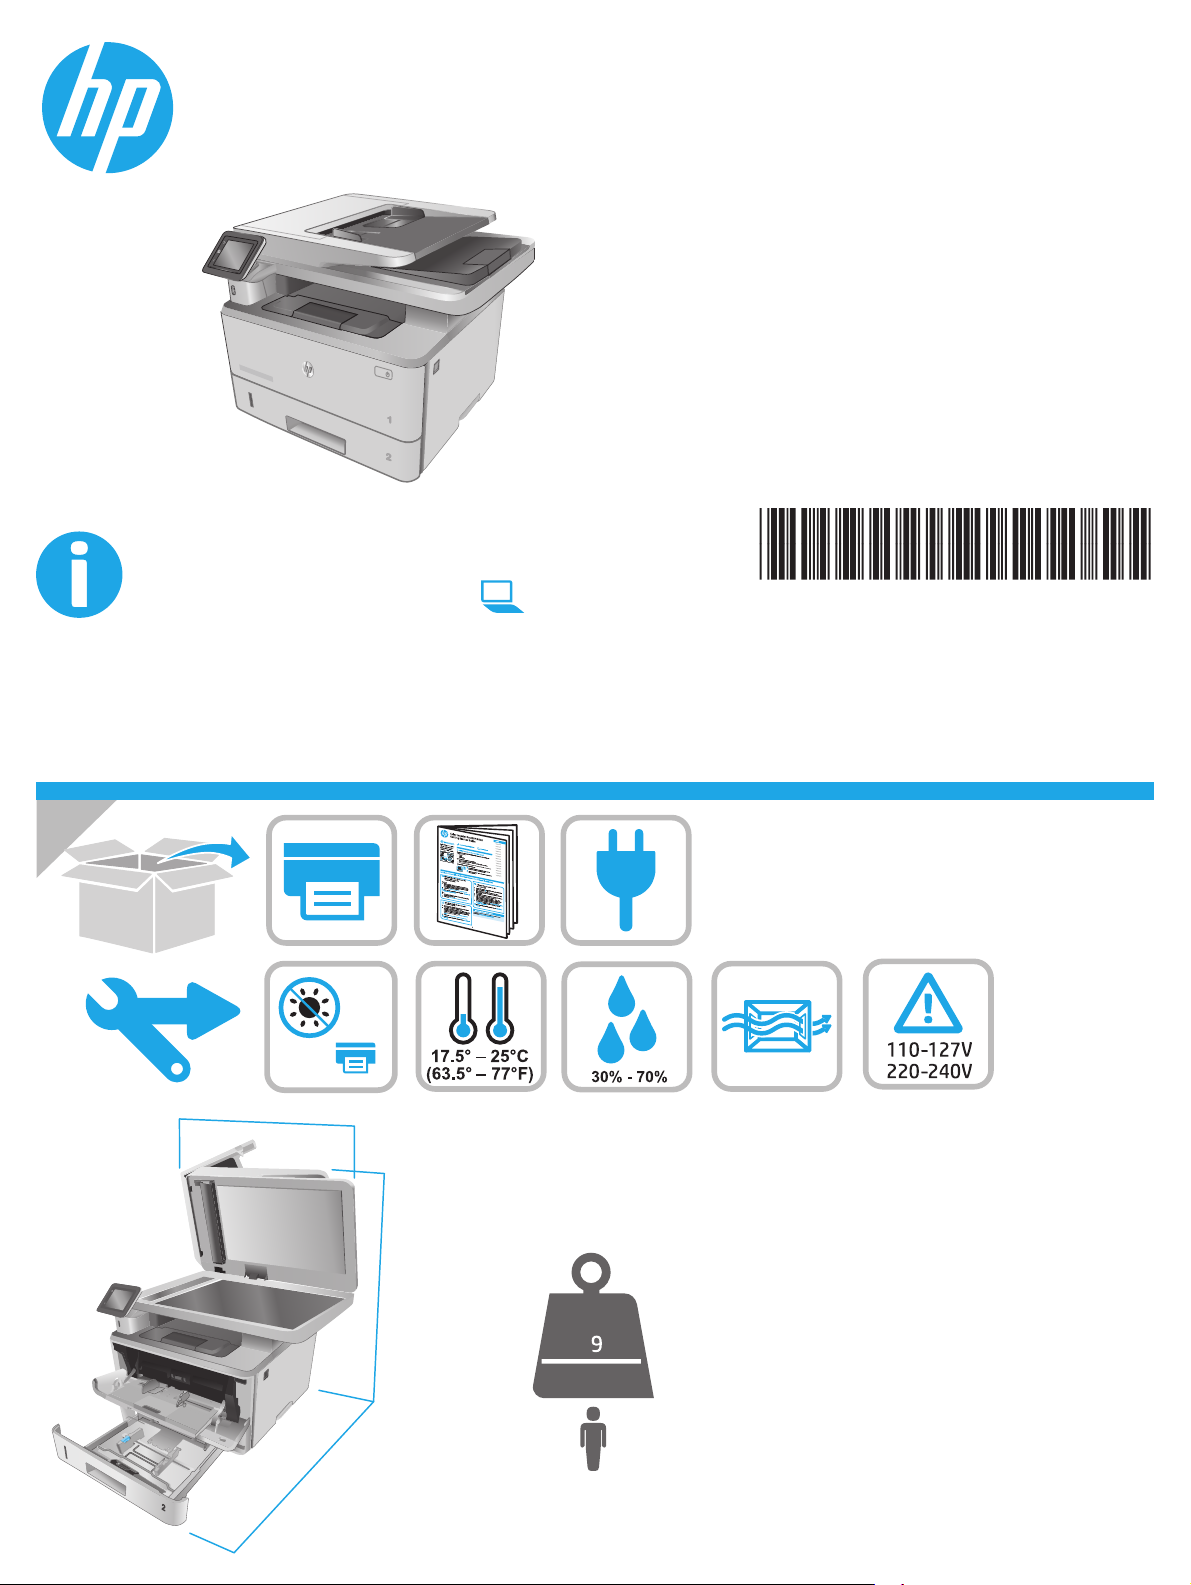
LaserJet Pro MFP M329, M428-M429
www.hp.com/support/ljM329MFP
www.hp.com/support/ljM428MFP
www.hp.com/support/ljM429MFP
W1A28-90930www.register.hp.com
© Copyright 2018 HP Development Company, L.P.
www.hp.com
453 mm
17.8 in
HEWLETT-PACKARD
HEWLETT-PACKARD
22.7 in
577 mm
NJ
OE
2
33 in
839 mm
Page 2

(7
7
3
$
&.$5
1
1.1
'
1.2
1.3
2
2.1
1.4
1.5
2.2 2.3
EN
ID
KO
TH
ZHTW
VI
CAUTION: To prevent damage to the printer, use only the power cord that is provided with the printer.
PERHATIAN: Untuk mencegah kerusakan printer, gunakan hanya kabel daya yang disertakan bersama printer.
주의: 프린터의 손상을 방지하려면 프린터와 함께 제공된 전원 코드만 사용하십시오.
注意:為了避免對印表機造成損害,請僅使用印表機隨附的電源線。
2
Page 3
LaserJet Pro MFP M329, M428-M429
English.........................3
Bahasa Indonesia ........6
Getting Started Guide
NOTE: Internet connection is required to set up the printer and download the software driver.
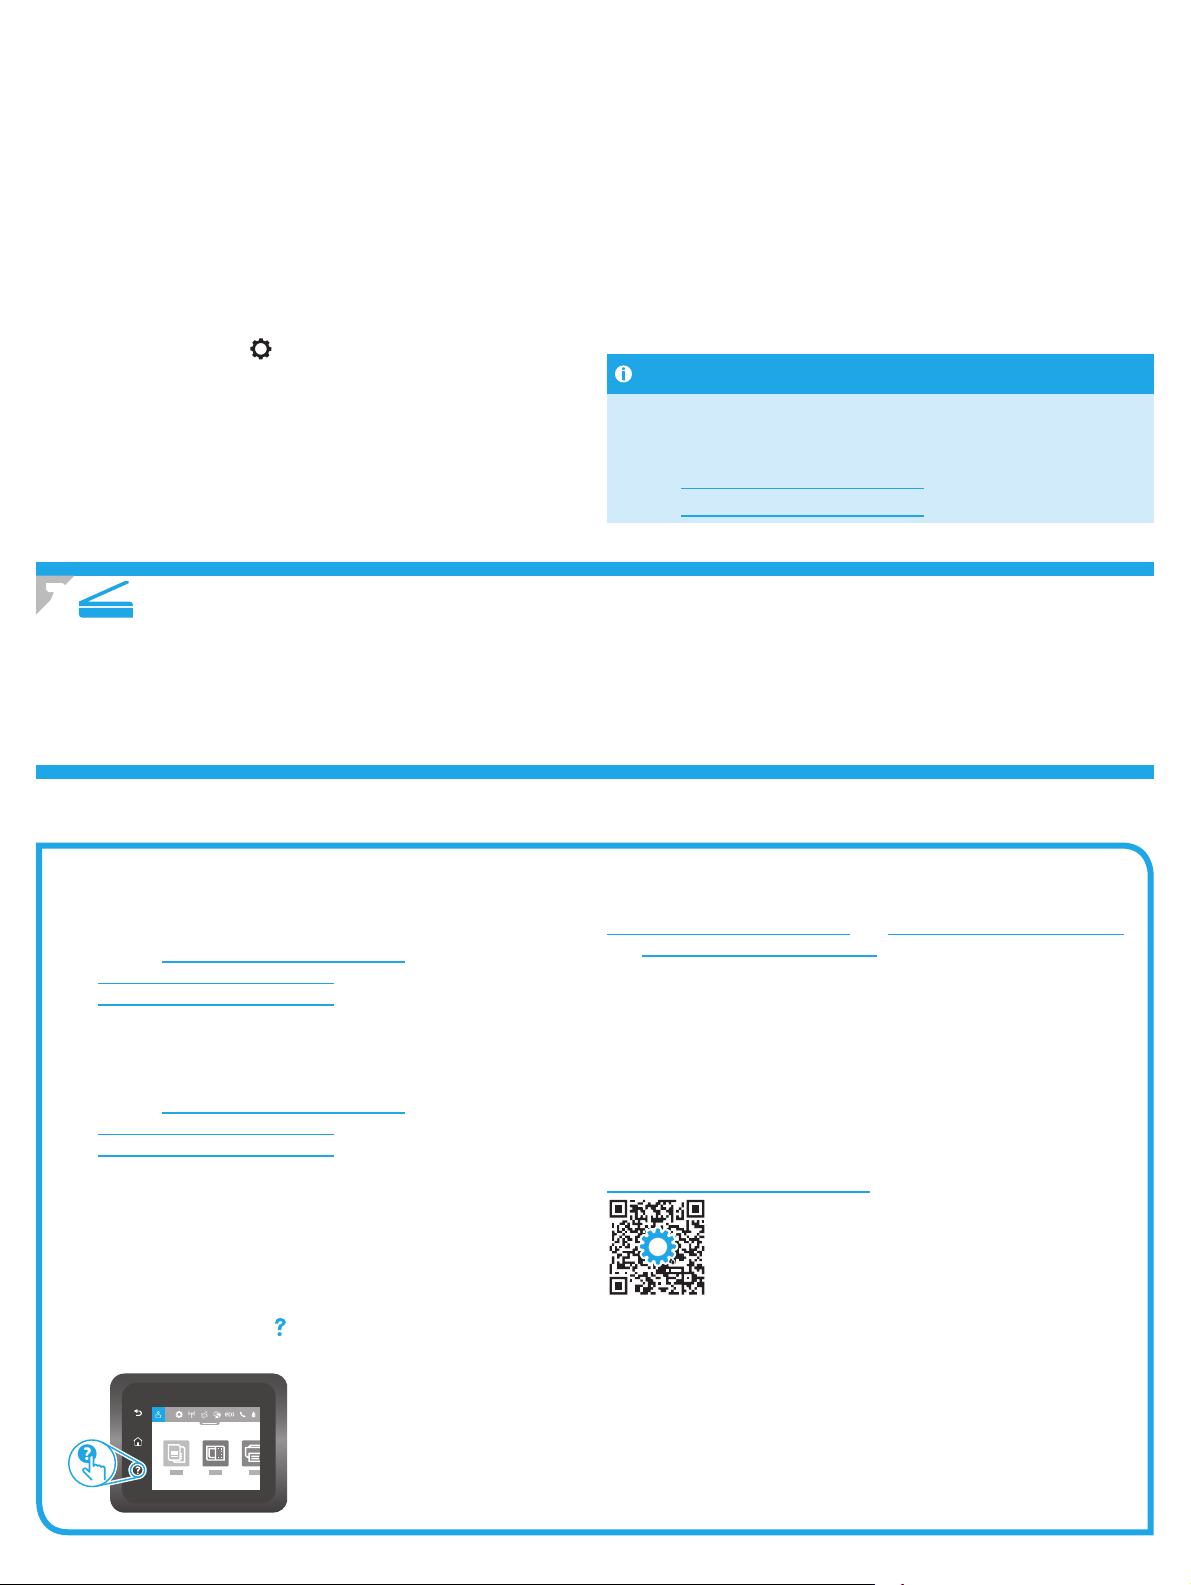
FAQ
For frequently asked questions, go to www.hp.com/support/ljM428MFPFAQ or
scan the QR code.
한국어 .........................9
ไทย ............................ 12
繁體中文.................. 15
Tiếng Việt ................. 18
3. Initial setup on the control panel
After turning on the printer, wait for it to initialize. To navigate the control panel, use touch, swipe, and scroll gestures. Follow the prompts on the control panel to
congure these settings:
• Language
• Location
• Printer Setup Environment
Select one of these options:
• Self-managed: Optimized default settings for most users that include guided setup and conguration steps and automatic updates.
• IT-managed: Optimized default settings for eet manageability.
Settings are fully customizable after initial setup.
4. Download and install the software
NOTE: Do not connect the USB cable until you are prompted to do so.
Method 1: Download HP Easy Start (Windows and
Mac OS)
1. Go to 123.hp.com/laserjet, and click Download.
2. Follow the onscreen instructions and prompts to save the le to the
computer.
3. Launch the software le from the folder where the le was saved.
4. Follow the onscreen instructions to install the software.
5. When prompted to select a connection type, select the appropriate
option for the type of connection.
Tips: Connect the printer to a wireless network (wireless models only)
1. From the Home screen on the printer control panel, swipe the tab at the top of the screen downward to open the Dashboard, and then touch
(Wireless).
2. Touch
3. Touch Wireless Settings.
4. Touch Wireless Setup Wizard.
5. Follow the display instructions to complete the setup.
(Setup).
Method 2: Download from printer support website
(Windows and Mac OS)
1. Go to www.hp.com/support/ljM329MFP or
www.hp.com/support/ljM428MFP or www.hp.com/support/ljM429MFP.
2. Select Software and Drivers.
3. Download the software for your printer model and operating system.
4. Launch the software le from the folder where the le was saved.
5. Follow the onscreen instructions to install the software.
6. When prompted to select a connection type, select the appropriate
optionfor the type of connection.
Manually congure the IP address
See the printer user guide for information about conguring the IP address manually. For more information, go to www.hp.com/support/ljM329MFP or
www.hp.com/support/ljM428MFP orwww.hp.com/support/ljM429MFP.
3
Page 4

5.
Mobile printing (Optional)
Method 1: HP Smart
Use the HP Smart app to set up, print, and more.
1. Scan the QR code or go to 123.hp.com.
2. Install the HP Smart app.
3. Run the HP Smart app and follow the onscreen instructions to connect, set up, print, and more.
Method 2: Wi-Fi Direct (wireless models only)
Wi-Fi Direct allows Wi-Fi capable devices, such as smart phones, tablets, or computers, to make a wireless network connection directly to the printer without
using a wireless router or access point. Connect to the printer’s Wi-Fi Direct signal the same way Wi-Fi capable devices are connected to a new wireless
network or hotspot.
Enable Wi-Fi Direct
1. From the Home screen on the printer control panel, swipe the tab at the
top of the screen downward to open the Dashboard, and then touch
(Wi-Fi Direct).
2. Touch
3. If the display shows that Wi-Fi Direct is o, touch Wi-Fi Direct and then
switch it on.
For more information on wireless printing and wireless setup, go to www.hp.com/go/wirelessprinting.
Learn more about mobile printing
(Setup).
Discover the printer
1. From the mobile device, turn on the Wi-Fi, and search for wireless
networks.
2. Select the printer name as it appears on the printer control panel.
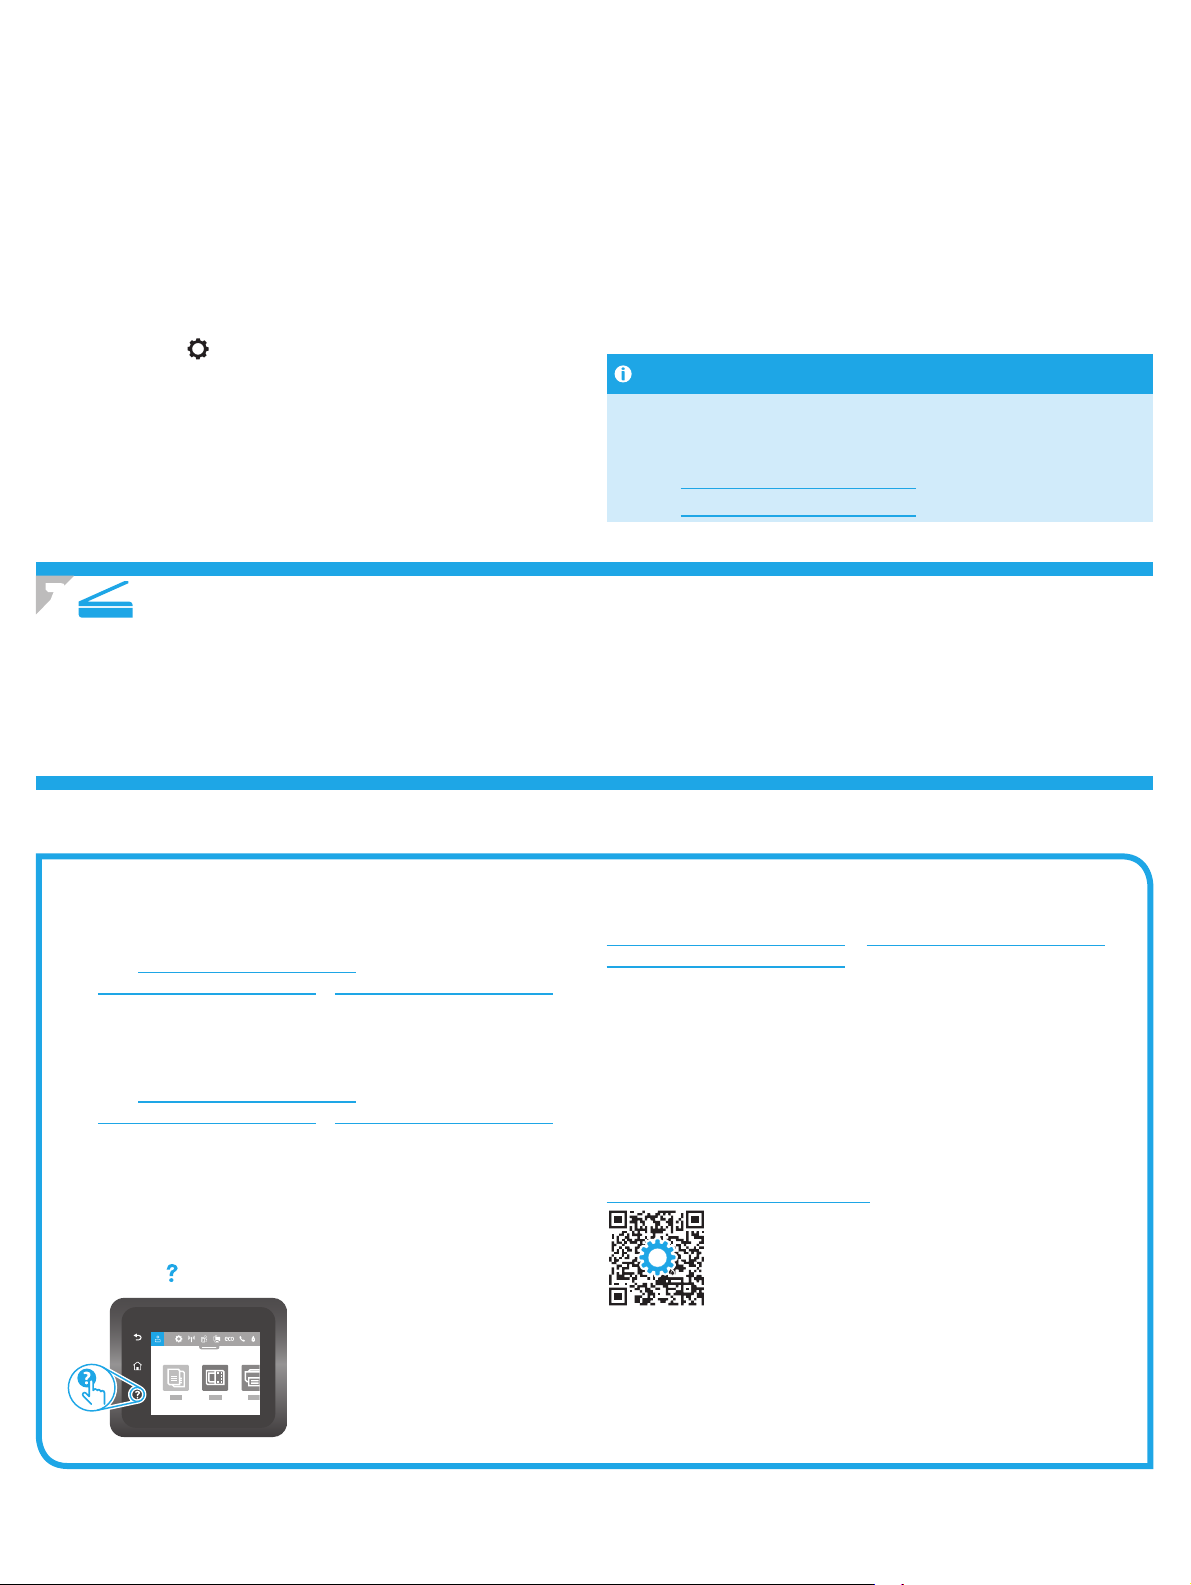
The product supports AirPrint and Wi-Fi Direct. For more mobile printing information, scan the QR code or go to
www.hp.com/go/LaserJetMobilePrinting.
6.
6.1
Set up fax (fax models only - optional)
Connect the printer
The printer is an analog device. HP recommends using the printer on
a dedicated analog telephone line.
NOTE: Some countries/regions might require an adapter for the
phone cord that came with the printer.
Connect the phone cord that came with the printer to the Fax port
on the printer and to the telephone jack on the wall.
How do I connect an answering machine or extension
phone?
1. Remove the plug from the phone port .
2. Disconnect the answering machine phone cord from the
phone jack, and then connect it to the phone port
printer.
on the
3. Connect the phone cord that came with the printer to the fax port on
the printer and to the telephone jack on the wall.
How do I set up HP printers in digital phone environments?
HP printers are designed specically for use with traditional analog phone
services. For a digital phone environment (such as DSL/ADSL, PBX, ISDN, or
FoIP), digital-to-analog lters or converters might be necessary when setting
up the printer for fax.
Note: Depending on the phone company, the printer might not be
compatible with all digital service lines or providers, in all digital
environments, or with all digital-to-analog converters. Contact the phone
company to determine which setup options are best.
Note: When setting up ring pattern detection in a PBX phone system that has
dierent ring patterns for internal and external calls, make sure to dial the
printer fax number using an external number for recording the ring pattern.
4
Page 5
6.2
Congure the printer
You must congure the fax time, date, and header settings to use the fax feature.
To open HP Fax Setup Wizard (Windows):
1. Open the HP Printer Assistant from Start menu.
2. In the HP Printer Assistant, select Fax, and then select Fax
Setup Wizard.
3. Follow the onscreen instructions to congure the fax settings.
To set up fax date/time:
1. From the Home screen on the printer control panel, swipe the
tab at the top of the screen downward to open the Dashboard.
2. Touch
3. Touch Preferences.
4. Touch Date/time to set up fax date and time.
(Setup) button.
7. Use the scan feature
Use the HP Scan software on your computer to start a scan job at the printer.
Windows
Open HP Printer Assistant, select Scan, and then select Scan a Document
orPhoto.
To set or change the fax header:
1. From the printer control panel display, touch Fax.
2. Touch Setup, and then touch Preferences.
3. Touch Fax Header.
4. Enter your personal or company name, and then touch Done.
5. Enter you fax number, and then touch Done.
NOTE: The maximum number of characters for the fax number is 20.
NOTE: The maximum number of characters for the fax header is 25.
Learn more!
For more information about other ways to send faxes, such as scheduling
afax to be sent later or sending faxes from a computer, see the User Guide
on the web:
• www.hp.com/support/ljM329MFP
• www.hp.com/support/ljM429MFP
Mac OS
Go to the Applications folder and open HP Easy Scan.
Troubleshooting
User Guide
The User Guide includes printer usage and troubleshooting information. It is
available on the Web:
1. Go to www.hp.com/support/ljM329MFP or
www.hp.com/support/ljM428MFP or www.hp.com/support/ljM429MFP.
2. Select the printer if prompted to, and then click User Guides.
Check for rmware updates
1. Go to www.hp.com/support/ljM329MFP or
www.hp.com/support/ljM428MFP or www.hp.com/support/ljM429MFP.
2. If prompted, select the printer, and then click Software and Drivers.
3. Select the operating system, and click the Next button.
4. Select Firmware, and click the Download button.
Control panel help
Touch the Help button on the printer control panel to access help topics.
Additional support resources
For HP’s all-inclusive help for the printer, go to
www.hp.com/support/ljM329MFP or www.hp.com/support/ljM428MFP or
www.hp.com/support/ljM429MFP.
• Solve problems
• Find advanced conguration instructions
• Download software updates
• Join support forums
• Find warranty and regulatory information
• Access mobile printing resources
To learn more about the printer, please go to
www.hp.com/support/ljM428MFPFAQ or scan the QR code.
5
Page 6
English ......................3
Bahasa Indonesia .....6
LaserJet Pro MFP M329, M428-M429
한국어 ......................9
ไทย ..........................12
繁體中文 ................15
Tiếng Việt ...............18
CATATA N: Diperlukan koneksi internet untuk menyiapkan printer dan mendownload driver
perangkat lunak.
Pertanyaan Umum
Untuk pertanyaan umum, kunjungi www.hp.com/support/ljM428MFPFAQ atau
pindai kode QR.
Panduan Persiapan
3. Kongurasi awal pada panel kontrol
Setelah menghidupkan printer, tunggu proses inisialisasi. Untuk menelusuri panel kontrol, gunakan gerakan sentuh, geser, dan gulir. Ikuti perintah pada
panel kontrol untuk mengongurasi pengaturan berikut:
• Bahasa
• Lokasi
• Lingkungan Penyiapan Printer
Pilih salah satu opsi ini:
• Dikelola sendiri: Pengaturan default yang dioptimalkan untuk sebagian besar pengguna mencakup langkah-langkah pengaturan dan kongurasi
terpandu, serta pembaruan otomatis.
• Dikelola TI: Pengaturan default yang dioptimalkan untuk kemampuan pengelolaan cepat.
Pengaturan dapat disesuaikan sepenuhnya setelah kongurasi awal.
4. Mendownload dan menginstal perangkat lunak
CATATA N: Jangan sambungkan kabel USB hingga diminta untuk melakukannya.
Metode 1: Download HP Easy Start (Windows dan
Mac OS)
1. Kunjungi 123.hp.com/laserjet, dan klik Download.
2. Ikuti instruksi di layar dan perintah untuk menyimpan le di komputer.
3. Jalankan le perangkat lunak dari folder tempat menyimpan le.
4. Ikuti petunjuk di layar untuk menginstal perangkat lunak.
5. Bila diminta untuk memilih jenis sambungan, gunakan pilihan yang
tepat untuk jenis sambungan.
Tips: Menghubungkan printer ke jaringan nirkabel (hanya model nirkabel)
1. Dari layar Awal di panel kontrol printer, geser tab di bagian atas layar ke bawah untuk membuka Dasbor, lalu sentuh (Wireless) (Nirkabel).
2. Sentuh
3. Sentuh Wireless Settings (Pengaturan Nirkabel).
4. Sentuh Wireless Setup Wizard (Wizard Kongurasi Nirkabel).
5. Ikuti petunjuk di tampilan untuk menyelesaikan pengaturan.
(Setup) (Pengaturan).
Metode 2: Download dari situs web dukungan
printer (Windowsdan Mac OS)
1. Kunjungi www.hp.com/support/ljM329MFP atau
www.hp.com/support/ljM428MFP atau www.hp.com/support/ljM429MFP.
2. Pilih Software and Drivers (Perangkat Lunak dan Driver).
3. Download perangkat lunak untuk model printer dan sistem operasi Anda.
4. Jalankan le perangkat lunak dari folder tempat menyimpan le.
5. Ikuti petunjuk di layar untuk menginstal perangkat lunak.
6. Bila diminta untuk memilih jenis sambungan, gunakan pilihan yang
tepat untuk jenis sambungan.
Mengongurasi alamat IP secara manual
Lihat panduan pengguna printer untuk informasi tentang mengongurasi alamat IP secara manual. Untuk informasi lebih lanjut, kunjungi
www.hp.com/support/ljM329MFP atau www.hp.com/support/ljM428MFP atau www.hp.com/support/ljM429MFP.
6
Page 7

5.
Pencetakan seluler (Opsional)
Metode 1: HP Smart
Gunakan aplikasi HP Smart untuk mengongurasi, mencetak, dan lainnya.
1. Pindai kode QR atau kunjungi 123.hp.com.
2. Instal aplikasi HP Smart.
3. Jalankan aplikasi HP Smart dan ikuti petunjuk di layar untuk menyambungkan, mengongurasi, mencetak, dan lainnya.
Metode 2: Wi-Fi Direct (hanya model nirkabel)
Wi-Fi Direct memungkinkan perangkat yang mendukung Wi-Fi, misalnya smartphone, tablet, atau komputer, membuat sambungan jaringan nirkabel
langsung ke printer tanpa menggunakan router atau jalur akses nirkabel. Sambungkan ke sinyal Wi-Fi Direct printer menggunakan cara yang sama seperti
menyambungkan perangkat yang mendukung Wi-Fi ke jaringan nirkabel atau hotspot baru.
Mengaktifkan Wi-Fi Direct
1. Dari layar Home (Awal) di panel kontrol printer, geser tab di bagian atas
layar ke bawah untuk membuka Dasbor, lalu sentuh
2. Sentuh
3. Jika tampilan menampilkan bahwa Wi-Fi Direct mati, sentuh Wi-FiDirect
lalu nyalakan.
Untuk informasi lebih lanjut tentang pencetakan nirkabel dan pengaturan nirkabel, kunjungi www.hp.com/go/wirelessprinting.
Selengkapnya tentang pencetakan seluler
(Setup) (Pengaturan).
(Wi-Fi Direct).
Menemukan printer
1. Dari perangkat seluler, aktifkan Wi-Fi, lalu cari jaringan nirkabel.
2. Pilih nama printer yang ditunjukkan pada panel kontrol printer.
Produk ini mendukung AirPrint dan Wi-Fi Direct. Untuk informasi lebih lanjut tentang pencetakan seluler, pindai kode
QR atau kunjungi www.hp.com/go/LaserJetMobilePrinting.
6.
6.1
Mengongurasi fax (hanya model fax - opsional)
Menyambungkan printer
Printer ini adalah perangkat analog. HP menganjurkan
penggunaan printer pada saluran telepon analog khusus.
CATATAN: Adapter mungkin diperlukan di beberapa negara/
kawasan untuk menggunakan kabel telepon yang disertakan
bersama printer.
Sambungkan kabel telepon yang disertakan bersama printer
keport Faks
Bagaimana menyambungkan mesin penjawab atau
telepon ekstensi?
1. Lepas konektor dari port telepon .
2. Lepas sambungan kabel telepon mesin penjawab dari soket
pada printer dan ke soket telepon di dinding.
telepon, lalu sambungkan ke port telepon
pada printer.
3. Sambungkan kabel telepon yang disertakan bersama printer ke port
faks pada printer dan ke soket telepon di dinding.
Bagaimana cara mengongurasi printer HP dalam lingkungan
telepon digital?
Printer HP dirancang khusus untuk digunakan bersama layanan telepon
analog biasa. Untuk lingkungan telepon digital (misalnya, DSL/ADSL, PBX,
ISDN, atau FoIP), lter atau konverter digital ke analog mungkin diperlukan
bila mengongurasi printer untuk faks.
Catatan: Berdasarkan perusahaan telepon, printer mungkin tidak
kompatibel dengan semua saluran atau penyedia layanan digital, di semua
lingkungan digital, atau dengan semua konverter digital ke analog. Hubungi
perusahaan telepon untuk menentukan pilihan kongurasi terbaik.
Catatan: Saat mengongurasi deteksi pola dering dalam sistem telepon PBX
yang memiliki pola dering berbeda untuk panggilan internal dan eksternal,
pastikan Anda menekan nomor faks printer menggunakan nomor eksternal
untuk merekam pola dering.
7
Page 8
6.2
Mengongurasi printer
Mengongurasi pengaturan waktu, tanggal, dan kepala faks diperlukan agar dapat menggunakan tur faks.
Membuka Wizard Kongurasi Faks HP (Windows):
1. Buka HP Printer Assistant dari menu Start (Mulai).
2. Pada HP Printer Assistant, pilih Fax (Faks), lalu pilih Fax Setup
Wizard (Wizard Kongurasi Faks).
3. Ikuti petunjuk di layar untuk mengongurasi pengaturan faks.
Mengatur tanggal/waktu faks:
1. Dari layar Awal di panel kontrol printer, geser tab di bagian atas
layar ke bawah untuk membuka Dasbor.
2. Sentuh tombol
3. Sentuh Preferences (Preferensi).
4. Sentuh Date/time (Tanggal/waktu) untuk mengatur tanggal
dan waktu faks.
(Setup) (Pengaturan).
Untuk mengatur atau mengubah kepala faks:
1. Dari tampilan panel kontrol printer, sentuh Fax (Faks).
2. Sentuh Setup (Pengaturan), lalu sentuh Preferences (Preferensi).
3. Sentuh Fax Header (Kepala Faks).
4. Masukkan nama pribadi atau perusahaan, lalu sentuh Done (Selesai).
5. Masukkan nomor faks, lalu sentuh Done (Selesai).
CATATA N: Jumlah maksimal karakter untuk nomor faks adalah 20.
CATATA N: Jumlah maksimal karakter untuk kepala faks adalah 25.
Selengkapnya!
Untuk informasi lebih lanjut tentang cara lain mengirim faks, misalnya
menjadwalkan faks untuk dikirim nanti atau mengirim faks dari komputer,
lihat Panduan Pengguna di web:
7. Menggunakan tur pindai
Gunakan perangkat lunak HP Scan di komputer untuk memulai tugas pindai pada printer.
Windows
Buka HP Printer Assistant, pilih Scan (Pindai), lalu pilih Scan a Document
orPhoto (Pindai Dokumen atau Foto).
Mac OS
Buka folder Applications (Aplikasi) dan buka HP Easy Scan.
• www.hp.com/support/ljM329MFP
• www.hp.com/support/ljM429MFP
Mengatasi masalah
Panduan Pengguna
Panduan Pengguna mencakup informasi tentang penggunaan dan cara
mengatasi masalah printer. Informasi ini tersedia di Web:
1. Kunjungi www.hp.com/support/ljM329MFP atau
www.hp.com/support/ljM428MFP atau
www.hp.com/support/ljM429MFP.
2. Pilih printer jika diminta, lalu klik User Guides (Panduan Pengguna).
Memeriksa pembaruan rmware
1. Kunjungi www.hp.com/support/ljM329MFP atau
www.hp.com/support/ljM428MFP atau
www.hp.com/support/ljM429MFP.
2. Jika diminta, pilih printer, lalu klik Software and Drivers
(PerangkatLunak dan Driver).
3. Pilih sistem operasi, lalu klik tombol Next (Berikutnya).
4. Pilih Firmware, lalu klik tombol Download.
Bantuan panel kontrol
Sentuh tombol Help (Bantuan) pada panel kontrol printer untuk
mengakses topik bantuan.
Sumber dukungan tambahan
Untuk bantuan lengkap dari HP terkait printer, kunjungi
www.hp.com/support/ljM329MFP atau www.hp.com/support/ljM428MFP
atau www.hp.com/support/ljM429MFP.
• Mengatasi masalah
• Menemukan petunjuk kongurasi tingkat lanjut
• Mendownload pembaruan perangkat lunak
• Mengikuti forum dukungan
• Mencari informasi jaminan dan peraturan
• Mengakses sumber pencetakan seluler
Untuk mengetahui lebih lanjut tentang printer, kunjungi
www.hp.com/support/ljM428MFPFAQ atau pindai kode QR.
8
Page 9

LaserJet Pro MFP M329, M428-M429
English.........................3
Bahasa Indonesia ........6
시작 설명서
참고: 프린터를 설치하고 소프트웨어 드라이버를 다운로드하려면 인터넷을 연결해야 합니다.
FAQ
자주 묻는 질문은 www.hp.com/support/ljM428MFPFAQ에서 확인하거나
QR 코드를 스캔하십시오.
한국어 .........................9
ไทย ............................ 12
繁體中文.................. 15
Tiếng Việt ................. 18
3. 제어판에서 초기 설정
프린터를 켠 후 초기화될 때까지 기다립니다. 제어판을 탐색하려면 터치, 스와이프, 스크롤 제스처를 사용합니다. 제어판에 표시되는 메시지에 따라
다음과 같은 설정을 구성합니다.
• 언어
• 위치
• 프린터 설치 환경
다음 옵션 중 하나를 선택합니다.
• 자가 관리: 설정 안내와 구성 단계 및 자동 업데이트를 포함하여 대부분의 사용자에게 최적화된 기본 설정입니다.
• IT 관리: 장비 관리성에 최적화된 기본 설정입니다.
설정은 초기 설정 후 모두 사용자 요구에 맞게 설정할 수 있습니다.
4. 소프트웨어 다운로드 및 설치
참고: 알림이 표시되기 전까지는 USB 케이블을 연결하지 마십시오.
방법 1: HP Easy Start 다운로드(Windows 및
Mac OS)
1. 123.hp.com/laserjet으로 이동한 다음 다운로드를 클릭합니다.
2. 화면의 안내와 알림에 따라 컴퓨터에 파일을 저장합니다.
3. 파일이 저장된 폴더에서 소프트웨어 파일을 실행합니다.
4. 화면의 지시에 따라 소프트웨어를 설치합니다.
5. 연결 유형을 선택하라는 메시지가 표시되면 연결 유형에 적합한
옵션을 선택합니다.
팁: 무선 네트워크에 프린터 연결(무선 모델만 해당)
1. 프린터 제어판의 홈 화면에서 화면 상단에 있는 탭을 아래로 밀어 대시보드를 연 다음 (무선)을 누릅니다.
2.
(설정)을 누릅니다.
3. 무선 설정를 누릅니다.
4. 무선 설정 마법사를 누릅니다.
5. 디스플레이의 설명에 따라 스캔을 완료합니다.
방법 2: 프린터 지원 웹사이트에서 다운로드
(Windows 및 Mac OS)
1. www.hp.com/support/ljM329MFP 또는
www.hp.com/support/ljM428MFP 또는
www.hp.com/support/ljM429MFP로 이동합니다.
2. 소프트웨어 및 드라이버를 선택합니다.
3. 해당 프린터 모델 및 운영 체제용 소프트웨어를 다운로드합니다.
4. 파일이 저장된 폴더에서 소프트웨어 파일을 실행합니다.
5. 화면의 지시에 따라 소프트웨어를 설치합니다.
6. 연결 유형을 선택하라는 메시지가 표시되면 연결 유형에 적합한
옵션을 선택합니다.
IP 주소 수동으로 구성
수동 IP 주소 구성에 대한 자세한 내용은 프린터 사용 설명서를 참조하십시오. 자세한 내용은 www.hp.com/support/ljM329MFP 또는
www.hp.com/support/ljM428MFP 또는 www.hp.com/support/ljM429MFP로 이동합니다.
9
Page 10

5.
모바일 인쇄(선택 사항)
방법 1: HP Smart
HP Smart 앱을 사용하여 연결, 설정 및 인쇄 등을 실시합니다.
1. QR 코드를 스캔하거나 123.hp.com으로 이동합니다.
2. HP Smart 앱을 설치합니다.
3. HP Smart 앱을 실행하여 화면에 표시되는 안내에 따라 연결, 설정 및 인쇄 등을 실시합니다.
방법 2: Wi-Fi Direct(무선 모델만 해당)
Wi-Fi Direct를 통해 스마트폰, 태블릿, 컴퓨터와 같은 Wi-Fi 케이블 장치를 무선 라우터나 액세스 지점을 사용하지 않고 직접 프린터에 무선 네트워크
연결을 할 수 있습니다. Wi-Fi를 사용할 수 있는 장치를 새 무선 네트워크 또는 핫스팟에 연결하는 방식과 동일한 방법으로 프린터의 Wi-Fi Direct 신호에
연결합니다.
Wi-Fi Direct 활성화
1. 프린터 제어판의 홈 화면에서 화면 상단에 있는 탭을 아래로 밀어
대시보드를 연 다음
2.
(설정)을 누릅니다.
3. 디스플레이에 Wi-Fi Direct가 꺼진 것으로 표시되면, Wi-Fi Direct를
누른 다음 켭니다.
무선 인쇄 및 무선 설정에 대한 자세한 내용은 www.hp.com/go/wirelessprinting으로 이동합니다.
모바일 인쇄에 대해 자세히 알아보기
(무선)을 누릅니다.
프린터 찾기
1. 모바일 장치에서 Wi-Fi를 켜고 무선 네트워크를 검색합니다.
2. 프린터 제어판에 표시되는 프린터 이름을 선택합니다.
제품은 AirPrint 및 Wi-Fi Direct를 지원합니다. 추가 모바일 인쇄 정보는 QR 코드를 스캔하거나
www.hp.com/go/LaserJetMobilePrinting으로 이동합니다.
6.
6.1
팩스 설정(팩스 모델만 해당 - 선택 사항)
프린터 연결
이 프린터는 아날로그 장치입니다. HP는 전용 아날로그
전화선에서 이 프린터를 사용하는 것이 좋습니다.
참고: 일부 국가/지역에서는 프린터와 함께 제공된 전화
코드에 대한 어댑터가 필요할 수 있습니다.
프린터와 함께 제공된 전화 코드를 프린터의 팩스 포트와
벽면의 전화 잭에 연결합니다.
자동 응답기나 내선 전화는 어떻게 연결하나요?
1. 전화 포트 에서 플러그를 제거합니다.
2. 전화 잭에서 자동 응답기 전화 코드를 분리한 다음
프린터의 전화 포트
에 연결합니다.
3. 프린터와 함께 제공된 전화 코드를 프린터의 팩스 포트 와 벽면의
전화 잭에 연결합니다.
디지털 전화기 환경에서는 HP 프린터를 어떻게 설정하나요?
HP 프린터는 기존 아날로그 전화 서비스와 함께 사용할 수 있도록
개발되었습니다. 디지털 전화기 환경(예: DSL/ADSL, PBX, ISDN, 또는
FoIP 등)의 경우 팩스용 프린터를 설치할 때 디지털-아날로그 필터 또는
변환기가 필요할 수 있습니다.
참고: 통신 업체에 따라 프린터가 모든 디지털 서비스 회선이나 제공
업체, 모든 디지털 환경 또는 모든 디지털-아날로그 변환기와 호환되지
않을 수 있습니다. 가장 적합한 설치 옵션을 확인하려면 통신 업체에
문의하십시오.
참고: 내선 및 외선 통화에 대해 다른 벨소리 종류를 가진 PBX 전화
시스템에 벨소리 종류 감지 기능을 설정할 때 외부 번호를 사용하여
프린터 팩스 번호로 전화를 걸어 벨소리 종류를 기록하십시오.
10
Page 11

6.2
프린터 구성
팩스 기능을 사용하려면 팩스 시간, 날짜 및 머리글 설정을 구성해야 합니다.
HP 팩스 설정 마법사 사용(Windows)
1. 시작 메뉴에서 HP Printer Assistant를 엽니다.
2. HP 프린터 길잡이에서 팩스를 누른 다음 팩스 설정 마법사를
선택합니다.
3. 화면의 지침을 따라 팩스 설정을 구성합니다.
팩스 날짜/시간 설정 방법:
1. 프린터 제어판의 홈 화면에서 화면 상단에 있는 탭을 아래로
밀어 대시보드를 엽니다.
2.
(설치) 버튼을 누릅니다.
3. 기본 설정을 누릅니다.
4. 날짜/시간을 눌러 팩스 날짜 및 시간을 설정합니다.
팩스 머리글 설정 또는 변경 방법:
1. 프린터 제어판 디스플레이에서 팩스를 누릅니다.
2. 팩스 설정, 기본 설정을 차례로 누릅니다.
3. 팩스 머리글을 누릅니다.
4. 개인 또는 회사 이름을 입력한 다음 완료를 누릅니다.
5. 팩스 번호를 입력한 다음 완료를 누릅니다.
참고: 팩스 번호로 최대 20자를 사용할 수 있습니다.
참고: 팩스 머리글로 최대 25자를 사용할 수 있습니다.
자세히 알아보기!
나중에 보내도록 팩스를 예약하거나 컴퓨터에서 팩스 보내기 등 팩스를
보내는 다양한 방법에 대한 자세한 내용은 웹에서 사용 설명서를
참조하십시오.
7. 스캔 기능 사용
프린터에서 스캔 작업을 시작하려면 컴퓨터의 HP Scan 소프트웨어를 사용하십시오.
Windows
HP 프린터 길잡이에서 스캔을 선택한 다음 문서 또는 사진 스캔을
선택합니다.
Mac OS
Applications 폴더로 이동한 다음 HP Easy Scan을 엽니다.
• www.hp.com/support/ljM329MFP
• www.hp.com/support/ljM429MFP
문제 해결
사용 설명서
사용 설명서에 프린터 사용법 및 문제 해결 정보가 포함되어
있습니다. 웹 에사 사용할 수 있습니다:
1. www.hp.com/support/ljM329MFP 또는
www.hp.com/support/ljM428MFP 또는
www.hp.com/support/ljM429MFP로 이동합니다.
2. 메시지가 표시되면 프린터를 선택하고 사용 설명서를 클릭합니다.
펌웨어 업데이트 확인
1. www.hp.com/support/ljM329MFP 또는
www.hp.com/support/ljM428MFP 또는
www.hp.com/support/ljM429MFP 로 이동합니다.
2. 프롬프트되면, 프린터를 선택한 다음 소프트웨어 및 드라이버를
클릭합니다.
3. 운영 체제를 선택하고 다음 버튼을 클릭합니다.
4. 펌웨어를 선택하고 다운로드 버튼을 클릭합니다.
제어판 도움말
도움말을 보려면 프린트 제어판의 도움말 버튼을 누르십시오.
추가 지원 리소스
프린터에 대한 모든 것을 포함하는 HP 도움말은
www.hp.com/support/ljM329MFP 또는
www.hp.com/support/ljM428MFP 또는
www.hp.com/support/ljM429MFP로 이동합니다.
• 문제 해결
• 고급 구성 지침 찾기
• 소프트웨어 업데이트 다운로드
• 지원 포럼 가입
• 보증 및 규정 정보 찾기
• 모바일 인쇄 리소스 액세스
프린터에 대한 자세한 내용을 알아보려면,
www.hp.com/support/ljM428MFPFAQ 또는 QR 코드를 스캔합니다.
11
Page 12

English ......................3
Bahasa Indonesia .....6
한국어 ......................9
ไทย ..........................12
繁體中文 ................15
Tiếng Việt ...............18
4.
12
Page 13

5.
6.
13
Page 14

147.15
Page 15

LaserJet Pro MFP M329, M428-M429
English.........................3
Bahasa Indonesia ........6
入門指南
附註:設定印表機和下載軟體驅動程式時必須要與網際網路連線。
常見問題集
如需常見問題解答,請前往 www.hp.com/support/ljM428MFPFAQ,或掃
描 QR 代碼。
한국어 .........................9
ไทย ............................ 12
繁體中文.................. 15
Tiếng Việt ................. 18
3. 控制面板上的初始設定
開啟印表機電源後,等待印表機初始化。若要瀏覽控制面板,請使用輕觸、撥動和捲動手勢。請依照控制面板上的提示,設定下列設定值:
• 語言
• 位置
• 印表機設定環境
選擇下列其中一個選項:
• 自我管理:適合大部分使用者的最佳化預設值,包括引導式設定和組態步驟,以及自動更新。
• IT 管理:適合機群管理功能的最佳化預設值。
設定值完全可在初始設定之後進行自訂。
4. 下載與安裝軟體
附註:在接獲提示前,請勿連接 USB 連接線。
方 法 1:下載 HP Easy Start (Windows 和 Mac OS)
1. 前往 123.hp.com/laserjet,然後按一下 Download (下載)。
2. 請按照螢幕上的指示和提示,將檔案儲存至電腦。
3. 從儲存軟體檔案的資料夾中,啟動軟體檔案。
4. 請依照螢幕上的指示,安裝軟體。
5. 在出現選擇連線類型的提示時,選擇適合連線類型的選項:
提示: 將產品連線至無線網路 (僅限無線機型)
1. 從印表機控制面板的 Home 主畫面中,將畫面最上方的分頁往下撥,即可開啟儀表板,然後輕觸 (Wireless (無線))。
2. 輕觸
3. 輕觸 Wireless Settings (無線設定值)。
4. 輕觸 Wireless Setup Wizard (無線設定精靈)。
5. 請依照面板指示,完成設定。
(Setup (設定))。
方法 2:從印表機支援網站下載 (Windows 和
Mac OS)
1. 前往 www.hp.com/support/ljM329MFP 或
www.hp.com/support/ljM428MFP 或
www.hp.com/support/ljM429MFP。
2. 選擇 Software and Drivers (軟體和驅動程式)。
3. 下載適用於您印表機型號和作業系統的軟體。
4. 從儲存軟體檔案的資料夾中,啟動軟體檔案。
5. 請依照螢幕上的指示,安裝軟體。
6. 在出現選擇連線類型的提示時,選擇適合連線類型的選項:
手動設定 IP 位址
請參閱使用指南,取得有關手動設定 IP 位址的資訊。如需詳細資訊,請造訪 www.hp.com/support/ljM329MFP 或
www.hp.com/support/ljM428MFP 或 www.hp.com/support/ljM429MFP。
Page 16

5.
行動列印 (選用)
方法 1:HP Smart
使用 HP Smart 應用程式,進行設定、列印和其他動作。
1. 掃描 QR 碼或前往 123.hp.com。
2. 安裝 HP Smart 應用程式。
3. 執行 HP Smart 應用程式,然後依照畫面上的指示,進行連線、設定、列印和其他動作。
方法 2:Wi-Fi Direct (僅限無線機型)
Wi-Fi Direct 可讓具備 Wi-Fi 功能的裝置 (例如智慧型手機、平板電腦或電腦) 在沒有使用無線路由器或存取點的情況下,直接與印表機進行無線
網路連線。使用將具備 Wi-Fi 功能的裝置連接至新的無線網路或熱點的相同方法,連接印表機的 Wi-Fi Direct 訊號。
啟用 Wi-Fi Direct
1. 從印表機控制面板的 Home 主畫面中,將畫面最上方的分頁往下
撥,即可開啟儀表板,然後輕觸
2. 輕觸
3. 如果面板顯示 Wi-Fi Direct 已經關閉,則請輕觸 Wi-Fi Direct,並接
著開啟網路。
如需無線列印及無線設定的詳細資訊,請前往 www.hp.com/go/wirelessprinting。
進一步了解行動列印
本產品支援 AirPrint 和 Wi-Fi Direct。如需行動列印的詳細資訊,請掃描 QR 碼或前往
www.hp.com/go/LaserJetMobilePrinting。
6.
6.1
(Setup (設定))。
設定傳真 (僅限傳真機型 - 選用)
連接印表機
印表機為類比裝置。HP 建議在專用類比電話線路上使用印
表機。
附註:有些國家/地區可能需要為印表機隨附的電話線準
備轉接器。
將印表機隨附的電話線連接到印表機上的傳真 連接埠和牆
上的電話插座。
(Wi-Fi Direct)。
探索印表機
1. 在行動裝置上,開啟 Wi-Fi,然後搜尋無線網路。
2. 選擇與印表機控制面板上所示相同名稱的印表機名稱。
3. 將印表機隨附的電話線連接到印表機上的傳真連接埠 和牆上
的電話插座。
如何連接答錄機或電話分機?
1. 從電話連接埠取下插頭 。
2. 從電話插座拔下答錄機電話線,然後將電話線連接到
印表機上的電話連接埠
。
如何在數位電話環境中設定 HP 印表機?
HP 印表機是專為搭配傳統類比電話服務而設計。在數位電話環境 (例
如 DSL/ADSL、PBX、ISDN 或 FoIP) 中進行印表機的傳真設定時,可能
需要數位轉類比過濾器或轉換器。
附註:印表機不一定能與所有的數位環境中的所有數位服務線路或
供應商相容、或不一定能搭配所有的數位轉類比轉換器,實際情況
會依電話公司而定。請聯絡電話公司,判斷哪些設定選項最適合。
附註:若在 PBX 電話系統中設定用於內線和外線通話等不同鈴聲模
式的鈴聲模式偵測時,請務必使用外線電話號碼撥打印表機傳真號
碼,以便錄製鈴聲模式。
16
Page 17

6.2
設定印表機
您必須設定傳真時間、日期及標題等設定值,才能使用傳真功能。
開啟 HP 傳真設定精靈 (Windows):
1. 從 Start (開始) 功能表中,開啟 HP Printer Assistant。
2. 在 HP Printer Assistant 中,選擇 Fax (傳真),然後選擇
Fax Setup Wizard (傳真設定精靈)。
3. 請依照螢幕上的指示,設定傳真設定值。
設定傳真日期/時間:
1. 從印表機控制面板的主畫面中,將畫面最上方的分頁往
下撥,即可開啟儀表板。
2. 輕觸
3. 輕觸 Preferences (偏好設定)。
4. 輕觸 Date/time (日期/時間),即可設定傳真日期和時間。
(Setup (設定)) 按鈕。
7. 使用掃描功能
使用電腦上的 HP Scan 軟體,啟動印表機的掃描工作。
Windows
開啟 HP Printer Assistant,選擇 Scan (掃描),然後選擇 Scan a Document
or Photo (掃描文件或相片)。
設定或變更傳真標題:
1. 從印表機控制面板中,輕觸 Fax (傳真)。
2. 輕觸 Setup (設定),然後輕觸 Preferences (偏好設定)。
3. 輕觸 Fax Header (傳真標題)。
4. 請輸入您個人或公司的名稱,然後輕觸 Done (完成)。
5. 請輸入您的傳真號碼,然後輕觸 Done (完成)。
附註:傳真號碼的字元數最多為 20 個。
附註:傳真標題的字元數最多為 25 個。
告訴我更多資訊!
如需其他傳真傳送方式 (例如排定在日後傳送傳真或從電腦傳送傳真)
的詳細資訊,請參閱網路版的使用指南:
• www.hp.com/support/ljM329MFP
• www.hp.com/support/ljM429MFP
Mac OS
移至 Applications (應用程式) 資料夾,並開啟 HP Easy Scan。
疑難排解
使用指南
使用指南包含印表機使用方式及疑難排解資訊。使用指南也有提供
網路版:
前往 www.hp.com/support/ljM329MFP 或
www.hp.com/support/ljM428MFP 或
www.hp.com/support/ljM429MFP。
1. 在收到提示時選擇印表機,然後按一下 User Guides (使用指南)。
查看韌體更新
前往 www.hp.com/support/ljM329MFP 或
www.hp.com/support/ljM428MFP 或
www.hp.com/support/ljM429MFP。
2. 在收到提示時,選擇印表機,然後按一下 Software and Drivers
(軟體和驅動程式)。
3. 選擇作業系統,然後按一下 Next (下一步) 按鈕。
4. 選擇 Firmware (韌體),然後按一下 Download (下載) 按鈕。
控制面板說明
輕觸印表機控制面板上的 Help (說明) 按鈕,即可存取說明主題。
其他支援資源
如需包含印表機所有相關資訊的 HP 說明,請前往
www.hp.com/support/ljM329MFP 或 www.hp.com/support/ljM428MFP
或 www.hp.com/support/ljM429MFP。
• 解決問題
• 尋找進階組態設定指示
• 下載軟體更新
• 加入支援論壇
• 尋找保固及法規資訊
• 存取行動列印資源
若要進一步了解印表機,請前往
www.hp.com/support/ljM428MFPFAQ,或掃描 QR 代碼。
17
Page 18

English ......................3
Bahasa Indonesia .....6
한국어 ......................9
ไทย ..........................12
繁體中文 ................15
Tiếng Việt ...............18
18
Page 19

19
Page 20

20
Page 21

Page 22

Page 23

Page 24

© Copyright 2018 HP Development Company, L.P.
Reproduction, adaptation or translation without prior written permission is
prohibited, except as allowed under the copyright laws.
The information contained herein is subject to change without notice.
The only warranties for HP products and services are set forth in the express
warranty statements accompanying such products and services. Nothing
herein should be construed as constituting an additional warranty. HP shall not
be liable for technical or editorial errors or omissions contained herein.
Trademark Credits
Windows® is a U.S. registered trademark of Microsoft Corporation.
Apple and the Apple logo are trademarks of Apple Inc., registered in the U.S.
and other countries.
Mac OS is a trademark of Apple Inc., registered in the U.S. and other countries.
AirPrint is a trademark of Apple Inc., registered in the U.S. and other countries.
www.hp.com
 Loading...