

Page 1
www.hp.com/support/ljM329MFP
www.hp.com/support/ljM428MFP
www.hp.com/support/ljM429MFP
Lea esto primero
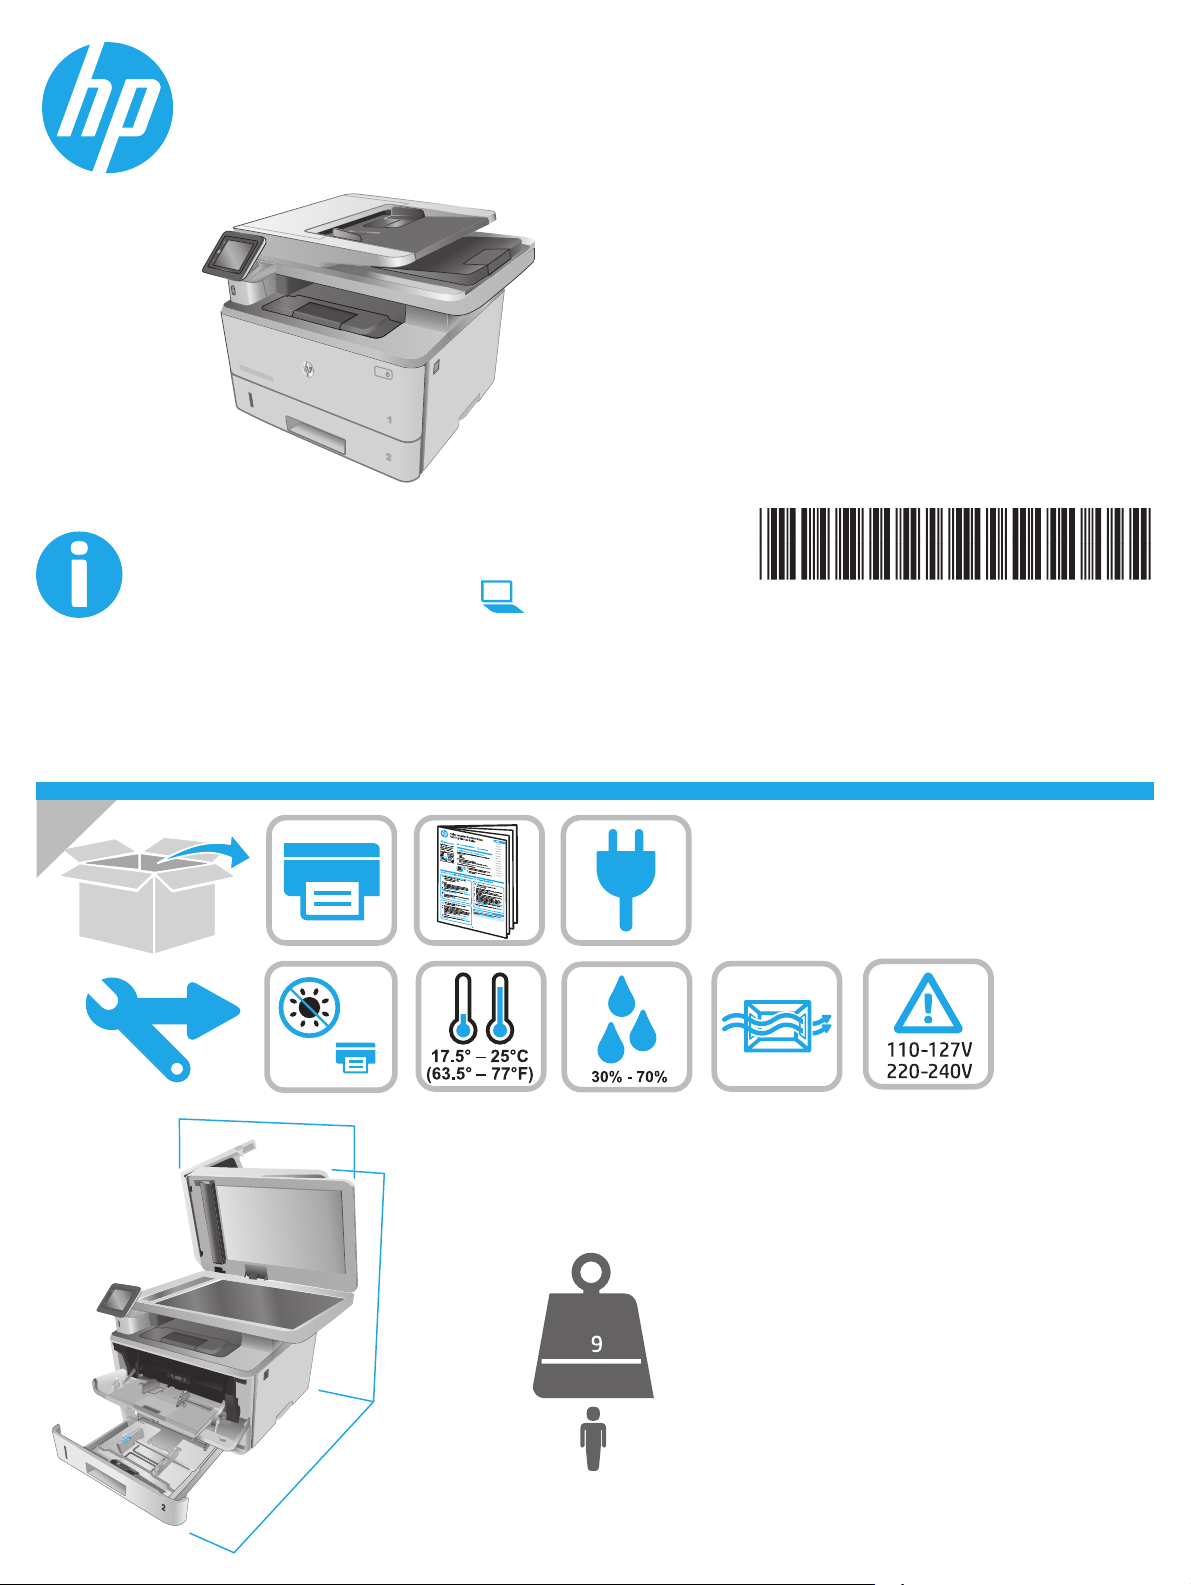
LaserJet Pro MFP M329, M428-M429
W1A28-90932www.register.hp.com
© Copyright 2018 HP Development Company, L.P.
www.hp.com
453 mm
17.8 in
HEWLETT-PACKARD
HEWLETT-PACKARD
22.7 in
577 mm
NJ
OE
2
33 in
839 mm
Page 2
(7
7
3
$
&.$5
1
1.1
'
1.2
1.3
1.4
2.1
1.5
2.2 2.3
2
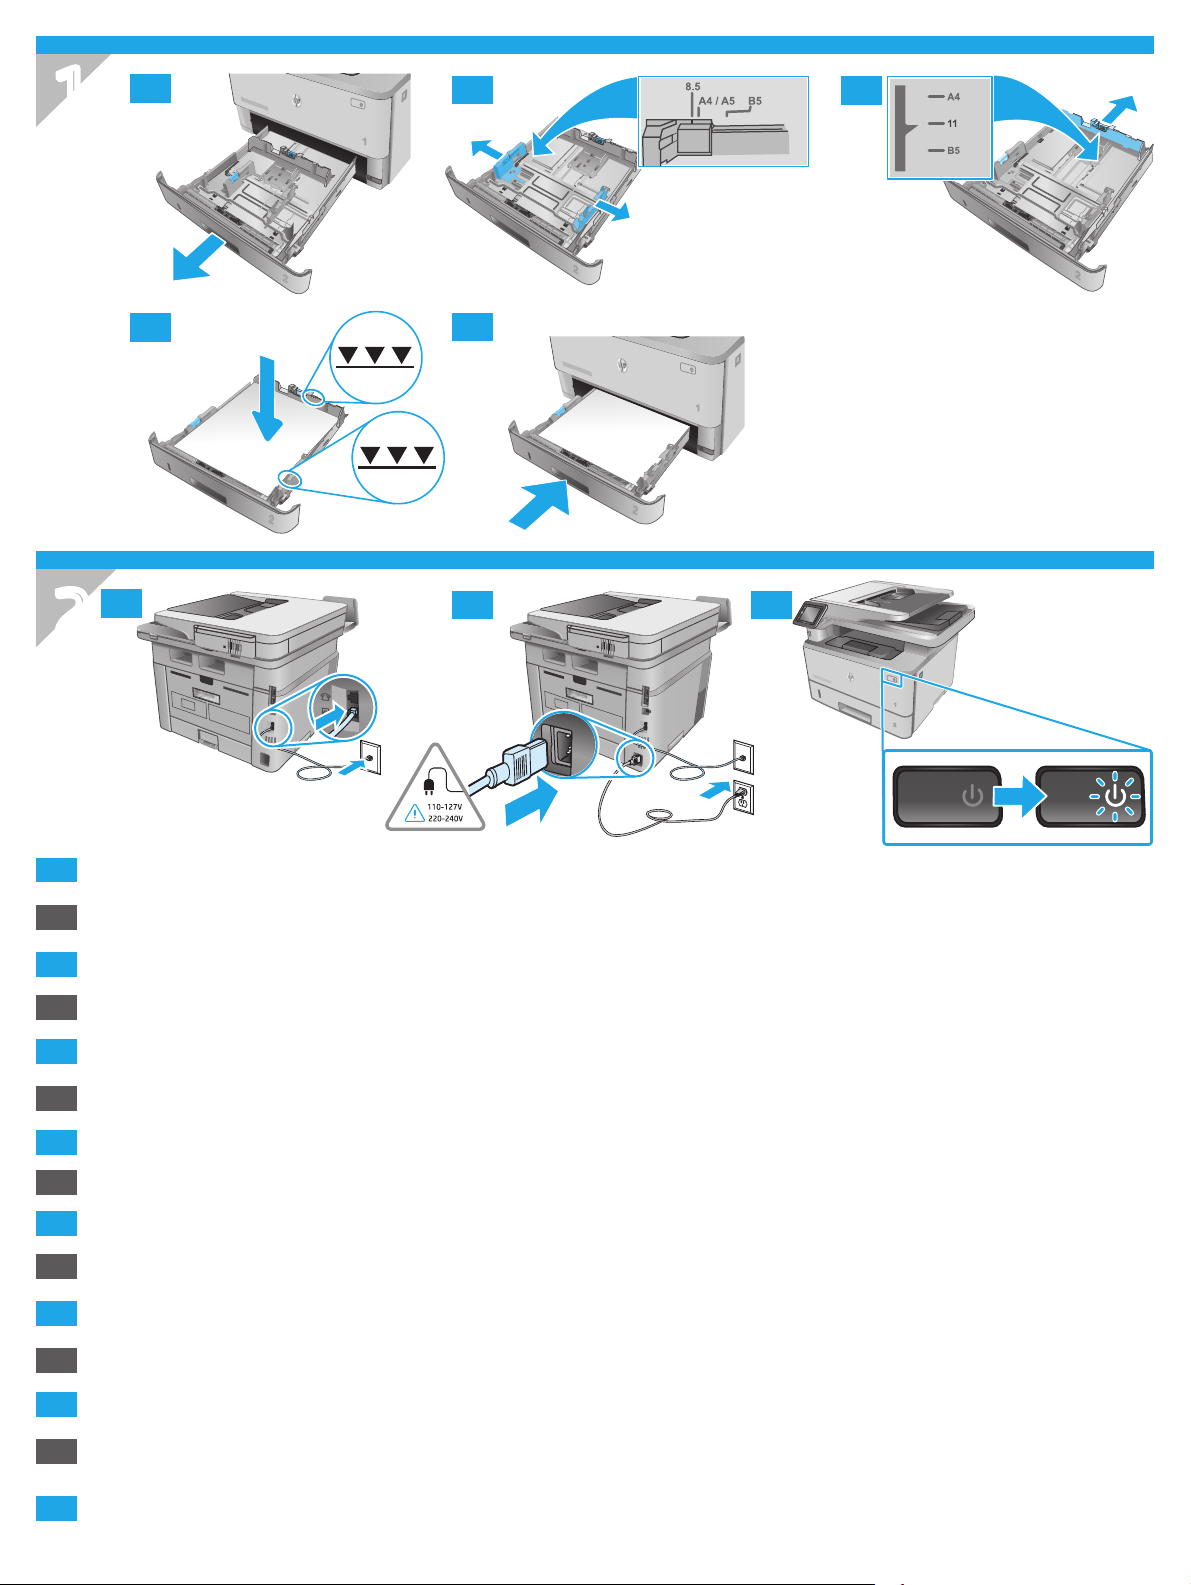
CAUTION: To prevent damage to the printer, use only the power cord that is provided with the printer.
EN
ATTENTION: An d’éviter d’endommager l’imprimante, utilisez uniquement le cordon d’alimentation fourni avec le produit.
FR
VORSICHT: Um Schäden am Drucker zu vermeiden, sollten Sie ausschließlich das Netzkabel verwenden, das im Lieferumfang des Druckers enthalten ist.
DE
ATTENZIONE: Per evitare di danneggiare la stampante, utilizzare solo il cavo di alimentazione fornito in dotazione.
IT
PRECAUCIÓN: Para evitar daños a la impresora, utilice solo el cable de alimentación que se proporciona con ella.
ES
ADVERTENCIA: Para evitar daños en el producto, en áreas en las que se utilice 110 V y 220 V, verique el voltaje del enchufe.
PRECAUCIÓ: per evitar fer malbé la impressora, utilitzeu només el cable d’alimentació que s’hi inclou.
CA
ADVARSEL: Hvis du vil forhindre beskadigelse af printeren, skal du kun bruge den netledning, der fulgte med printeren.
DA
WAARSCHUWING: Gebruik alleen het bij de printer geleverde netsnoer om schade aan de printer te voorkomen.
NL
ETTEVAATUST! Printeri kahjustuste vältimiseks kasutage ainult printeriga kaasas olevat toitejuhet.
ET
MUISTUTUS: Älä käytä muuta kuin tulostimen mukana toimitettua virtajohtoa. Muutoin tulostin voi vahingoittua.
FI
UZMANĪBU! Lai nesabojātu printeri, izmantojiet tikai printera komplektā iekļauto strāvas vadu.
LV
ĮSPĖJIMAS. Kad nesugadintumėte spausdintuvo, naudokite tik su spausdintuvu pateiktą maitinimo laidą.
LT
FORSIKTIG: Bruk bare strømledningen som følger med skriveren, slik at du ikke skader skriveren.
NO
CUIDADO: Para evitar danos à impressora, utilize somente o cabo de alimentação fornecido com a impressora.
PT
AVISO: Para impedir danos ao produto, em áreas onde 110 V e 220 V estiverem em uso, verique a tensão da tomada.
VARNING: Undvik skada på skrivaren genom att endast använda strömkabeln som medföljde skrivaren.
SV
2
Page 3
LaserJet Pro MFP M329, M428-M429
English................. 3
Français ............... 6
Getting Started Guide
NOTE: Internet connection is required to set up the printer and download the software driver.
FAQ
For frequently asked questions, go to www.hp.com/support/ljM428MFPFAQ or
scan the QR code.
3. Initial setup on the control panel
After turning on the printer, wait for it to initialize. To navigate the control panel, use touch, swipe, and scroll gestures. Follow the
prompts on the control panel to congure these settings:
• Language
• Location
• Printer Setup Environment
Select one of these options:
• Self-managed: Optimized default settings for most users that include guided setup and conguration steps and
automatic updates.
• IT-managed: Optimized default settings for eet manageability.
Deutsch ............... 9
Italiano .............. 12
Español ............. 15
Català ................ 18
Dansk ................ 21
Nederlands ........ 24
Eesti................... 27
Suomi ................ 30
Latviešu ............. 33
Lietuvių ............. 36
Norsk ................. 39
Português ......... 42
Svenska ............. 45
Settings are fully customizable after initial setup.
4. Download and install the software
NOTE: Do not connect the USB cable until you are prompted to do so.
Method 1: Download HP Easy Start (Windows and
Mac OS)
1. Go to 123.hp.com/laserjet, and click Download.
2. Follow the onscreen instructions and prompts to save the le to the
computer.
3. Launch the software le from the folder where the le was saved.
4. Follow the onscreen instructions to install the software.
5. When prompted to select a connection type, select the appropriate
option for the type of connection.
Tips: Connect the printer to a wireless network (wireless models only)
1. From the Home screen on the printer control panel, swipe the tab at the top of the screen downward to open the Dashboard, and then touch
(Wireless).
2. Touch
3. Touch Wireless Settings.
4. Touch Wireless Setup Wizard.
5. Follow the display instructions to complete the setup.
(Setup).
Method 2: Download from printer support website
(Windows and Mac OS)
1. Go to www.hp.com/support/ljM329MFP or
www.hp.com/support/ljM428MFP or www.hp.com/support/ljM429MFP.
2. Select Software and Drivers.
3. Download the software for your printer model and operating system.
4. Launch the software le from the folder where the le was saved.
5. Follow the onscreen instructions to install the software.
6. When prompted to select a connection type, select the appropriate
optionfor the type of connection.
Manually congure the IP address
See the printer user guide for information about conguring the IP address manually. For more information, go to www.hp.com/support/ljM329MFP or
www.hp.com/support/ljM428MFP orwww.hp.com/support/ljM429MFP.
3
Page 4

5.
Mobile printing (Optional)
Method 1: HP Smart
Use the HP Smart app to set up, print, and more.
1. Scan the QR code or go to 123.hp.com.
2. Install the HP Smart app.
3. Run the HP Smart app and follow the onscreen instructions to connect, set up, print, and more.
Method 2: Wi-Fi Direct (wireless models only)
Wi-Fi Direct allows Wi-Fi capable devices, such as smart phones, tablets, or computers, to make a wireless network connection directly to the printer without
using a wireless router or access point. Connect to the printer’s Wi-Fi Direct signal the same way Wi-Fi capable devices are connected to a new wireless
network or hotspot.
Enable Wi-Fi Direct
1. From the Home screen on the printer control panel, swipe the tab at the
top of the screen downward to open the Dashboard, and then touch
(Wi-Fi Direct).
2. Touch
3. If the display shows that Wi-Fi Direct is o, touch Wi-Fi Direct and then
switch it on.
For more information on wireless printing and wireless setup, go to www.hp.com/go/wirelessprinting.
Learn more about mobile printing
(Setup).
Discover the printer
1. From the mobile device, turn on the Wi-Fi, and search for wireless
networks.
2. Select the printer name as it appears on the printer control panel.
The product supports AirPrint and Wi-Fi Direct. For more mobile printing information, scan the QR code or go to
www.hp.com/go/LaserJetMobilePrinting.
6.
6.1
Set up fax (fax models only - optional)
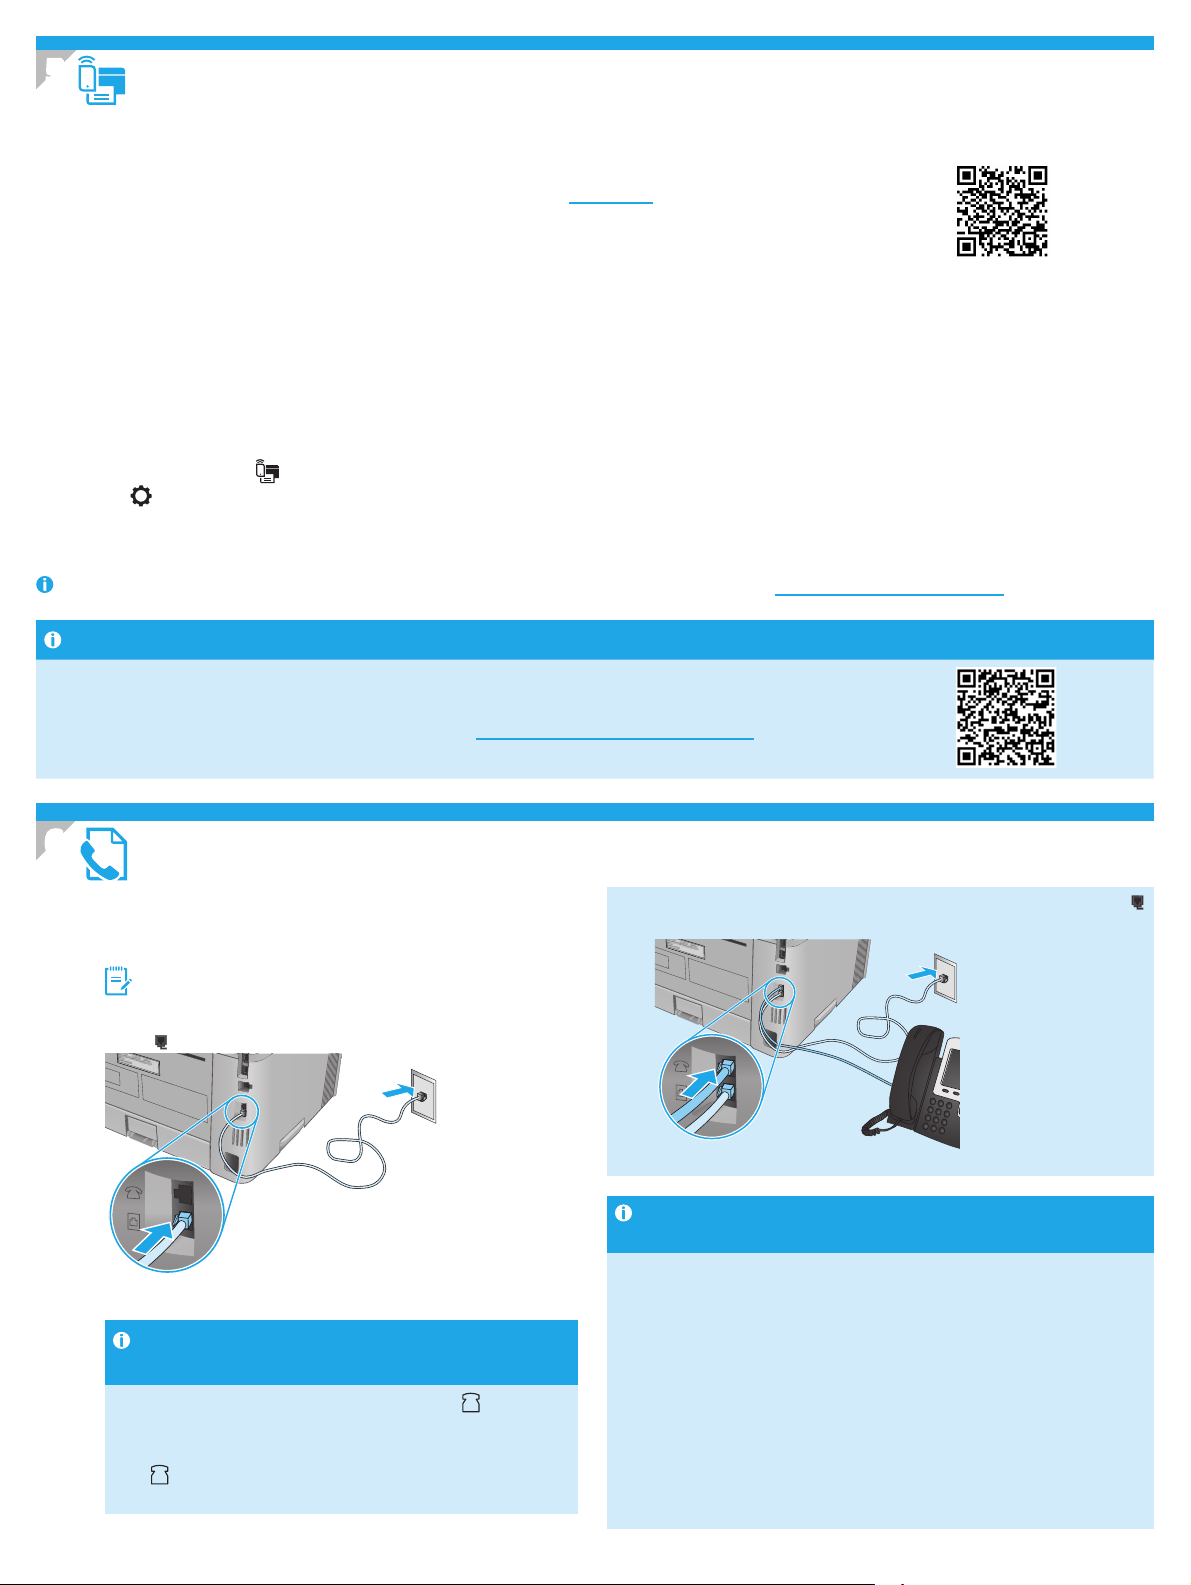
Connect the printer
The printer is an analog device. HP recommends using the printer on
a dedicated analog telephone line.
NOTE: Some countries/regions might require an adapter for the
phone cord that came with the printer.
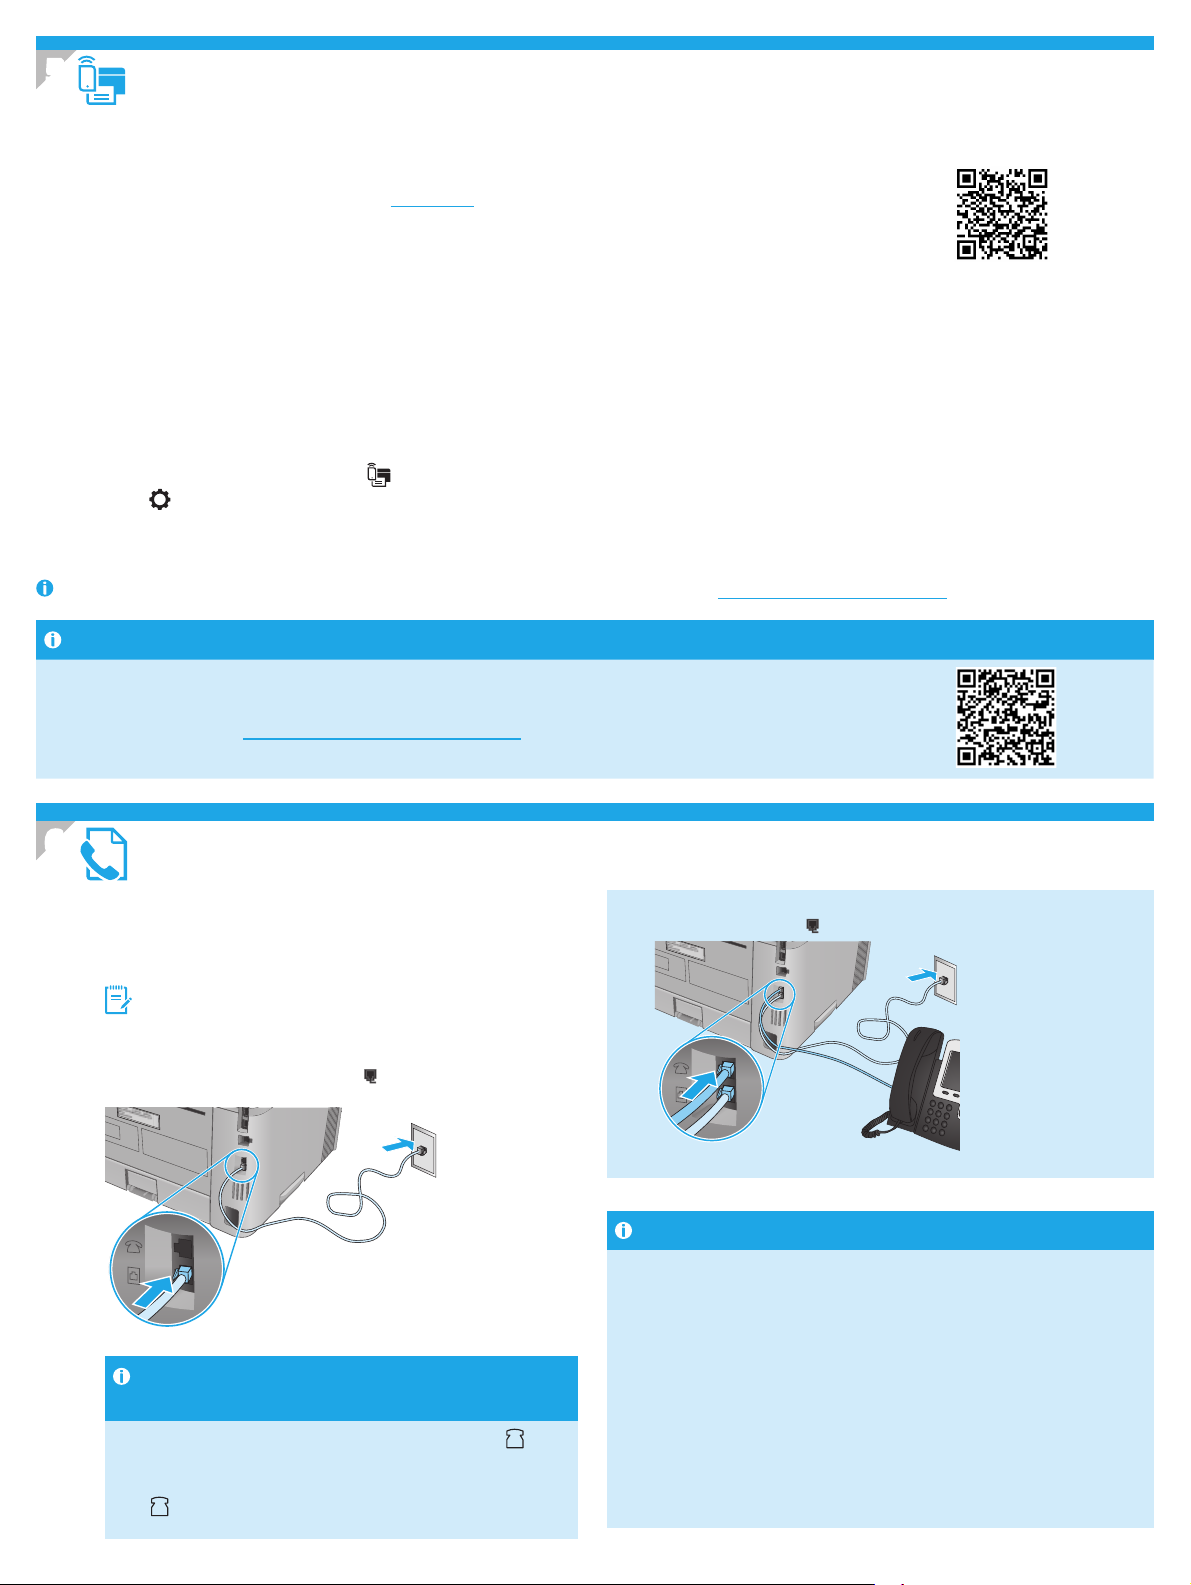
Connect the phone cord that came with the printer to the Fax port
on the printer and to the telephone jack on the wall.
How do I connect an answering machine or extension
phone?
1. Remove the plug from the phone port .
2. Disconnect the answering machine phone cord from the
phone jack, and then connect it to the phone port
printer.
on the
3. Connect the phone cord that came with the printer to the fax port on
the printer and to the telephone jack on the wall.
How do I set up HP printers in digital phone environments?
HP printers are designed specically for use with traditional analog phone
services. For a digital phone environment (such as DSL/ADSL, PBX, ISDN, or
FoIP), digital-to-analog lters or converters might be necessary when setting
up the printer for fax.
Note: Depending on the phone company, the printer might not be
compatible with all digital service lines or providers, in all digital
environments, or with all digital-to-analog converters. Contact the phone
company to determine which setup options are best.
Note: When setting up ring pattern detection in a PBX phone system that has
dierent ring patterns for internal and external calls, make sure to dial the
printer fax number using an external number for recording the ring pattern.
4
Page 5
6.2
Congure the printer
You must congure the fax time, date, and header settings to use the fax feature.
To open HP Fax Setup Wizard (Windows):
1. Open the HP Printer Assistant from Start menu.
2. In the HP Printer Assistant, select Fax, and then select Fax
Setup Wizard.
3. Follow the onscreen instructions to congure the fax settings.
To set up fax date/time:
1. From the Home screen on the printer control panel, swipe the
tab at the top of the screen downward to open the Dashboard.
2. Touch
3. Touch Preferences.
4. Touch Date/time to set up fax date and time.
(Setup) button.
7. Use the scan feature
Use the HP Scan software on your computer to start a scan job at the printer.
Windows
Open HP Printer Assistant, select Scan, and then select Scan a Document
orPhoto.
To set or change the fax header:
1. From the printer control panel display, touch Fax.
2. Touch Setup, and then touch Preferences.
3. Touch Fax Header.
4. Enter your personal or company name, and then touch Done.
5. Enter you fax number, and then touch Done.
NOTE: The maximum number of characters for the fax number is 20.
NOTE: The maximum number of characters for the fax header is 25.
Learn more!
For more information about other ways to send faxes, such as scheduling
afax to be sent later or sending faxes from a computer, see the User Guide
on the web:
• www.hp.com/support/ljM329MFP
• www.hp.com/support/ljM429MFP
Mac OS
Go to the Applications folder and open HP Easy Scan.
Troubleshooting
User Guide
The User Guide includes printer usage and troubleshooting information. It is
available on the Web:
1. Go to www.hp.com/support/ljM329MFP or
www.hp.com/support/ljM428MFP or www.hp.com/support/ljM429MFP.
2. Select the printer if prompted to, and then click User Guides.
Check for rmware updates
1. Go to www.hp.com/support/ljM329MFP or
www.hp.com/support/ljM428MFP or www.hp.com/support/ljM429MFP.
2. If prompted, select the printer, and then click Software and Drivers.
3. Select the operating system, and click the Next button.
4. Select Firmware, and click the Download button.
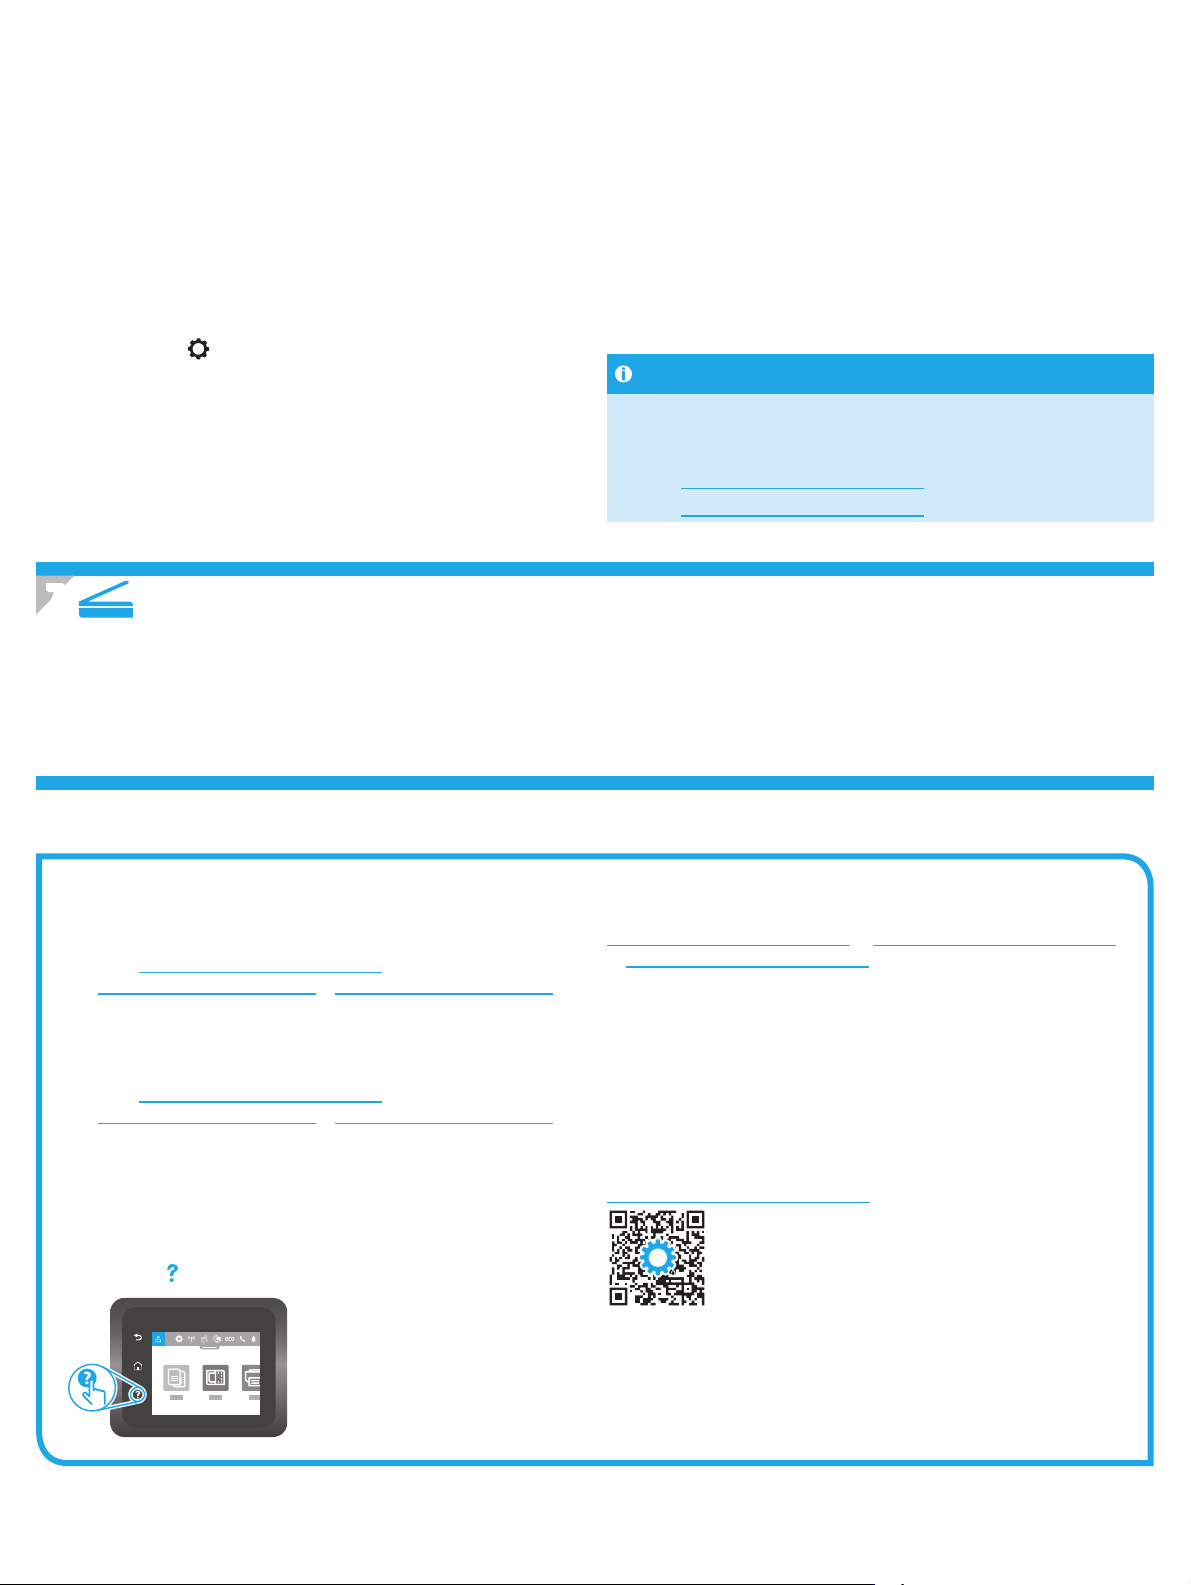
Control panel help
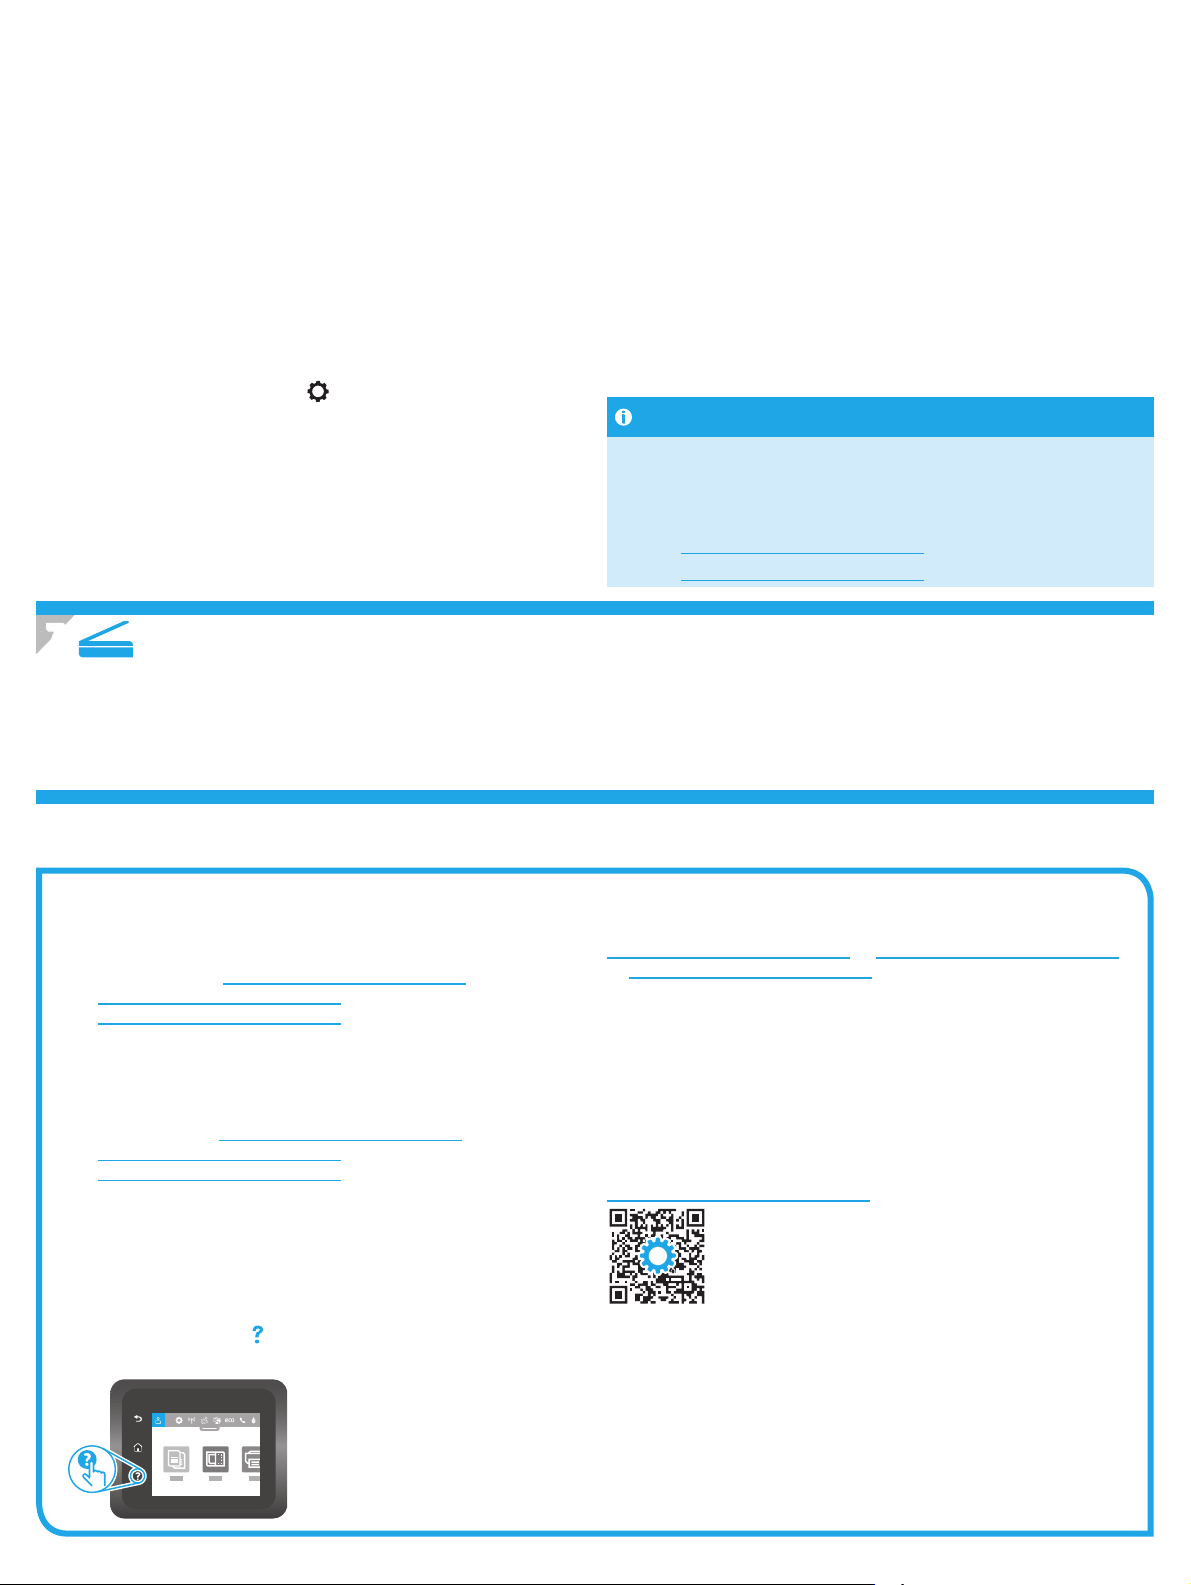
Touch the Help button on the printer control panel to access help topics.
Additional support resources
For HP’s all-inclusive help for the printer, go to
www.hp.com/support/ljM329MFP or www.hp.com/support/ljM428MFP
or www.hp.com/support/ljM429MFP.
• Solve problems
• Find advanced conguration instructions
• Download software updates
• Join support forums
• Find warranty and regulatory information
• Access mobile printing resources
To learn more about the printer, please go to
www.hp.com/support/ljM428MFPFAQ or scan the QR code.
5
Page 6

English............. 3
Français ........... 6
LaserJet Pro MFP M329, M428-M429
Deutsch ........... 9
Italiano .......... 12
Español ......... 15
Català ............ 18
Dansk ............ 21
Nederlands .... 24
Eesti............... 27
Suomi ............ 30
Latviešu ......... 33
Lietuvių ......... 36
Norsk ............. 39
Português ..... 42
Svenska ......... 45
Guide de démarrage
REMARQUE : Une connexion à internet est requise pour congurer l’imprimante et télécharger
le pilote du logiciel.
FAQ
Pour consulter les questions fréquemment posées, rendez-vous à l’adresse
www.hp.com/support/ljM428MFPFAQ ou scannez le code QR.
3. Conguration initiale sur le panneau de commande
Après avoir allumé l’imprimante, attendez son initialisation. Pour naviguer dans le panneau de commande, utilisez des gestes
detoucher, glissement etdélement. Suivez les instructions sur le panneau de commande pour congurer ces paramètres:
• Language (Langue)
• Emplacement
• Environnement de Conguration de l’Imprimante
Sélectionnez l’une des options suivantes:
• Autogéré : paramètres par défaut optimisés pour la plupart des utilisateurs qui incluent des étapes d’installation
etdeconguration guidées et des mises à jour automatiques.
• Géré par le service informatique : paramètres par défaut optimisés pour la facilité d’administration de la otte.
Les paramètres sont entièrement personnalisables après l’installation initiale.
4. Télécharger et installer le logiciel
REMARQUE : Ne connectez pas le câble USB avant d’y avoir été invité.
Méthode 1 : Téléchargez HP Easy Start
(WindowsetOS X)
1. Visitez la page 123.hp.com/laserjet, et cliquez sur Télécharger.
2. Suivez les instructions et les invites à l’écran pour enregistrer lechier
surl’ordinateur.
3. Lancez le chier du logiciel à partir du dossier dans lequel il a été
enregistré.
4. Suivez les instructions à l’écran pour installer le logiciel.
5. Lorsque vous êtes invité à sélectionner un type de connexion,
sélectionnez l’option appropriée pour le type de connexion.
Conseils : Connectez l’imprimante à un réseau sans l (modèles sans l uniquement)
1. Depuis l’écran d’Accueil sur le panneau de commande de l’imprimante, faites glisser vers le bas l’onglet se trouvant en haut de l’écran pour ouvrir
leTableau de Bord, puis appuyez sur
2. Appuyez sur
3. Appuyez sur Paramètres Sans Fil.
4. Appuyez sur Assistant de conguration sans l.
5. Suivez les instructions qui apparaissent à l’écran pour terminer la conguration.
(Conguration).
(Sans Fil).
Méthode 2 : Téléchargez depuis le site Web
d’assistance de l’imprimante (Windows et OS X)
1. Rendez-vous sur www.hp.com/support/ljM329MFP ou
www.hp.com/support/ljM428MFP ou www.hp.com/support/ljM429MFP.
2. Sélectionnez Pilotes et logiciels.
3. Téléchargez le logiciel adapté à votre modèle d’imprimante et à votre
système d’exploitation.
4. Lancez le chier du logiciel à partir du dossier dans lequel il a été enregistré.
5. Suivez les instructions à l’écran pour installer le logiciel.
6. Lorsque vous êtes invité à sélectionner un type de connexion,
sélectionnez l’option appropriée pour le type de connexion.
Congurer manuellement l’adresse IP
Consultez le guide de l’utilisateur de l’imprimante pour obtenir des informations sur la manière de congurer manuellement l’adresse IP. Pour plus
d’informations, rendez-vous sur www.hp.com/support/ljM329MFP ou www.hp.com/support/ljM428MFP ouwww.hp.com/support/ljM429MFP.
6
Page 7
5.
Impression mobile (facultatif)
Méthode 1 : HP Smart
Utilisez l’application HP Smart pour la conguration, l’impression et plus.
1. Scannez le code QR ou consultez 123.hp.com.
2. Installez l’application HP Smart.
3. Exécutez l’application HP Smart et suivez les instructions à l’écran pour connecter, congurer, imprimer et plus.
Méthode 2 : Wi-Fi Direct (modèles sans l uniquement)
Wi-Fi Direct permet aux périphériques Wi-Fi (smartphones, tablettes ou ordinateurs) d’eectuer une connexion réseau sans l directement vers l’imprimante
sans utiliser de routeur sans l ou de point d’accès. Les utilisateurs se connectent au signal d’impression directe Wi-Fi de l’imprimante de la même manière qu’ils
connectent un périphérique Wi-Fi à un nouveau réseau sans l ou à une borne d’accès.
Activer Wi-Fi Direct
1. A partir de l’écran d’Accueil sur le panneau de commande de
l’imprimante, glissez l’onglet en haut de l’écran vers le bas pour ouvrir
leTableau de Bord., puis appuyez sur
2. Appuyez sur
3. Si l’écran indique que la fonction Wi-Fi Direct est désactivé, appuyez sur
Wi-Fi Direct puis activez-la.
Pour en savoir plus d’informations sur l’impression sans l et la conguration sans l, accédez à www.hp.com/go/wirelessprinting.
En savoir plus sur l’impression mobile
(Conguration).
(Wi-Fi Direct).
Détecter l’imprimante
1. Depuis le périphérique mobile, activez le Wi-Fi, puis recherchez des
réseaux sans l.
2. Sélectionnez le nom de l’imprimante tel qu’il s’aiche sur le panneau
decommande de l’imprimante.
Le produit prend en charge AirPrint et Wi-Fi Direct. Pour en savoir plus sur l’impression mobile, numérisez le code QR
ou visitez la page www.hp.com/go/LaserJetMobilePrinting.
6.
6.1
Congurer le télécopieur (modèles de télécopie uniquement-facultatif)
Connexion de l’imprimante
Cette imprimante est un périphérique analogique. HP recommande
de relier l’imprimante à une ligne téléphonique analogique dédiée.
REMARQUE : Dans certains pays/régions, il peut être nécessaire
d’utiliser un adaptateur pour le cordon téléphonique fourni avec
l’imprimante.
Connectez le cordon téléphonique fourni avec l’imprimante au port
de télécopie
Comment puis-je connecter un répondeur ou un
téléphone supplémentaire?
1. Retirez la prise du port du téléphone .
2. Débranchez le cordon téléphonique du répondeur de la prise
sur l’imprimante et à la prise téléphonique murale.
téléphonique, puis connectez-le au port du téléphone
l’imprimante.
sur
3. Connectez le cordon téléphonique fourni avec l’imprimante au port
detélécopie sur l’imprimante et à la prise téléphonique murale.
Comment puis-je congurer les imprimantes HP dans des
environnements de téléphonie numérique?
Les imprimantes HP sont spéciquement conçues pour être utilisées avec
les services téléphoniques analogiques classiques. Pour un environnement
de téléphonie numérique (tels que DSL/ADSL, PBX, ISDN ou FoIP), des ltres
ou des convertisseurs numérique-analogique pourraient être nécessaires
lors de la conguration de l’imprimante pour la télécopie.
Remarque : Selon la compagnie de téléphone, l’imprimante pourrait ne
pas être compatible avec toutes les lignes de services numériques ou tous
les fournisseurs, dans tous les environnements numériques, ou avec tous
les convertisseurs numérique-analogique. Contactez votre compagnie de
téléphone pour déterminer les meilleures options de conguration.
Remarque : Lors de l’installation de la détection de modèle de sonnerie
sur un système téléphonique PBX qui comporte diérents modèles
de sonneries pour les appels internes et externes, assurez-vous de
composer le numéro de télécopie de l’imprimante en utilisant un numéro
externe pour enregistrer le modèle de sonnerie.
7
Page 8
6.2
Conguration de l’imprimante
Vous devez congurer les paramètres d’heure, de date et d’en-tête de télécopie pour utiliser la fonction de télécopie.
Pour ouvrir l’Assistant de conguration du télécopieurHP (Windows):
1. Ouvrez l’Assistant de l’Imprimante HP à partir du menu
Démarrer.
2. Dans l’Assistant d’imprimante HP, sélectionnez Télécopie,
puis Assistant de conguration du télécopieur.
3. Suivez les instructions à l’écran pour congurer les
paramètres de télécopie.
Pour congurer la date/l’heure du télécopieur:
1. A partir de l’écran d’Accueil sur le panneau de commande de
l’imprimante, glissez l’onglet en haut de l’écran vers le bas
pour ouvrir le Tableau de Bord.
2. Appuyez sur le bouton
3. Appuyez sur Préférences.
4. Appuyez sur Date/heure pour congurer l’heure et la date
dutélécopieur.
(Conguration).
Pour congurer ou modier l’en-tête de télécopie:
1. A partir de l’écran du panneau de commande de l’imprimante appuyez
sur Télécopieur.
2. Appuyez sur Conguration, puis sur Préférences.
3. Appuyez sur En-tête de télécopie.
4. Saisissez votre propre nom ou celui de votre société puis appuyez sur
Terminé.
5. Saisissez votre numéro de fax, puis appuyez sur Terminé.
REMARQUE : le nombre maximal de caractères pour un numéro de télécopie
est de20.
REMARQUE : le nombre maximal de caractères pour un en-tête de télécopie
est de25.
Pour en savoir plus
Pour plus d’informations sur d’autres manières de procéder à l’envoi de
télécopies, telles que la planication de l’envoi ultérieur d’une télécopie
ou l’envoi de télécopies depuis un ordinateur, consultez le Guide de
l’utilisateur sur internet :
• www.hp.com/support/ljM329MFP
• www.hp.com/support/ljM429MFP
7. Utiliser la fonction de numérisation
Utilisez le logiciel HP Scan sur votre ordinateur pour lancer un travail de numérisation sur l’imprimante.
Windows
Ouvrez l’Assistant d’imprimante HP, sélectionnez Numériser, puis Numériser
un document ou une photo.
Dépannage
Guide de l’utilisateur
Le guide de l’utilisateur comprend des informations relatives à l’utilisation
de l’imprimante et au dépannage. Il est également disponible sur le Web:
1. Rendez-vous sur www.hp.com/support/ljM329MFP ou
www.hp.com/support/ljM428MFP ou
www.hp.com/support/ljM429MFP.
2. Sélectionnez l’imprimante si vous y êtes invité, puis cliquez sur
Manuels de l’utilisateur.
Recherche des mises à jour de micrologiciels
1. Rendez-vous sur www.hp.com/support/ljM329MFP ou
www.hp.com/support/ljM428MFP ou
www.hp.com/support/ljM429MFP.
2. Si vous y êtes invité, sélectionnez l’imprimante, puis cliquez sur
Logiciel et Pilotes.
3. Sélectionnez le système d’exploitation et cliquez sur le bouton Suivant.
4. Sélectionnez le micrologiciel et cliquez sur le bouton Télécharger.
Mac OS
Accédez au dossier Applications et ouvrez HP Easy Scan.
Ressources d’assistance supplémentaires
Pour l’aide globale de HP relative à l’imprimante, rendez-vous sur
www.hp.com/support/ljM329MFP ou www.hp.com/support/ljM428MFP
ou www.hp.com/support/ljM429MFP.
• Résolution des problèmes
• Recherche d’instructions de conguration avancées
• Téléchargement des mises à jour du logiciel
• Inscription au forum d’assistance
• Recherche d’informations réglementaires et de garantie
• Accès aux ressources d’impression mobile
Pour en savoir plus sur l’imprimante, rendez-vous sur
www.hp.com/support/ljM428MFPFAQ ou scannez le code QR.
Aide du panneau de commande
Appuyez sur le bouton Aide sur le panneau de commande
del’imprimante pour accéder aux rubriques d’aide.
8
Page 9
LaserJet Pro MFP M329, M428-M429
English................. 3
Français ............... 6
Handbuch für die Inbetriebnahme
HINWEIS: Es ist eine Internetverbindung erforderlich, um den Drucker einzurichten und den
Druckertreiber herunterzuladen.
Häug gestellte Fragen
Häug gestellte Fragen nden Sie unter www.hp.com/support/ljM428MFPFAQ
oder scannen Sie den QR-Code.
3. Initialisierungseinrichtung über das Bedienfeld
Warten Sie nach dem Einschalten des Druckers, bis der Drucker initialisiert wurde. Im Bedienfeld können Sie mithilfe von
Finger-, Wisch- und Bildlaufbewegungen navigieren. Befolgen Sie die Anweisungen im Bedienfeld, um folgende Einstellungen
zu kongurieren:
• Sprache
• Position
• Drucker Setup-Umgebung
Wählen Sie eine der folgenden Optionen aus:
• Selbstverwaltet: Für die Benutzerführung optimierte Standardeinstellungen für Einrichtungen und Kongurationen
sowie für Updates.
• IT-verwaltet: Für die Massenverwaltung optimierte Standardeinstellungen.
Deutsch ............... 9
Italiano .............. 12
Español ............. 15
Català ................ 18
Dansk ................ 21
Nederlands ........ 24
Eesti................... 27
Suomi ................ 30
Latviešu ............. 33
Lietuvių ............. 36
Norsk ................. 39
Português ......... 42
Svenska ............. 45
Nach der Ersteinrichtung können alle Einstellungen im vollen Umfang angepasst werden.
4. Download und Installation der Software
HINWEIS: Schließen Sie das USB-Kabel erst an, wenn Sie dazu aufgefordert werden.
Methode 1: Download von HP Easy Start (Windows
und Mac OS)
1. Besuchen Sie die Website 123.hp.com/laserjet, und klicken Sie auf
Download.
2. Befolgen Sie die Anweisungen auf dem Bildschirm, um die Datei auf dem
Computer zu speichern.
3. Starten Sie die Softwaredatei in dem Ordner, in dem die Datei gespeichert
wurde.
4. Befolgen Sie zur Installation der Software die auf dem Bildschirm
angezeigten Anweisungen.
5. Wenn Sie dazu aufgefordert werden, einen Verbindungstyp auszuwählen,
wählen Sie die entsprechende Option für den Verbindungstyp aus.
Tipps: Anschließen des Geräts an ein Drahtlosnetzerk (nur Wireless-Modelle)
1. Wischen Sie vom Startbildschirm des Bedienfeldes des Druckers aus die Registerkarte am oberen Rand des Bildschirms nach unten, um das Dashboard
zu önen, und tippen Sie dann
2. Tippen Sie
3. Tippen Sie Wireless-Einstellungen an.
4. Tippen Sie Einrichtungsassistent für Wireless an.
5. Befolgen Sie die Anweisungen auf dem Display, um das Setup abzuschließen.
(Setup) an.
(Wireless) an.
Methode 2: Herunterladen von der DruckerSupportwebsite (Windows und Mac OS)
1. Besuchen Sie die Website www.hp.com/support/ljM329MFP oder
www.hp.com/support/ljM428MFP oder www.hp.com/support/ljM429MFP.
2. Wählen Sie Software & Treiber aus.
3. Laden Sie die Software für Ihr Druckermodell und Ihr Betriebssystem
herunter.
4. Starten Sie die Softwaredatei in dem Ordner, in dem die Datei gespeichert
wurde.
5. Befolgen Sie zur Installation der Software die auf dem Bildschirm
angezeigten Anweisungen.
6. Wenn Sie dazu aufgefordert werden, einen Verbindungstyp auszuwählen,
wählen Sie die entsprechende Option für den Verbindungstyp aus.
Manuelle Konguration der IP-Adresse
Weitere Informationen zur manuellen Konguration der IP-Adresse nden Sie im Benutzerhandbuch des Druckers. Weitere Informationen nden Sie unter
www.hp.com/support/ljM329MFP oder www.hp.com/support/ljM428MFP oder www.hp.com/support/ljM429MFP.
9
Page 10
5.
Mobiles Drucken (Optional)
Methode1: HP Smart
Verwenden Sie die HP Smart App zum Einrichten, Drucken und mehr.
1. Scannen Sie den QR-Code oder gehen Sie auf 123.hp.com.
2. Installieren Sie die HP Smart App.
3. Führen Sie die HP Smart App aus und befolgen Sie die Anweisungen auf dem Bildschirm zum Herstellen einer Verbindung,
Einrichten, Drucken und mehr.
Methode2: Wi-Fi Direct (nur Wireless-Modelle)
Mit Wi-Fi Direct können WLAN-fähige Geräte wie Smartphones, Tablets oder Computer eine direkte WLAN-Verbindung mit dem herstellen, ohne dass dafür ein
WLAN-Router oder Access Point erforderlich ist. Die Verbindung mit dem Wi-Fi Direct-Signal erfolgt auf dieselbe Weise wie die Verbindung eines WLAN-fähigen
Geräts mit einem neuen Drahtlosnetzwerk oder einem Hotspot.
Aktivieren von Wi-Fi Direct
1. Wischen Sie vom Startbildschirm des Bedienfeldes des Druckers aus
die Registerkarte am oberen Rand des Bildschirms nach unten, um das
Dashboard zu önen, und tippen Sie dann
2. Tippen Sie
3. Wenn auf dem Display angezeigt wird, dass Wi-Fi Direct deaktiviert ist,
dann tippen Sie auf Wi-Fi Direct und aktivieren es.
Weitere Informationen zum drahtlosen Drucken sowie zur drahtlosen Einrichtung gehen Sie auf www.hp.com/go/wirelessprinting.
Weitere Informationen zum mobilen Druck
(Setup) an.
(Wi-Fi Direct) an.
Erkennen des Druckers
1. Aktivieren Sie auf dem Mobilgerät den WLAN-Empfänger und suchen Sie
nach Drahtlosnetzwerken.
2. Wählen Sie den Druckernamen aus, wenn er auf dem Bedienfeld des
Druckers angezeigt wird.
Das Produkt unterstützt AirPrint und Wi-Fi Direct. Für weitere Informationen zum mobilen Drucken scannen Sie den
QR-Code oder gehen Sie auf www.hp.com/go/LaserJetMobilePrinting.
6.
6.1
Faxeinrichtung (nur Faxmodelle - optional)
Anschließen des Druckers
Bei dem Drucker handelt es sich um ein analoges Gerät. HP empehlt,
den Drucker nur an eine speziell dafür vorgesehene analoge
Telefonleitung anzuschließen.
HINWEIS: In einigen Ländern/Regionen ist möglicherweise
ein Adapter für das im Lieferumfang des Druckers enthaltene
Telefonkabel erforderlich.
Verbinden Sie das im Lieferumfang des Druckers enthaltene
Telefonkabel mit dem Faxanschluss
Telefondose.
Wie schließe ich einen Anrufbeantworter oder eine
Nebenstelle an?
1. Entfernen Sie den Stecker vom Telefonanschlusses .
2. Trennen Sie das Telefonkabel des Anrufbeantworters von
der Telefondose, und schließen Sie es am Telefonanschluss
des Druckers an.
am Drucker und mit der
3. Verbinden Sie das im Lieferumfang des Druckers enthaltene Telefonkabel
HPDrucker wurden speziell für die Verwendung mit herkömmlichen
analogen Telefondiensten entwickelt. Zur Einrichtung der Faxfunktion des
Druckers in einer digitalen Telefonumgebung wie DSL/ADSL, PBX, ISDN oder
FoIP ist möglicherweise ein Digital-Analog-Filter oder Konverter erforderlich.
Hinweis: Abhängig vom Telefonanbieter ist der Drucker möglicherweise
nicht mit allen digitalen Dienstleitungen oder Anbietern in allen digitalen
Umgebungen oder mit allen Digital-Analog-Konvertern kompatibel.
Erkundigen Sie sich bei Ihrem Telefonanbieter nach den optimalen
Einrichtungsoptionen.
Hinweis: Wenn Sie eine Ruftonmuster-Erkennung in einem PBX-Telefonsystem
einrichten, das unterschiedliche Ruftonmuster für interne und externe Anrufe
verwendet, müssen Sie zum Aufzeichnen des Ruftonmusters die Faxnummer
des Druckers über eine externe Nummer wählen.
mit dem Faxanschluss
Wie richte ich HPDrucker in digitalen Telefonumgebungen ein?
am Drucker und mit der Telefondose.
10
Page 11
6.2
Kongurieren des Druckers
Für die Nutzung der Faxfunktion müssen Uhrzeit, Datum und Kopfzeileneinstellungen eingestellt sein.
HPFaxeinrichtungsassistenten önen (Windows)
1. Önen Sie den HPFaxeinrichtungsassistenten vom
Startmenü aus.
2. Wählen Sie im HPDruckerassistenten die Option Fax und
anschließend Fax-Einrichtungsassistent aus.
3. Befolgen Sie die Bildschirmanweisungen, um die
Faxeinstellungen zu kongurieren.
Zum Einstellen von Datum/Uhrzeit:
1. Wischen Sie vom Startbildschirm aus dem Bedienfeld des
Druckers die Registerkarte am oberen Rand der Bildschirms
nach unten, um das Dashboard zu önen.
2. Tippen Sie die Schaltäche
3. Tippen Sie Einstellungen an.
4. Tippen Sie Datum/Uhrzeit an, um Datum und Uhrzeit
einzustellen.
(Setup) an.
Zum Ändern des Faxkopfzeile:
1. Tippen Sie von der Bedienfeldanzeige des Druckers aus Fax an.
2. Tippen Sie Setup und dann Einstellungen an.
3. Tippen Sie Faxkopfzeile an.
4. Geben Sie Ihren eigenen Namen oder den Firmennamen ein und tippen
Sie Fertig an.
5. Geben Sie Ihre Faxnummer ein und tippen Sie dann Fertig an.
HINWEIS: Eine Faxnummer darf höchstens 20Zeichen enthalten.
HINWEIS: Eine Faxkopfzeile darf höchstens 25Zeichen enthalten.
Weitere Informationen
Weitere Informationen zu anderen Faxversandmethoden wie der Planung
eines zeitvesetzten Faxversands oder dem Faxversand per Computer nden
Sie im Benutzerhandbuch im Internet:
• www.hp.com/support/ljM329MFP
• www.hp.com/support/ljM429MFP
7. Verwenden der Scanfunktion
Über die HPScan-Software auf dem Computer können Sie einen Scanauftrag auf dem Drucker starten.
Windows
Önen Sie den HPDruckerassistenten und wählen Sie die Option Scannen
und anschließend Dokument oder Foto scannen aus.
Mac OS
Wechseln Sie in den Ordner Anwendungen und önen Sie HP Easy Scan.
Fehlerbehebung
Benutzerhandbuch
Das Benutzerhandbuch enthält Informationen zur Nutzung des Druckers
sowie zur Fehlerbehebung. Es ist im Internet verfügbar:
1. Besuchen Sie die Website www.hp.com/support/ljM329MFP oder
www.hp.com/support/ljM428MFP oder
www.hp.com/support/ljM429MFP.
2. Wählen Sie den Drucker aus, wenn Sie dazu aufgefordert werden,
undklicken Sie anschließend auf Benutzerhandbücher.
Prüfung der Verfügbarkeit von Firmware-Updates
1. Besuchen Sie die Website www.hp.com/support/ljM329MFP oder
www.hp.com/support/ljM428MFP oder
www.hp.com/support/ljM429MFP.
2. Wählen Sie den Drucker aus, wenn Sie dazu aufgefordert werden,
undklicken Sie anschließend auf Software und Treiber.
3. Wählen Sie das Betriebssystem aus und klicken Sie dann auf die
Schaltäche Weiter.
4. Wählen Sie Firmware aus, und klicken Sie dann auf die Schaltäche
Download.
Hilfe zum Bedienfeld
Berühren Sie die Hilfetaste auf dem Bedienfeld des Druckers, um auf die
Hilfethemen zuzugreifen.
Weitere Support-Ressourcen
Eine alles umfassende Hilfe von HP für den Drucker nden Sie unter
www.hp.com/support/ljM329MFP oder www.hp.com/support/ljM428MFP
oder www.hp.com/support/ljM429MFP.
• Lösen von Problemen
• Suchen nach weiteren Kongurationsanweisungen
• Herunterladen von Softwareaktualisierungen
• Beitritt zu Support-Foren
• Suchen nach Garantie- und Zulassungsinformationen
• Zugri auf Druckressourcen für Mobilgeräte
Weitere Informationen zum Drucker erhalten Sie unter
www.hp.com/support/ljM428MFPFAQ oder scannen Sie den QR-Code.
11
Page 12

English............. 3
Français ........... 6
LaserJet Pro MFP M329, M428-M429
Deutsch ........... 9
Italiano .......... 12
Español ......... 15
Català ............ 18
Dansk ............ 21
Nederlands .... 24
Eesti............... 27
Suomi ............ 30
Latviešu ......... 33
Lietuvių ......... 36
Norsk ............. 39
Português ..... 42
Svenska ......... 45
Guida introduttiva
NOTA: è necessaria una connessione Internet per la congurazione della stampante e il download
di software e driver.
Domande frequenti
Per consultare le domande frequenti, visitare la pagina Web all’indirizzo
www.hp.com/support/ljM428MFPFAQ o eettuare la scansione del codice QR.
3. Congurazione iniziale dal pannello di controllo
Dopo aver acceso la stampante, attendere il termine dell’inizializzazione. Per navigare nel pannello di controllo, utilizzare i gesti
ditocco, trascinamento e scorrimento. Seguire i messaggi sul pannello di controllo per congurare le seguenti impostazioni:
• Lingua
• Posizione
• Ambiente di congurazione della stampante
Selezionare una delle opzioni riportate di seguito.
• Autogestito: impostazioni ottimizzate predenite per la maggior parte degli utenti che includono i passaggi
diinstallazione e congurazione e gli aggiornamenti automatici.
• Gestito da IT: impostazioni predenite ottimizzate per gestione del parco macchine.
Dopo la congurazione iniziale, le impostazioni sono completamente personalizzabili.
4. Download e installazione del software
NOTA: non collegare il cavo USB no a quando non è richiesto.
Metodo 1: Download di HP Easy Start (Windows
eMac OS)
1. Visitare la pagina Web all’indirizzo 123.hp.com/laserjet e fare clic su
Download.
2. Seguire le istruzioni e le richieste visualizzate per salvare il le nel computer.
3. Avviare il le del software dalla cartella in cui è stato salvato.
4. Seguire le istruzioni visualizzate per installare il software.
5. Quando viene richiesto di selezionare un tipo di connessione,
selezionare l’opzione appropriata per il tipo di connessione.
Suggerimenti: collegare la stampante a una rete wireless (solo modelli wireless)
1. Dalla schermata Home del pannello di controllo della stampante, trascinare verso il basso la scheda in alto nella schermata per aprire la dashboard,
quindi toccare
2. Toccare
3. Toccare Impostazioni wireless.
4. Toccare Impostazione guidata wireless.
5. Per completare la congurazione, seguire le istruzioni visualizzate.
(Wireless).
(Congura).
Metodo 2: Download dal sito Web di supporto della
stampante (Windows e Mac OS)
1. Visitare la pagina Web all’indirizzo www.hp.com/support/ljM329MFP o
www.hp.com/support/ljM428MFP o www.hp.com/support/ljM429MFP.
2. Selezionare Software e driver.
3. Scaricare il software per il modello di stampante e il sistema
operativoin uso.
4. Avviare il le del software dalla cartella in cui è stato salvato.
5. Seguire le istruzioni visualizzate per installare il software.
6. Quando viene richiesto di selezionare un tipo di connessione,
selezionare l’opzione appropriata per il tipo di connessione.
Congurazione manuale dell’indirizzo IP
Consultare la Guida per l’utente per informazioni sulla congurazione manuale dell’indirizzo IP. Per ulteriori informazioni, visitare la pagina Web all’indirizzo
www.hp.com/support/ljM329MFP o www.hp.com/support/ljM428MFP o www.hp.com/support/ljM429MFP.
12
Page 13
5.
Stampa da dispositivi mobili (facoltativo)
Metodo 1: HP Smart
Utilizzare l’applicazione HP Smart per congurare, stampare e altro ancora.
1. Eseguire la scansione del codice QR o visitare la pagina Web all’indirizzo 123.hp.com.
2. Installare l’app HP Smart.
3. Eseguire l’app HP Smart e seguire le istruzioni visualizzate sullo schermo per connettere, congurare, stampare e altro ancora.
Metodo 2: Wi-Fi Direct (solo modelli wireless)
Wi-Fi Direct consente ai dispositivi con Wi-Fi, quali smartphone, tablet o computer, di stabilire una connessione di rete wireless direttamente con una stampante
senza dover utilizzare un router wireless o un punto di accesso. La connessione avviene tramite il segnale Wi-Fi Direct della stampante in maniera analoga alle
modalità di connessione dei dispositivi Wi-Fi a una nuova rete o un nuovo hotspot wireless.
Abilitare Wi-Fi Direct
1. Dalla schermata Home del pannello di controllo della stampante,
trascinare verso il basso la scheda in alto nella schermata per aprire la
dashboard, quindi toccare
2. Toccare
3. Se lo schermo mostra che Wi-Fi Direct è disattivato, toccare Wi-Fi Direct,
quindi attivarlo.
Per ulteriori informazioni sulla stampa e sulla congurazione wireless, visitare la pagina Web all’indirizzo www.hp.com/go/wirelessprinting.
Maggiori informazioni sulla stampa da dispositivi mobili
(Congura).
(Wi-Fi Direct).
Rilevamento stampante
1. Dal dispositivo mobile, attivare il Wi-Fi e cercare le reti wireless.
2. Selezionare il nome della stampante come visualizzato sul pannello
dicontrollo.
Il prodotto supporta AirPrint e Wi-Fi Direct. Per ulteriori informazioni sulla stampa da dispositivi mobili, eseguire
lascansione del codice QR o visitare la pagina Web all’indirizzo www.hp.com/go/LaserJetMobilePrinting.
6.
6.1
Impostazione del fax (solo modelli con funzione fax, facoltativo)
Collegare la stampante
La stampante è un dispositivo analogico. HP consiglia di utilizzarla
su una linea telefonica analogica dedicata.
NOTA: in alcuni paesi/regioni potrebbe essere necessario
unadattatore per il cavo telefonico fornito con la stampante.
Collegare il cavo telefonico fornito con la stampante alla porta
delfax
della stampante e alla presa del telefono sulla parete.
Come si collega una segreteria telefonica o un
telefono interno?
1. Rimuovere la spina dalla porta del telefono .
2. Scollegare il cavo telefonico della segreteria telefonica
dalla presa del telefono e collegarlo alla porta del telefono
sulla stampante.
3. Collegare il cavo telefonico fornito con la stampante alla porta del fax
della stampante e alla presa del telefono sulla parete.
Come si installano le stampanti HP in un ambiente telefonico
digitale?
Le stampanti HP sono progettate per l’uso con i servizi di telefonia analogici
tradizionali. Per congurare la stampante per la trasmissione di fax in un
ambiente telefonico digitale (ad esempio, DSL/ADSL, PBX, ISDN o FoIP),
potrebbero essere richiesti ltri o convertitori di segnale digitale-analogico.
Nota: a seconda della società telefonica, la stampante potrebbe non essere
compatibile con tutte le linee o tutti i provider di servizi digitali, in tutti gli
ambienti digitali o con tutti i convertitori di segnale digitale-analogico. Per
stabilire le soluzioni di congurazione migliori, contattare la società telefonica.
Nota: quando si congura il rilevamento del tipo di suoneria in un sistema
telefonico PBX con suonerie diverse per le chiamate interne ed esterne,
assicurarsi di comporre il numero di fax della stampante utilizzando un
numero esterno per registrare la suoneria dierenziata.
13
Page 14
6.2
Congurazione della stampante
Per utilizzare la funzione fax, è necessario congurare le impostazioni relative a ora, data e intestazione del fax.
Per aprire la congurazione guidata faxHP (Windows):
1. aprire HP Printer Assistant dal menu Start;
2. in HP Printer Assistant selezionare Fax, quindi Impostazione
guidata fax.
3. Per congurare le impostazioni del fax, attenersi alle istruzioni
visualizzate sulla schermata.
Per impostare data/ora del fax:
1. Dalla schermata Home del pannello di controllo della
stampante, trascinare verso il basso la scheda in alto nella
schermata per aprire la dashboard.
2. Toccare il pulsante
3. Toccare Preferenze.
4. Toccare Data/Ora per impostare data e ora del fax.
(Congura).
Per impostare o modicare l’intestazione del fax:
1. Dallo schermo del pannello di controllo della stampante, toccare Fax.
2. Toccare Congura, quindi toccare Preferenze.
3. Toccare la voce Intestazione fax.
4. Immettere il proprio nome o quello della società, quindi toccare Fine.
5. Immettere il numero del fax, quindi toccare Fine.
NOTA: il numero del fax può essere composto da un massimo di 20 caratteri.
NOTA: le intestazioni del fax possono essere composte da un massimo
di25caratteri.
Maggiori informazioni
Per ulteriori informazioni su altre modalità di invio dei fax, ad esempio la
pianicazione di un fax per l’invio in un secondo momento o l’invio di fax dal
computer, consultare la Guida utente sul Web:
• www.hp.com/support/ljM329MFP
• www.hp.com/support/ljM429MFP
7. Utilizzo della funzione di scansione
Utilizzare il software HP Scan nel computer per avviare un processo di scansione dalla stampante.
Windows
Aprire HP Printer Assistant, selezionare Scansione, quindi selezionare Esegui
scansione di documento o foto.
Mac OS
Andare alla cartella Applicazioni e aprire HP Easy Scan.
Risoluzione dei problemi
Guida per l’utente
La Guida per l’utente comprende informazioni sull’utilizzo e sulla risoluzione
dei problemi della stampante. La suddetta guida è disponibile sul Web:
1. Visitare la pagina Web all’indirizzo www.hp.com/support/ljM329MFP o
www.hp.com/support/ljM428MFP o www.hp.com/support/ljM429MFP.
2. Selezionare la stampante se richiesto, quindi fare clic su Guide per
l’utente.
Ricerca degli aggiornamenti del rmware
1. Visitare la pagina Web all’indirizzo www.hp.com/support/ljM329MFP o
www.hp.com/support/ljM428MFP o www.hp.com/support/ljM429MFP.
2. Se richiesto, selezionare la stampante, quindi fare clic su
Softwaree driver.
3. Selezionare il sistema operativo, quindi fare clic sul pulsante Avanti.
4. Selezionare Firmware, quindi fare clic sul pulsante Download.
Guida del pannello di controllo
Per accedere agli argomenti della Guida, toccare il pulsante Guida sul
pannello di controllo della stampante.
Risorse di supporto aggiuntive
Per la guida completa di HP per la stampante, visitare la pagina
Weball’indirizzo www.hp.com/support/ljM329MFP o
www.hp.com/support/ljM428MFP o www.hp.com/support/ljM429MFP.
• Risoluzione dei problemi
• Ricerca di istruzioni per la congurazione avanzata
• Download di aggiornamenti software
• Registrazione al forum di supporto
• Ricerca di informazioni sulla garanzia e le normative
• Accesso alle risorse per la stampa da dispositivi mobili
Per ulteriori informazioni sulla stampante, visitare la pagina Web
all’indirizzo www.hp.com/support/ljM428MFPFAQ o eettuare la
scansione del codice QR.
14
Page 15
LaserJet Pro MFP M329, M428-M429
English................. 3
Français ............... 6
Guía de introducción
NOTA: Se requiere conexión a Internet para congurar la impresora y descargar el controlador
delsoftware.
Preguntas frecuentes
Para acceder a las preguntas más frecuentes, vaya
a www.hp.com/support/ljM428MFPFAQ o escanee el código QR.
3. Conguración inicial en el panel de control
Después de encender la impresora, espere a que se inicialice. Para navegar por el panel de control, utilice los gestos de tocar,
deslizar y desplazar. Siga las indicaciones del panel de control para congurar estos ajustes:
• Idioma
• Ubicación
• Entorno de conguración de la impresora
Seleccione una de estas opciones:
• Autogestionado: Ajustes predeterminados optimizados para la mayoría de los usuarios que incluyen la conguración
guiada y los pasos deconguración y las actualizaciones automáticas.
• Gestionado por TI: Ajustes predeterminados optimizados para una gestionabilidad de la ota.
Deutsch ............... 9
Italiano .............. 12
Español ............. 15
Català ................ 18
Dansk ................ 21
Nederlands ........ 24
Eesti................... 27
Suomi ................ 30
Latviešu ............. 33
Lietuvių ............. 36
Norsk ................. 39
Português ......... 42
Svenska ............. 45
La conguración puede personalizarse completamente después de la conguración inicial.
4. Descarga e instalación del software
NOTA: No conecte el cable USB hasta que se le indique.
Método 1: Descargue HP Easy Start
(WindowsyMacOS)
1. Vaya a 123.hp.com/laserjet, y haga clic en Descargar.
2. Siga las indicaciones e instrucciones en la pantalla para guardar
elarchivo en el equipo.
3. Inicie el archivo de software de la carpeta en la que se guardó el archivo.
4. Siga las instrucciones en la pantalla para instalar el software.
5. Cuando se le indique que seleccione un tipo de conexión, seleccione
laopción correspondiente para el tipo de conexión.
Consejos: Conecte la impresora a una red inalámbrica (solo modelos inalámbricos)
1. Desde la pantalla de Inicio en el panel de control de la impresora, deslice hacia abajo la pestaña en la parte superior de la pantalla para abrir
elDashboard, y luego toque (Inalámbrico).
2. Toque
3. Toque Conguración inalámbrica.
4. Toque Asistente de conguración inalámbrica.
5. Siga las instrucciones que aparecen en la pantalla para completar la conguración.
(Conguración).
Método 2: Descargue desde el sitio web de
asistencia de la impresora (Windows y Mac OS)
1. Vaya a www.hp.com/support/ljM329MFP o
www.hp.com/support/ljM428MFP o www.hp.com/support/ljM429MFP.
2. Seleccione Software y controladores.
3. Descargue el software para su modelo de impresora y sistema operativo.
4. Inicie el archivo de software de la carpeta en la que se guardó el archivo.
5. Siga las instrucciones en la pantalla para instalar el software.
6. Cuando se le indique que seleccione un tipo de conexión, seleccione
laopción correspondiente para el tipo de conexión.
Conguración manual de la dirección IP
Consulte la guía de usuario de la impresora para obtener información acerca de cómo congurar la dirección IP manualmente. Para ampliar la información,
consulte www.hp.com/support/ljM329MFP o www.hp.com/support/ljM428MFP owww.hp.com/support/ljM429MFP.
15
Page 16

5.
Impresión móvil (opcional)
Método 1: HP Smart
Utilice la aplicación HP Smart para congurar, imprimir y mucho más.
1. Escanee el código QR o vaya a 123.hp.com.
2. Instale la aplicación HP Smart.
3. Ejecute la aplicación HP Smart y siga las instrucciones en la pantalla para conectar, congurar, imprimir y mucho más.
Método 2: Wi-Fi Direct (solo modelos inalámbricos)
Wi-Fi Direct permite que los dispositivos con capacidad Wi-Fi, como por ejemplo, los teléfonos inteligentes, las tablets o los equipos, realicen conexiones de red
inalámbricas directamente a la impresora sin utilizar un router ni un punto de acceso inalámbrico. Conéctese a la señal directa de Wi-Fi Direct de la impresora del
mismo modo que conecta un dispositivo con capacidad Wi-Fi a una red inalámbrica nueva o a un punto de acceso inalámbrico.
Activar Wi-Fi Direct
1. Desde la pantalla de Inicio en el panel de control de la impresora, deslice
hacia abajo la pestaña en la parte superior de la pantalla para abrir
elDashboard, y luego toque
2. Toque
3. Si la pantalla muestra que Wi-Fi Direct está apagado, toque Wi-Fi Direct
yluego enciéndalo.
Para ampliar la información acerca de la impresión inalámbrica y la conguración inalámbrica, visite www.hp.com/go/wirelessprinting.
Obtener más información sobre la impresión móvil
(Conguración).
(Wi-Fi Direct).
Detección de la impresora
1. En el dispositivo móvil, active la conectividad Wi-Fi y busque redes
inalámbricas.
2. Seleccione el nombre de la impresora que se muestra en el panel
decontrol de impresoras.
El producto es compatible con AirPrint y Wi-Fi Direct. Para obtener más información acerca de la impresión móvil,
escanee el código QR o vaya a www.hp.com/go/LaserJetMobilePrinting.
6.
6.1
Conguración de fax (solo para modelos con fax, opcional)
Conexión de la impresora
La impresora es un dispositivo analógico. HP recomienda utilizar
laimpresora con una línea de teléfono analógica exclusiva.
NOTA: En algunos países/regiones podría ser necesario utilizar
el adaptador para cable telefónico incluido con la impresora.
Conecte el cable telefónico suministrado con la impresora al puerto
de la impresora y a la toma telefónica de la pared.
de fax
¿Cómo conecto un contestador o un teléfono con
extensión?
1. Extraiga la clavija del puerto telefónico .
2. Desconecte el cable telefónico del contestador de la toma
telefónica y, a continuación, conéctelo al puerto telefónico
de la impresora.
3. Conecte el cable telefónico suministrado con la impresora al puerto
¿Cómo conguro las impresoras HP en entornos telefónicos
digitales?
Las impresoras HP están especícamente diseñadas para utilizarse
enservicios de telefonía analógica tradicionales. En un entorno telefónico
digital (como DSL/ADSL, PBX, RDSI o FoIP), es posible que sean necesarios
ltros de digital a analógico o convertidores cuando se realice el ajuste
dela impresora para fax.
Nota: En función de la compañía telefónica, es posible que la impresora
no sea compatible con todas las líneas de servicio digital o proveedores,
en todos los entornos digitales ni con todos los convertidores de digital
aanalógico. Póngase en contacto con la compañía telefónica para
determinar qué opciones de conguración son las mejores.
Nota: Cuando ajuste la detección del patrón de tono en un sistema de
teléfono PBX que tenga diferentes patrones de tono para llamadas
internas y externas, asegúrese de marcar el número de fax de la
impresora mediante un número externo para grabar el patrón de tono.
de la impresora y a la toma telefónica de la pared.
defax
16
Page 17

6.2
Conguración de la impresora
Debe congurar los ajustes de hora, fecha y encabezado de fax para utilizar la función de fax.
Para abrir el Asistente de conguración de fax de HP (Windows):
1. Abra el Asistente de la impresora HP desde el menú Inicio.
2. En el Asistente de la impresora HP seleccione Fax y,
acontinuación, seleccione Asistente de conguración de fax.
3. Siga las instrucciones en la pantalla para congurar los
ajustes de fax.
Para congurar la fecha/hora de fax:
1. Desde la pantalla de Inicio en el panel de control de la
impresora, deslice hacia abajo la pestaña en la parte superior
de la pantalla para abrir el Dashboard.
2. Toque el botón
3. Toque Preferencias.
4. Toque Fecha/hora para congurar la fecha y hora de fax.
(Conguración).
Para establecer o cambiar el encabezado de fax:
1. En la pantalla del panel de control de la impresora, toque Fax.
2. Toque Conguración y, a continuación, toque Preferencias.
3. Toque Encabezado de fax.
4. Ingrese su nombre o el de su compañía, y luego toque Hecho.
5. Ingrese su número de fax, y luego toque Hecho.
NOTA: El número máximo de caracteres para el número de fax es de 20.
NOTA: El número máximo de caracteres para el encabezado de fax es de 25.
Obtener más información
Para obtener más información sobre otras maneras de enviar faxes, como
programar un fax para que se envíe más tarde o enviar faxes desde un
equipo, consulte la Guía del usuario en la web:
• www.hp.com/support/ljM329MFP
• www.hp.com/support/ljM429MFP
7. Uso de la función de escaneado
Utilice el software HP Scan en el equipo para iniciar un trabajo de escaneado en la impresora.
Windows
Abra Asistente de la impresora HP, seleccione Escanear y, a continuación,
seleccione Escanear un documento o foto.
Mac OS
Vaya a la carpeta Aplicaciones y abra HP Easy Scan.
Solución de problemas
Guía del usuario
En la Guía del usuario se incluye información sobre el uso de la
impresora y solución de problemas. Está disponible en la web:
1. Vaya a www.hp.com/support/ljM329MFP o
www.hp.com/support/ljM428MFP o
www.hp.com/support/ljM429MFP.
2. Seleccione la impresora si se le solicita y, a continuación, haga clic
enGuías de usuario.
Comprobar las actualizaciones del rmware
1. Vaya a www.hp.com/support/ljM329MFP o
www.hp.com/support/ljM428MFP o
www.hp.com/support/ljM429MFP.
2. Si se le solicita, seleccione la impresora y, a continuación, haga clic
enSoftware y controladores.
3. Seleccione el sistema operativo y haga clic en el botón Siguiente.
4. Seleccione Firmware y haga clic en el botón Descargar.
Ayuda del panel de control
Toque el botón Ayuda en el panel de control de la impresora para
acceder a los temas de ayuda.
Recursos de asistencia adicional
Para obtener ayuda integral de HP para la impresora, vaya
a www.hp.com/support/ljM329MFP o www.hp.com/support/ljM428MFP
o www.hp.com/support/ljM429MFP.
• Solucionar problemas
• Buscar instrucciones de conguración avanzada
• Descargar las actualizaciones de software
• Participar en foros de asistencia
• Cómo encontrar información legal y sobre la garantía
• Acceder a recursos de impresión móvil
Para obtener más información acerca de la impresora, vaya
a www.hp.com/support/ljM428MFPFAQ o escanee el código QR.
17
Page 18

English............. 3
Français ........... 6
LaserJet Pro MFP M329, M428-M429
Deutsch ........... 9
Italiano .......... 12
Español ......... 15
Català ............ 18
Dansk ............ 21
Dansk ............ 21
Nederlands .... 24
Eesti............... 27
Suomi ............ 30
Latviešu ......... 33
Lietuvių ......... 36
Norsk ............. 39
Português ..... 42
Svenska ......... 45
Guia d'inici
NOTA: cal tenir connexió a Internet per poder congurar la impressora i descarregar
elcontrolador del programari.
PMF
Per consultar les qüestions més freqüents, aneu a
www.hp.com/support/ljM428MFPFAQ o escanegeu el codi QR.
3. Conguració inicial al tauler de control
Després d’engegar la impressora, espereu ns que hagi acabat d’inicialitzar-se. Per desplaçar-vos pel tauler de control, feu
simplement els gestos de tocar, lliscar i desplaçar. Seguiu les indicacions del tauler de control per congurar aquests paràmetres:
• Idioma
• Ubicació
• Conguració de l’entorn de la impressora
Seleccioneu una d’aquestes opcions:
• Self-managed (Autogestionat): paràmetres predeterminats optimitzats per a la majoria d’usuaris; inclouen
actualitzacions automàtiques i passos guiats d’instal·lació i conguració.
• IT-managed (Gestionat per TI): paràmetres predeterminats optimitzats per fer anar el producte amb facilitat.
Els paràmetres es poden personalitzar totalment després de la conguració inicial.
4. Descàrrega i instal·lació del programari
NOTA: no connecteu el cableUSB ns que no se us demani durant la instal·lació.
Mètode 1: descàrrega de l’HP Easy Start
(WindowsimacOS)
1. Aneu a 123.hp.com/laserjet i feu clic a Descàrrega.
2. Seguiu les indicacions i instruccions en pantalla per desar el txer
al’ordinador.
3. Inicieu el txer del programari des de la carpeta en què l’hàgiu desat.
4. Seguiu les instruccions en pantalla per instal·lar el programari.
5. Quan se us demani que seleccioneu un tipus de connexió, seleccioneu
l’opció adequada per al tipus de connexió.
Consells: connexió de la impressora a una xarxa sense l (només models sense l)
1. A la pantalla Home (Inici) del tauler de control de la impressora, passeu el dit cap avall a la pestanya que hi ha a la part superior de la pantalla per obrir
eltauler i toqueu l’opció
2. Toqueu
3. Toqueu Wireless Settings (Conguració de la xarxa sense l).
4. Toqueu Wireless Setup Wizard (Assistent de conguració de la xarxa sense l).
5. Seguiu les instruccions en pantalla per completar la conguració.
(Setup) (Conguració).
(Wireless) (Xarxa sense l).
Mètode 2: descàrrega des del lloc web de suport
tècnic de la impressora (Windows i macOS)
1. Aneu a www.hp.com/support/ljM329MFP o
www.hp.com/support/ljM428MFP o www.hp.com/support/ljM429MFP.
2. Seleccioneu Software and Drivers (Programari i controladors).
3. Descarregueu el programari per al vostre model d’impressora
isistema operatiu.
4. Inicieu el txer del programari des de la carpeta en què l’hàgiu desat.
5. Seguiu les instruccions en pantalla per instal·lar el programari.
6. Quan se us demani que seleccioneu un tipus de connexió, seleccioneu
l’opció adequada per al tipus de connexió.
Conguració manual de l’adreça IP
Consulteu la guia de l’usuari de la impressora per obtenir informació sobre la conguració manual de l’adreça IP. Per obtenir més informació, visiteu
www.hp.com/support/ljM329MFP o www.hp.com/support/ljM428MFP o www.hp.com/support/ljM429MFP.
18
Page 19

5.
Impressió mòbil (opcional)
Mètode 1: HP Smart
Utilitzeu l’aplicació HP Smart per fer la conguració, la impressió i altres accions.
1. Escanegeu el codi QR o aneu a 123.hp.com.
2. Instal·leu l’aplicació HP Smart.
3. Executeu l’aplicació HP Smart i seguiu les instruccions en pantalla per fer la connexió, la conguració, la impressió
i altres accions.
Mètode 2: Wi-Fi Direct (només per a models sense l)
El Wi-Fi Direct permet que els dispositius amb capacitat per a Wi-Fi, com ara els telèfons intel·ligents, les tauletes o els ordinadors, estableixin directament
unaconnexió de xarxa sense l amb la impressora, sense haver d’utilitzar un punt d’accés o un encaminador sense l. Connecteu el senyal del Wi-Fi Direct
delaimpressora igual que connecteu els dispositius amb capacitat per a Wi-Fi a un punt d’accés Wi-Fi o a una xarxa sense l nova.
Habilitació del Wi-Fi Direct
1. A la pantalla Home (Inici) del tauler de control de la impressora, passeu
el dit cap avall a la pestanya que hi ha a la part superior de la pantalla per
obrir el tauler i toqueu l’opció
2. Toqueu
3. Si a la pantalla es mostra que l’opció Wi-Fi Direct està desactivada,
toqueuWi-Fi Direct i activeu-la.
Per obtenir més informació sobre la impressió i la conguració sense l, aneu a www.hp.com/go/wirelessprinting.
Més informació sobre la impressió mòbil
El producte admet AirPrint i Wi-Fi Direct. Per obtenir més informació sobre la impressió mòbil, escanegeu el codi QR
oaneu a www.hp.com/go/LaserJetMobilePrinting.
6.
6.1
(Setup) (Conguració).
Conguració del fax (només per models amb fax, opcional)
Connexió de la impressora
La impressora és un dispositiu analògic. HP recomana utilitzar-lo
amb una línia telefònica analògica dedicada.
NOTA: en regions o països determinats, pot ser necessari
unadaptador per al cable de telèfon, inclòs amb la impressora.
Connecteu el cable telefònic subministrat amb la impressora al port
del fax de la impressora i a l’endoll de telèfon de la paret.
(Wi-Fi Direct).
Detecció de la impressora
1. Des del dispositiu mòbil, activeu la Wi-Fi i cerqueu xarxes sense l.
2. Seleccioneu el nom de la impressora tal com es mostra al tauler de
control de la impressora.
3. Connecteu el cable telefònic subministrat amb la impressora al port del
fax de la impressora i a l’endoll de telèfon de la paret.
Com puc connectar un contestador automàtic o un
telèfon d’extensió?
1. Desconnecteu l’endoll del port del telèfon .
2. Desconnecteu el cable telefònic del contestador automàtic
de l’endoll del telèfon i, a continuació, connecteu-lo al port
del telèfon
de la impressora.
Com puc congurar les impressores HP en entorns telefònics
digitals?
Les impressores d’HP estan dissenyades especícament per a l’ús amb
serveis telefònics analògics tradicionals. Per obtenir un entorn telefònic
digital (com ara DSL/ADSL, PBX, ISDN o FoIP), es poden necessitar ltres
oconvertidors digitals-analògics quan es congura la impressora al fax.
Nota: en funció de la companyia telefònica, pot ser que la impressora no
sigui compatible amb totes les línies o proveïdors de serveis digitals, en tots
els entorns digitals o amb tots els convertidors digitals-analògics. Poseuvos en contacte amb la companyia telefònica per determinar quines són les
millors opcions de conguració.
Nota: en congurar la detecció del patró de timbre en un sistema telefònic
PBX que disposi de diferents patrons de timbre per a les trucades internes
iexternes, assegureu-vos de marcar el número de fax impressora
mitjançant un número extern de registre del patró de timbre.
19
Page 20

6.2
Conguració de la impressora
Cal congurar els paràmetres de l’hora, la data i la capçalera del fax per utilitzar-lo.
Per obrir l’Auxiliar de conguració del fax d’HP (Windows):
1. Obriu l’HP Printer Assistant al menú Inicia.
2. A l’HP Printer Assistant, seleccioneu Fax i, a continuació,
seleccioneu Fax Setup Wizard (Assistent de conguració del fax).
3. Seguiu les instruccions en pantalla per congurar els
paràmetres del fax.
Per congurar la data i l’hora del fax:
1. A la pantalla Home (Inici) del tauler de control de la impressora,
passeu el dit cap avall a la pestanya que hi ha a la part superior
de la pantalla per obrir el tauler.
2. Toqueu el botó
3. Toqueu Preferences (Preferències).
4. Toqueu Date/time (Data i hora) per congurar la data i l’hora
del fax.
(Setup) (Conguració).
Per establir o canviar la capçalera de fax:
1. A la pantalla del tauler de control de la impressora, toqueu Fax.
2. Toqueu Setup (Conguració) i Preferences (Preferències).
3. Toqueu Fax Header (Capçalera de fax).
4. Escriviu el vostre nom o el de l’empresa i toqueu Done (Fet).
5. Escriviu el vostre número de fax i toqueu Done (Fet).
NOTA: el nombre màxim de caràcters per al número de fax és de 20.
NOTA: el nombre màxim de caràcters per a la capçalera de fax és de 25.
Més informació
Per obtenir més informació sobre altres maneres d’enviar un fax, com ara la
programació d’un fax per enviar-lo posteriorment o l’enviament d’un fax des
d’un ordinador, consulteu la guia de l’usuari al web:
• www.hp.com/support/ljM329MFP
• www.hp.com/support/ljM429MFP
7. Ús de la característica d’escaneig
Utilitzeu el programari HP Scan a l’ordinador per iniciar una tasca d’escaneig a la impressora.
Windows
Obriu l’HP Printer Assistant, seleccioneu Scan (Escàner) i, a continuació,
seleccioneu Scan a Document or Photo (Escaneja un document o una foto).
macOS
Aneu a la carpeta Aplicacions i obriu HP Easy Scan.
Resolució de problemes
Guia de l’usuari
La guia de l’usuari inclou informació sobre l’ús de la impressora i de
resolució de problemes. Està disponible al web:
1. Aneu a www.hp.com/support/ljM329MFP o
www.hp.com/support/ljM428MFP o www.hp.com/support/ljM429MFP.
2. Si se us demana, seleccioneu la impressora i feu clic a User Guides
(Guies de l’usuari).
Cerca d’actualitzacions de microprogramari
1. Aneu a www.hp.com/support/ljM329MFP o
www.hp.com/support/ljM428MFP o www.hp.com/support/ljM429MFP.
2. Si se us demana, seleccioneu la impressora i feu clic a Software and
Drivers (Programari i controladors).
3. Seleccioneu el sistema operatiu i feu clic al botó Next (Següent).
4. Seleccioneu Firmware (Microprogramari) i feu clic al botó
Download(Descàrrega).
Ajuda del tauler de control
Toqueu el botó d’ajuda al tauler de control de la impressora per accedir
als temes de l’ajuda.
Recursos de suport tècnic addicionals
Si voleu consultar l’ajuda exhaustiva d’HP, visiteu
www.hp.com/support/ljM329MFP o www.hp.com/support/ljM428MFP o
www.hp.com/support/ljM429MFP.
• Resolució de problemes
• Cerca d’instruccions de conguració avançades
• Descàrrega d’actualitzacions de programari
• Informació per unir-se a fòrums de suport tècnic
• Obtenció d’informació normativa i sobre la garantia
• Accés a recursos d’impressió mòbil
Per obtenir més informació sobre la impressora, visiteu
www.hp.com/support/ljM428MFPFAQ o escanegeu el codi QR.
20
Page 21

LaserJet Pro MFP M329, M428-M429
English................. 3
Français ............... 6
Startvejledning
BEMÆRK: Der kræves internetforbindelse for at kongurere printeren og for at hente driveren.
Ofte stillede spørgsmål
Se ofte stillede spørgsmål ved at gå til www.hp.com/support/ljM428MFPFAQ
eller scanne QR-koden.
3. Startopsætning på kontrolpanelet
Når du har tændt printeren, skal du vente på, at den initialiseres. Brug tryk samt svirp- og rullebevægelser for at navigere
påkontrolpanelet. Følg anvisningerne på kontrolpanelet for at kongurere disse indstillinger:
• Language (Sprog)
• Placering
• Opsætningsmiljø for printer
Vælg én af disse indstillinger:
• Egenadministreret: Optimerede standardindstillinger for de este brugere. Disse indstillinger omfatter guidet opsætning
og kongurationstrin og automatiske opdateringer.
• IT-administreret: Optimerede standardindstillinger for administration af printere.
Deutsch ............... 9
Italiano .............. 12
Español ............. 15
Català ................ 18
Dansk ................ 21
Nederlands ........ 24
Eesti................... 27
Suomi ................ 30
Latviešu ............. 33
Lietuvių ............. 36
Norsk ................. 39
Português ......... 42
Svenska ............. 45
Indstillingerne kan brugertilpasses efter den indledende konguration.
4. Download og installation af softwaren
BEMÆRK: Isæt ikke USB-kablet, før du bliver bedt om det.
Metode 1: Download HP Easy Start (Windows
ogMac OS)
1. Gå til 123.hp.com/laserjet, og klik på Download.
2. Følg vejledning og meddelelser på skærmen for at gemme len
påcomputeren.
3. Start softwarelen fra den mappe, hvor len blev gemt.
4. Følg anvisningerne på skærmen for at installere softwaren.
5. Når du bliver bedt om at vælge en tilslutningstype, skal du vælge
denrette valgmulighed for tilslutningstypen.
Tips: Slut printeren til et trådløst netværk (kun trådløse modeller)
1. Fra startskærmen på printerens kontrolpanel skal du swipe fanen øverst i billedet nedad for at åbne dashboardet og derefter trykke på (Trådløs).
2. Tryk på
3. Tryk på Trådløs-indstillinger.
4. Tryk på Guiden for trådløs-indstillinger.
5. Følg anvisningerne på skærmen for at afslutte opsætningen.
(Opsætning).
Metode 2: Download fra webstedet med
printersupport (Windows og Mac OS)
1. Gå til www.hp.com/support/ljM329MFP eller
www.hp.com/support/ljM428MFP eller www.hp.com/support/ljM429MFP.
2. Vælg Software og drivere.
3. Download softwaren til din printermodel og dit operativsystem.
4. Start softwarelen fra den mappe, hvor len blev gemt.
5. Følg anvisningerne på skærmen for at installere softwaren.
6. Når du bliver bedt om at vælge en tilslutningstype, skal du vælge
denrette valgmulighed for tilslutningstypen.
Kongurer IP-adressen manuelt
I printerens brugervejledning kan du nde ere oplysninger om manuel kongurering af IP-adressen. Du kan nde yderligere oplysninger på
www.hp.com/support/ljM329MFP eller www.hp.com/support/ljM428MFP eller www.hp.com/support/ljM429MFP.
21
Page 22

5.
Mobil udskrivning (valgfrit)
Metode 1: HP Smart
Brug appen HP Smart til at kongurere, udskrive og meget mere.
1. Scan QR-koden, eller gå til 123.hp.com.
2. Installer appen HP Smart.
3. Kør appen HP Smart, og følg instruktionerne på skærmen for at oprette forbindelse, kongurere, udskrive og mere.
Metode 2: Wi-Fi Direct (kun trådløse modeller)
Wi-Fi Direct giver wi--enheder som f.eks. smartphones, tablets eller computere mulighed for at få trådløs netværksforbindelse direkte med printeren uden at
skulle bruge en trådløs router eller et adgangspunkt. Opret forbindelse til printerens Wi-Fi Direct-signal på samme måde, som wi--kompatible enheder opretter
forbindelse til et nyt trådløst netværk eller et hotspot.
Aktivér Wi-Fi Direct
1. Fra skærmen Hjem på printerens kontrolpanel skal du swipe fanen
øverst i billedet nedad for at åbne dashboardet og derefter trykke
(Wi-Fi Direct).
på
2. Tryk på
3. Hvis skærmen viser, at Wi-Fi Direct er slået fra, skal du trykke
på Wi-Fi Direct og derefter slå det til.
Yderligere oplysninger om trådløs udskrivning og trådløs opsætning ndes på adressen www.hp.com/go/wirelessprinting.
Få mere at vide om mobil udskrivning
(Opsætning).
Registrer printeren
1. Aktivér wif- fra mobilenheden, og søg efter trådløse netværk.
2. Vælg printerens navn, når det vises på printerens kontrolpanel.
Produktet understøtter AirPrint og Wi-Fi Direct. Du kan få ere oplysninger om mobil udskrivning ved at scanne
QR-koden eller gå til www.hp.com/go/LaserJetMobilePrinting.
6.
6.1
Opsætning af fax (kun faxmodeller – valgfrit)
Tilslut printeren
Printeren er en analog enhed. HP anbefaler at bruge printeren
påendedikeret analog telefonlinje.
BEMÆRK! I nogle lande/områder kan det være nødvendigt med
en adapter til den telefonledning, der fulgte med printeren.
Tilslut den telefonledning, der blev leveret sammen med printeren,
til faxporten på printeren og til telefonstikket på væggen.
Hvordan tilslutter jeg en telefonsvarer eller
enekstra telefon?
1. Fjern proppen fra telefonporten .
2. Frakobl telefonsvarerens telefonledning fra telefonstikket,
og tilslut det til telefonporten
på printeren.
3. Tilslut den telefonledning, der blev leveret sammen med printeren,
Hvordan opsætter jeg HP-printere i digitale telefonmiljøer?
HP-printere er specikt designet til brug sammen med traditionelle analoge
telefontjenester. Til et digitalt telefonmiljø (f.eks. DSL/ADSL, PBX, ISDN eller
FoIP) kan digital-til-analog-ltre eller konvertere blive nødvendige, når du
kongurerer printeren til fax.
Bemærk! Afhængigt af telefonselskabet er printeren måske ikke kompatibel
med alle digitale servicelinjer eller -udbydere i alle digitale miljøer eller med
alle digital-til-analog-konvertere. Kontakt telefonselskabet for at nde ud af,
hvilke opsætningsmuligheder der er bedst.
Bemærk! Når du kongurerer registrering af et opkaldsmønster i et PBXtelefonsystem, der har forskellige opkaldsmønstre for interne og eksterne
opkald, skal du sørge for at ringe til printerens faxnummer ved brug af et
eksternt nummer for at optage opkaldsmønsteret.
tilfaxporten på printeren og til telefonstikket på væggen.
22
Page 23

6.2
Kongurer printeren
Du skal kongurere indstillingerne for faxens klokkeslæt, dato og sidehoved for at kunne bruge faxfunktionen.
Brug af guiden HP Fax-opsætning (Windows)
1. Åbn HP Printer Assistant fra menuen Start.
2. I HP Printer Assistant skal du vælge Fax og derefter vælge
guiden Faxopsætning.
3. Følg vejledningen på skærmen for at kongurere
faxindstillingerne.
Sådan indstilles dato og klokkeslæt for faxen:
1. Fra startskærmen (Home) på printerens kontrolpanel skal
du swipe fanen øverst på skærmen nedad for at åbne
dashboardet.
2. Tryk på knappen
3. Tryk på Foretrukne.
4. Tryk på Dato/klokkeslæt for at indstille faxens dato
ogklokkeslæt.
(Opsætning).
7. Brug scanningsfunktionen
Brug HP Scan-softwaren på din computer til at starte et scanningsjob på printeren.
Windows
Åbn HP Printer Assistant, vælg Scan, og vælg derefter Scan et dokument
eller billede.
Sådan indstilles eller ændres fax-hovedet:
1. Tryk på Fax på displayet på printerens kontrolpanel.
2. Tryk på Opsætning, og tryk derefter på Foretrukne.
3. Tryk på Fax-hoved.
4. Indtast dit eget navn eller rmaets navn, og tryk på Fuldfør.
5. Indtast dit faxnummer, og tryk derefter på Fuldfør.
BEMÆRK: Det maksimalt tilladte antal tegn i et faxnummer er 20.
BEMÆRK: Det maksimalt tilladte antal tegn i et faxhoved er 25.
Få mere at vide!
Hvis du ønsker ere oplysninger om andre metoder til at sende faxer
som f.eks. planlægning af at sende en fax senere eller sende faxer fra
encomputer, kan du se brugervejledningen på:
• www.hp.com/support/ljM329MFP
• www.hp.com/support/ljM429MFP
Mac OS X
Gå til mappen Programmer, og åbn HP Easy Scan.
Fejlnding
Brugervejledning
Brugervejledningen indeholder oplysninger om printeranvendelse
ogfejlnding. Den er tilgængelig på web:
1. Gå til www.hp.com/support/ljM329MFP eller
www.hp.com/support/ljM428MFP eller
www.hp.com/support/ljM429MFP.
2. Vælg printeren, hvis du bliver bedt om det, og klik derefter
påBrugervejledninger.
Søg efter rmwareopdateringer
1. Gå til www.hp.com/support/ljM329MFP eller
www.hp.com/support/ljM428MFP eller
www.hp.com/support/ljM429MFP.
2. Vælg printeren, hvis du bliver bedt om det, og klik derefter
påSoftware og drivere.
3. Vælg operativsystemet, og klik på knappen Næste.
4. Vælg Firmware, og klik derefter på knappen Download.
Hjælp til kontrolpanel
Tryk på knappen Hjælp på printerens kontrolpanel for at få adgang
tilhjælpeemner.
Yderligere supportressourcer
Du kan nde HP’s komplette hjælp til printeren på
www.hp.com/support/ljM329MFP eller www.hp.com/support/ljM428MFP
eller www.hp.com/support/ljM429MFP.
• Løs problemer
• Søg efter avancerede kongurationsanvisninger
• Download softwareopdateringer
• Deltag i supportfora
• Find garantioplysninger og lovgivningsmæssige oplysninger
• Få adgang til mobiludskrivningsressourcer
Du kan lære mere om printeren på www.hp.com/support/ljM428MFPFAQ
eller ved at scanne QR-koden.
23
Page 24

English............. 3
Français ........... 6
LaserJet Pro MFP M329, M428-M429
Deutsch ........... 9
Italiano .......... 12
Español ......... 15
Català ............ 18
Dansk ............ 21
Nederlands .... 24
Eesti............... 27
Suomi ............ 30
Latviešu ......... 33
Lietuvių ......... 36
Norsk ............. 39
Português ..... 42
Svenska ......... 45
Aan de slag
OPMERKING: Internetverbinding is vereist om de printer te installeren en het
softwarestuurprogramma te downloaden.
Veelgestelde vragen
Voor antwoorden op veelgestelde vragen gaat u naar
www.hp.com/support/ljM428MFPFAQ of scant u de QR-code.
3. Eerste installatie op het bedieningspaneel
Na het inschakelen van de printer wacht u totdat deze is geïnitialiseerd. Gebruik touch-, veeg- en scrolbewegingen om te
navigeren door het bedieningspaneel. Volg de prompts op het bedieningspaneel om deze instellingen te congureren:
• Language (Taal)
• Location (Locatie)
• Printer Setup Environment (Printerinstallatieomgeving)
Selecteer een van deze opties:
• Self-managed (Zelfbeheerd): Geoptimaliseerde standaardinstellingen voor de meeste gebruikers, inclusief stappen voor
begeleide installatie en conguratie en automatische updates.
• IT-managed (IT-beheerd): Geoptimaliseerde standaardinstellingen voor apparatuurbeheer.
Instellingen kunnen na de eerste installatie volledig worden aangepast.
4. Software downloaden en installeren
OPMERKING: Sluit de USB-kabel niet aan totdat u daarom wordt gevraagd.
Methode 1: HP Easy Start downloaden (Windows en
Mac OS)
1. Ga naar 123.hp.com/laserjet en klik op Downloaden.
2. Volg de instructies op het scherm en prompts om het bestand op te slaan
op de computer.
3. Start het softwarebestand vanuit de map waar het bestand is opgeslagen.
4. Volg de instructies op het scherm om de software te installeren.
5. Wanneer u wordt gevraagd om een verbindingstype te selecteren,
selecteert u de passende optie voor het type verbinding.
Tips: Printer verbinden met een draadloos netwerk (alleen draadloze modellen)
1. Vanaf het beginscherm op het bedieningspaneel van de printer veegt u het tabblad bovenaan het scherm omlaag om het dashboard te openen.
Vervolgens raakt u
2. Raak
3. Raak Wireless Settings (Draadloze instellingen) aan.
4. Raak Wireless Setup Wizard (Wizard Draadloos instellen) aan.
5. Volg de instructies op het scherm om de installatie te voltooien.
(Instellingen) aan.
(Draadloos) aan.
Methode 2: Downloaden van website voor
printerondersteuning (Windows en Mac OS)
1. Ga naar www.hp.com/support/ljM329MFP of
www.hp.com/support/ljM428MFP of www.hp.com/support/ljM429MFP.
2. Selecteer Software en drivers.
3. Download de software voor uw printermodel en besturingssysteem.
4. Start het softwarebestand vanuit de map waar het bestand is opgeslagen.
5. Volg de instructies op het scherm om de software te installeren.
6. Wanneer u wordt gevraagd om een verbindingstype te selecteren,
selecteert u de passende optie voor het type verbinding.
IP-adres handmatig congureren
Zie de gebruikershandleiding voor de printer voor informatie over het handmatig congureren van het IP-adres. Voor meer informatie gaat u naar
www.hp.com/support/ljM329MFP of www.hp.com/support/ljM428MFP of www.hp.com/support/ljM429MFP.
24
Page 25

5.
Mobiel afdrukken (optioneel)
Methode 1: HP Smart
Gebruik de HP Smart app om te installeren, af te drukken en meer te doen.
1. Scan de QR-code of ga naar 123.hp.com.
2. Installeer de HP Smart app.
3. Start de HP Smart app en volg de instructies op het scherm om te verbinden, te installeren, af te drukken en meer te doen.
Methode 2: Wi-Fi Direct (alleen draadloze modellen)
Met Wi-Fi Direct kunt u apparaten met Wi-Fi, zoals smartphones, tablets of computers, rechtstreeks met de printer verbinden via een draadloze
netwerkverbinding, dus zonder een draadloze router of toegangspunt te gebruiken. Maak verbinding met het Wi-Fi Direct-signaal van de printer op dezelfde
manier als waarop u apparaten met Wi-Fi verbindt met een nieuw draadloos netwerk of hotspot.
Wi-Fi Direct inschakelen
1. Vanaf het beginscherm op het bedieningspaneel van de printer veegt
uhet tabblad bovenaan het scherm omlaag om het dashboard te
openen. Vervolgens raakt u
2. Raak
3. Als op het scherm wordt weergegeven dat Wi-Fi Direct uit staat, raakt
Voor meer informatie over draadloos afdrukken en draadloze instellingen gaat u naar www.hp.com/go/wirelessprinting.
Meer informatie over mobiel afdrukken
(Instellingen) aan.
uWi-Fi Direct aan en schakelt u het vervolgens in.
(Wi-Fi Direct) aan.
Printer detecteren
1. Vanaf het mobiele apparaat schakelt u de Wi-Fi in en zoekt u naar
draadloze netwerken.
2. Selecteer de printernaam zoals deze verschijnt op het bedieningspaneel
van de printer.
Het product ondersteunt AirPrint en Wi-Fi Direct. Voor meer informatie over mobiel afdrukken scant u de QR-code of
gaat u naar www.hp.com/go/LaserJetMobilePrinting.
6.
6.1
Fax installeren (alleen faxmodellen - optioneel)
Printer aansluiten
De printer is een analoog apparaat. HP beveelt aan de printer op een
vaste analoge telefoonlijn aan te sluiten.
OPMERKING: In bepaalde landen/regio’s is mogelijk een adapter
vereist voor het telefoonsnoer dat bij de printer is geleverd.
Sluit het telefoonsnoer dat bij de printer is geleverd, aan op de
faxpoort op de printer en op de telefoonaansluiting op de wand.
Hoe sluit ik een antwoordapparaat of extra toestel aan?
1. Haal de stekker uit de telefoonpoort .
2. Haal het telefoonsnoer van het antwoordapparaat uit
de telefoonaansluiting en sluit het vervolgens aan op de
telefoonpoort
op de printer.
3. Sluit het telefoonsnoer dat bij de printer is geleverd, aan op de
faxpoort op de printer en op de telefoonaansluiting op de wand.
Hoe stel ik HP printers in digitale telefoonomgevingen in?
HP printers zijn speciek ontworpen voor gebruik met traditionele analoge
telefoonservices. Voor een digitale telefoonomgeving (zoals DSL/ADSL,
PBX, ISDN of FoIP), heeft u misschien digitaal-analooglters of -omzetters
nodig wanneer u de printer instelt voor de fax.
Opmerking: Afhankelijk van de telefoonmaatschappij is de printer mogelijk
niet compatibel met alle digitale servicelijnen of providers, in alle digitale
omgevingen of met alle digitaal-analoogomzetters. Neem contact op met
de telefoonmaatschappij om te bepalen wat de beste installatieopties zijn.
Opmerking: Bij het instellen van belpatroondetectie in een PBX-
telefoonsysteem dat verschillende belpatronen heeft voor interne en externe
oproepen, zorgt u ervoor dat het faxnummer van de printer met een extern
nummer wordt gebeld opdat het juiste belpatroon wordt opgenomen.
25
Page 26

6.2
Printer congureren
Als u de faxfunctie wilt gebruiken, moet u de instellingen voor tijd, datum en koptekst van de fax congureren.
HP Fax Setup Wizard (Wizard HP Fax instellen) openen (Windows):
1. Open de HP Printer Assistant vanuit het menu Start.
2. In de HP Printer Assistant selecteert u Fax en selecteert
uvervolgens Fax Setup Wizard (Wizard Fax instellen).
3. Volg de instructies op het scherm om de faxinstellingen
tecongureren.
Datum/tijd van de fax instellen:
1. Vanaf het beginscherm op het bedieningspaneel van de
printer veegt u het tabblad bovenaan het scherm omlaag
omhet dashboard te openen.
2. Raak de knop
3. Raak Preferences (Voorkeuren) aan.
4. Raak Date/time (Datum/tijd) aan om de datum en tijd van
defax in te stellen.
(Instellingen) aan.
Faxkoptekst instellen of wijzigen:
1. Vanaf het bedieningspaneel van de printer raakt u Fax aan.
2. Raak Setup (Instellingen) aan en raak vervolgens Preferences
3. Raak Fax Header (Faxkoptekst) aan.
4. Voer uw eigen naam of bedrijfsnaam in en raak vervolgens
5. Voer uw faxnummer in en raak vervolgens Done (Gereed) aan.
OPMERKING: Het maximumaantal tekens voor het faxnummer is 20.
OPMERKING: Het maximumaantal tekens voor de faxkoptekst is 25.
Voor meer informatie over andere manieren om faxen te verzenden, zoals
het plannen van een fax zodat deze later wordt verzonden of het verzenden
van een fax vanaf een computer, ziet u de gebruikershandleiding op internet:
7. Scanfunctie gebruiken
Gebruik de HP Scan software op uw computer om een scantaak op de printer te starten.
Windows
Open HP Printer Assistant, selecteer Scan (Scannen) en selecteer vervolgens
Scan a Document or Photo (Een document of foto scannen).
Mac OS
Ga naar de map Programma’s en open HP Easy Scan.
(Voorkeuren) aan.
Done(Gereed) aan.
Meer informatie!
• www.hp.com/support/ljM329MFP
• www.hp.com/support/ljM429MFP
Problemen oplossen
Gebruikershandleiding
De gebruikershandleiding bevat informatie over het gebruik van de printer
en het oplossen van problemen. Het document is beschikbaar op internet:
1. Ga naar www.hp.com/support/ljM329MFP of
www.hp.com/support/ljM428MFP of
www.hp.com/support/ljM429MFP.
2. Selecteer de printer als dat wordt gevraagd en klik vervolgens
opGebruikershandleidingen.
Controleren op rmware-updates
1. Ga naar www.hp.com/support/ljM329MFP of
www.hp.com/support/ljM428MFP of
www.hp.com/support/ljM429MFP.
2. Als dit wordt gevraagd, selecteert u de printer. Vervolgens klikt
uopSoftware en drivers.
3. Selecteer het besturingssysteem en klik op de knop Volgende.
4. Selecteer Firmware en klik op de knop Downloaden.
Help op het bedieningspaneel
Raak de knop Help aan op het bedieningspaneel van de printer
omtoegang te krijgen tot hulponderwerpen.
Extra ondersteuningsbronnen
Voor de uitgebreide hulp van HP voor de printer gaat u naar
www.hp.com/support/ljM329MFP of www.hp.com/support/ljM428MFP of
www.hp.com/support/ljM429MFP.
• Problemen oplossen
• Geavanceerde conguratie-instructies zoeken
• Software-updates downloaden
• Meepraten op ondersteuningsforums
• Informatie over garantie en wettelijke informatie zoeken
• Toegang krijgen tot bronnen voor mobiel afdrukken
Voor meer informatie over de printer gaat u naar
www.hp.com/support/ljM428MFPFAQ of scant u de QR-code.
26
Page 27

LaserJet Pro MFP M329, M428-M429
English................. 3
Français ............... 6
Alustamisjuhend
MÄRKUS. Printeri seadistamiseks ja tarkvaradraiveri allalaadimiseks on vajalik Interneti-ühendus.
KKK
Korduma kippuvate küsimuste lugemiseks minge lehele
www.hp.com/support/ljM428MFPFAQ või skannige QR-kood.
3. Algne häälestus juhtpaneelil
Pärast printeri sisselülitamist oodake, kuni see lähtestub. Juhtpaneelil navigeerimiseks kasutage puute-, nipsamis- ja
kerimisliigutust. Järgige nende sätete kongureerimiseks juhtpaneeli viipasid.
• Keel
• Asukoht
• Printeri seadistamiskeskkond
Valige üks järgmistest suvanditest.
• Self-managed (Isejuhitav): Enamiku kasutajate jaoks sobivad optimeeritud vaikesätted, mis hõlmavad juhistega
installimist ja kongureerimist ning automaatseid värskendusi.
• IT-managed (IT-juhitav): optimeeritud vaikesätted seadmepargi juhtimiseks.
Deutsch ............... 9
Italiano .............. 12
Español ............. 15
Català ................ 18
Dansk ................ 21
Nederlands ........ 24
Eesti................... 27
Suomi ................ 30
Latviešu ............. 33
Lietuvių ............. 36
Norsk ................. 39
Português ......... 42
Svenska ............. 45
Pärast esialgset seadistamist saab sätteid muuta.
4. Tarkvara allalaadimine ja installimine
MÄRKUS. Ärge ühendage USB-kaablit enne, kui teil palutakse seda teha.
Esimene meetod: laadige alla rakendus HP Easy
Start (Windows ja Mac OS)
1. Minge aadressile 123.hp.com/laserjet ja klõpsake nuppu
Download(Laadialla).
2. Järgige faili arvutisse salvestamiseks ekraanil kuvatavaid juhiseid
javiipasid.
3. Käivitage tarkvarafail kaustast, kuhu see salvestati.
4. Tarkvara installimiseks järgige ekraanil kuvatavaid juhiseid.
5. Kui kuvatakse viip, et valida ühenduse tüüp, tehke sobiv ühenduse
tüübi valik.
Näpunäited Printeri ühendamine traadita võrku (ainult traadita ühenduse toega mudelid)
1. Nipsake armatuurlaua avamiseks printeri juhtpaneeli avakuva ekraani ülaosas olevat vahekaarti allapoole ja seejärel puudutage üksust
(Wireless(Traadita ühendus)).
2. Puudutage üksust
3. Puudutage üksust Wireless Settings (Traadita ühenduse sätted).
4. Puudutage üksust Wireless Setup Wizard (Traadita ühenduse seadistusviisard).
5. Järgige seadistuse tegemiseks ekraanijuhiseid.
(Setup (Seadistus)).
2. meetod: laadige alla printeritoe veebilehelt
(Windows ja Mac OS)
1. Minge aadressile www.hp.com/support/ljM329MFP või
www.hp.com/support/ljM428MFP või www.hp.com/support/ljM429MFP.
2. Valige Software and Drivers (Tarkvara ja draiverid).
3. Laadige alla printeri mudeli ja operatsioonisüsteemiga sobiv tarkvara.
4. Käivitage tarkvarafail kaustast, kuhu see salvestati.
5. Tarkvara installimiseks järgige ekraanil kuvatavaid juhiseid.
6. Kui kuvatakse viip, et valida ühenduse tüüp, tehke sobiv ühenduse
tüübi valik.
IP-aadressi käsitsi kongureerimine
IP-aadressi käsitsi kongureerimise teabe saamiseks vaadake printeri kasutusjuhendit. Lisateabe saamiseks külastage aadressi
www.hp.com/support/ljM329MFP või www.hp.com/support/ljM428MFP või www.hp.com/support/ljM429MFP.
27
Page 28

5.
Mobiilne printimine (valikuline)
1. meetod: HP Smart
Kasutage rakendust HP Smart seadistamiseks, printimiseks ja muude toimingute jaoks.
1. Skannige QR-kood või minge aadressile 123.hp.com.
2. Installige rakendus HP Smart.
3. Käivitage rakendus HP Smart ja järgige ühenduse loomiseks, seadistamiseks, printimiseks ja muude toimingute tegemiseks
ekraanil kuvatavaid juhiseid.
2. meetod: Wi-Fi Direct (ainult traadita side ühendusega mudelid)
Wi-Fi Direct võimaldab Wi-Fi-funktsiooniga seadmetel luua traadita võrguühenduse otse printeriga ilma traadita marsruuteri või pääsupunkti kasutamiseta.
Looge ühendus printeri Wi-Fi Directi signaaliga samal viisil, nagu ühendate Wi-Fi-funktsiooniga seadet uue traadita võrgu või pääsupunktiga.
Wi-Fi Directi lubamine
1. Nipsake armatuurlaua avamiseks printeri juhtpaneeli avakuva ekraani
ülaosas olevat vahekaarti allapoole ja seejärel puudutage üksust
(Wi-Fi Direct).
2. Puudutage üksust
3. Kui kuvatakse, et Wi-Fi Direct on välja lülitatud, puudutage üksust
Wi-Fi Direct ja seejärel lülitage see sisse.
Lisateavet juhtmevaba printimise kohta vaadake veebilehelt www.hp.com/go/wirelessprinting.
Lisateave mobiilse printimise kohta
Toode toetab AirPrinti ja Wi-Fi Directi. Mobiilse printimise kohta lisateabe saamiseks skannige QR-kood või minge
aadressile www.hp.com/go/LaserJetMobilePrinting.
6.
6.1
Faksi häälestamine (ainult faksiga mudelid – valikuline)
Printeri ühendamine
See printer on analoogseade. HP soovitab seda printerit kasutada
erianaloogliinil.
MÄRKUS. Konkreetses riigis/piirkonnas on printeriga kaasas
olevale telefonijuhtmele vaja adapterit.
Ühendage printeriga kaasas olev telefonikaabel printeril olevasse
faksiporti
(Setup (Seadistus)).
ja seinas olevasse telefoni pistikupessa.
Printeri avastamine
1. Lülitage mobiiliseadmes sisse Wi-Fi ja otsige traadita võrke.
2. Valige printeri nimi, nagu see on kuvatud printeri juhtpaneelil.
3. Ühendage printeriga kaasas olev telefonikaabel printeril olevasse
faksiporti ja seinas olevasse telefoni pistikupessa.
Kuidas ühendada automaatvastajat
võiparalleeltelefoni?
1. Eemaldage pistik telefonipordist .
2. Eemaldage automaatvastaja telefonijuhe telefonipistikust
jaühendage see printeri telefoniporti
.
Kuidas seadistada HP printer kasutamiseks digitaalse
telefoniliiniga?
HP printerid on spetsiaalselt loodud kasutamiseks koos traditsioonilise
analoogtelefoni teenustega. Digitaalse telefonikeskkonna (nt DSL/ADSL,
PBX, ISDN või FoIP) puhul, peate printeri faksiseadistuste tegemiseks võibolla kasutama digitaal-analoogltreid või konvertereid.
MÄRKUS. Olenevalt telefoniettevõttest ei pruugi printer ühilduda kõikide
digitaalvõrkude ja operaatorite, digitaalkeskkondade ega digitaal-
analoogkonverteritega. Võtke ühendust oma telefoniettevõttega ja küsige
teavet sobivate seadistusvalikute kohta.
MÄRKUS. Kui seadistate helisemismustri tuvastamise PBX-
telefonisüsteemis, mis kasutab eri mustreid sise- ja väliskõnede jaoks, valige
mustri salvestamisel printeri faksinumber kindlasti välisnumbrit kasutades.
28
Page 29

6.2
Printeri kongureerimine
Faksimisfunktsiooni kasutamise jaoks peate kongureerima faksi kellaaja, kuupäeva ja päise sätted.
Rakenduse HPFax Setup Wizard (Windows) (HP faksi
seadistusviisard) avamine
1. Avage menüüs Start rakendus HP Printer Assistant.
2. Tehke rakenduses HP Printer Assistant valik Fax (Faks) ja
seejärel tehke valik Fax Setup Wizard (Faksi seadistusviisard).
3. Faksisätete kongureerimiseks järgige juhiseid ekraanil.
Faksi kuupäeva/aja seadistamine
1. Nipsake armatuurlaua avamiseks printeri juhtpaneeli
avakuva ekraani ülaosas olevat vahekaarti allapoole.
2. Puudutage nuppu
3. Puudutage üksust Preferences (Eelistused).
4. Faksi kuupäeva ja kellaaja seadistamiseks puudutage üksust
Date/time (Kuupäev/kellaaeg).
(Setup (Seadistus)).
7. Kasutage skannimisfunktsiooni
Kasutage printeris skannimistöö alustamiseks oma arvutis HP skannimistarkvara.
Windows
Avage rakendus HP Printer Assistant ja tehke valik Scan (Skannimine) ning
seejärel valik Scan a Document or Photo (Dokumendi või foto skannimine).
Faksi päise määramine või muutmine
1. Puudutage printeri juhtpaneeli kuval üksust Fax (Faks).
2. Puudutage üksust Setup (Seadistus) ja seejärel üksust
Preferences(Eelistused).
3. Puudutage üksust Fax Header (Faksi päis).
4. Sisestage oma isiklik või ettevõtte nimija puudutage üksust Done (Valmis).
5. Sisestage oma faksinumber ja puudutage üksust Done (Valmis).
MÄRKUS. Faksinumber võib olla kuni 20 tärgi pikkune.
MÄRKUS. Faksi päis võib olla kuni 25 tärgi pikkune.
Vaadake lisateavet.
Vaadake lisateavet muude faksi saatmise viiside, näiteks faksi hilisema
saatmise ajastamise või arvutist fakside saatmise kohta veebis olevast
kasutusjuhendist:
• www.hp.com/support/ljM329MFP
• www.hp.com/support/ljM429MFP
Mac OS
Avage kaust Applications (Rakendused) ja valige HP Easy Scan.
Tõrkeotsing
Kasutusjuhend
Kasutusjuhend sisaldab teavet printeri kasutuse ja tõrkeotsingu kohta.
Seeon saadaval veebis.
1. Minge aadressile www.hp.com/support/ljM329MFP või
www.hp.com/support/ljM428MFP või
www.hp.com/support/ljM429MFP.
2. Valige printer, kui teilt seda küsitakse, ja seejärel valige
UserGuides(Kasutusjuhend).
Kontrollige, kas on püsivara uuendusi
1. Minge aadressile www.hp.com/support/ljM329MFP või
www.hp.com/support/ljM428MFP või
www.hp.com/support/ljM429MFP.
2. Kui kuvatakse viip, valige printer ja klõpsake üksust Software and Drivers
(Tarkvara ja draiverid).
3. Valige operatsioonisüsteem ja klõpsake nuppu Next (Järgmine).
4. Valige Firmware (Püsivara) ja klõpsake nuppu Download (Laadi alla).
Juhtpaneeli spikker
Spikriteemade lugemiseks puudutage printeri juhtpaneeli nuppu Help
(Spikker).
Täiendavad tugiressursid
HP-printeri täieliku spikri leiate aadressilt www.hp.com/support/ljM329MFP
või www.hp.com/support/ljM428MFP või www.hp.com/support/ljM429MFP.
• Probleemide lahendamine
• Täpsemate konguratsioonijuhiste teave
• Tarkvarauuenduste allalaadimine
• Tugifoorumites osalemine
• Garantii- ja normatiivteabe saamine
• Juurdepääs mobiilse printimise ressurssidele
Printeri kohta lisateabe saamiseks minge aadressile
www.hp.com/support/ljM428MFPFAQ või skannige QR-kood.
29
Page 30

English............. 3
Français ........... 6
LaserJet Pro MFP M329, M428-M429
Deutsch ........... 9
Italiano .......... 12
Español ......... 15
Català ............ 18
Dansk ............ 21
Nederlands .... 24
Eesti............... 27
Suomi ............ 30
Latviešu ......... 33
Lietuvių ......... 36
Norsk ............. 39
Português ..... 42
Svenska ......... 45
Aloitusopas
HUOMAUTUS: Internet-yhteys on pakollinen tulostimen määrittämiseksi ja ohjelmisto-ohjaimen
lataamiseksi.
Usein kysytyt kysymykset
Usein kysyttyjen kysymysten osalta siirry osoitteeseen
www.hp.com/support/ljM428MFPFAQ tai skannaa QR-koodi.
3. Ohjauspaneelin alkumääritys
Kytke tulostimeen virta ja odota laitteen alustuksen ajan. Voit selata kosketusnäytön ohjauspaneelia kosketus-, pyyhkäisy-, ja
vierityseleillä. Noudata ohjauspaneelin kehotteita ja määritä seuraavat asetukset:
• Kieli
• Sijainti
• Tulostimen määritysympäristö
Valitse yksi näistä vaihtoehdoista:
• Self-managed (Automaattinen hallinta): useimmille käyttäjille sopivat optimaaliset oletusasetukset, jotka sisältävät
ohjatun määrityksen, määritysvaiheet ja automaattiset päivitykset.
• IT-managed (IT-osaston hallinta): suuren laitejoukon hallinnan optimaaliset oletusasetukset.
Asetukset voi mukauttaa täysin alkumäärityksen jälkeen.
4. Ohjelmiston lataaminen ja asentaminen
HUOMAUTUS: Älä liitä USB-kaapelia, ennen kuin saat kehotuksen tehdä niin.
Tapa 1: Lataa HP Easy Start -ohjelmisto
(Windows- ja Mac-käyttöjärjestelmät)
1. Siirry osoitteeseen 123.hp.com/laserjet ja napsauta Lataa.
2. Tallenna tiedosto tietokoneeseen seuraamalla näytön ohjeita ja kehotteita.
3. Käynnistä ohjelmiston tiedosto kansiosta, johon tiedosto tallennettiin.
4. Asenna ohjelmisto näyttöön tulevien ohjeiden mukaan.
5. Kun asennusohjelma pyytää valitsemaan liitäntätyypin, valitse sopiva
vaihtoehto liitäntätyypille.
Vinkkejä: Laitteen liittäminen langattomaan verkkoon (vain langattomat mallit)
1. Pyyhkäise tulostimen ohjauspaneelin aloitusnäytöstä näytön ylälaidassa olevaa välilehteä alaspäin koontinäytön avaamiseksi ja kosketa sitten
(Langaton verkko).
2. Kosketa
3. Kosketa Langattoman verkon asetukset.
4. Kosketa Ohjattu langattoman verkon asennus.
5. Suorita asennus loppuun noudattamalla näytön ohjeita.
(Asennus).
Tapa 2: Lataaminen tulostintuen verkkosivustosta
(Windows- ja Mac-käyttöjärjestelmät)
1. Siirry osoitteeseen www.hp.com/support/ljM329MFP tai
www.hp.com/support/ljM428MFP tai www.hp.com/support/ljM429MFP.
2. Valitse Ohjelmisto ja ohjaimet.
3. Lataa käyttämääsi tulostinmalliin ja käyttöjärjestelmään tarkoitettu
ohjelmisto.
4. Käynnistä ohjelmiston tiedosto kansiosta, johon tiedosto tallennettiin.
5. Asenna ohjelmisto näyttöön tulevien ohjeiden mukaan.
6. Kun asennusohjelma pyytää valitsemaan liitäntätyypin, valitse sopiva
vaihtoehto liitäntätyypille.
IP-osoitteen määrittäminen manuaalisesti
Katso tulostimen käyttöoppaasta tietoja IP-osoitteen määrittämisestä manuaalisesti. Lisätietoja on osoitteessa www.hp.com/support/ljM329MFP tai
www.hp.com/support/ljM428MFP tai www.hp.com/support/ljM429MFP.
30
Page 31

5.
Mobiilitulostus (valinnainen)
Tapa 1: HP Smart
Käytä HP Smart -sovellusta asetusten määrittämiseen, tulostamiseen ja niin edelleen.
1. Skannaa QR-koodi tai siirry osoitteeseen 123.hp.com.
2. Asenna HP Smart -sovellus.
3. Suorita HP Smart -sovellus ja luo yhteys, määritä asetukset, tulosta ja suorita muut toimet näytön ohjeiden mukaan.
Tapa 2: Wi-Fi Direct (vain langattomat mallit)
Wi-Fi Direct -tekniikan avulla laitteet, joissa on langaton verkkoyhteys, kuten älypuhelimet, tabletit ja tietokoneet, voivat muodostaa langattoman verkkoyhteyden
suoraan tulostimeen käyttämättä langatonta reititintä tai liitäntäpistettä. Yhteys tulostimen Wi-Fi Direct -verkkoon muodostetaan samalla tavalla kuin
Wi-Fi-laitteilla muodostetaan yhteys uuteen langattomaan verkkoon tai tukiasemaan.
Wi-Fi Direct -toiminnon ottaminen käyttöön
1. Pyyhkäise tulostimen ohjauspaneelin aloitusnäytöstä näytön ylälaidassa
olevaa välilehteä alaspäin koontinäytön avaamiseksi ja kosketa sitten
(Wi-Fi Direct).
2. Kosketa
3. Jos näytön mukaan Wi-Fi Direct ei ole käytössä, kosketa Wi-Fi Direct
jakytke se sitten päälle.
Lisätietoja langattomasta tulostamisesta ja langattoman verkon asetusten määrittämisestä on osoitteessa www.hp.com/go/wirelessprinting.
Lisätietoja mobiililaitteista tulostamisesta
(Asennus).
Tulostimen löytäminen
1. Ota langaton Wi-Fi-verkkoyhteys käyttöön mobiililaitteessa ja hae
langattomat verkot.
2. Valitse tulostimen nimi, kun se ilmestyy tulostimen ohjauspaneeliin.
Tuote tukee AirPrintiä ja WiFi Directiä. Lisätietoja mobiililaitteista tulostamisesta saat skannaamalla QR-koodin tai
osoitteesta www.hp.com/go/LaserJetMobilePrinting.
6.
6.1
Faksin määrittäminen (vain faksimallit – valinnainen)
Tulostimen yhdistäminen
Tämä tulostin on analoginen. HP suosittelee, että tulostimelle
varataan erillinen, analoginen puhelinlinja.
HUOMAUTUS: Joissakin maissa / joillakin alueilla tarvitaan
puhelinjohtoa varten tulostimen mukana toimitettu sovitin.
Liitä tulostimen mukana tullut puhelinjohto tulostimen
faksiporttiin
Miten liitän puhelinvastaajan tai sivupuhelimen?
1. Poista pistoke puhelinportista .
2. Irrota puhelinvastaajan puhelinjohto puhelinpistorasiasta
ja sitten puhelinpistorasiaan.
jakytke se sitten tulostimen puhelinporttiin
.
3. Liitä tulostimen mukana tullut puhelinjohto tulostimen faksiporttiin
ja sitten puhelinpistorasiaan.
Miten asennan HP-tulostimet digitaalisissa
puhelinympäristöissä?
HP:n tuotteet on suunniteltu käytettäviksi erityisesti perinteisten analogisten
puhelinpalvelujen kanssa. Digitaalisissa puhelinympäristöissä(kuten DSL/
ADSL, PBX, ISDN, tai FoIP) digitaalisesta-analogiseen-suodattimia taimuuntimia saatetaan tarvita asennettaessa tulostinta faksia varten.
Huomautus: Puhelinyhtiöstä riippuen tulostin ei välttämättä ole
yhteensopiva kaikkien digitaalisten palvelulinjojen tai palveluntarjoajien
kanssa kaikissa digitaalisissa ympäristöissä tai kaikkien digitaalisestaanalogiseen-muuntimien kanssa. Ota yhteyttä puhelinyhtiöön
selvittääksesi, mitkä asennusvaihtoehdot ovat parhaita.
Huomautus: Asetettaessa soittoäänentunnistusta PBXpuhelinjärjestelmässä, jolla on erilaiset soittoäänet sisäisille ja ulkoisille
puheluille, muista soittaa tulostimen faksinumeroon ulkoisesta
numerosta soittoäänen tallennusta varten.
31
Page 32

6.2
Tulostimen asetusten määrittäminen
Faksitoiminnon käyttö edellyttää faksin kellonajan, päivämäärän ja ylätunnisteen asetusten määrittämistä.
HP:n ohjatun faksimäärityksen avaaminen (Windows):
1. Avaa HP Printer Assistant -ohjelma Start (Aloitus) -valikosta.
2. Valitse HP Printer Assistant -ohjelmassa Fax (Faksi) ja valitse
sitten Fax Setup Wizard (Ohjattu faksiasennus).
3. Määritä faksiasetukset noudattamalla näytön ohjeita.
Faksin kellonajan/päivämäärän määrittäminen:
1. Pyyhkäise tulostimen ohjauspaneelin aloitusnäytöstä
näytön ylälaidassa olevaa välilehteä alaspäin koontinäytön
avaamiseksi.
2. Kosketa
3. Kosketa Preferences (Asetukset).
4. Kosketa Date/time (Päivämäärä/kellonaika) faksin
päivämäärän ja kellonajan määrittämiseksi.
Setup (Asennus) -painiketta.
7. Skannaustoiminnon käyttäminen
Aloita skannaus tulostimella käyttämällä tietokoneen HP Scan -ohjelmistoa.
Windows
Avaa HP Printer Assistant, valitse Skannaus ja valitse sitten Skannaa asiakirja
tai valokuva.
Faksin ylätunnisteen määrittäminen tai vaihtaminen:
1. Kosketa tulostimen ohjauspaneelin näytöstä Fax (Faksi).
2. Kosketa Setup (Asennus) ja kosketa sitten Preferences (Asetukset).
3. Kosketa Fax Header (Faksin ylätunniste).
4. Kirjoita henkilökohtainen tai yrityksen nimi ja kosketa sitten Done (Valmis).
5. Kirjoita faksinumero ja kosketa sitten Done (Valmis).
HUOMAUTUS: Faksinumeron enimmäismerkkimäärä on 20.
HUOMAUTUS: Faksin ylätunnisteen enimmäismerkkimäärä on 25.
Lisätietoja!
Lisätietoja muista tavoista lähettää fakseja, kuten faksin aikatauluttamisesta
lähettäväksi myöhemmin tai faksin lähettämisestä tietokoneelta, löydät
verkossa olevasta käyttöoppaasta:
• www.hp.com/support/ljM329MFP
• www.hp.com/support/ljM429MFP
Mac-käyttöjärjestelmä
Siirry Sovellukset-kansioon ja avaa HP Easy Scan.
Vianmääritys
Käyttöopas
Käyttöoppaassa on tietoja tulostimen käytöstä ja vianmäärityksestä. Se on
saatavissa verkosta:
1. Siirry osoitteeseen www.hp.com/support/ljM329MFP tai
www.hp.com/support/ljM428MFP tai
www.hp.com/support/ljM429MFP.
2. Valitse tulostin kehotettaessa ja napsauta sitten Käyttöoppaat.
Laiteohjelmiston päivitysten tarkistaminen
1. Siirry osoitteeseen www.hp.com/support/ljM329MFP tai
www.hp.com/support/ljM428MFP tai
www.hp.com/support/ljM429MFP.
2. Valitse tulostin kehotettaessa ja napsauta sitten Ohjelmisto ja ohjaimet.
3. Valitse käyttöjärjestelmä ja napsauta sitten Seuraava-painiketta.
4. Valitse Laiteohjelmisto ja napsauta sitten Lataa-painiketta.
Ohjauspaneelin ohje
Pääset ohjeaiheisiin koskettamalla tulostimen ohjauspaneelin
Ohje -painiketta.
Muut tukisisällöt ja -palvelut
HP:n kattavat tulostinta koskevat ohjeet löytyvät osoitteesta
www.hp.com/support/ljM329MFP tai www.hp.com/support/ljM428MFP tai
www.hp.com/support/ljM429MFP.
• Ongelmien ratkaiseminen
• Lisämäärityksiä koskevat ohjeet
• Ohjelmistopäivitysten lataaminen
• Asiakastukifoorumit
• Tietoja takuusta ja säännöksistä
• Mobiilitulostusresurssit
Lisätietoja tulostimesta saat osoitteesta
www.hp.com/support/ljM428MFPFAQ tai skannaamalla QR-koodin.
32
Page 33

LaserJet Pro MFP M329, M428-M429
English................. 3
Français ............... 6
Darba sākšanas rokasgrāmata
PIEZĪME. Ir nepieciešams interneta pieslēgums, lai iestatītu printeri un lejupielādētu
programmatūras draiveri.
BUJ
Lai skatītu bieži uzdotos jautājumus, atveriet vietnes lapu
www.hp.com/support/ljM428MFPFAQ vai skenējiet QR kodu.
3. Sākotnējā iestatīšana vadības panelī
Pēc printera ieslēgšanas uzgaidiet, līdz tā darbība tiks inicializēta. Lai pārvietotos vadības panelī, izmantojiet pieskāriena, vilkšanas
un ritināšanas žestus. Ievērojiet uzvednes vadības panelī, lai kongurētu tālāk norādītos iestatījumus.
• Language (Valoda)
• Location (Atrašanās vieta)
• Printera iestatīšanas vide
atlasiet vienu no tālāk norādītajām opcijām.
• Self-managed (Pašpārvaldība): optimizēti noklusējuma iestatījumi lielākajai daļai lietotāju, kuros ietverts detalizētas
iestatīšanas un kongurēšanas darbības un automātiskā atjaunināšana.
• IT-managed (ITpārvaldība): optimizēti noklusējuma iestatījumi kolonnas pārvaldībai.
Deutsch ............... 9
Italiano .............. 12
Español ............. 15
Català ................ 18
Dansk ................ 21
Nederlands ........ 24
Eesti................... 27
Suomi ................ 30
Latviešu ............. 33
Lietuvių ............. 36
Norsk ................. 39
Português ......... 42
Svenska ............. 45
Pēc sākotnējās iestatīšanas visus iestatījumus var pielāgot.
4. Programmatūras lejupielāde un instalēšana
PIEZĪME. Nepievienojiet USBkabeli, kamēr tas netiek pieprasīts.
1.metode. HPEasy Start lejupielāde (Windows un
MacOS)
1. Atveriet 123.hp.com/laserjet un noklikšķiniet uz Download (Lejupielādēt).
2. Lai saglabātu failu datorā, izpildiet ekrānā redzamos norādījumus un
norādes.
3. Palaidiet programmatūras failu no mapes, kurā fails saglabāts.
4. Izpildiet ekrānā redzamās instrukcijas, lai instalētu programmatūru.
5. Kad saņemat uzaicinājumu izvēlēties savienojuma veidu, atlasiet
atbilstošā savienojuma veida opciju.
Padomi. Printera pievienošana bezvadu tīklam (tikai bezvadu modeļiem)
1. Printera vadības paneļa sākuma ekrānā pavelciet uz leju ekrāna augšdaļā esošo cilni, lai atvērtu informācijas paneli, un pēc tam pieskarieties
pie vienuma
2. Pieskarieties vienumam
3. Pieskarieties vienumam Wireless Settings (Bezvadu iestatījumi).
4. Pieskarieties vienumam Wireless Setup Wizard (Bezvadu iestatījumu vednis).
5. Sekojiet norādījumiem displejā, lai pabeigtu bezvadu iestatīšanu.
(Wireless (bezvadu)).
(Setup (Iestatīšana)).
2.metode. lejupielāde no printera atbalsta vietnes
(Windows un MacOS)
1. Atveriet tīmekļa vietnes lapu www.hp.com/support/ljM329MFP vai
www.hp.com/support/ljM428MFP vai www.hp.com/support/ljM429MFP.
2. Atlasiet Software and Drivers (Programmatūra un draiveri).
3. Lejupielādējiet printera modelim un operētājsistēmai atbilstošo
programmatūru.
4. Palaidiet programmatūras failu no mapes, kurā fails saglabāts.
5. Izpildiet ekrānā redzamās instrukcijas, lai instalētu programmatūru.
6. Kad saņemat uzaicinājumu izvēlēties savienojuma veidu, atlasiet
atbilstošā savienojuma veida opciju.
Manuāla IP adreses kongurācija
Informāciju par IP adreses kongurēšanu manuāli skatiet printera lietotāja rokasgrāmatā. Papildinformāciju skatiet vietnē www.hp.com/support/ljM329MFP
vai www.hp.com/support/ljM428MFP vaiwww.hp.com/support/ljM429MFP.
33
Page 34
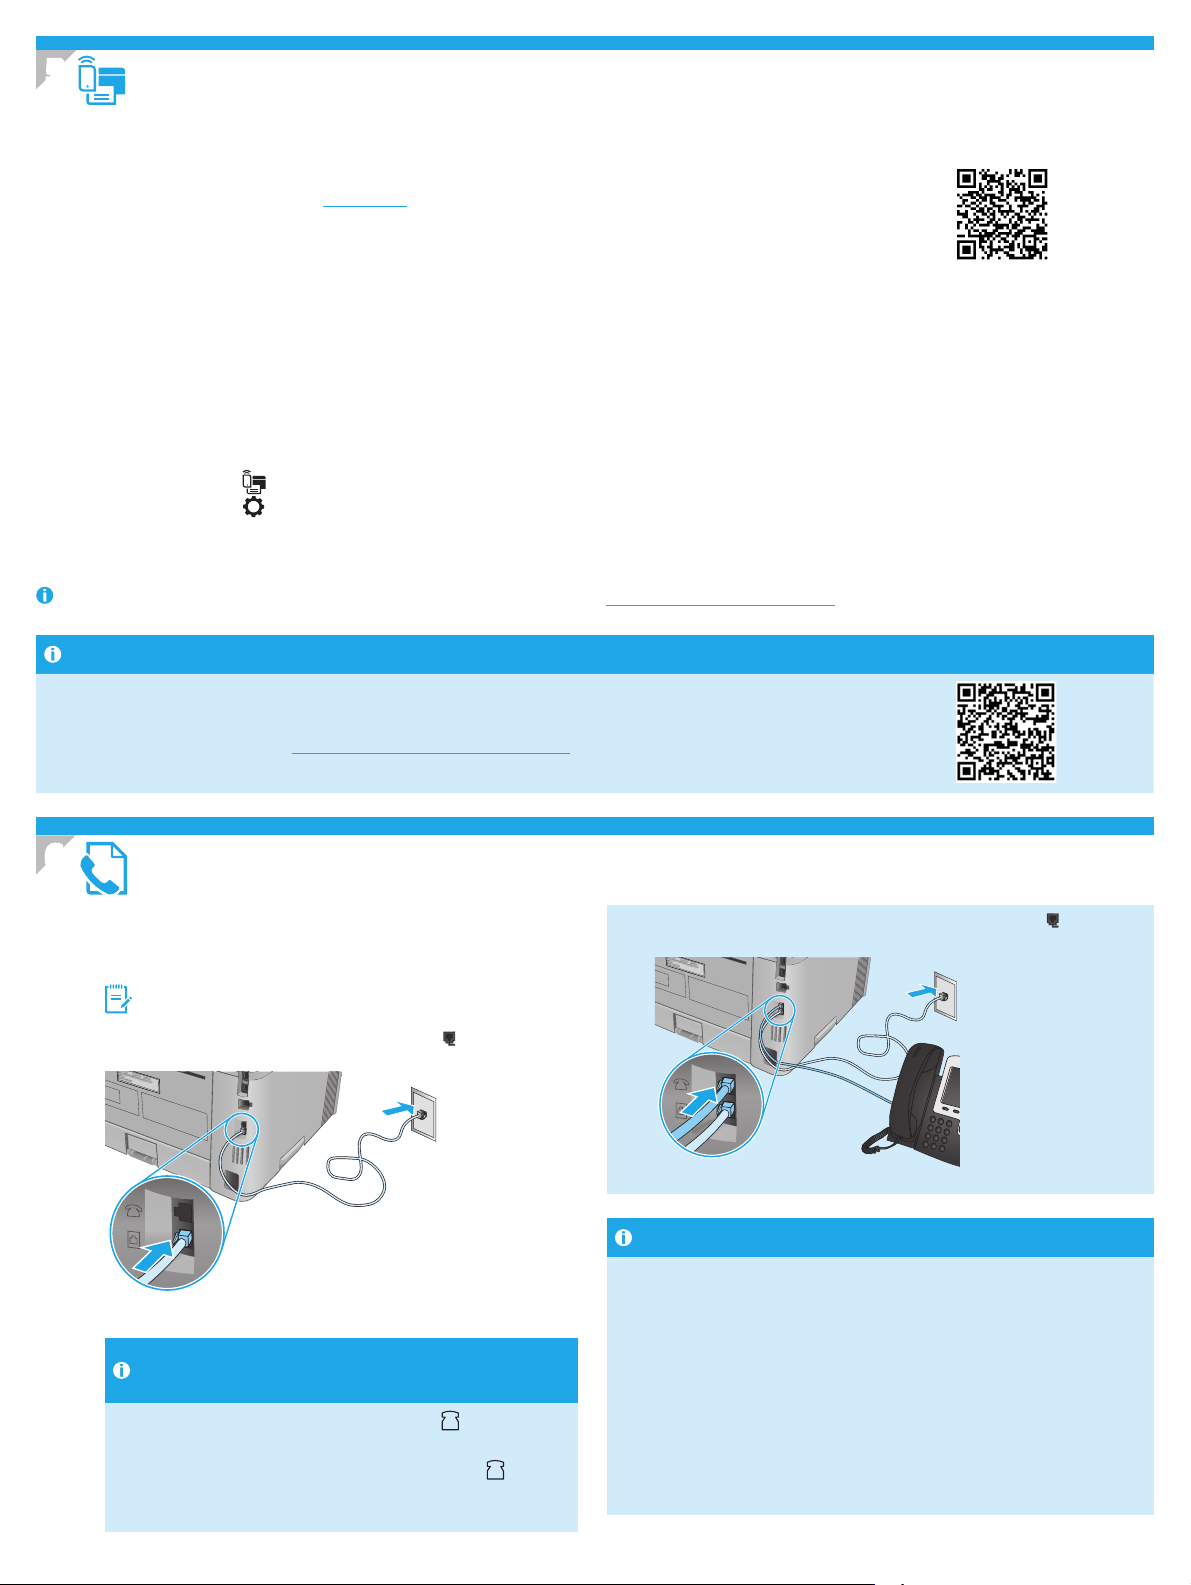
5.
Mobilās drukāšanas iestatīšana (pēc izvēles)
1.metode: HPSmart
Izmantojot lietojumprogrammu HPSmart, varat iestatīt iekārtas, drukāt un veikt citas darbības.
1. Skenējiet QRkodu vai atveriet vietni 123.hp.com.
2. Instalējiet lietojumprogrammu HPSmart.
3. Lai pievienotu un iestatītu iekārtas, drukātu un veiktu citas darbības, palaidiet lietojumprogrammu HPSmart un ievērojiet
ekrānā redzamos norādījumus.
2.metode: Wi-FiDirect (tikai bezvadu modeļiem)
Wi-FiDirect ļauj, izmantojot bezvadu maršrutētāju vai piekļuves punktu, izveidot tiešu savienojumu starp printeri un ar Wi-Fi saderīgām ierīcēm, piemēram,
viedtālruņiem, planšetdatoriem vai datoriem. Izveidojiet savienojumu ar printera Wi-FiDirect signālu tāpat, kā veidojat savienojumu starp ar Wi-Fi saderīgu ierīci
un jaunu bezvadu tīklu vai tīklāju.
Funkcijas Wi-Fi Direct iespējošana
1. Printera vadības paneļa Home (Sākuma) ekrānā pavelciet uz leju
ekrāna augšdaļā esošo cilni, lai atvērtu informācijas paneli, un pēc tam
pieskarieties vienumam
2. Pieskarieties vienumam
3. Ja displejā tiek rādīts, ka Wi-Fi Direct ir izslēgts, pieskarieties Wi-Fi Direct
un pēc tam ieslēdziet to.
Papildinformāciju par bezvadu drukāšanu un bezvadu iestatīšanu skatiet vietnē www.hp.com/go/wirelessprinting.
(Wi-Fi Direct).
(Setup (Iestatīšana)).
Printera noteikšana
1. Mobilajā ierīcē ieslēdziet Wi-Fi un meklējiet bezvadu tīklus.
2. Atlasiet printera nosaukumu, kad tas parādās printera vadības panelī.
Papildinformācija par mobilo drukāšanu
Iekārta atbalsta tehnoloģiju AirPrint un Wi-Fi Direct savienojumus. Lai iegūtu plašāku informāciju par mobilo druku,
skenējiet QRkodu vai atveriet vietni www.hp.com/go/LaserJetMobilePrinting.
6.
6.1
Faksa iestatīšana (tikai faksa modeļi— neobligāti)
Printera pievienošana
Printeris ir analoga ierīce. HPiesaka printeri izmantot ar īpaši
atvēlētu analogo tālruņa līniju.
PIEZĪME. Atsevišķās valstīs/reģionos var būt nepieciešams
tālruņa vada adapters, kas iekļauts iekārtas komplektācijā.
Pievienojiet printera tālruņa kabeli printera faksa portam un
tālruņa sienas kontaktligzdai.
3. Pievienojiet printera tālruņa kabeli printera faksa portam un tālruņa
sienas kontaktligzdai.
Kā pievienot automātisko atbildētāju vai tālruni?
1. Atvienojiet kontaktdakšu no tālruņa porta .
2. Atvienojiet automātiskā atbildētāja tālruņa vadu no tālruņa
kontaktligzdas un pievienojiet to tālruņa portam
printerī.
Kā uzstādīt HP printerus digitālo tālruņu sistēmā?
HP produkti ir īpaši paredzēti izmantošanai analogā tālruņa sistēmā.
Digitālo tālruņu sistēmai (tādām kā DSL/ADSL, PBX, ISDN vai FoIP) faksa
printera uzstādīšanai var būt nepieciešami ltri vai pārveide no digitālās
sistēmas uz analogo.
Piezīme. Atkarībā no tālruņa operatora printeris var nebūt saderīgs ar
visām digitālā pakalpojuma līnijām vai pakalpojuma sniedzējiem, visās
digitālajās sistēmās vai ar visiem pārveidotājiem no digitālās sistēmas
uz analogo. Sazinieties ar tālruņa operatoru, lai izvēlētos piemērotākās
iestatījumu opcijas.
Piezīme. Uzstādot zvana signāla veidu PBX tālruņu sistēmā, kam ir
atšķirīgi signāli iekšējiem un ārējiem zvaniem, pārliecinieties, ka ievadāt
faksa numuru, izmantojot ārējo numuru zvana signāla ierakstīšanai.
34
Page 35

6.2
Printera kongurēšana
Lai varētu izmantot faksa funkciju, jums ir jākongurē faksa laika, datuma un galvenes iestatījumi.
HPfaksa iestatīšanas vedņa atvēršana (Windows).
1. Atveriet HPPrinter Assistant izvēlnē Start (Sākums).
2. HPPrinter Assistant atlasiet opciju Fakss un pēc tam atlasiet
opciju Faksa iestatīšanas vednis.
3. Izpildiet ekrānā redzamās instrukcijas, lai kongurētu faksa
iestatījumus.
Faksa datuma/laika iestatīšana.
1. Printera vadības paneļa sākuma ekrānā pavelciet uz leju ekrāna
augšdaļā esošo cilni, lai atvērtu informācijas paneli.
2. Pieskarieties pogai
3. Pieskarieties vienumam Preferences (Preferences).
4. Pieskarieties vienumam Date/time (Datums/laiks), lai iestatītu
faksa datumu un laiku.
(Setup (Iestatīšana)).
Faksa galvenes iestatīšana vai maiņa.
1. Printera vadības paneļa displejā pieskarieties pie Fax (Fakss).
2. Pieskarieties vienumam Setup (Iestatīšana) un pēc tam pieskarieties
vienumam Preferences (Preferences).
3. Pieskarieties vienumam Fax Header (Faksa galvene).
4. Ievadiet savu vārdu vai uzņēmuma nosaukumu un pēc tam pieskarieties
pie vienuma Done (Gatavs).
5. Ievadiet savu faksa numuru un pēc tam pieskarieties pie Done (Gatavs).
PIEZĪME. Maksimālais faksa numura rakstzīmju skaits ir 20.
PIEZĪME. Maksimālais faksa galvenes rakstzīmju skaits ir 25.
Uzziniet vairāk.
For more information about other ways to send faxes, such as scheduling
afax to be sent later or sending faxes from a computer, see the User Guide
on the web:
• www.hp.com/support/ljM329MFP
• www.hp.com/support/ljM429MFP
7. Skenēšanas funkcijas izmantošana
Izmantojiet datorā esošo programmatūru HP Scan, lai sāktu skenēšanas uzdevumu printerī.
Windows
Atveriet HPPrinter Assistant, atlasiet Scan (Skenēšana) un pēc tam
ScanaDocument or Photo (Dokumenta vai fotoattēla skenēšana).
Mac OS
Pārejiet uz mapi Applications (Programmas) un atveriet HP Easy Scan.
Problēmu novēršana
Lietotāja rokasgrāmata
Lietotāja rokasgrāmatā ir ietverta informācija par printera lietošanu
unproblēmu novēršanu. Rokasgrāmata ir pieejama tīmeklī:
1. Atveriet tīmekļa vietnes lapu www.hp.com/support/ljM329MFP vai
www.hp.com/support/ljM428MFP vai
www.hp.com/support/ljM429MFP.
2. Atlasiet printeri, ja tiek parādīta uzvedne, un pēc tam noklikšķiniet
uzLietotāja rokasgrāmatas.
Aparātprogrammatūras atjauninājumu pārbaude
1. Atveriet tīmekļa vietnes lapu www.hp.com/support/ljM329MFP vai
www.hp.com/support/ljM428MFP vai
www.hp.com/support/ljM429MFP.
2. Ja tiek piedāvāts, atlasiet printeri, un pēc tam noklikšķiniet uz vienuma
Software and Drivers (Programmatūra un draiveri).
3. Izvēlieties operētājsistēmu un noklikšķiniet uz pogas Next (Tālāk).
4. Atlasiet Firmware (Programmaparatūra) un noklikšķiniet uz pogas
Download (Lejupielādēt).
Vadības paneļa palīdzība
Pieskarieties printera paneļa taustiņam Palīdzība , lai piekļūtu palīdzības
tēmām.
Papildu atbalsta resursi
HPvisaptverošo palīdzību printeriem meklējiet tīmekļa vietnē
www.hp.com/support/ljM329MFP vai www.hp.com/support/ljM428MFP
vai www.hp.com/support/ljM429MFP.
• Problēmu risinājumi
• Instrukcijas par papildu kongurācijām
• Programmatūras atjauninājumu lejupielādēšana
• Pievienošanās atbalsta forumiem
• Garantijas un reglamentējošās informācijas atrašana
• Piekļuve mobilās drukas resursiem
Lai uzzinātu vairāk par printeri, apmeklējiet vietni
www.hp.com/support/ljM428MFPFAQ vai skenējiet QR kodu.
35
Page 36

English............. 3
Français ........... 6
LaserJet Pro MFP M329, M428-M429
Deutsch ........... 9
Italiano .......... 12
Español ......... 15
Català ............ 18
Dansk ............ 21
Nederlands .... 24
Eesti............... 27
Suomi ............ 30
Latviešu ......... 33
Lietuvių ......... 36
Norsk ............. 39
Português ..... 42
Svenska ......... 45
Darbo pradžios vadovas
PASTABA. Norint nustatyti spausdintuvą ir atsisiųsti programinę įrangą reikalingas interneto ryšys.
DUK
Jei norite peržiūrėti dažniausiai užduodamus klausimus, apsilankykite adresu
www.hp.com/support/ljM428MFPFAQ arba nuskaitykite QR kodą.
3. Pradinė sąranka naudojant valdymo skydą
Įjungę spausdintuvą palaukite, kol jis bus paleistas. Norėdami naršyti valdymo skyde, naudokite lietimo, perbraukimo ir slinkimo
gestus. Vykdydami nurodymus valdymo skyde sukongūruokite toliau nurodytas nuostatas.
• Kalba
• Vieta
• Spausdintuvo sąrankos aplinka
Pasirinkite vieną iš šių parinkčių:
• Self-managed (naudotojo valdomi): daugumai naudotojų skirti optimizuoti numatytieji nustatymai, apimantys sąrankos,
kongūravimo veiksmų ir automatinio naujinimo funkcijos vedlius.
• IT-managed (IT darbuotojų valdomos): optimizuotos numatytosios nuostatos, skirtos įrenginių grupės valdymui paspartinti.
Atlikus pradinę sąranką nuostatas galima keisti.
4. Programinės įrangos atsisiuntimas ir diegimas
PASTABA. Nejunkite USB laido, kol būsite paraginti tai padaryti.
1 būdas: atsisiųskite „HP Easy Start“ („Windows“
ir„Mac“ OS)
1. Apsilankykite adresu 123.hp.com/laserjet ir spustelėkite
Download(atsisiųsti).
2. Norėdami įrašyti failą į kompiuterį vykdykite ekrane pateiktas instrukcijas
ir nurodymus.
3. Paleiskite programinės įrangos failą iš aplanko, kuriame jį įrašėte.
4. Laikydamiesi ekrane pateikiamų nurodymų įdiekite programinę įrangą.
5. Kai būsite paraginti pasirinkti jungimo tipą, pasirinkite atitinkamą parinktį
pagal jungimo tipą.
Patarimai: Prijunkite spausdintuvą prie belaidžio tinklo (tik belaidžiams modeliams)
1. Spausdintuvo valdymo skyde esančiame pagrindiniame ekrane žemyn braukite ekrano viršuje esančią lentelę, kad atidarytumėte skydelį, o tada
palieskite
2. Palieskite
3. Palieskite Wireless Settings (belaidžio ryšio nustatymai).
4. Palieskite Wireless Setup Wizard (belaidės sąrankos vedlys).
5. Vykdykite ekrane rodomas instrukcijas ir pabaikite sąranką.
(belaidis ryšys).
(sąranka).
2 būdas: atsisiųskite iš spausdintuvo palaikymo
svetainės („Windows“ ir „Mac“ OS)
1. Apsilankykite adresu www.hp.com/support/ljM329MFP arba
www.hp.com/support/ljM428MFP arba www.hp.com/support/ljM429MFP.
2. Pasirinkite Software and Drivers (programinė įranga ir tvarkyklės).
3. Atsisiųskite savo spausdintuvo modeliui ir operacinei sistemai skirtą
programinę įrangą.
4. Paleiskite programinės įrangos failą iš aplanko, kuriame jį įrašėte.
5. Laikydamiesi ekrane pateikiamų nurodymų įdiekite programinę įrangą.
6. Kai būsite paraginti pasirinkti jungimo tipą, pasirinkite atitinkamą parinktį
pagal jungimo tipą.
Neautomatinis IP adreso kongūravimas
Informacijos apie neautomatinį IP adreso kongūravimą rasite spausdintuvo vartotojo vadove. Daugiau informacijos rasite apsilankę adresu
www.hp.com/support/ljM329MFP arba www.hp.com/support/ljM428MFP arba www.hp.com/support/ljM429MFP.
36
Page 37

5.
Spausdinimas naudojant mobiliuosius įrenginius (pasirenkama)
1 būdas: „HP Smart“
Naudokite programą „HP Smart“, kad galėtumėte nustatyti, spausdinti ir atlikti kitus veiksmus.
1. Nuskaitykite QR kodą arba apsilankykite adresu 123.hp.com.
2. Įdiekite programą „HP Smart“.
3. Paleiskite programą „HP Smart“ ir laikydamiesi ekrane pateikiamų nurodymų prisijunkite, nustatykite, spausdinkite
ir atlikite kitus veiksmus.
2 būdas: „Wi-Fi Direct“ (tik belaidžiai modeliai)
„Wi-Fi Direct“ leidžia „Wi-Fi“ palaikantiems įrenginiams, pvz., išmaniesiems telefonams, planšetiniams arba staliniams kompiuteriams, užmegzti belaidžio tinklo
ryšį tiesiogiai su spausdintuvu nenaudojant belaidžio maršruto parinktuvo arba prieigos taško. Prijunkite spausdintuvą prie „Wi-Fi Direct“ signalo taip pat, kaip
prijungiate „Wi-Fi“ palaikantį įrenginį prie naujo belaidžio tinklo arba viešosios prieigos taško.
„Wi-Fi Direct“ įjungimas
1. Spausdintuvo valdymo skyde esančiame pagrindiniame ekrane žemyn
braukite ekrano viršuje esančią lentelę, kad atidarytumėte skydelį, o tada
palieskite
2. Palieskite
3. Jei ekrane rodoma, kad „Wi-Fi Direct“ funkcija išjungta, palieskite
Wi-FiDirect ir ją įjunkite.
Daugiau informacijos apie belaidį spausdinimą ir belaidžio ryšio sąranką rasite apsilankę adresu www.hp.com/go/wirelessprinting
Sužinokite daugiau apie spausdinimą naudojant mobiliuosius įrenginius
Gaminys palaiko spausdinimą naudojant „AirPrint“ ir „Wi-Fi Direct“. Norėdami gauti daugiau informacijos
apie spausdinimą naudojant mobiliuosius įrenginius, nuskaitykite QR kodą arba apsilankykite adresu
www.hp.com/go/LaserJetMobilePrinting.
6.
6.1
(„Wi-Fi Direct“).
(sąranka).
Fakso nustatymas (tik fakso modeliai – pasirenkama)
Spausdintuvo prijungimas
Spausdintuvas yra analoginis įrenginys. HP rekomenduoja
spausdintuvą naudoti su tam skirta analogine telefono linija.
PASTABA. Kai kuriose šalyse/ regionuose telefono laidui, kurį
gavote su spausdintuvu, gali reikėti adapterio.
Telefono laidą, kurį gavote su spausdintuvu, prijunkite prie
spausdintuvo fakso
prievado ir prie sieninio telefono lizdo.
Spausdintuvo paieška
1. Mobiliajame įrenginyje įjunkite „Wi-Fi“ ir ieškokite belaidžių tinklų.
2. Pasirinkite spausdintuvo pavadinimą, kai jis pasirodys spausdintuvo
valdymo skyde.
3. Telefono laidą, kurį gavote su spausdintuvu, prijunkite prie
spausdintuvo fakso prievado
ir prie sieninio telefono lizdo.
Kaip prijungti atsakiklį arba papildomą telefoną?
1. Ištraukite kištuką iš telefono prievado .
2. Atjunkite telefono atsakiklio laidą nuo telefono lizdo,
tada prijunkite jį prie telefono prievado
spausdintuvo.
, esančio ant
Kaip atlikti HP spausdintuvų sąranką skaitmeninėse telefonijos
aplinkose?
HP spausdintuvai skirti naudoti su tradicinėmis analoginėmis telefonijos
paslaugomis. Jei fakso spausdintuvas nustatomas skaitmeninėje telefonijos
aplinkoje (pvz., DSL/ ADSL, PBX, ISDN arba FoIP), gali reikėti skaitmeninių
signalų keitimo į analoginius ltrų arba keitiklių.
Pastaba. Priklausomai nuo telefono ryšio įmonės, spausdintuvas gali būti
nesuderinamas su visomis skaitmeninių paslaugų linijomis ir operatoriais,
visomis skaitmeninėmis aplinkomis arba visais skaitmeninių signalų keitimo
į analoginius keitikliais. Norėdami sužinoti, kurios sąrankos parinktys
tinkamiausios, susisiekite su telefono ryšio įmone.
Pastaba. Nustatydami skambučių šablono aptikimą PBX telefonijos
sistemoje, kurioje numatyti skirtingi vidinių ir išorinių skambučių šablonai,
būtinai rinkite spausdintuvo fakso numerį, naudodami išorinį numerį, skirtą
skambučių šablonui įrašyti.
37
Page 38

6.2
Spausdintuvo kongūravimas
Turite sukongūruoti fakso laiką, datą ir antraštės nuostatas, kad galėtumėte naudotis fakso funkcija.
HP fakso aparato sąrankos vedlio atidarymas („Windows“):
1. Atidarykite „HP Printer Assistant“ Start (pradžios) meniu.
2. „HP Printer Assistant“ pasirinkite Fax (faksas) ir tada pasirinkite
Fax Setup Wizard (fakso sąrankos vedlys).
3. Norėdami sukongūruoti fakso nuostatas, laikykitės ekrane
pateikiamų nurodymų.
Fakso datos ir laiko nustatymas
1. Spausdintuvo valdymo skyde esančiame pagrindiniame
ekrane žemyn braukite ekrano viršuje esančią lentelę, kad
atidarytumėte skydelį.
2. Palieskite mygtuką
3. Palieskite Preferences (nuostatos).
4. Palieskite Date/time (data / laikas), kad nustatytumėte fakso
datą ir laiką.
(sąranka).
7. Nuskaitymo funkcijos naudojimas
Galite nuskaityti spausdintuvu naudodami programinę įrangą „HP Scan“.
„Windows“
Atidarykite HP Printer Assistant, pasirinkite Scan (nuskaityti), tada pasirinkite
Scan a Document or Photo (nuskaityti dokumentą arba nuotrauką)
Fakso antraštės nustatymas arba keitimas
1. Spausdintuvo valdymo skydo ekrane palieskite Fax (faksas).
2. Palieskite Setup (sąranka), tada pasirinkite Preferences (nuostatos).
3. Palieskite Fax Header (fakso antraštė).
4. Įveskite savo asmenvardį arba įmonės pavadinimą, tada palieskite
Done(atlikta).
5. Įveskite fakso numerį, tada palieskite Done (atlikta).
PASTABA. Didžiausias fakso numerio simbolių skaičius yra 20.
PASTABA. Didžiausias faksogramos antraštės simbolių skaičius yra 25.
Sužinokite daugiau!
Norėdami daugiau sužinoti apie kitus būdus faksogramoms siųsti, pvz., kaip
suplanuoti vėlesnį faksogramos siuntimą arba kaip faksogramas siųsti iš
kompiuterio, žr. vartotojo vadovą internete:
• www.hp.com/support/ljM329MFP
• www.hp.com/support/ljM429MFP
„Mac“ OS
Eikite į aplanką Applications (programos) ir atidarykite HP Easy Scan.
Trikčių diagnostika
Vartotojo vadovas
Vartotojo vadove pateikiama informacija apie spausdintuvo naudojimą
irtrikčių diagnostiką. Jį galite rasti internete:
1. Apsilankykite adresu www.hp.com/support/ljM329MFP arba
www.hp.com/support/ljM428MFP arba
www.hp.com/support/ljM429MFP.
2. Jei esate paraginti, pasirinkite spausdintuvą, tada spustelėkite
UserGuides (vartotojo vadovai).
Kaip patikrinti, ar yra programinės aparatinės
įrangos naujinių
1. Apsilankykite adresu www.hp.com/support/ljM329MFP arba
www.hp.com/support/ljM428MFP arba
www.hp.com/support/ljM429MFP.
2. Jei esate paraginti, pasirinkite spausdintuvą, tada spustelėkite
Software and Drivers (programinė įranga ir tvarkyklės).
3. Pasirinkite operacinę sistemą ir spustelėkite mygtuką Next (toliau).
4. Pasirinkite Firmware (programinė aparatinė įranga) ir spustelėkite
mygtuką Download (atsisiųsti).
Valdymo skydo žinynas
Spausdintuvo valdymo skyde palieskite mygtuką „Help“ (žinynas) , kad
pamatytumėte žinyno temas.
Papildomi pagalbos ištekliai
Išsamų HP spausdintuvo žinyną rasite apsilankę adresu
www.hp.com/support/ljM329MFP arba www.hp.com/support/ljM428MFP
arba www.hp.com/support/ljM429MFP.
• Spręskite problemas
• Raskite papildomas kongūravimo instrukcijas
• Atsisiųskite programinės įrangos naujinius
• Prisijunkite prie pagalbos forumų
• Raskite informacijos apie garantiją ir teisinės informacijos
• Pasiekite spausdinimo naudojant mobiliuosius įrenginius išteklius
Daugiau apie spausdintuvą sužinosite apsilankę adresu
www.hp.com/support/ljM428MFPFAQ arba nuskaitę QR kodą.
38
Page 39

LaserJet Pro MFP M329, M428-M429
English................. 3
Français ............... 6
Startveiledning
MERK: Internett-tilkobling er påkrevd for å kongurere skriveren og laste ned
programvaredriveren.
Vanlige spørsmål
For vanlige spørsmål kan du gå til www.hp.com/support/ljM428MFPFAQ eller
skanne QR-koden.
3. Første oppstart på kontrollpanelet
Etter at du har slått på skriveren, venter du på at den initialiseres. Bruk berørings-, sveipe- og blabevegelser for å navigere på
kontrollpanelet. Følg meldingene på kontrollpanelet for å kongurere disse innstillingene:
• Språk
• Sted
• Skriveroppsettmiljø
Velg ett av disse alternativene:
• Selvstyrt: Optimaliserte standardinnstillinger for de este brukere som omfatter veiledet oppsett og kongurasjonstrinn
og automatiske oppdateringer.
• IT-styrt: Optimaliserte standardinnstillinger for åteadministrasjon.
Deutsch ............... 9
Italiano .............. 12
Español ............. 15
Català ................ 18
Dansk ................ 21
Nederlands ........ 24
Eesti................... 27
Suomi ................ 30
Latviešu ............. 33
Lietuvių ............. 36
Norsk ................. 39
Português ......... 42
Svenska ............. 45
Innstillingene kan tilpasses etter den innledende kongureringen.
4. Laste ned og installere programvaren
MERK: Ikke koble til USB-kabelen før du får beskjed om det.
Metode 1: Last ned HP Easy Start (Windows
ogMacOS)
1. Gå til 123.hp.com/laserjet, og klikk på Last ned.
2. Følg instruksjonene og meldingene på skjermen for å lagre len
pådatamaskinen.
3. Åpne programvarelen i mappen der den ble lagret.
4. Følg instruksjonene på skjermen når du skal installere programvaren.
5. Når du blir bedt om å velge en tilkoblingstype, velger du det aktuelle
valget for type tilkobling:
Tips: Koble skriveren til et trådløst nettverk (bare trådløse modeller)
1. Fra startskjermen på skriverens kontrollpanel sveiper du kategorien øverst på skjermen nedover for å åpne dashbordet, og deretter trykker du på
(Trådløs).
2. Trykk på
3. Trykk Trådløse innstillinger.
4. Trykk på Veiviser for trådløs kongurering.
5. Følg instruksjonene på skjermen for å fullføre kongurasjonen.
(Oppsett).
Metode 2: Last ned fra webområdet for
skriverstøtte (Windows og Mac OS)
1. Gå til www.hp.com/support/ljM329MFP eller
www.hp.com/support/ljM428MFP eller www.hp.com/support/ljM429MFP.
2. Velg Programvare og drivere.
3. Last ned programvaren for skrivermodellen og operativsystemet.
4. Åpne programvarelen i mappen der den ble lagret.
5. Følg instruksjonene på skjermen når du skal installere programvaren.
6. Når du blir bedt om å velge en tilkoblingstype, velger du det aktuelle
valget for type tilkobling:
Kongurere IP-adressen manuelt
Se skriverens brukerhåndbok for informasjon om kongurering av IP-adressen manuelt. Hvis du vil ha mer informasjon, kan du gå til
www.hp.com/support/ljM329MFP eller www.hp.com/support/ljM428MFP eller www.hp.com/support/ljM429MFP.
39
Page 40

5.
Mobilutskrift (valgfritt)
Metode 1: HP Smart
Bruk HP Smart-appen til å kongurere, skrive ut og mer.
1. Skann QR-koden eller gå til 123.hp.com.
2. Installer HP Smart-appen.
3. Kjør HP Smart-appen og følg instruksjonene på skjermen for å koble til, kongurere, skrive ut og mer.
Metode 2: Wi-Fi Direct (bare trådløse modeller)
Med Wi-Fi Direct kan enheter med Wi-Fi, for eksempel smarttelefoner, nettbrett og datamaskiner, koble direkte til skriveren uten behov for en trådløs ruter eller
ettilgangspunkt. Koble til skriverens Wi-Fi Direct-signal på samme måte som du kobler Wi-Fi-enhetene dine til et nytt trådløst nettverk eller Wi-Fi-sone.
Aktivere Wi-Fi Direct
1. Fra startskjermen på skriverens kontrollpanel sveiper du kategorien
øverst på skjermen nedover for å åpne dashbordet, og deretter trykker
du på
2. Trykk på
3. Hvis skjermen viser at Wi-Fi Direct er avslått, trykker du på Wi-Fi Direct
ogslår det på.
Du nner mer informasjon om trådløs utskrift og oppsett av dette på www.hp.com/go/wirelessprinting.
Finn ut mer om mobilutskrift
Produktet støtter AirPrint og Wi-Fi Direct. Hvis du vil ha mer informasjon om mobilutskrift kan du skanne QR-koden
eller gå til www.hp.com/go/LaserJetMobilePrinting.
6.
6.1
(Wi-Fi Direct).
(Oppsett).
Kongurere faks (bare faksmodeller - valgfritt)
Koble til skriveren
Skriveren er en analog enhet. HP anbefaler at du kobler skriveren til
en dedikert analog telefonlinje.
MERK: I enkelte land/regioner kan det være nødvendig å bruke
en medfølgende adapter til telefonledningen.
Koble telefonledningen som fulgte med skriveren til faks-porten
på skriveren, og deretter til telefonkontakten i veggen.
Finn skriveren
1. Slå på Wi-Fi på mobilenheten og søk etter trådløse nettverk.
2. Velg skrivernavnet slik det vises på skriverens kontrollpanel.
3. Koble telefonledningen som fulgte med skriveren til faks-porten
påskriveren, og deretter til telefonkontakten i veggen.
Hvordan kobler jeg til en telefonsvarer eller
viderekoblingstelefon?
1. Fjern pluggen fra den gamle telefonporten .
2. Koble telefonledningen til telefonsvareren fra
telefonkontakten, og koble den deretter til telefonporten
på skriveren.
Hvordan kongurerer jeg HP-skrivere i digitale telefonmiljøer?
HP-skrivere er utviklet spesielt for bruk med tradisjonelle analoge
telefontjenester. For et digitalt telefonmiljø (f.eks. DSL/ADSL, PBX, ISDN eller
FoIP), kan det være nødvendig med digital til analog-ltre eller -omformere
når du kongurerer skriveren for faks.
Merk: Avhengig av telefonselskapet, kan det hende at skriveren ikke
er kompatibel med alle digitale servicelinjer eller -operatører, i alle
digitale miljøer eller med alle digital/analog-omformere. Ta kontakt med
telefonselskapet for å nne ut hvilke kongurasjonsalternativer som er best.
Merk: Når du kongurerer ringemønsterregistrering i et PBX-telefonsystem
som har ulike ringemønstre for interne og eksterne anrop, må du huske
på å slå skriverfaksnummeret med et eksternt nummer for å ta opp
ringemønsteret.
40
Page 41

6.2
Kongurere skriveren
Du må kongurere klokkeslett, dato og topptekst for faks for å kunne bruke faksfunksjonen.
Slik åpner du HPsveiviser for faksoppsett (Windows):
1. Åpne HP Printer Assistant fra Start-menyen.
2. Velg Faks i HPPrinterAssistant og velg deretter Veiviser for
faksoppsett.
3. Følg instruksjonene på skjermen for å kongurere
faksinnstillingene.
Slik kongurerer du dato/klokkeslett for faksen:
1. Fra startskjermbildet på skriverens kontrollpanel sveiper du
kategorien øverst på skjermen nedover for å åpne dashbordet.
2. Trykk på
3. Trykk på Innstillinger.
4. Trykk på Dato/klokkeslett for å kongurere dato og klokkeslett
for faksen.
(Oppsett)-knappen.
Slik angir eller endrer du toppteksten for faksen:
1. På skriverens kontrollpanel trykker du på Faks.
2. Trykk på Oppsett og deretter Innstillinger.
3. Velg Fakstopptekst.
4. Angi navnet ditt eller rmanavnet og trykk på Ferdig.
5. Angi faksnummeret ditt og trykk på Ferdig.
MERK: Det maksimale antallet tegn for faksnummeret er 20.
MERK: Det maksimale antallet tegn for fakstoppteksten er 25.
Hvis du vil ha mer informasjon om andre måter å sende faks på, for
eksempel planlegge en faks for senere sending eller sende fakser fra
endatamaskin, kan du se brukerhåndboken på nettet:
7. Bruke skannefunksjonen
Bruk HP Scan-programvaren på datamaskinen for å starte en skannejobb på skriveren.
Windows
Åpne HP Printer Assistant, velg Skann, og velg deretter Skann et dokument
eller bilde.
Mac OS
Gå til mappen Programmer og åpne HP Easy Scan.
Finn ut mer!
• www.hp.com/support/ljM329MFP
• www.hp.com/support/ljM429MFP
Feilsøking
Brukerhåndbok
Brukerhåndboken inneholder informasjon om skriverbruk og feilsøking.
Den er tilgjengelig på Internett:
1. Gå til www.hp.com/support/ljM329MFP eller
www.hp.com/support/ljM428MFP eller
www.hp.com/support/ljM429MFP.
2. Velg skriveren hvis du blir bedt om det og klikk deretter
påBrukerhåndbøker.
Se etter fastvareoppdateringer
1. Gå til www.hp.com/support/ljM329MFP eller
www.hp.com/support/ljM428MFP eller
www.hp.com/support/ljM429MFP.
2. Hvis du blir bedt om det, velger du skriveren og klikker
påProgramvare og drivere.
3. Velg operativsystemet og klikk på Neste.
4. Velg Fastvare og klikk på Last ned-knappen.
Hjelp på kontrollpanelet
Velg Hjelp-knappen på kontrollpanelet for å få tilgang til Hjelp.
Flere støtteressurser
For HPs omfattende hjelp for skriveren, kan du gå til
www.hp.com/support/ljM329MFP eller www.hp.com/support/ljM428MFP
eller www.hp.com/support/ljM429MFP.
• Løse problemer
• Finn avanserte kongurasjonsinstruksjoner
• Last ned programvareoppdateringer
• Delta i støttefora
• Finn informasjon om garanti og forskrifter
• Få tilgang tilgang på ressurser for mobilutskrifter
Hvis du vil vite mer om skriveren, kan du gå til
www.hp.com/support/ljM428MFPFAQ eller skanne QR-koden.
41
Page 42

English............. 3
Français ........... 6
LaserJet Pro MFP M329, M428-M429
Deutsch ........... 9
Italiano .......... 12
Español ......... 15
Català ............ 18
Dansk ............ 21
Nederlands .... 24
Eesti............... 27
Suomi ............ 30
Latviešu ......... 33
Lietuvių ......... 36
Norsk ............. 39
Português ..... 42
Svenska ......... 45
Guia de Introdução
NOTA: Uma conexão com a Internet é necessária para congurar a impressora e baixar o driver
do software.
Perguntas frequentes
Para ver as perguntas frequentes, acesse
www.hp.com/support/ljM428MFPFAQ ou leia o código QR.
3. Conguração inicial no painel de controle
Depois de ligar a impressora, aguarde sua inicialização. Para navegar no painel de controle, use gestos de toque, de deslizamento
e de rolagem. Siga as instruções no painel de controle para denir estas congurações:
• Idioma
• Local
• Ambiente de conguração da impressora
Selecione uma destas opções:
• Autogerenciada: congurações padrão otimizadas para a maioria dos usuários que incluem etapas guiadas de
instalações e congurações eatualizações automáticas.
• Gerenciada por TI: congurações padrão otimizadas para capacidade de gerenciamento de frota.
As congurações podem ser completamente personalizadas após a conguração inicial.
4. Download e instalação do software
NOTA: Conecte o cabo USB somente quando for solicitado.
Método 1: Faça download do HP Easy Start
(Windows e Mac OS)
1. Acesse 123.hp.com/laserjet e clique em Download.
2. Siga as instruções na tela e os comandos para salvar o arquivo
nocomputador.
3. Inicie o arquivo de software a partir da pasta em que ele foi salvo.
4. Siga as instruções exibidas na tela para instalar o software.
5. Quando a seleção de um tipo de conexão for solicitada, selecione a opção
apropriada para o tipo de conexão.
Dicas: Conectar a impressora a uma rede sem o (somente modelos sem o)
1. Na tela inicial no painel de controle da impressora, deslize a guia na parte superior da tela para baixo para abrir o painel e toque em (Sem o).
2. Toque em
3. Toque em Congurações sem o.
4. Toque em Assistente de conguração sem o.
5. Siga as instruções exibidas na tela para concluir a conguração.
(Congurar).
Método 2: Faça download do site de suporte
daimpressora (Windows e Mac OS)
1. Acesse www.hp.com/support/ljM329MFP ou
www.hp.com/support/ljM428MFP ou www.hp.com/support/ljM429MFP.
2. Selecione Software e Drivers.
3. Faça o download do software para seu modelo de impressora e sistema
operacional.
4. Inicie o arquivo de software a partir da pasta em que ele foi salvo.
5. Siga as instruções exibidas na tela para instalar o software.
6. Quando a seleção de um tipo de conexão for solicitada, selecione a opção
apropriada para o tipo de conexão.
Congurar manualmente o endereço IP
Consulte o guia do usuário da impressora para obter informações sobre como congurar o endereço IP manualmente. Para obter mais informações, acesse
www.hp.com/support/ljM329MFP ou www.hp.com/support/ljM428MFP ou www.hp.com/support/ljM429MFP.
42
Page 43

5.
Impressão móvel (opcional)
Método 1: HP Smart
Use o aplicativo HP Smart para congurar, imprimir e muito mais.
1. Escaneie o código QR ou acesse 123.hp.com.
2. Instale o aplicativo HP Smart.
3. Execute o aplicativo HP Smart e siga as instruções na tela para conectar, congurar, imprimir e muito mais.
Método 2: Wi-Fi Direct (somente modelo sem o)
O Wi-Fi Direct permite que dispositivos compatíveis com Wi-Fi, como smartphones, tablets ou computadores, façam uma conexão de rede sem o diretamente
com a impressora sem o uso de um ponto de acesso ou roteador sem o. Conecte-se ao sinal Wi-Fi Direct da impressora da mesma maneira que dispositivos
compatíveis com Wi-Fi se conectam a uma nova rede sem o ou hotspot.
Ativar o Wi-Fi Direct
1. Na tela Iniciar no painel de controle da impressora, deslize a guia na
parte superior da tela para baixo para abrir o painel e toque em
(Wi-Fi Direct).
2. Toque em
3. Se a tela mostrar que o Wi-Fi Direct está desativado, toque em
Wi-FiDirect e ative-o.
Para obter mais informações sobre impressão sem o e conguração sem o, acesse www.hp.com/go/wirelessprinting.
Saiba mais sobre a impressão móvel
(Congurar).
Descobrir a impressora
1. No dispositivo móvel, ative a conexão Wi-Fi e procure redes sem o.
2. Selecione o nome da impressora conforme mostrado no painel de
controle dela.
O produto oferece suporte a AirPrint e Wi-Fi Direct. Para mais informações sobre impressão móvel, escaneie o código
QR ou acesse www.hp.com/go/LaserJetMobilePrinting.
6.
6.1
Conguração do fax (somente modelos com fax - opcional)
Conectar a impressora
A impressora é um dispositivo analógico. A HP recomenda usar
aimpressora com uma linha telefônica analógica dedicada.
NOTA: Alguns países/regiões podem exigir um adaptador para
ocabo telefônico que veio com a impressora.
Conecte o cabo telefônico que veio com a impressora à porta Fax
na impressora e à tomada telefônica na parede.
Como eu conecto uma secretária eletrônica ou uma
extensão?
1. Remova o plugue da porta do telefone .
2. Desconecte o cabo telefônico da secretária eletrônica da
tomada telefônica e então a conecte à porta telefônica
naimpressora.
3. Conecte o cabo telefônico que veio com a impressora à porta Fax
naimpressora e à tomada telefônica na parede.
Como eu conguro impressoras HP em ambientes
detelefonia digital?
As impressoras HP foram projetadas especicamente para uso
com serviços telefônicos analógicos tradicionais. Para um ambiente
de telefonia digital (como DSL/ADSL, PBX, ISDN ou FoIP), ltros ou
conversores de digital para analógico podem ser necessários na
conguração da impressora para o fax.
Nota: Dependendo da empresa telefônica, a impressora poderá não ser
compatível com todas as linhas ou provedores de serviço digital, em
todos os ambientes digitais ou com todos os conversores de digital para
analógico. Contate a empresa telefônica para determinar quais serão as
melhores opções de conguração.
Nota: Ao congurar a detecção de padrão de toque em um sistema
telefônico PBX com padrões de toque diferentes para chamadas internas
e externas, disque o número de fax da impressora usando um número
externo para a gravação do padrão de toque.
43
Page 44

6.2
Congurar a impressora
É necessário congurar a hora, a data e o cabeçalho do fax para utilizar o recurso de fax.
Para abrir o Assistente de conguração de faxHP (Windows):
1. Abra o Assistente da Impressora HP no menu Iniciar.
2. No Assistente da Impressora HP, selecione Fax e depois
Assistente de conguração de fax.
3. Siga as instruções mostradas na tela para congurar o fax.
Para congurar a data/hora do fax:
1. Na tela inicial no painel de controle da impressora, deslize
aguia na parte superior da tela para baixo para abrir o painel.
2. Toque no botão
3. Toque em Preferências.
4. Toque em Data/hora para congurar data e hora do fax.
(Congurar).
Para denir ou alterar o cabeçalho do fax:
1. Na tela do painel de controle da impressora, toque em Fax.
2. Toque em Conguração e depois em Preferências.
3. Toque em Cabeçalho de fax.
4. Insira seu nome pessoal ou o nome da empresa e toque em Concluído.
5. Insira o número do fax e toque em Concluído.
NOTA: O número máximo de caracteres para um número de fax é 20.
NOTA: O máximo de caracteres para um cabeçalho de fax é 25.
Saiba mais!
Para obter mais informações sobre outras formas de enviar faxes, como
o agendamento de um fax para ser enviado posteriormente de um
computador, consulte o Guia do usuário na Web:
• www.hp.com/support/ljM329MFP
• www.hp.com/support/ljM429MFP
7. Usar o recurso Digitalizar
Use o software HP Scan em seu computador para iniciar um trabalho de digitalização na impressora.
Windows
Abra o Assistente da Impressora HP, selecione Digitalizar e depois Digitalizar
um documento ou uma foto.
MacOS
Vá para a pasta Aplicativos e abra o HP Easy Scan.
Solução de problemas
Guia do usuário
O Guia do usuário inclui o uso da impressora e informações sobre solução
de problemas. Também disponível na Web:
1. Acesse www.hp.com/support/ljM329MFP ou
www.hp.com/support/ljM428MFP ou
www.hp.com/support/ljM429MFP.
2. Selecione a impressora, se for solicitado, e clique em Guias do usuário.
Vericar atualizações de rmware
1. Acesse www.hp.com/support/ljM329MFP ou
www.hp.com/support/ljM428MFP ou
www.hp.com/support/ljM429MFP.
2. Se solicitado, selecione a impressora e clique em Software e drivers.
3. Selecione o sistema operacional e clique no botão Avançar.
4. Selecione Firmware e clique no botão Download.
Ajuda do painel de controle
Toque no botão Ajuda no painel de controle da impressora para acessar
os tópicos da Ajuda.
Recursos de suporte adicionais
Para obter ajuda completa da HP para a impressora, acesse
www.hp.com/support/ljM329MFP ou www.hp.com/support/ljM428MFP ou
www.hp.com/support/ljM429MFP.
• Solucionar problemas
• Localizar instruções de conguração avançada
• Download de atualizações de software
• Participar de fóruns de suporte
• Localizar informações de garantia e regulamentação
• Acessar recursos de impressão móvel
Para saber mais sobre a impressora, acesse
www.hp.com/support/ljM428MFPFAQ ou digitalize o código QR.
44
Page 45

LaserJet Pro MFP M329, M428-M429
English................. 3
Français ............... 6
Komma igång-guide
OBS! Det behövs internetanslutning för att ställa in skrivaren och hämta programdrivrutinen.
Vanliga frågor
För att få svar på vanliga frågor kan du gå till
www.hp.com/support/ljM428MFPFAQ eller skanna QR-koden.
3. Grundinställningar på kontrollpanelen
Efter att du slagit på skrivaren ska du vänta på att den startar. För att navigera på kontrollpanelen använder du pekgesterna tryck,
svep och bläddra. Följ meddelandena på kontrollpanelen för att kongurera dessa inställningar:
• Språk
• Plats
• Skrivarens inställningsmiljö
Välj ett av följande alternativ:
• Self-managed (Självstyrt): Optimerade standardinställningar för de esta användare som inkluderar guidad installation
och konguration samt automatiska uppdateringar.
• IT-managed (IT-styrt): Optimerade standardinställningar för hantering av anläggningen.
Deutsch ............... 9
Italiano .............. 12
Español ............. 15
Català ................ 18
Dansk ................ 21
Nederlands ........ 24
Eesti................... 27
Suomi ................ 30
Latviešu ............. 33
Lietuvių ............. 36
Norsk ................. 39
Português ......... 42
Svenska ............. 45
Inställningarna är helt anpassningsbara efter första installation.
4. Hämta och installera programvaran
OBS! Anslut inte USB-kabeln förrän du uppmanas att göra det.
Metod 1: Hämta HP Easy Start (Windows och Mac OS)
1. Gå till 123.hp.com/laserjetoch klicka på Hämta.
2. Följ anvisningarna på skärmen och uppmaningar att spara len på datorn.
3. Starta programvarulen från mappen där len sparades.
4. Följ instruktionerna på skärmen för att installera programvaran.
5. När du uppmanas att välja anslutningstyp väljer du tillämpligt alternativ
för typen av anslutning.
Tips! Anslut skrivaren till ett trådlöst nätverk (endast trådlösa modeller)
1. På hemskärmen på skrivarens kontrollpanel sveper du iken längst upp på skärmen neråt för att öppna kontrollpanelen och sedan trycker du på
(Trådlöst).
2. Tryck på
3. Tryck på Trådlösa inställningar.
4. Tryck på Guide för trådlös installation.
5. Följ instruktionerna på skärmen för att slutföra installationen.
(Inställningar).
Metod 2: Hämta från webbsidan för skrivarsupport
(Windows och Mac OS)
1. Gå till www.hp.com/support/ljM329MFP eller
www.hp.com/support/ljM428MFP eller www.hp.com/support/ljM429MFP.
2. Välj Programvara och drivrutiner.
3. Hämta programvaran för din skrivarmodell och ditt operativsystem.
4. Starta programvarulen från mappen där len sparades.
5. Följ instruktionerna på skärmen för att installera programvaran.
6. När du uppmanas att välja anslutningstyp väljer du tillämpligt alternativ
för typen av anslutning.
Kongurera IP-adressen manuellt
Läs i skrivarens användarhandbok för information om att kongurera IP-adressen manuellt. Mer information nns på www.hp.com/support/ljM329MFP eller
www.hp.com/support/ljM428MFP eller www.hp.com/support/ljM429MFP.
45
Page 46

5.
Mobil utskrift (valfritt)
Metod 1: HP Smart
Använd appen HP Smart för att installera, skriva ut med mera.
1. Skanna QR-koden eller gå till 123.hp.com.
2. Installera appen HP Smart.
3. Kör appen HP Smart och följ anvisningarna på skärmen för att ansluta, installera, skriva ut med mera.
Metod 2: Wi-Fi Direct (endast trådlösa modeller)
Med Wi-Fi Direct kan Wi-Fi-förberedda enheter som smartphones, surfplattor och datorer skapa en trådlös nätverksanslutning direkt till skrivaren utan att
använda trådlös router eller åtkomstpunkt. Anslut till skrivarens Wi-Fi Direct-signal på samma sätt som Wi-Fi-förberedda enheter ansluts till ett nytt trådlöst
nätverk eller en hotspot.
Aktivera Wi-Fi Direct
1. På Hem-skärmen på skrivarens kontrollpanel sveper du iken längst upp
på skärmen neråt för att öppna kontrollpanelen och sedan trycker du på
(Wi-Fi Direct).
2. Tryck på
3. Om skärmen visar att Wi-Fi Direct är avslaget trycker du på Wi-Fi Direct
och slår sedan på det.
Mer information om trådlösa utskrifter och inställningar nns på www.hp.com/go/wirelessprinting.
Läs mer om mobil utskrift
(Inställningar).
Upptäcka skrivaren
1. Från den mobila enheten startar du Wi-Fi och söker efter trådlösa
nätverk.
2. Välj skrivarnamnet så som det visas på skrivarens kontrollpanel.
Produkten har stöd för AirPrint och Wi-Fi Direct. För mer information om mobil utskrift, skanna QR-koden eller gå till
www.hp.com/go/LaserJetMobilePrinting.
6.
6.1
Ställ in fax (endast faxmodeller – tillval)
Anslut skrivaren
Skrivaren är en analog enhet. HP rekommenderar att du använder
skrivaren på en dedikerad analog telefonlinje.
OBS! I vissa länder/regioner kan du behöva en adapter för
telefonsladden som levererades med skrivaren.
Anslut telefonsladden som medföljde skrivaren till faxporten
påskrivaren och till telefonjacket i väggen.
Hur ansluter jag en telefonsvarare eller
telefonanknytning?
1. Ta bort kontakten från telefonporten .
2. Koppla bort telefonsvararens sladd från telefonjacket
ochanslut den sedan till telefonporten
på skrivaren.
3. Anslut telefonsladden som medföljde skrivaren till faxporten på
skrivaren och till telefonjacket i väggen.
Hur ställer jag in HP-skrivare i digitala telefonmiljöer?
HP-skrivare är speciellt utformade för att användas med traditionella
analoga telefontjänster. För en digital telefonmiljö (till exempel DSL/
ADSL, PBX, ISDN eller FoIP) kan du behöva digitala till analoga lter eller
omvandlare när du ställer in skrivaren för fax.
Obs! Beroende på telefonbolaget är skrivaren kanske inte kompatibel med
alla digitala servicelinjer eller leverantörer i alla digitala miljöer eller med alla
digitala till analoga omvandlare. Kontakta telefonbolaget för att avgöra vilka
inställningsalternativ som är bäst.
Obs! När du ställer in ringmönsterdetekteringen i ett PBX-telefonsystem
som har olika ringmönster för interna och externa samtal ska du se till att
slå skrivarens faxnummer med hjälp av ett externt nummer för inspelning
av ringmönstret.
46
Page 47

6.2
Kongurera skrivaren
Du måste kongurera faxinställningarna för tid, datum och rubrik för att använda faxfunktionen.
Öppna HP:s faxinställningsguide (Windows)
1. Öppna HP Printer Assistant från Start-menyn.
2. I HP Printer Assistant väljer du Fax och sedan
Faxinställningsguiden.
3. Följ anvisningarna på skärmen för att kongurera
faxinställningarna.
Ställa in datum och tid på faxen:
1. På hemskärmen på skrivarens kontrollpanel sveper du iken
längst upp på skärmen neråt för att öppna kontrollpanelen.
2. Tryck på knappen
3. Tryck på Inställningar.
4. Tryck på Datum/tid för att ställa in faxens datum och tid.
(Installation).
Ställa in eller ändra faxhuvudet:
1. På skrivarens kontrollpanel trycker du på Fax.
2. Tryck på Installation och tryck sedan på Inställningar.
3. Tryck på Faxrubrik.
4. Ange ditt eller företagets namn och tryck sedan på Klar.
5. Ange faxnummer och tryck sedan på Klar.
OBS! Faxnumret får bestå av max20tecken.
OBS! Faxrubriken får bestå av max25tecken.
Mer information om andra sätt att skicka fax, t.ex. schemalägga ett fax som
ska skickas senare eller skicka fax från en dator, nns i användarhandboken
på webben:
7. Använda skanningsfunktionen
Använd programvaran HP Scan på datorn för att starta ett skanningsjobb på skrivaren.
Windows
Öppna HP Printer Assistant, välj Skanna och välj sedan Skanna ett dokument
eller foto.
Mac OS
Gå till appen Program och öppna HP Easy Scan.
Läs mer!
• www.hp.com/support/ljM329MFP
• www.hp.com/support/ljM429MFP
Felsökning
Användarhandbok
Den här användarhandboken innehåller information om användning och
felsökning. Den nns på webben:
1. Gå till www.hp.com/support/ljM329MFP eller
www.hp.com/support/ljM428MFP eller
www.hp.com/support/ljM429MFP.
2. Välj skrivaren om du uppmanas göra det och klicka sedan
påAnvändarhandböcker.
Leta efter uppdateringar av inbyggd programvara
1. Gå till www.hp.com/support/ljM329MFP eller
www.hp.com/support/ljM428MFP eller
www.hp.com/support/ljM429MFP.
2. Om du uppmanas till det väljer du skrivare och klickar sedan
påProgramvara och drivrutiner.
3. Välj ditt operativsystem och klicka på Nästa.
4. Välj Inbyggd programvara och klicka på knappen Hämta.
Hjälp på kontrollpanelen
Tryck på Hjälpknappen på skrivarens kontrollpanel för att visa hjälpavsnitt.
Ytterligare support
För HP:s heltäckande skrivarhjälp kan du gå till
www.hp.com/support/ljM329MFP eller www.hp.com/support/ljM428MFP
eller www.hp.com/support/ljM429MFP.
• Problemlösning
• Sök avancerade kongurationsanvisningar
• Hämta programuppdateringar
• Delta i supportforum
• Hitta information om garanti och föreskrifter
• Åtkomst till mobila utskriftsresurser
För att läsa mer om skrivaren kan du gå till
www.hp.com/support/ljM428MFPFAQ eller skanna QR-koden.
47
Page 48

© Copyright 2018 HP Development Company, L.P.
© Copyright 2018 HP Development Company, L.P.
Reproduction, adaptation or translation without prior written permission is
prohibited, except as allowed under the copyright laws.
The information contained herein is subject to change without notice.
The only warranties for HP products and services are set forth in the express
warranty statements accompanying such products and services. Nothing
herein should be construed as constituting an additional warranty. HP shall not
be liable for technical or editorial errors or omissions contained herein.
Trademark Credits
Windows® is a U.S. registered trademark of Microsoft Corporation.
Apple and the Apple logo are trademarks of Apple Inc., registered in the U.S.
and other countries.
Mac OS is a trademark of Apple Inc., registered in the U.S. and other countries.
AirPrint is a trademark of Apple Inc., registered in the U.S. and other countries.
La reproduction, l’adaptation ou la traduction sans autorisation écrite préalable
est interdite, sauf dans le cadre des lois sur le droit d’auteur.
Les informations contenues dans ce document peuvent être modiées sans
préavis.
Les seules garanties pour les produits et servicesHP sont décrites dans les
déclarations de garantie expresses accompagnant ces mêmes produits et
services. Les informations contenues dans ce document ne constituent en
aucun cas une garantie supplémentaire. HP ne pourra être tenu responsable
des erreurs ou omissions de nature technique ou rédactionnelle qui pourraient
subsister dans le présent document.
Crédits concernant les marques
Windows® est une marque déposée de Microsoft Corporation aux Etats-Unis.
Apple et le logo Apple sont des marques commerciales d’Apple, Inc. aux EtatsUnis et dans d’autres pays/régions.
Mac OS est une marque commerciale d’Apple Inc. aux États-Unis et dans
d’autres pays/régions.
AirPrint est une marque commerciale d’Apple Inc. aux États-Unis et dans
d’autres pays/régions.
www.hp.com
 Loading...