

Page 1
LaserJet Pro M101-M104,
LaserJet Ultra M105-M106
English................. 1
Français ............... 4
Español ............... 7
Getting Started Guide
www.hp.com/support/ljM101 www.register.hp.com
IMPORTANT:
First, follow Steps 1 - 3
on the printer hardware
setup poster, then continue
with Step 4.
5. Select a connection method
Português ......... 10
.................. 13
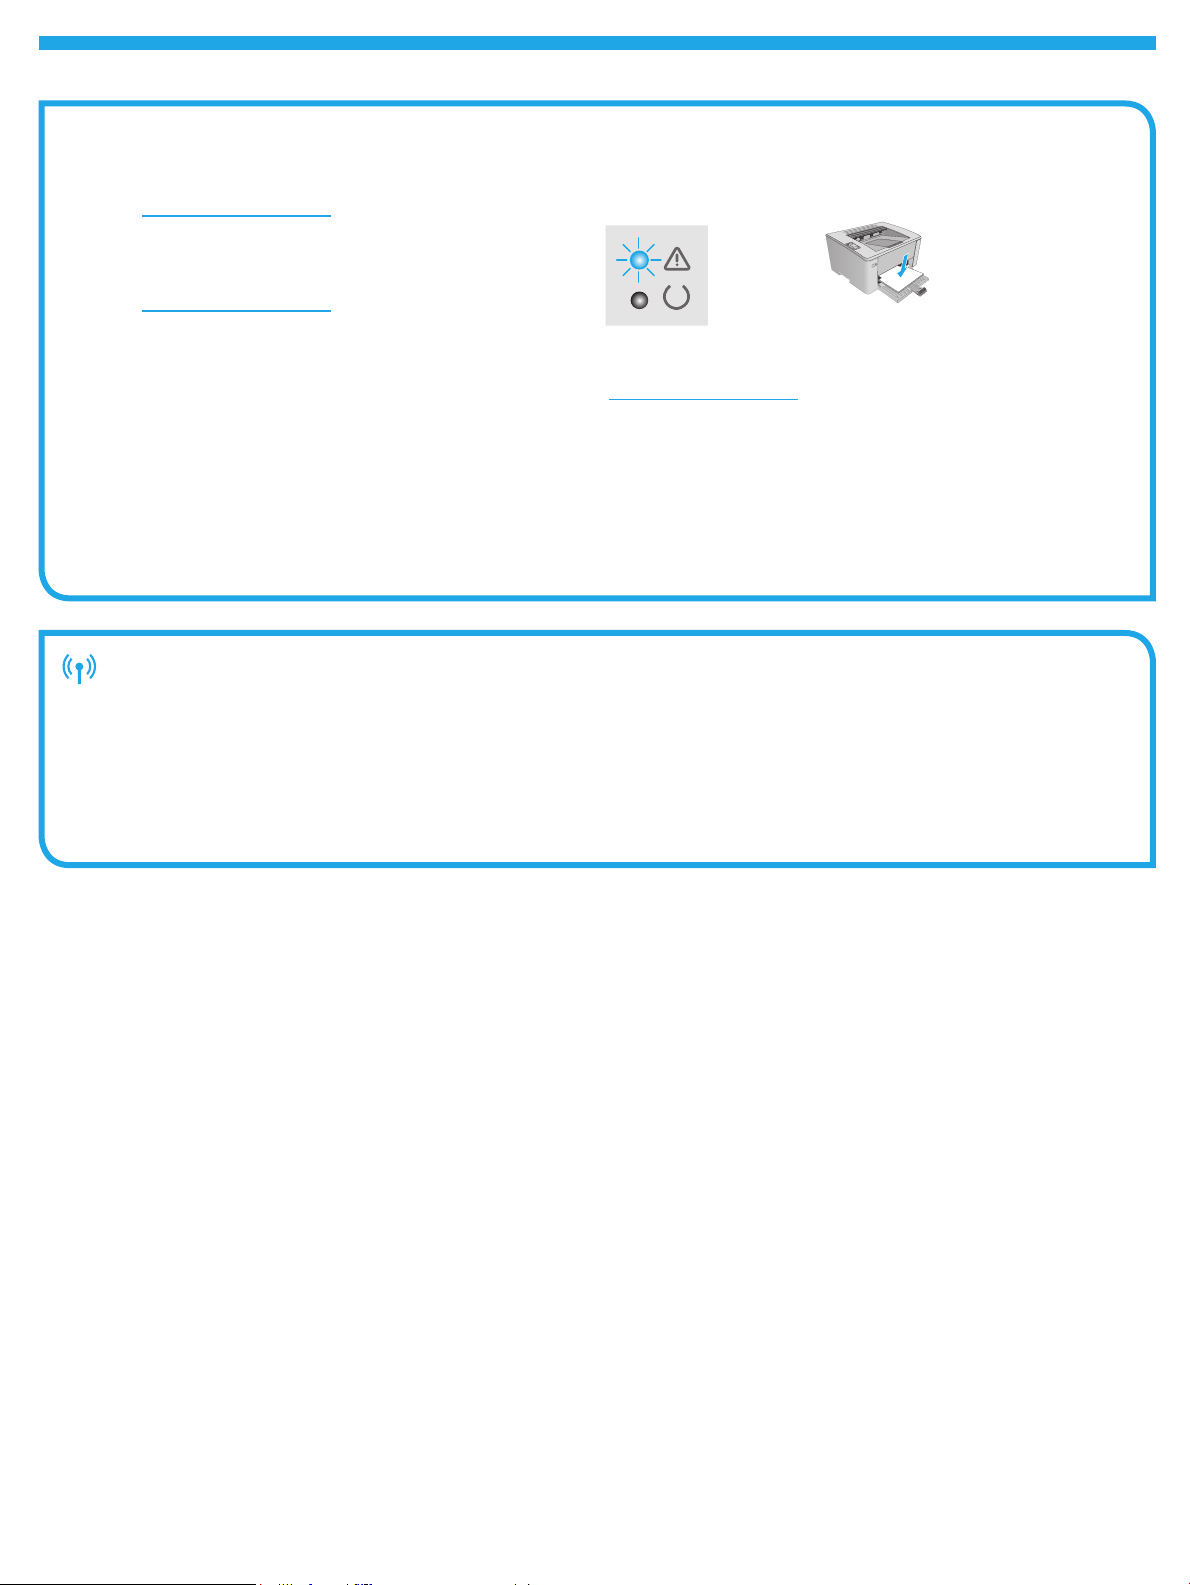
4. Set up the control panel
At the printer control panel, check the LED status before beginning
software installation.
USB connection directly between the
printer and the computer
Use an A-to-B type USB cable.
Windows
1. Do not connect the USB cable before installing the software. The
installation process prompts to connect the cable at the appropriate
time. If the cable is already connected, restart the printer when
installation prompts to connect the cable.
2. Continue to “6. Download and install the software.”
OS X
1. Connect the USB cable between the computer and the printer before
installing the software.
2. Continue to “6. Download and install the software.”
Wired (Ethernet) network connection
(optional)
Use a standard network cable.
1. Connect the network cable to the printer and to the network. Wait a few
minutes for the printer to acquire a network address.
2. Continue to “6. Download and install the software.”
Perform a wireless installation
(wireless models only)
Before starting the installation, verify that the wireless access point is working
correctly. Make sure that the printer, router, and computer are all turned on
and that the computer is connected to the same wireless network that the
printer will be connected to.
1. Place the CD in the CD-ROM drive, navigate to setup.exe and double click.
When the Printer connections dialog appears, choose Make a wireless
connection to the device.
2. Follow the on-screen instructions.
3. Select the printer detected by the software. If the printer cannot be
detected by the installer, manually input the printer’s IP address to
continue the installation.
NOTE: Print a conguration page to nd the printer’s IP address. At the
printer control panel, press and hold the Resume/Cancel button for
5 seconds, and then release the Resume/Cancel button to print the
conguration page. The IP address is listed on the conguration page in
the Network Information section.
Manually congure the IP address
See the printer user guide for information on how to manually congure the IP
address www.hp.com/support/ljM101.
1
Page 2
Download and install the software
6.
Method 1: Download HP Easy Start (Windows and OS X)
1. Go to 123.hp.com/laserjet, and click Download.
2. Follow the on-screen instructions and prompts to save the le to the computer.
3. Launch the software le from the folder where the le was saved.
Method 2: Download from the printer support website
(Windows and OS X)
1. Go to www.hp.com/support/ljM101.
2. Select Software and drivers.
3. Download the software for your printer model and operating system.
4. Launch the software le from the folder where the le was saved.
7. Mobile printing (optional)
Connect the device to the wireless network
7.1
To print from a phone or tablet, connect the device to the same wireless
network as the printer.
Apple iOS devices (AirPrint) Open the item to print, and select the Action icon.
Select Print, select the printer, and then select Print.
Android devices (4.4 or newer) Open the item to print, and select the Menu
button. Select Print, select the printer, and select Print.
Some devices require downloading the HP Print Service plugin app from the
Google Play store.
Windows Phone Download the HP AiO Remote app from the Windows Store.
Learn more about mobile printing
For further information on these and other operating
systems (Chrome/Google Cloud Print) go to
“www.hp.com/go/LaserJetMobilePrinting”
or scan the QR code below.
Method 3: Install from the printer CD (Windows only)
1. Insert the printer CD into the computer.
2. Follow the on-screen instructions to install the software. For more information
see the Install Notes on the printer CD.
Wi-Fi Direct (wireless models only)
7.2
Wi-Fi Direct allows Wi-Fi capable devices, such as smart phones, tablets,
or computers, to make wireless network connection directly to the printer
without using a wireless router or access point. Connect to the printer’s Wi-Fi
Direct signal the same way Wi-Fi capable devices are connected to a new
wireless network or hotspot.
Enable Wi-Fi Direct
Enable HP Web Services in the HP Embedded Web Server (EWS) by following
these steps:
1. Connect the printer to a network, and print a conguration page to get
the printer IP address.
NOTE: To set the IP address manually or congure it automatically, see
“Congure the network product” in the user guide.
2. Open a web browser, enter the printer IP address into the address line,
and then press E
3. In the HP EWS, select the Networking tab.
4. Select the Wi-Fi Direct Setup page, select On, and then click Apply.
nter. Example IP address: 192.168.0.1
8. Set up HP ePrint via email (optional)
Use HP ePrint via email to print documents by sending them as an email attachment to the printer’s email address from any email enabled device, even from devices that are
not on the same network.
To use HP ePrint via email, the printer must meet these requirements:
• The printer must be connected to wireless network and have Internet access.
• HP Web Services must be enabled on the printer, and the printer must be
registered with HP Connected.
Enable HP Web Services (wireless models only)
1. After the printer is connected to the HP Embedded Web Server (EWS), print a
conguration page and identify the printer IP address.
2. At the computer, open a web browser and enter the printer IP address into the
address line. The HP EWS opens.
3. Click the HP Web Services tab. If the network uses a proxy server do the
following:
• Select the Proxy Settings tab.
• Select the Check this box if your network uses a proxy server to access the
Internet check box.
• In the Proxy Server eld, enter the proxy server address and port number, and
then click the Apply button.
4. Select the HP Web Services tab, and click the Enable button. The printer
congures the connection to the Internet, and then a message appears indicating
an information sheet will print
5. Click the OK button. An ePrint page prints out. On the ePrint page, look for the
e-mail address that is automatically assigned to the printer.
2
Page 3
Troubleshooting
User guide
The user guide includes printer usage and troubleshooting information. It is
available on the printer CD and on the Web:
1. Go to www.hp.com/support/ljM101.
2. Select a printer or category from the list, and then click User Guides.
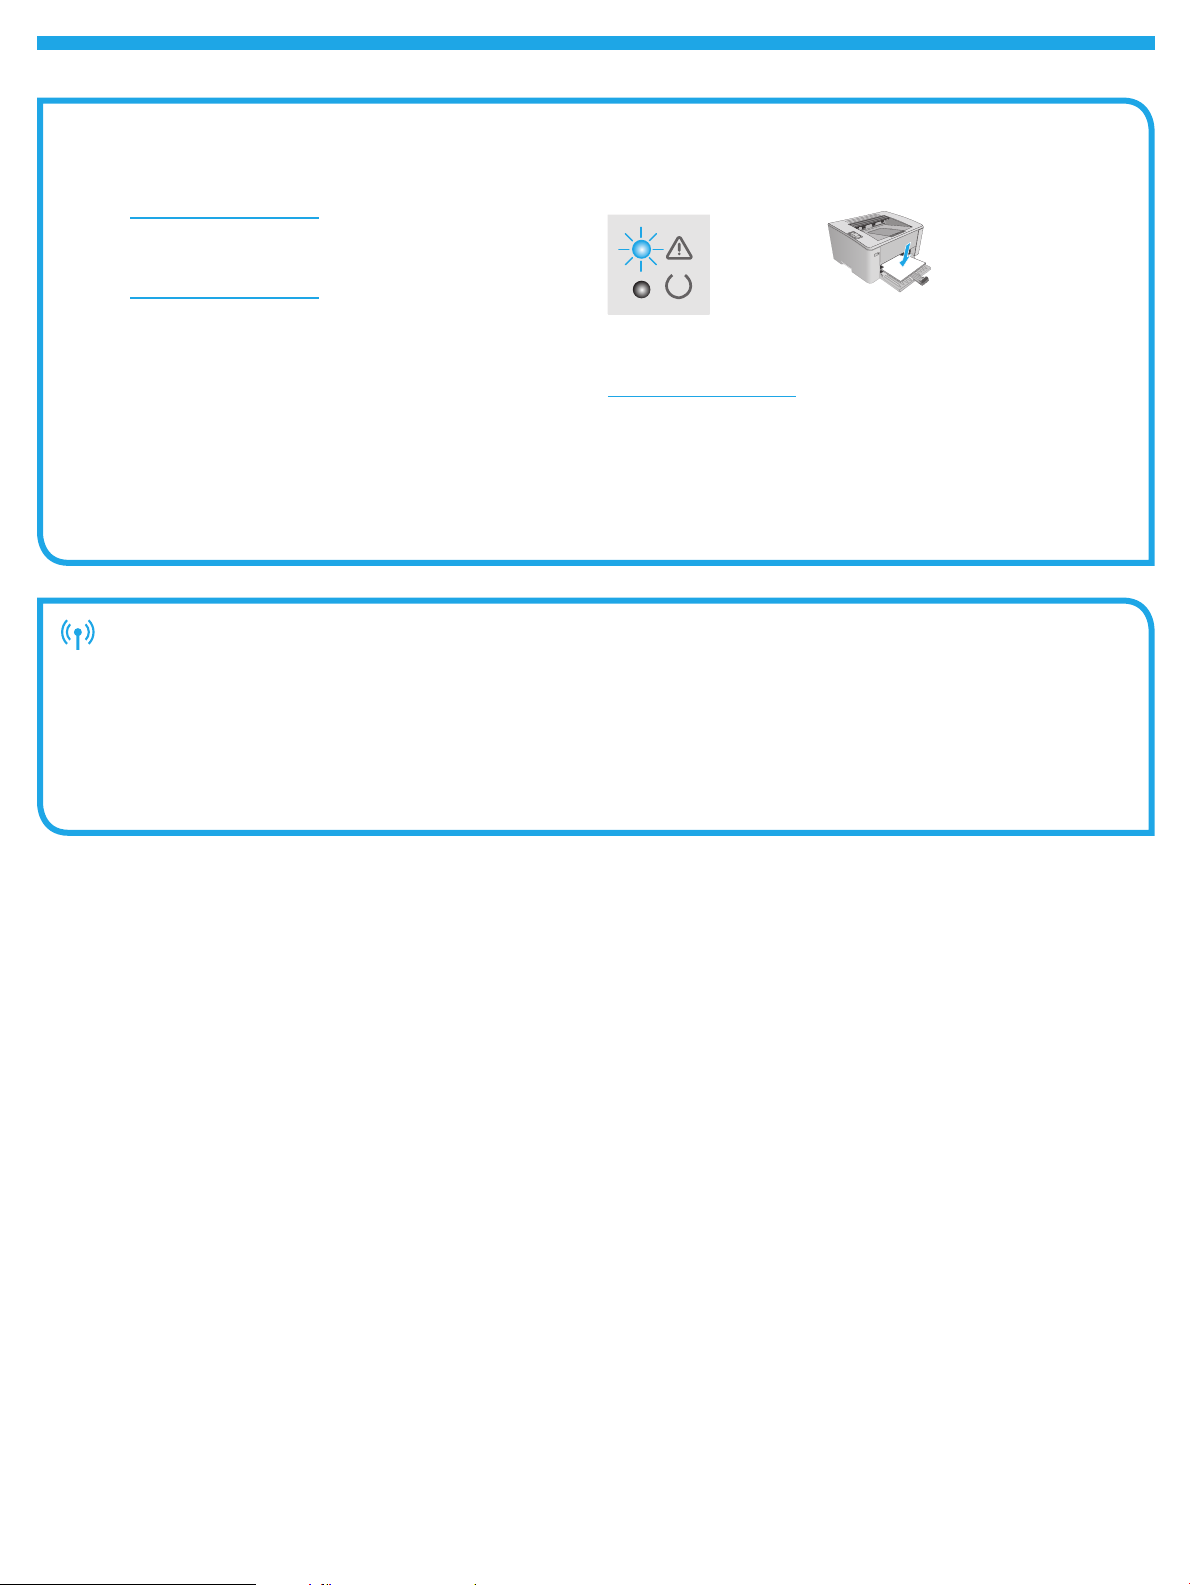
Resolve error code messages (First Use)
Error code Action
Attention light is blinking Load the paper into the tray
Check for rmware updates
1. Go to www.hp.com/support/ljM101.
2. Select a printer or category from the list, and then click Drivers.
3. Select the operating system, and then click the Next button.
4. Select Firmware, and then click the Download button.
Wireless network connection (wireless models only)
• Verify that the printer and wireless router are turned on and have power. Also make sure the wireless switch is turned on.
• Verify that the printer is within the range of the wireless network. For most networks, the printer must be within 30 m (100 ft) of the wireless access point
(wireless router).
• Verify that the print driver is installed on the computer.
• Verify that the computer and printer connect to the same wireless network.
• For Mac, verify that the wireless router supports Bonjour.
• Restart the wireless router.
Additional support resources
For HP’s all-inclusive help for the printer, go to
www.hp.com/support/ljM101:
• Solve problems
• Find advanced conguration instructions
• Download software updates
• Join support forums
• Find warranty and regulatory information
• Access mobile printing resources
3
Page 4

English ........... 1
Français ......... 4
Guide de démarrage
Español .......... 7
Português .... 10
............ 13
LaserJet Pro M101-M104,
LaserJet Ultra M105-M106
www.hp.com/support/ljM101 www.register.hp.com
IMPORTANT:
Suivez tout d'abord les
étapes1 à 3 indiquées
sur le poster d'installation
matérielle de l'imprimante,
puis passez à l'étape4.
4. Congurer le panneau de commande
Sur le panneau de commande de l'imprimante, vériez l'état des voyants avant
decommencerl'installation du logiciel.
5. Sélectionner une méthode de connexion
Connexion USB directement entre
l'imprimante et l'ordinateur
Utilisez un câble USB de type A-à-B.
Windows
1. Ne connectez pas le câble USB avant d'installer le logiciel. Le processus
d'installation vous invite à connecter le câble au moment opportun. Si le
câble est déjà connecté, redémarrez l'imprimante lorsque le processus
d'installation vous invite à connecter le câble.
2. Passez à la section «6. Télécharger et installer le logiciel.»
OS X
1. Pour Mac, branchez le câbleUSB entre l'ordinateur et l'imprimante avant
d'installer le logiciel.
2. Passez à la section «6. Télécharger et installer le logiciel.»
Connexion à un réseau laire (Ethernet)
(facultatif)
Utilisez un câble réseau standard.
1. Branchez le câble réseau à l'imprimante et au réseau. Attendez quelques
minutes que l'imprimante acquière une adresse réseau.
2. Passez à la section «6. Télécharger et installer le logiciel.»
Avant de commencer l'installation, vériez que le point d'accès sans l
fonctionne correctement. Assurez-vous que l'imprimante, le routeur et
l'ordinateur sont tous sous tension et que l'ordinateur est connecté au réseau
sans l auquel vous souhaitez connecter l'imprimante.
1. Placez le CD dans le lecteur de CD-ROM, rendez-vous au chier
2. Suivez les instructions aichées à l'écran.
3. Sélectionnez l'imprimante détectée par le logiciel. Si l'installateur ne
Congurer manuellement l'adresse IP
Consultez le manuel de l'utilisateur de l'imprimante pour obtenir des informations
sur la conguration manuelle de l'adresseIP www.hp.com/support/ljM101.
Eectuer une installation sans l
(modèles sans l uniquement)
setup.exe et double-cliquez. Lorsque la boîte de dialogue relative aux
connexions d'imprimante s'aiche, choisissez Établir une connexion sans
l vers le dispositif.
peut pas détecter l'imprimante, saisissez manuellement l'adresseIP de
l'imprimante pour continuer l'installation.
REMARQUE: Imprimez une page de conguration pour déterminer
l'adresseIP de l'imprimante. Sur le panneau de commande de
l'imprimante, appuyez sur le bouton Reprendre/Annuler pendant
5secondes, puis relâchez-le pour imprimer la page de conguration.
L'adresseIP est mentionnée sur la page de conguration dans la section
Information réseau.
4
Page 5
Télécharger et installer le logiciel
6.
Méthode 1: Téléchargement de HP Easy Start
(Windows et OS X)
1. Visitez la page 123.hp.com/laserjet et cliquez sur Télécharger.
2. Suivez les instructions et les invites à l'écran pour enregistrer le chier sur
l'ordinateur.
3. Lancez le chier du logiciel à partir du dossier dans lequel il a été enregistré.
Méthode 2: Téléchargement depuis le site Web
d'assistance de l'imprimante (Windows et OS X)
1. Accédez à www.hp.com/support/ljM101.
2. Sélectionnez Pilotes et logiciels.
3. Téléchargez le logiciel adapté à votre modèle d'imprimante et à votre système
d'exploitation.
4. Lancez le chier du logiciel à partir du dossier dans lequel il a été enregistré.
7. Impression mobile (facultatif)
Connexion du produit à un réseau sans l
7.1
Pour imprimer depuis un téléphone ou une tablette, connectez le périphérique
au même réseau sans l que l'imprimante.
Périphériques Apple iOS (AirPrint) Ouvrez le document à imprimer, puis
sélectionnez l'icône Action. Sélectionnez Imprimer, puis l'imprimante et
appuyez sur Imprimer.
Périphériques Android (4.4 ou ultérieurs) Ouvrez l'élément à imprimer puis
sélectionnez le bouton Menu. Sélectionnez Imprimer, puis l'imprimante et
appuyez sur Imprimer.
Pour certains périphériques, il est nécessaire de télécharger l'application
dumodule d'extension du service d'impressionHP sur Google Play.
Téléphones Windows Téléchargez l'appli HP AiO Remote disponible dans
leWindows Store.
En savoir plus sur l'impression mobile
Pour plus d'informations sur ces systèmes
d'exploitation et d'autres (Chrome/Google Cloud Print),
accédez à «www.hp.com/go/LaserJetMobilePrinting»
ou scannez le code QR ci-dessous.
Méthode 3: Installation avec le CD de l'imprimante
(Windows uniquement)
1. Insérez le CD de l'imprimante dans votre ordinateur.
2. Suivez les instructions à l'écran pour installer le logiciel. Pour plus d'informations,
consultez les notes d'installation sur le CD de l'imprimante.
Wi-Fi Direct (modèles sans l uniquement)
7.2
Wi-Fi Direct permet aux périphériques Wi-Fi (smartphones, tablettes ou
ordinateurs) d'eectuer une connexion réseau sans l directement vers
l'imprimante sans utiliser de routeur sans l ou de point d'accès. Les
utilisateurs se connectent au signal d'impression directe Wi-Fi de l'imprimante
de la même manière qu'ils connectent un périphérique Wi-Fi àun nouveau
réseau sans l ou à une borne d'accès.
Activer Wi-Fi Direct
Activez les servicesWeb HP dans le serveur Web intégré (EWS) HP en
procédant comme suit:
1. Connectez l'imprimante à un réseau et imprimez une page de
conguration pour déterminer l'adresseIP de l'imprimante.
REMARQUE: Pour congurer manuellement ou automatiquement
l'adresseIP, consultez «Congurer le produit en réseau» dans le manuel
de l'utilisateur.
2. Lancez un navigateur Internet, saisissez l'adresseIP de l’imprimante
dans le champ d'adresse, puis appuyez sur E
192.168.0.1
3. Dans le serveur Web intégré (EWS) HP, cliquez sur l'onglet Réseaux.
4. Sélectionnez la page Conguration Wi-Fi Direct, sélectionnez Activé,
puiscliquez sur Appliquer.
ntrée. Exemple d'adresse IP:
8. Congurer HPePrint via messagerie électronique (facultatif)
Utilisez HPePrint via messagerie électronique pour imprimer des documents en les envoyant en pièce jointe à l'adresse électronique de l'imprimante depuis n'importe quel
périphérique activé, même ceux qui ne sont pas sur le même réseau.
Pour utiliser HPePrint via messagerie électronique, l'imprimante doit répondre aux
exigences suivantes:
• L'imprimante doit être connectée à un réseau câblé ou sans l et avoir accès
àInternet.
• Les services WebHP doivent être activés sur l'imprimante et celle-ci doit être
enregistrée auprès de HPConnected.
Activer les Services Web HP (modèles sans l uniquement)
1. Une fois l'imprimante connectée au serveur Web intégré (EWS) HP, imprimez une
page de conguration et déterminez l'adresseIP de l'imprimante.
2. Sur votre ordinateur, ouvrez un navigateur Web et saisissez l'adresseIP
del'imprimante dans le champ d'adresse. L'EWS de HP s'ouvre.
3. Cliquez sur l'onglet Services Web HP. Si le réseau utilise un serveur proxy,
eectuez ce qui suit:
• Sélectionnez l'onglet Paramètres de proxy.
• Sélectionnez l'option Cochez cette case si votre réseau utilise un serveur
proxy pour accéder à Internet.
• Dans le champ Serveur proxy, entrez l'adresse et le numéro de port
duserveur proxy, puis cliquez sur le bouton Appliquer.
4. Sélectionnez l'onglet Services Web HP, puis cliquez sur le bouton Activer.
L'imprimante congure la connexion à Internet, puis un message s'aiche vous
indiquant qu'une page d'informations va être imprimée.
5. Cliquez sur le bouton OK. Une page ePrint est imprimée. Sur la page ePrint,
recherchez l'adresse électronique automatiquement attribuée à l'imprimante.
5
Page 6

Dépannage
Manuel de l'utilisateur
Le manuel de l'utilisateur comprend des informations relatives à l'utilisation de
l'imprimante et au dépannage. Il est disponible sur le CD de l'imprimante et sur
leWeb:
1. Accédez à www.hp.com/support/ljM101.
2. Sélectionnez une imprimante ou une catégorie dans la liste, puis cliquez
surManuels de l'utilisateur.
Résolution des messages à code d'erreur
(première utilisation)
Code d'erreur Action
Le voyant Attention clignote Chargez le papier dans le bac
Recherche des mises à jour de micrologiciels
1. Accédez à www.hp.com/support/ljM101.
2. Sélectionnez une imprimante ou une catégorie dans la liste, puis cliquez
surPilotes.
3. Sélectionnez le système d'exploitation et cliquez sur le bouton Suivant.
4. Sélectionnez Micrologiciel et cliquez sur le bouton Télécharger.
Connexion du réseau sans l (modèles sans l uniquement)
• Vériez que l'imprimante et le routeur sans l sont sous tension et alimentés. Vériez également que l'interrupteur sans l est activé.
• Vériez que l'imprimante se trouve dans la plage du réseau sans l. Pour la plupart des réseaux, l'imprimante doit se trouver dans une plage de 30m (100pi)
dupoint d'accès sans l (routeur sans l).
• Vériez que le pilote d’impression est bien installé sur l'ordinateur.
• Vériez que l'ordinateur et l'imprimante se connectent au même réseau sans l.
• Pour Mac, vériez que le routeur sans l prend en charge Bonjour.
• Redémarrez le routeur sans l.
Ressources d'assistance supplémentaires
Pour l'aide globale de HP relative à l'imprimante, accédez
à www.hp.com/support/ljM101:
• Résolution des problèmes
• Recherche d'instructions de conguration avancées
• Téléchargement des mises à jour du logiciel
• Inscription au forum d'assistance
• Recherche d'informations réglementaires et de garantie
• Accès aux ressources d'impression mobile
6
Page 7

LaserJet Pro M101-M104,
Guía de inicio de
English................. 1
Français ............... 4
Español ............... 7
LaserJet Ultra M105-M106
www.hp.com/support/ljM101 www.register.hp.com
IMPORTANTE:
En primer lugar, siga los
pasos 1 - 3 del folleto
deconguración del
hardware de la impresora
y, después, continúe con
elpaso 4.
5. Selección del método de conexión
Português ......... 10
.................. 13
4. Conguración del panel de control
En el panel de control de la impresora, compruebe el estado del LED antes de comenzar
ainstalar el software.
Conexión USB directamente entre la
impresora y el equipo
Utilice un cableUSB de tipoA aB.
Windows
1. No conecte el cable USB antes de instalar el software. El proceso de
instalación del software muestra un aviso para conectar el cable en el
momento adecuado. Si el cable ya está conectado, reinicie la impresora
cuando el proceso de instalación muestre el aviso para conectar el cable.
2. Continúe con “6. Descarga e instalación del software”.
OS X
1. Conecte el cable USB entre el equipo y la impresora antes de instalar
elsoftware.
2. Continúe con “6. Descarga e instalación del software”.
Conexión a una red por cable (Ethernet)
(opcional)
Utilice un cable de red estándar.
1. Conecte el cable de red a la impresora y a la red. Espere unos minutos
aque la impresora obtenga la dirección de red.
2. Continúe con “6. Descarga e instalación del software”.
Realice una instalación inalámbrica
(solopara los modelos inalámbricos)
Antes de comenzar la instalación, verique que el punto de acceso
inalámbrico funcione correctamente. Asegúrese de que la impresora,
eldireccionador y el equipo estén encendidos y que el equipo esté
conectadoa la misma red inalámbrica a la que desea conectar la impresora.
1. Coloque el CD en la unidad de CD-ROM, navegue hasta setup.exe y haga
doble clic. Cuando aparezca el diálogo de conexiones de la impresora,
seleccione Establecer una conexión inalámbrica con el dispositivo.
2. Siga las instrucciones que aparecen en pantalla.
3. Seleccione la impresora que el software ha detectado. Si el programa de
instalación no puede detectar la impresora, introduzca manualmente la
dirección IP de la impresora para proseguir con la instalación.
N O T A : Para obtener la dirección IP de la impresora, imprima una página
de conguración. En el panel de control de la impresora, mantenga
pulsado el botón Reanudar/Cancelar durante 5 segundos y, después,
suéltelo para imprimir la página de conguración. La dirección IP consta
en la sección Información de la red de la página de conguración.
Conguración manual de la direcciónIP
Consulte la Guía del usuario de la impresora para obtener información sobre cómo
congurar manualmente la dirección IP www.hp.com/support/ljM101.
7
Page 8

Descarga e instalación del software
6.
Método 1: Descarga desde HP Easy Start (Windows y OS X)
1. Vaya a 123.hp.com/laserjet y haga clic en Descargar.
2. Siga las instrucciones e indicaciones en pantalla para guardar el archivo
en el equipo.
3. Inicie el archivo de software de la carpeta en la que se guardó el archivo.
Método 2: Descarga desde el sitio web de asistencia de la
impresora (Windows y OS X)
1. Vaya a www.hp.com/support/ljM101.
2. Seleccione Software y controladores.
3. Descargue el software para su modelo de impresora y sistema operativo.
4. Inicie el archivo de software de la carpeta en la que se guardó el archivo.
7. Impresión móvil (opcional)
Conexión del dispositivo a la red inalámbrica
7.1
Para imprimir desde un teléfono o una tableta, conecte el dispositivo a la
misma red inalámbrica que la impresora.
Dispositivos iOS de Apple (AirPrint) Abra el elemento que desee imprimir
yseleccione el icono Acción. Seleccione primero Imprimir, después la
impresora y por último, de nuevo, Imprimir.
Dispositivos Android (4.4 o versiones posteriores) Abra el elemento que
desee imprimir y seleccione el botón Menú. Seleccione primero Imprimir,
después la impresora y por último, de nuevo, Imprimir.
Algunos dispositivos requieren que se descargue el complemento HP Print
Service de Play Store de Google.
Windows Phone Descargue la aplicación HP AiO Remote de Windows Store.
Obtener más información sobre la impresión móvil
Para obtener más información acerca de este y otros
sistemas operativos (Chrome/Google Cloud Print) vaya
a “www.hp.com/go/LaserJetMobilePrinting” oescanee
el código QR a continuación.
Método 3: Instalación desde el CD de la impresora
(solo Windows)
1. Inserte el CD de la impresora en el equipo.
2. Siga las instrucciones en pantalla para instalar el software. Para obtener más
información, consulte las Notas sobre la instalación del CD de la impresora.
Wi-Fi Direct (solo modelos inalámbricos)
7.2
Wi-Fi Direct permite que los dispositivos con capacidad Wi-Fi, como por ejemplo,
los teléfonos inteligentes, las tabletas o los equipos, realicen conexiones de
red inalámbricas directamente a la impresora sin utilizar un direccionador ni un
punto de acceso inalámbricos. Conéctese a la señal directa de Wi-Fi Direct de la
impresora del mismo modo que conecta un dispositivo con capacidad Wi-Fi a
una red inalámbrica nueva o a un punto deacceso inalámbrico.
Activar Wi-Fi Direct
Active los Servicios Web deHP en el servidor Web incorporado deHP (EWS)
siguiendo estos pasos:
1. Conecte la impresora a una red e imprima una página de conguración
para obtener la dirección IP de la impresora.
NOTA: Para establecer manualmente la dirección IP o congurarla de
manera automática, consulte la sección “Conguración del producto
dered” de la Guía del usuario.
2. Abra un navegador web, escriba la direcciónIP de la impresora en la barra
de direcciones y, a continuación, pulse I
192.168.0.1
3. En el EWS de HP, haga clic en la cha Redes.
4. Seleccione la página Conguración de Wi-Fi Direct, seleccione la opción
Activado y, a continuación, haga clic en Aplicar.
ntro. Dirección IP de ejemplo:
8. Conguración de HP ePrint a través del correo electrónico (opcional)
Utilice HP ePrint a través del correo electrónico para imprimir documentos enviándolos como adjunto de un mensaje de correo electrónico a la dirección de correo de la
impresora desde cualquier dispositivo que tenga acceso al correo electrónico, incluso desde dispositivos que no están en la misma red.
Para utilizar HPePrint a través del correo electrónico, la impresora debe cumplir los
requisitos siguientes:
• La impresora debe estar conectada a una red inalámbrica y disponer de acceso
a Internet.
• Los servicios web de HP deben estar activados en la impresora, la cual debe
estar registrada en HPConnected.
Activación de los servicios Web de HP (solo para los modelos
inalámbricos)
1. Una vez que la impresora ya se haya conectado al servidor Web incorporado
deHP (EWS), imprima una página de conguración e identique la dirección IP de
la impresora.
2. En el equipo, abra un navegador Web e introduzca la direcciónIP de la impresora
en la línea de la dirección. Se abre el EWS de HP.
3. Haga clic en la cha Servicios web de HP. Si en la red se utiliza un servidor proxy,
haga lo siguiente:
• Seleccione la cha Conguración del servidor proxy.
• Seleccione la casilla de vericación Marque esta casilla si en su red se utiliza
un servidor proxy para acceder a Internet.
• En el campoServidor proxy, introduzca la dirección y el número de puerto del
servidor proxy y, a continuación, haga clic en el botónAplicar.
4. Seleccione la cha Servicios Web de HP y haga clic en el botón Activar.
Laimpresora congura la conexión a Internet y, a continuación, se muestra un
mensaje en que se indica que se imprimirá una hoja de información.
5. Haga clic en el botón Aceptar. Se imprime una página de ePrint. En la página de
ePrint, busque la dirección de correo electrónico que se asigna automáticamente
a la impresora.
8
Page 9

Solución de problemas
Guía del usuario
En la Guía del usuario se incluye información sobre el uso de la impresora
ysolución de problemas. Está disponible en el CD de la impresora y en la Web:
1. Vaya a www.hp.com/support/ljM101.
2. Seleccione una impresora o una categoría en la lista y luego haga clic
enGuías del usuario.
Resolver mensajes de código de error (primer uso)
Código de error Acción
La luz Atención parpadea Cargue el papel en la bandeja
Comprobar las actualizaciones del rmware
1. Vaya a www.hp.com/support/ljM101.
2. Seleccione una impresora o una categoría en la lista y, a continuación, haga
clic en Controladores.
3. Seleccione el sistema operativo y haga clic en el botón Siguiente.
4. Seleccione Firmware y haga clic en el botón Descargar.
Conexión de la red inalámbrica (solo modelos inalámbricos)
• Compruebe que la impresora y el direccionador inalámbrico estén encendidos y tengan alimentación. Asegúrese también de que el interruptor inalámbrico esté
encendido.
• Compruebe que la impresora se encuentre dentro del alcance de la red inalámbrica. Para la mayoría de las redes, la impresora debe encontrarse dentro de un
alcance de 30m (100 pies) del punto de acceso inalámbrico (direccionador inalámbrico).
• Compruebe que el controlador de impresión está instalado en el equipo.
• Compruebe que el equipo y la impresora estén conectados a la misma red inalámbrica.
• En Mac, verique que el direccionador inalámbrico sea compatible con Bonjour.
• Reinicie el direccionador inalámbrico.
Recursos de asistencia adicional
Para obtener ayuda total de HP para la impresora, vaya
a www.hp.com/support/ljM101:
• Solucionar problemas
• Buscar instrucciones de conguración avanzada
• Descargar las actualizaciones de software
• Participar en foros de asistencia
• Buscar información legal y sobre la garantía
• Acceder a recursos de impresión móvil
9
Page 10
English ........... 1
Français ......... 4
Guia de primeiros passos da
Español .......... 7
Português .... 10
............ 13
LaserJet Pro M101-M104,
LaserJet Ultra M105-M106
www.hp.com/support/ljM101 www.register.hp.com
IMPORTANTE:
Primeiro, siga as
Etapas1 a 3 no
pôster de conguração do
hardware da impressora,
então prossiga para
a Etapa 4.
4. Congurar o painel de controle
No painel de controle da impressora, verique o status do LED antes de iniciar
a instalação do software.
5. Selecionar o método de conexão
Conexão USB direta entre a impressora
e o computador
É necessário utilizar um cabo USB do tipo A a B.
Windows
1. Não conecte o cabo USB antes de instalar o software. O processo
de instalação solicitará a conexão do cabo no momento apropriado.
Seocabo já estiver conectado, reinicie a impressora quando a instalação
solicitar a conexão do cabo.
2. Continue até “6. Baixe e instale o software”.
OS X
1. Conecte o cabo USB entre o computador e a impressora antes de instalar
o software.
2. Continue até “6. Baixe e instale o software”.
Conexão de rede cabeada (Ethernet)
(opcional)
Use um cabo de rede padrão.
1. Conecte o cabo de rede à impressora e à rede. Aguarde alguns minutos
até a impressora adquirir um endereço de rede.
2. Continue até “6. Baixe e instale o software”.
Execute uma instalação sem o
(somentenos modelos sem o)
Antes de iniciar a instalação, verique se o ponto de acesso sem o está
funcionando corretamente. Certique-se de que a impressora, o roteador
e o computador estejam ligados e que o computador esteja conectado
àmesma rede sem o à qual você conectará a impressora.
1. Coloque o CD na unidade de CD-ROM, navegue até setup.exe e clique
duas vezes. Quando a caixa de diálogo Conexões da impressora aparecer,
escolha Fazer uma conexão sem o com o dispositivo.
2. Siga as instruções na tela.
3. Selecione a impressora detectada pelo software. Se o instalador não
conseguir detectar a impressora, insira manualmente o endereço IP da
impressora para prosseguir a instalação.
N O T A : Imprima uma página de Conguração para localizar o endereço IP
da impressora. No painel de controle da impressora, pressione emantenha
pressionado o botão Retomar/Cancelar por 5 segundos elibere o botão
Retomar/Cancelar para imprimir a página de conguração. O endereço IP
élistado na página de Conguração na seção Informações da rede.
Congurar manualmente o endereço IP
Consulte o guia do usuário da impressora para obter informações sobre como
congurar o endereço IP manualmente www.hp.com/support/ljM101.
10
Page 11

Baixe e instale o software
6.
Método 1: Faça download do HP Easy Start
(Windows e OS X)
1. Acesse 123.hp.com/laserjet e clique em Fazer download.
2. Siga as instruções na tela e os comandos para salvar o arquivo no computador.
3. Inicie o arquivo de software da pasta onde ele foi salvo.
Método 2: Faça download do site de suporte
daimpressora (Windows e OS X)
1. Acesse www.hp.com/support/ljM101.
2. Selecione Software e drivers.
3. Faça o download do software para seu modelo de impressora e sistema operacional.
4. Inicie o arquivo de software da pasta onde ele foi salvo.
7. Impressão móvel (opcional)
Conectar o dispositivo à rede sem o
7.1
Para imprimir usando um telefone ou tablet, conecte o dispositivo à mesma
rede sem o em que a impressora está.
Dispositivos Apple iOS (AirPrint) Abra o item a ser impresso e selecione
oícone Ação. Selecione Imprimir, selecione a impressora e então selecione
Imprimir.
Dispositivos Android (4.4 ou mais recentes) Abra o item a ser impresso
eselecione o botão Menu. Selecione Imprimir, selecione a impressora
edepois Imprimir.
Alguns dispositivos exigem que o plug-in HP Print Service seja baixado
daGoogle Play Store.
Windows Phone Baixe o aplicativo HP AiO Remote da Windows Store.
Saiba mais sobre a impressão móvel
Para obter mais informações sobre esses e outros
sistemas operacionais (Chrome/Google Cloud Print),
acesse “www.hp.com/go/LaserJetMobilePrinting” ou
digitalize o código QR abaixo.
Método 3: Instale do CD da impressora (somente Windows)
1. Insira o CD da impressora no computador.
2. Siga as instruções exibidas na tela para instalar o software. Para obter mais
informações, consulte as notas sobre a instalação no CD da impressora.
Wi-Fi Direct (somente modelo sem o)
7.2
O Wi-Fi Direct permite que dispositivos compatíveis com Wi-Fi, como
smartphones, tablets ou computadores, façam uma conexão de rede sem o
diretamente com a impressora sem o uso de um ponto de acesso ou roteador
sem o. Conecte-se ao sinal Wi-Fi Direct da impressora da mesma maneira
que dispositivos compatíveis com Wi-Fi se conectam a uma nova rede sem o
ou hotspot.
Ativar o Wi-Fi Direct
Ative os HP Web Services no Servidor da Web incorporado (EWS) da
HPseguindo estas etapas:
1. Conecte a impressora a uma rede e imprima uma página de conguração
para obter o endereço IP da impressora.
NOTA: Para denir manualmente o endereço IP ou para congurá-lo
automaticamente, consulte "Congurar o produto de rede" no
Guia do Usuário.
2. Abra um navegador da Web e insira o endereço IP da impressora na linha
de endereço e pressione E
3. No EWS da HP, selecione a guia Rede.
4. Selecione a página Conguração do Wi-Fi Direct, a opção Habilitar e, em
seguida,clique em Aplicar.
nter. Exemplo de endereço IP: 192.168.0.1
8. Congurar o HP ePrint por e-mail (opcional)
Use o HP ePrint via e-mail para imprimir documentos enviando-os como um anexo de e-mail para o endereço de e-mail da impressora de qualquer dispositivo compatível com
e-mail, mesmo de dispositivos que não estejam na mesma rede.
Para usar o HP ePrint via e-mail, a impressora deverá atender a estes requisitos:
• A impressora deve estar conectada a uma rede sem o e ter acesso à Internet.
• Os Serviços da Web HP devem estar habilitados na impressora, e ela deverá
estar registrada no HPConnected.
Ativar o HP Web Services (somente nos modelos sem o)
1. Depois que a impressora estiver conectada ao HP Embedded Web Server (EWS),
imprima uma página de conguração e identique o endereço IP da impressora.
2. No computador, abra um navegador da Web e insira o endereço IP da impressora
na linha de endereço. O HP EWS é aberto.
3. Clique na guia HP Web Services. Se a rede usar um servidor proxy, faça o seguinte:
• Selecione a guia Congurações de proxy.
• Marque a caixa de seleção Marque esta caixa se a sua rede usar um servidor
proxy para acessar a Internet.
• No campo Servidor proxy, insira o endereço e o número da porta do servidor
proxy e então clique no botão Aplicar.
4. Selecione a guia HP Web Services e clique no botão Ativar. A impressora
congura a conexão com a Internet e então uma mensagem é exibida, indicando
que uma folha de informações será impressa
5. Clique em OK. Uma página do ePrint é impressa. Na página do ePrint, procure
oendereço de e-mail atribuído automaticamente à impressora.
11
Page 12
Solução de problemas
Guia do usuário
O guia do usuário inclui o uso da impressora e informações sobre solução
deproblemas. Ele está disponível no CD da impressora e na Web:
1. Acesse www.hp.com/support/ljM101.
2. Selecione uma impressora ou uma categoria na lista e clique em
Guias do usuário.
Resolver mensagens de código do erro (primeira utilização)
Código do erro Ação
A luz Atenção está piscando Carregue o papel na bandeja
Vericar atualizações de rmware
1. Acesse www.hp.com/support/ljM101.
2. Selecione uma impressora ou uma categoria na lista e então clique em Drivers.
3. Selecione o sistema operacional e clique no botão Avançar.
4. Selecione Firmware e clique no botão Download.
Conexão da rede sem o (somente nos modelos sem o)
• Verique se a impressora e o roteador sem o estão ligados e estão recebendo energia. Verique também se o switch sem o está ligado.
• Verique se a impressora está dentro do alcance da rede sem o. Na maioria das redes, a impressora deve estar a 30 m (100 pés) do ponto de acesso sem
o(roteador sem o).
• Verique se o driver de impressão está instalado no computador.
• Verique se o computador e a impressora estão conectados à mesma rede sem o.
• Para Mac, verique se o roteador sem o suporta Bonjour.
• Reinicie o roteador sem o.
Recursos de suporte adicionais
Para obter ajuda completa da HP para a impressora, acesse
www.hp.com/support/ljM101:
• Solucionar problemas
• Localizar instruções de conguração avançada
• Download de atualizações de software
• Participar de fóruns de suporte
• Localizar informações de garantia e reguladoras
• Acessar recursos de impressão móvel
12
Page 13

www.hp.com/support/ljM101 www.register.hp.com
.4
English................. 1
Français ............... 4
Español ............... 7
Português ......... 10
.................. 13
.5
13
Page 14

.6
7.2
.7
7.1
.8
.תשר התואל םירבוחמ םניאש םינקתהמ וליפא ,ל"אודב ךמותה ןקתה לכמ ,תספדמה לש ל"אודה תבותכ לא ל"אודל ףרוצמ ץבוקכ םתחילש ידי-לע םיכמסמ סיפדהל ידכ ל"אוד ךרד HP ePrint-ב שמתשה
תרוצת תא רידגמ רצומה .לעפה ןצחלה לע ץחלו HP Web Services הייסיטרכה תא רחב .4
.עדימ ןויליג ספדוי יכ תנייצמה העדוה העיפומ ןכמ רחאלו ,טנרטניאל רוביחה
ראודה תבותכ תא שפח ,ePrint ףדב .ePrint ףד ספדוי תעכ .רושיא ןצחלה לע ץחל .5
.תספדמל יטמוטוא ןפואב תיצקומה ינורטקלאה
תועצמאב תספדמה תא םושרל שיו ,תספדמב ןימז HP Web Services יכ אדוול שי •
:תואבה תושירדב דומעל תספדמה לע ,ל"אוד ךרד HP ePrint-ב שמתשהל ידכ
.טנרטניאל השיג הל השורדו תיטוחלא תשרל תרבוחמ תויהל הכירצ תספדמה •
.HP Connected
(דבלב םייטוחלא םימגדב) HP לש טנרטניא יתוריש תלעפה
ההזו הרוצת ףד ספדה , HP לש (EWS) ץבושמה טנרטניאה תרשל תספדמה רוביח רחאל .1
.תספדמה לש IP-ה תבותכ תא
תרש .תובותכה תרושב תספדמה לש IP-ה תבותכ תא ןזהו בשחמב טנרטניא ןפדפד חתפ .2
.חתפנ HP לש (EWS) ץבושמה טנרטניאה
תא עצב , proxy תרשב תשמתשמ תשרה םא .HP Web Services הייסיטרכה לע ץחל .3
. Proxy תורדגה הייסיטרכב רחב •
ךרוצל Proxy תרשב שמתשמ תשרה םא וז הבית ןמס ןומיסה תבית תא רחב •
.טנרטניאל השיג
, Proxy-ה תרש לש האיציה רפסמ תאו תבותכה תא ןזה , Proxy תרש הדשב •
.לחה ןצחלה לע ץחל ןכמ רחאלו
14
:תואבה תולועפה
Page 15

15
Page 16

© Copyright 2017 HP Development Company, L.P.
Reproduction, adaptation or translation without prior written permission is
prohibited, except as allowed under the copyright laws.
The information contained herein is subject to change without notice.
The only warranties for HP products and services are set forth in the express
warranty statements accompanying such products and services. Nothing herein
should be construed as constituting an additional warranty. HP shall not be liable for
technical or editorial errors or omissions contained herein.
Trademark Credits
Windows® is a U.S. registered trademark of Microsoft Corporation.
© Copyright 2017 HP Development Company, L.P.
La reproduction, l'adaptation ou la traduction sans autorisation écrite préalable est
interdite, sauf dans le cadre des lois sur le droit d'auteur.
Les informations contenues dans ce document peuvent être modiées sans préavis.
Les seules garanties pour les produits et servicesHP sont décrites dans les
déclarations de garantie expresses accompagnant ces mêmes produits et services.
Les informations contenues dans ce document ne constituent en aucun cas une
garantie supplémentaire. HP ne pourra être tenu responsable des erreurs ou
omissions de nature technique ou rédactionnelle qui pourraient subsister dans le
présent document.
Apple and the Apple logo are trademarks of Apple Inc., registered in the U.S. and
other countries.
OS X is a trademark of Apple Inc., registered in the U.S. and other countries.
AirPrint is a trademark of Apple Inc., registered in the U.S. and other countries.
FCC Regulations
This equipment has been tested and found to comply with the limits for a Class
B digital device, pursuant to Part 15 of the FCC rules. These limits are designed
to provide reasonable protection against harmful interference in a residential
installation. This equipment generates, uses, and can radiate radio-frequency
energy. If this equipment is not installed and used in accordance with the
instructions, it may cause harmful interference to radio communications. However,
there is no guarantee that interference will not occur in a particular installation. If
this equipment does cause harmful interference to radio or television reception,
which can be determined by turning the equipment o and on, correct the
interference by one or more of the following measures:
• Reorient or relocate the receiving antenna.
• Increase separation between equipment and receiver.
• Connect equipment to an outlet on a circuit dierent from that to which the
receiver is located.
• Consult your dealer or an experienced radio/TV technician.
Any changes or modications to the product that are not expressly approved by
HPcould void the user’s authority to operate this equipment. Use of a shielded
interface cable is required to comply with the Class B limits of Part 15 of FCC rules.
For more regulatory information, see the electronic user guide. HP shall not be
liable for any direct, indirect, incidental, consequential, or other damage alleged
inconnection with the furnishing or use of this information.
Crédits concernant les marques
Windows® est une marque déposée de Microsoft Corporation aux Etats-Unis.
Apple et le logo Apple sont des marques commerciales d’Apple, Inc. aux Etats-Unis
et dans d’autres pays/régions.
OS X est une marque commerciale d’Apple Inc. aux États-Unis et dans d’autres pays/
régions.
AirPrint est une marque commerciale d’Apple Inc. aux États-Unis et dans d’autres
pays/régions.
Réglementations de la FCC
Les tests eectués sur cet équipement ont déterminé qu’il est conforme aux
prescriptions des unités numériques de classeB, telles que spéciées à l’article15
des normes de laFCC (Commission fédérale des communications). Ces limites sont
destinées à assurer une protection suisante contre les interférences produites
dans une installation résidentielle. Cet équipement génère, utilise et peut émettre
de l’énergie sous forme de fréquences radio. Si ce matériel n’est pas installé et
utilisé conformément aux instructions, il peut causer des interférences nuisibles aux
communications radio. Aucune garantie n’est néanmoins fournie quant à l’apparition
d’interférences dans une installation particulière. Si cet appareil provoque des
interférences nuisibles (qui peuvent être déterminées en éteignant et rallumant
l’appareil) à des communications radio ou télévision, corrigez ce problème en
appliquant une ou plusieurs des mesures suivantes:
• Réorientez ou déplacez l’antenne de réception.
• Augmentez la distance séparant l’équipement du récepteur.
• Connectez l’équipement à une prise située sur un circuit diérent de celui sur
lequel se trouve le récepteur.
• Consultez votre revendeur ou un technicien radio/télévision expérimenté.
Toute modication apportée au produit sans le consentement de HP peut setraduire
par la révocation du droit d’exploitation de l’équipement dont jouit l’utilisateur.
Un câble d’interface blindé est requis an de satisfaire aux stipulationsde l’article
15des réglementations de la FCC sur les appareils de classeB. Pour de plus amples
informations sur les réglementations, reportez-vous au Guide de l’utilisateur au
format électronique. HP ne sera en aucun cas tenu responsable des dommages
directs, indirects, accessoires, consécutifs ou autres pouvant résulter de la mise à
disposition de ces informations ou de leur utilisation.
www.hp.com
 Loading...