

Page 1
HP LaserJet 4050 T
English
and 4050 TN Printers
Getting Started Guide
Page 2

Page 3

HP LaserJet 4050 T and
4050 TN Printers
Getting Started Guide
Page 4

© Copyright Hewlett-Packard
Company 1999
All Rights Reserved.
Reproduction, adaptation, or
translation without prior written
permission is prohibited,
except as allowed under the
copyright laws.
Publication number
C4252-90901
First Edition, February 1999
Warranty
The information contained in
this document is subject to
change without notice.
Hewlett-Packard makes no
warranty of any kind with
respect to this information.
HEWLETT-PACKARD
SPECIFICALLY DISCLAIMS
THE IMPLIED WARRANTY
OF MERCHANT ABILITY AND
FITNESS FOR A
PARTICULAR PURPOSE.
Hewlett-Packard shall not be
liable for any direct, indirect,
incidental, consequential, or
other damage alleged in
connection with the furnishing
or use of this information.
Trademark Credits
Adobe, PostScript, and Adobe
Photoshop are trademarks of
Adobe Systems Incorporated
which may be registered in
certain jurisdictions.
Microsoft, MS Windows,
Windows, and Windows NT
are U.S. registered trademarks
of Microsoft Corporation.
NERGY STAR
E
registered service mark of the
U.S. EPA.
is a U.S.
Hewlett-Packard Company
11311 Chinden Boulevard
Boise, Idaho 83714 USA
Page 5

Introduction
Congratulations on your purchase of the HP LaserJet 4050 printer . This
printer is available in four configurations.
Note
This getting started guide is specific to HP LaserJet 4050 T/4050 TN
printers.
Configurations
This printer is available in four configurations, as described below.
HP LaserJet 4050
The HP LaserJet 4050 comes standard with 8 MB RAM and one
500-sheet tray.
HP LaserJet 4050 N
The HP LaserJet 4050 N comes standard with 16 MB RAM,
a HP JetDirect 10/100Base-TX print server card for connecting to a
network, an HP Fast InfraRed (FIR) Receiv er, and one 500-sheet tray.
HP LaserJet 4050 T
The HP LaserJet 4050 T comes standard with 8 MB RAM and two
250-sheet trays.
HP LaserJet 4050 TN
EN
The HP LaserJet 4050 TN comes standard with 16 MB RAM,
a HP JetDirect 10/100Base-TX print server card for connecting to a
network, an HP Fast InfraRed (FIR) Receiv er , and two 250-sheet trays .
Getting Started Guide 1
Page 6
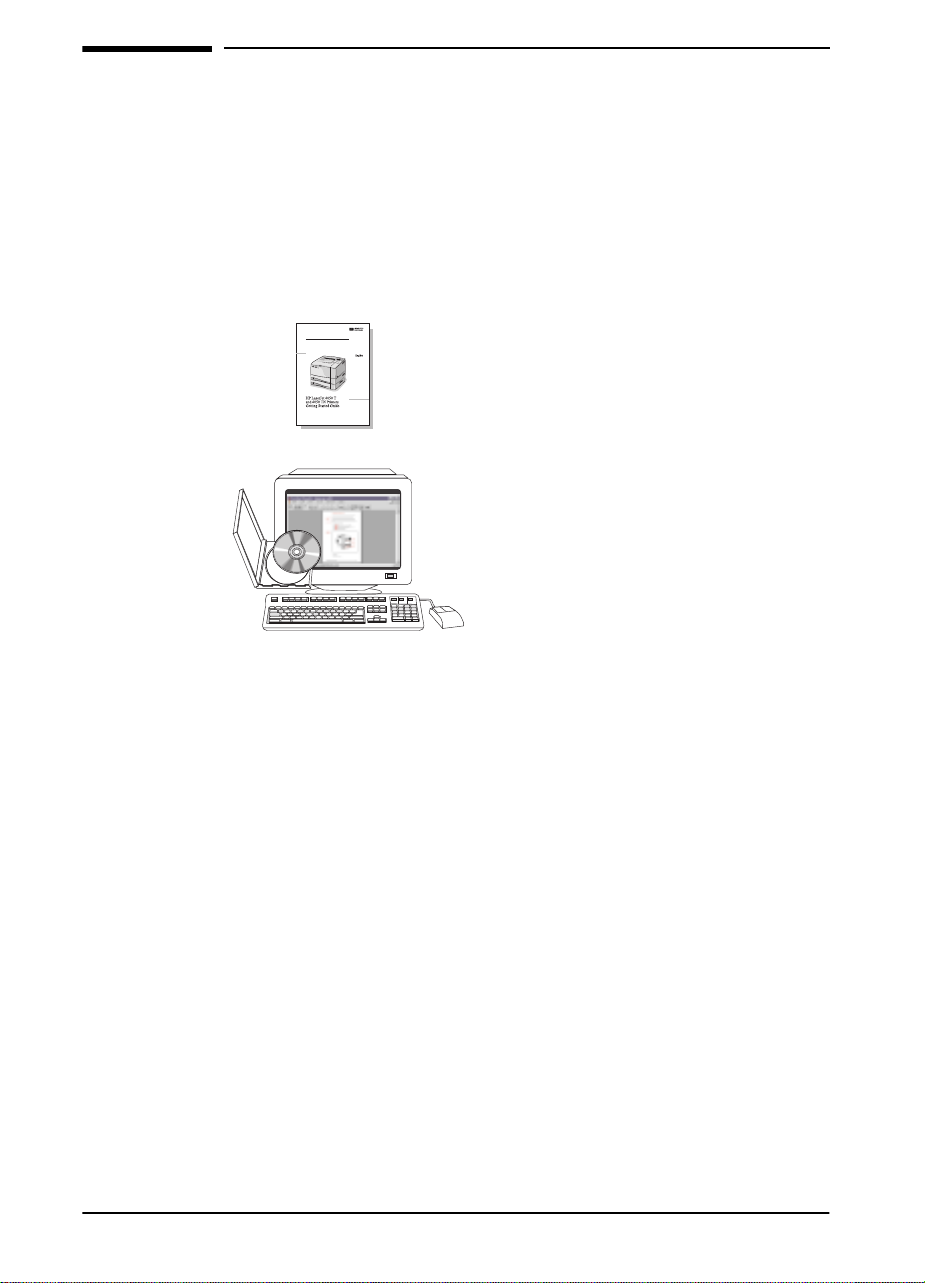
Where to Look for More Information . . .
Several ref erences are av ailable for use with this printer . F or additional
copies of the guides below , contact HP Direct at (800) 538-8787 (U.S.)
or contact your HP-authorized dealer. Additional information is
available at http://www.hp.com.
Setting Up the Printer
Getting Started Guide
Step-by-step instructions for
installing and setting up
the printer.
HP JetDirect Print Server
Software Installation Guide*
Step-by-step instructions for configuring
the HP JetDirect print server.
*Accompanies printers that include an HP JetDirect print server (network
card).
2 Getting Started Guide
EN
Page 7
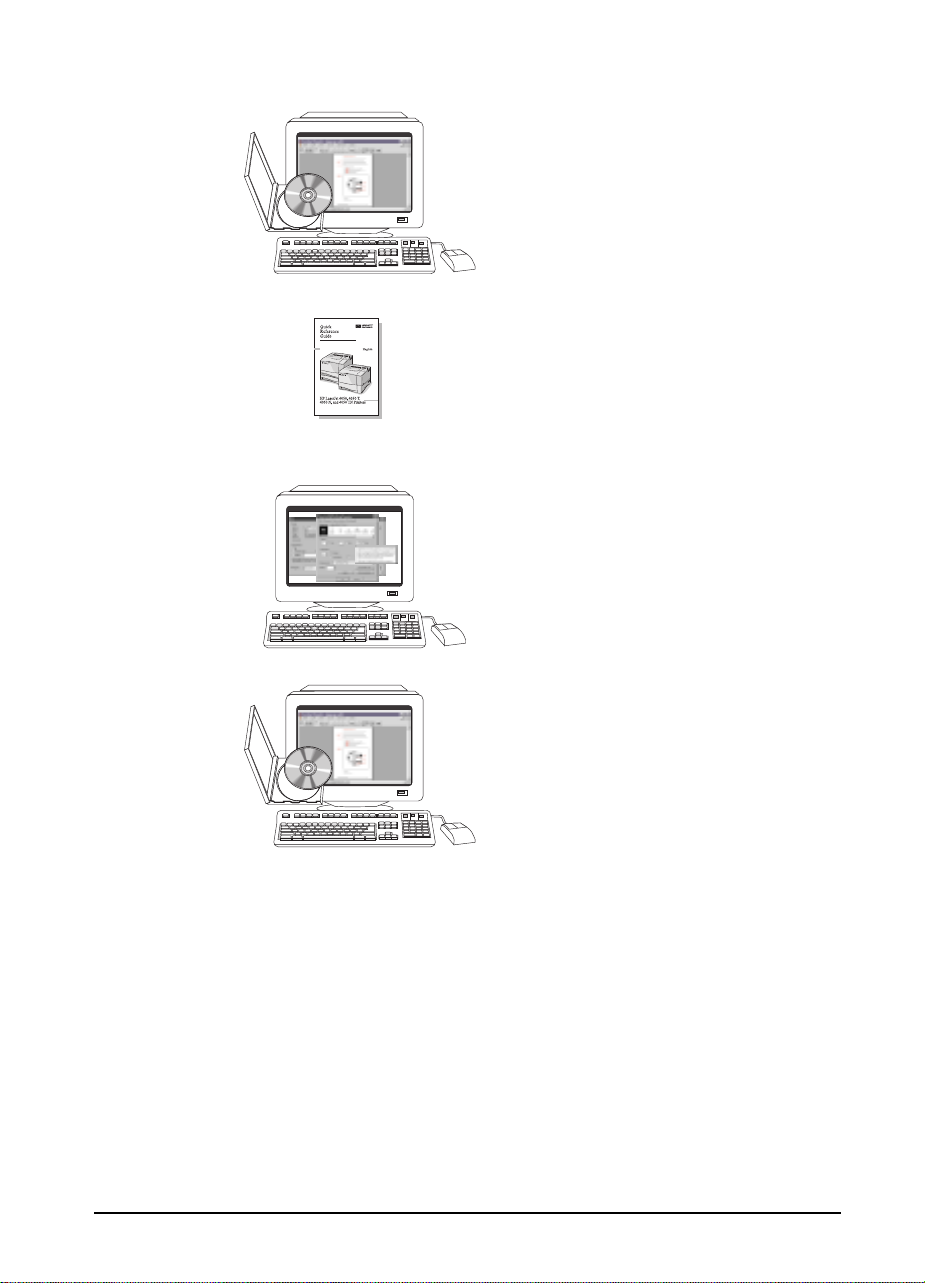
Using the Printer
Online User’s Guide
Detailed information on using and
troubleshooting the printer.
Quick Reference Guide
Tips and quick information in a booklet
to keep by the printer . See y our network
administrator for the copy that came
with the printer.
Online Help
Information on printer options that are
available from within printer drivers. To
view a help file, access the online help
through the printer driver.
EN
HP Fast InfraRed Receiver
User Guide
Detailed information on using and
troubleshooting the HP Fast InfraRed
Receiver.
Getting Started Guide 3
Page 8

Installation Checklist
This getting started guide will help you set up and install the new printer.
For proper installation, please complete each section in order.
Unpack the Printer steps 1-4
Install the Printer steps 5-9
Connect the Printer Cables step 10
Install Printing Software step 11
Printing with the HP Fast InfraRed Receiver step 12
Verify Printer Setup step 13
Accessing the User Documentation CD-ROM step 14
WARNING!
Note
The printer is heavy. We recommend having two people move it.
To learn about all the features and capabilities of the printer, see the
printer online user’s guide and the help menus in the printer driver
(available after you install the printing software).
4 Getting Started Guide
EN
Page 9
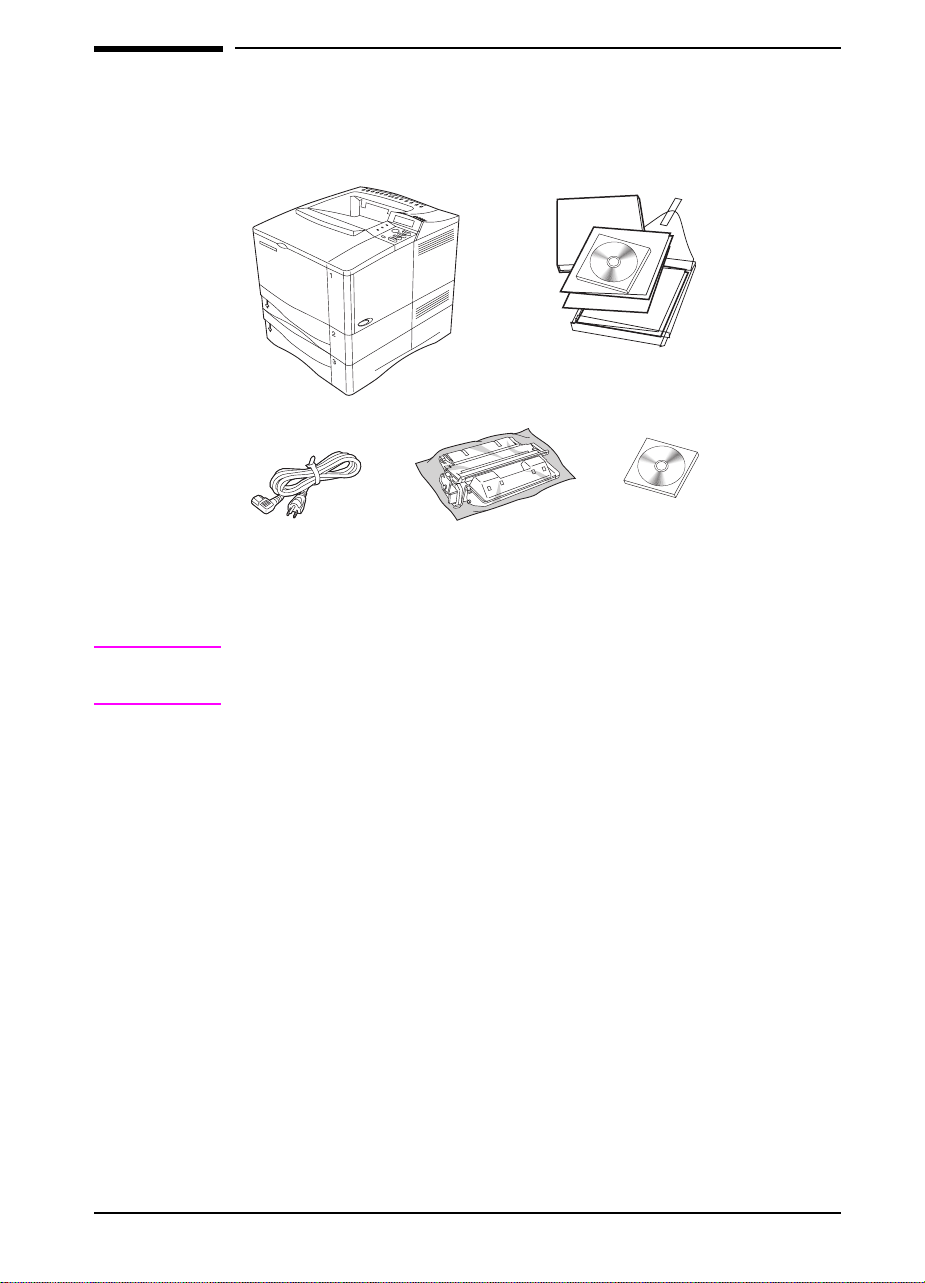
Step 1. Check Package Contents
Printer
Power Cord
Figure 1 Package Contents
Note
A printer cable is not included in the package contents. See the printer
online user’s guide for ordering information.
Toner
Cartridge
Printer
Documentation
Printer
Software
EN
Getting Started Guide 5
Page 10
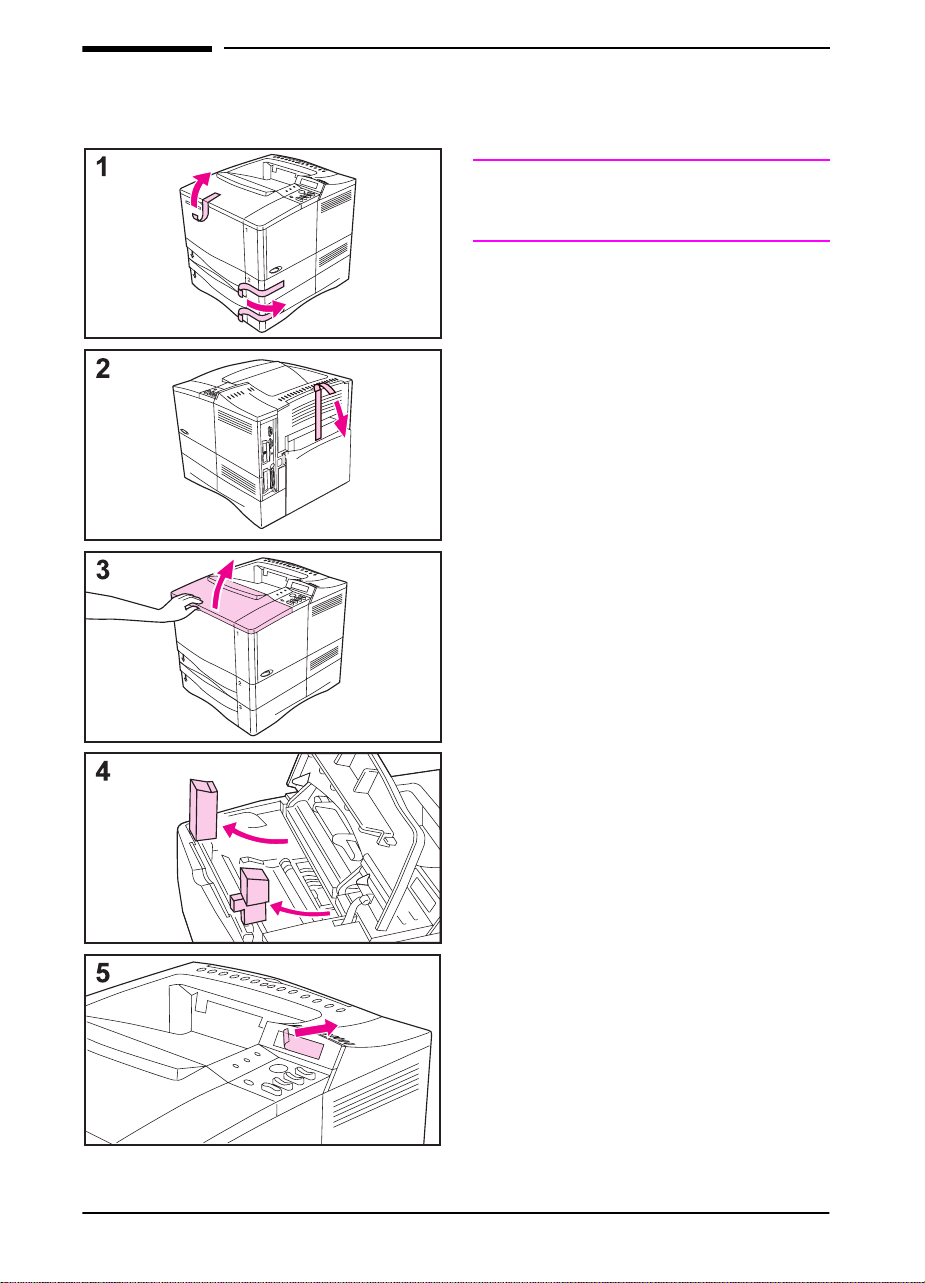
Step 2. Remove Internal Packaging
Note
Save all packaging material. You may
need to repack the printer at a later date.
1
Remove the shipping bag and tape
from the trays.
2
Remove the tape from the back of the
printer.
3
Open the top cover.
4
Remove the two pieces of packing
material from inside the toner cartridge
cavity .
5
Remove the plastic film on the control
panel display.
Continued on the next page.
6 Getting Started Guide
EN
Page 11
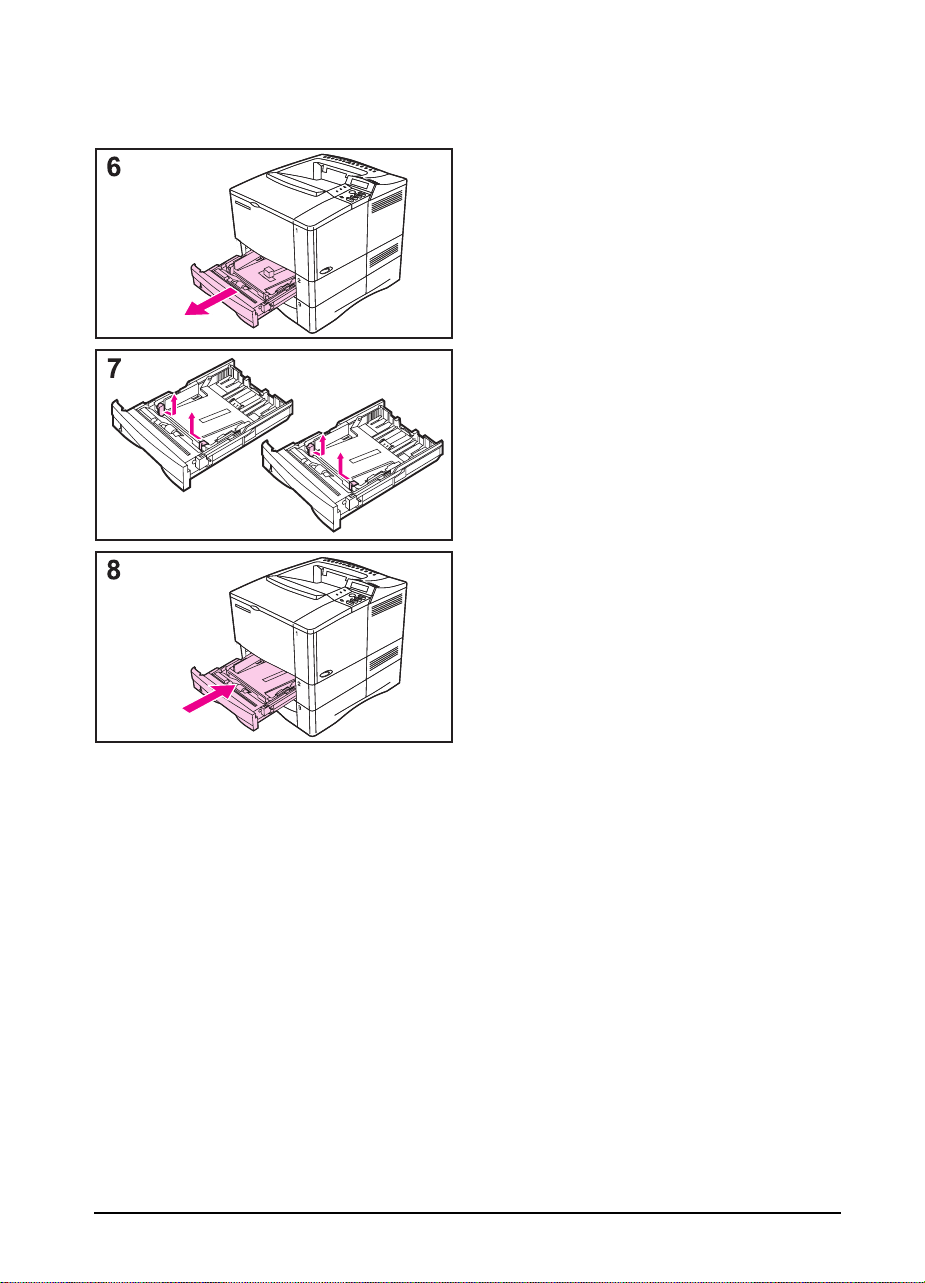
Slide Trays 2 and 3 out of the printer.
6
Remove all packaging material and
7
tape from the trays.
Slide Trays 2 and 3 back into the
8
printer.
EN
Getting Started Guide 7
Page 12
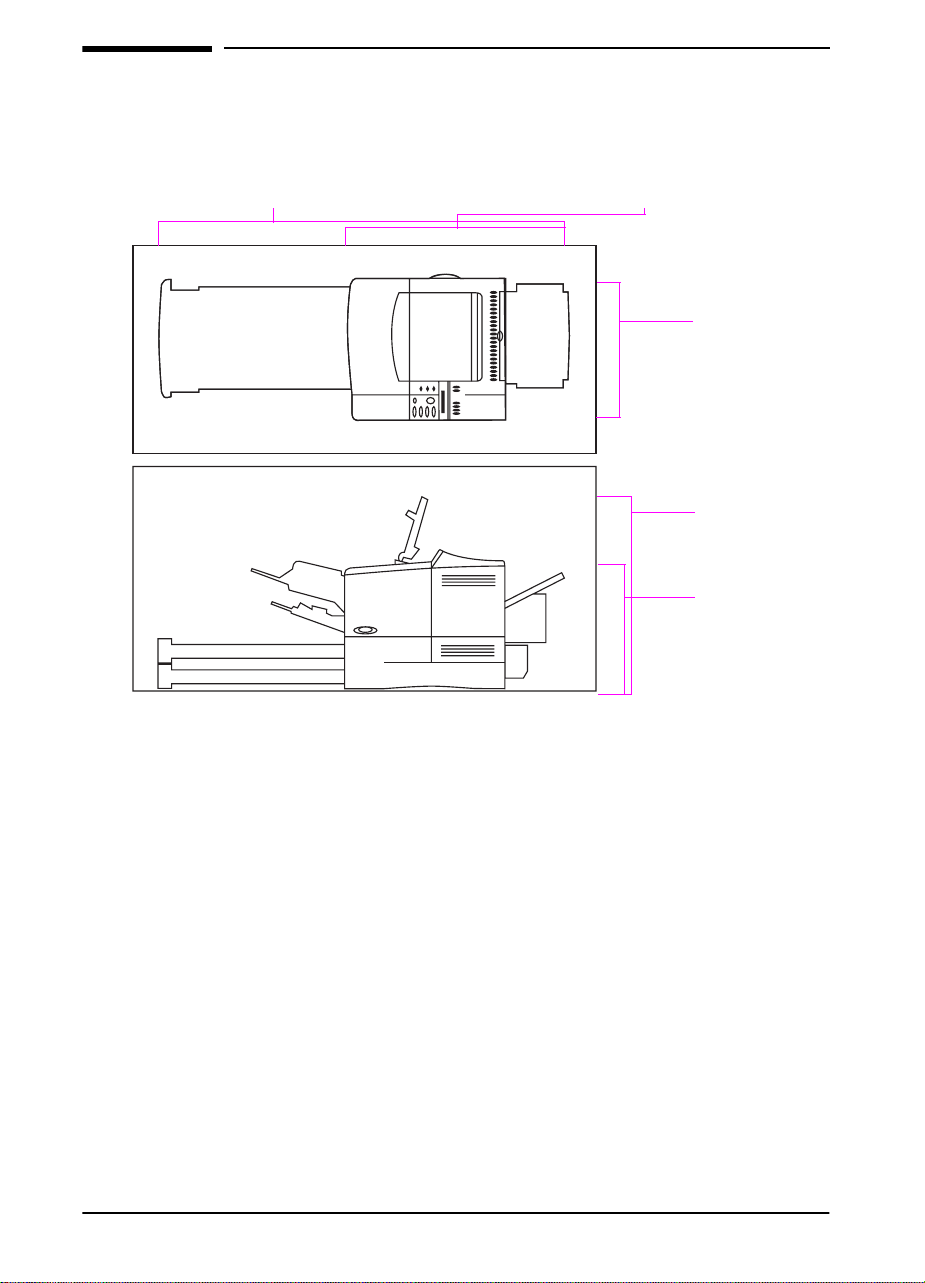
Step 3. Prepare Printer Location
39.67 inches (100.76 cm)
full length, trays and rear output bin open
Printer Weight:
(without toner cartridge)
45.66 lb (20.71 kg)
Figure 2 Printer Dimensions
24.27 inches (61.64 cm)
printer only, rear output bin open
15.4 inches
(39.0 cm)
HP LaserJet
4050 T/4050 TN
20.1 inches
(51.19 cm)
with cover open
15.5 inches
(38.5 cm)
with top cover closed
8 Getting Started Guide
EN
Page 13

Location Requirements for the Printer
A sturdy, level surface for
•
placement
Space allowance around the
•
printer
A well ventilated room
•
No exposure to direct sunlight
•
or chemicals, including
ammonia-based cleaning
solutions
Adequate power supply
•
A stable environment—no
•
abrupt temperature or
humidity changes
Relative humidity 20% to 80%
•
Room temperature 50° to
•
91°F (10° to 32° C)
EN
Getting Started Guide 9
Page 14

Step 4. Locate Printer Parts
The following illustrations giv e the locations and names of the important
printer parts.
Top output bin
Top cover
Tray 1
(100-sheet)
Paper level
indicators
Control
panel
Additional
memory can be
installed here.
Trays 2 and 3
(each 250-sheet, closed)
Power switch
Tray numbers
Figure 3 Printer Parts
(front view)
10 Getting Started Guide
EN
Page 15

11
10
9
8
7
6
Figure 4 Printer Parts
Rear output bin (straight-through paper path)
1
Power connector
2
Dust cover
3
FIR port (for the FIR receiver)
4
Parallel interface port
5
Network, I/O slot
6
10/100Base-TX RJ-45 port
7
Memory (More than one DIMM can be installed.)
8
Serial port
9
Accessory interface port
10
Serial and model numbers (inside cover)
11
1
2
3
45
(rear view)
EN
Getting Started Guide 11
Page 16

Step 5. Install Accessories
Install any accessories that you have purchased with the printer. Use
the installation instructions that are packaged with the accessories.
HP JetDirect
print server
EIO card
FIR receiver
Envelope Feeder
HP LaserJet 4050 T/4050 TN printers
* Dust cover is not used when the duplex printing accessory is installed
Hard disk
EIO card
Memory or Flash
Figure 5 Optional Accessories
DIMM
Duplex Printing
Accessory*
(or duplexer,
for two-sided printing)
500-sheet tray
Note
See the printer online user’s guide for information on ordering
accessories.
12 Getting Started Guide
EN
Page 17

Step 6. Install Toner Cartridge
Remove the toner cartridge from its
1
packaging (save packaging for
possible cartridge storage). Open the
printer by lifting the top cover.
Rotate the cartridge and gently shake
2
it from side to side to distribute the
toner evenly inside the cartridge.
Locate the sealing tape tab on the end
3
of the cartridge. Carefully bend the tab
back and forth until it separates from
the cartridge.
Firmly pull the tab straight out from the
4
cartridge to remove the entire length of
tape (22 in, or 56 cm). Avoid touching
any black toner on the tape.
Note
If the tab separates from the tape, grasp
the tape and pull it out of the cartridge.
EN
Continued on the next page.
Getting Started Guide 13
Page 18

5 Position the cartridge as shown with
the arrow pointing into the printer. Slide
the cartridge into the printer as far as it
will go.
If the cartridge is installed correctly, the
cover will close easily.
Note
If toner gets on your clothing, wipe it off
with a dry cloth and wash clothing in cold
water. (Hot water sets toner into fabric.)
14 Getting Started Guide
EN
Page 19

Step 7. Load Trays
Trays 2 and 3
Trays 2 and 3 are 250-sheet trays. For
supported sizes of paper, see the printer
online user’s guide.
1
2
3
Pull the tray completely out of the
printer.
If the tray is not already set to the
desired paper size, snap the left and
right guides into place to match the
width of the paper.
Locate the release tabs (indicated by
the two arrows).
Squeeze the blue tabs to release them
from the slots while sliding the back
section of the tray to the desired paper
size. Make sure the tabs lock into the
correct slots.
EN
Continued on the next page.
Getting Started Guide 15
Page 20

4 Load paper into the tray.
5 Make sure the paper is flat in the tray
at all four corners and below the tabs
on the guides. Gently slide the tray
back into the printer.
The printer automatically senses the size
of paper if the tray is adjusted correctly.
Repeat these steps for Tray 3.
16 Getting Started Guide
EN
Page 21

Tray 1
Tray 1 is a multi-purpose tray that holds up to 100 sheets of paper, 10
envelopes, or 20 index cards.
Tray 1 provides a convenient way to print envelopes, transparencies,
custom-sized paper, or other type of media without having to unload
the other trays.
Note
The printer may pull paper from Tray 1 first. To change this, see the
printer online user’s guide.
Tray 1 Orientation
Generally , load paper with the side to be printed facing up , and the top ,
short edge toward the printer. See the sections on letterhead, env elope,
and duplexing in the printer online user’s guide for proper orientation
for specific jobs.
Figure 6 Paper Orientation for Tray 1
EN
Getting Started Guide 17
Page 22

Step 8. Attach Power Cord
1
Locate the power switch on the right
side of the printer. Make sure the
printer is switched off.
2
Connect the power cord to the printer
and a grounded power strip or an AC
outlet.
Note
Only use the power cord that came with
the printer.
3
Switch the printer on.
4
After the printer warms up, the
message should be visible on the
control panel display and the Ready
light will remain on. If the
message does not appear, go to the
problem-solving chapter in the printer
online user’s guide.
READY
READY
READY
Ready
Data
Go
Menu
Item
18 Getting Started Guide
EN
Page 23

Step 9. Test the Printer
READY
INFORMATION
MENU
PRINT
CONFIGURATION
Before connecting the printer to a
network or computer, print a
configuration page to make sure the
printer is operating correctly.
Make sure the printer is on and the
1
message is displayed.
READY
Press
2
[Menu]
INFORMATION MENU
Press
3
[Item]
PRINT CONFIGURATION
Press
4
[Select]
until the display reads
.
until the display reads
.
to print.
If the control panel display prompts to
load letter or A4 paper size, press
to bypass the message for now and
check the paper configuration for
proper paper size. (See the printer
online user’s guide to change the
default paper size from the control
panel.)
[Go]
EN
PRINT
CONFIGURATION
Continued on the next page.
Getting Started Guide 19
Page 24

5 The configuration pages show how the
printer is configured.
Note
If an HP JetDirect print server is installed,
a JetDirect configuration page will also
print.
Note
If the configuration page does not print
correctly, go to the problem-solving
chapter in the printer online user’s guide.
20 Getting Started Guide
EN
Page 25

Step 10. Connect Printer Cables
The HP LaserJet 4050 T printer includes four interface connectors:
IEEE-1284 parallel
•
RS-232C serial
•
accessory
•
FIR
•
The HP LaserJet 4050 TN printer also includes an HP JetDirect 600N
print server card with an Ethernet 10/100Base-TX (RJ-45) port.
FIR cable and
port
Accessory cable
and port
10/100Base-TX
cable and
RJ-45 port
Figure 7 Interface Ports
EN
Serial cable
and port
Parallel cable and
IEEE-1284 port
Getting Started Guide 21
Page 26

Connecting Parallel Cable
Use the parallel port when directly
connecting the printer to a personal
computer.
Caution
Make sure the printer is turned off before
connecting the parallel cable.
Note
To ensure reliability, use an IEEE-1284
compliant parallel cable (these cables
are clearly marked with “IEEE-1284”).
Only IEEE-1284 cables support all of the
printer’s advanced features.
1 Connect the parallel cable to the
parallel port.
2 Snap the wire clips in place to secure
the cable to the printer.
The cable should install easily. If
installation is difficult, check the cable
orientation.
Connect the other end of the cable to the
proper port on the computer.
22 Getting Started Guide
EN
Page 27

Connecting Serial Cable
If you are connecting the printer with the
serial port, follow these instructions.
Caution
Make sure the printer is turned off before
connecting the serial cable.
Caution
Do not connect a serial cable to the
accessory port.
Connect the serial cable to the serial
1
port.
The cable should install easily. If
installation is difficult, check the cable
orientation.
Lock the serial cable into place with the
2
two cable screws.
Connect the other end of the cable to the
proper port on the computer.
EN
Getting Started Guide 23
Page 28

Connecting to Ethernet 10/100Base-TX Network
Use the RJ-45 port to connect the printer to an Ethernet
10/100Base-TX network.
Caution Make sure the printer is turned off before connecting to the RJ-45 port.
•
Connect a twisted-pair network cable to the RJ-45 port on the
HP JetDirect 600N print server card.
•
Connect the other end of the cable to the network.
Note For a successful link, either 10 or 100 LED at the port should turn on
when the printer is turned on.
Note If the print server is unable to link to the network, see the
problem-solving chapter in the printer online user’s guide.
24 Getting Started Guide
EN
Page 29

Accessory Port
The accessory port is used for adding optional paper handling (e xternal
input, output, and paper finishing) devices provided by HP-authorized
hardware developers. For specific installation instructions, see the
documentation provided with these products.
Caution
Caution
Make sure the printer is turned off before connecting a device to the
accessory port.
Do not connect the accessory cable to the serial port.
EN
Getting Started Guide 25
Page 30

Connecting the HP Fast InfraRed Receiver
Figure 8 FIR Port on the HP LaserJet 4050 N Printer
Follow the instructions below to connect the HP F ast InfraRed Receiver
to the printer:
1 Turn the printer’s power switch off.
2 Attach the HP Fast InfraRed Receiv er cable to the FIR port on the
rear of the HP LaserJet printer.
Note The HP Fast InfraRed Receiver can be placed on a table or attached
to the side of the printer using the Velcro fasteners shown in Figure 9
on page 27.
3 Attach one Velcro fastener to the round depression on the
underside of the HP Fast InfraRed Receiver (see Figure 9).
4 Attach the other Velcro fastener to the side of the printer (see
Figure 9 on page 27).
5 When the HP Fast InfraRed Receiver is situated on the printer, it
should be close to the printer’s front edge as shown in Figure 10.
This location allows for the largest possible area in which the
portable computer’s FIR port can operate.
26 Getting Started Guide
EN
Page 31

Figure 9 Attaching the Velcro Fasteners
Figure 10 HP Fast InfraRed Receiver After Installation
EN
For more information, see the
HP Fast InfraRed Receiv er User Guide
Getting Started Guide 27
.
Page 32

Step 11. Install Printing Software
The printer comes with printing software on a compact disc. The printer
drivers on this compact disc must be installed to take full advantage of
the printer features. If your computer does not have a CD-ROM drive
but you have access to one, you can copy the compact disc onto
diskettes for installation into your computer.
The most recent drivers are available on the Internet. Depending on
the configuration of Windows-driven computers, the installation
program for the printer software automatically chec ks the computer for
Internet access to obtain the latest software.
See the HP Customer Care Service and Support pages at the front of
the printer online user’s guide for additional information if you do not
have Internet access.
28 Getting Started Guide
EN
Page 33

Installing Windows Printing Software
Note
See the
networking software to configure the printer for your network.
HP JetDirect Print Server Software Installation Guide
For Windows 95/98 or NT 4.0
Close all running applications.
1
Insert the compact disc into the CD-ROM drive. (Depending on the
2
computer configuration, the installation program may automatically
start.)
Click
3
Click
4
Type
5
command line box and click OK.
Follow the instructions on the computer screen.
6
.
Start
.
Run
D:\SETUP
(or the appropriate drive directory letter) in the
For Windows 3.1 or Windows 3.11*
Close all running applications.
1
Insert the compact disc into the CD-ROM drive.
2
In the
3
4
5
6
Windows Program Manager
Click
Type
command line box and click OK.
Follow the instructions on the computer screen.
.
Run
D:\SETUP
(or the appropriate drive directory letter) in the
screen, click the
File
or your
menu.
Note
* Includes only PostScript Level 1 Emulation for Windows 3.1x and HP FontSmart.
EN
For the latest or additional drivers, go to http://www.hp.com on the
World Wide Web.
Getting Started Guide 29
Page 34

Installing Macintosh Printing Software
1 Quit all open applications.
2 Insert the compact disc into the CD-ROM drive.
3 Double-click the Installer icon and follow the instructions on the
screen.
4 Open the Chooser from the Apple menu.
5 Click the Apple LaserWriter 8 icon. If the icon is not there, contact
your Macintosh dealer.
6 If you are on a network with multiple zones, select the zone in the
AppleTalk Zones box where the printer is located. If this is
unknown, ask your network administrator.
7 Double-click the desired printer. A Desktop Printer icon should
appear.
8 Close the Chooser by clicking the go-aw ay (close) box in the upper
left corner.
30 Getting Started Guide
EN
Page 35

Step 12. Printing with the HP Fast
InfraRed Receiver
The HP Fast InfraRed Receiver enables cableless printing from any
IRDA-compliant portable device (such as a laptop computer) to the
HP LaserJet 4050 printer (when the optional FIR accessory is
installed).
The printing connection is maintained by positioning the sending
infrared (FIR) port within operating range. Note that the connection can
be blocked by objects such as a hand, paper, direct sunlight, or any
bright light shining into either the sending or receiving FIR port.
System Requirements
In order to print with the HP Fast InfraRed Receiver, you will need:
The receiver connected to this printer
•
IRDA-compliant portable or other IR-capable host supporting IRLPT
•
or JetSend Communication Technology over IR
Microsoft Windows 9x or Mac 8.5 with a LaserWriter 8.6 or higher
•
driver
Note
EN
Older non-IrDA-compliant portable computers may not be compatib le
with the HP Fast InfraRed Receiv er. If you experience problems when
attempting to print with the HP Fast InfraRed Receiver, contact the
manufacturer or dealer of your portable computer to v erify compatibility
with the IrDA standard.
For more information, see the
HP Fast InfraRed Receiv er User Guide
Getting Started Guide 31
.
Page 36

Step 13. Verify Printer Setup
The easiest way to verify that the installation has been completed
successfully is to print a document from a software application.
1
Load a software application of your choice and open or create a
simple document.
2
Make sure the correct printer driver is selected.
3
Print the document.
If the document prints, installation is complete. If nothing printed, see
the problem-solving chapter in the printer online user’s guide.
32 Getting Started Guide
EN
Page 37

Step 14. Accessing the User Documentation CD-ROM
The user documentation CD-ROM contains the printer online user’s
guide, the
HP F ast InfraRed Receiver User Guide
the English language. This documentation can be viewed directly from
the CD-ROM or loaded onto your operating system.
HP JetDirect Print Server Software Installation Guide
, and Adobe Acrobat Reader for
, the
Note
Note
To view user documentation, your system must have Adobe Acrobat
Reader installed.
Loading Adobe Acrobat Reader from the CD-ROM
For Windows 95/98 or NT 4.0
Double-click the
1
Double-click the
2
system for your computer . The English v ersion of Acrobat Reader
will be loaded onto your hard drive.
CD-ROM drive
ADOBE
root folder and select the operating
For Windows 3.1x or NT 3.51
From the
1
then double-click the
Double-click the
2
operating system. The English version of Acrobat Reader will be
loaded onto your hard drive.
If you already have Adobe Acrobat Reader on your operating system
and would like the newest version, or you need a version other than
English, go to http://www.adobe.com on the World Wide Web.
Main Group Window
CD-ROM drive
ADOBE
root directory and select the appropriate
icon from
double-click
My Computer
.
File Manager
.
, and
EN
Getting Started Guide 33
Page 38

To View the User Documentation from the CD-ROM
For Windows 95/98 or NT 4.0
1 From My Computer double-click the CD-ROM drive icon.
2 Double-click the appropriate documentation folder.
3 Double-click the preferred language.
4 Double-click the document to view.
For Windows 3.1x or NT 3.51
1 From the Main Group Window double-click File Manager, and
then double-click the CD-ROM drive.
2 Select the appropriate documentation root directory.
3 Double-click the preferred language.
4 Double-click the document to view.
34 Getting Started Guide
EN
Page 39

Page 40

Printedonatleast
50%TotalRecycledFiberwith
atleast10%Post-ConsumerPaper
Copyright© 1999
Hewlett-Packard Co.
Printed in USA
Manual Part No.
C4252-90901
*C4252-90901*
*C4252-90901*
C4252-90901
 Loading...