

HP Color LaserJet 3000/3600/3800 Series printers
Getting Started Guide

Copyright and License
© 2008 Copyright Hewlett-Packard De velopment Company , L.P.
Reproduction, adaptation or translation without prior written permission is
prohibited, except as allowed under the copyright laws.
The information contained herein is subject to change without notice.
The only warranties for HP products and services are set forth in the
express warranty statements accompanying such products and services.
Nothing herein should be construed as constituting an additional warranty .
HP shall not be liable for technical or editorial errors or omissions
contained herein.
Part number: Q5982-91044
Edition 1, 5/2008
FCC Regulations
This equipment has been tested and found to comply with the limits for a
Class B digital device, pursuant to Part 15 of the FCC rules. These limits
are designed to provide reasonable protection against harmful
interference in a residential installation. This equipment generates, uses,
and can radiate radio-frequency energy. If this equipment is not installed
and used in accordance with the instructions, it may cause harmful
interference to radio communications. Howe ver, there is no guarantee that
interference will not occur in a particular installation. If this equipment does
cause harmful interference to radio or television reception, which can be
determined by turning the equipment off and on, correct the interference
by one or more of the following measures:
• Reorient or relocate the receiving antenna. Increase separation
between equipment and receiver.
• Connect equipment to an outlet on a circuit different from that to
which the receiver is located.
• Consult your dealer or an experienced radio/TV technician.
Any changes or modifications to the printer that are not expressly
approved by HP could void the user’s authority to operate this equipment.
Use of a shielded interface cable is required to comply with the Class B
limits of Part 15 of FCC rules. For more regulatory information, see the
HP Color LaserJet 3000/3600/3800 Series printer electronic user guide.
Hewlett-Packard shall not be liable for any direct, indirect, incidental,
consequential, or other damage alleged in connection with the furnishing
or use of this information.
Trademark Credits
PostScript® is a trademark of Adobe Systems Incorporated.
Windows® is a U.S. registered trademark of Microsoft Cor poration.
1
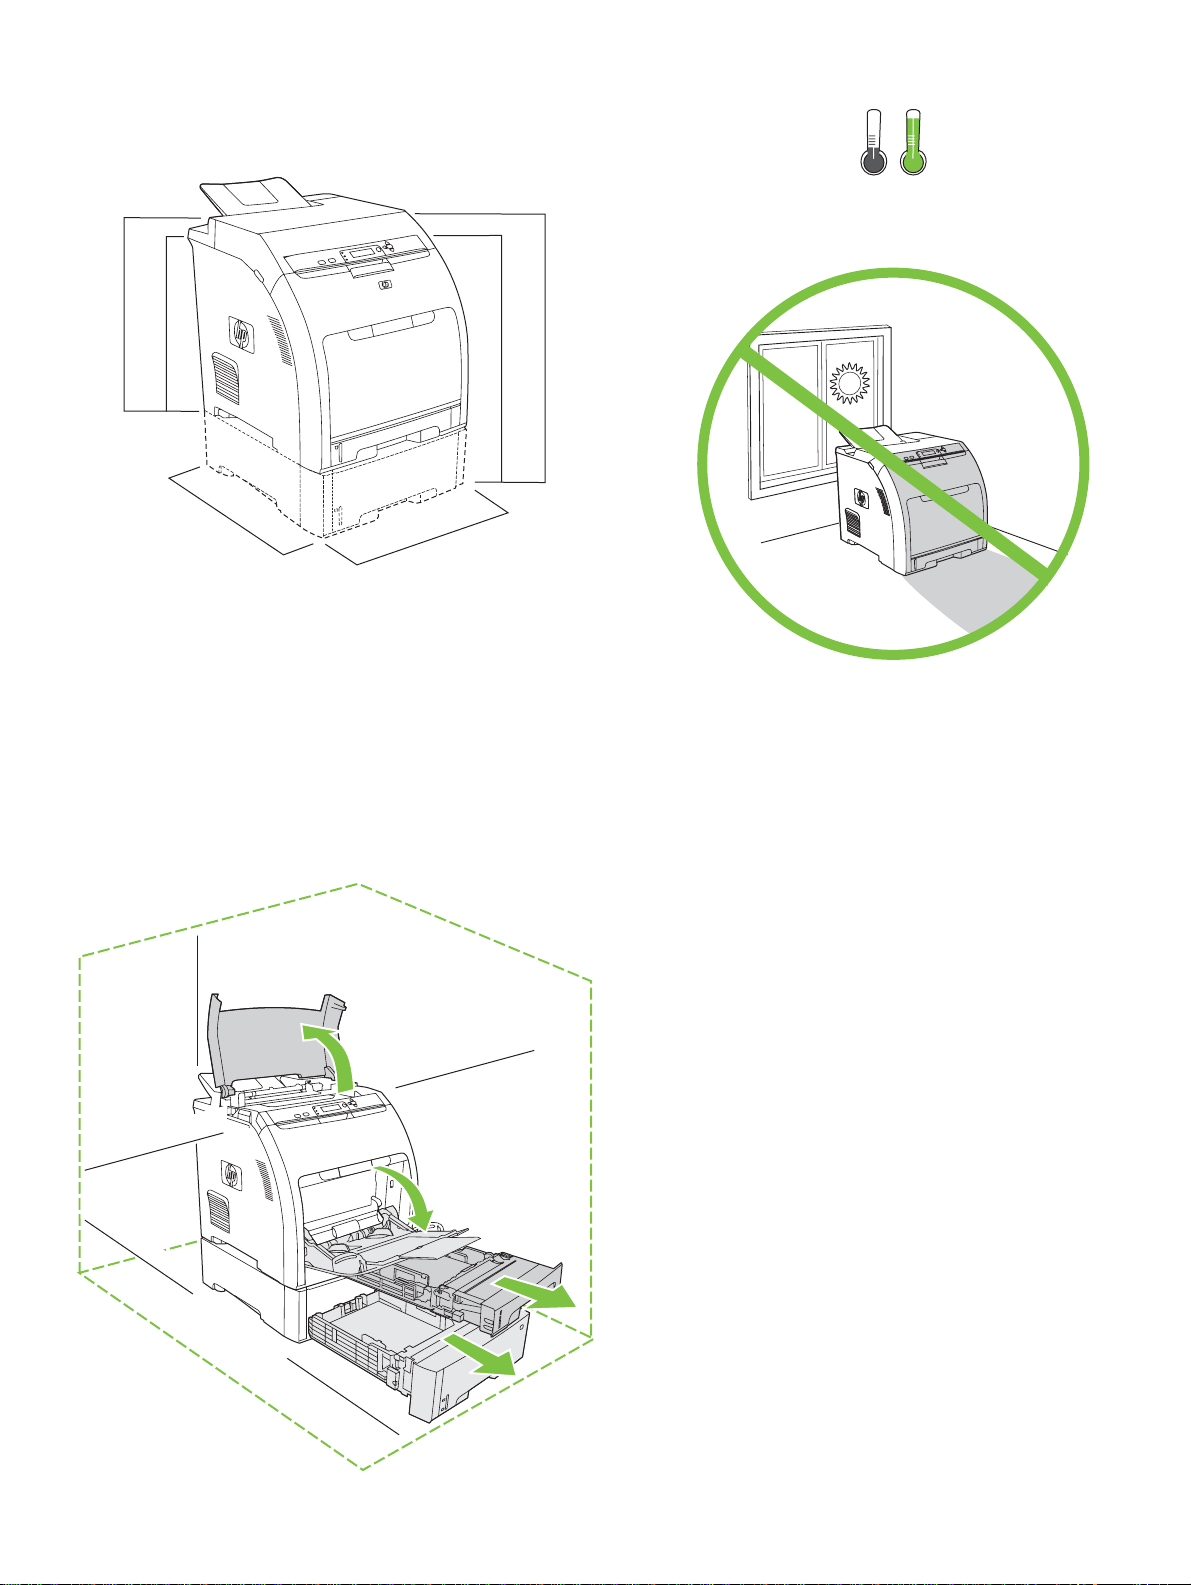
423 mm (16.65 in)
400 mm (15.75 in)
450 mm (17.7 in)
400 mm (15.75 in)
540 mm (21.25 in)
17° - 25°C
(62.6° - 77°F)
563 mm (22 in)
89 mm (3.5 in)
178 mm (7 in)
Select a sturdy, well-ventilated, dust-free area to
position the printer.
229 mm (9 in)
89 mm (3.5 in)
356 mm (14 in)
2
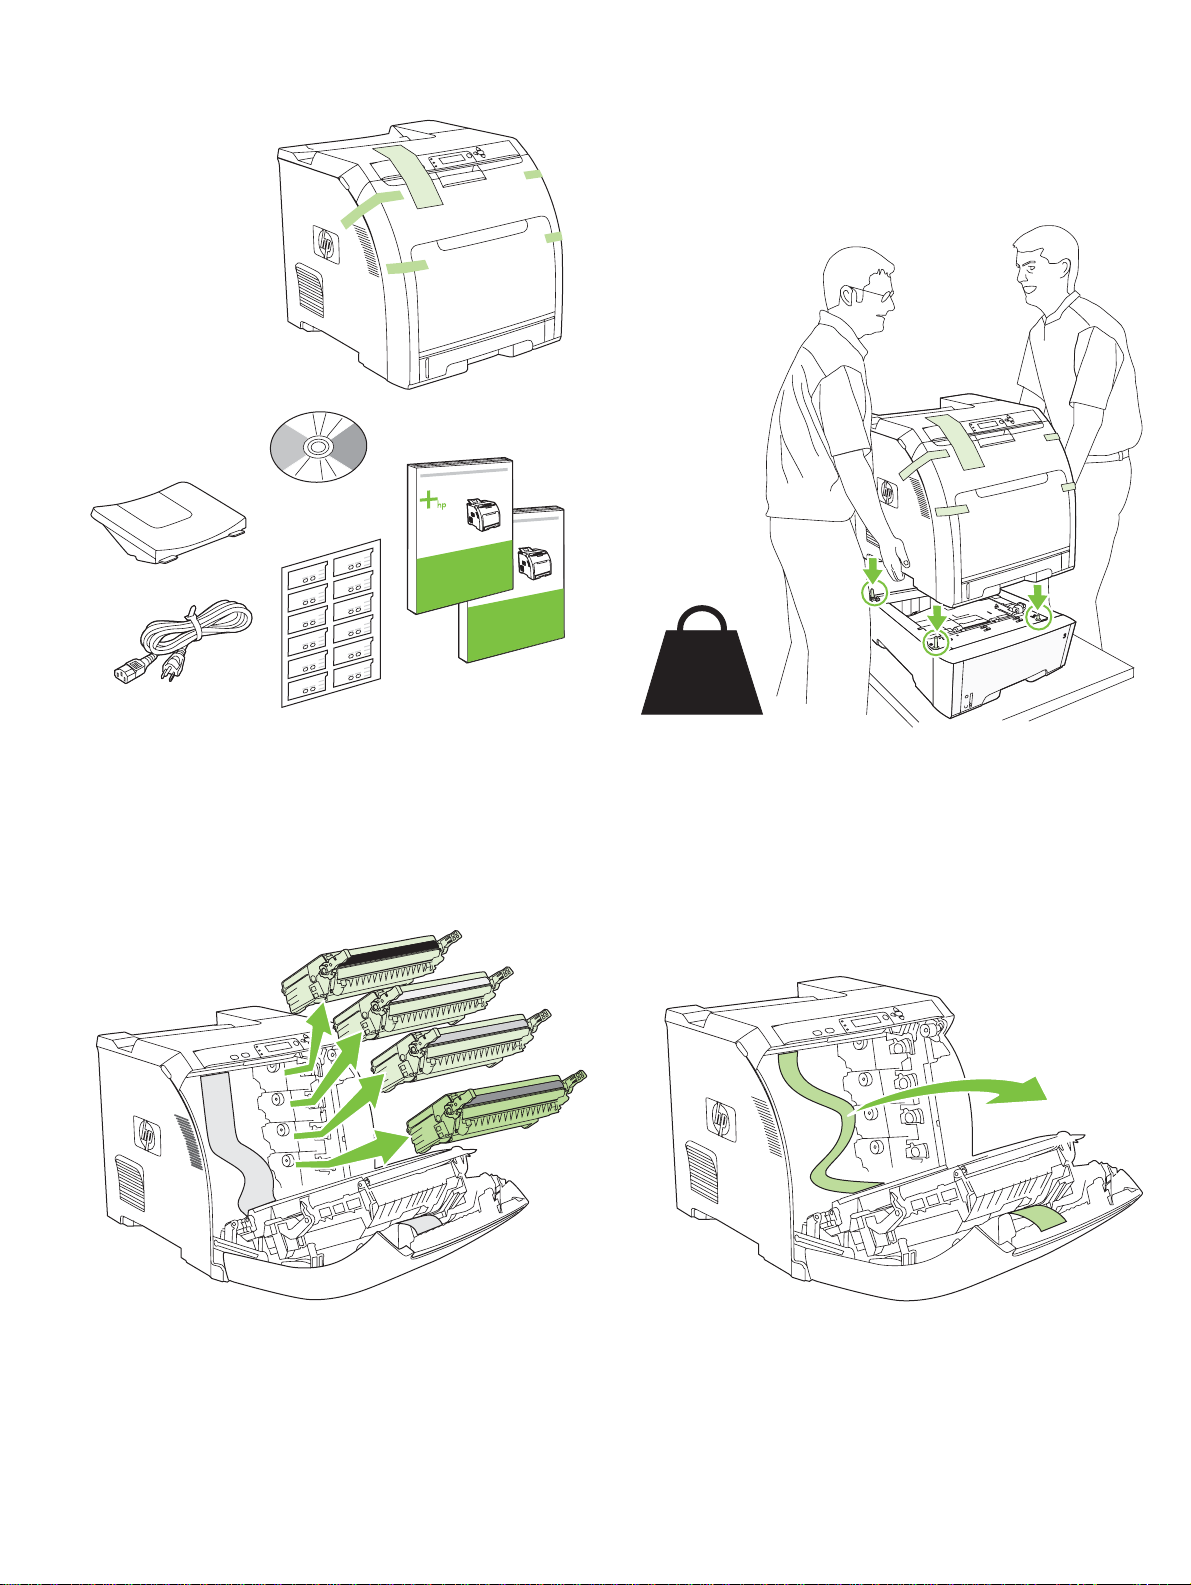
Check th
e contents of the box.
If th
ith
R
R
1
e printer came w
a tray 3, place the printer on top of it.
2
emove the print cartridges.
21.5 Kg.
47.4 lbs.
emove the shipping tape.
3
4
3
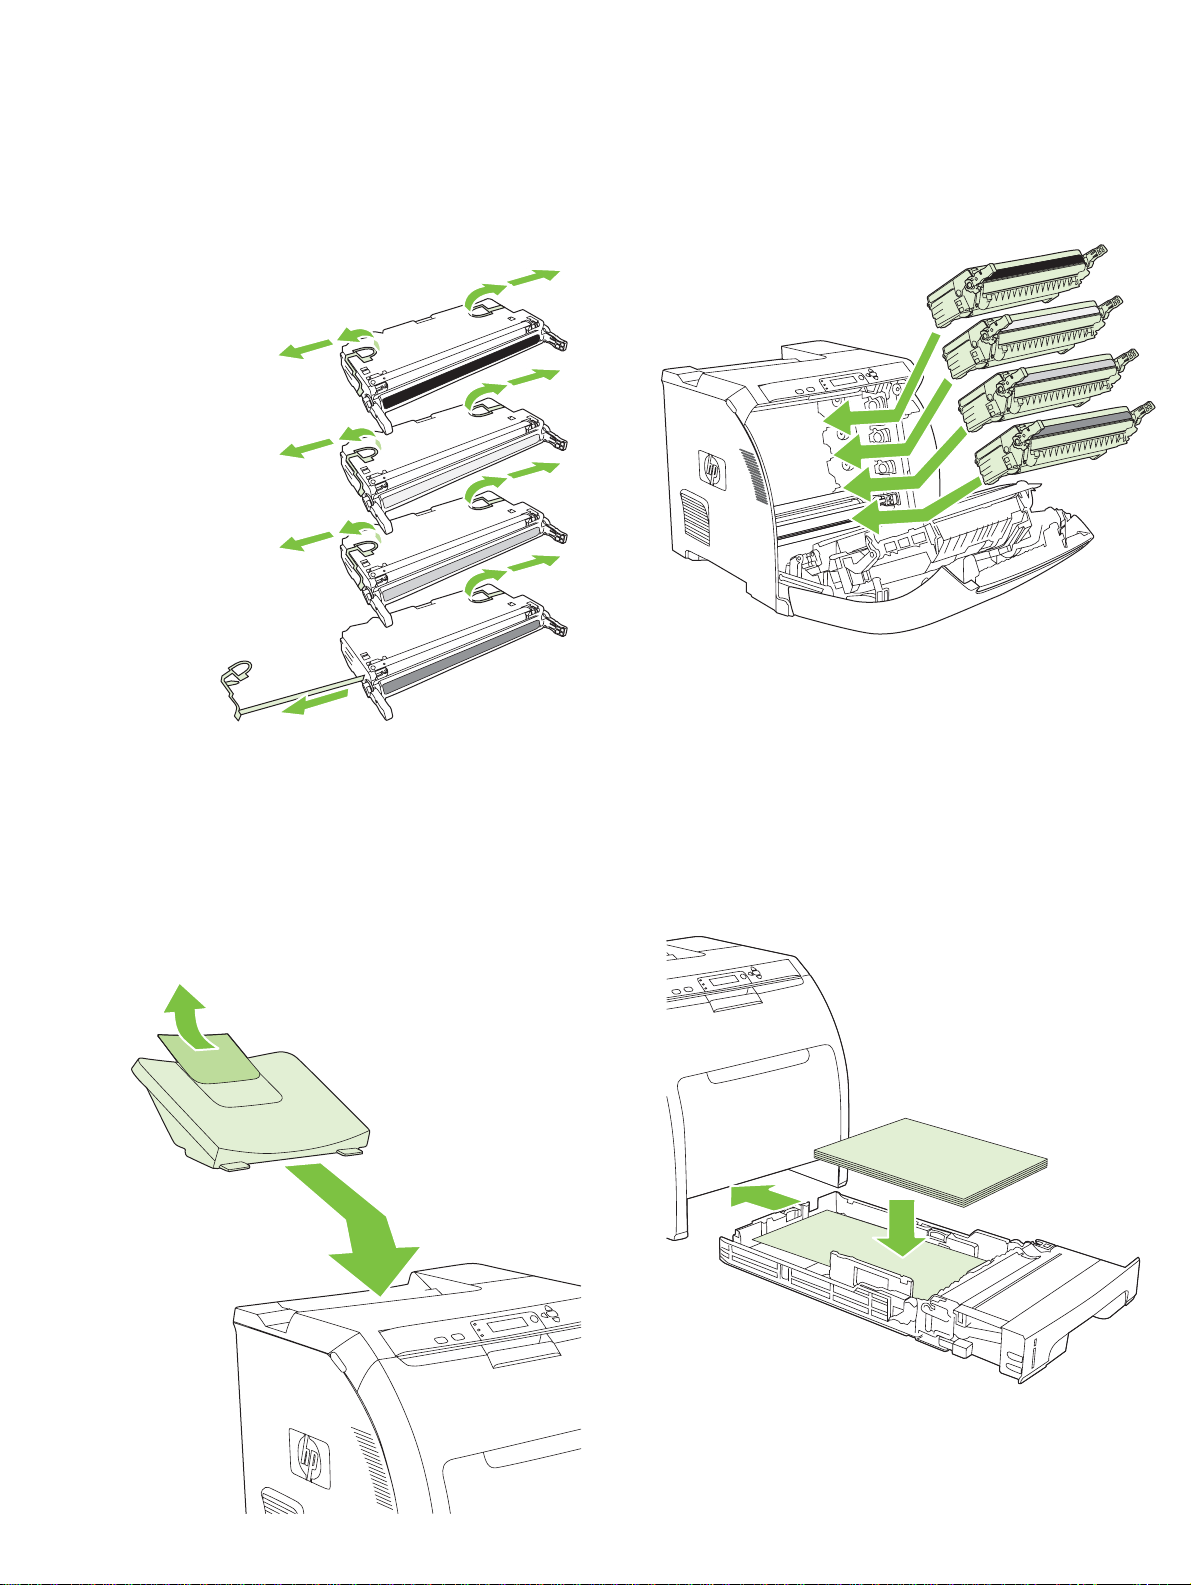
R
emove the shipping locks and tape from the print cartridges.
Reinstall th
Install th
Load
5
e print cartridges.
6
e output bin.
paper.
7
8
4
9
10
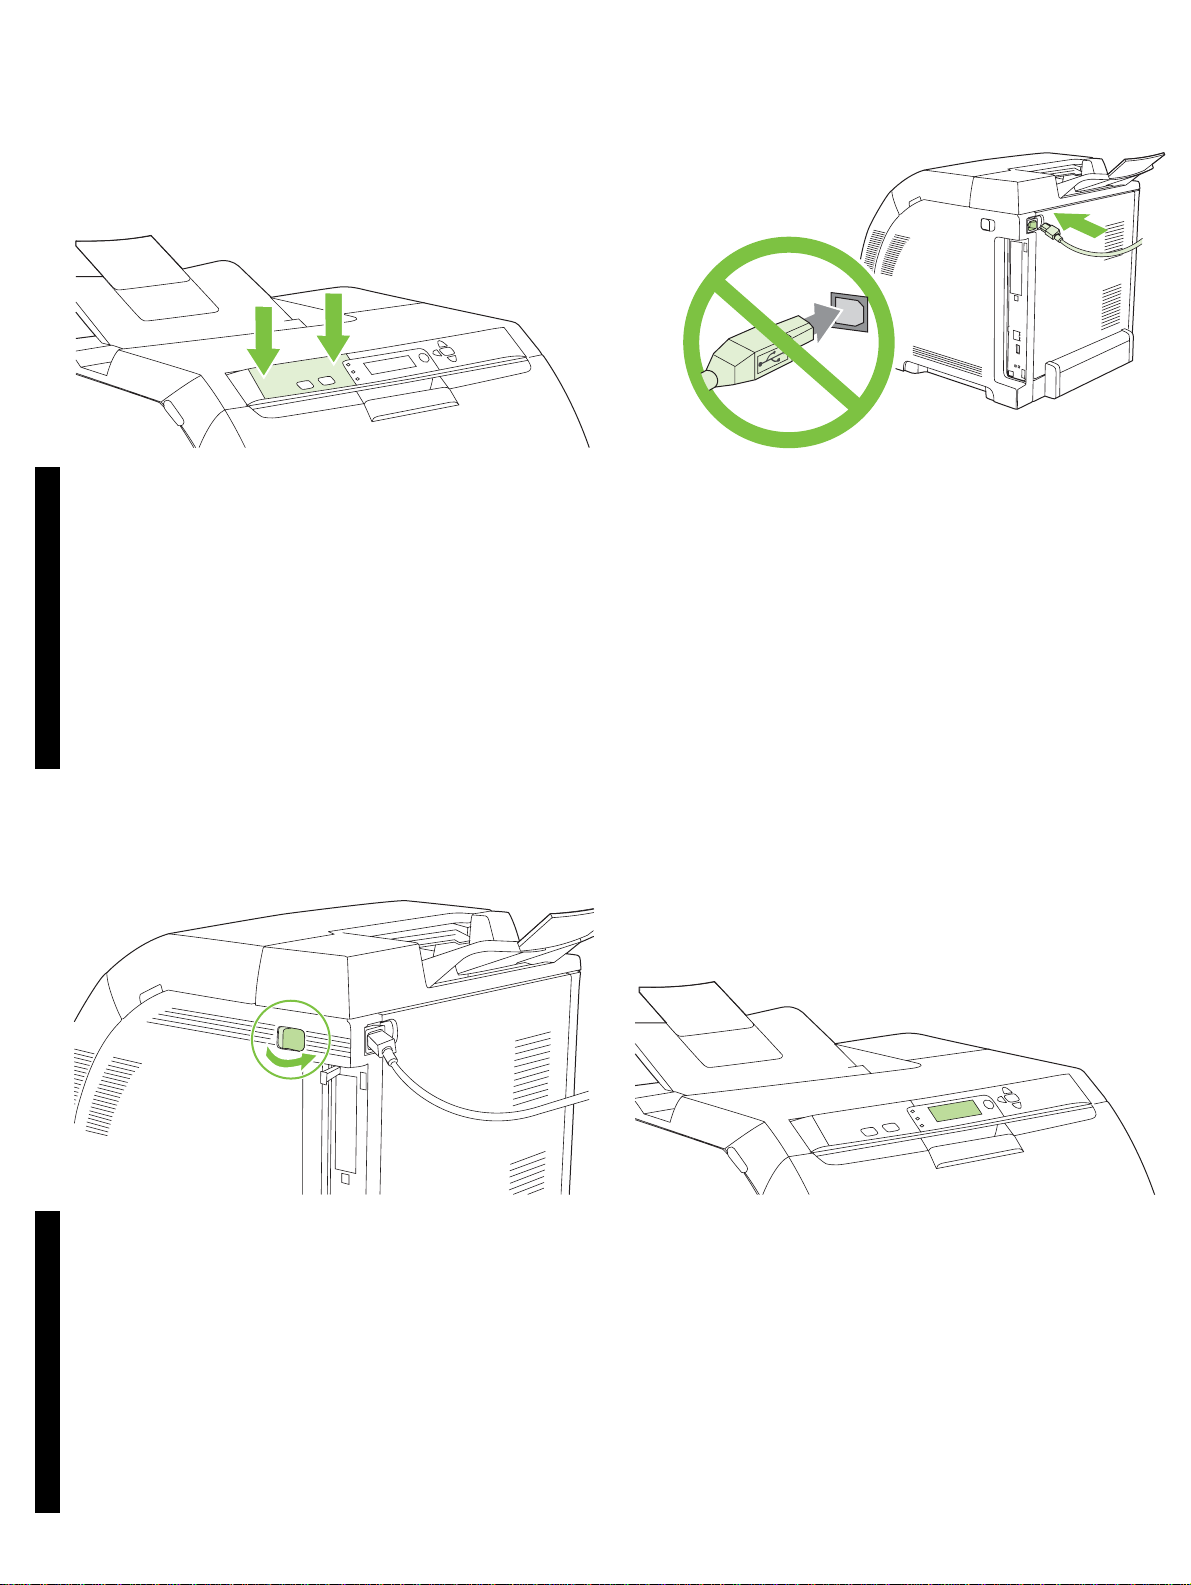
Install the control-panel overlay (if necessary). Press the ends of the
overlay straight down onto the printer and then move your hands toward
the center of the overlay until it completely adheres to the printer.
EnglishEnglish
10.1 Plug in the power cord. Do not plug in the USB cable until you are
prompted to in step 14.
Note Plug the power cord directly into a wall outlet only.
11
10.2 Turn on the printer.
Note Printer calibration and start-up noises are normal.
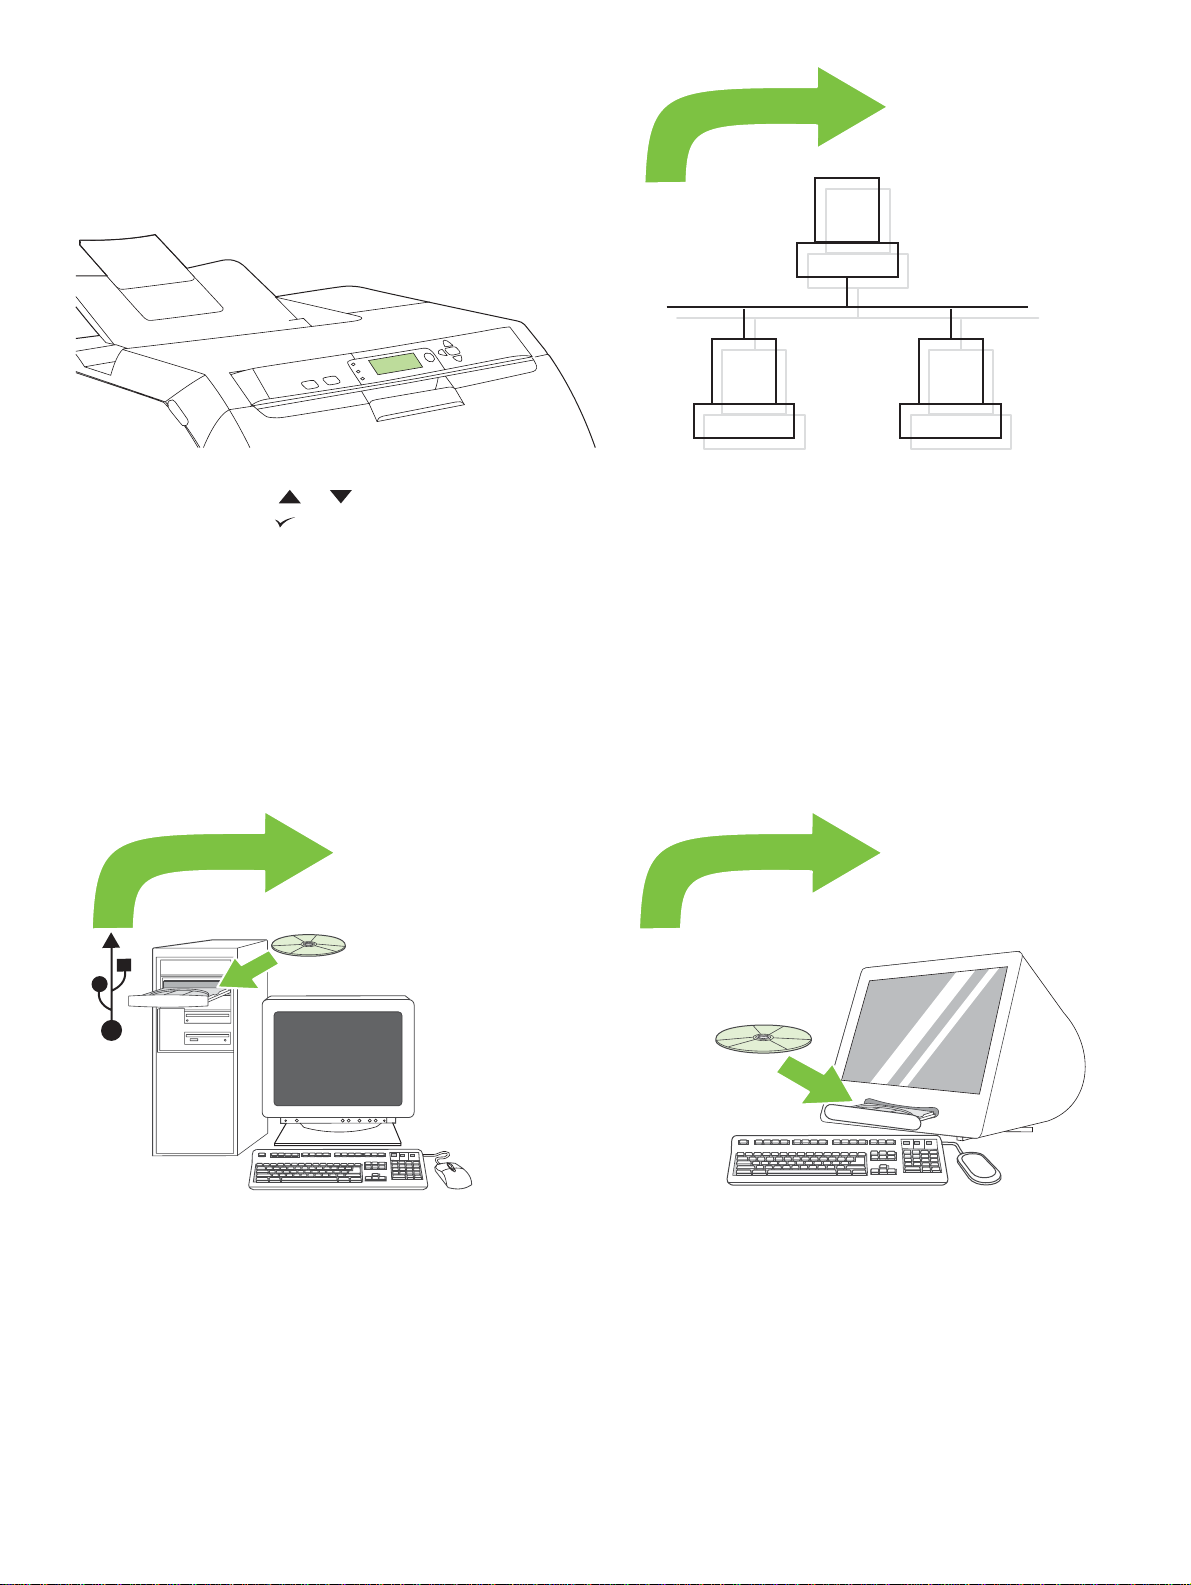
Set the language/date/time (if necessary). If prompted, select your
language and date/time. Follow the instructions on the control panel.
5
12
13
LAN
Set the media size and type for the input trays. At the printer control
panel, press MENU, use the or button to highlight PAPER
HANDLING, and then press . Use the control panel buttons to highlight
and select media sizes and types for each input tray. For more information,
see the online user guide.
14
To connect to a network, go to step 13 on page 7.
15
To install software for Windows® with a direct connection (USB), go to
step 14 on page 8.
To install software for Macintosh with a direct connection (USB), go to step
15 on page 10.
6
13
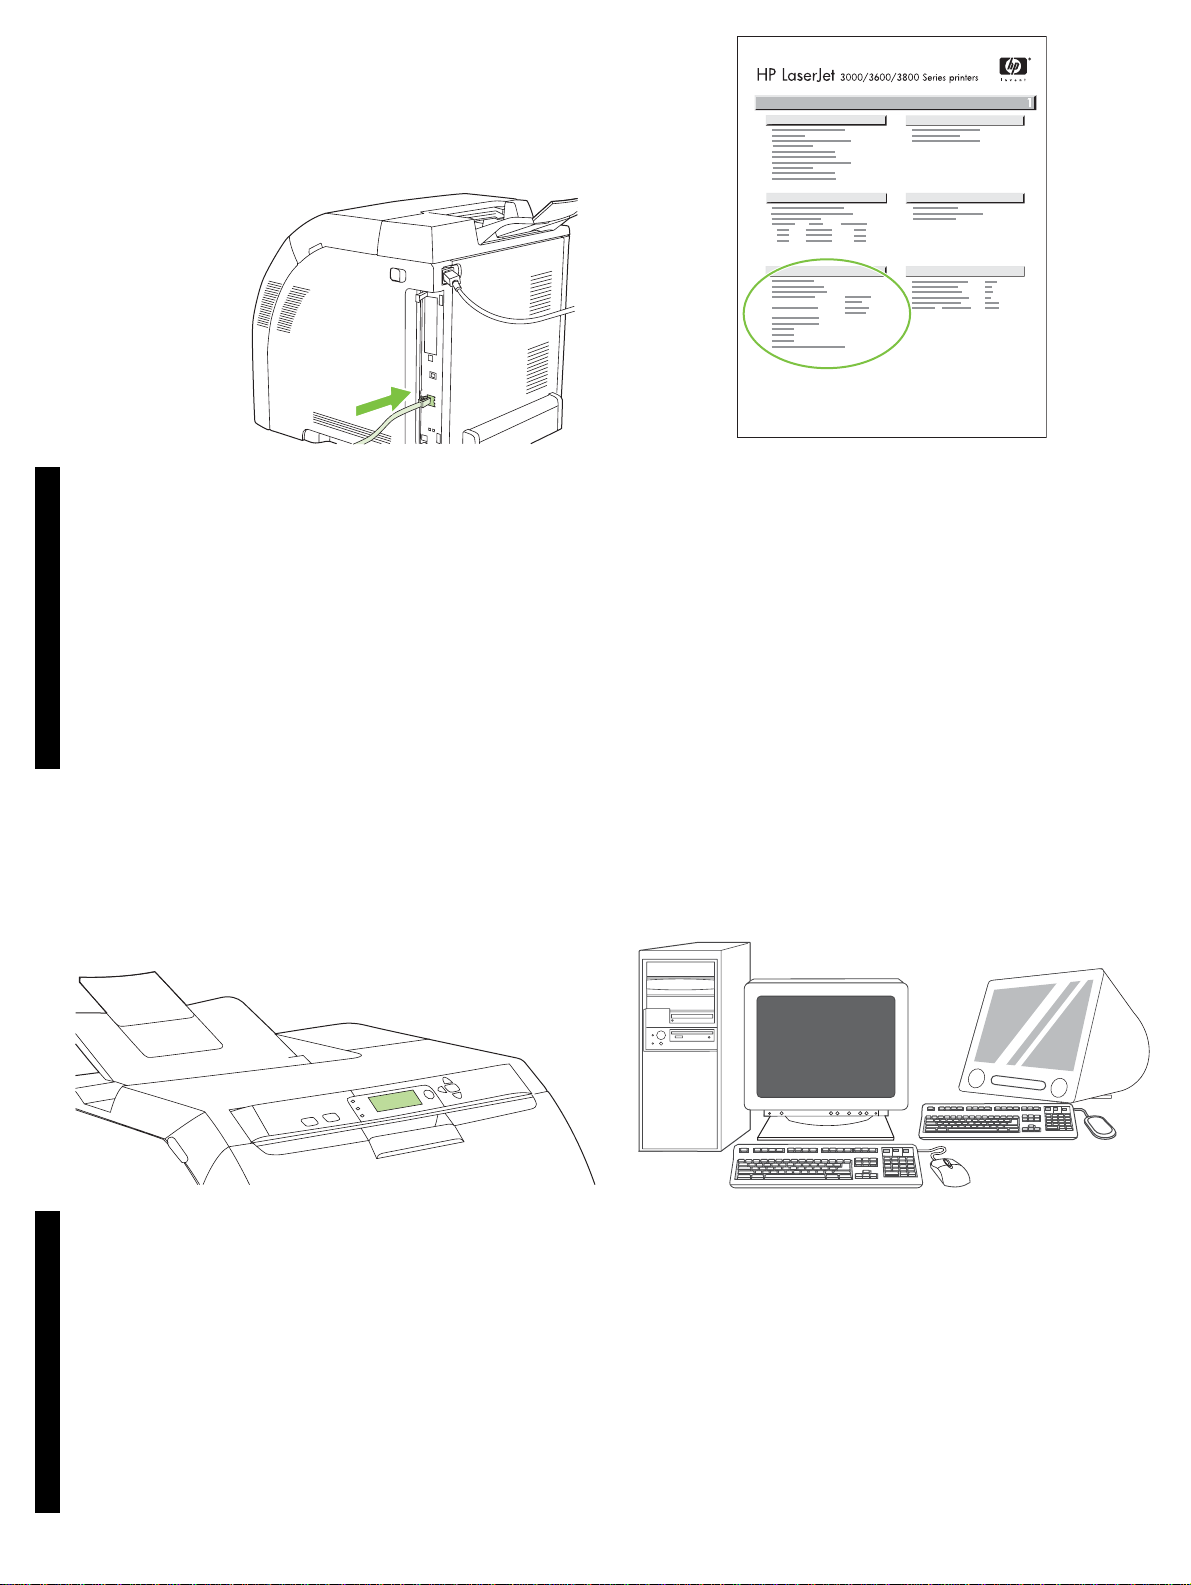
13.1 Connect to a network. Connect the network cable to the printer.
Note Ensure that all cables are HP-compliant.
EnglishEnglish
13.2 Find the IP address. On the control panel, press Menu. Select
INFORMATION, and then select PRINT CONFIGURATION. The IP
address is on the Jetdirect page, under “TCP/IP”.
Note You might need to assign an IP address depending on the type of
network that is installed. See “Configure an IP address (if necessary)” on
page 7 for more information.
13.3 Configure an IP address (if necessary). On the control panel,
press MENU. Select CONFIGURE DEVICE, select I/O, and then select
EMBEDDED JETDIRECT. Select TCP/IP, select CONFIG METHOD,
select MANUAL, and then select MANUAL SETTINGS. Use the control-
panel buttons to specify the IP address.
13.4 Prepare for software installation. Quit all of the programs (including
terminate-and-stay resident [TSR], antivirus, and firewall programs) on the
print server or on each computer that will use the printer.
7
13.5 Install the software. 1) Insert the CD that came with the printer.
2) On the welcome screen, click Install Printer. (If the welcome screen
does not appear, run SETUP.EXE from the root directory of the CD.)
3) Follow the onscreen instructions. When prompted, select Wired
Networking. The installer shows a v ailab le printers. Select the appropriate
IP address.
Windows
14
4) On the Installation Type screen select Full Installation to install the
most common drivers and software (recommended), select Basic
Installation to install the minimum set of drivers and software, or select
Custom Installation. 5) Allow the installation to finish. 6) Go to step 16 on
page 12.
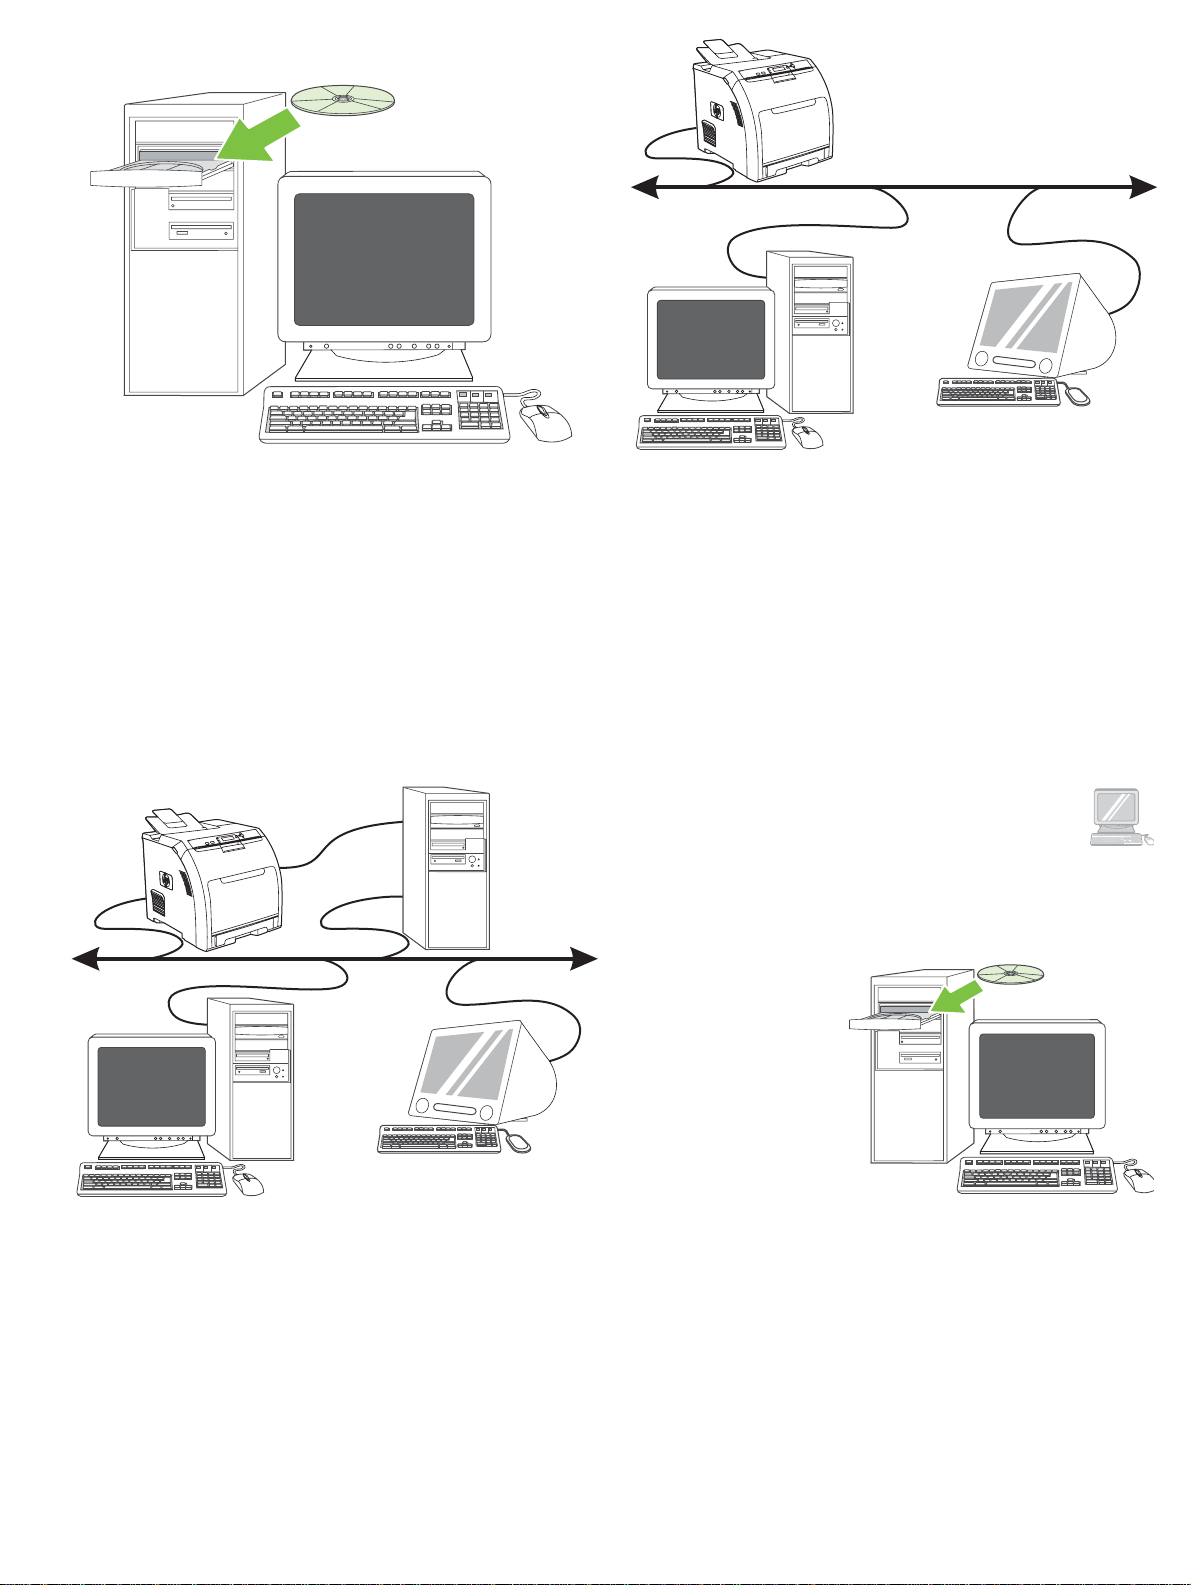
Windows® with a direct connection (USB). 1) Install the software from
the CD before connecting the cable to the printer.
8

Windows
Windows
Note If the Ne w Ha rdware Found message appears, insert the CD.
Follow the onscreen instructions, accept the default selections, and then
go to step 16 on page 12.
EnglishEnglish
Windows Windows
2) On the welcome screen, click Install Printer. The Setup Wizard
appears.
Note If the welcome screen does not appear, click Start, and then click
Run. Type X:SETUP, replace X with the CD-ROM drive letter, and then click
OK.
3) Follow the onscreen instructions. When prompted, connect a USB cable
between the printer and the computer.
Note HP does not recommend using USB hubs. Use a USB cable that is
no longer than 2 meters (6.5 feet).
4) Click Finish. If prompted, restart the computer. 5) Go to step 16 on
page 12.
9

15
A
Macintosh
Macintosh
Connect to a Macintosh computer. 1) Connect a USB cable between
the printer and the computer.
Note HP does not recommend using USB hubs. Use a USB cable that is
not longer than 2 meters (6.5 feet).
Macintosh Macintosh
2) Place the CD in the CD-ROM drive. For OS 9.1 to 9.2.x, go to A on
page 10. For OS X, go to B on page 11.
OS 9.1 to 9.2.x: 1) Run the Installer. Complete a custom install. 2) Select
all options, including USB Components (Classic). 3) When prompted,
restart the computer.
4) Run the Apple Desktop Printer Utility from HD/Applications/Utilities.
5) Double-click HP Printer (USB), and then click OK. 6) Next to the USB
Printer Sele c tion, click Change.
10

Macintosh
Macintosh
B
7) Select the printer, and then click OK. 8) Next to Postscript® Printer
Description (PPD) File, click Auto Setup, and then click Create. 9) Save
the printer setup. 10) On the desktop, highlight the printer. 11) Click the
Printing menu, and then click Set Default Printer. 12) Go to step 16 on
page 12.
EnglishEnglish
Macintosh Macintosh
OS X: 1) Run the Installer. Complete an easy install.
Note If OS X and OS 9.1 (Classic) to 9.2.x (Classic) are installed on the
same computer, the installer shows both the Classic and the OS X
installation options.
2) From HD/Applications/Utilities/Print Center, start the Print Center. 3) If
the printer appears in the Printer List, delete the printer. Click Add. 4) On
the next page, click the drop-down menu, and then select USB.
5) From the Printer Model drop-down list, select HP. 6) Under Model
Name, select the printer, and then click Add. 7) Go to step 16 on page 12.
11

16
17
Test the software installation. Print a page from any program to make
sure that the software is correctly installed.
Note If the installation failed, reinstall the software.
Congratulations! The printer is ready to use. The user guide is located on
the CD and in the HP Easy Printer Care Software.
Note Save the boxes and the packing materials in case you need to
transport the printer.
18
Register your printer. Register at www.register.hp.com. This is the
quickest and easiest way for you to register to receive the following
information: technical support updates, enhanced support options, ideas
and ways to use your new HP printer, and news about emerging
technologies.
For additional help for the printer, go to www.hp.com/support/clj3000,
www.hp.com/support/clj3600, www.hp.com/support/clj3800, or
http://instantsupport.hp.com.
12

13

Paper sizes •
216 x 356 mm
(8.5 x 14 inches)
216 x 356 mm
(8.5 x 14 inches)
216 x 356 mm
(8.5 x 14 inches)
76 x 127 mm
(3 x 5 inches)
148 x 210 mm
(5.83 x 8.26 inches)
148 x 210 mm
(5.83 x 8.26 inches)
For supplies, please visit www.hp.com/support/clj3000 •
Part numbers •
Black •
Cyan •
Yellow •
Magenta •
3000 3600 3800
Q7560A Q6470A Q6470A
Q7561A Q6470A Q7581A
Q7562A Q6472A Q7582A
Q7563A Q6473A Q7583A
14

HP Color LaserJet 3000/3600/3800
Clearing jams •
1
2
Questions? •
3
http://www.hp.com/support/go/clj3000
http://www.hp.com/support/go/clj3600
http://www.hp.com/support/go/clj3800
15

17
16
18
16

B
Macintosh
Macintosh
MacintoshMacintosh
17

Macintosh
A
Macintosh
15
MacintoshMacintosh
18

Windows
Windows
WindowsWindows
19

14
Windows
20

13
21

LAN
13
12
15
14
22

10
9
11
23

6
5
8
7
24

2
21.5 Kg.
47.4 lbs.
1
4
3
25

17° - 25°C
(62.6° - 77°F)
423 mm (16.65 in)
400 mm (15.75 in)
450 mm (17.7 in)
400 mm (15.75 in)
540 mm (21.25 in)
563 mm (22 in)
89 mm (3.5 in)
178 mm (7 in)
26
229 mm (9 in)
89 mm (3.5 in)
356 mm (14 in)

© 2008 Hewlett-Packard Development Company, L.P.
www.hp.com
*Q5982-91044*
*Q5982-91044*
Q5982-91044
 Loading...