


 Loading...
9YPS 645 (BK) GH/HA 9YPS 645 (WH) GH/HA 9YPS 645 AX/HA 9YPS 645 X GH/HA
9YPS 645 (AV) GH R/HA 9YPS 645 (AN) GH R/HA 9YPS 645 (OW) GH R/HA
 English
Operating Instructions
HOB
Contents
Operating Instructions,1 Warnings,3 Assistance,7
Description of the appliance,8 Installation,11
Start-up and use,15 Precautions and tips,15 Maintenance and care,16 Troubleshooting,16
 Български
Инструкции за употреба
ГОТВАРСКИ ПЛОТ Съдържание
Инструкции за употреба,1 Предупреждения,3 Техническо обслужване,7 Описание на уреда,8 Инсталиране,17 Пуск и експлоатация,22
Предпазни мерки и препоръки,22 Поддръжка и почистване,23 Отстраняване на неизправности,23
 Česky
Česky
Pokyny pro použití
VARNÁ DESKA
Obsah
Pokyny pro použití,1 Upozornění,4 Servisní služba,7 Popis zařízení,9
Instalace,24
Uvedení do činnosti a použití,28 Opatření a rady,28
Údržba a péče,29
Identifikace a řešení problémů,29
 Magyar
Használati útmutató
FŐZŐLAP
Tartalomjegyzék
Használati útmutató,1 Figyelmeztetések,4 Szerviz,7
A készülék leírása,9 Üzembe helyezés,30 Bekapcsolás és használat,34
Óvintézkedések és tanácsok,34 Karbantartás és ápolás,35 Hibaelhárítás,35
 Română
Instrucţiuni de utilizare
PLITA
Sommario
Instrucţiuni de utilizare,1 Avertizări,5
Asistenţă ,7
Descrierea aparatului,10 Instalarea,36
Pornirea şi folosirea,40 Precauţii şi sfaturi,40 Întreţinerea şi îngrijirea,41
Depanarea,41

 Українська
Інструкція по використанню
Варильна поверхня Зміст
Інструкція по використанню,2 Запобіжні заходи,5 Допомога,7 Опис приладу,10 Установка,42
Ввімкнення і використання,46 Запобіжні заходи та поради,46 Обслуговування та догляд,47 Усунення несправностей,47

Warnings
WARNING: The appliance and its accessible parts become hot during use. Care should be taken to avoid touching heating elements. Children less than 8 years of age shall be kept away unless continuously supervised. This appliance can be used by children aged from 8 years and above and persons with reduced physical, sensory or mental capabilities or lack of experience and knowledge if they have been given supervision or instruction concerning use of the appliance in a safe way and understand the hazards involved. Children shall not play with the appliance. Cleaning and user maintenance shall not be made by children without supervision.
WARNING: Unattended cooking on a hob with fat or oil can be dangerous and may result in fire. NEVER try to extinguish a firewithwater,butswitchofftheappliance and then cover flame e.g. with a lid or a fire blanket.
WARNING: Danger of fire: do not store items on the cooking surfaces.
Never use steam cleaners or pressure cleaners on the appliance.
Remove any liquid from the lid before opening it. Do not close the glass cover (if present) when the gas burners or electric hotplates are still hot.
The appliance is not intended to be operated by means of an external timer or separate remote control system.
CAUTION: the use of inappropriate hob guards can cause accidents.
Предупреждения
ПРЕДУПРЕЖДЕНИЕ: Уредът и достъпните му части се нагорещяват по време на употреба. Трябва да се избягва контакт с нагревателите. Деца под 8 години трябва да бъдат държанинастрана,освенаконесапод непрекъснат надзор. Уредът може да бъдеизползванотдецанад8годинииот хора с ограничени физически, сетивни или умствени способности или без опит и познания, ако са наблюдавани, или са им дадени указания относно използването на уреда по безопасен начин, и са запознати с възможните опасности.Децатанетрябвадаиграятс уреда.Почистванетоиподдръжкатаот потребителянетрябвадасеизвършва от деца без надзор.
ПРЕДУПРЕЖДЕНИЕ: Готвенето без надзор с мазнина или масло върху готварски плот може да бъде опасно и да доведе до пожар. НИКОГА не опитвайте да гасите пожар с вода, а изключете уреда и след това покрийте пламъка, например с капак или противопожарно одеяло.
ПРЕДУПРЕЖДЕНИЕ: Опасност от пожар: не поставяйте предмети върху повърхностите за готвене.
Никога не използвайте водочистачки или парочистачки върху уреда.
Отстранете течността от капака, преди да го отворите. Не затваряйте стъклениякапак(акоиматакъв),когато газовите горелки или електрическите котлони все още са горещи.
Уредът не е предназначен за управление с външен таймер или
3

отделна система за дистанционно управление.
ВНИМАНИЕ: използването на неподходящи готварски плотове може да доведе до инциденти.
Upozornění
UPOZORNĚNÍ: Toto zařízení a jeho přístupné části dosahují během použití velmi vysoké teploty.
Je třeba dávat pozor a zabránit styku s topnými články.
Udržujte děti mladší 8 let v dostatečné vzdálenosti,pokudnejsoupodneustálým dohledem.
Toto zařízení mohou používat děti od 8 let a osoby se sníženými fyzickými, senzorickými nebo duševními schopnostmi nebo osoby bez zkušeností a znalostí, které se nacházejí pod náležitým dohledem nebo které byly poučeny ohledně použití zařízení bezpečným způsobem a které si uvědomují související nebezpečí. Děti si nesmí hrát se zařízením. Děti nesmí provádět operace čištění a údržby bez dohledu.
UPOZORNĚNÍ: Ponechání sporáku s ohřívanými tuky a oleji může být nebezpe-čné a může způsobit požár. NIKDY není třeba hasit plamen/požár vo-dou, ale je nutné vypnout zařízení a zakrýt plamen například víkem nebo hydrofobní dekou.
VAROVÁNÍ: Nebezpečí požáru, nenechávejte nic na vaření.
Nikdy nepoužívejte k čištění zařízení vyso-kotlaký parní čistič.
Před otevřením krytu setřete případné kapaliny, které se na něm nacházejí. Neza-vírejte skleněný kryt (je-li součástí) s ještě teplými plynovými hořáky nebo elektrickou plotnou.
Přístroj není určen k uvedení do provozu pomocí externího časovače nebo samostatného systému dálkového ovládání.
UPOZORNNÍ: Použití nevhodných ochran varné desky može zposobit nehody.
Figyelmeztetések
FIGYELEM: A készülék és annak hozzáférhető részei a használat közben rendkívüli módon felmelegedhetnek.
Vigyázzon, hogy nehogy hozzáérjen a fűtőelemekhez.
Ha a gyermekek nincsenek folyamatos felügyelet alatt, tartsa távol a 8 éven aluli gyermekeket.
Ezt a készüléket a 8 éves kort betöltött gyermekek, valamint a testileg, érzékszervileg vagy szellemileg korlátozott, nem hozzáértő, illetve a terméket nem ismerő személyek csak megfelelő felügyelet mellett, vagy a készülék biztonságos használatával kapcsolatos alapvető utasítások és a kapcsolódó veszélyek ismeretében használhatják. Vigyázzon, hogy a gyermekek ne játsszanak a készülékkel. A tisztítási és karbantartási műveleteket gyermekek felügyelet nélkül nem végezhetik.
FIGYELEM:Atűzhelyenfelügyeletnélkül otthagyott zsír vagy olaj veszélyes lehet,
és tüzet okozhat.
SOHA ne próbálja meg vízzel eloltani a tüzet, hanem zárja el a készüléket, és
4

takarja le a lángot például fedővel vagy tűzálló takaróval.
FIGYELEM: Tűzveszély! Ne tároljon semmit a főző felületeken!
Akészülék tisztításához soha ne használjon gőztisztítót vagy nagynyomású tisztítót.
A fedő kinyitása előtt távolítsa el az összes folyadékot! Ne csukja be az üveg fedőt (típustól függően) ha a gáz égők vagy elektromos főzőmezők még melegek.
A készüléket nem szabad külső időmérővel vagy különálló távirányító rendszerrel használni.
FIGYELEM: A főzőlap nem megfelelő használata balesetet okozhat.
Avertizări
ATENŢIE: Acest aparat şi părţile sale accesibile devin foarte calde în timpul folosirii.
Trebuie să fiţi atenţi şi să nu atingeţi elementele de încălzire.
Îndepărtaţi copiii sub 8 ani dacă nu sunt supravegheaţi continuu.
Acest aparat poate fi utilizat de copiii de peste 8 ani şi de persoane cu capacităţi fizice,senzorialesaumentaleredusesau fără experienţă şi cunoştinţe dacă se află sub o supraveghere corespunzătoare sau dacă au fost instruiţi cu privire la folosirea aparatului în mod sigur şi dacă îşi dau seama de pericolele corelate. Copiii nu trebuie să se joace cu aparatul. Operaţiunile de curăţare şi de întreţinere nu trebuie să fie efectuate de copii fără supraveghere.
ATENŢIE: Lăsarea unui aragaz nesupravegheat cu grăsimi şi uleiuri poate fi periculoasă şi poate provoca un incendiu.
Nu trebuie NICIODATĂ să încercaţi să stingeţi o flacără/incendiu cu apă, ci trebuie să stingeţi aparatul şi să acoperiţi flacăra, de exemplu cu un capac sau cu o pătură ignifugă.
ATENŢIE: Risc de incendiu: nu lăsaţi obiecte pe suprafeţele de gătit.
Nu folosiţi niciodată aparate cu aburi sau sub presiune pentru a curăţa aparatul.
Eliminaţi eventualele reziduuri de lichid de pe capac, înainte de a-l deschide. Nu închideţi capacul din sticlă (dacă este prezent) cu arzătoarele de gaz sau plita electrică încă calde.
Aparatul nu trebuie pus în funcţiune prin intermediul unui temporizator extern sau al unui sistem separat de comandă la distanţă.
ATENŢIE: folosirea unor protecţii necorespunzătoare ale plitei poate provoca accidente.
Запобіжні заходи
УВАГА: Під час роботи цей прилад,
атакож його доступні частини нагріваються до високих температур. Слід бути особливо обережними, щоб не торкатися нагрівальних елементів. Дітивікомдо8роківмаютьзнаходитися на небезпечній відстані від приладу, якщонеможливозабезпечитипостійний контроль над ними.
Дозволяється користування цим приладом дітьми віком від 8 років,
атакож особами з обмеженими
5

фізичними,сенсорнимиаборозумовими можливостями або особами без належного досвіду і знань, якщо вони перебувають під постійним контролем або проінструктовані щодо правил з небезпечного користування приладу і усвідомлюють ступені ризику. Не дозволяйте дітям гратися з приладом. Операції з очищення і догляду не повинні виконуватися дітьми без належного контролю.
УВАГА: Небезпечно залишати без наглядуплитизжиромабоолією,тому що це може призвести до пожежі.
НІ В ЯКОМУ РАЗІ не слід намагатися погасити полум’я/пожежу водою. Необхідно вимкнути прилад і накрити полум’я, наприклад, кришкою або вогнетривким покривалом.
УВАГА:Небезпекапожежі:незалишайте речі на варильних поверхнях.
Забороняєтьсявикористанняапаратів для очищення парою або високим тиском.
Витріть насухо всі наявні на кришці рідини, перш ніж відкрити її. Не закривайте скляну кришку (якщо вона наявна), якщо газові пальники або електричні конфорки залишаються нагрітими.
Не передбачено увімкнення приладу за допомогою зовнішнього таймеру або окремої системи дистанційного керування.
УВАГА: використання невідповідних захиснихпристроївварильноїповерхні можепризвестидонещаснихвипадків.
6
Assistance
! Never use the services of an unauthorised technician.
Communicating:
•type of trouble
•appliance model (Mod.)
•serial number (S/N)
This information is found on the data plate located on the appliance and/or on the packaging.
Asistenţă
! Nu apelaţi niciodată la personal tehnic neautorizat.
Comunicaţi:
•tipul de anomalie;
•modelul maşinii (Mod.);
•numărul de serie (S/N).
Aceste informaţii se găsesc pe plăcuţa de caracteristici din frigider, în partea de jos, în stânga.
|
|
|
|
|
Техническо обслужване |
Допомога |
|||
! Никога не използвайте услугите на неоторизиран |
! Не звертайтеся по допомогу до не уповноваженого |
|||
техник. |
персоналу. |
|||
Подгответе следната информация: |
Повідомити: |
|||
• тип на възникналия проблем. |
• |
Тип несправності; |
||
• модел на уреда (Mod.). |
• |
Модель приладу (Mod.) |
||
• сериен номер (S/N). |
• |
Серійний номер (S/N) |
||
Тази информация се намира на табелката с данни |
Ці дані знаходяться на табличці з даними на самому |
|||
върху уреда. |
приладі. |
|||
|
|
|
|
|
|
|
|
|
|
Servisní služba
! Nikdy se neobracejte na neautorizované techniky.
Uveďte:
•Druh poruchy;
•Model zařízení (Mod.);
•Výrobní číslo (S/N).
Tyto informace se nacházejí na štítku s jmenovitými údaji, umístěném na zařízení.
Szerviz
! Sohase hívjon engedéllyel nem rendelkező szakembert!
Adja meg az alábbiakat:
•az anomália típusa;
•a készülék modellje (Mod.)
•a készülék szériaszáma (S/N)
Az utóbbi információk a készüléken elhelyezett adattáblán találhatók.
7

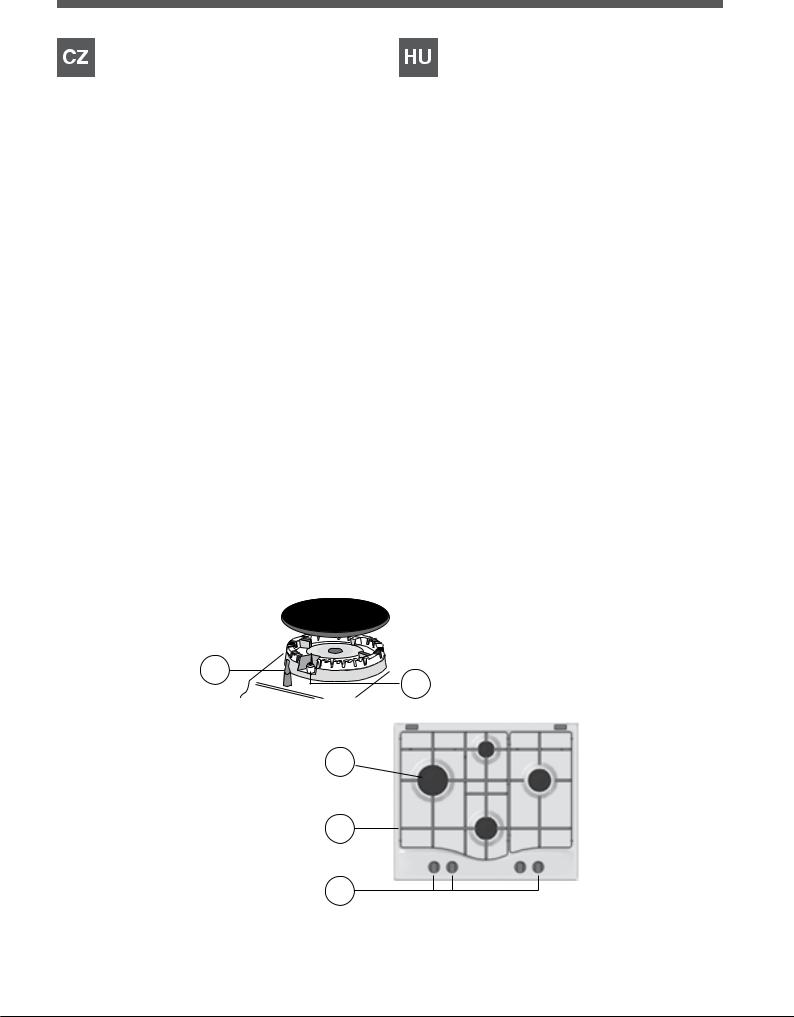
Description of the appliance
Overall view
1.Support Grid for Cookware
2.Gas burners
3.Control Knobs for gas burners
4.Ignition for Gas burners
5.Safety devices
•Gas burners differ in size and power. Use the diameter of the cookware to choose the most appropriate burner to cook with.
•Control Knobs for gas burners adjust the size of the flame.
•Gas burner ignition enables a specific burner to be lit automatically.
•Safety device stops the gas flow if the flame is accidentally extinguished.
Описание на уреда
Общ преглед
1.Носеща скара за готварските съдове
2.Газови горелки
3.Контролни превключватели за газовите
горелки
4.Запалване за газовите горелки
5.Механизми за безопасност
•Газовите горелки се различават по размер и мощност. Използвайте диаметъра на готварския съд, за да изберете най-подходящата горелка, с която да готвите.
•Контролните превключватели за газовите горелки регулират големината на пламъка
.
•Запалването за газови горелки позволява определена горелка да се запали автоматично.
•Механизмът за безопасност спира потока от газ, ако пламъкът бъде неволно изгасен.
5 |
4 |
|
2
1
3
8
Popis zařízení
Celkový pohled
1.Mřížky pro uložení NÁDOBY NA VAŘENĺ
2.PLYNOVÉ HOŘÁKY
3.Otočné ovladače PLYNOVÝCH HOŘÁKŮ
4.Zapalovací svíčka plynových hořáků
5.BEZPEČNOSTNÍ ZAŘÍZENÍ
•PLYNOVÉ HOŘÁKY jsou různých rozměrů a výkonu. Zvolte si ten, který je nejvhodnější pro průměr použité nádoby.
•Otočné ovladače PLYNOVÝCH HOŘÁKŮ pro ovládání plamene nebo výkonu.
•Zapalovací svíčka plynových hořáků umožňuje automatické zapálení zvoleného hořáku.
•BEZPEČNOSTNÍ ZAŘÍZENÍ pro případ náhodného zhasnutí plamene přeruší výstup plynu.
A készülék leírása
A készülék áttekintése
1.Főzőedénytartó RÁCSOK
2.GÁZÉgŐk
3.Gázégő vezérlő TEKERŐGOMBOK
4.GYÚJTÓGYERTYA gázégők
5.BIZTONSÁGI SZERKEZET
•GÁZÉgŐk: Különböző méretűek és teljesítményűek. Válassza a használni kívánt edény átmérőjének leginkább megfelelőt.
•Gázégő vezérlő TEKERŐGOMBOK: A teljesítmény szabályozására szolgálnak.
•GYÚJTÓGYERTYA gázégők: A kiválasztott gázégő automatikus meggyújtására szolgál.
•BIZTONSÁGI SZERKEZET: A láng véletlen kialvása esetén a gázellátás kikapcsolására szolgál.
5 |
4 |
|
2
1
3
9

Descrierea aparatului
Vedere de ansamblu
1.Grătare de sprijin pentruRECIPIENTELEDECOACERE
2.ARZĂTOARE PE GAZ
3.Selectoare de comandă ale ARZĂTOARELOR PE GAZ
4.Dispozitiv de aprindere al ARZĂTOARELOR PE GAZ
5.DISPOZITIV DE SIGURANŢĂ
•ARZĂTOARELE PE GAZ sunt de diferite dimensiunişi puteri.Alegeţi-lepeceleadecvatediametruluirecipientului utilizat.
•SelectoareledecomandăaleARZĂTOARELORPEGAZ şi sunt folosite pentrureglarea flăcării.
•Dispozitivul de aprindere al ARZĂTOARELOR PEGAZ permite aprinderea automată a arzătoaruluiprestabilit.
•DISPOZITIVUL DE SIGURANŢĂ este utilizat încazul stingerii accidentale a flăcării, împiedicândscurgerile de gaz.
Опис приладу
Загальний вигляд
1.Підтримуюча Решітка для Посуду
2.Газові Пальники
3.Ручки управління газових пальників
4.Запалювання для Газових Пальників
5.Пристрої Безпеки
•Газові Пальники відрізняються за розмірами тапотужністю. Використовуйте для приготування їжі посудз діаметром у відповідності до розміру найбільшпідходящого пальника.
•Газовиmи Пальникamиполум’я
•ЗапалюваннядляГазовихПальників дозволяють, привключенні, запалювати конкретні пальники автоматично.
•Пристрій безпеки зупиняє потік газу, якщо полум’явипадково гасне.
5 |
4 |
|
2
1
3
10
Installation
!Before operating your new appliance please read this instruction booklet carefully. It contains important information for safe use, installation and care of the appliance.
!Please keep these operating instructions for future reference. Pass them on to possible new owners of the appliance.
Positioning
!Keep packaging material out of the reach of children. It can become a choking or suffocation hazard (see Precautions and tips).
!The appliance must be installed by a qualified professional according to the instructions provided. Incorrect installation may cause harm to people and animals or may damage property.
!This unit may be installed and used only in permanently ventilated rooms in accordance with current national regulations. The following requirements must be observed:
• The room must be equipped with an air extraction system that expels any combustion fumes. This may consist of a hood or an electric fan that automatically starts each time the appliance is switched on.
|
|
|
|
|
|
|
|
|
|
|
|
|
|
|
|
|
|
|
|
|
|
|
|
|
|
|
|
|
|
|
|
|
|
|
|
|
|
|
|
|
|
|
|
|
|
|
|
|
|
|
|
|
|
|
|
|
|
|
|
|
|
|
|
|
|
|
|
|
|
|
|
|
|
|
|
|
|
|
|
|
|
|
|
|
|
|
|
|
|
|
|
|
|
|
|
|
|
|
|
|
|
|
|
|
|
|
|
|
|
|
|
|
|
|
|
|
|
|
|
|
|
|
|
|
|
|
|
|
|
|
|
In a chimney stack or branched flue. |
Directly to |
|
|
|
|
|
|||||||||||||||
(exclusively for cooking appliances) |
the Outside |
|
|
|
|
|
|||||||||||||||
|
|
|
|
|
|
|
|
|
|
|
|
|
|
|
|
|
|
|
|
|
|
•The room must also allow proper air circulation, as air is needed for combustion to occur normally. The flow of air must not be less than 2 m3/h per kW of installed power.
A |
Examples of ventilation holes for comburant air.
The air circulation system may take air directly from the outside by means of a pipe with an inner cross section of at least 100 cm2; the opening must not be vulnerable to any type of blockages.
in rooms or storage areas that are below ground level (cellars, etc.). It is advisable to keep only the cylinder GB being used in the room, positioned so that it is not subject
to heat produced by external sources (ovens, fireplaces, stoves, etc. ) which could raise the temperature of the cylinder above 50°C.
Fitting the appliance
The following precautions must be taken when installing the hob:
•Kitchen cabinets adjacent to the appliance and taller than the top of the hob must be at least 600 mm from the edge of the hob.
•Hoods must be installed according to their relative installation instruction manuals and at a minimum distance of 650 mm from the hob (see figure).
•Placethewallcabinetsadjacentto thehoodataminimum height of 420 mm from the hob (see figure).
|
600mm min. |
650mmmin. |
420mmmin. |
If the hob is installed beneath a wall cabinet, the latter must be situated at a minimum of 700 mm above the hob.
Before the installation remove the grids and burners from the hob and turn it upside down, making sure you don’t damage the thermocouples and spark plugs.
Apply the seals that come with the appliance along the outer edges of the hob to prevent any passage of air, humidity and water (see Figure).
For proper application make sure the surfaces to be sealed are clean, dry and free of any grease/oil.
Adjacent |
Room to be |
Room |
Vented |
Enlarging the ventilation slot |
|
between window and floor. |
|
The system can also provide the air needed for combustion indirectly, i.e. from adjacent rooms fitted with air circulation tubes as described above. However, these rooms must not be communal rooms, bedrooms or rooms that may present a fire hazard.
•Liquid petroleum gas sinks to the floor as it is heavier than air.Therefore, rooms containing LPG cylinders must also be equipped with vents to allow gas to escape in the event of a leak. As a result LPG cylinders, whether partially or completely full, must not be installed or stored
•The installation cavity should have the dimensions indicated in the figure.
Fastening hooks are provided, allowing you to fasten the hob to tops that are between 20 and 40 mm thick. To ensure the hob is securely fastened to the top, we recommend you use all the hooks provided.
|
|
|
555 mm |
|
|
|
|
|
|
|
|
55 |
mm |
|
|
mm |
|
475 |
|||||
|
|||||
|
|
|
|||
|
|
|
|
|
|
11

GB Hook fastening diagram
Hooking position |
Hooking position |
for top H=20mm |
for top H=30mm |
|
Front |
Hooking position |
Back |
for top H=40mm |
|
! Use the hooks contained in the “accessory pack”.
•Where the hob is not installed over a built-in oven, a wooden panel must be installed as insulation. This must be placed at a minimum distance of 20 mm from the lower part of the hob.
Ventilation
To ensure adequate ventilation, the back panel of the cabinet must be removed. It is advisable to install the oven so that it rests on two strips of wood, or on a completely flat surface with an opening of at least 45 x 560 mm (see diagrams).
. |
45 |
mm. |
mm |
|
|
560 |
|
|
Where a hob is installed above an oven without a forced ventilation cooling system, adequate ventilation must be provided inside the cabinet by means of air holes through which air can pass (see figure).
Electrical connection
Hobs equipped with a three-pole power supply cable are designed to operate with alternating current at the voltage and frequency indicated on the data plate (this is located on the lower part of the appliance). The earth wire in the cable has a green and yellow cover. If the appliance is to be installed above a built-in electric oven, the electrical connection of the hob and the oven must be carried out separately, both for electrical safety purposes and to make extracting the oven easier.
Connecting the supply cable to the mains
Install a standardised plug corresponding to the load indicated on the data plate.
The appliance must be directly connected to the mains using an omnipolar circuit-breaker with a minimum contact opening of 3 mm installed between the appliance and the mains. The circuit-breaker must be suitable for the charge indicated and must comply with current electrical regulations (the earthing wire must not be interrupted by the circuitbreaker). The supply cable must not come into contact with surfaces with temperatures higher than 50°C.
! The installer must ensure that the correct electrical connection has been made and that it is compliant with safety regulations.
Before connecting to the power supply, make sure that:
•The appliance is earthed and the plug is compliant with the law.
•The socket can withstand the maximum power of the appliance, which is indicated on the data plate.
•The voltage is in the range between the values indicated on the data plate.
•The socket is compatible with the plug of the appliance.
If the socket is incompatible with the plug, ask an authorised technician to replace it. Do not use extension cords or multiple sockets.
!Once the appliance has been installed, the power supply cable and the electrical socket must be easily accessible.
!The cable must not be bent or compressed.
!The cable must be checked regularly and replaced by authorised technicians only (see Assistance).
!The manufacturer declines any liability should these safety measures not be observed.
Gas connection
The appliance should be connected to the main gas supply or to a gas cylinder in compliance with current national regulations. Before carrying out the connection, make sure the cooker is compatible with the gas supply you wish to use. If this is not the case, follow the instructions indicated in the paragraph “Adapting to different types of gas.” When using liquid gas from a cylinder, install a pressure regulator which complies with current national regulations.
! Check that the pressure of the gas supply is consistent with the valuesindicatedinTable1(“Burnerandnozzlespecifications”).
12
This will ensure the safe operation and longevity of your appliance while maintaining efficient energy consumption.
Connection with a rigid pipe (copper or steel)
! Connection to the gas system must be carried out in such a way as not to place any strain of any kind on the appliance.
There is an adjustable L-shaped pipe fitting on the appliance supply ramp and this is fitted with a seal in order to prevent leaks. The seal must always be replaced after rotating the pipe fitting (seal provided with appliance). The gas supply pipe fitting is a threaded 1/2 gas cylindrical male attachment.
Connecting a flexible jointless stainless steel pipe to a threaded attachment
The gas supply pipe fitting is a threaded 1/2 gas cylindrical male attachment.
These pipes must be installed so that they are never longer than 2000 mm when fully extended. Once connection has been carried out, make sure that the flexible metal pipe does not touch any moving parts and is not compressed.
! Only use pipes and seals that comply with current national regulations.
Checking the tightness of the connection
! When the installation process is complete, check the pipe fittings for leaks using a soapy solution. Never use a flame.
Adapting to different types of gas
To adapt the hob to a different type of gas other than default type (indicated on the rating plate at the base of the hob or on the packaging), the burner nozzles should be replaced as follows:
1.Remove the hob grids and slide the burners off their seats.
2.Unscrew the nozzles using a 7 mm socket spanner, and replace them with nozzles for the new type of gas (see table 1 “Burner and nozzle characteristics”).
3.Reassemble the parts following the above procedure in the reverse order.
4.Once this procedure is finished, replace the old rating sticker with one indicating the new type of gas used. Sticker are available from any of our Service Centres.
•Adjusting the burners’ primary air Does not require adjusting.
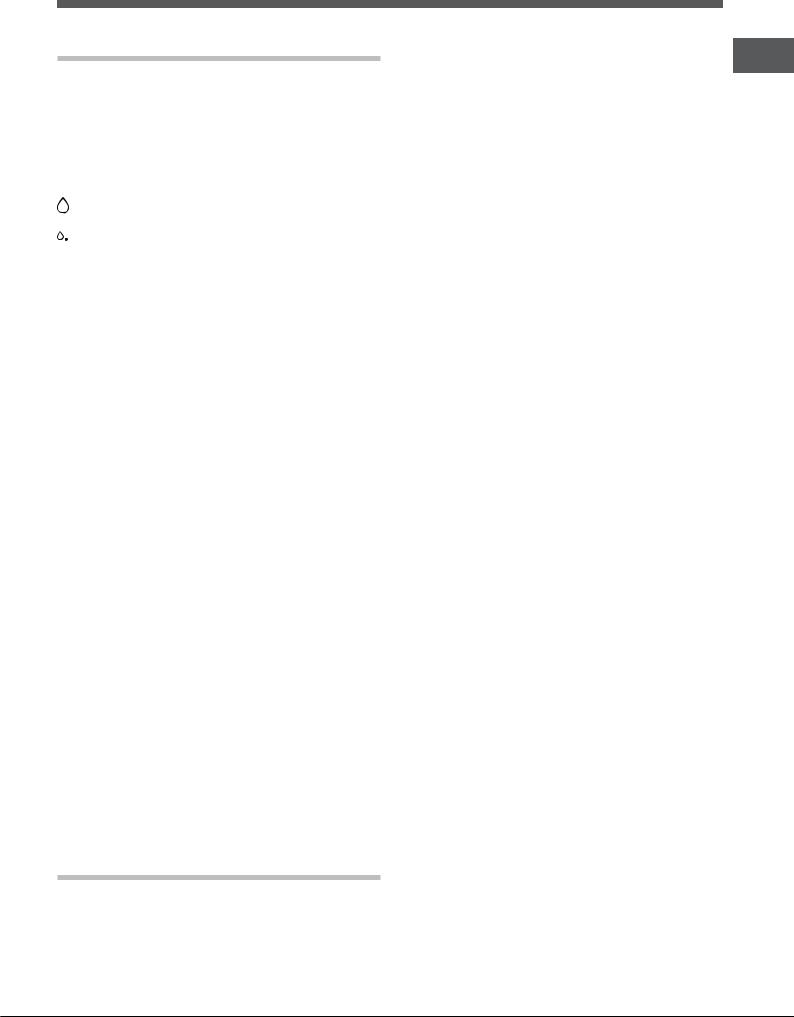
•Setting the burners to minimum
1. Turn the tap to the low flame position;
2.Remove the knob and adjust the adjustment screw, which is positioned in or next to the tap pin, until the flame is small but steady.
3.Having adjusted the flame to the required low setting, while the burner is alight, quickly change the position of the knob from minimum to maximum and vice versa several times, checking that the flame does not go out.
4. Some appliances have a safety device (thermocouple) fitted. If the device fails to work when the burners are set GB to the low flame setting, increase this low flame setting using the adjusting screw.
5.Once the adjustment has been made, replace the seals on the by-passes using sealing wax or a similar substance.
!If the appliance is connected to liquid gas, the regulation screw must be fastened as tightly as possible.
!Once this procedure is finished, replace the old rating sticker with one indicating the new type of gas used. Stickers are available from any of our Service Centres.
!Should the gas pressure used be different (or vary slightly) from the recommended pressure, a suitable pressure regulator must be fitted to the inlet pipe (in order to comply with current national regulations).
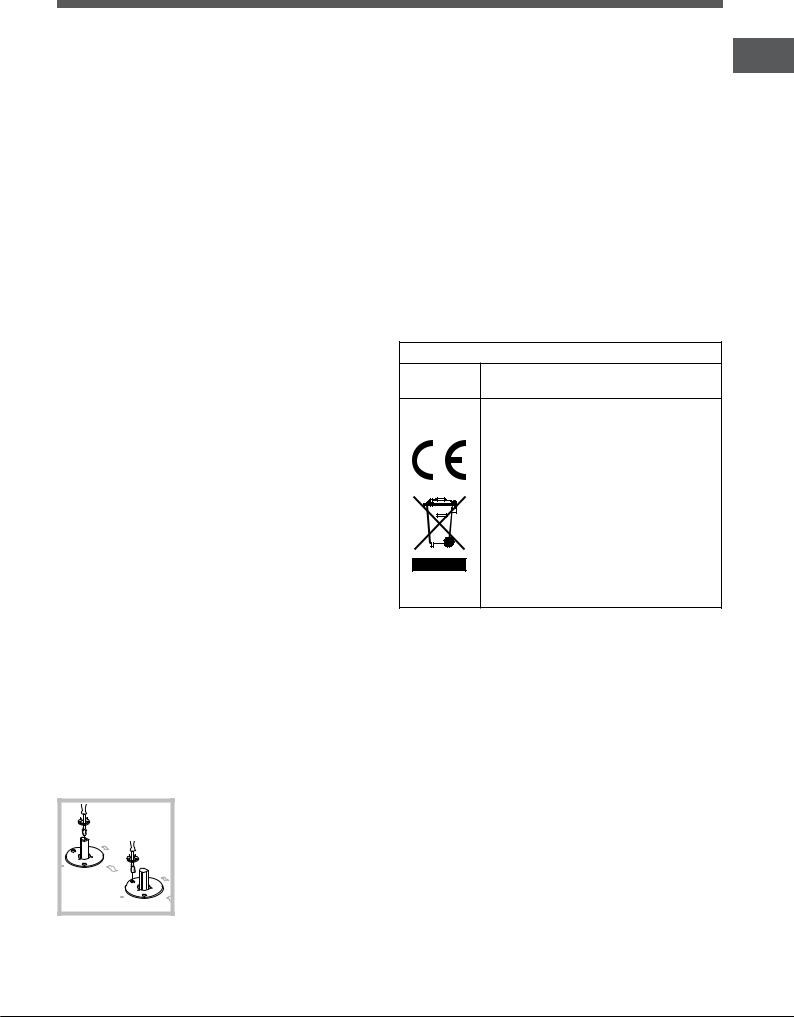
DATA PLATE
Electrical |
see data plate |
connections |
This appliance conforms to the following
European Economic Community directives:
-2006/95/EEC dated 12/12/06 (Low Voltage) and subsequent amendments
-2004/108/EEC dated 15/12/04 (Electromagnetic Compatibility) and
subsequent amendments
- 93/68/EEC dated 22/07/93 and subsequent amendments.
- 2009/142/EEC dated 30/11/09 (Gas) and subsequent amendments.
- 2012/19/EC and subsequent amendments.
13

GB Burner and nozzle specifications
Table 1 |
|
|
|
|
|
|
Liquid Gas |
|
Natural Gas (G20) |
||||
|
|
|
|
|
|
|
|
|
|
|
|
||
Burner |
Diameter |
Thermal Power |
By-pass |
Nozzle |
|
Flow* |
Nozzle |
|
Flow* |
||||
|
(mm) |
kW (p.c.s.*) |
1/100 |
1/100 |
|
g/h |
|
1/100 |
|
l/h |
|||
|
|
Nomin. |
|
Reduc. |
(mm) |
(mm) |
|
|
|
**(G31) |
(mm) |
|
|
|
|
|
|
|
***(G30) |
|
|
|
|||||
|
|
|
|
|
|
|
|
|
|
|
|
|
|
Fast (R) |
100 |
3.10 |
|
0.80 |
39 |
86 |
|
225 |
|
221 |
132(H3) |
|
295 |
|
|
|
|
|
|
|
|
|
|
|
|
|
|
Semi Fast (S) |
75 |
1.75 |
|
0.45 |
28 |
64 |
|
127 |
|
125 |
96(Z) |
|
167 |
|
|
|
|
|
|
|
|
|
|
|
|
|
|
Auxiliary (A) |
55 |
1.05 |
|
0.45 |
28 |
50 |
|
76 |
|
75 |
79(6) |
|
100 |
|
|
|
|
|
|
|
|
|
|
|
|
|
|
Supply pressures |
|
Nominal (mbar) |
|
|
|
28-30 |
20 |
|
|||||
|
|
Minimum (mbar) |
|
|
|
25 |
|
17 |
|
||||
|
|
Maximum (mbar) |
|
|
|
35 |
|
25 |
|
||||
*At 15°C and 1013,25 mbar - dry gas
** |
Propane |
P.C.S. = 50.37 |
MJ/Kg |
*** |
Butane |
P.C.S. = 49.47 |
MJ/Kg |
|
Natural |
P.C.S. = 37.78 |
MJ/m3 |
A
R S
S
9YPS 645 GH/HA 9YPS 645 AX/HA 9YPS 645 X GH/HA 9YPS 645 GH R/HA
14
Start-up and use
! The position of the corresponding gas burner is shown on every knob.
Gas burners
Each burner can be adjusted to one of the following settings using the corresponding control knob:
●Off
 Maximum
Minimum
To light one of the burners, hold a lit match or lighter near the burner and, at the same time, press down and turn the corresponding knob anti-clockwise to the maximum setting.
Since the burner is fitted with a safety device, the knob should be pressed for approximately 2-3 seconds to allow the automatic device keeping the flame alight to heat up.
Models are equipped with an ignition button incorporated into the control knob. If this is the case, the ignitor is present, but not the button.To light a burner, simply press the corresponding knob all the way in and then turn it in the counter-clockwise direction to the “High” setting, keeping it pressed in until the burner lights.
! If a flame is accidentally extinguished, turn off the control knob and wait for at least 1 minute before trying to relight it.
To switch off the burner, turn the knob in a clockwise direction until it stops (when reaches the “●” position).
Practical advice on using the burners
To ensure the burners operate efficiently:
•Use appropriate cookware for each burner (see table) so that the flames do not extend beyond the bottom of the cookware.
•Always use cookware with a flat base and a cover.
•When the contents of the pan reach boiling point, turn the knob to minimum.
Burner |
Ø Cookware Diameter (cm) |
|
|
Fast (R) |
24 - 26 |
|
|
Semi Fast (S) |
16 - 20 |
|
|
Auxiliary (A) |
10 - 14 |
|
|
To identify the type of burner, refer to the designs in the section entitled, “Burner and Nozzle Specifications”.
Precautions and tips
! This appliance has been designed and manufactured in compliance with international safety standards. The following warnings are provided for safety reasons and must be read carefully.
General safety |
GB |
|
• This is a class 3 built-in appliance. |
||
|
•Gas appliances require regular air exchange to maintain efficient operation. When installing the hob, follow the instructions provided in the paragraph on
“Positioning” the appliance.
•These instructions are only valid for the countries whose symbols appear in the manual and on the serial number plate.
•The appliance was designed for domestic use inside the home and is not intended for commercial or industrial use.
•The appliance must not be installed outdoors, even in covered areas. It is extremely dangerous to leave the appliance exposed to rain and storms.
•Do not touch the appliance with bare feet or with wet or damp hands and feet.
•The appliance must be used by adults only for the preparationoffood,inaccordancewiththeinstructions outlinedinthisbooklet.Anyotheruseoftheappliance (e.g.forheatingtheroom)constitutesimproperuseand isdangerous.Themanufacturermaynotbeheldliable foranydamageresultingfromimproper,incorrectand unreasonable use of the appliance.
•Ensure that the power supply cables of other electrical appliances do not come into contact with the hot parts of the oven.
•The openings used for ventilation and dispersion of heat must never be covered.
•Always make sure the knobs are in the “●”/“○” position when the appliance is not in use.
•When unplugging the appliance always pull the plug from the mains socket, do not pull on the cable.
•Never carry out any cleaning or maintenance work without having detached the plug from the mains.
•In case of malfunction, under no circumstances should you attempt to repair the appliance yourself. Repairs carried out by inexperienced persons may cause injury or further malfunctioning of the appliance. Contact a Service Centre (see Assistance).
•Always make sure that pan handles are turned towards the centre of the hob in order to avoid accidental burns.
•Do not close the glass cover (if present) when the gas burners are still hot.
•Do not use unstable or deformed pans.
•The appliance should not be operated by people
(including children) with reduced physical, sensory or mental capacities, by inexperienced individuals or by anyone who is not familiar with the product. These individuals should, at the very least, be supervised by someone who assumes responsibility for their safety or receive preliminary instructions relating to the operation of the appliance.
•Do not let children play with the appliance.
•The appliance is not intended to be operated by means of an external timer or separate remotecontrol system.
Disposal
•When disposing of packaging material: observe local legislation so that the packaging may be reused.
•The European Directive 2012/19/EC on Waste Electrical and Electronic Equipment (WEEE), requires
15
Loading...