

Honeywell THP9045A Installation Manual
Wire Saver Installation
Wire Saver THP9045A
(Optional – for thermostats
without 24-volt C wire)
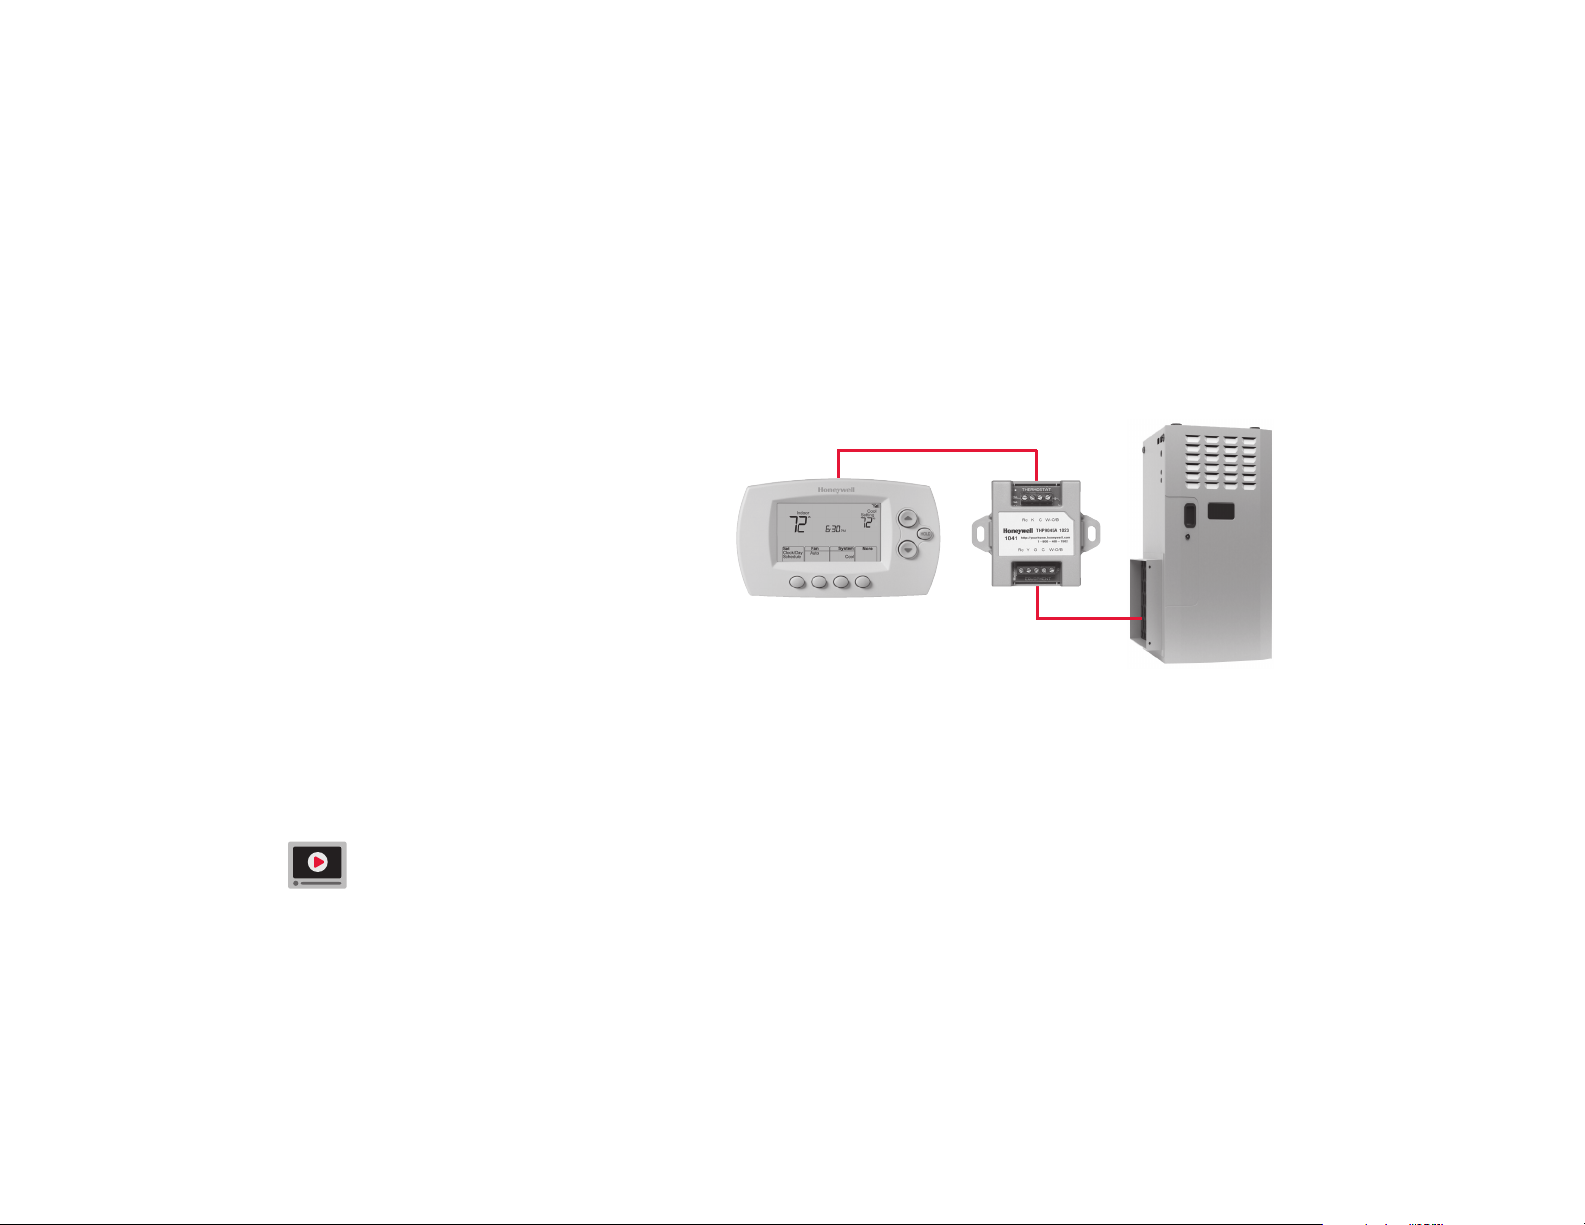
About the Wire Saver
THERMOSTAT
WIRE SAVER
HEATING/COOLING
SYSTEM
A wire saver acts as a splitter for
applications that do not include a
24-volt C wire. If your heating/cooling
system does not include a C wire,
install the wire saver in or near the
main unit (furnace, air handler) of
your heating/cooling system.
What tools do I need to install it?
• Small, flat screwdriver
• Two-sided mounting tape (included)
• Thermostat wire bundle, ends
stripped (included)
Before you begin installation, view the video at http://hwll.co/wiresaver
2

Step 1 Verify that you need a wire saver
Important! Ensure that the system is OFF
(Quick Start Guide Step 1.1)
Complete Steps 1.1 through 1.6 in the Quick
Start Guide.
Quick Start Guide
Wi-Fi Programmable
Thermostat
RTH6500WF Wi-Fi Series
• Identify existing wires and verify that there
is no C wire (Quick Start Guide Step 1.2).
If you have a C wire, you do not need to
install the wire saver.
• If your old thermostat has no C wire connector but the wire bundle from your heating/
cooling system includes an extra wire not connected to the old thermostat, you can use
that wire to connect your Wi-Fi thermostat’s C terminal. You do not need to use the wire
saver. Refer to the Alternate Wiring video at wifithermostat.com/videos
Take a photo of the wire connections (Quick Start Guide Step 1.2) or make notes
to carry to your heating/cooling system.
3
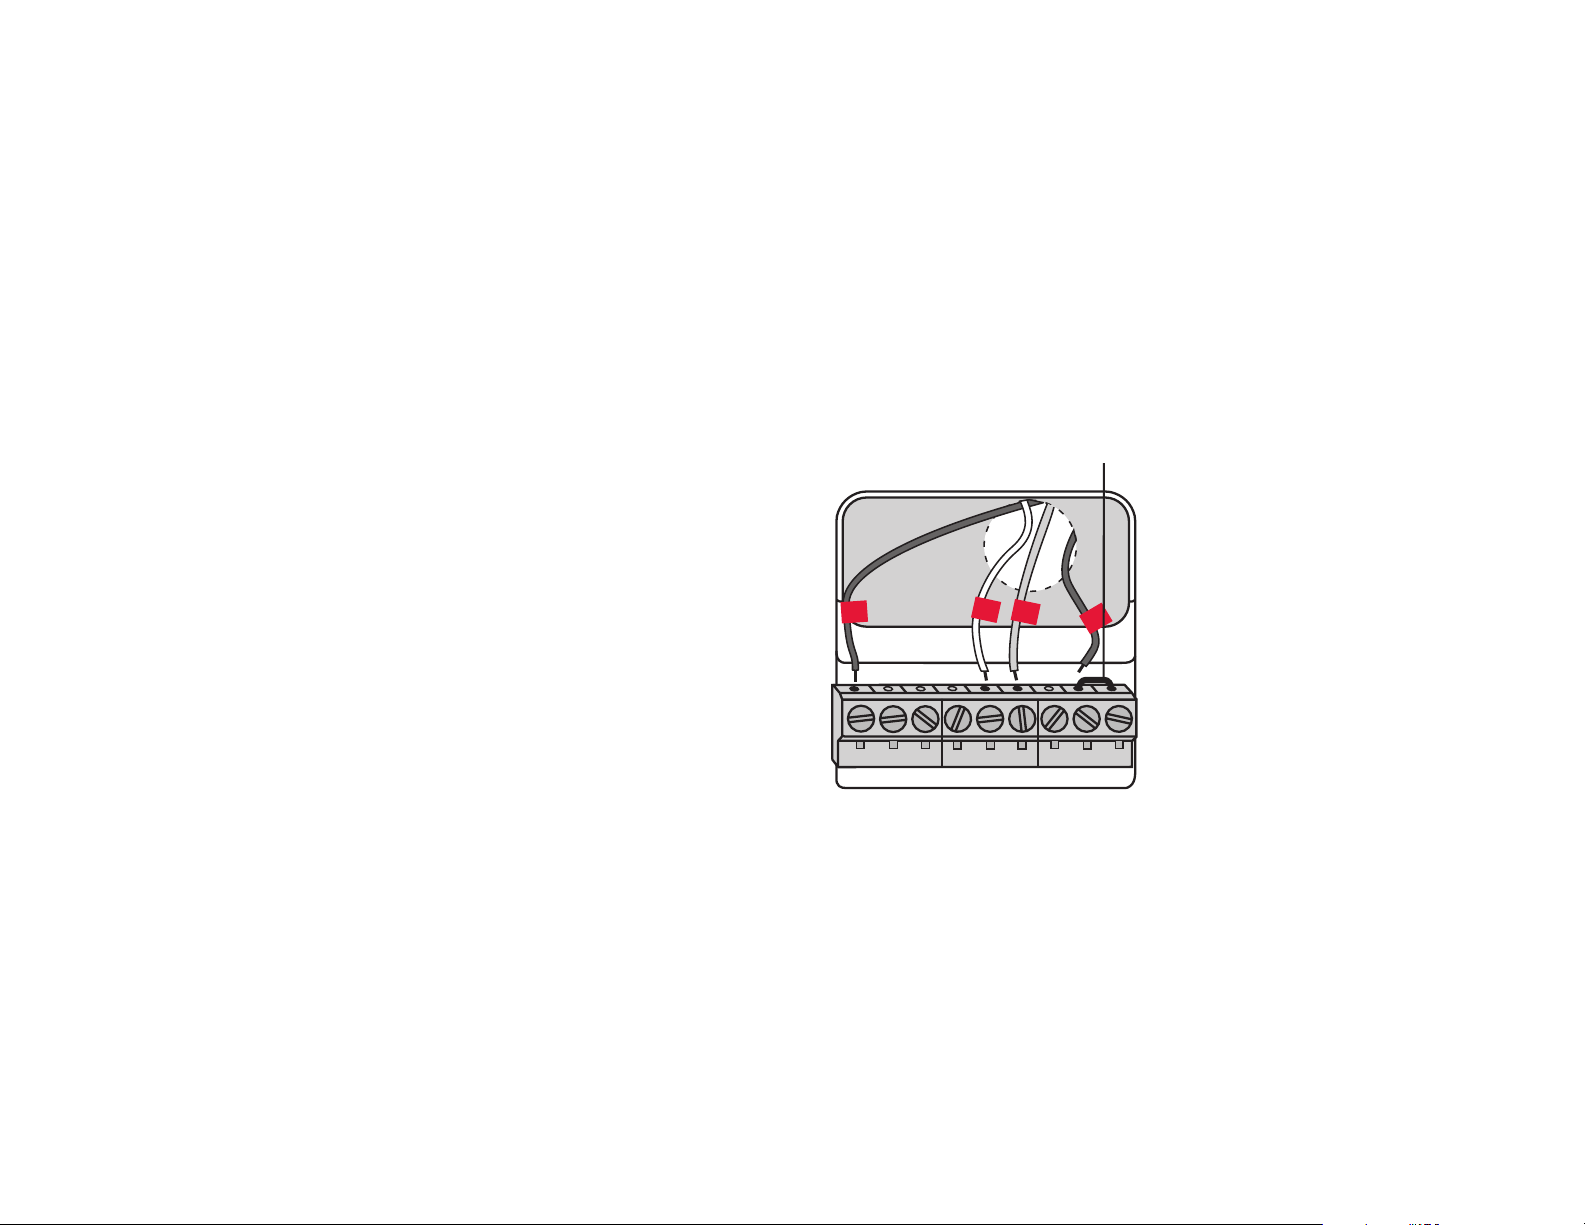
Step 2 Wire the thermostat
W2
GW
YR RcK
Y2
C
Y
HEAT PUMP
CONVENTIONAL
AUX/E
GO/B
YRRcK
L
C
G
W
R
At your new thermostat, for each wire:
1. Loosen the screw, insert wire on inside edge
of thermostat terminal, then tighten screw.
Remove metal jumper
only if you have both R
and Rc wires
2. Verify wire is firmly secured by gently
pulling on wire.
3. Repeat steps 1 and 2 for all wires.
a. Match the wires labeled R and W to
the R and W terminals.
b. Match the wire labeled Y to the C
terminal.
c. Match the wire labeled G to the K
terminal.
4. Push any excess wire back into the wall
opening after all wires are installed.
Note: The wiring for your application might be different from the wiring shown here.
4
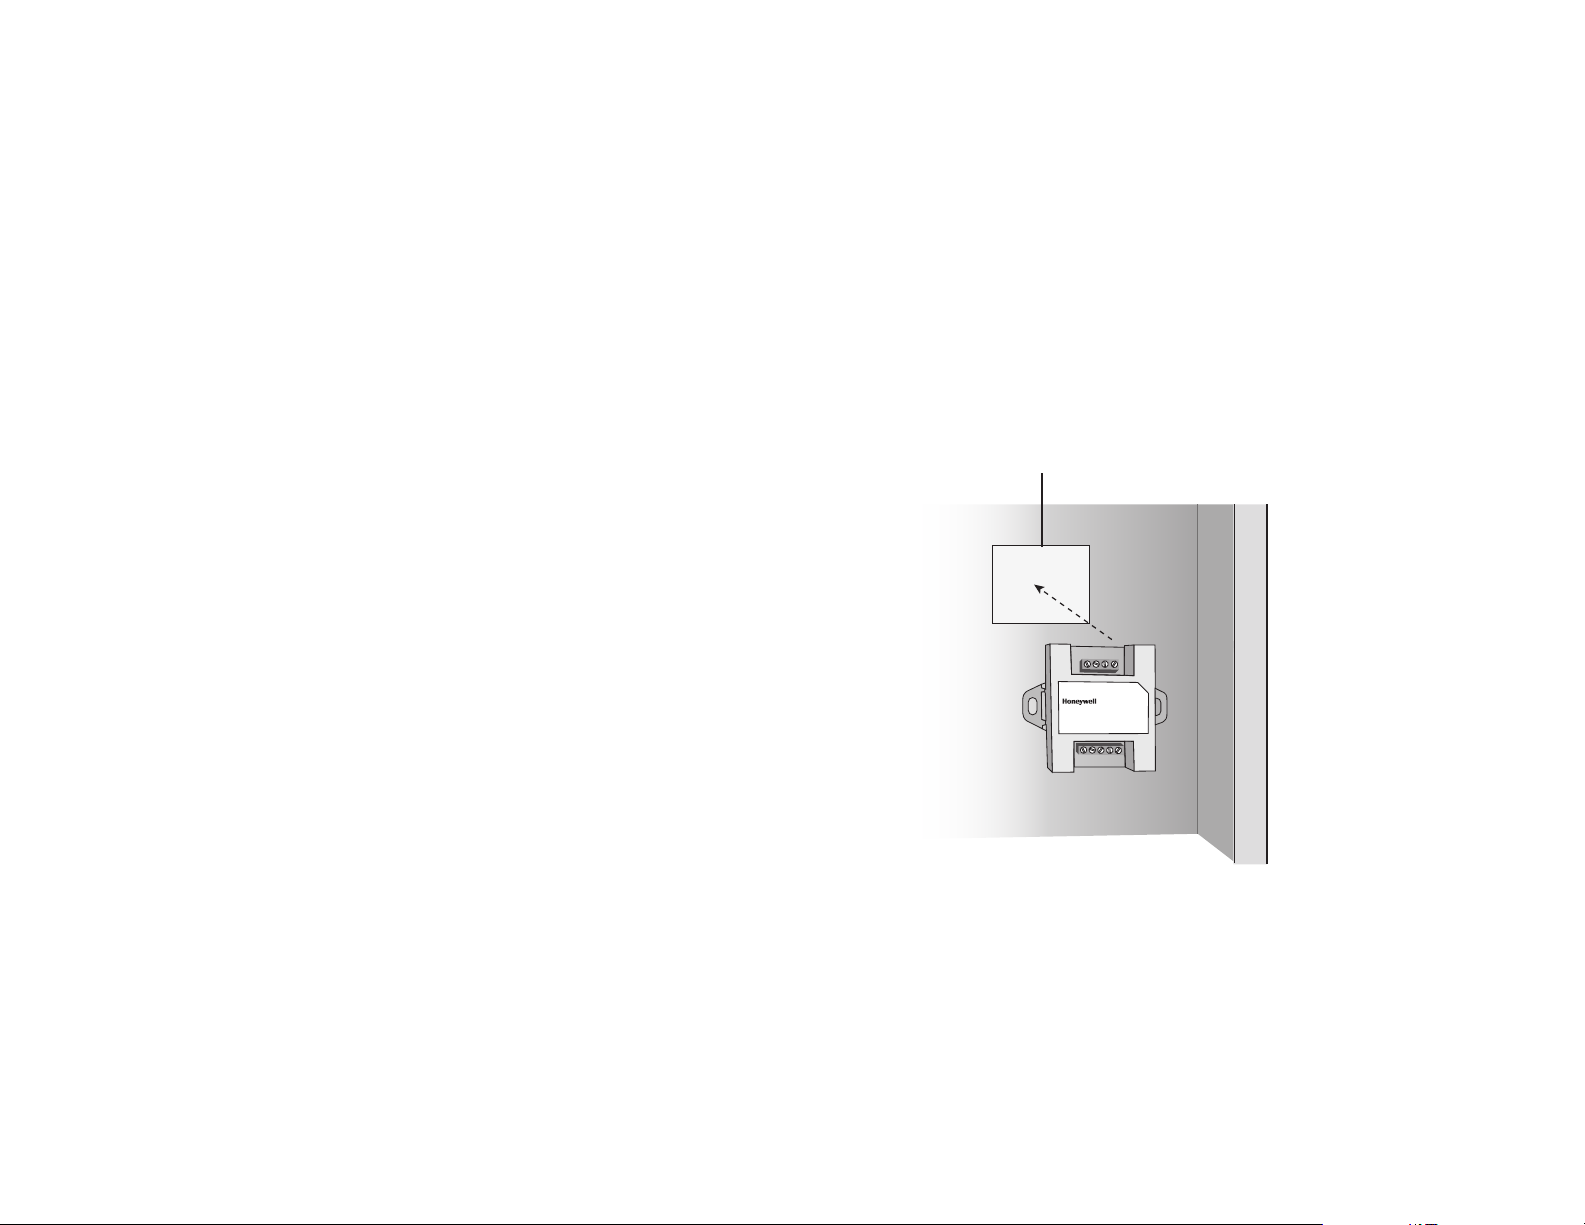
Step 3 Mount the wire saver
Rc K C W-O/B
Rc Y G C W-O/B
THP9045A 1023
1326
http://yourhome.honeywell.com
1-800-546-1502
EQUIPMENT
THERMOSTAT
Mount the wire saver to a surface near the terminal block for the heating/cooling system.
a. Locate the terminal block in your heating/cooling
system to which the thermostat wires are attached.
You may need to open or remove the front
panel/door. If you are unsure how to do this,
refer to your heating/cooling system
documentation.
b. Peel paper from one side of the included two sided mounting tape.
c. Attach the sticky side to a suitable surface
(such as the furnace wall or floor) that is close
enough to the terminal block for the shortest
wire to reach the wire saver.
d. Peel the paper from the outer surface of the
mounting tape and attach the wire saver with
the terminal block labeled THERMOSTAT at the top.
Two-sided mounting tape
5
 Loading...