

Hellwig 7227 User Manual

559-734-7451 800-367-5480 FAX 559-734-7460
INSTALLATION INSTRUCTIONS
Rear Stabilizer Bar
Workhorse W20,W22 Models
Thank you for purchasing a quality Hellwig Product.
PLEASE READ THIS INSTRUCTION SHEET COMPLETELY BEFORE STARTING YOUR INSTALLATION
1
1
U-Bolt Plate Shock Bracket
TORQUE TABLE
BOLT SIZE: 3/8” = 20-30 ft. lbs. – 7/16” = 35-45 ft. lbs. –½” =50-70 ft. lbs. – 9/16” = 70-90 ft.lbs.
SAFETY: BEFORE STARTING YOUR INSTALLATION, BE SURE TO SET PARKING BRAKE AND CHOCK TIRES.
NOTE: TO EASE INSTALLATION AND TO PROPERLY ADJUST BAR, THE WEIGHT OF THE VEHICLE MUST BE
ON THE SUSPENSION, AS IF DRIVING DOWN THE ROAD. DO NOT RAISE VEHICLE BY FRAME.
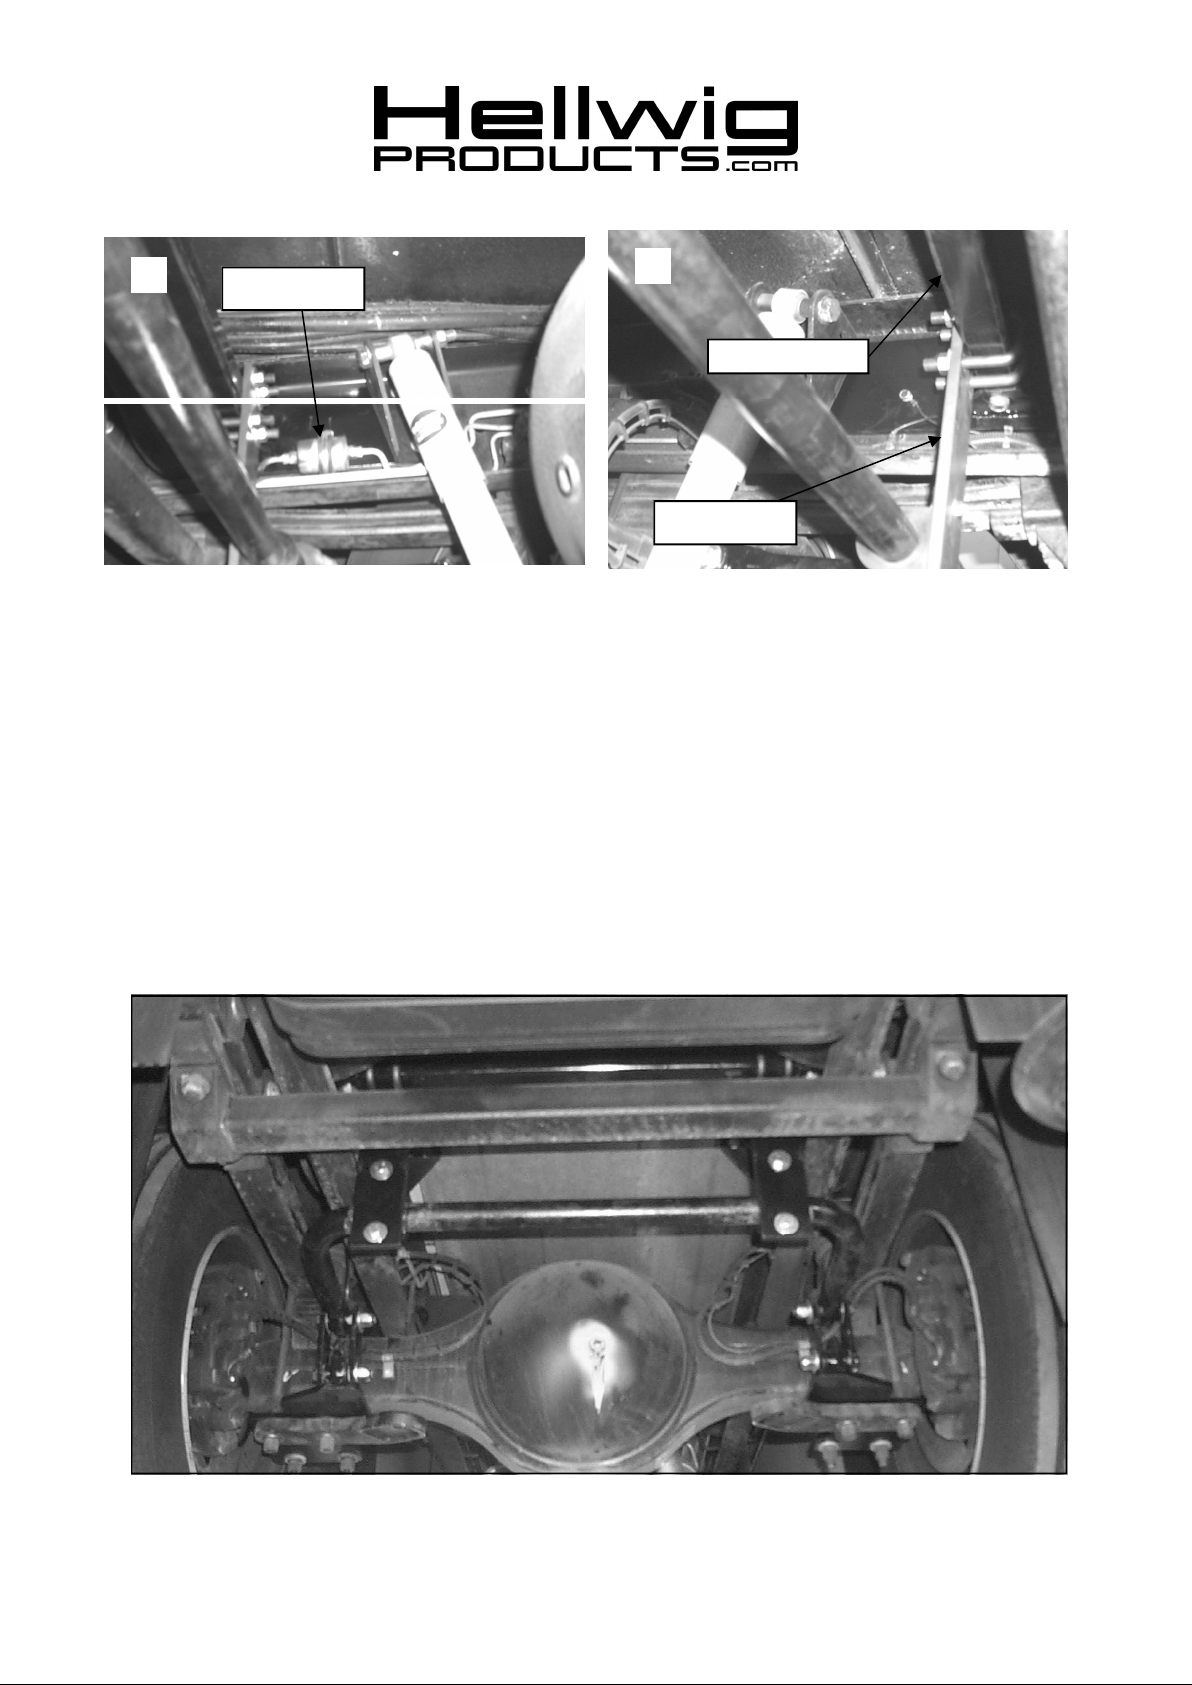
1. Remove axle U-bolts. Install U-bolt plate with the mounting tabs towards the inside of the vehicle
andfacing up. Reinstall U-bolts and shock bracket. (see picture 1) Torque to manufacturers recommended specifications.
2. Locate the upper shock mount brackets on the inside of the frame rails and remove the shocks and
shock mount brackets as well as the three nuts for rear crossmember. (see picture 2) Remove self
tapping bolt from drivers side frame rail (fuel filter bolt). Slide driver’s side frame plate behind fuel
filter.
2
Crossmember mounting bolts
7219 (R-7219) 07/08/03
559-734-7451 800-367-5480 FAX 559-734-7460
3
Fuel Filter
4
4Crossmember
Drop Plate
3. Remove self tapping bolt from drivers side frame rail (fuel filter bolt). Slide driver’s side frame plate behind fuel filter.
Reinstall filter and shock bracket as shown in photo 3, but leave bolts loose at this time.
4. Leave passenger side ground bolt installed and place frame plate over ground bolt. Install shock bracket but leave bolts
loose at this time.
5. Place crossmember into frame brackets using hardware provided and tighten all hardware to recommended torque.
6. Attach swaybar drop plates to crossmember using the four U-bolts provided. LEAVE LOOSE AT THIS TIME FOR
ADJUSTMENT LATER.
7. Prelube swaybar bushings and install swaybar on drop plates with U-plates and hardware provided. Drop plates and
U-plates should be as far outward as possible on the swaybar.
8. Install end-links on swaybar and rotate into position then connect end-links to mounting tabs on U-bolt plate installed in
step #1.
9. Reinstall shocks and double check your installation making sure all hardware is tightened to specified torque rates.
10. Recheck your installation after one weeks driving and periodically thereafter.
ATTENTION INSTALLER: PLEASEMAKE SURE CUSTOMER RECEIVES THIS INSTRUCTION SHEET,
ALL IMPORTANT NOTE CARDS, WARNINGCARDSAND THE WARRANTY FORM.
7219 (R-7219) 07/08/03
 Loading...