

Page 1
CABINETMAKER’S VISE
ITEM
#95-700
www.general.ca
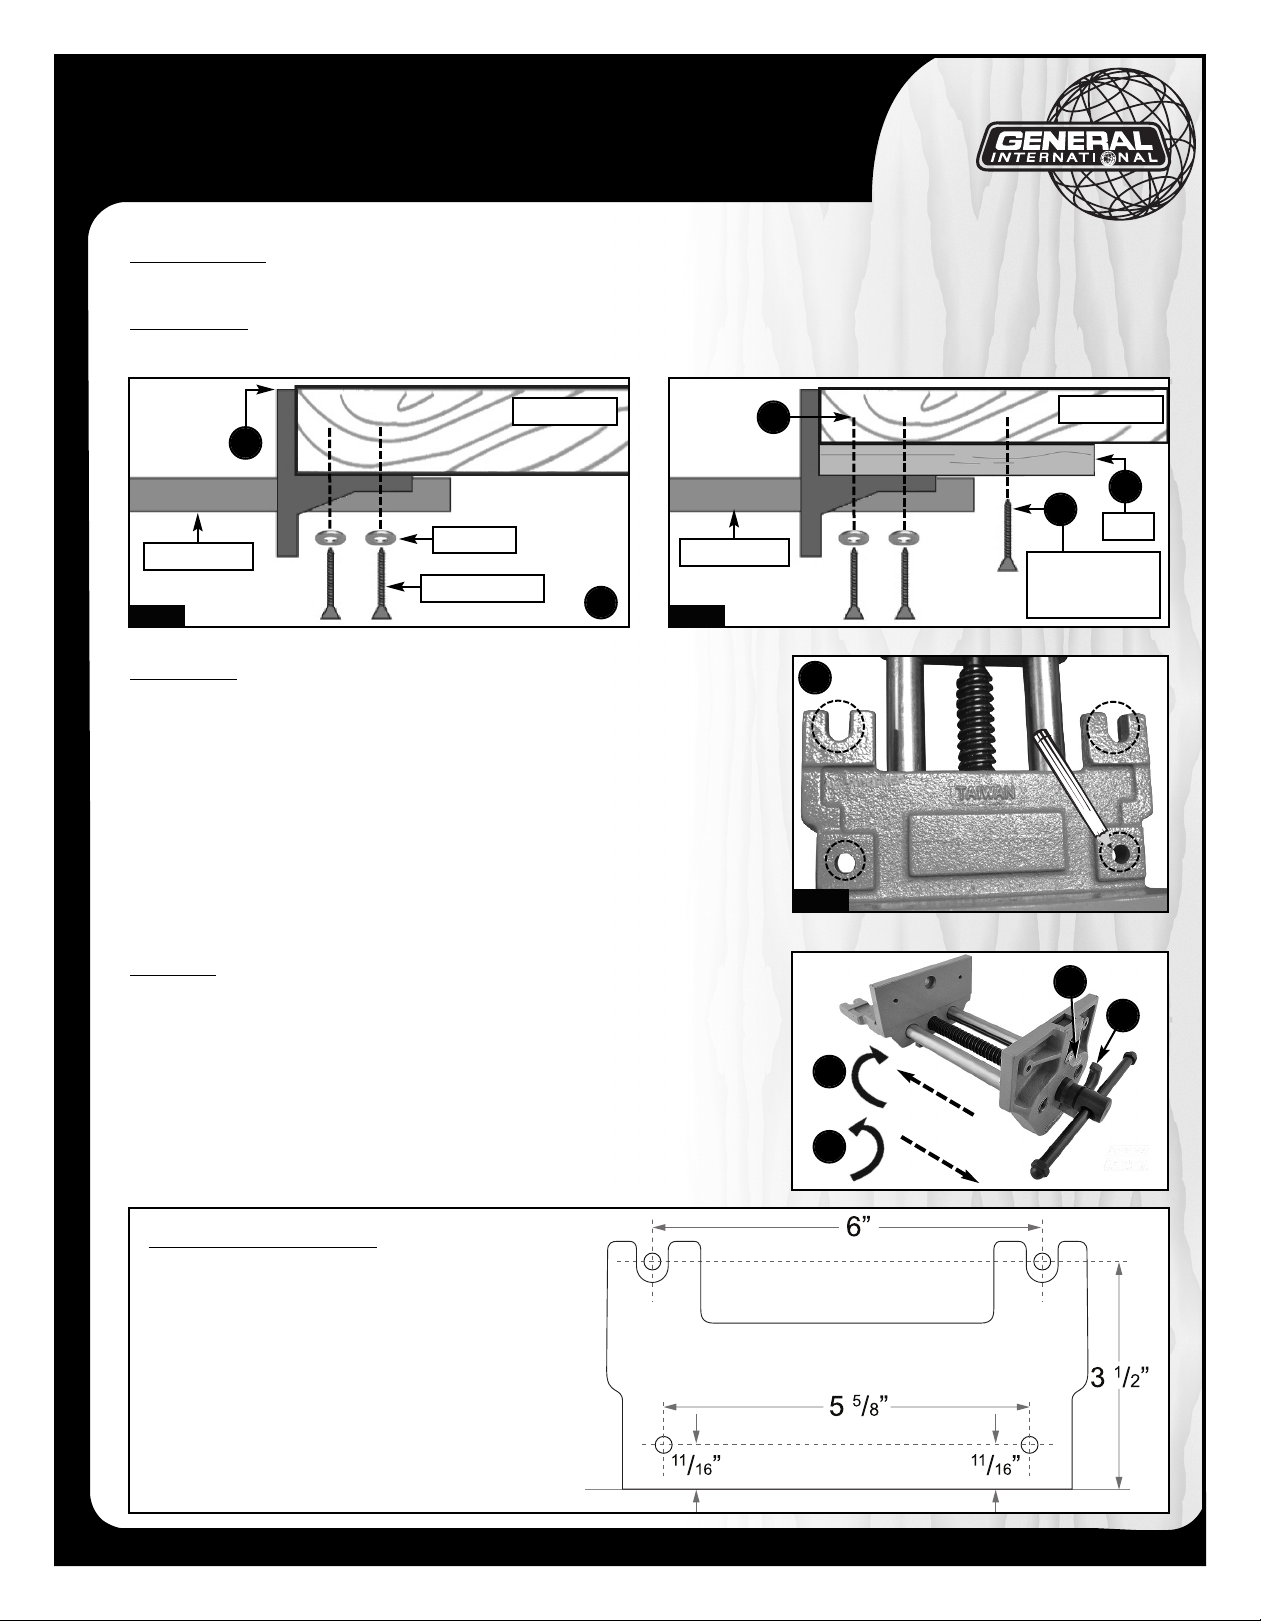
Installation note: The top of the movable jaw must sit flush with, or slightly below (Fig.1-A) the top of your workbench.
Depending on the thickness of your workbench, this may require installing a shop-made wooden shim (Fig.2-B) of the appropriate thickness between the vise and the workbench.
If using a shim, make sure the wood screws pass completely through the shim and secure at least halfway into the workbench
thickness (Fig.2-C). You may need wood screws of a different length when using a shim. Also, for added holding strength,
attach the shim directly to the workbench with wood screws that are independent of the vise (Fig.2-D).
Workbench
A
Vise Screw
Fig. 1
Washers
Wood Screws
F
Vise Screw
Fig. 2
INSTALLATION
1. Clamp or have another person hold the vise up against the underside
of the workbench in the desired mounting location.
2. Use a pencil to mark the workbench through the four vise mounting
holes (Fig.3-E) so you know where to drill pilot holes in the workbench.
3. Use a 1⁄4" drill bit to drill pilot holes approximately 1" deep in the underside of the workbench.
4. Attach the vise to the workbench with four 5/16” x 1-1/2" wood screws*
and washers* through the underside of the workbench. (Fig.1-F)
* Not included
C
E
Fig. 3
Workbench
B
D
Shim
Wood Screw
Independant
of Vise
OPERATION
1. Turning the vise handle clockwise moves the movable jaw in towards
the fixed jaw.
2. Turning the vise handle counterclockwise moves the movable jaw out
away from the fixed jaw.
3. Press the lever down to release the movable jaw for quick adjustments.
4. Loosen the thumbscrew to adjust the height of the bench dog (stop) as
needed.
MOUNTING HOLE DIMENSIONS
4
3
1
2
95-700_14-03-2013 © COPYRIGHT GENERAL INTERNATIONAL 03/2013
 Loading...