


RGA524EWB
GE RGA524EWB, RGA520PW6, RGA524EW5, RGA520EW5, RGA520EWB Owner's Manual
...
Owner'sManuel
©
Part No. 164D3333P185-1 Pub.No. 49-8955-3 180-6C139 04-0! JR

READALLINSTRUCTIONSBEFOREUSING
A WARNING!
IMPORTANTSAFETYNOTICE
The California Safe Drinking Water and ToxicEnforcement Act requires the Governor of California to
publish a list of substances known to the state to cause cancer, birth defects or other reproductive
harm, and requires businesses to warn customers of potential exposure to such substances.
Gas appliances can cause minor exposu,e to f()tlFof flmse substances, namely benzene, carl)on
monoxide, f_[maldehyde and soot, caused primarily by tile incomplete combustion of natural
gas or I,P fllels. Pmpedy adjusted burners, indicated by a bh|isll rather than a yellow flame, will
minimize incomplete combustion. Exposure to these substances can be minimized by venting
with an open window or using a ventilation tan or hood.
WARNING: If the information in this
manual is not followed exactly, a fire or
explosion may result causing property
damage, personal injury or death.
-- Do not store or use gasoline or other
flammable vapors and liquids in the
vicinity of this or any other appliance.
WHAT TODO IF YOUSMELLGAS
• Do not try to light any appliance.
• Do not touch any electrical switch; do
not use any phone in your building.
• Immediately call your gas supplier
from a neighbor's phone. Follow the
gas supplier's instructions.
• If you cannot reach your gas supplier,
call the fire department.
-- Installation and service must be
performed by a qualified installer,
service agency or the gas supplier.
WARNING!
ANT/-TIPDEVICE
• ALLRANGESCAN TIP
• INJURY TOPERSONS
COULDRESULT
• INSTALLAN_TIP
DEVICESPACKEDWITH
RANGE
• SEEINSTALLAtiON
INSTRUCtiONS
2

Congratulations/.
YouAre Now Partof OurFamily.
Welcome to the fainily. We're proud of c,ur quality pro(hlcts and we me committed
to proxiding dependable seixice. You'll see it in this easy-to-use Owner's Manual and
you'll hear it in the fiiendly voices of our customer seiYice deparunent.
Best ()fall, you'll experience these values each time you use )_)ur range. That's
important, beomse y_tur new range will be part of your Lunily ti)r many years.
And we hope you will be pmt of ours tor a long time to come.
We thank y()u tor buying our product. We appreciate your purchase, and hope y(tu
will continue to rely on us whenever you need quali/y appliances for your home.
A Service Partnership.
%11 t
{' /MPoRrANr;
_ [k_r_ Fill out and return the Consumer Produ(t Registration Card
that is pa(ked _dth tiffs produ(t.
FORYOURRECORDS
Write the model and serial numbershere:
#
#
You can find them on a label under the cooktop on the right
side wall.
Staple sales slip or cancelled check here.
Proof of the original purchase date is needed to obtain set,ice
under the W,uTanty.
Safety Information
Anti-Tip Device ............ 4
SafetyPrecautions ....... 4,5
Oven .................... 5
SurfaceCookingUnits ...... 6
Operating Instructions
UsingtheSurfaceBurners.. 8,9
Usingthe Oven........ 10-17
Careand Cleaning
Lift-UpCo&top ........... 18
Burners.................. 19
OvenShelves ............. 19
RemovableOvenBottom .... 20
Lift-Off OvenDoor ......... 21
PorcelainOvenInterior...... 22
Installation Instructions
BeforeYouBegin ......... 23
Dimensions& Clearances.. 24
Anti-Tip Device............ 27
Connectthe Rangeto gas...29
Air ShutterAdjustment ..... 32
READTHISMANUAL
Inside you _411find many helpfifl hints on how touse and maintain
y{tur range properly.Just a little prevendve cme on your pmt can save
you a great deal of time and money over the life of your range.
TroubleshootingBps
BeforeYouCall
ForService .............. 34
IFYOUNEEDSERVICE
You'll find ma W answers to common problems in the Before YouCall
ForService section. Ifyou review our chm't of TroubleshootingTips
first, you may not need to call ti)r sei_'ice at all.
If}xn] do need sei_-ice, }_u can relax knoxdng help is only a phone
call away. A list of toll-flee customer sei_-ice numbers is included in
the back section of this manual.
Customer Service
Warranty................ 35
ServiceTelephone
Numbers ......... BackCover
3

IMPORTANTSAFETYINFORMAtiON.
READALLINSTRUCtiONSBEFOREUSING.
A WARNING!
Foryoursafe_ the informationin thismanualmustbefollowed tominimizetherisk offire or
explosion,electricshock,or topreventpropertydamage,personalinjury,or lossof life.
A WARNINGANti-TIPDEVICE
A# ranges can tip and injury could result. Toprevent accidental tipping of the range, attach an
approved Anti--fip device to the floor. (See Installation Instructions.)
Tocheck if the device is installed and engaged properly, carefully tip the range forward. TheAnti--tip
device should engage and pravent the range from tipping over.
If you pu# the range out from the waft for any reason, make sure the Anti--tip device is engaged when
you push the range back against the wall. If it is not, there is apossible risk of the range tipping over
if you or a child stand, sit or lean on an open door.
SAFETYPRECAUtiONS
Besureallpackingmaterialsareremovedfrom therangebefore operating#topreventfire or smoke
damageshouldthepackingmaterialignite.
4
• Have dm installer show you the location of
the range gas cut-offvalve and how to shut
it off if necessa U.
• Have your rmlge installed and properly
g_mnded by a qualified installer, in
accor, lan(,e with tile Iuslallation Insmlctions.
Any a(!justment and sere'ice should be
pe_tbrmed only by qualified gas range
installers or ser_ice teclmicians.
• Plug your range into a 120-volt g_,mnded
outlet only. Do not r,emove the r_mnd
g_mn(ting prong fi_)m the plug. Ifin doubt
about the grounding of the home elecuical
system, it isyour personal responsibility
and obligmion to have an ung_mnded
outlet replaced with a properly g_mnded,
th,,ee-prong outlet in acct,,lance with the
National Electrical Code NFI'A-70 latest
edition. In Canada, the appliance must be
electrically gTounded in acco,dance with
the Canadian Electrical Code. Do not use
an extension co_,l with this appliance.
• Do not attempt to repair or replace any
part of your rang,e unless it is specifically
recommended in this manual. All other
se,_qcing should be refe,Ted to a qualified
technician.
• I,)cate range out of kitchen uatfic path
and out ofdrafty locations to prevent pilot
outage (on standing pilot models) and
poor air cirodation.
• Be sure your range is con`ectly a¢!justed by a
qualified sere'ice teclmician or installer for
the type of gas (natural or LI') that is u) be
used. Your range can be converted for use
with either type of gas. See tim Installation
hlstmctkms.
WARNING:These a(!jusmmnts must be
made by a qualified se,s'ice technician in
acct,,lance with the manufacm,,er's
insmlctions and all codes and,,equirements
of the authority having,jurisdiction. Failure
to follow these instructions could ,,>suit in
serious injuU or property damage. The
qualified agent TperR)mdng this work
assumes ,,esponsibility for the conversion.
• After prolonged use of a rang,e, high floor
temperatures m W result and many floor
coverings will not withstand this kind of
use. Never install the range over vinyl tile or
linoleum that cannot withsland such type
of use. Never install it directly over interior
ldtdlen carpeting.
• Do not leave children alone or unattended
whe,,e a rang,e is hot or in operation. They
could be seriously burned.
• Do not allow anyone to climb, stand or
hang on the door, broiler (kawer or range
top. They couM damage the rang> and
even tip it over, causing severe personal
iqju¢.
• Clean only parts listed in this manual.

SAFETYPRECAUTIONS
2...__ Never wear loose fitting or hanging garments while using the appliance. Be careful when reaching
_ _'__'_ foritemsstored in cabinetsoverthecooktop.Flammablematerialcouldbeignitedifbroughtin
contact with flame or hot oven surfaces and may cause severe bums.
• I,et burner gTates and ()tiler smiaces cool
1)eR)r,eU)uclring them or leaving them
where children can r,eaclr them.
• For your safety, never use your appliance
for warming or beating dre morn.
• Do not use water on g_,easefires. Never pick
up a flaming pan. Turn offburner, then
smother flaming pan by covering pan
completely with x_ll4itting lid, coolde
sheet or fiat tr W.Flaming g¢,easeoutside a
pan can be put out by covering with baking
soda or, if available, a multi-purpose dU
chemical or fimm-type fire extingldsher.
• Do not stor,e flammable materials in alloven,
a rang,e broiler drawer or near a cooku)p.
• Do not stor,e or use combustible materials,
gasoline or otlmr flammable vapors and
liquids in the vicinity of this or any other
appliance.
• Do not let cooking gTease or other
flammable materials accumulate in
or near the range.
• cautioN.. Items of interest to children
should not be stored in tire cabinel_s above
a rang,e or on tire backsplash of arang,e-
children dimbing on the range to reach
items could be seriously iqjur,ed.
\l|l
cook MEATANDPOULTRYTHOROUGHLY...
_ _P" _ Cookmeat andpoultry thoroughly--meat to atleast an INTERNALtemperatureof 160°Eandpoultry
toat least an INTERNALtemperatureof 180°ECookingtothese temperaturesusuallypretectsagainst
foodbomeil/ness.
OVEN
Stand away from range when opening oven door. Hot air or steam which escapes can cause bums
to hands, face and/or eyes.
• Do not use tim oven fi)r a storage area.
Items stor,ed in fire oven can ignite.
• Place tire oven shelves in tire desired
position while tire oven is cool.
• Keep the oven fi,ee fiom g_,easebuildup.
• Pulling out tire shelf to tire shelt_stop is a
convenience in lifdng heaxy foods. It is also
a precaution against bums from touching
hot smiaces of tire ok)or or oven x_lls.
• Do not heat unopened R)od containers.
Pressure could build up and the container
could burst, causing an in,juU.
• Do not use aluminum Rill am_imr,e in fl_e
oven except as described in tiris book.
Misuse could result in a fire hazard or
damage m the rang,e.
• V_qrenusing cooking or masting bags in tire
oven, follow the manutacu|r,er's directions.
• Use only glass cookwar,e drat is
recommended for use in gas ovens.
• After broiling, always take the broiler pan
out of the range and clean it. I,efk)ver
gTease in tire broiler pan cml catch fire the
next time you use the pan.
• V_qmnbroiling, ifmeat is too dose u) the
flame, the fat m Wignite. Trim excess fat to
prevent excessive tar,e-ups.
• Make sure tire broiler pan is in place
cor_,ectlvto reduce the possibility of
gTease fires.
• lt>)u should have a g_,ease fire in tire
broiler pan, mm olf oven control, and
keep broiler drm_r and oven door closed
to contain fire until it bums out.
• Never leave jars offat drippings on
or near your range.
5

IMPORTANTSAFETYINFORMATION.
READALLINSTRUCTIONSBEFOREUSING.
a, WARNING'!
SURFACECOOKINGUNITS
Use proper pan size--Avoid pans that are unstable or easily tipped. Select cookware having flat
bottoms large enough to properly contain food and avoid boilovers and spillovers and large enough to
cover burner grate. This will both save cleaning time and prevent hazardous accumulations of food,
since heavy spattering or spillovers left on range can ignite. Use pans with handles that can be easily
grasped and remain cool
• Always use file LITEposition (on elecuic
ignition models) or the HI position (on
standing pilot models) when igniting top
burners and make sure the burners have
ignited.
• Never leave smthce burners unattended
at high flame settings, l_)ilover causes
smoking and g_easy spillovers that m W
catch on fire.
• Adjust the mp burner flame size so it
does not extend beyond the edge of the
(:ookware. Excessive flame is hazar, Mus.
• Use only d U pot holders-moist or damp
pot hoMers on hot smihces m W result in
bums fl_ml steam. Do not let pot holders
come near open flames when lifting
cookx_le. Do not use a tox_l or other
bulky clofll in place of a pot holder.
• To minimize the possibility of burns,
ignition of flammable materials, and
spillage, turn cookware handles toward the
side or back of file range without extending
over a(!jacent burners.
• Always turn tim smlhce burner to OFF
l_fbr_ removing the (:ookware.
• Carefhlly watch foods being flied at a high
flame setting.
• Never blo(:k the vents (air openings) of the
range. They provide the air inlet and outlet
flint are necessa U ff)r the range to operate
properly with correct combustion. Air
openings are located at the rear of the
cooktop, at dm top and bottom of the oven
door, and at the bottom of the range under
the broiler drinker.
• Foods for flying shouM be as (hT as
possible. Frost on fiozen foods or moisture
on flesh foods can cause hot fat to bubble
up and over sides of the pan.
• Use least possible amount of fat fbr effective
shallow or deep4at fiTing. Filling the pan
too fhll of fat can cause spillovers when
food is added.
• V_qmnflaming foods under the hood,
turn the fan on.
• Ira combination of oils or Inks will be used
in flying, stir uNether before heating or as
faks melt sloMy.
• Always heat fat slowly, and wat(:h as it heats.
• Use a deep fat them_ometer whenever
possible u) prevent overheating fat 1)eyond
the smoking point.
• V_qmn using glass cookware, make sure it is
designed for mp-of:range cooking.
• Keep all plastics away from top burners.
• Do not leave plastic items on the cooktop-
they may melt ifleft too close to the vent.
• Do not leave any items on the cooktop. The
hot air fiom the vent may ignite flammable
items and will increase pressure in closed
containers, which may cause them to burst.
• To avoid the possibility of a burn, ah_ys be
certain that the conmfls for all burners are
at the OFF position and all gTates are cool
bef0r_ attempting to remove them.
• Should _x)u have a g_ase fire, turn the fan
oftL The fan, if operating, may spread the
flames.
• ff range is located near a win(bw, do not
hang long curtains that couM blow over
the top burners and create a fire h_ar,1.
• Wqlen a pilot goes out (on standing pilot
models), you will demct a faint odor (fig'as
as your signal m relight the pilot. V_qmn
relighting the pilot, make sure burner
controls are in the OFFposition, and follow
instructions in this manual m r_light.
• If you smell gas, and >)u have already made
sure pilots are lit (on standing pilot
m odels),mrn off tim gas to tim range and
call a qualified sere'ice technician. Never
use an ()pen flame to locate a leak.
• Keep range clean and flee ofaccumulations
ofg_ease or spillovers, which may ignite.
• Be carefifl when you clean the cooktop
because tim area over tim pilot (on standing
pilot models) will be hot.
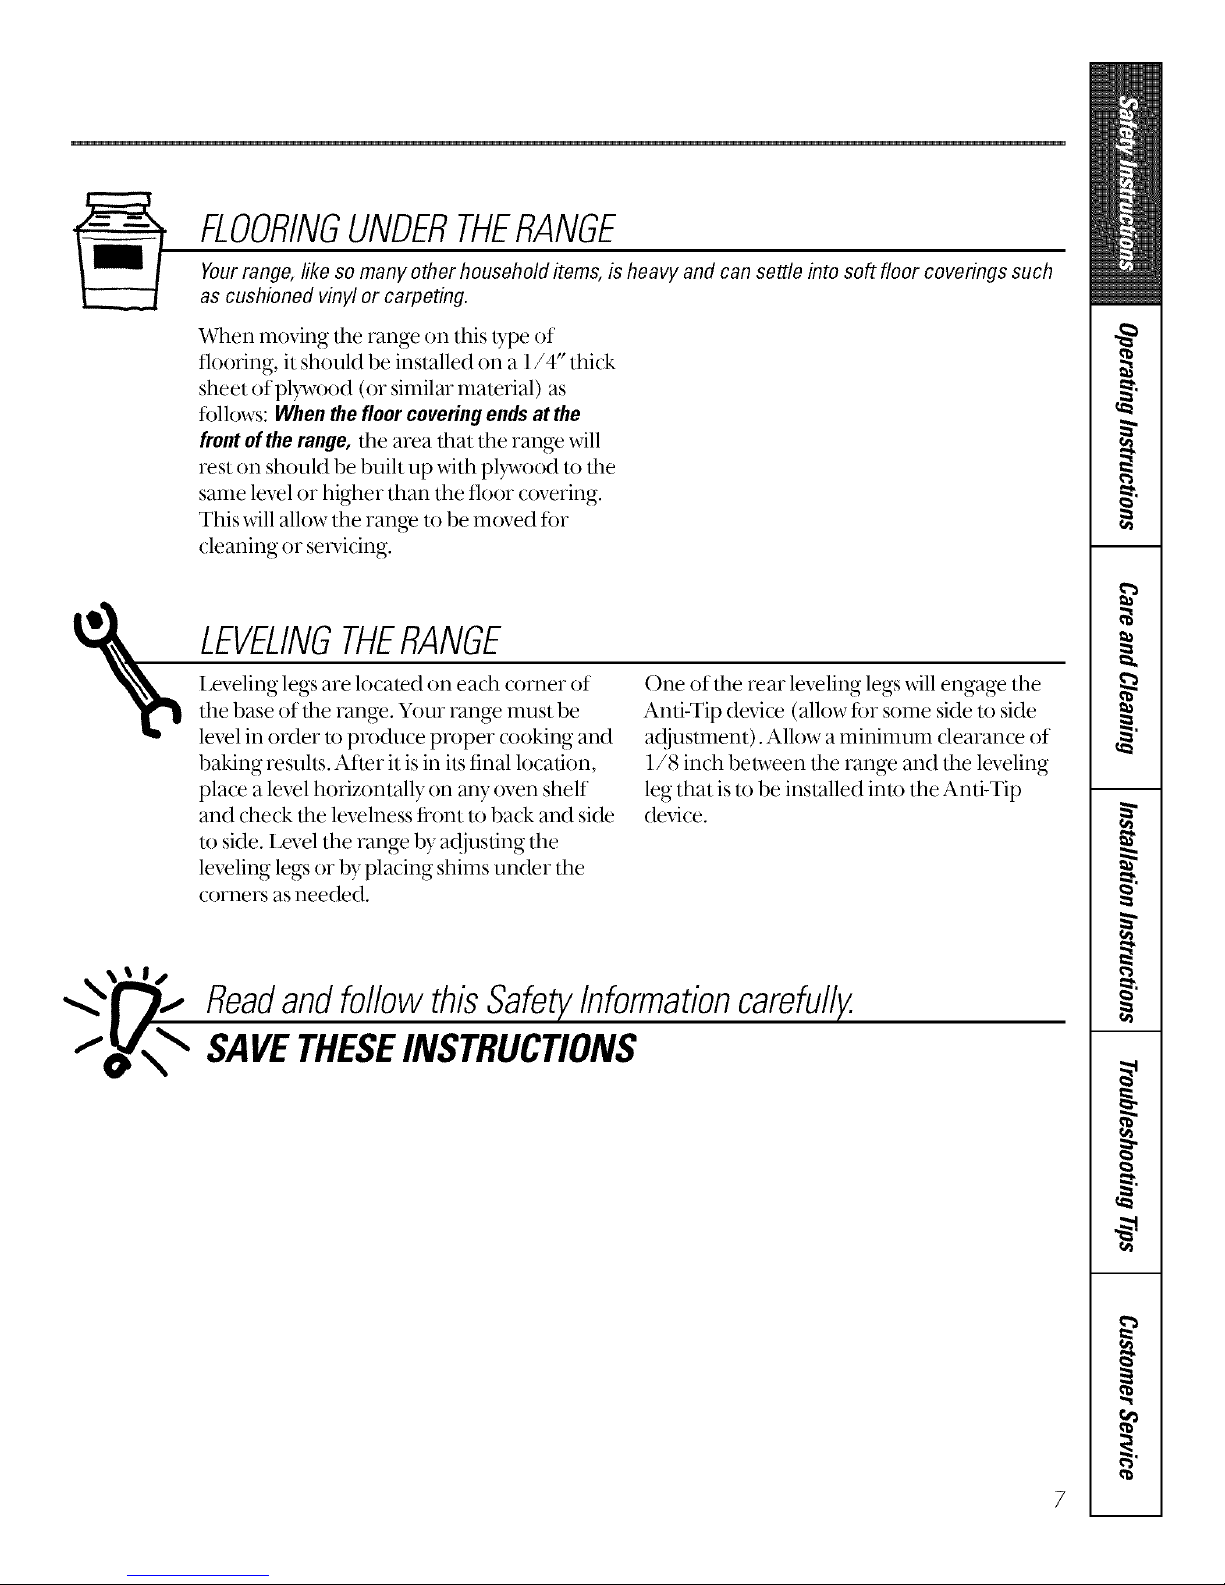
FLOORINGUNDERTHERANGE
Yourrange, like so many other household items, is heavy and can settle into soft floor coverings such
as cushioned vinyl or carpeting.
V_qmn **loving dm range on this type of
flooring, it should be installed oil a 1/4" thick
sheet ofpl}_vood (or similar material) as
follows: When thefloor coveringends at the
front ofthe range, the area that the range will
rest (m should be built up with plD_x_od to the
same level or higher than tim floor covering.
This will allow tim range m be moved for
cleaning or servicing.
%
LEVELINGTHERANGE
I,eveling legs are located on each corner of
the base of dm range. Your range must be
level in o,,ler to produce proper cooking and
baking results. After it is in its final location,
place a level horizontally on any oven shelf
and check the levelness flont m back and side
u) side. Level the range by ad,jusfing the
leveling legs or by placing shims under the
corners as needed.
One of tim rear leveling legs will engage the
Anti-Tip device (allow f0r some side m side
a(!jusmmnt). Allow a mininmm clearance of
1/8 inch between the range and the leveling
leg that is m be installed into the Anti-Tip
device.
ReadandfollowthisSafetyInformationcarefully.
SAVETHESEINSTRUCTIONS

Usingthesurfaceburners.
Throughout this manual, features and appearance may vary from your model
Lighting Instructions for Electric Ignition Models
Thesurfaceburnersonsomemodelsareflghted
byelectricignition,e//_ninatingtheneedfor
standingpilot/l_?htswithconstantlyburning
flames.
Incaseofa powerfailure,y{)u can ligh t
the sudilce burners on y{)m range xdth a
match. HeM a lighted match to the
burner, then turn tile knob to tile LITE
position. Useextremecautionwhen
lightingburnersthisway.
The electrode of tile spark igxfitex is
exposed. When one burner is turned
to LITE,all the burners spmk. Do not
atmmpt to disassemble or clean
m'ound any burner while another
burner is on.An electric shock may
result, which couM cause you to
knock _)ver hot cookw;ue.
Stlrfa( e btlri]eis in tlse when an
elecnical power failure occurs will
(onfinue to operate nora]ally.
Toppilots
adjustmentscrew
Manifoldpipe_ 0 0
Thermostat"_""_
Toppilots adjustment screw controls
flTerate of gas to the top burner
pilots.
LightingInstructionsfor StandingPilot Models
Thesurfaceburners ontheserangeshave
standingpilots that must be /it initially
Tolight them:
] Be sure suYlh(e 1)urner ( onuol knobs
are in the OFFposition.
[] I,ifi the (ooktop up or off (see the
Careand cleaning of the range se(tion).
[] I,ocate the 2 pih)t ports and light
each of theln with a inatch.
[] lfthepilotsneeda({iusting, mrnthe
a({iusting s(rew lo(ated on the pilot
fiher.
] I,ower tile cooktop. Yotlr sHithce
burners are now ready for use.
[] Observe lighted burners. Compare
the flames to pictures in the Before
youcallforservicese(tion.If any
flalne is unsatisfactolT, call fi)r
service.
\
Surface Burner Controls
Theknobsthatturnthesurfaceburnersonand
offarelocatedonthecontrolpanelonthefront
oftherange.Thetwoknobsonthe/eftcontro/
theleftfrontandleft rearburners.Thetwoknobs
onthen_?htcontroltherightfrontandWht rear
burners.
ToLight a Surface Burner
[]
Push tile conuol knob in and turn it
to LITE(Hhm pilot inodels). On
ele(tri( ignition models, you will
hear a little clickingnoise-the
sound of the electric spark igniting
the burner.
[] After the burner ignites, mrnthe
knob to ac{iusttile flame size.
AfterLightingaBurner
• Check to be stlre tile burner you turned
on is tile one yot] want to use.
• Do not operate a burner fi)r an
extended period of time without
cookw, ue on the grate. The finish on
the grate may chip without cookware
to absorb the heat.
• Be sure the burners and grates are
_ool befi)re you pla(e your hand, a
pot hoMer, (leaning (loths or other
inaterials on theln,
8
!
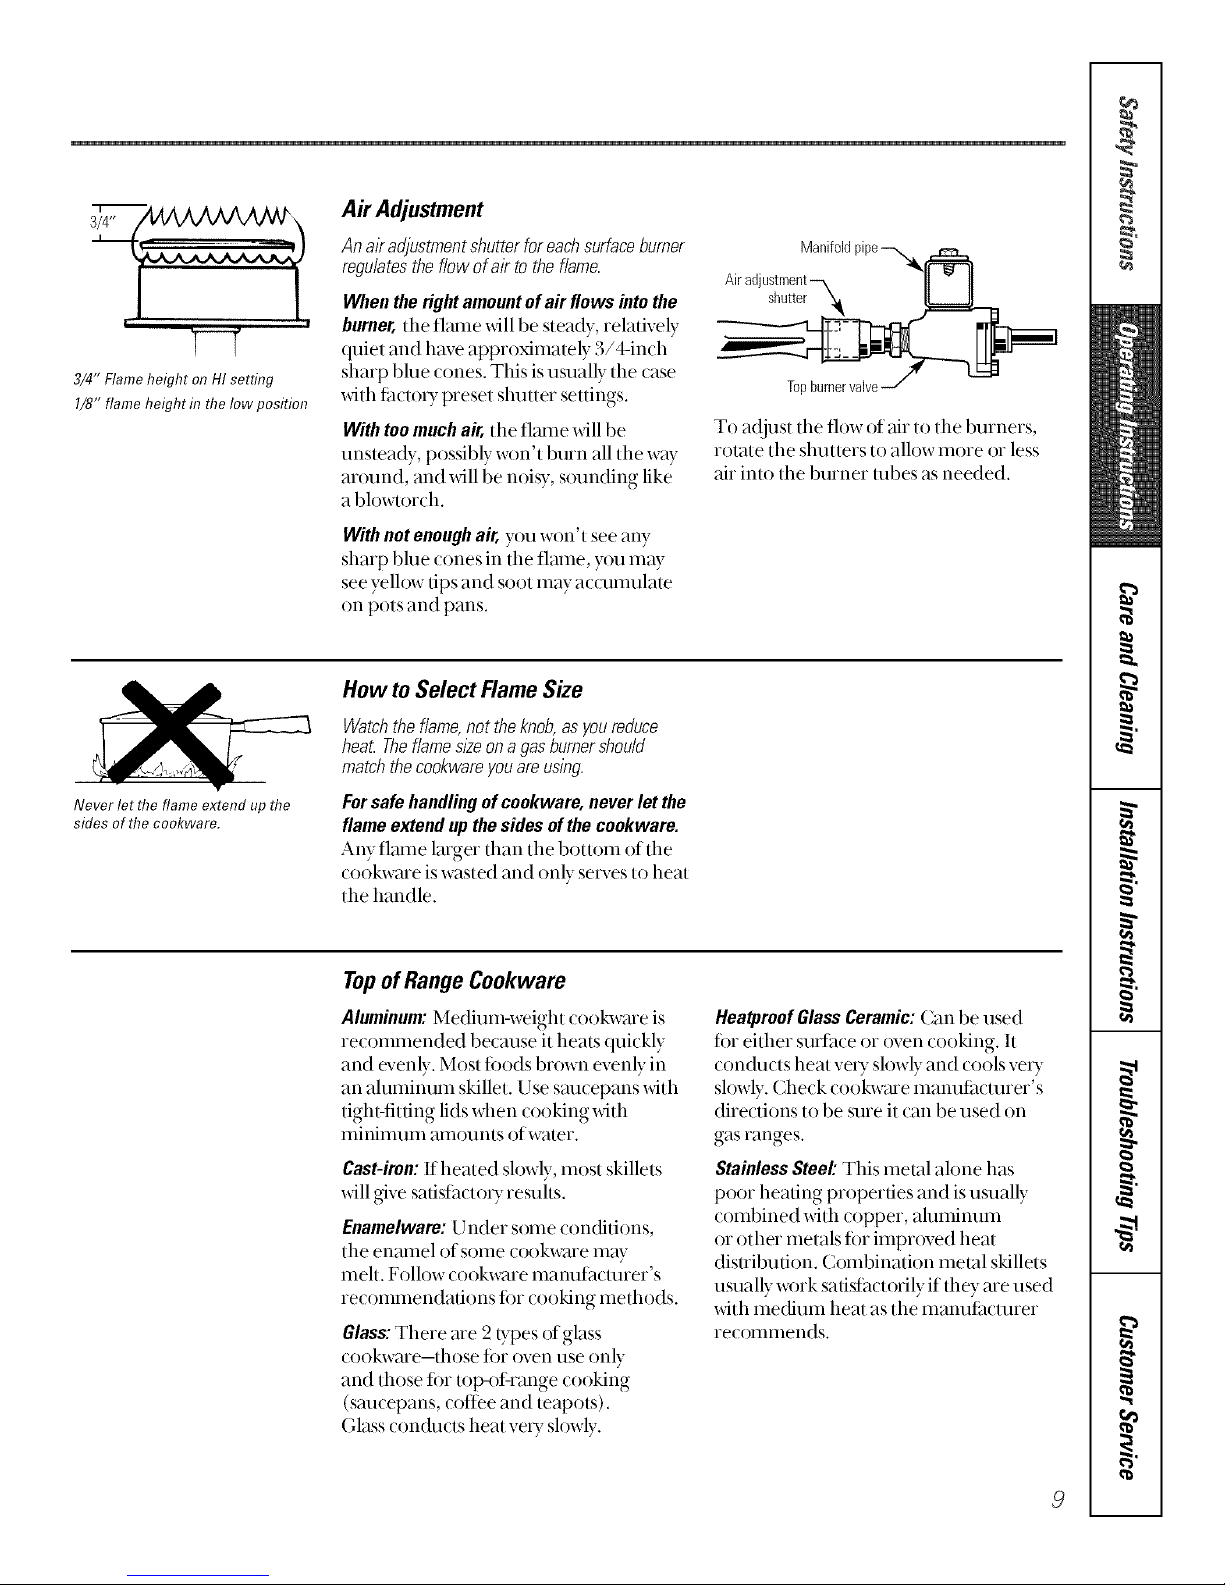
3/4" Flameheight on HI setting
I/8" flame height in the low position
Air Adjustment
An aYadjustment shutter for each surfaceburner
regulates the flow of air to theflame.
Whentherightamountofa# flowsintothe
burner,the flmne xdll be steady, relatively
quiet and have approximately 3/4-inch
sharp blue cones. This isusually the case
xdth fitcto_Tpreset shutter settings.
With tee much air, the fl_une xdll be
unsteady, possibly wtm't burn all the w_ff
around, and will be noisy, st)unding like
a blowtorch.
Withnotenoughair,you wtm't see any
sharp blue cones in the flmne, you may
see yelh)w tips and soot may accumulam
on pots and pans.
_TnrJ burnervalve-../
To a(!just the flow of air to the burners,
rotate the shutters to allow more or less
air into the burner tubes as needed.
Never let the flame extend up the
sides of the cookware.
How to Select FlameSize
Watchthe flame,not the knob,asyou reduce
hea_ Theflame sloeona gas burnershou/d
match thecookware youare using.
Forsafehandlingofcookware,neverletthe
flameextendupthesidesofthe coekware.
Any flame larger than the bottom of the
cookwme is wasted and only serves to heat
the handle.
Topof RangeCookware
Aluminum:Medium-weight cookwme is
recommended beomse it heals quickly
and evenly. Most fi)ods brown evenly in
an aluminum skillet. Use sm_cepans with
tight-fitting lids when cooking with
nfininnnn :41tlotln|s ofw;ner.
Cast-iron:If heated sh)wly, most skillets
_dll give safisl[hcto_Tresuhs.
Enamelware:Under some contritions,
the enmnel of some cookwme may
melt. Follow cookware manufacturer's
recommendations fin cooking methods.
Glass:There me 2 types of glass
cookware-those fin oven use only
and those fi)r top-of range cooking
(smmepans, coffee and teapots).
Glass con(hints heat ve_y slowly.
HeatproofGlassCeramic:Can be used
fi)r either smthce or oven cooking. It
con(h_cts heat vexT slowly and cools vexT
slowly. Check cookwme manufimmrer's
directions to be sure it can be used on
gasranges.
StainlessSteel'.This metal alone has
poor heating properties and is usually
combined with copper, ahmfinum
or other metals fin imprt)ved heat
disnibufion. Combination metal skillets
usually w{nk sads_,mtorily if they are used
with medium heat as the manufimmrer
iecollllllends.

Usingthe oven.
Throughout this manual, features and appearance may vary from your model
Lighting Instructions for Electric Ignition Models
Theovenburner is hghtedby electricignition.
To light tile burner, mrn the OVENTEMP
knob to the desired temperature. The
• . . (
bm nex shouM hght x_tlnn 30-,)0 se( onds.
After the oven reaches the selected
temperature the oven burner _)Tcleson
and off to maintain the selected
temperature.
Power Outage--Electric Ignition Models
Aburnerin usewhenane/ectncalpowerfailure
occurswillcontlbueto operatenormallyYour
ovenmaybeusedduringane/ectricalpower
outagebycarefullyfo/lowlbgthestepsbelow
Tolighttheovenpilotduringan electrical
poweroutage:
[] Be sure the OVENTEMPknob is in
the OFFposition.
[] Open both the oven and broiler
doors and wait 5 minutes to alh)w
any pilot gas to dissipate.
[]
Unplug the range flom the wall
outlet, mrn offflm dr(tilt breaker, or
remove the fi]se to avoid accidental
ignition of the oven if electrical
power is restored while you are
lighting the pilot,
[] Remove the broiler pan.
[] I,ocate the oven pih)t assembly by
h)oking into the broiler opening.
The pilot is at the ba(k of the broiler
comp_uunent, on the left side of the
burner.
NOTE:Theovenmustbeat roomtemperature
beforeyoushouldattempttohghttheovenpilot
manually
[]
[]
Turn the OVENTEMP knob to the
desired temperature setting.
I,ight the pih)t with a match and
withchaw your arm immediately
be(ause the oven burner may light in
aslittle as 20 se(ends.
[] Replace the broiler pan and ch)se
the oven and broiler doors.
NOTE:It isnecessarytolightthepilotmanually
eachtimetheovenisuseddunwapoweroutage.
Lighting Instructions for Standing Pilot Models
Thestandingovenpilot mustbelitinitially • To light the oven burner, mrn the
Tolight the oven pilot:
[] Besure the OVENTEMPknob is in
the OFFposition.
] Remove the oven bottom. See the
Careand cleaningofthe range section.
[] Find the oven pih)t port at the back
of the oven.
OVENTEMPknob to the desired
temperature. The burner shouM
light xdthin 60 se(onds.
• Power failure? An electrical power
failure will not affect the standing
oven pih)t.
[] Using a hmg match or match holder,
reach in and light the oven pilot.
[] Repla(e the oven bottom and (lose
the door. Your oven and broiler are
now ready for use.
10

OvenControl
YouroveniscontrolledbyanOVENTEMPknob.It
willnormallytake30-90secondsbeforethe
flamecomeson.
After the oven reaches the selected
temperature, the oven burner (Tcles-off
completely, then on _dth a flfll flame-to
maintain the selected temperature.
Air Adjustment
An airadjustmentshutterfortheovenburner
regulatestheflowofair totheflame.
You'll lind the shutter against the back
wall behind the broiler drawer. To reach
it remove the oven bottom (see the Care
and cleaningofthe range section) and the
burner baffle.
Toadjusttheflowof air,loosen the Phillips
head soew and rotate the shutter to allow
more or less air into the burner robe as
needed.
When _e right amount ofair flows into
the burner, the flame shouM be steady,
with approxima/ely 1/2 inch blue cones,
and shouM not extend out over the
baffle edges.
Bump
OvenShelves
The shelves me designed with stop-locks
so when placed conectly on the shelf
supports, they will stop befi)re coming
completely out of the oven and will not
tilt when )_m me rem_)ving ti)od flom
them or placing ti)od on them.
When pladng cookwme on a shelf,
pull the shelf out to the bump on the
shelf support. Place the cookwme on the
shelf, then slide the shelf back into the
oven. This will eliminate reaching into
the hot oven.
Toremove the shelves from the oven, pull
them t{)ward you, flit flont end upwmd
and pull them out.
Toreplace,place shelf on shelf support
with stop-locks (cucved extension of
shell) fitdng up and toward back of oven.
Tilt up fiont and push shelf tow:trd back
of oven until it goes past the bump on the
shelf support. Then lower flont of shelf
and push it all the way back.
17
 Loading...