


Gateway Profile 5.5 Owner's Manual

User Guide
Gateway Profile™ 5/5.5


Contents
1Getting Help. . . . . . . . . . . . . . . . . . . . . . . . . . . . . . . . . . . . . . . . . . . . . . . . . . . . . . . . . . . . 1
Gateway Web site . . . . . . . . . . . . . . . . . . . . . . . . . . . . . . . . . . . . . . . . . . . . . . . . . . . . . . . . . 3
Using eSupport . . . . . . . . . . . . . . . . . . . . . . . . . . . . . . . . . . . . . . . . . . . . . . . . . . . . . . . . 4
Help and Support . . . . . . . . . . . . . . . . . . . . . . . . . . . . . . . . . . . . . . . . . . . . . . . . . . . . . . . . . . 5
Searching for a topic . . . . . . . . . . . . . . . . . . . . . . . . . . . . . . . . . . . . . . . . . . . . . . . . . . . . 6
BigFix . . . . . . . . . . . . . . . . . . . . . . . . . . . . . . . . . . . . . . . . . . . . . . . . . . . . . . . . . . . . . . . . . . . 6
Using Your Computer guide . . . . . . . . . . . . . . . . . . . . . . . . . . . . . . . . . . . . . . . . . . . . . . . . . 7
Online help . . . . . . . . . . . . . . . . . . . . . . . . . . . . . . . . . . . . . . . . . . . . . . . . . . . . . . . . . . . . . . . 7
Gateway contact information . . . . . . . . . . . . . . . . . . . . . . . . . . . . . . . . . . . . . . . . . . . . . . . . . 8
2 Checking Out Your Gateway Computer . . . . . . . . . . . . . . . . . . . . . . . . . . . . . . . . 9
Front . . . . . . . . . . . . . . . . . . . . . . . . . . . . . . . . . . . . . . . . . . . . . . . . . . . . . . . . . . . . . . . . . . . 10
Back . . . . . . . . . . . . . . . . . . . . . . . . . . . . . . . . . . . . . . . . . . . . . . . . . . . . . . . . . . . . . . . . . . . 12
Right side . . . . . . . . . . . . . . . . . . . . . . . . . . . . . . . . . . . . . . . . . . . . . . . . . . . . . . . . . . . . . . . 14
Microsoft Certificate of Authenticity . . . . . . . . . . . . . . . . . . . . . . . . . . . . . . . . . . . . . . . . . . . 15
Finding your specifications . . . . . . . . . . . . . . . . . . . . . . . . . . . . . . . . . . . . . . . . . . . . . . . . . 15
Accessories . . . . . . . . . . . . . . . . . . . . . . . . . . . . . . . . . . . . . . . . . . . . . . . . . . . . . . . . . . . . . 16
3Getting Started. . . . . . . . . . . . . . . . . . . . . . . . . . . . . . . . . . . . . . . . . . . . . . . . . . . . . . . . 17
Working safely . . . . . . . . . . . . . . . . . . . . . . . . . . . . . . . . . . . . . . . . . . . . . . . . . . . . . . . . . . . 18
Reducing eye strain . . . . . . . . . . . . . . . . . . . . . . . . . . . . . . . . . . . . . . . . . . . . . . . . . . . . 18
Setting up your computer desk and chair . . . . . . . . . . . . . . . . . . . . . . . . . . . . . . . . . . . 18
Setting up your computer and computer accessories . . . . . . . . . . . . . . . . . . . . . . . . . 19
Sitting at your computer . . . . . . . . . . . . . . . . . . . . . . . . . . . . . . . . . . . . . . . . . . . . . . . . 19
Avoiding discomfort and injury from repetitive strain . . . . . . . . . . . . . . . . . . . . . . . . . . 19
Protecting from power source problems . . . . . . . . . . . . . . . . . . . . . . . . . . . . . . . . . . . . 20
Starting your computer . . . . . . . . . . . . . . . . . . . . . . . . . . . . . . . . . . . . . . . . . . . . . . . . . . . . 20
Waking up your computer . . . . . . . . . . . . . . . . . . . . . . . . . . . . . . . . . . . . . . . . . . . . . . . 21
Turning off your computer . . . . . . . . . . . . . . . . . . . . . . . . . . . . . . . . . . . . . . . . . . . . . . . . . . 22
Restarting (rebooting) your computer . . . . . . . . . . . . . . . . . . . . . . . . . . . . . . . . . . . . . . . . . 23
Using the cord cover . . . . . . . . . . . . . . . . . . . . . . . . . . . . . . . . . . . . . . . . . . . . . . . . . . . . . . 24
Locking your computer . . . . . . . . . . . . . . . . . . . . . . . . . . . . . . . . . . . . . . . . . . . . . . . . . . . . 25
Adjusting the volume . . . . . . . . . . . . . . . . . . . . . . . . . . . . . . . . . . . . . . . . . . . . . . . . . . . . . . 26
Using the keyboard . . . . . . . . . . . . . . . . . . . . . . . . . . . . . . . . . . . . . . . . . . . . . . . . . . . . . . . 27
Standard keyboard . . . . . . . . . . . . . . . . . . . . . . . . . . . . . . . . . . . . . . . . . . . . . . . . . . . . 27
Multifunction keyboard . . . . . . . . . . . . . . . . . . . . . . . . . . . . . . . . . . . . . . . . . . . . . . . . . . 28
Wireless keyboard . . . . . . . . . . . . . . . . . . . . . . . . . . . . . . . . . . . . . . . . . . . . . . . . . . . . . 30
Using the mouse . . . . . . . . . . . . . . . . . . . . . . . . . . . . . . . . . . . . . . . . . . . . . . . . . . . . . . . . . 31
Connecting the modem . . . . . . . . . . . . . . . . . . . . . . . . . . . . . . . . . . . . . . . . . . . . . . . . . . . . 33
Connecting to a wired Ethernet network . . . . . . . . . . . . . . . . . . . . . . . . . . . . . . . . . . . . . . . 33
Computer display . . . . . . . . . . . . . . . . . . . . . . . . . . . . . . . . . . . . . . . . . . . . . . . . . . . . . . . . . 34
External controls . . . . . . . . . . . . . . . . . . . . . . . . . . . . . . . . . . . . . . . . . . . . . . . . . . . . . . 34
www.gateway.com
i

OSD options . . . . . . . . . . . . . . . . . . . . . . . . . . . . . . . . . . . . . . . . . . . . . . . . . . . . . . . . . . 35
Installing a printer, scanner, or other peripheral device . . . . . . . . . . . . . . . . . . . . . . . . . . . 38
4 Using Drives and Ports. . . . . . . . . . . . . . . . . . . . . . . . . . . . . . . . . . . . . . . . . . . . . . . . 39
Using the diskette drive . . . . . . . . . . . . . . . . . . . . . . . . . . . . . . . . . . . . . . . . . . . . . . . . . . . . 40
Using the memory card reader . . . . . . . . . . . . . . . . . . . . . . . . . . . . . . . . . . . . . . . . . . . . . . 41
Memory card types . . . . . . . . . . . . . . . . . . . . . . . . . . . . . . . . . . . . . . . . . . . . . . . . . . . . 41
Inserting a memory card . . . . . . . . . . . . . . . . . . . . . . . . . . . . . . . . . . . . . . . . . . . . . . . . 42
Using the CD or DVD drive . . . . . . . . . . . . . . . . . . . . . . . . . . . . . . . . . . . . . . . . . . . . . . . . . 43
Identifying drive types . . . . . . . . . . . . . . . . . . . . . . . . . . . . . . . . . . . . . . . . . . . . . . . . . . 43
Inserting a CD or DVD . . . . . . . . . . . . . . . . . . . . . . . . . . . . . . . . . . . . . . . . . . . . . . . . . . 44
Playing a CD . . . . . . . . . . . . . . . . . . . . . . . . . . . . . . . . . . . . . . . . . . . . . . . . . . . . . . . . . 46
Playing a DVD . . . . . . . . . . . . . . . . . . . . . . . . . . . . . . . . . . . . . . . . . . . . . . . . . . . . . . . . 46
Creating CDs and DVDs . . . . . . . . . . . . . . . . . . . . . . . . . . . . . . . . . . . . . . . . . . . . . . . . 46
5 Maintaining Your Computer . . . . . . . . . . . . . . . . . . . . . . . . . . . . . . . . . . . . . . . . . . . 47
Caring for your computer . . . . . . . . . . . . . . . . . . . . . . . . . . . . . . . . . . . . . . . . . . . . . . . . . . . 48
Updating Windows . . . . . . . . . . . . . . . . . . . . . . . . . . . . . . . . . . . . . . . . . . . . . . . . . . . . . . . . 48
Protecting your computer from viruses . . . . . . . . . . . . . . . . . . . . . . . . . . . . . . . . . . . . . . . . 49
Cleaning your computer . . . . . . . . . . . . . . . . . . . . . . . . . . . . . . . . . . . . . . . . . . . . . . . . . . . . 51
Cleaning the exterior . . . . . . . . . . . . . . . . . . . . . . . . . . . . . . . . . . . . . . . . . . . . . . . . . . . 51
Cleaning the keyboard . . . . . . . . . . . . . . . . . . . . . . . . . . . . . . . . . . . . . . . . . . . . . . . . . . 52
Cleaning the computer display . . . . . . . . . . . . . . . . . . . . . . . . . . . . . . . . . . . . . . . . . . . 52
Cleaning the mouse . . . . . . . . . . . . . . . . . . . . . . . . . . . . . . . . . . . . . . . . . . . . . . . . . . . . 52
Cleaning CDs or DVDs . . . . . . . . . . . . . . . . . . . . . . . . . . . . . . . . . . . . . . . . . . . . . . . . . 54
Restoring your system . . . . . . . . . . . . . . . . . . . . . . . . . . . . . . . . . . . . . . . . . . . . . . . . . . . . . 54
Preventing static electricity discharge . . . . . . . . . . . . . . . . . . . . . . . . . . . . . . . . . . . . . . . . . 55
Opening the case . . . . . . . . . . . . . . . . . . . . . . . . . . . . . . . . . . . . . . . . . . . . . . . . . . . . . . . . . 56
Closing the case . . . . . . . . . . . . . . . . . . . . . . . . . . . . . . . . . . . . . . . . . . . . . . . . . . . . . . . . . . 57
Replacing the hard drive . . . . . . . . . . . . . . . . . . . . . . . . . . . . . . . . . . . . . . . . . . . . . . . . . . . 58
Installing memory . . . . . . . . . . . . . . . . . . . . . . . . . . . . . . . . . . . . . . . . . . . . . . . . . . . . . . . . . 62
Adding and removing PC Cards . . . . . . . . . . . . . . . . . . . . . . . . . . . . . . . . . . . . . . . . . . . . . 64
Adding a PC Card . . . . . . . . . . . . . . . . . . . . . . . . . . . . . . . . . . . . . . . . . . . . . . . . . . . . . 64
Removing a PC Card . . . . . . . . . . . . . . . . . . . . . . . . . . . . . . . . . . . . . . . . . . . . . . . . . . . 65
6 Troubleshooting. . . . . . . . . . . . . . . . . . . . . . . . . . . . . . . . . . . . . . . . . . . . . . . . . . . . . . . 67
Safety guidelines . . . . . . . . . . . . . . . . . . . . . . . . . . . . . . . . . . . . . . . . . . . . . . . . . . . . . . . . . 68
First steps . . . . . . . . . . . . . . . . . . . . . . . . . . . . . . . . . . . . . . . . . . . . . . . . . . . . . . . . . . . . . . . 68
Troubleshooting . . . . . . . . . . . . . . . . . . . . . . . . . . . . . . . . . . . . . . . . . . . . . . . . . . . . . . . . . . 69
Audio . . . . . . . . . . . . . . . . . . . . . . . . . . . . . . . . . . . . . . . . . . . . . . . . . . . . . . . . . . . . . . . 69
Battery . . . . . . . . . . . . . . . . . . . . . . . . . . . . . . . . . . . . . . . . . . . . . . . . . . . . . . . . . . . . . . 69
CD or DVD drives . . . . . . . . . . . . . . . . . . . . . . . . . . . . . . . . . . . . . . . . . . . . . . . . . . . . . 69
Computer . . . . . . . . . . . . . . . . . . . . . . . . . . . . . . . . . . . . . . . . . . . . . . . . . . . . . . . . . . . . 70
Diskette drive . . . . . . . . . . . . . . . . . . . . . . . . . . . . . . . . . . . . . . . . . . . . . . . . . . . . . . . . . 70
Display . . . . . . . . . . . . . . . . . . . . . . . . . . . . . . . . . . . . . . . . . . . . . . . . . . . . . . . . . . . . . . 71
ii
www.gateway.com

DVD drives . . . . . . . . . . . . . . . . . . . . . . . . . . . . . . . . . . . . . . . . . . . . . . . . . . . . . . . . . . 72
File management . . . . . . . . . . . . . . . . . . . . . . . . . . . . . . . . . . . . . . . . . . . . . . . . . . . . . . 73
Hard drive . . . . . . . . . . . . . . . . . . . . . . . . . . . . . . . . . . . . . . . . . . . . . . . . . . . . . . . . . . . 73
Internet . . . . . . . . . . . . . . . . . . . . . . . . . . . . . . . . . . . . . . . . . . . . . . . . . . . . . . . . . . . . . . 74
Keyboard . . . . . . . . . . . . . . . . . . . . . . . . . . . . . . . . . . . . . . . . . . . . . . . . . . . . . . . . . . . . 75
Memory . . . . . . . . . . . . . . . . . . . . . . . . . . . . . . . . . . . . . . . . . . . . . . . . . . . . . . . . . . . . . 76
Memory card reader . . . . . . . . . . . . . . . . . . . . . . . . . . . . . . . . . . . . . . . . . . . . . . . . . . . 76
Modem (dial-up) . . . . . . . . . . . . . . . . . . . . . . . . . . . . . . . . . . . . . . . . . . . . . . . . . . . . . . 76
Mouse . . . . . . . . . . . . . . . . . . . . . . . . . . . . . . . . . . . . . . . . . . . . . . . . . . . . . . . . . . . . . . 79
Networks . . . . . . . . . . . . . . . . . . . . . . . . . . . . . . . . . . . . . . . . . . . . . . . . . . . . . . . . . . . . 80
Passwords . . . . . . . . . . . . . . . . . . . . . . . . . . . . . . . . . . . . . . . . . . . . . . . . . . . . . . . . . . . 80
Power . . . . . . . . . . . . . . . . . . . . . . . . . . . . . . . . . . . . . . . . . . . . . . . . . . . . . . . . . . . . . . . 80
Printer . . . . . . . . . . . . . . . . . . . . . . . . . . . . . . . . . . . . . . . . . . . . . . . . . . . . . . . . . . . . . . 81
Sound . . . . . . . . . . . . . . . . . . . . . . . . . . . . . . . . . . . . . . . . . . . . . . . . . . . . . . . . . . . . . . 82
Telephone support . . . . . . . . . . . . . . . . . . . . . . . . . . . . . . . . . . . . . . . . . . . . . . . . . . . . . . . . 83
Before calling Gateway Customer Care . . . . . . . . . . . . . . . . . . . . . . . . . . . . . . . . . . . . 83
Telephone numbers . . . . . . . . . . . . . . . . . . . . . . . . . . . . . . . . . . . . . . . . . . . . . . . . . . . . 84
Self-help . . . . . . . . . . . . . . . . . . . . . . . . . . . . . . . . . . . . . . . . . . . . . . . . . . . . . . . . . . . . . 85
Tutoring . . . . . . . . . . . . . . . . . . . . . . . . . . . . . . . . . . . . . . . . . . . . . . . . . . . . . . . . . . . . . 85
Training . . . . . . . . . . . . . . . . . . . . . . . . . . . . . . . . . . . . . . . . . . . . . . . . . . . . . . . . . . . . . 85
7 Networking Your Computer . . . . . . . . . . . . . . . . . . . . . . . . . . . . . . . . . . . . . . . . . . . 87
Introduction to networking . . . . . . . . . . . . . . . . . . . . . . . . . . . . . . . . . . . . . . . . . . . . . . . . . . 88
Using a network . . . . . . . . . . . . . . . . . . . . . . . . . . . . . . . . . . . . . . . . . . . . . . . . . . . . . . . 88
Selecting a network connection . . . . . . . . . . . . . . . . . . . . . . . . . . . . . . . . . . . . . . . . . . 89
Creating an Ethernet network . . . . . . . . . . . . . . . . . . . . . . . . . . . . . . . . . . . . . . . . . . . . . . . 96
Installing Ethernet cards and drivers . . . . . . . . . . . . . . . . . . . . . . . . . . . . . . . . . . . . . . 96
Making sure your broadband connection works . . . . . . . . . . . . . . . . . . . . . . . . . . . . . . 97
Naming the computers and the workgroup . . . . . . . . . . . . . . . . . . . . . . . . . . . . . . . . . . 97
Configuring the TCP/IP protocol . . . . . . . . . . . . . . . . . . . . . . . . . . . . . . . . . . . . . . . . . . 98
Setting up a wireless Ethernet network . . . . . . . . . . . . . . . . . . . . . . . . . . . . . . . . . . . 101
Setting up a wired Ethernet network . . . . . . . . . . . . . . . . . . . . . . . . . . . . . . . . . . . . . . 108
Configuring your router . . . . . . . . . . . . . . . . . . . . . . . . . . . . . . . . . . . . . . . . . . . . . . . . 110
Testing your network . . . . . . . . . . . . . . . . . . . . . . . . . . . . . . . . . . . . . . . . . . . . . . . . . . . . . 111
Sharing your resources . . . . . . . . . . . . . . . . . . . . . . . . . . . . . . . . . . . . . . . . . . . . . . . . . . . 112
Sharing an Internet connection . . . . . . . . . . . . . . . . . . . . . . . . . . . . . . . . . . . . . . . . . . 112
Sharing drives and printers . . . . . . . . . . . . . . . . . . . . . . . . . . . . . . . . . . . . . . . . . . . . . 115
Using the network . . . . . . . . . . . . . . . . . . . . . . . . . . . . . . . . . . . . . . . . . . . . . . . . . . . . 117
Connecting to hotspots . . . . . . . . . . . . . . . . . . . . . . . . . . . . . . . . . . . . . . . . . . . . . . . . 120
Troubleshooting Your Ethernet network . . . . . . . . . . . . . . . . . . . . . . . . . . . . . . . . . . . . . . 121
Wired Ethernet network . . . . . . . . . . . . . . . . . . . . . . . . . . . . . . . . . . . . . . . . . . . . . . . . 121
Wireless Ethernet network . . . . . . . . . . . . . . . . . . . . . . . . . . . . . . . . . . . . . . . . . . . . . 122
www.gateway.com
iii

A Safety, Regulatory, and Legal Information . . . . . . . . . . . . . . . . . . . . . . . . . . . 125
B Specifications . . . . . . . . . . . . . . . . . . . . . . . . . . . . . . . . . . . . . . . . . . . . . . . . . . . . . . . . 131
Index . . . . . . . . . . . . . . . . . . . . . . . . . . . . . . . . . . . . . . . . . . . . . . . . . . . . . . . . . . . . . . . . . . . . 137
iv
www.gateway.com

Chapter 1
Getting Help
■ Using the Gateway W eb site
■ Using Help and Support
■ Using BigFix
■ Using Y our Computer guide
■ Using Do More With Ga teway
■ Using online help
■ Contacting Gateway
1

Thank y ou for purchasing our computer!
You have made an excellent decision choosing Gateway. We are sure that you will be
pleased with the outstanding quality, reliability, and performance of your new computer.
Each and every Gateway computer uses the latest technology and passes through the most
stringent quality control tests to ensure that you are provided with the best product
possible.
Please read this manual carefully to familiarize yourself with our range of services and
support. We have highlighted some basic care and safety information to help you keep
your computer in good operating condition.
Gateway stands behind our value proposition to our custom ers — to provide best-of-cla ss
service and support in addition to high-quality, brand-name components at affordable
prices. If you ever have a problem, our knowledgeable, dedicated customer ser vice
department will provide you with fast, considerate service.
We sincerely hope that you will receive the utmost satisfaction and enjoyment from your
new Gateway computer for years to come.
Thanks again, from all of us at Gateway.
2
www.gateway.com

Gatewa y W eb site
Gateway's online support is available 24 hours per day, 7 days per week and provides the
most current drivers, product specifications, tutorial s, and personalized information a bout
your computer. Visit the Gateway eSupport Web site at support.gateway.com
.
www.gateway.com
3

Using eSupport
The eSupport site is divided into six major areas:
■ Support Home
■ Product Support
■ Downloads
■ Contact Us
■ Account Info
■ PC Tools
Each of these areas is represented by a menu across the top of the Web page.
Support Home
Click Suppor t Home, then click All Support Documents to access product documentation,
specifications, and guides. You can also browse through the reference area to locate an
article specific to the question you have.
Click
Support Home, then click General Tutorials to access an extensive library of how-to
articles and videos on top ics, such as making au dio CDs and installing a hard drive.
Product Support
Click Product Support to view a list of all the products that Gateway supports.
Downloads
Click Downloads, then click My Downloads to get the latest software updates for BIOS and
driver upgrades. By entering your serial number you get drivers specific to your computer.
Click
All Downloads to walk through a step-by-step wizard to locate your drivers.
Contact Us
Click Contact Us to access links to technical support with a live technician, including chat
and e-mail. Click
support. For more information, see “Telephone support” on page 83.
Call Us to get a list of Gateway telephone numbers for both sales and
Account Info
Click Account Info to access support for non-technical issues, such as the status of your
order or changing your accoun t address.
PC T ools
Click PC Tools to access utilities to help you manage your computer.
4
www.gateway.com

Help and Support
Your computer includes Help and Support, an easily accessible collection of help
information, troubleshooters, and automated support. Use Help and Support to answer
questions about Windows and to help you quickly discover and use the many features of
your Gateway computer.
To start Help and Support:
■ Click Start, then click Help and Support. Help and Support op ens.
You can find help information by clicking a link, performing a search, or browsing the
index.
www.gateway.com
5

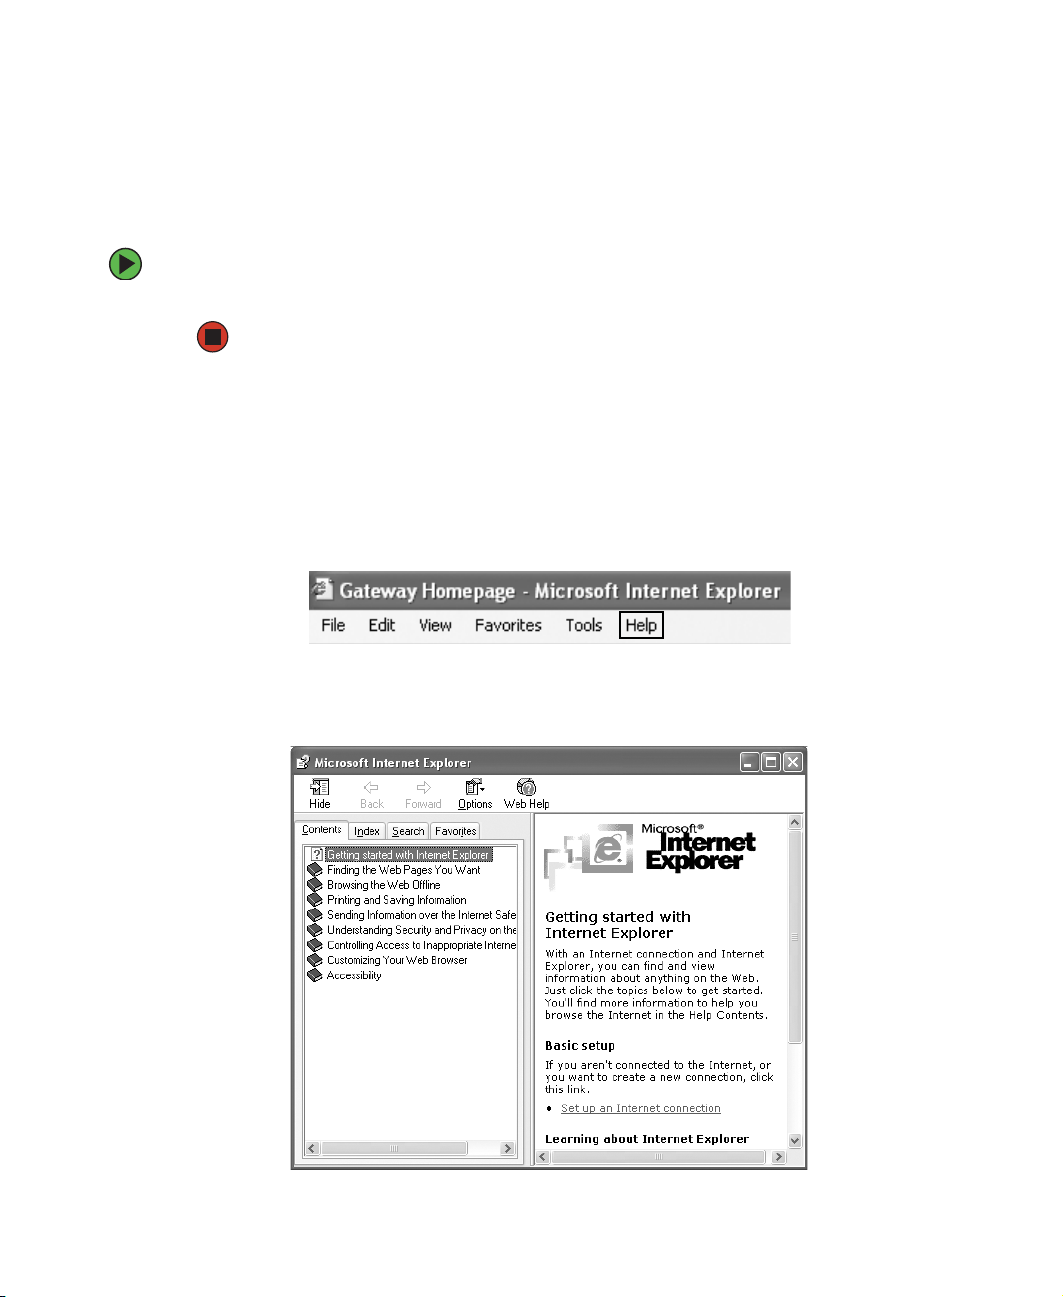
Searching for a topic
To search for a topic in He lp an d Supp ort, ty pe a word or phra se ( keywor d) in th e Search
box located at the top of any Help and Support screen, then click the arrow button.
For each search, you receive the following search result types:
■ Suggested Topics - These topics are located in Help and S upport and are releva nt to
your search topic.
■ Full-text Search Matches - These topics are located in Help and Support and contain
the words you entered in the
■ Microsoft Knowledge Base - These topics are located on the Microsoft Web site and
contain the words you entered in the
Internet to search for and acces s these topics.
To view a list of your search results, click the results header for the type of results you
want to view.
Search box.
Search box. You must be connected to the
To view a topic, clic k the top ic name in the
Search Result s list.
BigFix
BigFix monitors your computer for problems and conflicts. It automatically gathers
information about the latest bugs, security alerts, and updates from BigFix sites on the
Internet. Whenever BigFix detects a problem, it alerts you by flashing the blue taskbar icon.
To fix the problem, click on that icon to open BigFix.
To start BigFix:
■ Click Start, All Programs, Accessories, System Tools, then click BigFix.
To learn more about using BigFix:
■ From the BigFix program, click Help, then click Tutorial.
6
www.gateway.com
Using Your Computer guide
In addition to this guide, the Using Your Computer guide has been included on your hard
drive. This guide includes information on using Windows, using the Internet, sending a
fax, and changing power-saving settings as well as other topics.
To access the Using Your Computer guide:
■ Click Start, All Programs, then click Gateway Documentation.
Online help
Many programs provide information online so you can research a topic or learn ho w to
perform a task while you are using the program. You can access most online help
information by selecting a topic from a
Help menu or by clicking a Help button.
Y ou can search fo r information by viewing the help contents, c hecking the index, searchi ng
for a topic or keyword, or browsing through the online help.
www.gateway.com
7

Gateway c ontact information
To help you locate Gateway contact information, you can find the Gateway Web site,
Online Support, and technical support contact information on the label located on your
computer case.
8
www.gateway.com

Chapter 2
Checking Out Your
Gateway Computer
■ Identifying features
■ Locating your compu ter model and serial
number
■ Locating the Microsoft Certificate of
Authenticity
■ Locating the specifications for your
computer
■ Purchasing accessories
9

Front
Display
controls
Speaker
Headphone
jack
Microphone
jack
Memory card
reader or
diskette drive
Volume control
buttons
Speaker
Power buttonCD/DVD/
Recordable
drive
10
www.gateway.com

Component Icon Description
Speakers Provide stereo audio output when headphones or amplified
speakers are not plugged in.
Headphone jack Plug headphones into this jack.
Microphone jack Plug a microphone into this jack to record sound.
Vo l ume co n t ro l
buttons
Diskette drive or
memory car d reader
CD/D VD/Recordable
drive
Power button Press this button to turn the power on or off. You can also
Press these buttons to adjust speaker volume.
Diskette dri ve: Use this d rive to stor e smaller files on
diskettes. For more information, see “Using the diskette drive”
on page 40.
Memory card reader: Use this to read from and write to
memory cards. For more information, see “Using the memory
card reader” on page 41.
Use this drive to listen to audio CDs, install games and
programs , w atc h DVDs, and store large files onto rec orda ble
CDs or DVDs. For more information, see “Using the CD or
DVD drive” on page 43 and “Creating CDs and DVDs” on
page 46.
This drive may be a CD, recordable CD, DVD, or
recordable DVD driv e. To identify your driv e type and f or more
information about your drive, see “Identifying drive types” on
page 43.
configure the power button to operate in Standby/Resume
mode or Hibernate mode. For more information on changing
the power button setting, see “Changing Power-Saving
Settings” in
on your hard drive. To access this guide, click Start,
All Programs, then click Gateway Documentati on.
Using Your Computer
which has been included
Display controls Use these controls to enter the OSD (on-screen display) and
adjust the computer display settings. For more information
about the comput er displa y and OSD , se e “Computer display”
on page 34.
www.gateway.com
11

Back
Monitor out port
(optional)
Modem jack
(optional)
USB ports
Ethernet
jack
Audio
line out
jack
PS/2
mouse port
Audio
line in
jack
Microphone
jack
PS/2
keyboard
port
Parallel
port
Serial
port
KB/Mouse
Connect button
(optional)
Monitor
in port
Power
connector
12
www.gateway.com

Component Icon Description
Monitor (VGA) out
Plug an additional monitor into this port.
port (optional)
Ethernet jack Plug a 10/100 Ethernet network cable or a device (such as a
DSL or cable mo dem fo r a broadband Int ernet connection) in to
this jack. For more information, see “Connecting to a wired
Ethernet network” on page 33.
Audio line in jack Plug an ex ternal audio inp ut source (such as a stereo) in to this
jack so you can record sound on your computer.
PS/2 mouse p or t Plug a Personal Sys tem/2
®
(PS/2) mous e into th is por t.
Parallel port Plug a parallel device (such as a printer) into this port. For more
information, see “Installing a printer, scanner, or other
peripheral device” on page 38.
KB/Mouse Connect
button (optional)
Modem jack
(optional)
Establishes communication between your wireless keyboard,
wireless mouse , and y our computer . F or more information , see
Wireless keyboard setup guid e
the
.
Plug a modem cable into this jack. For more information, see
“Connecting the modem” on page 33.
USB ports Plug USB (Universal Serial Bus) devices (such as a USB
Iomega™ Zip™ drive, printer, scanner, camera, keyboard, or
mouse) into th ese po rts. For more infor matio n, se e “Installing
a printer, scanner, or other peripheral device” on page 38.
Audio line out jack Plug an external audio output source (such as external
speakers) into this jack.
Microphone jack Plug a microphone into this jack to record sound.
®
PS/2 keyboard port Plug a Personal System/2
(PS/2) keyboard into this port.
Serial port Plug a serial device (such as a digital camera) into this port.
For more inf ormation, see “Installing a printer , scanner , or other
peripheral device” on page 38.
Monitor (VGA) in
Plug an external video source into this port.
port
Power connector Plug the power cable into this connector.
www.gateway.com
13

Right side
PC Card slot
IEEE 1394 port
(4-pin)
IEEE 1394 port
(6-pin)
USB ports
14
Component Icon Description
PC Card slot Insert a Type I or TypeII PC Card into this slot. For more
information, see “Adding a nd re moving PC Cards” on pag e 64.
IEEE 1394 ports Plug IEEE 1394 (also known as Firewire
(such as a digital video camera) into these 4-pin and 6-pin
IEEE 1394 ports. For m ore information, se e “Installing a p rinter,
scanner, or other peripheral device” on page 38.
USB ports Plug USB (Universal Serial Bus) devices (such as a USB
Iomega™ Zip™ drive, printer, scanner, camera, keyboard, or
mouse) into these ports. For more information, see “Installing
a printer, scanner, or other peripheral device” on page 38.
www.gateway.com
®
or i.Link®) devices

Microsoft Certificate of A uthenticity
The Microsoft Certificate of Authenticity label found on the back or side of your computer
includes the product key code for your operating system.
Finding y our specifications
For more information abo ut your computer, such as memory size, memory type, and hard
drive size, see visit Gateway’s eSupport page at support.gateway.com
has links to additional Gateway documentation and detailed specifications. For more
information, see “Using eSu pport” on page 4.
. The eSupport page also
www.gateway.com
15

Accessories
To order accessories, visit the Accessory Store at accessories.gateway .com.
Memory
Large programs, such as multimedia games or graphics programs, use a lot of memory. If
your programs are running more slowly than you think they should, try adding more
memory.
Printers
You can attach almost any type of printer to your computer. The most common types are
inkjet and laser printers, which print in color or black and white. See “Installing a printer,
scanner, or other peripheral device” on page 38 for more information about attaching a
printer.
Inkjet printers and cartridges are relatively inexpensive, but they are slower than laser
printers. Using an inkjet color prin ter, you can print pictures, banners, and greeting cards,
as well as documents.
Laser printers and cartridges are more expensive, but they print much faster than inkjet
printers. Laser printers are better than inkjet printers when you are printing large
documents.
USB flash drive
Use a USB flash drive for storing files or transferring files to another computer.
Uninterruptible power supplies
A standby, uninterruptible power supply (UPS) protects your computer from data loss
during a total power failure. A UPS uses a battery to keep your computer running
temporarily during a power failure so you can save your work and shut down your
computer correctly. A UPS may also provide protection from power surges.
16
www.gateway.com

Chapter 3
Getting Started
■ Using your computer safely
■ Protecting your computer from power
source problems
■ T urning your computer on and off
■ Adjusting the volume
■ Using the keyboard and the mouse
■ Using the computer display
■ Installing peripheral devices
17

W orking safely
Before using your computer , read the following recommendations for setting up a safe and
comfortable work area and avoiding discomfor t and strain.
Top of screen is not
higher than eye level
Screen is
perpen dicular to
Hands and
arms ar e
parallel to
the floor
Feet are flat on the floor
your line of sight
Reducing eye strain
Sunlight or bright indoor lighting should not reflect on the display or shine directly into
your eyes.
■ Position the computer desk and display so you can avoid glare on your screen and
light shining directly into your eyes. Reduce glare by installing shades or curtains on
windows, and by installing a glare screen filter on your display.
■ Use soft, indirect lighting in yo ur work area. Do not use your computer in a dark ro om.
■ Avoid focusing your eyes on your computer screen for long periods of time. Look away
from your computer occasionally, and try to focus on distant objects.
Setting up your computer desk and chair
When you are setting up your computer desk and chair, make sure that the desk is the
appropriate height and the chair helps you maintain good posture.
■ Select a flat surface for your computer desk.
18
www.gateway.com

■ Adjust the height of the computer desk so your hands and arms are positioned parallel
to the floor when you use the keyboard and mouse. If the desk is not adjustable or
is too tall, consider using a keyboard drawer.
■ Use an adjustable chair that is comfortable, distributes your weight evenly , and keeps
your body relaxed.
■ Position your chair so the keyboard is at or slightly below the level of your elbow.
This position lets your shoulders relax while you type.
■ Adjust the chair height, adjust the forward tilt of the s eat, or use a footrest to distribute
your weight evenly on the chair and relieve pressure on the back of your thighs.
■ Adjust the back of the chair so it supports the lower curve of your spine. You can use
a pillow or cushion to provide extra back support.
Setting up your computer and computer accessories
■ Set up the computer so the top of the display is no higher than eye level, the controls
are within reach, and the screen is tilted to be perpendicular to your line of sight.
■ Place your keyboard and mouse at a comfortable distance. You should be able to reach
them without stretching.
■ Set paper holders at the same height and distance as the display.
Sitting at your computer
■ Avoid bending, arching, or angling your wrists. Make sure that they are in a relaxed
position when you type.
■ Do not slouch forward or lean far back. Sit with your back straight so your knees,
hips, and elbows form right angles when you work.
■ Take breaks to stand and stretch your legs.
■ Avoid twisting your torso or neck.
A voiding discomfort and injury from repetitive strain
■ Vary your acti vities to a void exces sive repe tition.
■ Take breaks to change your position, stretch your muscles, and relieve your eyes.
■ Find ways to break up the work day, and schedule a variety of tasks.
www.gateway.com
19

Protecting from pow er source pr oblems
During a power surge, the voltage level of electricity coming into your computer can
increase to far above normal levels and cause data loss or system damage. Protect yo ur
computer and peripheral devices by connecting them to a surge protector, which absorbs
voltage surges and prevents them from reaching your computer.
Warning High voltages can enter your computer through both the power cord
and the modem connection. Protect your computer by using a surge
protector . If you ha v e a telep hone mod em, us e a su rge prot ector th at
has a modem jac k. If y ou ha ve a c able modem, u se a surge pro tector
that has an antenn a/cable TV jac k. During an electrical sto rm, unplug
both the surge protector and the modem.
An uninterruptible power su pply (UPS) supplies battery power to your computer during a
power failure. Although you cannot run your computer for an extended period of time
with a UPS, a UPS lets you run your computer long enough to save your work and shut
down your computer normally.
Starting your computer
To start your computer:
1 Connect the cables to your computer. See the setup poster for more information.
2 Press the power button.
Power button
20
www.gateway.com

3 If you are starting your computer for the first time, follow the on-screen instructions
to set up your computer.
Important Your computer has a built-in variable speed fan. In addition, your
computer uses a powerful processor which produces heat. Both the
system fan and processor can run at different speeds at times to
ensure proper syst em co oli ng. You may notice an in crease in the f an
noise when the fan is running at high speed and a decrease in the
fan noise when it switches to normal speed.
4 Turn on any peripheral devices, such as printers or scanners, an d see the
documentation that came with the device for setup instructions.
W aking up your c omputer
When you have not used your computer for several minutes or have not turned off your
computer, it may enter a power-saving mode called Standby. While in Standby, the power
indicator flashes.
If your computer is in Standby mode, move the mouse or press the power butt on to “wake”
it up.
Tips & Tricks For more information about changing the power button mode, see
“Changing Po wer-Saving Setting s” in
been included on your hard drive. To access this guide, click Start,
All Programs, then click Gateway Documentation.
www.gateway.com
Using Y o ur Computer
which has
21

T urning off your c omputer
Warning When you turn off your computer, certain components in the power
supply and system board remain energized. In order to remove all
electrical power from your computer, unplug the power cord and
modem cable from the w all outlets. We recommend disconnecting the
power cord and modem cable when your computer will not be used
for long periods.
For more information about changing the power button mode, see
“Changing Po wer-Saving Setting s” in
been included on your hard drive. To access this guide, click Start,
All Programs, then click Gateway Documentation.
Using Y o ur Computer
To turn off your computer:
1 Click Start, then click Turn Off Computer. The Tu r n Of f C o mp u t e r dialog box open s.
2 Click Tur n O ff. Windows shuts down and turns off your computer.
Important If for some reason you cannot use the Tur n Off Computer option in
Windows to turn off your computer, press and hold the power button
for about five seconds, then release it.
which has
22
www.gateway.com

Restarting (rebooting) your co mputer
If your computer does not respond to keyboard or mouse input, you may have to close
programs that are not responding. If closing unresponsive programs does not restore your
computer to normal operation, you may have to restart (reboot) your computer.
To close unresponsive programs and restart your computer:
1 Press CTRL+ALT+DEL. The Task Manager window opens.
2 Click the Applications tab, then click the program that is not responding.
3 Click End Task.
4 Click X in the top-right corner of the Windows Task Manager dialog box.
5 If your computer does not respond, turn it off, wait ten seconds, then turn it on again.
Important If your computer does not turn off, press and hold the power button
for about five seconds, then release it.
As a part of the regular startup process, a program to check the disk status runs
automatically. When the checks are finished, Windows starts.
www.gateway.com
23

Using the cord cover
After you have the power and peripheral device cords connected to your computer, you
can install the optional cord cover to make your computer look less cluttered.
To install the optional cord cover:
■ Align the tabs on the top of the cover with the sl ot s above the bac k ports, then swing
the cord cover’ s bottom tabs into the slots on the botto m of the computer (view shown
from below for clarity).
Tips & Tricks If you hav e d ifficu lty s liding the c over’s bo ttom ta bs in to the c ompu ter
slots, press the bottom corners of the cord cover inward while
pressing the cord cover into place.
To remove the cord cover:
■ Press the cord cover’s bottom tabs inward, then rotate the cord cover away from the
computer.
24
www.gateway.com
 Loading...