

Gateway 710 Owner's Manual

your Gateway computer
user'sguide
Customizing
Troubleshooting


Contents
1 Checking Out Your Gateway Computer. . . . . . . . . . . . . . . . . . . . . . . . . . 1
Front . . . . . . . . . . . . . . . . . . . . . . . . . . . . . . . . . . . . . . . . . . . . . . . . . . . . . . . . . . . . . 2
Back . . . . . . . . . . . . . . . . . . . . . . . . . . . . . . . . . . . . . . . . . . . . . . . . . . . . . . . . . . . . . . 4
Identifying your model . . . . . . . . . . . . . . . . . . . . . . . . . . . . . . . . . . . . . . . . . . . . . . . . 6
Gateway model number . . . . . . . . . . . . . . . . . . . . . . . . . . . . . . . . . . . . . . . . . . . 6
Gateway serial number . . . . . . . . . . . . . . . . . . . . . . . . . . . . . . . . . . . . . . . . . . . . 6
Microsoft Certificate of Authenticity . . . . . . . . . . . . . . . . . . . . . . . . . . . . . . . . . . 6
Finding your specifications . . . . . . . . . . . . . . . . . . . . . . . . . . . . . . . . . . . . . . . . . . . . 7
Accessories . . . . . . . . . . . . . . . . . . . . . . . . . . . . . . . . . . . . . . . . . . . . . . . . . . . . . . . . 8
2Getting Started. . . . . . . . . . . . . . . . . . . . . . . . . . . . . . . . . . . . . . . . . . . . . . . . . . 11
Working safely . . . . . . . . . . . . . . . . . . . . . . . . . . . . . . . . . . . . . . . . . . . . . . . . . . . . . 12
Reducing eye strain . . . . . . . . . . . . . . . . . . . . . . . . . . . . . . . . . . . . . . . . . . . . . 12
Setting up your computer desk and chair . . . . . . . . . . . . . . . . . . . . . . . . . . . . 13
Setting up your computer and computer accessories . . . . . . . . . . . . . . . . . . . 13
Sitting at your computer . . . . . . . . . . . . . . . . . . . . . . . . . . . . . . . . . . . . . . . . . . 14
Avoiding discomfort and injury from repetitive strain . . . . . . . . . . . . . . . . . . . . 14
Protecting from power source problems . . . . . . . . . . . . . . . . . . . . . . . . . . . . . . . . . 15
Starting your computer . . . . . . . . . . . . . . . . . . . . . . . . . . . . . . . . . . . . . . . . . . . . . . 16
Turning off your computer . . . . . . . . . . . . . . . . . . . . . . . . . . . . . . . . . . . . . . . . . . . . 17
Restarting (rebooting) your computer . . . . . . . . . . . . . . . . . . . . . . . . . . . . . . . . . . . 18
Multifunction keyboard . . . . . . . . . . . . . . . . . . . . . . . . . . . . . . . . . . . . . . . . . . . . . . . 19
Special-function buttons . . . . . . . . . . . . . . . . . . . . . . . . . . . . . . . . . . . . . . . . . . 20
Mouse . . . . . . . . . . . . . . . . . . . . . . . . . . . . . . . . . . . . . . . . . . . . . . . . . . . . . . . . . . . 22
Using the mouse . . . . . . . . . . . . . . . . . . . . . . . . . . . . . . . . . . . . . . . . . . . . . . . . 23
Installing a printer, scanner, or other peripheral device . . . . . . . . . . . . . . . . . . . . . 24
3Getting Help . . . . . . . . . . . . . . . . . . . . . . . . . . . . . . . . . . . . . . . . . . . . . . . . . . . . 25
Help and Support . . . . . . . . . . . . . . . . . . . . . . . . . . . . . . . . . . . . . . . . . . . . . . . . . . 26
Searching for a topic . . . . . . . . . . . . . . . . . . . . . . . . . . . . . . . . . . . . . . . . . . . . . 26
Online help . . . . . . . . . . . . . . . . . . . . . . . . . . . . . . . . . . . . . . . . . . . . . . . . . . . . . . . 27
Gateway Web site . . . . . . . . . . . . . . . . . . . . . . . . . . . . . . . . . . . . . . . . . . . . . . . . . . 28
Using eSupport . . . . . . . . . . . . . . . . . . . . . . . . . . . . . . . . . . . . . . . . . . . . . . . . . 28
4 Windows Basics . . . . . . . . . . . . . . . . . . . . . . . . . . . . . . . . . . . . . . . . . . . . . . . . 31
About the Windows environment . . . . . . . . . . . . . . . . . . . . . . . . . . . . . . . . . . . . . . 32
Using the desktop . . . . . . . . . . . . . . . . . . . . . . . . . . . . . . . . . . . . . . . . . . . . . . . . . . 33
Using the Start menu . . . . . . . . . . . . . . . . . . . . . . . . . . . . . . . . . . . . . . . . . . . . 34
i

Adding icons to the desktop . . . . . . . . . . . . . . . . . . . . . . . . . . . . . . . . . . . . . . .35
Identifying window items . . . . . . . . . . . . . . . . . . . . . . . . . . . . . . . . . . . . . . . . . . . . . .36
Working with files and folders . . . . . . . . . . . . . . . . . . . . . . . . . . . . . . . . . . . . . . . . .38
Viewing drives . . . . . . . . . . . . . . . . . . . . . . . . . . . . . . . . . . . . . . . . . . . . . . . . . .38
Creating folders . . . . . . . . . . . . . . . . . . . . . . . . . . . . . . . . . . . . . . . . . . . . . . . . .39
Copying and moving files and folders . . . . . . . . . . . . . . . . . . . . . . . . . . . . . . . .41
Deleting files and folders . . . . . . . . . . . . . . . . . . . . . . . . . . . . . . . . . . . . . . . . . .43
Browsing for files and folders . . . . . . . . . . . . . . . . . . . . . . . . . . . . . . . . . . . . . .44
Searching for files . . . . . . . . . . . . . . . . . . . . . . . . . . . . . . . . . . . . . . . . . . . . . . . . . . .46
Using the Windows Search utility . . . . . . . . . . . . . . . . . . . . . . . . . . . . . . . . . . .47
Working with documents . . . . . . . . . . . . . . . . . . . . . . . . . . . . . . . . . . . . . . . . . . . . .49
Creating a new document . . . . . . . . . . . . . . . . . . . . . . . . . . . . . . . . . . . . . . . . .49
Saving a document . . . . . . . . . . . . . . . . . . . . . . . . . . . . . . . . . . . . . . . . . . . . . .50
Opening a document . . . . . . . . . . . . . . . . . . . . . . . . . . . . . . . . . . . . . . . . . . . . .51
Printing a document . . . . . . . . . . . . . . . . . . . . . . . . . . . . . . . . . . . . . . . . . . . . . .52
Shortcuts . . . . . . . . . . . . . . . . . . . . . . . . . . . . . . . . . . . . . . . . . . . . . . . . . . . . . . . . . .53
5 Using the Internet . . . . . . . . . . . . . . . . . . . . . . . . . . . . . . . . . . . . . . . . . . . . . . .55
Learning about the Internet . . . . . . . . . . . . . . . . . . . . . . . . . . . . . . . . . . . . . . . . . . .56
Setting up an Internet account . . . . . . . . . . . . . . . . . . . . . . . . . . . . . . . . . . . . . . . . .57
Accessing your Internet account . . . . . . . . . . . . . . . . . . . . . . . . . . . . . . . . . . . .58
Using the World Wide Web . . . . . . . . . . . . . . . . . . . . . . . . . . . . . . . . . . . . . . . . . . .59
Connecting to a Web site . . . . . . . . . . . . . . . . . . . . . . . . . . . . . . . . . . . . . . . . . .60
Downloading files . . . . . . . . . . . . . . . . . . . . . . . . . . . . . . . . . . . . . . . . . . . . . . . .61
Using e-mail . . . . . . . . . . . . . . . . . . . . . . . . . . . . . . . . . . . . . . . . . . . . . . . . . . . . . . .62
Sending e-mail . . . . . . . . . . . . . . . . . . . . . . . . . . . . . . . . . . . . . . . . . . . . . . . . . .62
Checking your e-mail . . . . . . . . . . . . . . . . . . . . . . . . . . . . . . . . . . . . . . . . . . . . .63
6 Sending and Receiving Faxes . . . . . . . . . . . . . . . . . . . . . . . . . . . . . . . . . . .65
Installing and configuring Fax . . . . . . . . . . . . . . . . . . . . . . . . . . . . . . . . . . . . . . . . . .66
Installing Fax . . . . . . . . . . . . . . . . . . . . . . . . . . . . . . . . . . . . . . . . . . . . . . . . . . .66
Configuring Fax . . . . . . . . . . . . . . . . . . . . . . . . . . . . . . . . . . . . . . . . . . . . . . . . .67
Sending a simple fax . . . . . . . . . . . . . . . . . . . . . . . . . . . . . . . . . . . . . . . . . . . . . . . .69
Setting up your cover page template . . . . . . . . . . . . . . . . . . . . . . . . . . . . . . . . . . . .71
Faxing from programs . . . . . . . . . . . . . . . . . . . . . . . . . . . . . . . . . . . . . . . . . . . . . . .72
Faxing a scanned document . . . . . . . . . . . . . . . . . . . . . . . . . . . . . . . . . . . . . . . . . .72
Receiving and viewing a fax . . . . . . . . . . . . . . . . . . . . . . . . . . . . . . . . . . . . . . . . . . .73
Canceling a fax . . . . . . . . . . . . . . . . . . . . . . . . . . . . . . . . . . . . . . . . . . . . . . . . . . . . .73
Automatically retry sending a fax . . . . . . . . . . . . . . . . . . . . . . . . . . . . . . . . . . . . . . .74
Automatically cancelling a fax . . . . . . . . . . . . . . . . . . . . . . . . . . . . . . . . . . . . . . . . .75
ii

7 Using Multimedia . . . . . . . . . . . . . . . . . . . . . . . . . . . . . . . . . . . . . . . . . . . . . . . 77
Adjusting the volume . . . . . . . . . . . . . . . . . . . . . . . . . . . . . . . . . . . . . . . . . . . . . . . . 78
Recording and playing audio . . . . . . . . . . . . . . . . . . . . . . . . . . . . . . . . . . . . . . . . . . 80
Playing audio and video files with the Windows Media Player . . . . . . . . . . . . . . . . 82
Using the CD or DVD drive . . . . . . . . . . . . . . . . . . . . . . . . . . . . . . . . . . . . . . . . . . . 84
Identifying drive types . . . . . . . . . . . . . . . . . . . . . . . . . . . . . . . . . . . . . . . . . . . . 84
Inserting a CD or DVD . . . . . . . . . . . . . . . . . . . . . . . . . . . . . . . . . . . . . . . . . . . 85
Listening to CDs . . . . . . . . . . . . . . . . . . . . . . . . . . . . . . . . . . . . . . . . . . . . . . . . . . . 86
Using MUSICMATCH . . . . . . . . . . . . . . . . . . . . . . . . . . . . . . . . . . . . . . . . . . . . . . . 88
Playing CDs . . . . . . . . . . . . . . . . . . . . . . . . . . . . . . . . . . . . . . . . . . . . . . . . . . . 88
Creating MP3 music files . . . . . . . . . . . . . . . . . . . . . . . . . . . . . . . . . . . . . . . . . 90
Editing track information . . . . . . . . . . . . . . . . . . . . . . . . . . . . . . . . . . . . . . . . . . 91
Building a music library . . . . . . . . . . . . . . . . . . . . . . . . . . . . . . . . . . . . . . . . . . . 93
Changing the music library display settings . . . . . . . . . . . . . . . . . . . . . . . . . . . 94
Listening to Internet radio . . . . . . . . . . . . . . . . . . . . . . . . . . . . . . . . . . . . . . . . . 95
Using advanced features . . . . . . . . . . . . . . . . . . . . . . . . . . . . . . . . . . . . . . . . . 95
Playing a DVD . . . . . . . . . . . . . . . . . . . . . . . . . . . . . . . . . . . . . . . . . . . . . . . . . . . . . 95
Creating CDs and DVDs . . . . . . . . . . . . . . . . . . . . . . . . . . . . . . . . . . . . . . . . . . . . . 97
Copying a CD or DVD . . . . . . . . . . . . . . . . . . . . . . . . . . . . . . . . . . . . . . . . . . . 98
Creating a data CD or DVD . . . . . . . . . . . . . . . . . . . . . . . . . . . . . . . . . . . . . . 102
Copying music tracks . . . . . . . . . . . . . . . . . . . . . . . . . . . . . . . . . . . . . . . . . . . 105
Creating a music CD . . . . . . . . . . . . . . . . . . . . . . . . . . . . . . . . . . . . . . . . . . . 108
Advanced features . . . . . . . . . . . . . . . . . . . . . . . . . . . . . . . . . . . . . . . . . . . . . 112
Connecting a digital camera . . . . . . . . . . . . . . . . . . . . . . . . . . . . . . . . . . . . . . . . . 113
Connecting a digital video camera . . . . . . . . . . . . . . . . . . . . . . . . . . . . . . . . . . . . 114
Creating video DVDs . . . . . . . . . . . . . . . . . . . . . . . . . . . . . . . . . . . . . . . . . . . . . . . 114
Using the optional diskette drive . . . . . . . . . . . . . . . . . . . . . . . . . . . . . . . . . . . . . . 116
Using the optional media card reader . . . . . . . . . . . . . . . . . . . . . . . . . . . . . . . . . . 117
Media card types . . . . . . . . . . . . . . . . . . . . . . . . . . . . . . . . . . . . . . . . . . . . . . 117
Using a media card . . . . . . . . . . . . . . . . . . . . . . . . . . . . . . . . . . . . . . . . . . . . . 118
8 Customizing Your Computer . . . . . . . . . . . . . . . . . . . . . . . . . . . . . . . . . . . 119
Adjusting the screen and desktop settings . . . . . . . . . . . . . . . . . . . . . . . . . . . . . . 120
Adjusting the color depth . . . . . . . . . . . . . . . . . . . . . . . . . . . . . . . . . . . . . . . . 120
Adjusting the screen resolution . . . . . . . . . . . . . . . . . . . . . . . . . . . . . . . . . . . 122
Changing the colors on your Windows desktop . . . . . . . . . . . . . . . . . . . . . . . 123
Changing the desktop background . . . . . . . . . . . . . . . . . . . . . . . . . . . . . . . . 125
Selecting a screen saver . . . . . . . . . . . . . . . . . . . . . . . . . . . . . . . . . . . . . . . . 126
Changing the mouse settings . . . . . . . . . . . . . . . . . . . . . . . . . . . . . . . . . . . . . . . . 128
Adding and modifying user accounts . . . . . . . . . . . . . . . . . . . . . . . . . . . . . . . . . . 129
Power management . . . . . . . . . . . . . . . . . . . . . . . . . . . . . . . . . . . . . . . . . . . . . . . 131
Using power saving modes . . . . . . . . . . . . . . . . . . . . . . . . . . . . . . . . . . . . . . 131
iii

Changing power settings . . . . . . . . . . . . . . . . . . . . . . . . . . . . . . . . . . . . . . . . .132
Changing the power scheme . . . . . . . . . . . . . . . . . . . . . . . . . . . . . . . . . . . . . .132
Changing advanced power settings . . . . . . . . . . . . . . . . . . . . . . . . . . . . . . . . .133
Activating and using Hibernate mode . . . . . . . . . . . . . . . . . . . . . . . . . . . . . . .134
Setting up an uninterruptible power supply . . . . . . . . . . . . . . . . . . . . . . . . . . .136
9 Networking Your Computer. . . . . . . . . . . . . . . . . . . . . . . . . . . . . . . . . . . . .139
Benefits of networking . . . . . . . . . . . . . . . . . . . . . . . . . . . . . . . . . . . . . . . . . . . . . .140
Sharing a single Internet connection . . . . . . . . . . . . . . . . . . . . . . . . . . . . . . . .140
Sharing drives . . . . . . . . . . . . . . . . . . . . . . . . . . . . . . . . . . . . . . . . . . . . . . . . .140
Sharing peripheral devices . . . . . . . . . . . . . . . . . . . . . . . . . . . . . . . . . . . . . . . .141
Streaming audio and video files . . . . . . . . . . . . . . . . . . . . . . . . . . . . . . . . . . .141
Playing multi-player games . . . . . . . . . . . . . . . . . . . . . . . . . . . . . . . . . . . . . . .141
Selecting a network connection . . . . . . . . . . . . . . . . . . . . . . . . . . . . . . . . . . . . . . .142
Wired Ethernet network . . . . . . . . . . . . . . . . . . . . . . . . . . . . . . . . . . . . . . . . . .142
Wireless Ethernet network . . . . . . . . . . . . . . . . . . . . . . . . . . . . . . . . . . . . . . . .142
Using a wired Ethernet network . . . . . . . . . . . . . . . . . . . . . . . . . . . . . . . . . . . . . . .143
Ethernet, Fast Ethernet, or Gigabit Ethernet . . . . . . . . . . . . . . . . . . . . . . . . . .143
Example wired Ethernet network . . . . . . . . . . . . . . . . . . . . . . . . . . . . . . . . . . .144
Equipment you need for a wired Ethernet network . . . . . . . . . . . . . . . . . . . . .145
Using a wireless Ethernet network . . . . . . . . . . . . . . . . . . . . . . . . . . . . . . . . . . . . .146
Wireless Ethernet speed and frequency . . . . . . . . . . . . . . . . . . . . . . . . . . . . .146
Example access point wireless Ethernet network . . . . . . . . . . . . . . . . . . . . . .148
Equipment you need fo r an access point wireles s Ethernet network . . . . . . .149
Example peer-to-peer wireless Ethernet network . . . . . . . . . . . . . . . . . . . . . .150
Equipment you need fo r a peer-to-peer wireless Ethernet network . . . . . . . .151
For more information . . . . . . . . . . . . . . . . . . . . . . . . . . . . . . . . . . . . . . . . . . . .151
Using your computer on a network . . . . . . . . . . . . . . . . . . . . . . . . . . . . . . . . . . . .152
Installing and configuring your computer for Ethernet networking . . . . . . . . .152
10 Moving from Your Old Computer. . . . . . . . . . . . . . . . . . . . . . . . . . . . . . .153
Using the Windows XP Files and Settings Transfer Wizard . . . . . . . . . . . . . . . . .154
Transferring files . . . . . . . . . . . . . . . . . . . . . . . . . . . . . . . . . . . . . . . . . . . . . . . . . . .155
Finding your files . . . . . . . . . . . . . . . . . . . . . . . . . . . . . . . . . . . . . . . . . . . . . . .155
Transferring Internet settings . . . . . . . . . . . . . . . . . . . . . . . . . . . . . . . . . . . . . . . . .157
Setting up your ISP . . . . . . . . . . . . . . . . . . . . . . . . . . . . . . . . . . . . . . . . . . . . .157
Transferring your e-mail and address book . . . . . . . . . . . . . . . . . . . . . . . . . . .158
Transferring your Internet shortcuts . . . . . . . . . . . . . . . . . . . . . . . . . . . . . . . . .158
Installing your old printer or scanner . . . . . . . . . . . . . . . . . . . . . . . . . . . . . . . . . . .158
Installing a USB printer or scanner . . . . . . . . . . . . . . . . . . . . . . . . . . . . . . . . .158
Installing a parallel port printer . . . . . . . . . . . . . . . . . . . . . . . . . . . . . . . . . . . .159
Installing your old programs . . . . . . . . . . . . . . . . . . . . . . . . . . . . . . . . . . . . . . . . .160
iv

11 Maintaining Your Computer . . . . . . . . . . . . . . . . . . . . . . . . . . . . . . . . . . . . 161
Caring for your computer . . . . . . . . . . . . . . . . . . . . . . . . . . . . . . . . . . . . . . . . . . . 162
Protecting your computer from viruses . . . . . . . . . . . . . . . . . . . . . . . . . . . . . . . . . 164
Managing hard drive space . . . . . . . . . . . . . . . . . . . . . . . . . . . . . . . . . . . . . . . . . . 167
Checking hard drive space . . . . . . . . . . . . . . . . . . . . . . . . . . . . . . . . . . . . . . . 167
Using Disk Cleanup . . . . . . . . . . . . . . . . . . . . . . . . . . . . . . . . . . . . . . . . . . . . 168
Checking the hard drive for errors . . . . . . . . . . . . . . . . . . . . . . . . . . . . . . . . . 169
Defragmenting the hard drive . . . . . . . . . . . . . . . . . . . . . . . . . . . . . . . . . . . . . 171
Backing up files . . . . . . . . . . . . . . . . . . . . . . . . . . . . . . . . . . . . . . . . . . . . . . . . 173
Using the Scheduled Task Wizard . . . . . . . . . . . . . . . . . . . . . . . . . . . . . . . . . 173
Cleaning your computer . . . . . . . . . . . . . . . . . . . . . . . . . . . . . . . . . . . . . . . . . . . . 175
Cleaning the exterior . . . . . . . . . . . . . . . . . . . . . . . . . . . . . . . . . . . . . . . . . . . . 175
Cleaning the keyboard . . . . . . . . . . . . . . . . . . . . . . . . . . . . . . . . . . . . . . . . . . 176
Cleaning the computer screen . . . . . . . . . . . . . . . . . . . . . . . . . . . . . . . . . . . . 176
Cleaning the mouse . . . . . . . . . . . . . . . . . . . . . . . . . . . . . . . . . . . . . . . . . . . . 177
12 Restoring Software . . . . . . . . . . . . . . . . . . . . . . . . . . . . . . . . . . . . . . . . . . . . 179
Using the Restoration CDs . . . . . . . . . . . . . . . . . . . . . . . . . . . . . . . . . . . . . . . . . . 180
Reinstalling device drivers . . . . . . . . . . . . . . . . . . . . . . . . . . . . . . . . . . . . . . . . . . . 181
Updating device drivers . . . . . . . . . . . . . . . . . . . . . . . . . . . . . . . . . . . . . . . . . . . . . 183
Reinstalling programs . . . . . . . . . . . . . . . . . . . . . . . . . . . . . . . . . . . . . . . . . . . . . . 184
Reinstalling Windows . . . . . . . . . . . . . . . . . . . . . . . . . . . . . . . . . . . . . . . . . . . . . . 186
13 Upgrading Your Computer . . . . . . . . . . . . . . . . . . . . . . . . . . . . . . . . . . . . . 189
Selecting a place to work . . . . . . . . . . . . . . . . . . . . . . . . . . . . . . . . . . . . . . . . . . . 190
Gathering the tools you need . . . . . . . . . . . . . . . . . . . . . . . . . . . . . . . . . . . . . . . . 190
Preventing static electricity discharge . . . . . . . . . . . . . . . . . . . . . . . . . . . . . . 191
Opening the case . . . . . . . . . . . . . . . . . . . . . . . . . . . . . . . . . . . . . . . . . . . . . . . . . 192
Removing the side panel . . . . . . . . . . . . . . . . . . . . . . . . . . . . . . . . . . . . . . . . 192
Removing the front bezel . . . . . . . . . . . . . . . . . . . . . . . . . . . . . . . . . . . . . . . . 195
Closing the case . . . . . . . . . . . . . . . . . . . . . . . . . . . . . . . . . . . . . . . . . . . . . . . . . . 196
Replacing the side panel . . . . . . . . . . . . . . . . . . . . . . . . . . . . . . . . . . . . . . . . 196
Replacing the front bezel . . . . . . . . . . . . . . . . . . . . . . . . . . . . . . . . . . . . . . . . 197
Adding or replacing a CD, DVD, or diskette drive . . . . . . . . . . . . . . . . . . . . . . . . 198
Replacing the hard drive . . . . . . . . . . . . . . . . . . . . . . . . . . . . . . . . . . . . . . . . . . . . 203
Adding or replacing add-in cards . . . . . . . . . . . . . . . . . . . . . . . . . . . . . . . . . . . . . 206
Installing memory . . . . . . . . . . . . . . . . . . . . . . . . . . . . . . . . . . . . . . . . . . . . . . . . . 208
Replacing the system battery . . . . . . . . . . . . . . . . . . . . . . . . . . . . . . . . . . . . . . . . 212
Replacing the power supply . . . . . . . . . . . . . . . . . . . . . . . . . . . . . . . . . . . . . . . . . 214
Replacing the system board . . . . . . . . . . . . . . . . . . . . . . . . . . . . . . . . . . . . . . . . . 216
v

14 Troubleshooting. . . . . . . . . . . . . . . . . . . . . . . . . . . . . . . . . . . . . . . . . . . . . . . .219
Safety guidelines . . . . . . . . . . . . . . . . . . . . . . . . . . . . . . . . . . . . . . . . . . . . . . . . . .220
First steps . . . . . . . . . . . . . . . . . . . . . . . . . . . . . . . . . . . . . . . . . . . . . . . . . . . . . . . .220
Software support tools . . . . . . . . . . . . . . . . . . . . . . . . . . . . . . . . . . . . . . . . . . . . . .221
Troubleshooting . . . . . . . . . . . . . . . . . . . . . . . . . . . . . . . . . . . . . . . . . . . . . . . . . . .222
Add-in cards . . . . . . . . . . . . . . . . . . . . . . . . . . . . . . . . . . . . . . . . . . . . . . . . . . .222
CD, DVD, or recordable drives . . . . . . . . . . . . . . . . . . . . . . . . . . . . . . . . . . . .222
Cleaning CDs and DVDs . . . . . . . . . . . . . . . . . . . . . . . . . . . . . . . . . . . . . . . . .224
Computer . . . . . . . . . . . . . . . . . . . . . . . . . . . . . . . . . . . . . . . . . . . . . . . . . . . . .224
File management . . . . . . . . . . . . . . . . . . . . . . . . . . . . . . . . . . . . . . . . . . . . . . .225
Hard drive . . . . . . . . . . . . . . . . . . . . . . . . . . . . . . . . . . . . . . . . . . . . . . . . . . . . .225
Internet . . . . . . . . . . . . . . . . . . . . . . . . . . . . . . . . . . . . . . . . . . . . . . . . . . . . . . .226
Keyboard . . . . . . . . . . . . . . . . . . . . . . . . . . . . . . . . . . . . . . . . . . . . . . . . . . . . .228
Memory . . . . . . . . . . . . . . . . . . . . . . . . . . . . . . . . . . . . . . . . . . . . . . . . . . . . . . .228
Modem . . . . . . . . . . . . . . . . . . . . . . . . . . . . . . . . . . . . . . . . . . . . . . . . . . . . . . .229
Monitor . . . . . . . . . . . . . . . . . . . . . . . . . . . . . . . . . . . . . . . . . . . . . . . . . . . . . . .233
Mouse . . . . . . . . . . . . . . . . . . . . . . . . . . . . . . . . . . . . . . . . . . . . . . . . . . . . . . . .235
Power . . . . . . . . . . . . . . . . . . . . . . . . . . . . . . . . . . . . . . . . . . . . . . . . . . . . . . . .235
Printer . . . . . . . . . . . . . . . . . . . . . . . . . . . . . . . . . . . . . . . . . . . . . . . . . . . . . . . .236
Sound . . . . . . . . . . . . . . . . . . . . . . . . . . . . . . . . . . . . . . . . . . . . . . . . . . . . . . . .237
Using the BIOS Setup utility . . . . . . . . . . . . . . . . . . . . . . . . . . . . . . . . . . . . . .238
Telephone support . . . . . . . . . . . . . . . . . . . . . . . . . . . . . . . . . . . . . . . . . . . . . . . . .240
Before calling Gateway Technical Support . . . . . . . . . . . . . . . . . . . . . . . . . . .240
Telephone support . . . . . . . . . . . . . . . . . . . . . . . . . . . . . . . . . . . . . . . . . . . . . .241
Tutoring and training . . . . . . . . . . . . . . . . . . . . . . . . . . . . . . . . . . . . . . . . . . . . . . . .242
Self-help . . . . . . . . . . . . . . . . . . . . . . . . . . . . . . . . . . . . . . . . . . . . . . . . . . . . . .242
Tutoring . . . . . . . . . . . . . . . . . . . . . . . . . . . . . . . . . . . . . . . . . . . . . . . . . . . . . .242
Training . . . . . . . . . . . . . . . . . . . . . . . . . . . . . . . . . . . . . . . . . . . . . . . . . . . . . . .243
A Safety, Regulatory, and Legal Information. . . . . . . . . . . . . . . . . . . . . .245
Index. . . . . . . . . . . . . . . . . . . . . . . . . . . . . . . . . . . . . . . . . . . . . . . . . . . . . . . . . . . . . . 255
vi

Checking Out
Your Gateway
Computer
This chapter introduces you to the basic features of your
Gateway computer. Read this chapter to learn:
■ How to identify the features of your computer
■ How to locate your co mputer’s model and serial
number
■ How to locate the Microsoft Certific ate of
Authenticity
■ How to locate the specifications for your computer
■ What accessories are ava ilable for your computer
1
1
Chapter 1: Checking Out Yo ur Gateway Computer
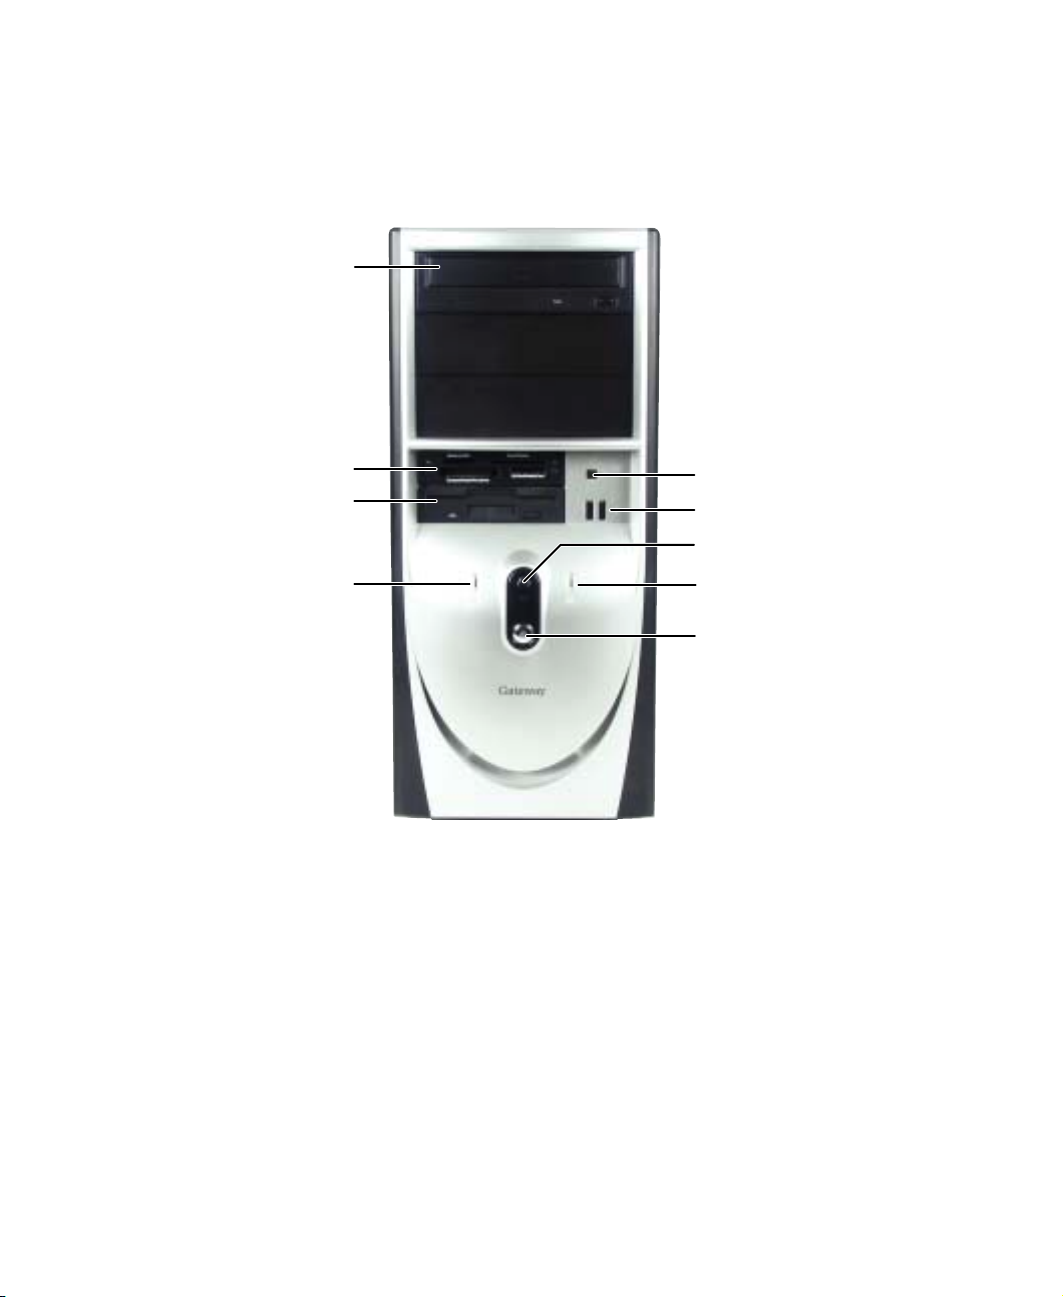
Front
Your computer may contain any of the following components.
CD/DVD drive
Media card reader
Diskette drive
Hard drive
indicator
IEEE 1394 port
USB ports
Reset button
Power indicator
Power button
2
www.gateway.com

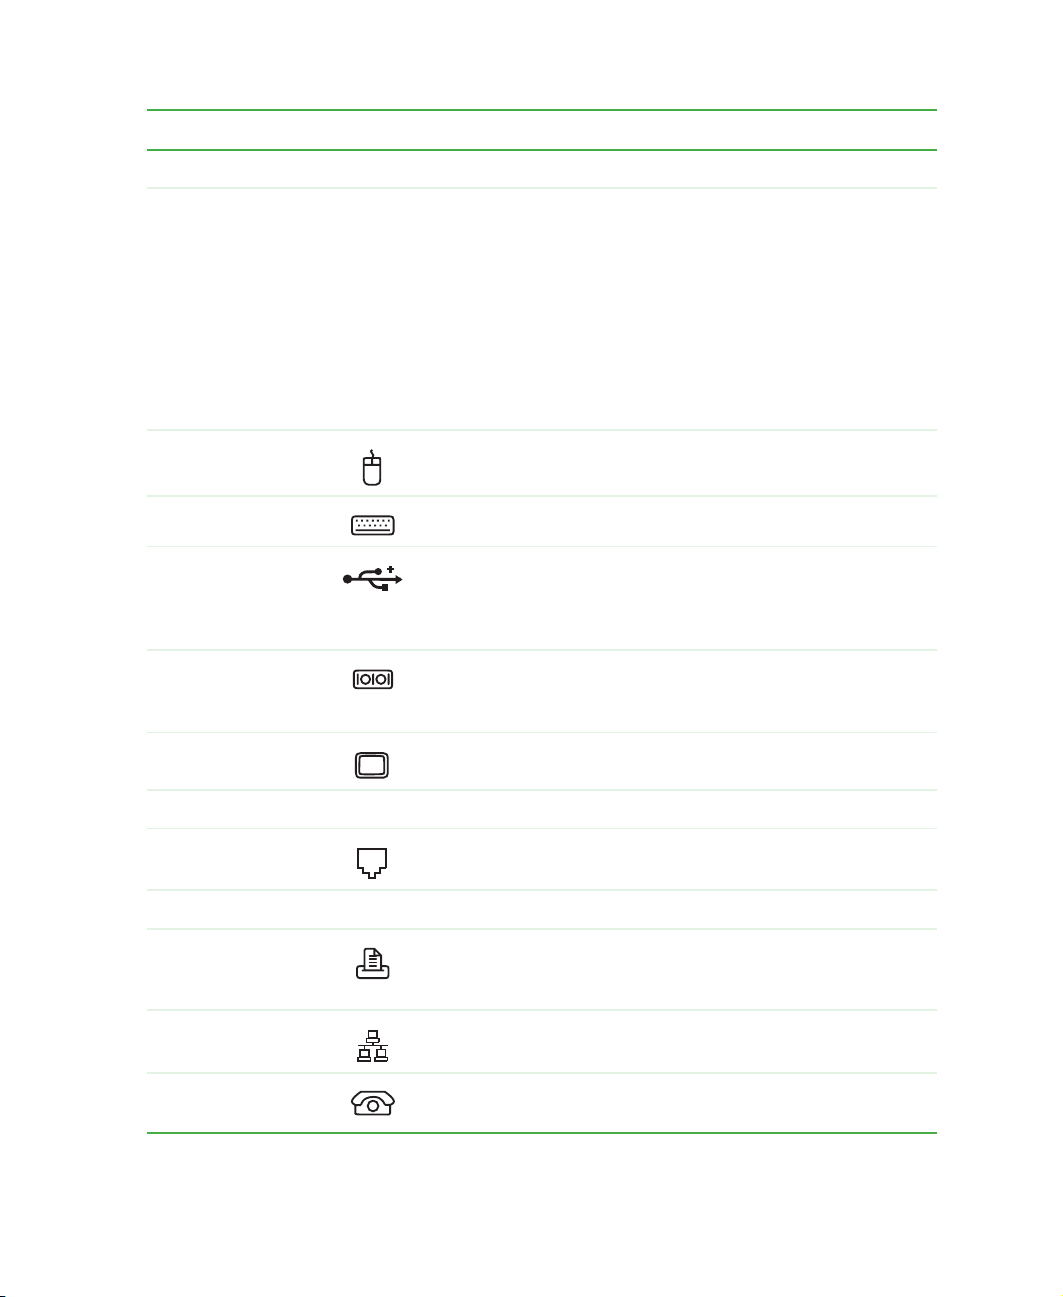
Component Icon Description
CD/DVD drive Use this drive to listen to audio CDs, install games and
programs, watch DV Ds, and st ore large files onto rec orda bl e
CDs (depending on drive type). For more information, see
“Using the CD or DVD drive” on page 84.
This drive may be a CD, CD-RW, DVD, or DVD/CD-RW drive.
T o identify your drive type and for more information abou t your
drive, see “Identifying drive types” on page84.
Media card reader Use media cards in this dri ve to transfer pictures fro m a digital
camera to your computer. You can also use the reader to
transfer data between your computer and a device that uses
media cards, such as a PDA, MP3 player, or cellular
telephone.
Diskette drive Use this drive for 3.5-inch diske ttes (so metim es called floppy
disks). Diskettes are useful for storing files or transferring files
to another computer.
Hard drive indicator Turns on when the hard drive is accessed.
®
IEEE 1394
(FireWire)
Plug an IEE E 1394 (also k nown as F irewire
device (suc h as a digi tal camcord er) into t his port.
or i.Link®)
Front
USB ports Plug USB (Universal Serial Bus) devices (such as a USB
Iomega™ Zip™ drive, printe r, scanner, camer a, keyb oard, or
mouse) into these ports. For more information, see “Installing
a printer, scanner, or other peripheral device” on page24.
Reset button Press this button to restart your computer if your computer
does not respond to mouse or keyboard input.
Power indicator Turns on when computer power is on.
Power button Press this button to turn the power on or off. You can also
configure the power button to operate in Standby/Resume
mode or Hibernate mode. For more information on changing
the power button setting, see “Changing th e pow e r sc he me ”
on page 132.
www.gateway.com
3
Chapter 1: Checking Out Yo ur Gateway Computer
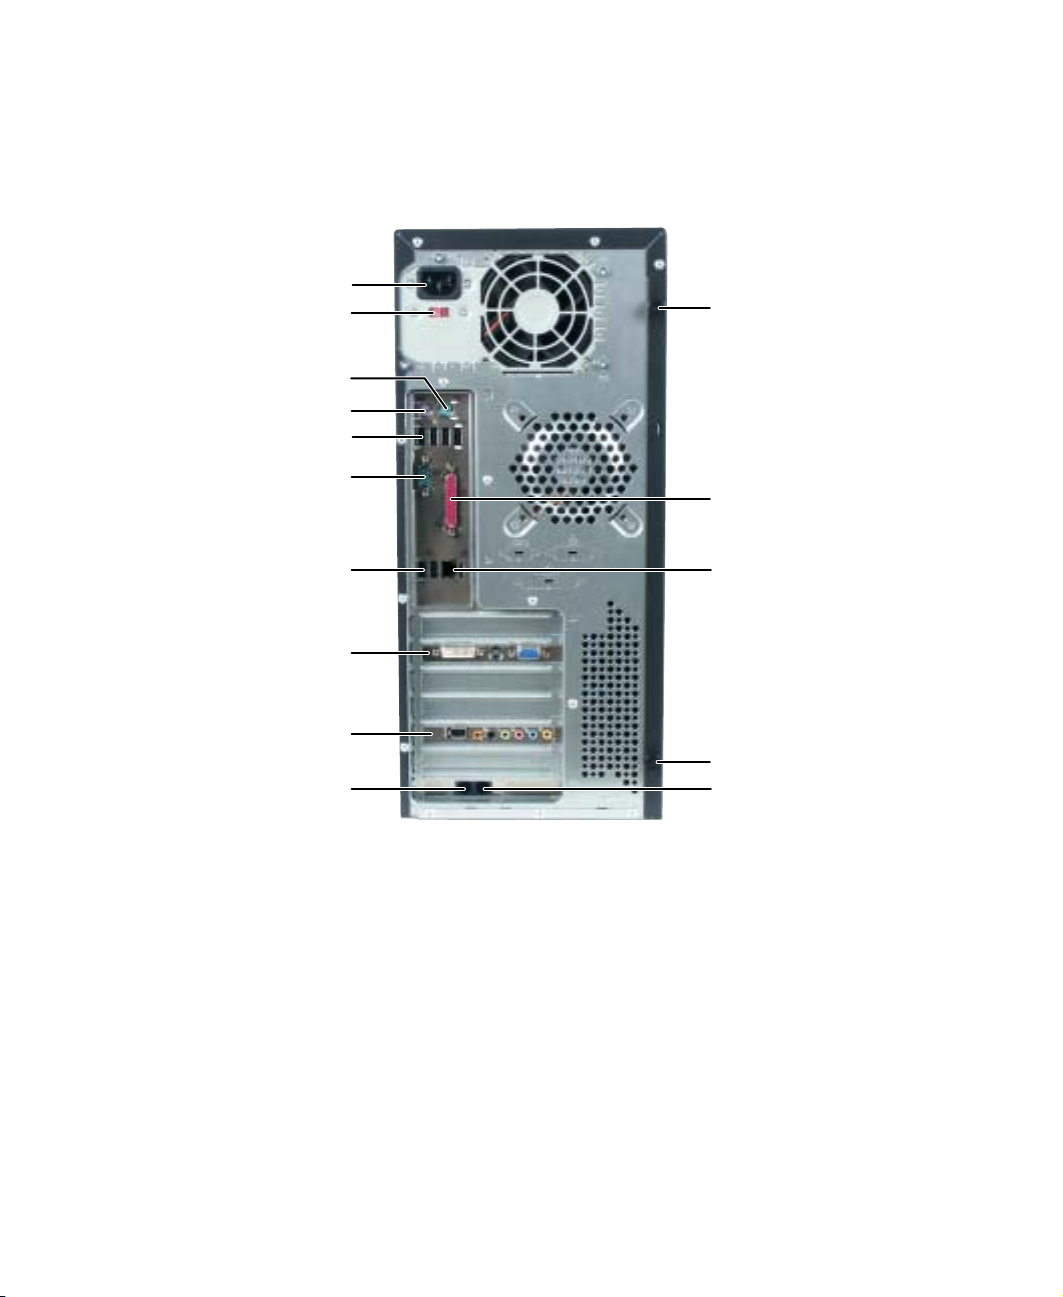
Back
Your computer may contain any of the following components.
Power connector
Voltage switch
PS/2 mouse port
PS/2 keyboard port
USB ports
Serial port
Thumbscrew
Parallel port
USB ports
Monitor ports
Audio jacks
Modem jack
Ethernet
(network) jack
Thumbscrew
Telephone jack
4
www.gateway.com
Component Icon Description
Power connector Plug the power cable into this connector.
Voltage switch Before turning on your computer, make sure that this switch
is in the correct position for the correct power available. The
switch is preset at the factory with the correct voltage for your
area.
In the United States, the utility power is supplied at a nominal
115 volts at 60 Hz. The power supply should always be set to
this when your computer is operating in the United States. In
other areas of the world, such as Europe, the utility power is
supplied at 230 volts at 50 Hz. If your computer is operating
in such an environment, move the switch to 230.
®
PS/2 mouse port Plug a Personal System/2
PS/2 keyboard port Plug a PS/2 keyboard into this port.
USB ports Plug USB (Universal Serial Bus) devices (such as a USB
Iomega™ Zip™ drive, printer, scanner, camera, keyboard, or
mouse) into these ports. For more information, see “Installing
a printer, scanner, or other peripheral device” on page24.
(PS/2) mou se into t his port.
Back
Serial port Plug a serial device (such as a digital camera) into this port.
For more information, se e “Installing a printer , scanner , or other
peripheral device” on page 24.
Monitor ports Plug a monitor into one of these ports.
Audio jacks Plug a microphone, speakers , o r headphones into th es e jac k s.
Modem jack Plug a modem cable into this jack.
Thumbscrews Remove these screws before opening the case.
Parallel port Plug a parallel device (s uch as a printer) into this port . For more
information, see “Installing a printer, scanner, or other
peripheral device” on page 24.
Ethernet (network)
jack
Telephone jack If your optional modem has a telephone jack, plug the cable
Plug a 10/100 Ethernet network cable into this jack. For more
information, see “Learning about the Internet” on page 56.
for a telephone into this jack.
www.gateway.com
5
Chapter 1: Checking Out Yo ur Gateway Computer
Identifying your model
Important The labels shown in this section are for informational
purposes only . Label information varie s by model, featur es
ordered, and location.
Gateway model number
The label on the back of your computer case contains information that
identifies your computer model. Gateway Technical Support will need this
information if you call for assistance.
Gateway serial number
You can locate the Gateway serial number:
■ Printed on a white sticker on the back of your computer case.
■ Printed on the customer invoice that came with your computer. The
invoice also contains your customer ID number.
■ Displayed in Help and Support. Click Start, Help and Support, then click View
product serial number
.
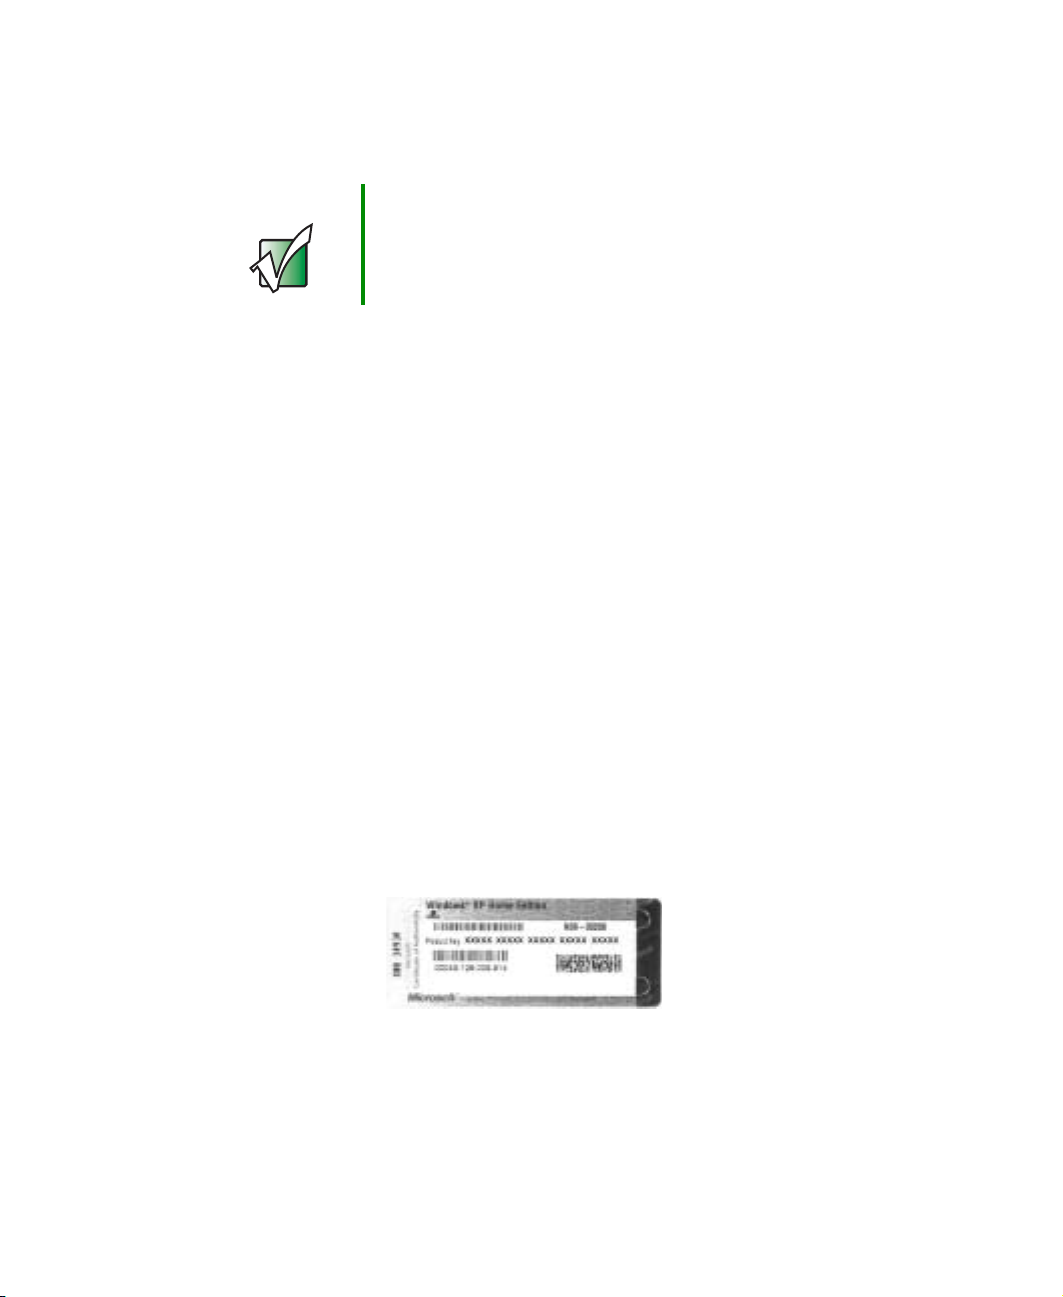
Microsoft Certificate of Authenticity
The Microsoft Certificate of Authenticity label found on the side of your
computer case includes the product key code for your operating system.
6
www.gateway.com
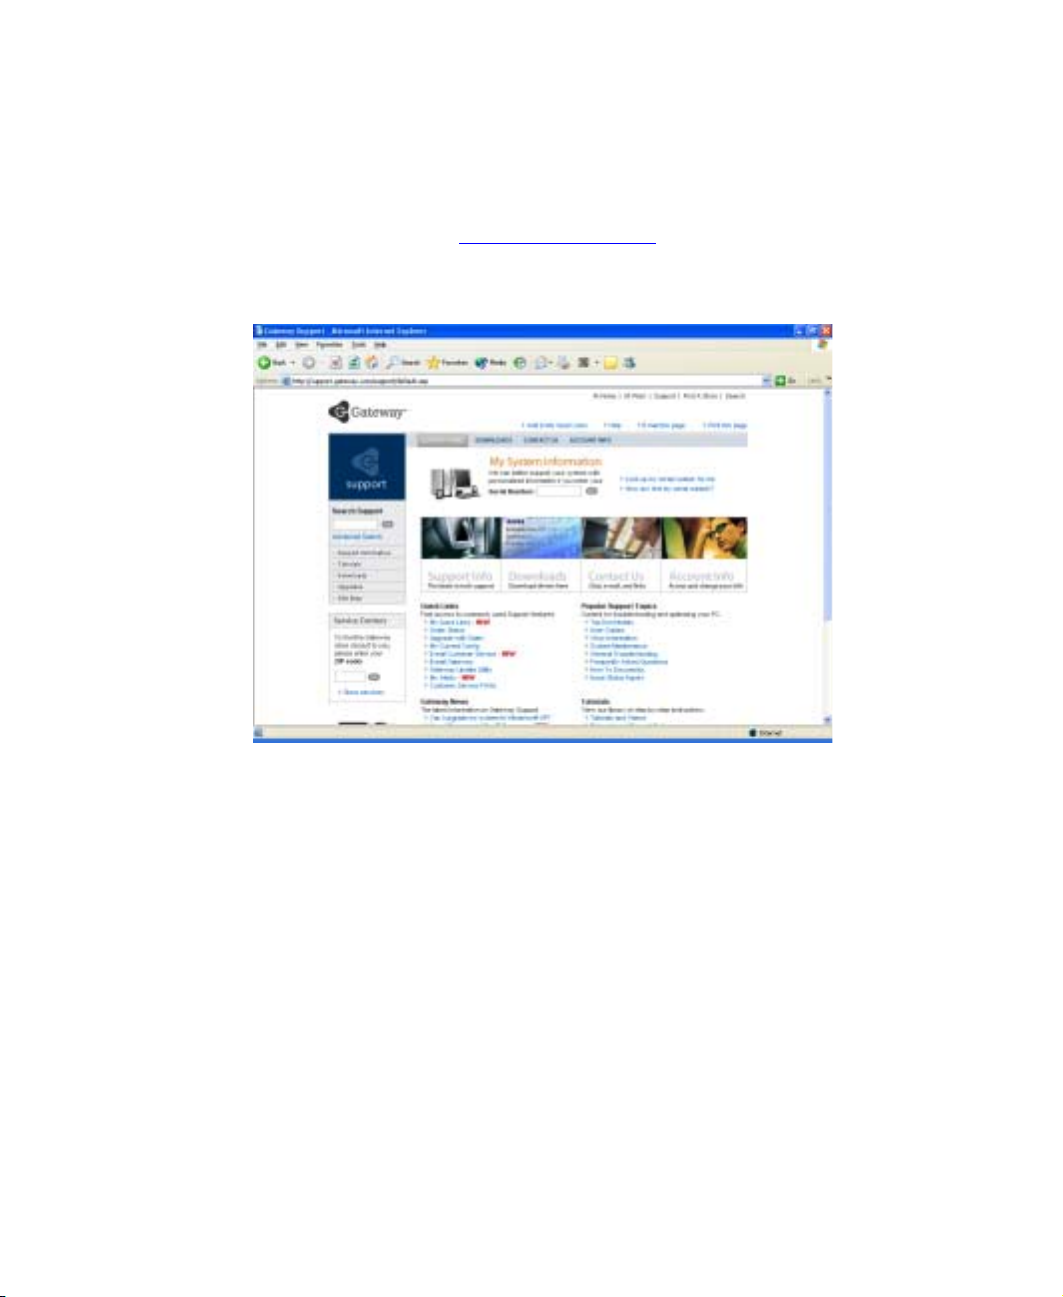
Finding your sp ecifications
Finding your specifications
For more information about your computer , such as memory size, memory type ,
and hard drive size, go to the
Gateway’s eSupport page at support.gateway.com
links to additional Gateway documentation and detailed specifications. For
more information, see “Using eSupport” on page 28.
My Computer Info link in Help and Support or visit
. The eSupport page also has
www.gateway.com
7

Chapter 1: Checking Out Yo ur Gateway Computer
Accessories
Gateway offers accessories that can help you make the most of using your
computer. To order accessories, visit the Accessory Superstore at
accessories.gateway.com
Home networking kit
With a home networking kit, you can network, or “link”, two or more
computers in your home. After you have set up a home network, you can access
the files, drives, and printers on linked computers, play multiplayer games, and
even share one Internet connection.
Two types of home networking kits are available. Wireless home networking
kits use radio frequency to link your computers wirelessly. Ethernet home
networking kits use network cabling to link your computers. For more
information, see “Networking Your Computer” on page 139 .
Imaging equipment
A digital camera lets you take pictures that you can view and edit on your
computer. For more information, see “Con necting a digi tal camera” on
page 113.
.
A digital video camera lets you take movies that you can view and edit on your
computer. For more information, see “Connecting a digital video camera ” on
page 114.
A scanner copies an image, such as a graphic or document, then stores the copy
in a file.
You can attach your digital photographs or scanned images to e-mail messages
or post them on a Web site.
Printers
You can attach many types of printers to your computer. The most common
types are inkjet and laser printers, which print in color or black and white. For
more information about attaching a printer to your computer, see “Installing
a printer, scanner, or other peripheral device” on p age 24.
Inkjet printers and cartridges are relatively inexpensive, but usually they are
slower than laser printers. Using an inkj et color print er, you can print pictures,
banners, and greeting cards, as well as documents.
8
www.gateway.com

Accessories
Laser printers and cartridges are more expensive, but usually they print much
faster than inkjet printers. Laser printers are better than inkjet printers when
you are printing large documents.
Storage Devices
If you need additional storage space or you want to back up your files, you
can add storage devices to you comput er.
With a recordable CD or DVD drive, you can free up hard drive space by backing
up files, then removing them from your hard drive. Writable CDs can hold as
much as 700 MB of data. Writable DVDs can hold as much as 4,700 MB of data.
For more information about using recordable drives, see “Creating CDs and
DVDs” on page 97.
If you need to back up your entire system, you probably need a tape backup
(TBU) drive. TBU drives, like tape recorders, use magnetic tape cartridges to store
data. Tape drive cartridges can store 2 GB, 20 GB, 40 GB , 130 GB, or more of
data.
If you want to increase your internal storage space, try replacing your existing
hard drive with a larger drive. For more information about installing a larger
drive, see “Replacing the hard drive” on page 203.
Memory
Large programs, such as multimedia games or graphics programs, use a lot of
memory . If your programs a re running more slo wly than you think they sho uld,
try adding more memory.
Uninterruptible power supplies
A standby, uninterruptible power supply (UPS) protects your computer from
data loss during a total power failure. A UPS uses a battery to keep your
computer running temporarily during a power failure so you can save your work
and shut down your computer correctly. A UPS may also provide protection
from power surges. For information about setting up a UPS, see “Setting up an
uninterruptible power supply” on page 136.
www.gateway.com
9

Chapter 1: Checking Out Yo ur Gateway Computer
10
www.gateway.com

Getting Started
Read this chapter to find out how to:
■ Use your computer safely
■ Protect your computer from power source problems
■ Start and turn off your computer
■ Use the keyboard
■ Use the mouse
■ Use the computer display
■ Install peripheral devices
2
11
Chapter 2: Getting Started
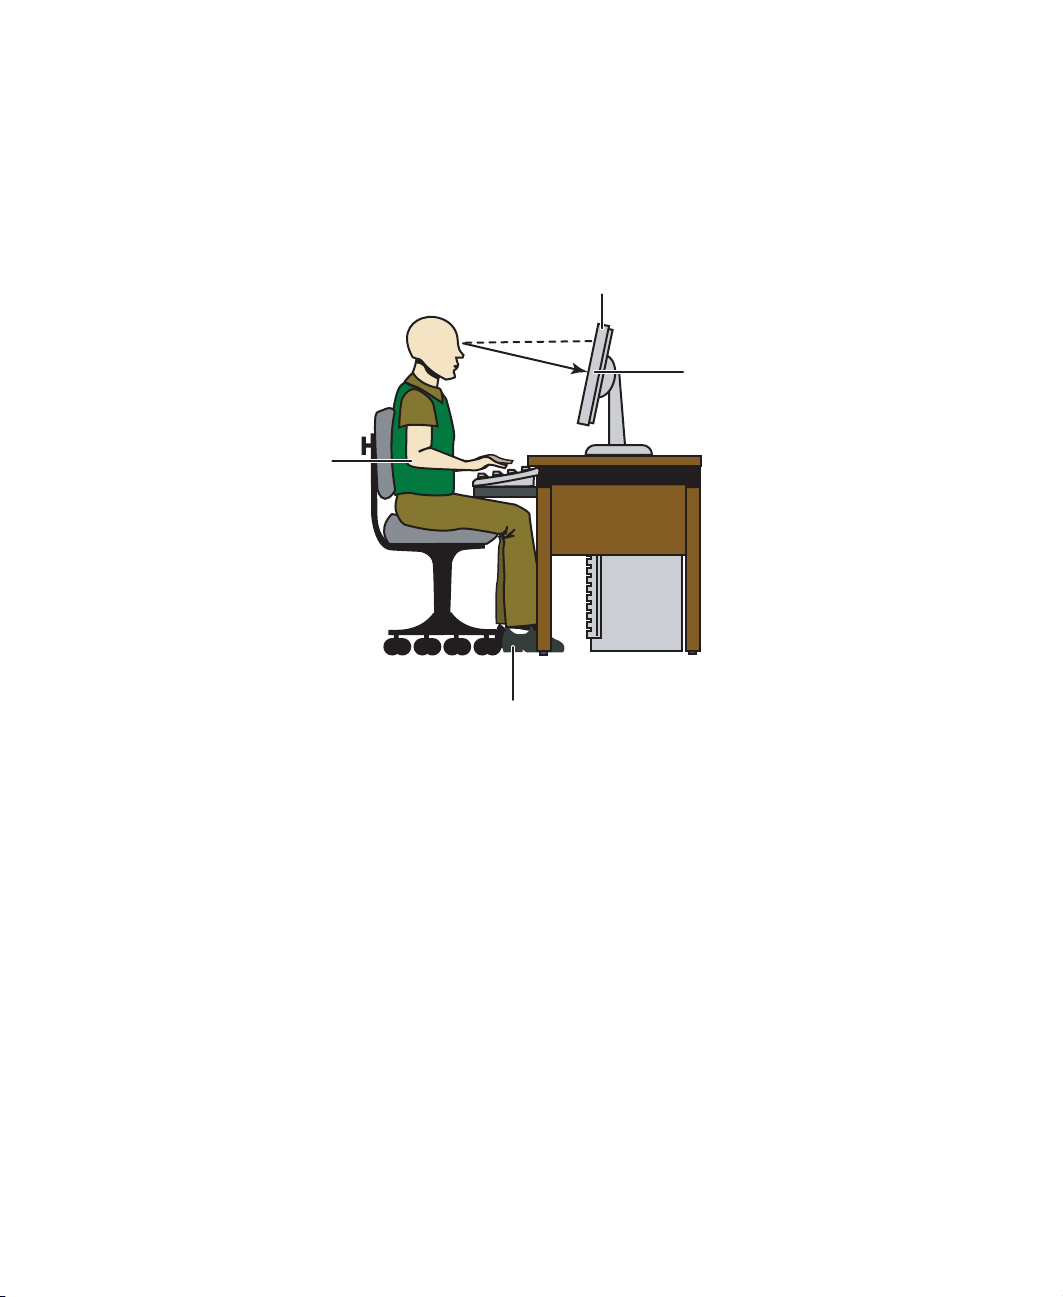
Top of display is not
Working safely
Before using your computer, read the following recommendations for setting
up a safe and comfortable work area and avoiding disco mfort and strain.
Hands and
arms are
parallel to the
floor
higher than eye level
Screen is
perpendicular to
your line of sight
Feet are flat on the floor
Reducing eye strain
Sunlight or bright indoor lighting should not reflect on the computer display
or shine directly into your eyes.
■ Position the computer desk and computer so you can avoid glare on your
computer display and light shining directly into your eyes. Reduce glare
by installing shades or curtains on windows, and by installing a glare screen
filter on your computer display.
■ Use soft, indirect lighting in your work area. Do not use your computer
in a dark room.
■ Avoid focusing your eyes on your computer display for long periods of
time. Look away from your display occasionally, and try to focus on distant
objects.
12
www.gateway.com

Setting up your compu ter desk and chair
When you are setting up your computer desk and chair, make sure that the
desk is the appropriate height and the chair helps you maintain good posture.
■ Select a flat surface for your computer desk.
■ Adjust the height of the computer desk so your hands and arms are
positioned parallel to the floor when you use the keyboard and mouse. If
the desk is not adjustable or is too tall, consider using a keyboard drawer.
■ Use an adjustable chair that is comfortable, distributes your weight evenly ,
and keeps your body relaxed.
■ Position your chair so the keyboard is at or sl ightly below the level of your
elbow. This position lets your shoulders relax while you type.
■ Adjust the chair height, adjust the forward tilt of the seat, or use a footrest
to distribute your weight evenly on the chair and relieve pressure on the
back of your thighs.
■ Adjust the back of the chair so it supports the lower cur ve of your spine.
You can use a pillow or cushion to provide extra back support.
Working safely
Setting up your computer and computer accessories
■ Set up your computer so the display is no higher than eye level, the display
controls are within reach, and the display is tilted to be perpendicular to
your line of sight.
■ Place your keybo ard and mou se at a comfort able di stance . You should be
able to reach them without stretching.
■ Set paper holders at the same height and distance as the computer display.
www.gateway.com
13

Chapter 2: Getting Started
Sitting at your computer
■ Avoid bending, arching, or angling your wrists. Make sure that they are
in a relaxed position when you type.
■ Do not slouch forward or lean far back. Sit with your back straight so your
knees, hips, and elbows form right angles when you work.
■ Take breaks to stand and stretch your legs.
■ Avoid twisting your torso or neck.
A voiding discomfort and injury from repetitive strain
■ Vary your activities to avoid excessive repetition.
■ T ake breaks to change your position, stretch your muscles, and relieve your
eyes.
■ Find ways to break up the work day, and schedule a variety of tasks.
14
www.gateway.com

Protecting from power source problems
Protecting from power source
problems
During a power surge, the voltage level of electricity coming into your computer
can increase to far above normal levels and cause data loss or system damage.
Protect your computer and peripheral devices by connecting them to a surge
protector, which absorbs voltage surges and prevents them from reaching your
computer.
Warning High voltages can enter your computer through both the
power cord and the modem connection. Protect your
computer by using a s urge prot ector. If you have a
telephone modem, use a surge protector that has a
modem jack. If you have a cable modem, use a surge
protector that has an antenna/cable TV jack. During an
electrical storm, unplug both the surge protector and the
modem.
An uninterruptible power supply (UPS) supplies battery power to your computer
during a power failure. Although you cannot run your computer for an
extended period of time with a UPS, a UPS lets you run your computer long
enough to save your work and shut down your computer normally. For more
information, see “Setting up an uninterruptible power supply” on page 136.
www.gateway.com
15
Chapter 2: Getting Started
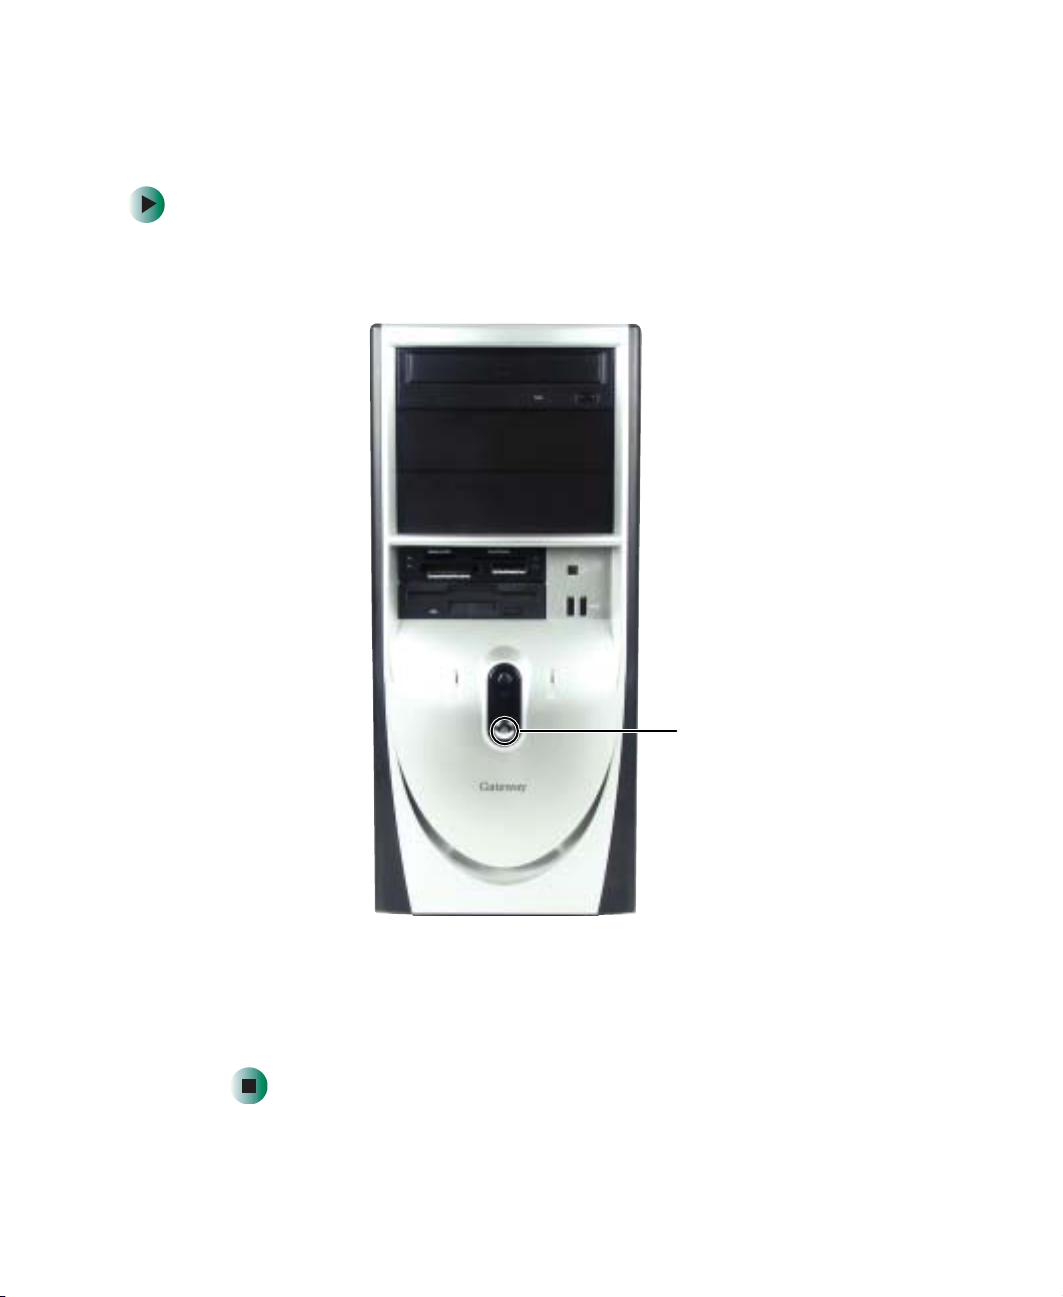
Starting your computer
To start your computer:
1 Connect the cables to your computer using the setup poster.
2 Press the power button on your computer.
16
Power button
3 If you are starting your computer for the first time, follow the on-screen
instructions to set up your computer.
4 Turn on any peripheral devices, such as printers or scanners, and see the
documentation that came with the device for setup instructions.
www.gateway.com

T urning off your computer
Tips & Tricks When you tur n off your co mputer, certai n compone nts in
the power supply and system board remain energized. In
order to remove all electrical power from your computer,
unplug the power cord and modem cable from the wall
outlets. We recom mend disc onnecting the power cord and
modem cable when your co mputer will not be used fo r long
periods.
To turn off your computer:
1 Click Start, then click Turn Off Computer. The Turn Off Computer dialog box
opens.
2 Click Tu r n O f f . Windows shuts down and turns off your computer.
Important If for some reason you cannot use the Turn Off Computer
option in Windows to turn off your computer, press and
hold the power button for about five seconds, then
release it.
Turning off your com puter
www.gateway.com
17

Chapter 2: Getting Started
Restarting (rebooting) your computer
If your computer does not respond to keyboard or mouse input, you may have
to close programs that are not responding. If clos ing unresponsive programs
does not restore your computer to normal operation, you may have to restart
(reboot) your computer.
To close unresponsive programs and restart your computer:
1 Press CTRL+ALT+DEL, then click Task Manager. The Ta sk Mana g e r window
opens.
2 Click the Applications tab, then click the program that is not responding.
3 Click End Task.
4 If your computer does not respond, turn it off, wait ten seconds and turn
it on again.
18
Important If your computer does not turn off, press and hold the
power button for about five seconds, then release it.
www.gateway.com
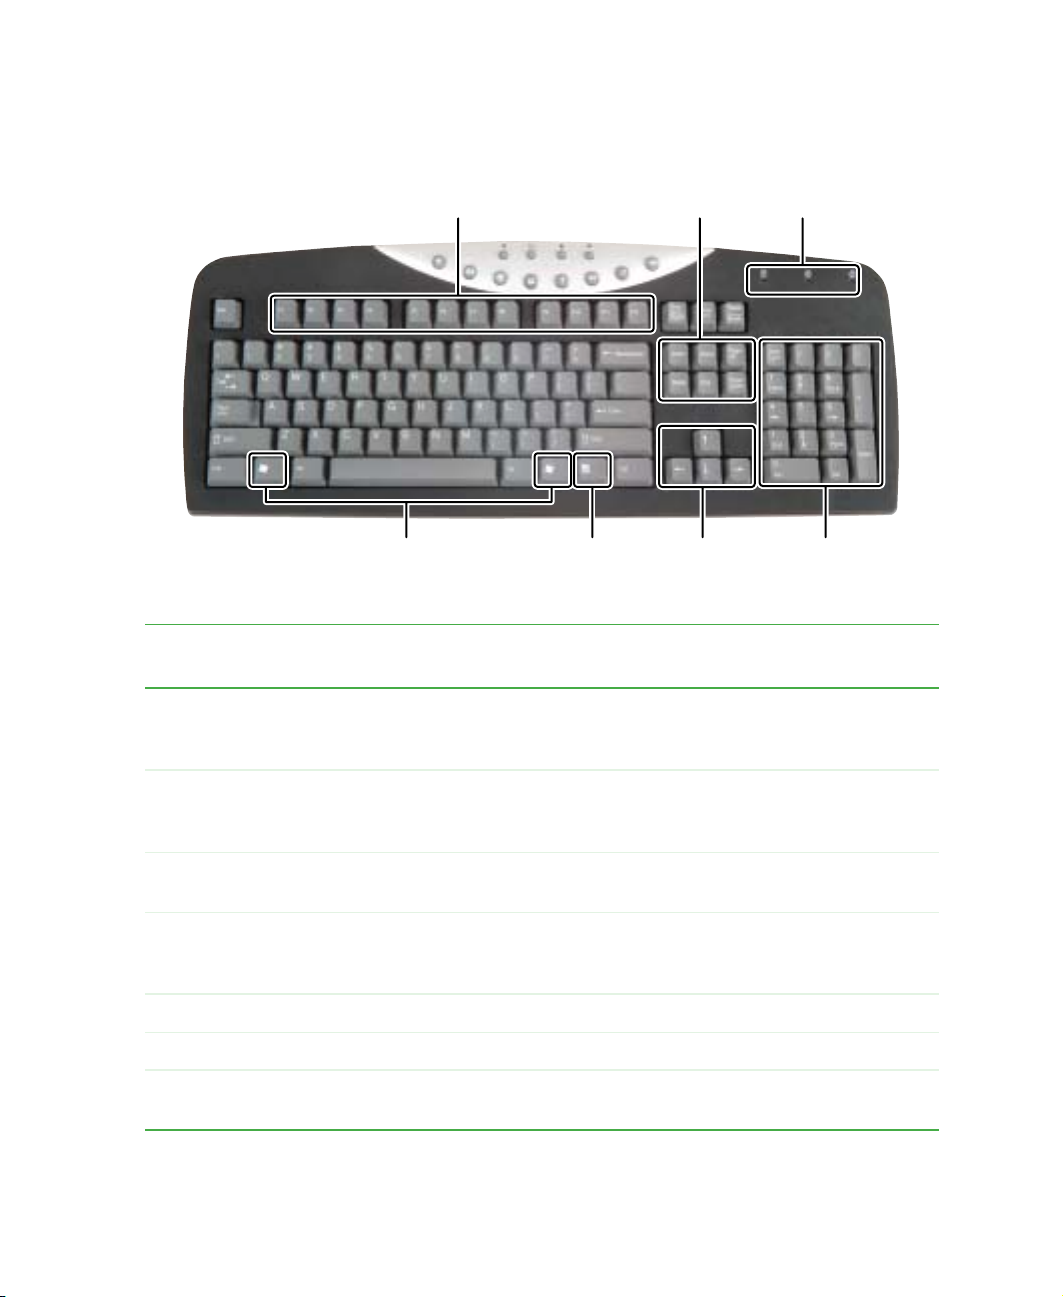
Multifunction keyboard
Function keys Navigation keys Indicators
Multifunction keyboa rd
Press these
Windows keys Application
key
To...
Directional
keys
Numeric
keypad
keys...
Function keys Start program actions. Each program uses different function keys for different
purposes. See the program documentation to find out more about the
function key actions.
Navigation keys Press these keys to move the cursor to the beginning of a line, to the end
of a line, up the page, down the page, to the beginning of a document, or
to the end of a document.
Indicators Show if your
Press the corresponding key to activate the function.
Windows keys Press this key to open the Windows Start menu. This key can also be used
in combination w it h o ther keys to open uti lities like
utility), and
Application key Access shortcut menus and help assistants in Windows.
Directional keys Move the cursor up, down, right, or left.
Numeric keypad Use these keys to type numbers when the numeric keypad (
turned on.
NUM LOCK, CAPS LOCK, or SCROLL LOCK keys are activated.
F (Search utility), R (Run
E (Explorer utility).
NUM LOCK) is
www.gateway.com
19

Chapter 2: Getting Started
Special-function buttons
Previous
Play/Pause
Volume down
Vol u me u p
Special-function buttons
Previous Return to the previous CD track or DVD chapter.
Play/Pause Start or pause the play of the CD or DVD.
Stop Stop the pla y of the C D or DVD.
Mute
My Documents
Icons Press to...
Stop
Help
Next
Search
InternetE-mail
Next Move to the next CD track or DVD chapter.
Volume down Decrease the volume.
Volume up Increase th e volume.
Mute Turn off all sound.
My D ocuments Open the My Docu ments fold er.
Help Open online help.
20
www.gateway.com

Multifunction keyboa rd
Special-function buttons
E-mail Open your e-mail program.
Search Open online search.
Internet Open your Web browser.
Icons Press to...
www.gateway.com
21
Chapter 2: Getting Started
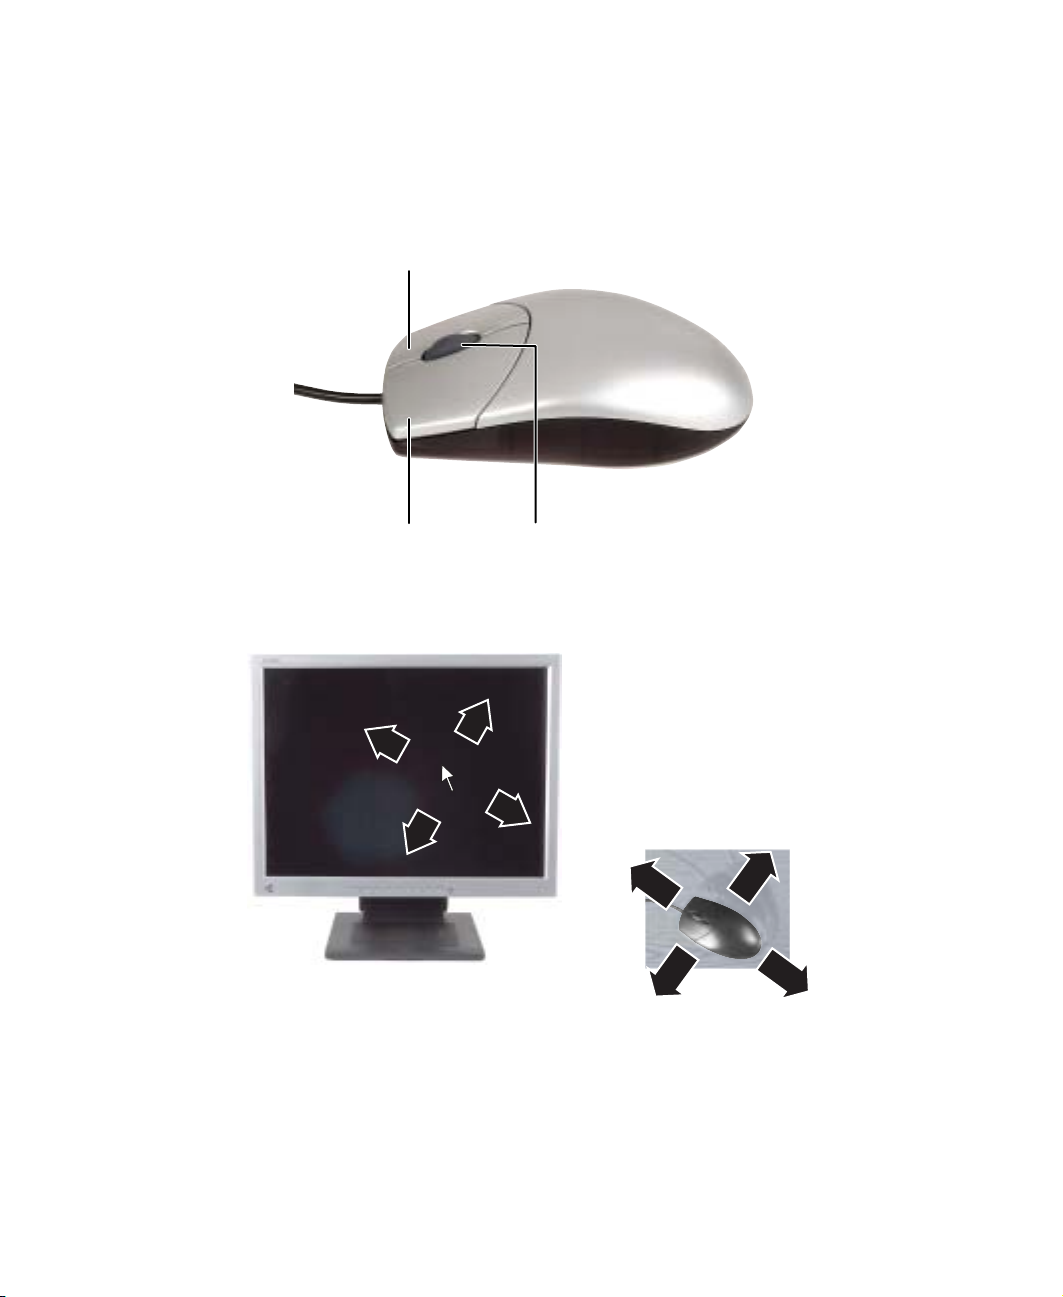
Right button
Mouse
The mouse is a device that controls the pointer movement on the computer
display. This illustration shows the standard mouse.
Left button
As you move the mouse, the pointer (arrow) on the display moves in the same
direction.
You can use the left and right buttons on the mouse to select objects on the
display.
Yo u can use the scroll wheel on the mouse to move through a document. This
feature is not available in all programs.
Scroll wheel
22
www.gateway.com
 Loading...