

Page 1

Page 2

TABLE OF CONTENTS
First Things First . . . . . . . . . . . . . . . . . . . . . . . . . . . . . . . . . . . . .3
The ReadMe File . . . . . . . . . . . . . . . . . . . . . . . . . . . . . . . . .3
System Requirements . . . . . . . . . . . . . . . . . . . . . . . . . . . . .3
Setup and Installation . . . . . . . . . . . . . . . . . . . . . . . . . . . . . . . . . .4
Saving and Loading . . . . . . . . . . . . . . . . . . . . . . . . . . . . . . . . . . .4
Welcome to Deer Hunter®2005 . . . . . . . . . . . . . . . . . . . . . . . . . .5
Main Menu . . . . . . . . . . . . . . . . . . . . . . . . . . . . . . . . . . . . . . . . . .5
Hunter Selection . . . . . . . . . . . . . . . . . . . . . . . . . . . . . . . . . . . . . .6
Choose Location . . . . . . . . . . . . . . . . . . . . . . . . . . . . . . . . . . . . . .7
Choose Gear . . . . . . . . . . . . . . . . . . . . . . . . . . . . . . . . . . . . . . . . .8
Game Rules . . . . . . . . . . . . . . . . . . . . . . . . . . . . . . . . . . . . . . . . . .9
Wildlife Mode . . . . . . . . . . . . . . . . . . . . . . . . . . . . . . . . . . . . . . .10
Settings . . . . . . . . . . . . . . . . . . . . . . . . . . . . . . . . . . . . . . . . . . . .11
Online Setup . . . . . . . . . . . . . . . . . . . . . . . . . . . . . . . . . . . . . . . .12
Controls . . . . . . . . . . . . . . . . . . . . . . . . . . . . . . . . . . . . . . . . . . . .15
Playing Deer Hunter 2005 . . . . . . . . . . . . . . . . . . . . . . . . . . . . . .17
Trophy Room . . . . . . . . . . . . . . . . . . . . . . . . . . . . . . . . . . . . . . .21
Play Movies . . . . . . . . . . . . . . . . . . . . . . . . . . . . . . . . . . . . . . . . .22
Wildlife Mode . . . . . . . . . . . . . . . . . . . . . . . . . . . . . . . . . . . . . . .22
Credits . . . . . . . . . . . . . . . . . . . . . . . . . . . . . . . . . . . . . . . . . . . . .23
Atari Web Sites . . . . . . . . . . . . . . . . . . . . . . . . . . . . . . . . . . . . . .25
Technical Support . . . . . . . . . . . . . . . . . . . . . . . . . . . . . . . . . . . .26
End-User License Agreement . . . . . . . . . . . . . . . . . . . . . . . . . .28
FIRST THINGS FIRST
The ReadMe File
The Deer Hunter 2005 CD-ROM game has a ReadMe file where you can view both the License
Agreement and updated information about the game. We strongly encourage you to read this
file in order to benefit from changes made after this manual went to print.
To view this file, double-click on it in the Deer Hunter 2005 directory found on your hard drive
(usually C:\Program Files\Atari\Deer Hunter 2005). You can also view the ReadMe file by first
clicking on the Start button on your Windows®taskbar, then on Programs, then on Atari, then
on Deer Hunter 2005, and then on the ReadMe file.
System Requirements
Operating System: Windows®98/Me/2000/XP
Processor: Pentium®III 700 or higher (Pentium®4 1.2 GHz recommended)
Memory: 128 MB RAM (256 MB RAM recommended)
Hard Disk Space: 200 MB Free (750 MB recommended)
CD-ROM Drive: 8X Speed or higher
Video: 32 MB graphics card (GeForce 256 DDR, ATI Radeon 32 MB); 64 MB
graphics card (GeForce 2 MX400, ATI Radeon 7200) recommended
Sound: DirectX®9.0-compatible sound card
DirectX®: DirectX®version 9.0 (included) or higher
Modem: 56 Kbps modem, DSL, Cable modems supported
* Indicates device should be compatible with DirectX®version 9.0 or higher.
2
3
Page 3

SETUP AND INSTALLATION
1. Start Windows®98/Me/2000/XP.
2. Insert the Deer Hunter 2005 CD-ROM game disc into your CD-ROM drive.
3. If AutoPlay is enabled, a title screen should appear. If AutoPlay is not enabled, or the
installation does not start automatically, click on the Start button on your Windows®taskbar,
then on Run. Type D:\Setup and click on OK. Note: If your CD-ROM drive is assigned to a
letter other than D, substitute that letter.
4. Follow the remainder of the on-screen instructions to finish installing the Deer Hunter 2005
CD-ROM game.
5. Once installation is complete, click on the Start button on the Windows®taskbar and choose
Programs/Atari/Deer Hunter 2005/Deer Hunter 2005 to start the game.
Note: You must have the Deer Hunter 2005 game disc in your CD-ROM drive to play.
Installation of DirectX
The Deer Hunter 2005 CD-ROM requires DirectX®9.0 or higher in order to run. If you do not
have DirectX®9.0 or higher installed on your computer, click “Ye s ” to accept the DirectX®9.0
License Agreement. This will then launch the DirectX®9.0 Install.
®
SAVING AND LOADING
The game automatically saves your hunter’s progress after the completion of each hunt (except
for LAN or Internet games). To load a saved hunter, click on the HUNTER button on the Main
Menu. Click on the up / down arrow buttons to select a hunter, and then click on the HUNT
button to resume playing the game.
®
WELCOME TO DEER HUNTER
Put your skills and experience to the test! Customize your rifles to bring down prize game.
Scout five realistic species of deer in highly detailed natural habitats. Travel the globe to
hunt Axis Deer and European Roe Deer. It’s as close to real hunting action as you can get
on your PC.
2005
MAIN MENU
Hunter Selection Quit
Choose Location Credits
Gear Settings
Rules Extras
Online Movie
Trophy Hunt
The Main Menu is the starting point for all of the Deer Hunter 2005 action. Click on one of the
following buttons to begin:
Hunter Selection: Create and customize a new hunter or select an existing hunter (see next page).
Choose Location: Pick a hunting location (see page 7).
Choose Hunting Gear: Outfit your hunter with weapons, gear, vehicles and more (see page 8).
Game Rules: Adjust single-player gameplay rules and multiplayer gameplay rules (see page 9).
Online: Play a multiplayer game over a LAN (Local Area Network) or via the Internet (see page 12).
Trophy Room: Check out your hunter’s top trophy kills and trophy case (see page 21).
Movie: Watch replays of your hunting trips (see page 22).
4
5
Page 4
Extras: Sit back and observe animal behavior up close in Wildlife mode (see page 10).
Settings: Adjust controls, video and audio settings (see page 11).
Credits: Display a list of the people who created Deer Hunter 2005.
Quit: Exit the game and return to the Windows®desktop.
Hunt: Click on the HUNT button to start playing the game.
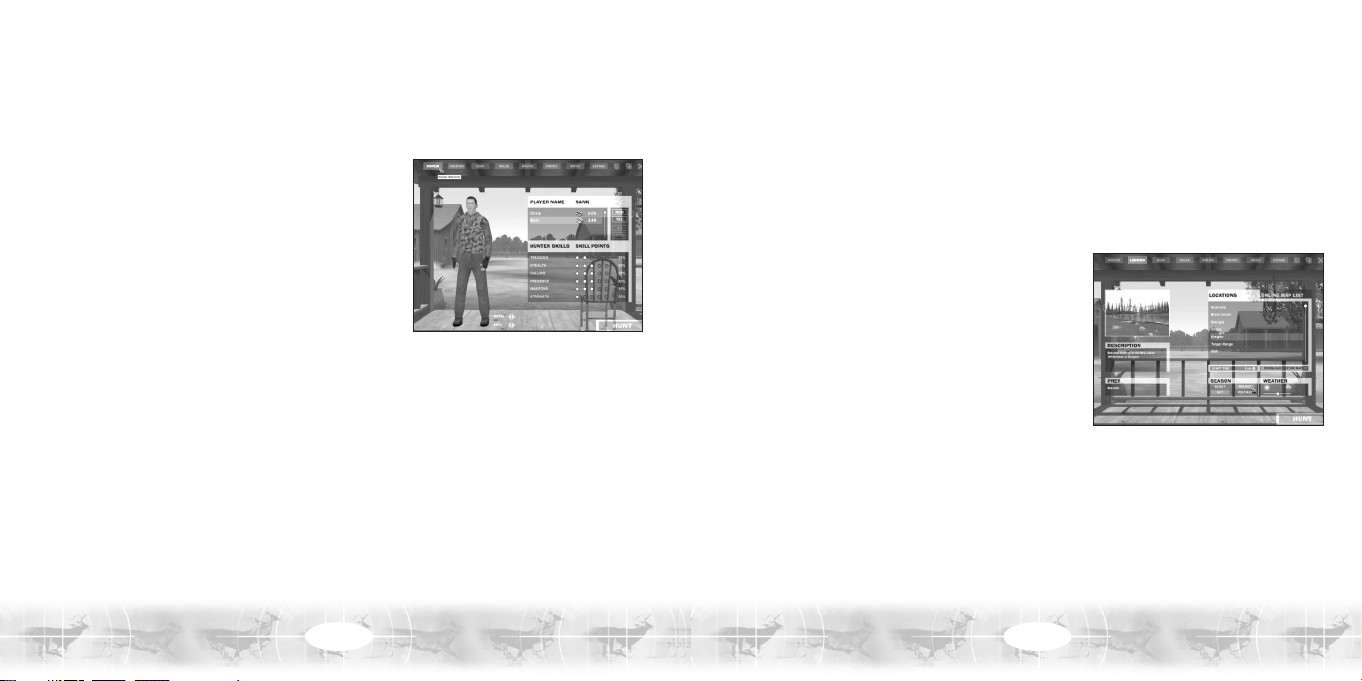
HUNTER SELECTION
Player Name
Click on the NEW button to create a new hunter, or
click on the up / down arrow buttons to highlight an
existing hunter. To edit your hunter’s name, just doubleclick on the name field and then type in the new name.
Hunting Skills
New hunters begin with a pool of 15 skill points.
Distribute your skill points by clicking on the circles
located to the right of each of the following categories:
Tracking: Ability to follow an animal that has already been identified. As this skill improves, the
hunter sees more tracks and blood.
Stealth: Ability to create less noise and remain less visible.
Calling: Ability to attract animals with calls, particularly larger animals. Also reduces the
hunter’s chances of “blowing” a call.
Presence: Enhances the hunter’s ability to discover signs of animals and distinguish animal
sounds from ambient sounds. A higher Presence level increases the hunter’s ability to accurately
estimate an animal’s size when using a scope.
Weapons: Improves preparation time, reload time, weapon stability and recovery after shooting.
Strength: Enables the hunter to run faster, rapidly change positions, rapidly mount stands and
tripods, and better handle certain weapons that require more force, such as bows, handguns, and
high-caliber rifles.
Model
Click on the left / right arrow buttons to see more body types for your hunter.
Skin
Click on the left / right arrow buttons to see more camouflage and clothing options.
Deleting a Hunter
Click on the DEL button to delete a hunter. Note: This will erase the currently selected hunter
and all of his or her skill points and trophies, so be sure you really want to delete a hunter
before you use this option.
CHOOSE LOCATION
Available Locations
There are six hunting locations in the game and a target
range for honing your marksmanship. Choose one of the
following options: Australia, Black Forest, Georgia,
Illinois, Oregon, Target Range or Utah.
Start Time
Choose a start time (in one-hour increments) between 6
a.m. and 5 p.m. Night hunting is not permitted.
Season
Scout Mode (pre-season): Scout out a hunting location in advance, without weapons. In Scouting
mode, the hunter is permitted to set up equipment including blinds, stands and feeders.
Concealments placed in Scouting mode are more effective than those set up during a hunt.
Pre-rut (early fall): Deer can be found together in groups, seeking out mates. Male behavior
turns aggressive — mature bucks attempt to drive away weaker yearlings. Does spend most
waking hours feeding.
Rut (middle / late fall): Deer abandon their groups. Male behavior turns violent during the rut
— while tending to their mates, the big bucks stand their ground and engage in frequent clashes.
6
7
Page 5
Post-rut (early winter): Deer rejoin their groups and spend their time eating and storing fat for
the coming winter months. During the post-rut, laying food can be an effective technique.
Download Custom Maps
Select this option to exit the game and open a web page containing custom maps for download.
Atari does not control, and disclaims any responsibility or liability for, the functioning and performance
of third-party web sites and any content on or available through third-party web sites.
Weather
Weather conditions may affect how often you encounter animals in the open. For example,
unsettled weather may cause animals to seek shelter. Use the slider to adjust weather conditions.
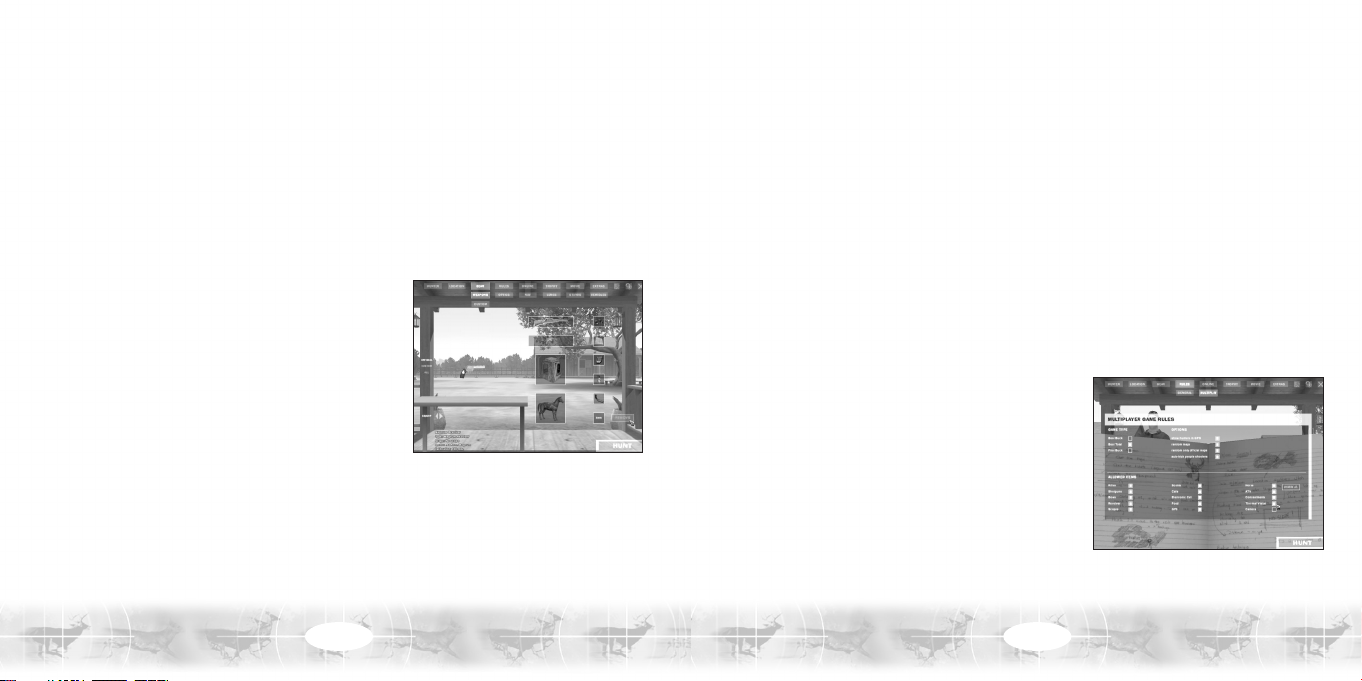
CHOOSE GEAR
To gear up, open one of the equipment sub-menus by
clicking on the corresponding button. Click on the
EQUIP button to put a piece of equipment in your
hunter’s inventory, or click on the left / right arrow
buttons to see more options. To delete an item from
your hunter’s inventory, highlight that item and then
click on the REMOVE button. You can sort available gear
by clicking on the OFFICIAL, CUSTOM (if you have
any) and ALL buttons.
Weapons
Select one or two sporting arms.
Weapon Customization Tutorial
In Deer Hunter 2005, you can create custom sporting arms. Customization includes complete
control over weapon appearance, chambering, calibration, and more.
To access the Deer Hunter 2005 Weapon Customization Tutorial, first click on the Start button on
your Windows®taskbar, then on Programs, then on Atari, then on Deer Hunter 2005, and then
on Weapon Customization Tutorial.
Optics
Outfit your hunter with thermal goggles, binoculars, a motion-sensing video camera, and more.
Navigation
Choose one (or both) of the available navigational tools.
Lures
Pack as many of the attractants as you want, provided there’s enough room.
Stands
You may want to equip one of the available concealment pieces.
Vehicles
Select up to two vehicles. Use the left / right arrow buttons to change the vehicle Skin (appearance).
GAME RULES
General Rules
Scale Time: Scale the game time to real-world time.
Choose one real minute = 10 game minutes, one real
minute = 20 game minutes, etc.
Difficulty: Set the game difficulty level here. Pick one of
the following options:
• Easy: Animals are less aware of human presence and
they frequently react to attractants. The hunter will bag average-scoring animals most of
the time.
8
9
Page 6

• Normal: Animal sensitivity and reaction matches real-world behavior. The hunter can bag
“Record Book” animals.
• Expert: Animals are highly aware of human presence and don’t frequently react to
attractants. The hunter will have the chance to bag “World Record” animals.
Multiplayer Rules
Game Type: Choose one of the following victory conditions for hosted LAN / Internet games:
• Best Buck: The hunter with the highest point score for a single buck wins.
• Best Total: The hunter with the highest overall score wins.
• First Buck: The first hunter to bag a buck wins.
Options: Set the following gameplay options for hosted LAN / Internet games:
• Show Hunters in GPS: Mark individual hunters on the GPS screen.
• Random Maps: Choose the multiplayer hunting location at random. Includes custom
downloaded maps.
• Random Only Official Map: Choose the multiplayer hunting location at random. Includes
only maps that come with the game.
• Auto-kick People Shooters: Automatically boot irresponsible players from the game.
Allowed Items: Specify the hunting gear and equipment permitted in games hosted on
your server.
WILDLIFE MODE
Click on the EXTRAS button on the Main Menu and then on the WILDLIFE button to activate
Wildlife mode. Wildlife mode enables you to observe all of the animals that are present on the
current map. You are unable to hunt while in Wildlife mode, but you can cycle through each of
the animals to learn about their behavior and movements. Control the camera by using the
rotation, zoom, and pan buttons on the bottom of the screen, or activate Automatic Camera if
you want the game to do the work for you. To exit Wildlife mode, press the Esc key to display
the Confirmation Menu, and then click on the STOP WILDLIFE button.
SETTINGS
Controls
To change a keyboard control, double-click on it and
then type in the new key. To restore the default keyboard
controls layout, click on the DEFAULT button.
You can also change or adjust the following settings:
Use Mouse: Turn mouse control ON / OFF.
Invert Mouse: Turn inverted mouse controls ON / OFF.
Mouse Speed: Use the slider to increase or decrease mouse sensitivity.
Vehicle Free Look: Turn independent control of hunter view and vehicle direction ON / OFF.
Hunt Intro: Turn the intro sequence ON / OFF.
Bullet Cam: Turn bullet view (when a kill occurs) ON / OFF. Note: Bullet view is available in
single-player mode only.
Video
There are four preset video levels: Low, Medium, High and Ultra. You can also change any of
the video settings individually. Click on the APPLY button when you’re finished.
Audio
There are four preset audio levels: Low, Medium, High and Ultra. You can change any of the
audio settings individually. Click on the APPLY button when you’re finished.
10
11
Page 7

ONLINE SETUP
Join Game
Click on the JOIN button on the Main Menu to compete against other players over a LAN or via
the Internet.
Server List Window
There are three options for locating a server (host).
• To search for a LAN server, click on the LOCAL button.
• To search for an Internet server, click on the
INTERNET button.
• To specify the IP address of a known server (can be
LAN or Internet), click on the GIVEN IP button.
A list of servers will appear on the screen. Select the
server you want to join, and then click on the CONNECT
button. Note: Additional players can join a game already in progress.
Chat Window
Once connected to a server, you will have the opportunity to chat with other players before and
during the game.
When the game is about to begin, the HUNT ONLINE button will illuminate.
• To begin hunting, click on the HUNT ONLINE button.
Voting Options
• During a game, press the Esc key to display voting options.
Chat Messages: Atari does not monitor, control, endorse, or accept responsibility for the content of chat
messages. You are strongly encouraged not to give out identity or other personal information through
chat message transmissions. Kids, check with your parent or guardian if you are concerned about any
chat you receive.
Host a Game
Click on the HOST button on the Main Menu to host an online multiplayer game.
Launch Server
There are two options for hosting an online game:
• To host a LAN game, uncheck the Publish in GameSpy
box, and then click on the OPEN SERVER button.
• To host an Internet game, check the Publish in GameSpy
box, and then click on the OPEN SERVER button.
Note: The maximum number of online players is 16.
Start Game
When you’re ready to start the game, click on the HUNT ONLINE button.
GameSpy Deer Hunter 2005 Game
GameSpy Arcade is a free online player-matching service. Use it to set up Multiplayer games
over the Internet with your friends and anybody else who is searching for an opponent.
Compete in an online Tournament against players near and far.
GameSpy Arcade is an independent gaming service run by GameSpy. Atari does not control, and disclaims
any responsibility or liability for, the functioning and performance of GameSpy Arcade and any content on or
available through GameSpy Arcade.
Children under the age of 13 should check with their parents or guardian before registering.
GameSpy Arcade System Requirements
• GameSpy Arcade: Version 1.1 (included) or higher
• Internet Connection: 14.4 Kbps or higher
• Internet Service Provider (ISP)
Note: All firewall protection needs to be disabled for this Internet feature to function properly.
12
13
Page 8

GameSpy Arcade Installation
To install GameSpy Arcade:
1. Close all running programs.
2. Insert the Deer Hunter 2005 game disc into the CD-ROM drive.
3. When the AutoPlay screen appears, click Play.
4. Follow the on-screen instructions.
5. After the game is installed, you are prompted to install GameSpy Arcade.
6. Follow the on-screen installation instructions.
7. GameSpy Arcade automatically launches after it is installed.
8. When GameSpy Arcade is launched, it locates the Deer Hunter 2005 game on your system.
9. Register your information and log in into GameSpy Arcade.
10. Find the Deer Hunter 2005 game under My Games. If you don’t see it, scan for games in the
file menu.
Launch GameSpy Arcade and Go to the Deer Hunter 2005 Game Room: Click on the
GameSpy Arcade link in your Start menu. When the software starts, you’ll see a list of games
and more along the left-hand side. Click on the Deer Hunter 2005 game button on the left to
enter the Deer Hunter 2005 game room.
Find or Start a Deer Hunter 2005 Game Server: Once you’re in the Deer Hunter 2005 game
room you can meet or greet other players, find servers or create your own server. The top half
of the application lists all of the available servers, including the number of people playing and
your connection speed (measured by “ping” — the lower your ping, the better). Don’t like any
servers? Click on the “Create Room” button to start your own server and wait for people to sign
up. (A clever server name usually attracts people.) Otherwise, double-click on a server of your
choice to join in.
Joining and Starting a Game: Once you double-click on a server or start your own, you’ll be in
a staging room, in which you can talk with your fellow players. When you’re ready to play, click
the “Ready” button at the top of the screen. When everyone in the room has signaled their
readiness, the host can then launch the game. GameSpy Arcade fires up the Deer Hunter 2005
game and the fun begins!
Problems? If you have problems using GameSpy Arcade, whether installing the program,
registering it, or using it in conjunction with the Deer Hunter 2005 game, consult our help pages,
located at:
http://www.gamespyarcade.com/support or e-mail us by using the form located at
http://support.gamespyarcade.com/support/contact.shtml.
Atari does not control, and disclaims any responsibility or liability for, the functioning and performance of
third-party web sites and any content on or available through third-party web sites.
CONTROLS
Movement
ACTION PRIMARY KEYBOARD CONTROL ALTERNATE KEYBOARD CONTROL
Movement / Look around Mouse —
Move forward W Up arrow
Move backward S Down arrow
Move left A Left arrow
Move right D Right arrow
Look up — PgUp
Look down — PgDown
Look left — Left arrow
Look right — Right arrow
Toggle crouch / Prone position X End
Stand up C Home
Toggle walk / Run mode Left-Shift Right-Shift
14
15
Page 9

Use Weapon / Item
ACTION PRIMARY CONTROL ALTERNATE CONTROL
Activate scope view Left mouse button —
Shoot weapon
(in scope view) / Use item Left mouse button Left-Ctrl
Exit scope view Right mouse button —
Reload weapon R Insert
Perform action / Enter
vehicle / Exit vehicle O Enter
Gesture G —
Display inventory Right mouse button Spacebar
Select item Number keys 1-9 —
Select next item Tab >
Select previous item Caps Lock <
Additional Controls
ACTION PRIMARY CONTROL ALTERNATE CONTROL
Pause Menu Esc —
Toggle HUD F9 —
Show FPS F8 —
Zoom scope in [ = ] M
Zoom scope out [ - ] N
Record movie F5 —
Take screenshot F10 —
Change camera V —
View score and point total (Multiplayer only) F1 —
(Multiplayer only)
Send message T —
PLAYING DEER HUNTER 2005
Bag Limit
Your bag limit for each hunt is two bucks and one fawn or doe.
Hunter Rating
• Playing the game on a harder difficulty level (Normal or Expert) improves your hunter rating
• Using challenging and exotic weapons (bows, crossbows, shotguns, pistols and muzzleloaders)
improves your hunter rating
• Only bucks count toward your hunter rating
• Infractions and shot animals that aren’t bagged count against your hunter rating
Infractions
The following actions will zero out your bag count for the current hunt:
• Shooting a rare bird
• Shooting over water
• Exceeding the bag limit
Multiday Hunts
At the end of the day, you have the option to camp out and continue your hunt the following
morning. You may camp out up as many times as you choose, but you keep the same bag limit.
Note: Multiday hunts are available in single-player mode only.
16
17
Page 10

Normal View HUD
Heading Windsock
Hunter position Vehicle
Ammo Active weapon
Time
Scope View HUD
Crosshairs Rangefinder
(if in use)
Ammo Active weapon / Item
In normal view, the following appear in your HUD (Heads-Up Display):
Heading: Direction you are facing.
Windsock: Wind direction.
Time: Current time in the game.
Concealment / Vehicle: Appears when you are using (or near enough to use) a concealment
or a vehicle.
Active weapon / Item: Currently selected weapon or item.
Ammo: How much ammo you have in your weapon.
Hunter position: Stance (standing / crouching / prone). Note: An arrow icon appears on this
indicator when you are running.
18
In scope view, the following appear in your HUD:
Crosshairs: Use the crosshairs to center your weapon on the target.
Rangefinder: When using the range–finding riflescope, the distance to the target appears here.
Active weapon / Item: Currently selected weapon or item.
Ammo: How much ammo you have in your weapon.
19
Page 11

Inventory
Bag limit icons
Recording Movies
You can record in-game movies. Press the F5 key to begin recording; when you want to stop
recording, press the F5 key again. At the prompt, enter a movie name, and then click on the
SAVE button to save your movie.
Inventory item slots
Bag limit icons: As you bag legal game animals, green check marks appear over the grayed-out
bag limit icons. If you have committed infractions, red X’s appear over the icons.
Inventory item slots: Your inventory has nine numbered slots. To select a weapon or item, simply
press the corresponding number key (1-9); you can also toggle through the inventory slots by
pressing the Tab key for the previous slot, and the Caps Lock key for the next slot.
Using Equipment
Weapons
You must be in scope view before you can fire your weapon. To activate scope view, left-click.
When you’ve got the target sighted, left-click again to shoot. Exit scope view by right-clicking.
Items
To use a piece of equipment such as a scent or a call, first select it and then left-click. When
you’re finished, left-click again to put away the item.
Setting Up the Tree Stand, Blind or Tripod
To set up a concealment, first select it and then left-click. Once assembled, press the 0 key or the
Enter key to enter or exit the concealment.
20
Pause Menu
Press the Esc key during a game to display the Pause Menu.
Quit Hunt: End your current hunt and return to the Main Menu. Note: When you quit a hunt
before reaching the bag limit, your progress in that hunt is not saved.
Settings: Adjust controls, video or audio settings (see “Settings” on page 11). When finished,
click on the HUNT button.
Quit to Windows®: Exit the game and return to the Windows®desktop.
Cancel: Continue hunting.
TROPHY ROOM
To view all of the current hunter’s whitetail trophies,
blacktail trophies, mule deer trophies and more, click on
the TROPHY button on the Main Menu.
Hunters who play the game on Normal difficulty level or
Expert difficulty level (see page 10) will have a chance of
bagging Record Book animals. The top-scoring Record
Book deer for each species will display in the Trophy
Room as a World Record.
To view more animals, click on the up / down arrow buttons. To delete the currently displayed
animal, click on the DELETE button.
21
Page 12

Trophy Case
To view all of the current hunter’s special trophies, click on the TROPHY CASE button on the
Main Menu.
Export Trophy
Click on the EXPORT button to export your trophy to the Trophy Viewer utility that comes
with the Deer Hunter 2005 game.
PLAY MOVIES
When you click on the MOVIE button on the Main Menu, a list of recorded game movies
(if you have any) appears on screen. Select a movie and click on the PLAY button to view it.
To delete a movie, click on the DELETE button.
CREDITS
Atari
Constantine Hantzopoulos
Senior Producer
Tara Greco
Brand Manager
Hudson Piehl
Executive Producer
Paul Hellier
Director of Technology
Tom Nichols
Director of Marketing
Steve Martin
Director of Creative Services
Liz Mackney
Director of Editorial &
Documentation Services
Charles Rizzo
Art Director
Roderick Tilley
Graphic Designer
Ross Edmond
Documentation Specialist
Paul Collin
Copywriter
Michael Gilmartin
Director of Publishing Support
Bill Carroll
Q.A. Manager
Ken Ford
I.T. Manager/Western Region
Michael Vetsch
Manager of Technical Support
Chuck Nunez
Q.A. Testing Supervisor
Daniyel Garcia
Lead Tester
Chris Morales
Henry Yei
Assistant Lead Testers
Raquel Botti
Bryce Ericson
Aaron Ichiyasu
Chad Neel
Mark Nonato
Carl Vogel
Sean Winck
Testers
Ken Moodie
Betatest Administrator
Dave Strang
Manager, Engineering Services and
Compatibility Lab
Ken Edwards
Engineering Services Specialist
Dan Burkhead
Eugene Lai
Engineering Services Technicians
Chris McQuinn
Senior Compatibility Analyst
Scottie Kramer
Compatibility Test Lead
Randy Buchholz
Patricia-Jean Cody
Mark Florentino
Scotte Kramer
Cuong Vu
Compatibility Analysts
Jon Nelson
Director, Global Web Services
Scott Lynch
Producer, Online
Gerald “Monkey” Burns
Senior Programmer, Online
Richard Leighton
Senior Web Designer, Online
Sarah Horton
Online Marketing Manager
Todd Curtis
Vice President, Operations
Eddie Pritchard
Director of Manufacturing
Lisa Leon
Lead Senior Buyer
Gardnor Wong
Senior Buyer
Tara Moretti
Buyer
Janet Sieler
Materials Planner
Nichole Mackey
Process Planner
22
23
Page 13

Southlogic Studios
Modeling and Animation Team
Ricardo Coimbra da Rocha
Lead Artist
Cláudio Marzo da Silva
Felipe Pulcinelli da Jornada
Henrique Schlatter Manfroi
Luiz Henrique Lopes Pellizzari
Ricardo Coimbra da Rocha
3D Character and Item Modeling
and Animation
Felipe Pulcinelli da Jornada
Splash Screen
Henrique Schlatter Manfroi
Weapon Customization Tutorial
Design Team
Adriano Ledur
Lead Architect
Fernando Peña D'Andrea
Nereu Bavaresco Felzke
Juliano Salazar Rocha
Adriano Ledur
Maurício Bammann Gehling
3D Organic and Mechanical
Modeling and Level Layout
Adriano Ledur
Interface Design
Application Programming Team
Rafael Horbach
Lead Programmer
Rafael Horbach
Luiz Henrique Pereira da Silva Gama
Christian Lykawk
Application Programming
Engine and Tools Team
Gustavo Goedert
Lead Programmer
Gustavo Goedert
Rafael Piccin Torchelsen
Christian Lykawka
Engine Programming
Paulo Zaffari
Gustavo Goedert
Christian Lykawka
Tools Programming
Project Management
Christopher Kastensmidt
Adriano Ledur
Lead Designer
Christopher Kastensmidt
Producer (Southlogic)
Corporate Management
Adriano Ledur
Creative Director
Ricardo Rocha
Art Director
Christian Lykawka
President
Gustavo Goedert
Technical Director
Christopher Kastensmidt
Commercial Director
Marília Mota
Administrative Assistant
Dan Lee Rogers
President, Biz-Dev. Inc
Business Development
Other Contributors
Ragdoll physics system
Tokamak Game Physics SDK
www.tokamakphysics.com
Music
Glauco Alves - solo guitar
Luciano Albo - rhythm guitar and bass
Alexandre “Papel” Loureiro - drums
Luis Henrique “Tc hê” Gomes solo guitar
All music written and produced
by Luciano Albo 2004
Sounds Licensed From
Jones Calls (www.jonescalls.com)
Sounddogs.com
Soundrangers.com
Shockwave-Sound.com
Other Technologies
Mark Adler
Jean-loup Gailly
zLib Compression Library
Jordan Russell
Martijn Laan
Inno Setup & My Inno Setup
Extensions
Technical Partners
Matthias Wloka
NVidia
Agnes So
ATI
Joost Schuur
Orlando Rojas
Tom Hitchcock
Bill Dewey
GameSpy
ATARI WEB SITES
To get the most out of your new game, visit us at:
atari.com/us
atari.com/deerhunter
If you would like to chat with other gamers, as well as developers, visit our Community
Forum area at:
ataricommunity.com
Kids, check with your parent or guardian before visiting any web site.
Chat Messages: Atari does not monitor, control, endorse, or accept responsibility for the content of chat
messages. You are strongly encouraged not to give out identity or other personal information through
chat message transmissions. Kids, check with your parent or guardian if you are concerned about any
chat you receive.
Use of Atari web sites is subject to terms and conditions, which you can access at:
atari.com/us/tos
TECHNICAL SUPPORT (U.S. & CANADA)
Help Via the Internet
Up-to-the-minute technical information about Atari products is generally available 24 hours a
day, 7 days a week via the Internet at:
http://www.atarisupport.com
Through this site you’ll have access to our FAQ (Frequently Asked Questions) documents, our
FTP (File Transfer Protocol) area where you can download patches if needed, our Hints/Cheat
Codes if they’re available, and an E-Mail area where you can get help and ask questions if you
do not find your answers within the FAQ .
24
25
Page 14

Note: In the event we must send you a Hint Sheet, FAQ document, patch or update disc via
E-mail, we may require verifiable consent from a parent or guardian in order to protect
children’s privacy and safety online. Consent Forms are available at the web site listed above.
Help Via Tele
For phone assistance, call Atari Technical Support at (425) 951-7108. Our Interactive Voice
Response system is generally available 24/7, providing automated support solutions immediately.
Great News! We’ve improved our Automated Systems so that you can get product-specific
Troubleshooting help more quickly. All you need to do is enter the product’s Part # when
prompted to do so. This will take you directly to all of our known issues and solutions for this
title. The product’s Part # is located in several places (on the CD label, package and/or plastic
disc case) and is usually identified by a number such as 04-12345. When prompted by the
Automated System, enter the last five digits of your product’s Part #. (For example,
Part # 04-12345 would require that you enter the “12345” portion of the number for that
product.) Note: Some products simply feature a five-digit Part # without an “04-” prefix.
Live support is generally available Monday through Friday, 8:00 AM until 6:00 PM (Pacific
Time). Note: We may be closed on major holidays.
Before making your call, we ask that you be at your computer, have the following information
available, and be ready to take notes:
• System Make and Model
• Processor Type
• Operating System, including version number if possible
(such as Windows®98; Windows®Me)
• RAM (Memory)
• Video and sound card data and drivers
• Any screen or error messages you’ve encountered (and where)
phone in the United States & Canada
Product Return Procedures in the United States & Canada
In the event our technicians at (425) 951-7108 determine that you need to forward materials
directly to us, please include a brief letter explaining what is enclosed and why. Make sure you
include the Return Merchandise Authorization Number (RMA#) supplied to you by the technician, and your telephone number in case we need to call you. You will receive the mailing
address when the technician gives you the RMA#. Any materials not containing this RMA# will
be returned to you unprocessed.
Warranty Policy in the United States & Canada
If our technicians determine that the product storage medium is found to be defective within
ninety (90) days of original purchase, (unless otherwise provided by applicable law), Atari will
replace the item free of charge, to the original purchaser, if
original dated receipt and packaging.
© 2004 Atari Interactive, Inc. All Rights Reserved. © 2004 Southlogic Studios, represented exclusively by BizDev. Inc.
All Rights Reserved. All trademarks are the property of their respective owners.
Windows and DirectX are either registered trademarks or trademarks of Microsoft Corporation
in the United States and/or other countries.
Pentium is a trademark or registered trademark of Intel Corporation or its subsidiaries
in the United States and other countries.
This product contains software technology licensed from GameSpy Industries, Inc.
© 1999-2004 GameSpy Industries, Inc. All rights reserved.
Ogg Vorbis Technology © 2004, Xiph.Org Foundation
08184
the item is accompanied by the
26
27
Page 15

END-USER LICENSE AGREEMENT
IMPORTANT — READ CAREFULLY: Please be sure to carefully read and understand all of the rights and restrictions
described in this End-User License Agreement (“EULA”).
AGREEMENT
This document is an agreement between you and Atari, Inc. and its affiliated companies (“Company”). The enclosed software
game disc(s), cartridge or Game Pak (“Software”) and any accompanying printed materials are licensed to you only on the
condition that you accept all of the terms contained in this EULA.
By opening this package and installing or otherwise using the Software you agree to be bound by the terms of this EULA. If
you do not agree to the terms of this EULA you may not install or use the Software and within 15 days of purchase you must
call the Tech Support telephone number listed in the manual accompanying the Software (the “Manual”). Select the
Automated Phone System’s Main Menu option for Consumer Services and follow the prompts.
You will be given a Return Merchandise Authorization number (RMA #) by the technician. You then have 15 days from the
date of this contact to return the Software in its protective covering, the Manual and the original sales invoice to the address
supplied to you.
If this is a PC product, when you install the Software you will be asked to review and either accept or not accept the terms of
the EULA by clicking the “I Accept” button. By clicking the “I Accept” button you acknowledge that you have read the EULA,
understand it and agree to be bound by its terms and conditions.
COPYRIGHT
The Software is protected by copyright laws and international copyright treaties, as well as other intellectual property laws
and treaties. All title and copyrights in and to the Software (including but not limited to any images, photographs, animations, video, music, text and “applets” incorporated into the Software) and any printed materials accompanying the Software
are owned by the Company or its Licensors.
GRANT OF LICENSE
The Software is licensed and not sold to you and its use is subject to this EULA. The Company grants you a limited, personal,
non-exclusive license to use the Software in the manner described in the user documentation. The Company reserves all
rights not expressly granted to you in this EULA.
PERMITTED USES
1. If the Software is configured for loading on a hard drive, you may install and use the Software on a single computer.
2. You may make and maintain one copy of the Software for backup and archival purposes, provided that the original and
copy of the Software are kept in your possession.
3. You may permanently transfer all your rights under this EULA, provided you retain no copies, you transfer all of the
Software (including all component parts, the media and printed materials and any upgrades) and the recipient reads and
accepts this EULA.
RESTRICTIONS
1. You may not delete or obscure any copyright, trademark or other proprietary notice on the Software or accompanying
printed materials.
2. You may not decompile, modify, reverse engineer, disassemble or otherwise reproduce the Software.
3. You may not copy, rent, lease, sublicense, distribute, publicly display the Software, create derivative works based on the
Software (except to the extent expressly permitted in the Editor and End-User Variation section of this Agreement or other
documentation accompanying the Software) or otherwise commercially exploit the Software.
4. You may not electronically transmit the Software from one computer, console or other platform to another or over a
network.
5. You may not use any backup or archival copy of the Software for any purpose other than to replace the original copy in the
event it’s destroyed or becomes defective.
EDITOR AND END-USER VARIATIONS
If the Software includes a feature that allows you to modify the Software or to construct new variations (an “Editor”), you may
use such Editor to create modifications or enhancements to the Software, including the construction of new levels
(collectively the “Variations”), subject to the following restrictions. Your Variations: (i) must only work with the full,
registered copy of the Software; (ii) must not contain modifications to any executable file; (iii) must not contain any libelous,
defamatory or other illegal material, material that is scandalous or invades the rights of privacy or publicity of any third
party; (iv) must not contain any trademarks, copyright-protected work or other property of third parties; and (v) may not be
commercially exploited by you, including but not limited to making such Variations available for sale or as part of a
pay-per-play or timesharing service.
28
29
Page 16

TERMINATION
This EULA is effective until terminated. You may terminate this EULA at any time by destroying the Software. This EULA
will terminate automatically without notice from the Company if you fail to comply with any provisions of this EULA. All
provisions of this EULA as to warranties, limitation of liability, remedies and damages will survive termination.
LIMITED WARRANTY AND DISCLAIMER OF WARRANTIES
You are aware and agree that use of the Software and the media on which is recorded is at your sole risk. The Software and
media are supplied “AS IS.” Unless otherwise provided by applicable law, the Company warrants to the original purchaser
of this product that the Software storage medium will be free from defects in materials and workmanship under normal use
for ninety (90) days from the date of purchase. The warranty is void if the defect has arisen through accident, abuse, neglect
or misapplication. If the Software fails to conform to this warranty, you may at your sole and exclusive remedy, obtain a
replacement free of charge if you return the defective Software. Follow the Product Return Procedures described in the
Manual. The Company does not warrant that the Software or its operations or functions will meet your requirements, or that
the use of the Software will be without interruption or error.
TO THE FULLEST EXTENT PERMISSIBLE UNDER APPLICABLE LAW, EXCEPT FOR THE EXPRESS WARRANTY
SET FORTH ABOVE, THE COMPANY DISCLAIMS ALL WARRANTIES, EXPRESS OR IMPLIED, INCLUDING AND
WITHOUT LIMITATION, THE IMPLIED WARRANTIES OF MERCHANTABILITY AND FITNESS FOR A PARTICULAR
PURPOSE AND NON-INFRINGEMENT. EXCEPT FOR THE EXPRESS WARRANTY SET FORTH ABOVE, THE
COMPANY DOES NOT WARRANT, GUARANTEE OR MAKE ANY REPRESENTATION REGARDING THE USE OR THE
RESULTS OF THE USE OF THE SOFTWARE IN TERMS OF ITS CORRECTNESS, ACCURACY, RELIABILITY,
CURRENTNESS OR OTHERWISE. SOME JURISDICTIONS DO NOT ALLOW THE EXCLUSION OF OR LIMITATIONS
ON IMPLIED WARRANTIES, SO THE ABOVE EXCLUSIONS AND LIMITATIONS MAY NOT APPLY TO YOU.
LIMITATION OF LIABILITY
IN NO EVENT WILL THE COMPANY OR ITS EMPLOYEES OR LICENSORS BE LIABLE FOR ANY INCIDENTAL,
INDIRECT, SPECIAL, CONSEQUENTIAL OR PUNITIVE DAMAGES, OR ANY DAMAGES WHATSOEVER (INCLUDING, WITHOUT LIMITATION, DAMAGES FOR INJURY TO PERSON OR PROPERTY, FOR LOSS OF PROFITS,
BUSINESS INTERRUPTION, LOSS OF BUSINESS INFORMATION, LOSS OF PRIVACY, FAILURE TO MEET ANY
DUTY AND NEGLIGENCE) ARISING OUT OF OR IN ANY WAY RELATED TO THE USE OR INABILITY TO USE THE
SOFTWARE, EVEN IF THE COMPANY OR AN AUTHORIZED REPRESENTATIVE OF THE COMPANY HAS BEEN
ADVISED OF THE POSSIBILITY OF SUCH DAMAGES. SOME JURISDICTIONS DO NOT ALLOW THE EXCLUSION
OF LIABILITY FOR INCIDENTAL OR CONSEQUENTIAL DAMAGES, SO THE ABOVE EXCLUSION MAY NOT APPLY
TO YOU.
IN NO EVENT WILL THE LIABILITY OF THE COMPANY FOR DAMAGES WITH RESPECT TO THE SOFTWARE
EXCEED THE AMOUNTS ACTUALLY PAID BY YOU FOR THE SOFTWARE.
CHOICE OF LAW AND VENUE
This EULA is governed by the laws of the United States of America and the State of New York, exclusive of its conflicts of law
provisions. The exclusive venue for litigation regarding or arising from this EULA is New York County, New York and you
agree to submit to the Jurisdiction of the courts of New York County, New York for any such litigation.
MISCELLANEOUS
If any provision or portion of this EULA is found to be unlawful, void, or for any reason unenforceable, it will be severed from
and in no way affect the validity or enforceability of the remaining provisions of the EULA.
This EULA constitutes the entire agreement between you and the Company regarding the Software and its use.
In Memory of:
Mila Fike
A longtime friend of the Deer Hunter community
30
31
 Loading...