

Page 1

Deadly Tide Jewelcase - Part Number 91041
Designer: JoAnne Williams
Microsoft - 882-8080 x24268
Fonts= Helvetica, Helvetica-Narrow
Color= Match colors to color proofs provided.
Art=CMYK TIFF format
Page 2 (inside front cover) Bubbles.tif
Page 3 (interior booklet) Hastings.tif
Page 4 (interior booklet) Bubbles.tif
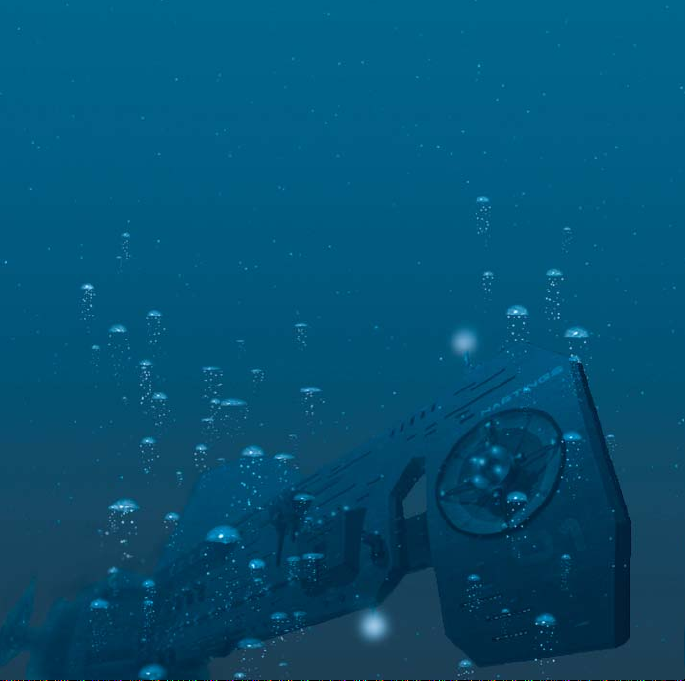
Page 5 (interior booklet) Fighter.tif
Page 6 (interior booklet) PCC.tif
Page 7 (interior booklet) Bubbles.tif
Page 8 (interior booklet) Land_L.tif
Page 9 (interior booklet) Land_R.tif
Page 10 (center spread) Center_L.tif
Page 11 (center spread) Center_R.tif
Page 12 (interior booklet) HUD.tif & Bubbles.tif
Page 13 (interior booklet) Railicon.tif, Cubeicon.tif, Bubbles.tif
Page 14 (interior booklet) Bubbles.tif
Page 15 (interior booklet) Hydra.tif
Page 16 (interior booklet) Bubbles.tif
Page 17 (interior booklet) Advbio.tif
Page 18 (interior booklet) Bubbles.tif
Page 19 (inside back cover) Bubbles.tif
Page 1 & 20 placeholders for outside cover
Page 2

Information in this document is subject to change without notice. Companies,
names, and data used in examples herein are fictitious unless otherwise noted.
No part of this document may be reproduced or transmitted in any form or by any
means, electronic or mechanical, for any purpose, without the express written
permission of Microsoft Corporation.
© 1996 Microsoft Corporation. All rights reserved. Printed in the United States
of America.
Microsoft, MS, MSN, Windows and the Windows logo are either registered
trademarks or trademarks of Microsoft Corporation in the US and/or other
countries.
© Copyright 1996 by Rainbow Multimedia Group, Inc. All rights reserved.
Developed in conjunction with TRG3 Inc.
Pentium is a registered trademark of Intel Corporation.
Page 3
System Requirements
To run Deadly Tide, you need:
• Personal computer with a Pentium® 75 MHz or higher
processor.
• 8 MB or more of RAM.
• 25 MB of available hard disk space.
• 4X CD-ROM drive or faster.
• PCI SVGA video with 1 MB of memory.
• 256-Color display.
• Microsoft® Windows® 95 operating system or later.
• Mouse or other pointing device.
• Joystick or other flight control recommended.
• Sound board and speakers or headphones to hear audio.
Page 4

To Set Up Deadly Tide
1 Turn on your computer and start Windows 95.
2 Insert Deadly Tide Disc 1 in the CD-ROM drive.
If AutoRun is enabled on your computer, Deadly Tide Setup
starts automatically. Click Install to continue.
If AutoRun is disabled, continue with steps 3 and 4.
3 Double-click the My Computer icon, and then double-click
the icon for the CD-ROM drive.
4 Double-click the Setup icon.
To Start Deadly Tide
1 Insert a Deadly Tide disc in the CD-ROM drive. For first-time
pilots, insert Disc 1. For those continuing the battle, insert
the disc that contains the last level you played. Levels are
labeled on each disc.
If AutoRun is enabled on your computer, the Deadly Tide
Setup dialog box appears. Click Play to continue.
If AutoRun is disabled, continue with steps 2 and 3.
2 Click the Start button, point to Programs, and then point to
Microsoft Games.
3 Click Deadly Tide.
Page 5
The Alien Threat
What if the enemy were no longer out there in space, but right here
on Earth, building massive fortifications in our oceans? What if the
enemy’s presence and mission to exterminate the human race had
finally been discovered? Those pounding explosions you hear,
they’re only the beginning—the beginning of the end of humanity.
And only you can stop it.
As a 26th century Earth Oceans Alliance (EOA) hydrofighter pilot,
your mission is to destroy the aquatic-based aliens. Armed with
the latest in underwater technology, you are Earth’s only hope for
Hydra,
victory. Some missions put you in the cockpit of the
deadly hydrofighter prototype. Others take advantage of your aquatic
combat suit’s deep sea–pressure handling capabilities.
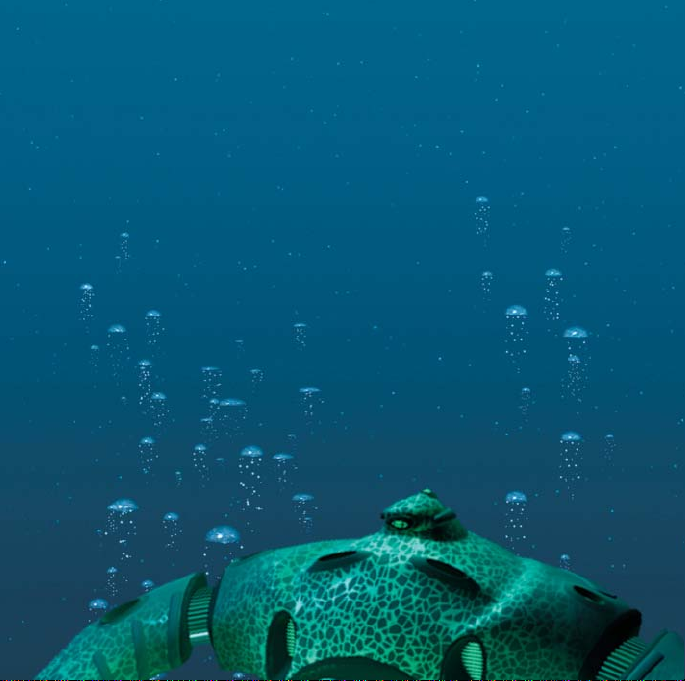
Relentless encounters with powerful biomechanical aliens continually
challenge you to make strategic as well as combative choices. The
aliens’ underwater defensive shield will vaporize human craft—can
the shield be disabled, or is there a way around it? A found crystal
may help you to navigate an alien ship, or it could explode upon
contact—do you risk the chance? The wrong answers mean certain
death.
a sleek,
Page 6
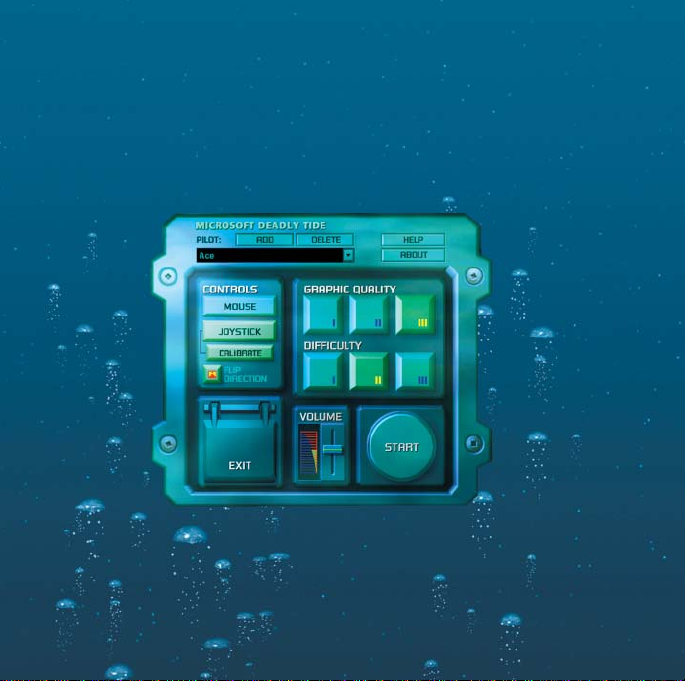
The Pilot Control Center
After starting Deadly Tide, you’ll be launched into the Pilot Control
Center—the place to sign in, customize your controls, and plunge
into combat. Ready to start a battle or revisit a former battle? Click
Start from within the Pilot Control Center.
Need to fine-tune your cockpit by increasing the difficulty level,
adjusting your graphic quality, or cranking up the volume? Return
to the Pilot Control Center at any time during gameplay by pressing
F3 or PAUSE.
Page 7

Signing In
The first time Deadly Tide is played, the default pilot is the
registered user. Want to play incognito or let a friend try? Click
Add, and type another name. To delete a name from the drop-down
list, select the name and click Delete.
When you enter a new name in the Pilot sign-in box during
gameplay, you must start Deadly Tide from the beginning. If you
switch to an existing pilot’s name during gameplay, you must start
Deadly Tide from that particular pilot’s last save point.
Choosing Your Controls: Joystic k vs. Mouse
You can sight your targets with either a joystick or a mouse. If a
joystick is detected during Setup, the Joystick button is selected
automatically, under Controls in the Pilot Control Center. If you
prefer aiming with a mouse, click the Mouse button.
Joystick Calibration
To calibrate your joystick, click Calibrate, and the standard
Windows 95 Joystick Properties dialog box will appear.
Flip Direction
Tired of your cross-hairs moving up when pulling your joystick
or mouse back? Click Flip Direction and reverse the trend.
Page 8

Starting a Battle
Once you’ve signed in and calibrated your controls, click Start in the
Pilot Control Center to begin battle. After you’ve engaged in battle for
the first time, clicking Start will take you to the Tactical Engagement
Sphere, where a record of your progress is kept.
Using the Tactical Engagement Sphere
The Tactical Engagement Sphere indicates the sites where you’ve
fought and the position where you are currently battling. To replay a
particular battle, click its corresponding level number. To continue
the battle in progress, click the highest level number.
Some battles include multiple save points. To return to the
beginning of a level that is already in progress, click the highest
level number while pressing
To return to the Tactical Engagement Sphere at any time
during gameplay, press
CTRL.
F2.
Page 9

Pausing a Battle
A reprieve is often necessary, no matter what your line of business.
F3 or PAUSE and reenter the Pilot Control Center for a
Press
well-deserved break. Click Continue and you’re back on your way.
Saving a Battle
When you exit a battle—and even as you’re playing—Deadly Tide
automatically saves for you. The next time you click Start from
within the Pilot Control Center, the highest level number in the
Tactical Engagement Sphere will indicate the battle you need
to fight next.
Exiting the Game
To exit a battle, press F3 or PAUSE to return to the Pilot Control
Center. From here, click Exit, and you will exit the game.
Page 10

e
Your objective: to save Earth from being floode
d
o
t
’
e
m
a
s
n
b
r
How to Play
• Shoot everything that shoots at y
• Keep an eye on your HUD. Close
temperature gauge and shield in
instrument determines when you
power . The second indicates wh
• There are two modes of play. In fl
handles your steering. In rotate
stops and you can rotate as if in
aim and fire!
• Listen to the Comp. She provide
your missions and for survival.
• Select your paths carefully. Whe
to choose a path, press joystick
mode, simply aim your cross-hai
And never forg
Page 11

ou.
ly monitor your weapon
’re about to lose your weapon
ight mode, Navigational Control
Page 12

HUD 101
Your head-up display, or HUD, will vary depending on whether you’re
Hydra
navigating the
suit. Two instruments are vital on either HUD: the shield integrity
indicator and the engagement conditions bar.
Specific to the
Unlike the forearm blaster in your suit, the
capable of rapid fire. Excessive rapid fire may result in their
overheating, and you’ll be unable to shoot until they cool.
Rotate/Flight
Indicator
Weapon
Temperature Gauge
Blue = cool
Red = overheating
or exploring the terrain in your aquatic combat
Hydra
’s HUD is the weapon temperature gauge.
Hydra
’s lasers are
Shield Integrity
Indicator
Blue = full strength
Green = light damage
Yellow = heavy damage
Red = critical depletion
Aquatic Concussion
Torpedo Count
Engagement
Conditions Bar
Page 13

Selecting a Path with Navigational Control
Navigational Control is a highly advanced steering system utilized by
all EOA vessels. It employs two modes: flight and rotate. When either
mode is activated, the flight or rotate indicator appears in the upperleft corner of your HUD. How you select a path depends on the
particular mode you’re in.
Selecting a Path in Flight Mode
When Navigational Control is in flight mode, it acts as an auto-pilot
and performs steering for you. Where you move your cross-hairs
will not affect where Navigational Control moves you,
at a specific path juncture.
The Comp will alert you when selecting a path is necessary while
in flight mode. Aim your cross-hairs in the direction you want to
go—and live with your decision.
Selecting a Path in Rotate Mode
In rotate mode, Navigational Control stops your movement, allowing
you to rotate and survey the scene. Beware of enemies, doubtlessly
coming at you from
If your cross-hairs change into an arrow, now’s the time to
escape—aim the arrow in the direction you want to go, and press
joystick button 2 or your right mouse button.
all
sides.
unless
you’re
Page 14

Sighting and Destroying Your Targets
When your cross-hairs lock onto an enemy target, they will change in
both size and color. Shoot immediately. Press your joystick trigger or
left mouse button.
Forearm Blaster
Your suit is a deadly weapon when you access the forearm blaster.
Blast away, but note that rapid fire is not accessible when using
this weapon.
Lasers
The
Hydra
’s standard weapon is the laser. Use the rapid-fire option
cautiously. Note your HUD’s weapon temperature gauge. Overheat
and you’re without weapon power until your lasers cool down.
Aquatic Concussion Torpedoes
Lasers aren’t the only weapons that you can wield on the
Aquatic Concussion Torpedoes, or ACTs, are the latest in
underwater weaponry. Press the
but do so sparingly. ACTs are limited and are only supplied at the
beginning of each level.
SPACEBAR to trigger this weapon,
Hydra.
Page 15

Your Allies in War
You can rely on two essential pieces of equipment in your fight
against the alien threat: the Comp and the Vidlink.
The Comp
Your most dependable ally is the Comp. This transportable
computer will offer life-saving advice and information at various
points during battle. In the
computer. In your aquatic combat suit, the Comp becomes part
of the suit’s built-in computer system. When you’re aboard the
Hastings,
the Comp resides within your personal data terminal.
The Vidlink
The Vidlink is a two-way HDTV located on the
prototype of the Vidlink is also located on the
mission briefings from your commander through the Vidlink.
Hydra,
the Comp is part of the ship’s
Hastings.
Hydra.
An earlier
Y ou’ll receive
Page 16

Fine-Tuning Your Cockpit
While in the throes of battle, you may want to fine-tune your controls.
F3 or PAUSE at any point during gameplay and return to the
Press
Pilot Control Center.
Graphic Quality
If Deadly Tide is running slowly, try decreasing your graphic quality to
improve performance. Level III represents the highest graphic quality.
After adjusting your graphic quality, you will be prompted to begin
Deadly Tide from your last save point.
Difficulty Level
Choose a higher difficulty level, and the rate and accuracy of enemy
fire will automatically increase. Decrease the difficulty level, and the
enemy will not only lose its targeting edge, but your shield repair rate
will increase as well. Level III represents the highest difficulty level.
Volume
Cockpit too noisy? Slide down the Volume control, or press F4 to
mute the sound altogether.
Need Help?
For more information about Deadly Tide, click Help in the Pilot
Control Center, or press
F1 at any point during gameplay.
Page 17

Troub leshooting
For troubleshooting information, see the
Readme file, or look in the Troubleshooting
topic of online Help.
Microsoft AnswerPoint
In the event you cannot install Microsoft Deadly Tide, please refer to
the following support offerings. Microsoft’s support offerings range from
no-cost and low-cost online information services (available 24 hours a day,
7 days a week) to annual support plans.
Microsoft support services are subject to Microsoft’s then-current prices, terms,
and conditions, which are subject to change without notice.
Information Services
AnswerPoint Information Services provides you with easy access to the latest
technical and support information for Microsoft products. You can access a
variety of no-cost and low-cost information services 24 hours a day, 365 days
a year.
Internet Services (World Wide Web and FTP Sites): Access Microsoft
Frequently Asked Questions, Software Library, Knowledge Base, customer-tocustomer newsgroups, and other technical information on our Internet sites.
• The World Wide Web site is located at http://www.microsoft.com
• The FTP site is located at ftp.microsoft.com
Page 18

MSN™ (The Microsoft Network) and Other Online Services: Access Microsoft
Frequently Asked Questions, Software Library, Knowledge Base, customer-tocustomer bulletin board services, and other technical information on MSN and
other online services. To access Microsoft ser vices on MSN, choose Go To Other
Location on the Edit menu, and then type mssupport.
Microsoft Download Service (MSDL): Direct modem access to a variety of
technical information is available on MSDL by dialing (206) 936-6735. Connect
information is 1200, 2400, 9600, or 14400 baud, no parity, 8 data bits, and
1 stop bit.
Microsoft FastTips: This automated service provides quick answers to your
common technical questions via an automated toll-free telephone number, fax,
or mail. To access FastTips or to receive a map and catalog, call the following
FastTips number: 1-800-936-4100 (desktop applications).
Standard Support
No-charge support from Microsoft suppor t engineers is available via a toll call
between 6:00 A.M. and 6:00 P.M. Pacific time, Monday through Friday, excluding
holidays. In Canada, call between 8:00 A.M. and 8:00 P.M. Eastern time, Monday
through Friday, excluding holidays. In the United States, call (206) 637-9308.
In Canada, call (905) 568-3503.
Te xt Telephone
Microsoft text telephone (TT/TDD) services are available for the deaf or hard-ofhearing. In the United States, using a TT/TDD modem, dial (206) 635-4948.
In Canada, using a TT/TDD modem, dial (905) 568-9641.
Page 19

MICROSOFT
Tim Znamenacek – Producer
Edward Ventura – Product Planner
Heather Burgess – Assoc. Planner
Chris DiCesare – Marketing
Steven Kastner – Support Lead
Development
Craig Henry – Setup
Ashley Fryer – UI
Documentation
Alexandra Shapiro – Doc. Lead
Dana Fos – Editor
Jennifer Epps – UI Design
Stefan Schwartz – Online Art
JoAnne Williams – Jewel Case Art
Brent Vitolins – UI Art
Max Klaisner – Developer
Laurence K. Smith – Localization
Testing
Kevin Fetters – Test Lead
Michelle Gamboa – Tester
David Coombs – Tester
Administration
Stuart Moulder
Kathleen Billington
Robert Gallup
Jo T y o
Brian Bennink
TRG3
Executive Producer
Tony Stutterheim
Production Designer
Bruce Hall
3D Animation
& Modeling
Alan Chan
Bruce Hall
Andrew Lesniak
Peter Nye
Tony Stutterheim
Additional Modeling
Greg Teegarden
Level Design
Bruce Hall
Tony Stutterheim
Special Thanks
Allen Hastings
Stuart H. Ferguson
Steve Worley
Brad Peebler
Brian Thomas
NewTek Inc.
Carrera Computers
Martha Stutterheim
Jeremy Hall
RAINBOW STUDIOS
Senior Producer
Earl Jarred
Lead Programmer
Mark De Simone, Ph.D.
Assistant Programmer
Hiro T akahashi
Animation & CGI
Terrence Walker
Music Composition
Mark Stratford
Audio Production
Robb Rinard
Motion Analysis
Tom Shepherd, Ph.D.
Behavioral CGI
Specialist
John Sommer
Business Affairs
Sandy Jarred
Administrative Support
Mark Mahler
Special Thanks
Jeff Padden
Paul Kohler
Michele De Simone
The DirectX Team
Page 20

Deadly Tide Jewelcase - Part Number 91041
Designer: JoAnne Williams
Microsoft - 882-8080 x24268
Placeholder - Outside Back Cover
The function keys and company logos w ere printed here.
Passed off to Landor f or print with cover on 6/5/96.
See file 91041cvr.pm6
 Loading...