

Page 1

TABLE OF CONTENTS
Diary of Sprawl Council Leader Ren Ordic . . . . . . . . 1
Minimum System Requirements . . . . . . . . . . . . . . 2
Installing Dark Reign 2 . . . . . . . . . . . . . . . . . . . . . 3
Install Directions . . . . . . . . . . . . . . . . . . . . . . 3
AutoPlay . . . . . . . . . . . . . . . . . . . . . . . . . . . . 3
DirectX 7a® . . . . . . . . . . . . . . . . . . . . . . . . . . . 4
Story . . . . . . . . . . . . . . . . . . . . . . . . . . . . . . . . . . 7
Gameplay . . . . . . . . . . . . . . . . . . . . . . . . . . . . . . . 9
Copy Protection . . . . . . . . . . . . . . . . . . . . . . . 9
Main Menu . . . . . . . . . . . . . . . . . . . . . . . . . . 9
Game Controls . . . . . . . . . . . . . . . . . . . . . . . . . . . 13
Interface . . . . . . . . . . . . . . . . . . . . . . . . . . . . 13
The Game Window . . . . . . . . . . . . . . . . . . . . . 13
Moving around the world . . . . . . . . . . . . . 13
Selecting and Moving Units . . . . . . . . . . . 13
Targeting and Attacking . . . . . . . . . . . . . . 13
Grouping Units . . . . . . . . . . . . . . . . . . . . . 14
Unit Status . . . . . . . . . . . . . . . . . . . . . . . 14
Line of Sight and the Fog of War . . . . . . . . 14
Minimap . . . . . . . . . . . . . . . . . . . . . . . . . . . . 15
Infogroup Window . . . . . . . . . . . . . . . . . . . . . 15
Squad Manager . . . . . . . . . . . . . . . . . . . . . . . 16
Building Manager . . . . . . . . . . . . . . . . . . . . . . 17
Unit/Building Context Menu . . . . . . . . . . . . . . 17
Comms Menu . . . . . . . . . . . . . . . . . . . . . . . . . 19
Orders Menu . . . . . . . . . . . . . . . . . . . . . . . . . 19
Options Menu . . . . . . . . . . . . . . . . . . . . . . . . 20
Playing Dark Reign 2 . . . . . . . . . . . . . . . . . . . . . . 23
Building Structures . . . . . . . . . . . . . . . . . . . . . 23
Building Units . . . . . . . . . . . . . . . . . . . . . . . . 23
Power . . . . . . . . . . . . . . . . . . . . . . . . . . . . . . 24
Funding your War Machine . . . . . . . . . . . . . . . 24
Unit Status and Repairing: . . . . . . . . . . . . . . . 25
Recycling Buildings . . . . . . . . . . . . . . . . . . . . 25
Power Up/ Power Down . . . . . . . . . . . . . . . . . . 25
Upgrading Buildings . . . . . . . . . . . . . . . . . . . . 26
Unit Limit . . . . . . . . . . . . . . . . . . . . . . . . . . . . 26
Advanced Features . . . . . . . . . . . . . . . . . . . . . . . . 27
Rally Points . . . . . . . . . . . . . . . . . . . . . . . . . . 27
Rearming . . . . . . . . . . . . . . . . . . . . . . . . . . . . 27
The Spies . . . . . . . . . . . . . . . . . . . . . . . . . . . . 27
Cloaking . . . . . . . . . . . . . . . . . . . . . . . . . . . . 28
Anti-Clandestine . . . . . . . . . . . . . . . . . . . . . . 28
Self Destruct . . . . . . . . . . . . . . . . . . . . . . . . . 28
Special Attacks and Maneuvers . . . . . . . . . . . . 28
Waypoints . . . . . . . . . . . . . . . . . . . . . . . . . . . 29
Unit Behaviors . . . . . . . . . . . . . . . . . . . . . . . . 29
Auto Repair . . . . . . . . . . . . . . . . . . . . . . . . . . 30
Guard . . . . . . . . . . . . . . . . . . . . . . . . . . . . . . 30
Explore . . . . . . . . . . . . . . . . . . . . . . . . . . . . . 31
Traps . . . . . . . . . . . . . . . . . . . . . . . . . . . . . . . 31
Mojos and Air Strikes . . . . . . . . . . . . . . . . . . . 32
Telepad . . . . . . . . . . . . . . . . . . . . . . . . . . . . . 33
Mouse and Keyboard Commands . . . . . . . . . . . . . . 34
Using the Camera . . . . . . . . . . . . . . . . . . . . . . 36
Multiplayer . . . . . . . . . . . . . . . . . . . . . . . . . . . . . 37
Internet (WON) . . . . . . . . . . . . . . . . . . . . . . . 37
Network (LAN) . . . . . . . . . . . . . . . . . . . . . . . . 37
Game Setup . . . . . . . . . . . . . . . . . . . . . . . . . . 38
Player Setup Control . . . . . . . . . . . . . . . . . . . . 38
Host Setup . . . . . . . . . . . . . . . . . . . . . . . . . . . 38
Map Selection . . . . . . . . . . . . . . . . . . . . . 38
Type Filters . . . . . . . . . . . . . . . . . . . . . . . 39
Start Locations . . . . . . . . . . . . . . . . . . . . . 39
Starting Credits . . . . . . . . . . . . . . . . . . . . 39
Rule Set . . . . . . . . . . . . . . . . . . . . . . . . . 39
Kick Player . . . . . . . . . . . . . . . . . . . . . . . 39
Launch . . . . . . . . . . . . . . . . . . . . . . . . . . 39
Add AI . . . . . . . . . . . . . . . . . . . . . . . . . . . 39
Earth . . . . . . . . . . . . . . . . . . . . . . . . . . . . 39
Lock . . . . . . . . . . . . . . . . . . . . . . . . . . . . 39
Unit Limit . . . . . . . . . . . . . . . . . . . . . . . . 40
Unit Filter . . . . . . . . . . . . . . . . . . . . . . . . 40
Map Transfer . . . . . . . . . . . . . . . . . . . . . . . . . 40
Multi-Player in Game Features . . . . . . . . . . . . 40
Multi-Player Mods and Rulesets . . . . . . . . . . . 40
Multi-Player Mods . . . . . . . . . . . . . . . . . . 41
Multi-Player Rulesets . . . . . . . . . . . . . . . 42
Units . . . . . . . . . . . . . . . . . . . . . . . . . . . . . . . . . . 43
Jovian Detention Authority . . . . . . . . . . . . . . . 43
Guardian . . . . . . . . . . . . . . . . . . . . . . . . . 43
Enforcer . . . . . . . . . . . . . . . . . . . . . . . . . 44
Castigar . . . . . . . . . . . . . . . . . . . . . . . . . . 44
PsiTech . . . . . . . . . . . . . . . . . . . . . . . . . . 45
Page 2

...but I knew that the seal was set by Togra himself - just before he left the earth,
just before the hopes for a new age of unity for all people were buried under the
boot of oppression. And now in these dark times we discover ourselves divided -
by war, by hunger, and by the grasping fists of the JDA, which pull us ever deeper
into a rising tide of blood. We need a sign from Togra - a banner around which we
can unite...
- Diary of Sprawl Council Leader Ren Ordic
1
Shadowhand . . . . . . . . . . . . . . . . . . . . . . 45
Watchman . . . . . . . . . . . . . . . . . . . . . . . . 46
Blackstar . . . . . . . . . . . . . . . . . . . . . . . . . 46
Striker . . . . . . . . . . . . . . . . . . . . . . . . . . . 47
Warden . . . . . . . . . . . . . . . . . . . . . . . . . . 47
Rover . . . . . . . . . . . . . . . . . . . . . . . . . . . 48
Bulldog . . . . . . . . . . . . . . . . . . . . . . . . . . 48
Growler . . . . . . . . . . . . . . . . . . . . . . . . . . 49
Mastiff . . . . . . . . . . . . . . . . . . . . . . . . . . 49
Collector . . . . . . . . . . . . . . . . . . . . . . . . . 50
Hover Collector . . . . . . . . . . . . . . . . . . . . 50
Contstruction Rig . . . . . . . . . . . . . . . . . . . 51
Patrol Cruiser . . . . . . . . . . . . . . . . . . . . . . 51
Dreadnaught . . . . . . . . . . . . . . . . . . . . . . 52
Tech Boat . . . . . . . . . . . . . . . . . . . . . . . . . 52
Sky Fortress . . . . . . . . . . . . . . . . . . . . . . 53
Sprawlers . . . . . . . . . . . . . . . . . . . . . . . . . . . . 54
Rumbler . . . . . . . . . . . . . . . . . . . . . . . . . 54
Fiend . . . . . . . . . . . . . . . . . . . . . . . . . . . 54
Banshee . . . . . . . . . . . . . . . . . . . . . . . . . 55
Skulk . . . . . . . . . . . . . . . . . . . . . . . . . . . . 55
Judas . . . . . . . . . . . . . . . . . . . . . . . . . . . . 56
Infiltrator . . . . . . . . . . . . . . . . . . . . . . . . 56
Voodun . . . . . . . . . . . . . . . . . . . . . . . . . . 57
Scaver . . . . . . . . . . . . . . . . . . . . . . . . . . . 57
GoGo . . . . . . . . . . . . . . . . . . . . . . . . . . . . 58
Scorpion Tank . . . . . . . . . . . . . . . . . . . . . 58
Thunder Cannon . . . . . . . . . . . . . . . . . . . . 59
Collector . . . . . . . . . . . . . . . . . . . . . . . . . 59
Hover Collector . . . . . . . . . . . . . . . . . . . . 60
Contstruction Rig . . . . . . . . . . . . . . . . . . . 60
Vulture . . . . . . . . . . . . . . . . . . . . . . . . . . 61
Air Barge . . . . . . . . . . . . . . . . . . . . . . . . . 61
Disruptor . . . . . . . . . . . . . . . . . . . . . . . . . 62
Hydrofoil . . . . . . . . . . . . . . . . . . . . . . . . . 62
Stasis Boat . . . . . . . . . . . . . . . . . . . . . . . 63
Leviathan . . . . . . . . . . . . . . . . . . . . . . . . 63
Juggernaut . . . . . . . . . . . . . . . . . . . . . . . 64
Buildings . . . . . . . . . . . . . . . . . . . . . . . . . . . . . . . 65
Jovian Detention Authority . . . . . . . . . . . . . . . 65
Command Center . . . . . . . . . . . . . . . . . . . 65
Precinct . . . . . . . . . . . . . . . . . . . . . . . . . . 65
Motorpool . . . . . . . . . . . . . . . . . . . . . . . . 65
Refinery . . . . . . . . . . . . . . . . . . . . . . . . . 65
Dock . . . . . . . . . . . . . . . . . . . . . . . . . . . . 66
Solar Array . . . . . . . . . . . . . . . . . . . . . . . 66
Atomic Generator . . . . . . . . . . . . . . . . . . . 66
Restoration Facility . . . . . . . . . . . . . . . . . 66
Air Control . . . . . . . . . . . . . . . . . . . . . . . . 67
Radome . . . . . . . . . . . . . . . . . . . . . . . . . . 67
Sentinel Gun . . . . . . . . . . . . . . . . . . . . . . 67
Defense Tower . . . . . . . . . . . . . . . . . . . . . 67
Lightning Tower . . . . . . . . . . . . . . . . . . . . 68
Force Field Emitter . . . . . . . . . . . . . . . . . . 68
Camera Tower . . . . . . . . . . . . . . . . . . . . . 68
Telepad . . . . . . . . . . . . . . . . . . . . . . . . . . 68
Sky Fortress Facility . . . . . . . . . . . . . . . . . 68
Sprawlers . . . . . . . . . . . . . . . . . . . . . . . . . . . . 69
Command Center . . . . . . . . . . . . . . . . . . . 69
Barracks . . . . . . . . . . . . . . . . . . . . . . . . . 69
Garage . . . . . . . . . . . . . . . . . . . . . . . . . . 69
Refinery . . . . . . . . . . . . . . . . . . . . . . . . . 69
Scaver Hut . . . . . . . . . . . . . . . . . . . . . . . . 70
Sarcology . . . . . . . . . . . . . . . . . . . . . . . . 70
Shrine . . . . . . . . . . . . . . . . . . . . . . . . . . . 70
Aerodrome . . . . . . . . . . . . . . . . . . . . . . . 71
Wharf . . . . . . . . . . . . . . . . . . . . . . . . . . . 71
Solar Array . . . . . . . . . . . . . . . . . . . . . . . 71
Atomic Power Plant . . . . . . . . . . . . . . . . . 71
Gun Post . . . . . . . . . . . . . . . . . . . . . . . . . 72
Ravager Turret . . . . . . . . . . . . . . . . . . . . . 72
Camera Tower . . . . . . . . . . . . . . . . . . . . . 72
Fence Post . . . . . . . . . . . . . . . . . . . . . . . . 72
Sky Sweeper . . . . . . . . . . . . . . . . . . . . . . 73
Juggernaut Factory . . . . . . . . . . . . . . . . . 73
JDA Build Tree . . . . . . . . . . . . . . . . . . . . . . . . 74
Sprawlers Build Tree . . . . . . . . . . . . . . . . . . . . 75
Unit Effectiveness Chart . . . . . . . . . . . . . . . . . 76
Customer Support . . . . . . . . . . . . . . . . . . . . . . . . . 77
Credits . . . . . . . . . . . . . . . . . . . . . . . . . . . . . . . . . 78
Software License Agreement . . . . . . . . . . . . . . . . . 82
Page 3
2 3
INSTALLING DARK REIGN 2
GENERAL MINIMUM SYSTEM REQUIREMENTS
INSTALL DIRECTIONS
• To install Dark Reign 2, insert the game CD into your CD-ROM drive.
• If AutoPlay is enabled, the installer splash screen should appear.
• When the installer splash screen appears, click on the Install Dark Reign 2 button.
• For online help, click the Help button. For Electronic Registration, previews, and extras, click the
More button.
• Reinstall Dark Reign 2 Button – Should your copy of Dark Reign 2 be accidentally deleted from your
hard drive, the "Install Dark Reign 2" option will remain grayed out in the installer splash screen. In
this case, you can reinstall using this option.
• Uninstall Dark Reign 2 Shortcut – If you wish to remove Dark Reign 2 from your hard drive, you should
always use this shortcut from the Start Menu. This option will remove all game files except your saved
games, screen shots, and personal settings.
Note: You can return to the splash screen any time without affecting your installed game.
AUTOPLAY
If the Dark Reign 2 splash screen does not appear, try performing the following steps:
1. Double-click on the My Computer icon on your desktop, or right-click on the icon and choose the Open
option.
2. Select the Refresh option located in the View pull-down menu.
3. Double-click on the Dark Reign 2 CD icon in the window or right-click on the icon and choose the
AutoPlay option.
4. After the Dark Reign 2 title screen appears, click on the Install button.
If the AutoPlay feature does not function, please check the following:
1. Make sure the CD is clean and properly placed in the CD-ROM drive.
2. Your CD-ROM driver may not be optimized for use with Windows 95/98. To verify this, perform the
following steps:
a. Open the Windows 95/98 Control Panel folder and double-click on the System icon.
b. Click on the Performance tab. If any of your hardware drivers are not fully optimized for use with
Windows 95/98, they will be listed here with an explanation of the exact problem and suggestions
on how to fix it.
OS: US English Language version of Windows
®
95 or Windows®98
Direct X: DirectX 7.0A required (included)
CPU: Pentium
®
II 233
RAM: 64 MB
Hard Drive Space: 550 MB plus 100 MB for Windows Swap File
2D Video: 100% DX7a compliant 4 MB 2D card (or 2D capable 3D card*) and Drivers
3D Video: 100% DX7a compliant 3D card and Drivers **
Sound: 100% DX7a compliant true 16 bit sound card and Drivers
CD-ROM: 100% Windows 95/98-compatible Quad Speed
(600 K/sec sustained transfer rate) and Drivers
Input: 100% Windows 95/98-compatible mouse or trackball and drivers
100% Windows 95/98-compatible keyboard
MULTIPLAYER
MINIMUM SYSTEM REQUIREMENTS
Connection Type: Internet (TCP/IP) and LAN (TCP/IP) play supported
MODEM: Internet play requires a 100% Windows 95/98-
compatible 28.8 Kbps (or faster) modem and drivers
Network Interface
Card: LAN play (and high-speed Internet play over DSL and cable modems) requires a 100%
Windows 95/98-compatible network interface card and drivers
Supported Chipsets for Windows 95/98:***
3DFx Banshee 3DFx Voodoo 3 Matrox G200 NVIDIA TnT NVIDIA GeForce
3DFx Voodoo 2 ATI Rage 128 Matrox G400 NVIDIA TnT2 NVIDIA GeForce 2
* Some 3D cards do not have refined 2D capabilities. Your 3D card may meet this requirement without the need for
additional hardware. Please contact your 3D card manufacturer for further information on your card's capabilities.
** 3D Accelerator Card Required. A 100% DirectX 7.0a (or higher) compliant 3D video card and driver with z-buffering
capability is Required to play Dark Reign 2. Dark Reign 2 uses Microsoft's Direct 3D to support 3D hardware
acceleration. It has been tested on many, but not all of the major cards incorporating the chipsets listed above. Some
3D accelerator card brands utilizing the chipsets whose names appear on this box may not be fully compatible with the
3D acceleration features utilized by Dark Reign 2. For a list of cards and drivers that have been tested, please visit
http://www.activision.com
*** Some, but not all of the cards with the chipsets listed above have been tested on Windows 2000. For Windows
2000 3D Support, please refer to your hardware manufacturer for 100% Direct X 7.0a (Direct 3D) compliant Windows
2000 drivers.
Page 4

4
Q. I already have other Windows 95/98 games installed on my computer. Will the Microsoft DirectX Installer
change my DirectX files?
A. If you already have other Windows 95/98 games on your computer, chances are you already have the
initial version of DirectX installed. In this case, the Microsoft installer will detect and overwrite any
previous versions with DirectX 7a. At that point, you will need to restart your computer for the changes
to take effect.
If, however, you already have DirectX 7a installed on your computer, the Microsoft DirectX 7a installer
will detect it and not overwrite any DirectX 7a files. You may not need to restart your computer after
installation in order to run Dark Reign 2.
5
3. Windows 95/98 may not be setup to autoplay CDs. To check, perform the following steps:
a. Open the Windows 95/98 Control Panel folder and double-click on the System icon.
b. Click on the Device Manager tab. Click on the plus sign next to CDROM, select your CD-ROM and
choose Properties.
c. Click on the Settings tab. Insert a check mark in the box to the left of the Auto Insert Notification
and select OK.
4. If autoplay still does not work, please try the following:
a. Double-click on Setup.exe at the root level of the CD, or
b. Go to Run… in your Start menu and type d:\Setup.exe (substitute your CD-ROM’s drive letter if
different from "d:")
DIRECTX 7A
During the Dark Reign 2 setup, the install process will determine if Microsoft DirectX needs to be installed
on your computer. If so, the Microsoft DirectX setup program will install the appropriate files on your
computer. See the online Dark Reign 2 Technical Help file for additional information.
Q. What is DirectX 7a and why do I need it?
A. Microsoft’s DirectX 7a is a set of functions which gives Windows 95/98 games and other applications
their power. Using these functions allows applications to perform advanced functions in networking,
graphics, sound, and input beyond what’s possible on other operating systems and accounts for many
of the performance gains associated with Windows 95 games.
Q. If I don’t install DirectX 7a when I install the game, can I install it later?
A. Yes. You will need to manually install it. To do so, use the following instructions:
1. Place the disc in the CD-ROM drive and exit from any autoplay screens.
2. Double-click on My Computer.
3. Right-click on your CD-ROM drive and choose Install DirectX.
4. Follow the installation process. When DirectX installation finishes, you will need to restart your
computer for the new drivers to work.
Page 5

6
I have always been here. And I watch.
Once I had a name, but I cannot remember it now—the way of things, perhaps, when one spends years,
decades, in silence, without the company of one’s fellow man. If one can call him that.
Once I too was a man. A man of strength, of honor. A leader of other men. I cast a long shadow in the harsh
glare of the searing sun, my body girded with iron and steel, my mind bathed in pride, the shape of an
eagle etched in silver on my chest. I seemed to other eyes as a walking god, and so I saw myself. After a
time. For a time.
Once I believed, and I listened, and I obeyed. I was told I was a soldier for truth and order, and so I saw
myself. I watched those who were weaker flee in fear as I approached, and I told myself it was my very
righteousness they feared. And I believed, and they obeyed, or they died. I told myself it was justice.
And then a day came when I was given a new directive... Ah, well; this was many, many years ago—ancient
history, one might say. And, in all honesty, these days I view my remembrances as through a smoky glass.
The details fade into the distance. The greater truth remains, undimmed. Accusing me. Always accusing
me.
We make our choices, and we must accept the consequences. I think it was Togra who said that.
As regards my own choices, I struggled for a time to redeem them... and then, when the time came, I
vanished, to live out my waning days in self-imposed exile. I wished to complete my penance in solitude. I
also suspected I would be more potent as a myth than as a man. I was right.
Garvey. That was my name. Now I remember. Though—later on—they called me Judas. A mark that I handed
down to my brothers, and to my sons. Judas. Betrayer...
And so I disappeared into the mountains, to watch from afar while my ancient warrior bones slowly
crumbled. But as it turns out, my expectations of imminent mortality were wickedly subverted: weary
though I may be, my mortal coil shows few signs of being shuffled off any time soon.
But do not be deceived. Once I was a man—a god, perhaps—but now I am only a ghost, in all but name.
Nothing more. Each moment stretches into the next, and reaches back to the last; there are no endings, nor
beginnings, but only a single time, indivisible, unborn and undying.
I have always been here. And I watch.
I have watched as the Earth, this home I love, has been ravaged. Ravaged by war. Ravaged by unchecked
population growth. Ravaged by squanderous waste of the few precious natural resources she has left to
give, by governments, corporations, and consumers who devour her and spit out her bones. Ravaged—this
above all—by power-mad governmental mandarins who take the work of terraforming scientists and
attempt to use it to redress the terrible damage to the Earth which their own policies have wrought.
7
Memory and expectation—past and future, that which was and that which yet may
be—these things are not diametrically opposed, either in concept or in reality, as
we often believe them to be. They are but two faces of a single coin, one whose
mold is forever unfixed. The past is no more certain than the future; each yields
to the vagaries of perception. And so never doubt: that which will be had its
genesis in that which was... and vice versa.
- Alpheus Togra
Meditations from First Principles, 2381
STORY
Page 6

8
And just to be certain, the JDA has stamped its bootprint on the Sprawls. Divided them up into Precincts,
and established Command Centers, and generally made a show of acting as if it actually controls them. And
every so often JDA troops are ordered down into the Sprawls to get their gloves muddy on Roundup detail,
flushing out subversives and agitators and snot-nosed children and anyone else they can find. The
malefactors are funneled into holding vehicles, taken to detention camps, beaten, interrogated, and then
piled into the cargo hold of an interplanetary projectile, injected with drugs and put into narco-freeze, to
be re-animated on landing and ushered into one of the JDA’s plush incarceration facilities on the beautiful
moons of Jupiter. If they are fortunate, they will eventually be impressed into service in the Exploratory
Corps, in which case they go back into the cargo hold for more narco-sleep, and next stop Alpha Centauri;
if not, they can look forward to a long life of work on Io or Ganymede, on underground mining crews in
sub-zero conditions—assuming, that is, that the guards or the gangs or the malnutrition or the climate do
not end their pitiful existence sooner rather than later. Which they usually do. Either way, a Sprawler, once
taken, is never seen again.
Yes, I have watched the Sprawls. And, time and time again, I have seen them sabotage their own potential
strength through bickering, through fear, through the ephemeral amnesia of drink and drugs intended not
to free the senses but to numb them. I have watched the Sprawls, and I know that their most potent foes
are themselves. If united, they could be a force the likes of which this weary planet has never seen. If.
I have watched my own sons and brothers, the Judas, cast-out Castigars, errant knights in quest of
redemption, as they have taken to the thin cover of Bone Valley, to lick their wounds and ponder just how
to reconcile the warring impulses within them. I empathize. I was their Abraham—and their Moses too,
knowing full well that I would never in my lifetime see that land to which I hoped to lead them.
And—perhaps most intriguingly—I have watched the followers of Alpheus Togra, who turned the pain of their
abandonment into a religious and scientific quest of astounding depth and commitment. They revere the
research data their vanished avatar left behind, even as they cannot comprehend it; they guard his two
laboratories, the labyrinth beneath Deyssa Sprawl and the mountain shrine which Togra himself is said to
have sealed shut forever. They pray fervently for the portentous events, no doubt of galaxy-shaking
magnitude, which they are so certain will follow a successful attempt to enter the sealed mountain lab—an
obsession which has only convinced Dalen and the JDA that the shrine must be concealing some
technological marvel. I know nothing of any such secret. I know only that the fervor of the Tograns
surpasses any allegiance I have ever witnessed—that of JDA soldiers most certainly included. Misguided
they may be; irrelevant they most certainly are not. Were I Edward Dalen, I would be very, very concerned.
9
How could Terra require terraforming? Who could conceive such a thing?
Certainly not the Exploratory Corps, miscreants with suspended sentences who were taught which buttons
to push and hurled off to the cosmic frontier. (They taught themselves more—much more—during their
compulsory voyages of colonization.) And not the learned men of science who gave them the technology
they needed to succeed: the machines, the enormous geo-sonic verberators which caused spontaneous
eruptions of the new silicon-based isotope they called Taelon. No. The men who made the choice—to pound
this cheap new energy source out of the Earth’s crust with no thought of what such a seismic trauma might
do to their own biosphere—these were the same men who always make such myopic, fateful choices.
The bureaucrats.
I have watched a collection of glorified prison guards transform itself into the mightiest and most feared
law enforcement and ruling body this system has ever known. The Jovian Detention Authority. Success
story of the third millennium. Don’t speak to me of the Global Commonwealth; those gray-haired fools
have long since surrendered all authority to their power-mad creation. They are puppets, and nowadays
hardly even that. The servant is the master now.
I have watched the JDA spearhead the building of the Domes—shining, hemispherical refutations of
thousands of years of painstaking social progress. (Or, to a more cynical eye, the confirmation of the lack
thereof.) You are wealthy, beautiful, powerful? Enter the enclave and enjoy the fruits of your innate
superiority. You are poor, unfed, unhoused, undesirable? Consider yourself consigned to Hell on Earth. And
beyond it; never believe for a moment that the colonization missions of the Exploratory Corps have been
anything but a search for haven worlds to which the Terran elite can escape, ultimately to leave the scum of
the Earth to their own, filthy, self-destructive devices. Ah, the irony of it: prisoners sent to find a life of
eternal luxury for their jailers—a life which the prisoners themselves are never to know. Brilliant. Edward
Dalen is a genius.
And what of the Sprawls, you say—what of the teeming, unwashed masses whom Dalen would leave behind?
Surely there are more, many more, outside the Domes than inside. Why have the Sprawlers not risen up
and shaken off the shackles of their would-be masters? Why have they not taken what is rightfully theirs?
Have you ever seen two Sprawlers agree on anything?
Yes, the Sprawlers outnumber those inside the Domes by a factor of several hundred. But historically they
have been anything but cohesive. Rumblers, Go-Go’s, Fiends, Voodun... Countless gang factions, far too
busy scuffling with each other to even contemplate standing together against Dalen. And never forget,
Dalen has the JDA: Guardians, Enforcers, Castigars, a virtually limitless supply of warships and weapons.
He sees Sprawlers as animals, incapable of working in concert. For all I know, he may be right. I have seen
little evidence to the contrary, their stumbling attempts at a “Sprawl Council” notwithstanding.
Page 7
10 11
COPY PROTECTION
The first time you run Dark Reign 2, you will be prompted to enter your CD-key. The number is located on
your game’s CD jewel case. You must enter this Key before you can play Dark Reign 2. For your own
protection, do not give out your CD-key to anyone.
In addition, you must have the game CD in your CD-Rom drive to:
Play campaigns
Play Instant Action
Host a LAN game
You do NOT need the game CD in your drive to:
Host a WON game
Join a WON game
Join a LAN game
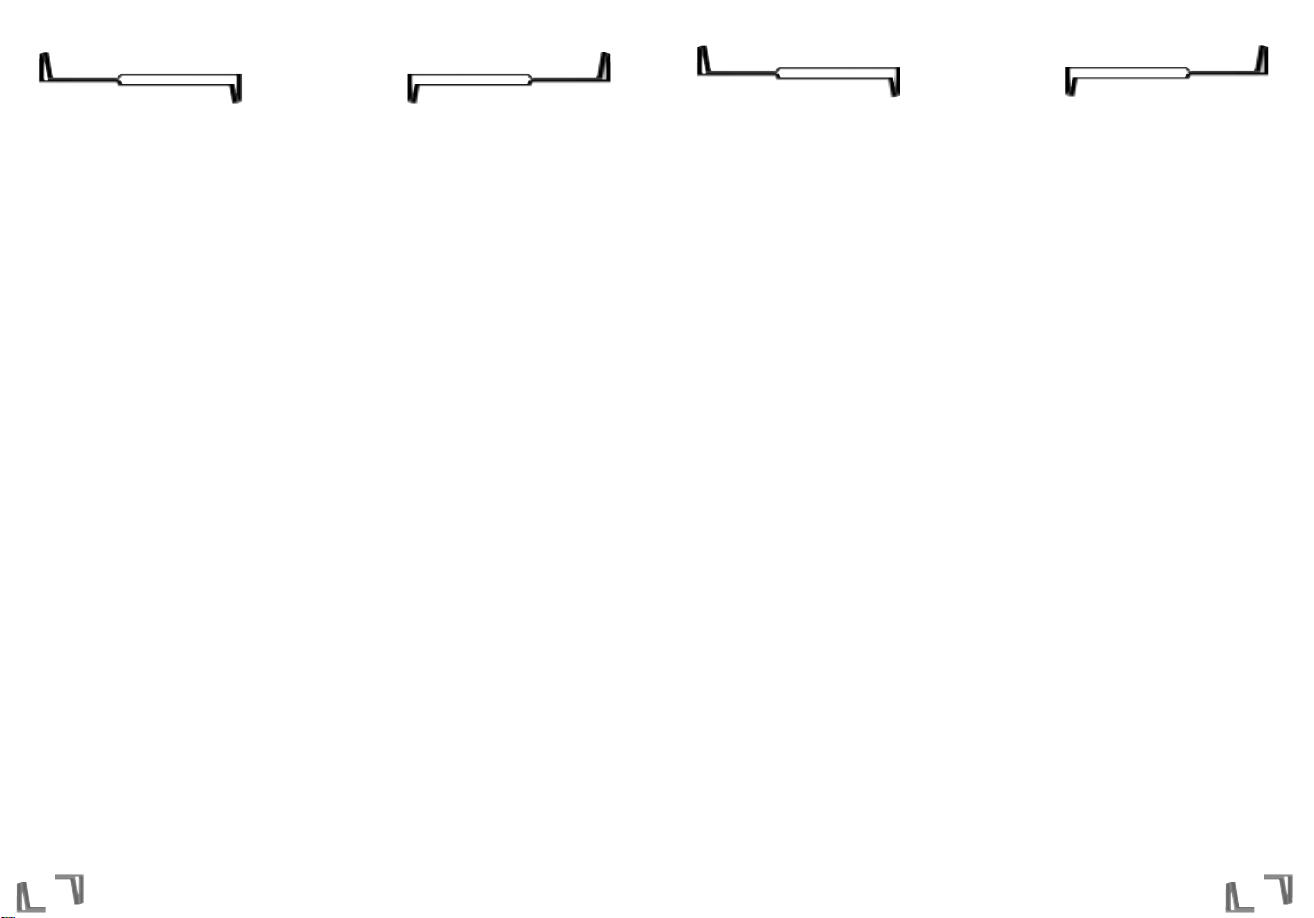
MAIN MENU
LOGIN SCREEN
This is where you create your player profiles. Click on “Create”
to make a profile. Highlight the name you wish to log in under,
then click “Login.” “Delete” will delete a user profile. “Quit”
will exit the game.
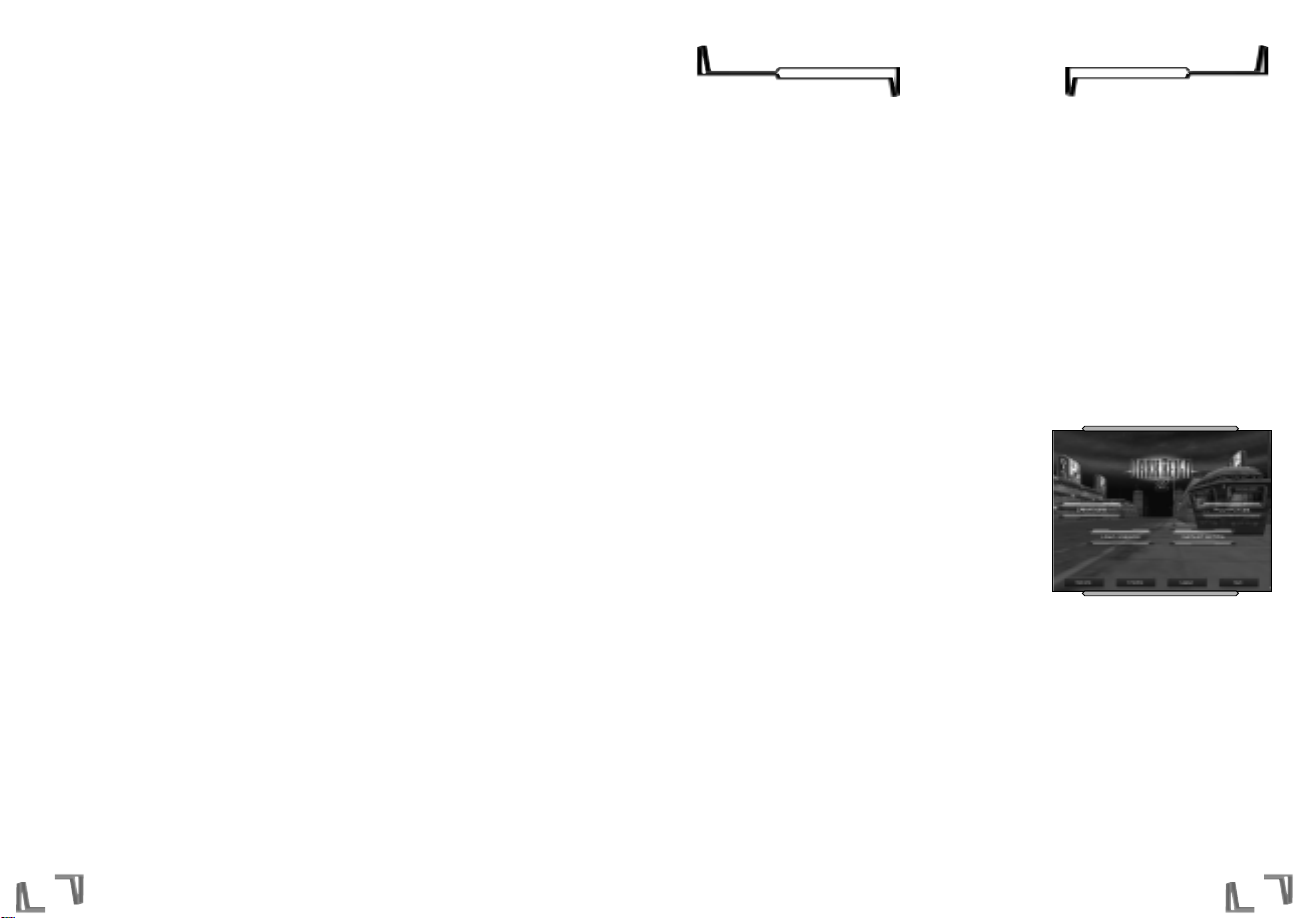
CAMPAIGN
Choose this option to play the Single Player campaigns in Dark
Reign 2. You will have the option of starting a new campaign
as either the JDA or the Sprawlers.
MULTI-PLAYER
Choose this option to play Dark Reign 2 over a Local Area Network or on the Internet. For more information
on Dark Reign 2 multiplayer see page 37.
INSTANT ACTION
Choose this option if you would like to play against up to seven computer opponents. You have the ability
to select the difficulty and the personality of all of the computer opponents. The setup for an Instant
Action game works the same as for a multiplayer game except that you will not need to be connected to a
LAN or the Internet in order to play.
Which way the wind will finally blow in the coming storm—whose resolve will crumble, whose grip will prove
the strongest—that I cannot guess. I would be a fool to try. And though I once did have a name, the day is
long since past when its mention caused a Rumbler’s voice to silence or a Guardian’s mouth to go dry. I
cannot influence events now, even were I to wish it so. Which, in candor, I do not.
But one thing I can do—I want to do. Call it a guilty man’s final act of penance.
I can bear witness. I will see all that which yet is to unfold, and mark it, in my mind if nowhere else.
I have always been here.
And I watch.
GAMEPLAY
Page 8
13
INTERFACE
The Dark Reign 2 interface is composed of several elements: the Game Window, the Minimap, the
Infogroup, the Squad Manager, the Building Manager, the Unit/Building Context Menu, and the Options
Menu.
THE GAME WINDOW
The Game Window is your view on the world of Dark Reign 2.
Within this window you can control all of your units, telling
them where to go and what to do.
MOVING AROUND THE WORLD
Assuming no unit or building has been selected, you will see a
standard arrow cursor. This is your “Selection” cursor. If you
move the cursor to any edge of the screen your window’s field
of view will scroll in that direction as well.
You can move around the world more quickly using either of two options. Holding the right mouse button
down as you move the mouse will allow you to turbo-scroll around the terrain at super-speed. To be
“transported” to another place instantly, find the place you’d like to go to on the Minimap, and left-click
on it (be sure you have no units currently selected). Also, during a battle you can be transported to the
battle scene instantly by pressing the space bar.
SELECTING AND MOVING UNITS
When you place the cursor over a unit, the cursor will highlight and the unit’s status bar will appear below
the unit. Left-click on the unit to select it.
With a unit selected, move the cursor around the Game Window; you will see a “Move” cursor over areas
that the unit can move to. Choose a spot, then left-click; the unit will report that your orders were received
and then hurry over to that spot. If you mouse over an area the unit can’t access (a steep hill, for instance),
the cursor will become a “Can’t Move” cursor. (If you are uncertain of a unit’s identity, simply place the
cursor over the unit for a moment; a label will appear above the unit, indicating its type.)
To deselect a unit or group of units, right-click anywhere on the screen.
TARGETING AND ATTACKING
In addition, just above the Minimap, you will notice three small buttons. From left to right, they are
Attack, Move and Attack, and Stop. You can use these to further control your units. Clicking Attack and then
a target will force the selected unit to attack that target, whether it is friend or foe. Units on Move and
Attack orders will travel to the designated location. If they encounter enemy units, they will stop and
GAME CONTROLS
LOAD MISSION
Choose this option to load a previously saved game.
OPTIONS
Choose this option to set up your video, sound, and gameplay options.
CREDITS
Choose this option to see all the fine people who brought you Dark Reign 2.
LOGOUT
Choose this option to Logout the current user and return to the Login Screen.
QUIT
Select this option if you would like to leave Dark Reign 2 and return to Windows. Choose wisely.
12
Page 9
14
MINIMAP
The Minimap is your battle map and provides a miniature view of the
entire battlefield. It appears in the bottom right of the screen as long
as you have a functioning Command Center and a sufficient power
supply. This allows you to move efficiently to control your forces
once your domain has expanded beyond the area seen within the
Game Window, and to simultaneously track the movement of your
units and those of your opponent in far-flung areas of the battlefield.
You will see a small representation of the current camera position on
the Minimap at all times; the glowing green area next to it represents
the area currently visible in your Game Window, as well as which direction the camera is facing. The
locations of your buildings and units, and your opponents’ buildings and units, are displayed on the
Minimap as dots and triangles of the appropriate colors.
With no units selected, left-click on any point on the Minimap and your Game Window view will shift to
that location. To move units or groups of units using the Minimap, select them and then left-click on the
desired destination on the Minimap.
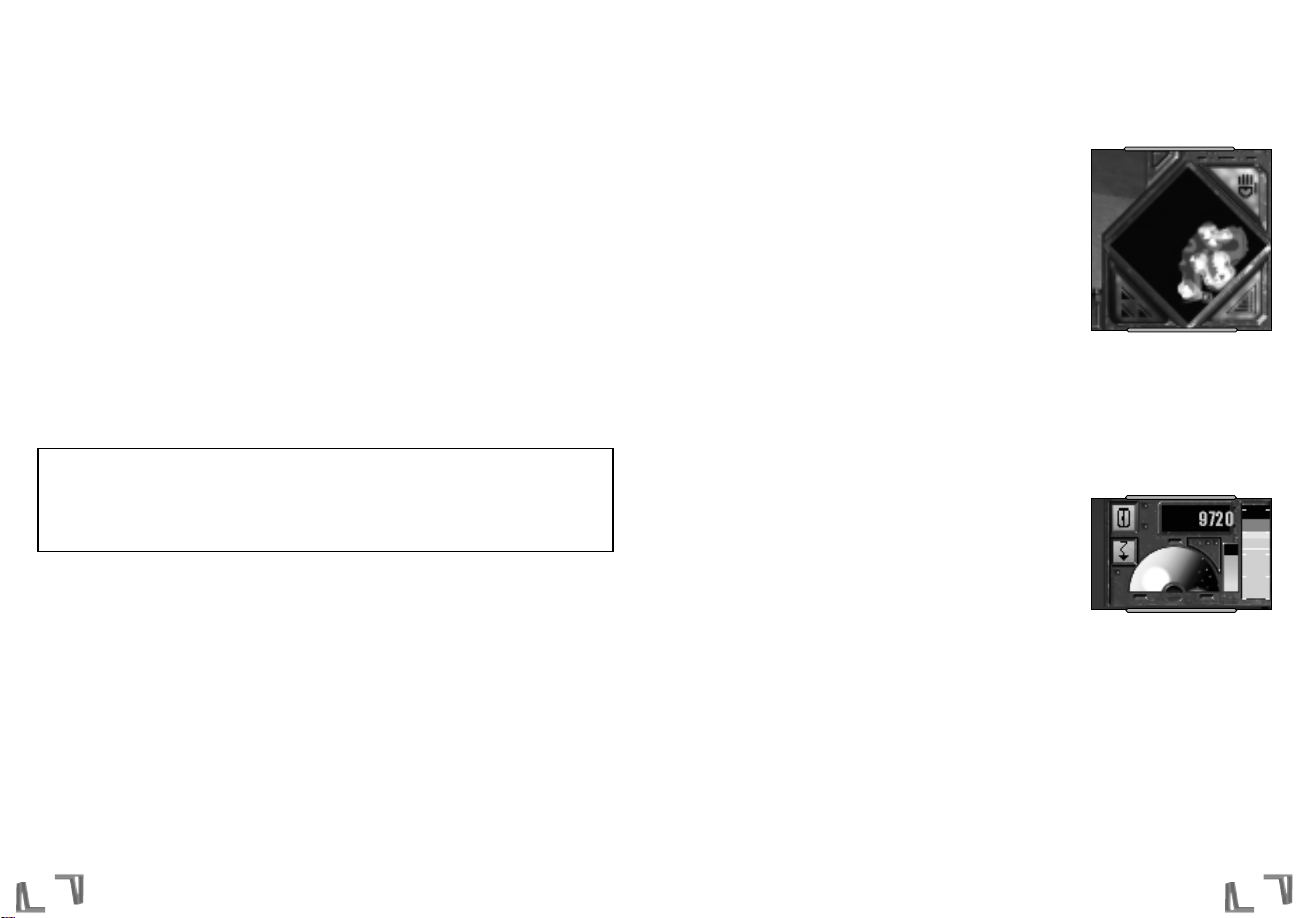
INFOGROUP WINDOW
This window is located in the top right corner of your screen, and
tracks important information about your current status. Along the
right side is a slider bar which represents your current power output
(see Power for a description of how this slider works in relationship to
your current output and usage).
Just to the left of the power indicator is a small vertical bar. This
represents your unit limit. As you build, the bar will rise. When the bar becomes full you have reached the
unit limit and will be unable to build anything more. See the section titled “Unit Limit” for more
information.
To the left of the unit limit indicator is a semicircular window which shows the current Time of Day. Full sun
equals midday, and full darkness means midnight; a split indicates dawn or dusk. This window is inactive if
Time of Day is unimportant in a mission (for example, an indoor mission).
Above the Time of Day window is the Taelon window, which shows the current amount of Taelon you have
collected. Taelon is an energy source about whose origins more can be found in the story (page 7) and in
Dark Reign. See the Resources section of this manual to see how Taelon is collected and used.
15
engage them and then resume their course to their original destination. Stop will make the selected units
stop immediately.
GROUPING UNITS
Often you may find you want to select more than one unit at a time. To do this, left-click next to a group of
units and, while holding down the left mouse button, move the cursor diagonally to draw around the box
around them. Release the button, and the units are selected. All units in that group will then respond to
any move or attack command you give.
You can keep units grouped for quick and easy selection by using the Squad Manager. For more
information, see “Squad Manager” on page 16.
UNIT STATUS
The physical condition of each unit is measured by its health status bar. To check on the status of a
particular unit, left-click on the unit; the health status bar will appear below it. A green status bar means
the unit is in good health. As the unit is damaged, its status bar decreases in size and changes color from
green to yellow to red.
Note: Several JDA units have a blue health bar, indicating that the unit has regenerating armor.
Regenerating armor will take any damage first and will slowly build back up to full health when not
under attack. As the armor is taking damage you will see the bar shrink and the color go from a
light blue to a dark blue. If the bar shrinks too far, the armor is destroyed; at that point the unit
itself will begin to take damage.
LINE OF SIGHT, SHROUD, AND THE FOG OF WAR
Each unit can only see a limited area in its own immediate vicinity. This area is called “line of sight.” A
unit’s line of sight is affected by the elevation of the terrain around it and any object (for instance,
buildings) that may be in its way. As a general rule, the higher a unit’s elevation is, the more of the
surrounding terrain it will be able to see.
When you start a mission, you will only be able to see a portion of the map. Unexplored regions will appear
black. This is called the “shroud.” As you send units out to explore, the areas of the map into which they
move will become visible, both in your window and on the Minimap (see next section).
Regions that have been explored but are not currently in the line of sight of any unit will appear grayed out
both in your window and on the Minimap. This is known as the “fog of war.” Any terrain features will
continue to appear as they did when they were last in a unit’s line of sight, but you will not be able to see
any objects or enemy units.
Page 10
16
BUILDING MANAGER
The Building Manager is a visual
representation of all buildings that can
construct other units or buildings. For
example, a Command Center has the
ability to build new Construction Rigs—
so once you have built a Command Center,
the Command Center icon will appear on the Building Manager.
Along the top of each building’s icon on the Building Manager is a bar which displays the current health
status of the building. The Building Manager will also show you if a building is currently at work
constructing units, and, if so, how many units are in the queue awaiting construction.
You can select any building by left-clicking once on its icon in the Building Manager. This will bring up the
building’s Build Menu. By doing this you can order a specific building to begin constructing a unit without
having to go back to the building itself.
If you double-click on a building icon in the Building Manager, your Game Window’s field of view will shift
to center on the building you have clicked on.
TIP: Use the Building Manager to set rally points and then build up troops without having to move back to the base.
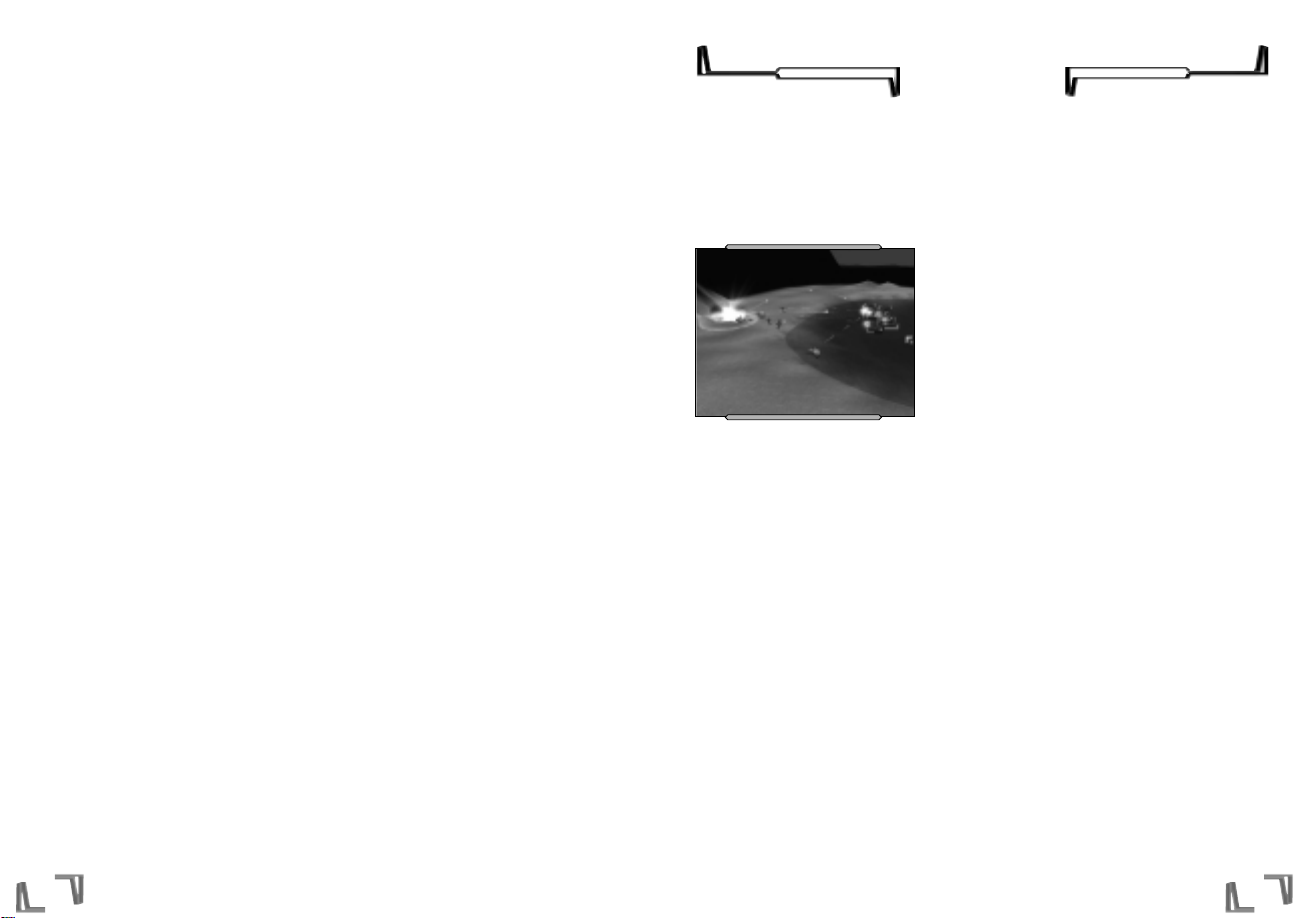
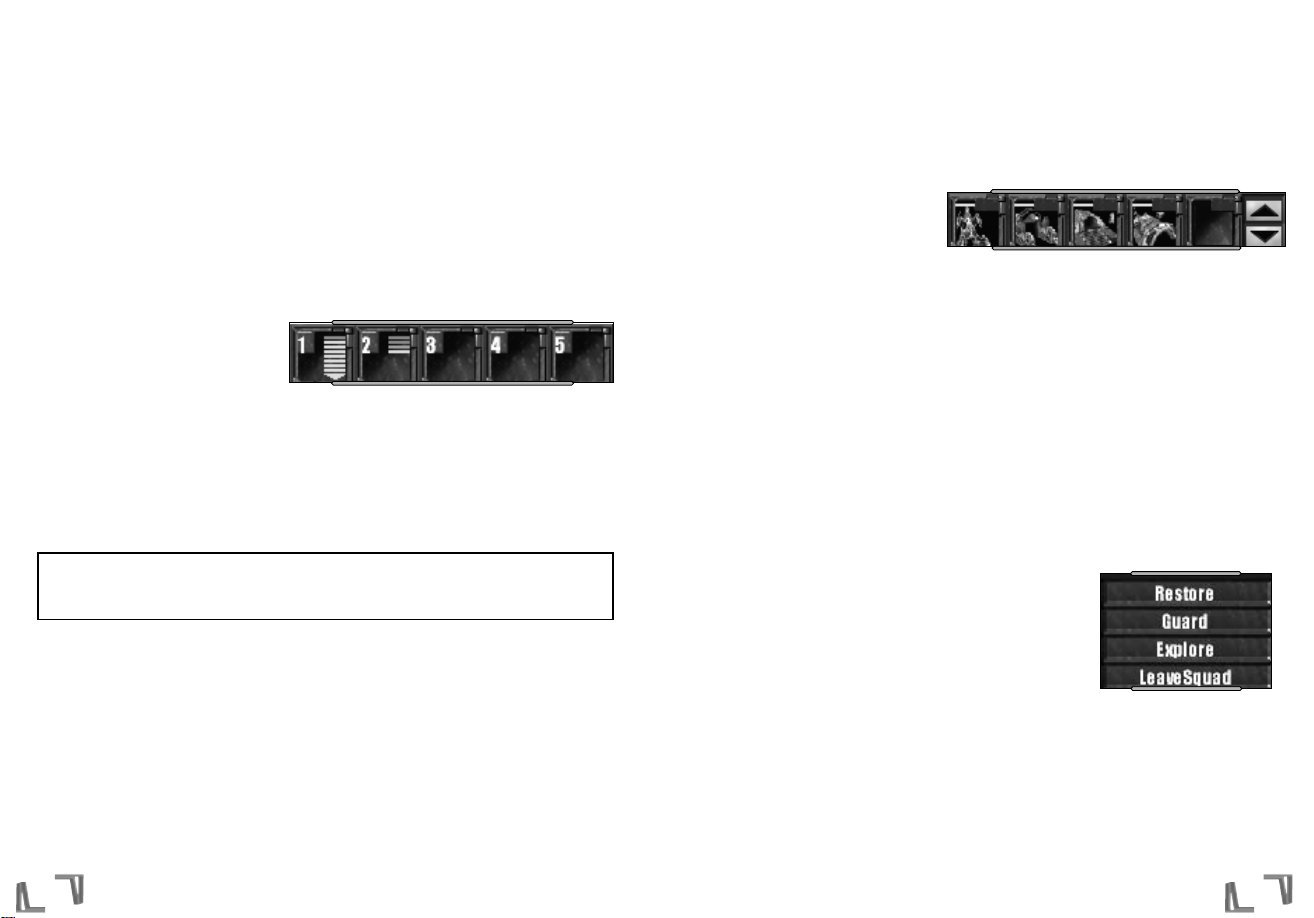
UNIT/BUILDING CONTEXT MENU
Whenever you select a unit or structure, a menu will appear just above
the Minimap which lists the options currently available to that unit.
These options will vary but could include:
FOR UNITS:
Collect Resource — This will enable you to order a Collector to a specific
patch of Taelon. This option will only appear when you have a Collector
selected.
Explore — This will order your unit or units to explore the map. This
option will appear with any unit selected.
Guard — This will order your units to follow and protect a selected unit (or building). First select any unit or
units you want to be the guards, click on the guard button, then select the unit, or building, you want them
to safeguard. This option will appear with any unit selected.
Leave Squad — This will kick out the selected unit or units from one of your squads. This option will appear
with any unit selected.
17
To the left of the Time of Day window is an icon for the Waypoints Menu. Clicking on this icon will bring up
the Waypoints Menu, along with any waypoints currently placed in the world. For more information on how
to use waypoints see the Waypoints section in this manual on page 29.
To the left of the Infogroup window is the Objectives window. During the single player campaigns, this
window will always display your current objectives in the mission. To toggle the window, click the small
button in the upper-left corner of the Infogroup window. You can also press the “O” key on your keyboard.
SQUAD MANAGER
Along the bottom right-hand corner of
your screen you will see a row of icons.
This is your Squad Manager. The Squad
Manager is a visual representation of any
squads you have created in the game.
You can keep units grouped for quick and easy selection as follows: select the group as outlined above,
hold down the Control key, then press a number, 1-5. The selected units will be grouped under that
number—and their “squad” will be shown on the Squad Manager bar (lower-right corner of your screen).
Once you have formed a squad, you can re-select it at any time by left-single-clicking on its icon on the
Squad Manager bar (in your Game Window, you will see all its units highlight and show their health status
bars). Left-double-clicking the icon will not only select the squad, but also shift the field of view to center
on the squad itself.
Note: You may group your units into 10 squads using the 1-0 keys, but only squads 1-5 will be
available through the Squad Manager. To access squads 6-0, simply press the corresponding
number key on your keyboard.
The Squad Manager contains five large squad icons, each representing one of your first five potential
squads. In each squad icon, the row of small bars on the right side shows the number of units in the squad
(the color of each bar indicates that unit’s health). This only indicates one through eight units, or greater
than eight as in squad one in the image above. On the left side is another, smaller icon which represents
the squad’s current action (idle, moving, or attacking). Thus, by glancing at the Squad Manager you can
quickly check the status of all your squads.
Units in a squad will always try to stay together, and will communicate with each other to work as a team.
Page 11

COMMS MENU
This menu relates to multiplayer functions and is only
available during a multiplayer game. Access the
Comms Menu by pressing the button to the lower-left
of the Minimap.
In this menu you can:
• View a list of players in the game.
• Chat with those in the game.
• Set the default chat channel.
• Give an ally units and Taelon.
• Set map markers.
To chat with other players, type your message in the message window at the bottom of the Comms Menu
and press enter. You can select who receives the message by clicking on the box to the left of the message
window. You can select All (everyone will see the message), Team (only teammates will see the message),
or Allies (all allies will see the message). After you choose a chat channel it will remain on that channel
until you change it.
To give an ally units, select the units you wish to give, then open the Comms Menu. Select the person you
wish to give the units to (you will see a pull-down box). Then press “Give Units.”
To give an ally Taelon, open the Comms Menu. You will see a box with a “0” in it. Type in the amount you
wish to give. Select the player you wish to give the Taelon to from the pull-down box. Select “Give
Resource.”
To set a field flag marker, open the Comms Menu. Click the SelectFlag (SetF) button. Then click on the
terrain where you wish to place a marker. All teammates and allies will be able to see the marker. You may
only lay one marker at a time. To clear the marker open the Comms Menu and click the ClearFlag (ClrF)
button.
ORDERS MENU
Access the Orders Menu by pressing the hand button on the upper-right side of
the Minimap. Here you can set the behaviors of individual units. To change a
unit’s settings, select the unit (or units), then open the Orders Menu. You can
select the following behavior types: Scout, Defender, Skirmisher, Warrior, and
Terminator (see “Unit Behaviors” for more info).
19
Restore — If a unit is damaged or expends ammunition (air units), you will see the button to 'Restore.' This
will enable you to order your units to return to the nearest repair or air tower. It is only active when an
appropriate station is available. This option will appear any time a damaged unit or a unit needing ammo is
selected.
Self Destruct — This will enable you to blow up a unit and possibly damage other friends or foes in the area.
Only Collectors and the Juggernaut have this option when selected.
Store Resource — This will enable you to order a Collector to deliver Taelon to a Refinery. This option will
only appear when you have a Collector selected.
Unload Cargo — This will enable you to order a transport or teleport to release your units. This will only
appear for selected Air Barge and Telepads with stored infantry.
FOR STRUCTURES:
Eject Spy — If a spy unit has infiltrated a selected building, this option will enable you to kick them out.
This option will only appear for infiltrated structures.
Pause — This option will halt the building or upgrading of a facility. This will only appear when the selected
building is being constructed.
Power Down — This will enable you to save energy by turning off the power to inactive buildings. This
option will appear for any structure that is receiving energy.
Power Up — This will enable you to re-activate a building you have powered down. This option will appear
for any structure that is not receiving energy.
Recycle — This will enable you to sell a building. You will only receive a portion of what it originally cost.
This option will appear for any selected building.
Set Rally — This will enable you to order your newly constructed units to a specific point. You could select a
barracks and then set a rally point to a spot near a large battle. Until the rally point is changed, any new
units built by the barracks will run to that point. This option will appear for any selected building that
constructs units.
Unpause — This option will resume construction of a paused building (see above). This option will appear
for any paused selected building.
Upgrade — This option will appear for any building that has the potential to be upgraded. The button will
not be active until all the prerequisites for the upgrade have been completed.
If you click on a Construction Rig or on a building that can build (such as a Precinct or a Motorpool), a Build
Menu will appear on the left side of your screen. For more information on base building and unit
construction see this section on page 21 of this manual.
18
Page 12
Resolution Window
Allows you to set the display resolution based on your video card
Detail Settings
Allows you to change the level of graphical details in the game
You may toggle other display features (such as mirrored water) as well. Hold your mouse cursor over a
button to display a tool tip explanation of each feature. These settings are saved when you exit the menu.
You may also run Dark Reign 2 in windowed mode from this menu. To return to full-screen, click off the
"Win" button in this menu.
AUDIO
The volume levels for Dark Reign 2’s glorious sounds are set in the Audio options menu.
Digital Master Volume
Sets the volume of sound effects
Speech Volume
Sets the volume of game messages
CD Music Volume
Sets the volume of CD music
Enable CD Audio
Plays music from a CD in your CD-ROM drive
MULTIPLAYER
Although most users will not need to alter the defaults, advanced users may modify them if they wish to
host games from behind firewalls or connection sharing mechanisms. Refer to the Technical help readme
file for more information.
ADDONS
Dark Reign 2 supports additional mods and add-on's created by other players. Please consult the
readme.txt file for more information on this. Neither Pandemic Studios, LLC, nor Activision support these
addons.
Available Addons
Displays any available addons
Current Addons
Displays any addons currently in use
2120
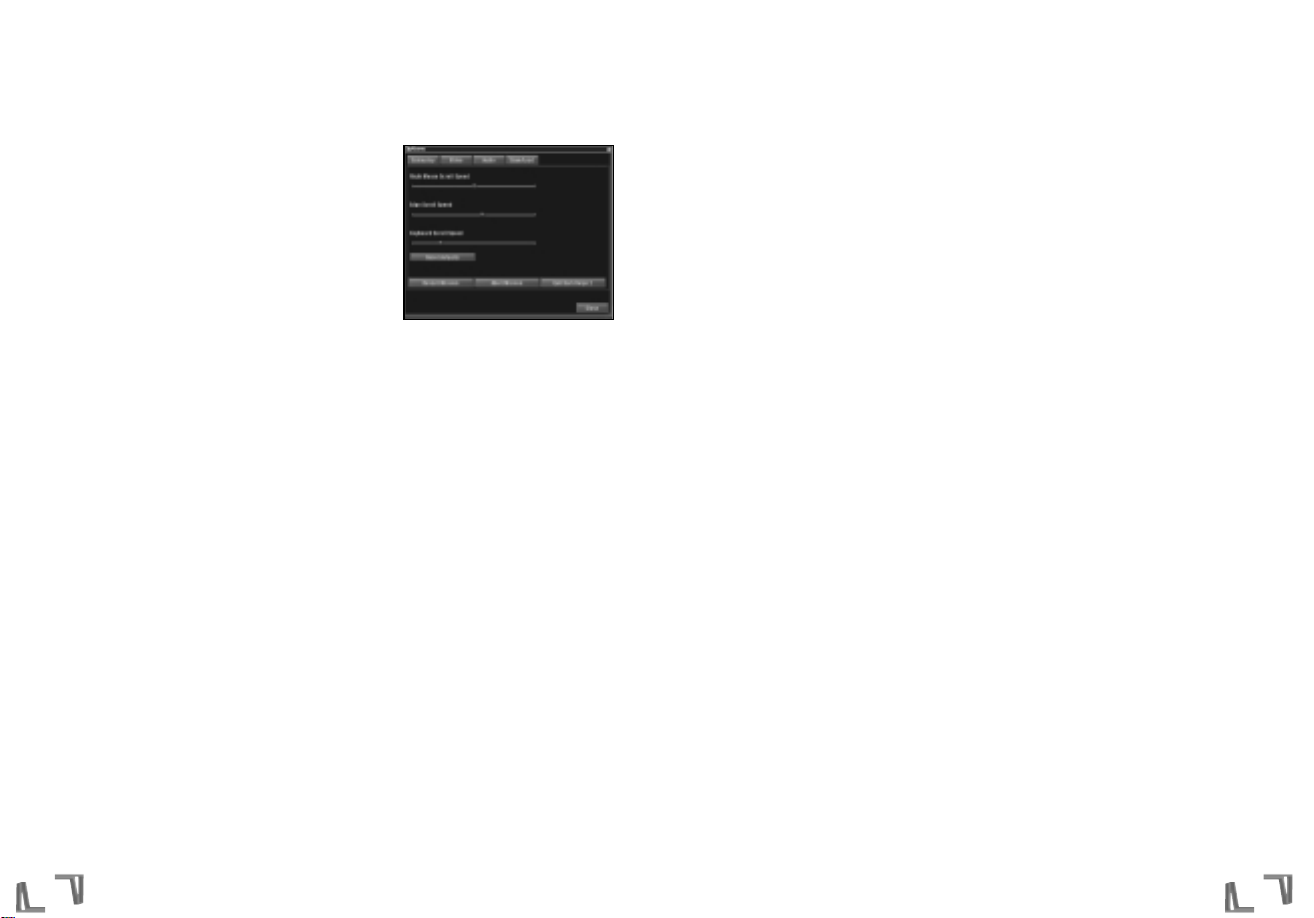
OPTIONS MENU
While playing the game you can access the Options Menu by
clicking on the triangular button with lines to the lower-right of
the Minimap, or by hitting the Escape key. This will bring up an
Options Menu which allows you to load/save your game, set
gameplay/video/audio options, restart a mission, abort a
mission and return to the main shell or exit Dark Reign 2 and
return to Windows.
GAMEPLAY
The Gameplay options menu allows you to adjust the rate at
which your camera moves about in the world. In the unfortunate event that you must stop playing Dark
Reign 2 and return to the real world, you may also exit from this screen. Any settings you make here are
saved when you exit.
Right Mouse Scroll Speed
Sets the speed at which the camera moves when right mouse scrolling
Edge Scroll Speed
Sets the speed at which the camera moves when edge scrolling
Keyboard Scroll Speed
Sets the speed at which the camera moves when arrow-key scrolling
Reset Defaults
Sets the defaults to their state when you first installed Dark Reign 2.
Restart Mission
This allows you to turn back time and begin a mission again.
Abort Mission
This allows you to return to the shell to access other portions of Dark Reign 2.
Quit Dark Reign 2
Something you will never want to press!
VIDEO
The Video options allow you to adjust the graphical settings of the game. The most commonly used
functions are:
Video Card
Selects your primary video card from those available.
Page 13
22 23
PLAYING
DARK REIGN 2
This section outlines many features of Dark Reign 2, including building your base, collecting resources,
and setting individual behavior settings for each of your units.
BUILDING STRUCTURES
In most missions, you will want to build a base to support and protect your war machine. Structures are
built by individual Construction Rigs. To start the building process, left-click on a Construction Rig unit on
the map; the buildings available for construction will be shown in the Build Menu above the Building
Manager. (Building types that are not yet available will be shaded over in red.) If you hold the mouse
cursor over one, a text cue will appear informing you what prerequisite structures must be completed
before this building can be constructed (for instance, in the JDA campaign to build a Motorpool you must
first build a Command Center).
To select the available building type you wish to construct, left-click on that structure in the Build Menu.
An image of the building will now appear on your cursor as you scroll back over the Game Window. You may
designate any flat, unobstructed area of the map as your building site by left-clicking on the desired spot
(areas unsuitable for building include sloping hillsides or over terrain features such as trees or boulders;
when you scroll over these with your building cursor, it will turn red). You may use the
<
and > keys to
rotate the orientation of the building. This must be done before you actually click on the terrain to give the
order.
Once you have left-clicked on the desired spot, the selected Construction Rig will confirm your choice
verbally, move to the site, and begin building. Once given, you may cancel a construction order before
building begins by selecting the Rig and left-clicking anywhere on the map. Buildings are not operational
until they are completed. Left-clicking on the building under construction brings up a status bar indicating
the progress of the job. You may pause a building’s construction by selecting that building, and then
selecting “Pause” from the Building Context Menu, which will appear above the Minimap. When you wish
construction to resume, select the building again, and then select “Unpause” from the Building Context
Menu.
BUILDING UNITS
Once you have constructed one or two basic buildings, you can begin to manufacture units and wage war
against your opponent. The first thing to build is a Command Center; with this you can make Construction
Rigs, which can in turn construct other buildings.
To generate infantry you will want to then build a Barracks (Sprawlers) or a Precinct (JDA). (Keep in mind
that some specialized units won’t become available until you “upgrade” these buildings; see below.) Once
your Barracks or Precinct is complete, left-click on the structure; the units available for building will
appear in the context menu above the Building Manager. To build a unit, simply left-click on that unit’s
image in the context menu. (Again, Construction Rigs will emerge from the Command Center, while
Page 14

You can change the destination of your Collectors by selecting one and then clicking on a Refinery and/or
Taelon field. The Collector will then travel between those two points until the Taelon field is exhausted or
you change its destination.
HINT: Control as many Taelon fields as possible. A well-funded army is a strong army.
UNIT STATUS AND REPAIRING
As discussed above, the physical condition of each unit and building is measured as “health status.” To
check the health status of a particular unit or building, left-click on its image on the map; a status bar will
appear below it. The bar will display green as long as the unit/building’s health is good, yellow if it is
marginal, and red if it is poor.
There are several ways to raise the health status of a unit or building. Damaged vehicles can retreat to their
repair bay, or find (or be found by) a Scaver (Sprawlers) or Psitech (JDA). As long as they are in contact
with the Scaver/Psitech or on the pad at the Scaver Hut/Restoration Facility, they will then be repaired at a
steady rate. You can order a group of vehicles into the repair bay, and they will enter and exit one by one
as they are repaired. Infantry units are healed in the same way by their own special units or by entering
their hospital. Group healing works the same way as group repair.
To repair a building, you will need to use a Scaver or a Psitech. Select the unit and mouse over the damaged
building; your cursor will switch to the heal cursor. Left-click on the building, and the unit will move over
to it and begin the repair job. The building will be repaired at a steady rate until it has regained full health.
RECYCLING BUILDINGS
There will be times when you will want to ‘recycle’ structures that you have built. Left-click on a building;
its context menu will appear above the Minimap, and one of the items on the menu will be Recycle. Leftclick on Recycle; the selected building will then “de-construct,” and you will receive (in credits) a portion
of what you paid to build it.
Like the building process, the deconstruction process is not instantaneous but will take some time.
Therefore, if you are planning to get some value out of a building that is under attack and unsalvageable,
you may want to start the deconstruction process early.
POWER UP/POWER DOWN
If you are running low on power, you may wish to turn off the power to one or more of your buildings and
so lighten your energy load. To do this, left-click on the building you would like to power down. On the
Building Context Menu you will see a Power Up/Down button; click this button and the building will power
down. To restore power to buildings you have temporarily shut down, simply repeat the process. Buildings
that are powered down will not function or provide line of sight.
2524
infantry will emerge from the Barracks or Precinct.) To build multiple units— one after the other—click on
the desired unit’s image multiple times or on a different unit’s image. You can also preselect units so that
as soon as the unit is available, it will be built.
To build vehicles, you will first need to construct a Garage or Motorpool. Once these structures are
complete, left-click on the structure; the units available for building will appear in the context menu above
the Building Manager. To build a vehicle, simply left-click on the unit’s image in the context menu; the
vehicle will emerge from the Garage or Motorpool.
HINT: Building speed can be severely reduced if you are low on power,
so always make sure that you have enough power plants.
POWER
Another of the first structures you should build when setting up your base is a power plant, because all of
your buildings need power to function.
There are two types of plants available. The first is solar, which is inexpensive but generates a very limited
supply of power. When the sun goes down this production is reduced even further. (You can see how much
extra power you are getting from the sun by checking the light green bar on the power bar in the interface.
When the sun sets, this light green bar will disappear.)
The second type of plant is nuclear and generates a potent, constant source of energy. Though powerful, it
is expensive to build.
When power is low, building production will slow down and force field walls may turn off. When power is
critical, building production becomes very slow, and gun turrets will not fire.
HINT: Take out your opponent’s power before attacking the rest of his base—
you’ll weaken his ability to quickly re-build.
FUNDING YOUR WAR MACHINE
In order to build your base and units, you will need to locate and harvest Taelon. To do this, construct a
Refinery and send out your Collector to find a patch of Taelon. Once located, he will begin harvesting it
until he has reached his full capacity, at which point he will return to the Refinery to empty his load.
Note that as you harvest Taelon at a given location, the supply there will shrink and eventually disappear,
forcing you to move on and look for new sources. However, some Taelon deposits will regenerate as the
game progresses, so from time to time you may want to return to areas you may have already harvested, to
see if the Taelon has regrown.
Page 15

2726
RALLY POINTS
Each building that constructs or heals units can have a rally point. A rally point is the position where units
will move to when they exit the building. To set a rally point, select the building and then select Set Rally
from the Building Context Menu. Your cursor will then switch to a rally point icon. Click on the map where
you would like to set the rally point. A marker will be placed on the terrain to show where your rally point
is. When you deselect the building the rally point will disappear.
Tip: You can control your units’ route to a rally point
by setting the rally point at the beginning of a Waypoint path. (See Waypoints)
REARMING
Some of your units will have limited ammunition. This is generally true for flying units. The amount of
ammo they have is shown in the unit status bars that appear around a unit when you mouse over it or select
it. When a unit is out of ammo it will automatically return to its air control tower to rearm. Once it is done
rearming it will remain next to the air control tower or move to its rally point if one has been placed.
THE SPIES
Both the JDA and the Sprawlers have spies at their disposal. For the JDA, the spy is called the Shadowhand;
for the Sprawlers, it’s the Infiltrator. Spies can be very effective at getting line of sight on the enemy and
can also be used effectively to sabotage the enemy as well. One of the main features of the spy, is its
ability to disguise itself as an enemy unit. To do this, select the spy. Then mouse over any enemy infantry
unit that you currently have line of sight to. You will get the disguise cursor which will allow you to look
like the enemy you clicked on (note: if the enemy unit you are trying to morph into can see the spy, you
will not be able to morph). Although your spy will now look like the enemy, he still acts like a spy and
gains none of the functionality of the unit he is impersonating. But you now can move your spy in amongst
the enemy ranks, and unless they are looking for a spy, you can go undetected and gain line of sight to his
troops and base. A spy is uncovered when the enemy is told to fire at it or it is discovered by an anticlandestine unit. For more on anti-clandestine units see the section below.
The spy can also sabotage the enemy. He has three methods of sabotage. If you get the spy into the
enemy Command Center you will gain line of sight to all of the enemy units. If you put the spy into the
enemy Refinery, you slowly begin stealing Taelon from the enemy and transfering it to yourself. Finally, if
you get the spy into an enemy power plant, you will steal a large portion of the power that building is
producing and use it for your own war-machine.
ADVANCED
FEATURES
UPGRADING BUILDINGS
Certain buildings have the ability to upgrade, and thereby manufacture new and more specialized units or
allow you to construct more advanced buildings. When a building becomes upgradable, you will be alerted
by a message that appears on them when they are selected. To find out the prerequisites for a building
upgrade, select an upgradable building and mouse over the Upgrade button that appears on the Building
Context Menu; the prerequisites will appear along with the cost. If the Upgrade button is highlighted in the
menu, click it to begin the upgrade process. Note that it will take time to upgrade the building.
UNIT LIMIT
You are limited in the total amount of units and structures you can build. The Unit Limit is represented by a
small vertical bar located in the Infogroup window, between the Power indicator and the Time of Day
indicator. The more you build, the higher the bar will rise. When the bar is full, you have reached the unit
limit and will be unable to build any new units or structures (until you are again below the limit). Note that
Mojos and Airstrikes do not affect the unit limit (you will always be able to launch them), however the
structures that produce them do count against the unit limit. Hold your mouse cursor over the Unit Limit
bar, and it will give you a numeric value. Keep in mind that all units are not counted equally towards the
unit limit. A Mastiff, for example, will raise the unit limit bar higher than a Guardian.
Page 16

To make a unit or group of units abort an order, left-click the Stop button (or the “S” key) on the top of the
Minimap.
When you are moving units across the map they will not stop to engage any units they encounter along the
way. You could set their AI behaviors to allow them to attack en route (see Behaviors section below) or you
could use the Move and Attack command (the “M” key). Pressing “M” while a unit is selected will give you
the Move cursor. When you left-click on the terrain your units will begin moving to this position, but if
they find any enemy troops along the way they will pause on the path in order to engage the enemy.
If you think you know what direction an attack is coming from, you can turn your troops towards the
imminent assault. This will help them to get off their first shot as quickly as possible. The effect is not
great, but in battle every second counts. Select the units and press the “T ” key. You will see the Turn
cursor. Left-click on the point on the map you want your units to face, and they will turn in that direction.
WAYPOINTS
To lay points in the game or to view waypoints that you have created before, you must bring up the
Waypoint Menu. This is done by clicking on the waypoints icon which is in the left side of the Infogroup
window (located in the top right-hand corner of the screen.) To lay a waypoint, first pick the type of path
you would like to create. There are three paths in all. One Way, Two Way and Looping. Units on a one way
path will go from the start to the end and stop. Units on a two way path will follow the path then retrace
their steps back to the beginning. Units on a looping path will go from the beginning to the end of the path
and then will take the shortest route back to the start.
Once you have decided what type of path you would like, start clicking on the terrain to lay points along
the path. A line will be drawn between all points so you can see the actual path. When you have completed
creating the path, click the Create button in the Waypoints Menu or simply right-click. This will “save” the
path in the world. To delete a path, select it and hit the Clear button, or hit the delete key on your
keyboard.
To put units onto a path, select the units and click the point on the path you would like them to start at.
They will then move along the path to their destination.
TIP: Use a looping path to set up patrols around your base for repair units.
The repair units will stop at any building that needs repairing and then return to the trail.
UNIT BEHAVIORS
Dark Reign 2 allows you to customize the way a unit behaves in certain situations. You can use unit
behaviors to get units to do precisely what you would like them to do in a certain situation. You set a unit’s
2928
CLOAKING
Fiends on the Sprawler side have the ability to cloak. When the Fiend is standing still he is invisible to the
enemy units (put the Fiend on “Scout” mode to ensure he will not move and reveal himself; see Unit
Behaviors for more info). He can only be spotted by anti-clandestine units while cloaked. When the Fiend
moves or attacks he will then become visible again. You can use the Fiend’s cloaking ability to stage
ambushes which will give him a significant advantage due to his effective hand to hand combat abilities.
ANTI-CLANDESTINE
Certain units have anti-clandestine abilities. This means they can see through the cloaked enemy units
and they can spot spies. Anti-clandestine units can also uncover traps that may have been placed around
the map by Sprawler Scavers. The units in Dark Reign 2 with anti-clandestine abilities are the Sprawler
Disruptor and the JDA Warden.
SELF DESTRUCT
Collectors, the Juggernaut, Atomic Generators and Atomic Power Plants have the ability to self destruct.
Any units or buildings that can self destruct will have a special button that will appear in the context menu.
Destroying your units or buildings in this way will cause an area of effect explosion which could damage or
even destroy any units that may be attacking it at the time. This is often a good last ditch maneuver to try
to get something in exchange for the loss of this unit or building.
SPECIAL ATTACKS AND MANEUVERS
When you place the cursor over an enemy unit you will see the Attack cursor. However, there will be
situations when you want to attack a target that does not present you with an Attack cursor. For example,
you do not see the Attack cursor when you mouse over allied or neutral units. You can attack an ally by
left-clicking on the Attack button which is above the Minimap. You can then left-click on the allied unit
and your troops will attack it. You can also use the Attack button to fire on trees and rocks or to attack the
ground where you believe cloaked Fiends might be hiding.
Occasionally, when you give your units an attack order they will move to close on to the target or will
pursue a target that moves out of range. You may want your units to attack without breaking their position.
If you have an established defensive position you don’t want to move from or you don’t want your units to
move nearer to the enemy and get picked off, you can use the Shift+A keystroke combination. This will
give you an Attack cursor and allow you to target units as normal. However, when you left-click on the
target, your unit will only attack if the target is within range. Your troops won’t close to fire on targets out
of their range or pursue fleeing units. They will simply hold their position and attack if an enemy is in
range.
TIP: This attack is particularly useful for artillery units.
Page 17

EXPLORE
Any of your units can be set to explore the map. When you select a unit, or group of units, you will see the
Explore button appear in the context menu. Clicking it will send the unit(s) out looking around the map to
try to uncover areas that you have not been to yet. If the units that you send out to explore are in a squad
together, they will then stick together and will try to avoid getting separated.
TIP: Exploring with unit behavior set to Scout is a good way to uncover the map
in the early stages of a mission or game.
TRAPS
The Sprawlers have the ability to set traps in the world. Traps are set by the Scaver and he must have the
second or third upgrade to the Scaver Hut in order to build a trap. Traps are invisible to the enemy and are a
good way to ambush them.
To build a trap select a Scaver and the Trap Menu will come up. Select the trap you would like to build and
then click on the terrain where you would like to build it. The Scaver will then move into position and begin
constructing the trap. Traps are invisible to the enemy. However, if the enemy sees the trap being
constructed, then it will no longer be invisible to him. In addition, the enemy can use anti-clandestine
units to sniff out traps and uncover them.
There are four types of traps that can be built. They are:
• Land Mine
Lays a mine field under the trap. When an enemy unit walks over it, the mine will explode.
• EMP Trap
Any vehicles which drive over this trap will have their power shut down for a short amount of time where
they will be unable to move or defend themselves.
• Parasite
A unit that walks over the Parasite trap has a Parasite attached to it. This Parasite gives you line of sight
to this unit no matter where he moves on the map.
• Time Bomb
A unit who walks over the Time Bomb trap will have a Time Bomb strapped to him which will go off about
one minute after walking over the trap, destroying the target, but leaving the hidden trap intact.
3130
behavior through the Orders button next to the Minimap. There are five different types of unit behaviors:
Scout, Defender, Skirmisher, Warrior, and Terminator. These behaviors do the following:
SCOUT
On Scout mode, your unit will not automatically attack the enemy. If the unit is attacked it will retreat.
DEFENDER
Units that are set to Defender will hold their ground. They will not leave their position to attack an enemy.
They will only attack if a unit gets in range. Units set to Defender also have smart target selection,
meaning they will fire at units that they can damage the most first.
SKIRMISHER
Units that have Skirmisher set as their behavior will fire at any target they come in contact with as they
move. But if they are attacked they will retreat. Skirmisher is a good setting to use if you would like to
harass the enemy and keep them on their toes.
WARRIOR
This is the default setting for units. A unit on Warrior will use smart target selection (fire at the unit it is
most effective against first.) Units on Warrior will also pursue the enemy if it retreats to the unit’s initial
line of sight. Once it reaches this point it will then return to its original location.
TERMINATOR
When a unit is on Terminator, it will attack until either its target or itself is destroyed. It will not attempt to
flee if it gets too damaged. It will attack an enemy whenever possible, even if it has to move to do so.
TIP: Different behavior settings can be very good for different types of units.
The best thing to do is experiment and see what works best and
then you can configure your units to behave the way you want them to.
AUTO REPAIR
In the Orders Menu, you will see Auto Repair buttons along the bottom. When Auto Repair is turned on for
a unit, it will automatically leave battle when its damage threshold gets into the red and it will move to the
nearest healing station and will repair itself before it returns to battle.
GUARD
Sometimes you may want to protect another unit or building in the game. To do this, select a unit and the
Guard button will appear in the context menu. If you click it you will then get a Guard cursor. Click on the
unit or building you would like to guard. The unit will then stay next to that unit/building at all times and
will attempt to protect it from the enemy.
Page 18

EMP BOMB
Temporarily powers down all vehicles and buildings in a region and stops them from working properly.
CONCUSSION BOMB
Drops a Concussion Bomb attack in the targeted region with devastating effects.
TELEPAD
The Telepad is an advanced JDA building that can instantly transport infantry to any location where you
have line of sight. Keep in mind that the Telepad opens a temporary two-way portal ANY unit type can
enter. It is a double-edged sword that you must wield carefully.
To load infantry into the Telepad, select them, then click on the Telepad (you should get a special cursor).
A Telepad can only hold 6 infantry units, but you can build multiple Telepads.
To teleport units that are in the Telepad, select the Telepad building, then select "Unload Cargo" from the
menu above the Minimap. You should get a special "unload" cursor. Click on terrain where you wish to
teleport the troops. You must have line of sight on the area you wish to teleport to. At the spot where your
troops materialize, a Reverse Gate Portal will be created (it looks like a hovering ring). Units that travel
through the Reverse Gate Portal will come out at the teleport source (the Telepad). To move units through
the Reverse Gate Portal, select the units, and then click on the Reverse Gate Portal object.
HINT: Sending the right forces through a Reverse Gate can be devastating
to an unsuspecting enemy, since often the teleport source is in the enemy base.
3332
MOJOS AND AIR STRIKES
The Sprawlers and JDA have the ability to bring in off-map attacks. Off-map attacks are attacks that are not
attached to a unit and can be sent anywhere the player has line of sight. These attacks may not be used in
an area protected by a Disruptor or Warden.
MOJOS (SPRAWLER)
The Sprawlers have the ability to conjure up Mojos from the Shrine. To conjure a Mojo, select the Shrine
and the Build Menu will come up. Select the Mojo you would like to build. Mojos do not cost money to
build, they take only time. Once the Mojo is ready you can cast the Mojo by selecting it from the menu and
then clicking in the world to any position for which you hold line of sight. There are four possible Mojos
you can conjure:
EYEBITER
Temporarily blinds the enemy in a region around where the Mojo is cast.
RAGE
This Mojo makes your units who are hit by it move faster and attack with more firepower. It is a temporary
effect.
BERSERKER
Any units in range of this Mojo will lose all concept of friend or foe and will begin attacking the first unit
they see. This Mojo wears off after about 30 seconds.
BARON SAMEDI
When you call this Mojo, it will conjure up a giant psycho-kinetic ‘Golum’ who will go around and attack the
enemy with devastating power.
AIR STRIKES (JDA)
The JDA have the ability to call in Air Strikes to attack key targets on the map. To build an Air Strike, select
the Radome and the Build Menu will come up. Select the Air Strike you would like to build. Air Strikes do
not cost money but they do take time to charge. Once the Air Strike is ready you can launch it by selecting
it from the Radome’s menu and then clicking in the world to any position for which you hold line of sight.
VULCAN MINES
Lays a minefield in the targeted area.
ASSAULT BOTS
Drops off automated bots that will wander the map until they see an enemy target which they will then
Kamikaze into.
Page 19

3534
SQUAD MANAGER
<1-0> Selects Squad
Shift <1-0> Jump to Squad
Left-Click on # Jump to Squad
V Selected Units Move to Wedge formation
B Selected Units Move to Box formation
N Selected Units move to Line formation
X Selected Units Scatter
BUILDING MENU
Left-Click Build/Add Unit to Production Queue
Shift-Left-Click Add Five Units to Queue
Right-Click Remove One Unit from Queue
Shift-Right-Click Remove All Units from Queue and Cancel Construction
P Pause/Unpause Building Construction
R Set Building Rally Point
> Rotate Building Cursor Clockwise
< Rotate Building Cursor Counter-Clockwise
H Jump to Command Center
CAMERA
Arrow keys Scroll Camera/Map
F Camera Freelook (hold)
F1-F6 Change Camera Presets
Numpad arrows Change Camera Facing
Num5 Face North at Default Camera Height
Num7 / Num9 Rotate Camera 90*
Right Mouse
(Hold) Scroll
+ Left Control Pivot
+ Left Alt Rotate
+ Left Control
& Left Alt Swoop/Zoom
Mousewheel Swoop
GENERAL
O Open/Close Objectives Window
Shift-O Display Orders Menu
Ctrl Cue Any Order
Tab Toggles Trails menu
Backspace Delete Last Trails
Delete Delete Selected Trail
Ctrl-S Quick Save Mission
Ctrl-L Quick Load Mission
Pause Pause Game
Scroll Lock Frame Advance When Paused
Print Screen Create a Screenshot
Space Jump to Location of Last Warning Message
Ctrl-Space Message Return
Enter Activate Client Chat
UNIT
Ctrl - <1-0> Adds Selected Units to Squad (removed selected units from any previous squad)
Alt - <1-0> Adds Selected Units to Squad (retains squad you are adding units to)
1-0 Select Squads
Ctrl-Left-Click Selects All Units of Same Type
Alt-Left-Click Selects All Units of a Type on Screen
M Move & Attack
Shift-M Move
A Attack
Shift-A Attack Without Moving
S Stop
T Turn
Shift-D Self-Destruct
G Guard
[ ] Select Next/Previous Unit and Jump to Location
Alt -[ ] Select Next/Previous Unit of a Type and Jump to Location
J Jumpscroll (click to trigger)
U Upgrade
W Restore
MOUSE AND KEYBOARD COMMANDS
Page 20

37
After selecting Multiplayer from the Main Menu, you will be given the choice to play over your Local Area
Network or over the Internet. Dark Reign 2 uses the free World Opponent Network (WON) to setup games
on the Internet. Select the kind of connection you want to play over.
INTERNET (WON)
The first time you connect to WON you’ll need to log in. If you have an existing WON account you can use it
or you can create a new account by pressing “New Account.” If you want to change your account password
you can do so by pressing “Modify Account.” Usernames on WON are unique and you may be asked to
select a different username if the name you desire is already taken. Once you have a username and
password, proceed by pressing “Login.” The next time you select Internet you will be automatically logged
in using the username and password you previously entered. If you want to login using a different
username press the “Logout” button from the main WON screen.
Once connected to WON, you will be placed in the Lobby to meet other players. You can join rooms other
than the Lobby by selecting them in the Rooms list and then pressing "Join Room" or by double-clicking
on the room you wish to join. You can create a new room by pressing "Create Room." Rooms can optionally
be password protected by entering a password when creating the room.
Within each room you can see the list of games that are being setup and the list of players who are in that
room. You can chat privately with a player by selecting them in the player list. If you want to talk to all
players you can deselect the player by right-clicking on the player list. The list of games shows the name
of the game, the name of the player who hosted the game, the number of players currently in the game
and the maximum number of players who can be in the game. There’s also a ping indicator that shows the
quality of the connection that can be expanded by pressing the info button. A game can be joined by
selecting the game you want to join and pressing “Join Game” or by double-clicking on a game. New
games can be created by pressing “Create Game.” Games can be optionally password protected by entering
a password when the game is created.
NETWORK (LAN)
The LAN screen shows the list of available games on the local network. You can join a game by selecting it
and pressing “Join” or by double-clicking on the game. Games can be created by pressing “Create.”
Once you have joined or created a game you will see the game setup screen.
MULTIPLAYER
USING THE CAMERA
There are several controls for adjusting the angle and view of the game world.
SCROLLING
You can scroll around the map by moving the mouse cursor to the edge of the map. The map will scroll in
that direction. Note: Edge scrolling is not available in windowed modes. To scroll much faster, press and
hold the right mouse button while moving the mouse. You can also scroll by using the arrow keys on your
keyboard.
VERTICAL ANGLE
To adjust the angle by which you view the action, use the F1 – F6 keys. F1 is low to the ground and close to
your units, F2-F6 adjusts the camera progressively higher. You can also use your mousewheel to adjust the
vertical angle of the camera.
ROTATING
You can rotate the camera with the 7 and 9 keys on your keyboard’s number pad. These keys will rotate the
camera 90 degrees in the desired direction. After the camera rotates it will still be looking at the area you
were previously viewing. You can also rotate incrementally by holding down both mouse buttons
simultaneously and moving the mouse left or right.
HEADING
You can change the camera’s heading, or the way it’s facing, by using the arrow keys on your keyboard’s
number pad. The up arrow will face the camera North, down South, right East, and left West.
36
Page 21

UNIT FILTERS
The host can disallow the construction of certain types of units. Spies, Super Weapons,
Mojos/Strikes and Turrets can all be disallowed.
Tip: You can turn off Turrets/Posts to make defending a base a real challenge!
START LOCATIONS
You will be able to set whether you want players to be able to set their own start locations of if you’d like to
have random start locations. If you allow players to set their own start locations they will have to do that on
their own through the player controlled setup menu.
STARTING CREDITS
All maps have default starting credits. You can change this value by entering an amount here.
RULE SET
Some multiplayer missions can be played with different rule sets. Rule sets define the objectives that must
be achieved to win the game. For example, “Protect HQ” requires that players maintain at least one HQ and
if they don’t have a HQ for 3 minutes all of their units will be destroyed. See page 42 for more on rules.
KICK PLAYER
The host can kick someone out of the game who they don’t want in by using /kick "playername" in the
chat area or clicking the kick button next to the player’s name.
LAUNCH
Once all players are in and all options are set then all players need to click launch before the game can
begin.
ADD AI
You can add an AI player to the game by clicking the “Add AI” button. You may play against or ally with AI
teams. You may ally AI teams together by clicking on the team color tab in AI’s window.
EARTH
Click on the Earth button to view where on Earth your opponents are. From this window you can also set
your own latitude and longitude. This feature is optional and does not affect gameplay.
LOCK
The host can use the lock at the bottom of the screen to prevent any other players from joining
the game.
3938
GAME SETUP
The game setup screen allows the host and players to change game options prior to play. The main
components of the setup screen are: the player list, the map information, the chat area and the menu
icons. The player list at the top left of the screen shows all of the players currently in the game, and the
relationships between them. The map information at the bottom left of the screen shows the current
mission and options set by the host. Options are highlighted in red if the host has changed them from the
default settings. The chat area allows you to converse with the other players in the game. If you came from
WON then there will be an additional chat area that allows you to converse with players who are in the room
where the game was created.
PLAYER SETUP CONTROL
You access the Player Setup Controls by selecting the wrench next to your name. A menu will pop
up which will allow you to select your team color, your side (Random, Sprawler or JDA) and your
start location if the host has allowed it. You will also be able to set a handicap in this menu. A handicap will
adjust the power of your units so if you are a stronger player playing against a weaker player you could set
your handicap to easy and your units will be less effective. If you have chosen to play cooperatively with
another player the wrench will not be available and only the "team leader" can adjust the settings. The
player who hosted the game also has access to the setup control of any AI teams.
You can ally with a player by selecting the ‘ally’ icon next to their name. Allies share line of
sight in the game and can trade units and Taelon during the course of the game.
You can also choose to play cooperatively with another player by selecting the coop icon next to
their name. When you play coop, you actually control the same units. You can use coop to split
duties among yourselves. For example one player may handle base building and resource
management while the other player may handle exploration and attacks.
TIP: You can play coop together through the single player campaign.
HOST SETUP
The host is tasked with setting up most of the game. Most game setup is done by selecting the game setup
icon at the bottom of the screen. Some of the options include:
MAP SELECTION
The host will need to select the map that will be used. If your opponents don’t have a map you
select they will have the opportunity to download it from your computer automatically.
Page 22

MULTIPLAYER MODS
KING OF THE HILL
In KOTH, your goal is to take a Construction Rig and build a throne on the hilltop at the center of the map.
You must keep the hilltop occupied with your throne for five minutes to win the game.
CONTROL FREAK
On each Control Freak map, there are 5 control points that you must take over to win. To occupy the points,
you must move at least one allied unit within range of the control point without having any enemy units
also in range.
ASSAULT!
Assault is based around a well fortified AI base guarding a portal to another world. Your goal is to break
through the base and move your 'Dezigner' piece to the portal. You have 60 minutes to move your Dezigner
to the portal before it closes, at which point all players lose.
MULTIPLAYER RULESETS
BLOODBATH
Bloodbath requires you to destroy 50 enemy units before any other players do.
GLUTTONY
Gluttony requires you to refine 30,000 Taelon or steal 1,000 Taelon before other players do.
PROTECT HQ (DEFAULT)
ProtectHQ is a variation of standard deathmatch rules, except with one caveat—if you do not have a
Command Center for more than three minutes, you lose. This prevents games from going on for many hours
as the obvious winner hunts down the last remaining unit(s) of the loser.
DEATHMATCH
Standard fare deathmatch - your goal is to destroy all other enemies.
MAP TYPES
Map types are an example of a map that adds another dimension of gameplay without affecting the actual
rules of the game.
In addition to the standard multiplayer maps and the ruleset specific maps, another type of map exists,
called ‘Fence Post’' These maps allow for any ruleset to be played on them, but have fence posts guarding
each base from one another. The fence posts turn off and on at regular intervals. This prevents players
from rushing units in, and also helps players coordinate their attacks in intervals, while the fence posts are
down.
4140
UNIT LIMIT
You can change the unit limit from the default (150) to 250 (or even 1000!) for huge games. Be warned,
even users with high-end systems and great bandwidth may see a performance hit with 1000 units in the
game!
MAP TRANSFER
If the host is using a custom map, and the players in the game do not have that map, the host may upload
the map to the other players. If a player does not have the map you currently have selected on their hard
drive, two icons will appear by their name. The red map icon shows that the player does not have the map.
The other icon will initiate the map transfer when pressed. Press this icon. The other player will get a
confirmation dialog box to verify that he really wants to download the map. If he chooses Yes, the transfer
will commence.
MULTIPLAYER IN GAME FEATURES
When in the game, players have the ability to give their allies units or Taelon. To do so you
must bring up the Comms window which is done by clicking the Comms Menu next to the
Minimap. The Comms window shows you who’s left in the game and their recent chat
messages. You can also send quick messages by hitting the ‘enter’ key, typing your message
and pressing enter. If you change your mind and don’t want to send a message, hit the ‘esc’ key to remove
the window. In both the quick chat and Comms window, you can change who your messages go to by
selecting the pulldown on the left of the chat entry. You can decide to send to everyone (all), your co-op
partners (team), to your allies (allies) or to your enemies (enemies).
MULTIPLAYER MODS AND RULESETS
Dark Reign 2 allows for several different types of multiplayer games. Basic multiplayer maps can be found
in the ‘Standard Multiplayer Maps’ folder. But there are also a collection of Multiplayer Mods in separate
folders such as King of the Hill and Control Freak. Any of the maps within those folders play according to
their appropriate Mod. A listing of different Mods available with Dark Reign 2 can be found below.
In addition to Mods, game hosts can also select from a variety of Rulesets. Rulesets change the end
conditions for a standard multiplayer map. Most games will be played with the Deathmatch ruleset but you
can choose from several other variations. Different rulesets are listed below.
Page 23

4342
JOVIAN DETENTION AUTHORITY
MEET THE MEN AND WOMEN OF TODAYS J.D.A.!
As the human race grows in knowledge and power, it’s good to know your best interests are protected. The
proud heroes of YOUR J.D.A. are marching forward to take hold of humanity’s destiny with both hands—for
all of us.
So when you see them on the street, be sure to cooperate and do as they ask. And feel free to say thanks—
because they’re looking out for you, your family... and your way of life.
TODAYS J.D.A. IS YOUR J.D.A.!
(all descriptions excerpted from the Encyclopedia Commonwealth, 92nd Edition.)
GUARDIAN
Even centuries ago, the Guardians of the Order were synonymous with law and order;
now their descendants, known to us simply as Guardians, serve the Domes as foot
soldiers of the JDA. Whether conducting a Rumbler round-up in Deyssa Sprawl or
responding to an attack on the Dome Rampart, they’re the first ones into a crisis zone
and the last to leave. Armed with Grepler
®
trip-rifles—“a grunt’s best friend™” – they’re
also protected by regenerating armor.
“Give me ten Guardians and a week, and I will change the course of history.”
— Lt. Major T. Kelvin Duran, 6th Protectorate, in a 21.9.2492 interview with
Commonwealth Today
UNITS
ROLE General SIGHT RANGE Norm
HIT POINTS Low TAELON COST Low
DAMAGE Low COMMAND COST 2
SPEEED Norm
Page 24

4544
PSITECH
Our noble practitioners of the Healing Arts and Sciences, trained and field-tested as
they have been for decades at Angel Bay’s own Ucladian Hippocreum. Whenever a
Guardian or Castigar is wounded in a campaign, the men and women of PsiTech are there
with the latest medical technology and their own psychogenetically-boosted Psi-Ray.
They’re also handy with a quad-wrench if an Enforcer takes shrapnel in his PJP.
“She changed the dressing on my Maser burns, held my hand at night when the pain got
real bad—and even managed to get that ping out of my Boomer’s plasma carb. If you ask
me, they’re all angels!”
— PTC Lylo Hantrev
2nd Platoon, 43rd Infantry, Division 6 (Miadad Dome)
SHADOWHAND
Any healthy society needs a secret police force, and ours is no exception. For many
years, the Shadowhand have been famous for their ability to blend in and spy on enemy
strongholds at will. Today, the Circle serves the JDA with new light-refracting polymer
and Psychopush technologies (all highly classified, of course); Shadowhand operatives
can seemingly become the enemy they stalk, and make their way unnoticed into his
lairs.
“But he... he looked... he looked just like you, sir!”
— Reportedly the dying words of shocked Rumbler Janus Karavion, to his gang boss
as he expired from twelve stiletton wounds, Quilvio Sprawl, 2504; heard by
another Shadowhand operative still in the room
ENFORCER
Our elite, high-flying Guardians, equipped with Kontel-Murfee dual-exhaust PJPs
(personal jet propulsion devices) bring death from above to ground-based Sprawlers.
Their maneuvering ability makes them impervious to most infantry attackers, though
they can be vulnerable to anti-air units (like the Go-Gos of the Sprawls). Enforcers
come armed with third-generation Grepler
®
swit-bore rifles.
“All of a sudden they come over the mountains like a swarm o’ freakin’ mosquitoes
through the night fog -- I thought I was gonna hafta bail... Still givin’ me nightmares,
those flyboys.”
— Valen Caffardlin, Member, Go-Gos of Nagaer Sprawl(overheard in a cashdown)
CASTIGAR
Bearers of the highest standard in noble gallantry, the knightly orders of Castigars
have now pledged their honor in willing servitude to the JDA (unlike their errant
brethren, the Judas). They guard our spanways as huge, walking towers of hightech armor and strength, mounting as their principal weapon the enormous Jarvik
®
surpressor cannons on their power-assisted arms.
“Proof that God is on our side—and that He has no mercy whatsoever in His heart.”
— Edward Dalen, to Primatur Colum Birabess at the
Council of Mehica, 2503
ROLE Anti-Vehicle SIGHT Norm
HIT POINTS Med COST Low
DAMAGE Med COMMAND COST 2
SPEEED Norm
ROLE Anti-Personnel SIGHT RANGE Norm
HIT POINTS Low TAELON COST Low
DAMAGE Med COMMAND COST 2
SPEEED Norm
ROLE Healer SIGHT RANGE Norm
HIT POINTS Low TAELON COST Med
DAMAGE N/A COMMAND COST 2
SPEEED Slow
ROLE Spy SIGHT RANGE Far
HIT POINTS Low TAELON COST Med
DAMAGE N/A COMMAND COST 2
SPEEED Norm
Page 25

STRIKER
Since the uprisings at Damasq four years ago, the shadows of these
magnificent bombers have struck fear into enemy hearts. Like a giant bird of
prey, our Strikers descend from the air to drop their dreaded Litson
®
I-19
Hellfire Bombs, decimating an unsuspecting enemy’s armored column or
obliterating his headquarters. They carry limited ammunition and require the
services of nimbler escorts to defend them from other aircraft, but the
Striker remains the big air gun in today’s JDA.
“Against men, we could continue. Against guns, and tanks, we could
persevere. But this... this monster of the sky can signify only one thing: the
Gods will the end of our glorious struggle.”
— Self-styled Damasqian revolutionary leader Shidona Pri, 3.12.2493
WARDEN
With these small, unmanned hover pods, our forces are able to detect and
counter much of the Sprawl’s special weaponry, including mojos and traps.
They can also reveal morphed Infiltrators and cloaked Fiends. The secret is a
highly classified antenna system designed at the Garonti-Scherm
®
labs in
Midway Dome, which gives the JDA better ears and eyes than ever before. The
propulsion system, by Fawasi
®
, allows the Warden to run almost silently, and
thus makes it highly effective for in-Sprawl missions.
“One of the Decades Ten Best” (two decades running)
— Surveillance Monthly, August 2499
4746
WATCHMAN
These giant walkers, made by Garonti-Scherm
®
and first used in the Beijinta
Campaigns of 2493, are extremely useful as escorts for tank columns. With their
SWARMs (Short-range Wide Area Reaction Missiles), they make an excellent
anti-aircraft defense (as the Corsairs in the Byzardian Conflict found out!). Their
vulnerability to ground attack is, however, considerable.
“We were thirty-five klicks away when they first locked on and started lobbing
those (expletive deleted) bumblebee-missiles at us. Like flying through a swarm
of giant gnats. I hate those (expletive deleted) (expletive deleted).”
— Byzar pilot Ural tam Rigo, from his bed in Istandar Domes Konst
Military Medical Center, 2494
BLACKSTAR
Small, sleek, and birdlike, Blackstars have been our workhorse aircraft for
over twenty years. They are especially agile in the close quarters of an urban
Sprawl. They are powered by twin outboard Fawasi
®
529-Airhawk ionpulse/jet hybrid engines, and modified Trace Masers allow their shots to
pursue an enemy to his final destruction, whether he’s in the air or on the
ground (though the diminutive Blackstar has limited ammunition
capabilities). They often escort our Strikers on their bombing runs.
“If theres ever a combat-use aircraft Hall of Fame, Blackstar will undoubtedly
be the first—and unaninmous—inductee.”
— Strike Craft Illustrated, May 2501
ROLE Anti-Air SIGHT RANGE Norm
HIT POINTS Med TAELON COST Med
DAMAGE High COMMAND COST 3
SPEEED Fast
ROLE Anti-Air SIGHT RANGE Norm
HIT POINTS Low TAELON COST Med
DAMAGE Med COMMAND COST 3
SPEEED Fast
ROLE Anti-Ground SIGHT RANGE Norm
HIT POINTS Med TAELON COST High
DAMAGE V. High COMMAND COST 3
SPEEED Fast
ROLE Shield/Anti-Clandestine SIGHT RANGE Norm
HIT POINTS Med TAELON COST Med
DAMAGE N/A COMMAND COST 3
SPEEED Norm
Page 26

4948
GROWLER
This heavy tank, built by FrennetiCorp Land & Sea
®
, showed at the Seaport Dome
terrorist attack just how much havoc it can wreak against other tanks and even
buildings! It carries a Harkli
®
Mark 7 rail gun which fires high-speed uranium
projectiles, ensuring total destruction of any enemy target either stationary or
moving at less than 75 kph.
“This big boy may be expensive, but the muscle it brings to a fight is
unparalleled.”
— Tank & Armor, February, 2497
MASTIFF
These self-propelled artillery units combine the best features of a light tank
with a powerful Miklin
®
790-series artillery gun which produces an arcing fire
that rains oblivion on unsuspecting Sprawlers.
Though a good all-target fighting machine, the Mastiff carries light armor; the
well-publicized events of the Warsavian police action in 2499 showed it is best
used from a rear-line position where we can protect it from air attack.
“Two shots... It took out the Parliament building in two shots... Demolished... I
cant believe it...”
— stunned Net-Verite journalist Armena Comarra, live rooftop broadcast
from Warsaw Dome, 27.10.2499
ROVER
Of a similar size as the Warden, the Rover is an unmanned hoverpod first used
for reconnaissance and light combat in the Dallaston riots twenty-one years
ago. With a highly recognizable profile due to the protruding shields on each
side, it utilizes the same Fawasi
®
hover-propulsion system as the Warden, but
unlike that craft the Rover also carries its own Nix-Yelco
®
laser weaponry.
“Somebody get that (expletive deleted) thing offa me!”
— Dayess Sprawl resident and suspected Fiend leader Jo-Jo Ecafda,
moments before his refusal to surrender led to extermination by a
Rover Patrol craft
BULLDOG
These light tanks, our main such ground vehicles, have proven their
usefulness time and again over the years, most recently against the Judas in
the Spanway skirmishes in Bone Valley outside Angel Bay Dome.
Manufactured for us by Insignus, their main weapon is a Miklin 346-B hightraj mortar cannon, which can be used to great effect against enemy infantry
or, should the situation dictate, mobs of lawless Sprawl rioters.
“I’ve driven every ground vehicle we’ve got, but I’m here to tell you, I’d rather
be in an L-4 (Bulldog) every time. The balance between maneuverability and
firepower can’t be beat.”
— Capt. JG Fuller Yntami, Rampart Division, Angel Bay Dome
ROLE General SIGHT RANGE Norm
HIT POINTS Low TAELON COST Low
DAMAGE Low COMMAND COST 3
SPEEED Norm
ROLE Anti-Personnel SIGHT RANGE Norm
HIT POINTS Med TAELON COST Med
DAMAGE Med COMMAND COST 3
SPEEED Norm
ROLE Anti-Tank SIGHT RANGE Norm
HIT POINTS High TAELON COST Med
DAMAGE High COMMAND COST 3
SPEEED Norm
ROLE Artillery SIGHT RANGE Norm
HIT POINTS Med TAELON COST High
DAMAGE V. High COMMAND COST 3
SPEEED Slow
Page 27

CONSTRUCTION RIG
The new Rigs made for us by Insignus are plated with some of the same
Kealan armor used to protect our Taelon collectors. Pod navigation is the
ingenious design of the team at Fawasi. Our Rigs can get basic facilities up
and running in minimal time
“When that pack of screaming Go-Go’s came down on us, we knew we had to
get our Sentinel Guns rebuilt immediately. The Go’s weren’t stupid – they
went after the Rigs right away. Several of them took some shots, but we got
two guns put together pretty quickly, and then those damn Go-Go’s became
“went-gones”!
— Strikeforce leader Morly Ferafson, recalling a surprise attack on
Precinct 5 in the Sprawls around Mount Denver.
PATROL CRUISER
Our primary small attack boat, this version of the FrennetiCorp Land & Sea
®
TSeries was adapted especially for use by the JDA in combat situations, and
saw its first action in the Guantana Dome invasion three years ago. Used for
water reconnaissance and escort duty, the Cruiser is also an effective
defender against both air and water attack, and has chalked up an excellent
record providing supplementary defense for other, larger JDA watercraft.
“A Dreadnaught without a Patrol Cruiser escort is like a hippo in a river—it can
hurt you, but it can’t maneuver well. Add a couple of PCs—now you’ve got two
crocodiles in the mix, and the options for mischief are exponential.”
— Lt. Cmdr. Ryan Keel, Captain of the Patrol Cruiser Kilroy, DSL-5377
5150
ROLE Resource Collection SIGHT RANGE Norm
HIT POINTS V. High TAELON COST Med
DAMAGE N/A COMMAND COST 1
SPEEED Norm
COLLECTOR
Our Kealan-armor plated Taelon Collectors are manufactured for us by
Insignus. It’s ironic that one of our simplest vehicles is also one of our most
important. We only wish Insignus could provide us with a faster vehicle, but
they’ve assured us it’s not possible with the armor weight that we’ve
specified.
“That new Taelon deposit up in Dena was crawling with Rumblers, but those
new Collectors held up real good. Didn’t lose but one before we tapped it out.”
— T-Crew chief Everell Means, JDA Resource Management Corps
HOVER COLLECTOR
Our Hover Collectors are designed along similar lines to our regular collectors
– they also feature Kealan-armor plating. Their hover propulsion is provided
by a Fawasi
®
well converter. We had them built specially for getting to some
of the newest Taelon outcroppings that are appearing on some of the newly
formed coastal islands of Asia and America.
“Our division set a new Taelon collection record last year, and thanks to our
new hover collectors, I’m sure we’ll break it this year.”
— Isley Taelon Extraction Inc. Chair Wayne Seaden in an interview with
Geo Quarterly, March 2499.
ROLE Resource Collection SIGHT RANGE Norm
HIT POINTS V. High TAELON COST Med
DAMAGE N/A COMMAND COST 1
SPEEED Norm
ROLE Construction SIGHT RANGE Near
HIT POINTS Low TAELON COST Med
DAMAGE N/A COMMAND COST 1
SPEEED Slow
ROLE General SIGHT RANGE Norm
HIT POINTS Med TAELON COST Med
DAMAGE Low COMMAND COST 3
SPEEED Fast
Page 28

SKY FORTRESS
The largest, most powerful, most majestic of all our airships. The Sky
Fortress, a joint project of Garonti-Scherm
®
and Insignus, resembles nothing
so much as the floating alien “saucers,” tales of which parents used to
frighten their children with centuries ago. Sprawlers have been known to run
in terror at the sight of its enormous shadow sweeping across their hovels. Its
highly modified Nix-Yelco
®
TR-47 fusion beam accelerator is the largest
single weapon any of our forces have at their disposal; it can erase whole city
blocks with one blast and has, as anyone present at the Johan Dome crisis of
2502 could attest, had they survived.
“Pity is for the weak. This is what strength looks like.”
— Edward Dalen, at the christening of the first commissioned Sky
Fortress, the Sargon, DSH-2809, 23.7.2493
53
DREADNAUGHT
If the Mastiff is our big land gun, then the Dreadnaught is like a Mastiff on
the open seas. A larger vessel than the Patrol Cruiser, FrennetiCorp
®
s JC-117
Dreadnaught combines all the advantages of a land-based artillery-launch
system with the ability to deploy anywhere on the 5/6ths of the Earth’s
surface which is covered with water. This has proven a boon on missions to
areas which were too remote to easily bring in ground artillery, like the
Micronesian Melees of 2490.
“We never stood a chance... At least I can swim.”
— Micronesian terrorist Jinga Tungaka, survivor of the Melees, before
being sentenced to work on Callisto
TECH BOAT
MacDill & Howit
®
s trusty 9000-series is the basis for our Tech Boats, which are
dispatched to repair other watercraft both in port and on the water. Ever since
the Ross Dome disaster they have earned a reputation for keeping a fleet up
and running even in the heat of combat or emergency operations. Powered by
a rugged Fawasi
®
counter-prop engine with jet intake, the TBs generally arrive
on the scene in good order.
“Skipper asked me if I wanted a transfer twice already. I turned her down;
where else would I want to be? Without us, the whole fleet’d have to stand
down inside six months. Now that’s what I call indispensable.”
— Ensign Tiggo Phillipa, Tech Boat MacGuffin, DSY-8364
52
ROLE Artillery SIGHT RANGE Norm
HIT POINTS Low TAELON COST Med
DAMAGE High COMMAND COST 3
SPEEED Norm
ROLE Repair SIGHT RANGE Norm
HIT POINTS Low TAELON COST Med
DAMAGE N/A COMMAND COST 3
SPEEED Norm
ROLE Base Annihilation SIGHT RANGE Norm
HIT POINTS Low TAELON COST High
DAMAGE V. High COMMAND COST 4
SPEEED Slow
Page 29

BANSHEE
Now this big gal over here is Gorlinda Pitt, and she belongs to the Banshees.
They’re a rough-and-tumble bunch of ladies. For Gorlinda and her pals we’ve
modified shipments of Tyrian light mortars we pinched from some Castigars—
its a kind of mortar cannon; takes out whole bunches a infantry at one blow,
splashin’ shrapnel all over the place. One other thing to remember about
Banshees, kid: they’ll drink you under the table if you’re not careful. Oops,
better turn the other way — Gorlinda’s lookin’ amorous...
SKULK
Over in the corner—thats Varinne. Shes a Skulk – snipin’s her game, and her and her
gang are the best snipers there is. They got great eyes—they can even see in the dark.
The devil mask? I dunno whats up wit that—sposedta strike fear in the hearts of men, I
guess. We rig up these Lucifer rifles for ‘em—the scopes a beauty; between the scopes
and a Skulks eyes, they could take out a dragonfly at seven klicks. Whats a dragonfly?
(sigh) Before your time, kid...
5554
SPRAWLERS
Welcome to the Works, kid. Come on in. This is it, the place where we develop a bunch of the hardware
that’s carried by the guys out there on the street. At any given time we’ll have a collection of some of the
toughest customers in the Sprawl down here, gettin’ new weapons, gettin’ their stuff fixed, or tradin’ stuff
in. Sure, a bunch of it is recycled outta stuff we ripped off the JDA, but a lot of the rest of it is stuff we
come up with ourselves— an’ a lot of it beats that ‘standard’ assembly-line weaponry they use. Ya see, our
stuff has special modifications, extra features, stuff those JDA dims haven’t been able to figure out yet.
Come on. I’ll show ya.
RUMBLER
Rico here, he’s a Rumbler. There’s more of them than any other gang, and
they’re a pretty tough bunch. We call em the “sons of Robar” – you’ve heard
of him? Well, that’s another story... Now for the Rumblers we put together
some of these big charge-cannons – show’im, Rico—they take both hands, as
you see, and they fire one hell of an energy blast. No, Rico, no need for a
demonstration... The Rumblers, they been around a long time, and I’d match
one a them up against a Guardian any day of the week.
FIEND
Now you see that freako in the long coat over there? Thats Muushti, an he’s a
member of the Fiends. No, don’t stare; I know they’re pretty scary-lookin’,
with their tiny little heads, and their hunchbacks, and that wacko voice. But
his kind are mutants; they can’t help it. They’re some pretty fast buggers, and
more’n handy in a fight. These “Sikkers” we build ‘em fire beams of lava
stuff—with those a Fiend can gut a Guardian in seconds. When they’re not
moving Fiends can cloak themselves—half mind-trick, if you ask me, but it
works. I said, don’t stare...
ROLE General SIGHT RANGE Norm
HIT POINTS Med TAELON COST Low
DAMAGE Low COMMAND COST 2
SPEEED Norm
ROLE Anti-Personnel SIGHT RANGE V. Far
HIT POINTS Med TAELON COST Med
DAMAGE V. High COMMAND COST 2
SPEEED Norm
ROLE Anti-Personnel SIGHT RANGE Near
HIT POINTS Med TAELON COST Low
DAMAGE High COMMAND COST 2
SPEEED Norm
ROLE Anti-Personnel SIGHT RANGE Norm
HIT POINTS Med TAELON COST Low
DAMAGE Med COMMAND COST 2
SPEEED High
Page 30

VOODUN
Hey kid, look out through the door – right there. See that guy in the robe? He’s a high
priest of the Voodun blood cult, which as you know hangs out up in the hills havin’
ceremonies and castin’ curses and god knows what else.
They’re damn good healers, though; if you’re still warm, they can save you. That staff
hes carryin’ is called a ‘Crysagon’; you know he’s workin’ his stuff with it when the crook
starts glowin’. Took one apart once—nothin but serrite; I couldnt figure it out. Still
can’t....
SCAVER
Me? Well, why didn’t you ask before? I’m a Scaver, kid. We’re the techies, the
guys who lay the mines and the traps—most important, the guys who keep
everything runnin’. If it’s man-made, we can fix it, rebuild it, re-rig it, and
improve on it. No, that’s okay, curiosity’s natural—yeah, were all cyborgs. It
helps, actually. See, I got my own modified Kontel-Murfee hoverboard to get
around on, and when I’m workin’ on a project and I need a tool—power drill,
Particle Welder, whatever—I just plug it right onto my elbow here, like so...
Oh. Sorry. Guess it is a little weird if you never seen it before. Anyhoo...
5756
JUDAS
Looks like you just got lucky, kid. See that walkin’ hunka metal just came in?
We don’t see many like him around here – he’s one of the Judas. Check out
that armor, will you? That arm-mounted weapon he’s got is a Mortis beam –
it’ll cut through a tank or even a building like a hot knife through butter. Not
so bad against aircraft – but gets weaker at long range—but if you met him on
the ground you could kiss your hooey-vohs goodbye... Course he looks like a
Castigar. The Judas useta be Castigars! Don’t they teach you kids nothin’ in the
Primers anymore?
INFILTRATOR
Now that tall, spindly scarecrow-lookin’ guy at the datstand, with the long
fingers? He’s what they call an Infiltrator. His gang are spies; they’re terrific
at sneakin’ in places—that metallic skin-suit hes wearin’ actually contains
microscopic reflectin’ surfaces smaller than a pinhead. They’re hardwired into
his brain stem; he controls their angle electro-chemically. Words too big for
ya, kiddo? Good for sneakin’ about. Nah, we came up with that techno—damn
JDA stole it from us. Tit for tat, I guess...
ROLE Anti-Tank SIGHT RANGE Norm
HIT POINTS High TAELON COST Low
DAMAGE Med COMMAND COST 2
SPEEED Slow
ROLE Repair SIGHT RANGE Norm
HIT POINTS Med TAELON COST Med
DAMAGE N/A COMMAND COST 2
SPEEED Slow
ROLE Repair SIGHT RANGE Norm
HIT POINTS Med TAELON COST Med
DAMAGE N/A COMMAND COST 2
SPEEED Slow
ROLE Spy SIGHT RANGE Far
HIT POINTS Low TAELON COST Med
DAMAGE N/A COMMAND COST 2
SPEEED Norm
Page 31

THUNDER CANNON
The Thunder Cannon we build from a modified JDA Mastiff platform. You got
your Miklin 790-series artillery gun up there—big gun, tremendous range, but
you gotta get your line-of-sight from a spotter; we learned that early on in
the Palisadia police action in 97. The only other problem here is, you’re
turnin’ on treads, so the whole thing moves and fires pretty slow. But we’re
workin’ hard on that.
COLLECTOR
No mystery here, kid. These tough bugs just do one thing: collect Taelon and
get the stuff to our nearest Refinery. Now give that side panel a good kick –
go on. See? You’d have to hit that thing with a Mastiff round or two before
you’d tear a whole in that. Course some of ‘em leak a little now and then,
which is bad, ‘cause prolonged exposure to that Taelon stuff can’t be good for
ya. They say one of the drivers from up in the north end of Deyssa has grown
an extra pinky finger on the side of his hand from touchin’ too much of it.
Believe that one if ya want.
5958
GOGO
Howya doin’, ladies?
That buncha wild things shoutin’ and carryin’ on in the corner, they’re
members of the Go-Gos gang. They’re bikers—trikers, actually; we build some
of their sweet stretch hover-trikes down here, with bubble enclosures and a
Harkli
®
Mark 3 missile launcher mounted on the front between the
handlebars. Shoots off homing missiles. Okay against enemies on the ground,
but pure death to any aircraft stupid enough to come in range. Love those
trikes—might hafta make me one myself one of these days...
No, I told ya, I cant take you to the sub-basement. Sorry, kid, I don’t know
you that well—and if the JDA were to find it, us Scavers’d all be in a world of
hurt. I don’t make the rules, kid...
Okay, okay... Tell ya what. If you promise to stay quiet and not touch
anything, I can take you over to the Garage, where we store some of the
vehicles we been workin’ on. How’s that sound? Okay then, follow me —
SCORPION TANK
This baby started life as a Frenetti 927 SG tank, but we’ve done some work on
her. She’s a terror on other vehicles, on account of those twin Harkli cannons
you see stickin’ up there like eyes. They fire what’s called STING rounds—rip
the hell out of another tank. At the Mulhol breach skirmish a few years ago we
sent a whole division of JDA light armored tanks runnin’ squealin’ for their
mommies. Now that was what I call fun...
ROLE Anti-Air SIGHT RANGE Norm
HIT POINTS High TAELON COST Med
DAMAGE Med COMMAND COST 3
SPEEED Fast
ROLE Anti-Tank SIGHT RANGE Norm
HIT POINTS High TAELON COST Med
DAMAGE Med COMMAND COST 3
SPEEED Norm
ROLE Artillery SIGHT RANGE Norm
HIT POINTS High TAELON COST Med
DAMAGE V. High COMMAND COST 3
SPEEED Slow
ROLE Resource Collection SIGHT RANGE Norm
HIT POINTS V. High TAELON COST Med
DAMAGE N/A COMMAND COST 1
SPEEED Norm
Page 32

VULTURE
I love this plane. Good solid general air fighter, with a Gill & Mafta turbine
dual-intake engine. She can do some light recon work for you, and she’s good
in a fight with either ground forces or other aircraft—see those Harrower
missiles mounted beneath the fuselage? Yeah, I’ll take a Vulture against a
Blackstar every time. Oh, you noticed those props under the wings, huh?
Yeah, this here’s whatcha call a VTOL—vertical take-off and landing, that is.
Helps in stashing and scrambling, cause you don’t need a runway.
AIR BARGE
The Air Barge is the best troop transport unit we got. Kinda looks like a big, fat
walrus, don’t it? But that’s cause, volume-wise, you get the most cubic for your
surface area that way. We can pack ten guys in full gear in there. Best thing
about the Barge is, she’s a tough old girl—that skin is made from a synthesized
plastic polymer with a tensile strength of—oh, I see your eyes glazin’ over. Lets
just say it would take more than a couple of little anti-air shells to pierce it.
61
HOVER COLLECTOR
The JDA has started harvesting Taelon from some of the nearby channel
islands, so we decided we needed to get in on the act as well. Whoah! Don’t
touch that part. You’ll turn off its hover reactor and that tem rim will land right
on your foot! It’s got the same armor plating as its treaded cousin, but those
hover reactors make them much more expensive to build.
CONSTRUCTION RIG
Well right now we’ve got several rows of Rigs in here. Wow, look at this one. That’s not
just a trip-rifle mark. Dunno what did that. And this one over here’s taken some licks
as well. But our Rigs are tough, and we can get things assembled out in the field
pretty quickly. Used to be you had to build a lot of facilities without Rigs, back when
kids your age used to have to work. Now these Rigs make everything easy for ya.
60
ROLE Resource Collection SIGHT RANGE Norm
HIT POINTS V. High TAELON COST Med
DAMAGE N/A COMMAND COST 2
SPEEED Norm
ROLE Construction SIGHT RANGE Near
HIT POINTS Low TAELON COST Med
DAMAGE N/A COMMAND COST 2
SPEEED Slow
ROLE Skirmish SIGHT RANGE Norm
HIT POINTS High TAELON COST Med
DAMAGE Med COMMAND COST 3
SPEEED Fast
ROLE Transport SIGHT RANGE Norm
HIT POINTS V. High TAELON COST Med
DAMAGE N/A COMMAND COST 3
SPEEED Fast
Page 33

DISRUPTOR
Have you ever seen anything like that? Basically you’re lookin at a big radar
jammer – it’s not much more than a giant Hagira radar dish on treads. The big
attraction here is versatility: we can use ‘em from down here in the Sprawls,
or if we want we can send ‘em out with an armored column to help protect ‘em
from air strikes. They’re also handy for uncovering those devilish, morphed
Shadowhand agents. Sure are funny lookin, though.
HYDROFOIL
On this little number we outfitted a FrennetiCorp chassis with a chain of
twenty souped-up Kontel-Murfee hover engines, and—presto! You got
yourself an attack boat that floats over the water on a cushion of air. Its quick
as a dolphin, and that high-energy PLASER weapon you see up top there
makes it as tough on aircraft as it is on other boats. I got a soft spot for this
baby; it saved our butts at Catalina four years ago...
STASIS BOAT
These Stasis Boats are basically just Frenneti D-series platforms with two
Gill & Mafta 927 outboards in back, so they’re agile but not too speedy.
They do carry Nix-Yelco neutron guns in front, though— that send an
electro-magnetic pulse that’ll disable your enemy’s power systems and
leave ‘em dead in the water, so a Hydrofoil can come along and finish the
job.
LEVIATHAN
This monster is our big sea artillery. We took some JDA Dreadnaughts we
wrecked at Big Sur, cleaned ‘em out, then re-assembled ‘em with the
Miklin 1200-Series guns. The Leviathan’s got less range or power than the
Thunder Cannon, just by virtue of its size, but bein’ a watercraft helps; we
can deploy it in places where we cant get the TC, like we did in 03 at
Signal Island, and It’ll rip the heart outta the JDA ships.
6362
ROLE Shield/Anti-Clandestine SIGHT RANGE Norm
HIT POINTS High TAELON COST Med
DAMAGE N/A COMMAND COST 3
SPEEED Norm
ROLE General SIGHT RANGE Norm
HIT POINTS High TAELON COST Med
DAMAGE Med COMMAND COST 3
SPEEED Fast
ROLE General SIGHT RANGE Norm
HIT POINTS Med TAELON COST Low
DAMAGE N/A COMMAND COST 3
SPEEED Norm
ROLE Artillery SIGHT RANGE Norm
HIT POINTS High TAELON COST Med
DAMAGE High COMMAND COST 3
SPEEED Norm
Page 34

JOVIAN DETENTION AUTHORITY
COMMAND CENTER
The Command Center is the heart of any base, the beginning of the build tree. It
builds Construction Rigs which will allow you to build more structures. This
building has two potential upgrades.
PRECINCT
This is the primary structure for building infantry units. It allows you to build the
following: Guardian, Enforcer (requires Motorpool), Psi-Tech (requires
Restoration Facility), Castigar (requires Command Center level 2, Precinct level 2)
and Shadowhand (requires Command Center level 3, Precinct level 2). This
building has one potential upgrade.
MOTORPOOL
This is the primary structure for building vehicles. It allows you to build the
following: Collector, Watchman, Rover, Warden, Bulldog (requires Motorpool
level 2), Growler (requires Motorpool level 2), Mastiff (requires Command Center
level 3), Blackstar (requires Air Contro level 1), Striker (requires Air Control level
2 and Motorpool level 2.) This building has one potential upgrade.
REFINERY
This is the structure that Collectors use to drop off the Taelon they have harvested.
A Refinery is necessary for the collection of Taelon.
65
BUILDINGS
JUGGERNAUT
We ever got our hands on one of these we could go crashin’ through the Dome
Rampart in style. Our people ‘on the inside’ tell us that it’s a new JDA
superweapon, but to me it just sounds like a big nuclear fusion bomb on
wheels. We’re not sure where they’re workin’ on it, but if we can find one, I’ll
bet I can replicate it, and then we’d have things turned around in a hurry,
wouldn’t we?
64
ROLE Base Annihilation SIGHT RANGE Norm
HIT POINTS V. High TAELON COST High
DAMAGE V. High COMMAND COST 4
SPEEED V. Slow
HIT POINTS High TAELON COST P1=High, 2=V. High
POWER NEEDED CC1=High, 2=High, 3=V. High COMMAND COST 1
HIT POINTS Med TAELON COST P1=Med, 2=Med
POWER NEEDED P1=High, 2=V. High COMMAND COST 1
HIT POINTS Med TAELON COST M1=High, 2=High
POWER NEEDED M1=High, 2=V. High COMMAND COST 1
HIT POINTS Med TAELON COST Med
POWER NEEDED V.High COMMAND COST 1
Page 35

6766
AIR CONTROL
Constructing this building allows you to build and maintain air units. It is also the
only facility which can repair and re-arm your air units (air units have a limited
ammo supply). Re-arms the air units Blackstar and Striker. Permits the Blackstar
and Striker to be built (Striker requires Air Control level 2). This building has one
potential upgrade.
RADOME
The Radome is the facility that allows you to build and execute air strikes. (See
the section "Mojo’s and Airstrikes" for more info). Builds and launches Assault
Bots, Vulcan Mines, the EMP Bomb (requires Radome level 2), and Concussion
Bomb (requires Radome level 2). This building has one potential upgrade.
SENTINEL GUN
The Sentinel Gun is a stationary gun tower. It is a very effective anti-infantry
weapon, but can also damage vehicles and buildings. Sentinel Guns are not
equipped to hit air units. These can also be linked with force field emitters to
form force fields.
DEFENSE TOWER
The Defense Tower is a more powerful stationary tower. It is devestating to
infantry and vehicles, but is not equipped to hit air units. These can also be linked
with force field emitters to form force fields.
DOCK
This is the primary structure for building watercraft, and it must be built over water.
It allows the production of the following units: Attack Boat, Tech Boat, Dreadnaught
(requires Dock level 2) and Hover Collector. This building has one potential upgrade.
SOLAR ARRAY
This is the main power source for your base. Often you will need to build several of
these to power an entire base. Since they gather their energy from the Sun, their
power output at night is significantly reduced.
ATOMIC GENERATOR
The Atomic Generator provides much more power to your base than a Solar Array.
Since it is not dependant on the Sun, it’s power output is the same day and
night. Be careful where you place these—when they are destroyed they create a
nasty explosion which can damage large parts of your base. You can also selfdestruct an Atomic Generator (there are times when this may be a viable
strategy)—when self destructed, it does considerable damage to anything in the
surrounding area.
RESTORATION FACILITY
With this structure you can repair your units and vehicles. Select a unit, then click
on the Restoration Facility. The unit will go to the building for repairs. The
Restoration Facility also allows you to build the PsiTech, mobile medics that can
repair infantry and vehicles on the battlefield. The Facility and the Psi-Tech can heal
all ground vehicle and infantry units.
HIT POINTS Med TAELON COST D1=Med, 2=Low
POWER NEEDED D1=High, 2=V. High COMMAND COST 1
HIT POINTS Low TAELON COST Med
POWER NEEDED None COMMAND COST 1
HIT POINTS Med TAELON COST High
POWER NEEDED None COMMAND COST 1
HIT POINTS Med TAELON COST High
POWER NEEDED High COMMAND COST 1
HIT POINTS Med TAELON COST AC1-Med, 2-Med
POWER NEEDED AC1-High, 2-V.High COMMAND COST 1
HIT POINTS Med TAELON COST R1=High, 2=High
POWER NEEDED R1=High, 2=V. High COMMAND COST 1
HIT POINTS Low TAELON COST Low
POWER NEEDED Med COMMAND COST 1
HIT POINTS Low TAELON COST Med
POWER NEEDED High COMMAND COST 1
Page 36

68 69
SPRAWLERS
COMMAND CENTER
The Command Center is the heart of any base, the beginning of the build tree. It
builds Construction Rigs which will allow you to build more structures. This
building has two potential upgrades.
BARRACKS
This is the primary structure for building infantry units. A basic Command Center
allows you to build Rumblers and Fiends. With an upgraded Barracks you can build
the Banshee, Judas, and Skulk. With a level 3 Command Center you can build an
Infiltrator out of the Barracks. To build a Voodun you will also need to have built a
Sarcology. This building has one potential upgrade.
GARAGE
This is the Sprawler’s main facility for building vehicles and air units. It allows you
to build the following: Collector, Go-Go, Disruptor, Scorpion Tank (requires
Garage level 2), Thunder Cannon (requires Garage level 2, Command Center level
3) Scaver (requires Scaver Hut) Air Barge and Vulture (requires Aerodrome). This
building has one potential upgrade.
REFINERY
This is the structure that Collectors use to drop off the Taelon they have harvested.
A Refinery is necessary for the collection of Taelon.
LIGHTNING TOWER
The ultimate in anti-air protection, a well placed Lighting Tower can wreak havoc
on an enemy’s air force. It is only equipped to hit air units. Unlike other towers, it
cannot link force fields
FORCE FIELD EMITTER
A cheap, quick, yet effective base defense post. When these posts are built in
alignment, they can form an impassible force field.
CAMERA TOWER
Camer Towers are small stationary structures that provide a wide line of sight in
the area in which they are placed. They require power and a functional Command
Center to operate. These also can be linked to form force fields.
TELEPAD
The most effective form of transport, the Telepad can instantly deliver infantry to
any location on the map you can see. (See the section “Telepad” for more info.)
SKY FORTRESS FACILITY
The production facility for the JDA’s ultimate super-weapon, this facility is
extremely expensive and takes a long time to build.
HIT POINTS Low TAELON COST Low
POWER NEEDED Med COMMAND COST 1
HIT POINTS Med TAELON COST Low
POWER NEEDED Low COMMAND COST 1
HIT POINTS Low TAELON COST Low
POWER NEEDED Low COMMAND COST 1
HIT POINTS Med TAELON COST Med
POWER NEEDED V. High COMMAND COST 1
HIT POINTS High TAELON COST High
POWER NEEDED V.High COMMAND COST 1
HIT POINTS High TAELON COST CC1=Med, 2=High, 3-V. High
POWER NEEDED CC1=High, 2=High, 3=V. High COMMAND COST 1
HIT POINTS Med TAELON COST B1=Med, 2=Med
POWER NEEDED B1=High, 2=V. High COMMAND COST 1
HIT POINTS Med TAELON COST G1=Med, 2=Med
POWER NEEDED G1=High, 2=V. High COMMAND COST 1
HIT POINTS Med TAELON COST High
POWER NEEDED High COMMAND COST 1
Page 37

71
SCAVER HUT
This is the Sprawler’s repair and maintainence facility for vehicles. To repair
vehicles at the facility, select the vehicle(s), then left click on the Scaver Hut
(you should get a special repair cursor). The vehicle(s) will travel there and
receive repairs. The Scaver Hut also allows the construction of the Scaver unit, a
mobile repair unit that can heal ground, naval and air vehicles and buildings (but
not infantry). When upgraded to Levels 2 and 3, the Scaver Hut is also capable of
producing traps that can be set by Scavers (see the section “Traps” for more info).
This building has two potential upgrades.
SARCOLOGY
This is the facility for healing infantry units. To heal infantry units at the facility,
select the units, then left click on the Sarcology building (you should get a special
repair cursor). The selected units will move to the facility and get healed.
The Sarcology also allows you to build the Voodun, a mobile medic that can heal
infantry.
SHRINE
The Shrine is the mystical techno-religious building structure that allows the
Sprawlers to conjure Mojo’s, a category of powerful remote effect weapons.
It allows construction and delivery of Rage, Eyebiter, Brezerker, and Baron Samedi
Mojos. (See the section "Mojo’s and Air Strikes" for more info).
This building has one potential upgrade.
70
AERODROME
The Sprawler’s main air unit facility. It allows you to build the Vulture and Air
Barge. It also can repair and re-arm your air units. To do this, select the air
unit(s), then left click on the Aerodrome (you should get a repair cursor). The air
units will move there and receive health and ammo.
WHARF
The Wharf allows you to build a variety of watercraft. It must be constructed over
water. The Wharf allows the construction of the Hydrofoil, Stasis Boat, Leviathan
(requires Wharf level 2), and Hover Collector. This building has one potential
upgrade.
SOLAR ARRAY
These are the main power source for your base. Often you will need to build
several of these to power an entire base. Since they gather their energy from the
Sun, their power output at night is significantly reduced.
ATOMIC POWER PLANT
The Atomic Power Plant provides much more power to your base than a Solar
Array. Since it is not dependant on the Sun, its power output is the same day and
night. Be careful where you place these—when they are destroyed they create a
nasty explosion which can damage large parts of your base. You can also selfdestruct an Atomic Generator (there are times when this may be a viable
strategy).
HIT POINTS Med TAELON COST SC1=Med, 2=Low, 3-Low
POWER NEEDED SC1=High, 2=High, 3-V. High COMMAND COST 1
HIT POINTS Med TAELON COST Med
POWER NEEDED Med COMMAND COST 1
HIT POINTS Med TAELON COST SR1=High, 2=High
POWER NEEDED SR1=V. High, 2=V. High COMMAND COST 1
HIT POINTS Med TAELON COST Med
POWER NEEDED High COMMAND COST 1
HIT POINTS Med TAELON COST W1-Med, 2-Low
POWER NEEDED W1-High, 2-V. High COMMAND COST 1
HIT POINTS Low TAELON COST Med
POWER NEEDED None COMMAND COST 1
HIT POINTS High TAELON COST High
POWER NEEDED None COMMAND COST 1
Page 38

SKY SWEEPER
The last word in anti-air base defense. The Sky Sweeper can make short work of
most air units. These can also be linked with fence posts to form force fields.
JUGGERNAUT FACTORY
This is the facility from which the Sprawlers crank out Juggernauts, the explosive
super-weapon they stole from the JDA. This building is very expensive and takes a
long time to construct.
73
GUN POST
The Gun Post is the Sprawler’s most basic stationary turret. It is very effective
versus infantry, somewhat effective against buildings, and through special
engineering is also capable of being mildly effective against air units. These can
also be linked with fence posts to form force fields.
RAVAGER TURRET
The Sprawler’s ultimate ground-holder. The Ravager Turret will clean the floor with
vehicles and infantry, but has no anti-air capabilities. These can also be linked
with fence posts to form force fields.
CAMERA TOWER
Camer Towers are small stationary structures that provide a wide line of sight in
the area in which they are placed. They require power and a functional Command
Center to operate. These also can be linked to form force fields.
FENCE POST
A cheap, quick, yet effective base defense post. When these posts are built in
alignment, they can form an impassible force field.
72
HIT POINTS Low TAELON COST Med
POWER NEEDED Low COMMAND COST 1
HIT POINTS Low TAELON COST Med
POWER NEEDED High COMMAND COST 1
HIT POINTS Low TAELON COST Low
POWER NEEDED Low COMMAND COST 1
HIT POINTS Low TAELON COST Med
POWER NEEDED Low COMMAND COST 1
HIT POINTS Low TAELON COST Low
POWER NEEDED Med COMMAND COST 1
HIT POINTS High TAELON COST High
POWER NEEDED V.High COMMAND COST 1
Page 39

75
74
SPRAWLERS
BUILD TREE
(w/Barracks 2 and Garage 2)
Refinery
Command Center 1 Solar Array
Barracks 1
Garage 1
Wharf 1
Camera Tower Power Fence
Emitter
Gun Post Sky Sweeper
Scaver Hut 1
Command Center 2
Command Center 3
Barracks 2 Garage 2
Wharf 2 Shrine 1 Aerodome Ravager
Turret
Juggernaut
Factory
Shrine 2
Atomic Power
Plant
(w/Barracks 1 and
Garage 1)
(w/Barracks 1 and Garage 1)
Building
Upgrade
Non-Core Building
Builds/Allows
KEY
Scaver Hut 2
(w/Scaver Hut 3)
Scaver Hut 3
Sarcology
(w/Barracks 1)
Refinery
Command Center 1 Solar Array
Precinct 1 Motorpool 1 Dock 1
Camera Tower Force Field
Emitter
Sentinel Gun
Lightning Tower
Restoration Facility
Command Center 2
Command Center 3
Precinct 2 Motorpool 2
Dock 2
Air Control 1 Radome 1 Atomic
Generator
TelePad
Defense Tower
Sky Fortress
Facility
Air Control 2
Radome 2
(w/Precinct 1 and
Motorpool 1)
(w/Precinct and Motorpool)
Building
Upgrade
Non-Core Building
Builds/Allows
KEY
JDA BUILD TREE
Page 40

7776
UNIT EFFECTIVENESS CHART
This chart will help you to determine which units are most effective in different situations. It shows how
effective each attack unit is versus vehicles, infantry, air units, and structures.
None = Can’t damage this type; Low = Slightly effective; Med = Moderately effective; High = Very effective
JDA
Vehicles Infantry Air Structure Command Cost
Sentinel Gun Medium High None Medium 1
Defense Tower High High None High 1
Lightning Tower None None High None 1
Guardian Low Low None Low 2
Enforcer Low Medium Low Low 2
Castigar High Low Low Medium 2
Watchman None None High None 3
Blackstar Medium Medium High Medium 3
Striker High High None High 3
Rover Medium Medium None Medium 3
Bulldog Medium High None Medium 3
Growler High Medium None High 3
Mastiff High High None High 3
Patrol Cruiser High High Medium Medium 3
Dreadnaught Medium Medium None Medium 3
Sky Fortress High High None High 4
Sprawlers
Vehicles Infantry Air Structure
Gun Post Medium High Medium Medium 1
Ravager Turret High High None High 1
Sky Sweeper None None High None 1
Rumbler Low Medium None Low 2
Fiend High Medium Medium Low 2
Banshee Medium High None Medium 2
Skulk Low High None None 2
Judas High Low Low Medium 2
GoGo Low Low High Low 3
Scorpion Tank High Medium None High 3
Thunder Cannon High High None High 3
Vulture Medium Medium Medium Low 3
Hydrofoil High High Medium Medium 3
Leviathan Medium Medium None Medium 3
Juggernaut High High None High 4
If you have any comments, questions, or suggestions about this game or any other Activision product, please
feel free to contact us. If you are experiencing difficulty playing the game, please consult this help file
before contacting Customer Support. The help file contains the answers to some of our most frequently asked
questions and may quickly provide a solution to your problem. If, after reviewing the help and README files,
you are still experiencing problems, please feel free to contact us through any of the services listed. So that
we can better help you, please be at your computer and have the following information ready:
1. Complete product title
2. Exact error message reported (if any) and a brief description of the problem
3. Your computer’s processor type and speed (e.g. Pentium 200 MHz)
4. Video, 3D and sound card makes and models (e.g. ATI Rage Pro Turbo x2, Diamond Monster 2 w/8 MB,
Sound Blaster Live-Value...)
NOTE: Please do not contact Customer Support for hints or walkthroughs; only technical support.
CUSTOMER SUPPORT: NORTH AMERICA
NOTE: Multiplayer components of Activision games are handled online only.
World Wide Web: http://www.activision.com
E-Mail: support@activision.com
Note: E-mail is for technical issues only, no hints or codes will be given. Please note that online
support is available in English only.
Fax: 310-255-2151
Mail: Activision Customer Support
P.O. Box 67713
Los Angeles, CA 90067
Phone: Call our 24-hour voice-mail system for answers to our most frequently asked questions at 310-
255-2050. Contact a Customer Support representative at the same number between the hours of
9:00 am and 5:00 pm (Pacific Time) Monday through Friday, except holidays.
CUSTOMER SUPPORT
Page 41

7978
Global Brand Manager
John Heinecke
Associate Brand Manager
Jamey Gottlieb
Installer
John Fritts
Paul Baker
Press Relations
Michael James Larson
Michelle Nino
Executive Producer
Mark Lamia
Legal
George Rose
Michael Hand
Quality
Assurance
Project Lead
John Sherwood
Testers
Rob Hargraves, Patrick Ratliff,
Luke Grannis, Yon Vo, Shreedhar
Patel, Toby Vise, Lee Casady,
Jason Richey, Ben Gilbert, Fred
Talai, Hector Guerrero, Sion
Gibson, Chad Siedhoff, Anthony
Korotko, Rob Mailloux, Ronyie
Weibel, Stephen Boisvert, Glenn
Vistante, Jason Olson, David
Stolfa, Danny Taylor, John
Sweeney, Sean Shaughnessy,
Jon Virtes, Matthew Beal, Gary
DeBrown, Thann Harvey, Patrick
Tse, John Cung, Thomas Jackson,
Ron Weibel, Michael Harris, Brad
Saavedra, Charles Staples,
Robert Fleischacker, Derek Green
Technology Leads
John Fritts, Neil Barizo Compatibility Lab Leads
Chris Keim - Network Lab Lead
Code Release Group Leads
Juan Valdez, Danny Lee
Senior Lead
Jeff Poffenbarger
Manager of PC Titles
Matt Powers
Manager Night Testing Group
Sam Nouriani
Manager Code Release Group
Tim Vanlaw
Manager CS/QA Technology
Aaron King
Senior Manager Studio Support
Resources
Eric Zala
Senior Manager General Testing
Jason Wong
Vice President Quality Assurance
Jim Summers
Special Thanks
Indra Gunawan, Todd Komesu,
Joule Middleton, Tanya
Langston, Willie Bolton, Jenny
Cassel , Sheryl Seddon
Customer
Support
Customer Support Manager
Bob McPherson
Customer Support Lead
Gary Bolduc
Technical Help Coordinator
Rob Lim
External Test Coordinator
Stacey Drellishak
Visioneers
Jean-Ray Arseneau, John Aubin,
Jacob Baime, Andy Bohne,
Michael Brinton, Liam Byrne,
Paul Castillo, Adnan Chowdhury,
Akiva Clark, Ryan Clemmer, Dan
Condon, Scott Cook, Aaron Cox,
Paul Dunlap, Michael Dwiel,
Craig Edrington, Joseph Faske,
Eric Friedner, Jon Gabrielse,
Keith Galocy, Keith L. Graydon,
Panayoti Haritatos, Ian Hayes,
Tom Hepner, Mike Herauf, Iain
Hill, Scott Howie, Nic Jansma,
Stephen Jensen, Clayton Jung,
Mark W. Kaelin, Scott Kasai,
Andrew Keller, Pat Klamerus,
David Kong, Andrew Kuschnerait,
Jason L'Hirondelle, Grant
LaFrance, Gary Lapidus,
Giancarlo Lenzi, Michael Leparc,
Charles Little, Jr., Matt Luce,
Derek Lung, Todd Manion, David
Marcinowski, Chris Massey, Gary
McCoy, Mike McCurdy, Sean
Director
Greg Borrud
Lead Programmer
Andrew Payne
Programmers
John Cooke
Adam Iarossi
Matthew Versluys
Lead Designer
Christopher Lawrence
Designers
Jack Davis
Matt Harding
Nick Punt
Art Director
Will Rosas
Lead Artist
Hess Barber
2D and Concept Artist
Adam Marquis
Artists
Chris Felts
John Rheaume
Story, Movies and Characters
Joseph Donaldson
Manual
Tom Abernathy
Jack Davis
Joseph Donaldson
Sound Design and Mixing
Bill Black, Big Fat Kitty
Productions
Music Composer
Christian A. Salyer, Eric Klein,
Sound Element
Intro Title Movie
John DeTemple, D.inc Design
VOICE ACTORS
Cignet
Carol Bach-y-Rita
Sid
Barry Stigler
Dalen
Wally Burr
The Agent
Nicholas Guy Smith
Ordic
Simon Prescott
SINDI
Kimberly Brooks
Thara
Grey Delisle
Kran
Barry Stigler
Soonsa
Nicholas Guy Smith
Additional Voices
Carol Bach-y-Rita
Kimberly Brooks
Wally Burr
Grey Delisle
Robert Foster
Simon Prescott
Nicholas Guy Smith
Barry Stigler
Richard Tatum
Mike Vaez
Additional Programming
Ken Miller
Additional Design
Joseph Donaldson
Dave Osper
Tim Ryan
Matt Staroscik
Additional Art
Joseph Donaldson
Rick Glenn
Sean Kinnear
Interns
Tom Cadwell
Luis Hurtado
Samaan Vahedi
President, Pandemic Studios
Josh Resnick
CEO, Pandemic Studios
Andrew Goldman
ACTIVISION, INC.
Producers
Doug Pearson
Matt Candler
Associate Producer
Jonathan Moses
Production Testers
Chad Bordwell
Eric Grossman
Joe Shackelford
CREDITS
Page 42

8180
German Localisation
Effective Media GmbH
German recording sessions done
by Effective Media.
French Localisation
Localisation : Exequo, Paris.
Special Thanks
The Original Dark Reign Team
Robert Berger
Willie Bolton
Dion Brain
Brian Bright
Dustin Browder
Mike Burrows
Jenny Cassel
Max Chapman
George Collins
Digimation
Stacey Drellishak
Indra Gunawan
Stacey Hayes
Chris Hepburn
Intel 3D Labs
Intel Programming Team
Stephen Junkins
Peter Karpas
Cathy Kinzer
Todd Komesu
Lori Lahmann
Matthew Langie
Tanya Langston
Jennifer "Wookie Cookie"
Lawrence
Mike Minahan
Matthew Ployhar
RAD Tools
Barbara, Sammy and
Elan Resnick
Mitch Soule
Mark Struhl
Harry Travis
Roger Vakharia
Juan Valdes
James Vaughn
Sonya and Lily Versluys
Andrew Walker
Licenses
Uses Miles Sound System.
Copyright © 1991-2000 by RAD
Game Tools, Inc.
Uses Bink Video. Copyright ©
1997-2000 by RAD Game Tools,
Inc.
Based on Design Created by
Greg Borrud
Chris Hewish
Josh Resnick
Trey Watkins
McKay, Adrian Moscher, Graham
Nardone, Dan Oliver, Samuel
Pettit, Alan Precourt, Carolann
Quinn, Jason Reid, Joseph
Ruffolo, David Seale, John Silva,
William Slayton, Michael Smith,
Ryan Smolar, Chris Squatritto,
Jeff Sterck, Brian Sutton, Don
"Machman" Swanner, Jr., Clint
Swereda, Kevin Swisher, David
Teague, Steve Tobin, Joseph
Vegh, John Vernon, Michael
Wedge, Alan Wexelblat, Brian
Winslow, James Wright Jr., Jason
Yeh, Omar Yehia, Brendan Young
Additional External Testing
Andrew Burwell
Michael Foehrkolb
Thomas Hicks
Cory Aiken
Peter Borrud
Andrew Burwell
Robert Couch
David Horn
Will Horner
Dan Hsu
Troy Roberts
Joe Rybicki
Todd Tompkins
Sean Rhea
Eric Brinkley
Kirk Ellern
Troy Tompkins
Absolute
Quality
Project Manager
Jesse Smith
Project Lead
Fran Katsimpiris
Ralph Liguori
Ray Shreckengost
Josh Scanlan
Testers
Ed Piper
Nathan Briggs
Scott Wood
Debby Dillon
Adrian Miller
Erik Melen
Paul Cooper
Steve Teller
Ernest Tolin
Chris Ho
Howard Leung
Steven Alvarado
Toby Watkins
Eura Campbell
WON.net
WON.net Producers
Ross Perez
Scott Warren
WON.net Engineering
Erik De Bonte
Mike Nicolino
WON.net Quality Assurance
Eric Harmon
David Cain
International
Localization Coordinator
Stephanie O’Malley
Senior Vice President
International
Scott Dodkins
Brand Manager UK/RoE
Matti Kuorehjarvi
Brand Manager France
Bernard Sizey
Marketing Manager France
Guillaume Lairan
Brand Manager Germany
Achim Kasper
Marketing Director Germany
Andreas Stock
PR Director Germany
Markus Wilding
Creative Services Manager
International
Jackie Whale
Production International
Emily Knight, Heather Clarke
Localisation
Localisation Supervisor UK
Peter Lykke Nielsen
Localisation Director Germany
Natascha Conrad
Page 43

8382
• All New Game Materials must contain prominent identification at least in any on-line description and with reasonable duration on the
opening screen: (a) the name and E-mail address of the New Game Materials’ creator(s) and (b) the words "THIS MATERIAL IS NOT
MADE OR SUPPORTED BY ACTIVISION."
LIMITED WARRANTY: Activision warrants to the original consumer purchaser of this Program that the recording medium on which the
Program is recorded will be free from defects in material and workmanship for 90 days from the date of purchase. If the recording medium is
found defective within 90 days of original purchase, Activision agrees to replace, free of charge, any product discovered to be defective within
such period upon its receipt of the Product, postage paid, with proof of the date of purchase, as long as the Program is still being
manufactured by Activision. In the event that the Program is no longer available, Activision retains the right to substitute a similar program of
equal or greater value. This warranty is limited to the recording medium containing the Program as originally provided by Activision and is
not applicable to normal wear and tear. This warranty shall not be applicable and shall be void if the defect has arisen through abuse,
mistreatment, or neglect. Any implied warranties prescribed by statute are expressly limited to the 90-day period described above.
EXCEPT AS SET FORTH ABOVE, THIS WARRANTY IS IN LIEU OF ALL OTHER WARRANTIES, WHETHER ORAL OR WRITTEN, EXPRESS OR
IMPLIED, INCLUDING ANY WARRANTY OF MERCHANTABILITY, FITNESS FOR A PARTICULAR PURPOSE OR NON-INFRINGEMENT, AND NO
OTHER REPRESENTATIONS OR CLAIMS OF ANY KIND SHALL BE BINDING ON OR OBLIGATE ACTIVISION.
When returning the Program for warranty replacement please send the original product disks only in protective packaging and include:
(1) a photocopy of your dated sales receipt; (2) your name and return address typed or clearly printed; (3) a brief note describing the defect,
the problem(s) you are encountered and the system on which you are running the Program; (4) if you are returning the Program after the 90day warranty period, but within one year after the date of purchase, please include check or money order payable to Activision for $10 U.S.
(A$17 for Australia, or £10.00 for Europe) currency per CD. Note: Certified mail recommended.
LIMITATION ON DAMAGES: IN NO EVENT WILL ACTIVISION BE LIABLE FOR SPECIAL, INCIDENTAL OR CONSEQUENTIAL DAMAGES
RESULTING FROM POSSESSION, USE OR MALFUNCTION OF THE PROGRAM, INCLUDING DAMAGES TO PROPERTY, LOSS OF GOODWILL,
COMPUTER FAILURE OR MALFUNCTION AND, TO THE EXTENT PERMITTED BY LAW, DAMAGES FOR PERSONAL INJURIES, EVEN IF
ACTIVISION HAS BEEN ADVISED OF THE POSSIBILITY OF SUCH DAMAGES. ACTIVISION’S LIABILITY SHALL NOT EXCEED THE ACTUAL
PRICE PAID FOR THE LICENSE TO USE THIS PROGRAM. SOME STATES/COUNTRIES DO NOT ALLOW LIMITATIONS ON HOW LONG AN
IMPLIED WARRANTY LASTS AND/OR THE EXCLUSION OR LIMITATION OF INCIDENTAL OR CONSEQUENTIAL DAMAGES, SO THE ABOVE
LIMITATIONS AND/OR EXCLUSION OR LIMITATION OF LIABILITY MAY NOT APPLY TO YOU. THIS WARRANTY GIVES YOU SPECIFIC LEGAL
RIGHTS, AND YOU MAY HAVE OTHER RIGHTS WHICH VARY FROM JURISDICTION TO JURISDICTION.
TERMINATION: Without prejudice to any other rights of Activision, this Agreement will terminate automatically if you fail to comply with its
terms and conditions. In such event, you must destroy all copies of this Program and all of its component parts.
U.S. GOVERNMENT RESTRICTED RIGHTS: The Program and documentation have been developed entirely at private expense and are
provided as "Commercial Computer Software" or "restricted computer software." Use, duplication or disclosure by the U.S. Government or a
U.S. Government subcontractor is subject to the restrictions set forth in subparagraph (c)(1)(ii) of the Rights in Technical Data and Computer
Software clauses in DFARS 252.227-7013 or as set forth in subparagraph (c)(1) and (2) of the Commercial Computer Software Restricted
Rights clauses at FAR 52.227-19, as applicable. The Contractor/Manufacturer is Activision, Inc., 3100 Ocean Park Boulevard, Santa Monica,
California 90405.
INJUNCTION: Because Activision would be irreparably damaged if the terms of this Agreement were not specifically enforced, you agree that
Activision shall be entitled, without bond, other security or proof of damages, to appropriate equitable remedies with respect to breaches of
this Agreement, in addition to such other remedies as Activision may otherwise have under applicable laws.
INDEMNITY: You agree to indemnify, defend and hold Activision, its partners, affiliates, licensors, contractors, officers, directors, employees
and agents harmless from all damages, losses and expenses arising directly or indirectly from your acts and omissions to act in using the
Product pursuant to the terms of this Agreement.
MISCELLANEOUS: This Agreement represents the complete agreement concerning this license between the parties and supersedes all prior
agreements and representations between them. It may be amended only by a writing executed by both parties. If any provision of this
Agreement is held to be unenforceable for any reason, such provision shall be reformed only to the extent necessary to make it enforceable
and the remaining provisions of this Agreement shall not be affected. This Agreement shall be construed under California law as such law is
applied to agreements between California residents entered into and to be performed within California, except as governed by federal law and
you consent to the exclusive jurisdiction of the state and federal courts in Los Angeles, California.
If you have any questions concerning this license, you may contact Activision at 3100 Ocean Park Boulevard, Santa Monica, California 90405,
(310) 255-2000, Attn. Business and Legal Affairs, legal@activision.com
In the U.S. send to:
Warranty Replacements
Activision, Inc.
P.O. Box 67713
Los Angeles, California 90067
In Europe send to:
Activision
Gemini House
133 High Street
Yiewsley
West Drayton
Middlesex UB7 7QL
United Kingdom
In Australia send to:
Warranty Replacements
Activision
P.O. Box 873
Epping, NSW 2121, Australia
SOFTWARE LICENSE AGREEMENT
IMPORTANT - READ CAREFULLY: USE OF THIS PROGRAM IS SUBJECT TO THE SOFTWARE LICENSE TERMS SET FORTH BELOW. "PROGRAM"
INCLUDES ALL SOFTWARE INCLUDED WITH THIS AGREEMENT, THE ASSOCIATED MEDIA, ANY PRINTED MATERIALS, AND ANY ON-LINE OR
ELECTRONIC DOCUMENTATION, AND ANY AND ALL COPIES OF SUCH SOFTWARE AND MATERIALS. BY OPENING THIS PACKAGE,
INSTALLING, AND/OR USING THE PROGRAM AND ANY SOFTWARE PROGRAMS INCLUDED WITHIN, YOU ACCEPT THE TERMS OF THIS
LICENSE WITH ACTIVISION, INC. ("ACTIVISION").
LIMITED USE LICENSE. Subject to the conditions described below, Activision grants you the non-exclusive, non-transferable, limited right and
license to install and use one copy of this Program solely and exclusively for your personal use. All rights not specifically granted under this
Agreement are reserved by Activision and, as applicable, Activision’s licensors. This Program is licensed, not sold, for your use. Your license
confers no title or ownership in this Program and should not be construed as a sale of any rights in this Program.
LICENSE CONDITIONS.
You shall not:
• Exploit this Program or any of its parts commercially, including but not limited to use at a cyber cafe, computer gaming center or any other
location-based site. Activision may offer a separate Site License Agreement to permit you to make this Program available for commercial use;
see the contact information below.
• Use this Program, or permit use of this Program, on more than one computer, computer terminal, or workstation at the same time.
• Make copies of this Program or any part thereof, or make copies of the materials accompanying this Program.
• Copy this Program onto a hard drive or other storage device; you must run this Program from the included CD-ROM (although this Program
itself may automatically copy a portion of this Program onto your hard drive during installation in order to run more efficiently).
• Use the program, or permit use of this Program, in a network, multi-user arrangement or remote access arrangement, including any online
use, except as otherwise explicitly provided by this Program.
• Sell, rent, lease, license, distribute or otherwise transfer this Program, or any copies of this Program, without the express prior written
consent of Activision.
• Reverse engineer, derive source code, modify, decompile, disassemble, or create derivative works of this Program, in whole or in part.
• Remove, disable or circumvent any proprietary notices or labels contained on or within the Program.
• Export or re-export this Program or any copy or adaptation in violation of any applicable laws or regulations of the United Sates government.
OWNERSHIP. All title, ownership rights and intellectual property rights in and to this Program and any and all copies thereof (including but not
limited to any titles, computer code, themes, objects, characters, character names, stories, dialog, catch phrases, locations, concepts, artwork,
animation, sounds, musical compositions, audio-visual effects, methods of operation, moral rights, any related documentation, and "applets"
incorporated into this Program) are owned by Activision, affiliates of Activision or Activision’s licensors. This Program is protected by the
copyright laws of the United States, international copyright treaties and conventions and other laws. This Program contains certain licensed
materials and Activision’s licensors may protect their rights in the event of any violation of this Agreement.
PROGRAM UTILITIES. This Program contains certain design, programming and processing utilities, tools, assets and other resources ("Program
Utilities") for use with this Program that allow you to create customized new game levels and other related game materials for personal use in
connection with the Program ("New Game Materials"). The use of the Program Utilities is subject to the following additional license restrictions:
•
You agree that, as a condition to your using the Program Utilities, you will not use or allow third parties to use the Program Utilities and the
New Game Materials created by you for any commercial purposes, including but not limited to selling, renting, leasing, licensing, distributing,
or otherwise transferring the ownership of such New Game Materials, whether on a stand alone basis or packaged in combination with the
New Game Materials created by others, through any and all distribution channels, including, without limitation, retail sales and on-line
electronic distribution. You agree not to solicit, initiate or encourage any proposal or offer from any person or entity to create any New Game
Materials for commercial distribution. You agree to promptly inform Activision in writing of any instances of your receipt of any such
proposal or offer.
•
If you decide to make available the use of the New Game Materials created by you to other gamers, you agree to do so solely without charge.
• New Game Materials shall not contain modifications to any COM, EXE or DLL files or to any other executable Product files.
• New Game Materials may be created only if such New Game Materials can be used exclusively in combination with the retail version of the
Program. New Game Materials may not be designed to be used as a stand-alone product.
• New Game Materials must not contain any illegal, obscene or defamatory materials, materials that infringe rights of privacy and publicity of
third parties or (without appropriate irrevocable licenses granted specifically for that purpose) any trademarks, copyright-protected works or
other properties of third parties.
Page 44

 Loading...